Embed Size (px)
Citation preview
Bluefruit Controlled Macetech RGB LED ShadesCreated by John Wall
Last updated on 2017-08-31 02:54:03 AM UTC
24558899
101011
121515161717181819
2021212121
2327272930313133
Guide Contents
Guide ContentsProject OverviewRecommended Precursor GuideTools NeededParts and ModificationsRGB LED ShadesMicrocontroller
Feather 32u4 Bluefruit LE
SensorsElectret MicrophoneOther Sensor Options
Parts listWiring and AssemblyCircuit ConnectionsPart PlacementSoldering the Feather 32u4 Bluefruit LE
Prepare the header strip:Add the breakout board:And Solder!Attach the Feather
Soldering the MicrophonePrepare the header strip:Add the breakout board:And Solder!Attach the Microphone
Final WiringShades AssemblyBuild Complete!Software PreparationRequired Arduino LibrariesSoftware TestingNeopixel TestBLE Library Test
© Adafruit Industries https://learn.adafruit.com/ledshades Page 2 of 45
34
3435353637373738414143
44
Custom Device Name
Test Success!(?)Software and Bluetooth ControlClever Code with 2D arraysProgramming the ShadesYou did it!Powering your ShadesBluefruit LE Connect AppControlling the ShadesModes
Color PickerAnimations
Guide Complete!
© Adafruit Industries https://learn.adafruit.com/ledshades Page 3 of 45
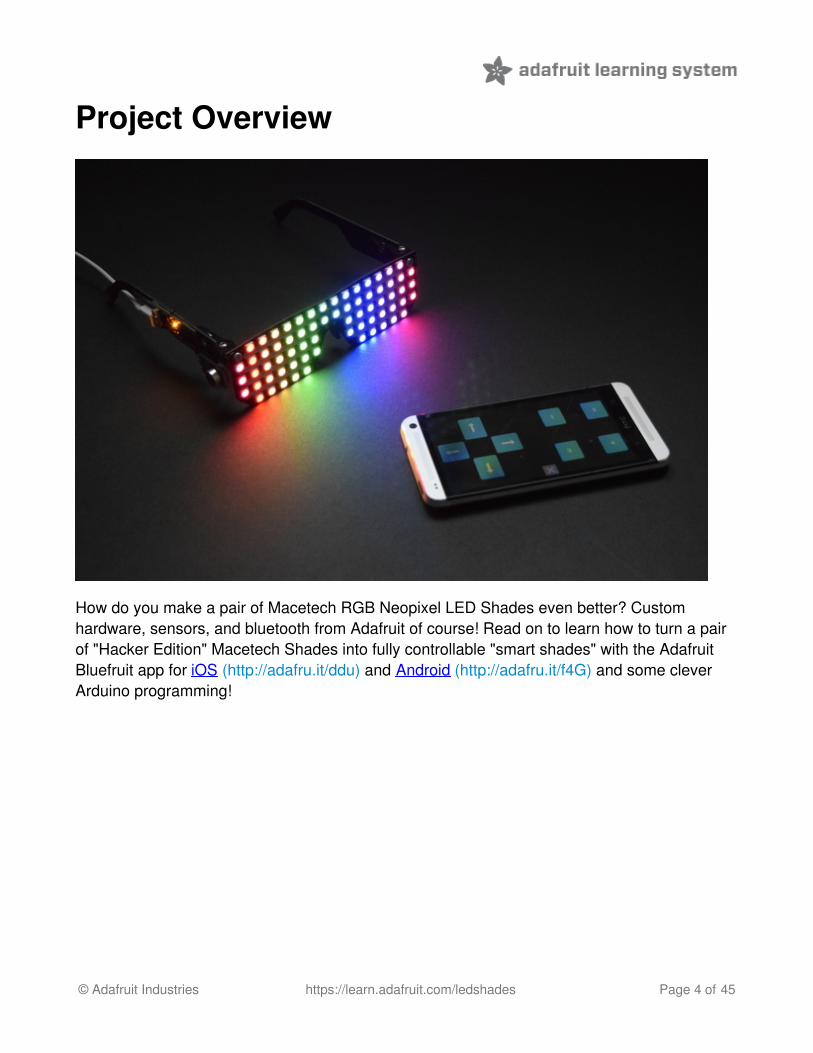
Project Overview
How do you make a pair of Macetech RGB Neopixel LED Shades even better? Customhardware, sensors, and bluetooth from Adafruit of course! Read on to learn how to turn a pairof "Hacker Edition" Macetech Shades into fully controllable "smart shades" with the AdafruitBluefruit app for iOS (http://adafru.it/ddu) and Android (http://adafru.it/f4G) and some cleverArduino programming!
© Adafruit Industries https://learn.adafruit.com/ledshades Page 4 of 45
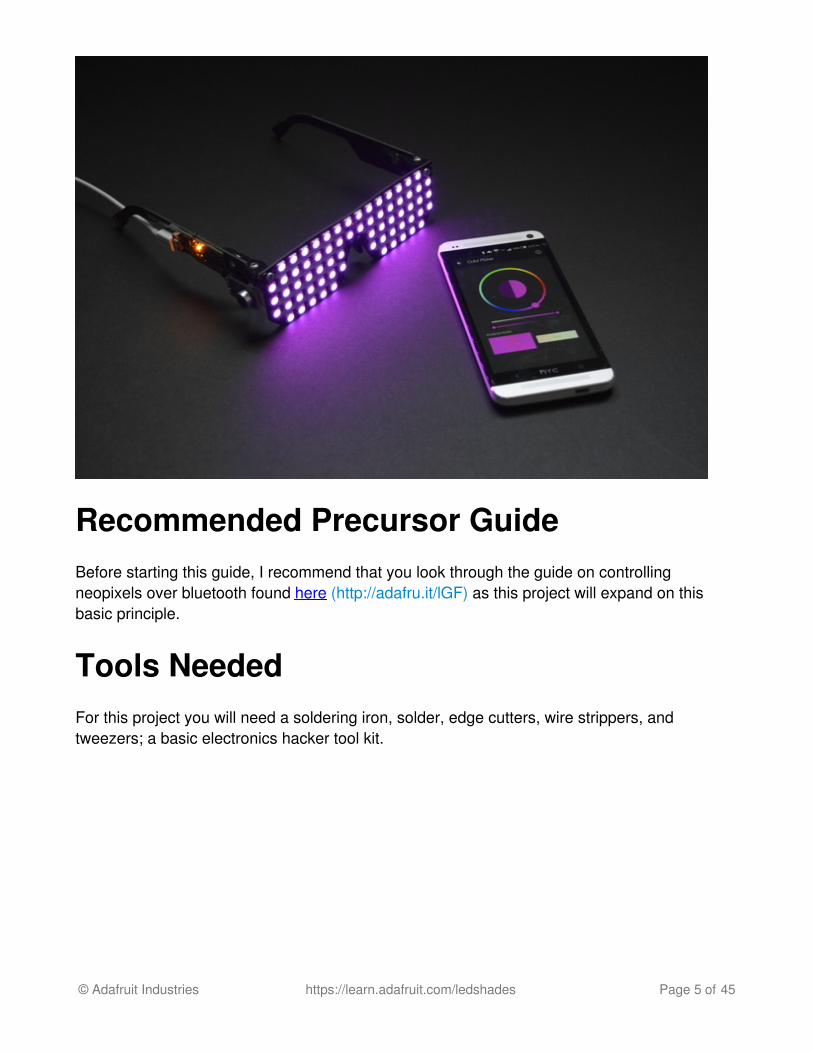
Recommended Precursor GuideBefore starting this guide, I recommend that you look through the guide on controllingneopixels over bluetooth found here (http://adafru.it/lGF) as this project will expand on thisbasic principle.
Tools NeededFor this project you will need a soldering iron, solder, edge cutters, wire strippers, andtweezers; a basic electronics hacker tool kit.
© Adafruit Industries https://learn.adafruit.com/ledshades Page 5 of 45
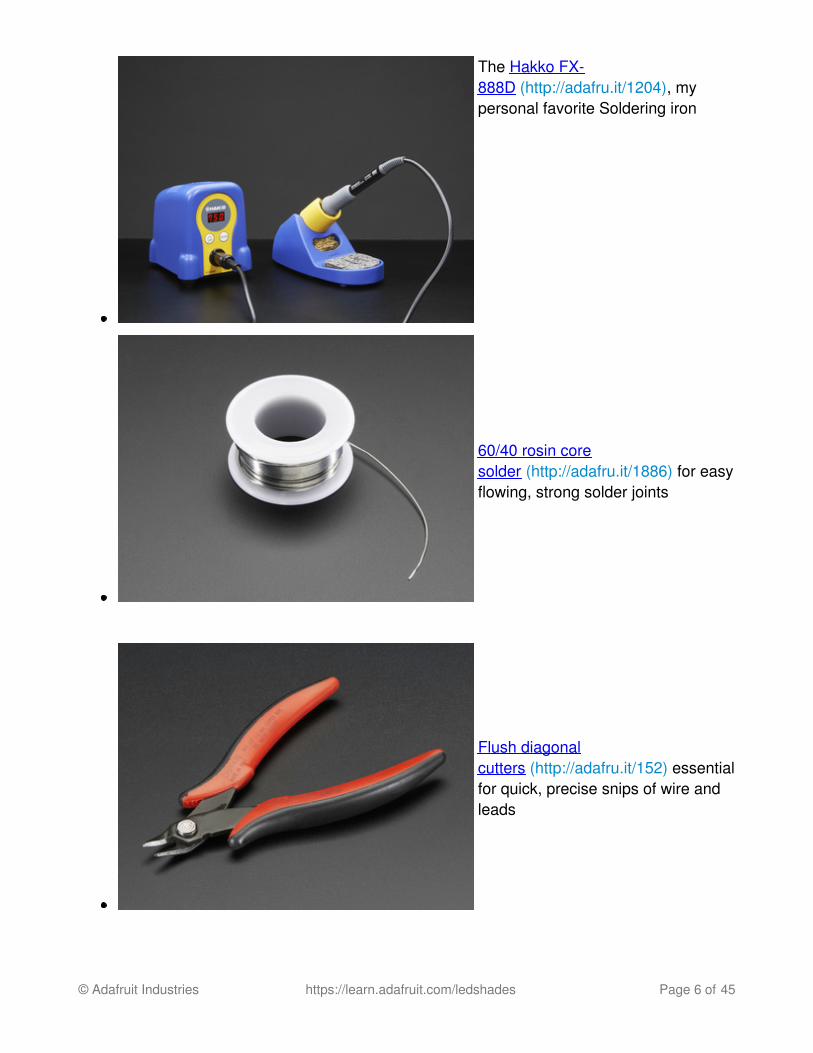
The Hakko FX-888D (http://adafru.it/1204), mypersonal favorite Soldering iron
60/40 rosin coresolder (http://adafru.it/1886) for easyflowing, strong solder joints
Flush diagonalcutters (http://adafru.it/152) essentialfor quick, precise snips of wire andleads
© Adafruit Industries https://learn.adafruit.com/ledshades Page 6 of 45
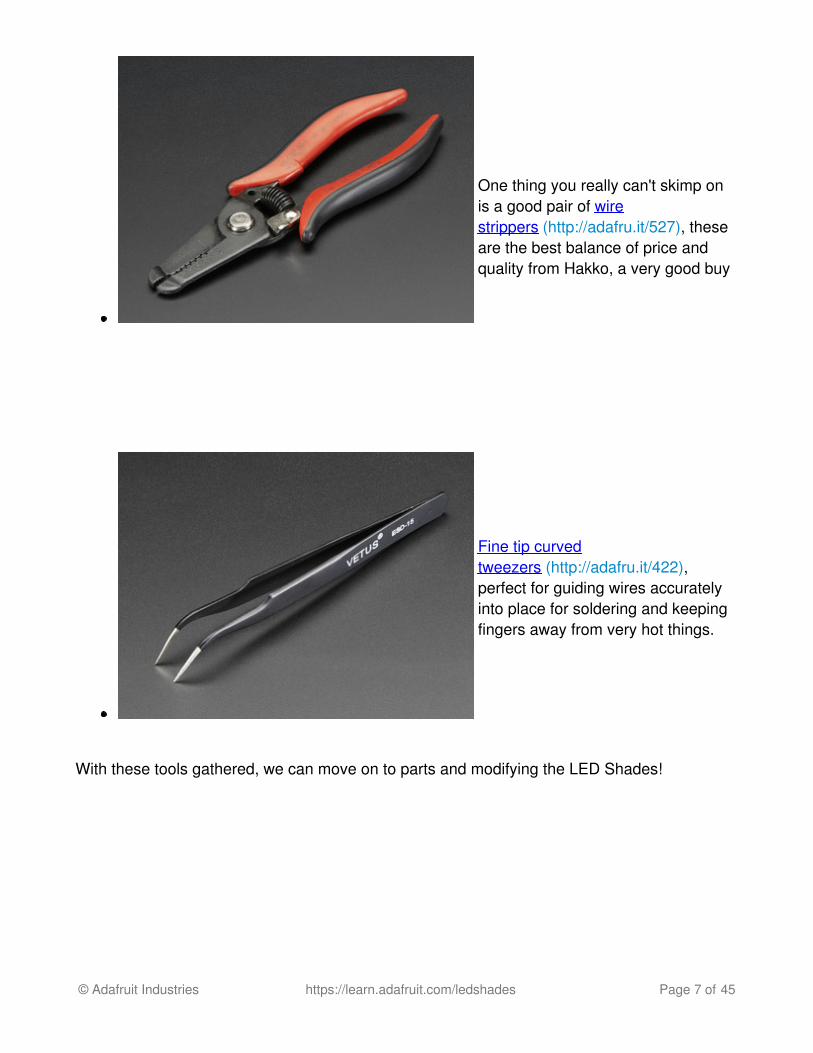
One thing you really can't skimp onis a good pair of wirestrippers (http://adafru.it/527), theseare the best balance of price andquality from Hakko, a very good buy
Fine tip curvedtweezers (http://adafru.it/422),perfect for guiding wires accuratelyinto place for soldering and keepingfingers away from very hot things.
With these tools gathered, we can move on to parts and modifying the LED Shades!
© Adafruit Industries https://learn.adafruit.com/ledshades Page 7 of 45
Parts and Modifications
RGB LED Shades
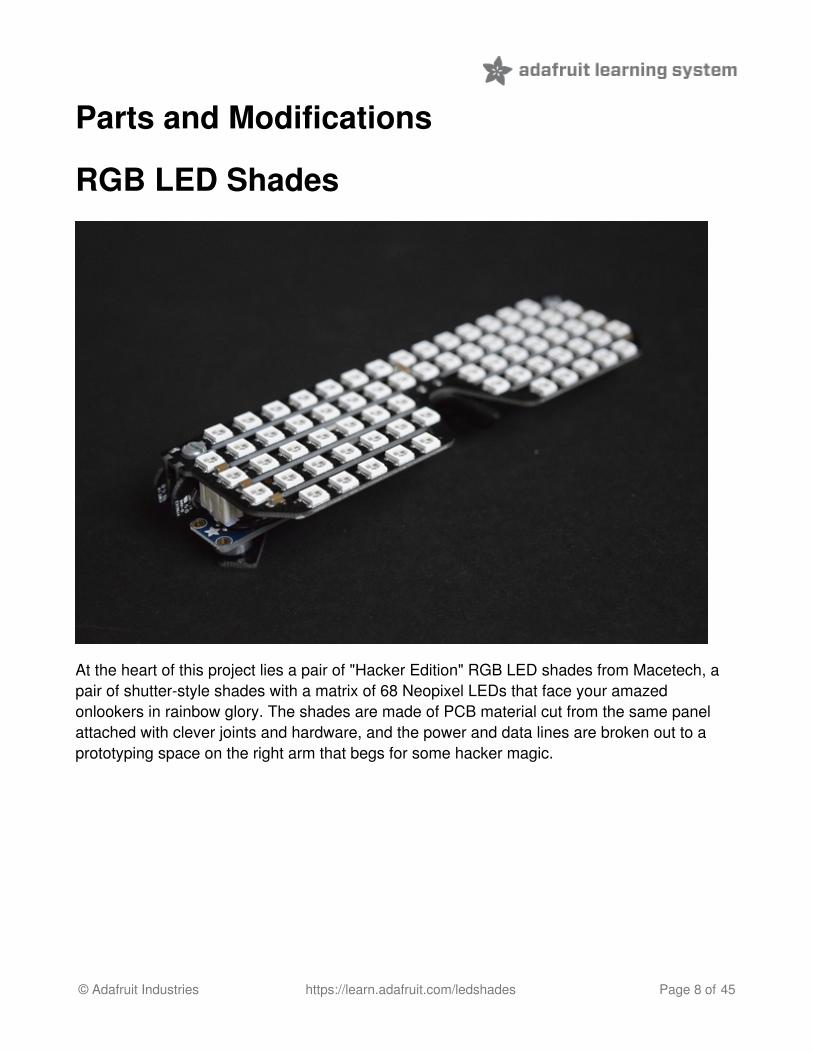
At the heart of this project lies a pair of "Hacker Edition" RGB LED shades from Macetech, apair of shutter-style shades with a matrix of 68 Neopixel LEDs that face your amazedonlookers in rainbow glory. The shades are made of PCB material cut from the same panelattached with clever joints and hardware, and the power and data lines are broken out to aprototyping space on the right arm that begs for some hacker magic.
© Adafruit Industries https://learn.adafruit.com/ledshades Page 8 of 45
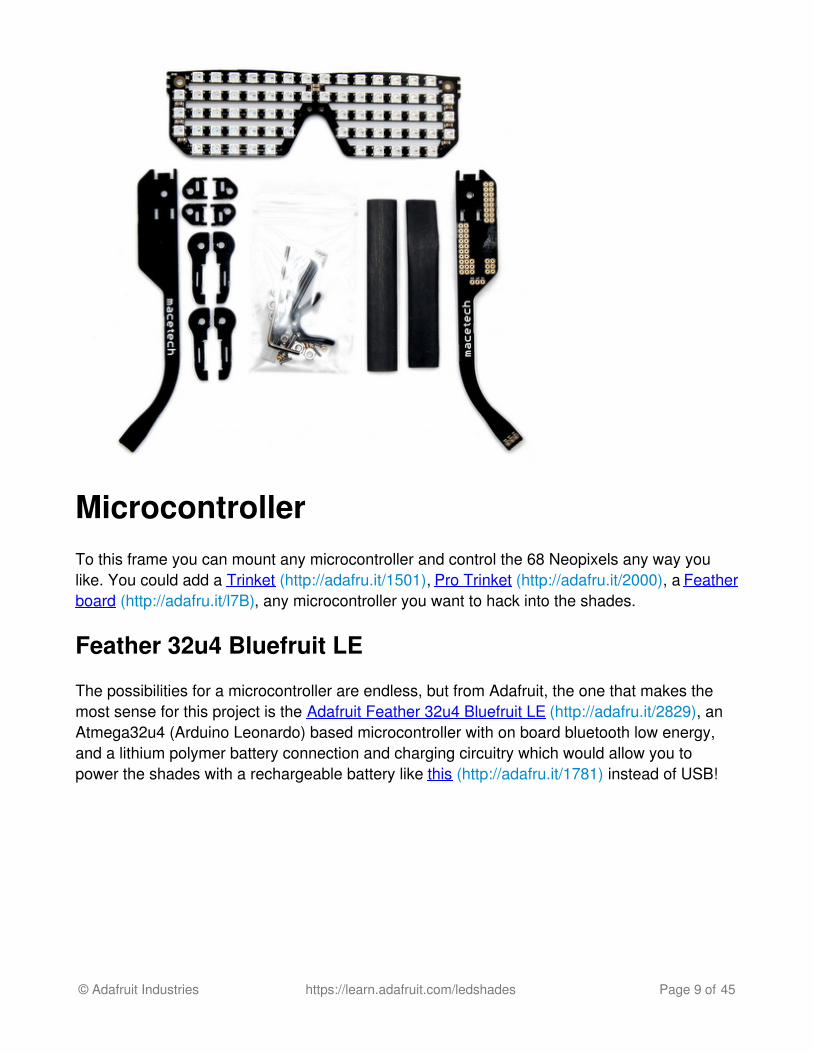
MicrocontrollerTo this frame you can mount any microcontroller and control the 68 Neopixels any way youlike. You could add a Trinket (http://adafru.it/1501), Pro Trinket (http://adafru.it/2000), a Featherboard (http://adafru.it/l7B), any microcontroller you want to hack into the shades.
Feather 32u4 Bluefruit LE
The possibilities for a microcontroller are endless, but from Adafruit, the one that makes themost sense for this project is the Adafruit Feather 32u4 Bluefruit LE (http://adafru.it/2829), anAtmega32u4 (Arduino Leonardo) based microcontroller with on board bluetooth low energy,and a lithium polymer battery connection and charging circuitry which would allow you topower the shades with a rechargeable battery like this (http://adafru.it/1781) instead of USB!
© Adafruit Industries https://learn.adafruit.com/ledshades Page 9 of 45
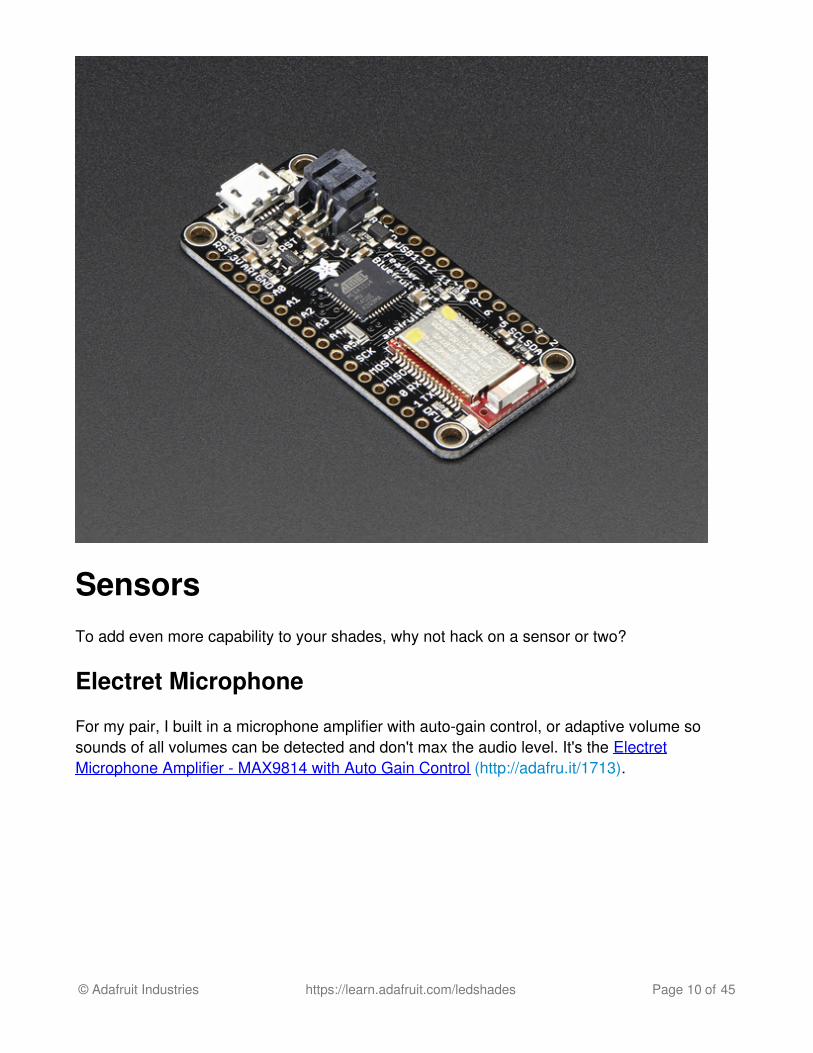
SensorsTo add even more capability to your shades, why not hack on a sensor or two?
Electret Microphone
For my pair, I built in a microphone amplifier with auto-gain control, or adaptive volume sosounds of all volumes can be detected and don't max the audio level. It's the ElectretMicrophone Amplifier - MAX9814 with Auto Gain Control (http://adafru.it/1713).
© Adafruit Industries https://learn.adafruit.com/ledshades Page 10 of 45
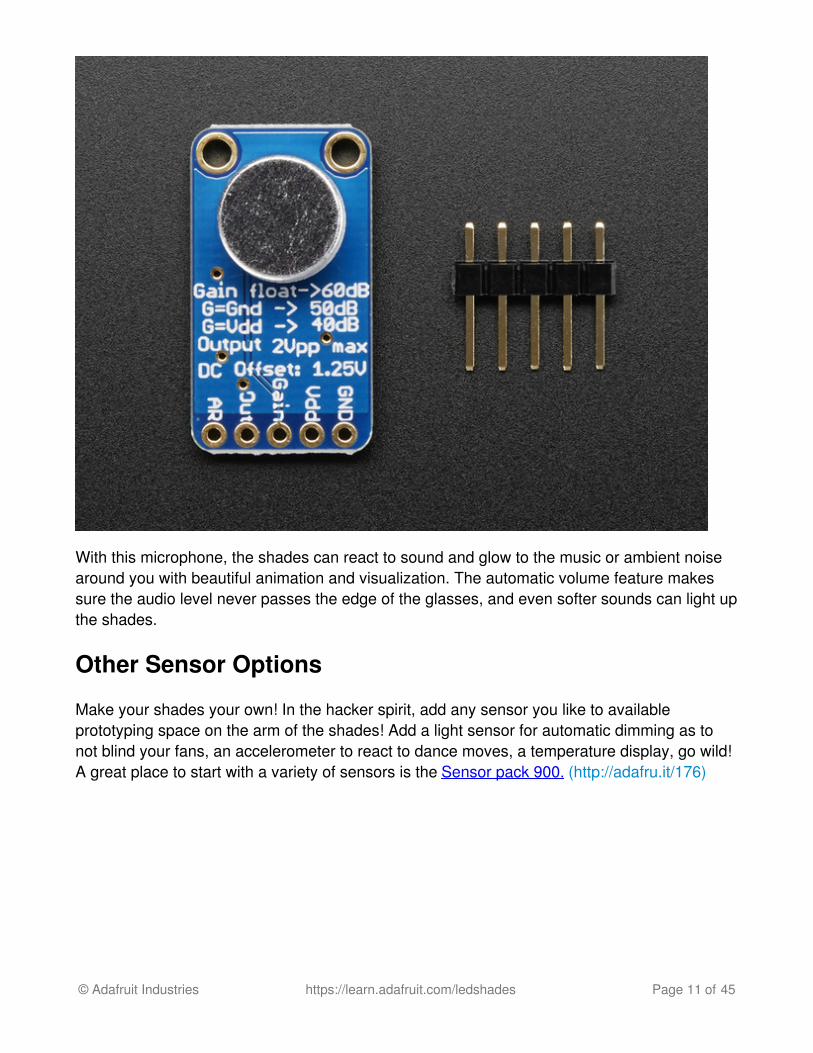
With this microphone, the shades can react to sound and glow to the music or ambient noisearound you with beautiful animation and visualization. The automatic volume feature makessure the audio level never passes the edge of the glasses, and even softer sounds can light upthe shades.
Other Sensor Options
Make your shades your own! In the hacker spirit, add any sensor you like to availableprototyping space on the arm of the shades! Add a light sensor for automatic dimming as tonot blind your fans, an accelerometer to react to dance moves, a temperature display, go wild!A great place to start with a variety of sensors is the Sensor pack 900. (http://adafru.it/176)
© Adafruit Industries https://learn.adafruit.com/ledshades Page 11 of 45
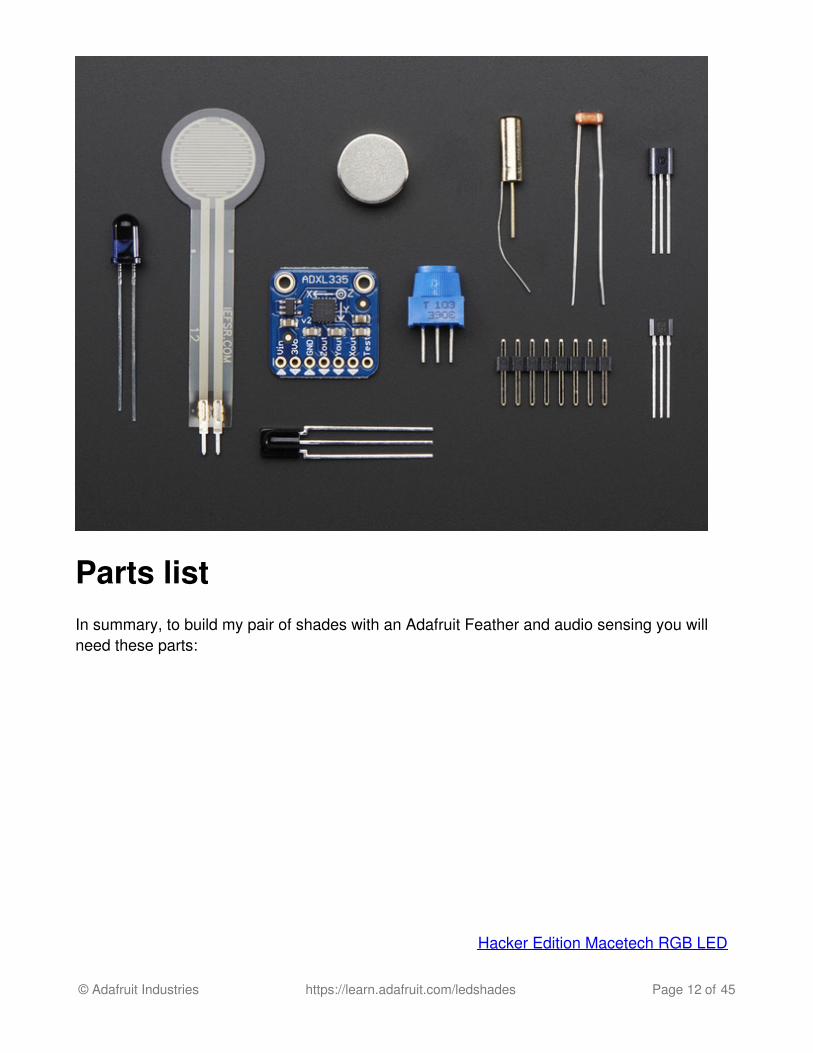
Parts listIn summary, to build my pair of shades with an Adafruit Feather and audio sensing you willneed these parts:
Hacker Edition Macetech RGB LED
© Adafruit Industries https://learn.adafruit.com/ledshades Page 12 of 45
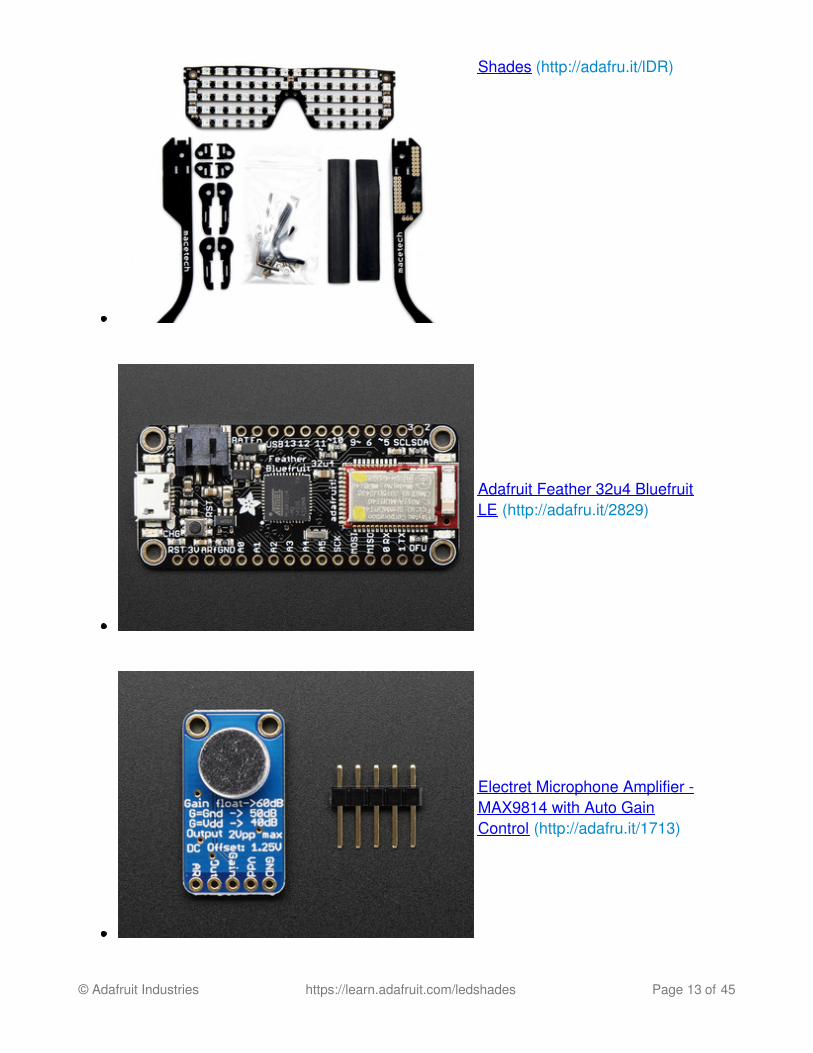
Shades (http://adafru.it/lDR)
Adafruit Feather 32u4 BluefruitLE (http://adafru.it/2829)
Electret Microphone Amplifier -MAX9814 with Auto GainControl (http://adafru.it/1713)
© Adafruit Industries https://learn.adafruit.com/ledshades Page 13 of 45
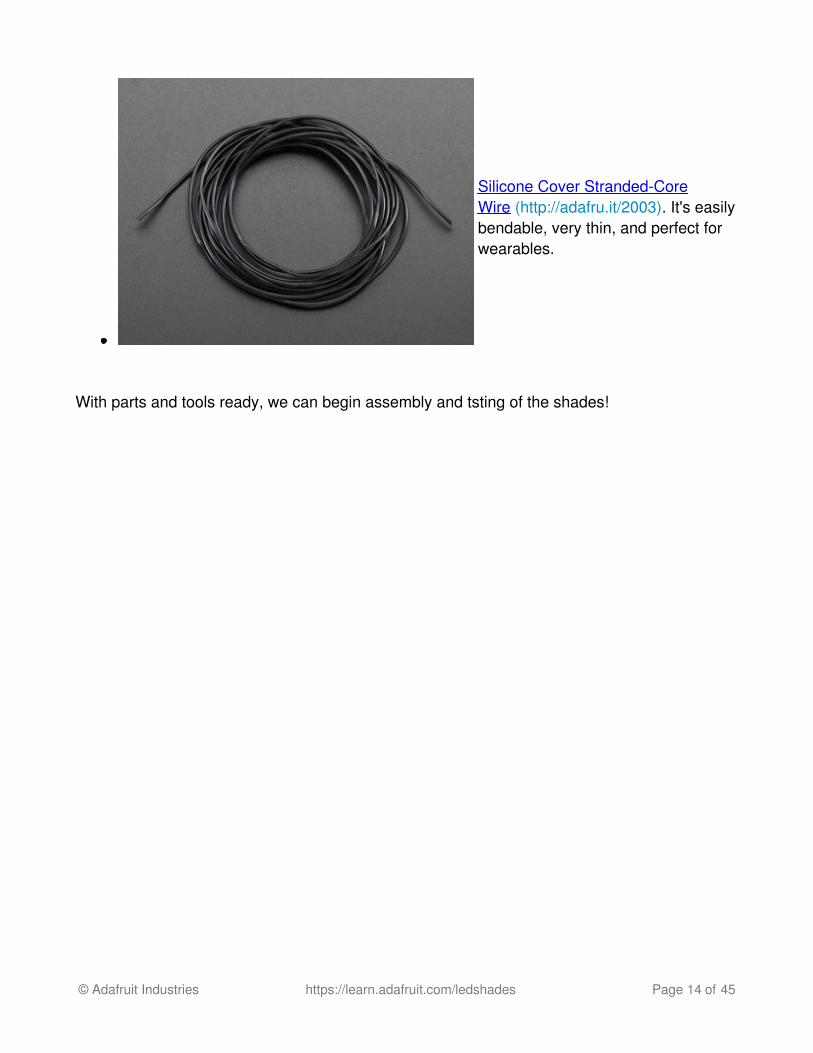
Silicone Cover Stranded-CoreWire (http://adafru.it/2003). It's easilybendable, very thin, and perfect forwearables.
With parts and tools ready, we can begin assembly and tsting of the shades!
© Adafruit Industries https://learn.adafruit.com/ledshades Page 14 of 45
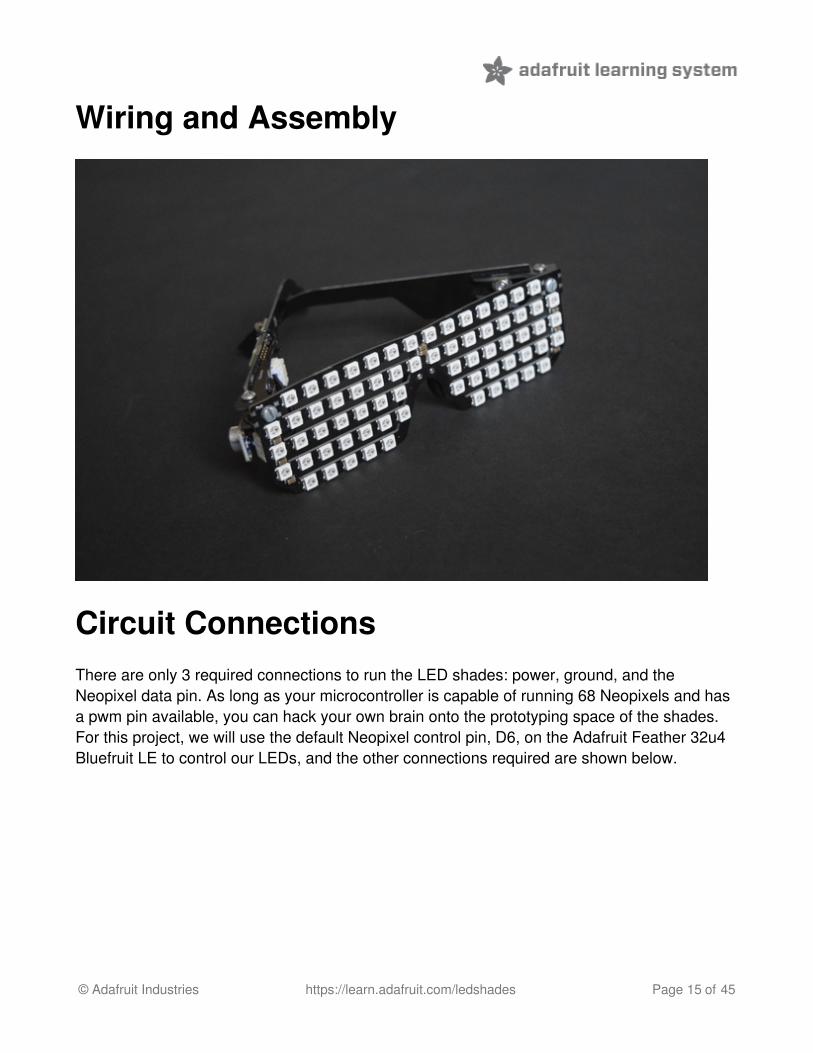
Wiring and Assembly
Circuit ConnectionsThere are only 3 required connections to run the LED shades: power, ground, and theNeopixel data pin. As long as your microcontroller is capable of running 68 Neopixels and hasa pwm pin available, you can hack your own brain onto the prototyping space of the shades.For this project, we will use the default Neopixel control pin, D6, on the Adafruit Feather 32u4Bluefruit LE to control our LEDs, and the other connections required are shown below.
© Adafruit Industries https://learn.adafruit.com/ledshades Page 15 of 45
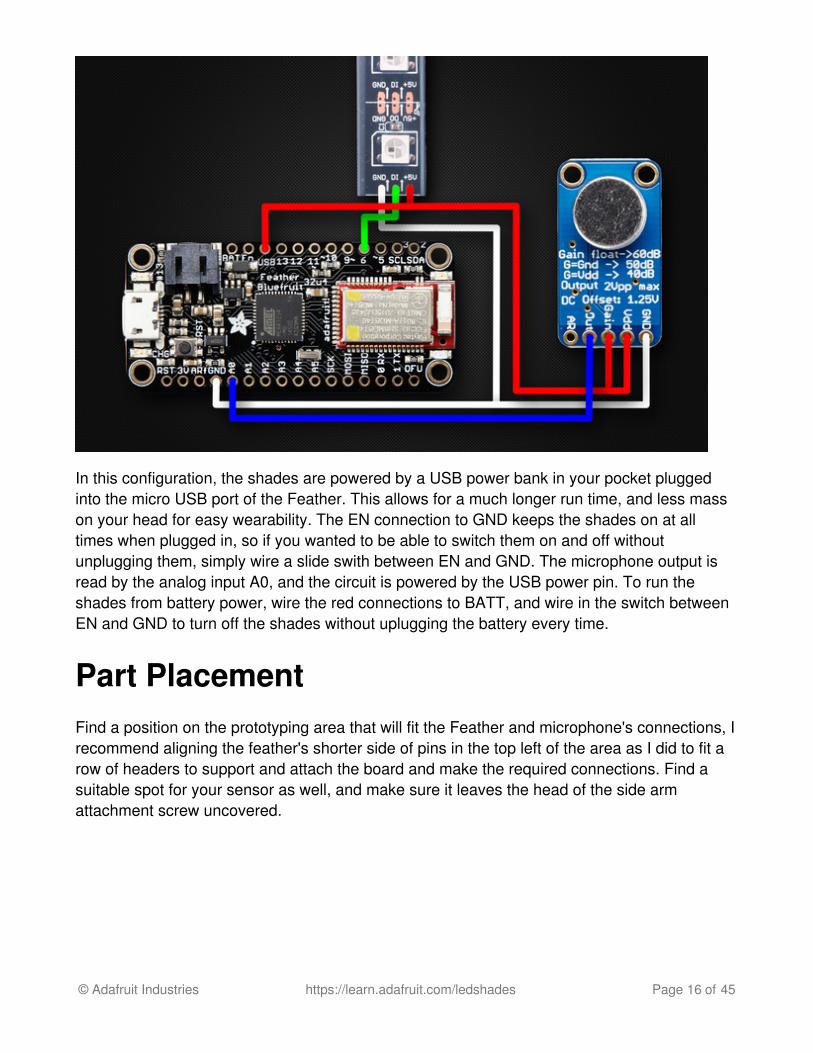
In this configuration, the shades are powered by a USB power bank in your pocket pluggedinto the micro USB port of the Feather. This allows for a much longer run time, and less masson your head for easy wearability. The EN connection to GND keeps the shades on at alltimes when plugged in, so if you wanted to be able to switch them on and off withoutunplugging them, simply wire a slide swith between EN and GND. The microphone output isread by the analog input A0, and the circuit is powered by the USB power pin. To run theshades from battery power, wire the red connections to BATT, and wire in the switch betweenEN and GND to turn off the shades without uplugging the battery every time.
Part PlacementFind a position on the prototyping area that will fit the Feather and microphone's connections, Irecommend aligning the feather's shorter side of pins in the top left of the area as I did to fit arow of headers to support and attach the board and make the required connections. Find asuitable spot for your sensor as well, and make sure it leaves the head of the side armattachment screw uncovered.
© Adafruit Industries https://learn.adafruit.com/ledshades Page 16 of 45

Soldering the Feather 32u4 Bluefruit LEFrom Ladyada's guides to the Feather 32u4 BLE and the auto-gain microphone, here's how tosolder the header pins and attach them to the board:
Prepare the headerstrip:
Cut the strip to a length of 10 pins,and make sure it lines up with thepins BATT through 5 on theFeather. It will be easier to solder ifyou insert it into a breadboard - longpins down
Remember, only solder headers to the 10 pins EN-3, or your feather won't fit into your
© Adafruit Industries https://learn.adafruit.com/ledshades Page 17 of 45
prototyping area!
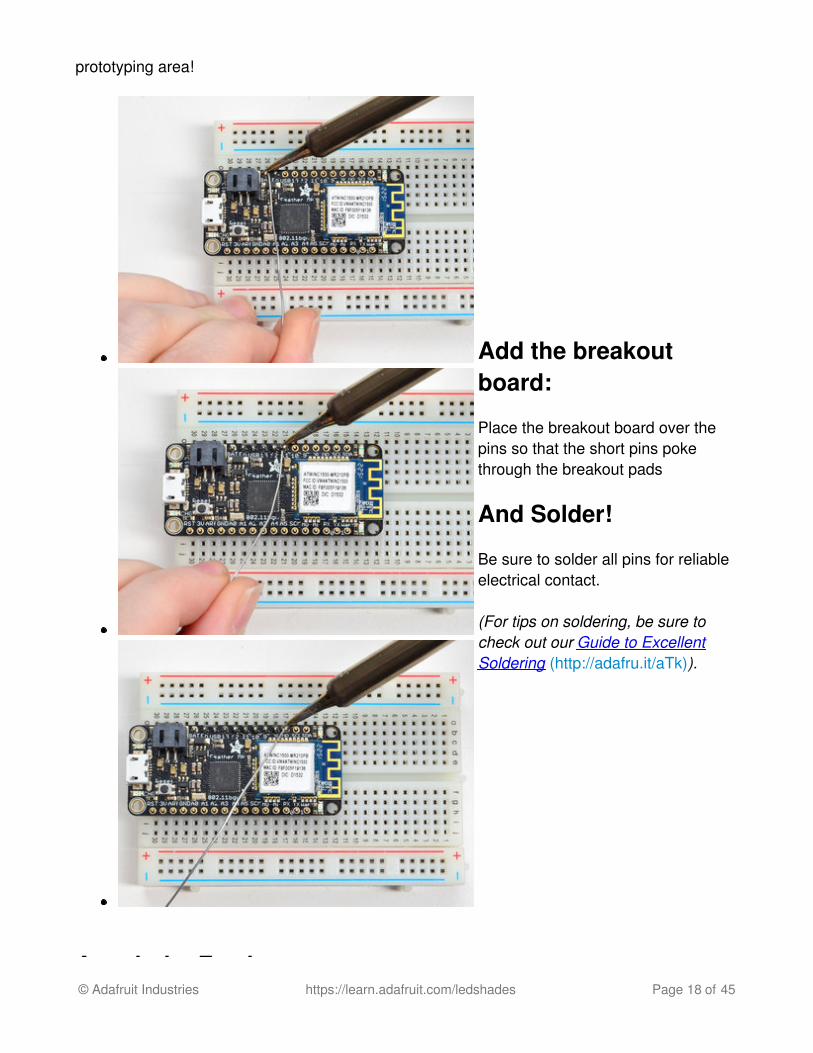
Add the breakoutboard:
Place the breakout board over thepins so that the short pins pokethrough the breakout pads
And Solder!
Be sure to solder all pins for reliableelectrical contact.
(For tips on soldering, be sure tocheck out our Guide to ExcellentSoldering (http://adafru.it/aTk)).
Attach the Feather© Adafruit Industries https://learn.adafruit.com/ledshades Page 18 of 45
Attach the Feather
Once you've soldered the top row, you may remove the Feather from the breadboard andsolder it into the prototyping area of the hacker edition LED shades arm so the row of headersis in the top left of the area, as shown on my pair.
1. For a stronger connection tothe shades, remove the plasticheaders spacer with pliers(optional)
2. Then place the Feather intothe prototyping area as shown.
© Adafruit Industries https://learn.adafruit.com/ledshades Page 19 of 45
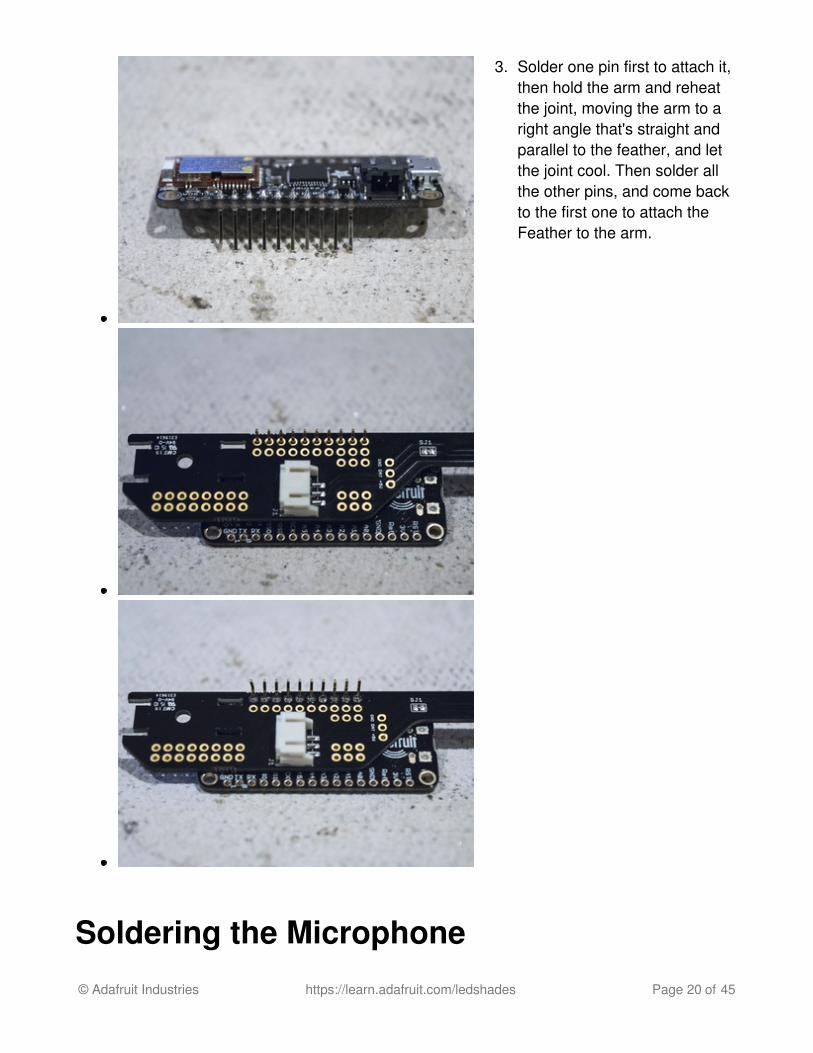
3. Solder one pin first to attach it,then hold the arm and reheatthe joint, moving the arm to aright angle that's straight andparallel to the feather, and letthe joint cool. Then solder allthe other pins, and come backto the first one to attach theFeather to the arm.
Soldering the Microphone© Adafruit Industries https://learn.adafruit.com/ledshades Page 20 of 45
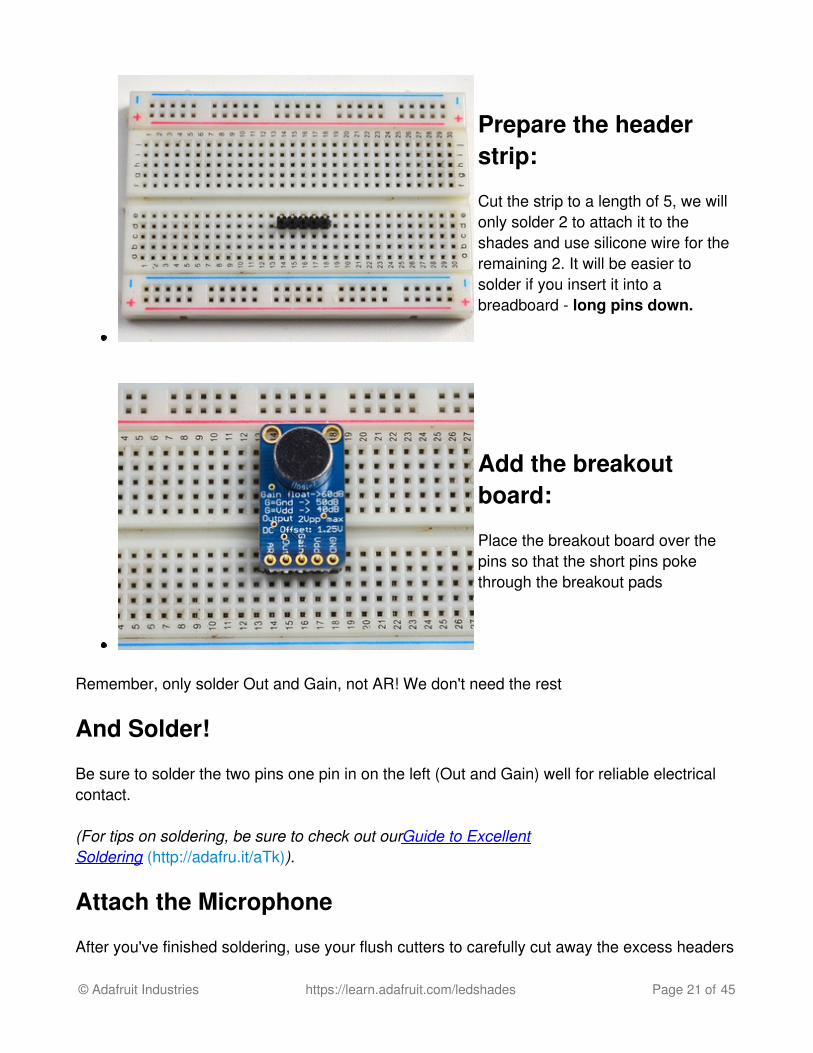
Prepare the headerstrip:
Cut the strip to a length of 5, we willonly solder 2 to attach it to theshades and use silicone wire for theremaining 2. It will be easier tosolder if you insert it into abreadboard - long pins down.
Add the breakoutboard:
Place the breakout board over thepins so that the short pins pokethrough the breakout pads
Remember, only solder Out and Gain, not AR! We don't need the rest
And Solder!
Be sure to solder the two pins one pin in on the left (Out and Gain) well for reliable electricalcontact.
(For tips on soldering, be sure to check out our Guide to ExcellentSoldering (http://adafru.it/aTk)).
Attach the Microphone
After you've finished soldering, use your flush cutters to carefully cut away the excess headers
© Adafruit Industries https://learn.adafruit.com/ledshades Page 21 of 45
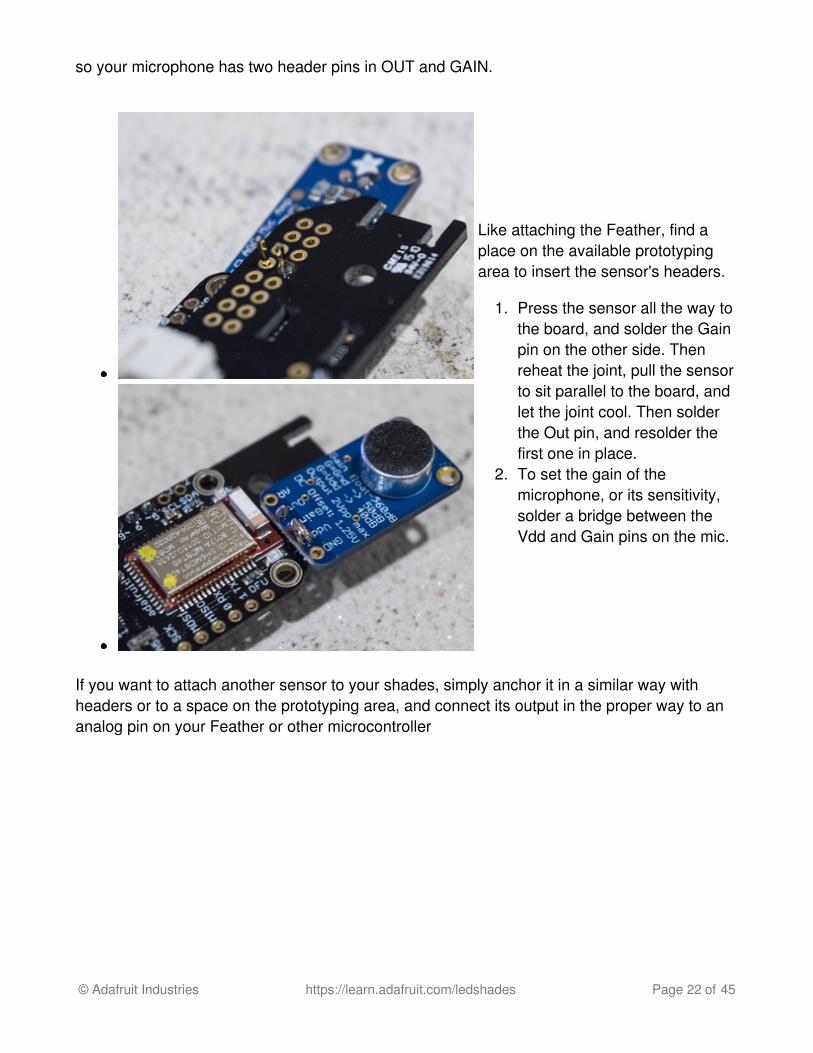
so your microphone has two header pins in OUT and GAIN.
Like attaching the Feather, find aplace on the available prototypingarea to insert the sensor's headers.
1. Press the sensor all the way tothe board, and solder the Gainpin on the other side. Thenreheat the joint, pull the sensorto sit parallel to the board, andlet the joint cool. Then solderthe Out pin, and resolder thefirst one in place.
2. To set the gain of themicrophone, or its sensitivity,solder a bridge between theVdd and Gain pins on the mic.
If you want to attach another sensor to your shades, simply anchor it in a similar way withheaders or to a space on the prototyping area, and connect its output in the proper way to ananalog pin on your Feather or other microcontroller
© Adafruit Industries https://learn.adafruit.com/ledshades Page 22 of 45
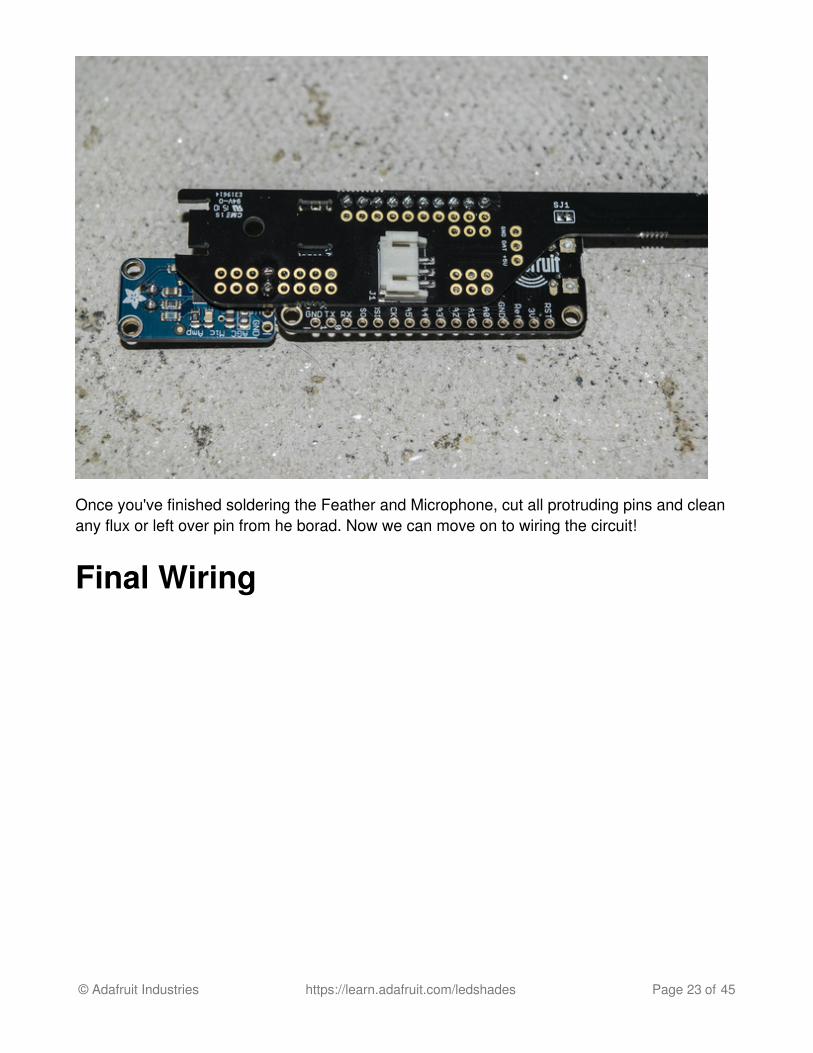
Once you've finished soldering the Feather and Microphone, cut all protruding pins and cleanany flux or left over pin from he borad. Now we can move on to wiring the circuit!
Final Wiring
© Adafruit Industries https://learn.adafruit.com/ledshades Page 23 of 45

Now, review and identify where the pins required for this project are located from the "CircuitConnections" sections above, and refer to the circuit diagram to plan out your wiring.
© Adafruit Industries https://learn.adafruit.com/ledshades Page 24 of 45
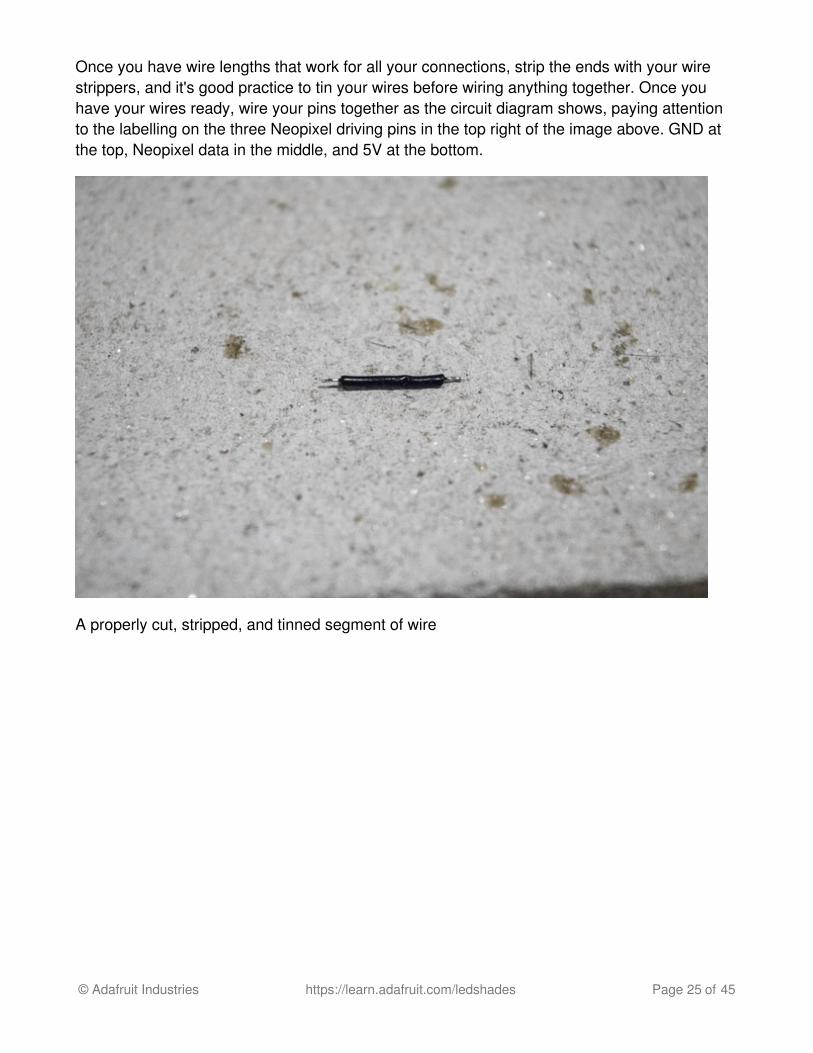
Once you have wire lengths that work for all your connections, strip the ends with your wirestrippers, and it's good practice to tin your wires before wiring anything together. Once youhave your wires ready, wire your pins together as the circuit diagram shows, paying attentionto the labelling on the three Neopixel driving pins in the top right of the image above. GND atthe top, Neopixel data in the middle, and 5V at the bottom.
A properly cut, stripped, and tinned segment of wire
© Adafruit Industries https://learn.adafruit.com/ledshades Page 25 of 45
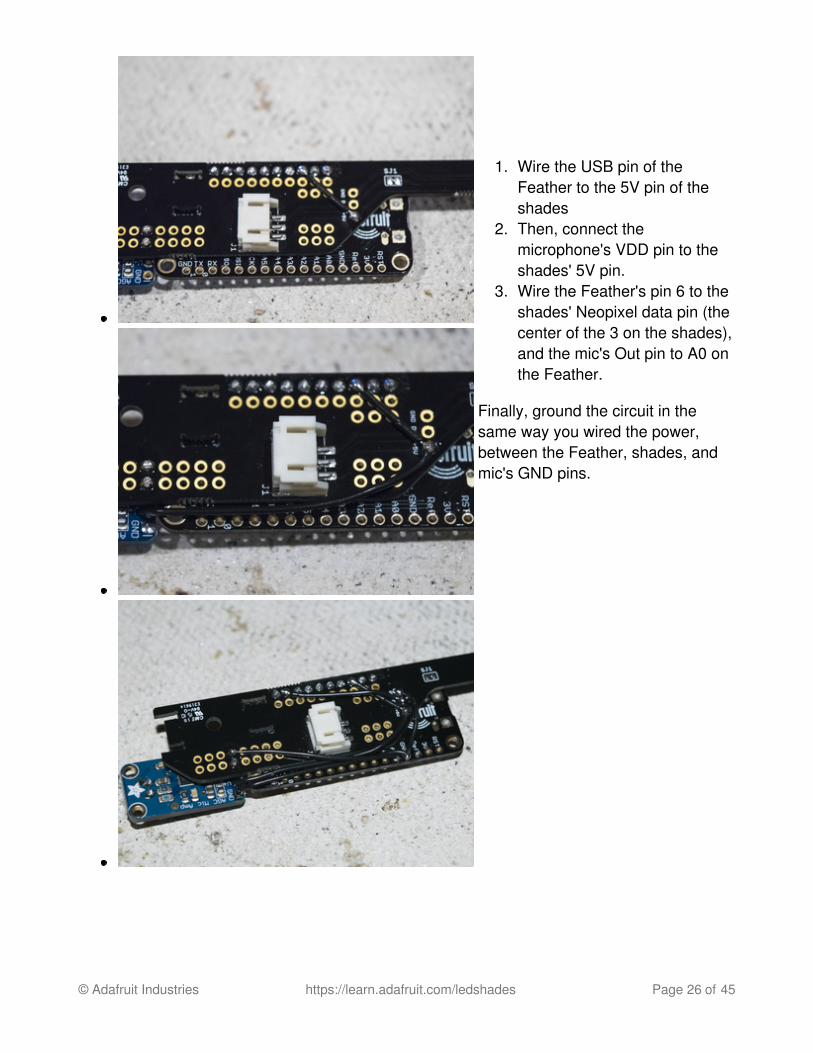
1. Wire the USB pin of theFeather to the 5V pin of theshades
2. Then, connect themicrophone's VDD pin to theshades' 5V pin.
3. Wire the Feather's pin 6 to theshades' Neopixel data pin (thecenter of the 3 on the shades),and the mic's Out pin to A0 onthe Feather.
Finally, ground the circuit in thesame way you wired the power,between the Feather, shades, andmic's GND pins.
© Adafruit Industries https://learn.adafruit.com/ledshades Page 26 of 45
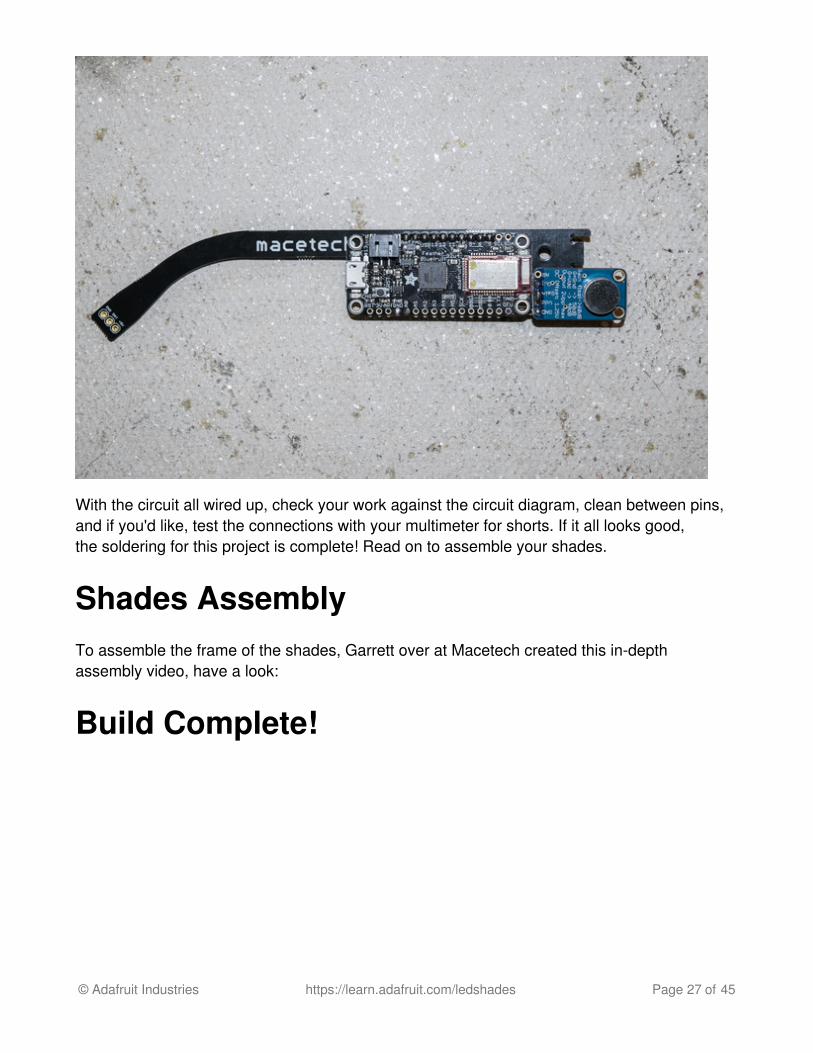
With the circuit all wired up, check your work against the circuit diagram, clean between pins,and if you'd like, test the connections with your multimeter for shorts. If it all looks good,the soldering for this project is complete! Read on to assemble your shades.
Shades AssemblyTo assemble the frame of the shades, Garrett over at Macetech created this in-depthassembly video, have a look:
Build Complete!
© Adafruit Industries https://learn.adafruit.com/ledshades Page 27 of 45
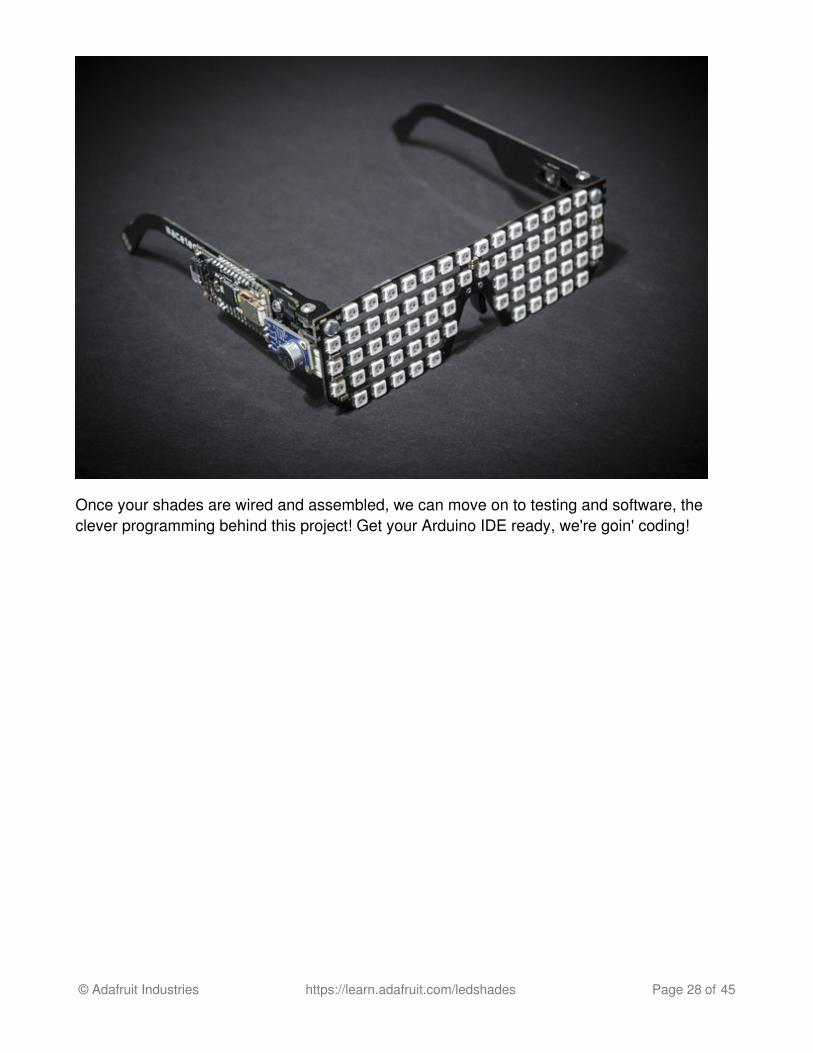
Once your shades are wired and assembled, we can move on to testing and software, theclever programming behind this project! Get your Arduino IDE ready, we're goin' coding!
© Adafruit Industries https://learn.adafruit.com/ledshades Page 28 of 45
Software Preparation
To program the LED Shades, we must first install and set up the Arduino IDE to accept theFeather as a programmable board. From Lady Ada's Feather 32u4 Bluefruit LE guide on thelearning system, here are the instructions to get all set up, then we'll move on to testing andcode!
Arduino IDE Setuphttp://adafru.it/lHaUsing With the Arduino IDEhttp://adafru.it/lHb
© Adafruit Industries https://learn.adafruit.com/ledshades Page 29 of 45
Required Arduino LibrariesOnce our Arduino IDE is set up for our Feather board, we can install the required Arduinolibraries for this project by unzipping them and dropping them in your arduino "libraries" folder.If you haven't added Arduino libraries, follow this handy guide (http://adafru.it/dit) on theLearning System, but if you're a pro, go ahead and download them below.
Download the Adafruit Neopixel Libraryhttp://adafru.it/cDjDownload the Adafruit nRF51 BLE Libraryhttp://adafru.it/f4W
© Adafruit Industries https://learn.adafruit.com/ledshades Page 30 of 45
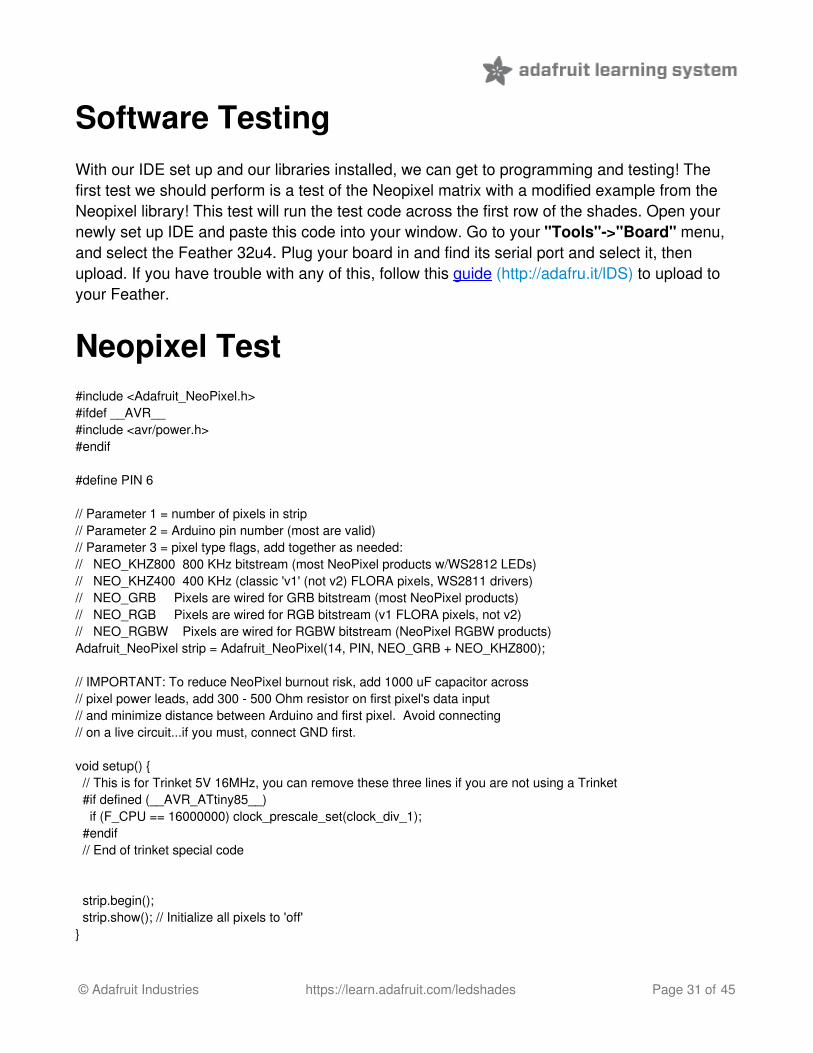
Software TestingWith our IDE set up and our libraries installed, we can get to programming and testing! Thefirst test we should perform is a test of the Neopixel matrix with a modified example from theNeopixel library! This test will run the test code across the first row of the shades. Open yournewly set up IDE and paste this code into your window. Go to your "Tools"->"Board" menu,and select the Feather 32u4. Plug your board in and find its serial port and select it, thenupload. If you have trouble with any of this, follow this guide (http://adafru.it/lDS) to upload toyour Feather.
Neopixel Test#include <Adafruit_NeoPixel.h>#ifdef __AVR__#include <avr/power.h>#endif
#define PIN 6
// Parameter 1 = number of pixels in strip// Parameter 2 = Arduino pin number (most are valid)// Parameter 3 = pixel type flags, add together as needed:// NEO_KHZ800 800 KHz bitstream (most NeoPixel products w/WS2812 LEDs)// NEO_KHZ400 400 KHz (classic 'v1' (not v2) FLORA pixels, WS2811 drivers)// NEO_GRB Pixels are wired for GRB bitstream (most NeoPixel products)// NEO_RGB Pixels are wired for RGB bitstream (v1 FLORA pixels, not v2)// NEO_RGBW Pixels are wired for RGBW bitstream (NeoPixel RGBW products)Adafruit_NeoPixel strip = Adafruit_NeoPixel(14, PIN, NEO_GRB + NEO_KHZ800);
// IMPORTANT: To reduce NeoPixel burnout risk, add 1000 uF capacitor across// pixel power leads, add 300 - 500 Ohm resistor on first pixel's data input// and minimize distance between Arduino and first pixel. Avoid connecting// on a live circuit...if you must, connect GND first.
void setup() { // This is for Trinket 5V 16MHz, you can remove these three lines if you are not using a Trinket #if defined (__AVR_ATtiny85__) if (F_CPU == 16000000) clock_prescale_set(clock_div_1); #endif // End of trinket special code
strip.begin(); strip.show(); // Initialize all pixels to 'off'}
© Adafruit Industries https://learn.adafruit.com/ledshades Page 31 of 45
void loop() { // Some example procedures showing how to display to the pixels: colorWipe(strip.Color(255, 0, 0), 50); // Red colorWipe(strip.Color(0, 255, 0), 50); // Green colorWipe(strip.Color(0, 0, 255), 50); // Blue//colorWipe(strip.Color(0, 0, 0, 255), 50); // White RGBW // Send a theater pixel chase in... theaterChase(strip.Color(127, 127, 127), 50); // White theaterChase(strip.Color(127, 0, 0), 50); // Red theaterChase(strip.Color(0, 0, 127), 50); // Blue
rainbow(20); rainbowCycle(20); theaterChaseRainbow(50);}
// Fill the dots one after the other with a colorvoid colorWipe(uint32_t c, uint8_t wait) { for(uint16_t i=0; i<strip.numPixels(); i++) { strip.setPixelColor(i, c); strip.show(); delay(wait); }}
void rainbow(uint8_t wait) { uint16_t i, j;
for(j=0; j<256; j++) { for(i=0; i<strip.numPixels(); i++) { strip.setPixelColor(i, Wheel((i+j) & 255)); } strip.show(); delay(wait); }}
// Slightly different, this makes the rainbow equally distributed throughoutvoid rainbowCycle(uint8_t wait) { uint16_t i, j;
for(j=0; j<256*5; j++) { // 5 cycles of all colors on wheel for(i=0; i< strip.numPixels(); i++) { strip.setPixelColor(i, Wheel(((i * 256 / strip.numPixels()) + j) & 255)); } strip.show(); delay(wait); }}
//Theatre-style crawling lights.void theaterChase(uint32_t c, uint8_t wait) {
© Adafruit Industries https://learn.adafruit.com/ledshades Page 32 of 45
for (int j=0; j<10; j++) { //do 10 cycles of chasing for (int q=0; q < 3; q++) { for (uint16_t i=0; i < strip.numPixels(); i=i+3) { strip.setPixelColor(i+q, c); //turn every third pixel on } strip.show();
delay(wait);
for (uint16_t i=0; i < strip.numPixels(); i=i+3) { strip.setPixelColor(i+q, 0); //turn every third pixel off } } }}
//Theatre-style crawling lights with rainbow effectvoid theaterChaseRainbow(uint8_t wait) { for (int j=0; j < 256; j++) { // cycle all 256 colors in the wheel for (int q=0; q < 3; q++) { for (uint16_t i=0; i < strip.numPixels(); i=i+3) { strip.setPixelColor(i+q, Wheel( (i+j) % 255)); //turn every third pixel on } strip.show();
delay(wait);
for (uint16_t i=0; i < strip.numPixels(); i=i+3) { strip.setPixelColor(i+q, 0); //turn every third pixel off } } }}
// Input a value 0 to 255 to get a color value.// The colours are a transition r - g - b - back to r.uint32_t Wheel(byte WheelPos) { WheelPos = 255 - WheelPos; if(WheelPos < 85) { return strip.Color(255 - WheelPos * 3, 0, WheelPos * 3); } if(WheelPos < 170) { WheelPos -= 85; return strip.Color(0, WheelPos * 3, 255 - WheelPos * 3); } WheelPos -= 170; return strip.Color(WheelPos * 3, 255 - WheelPos * 3, 0);}
BLE Library Test
© Adafruit Industries https://learn.adafruit.com/ledshades Page 33 of 45

If you would like to test the BLE library, perform the steps listed in the Feather 32u4 BluefruitLE guide here:
BLE Library Testhttp://adafru.it/lDS
Custom Device Name
One of the cool things you can do with the Feather 32u4 Bluefruit LE is add a custom devicename! I named mine "Shades!" so it appears on my phone as such, and to do so yourself youcan follow this guide here!
Custom Device Name Instructionshttp://adafru.it/lDTTo save your custom name, disable the factory reset of the bluetooth module in the code.
Test Success!(?)If your upload was a success, you should see a rainbow and other test patterns on the first rowof your shades, and see a working bluetooth link! If not, check your code and wiring, and you'llget it I'm sure! Refer to the uploading guide or the previous steps and the circuit diagram tofind your issue, or post it up in the Adafruit support forums (http://adafru.it/lDU). Now we canmove on to the project's code!
Don't proceed until your circuit and libraries work!
© Adafruit Industries https://learn.adafruit.com/ledshades Page 34 of 45
Software and Bluetooth Control
Clever Code with 2D arrays
© Adafruit Industries https://learn.adafruit.com/ledshades Page 35 of 45
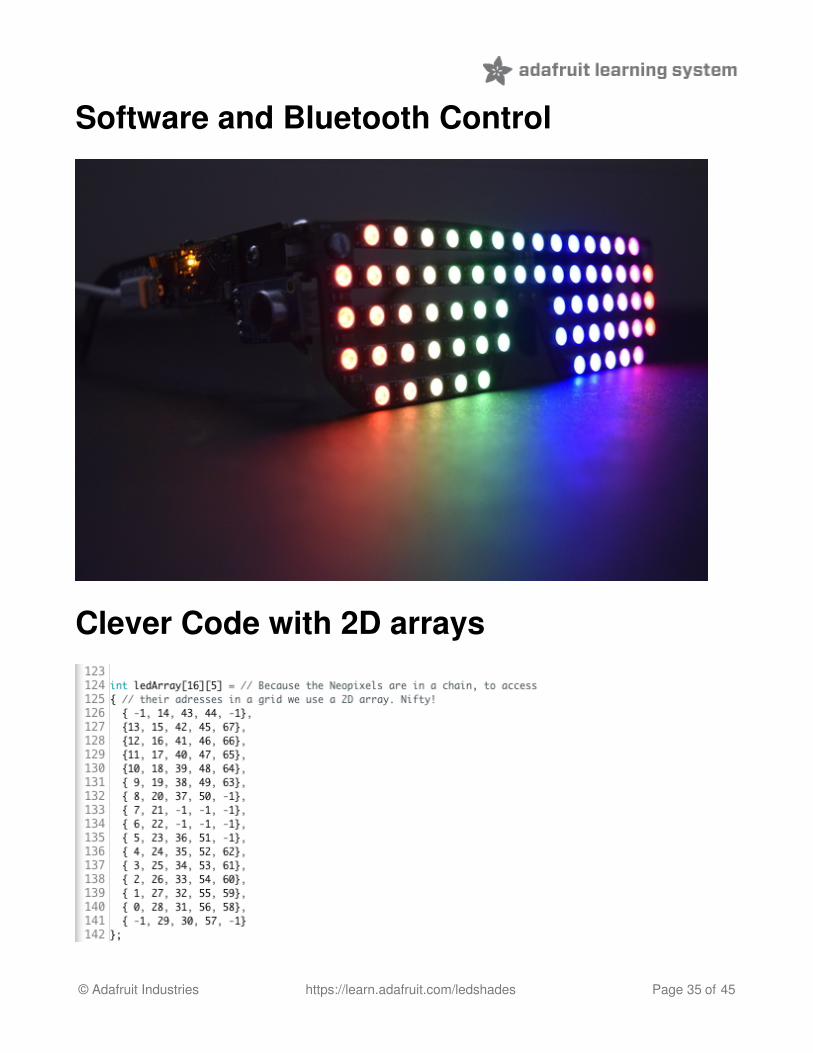
With a built and tested pair of custom Neopixel Shades, we can now move on to what makesthese shades tick, the code! This program is a great use of what's called a two dimensionalarray, or essentially a grid of datatypes that can be accessed by row and column. Because theNeopixels are connected in a chain, if we want to control the leds from left to right on theshades, or control them by row and column as they appear on the front of the shades, we can'tjust count up from 0 as it would zig-zag. The array solves this by putting the addresses of theleds into a grid as they appear on the shades, so each can be addressed and controlled in alogical way. Read more here (http://adafru.it/lDV) if you're interested.
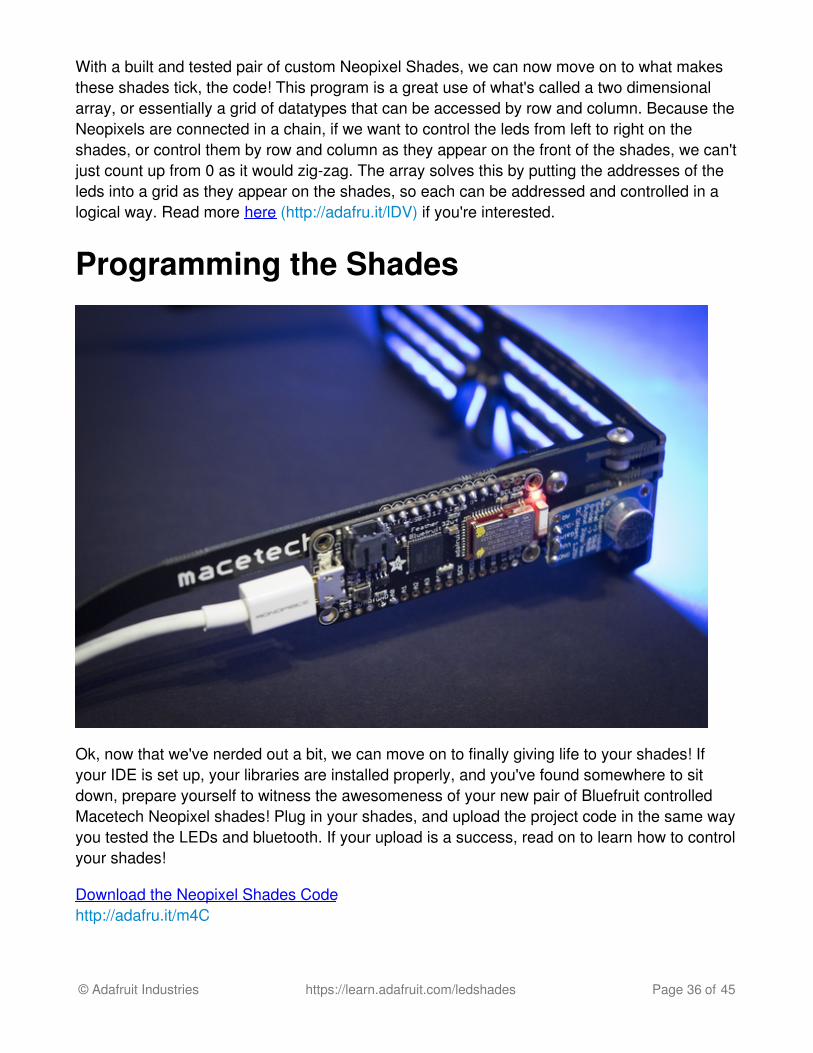
Programming the Shades
Ok, now that we've nerded out a bit, we can move on to finally giving life to your shades! Ifyour IDE is set up, your libraries are installed properly, and you've found somewhere to sitdown, prepare yourself to witness the awesomeness of your new pair of Bluefruit controlledMacetech Neopixel shades! Plug in your shades, and upload the project code in the same wayyou tested the LEDs and bluetooth. If your upload is a success, read on to learn how to controlyour shades!
Download the Neopixel Shades Codehttp://adafru.it/m4C
© Adafruit Industries https://learn.adafruit.com/ledshades Page 36 of 45
You did it!Congrats on building your own pair of Ada-hacked Macetech RGB LED shades!
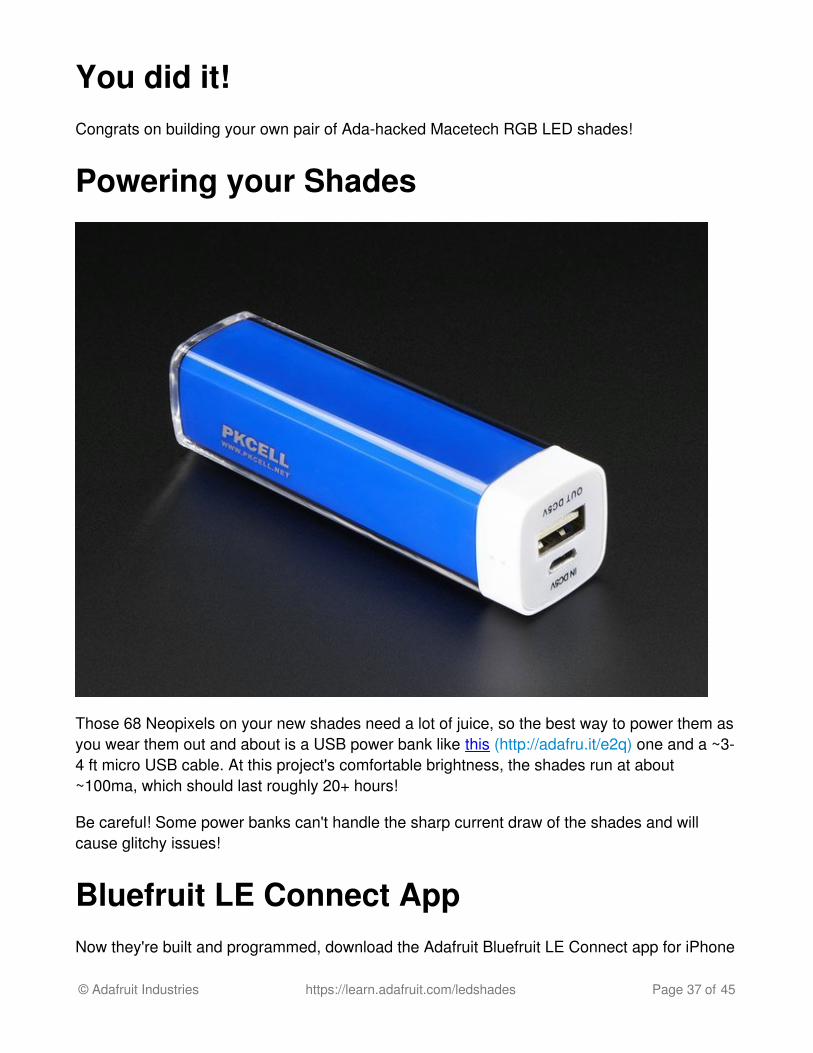
Powering your Shades
Those 68 Neopixels on your new shades need a lot of juice, so the best way to power them asyou wear them out and about is a USB power bank like this (http://adafru.it/e2q) one and a ~3-4 ft micro USB cable. At this project's comfortable brightness, the shades run at about~100ma, which should last roughly 20+ hours!
Be careful! Some power banks can't handle the sharp current draw of the shades and willcause glitchy issues!
Bluefruit LE Connect AppNow they're built and programmed, download the Adafruit Bluefruit LE Connect app for iPhone
© Adafruit Industries https://learn.adafruit.com/ledshades Page 37 of 45
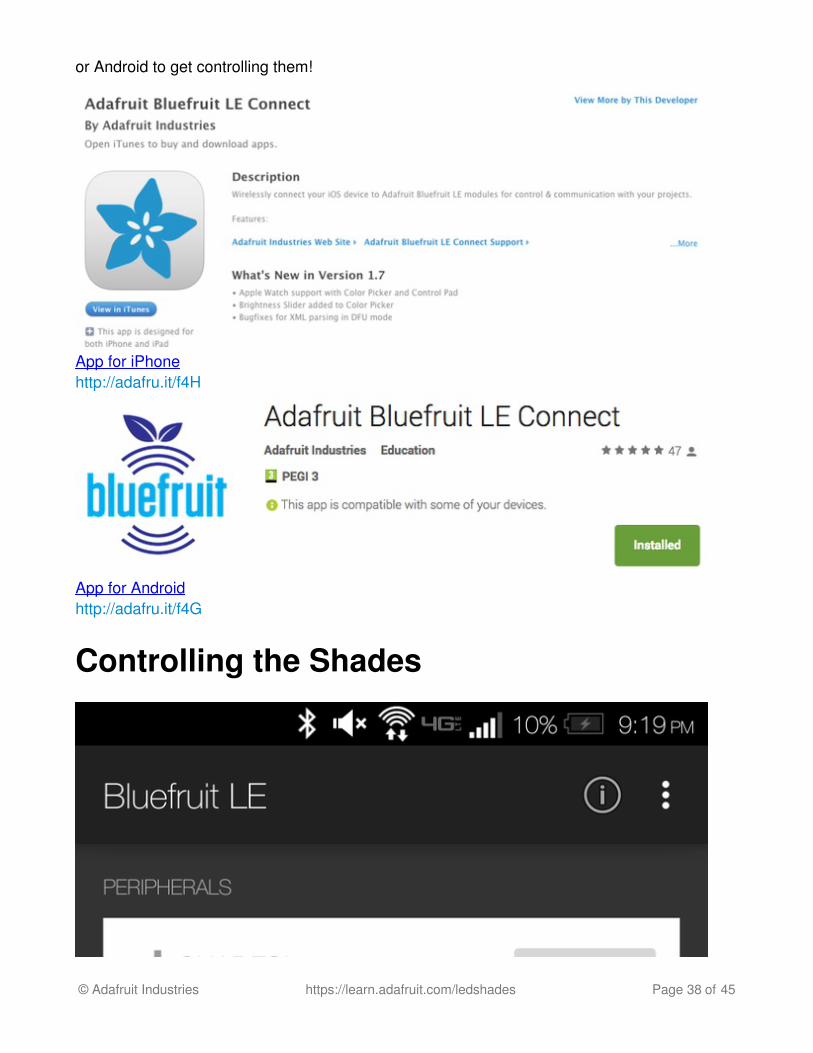
or Android to get controlling them!
App for iPhonehttp://adafru.it/f4H
App for Androidhttp://adafru.it/f4G
Controlling the Shades
© Adafruit Industries https://learn.adafruit.com/ledshades Page 38 of 45
© Adafruit Industries https://learn.adafruit.com/ledshades Page 39 of 45
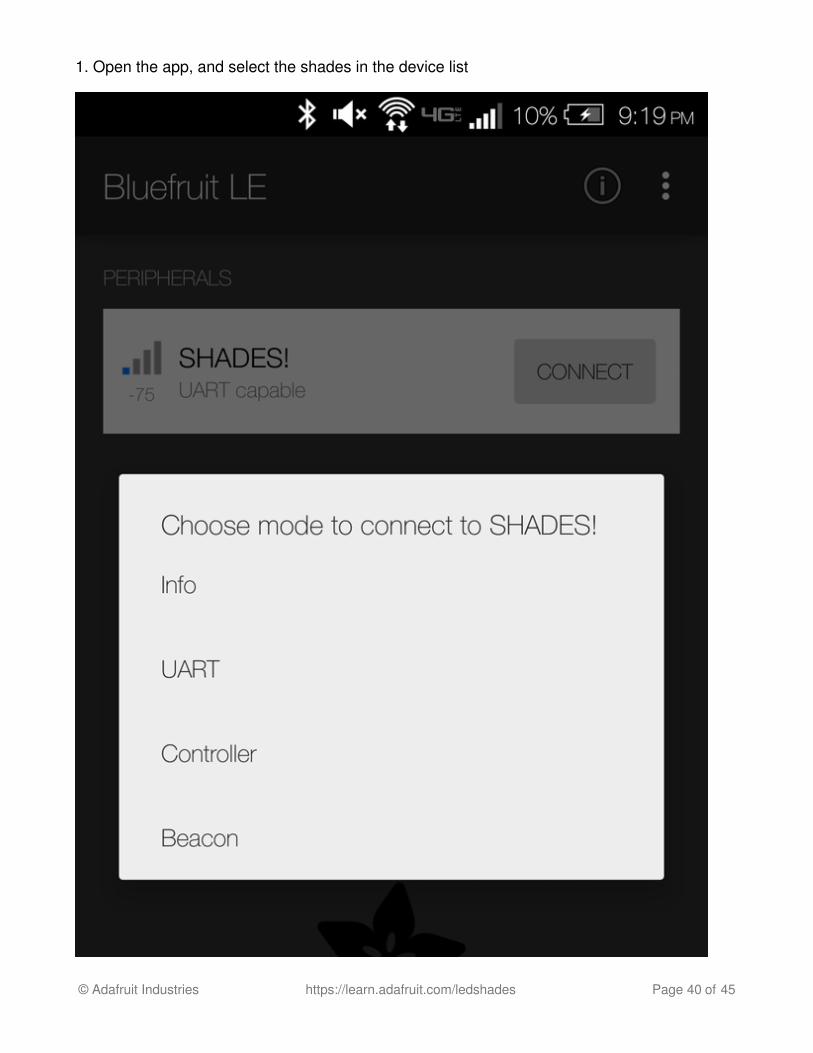
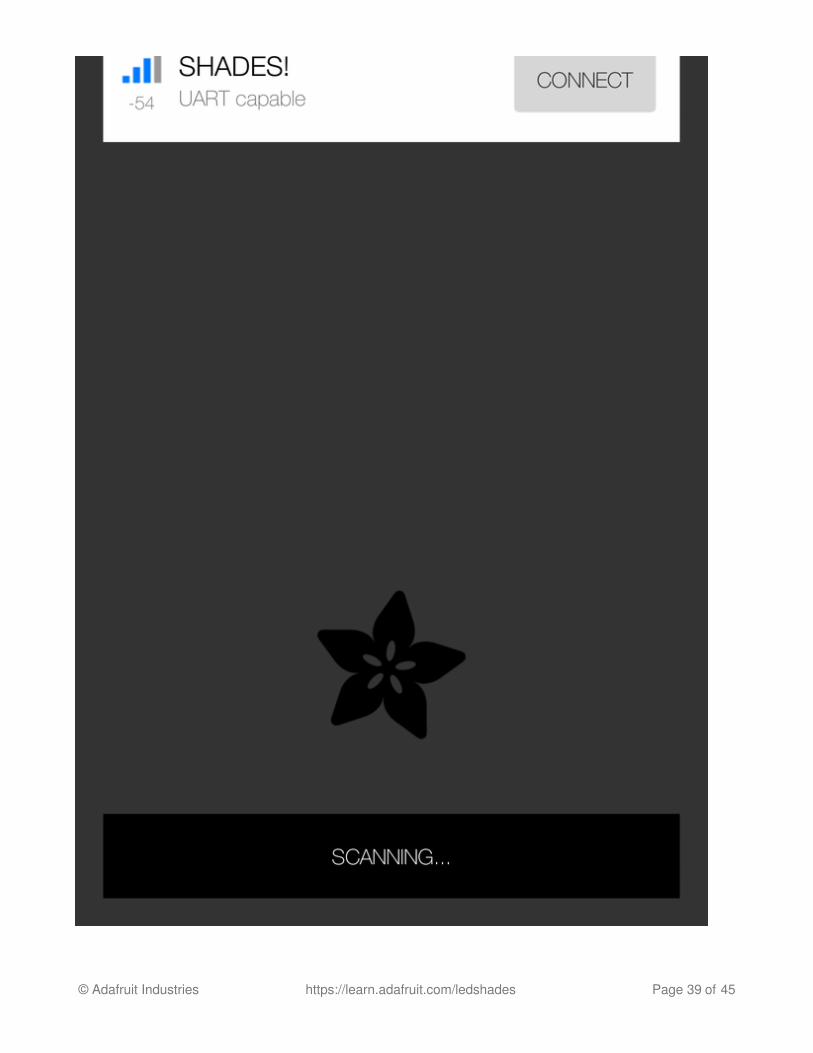
1. Open the app, and select the shades in the device list
© Adafruit Industries https://learn.adafruit.com/ledshades Page 40 of 45
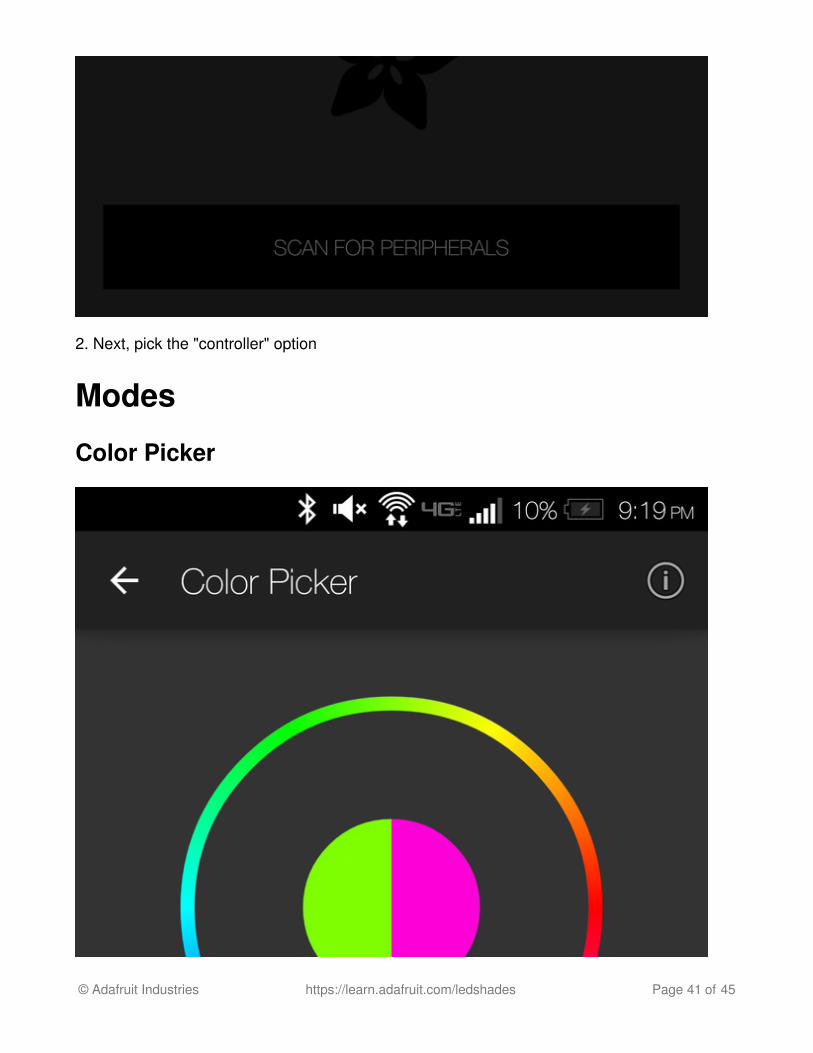
2. Next, pick the "controller" option
Modes
Color Picker
© Adafruit Industries https://learn.adafruit.com/ledshades Page 41 of 45
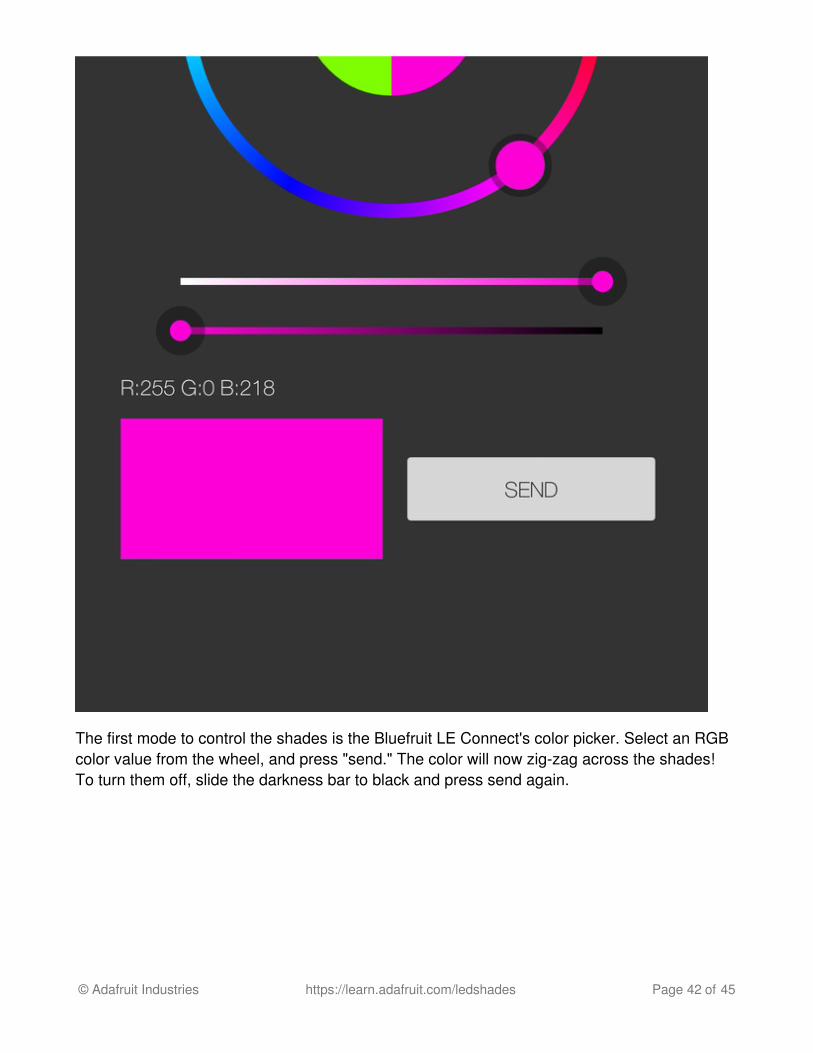
The first mode to control the shades is the Bluefruit LE Connect's color picker. Select an RGBcolor value from the wheel, and press "send." The color will now zig-zag across the shades!To turn them off, slide the darkness bar to black and press send again.
© Adafruit Industries https://learn.adafruit.com/ledshades Page 42 of 45

Animations
The second mode to control the shades is a selection of four animations triggered by the
© Adafruit Industries https://learn.adafruit.com/ledshades Page 43 of 45
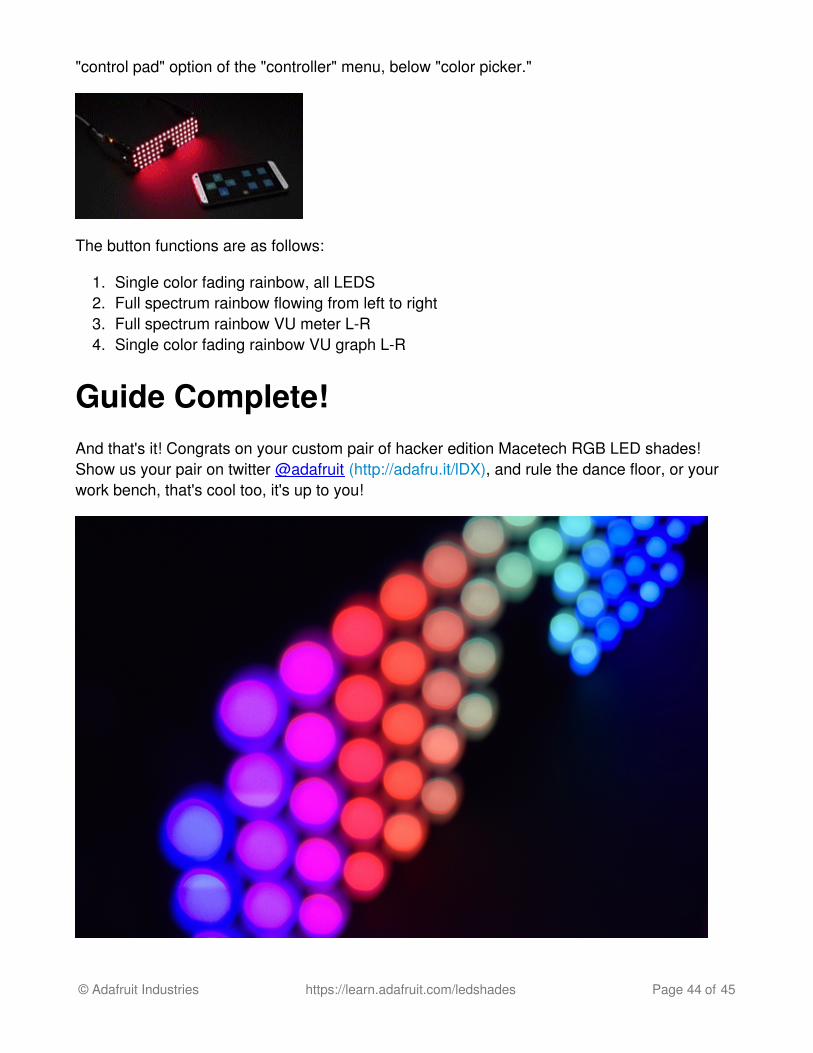
"control pad" option of the "controller" menu, below "color picker."
The button functions are as follows:
1. Single color fading rainbow, all LEDS2. Full spectrum rainbow flowing from left to right3. Full spectrum rainbow VU meter L-R4. Single color fading rainbow VU graph L-R
Guide Complete!And that's it! Congrats on your custom pair of hacker edition Macetech RGB LED shades!Show us your pair on twitter @adafruit (http://adafru.it/lDX), and rule the dance floor, or yourwork bench, that's cool too, it's up to you!
© Adafruit Industries https://learn.adafruit.com/ledshades Page 44 of 45

© Adafruit Industries Last Updated: 2017-08-31 02:54:02 AM UTC Page 45 of 45