Embed Size (px)
Citation preview
©2012 BERNINA of America, Inc. Page 1 of 5
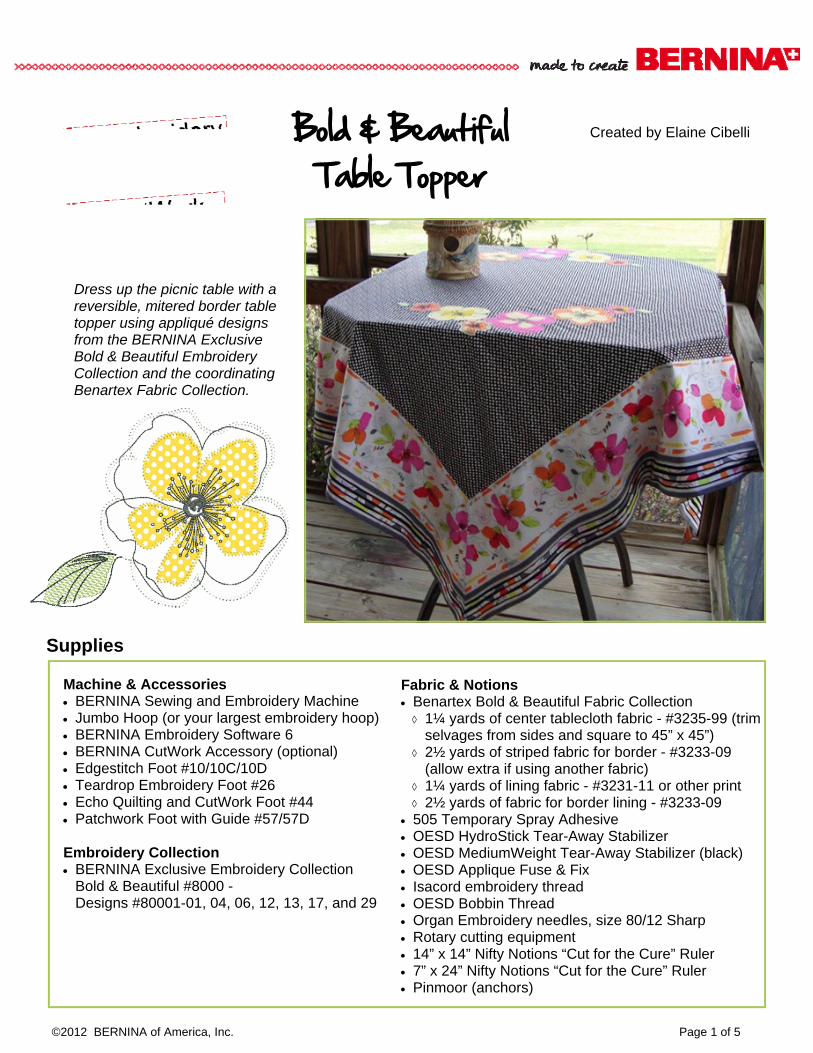
Bold & Beautiful Table Topper
Created by Elaine Cibelli
Supplies
Machine & Accessories BERNINA Sewing and Embroidery Machine Jumbo Hoop (or your largest embroidery hoop) BERNINA Embroidery Software 6 BERNINA CutWork Accessory (optional) Edgestitch Foot #10/10C/10D Teardrop Embroidery Foot #26 Echo Quilting and CutWork Foot #44 Patchwork Foot with Guide #57/57D Embroidery Collection BERNINA Exclusive Embroidery Collection
Bold & Beautiful #8000 - Designs #80001-01, 04, 06, 12, 13, 17, and 29
Fabric & Notions Benartex Bold & Beautiful Fabric Collection 1¼ yards of center tablecloth fabric - #3235-99 (trim
selvages from sides and square to 45” x 45”) 2½ yards of striped fabric for border - #3233-09
(allow extra if using another fabric) 1¼ yards of lining fabric - #3231-11 or other print 2½ yards of fabric for border lining - #3233-09
505 Temporary Spray Adhesive OESD HydroStick Tear-Away Stabilizer OESD MediumWeight Tear-Away Stabilizer (black) OESD Applique Fuse & Fix Isacord embroidery thread OESD Bobbin Thread Organ Embroidery needles, size 80/12 Sharp Rotary cutting equipment 14” x 14” Nifty Notions “Cut for the Cure” Ruler 7” x 24” Nifty Notions “Cut for the Cure” Ruler Pinmoor (anchors)
Dress up the picnic table with a reversible, mitered border table topper using appliqué designs from the BERNINA Exclusive Bold & Beautiful Embroidery Collection and the coordinating Benartex Fabric Collection.
©2012 BERNINA of America, Inc. Page 2 of 5
Cut the Appliqué Shapes Some of the Bold & Beautiful designs are appliqué designs. These may be cut with scissors or with the BERNINA CutWork Accessory. Using Scissors Print the appliqué pattern pieces from the PDF
included on the CD or USB stick. Adhere Appliqué Fuse & Fix to the wrong side of
the appliqué fabric. Place the pattern on top of the appliqué fabric and
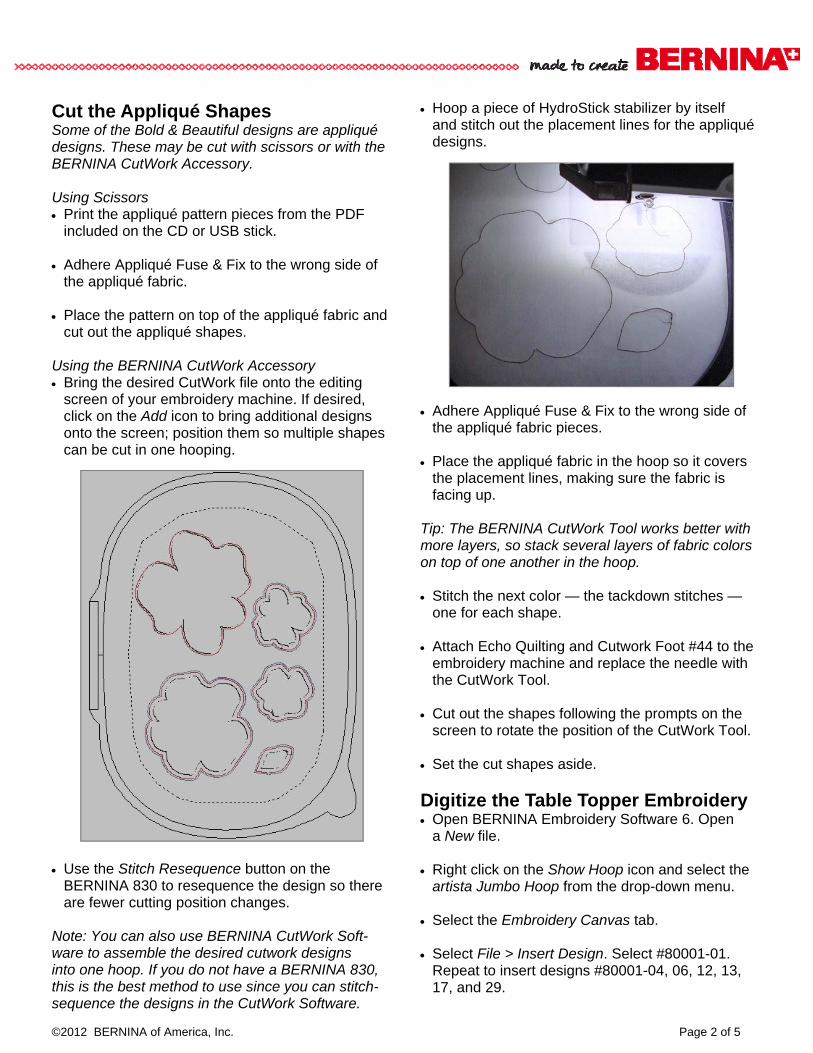
cut out the appliqué shapes. Using the BERNINA CutWork Accessory Bring the desired CutWork file onto the editing
screen of your embroidery machine. If desired, click on the Add icon to bring additional designs onto the screen; position them so multiple shapes can be cut in one hooping.
Use the Stitch Resequence button on the BERNINA 830 to resequence the design so there are fewer cutting position changes.
Note: You can also use BERNINA CutWork Soft-ware to assemble the desired cutwork designs into one hoop. If you do not have a BERNINA 830, this is the best method to use since you can stitch-sequence the designs in the CutWork Software.
Hoop a piece of HydroStick stabilizer by itself and stitch out the placement lines for the appliqué designs.
Adhere Appliqué Fuse & Fix to the wrong side of the appliqué fabric pieces.
Place the appliqué fabric in the hoop so it covers
the placement lines, making sure the fabric is facing up.
Tip: The BERNINA CutWork Tool works better with more layers, so stack several layers of fabric colors on top of one another in the hoop. Stitch the next color — the tackdown stitches —
one for each shape. Attach Echo Quilting and Cutwork Foot #44 to the
embroidery machine and replace the needle with the CutWork Tool.
Cut out the shapes following the prompts on the
screen to rotate the position of the CutWork Tool. Set the cut shapes aside.
Digitize the Table Topper Embroidery Open BERNINA Embroidery Software 6. Open
a New file. Right click on the Show Hoop icon and select the
artista Jumbo Hoop from the drop-down menu. Select the Embroidery Canvas tab. Select File > Insert Design. Select #80001-01.
Repeat to insert designs #80001-04, 06, 12, 13, 17, and 29.

©2012 BERNINA of America, Inc. Page 3 of 5
Arrange designs as shown in the diagram below, using the editing tools to rotate and position the designs as desired.
Note: Design #29, the leaf, is used twice, once at the upper left and once in the lower position. Select the Hoop Layout tab. Select the hoop and
then click Add Hoop Right. Position the two hoops so the entire arrangement is covered.
Tip: If you find it hard to cover all the objects, return to Embroidery Canvas and arrange the designs closer together as needed. In the Hoop Layout tab, select the Calculate
Hoopings icon. This should result is a message that says, “The current layout of hoop positions will result in two hoopings. All objects in the design are covered by hoops.” Click Okay when you get this message.
Select the Embroidery Canvas tab. To reduce the number of repeated thread
changes, select Arrange > Stitch Sequence. After the sequencing has been calculated, click Yes.
Select File > Save As. Name the file BB Table Master and save it in the location of your choice. In the dialog box that opens, click the No beside Export Everything in One File.
Select File > Save As. Name this file in the folder of your choice, but name it BB Table Split. In the Multi-Hoopings dialog box that opens click Yes—Export one file for every hooping...show me first.
In the Hooping Sequence—To Files box that
opens, click Save All. Click Close.
Embroidery Canvas will open; click on the Write to Machine icon.
The Hooping Sequence—To Machine box should
open, and the first design (BB Table Split-01) should be highlighted (dark blue).
Click the radio button next to the machine of your
choice and the transfer method (machine or USB) and transfer the first split design to the machine or USB stick.
Select the second design (BB Table Split-02) and
repeat the process.
©2012 BERNINA of America, Inc. Page 4 of 5
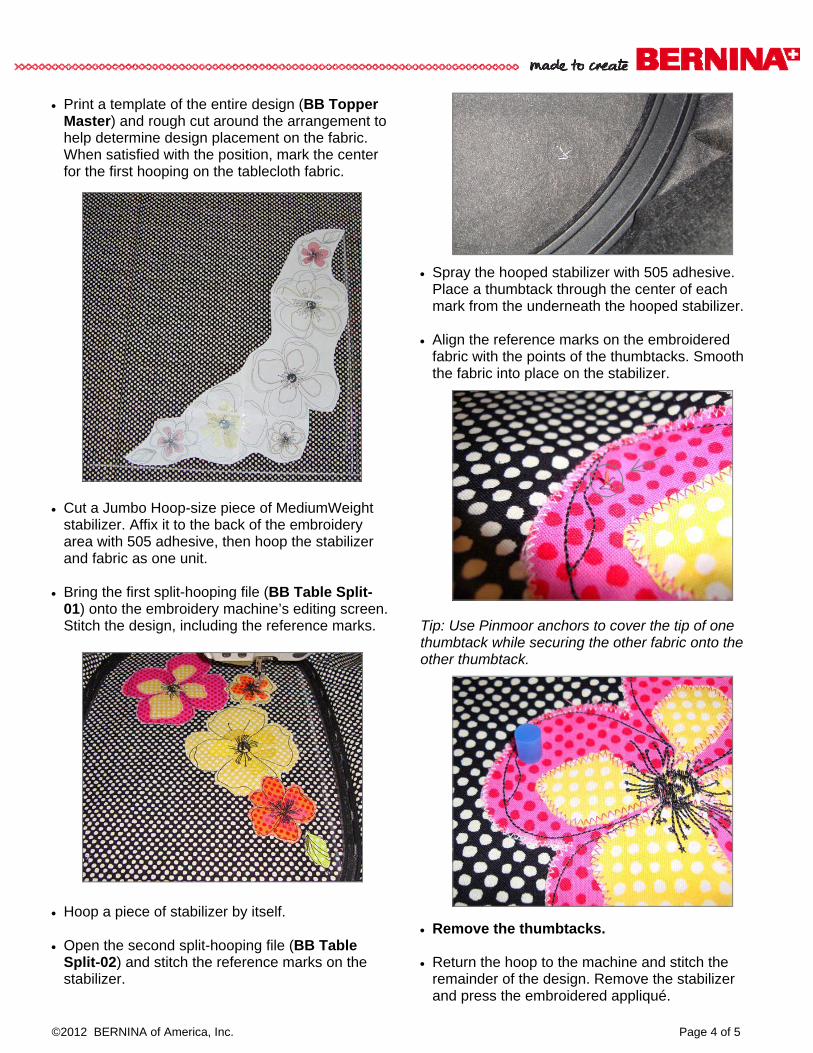
Print a template of the entire design (BB Topper Master) and rough cut around the arrangement to help determine design placement on the fabric. When satisfied with the position, mark the center for the first hooping on the tablecloth fabric.
Cut a Jumbo Hoop-size piece of MediumWeight stabilizer. Affix it to the back of the embroidery area with 505 adhesive, then hoop the stabilizer and fabric as one unit.
Bring the first split-hooping file (BB Table Split-
01) onto the embroidery machine’s editing screen. Stitch the design, including the reference marks.
Hoop a piece of stabilizer by itself. Open the second split-hooping file (BB Table
Split-02) and stitch the reference marks on the stabilizer.
Spray the hooped stabilizer with 505 adhesive. Place a thumbtack through the center of each mark from the underneath the hooped stabilizer.
Align the reference marks on the embroidered
fabric with the points of the thumbtacks. Smooth the fabric into place on the stabilizer.
Tip: Use Pinmoor anchors to cover the tip of one thumbtack while securing the other fabric onto the other thumbtack.
Remove the thumbtacks. Return the hoop to the machine and stitch the
remainder of the design. Remove the stabilizer and press the embroidered appliqué.
©2012 BERNINA of America, Inc. Page 5 of 5
If desired, stitch a second grouping in the opposite corner of the tablecloth.
Cut four lengths of the striped fabric according to the table topper width desired, adding an extra ½” for seam allowances. Measure the width of the strip; the borders of the sample are 9¾” wide.
Lay the center of the table topper on a flat surface and begin pinning a strip to one side, leaving tails on each end. The length of each tail should be the width of the strip plus 2”.
Note: If using a different striped fabric for the borders, or matching print motifs at the corners, you may need extra length at each end.
Attach Patchwork Foot with Guide #57/57D to the machine and use the notches on the foot as guides. Begin stitching ¼” from the topper corner edge, and stop sewing ¼” from the end. Repeat for the remaining three sides.
Fold the table topper and borders in half diagonally and match up the seams. Use the 45° line on the ruler to draw a diagonal line extending from the crease of the main panel to the edge of the border.
Stitch along this line to create the miter. Trim away
the excess fabric, leaving ¼” seam allowances. Press the seam allowances open. Repeat for the remaining three corners.
Repeat the entire process for the lining to create
a reversible table covering. Pin the top and lining together. Stitch together,
leaving an opening for turning. Turn and press. Turn under the edges of the
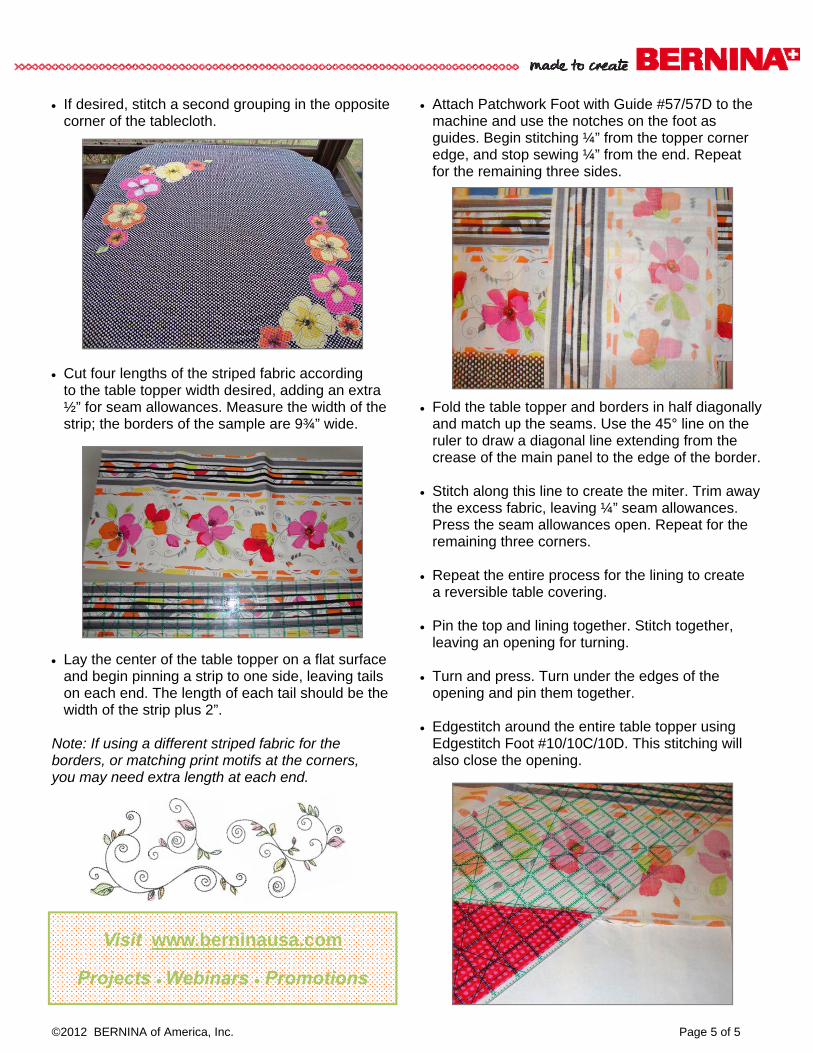
opening and pin them together. Edgestitch around the entire table topper using
Edgestitch Foot #10/10C/10D. This stitching will also close the opening.
Visit www.berninausa.com
Projects ● Webinars ● Promotions