Embed Size (px)
Citation preview
BOX OVEN COOKING
A box oven can be used to cook anything you might cook in your oven at home. It’s a great way to expand your cooking options when camping using simple materials and cooking techniques.
Simple Box Oven Construction
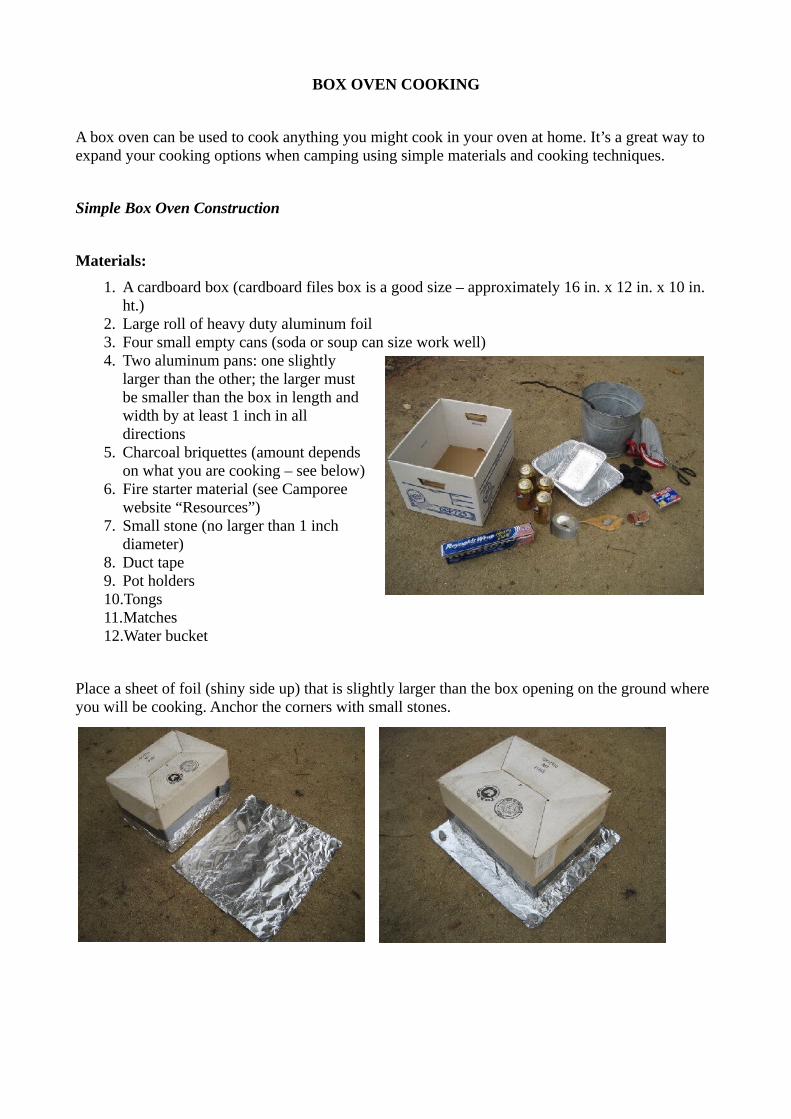
Materials:
1. A cardboard box (cardboard files box is a good size – approximately 16 in. x 12 in. x 10 in. ht.)
2. Large roll of heavy duty aluminum foil 3. Four small empty cans (soda or soup can size work well) 4. Two aluminum pans: one slightly
larger than the other; the larger must be smaller than the box in length and width by at least 1 inch in all directions
5. Charcoal briquettes (amount depends on what you are cooking – see below)
6. Fire starter material (see Camporee website “Resources”)
7. Small stone (no larger than 1 inch diameter)
8. Duct tape 9. Pot holders 10.Tongs 11.Matches 12.Water bucket
Place a sheet of foil (shiny side up) that is slightly larger than the box opening on the ground where you will be cooking. Anchor the corners with small stones.
Light the charcoal:
While the charcoal is being lit and turning to ash,
• build the box oven (see below) and • prepare the food you will be cooking (see below)
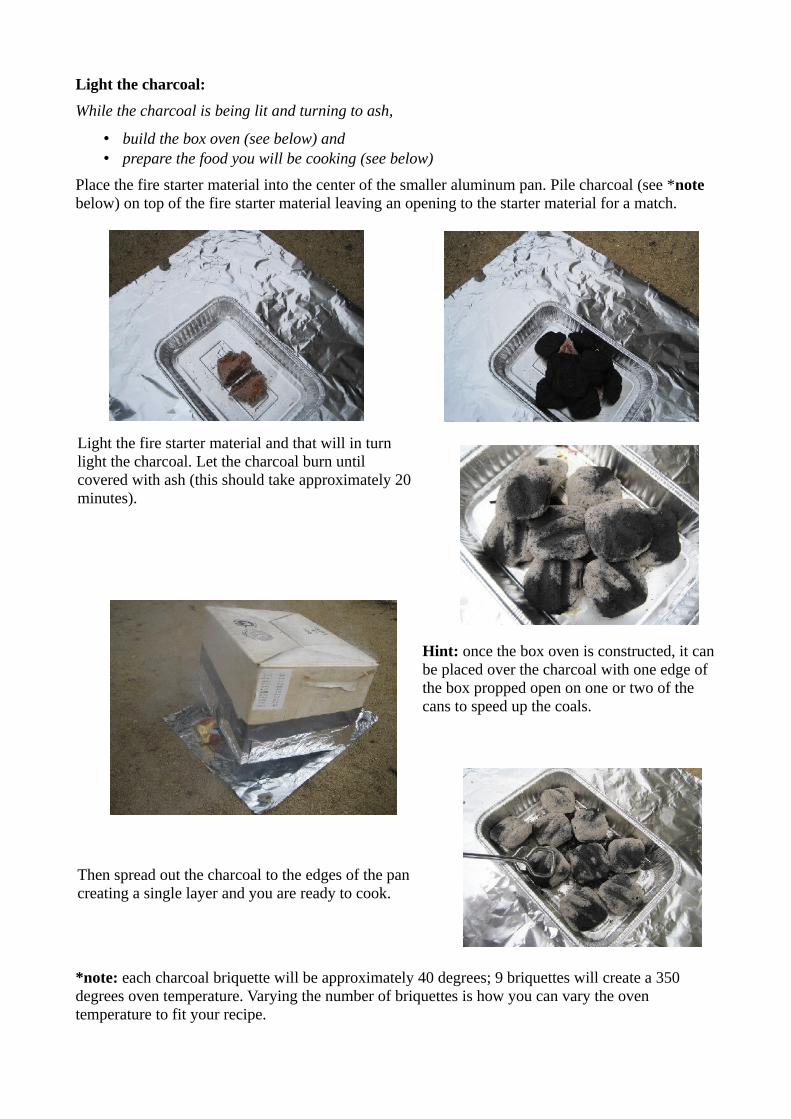
Place the fire starter material into the center of the smaller aluminum pan. Pile charcoal (see *note below) on top of the fire starter material leaving an opening to the starter material for a match.
Light the fire starter material and that will in turn light the charcoal. Let the charcoal burn until covered with ash (this should take approximately 20 minutes).
Hint: once the box oven is constructed, it can be placed over the charcoal with one edge of the box propped open on one or two of the cans to speed up the coals.
Then spread out the charcoal to the edges of the pan creating a single layer and you are ready to cook.
*note: each charcoal briquette will be approximately 40 degrees; 9 briquettes will create a 350 degrees oven temperature. Varying the number of briquettes is how you can vary the oven temperature to fit your recipe.
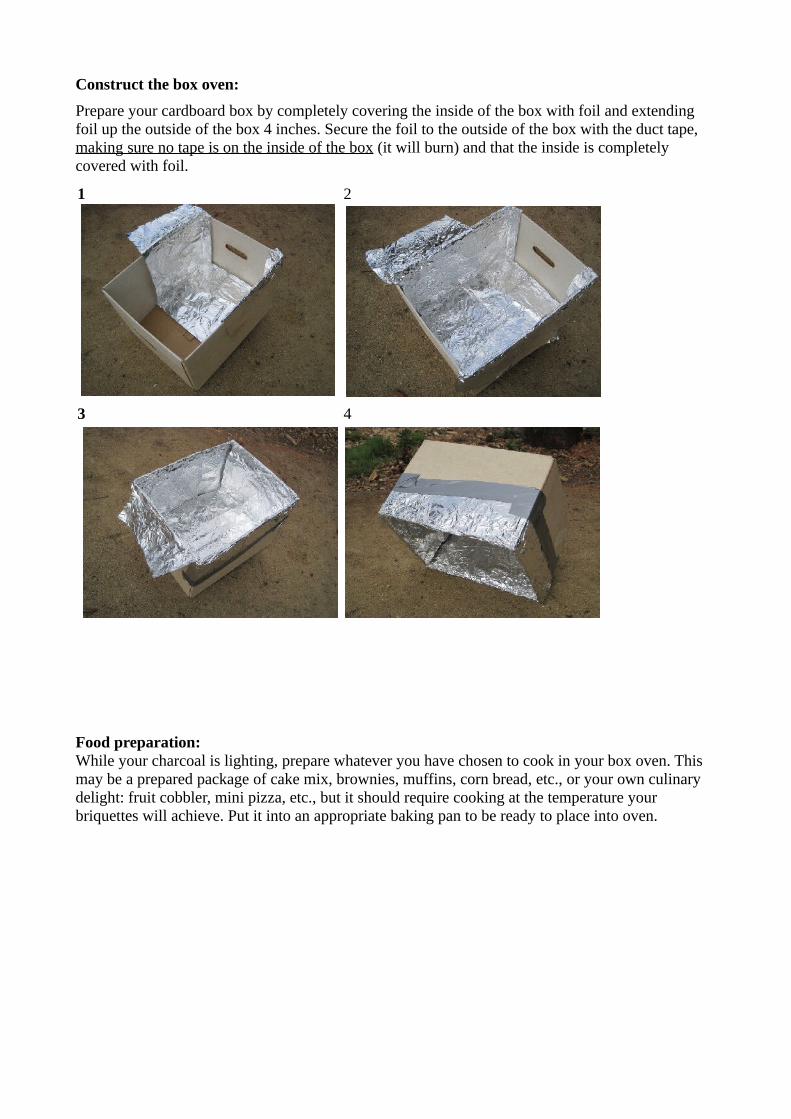
Construct the box oven:
Prepare your cardboard box by completely covering the inside of the box with foil and extending foil up the outside of the box 4 inches. Secure the foil to the outside of the box with the duct tape, making sure no tape is on the inside of the box (it will burn) and that the inside is completely covered with foil.
1 2
3 4
Food preparation:While your charcoal is lighting, prepare whatever you have chosen to cook in your box oven. This may be a prepared package of cake mix, brownies, muffins, corn bread, etc., or your own culinary delight: fruit cobbler, mini pizza, etc., but it should require cooking at the temperature your briquettes will achieve. Put it into an appropriate baking pan to be ready to place into oven.
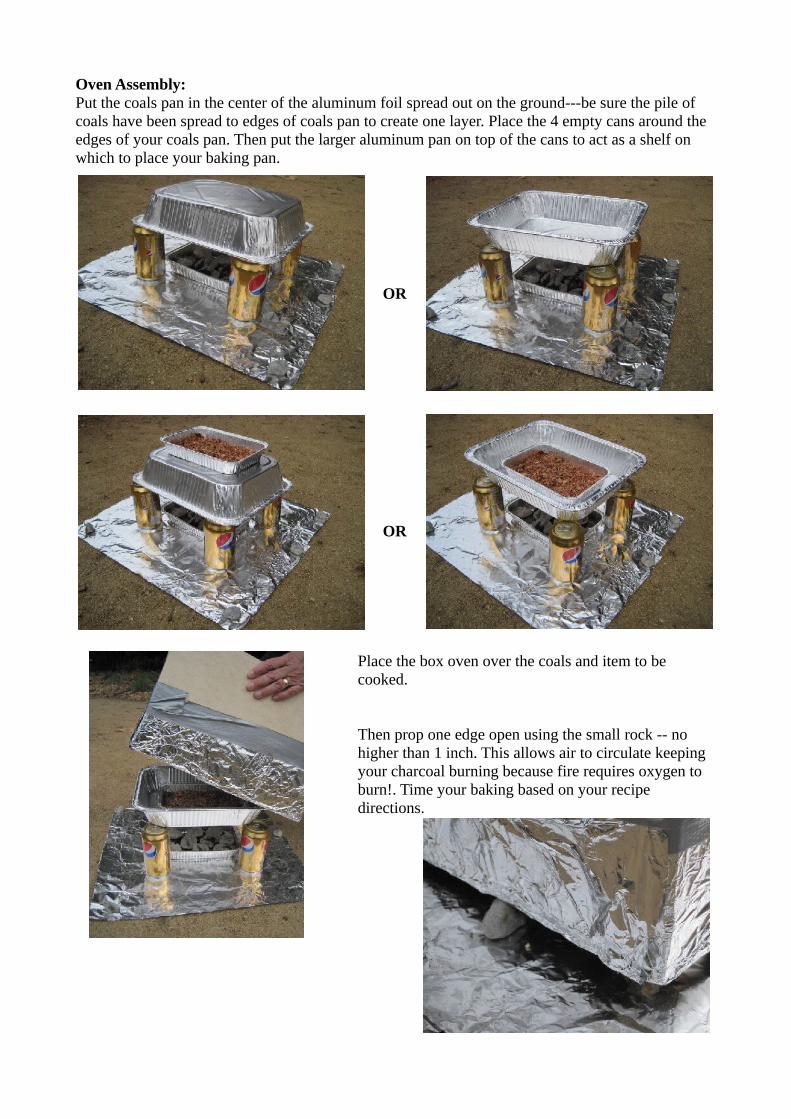
Oven Assembly:Put the coals pan in the center of the aluminum foil spread out on the ground---be sure the pile of coals have been spread to edges of coals pan to create one layer. Place the 4 empty cans around the edges of your coals pan. Then put the larger aluminum pan on top of the cans to act as a shelf on which to place your baking pan.
OR
OR
Place the box oven over the coals and item to be cooked.
Then prop one edge open using the small rock -- no higher than 1 inch. This allows air to circulate keeping your charcoal burning because fire requires oxygen to burn!. Time your baking based on your recipe directions.
Try not to peek!
But if you must add charcoal or check your cooking process, have everything ready to do it quickly. Having your oven open causes a fast loss of critical heat for the cooking process.
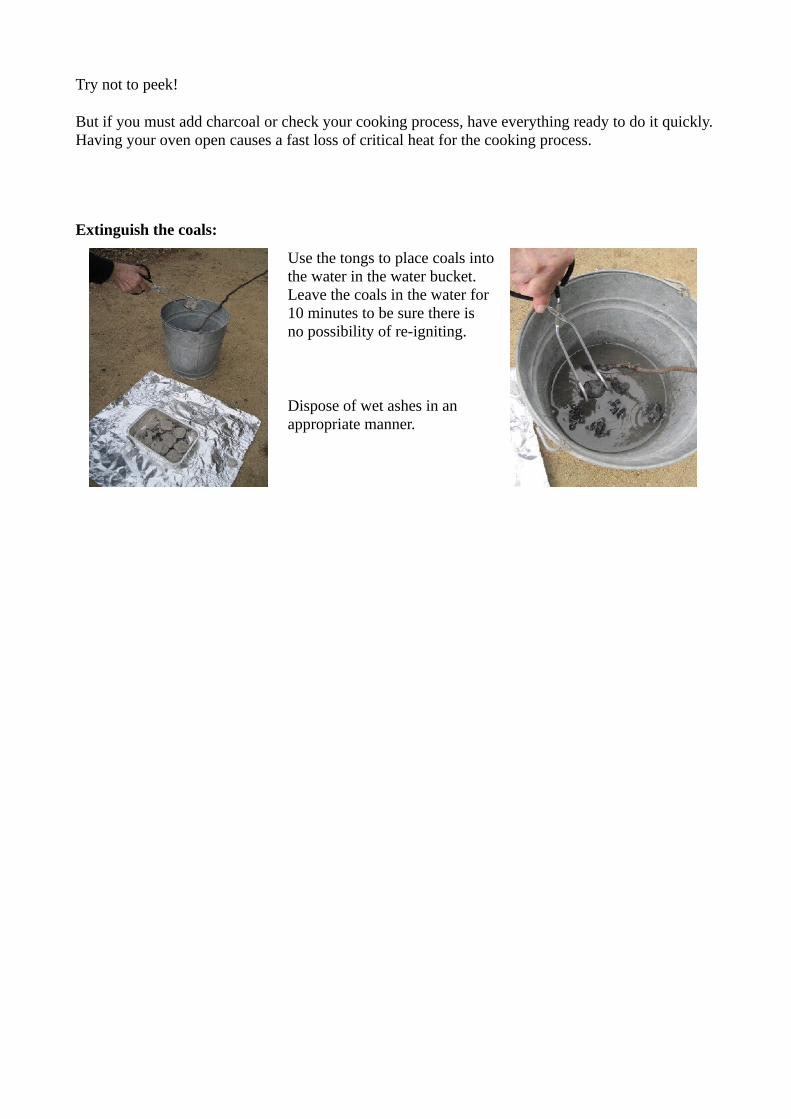
Extinguish the coals:
Use the tongs to place coals into the water in the water bucket. Leave the coals in the water for 10 minutes to be sure there is no possibility of re-igniting.
Dispose of wet ashes in an appropriate manner.


![com...than 3/4" high; remove the top foil cover and return the tlvg to the box. When ttsing foil in the microwave oven, keep the foil at least ]" aw_g ibm/the sides of the oven. Plastic](https://img.pdfslide.net/doc/110x75/607bbe4508429c6d532b4c62/com-than-34-high-remove-the-top-foil-cover-and-return-the-tlvg-to-the.jpg)