Embed Size (px)
Citation preview


Brief Introduction
This book primarily introduces several major functions applied to MCGS software configuration engineering:
animation, alarms, formulas and multi language. It is divided into 4 chapters: chapter 1, simple animation
configuration, introduces the configuration process of common animation forms in details, such as rotation, move
and size change; chapter 2, alarms, it lists the most common alarm forms in project; chapter 3, formulas, it
introduces configuration forms of two modes, formula stored in PLC and HMI in details, taking bread formula as
an example; chapter 4 introduces multi language function newly added into MCGS embedded vision configuration
software 6.8 vision and its specific implementation methods.
No part of this book may be reproduced or transmitted in any form or by any means, electronic or
mechanical, including photocopying, recording or by any information storage retrieval system, without
permission from Beijing Kunlun Tongtai Automation Software Technology Co., Ltd.
Simplified Chinese-language edition copyright © 2010 by Beijing Kunlun Tongtai Automation Software
Technology Co., Ltd. All rights reserved.
The tutorial introduces simple applications of mcgsTps embedded integration touch screen and MCGS
configuration software, suitable to friends familiar with the junior tutorials.
mcgsTpc series of tutorials:
Junior tutorial of mcgsTpc Beijing Kunlun Tongtai Automation Software Technology Co., Ltd
Intermediate tutorial of mcgsTpc Beijing Kunlun Tongtai Automation Software Technology Co., Ltd
Advanced tutorial of mcgsTpc Beijing Kunlun Tongtai Automation Software Technology Co., Ltd
Industry Control Configuration Software & PLC Application Technologies Beijing University of Aeronaonutics
Press
Configuration Software Control Technologies Tsinghua University Press & Beijing Jiaotong University Press
Configuration Software Technologies and Applications Electronics Industry Press
Intermediate tutorial of mcgsTpc
Issues by Beijing University of Aeronaonutics Press
The first edition in May, 2009 The first impression in 2009
Copies: 5000

Preface
Training objective: through the training, users are fully capable of actual projects of self-configuration and
solve on-site problems.
Training objects: users familiar with PLC knowledge and having learnt junior tutorial of MCGS.
Training plan:
Schedule Course Arrangement
09:00-09:20 Student attendance to receive
materials
09:20-10:00 Overall introduction of company
10:00-10:30 Simply animation configuration
10:30-10:50 Practice
10:50-11:00 Rest
11:00-11:40 Introduction of alarm configuration
11:40-12:00 Practice
12:00-13:00 Lunch
Filling out the customer questionnaire
13:00-13:50 Formula introduction and the 1st mode
configuration
13:50-14:20 Practice
14:20-14:30 An interval
14:30-15:00 Formula and the 2nd mode
configuration
15:00-15:30 Practice on computer
15:40-15:50 An interval
15:50-16:20 Multi-language configuration contents
16:20-16:40 Practice
16:40-17:00 Analysis & interactive
communications of configuration FAQ

Chapter 1 Simple Animation Configuration 1
Chapter 1 Simple Animation Configuration
With the improvement of life-living standard, people have higher requirements of beauty in both life and work.
In the true color era of HMI products came, just the gorgeous colors are far beyond customers’ needs. What the
customers really need most is to show a really realistic operation status of equipment with images in order to
further improve the whole product to a higher level. The mcgsTps products of Kunlun Tongtai are dedicated to
meet the customers’ needs and, with good-quality hardware feature and powerful software functions, capable of
offering complete animation solutions.
Complex actions are the applications of combining simple actions while most of the simple actions in the life
can be understood as flashing, moving, rotation and size change, etc. It can show the industrial equipment vividly
and realistically by combining such types of simple animations. From this chapter, we mainly learn to how to
implement such simple actions in MCGS software.
1.1 Pre-knowledge
Before learning configuration, we firstly get to know the general frameworks and work processes of MCGS
configuration software.
The real-time database in the core of the whole software: data collected from external hardware is sent to
real-time database and then called by the window; through user window, values of database is changed and then
output to external hardware through equipment window.
Animation components in user window are associated with data objects in database and correspondingly
change according to values of data objects, so as to achieve “move” effects.
Figure 1-1-1 Schematic Program of MCGS Software
用户窗口
以图形和动画的形式显示数据
实时数据库
数据对象的集合
策略窗口
可编辑脚本来控制数据
设备窗口
从外部设备读取数据到实时数据库,输出数据到设备
用户窗口
以图形和动画的形式显示数据
用户窗口
以图形和动画的形式显示数据
实时数据库
数据对象的集合
实时数据库
数据对象的集合
策略窗口
可编辑脚本来控制数据
策略窗口
可编辑脚本来控制数据
设备窗口
从外部设备读取数据到实时数据库,输出数据到设备
设备窗口
从外部设备读取数据到实时数据库,输出数据到设备

2Intermediate Tutorial of mcgsTpc
In the multimedia CD-ROM, there is a simple animation sample, including flash, move, rotation and size
change, etc. which can be accomplished by simple setting in component’s property window. Figure 1-1-2 shows
operational effects of this sample in TPC7062K; we can respectively give a small environment to such several
effects:
Implement flash of titles
Wrong message displayed is implemented with horizontal shift while motor polishes glass is
implemented with vertical shift.
Button controls rotation of fan.
Size change of bar graph shows increase and reduction of data.
1.2 Animation Configuration
Start a new project and then conduct the configuration. MCGS configuration software offers a rich graphics
library and almost all the components can set animation properties. As long as you make the appropriate settings in
property dialog box, you can implement move, size change and flash, etc.
1.2.1 Set the Background
Before the configuration screen, the style and tone of the overall picture is recommended to be firstly set, so as
to better set colors of other components in configuration making more beautiful pictures. We are going to introduce
how to set the background according to the style of the sample.
1. Setting window background
Start a window and enter the configuration screen to add a “bit screen” . Click the icon with right-hand
button and select “load bitmap” from shortcut menu ejected. Choose a pre-prepared bitmap,select it after loading
and then set the coordinates of the bitmap (0,0) in the status bar in the lower-right corner with the size of 800*480.
As figure 1-2-1 shows, the setting of background is completed.
Figure 1-1-2Opeational Effects of Simple Animation

Chapter 1 Simple Animation Configuration 3
Figure 1-2-1 Setting of Coordinates and Size of Status Bar
2. Add the title background
Add “rectangular” component and enter “animation configuration property settings” dialog box. In
Property Setting page, set the filling color to “white” and edge color to “no edge”. Set its coordinates to (0, 0) with
size to 800*60, so the setting of title background is completed.
Next let’s start configuring animation effects.
1.2.2 The 1st Animation Effect Flash
Flash effect is implemented through setting the properties of tag. We do firstly introduce uses of tag:
Besides the display of data, the tag can also be used as a text display, such as of a paragraph of company
introduction, annotation information and titles, etc. Through the property dialogue box, the animation effect can
also be set. Tag can be considered as one of the most useful components.
Add “tag” component and enter “tag animation configuration property settings” dialog box. In the
property setting page, set the filling color to “no filling”, character color to “navy blue”, font to “Song Ti, bold and
small II” and select “flash effect”.
In extended property page, input the text contents, “simple animation configuration”.
In the flash effect property page, fill out 1 in the flash effect expression which means the conditions are
established forever. Select flash implementation way “implement flash with pixel visibility change”. The
configuration effect is shown in figure 1-2-2 and click confirm after the settings. Set the coordinates of tag to (230,
10) and size to 320*40. The configuration effect is displayed in figure 1-2-3.
Figure 1-2-2 Setting of Flashing Effect Figure 1-2-3Flashing Effect Picture of Tag
Note: when the values of the data objects connected (or expressions constituted by data objects) are non-0, the
graphics objects start to blink at the speed set. When the value of the expression is 0, the graphic object stops the

4Intermediate Tutorial of mcgsTpc
flashing.
1.2.3 The 2nd
Animation Effect Move
1. Horizontal move effect: we can also implement horizontal move effect with tag as long as we set the
properties of “horizontal move” of tag.
Add a “tag” and enter tag property setting page. Set the filling color to “no filling”, character color to
“red” and font to “Song Ti, bold and IV”. Select “horizontal move” in location animation connection part.
In extended property page, input the text contents, “display error message”.
In the horizontal move property page, fill a data object in expression column; here we define a data object i.
Set the minimum offset to 0 and maximum offset to 200; the corresponding values of expressions are respectively
“0” and “100” shown in figure 1-2-4. Click confirm and the prompting frame is ejected shown in the figure 1-2-5;
click “yes” and the dialogue box of “data object property setting” is ejected; select the object type of i to “value
type” shown in the figure 1-2-6, and then the data object is added into the real-time database. (Note: the operation
to rapidly add the variables is briefly described below in the book).
Figure 1-2-4 Property Setting of Horizontal Shift Figure 1-2-5 Error Message of Data Objects
Double click the space of the window and enter the dialogue box of “user window property setting”. Add the
script of “horizontal move of tag” in cycling script page and set the cycle time to 100 shown in the figure 1-2-7.

Chapter 1 Simple Animation Configuration 5
Figure 1-2-6 Adding Data Object of Horizontal Shift Figure 1-2-7 Script Setting of Horizontal Shift
2. Vertical move effect: we express vertical move effect by cutting glass with a motor as long as we set the
“vertical move” property of the glass.
Motor: select “insert component” , add “motor 13” and “motor 14” to the window in the
object component library management, set the size to 70*40 and copy 3 groups of motors placing shown in the
figure 1-2-8.
Glass slip band: add “rectangular” and set the size to 10*230. Enter “animation configuration property
setting” dialogue box; in the property setting page, set filling color to “red” and edge to black. Copy a rectangular
and place it in the location shown in the figure 1-2-9.
Figure 1-2-8 Specimen of Motor Figure 1-2-9 Glass Figure
Glass: select the “common symbol” in the toolbox; open the common icons toolbox to select “cube”
to be added to the window. Enter its “animation configuration property settings” dialogue box, set the filling color
to “white” and select “vertical move”.
In the vertical shift property page, define the numerical object b associated with expression with the minimum
offset as 0 and maximum offset as 200. The values of corresponding expressions are respectively “0” and “100”

6Intermediate Tutorial of mcgsTpc
shown in the figure 1-2-10. Click “confirm’; when it hints configuration error, select “yes” to add data object b.
Open “user window property setting” dialogue box and add glass vertical shift script in cycle script shown in
the label part of the figure 1-2-11.
Figure 1-2-10 Property Setting of Vertical Shift Figure 1-2-11Script Setting of Vertical Shift
Note: the offset considers graphic object’s locations in configuration as the basis (initial position) with the
pixel as the unit. To the left is the negative direction while to the right is the positive direction (for vertical
movement, being downward is the positive direction while being upward is the negative direction). The relationship
of expressions and offset: taking the configuration setting in the figure 1-2-10 as an example. When the value of
expression b is 0, the location of graphic object is moved 0 pixels to the right (namely, staying still); when the value
of expression is 100, the location of graphic object is moved 200 pixels to the right.
1.2.4 The 3rd
Animation Effect Rotation
The rotation of fan can be implemented with animation display members. The stage dividing points can be
added to animation display member; the pictures can be added to each stage dividing point; a large number of stage
dividing points can have many pictures. The alternating display of many pictures in different status can implement
rotation effect; the rotation of fan is implemented by alternating displaying two pictures at different status.
1. Making fan frame: add “convex plane” from common icons toolbox and set its size to 30*90; enter
“animation configuration property setting” dialog box, set the filling color to “gray” and click “confirm” to save it.
Copy two convex planes, adjust the size to 70*30 and respectively place them above and below the original convex
shown in the figure 1-2-12. The framework of the fan is therefore completed.
Figure 1-2-12 Framework

Chapter 1 Simple Animation Configuration 7
2. Setting fan effect: add “animation display” component, enter the dialogue box of “animation display
component property setting”, select the stage dividing point “0”, click “bitmap” button to load the image and eject
the dialogue box of “object component library management”. Click the “load” and add pre-prepared fan photos.
After the successful load of image, select fan bitmap just added and click “confirmation” to save it. After the
“0”, the stage dividing point, is successfully added into the bitmap, delete the text list and set the image size to “full
of buttons” shown in the figure 1-2-13. Set “1”, another stage dividing point, in the same way and insert another fan
bitmap .
In the display property page, select the display variable “switch, the numeric type”, define associated
numerical variables as “rotation visibility” and select animation display way “display images according to value
shift of display variable” shown in the figure 1-2-14. Click “confirm”; when it indicates configuration error, select
to add the data object “rotation visibility”.
Figure 1-2-13 Setting of Fan Figure 1-2-14Setting of Rotation Effects
After the settings, adjust the size of animation display configuration to 60*50 and drag it to the top left corner
of fan framework. And then copy 3 fans, respectively placed to the upper right, lower left and right corners, shown
in the figure 1-2-15.
3. Add script: open the dialogue frame of “user window property setting” and add script enabling fans to rotate
in cycle script page shown in the label part of the figure 1-2-16.

8Intermediate Tutorial of mcgsTpc
Figure 1-2-15 Configuration Effect of Fan Figure 1-2-16 Rotation Script of Fan
4. Fan’s button control: add two “standard buttons” and set the button titles respectively to “start” and
“stop”.
(1)Start
Enter the property setting dialogue box of “start” button; in the operation property page, set “lift function”: fill
“set 1” in data object operation and define numerical values as “cycle” shown in the figure 1-2-17. “Cycle” controls
the rotation of fans; when it is 1, the fan starts the rotation.
In property setting dialogue box of user window, add cycle script “IF cycle=1 THEN rotation visibility=
1-rotation visibility” shown in the label part of the figure 1-2-18.
Figure 1-2-17 Start Control of Fan Figure 1-2-18 Rotation Script of Fan Control
(2) Stop
Enter the property setting dialogue box of “stop” button. In the operational attribute page, set “lifting function”:
operate “to 0” of data object value and “cycle” for associated variables shown in the figure 1-2-19. “Cycle” controls
the rotation of fans; when it is 0, the fan stops the rotation.

Chapter 1 Simple Animation Configuration 9
Fan rotation control configuration is completed shown in the figure 1-2-20.
Figure 1-2-19 Stop Control of Fan Figure 1-2-20 Impression Drawing of Fan Control
1.2.5 The 4th
Animation Effect Bar Graph
Representing data with bar graph can more intuitively show the changes of data; the change of data can be
implemented with “size change” of the bar graph.
1. Adding a coordinate plane
Add a “rectangular” component and enter “animation configuration property setting” dialogue box. In
the property setting page, set the filling color to “white” and edge color to “black” and click “confirm” to save
it. Thus, the coordinate plane is produced.
2. Producing Y axis coordinate
Add a “tag” and enter “tag animation configuration property setting” to set the filling color to “no filling”,
edge color to “no edge” and character color to “black”.
Add the following numbers in the “text content input” of the extended property page: 120,90,60,30,0
(leaving 2 lines space between each two numeric characters) shown in the figure 1-2-21. The Y axis is
produced.
Figure 1-2-21 Coordinate Settings of Y Axis
3. Producing bar graph
In the common icons toolbox, add “vertical pipe” as the bar graph. Enter its “animation configuration

10Intermediate Tutorial of mcgsTpc
property setting” dialogue box in which set the filling color to “red” and select “size change”.
In size change page, the associated expression is defined as numerical data object c; click the icon button on
the right of “change direction” and select size change direction is one-way upward change with change way as
zooming shown in the figure 1-2-22.
Figure 1-2-22 Size Change Setting of Bar Graph
Copy another two bar graphs and respectively set the filling colors to “light green” and “navy blue”. In the
size change page, set “maximum change percentage” respectively to 80 and 50 with the other setting the same as
the 1st bar graph.
Note: when the value of expression is greater than or equal to 100 and the maximum change percentage is set
to 100%, the size of graph object is equal to the initial size. No matter how the value of expression changes, the size
of graph object changes between the minimum and maximum change percentage.
4. Adding script
In user window property setting dialogue box, add the script of bar graph change in the cycle script page
shown in the label part in the figure 1-2-23.
Figure 1-2-23 Script Setting of Bar Graph Figure 1-2-24 Configuration Effects of Bar Graph

Chapter 1 Simple Animation Configuration 11
5. Adding annotations
Add a “tag” , dag it to the right of the bar graph and set the text content to “bar graph demonstration
effect” shown in the figure 1-2-24.
Thus, 4 simple animation effect configurations are completed. After completing, you can download them to
TPC to check whether the operational effect is consistent with those in the samples.

12 Intermediate Tutorial of mcgsTpc
Chapter 2 Alarms
In the working process, we do really hope that: when the equipment operation fails, we are capable of
informing the working staffs so as to timely deal with it; checking the history record of alarms enables us to clearly
understand the operation situations of equipment. Different field operations require different alarm ways. In
conclusion, alarm has already become the necessary conditions for industrial site. According to customers’ needs,
MCGS configuration software comprehensively analyzes various needs of industrial site alarms and is committed
to offer suitable alarm programs to the customers. This chapter is: after analyzing customers’ real needs, Kunlun
Tongtai lists implementation of word alarm, level alarm, multi-state alarm and alarm information displayed by
window ejected, etc.
2.1 Alarm Introduction
Before learning alarms, let’s firstly get to know the processes to implement alarms in MCGS configuration
software. In chapter 1, we have understood: data read from PLC and other external devices is the corresponding
data objects sent to real-time database. Judge s whether the values of data object meet the conditions for alarms,
and conduct the alarms if they do; saving values of data objects is to save the history record of alarms; displaying
values of corresponding object (hereinafter abbreviated to as variable) in user window is to display the median of
current PLC shown in the figure 2-1-2.

Chapter 2 Alarms13
Figure 2-1-1 Setting Process of Configuration Figure 2-1-2 Data Process in Operation
The figure 2-1-1 displays the configuration processes of alarms; firstly the hardware equipment should be
confirmed, such as PLC Model; add right drive component in the equipment window and addresses used in PLC (it
is called passage in MCGS configuration software) and associate them with variables; set alarm properties in
real-time database and display them in user window. MCGS offers alarm bar (digital gallop lamp), alarm display
component, alarm browser component and many alarm components.
Start
Read data of specific
address of PLC
Associating variables transferred
to PLC address
Meet the alarm
conditions?
yes
no
Recording alarms
to alarm queue
Displaying
alarms
End
PLC
HMI
Add a drive and
select PLC address
Start
Add channel
Associated variables
Equipment
editing
window
Set alarm conditions of
variables
Add component displaying
alarm information
的构件
End
Real-tim
e
database
User
wind
ow
14 Intermediate Tutorial of mcgsTpc
2.2 Alarm Configuration
2.2.1 Alarm Needs
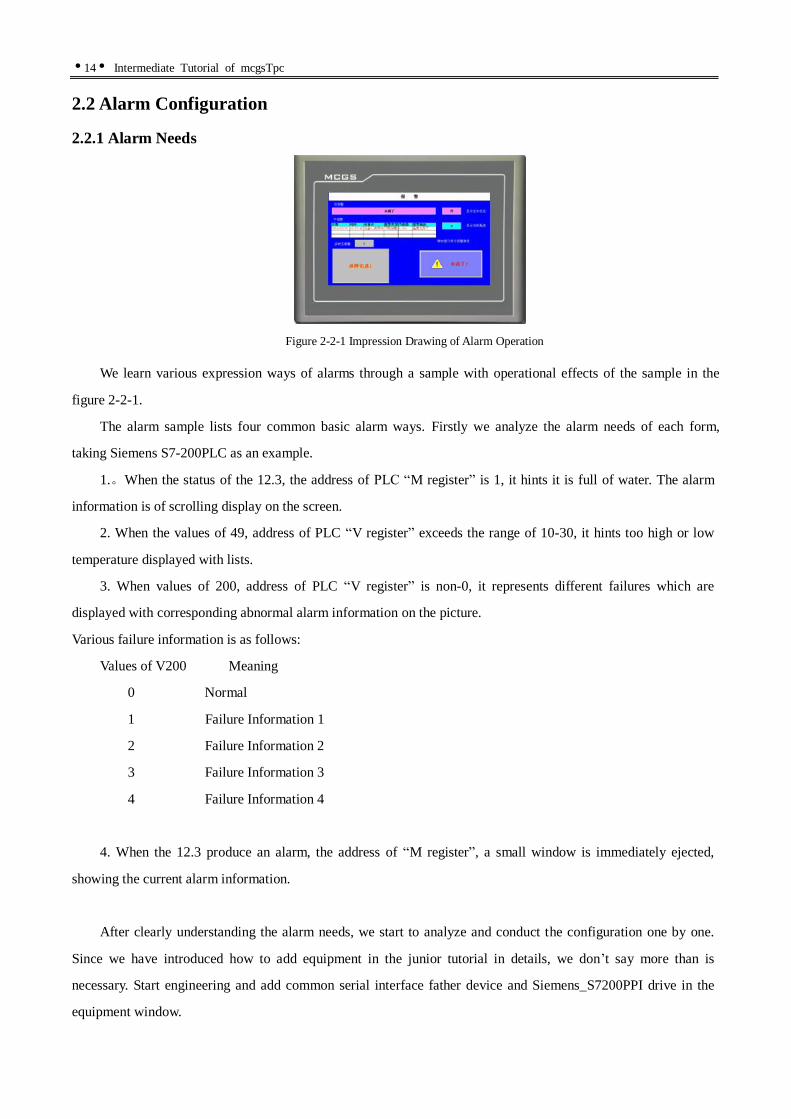
Figure 2-2-1 Impression Drawing of Alarm Operation
We learn various expression ways of alarms through a sample with operational effects of the sample in the
figure 2-2-1.
The alarm sample lists four common basic alarm ways. Firstly we analyze the alarm needs of each form,
taking Siemens S7-200PLC as an example.
1.。When the status of the 12.3, the address of PLC “M register” is 1, it hints it is full of water. The alarm
information is of scrolling display on the screen.
2. When the values of 49, address of PLC “V register” exceeds the range of 10-30, it hints too high or low
temperature displayed with lists.
3. When values of 200, address of PLC “V register” is non-0, it represents different failures which are
displayed with corresponding abnormal alarm information on the picture.
Various failure information is as follows:
Values of V200 Meaning
0 Normal
1 Failure Information 1
2 Failure Information 2
3 Failure Information 3
4 Failure Information 4
4. When the 12.3 produce an alarm, the address of “M register”, a small window is immediately ejected,
showing the current alarm information.
After clearly understanding the alarm needs, we start to analyze and conduct the configuration one by one.
Since we have introduced how to add equipment in the junior tutorial in details, we don’t say more than is
necessary. Start engineering and add common serial interface father device and Siemens_S7200PPI drive in the
equipment window.
Chapter 2 Alarms 15
2.2.2 Level Alarm
The first alarm need: when the value of 12.3, the address of “M register” in PCL, is 1, it hints it is full of
water and is of scrolling display.
Plan: the alarm contents of address M12.3 is fixed and directly set the alarm property of corresponding
variable; display with alarm bar component in user window (digital gallop lamp).
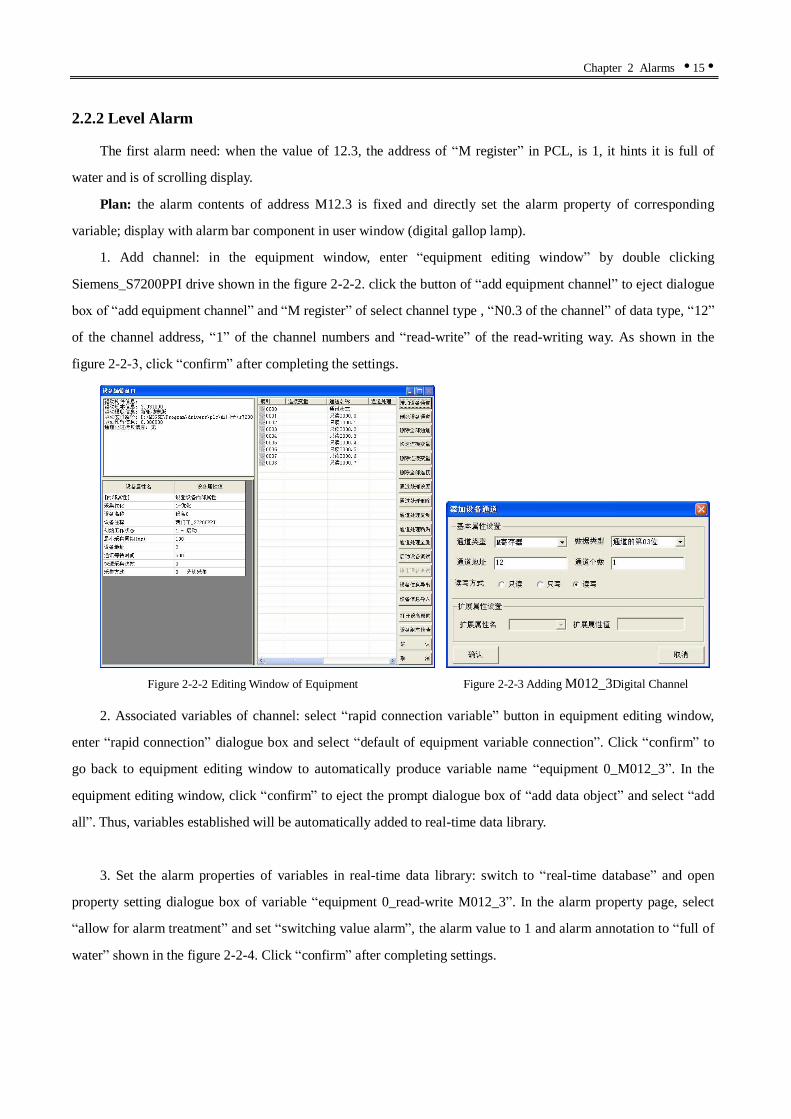
1. Add channel: in the equipment window, enter “equipment editing window” by double clicking
Siemens_S7200PPI drive shown in the figure 2-2-2. click the button of “add equipment channel” to eject dialogue
box of “add equipment channel” and “M register” of select channel type , “N0.3 of the channel” of data type, “12”
of the channel address, “1” of the channel numbers and “read-write” of the read-writing way. As shown in the
figure 2-2-3, click “confirm” after completing the settings.
Figure 2-2-2 Editing Window of Equipment Figure 2-2-3 Adding M012_3Digital Channel
2. Associated variables of channel: select “rapid connection variable” button in equipment editing window,
enter “rapid connection” dialogue box and select “default of equipment variable connection”. Click “confirm” to
go back to equipment editing window to automatically produce variable name “equipment 0_M012_3”. In the
equipment editing window, click “confirm” to eject the prompt dialogue box of “add data object” and select “add
all”. Thus, variables established will be automatically added to real-time data library.
3. Set the alarm properties of variables in real-time data library: switch to “real-time database” and open
property setting dialogue box of variable “equipment 0_read-write M012_3”. In the alarm property page, select
“allow for alarm treatment” and set “switching value alarm”, the alarm value to 1 and alarm annotation to “full of
water” shown in the figure 2-2-4. Click “confirm” after completing settings.

16 Intermediate Tutorial of mcgsTpc
Figure 2-2-4 Setting Switching Value Alarm Figure 2-2-5 Property Setting of Alarm Bar
4. Set alarm bar (digital gallop lamp) component: start “window 0” and add an “alarm bar (digital gallop
lamp)” component. Enter dialogue box of “digital gallop lamp alarm property setting” and click to
select the variable “equipment 0_read-write M012_3” established in equipment window. Set the foreground color
to “black”, background color to “light pink”, scrolling characters to 3, scrolling speed to 200 and support the flash
shown in the figure 2-2-5.
Note: when the alarm bar (digital gallop lamp) component is not associated with any variable, it displays all
the real-time alarm information.
5. Display data: add a “tag” and select display output. In the display output property page, click
to select variable “equipment 0_read-write M012_3”, output with switching value. Besides, add a “tag” and
input “display water flooding”. Set color of tag and font according to effects of the figure 2-2-6.
6. Check effects: after completing the configuration, connect PLC and download operation check effects:
when PLC produces alarms, the alarm information is displayed.
Figure 2-2-6 Operational Effects of Level Alarm
2.2.3 Word Alarm
The second alarm needs: when values of 49, the address of “V register” in PLC, exceed the range of 10-30,
the list form is used to display too high or low temperature.
Plan: set the variables’ alarm property corresponding to 49, the address of “V register” and display it with
alarm browser component in user window.
1.Add word channel: in equipment window, double click Siemens_S7200PPI drive to enter “equipment

Chapter 2 Alarms 17
editing window”; click “add equipment channel” button and enter “add equipment channel” dialogue box;
select channel type “V register”, “16-bit unsigned binary” of data type, “49” of channel address, “1” of channel
numbers and “read-write” of read-write way shown in the figure 2-2-7. Click “confirm” after completing the
settings.
Figure 2-2-7 Adding VWUB049 Word Channel
2. Associated variables of channel: in the equipment editing window, select “rapid connection variable”
button; enter “rapid connection” dialogue box; select “default equipment variable connection”; click “confirm” to
return to equipment editing window to automatically generate variable name “equipment 0_read-write
VWUB049”; click “confirm” in equipment editing window. The system hints adding variables; select “add all”
and then variables established will be automatically added into real-time data library.
3. Set the alarm properties of variables in real-time database: switch to real-time database and open property
setting dialogue box of variable “equipment 0_read-write VWUB049”. In the alarm property page, select “allow
for alarm treatment”, set value of “upper limit of alarm” to 30 and alarm annotation to “too higher temperature”
shown in the figure 2-2-8. Set value of “lower limit of alarm” to 10 and alarm annotation is “too lower
temperature” shown in the figure 2-2-9. Click “confirm” after completing settings.
Figure 2-2-8 Setting of Alarm Upper Limit Property Figure 2-2-9 Setting of Alarm Lower Limit Property
4. Set alarm bar component: start “window 0” and add an “alarm browser ” component. Enter dialogue

18 Intermediate Tutorial of mcgsTpc
box of “alarm browser component property setting”. In the basic property page, select “real-time alarm data (R)”
for display mode, click to select the variable “equipment) _read-write VWUB049” shown in the figure
2-2-10. In the display format page, check “date”, “time”, “object name”, “alarm type”, “current value”, “alarm
description”, set proper column width and adopt default settings to the other items shown in the figure 2-2-11. In
the font and color page, set background color to “light blue” and font to “Song Ti, bold, small IV and black” and
adopt default settings to the other items. Click “confirm” to save it.
Figure 2-2-10 Basic Property Page Figure 2-2-11 Setting the Display Format
Note: when the alarm browser component is not associated with any variable, all the real-time alarm
information currently is displayed.
5.Display data: add a “tag” and select display output. In the display output property page, click
to select variable “equipment 0_read-write VWUB049”, output with switching value. Besides, add a “tag” ,
input “display current temperature” in the extended property page. Set tag filling and font color according to the
figure 2-2-12.
6. Check effects: after completing the configuration, connect PLC and download operation check effects:
when PLC produces alarms, the alarm information is displayed.
Figure 2-2-12 Operational Effects of Word Alarm
2.2.4 Multi-state Alarm
The third alarm need: when the values of 200, the address of “V register” in PCL, are different, they hint

Chapter 2 Alarms 2
different failure information.
Plan: it is implemented with animation display component’s characteristic of setting many stage dividing
points; each non-0 stage dividing point represent a piece of failure information.
1. Add word channel: in equipment window, double click Siemens_S7200PPI drive to enter “equipment
editing window”; click “add equipment channel” button and enter “add equipment channel” dialogue box; select
channel type “V register”, “16-bit unsigned binary” of data type, “200” of channel address, “1” of channel
numbers and “read-write” of read-write way shown in the figure 2-2-13. Click “confirm” after completing the
settings.
Figure 2-2-13 Adding VWUB200 Word Channel
2. Associated variables of channel: in the equipment editing window, select “rapid connection variable”
button; enter “rapid connection” dialogue box; select “default equipment variable connection”; click “confirm” to
return to equipment editing window to automatically generate variable name “equipment 0_read-write
VWUB200”; click “confirm” in equipment editing window. The system hints adding variables; select “add all”
and then variables established will be automatically added into real-time data library.
3. Animation component setting: add a component of “animation display ” in “window0” and enter
dialogue box of “animation display component property setting”. In the basic property page, set stage dividing
points to “0, 1, 2, 3, and 4”. Clear picture list of each stage dividing point and set all the background types to “bold
frame button: push” and the text settings are in order (according to stage dividing point sequence): “normal”,
“default information 1”, “default information 2”, “default information 3” and “default information 4”. Set
foreground color, background, 3D effect and select “Song Ti, bold and small II” shown in the figure 2-2-14.

20 Intermediate Tutorial of mcgsTpc
Figure 2-2-14 Setting Stage Dividing Point and Property Figure 2-2-15 Select Display Variable
In the display property page, select “switch and numeric type” for the display variable; click to select
variable “equipment 0_read-write VWUB200”;select “display all pictures according to value shift of display
variable” shown in the figure 2-2-15. Click “confirm” to save it.
4. Display data: add a “tag” and select display output. In the display output property page, click
to select variable “equipment 0_read-write VWUB200”, output with switching value. Besides, add a “tag” ,
input “multi-state alarm” in the extended property page. Set tag filling and font color according to the figure
2-2-16.
5. Check effects: after completing the configuration, connect PLC and download operation check effects:
when PLC produces alarms, the alarm information is displayed.
Figure 2-2-16 Operational Effects of Multi-state Alarm
2.2.5 Pop-up Window Mode Alarm
The fourth alarm need: when the state of M12.3 is 1, a small window is ejected hinting “full of water”.
Plan: it is implemented with child window ejected; utilize alarm strategy to timely judge whether the alarm is
produced and set the size and coordinates of child window display.

Chapter 2 Alarms 21
1. Add the child window: switch to user window in the workbench interface and start “window1”.
2. Set display information: open “window 1”, select “common symbols” of the toolbox and open the
common icons toolbox. Add “convex plane” and set coordinates to (0, 0), size to 310*140, “silver” for the
filling color and no edge. And then add a “rectangular” and set coordinates to (5, 5) and size to 300*130.
Insert “logo 24” from object component library and add a “tag” with text contents “full of water”! And
then put the two components in the suitable location of rectangular shown in the figure 2-2-17.
Figure 2-2-17 Window Information of Level Alarm
3. Set window pop-up effect: switch to the operational strategy window in the workbench interface, click
“new strategy” button; select “alarm strategy” in the “select types of strategies” dialogue box; return to the
operational strategy window after clicking confirm. Double click new strategy to enter strategy configuration
window, click “new strategy line” in the tool bar and then open strategy toolbox to select “script program” shown
in the figure 2-2-18.
Double click to enter “strategy property setting” dialogue box; set strategy name to “affusion state
alarm display strategy”; click to select variable “equipment 0_read-write M012_3”; select “perform it once
when the alarm is produced” for the corresponding alarm state; click confirm to save it shown in the figure 2-2-19.
Double click script program icon of the strategy; enter script program window and input
“!OpenSubWnd (window1,450,300,310,140,0)”; click confirm to save it.
The similar ways are adopted to start “afffusion state alarm end strategy”; select “perform it once when the
alarm is produced” for the corresponding alarm state; the script program is “!CloseSubWnd(window1 )”.
Figure 2-2-18 Adding Alarm Strategy Figure 2-2-19 Property Setting of Level Alarm Strategy

22 Intermediate Tutorial of mcgsTpc
4. Check effects: after the configuration, connect PCL; when the 12.3, the address of “M register” produces
alarms, the window display alarm information will be ejected from window 0.
Note: if there is the alarm when starting the engineering, the alarm window will not be ejected.
After completing the alarm example function and then add a “tag” to “window 0” as the title with text
contents as “alarm” and background color as “white”. Add annotation “level alarm”, “word alarm” and “pop-up
window display alarm information” to all alarms. After the configuration settings, the operational effects are
implemented.

Chapter 3 Formula Functions 23
Chapter 3 Formula Functions
The chapter mainly introduces formula solutions offered by MCGS embedded vision of configuration software
and make users grasp implementation methods of formula configuration as much as possibly through specific
examples.
3.1 Introduction of Formula Function
Formula is the set of data in the same type, such as the machine parameter setting or production data. Our
formula function can offer HMI interface to enable users to check and edit data. According to different data storage
methods, formulas are generally divided into two modes:
Formula data stored in PLC
Formula data is stored in PLC; you can upload formula data needed to HMI for display. Users select certain
formulas and modify them; and then they download them into PLC as the current formulas, commonly seen in the
initial system as a way. Since way mainly appears in the early system. Since the early HMI itself can’t store
formula, it can only be implemented with storage space of PLC.
Formula data stored in HMI
Formula data is stored in HMI for displaying all the formula data. Users select certain formulas to be
downloaded into PLC as the current formulas.
In this course, we introduce how to utilize MCGS embedded vision of configuration software and, taking
bread formula as an example, implement the applications of the two formulas.
Suppose there are only 3 parameters in the bread formula: bread, water and salt. The different ratio mixtures
can lead to three different flavors of bread, such as sugar-free, less sugar and cookie. Thus there are 3 members in
the formula; 3 formula records are divided into according to different contents of 3 members.
The multi-media CD offers samples of formulas and two modes of formulas with operational effects shown in
the figure 3-1-1 and 3-1-2.

24 Intermediate Tutorial of mcgsTpc
Figure 3-1-1 Operational Effects of Formulas Stored in PLC Figure 3-1-2 Operational Effects of Formulas Stored in HMI
3.2 Usage of Formula Data Stored in PLC
3.2.1 Preparation work
Such applications store all the formula data in PLC; thus, HMI can only conduct several following operations:
1. HMI can be used to browse formula data of PLC.
2. A formula item can be selected for modification.
3. Any formula item can be downloaded into certain regions so as to enable normal operation of PLC.
Analysis:
1. Three formula items of bread formula are all stored in the register of Siemens S7-200. Since 16-bit unsigned
binary is selected for data format, each formula member takes 2-bit storage space. Each formula item is 6 bytes; 3
formulas are 18 bytes in total set to be stored in 18-byte contiguous address space, ranging from 0 to 17 bytes, in V
register. The initial data can be written to by PLC program software.
2. We use Siemens S7-200 PLC to stimulate bread production machine, receive three parameters of bread
formula with the receiving address as 100~105 bytes of V register.
2.
Configuration ideas:
According to needs above, a following configuration idea is offered by comprehensively combining
characteristics of MCGS software.
1. Add variables firstly in the MCGS database for operating formula data, later.
2. Add PLC equipment in equipment window and set it.
3. And then, add several tags, input boxes and button components in user window; edit necessary scripts for
displaying and operating formulas.
PLC
address Data
VWUB000 1
VWUB002 1
VWUB004 5
VWUB006 2
VWUB008 0
VWUB010 0
VWUB012 3
VWUB014 0
VWUB016 0
PLC
address Data
VWUB100 1
VWUB102 1
VWUB104 5
Starting address of 1st formula
Starting address of 2nd
formula
Starting address of 3rd
formula

Chapter 3 Formula Functions 25
After setting configuration environment, we can immediately download engineering to HMI and operate
formulas in operating environment.
3.2.2 Formula Configuration
Start a new project and let’s begin the configuration.
1. Creating variables
Open “real-time database” of workbench and start 3 numerical variables of “flour”, “water” and “sugar”;
other properties keep the default values. Such variables are applied to implement the display and
modification of data of formula.
Start a char-type variable “equipment string” and other properties keep default value. The variable is
used for information transfer with equipment.
Start a numerical variable “offset” and other properties keep default value. Such variables are used to
store offset addresses of formula data in PLC.
Start two numerical variables “a” and “b” and other properties keep default value. Such variable is used
to analyze “equipment character string” variable.
After creating variables, necessary notes can be selected to be added; the real-time database accomplished
is shown in the figure 3-2-1.
Figure 3-2-1 Creating Variables of Real-time Database
2. Adding equipment
Switch to workbench; open equipment window; add “common serial interface father device” and
Siemens_ S7200PPI”; consider “S7200PPI” drive as the child device of “common serial interface father
device”.
Double click “Siemens_ S7200PPI” drive; enter equipment editing window; check drive template
information in order to make sure the drive is “new drive template” shown in the figure 3-2-2.

26 Intermediate Tutorial of mcgsTpc
Figure 3-2-2 Equipment Window Configuration
In order to facilitate real-time check of formula data in PLC, we add channels of the data in the
equipment and connect the variables shown in the figure 3-2-2, so as to view the data in real time.
Figure 3-2-3 Channel Connection Variables
Note: it is suggested that add a tag or input box component in engineering interface associating with
“equipment 0_communiction status” variable for displaying current communication status of PLC and HMI in
order to assure the normal operation of the project. When the communication status is 0, it means the normal PLC
and HMI.
3. Creating animation component and writing script program
Switch to “user window” interface in workbench; start a user window; add tag, input box, button, free
forms and other components; start window interface shown in the figure 3-2-4.
Figure 3-2-4 Configuration Window Interface

Chapter 3 Formula Functions 27
Set operation property page in the properties of the three input box above, respectively associating with
data center variables, “flour”, “water” and “sugar” used for display and modification of formula
numbers.
The form component can be activated by double clicking free form component below “PLC” tag so as to
enter form editing mode. Once selecting “connect” command in “form” menu, you will find the asterisks
(“*”)are added behind the line and column number of form for display. Click form with right-hand
button and adopt the way selecting from data center in variable selection dialogue frame opened
associating with channel connection variables shown in the figure 3-2-3 to display data of channel.
Pushing script of “move a strip down” button is edited as follows:
if offset = 12 then exit
if (offset < 12) then offset = offset + 6
!SetDevice(equipment 0,6,"ReadBlock(V,offset,[WUB][WUB][WUB],1,equipment character
string)")
a = 1
b = 1
b = !InStr(a, equipment character string, ",")
flour = !Val(!Mid(equipment character string, a, (b -a)))
a = b + 1
b = !InStr(a, equipment character string, ",")
water = !Val(!Mid(equipment character string, a, (b - a)))
sugar = !Val(!Mid(equipment character string, (b + 1), (!Len(equipment character
string)-b)))
The meaning of the script is:
1) Within the specified range, move PLC address forward with the length of a set of formula data.
2) Read formula data of offset location in PLC memory.
3) Analyze date acquired and assign to formula members for display and modification.
Pushing script of “move a strip up” button is edited as follows:
if offset = 0 then exit
if (offset >= 6) then offset = offset – 6
!SetDevice(equipment0,6,"ReadBlock(V,offset,[WUB][WUB][WUB],1, equipment character
string)")

28 Intermediate Tutorial of mcgsTpc
a = 1
b = 1
b = !InStr(a, equipment character string, ",")
flour = !Val(!Mid(equipment character string, a, (b -a)))
a = b + 1
b = !InStr(a, equipment character string ",")
water = !Val(!Mid(equipment character string, a, (b - a)))
sugar = !Val(!Mid(equipment character string, (b + 1), (!Len(equipment character string) -
b)))
The meaning of the script is:
1) Within the specified range, move PLC address forward with the length of a set of formula data.
2) Read formula data of offset location in PLC memory.
3) Analyze date acquired and assign to formula members for display and modification.
Pushing script of “modify PLC formula data” button is edited as follows:
equipment character string = !StrFormat("%g,%g,%g", flour, water, sugar)
!SetDevice(equipment 0, 6, "WriteBlock(V,offset,[WUB][WUB][WUB], 1, equipment
character string)")
The meaning of script is:
Write numbers of flour, water and sugar into PLC formula data storage regions according to prescribed format,
namely, modify formula.
Pushing script of “download formula data to PLC” button is edited as follows:
equipment character string = !StrFormat("%g,%g,%g", flour, water, sugar)
!SetDevice(equipment0, 6, "WriteBlock(V,100,[WUB][WUB][WUB], 1, equipment character
string)")
The meaning of script is:
Write numbers of flour, water and sugar into PLC formula data storage regions according to prescribed format
in which the formulas for use should be selected.
Note: when variable names in the real-time database corresponding to formulas are in order; batch read-write
equipment orders can be utilized to implement data operation. There is no need to analyze the character string.
For instance: we consider Data1,Data2,Data3 as three variables of bread formula, flour, water and sugar; thus,
batch read-write functions, ReadPV,WritePV, can be used for check and modification of formula operation.
!SetDevice(equipment 0,6,"ReadPV(V,offset,WUB,3,Data1, nReturn)")

Chapter 3 Formula Functions 29
It means three 16-bit binary numbers of V register from address of offset with the variable, Data 1, in the
MCGS as the start. In the successive 3 variables (namely, Data1,Data2,Data3), perform whether it can be
successfully returned with nReturn: 0 means success while non-0 means failure. Thus, it can control the reading of
the previous strip or the next formula data to configuration variables and display them.
!SetDevice(equipment0,6, "WritePV(V,offset,WUB,3,Data1,nReturn)")
It means that it will consider Data1 of MCGS variable as the start; values of three successive variables
(namely, Data1,Data2,Data3) are written into successive registers from starting from offset of V register in 16-bit
unsigned binary way; perform whether it can be successfully returned with nReturn: 0 means success while non-0
means failure. Thus, it can control that writing designated formula data into designated locations of PLC so as to
achieve goal modifying or perform formula data.
3.2.3 Using the formula
Download formula projects edited to HMI and connect PLC equipment; the project’s operation effect is shown
in the figure 3-2-5.
Figure 3-2-5 Operational Effect Diagram
Click “move a strip upward” and “move a strip downward” to switch formula items. The current formula
item data is displayed in the 3 input box components below HMI.
Click “modify PLC formula data” so that data in the three frames below “HMI” can be written into PLC
according to the specified format; modify the current formula data in PLC. The figure 3-2-6 and 3-2-7
represent modification processes of formula data.
In test, you can
check all formula
data stored in PLC
(this part is not
essential).

30 Intermediate Tutorial of mcgsTpc
Figure 3-2-6 Initial Value of Formula Stored in PLC Figure 3-2-7 Modifying 3rd Formula Data of PLC
When switching to formula data adopted, click “download formula data to PLC’ so that formula selected
can be downloaded to certain regions of PLC, representing change of the usage of the formula data. It is
100 here; the address differs from project to project and is generally determined value.
Form component in the bottom is associated with data in all addresses of objected PLC, capable of
representing all formula data of PLC. (the part is not essential)
Note: the premise to assure normal operation of the project is normal communications of PLC and HMI.
3.3 Usage of Formula Data Stored in HMI
3.3.1 Preparation Work
The formula functions of this mode: all the data of formulas are stored in HMI; the formula function of
configuration software can be utilized for convenient check and modification in operation. If it is necessary to
check data currently used in PLC, data of addresses corresponding to PLC can be read and displayed through
channels. HMI can conduct the following operations:
1. All the data of formulas can be browsed with HMI.
2. Designated items can be selected for modification.
3. A certain formula can be downloaded to certain regions so as to make normal operation of PLC.
We can still utilize Siemens S7-200 PLC to stimulate bread production machine to receive three parameters of
bread formula with 100 ~105 bytes of V register as the receiving address.
Configuration ideas:
1. Add variables in MCGS database for operating formula data, later.
2. Add PLC equipment and conduct settings in equipment window.
3. Use formula configuration tool to edit formula members, items and data.
4. Add several tags, input boxes and button components in user window; edit necessary scripts to display and
operate formula.
PLC
address Data
VWUB000 1
VWUB002 1
VWUB004 5
VWUB006 2
VWUB008 0
VWUB010 0
VWUB012 3
VWUB014 0
VWUB016 0
PLC
address Data
VWUB000 1
VWUB002 1
VWUB004 5
VWUB006 2
VWUB008 0
VWUB010 0
VWUB012 3
VWUB014 3
VWUB016 5
Offset Offset
Modify the
current formula
(3,3,5)

Chapter 3 Formula Functions 31
After setting configuration environment, we can download projects to HMI and operate formulas in operating
environment.
3.3.2 Formula Configuration
Start a project; let’s start configuration.
1. Starting variables
Open “real-time database” of workbench; start 3 numeric variables “flour”, “water” and “sugar” with
other properties keeping default values. Such variables are used to associate with displaying formula
data.
Start group object “raw material group”; add “flour”, “water” and “sugar” to group members. Such
variables are used to operate a set of formula data.
Start a char-type variable “equipment character string” and other properties keep the default values.
Such variables are used for information transfer with equipment.
Start two numeric variables “a” and “b” and other properties keep the default values. Such variables are
used to analyze “equipment character string”. The variables created are shown in the figure 3-3-1.
Figure 3-3-1 Creating Variables of Real-time Database
2 Adding equipment
Switch to workbench; open equipment window; use equipment toolbox to add “common serial interface
father device” and “Siemens_S7200PPI”; consider “Siemens_S7200PPI” as the subset of “common
serial interface father device”.
Double click Siemens_S7200PPI drive to enter equipment editing window; check drive template
information in the upper left corner of the window to assure the drive to be the “new drive template”
shown in the figure 3-3-2.
Figure 3-3-2 Equipment Window Configuration

32 Intermediate Tutorial of mcgsTpc
3 Design formulas
Click “tool (T)” of the main menu of MCGS, select menu item of “formula configuration design” and
open formula configuration design tool.
Click “file((F)” “add formula group(N)” or click tool bar button to start a formula group
(“formula group 0”). Click the right button of “formula group 0”, select “rename formula group (R)” and
rename formula group “formula group 0”).
Click “mode(M)”“increase a line(I)”, or toolbar button to start a formula member. Click the
right button of variable name of formula members, select variable “flour” in variable selection dialogue
box ejected. Likewise, start two formula members, respectively connected to variables “water” and
“sugar”.
Click “use variable name as column title name” button to respectively name formula members “flour”,
“water” and “sugar”. Formula members created are shown in the figure 3-3-3.
Figure 3-3-3 Creating Formulas
Click “edit(E)”“edit formula(E)”,or toolbar button to open formula modification dialogue box.
Click “increase” button in formula modification dialogue box can increase a formula item. Adding
formula data is shown in the figure 3-3-4; save it after completing the adding and exit formula
modification dialogue frame.
Figure 3-3-4 Modification Dialogue Box of Formulas
Click “file(F)”“save formula(S)”,or toolbar button to save the formula. After saving it, close
formula configuration design tool.
4 Creating animation components and writing script program
Switch to “user window” interface of workbench; start a user window and open it.
Create tag, button, input box and animation components; the configuration is shown in the figure 3-3-5.

Chapter 3 Formula Functions 33
Figure 3-3-5 Window Configuration Interface
Consider two bigger tags as titles and respectively name them “HMI” and “PLC”. Three input boxs are
used to display formula data values of HMI; three tags below are used to display data values on PLC
equipment.
Make three input boxs below “HMI” respectively associate with parameters of data center “flour”,
“water” and “sugar”, used for display and modification of formula members.
Make three tags below “PLC” as “display output” to display data of PLC. When associating with
variables, check “generate according to collect information”, select “common serial interface father
device 0[common serial interface father device]” for communication port, “equipment 0
[Siemens_S7200PPI]” for collection equipment, “V register” for channel type, “16-bit unsigned binary”
for data type” and “read-write” for read-write type. Channel addresses of three tags are respectively
filled with “100”, “102” and “104”. Three tags are all selected to be output as numerical quantity.
Texts of three button components are respectively set: “download formula data to PLC”, “check HMI
formula data” and “edit HMI formula data”.
Pushing script of “download formula data to PLC” button is edited as follows:
equipment character string = !StrFormat("%g,%g,%g", flour, water, sugar)
!SetDevice(equipment0, 6, "WriteBlock(V,100,[WUB][WUB][WUB], 1, equipment character
string)")
The meaning of the script:
Write numbers of flour, water and sugar of current formula into PLC equipment according to prescribed
format
Pushing script of “check HMI formula data” button is edited as follows:
!RecipeLoadByDialog("bread formula", "please select a bread formula" )
The meaning of the script:
Call formula check dialogue box to check formula data.
Pushing script of “edit HMI formula data” button is edited as follows:

34 Intermediate Tutorial of mcgsTpc
!RecipeModifyByDialog("bread formula")
The meaning of the script:
Call formula check dialogue box to edit designated formula data.
Note: it is suggested that adding a tag or input box component in the project interface associating with a
switch-type variable representing PLC communication status for displaying the current communication status of
PLC and HMI, so as to assure normal operation of the project. When the communication state is 0, it represents the
normal communications of PLC and HMI.
3.3.3 Use the Formula
Download formula project edited to HMI and connect to PLC equipment to run HMI with operational effects
shown in the figure 3-3-6.
Figure 3-3-6 Operational Effect Diagram
The initialization of input box is 0, the initial value of data object. After selecting the designated formula
items, data of formula item is displayed in three input boxes below HMI.
Click “download formula data to PLC” to write data in three input boxes below “HMI” into PLC according to
the prescribed format.
Click “check formula data of HMI” to call formula check window.
Click “edit formula data of HMI” to call formula editing window so as to edit and modify formula data.
Chapter 4 Multi-language Project Configuration 35
Chapter 4 Multi-language Project Configuration
With the development of industrial internationalization, the multi-language display effects have become the
basic needs of many international companies. MCGS embedded software adds multi-language functions in 6.8
visions, offering multi-language display plan to users.
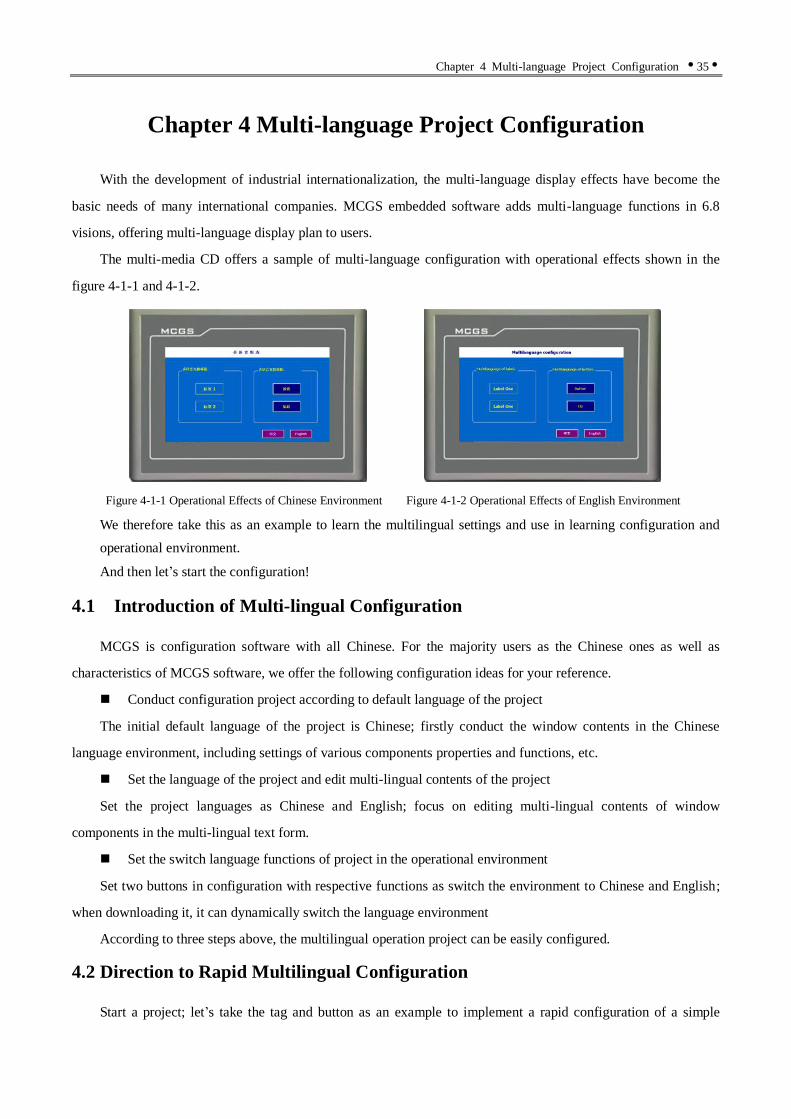
The multi-media CD offers a sample of multi-language configuration with operational effects shown in the
figure 4-1-1 and 4-1-2.
Figure 4-1-1 Operational Effects of Chinese Environment Figure 4-1-2 Operational Effects of English Environment
We therefore take this as an example to learn the multilingual settings and use in learning configuration and
operational environment.
And then let’s start the configuration!
4.1 Introduction of Multi-lingual Configuration
MCGS is configuration software with all Chinese. For the majority users as the Chinese ones as well as
characteristics of MCGS software, we offer the following configuration ideas for your reference.
Conduct configuration project according to default language of the project
The initial default language of the project is Chinese; firstly conduct the window contents in the Chinese
language environment, including settings of various components properties and functions, etc.
Set the language of the project and edit multi-lingual contents of the project
Set the project languages as Chinese and English; focus on editing multi-lingual contents of window
components in the multi-lingual text form.
Set the switch language functions of project in the operational environment
Set two buttons in configuration with respective functions as switch the environment to Chinese and English;
when downloading it, it can dynamically switch the language environment
According to three steps above, the multilingual operation project can be easily configured.
4.2 Direction to Rapid Multilingual Configuration
Start a project; let’s take the tag and button as an example to implement a rapid configuration of a simple

36 Intermediate Tutorial of mcgsTpc
multilingual project according to steps introduced in the previous chapter.
4.2.1 Conduct Configuration Project According to Default Language of the Project
Interface configuration: start a window; enter “user window property setting” dialogue box and set the window
background to blue. Add a “tag” as the title of the window; set the coordinates to (0,0), size to 800*50, filling
color to white and text contents to “multilingual configuration”. And then add two “round rectangular” .
Tag configuration: add two “tag” , enter its property setting dialogue box; set text contents to “tag 1” and
“tag 2” and both character and edge color to “yellow” and select “no filling” for filling color.
Button configuration: add two “button” components; enter the 2nd
button property setting dialogue box;
cancel “use the same property”; set “lift” state to “life”, text of “push” state to “push” and button background color
to “navy blue”. The text of the 1st button will not be modified but keep the default state.
Since the initial language environment here is Chinese, it is the Chinese language contents of tag button that
we set here.
Figure 4-2-1 Tag & Button Configuration
4.2.2 Editing of Multilanguage Contents
After configuring components of window, the multilingual contents of project are then edited. Firstly, the
project language is set to Chinese and English and then the multilingual contents of various components are edited.
1. Set Project Language
Click “multilingual configuration” of the toolbar and open multilingual configuration window shown in
the figure 4-2-2. In the initial situations, the window displays the No., Chinese and column contents referred to
which are the multilingual locations in the configuration window. Serial number, language column and reference
column together are called multilingual configuration text form.
Click “open language selection dialogue box” of the toolbar and enter “language selection in operation”
dialogue box shown in the figure 4-2-3. Check English and then the project settings are two languages. The
drop-down list leftward is to set the default language of the project, namely, the initial operational language when

Chapter 4 Multi-language Project Configuration 37
downloading and running the project with the default choice as Chinese. After click confirm, return to
multilingual configuration window; at that time, the “English” display column is added into the window.
Figure 4-2-2 Multilanguage Setting Dialogue Box Figure 4-2-3 Language Selection Dialogue Box
2. Edit Multilanguage Contents
Multilingual configuration text form displays the language column contents supported by current projects.
When the relevant text contents of the project configuration change, the multilingual configuration text form will
conduct the real-time display. If the English language contents of the current interface are to be edited, you do need
just enter the corresponding English contents. For instance, English contents of “tag 1” is “Label One”, you do only
need to input the content according to the showing in the figure of 4-2-4.
When there is any duplicate language column contents, the “copy same items” function on the toolbar
can be used. For the duplicate contents, you do only need to input the corresponding multilingual contents once;
multilingual contents of other items will be automatically filled.
Additionally, users can also select to export the contents of multilingual text form to “*.csv” file; edit
multilingual contents in Excel and then import the contents edited.
Figure 4-2-4 Editing Multilanguage Contents
4.2.3 Language Switch Setting of the Project
The language switch of the project is implemented with script function!SetCurrentLanguageIndex ( ). If we

38 Intermediate Tutorial of mcgsTpc
want to manually switch the languages in operation; we can add two language switch buttons and set language
switch script in the script of button.
1. Add two “buttons” in the window; set its properties with one text contents as “Chinese” and the other
as “English” shown in the figure 4-2-5. here we set the background color of buttons to “purple”.
Figure 4-2-5 Chinese-English Switch Button
2. Enter the property setting dialogue box of “Chinese” button; in the script program page and “life script”
interface, click “open script program editor”, enter script program editing window and select system
function—>operational environment operational functions —>!SetCurrentLanguageIndex( ) , from the directory
tree on the right side of the window shown in the figure 4-2-6. Click confirm and add functions into the script.
Return script program page and add parameter 0 in the function parenthesis (of which 0 represents the setting is
Chinese while 1 represents the setting is English). The “English” button is set in the same way and the parameter in
the function is 1 shown in the figure 4-2-7.
Figure 4-2-6 Function Selection List Figure 4-2-7 Scrip Program Page
4.3 Explanation to Multilingual Support Contents
The section mainly introduces, in the MCGS embedded software, components and contents supporting
multilingual.

Chapter 4 Multi-language Project Configuration 39
1. Text contents of operational environment
Text contents displayed when downloading and running the project are generally divided into three types:
software built-in text, editable parts in users’ configuration and adding contents in the operational contents. It is the
introduction of multilingual support of the three types of contents below.
Software built-in text: such as title of alarm browser component not capable of being edited by users but
supporting multilingual.
Editable parts of users’ configuration: such as text contents of tags and buttons not capable of being
edited by users but support multilingual.
Adding contents to operational environment: such as user information added in the operation not
supporting multilingual.
2. Components supporting multi language
Main animation component: tag, button, animation button and display component.
Data display component: data browse of deposit, free form, historical form and combo box component.
Components related to alarm: alarm display component, browse and bar (digital gallop lamp).
Display output; switch and other text information set in the button input.
Parameters in the script.

40 Intermediate Tutorial of mcgsTpc
Appendix mcgsTpc Selection Guide
Technical Overview

Intermediate Tutorial of mcgsTpc 41
Equipment Overview
mcgsTpc K Series
TPC7062K
TPC7062KS
Front of TPC7062KS Back of TPC7062KS
Interface of TPC7062KS
①Power
②COM
③USB1
④USB2
Product Attributes
CPU Board:ARM embedded CPU,GHz 400MHz
Memory:64M SDRAM
Storage Device:64M NAND FLASH
Touch Screen:resistance-type
Interface:1×RS232,1×RS485、2×USB(1 major and 1 subordinate)
Product Specifications
Power: 24V DC
Permitted Range: 19.2V~28.8V
Panel Size: 226.5mm×163mm
Pore of Cabinet: 215mm×152mm
净 重: 0.8kg
①
② ③
④
Application Environment
Working Temperature:0℃~50℃
Working Humidity:5%~90%
Storage Temperature:-10℃~60℃
Display Specifications
Display size:7 inches
Display materials:TFT color LCD
Display Color:65535colors
Resolution:800×480
Backlight:LED
Backlight Life:50,000hours
Interface ofTPC7062K ①Power
②COM
③USB1
④USB2
⑤Ethernet
Product Attributes
CPU Board:ARM embedded CPU,GHz 400MHz
Memory:64M SDRAM
Storage Device:64M NAND FLASH
Touch Screen:resistance-type
Interface:1×RS232、1×RS485、2×USB(1 major and 1 subordinate))、 1×LAN
Product Specifications
Power: 24V DC
Permitted Range: 19.2V~28.8V
Panel size: 226.5mm×163mm
Pore of Cabinet: 215mm×152mm
Weight: 0.8kg
①
②
Back of TPC7062K Front of TPC7062K
⑤
③
④
Application Environment
Working Temperature:0℃~50℃
Working Humidity:5%~90%
Storage Temperature:-10℃~60℃
Display Specifications
Display size:7 inches
Display materials:TFT color LCD
Display Color:65535colors
Resolution:800×480
Backlight:LED
Backlight Life:50,000hours
inter

42 Intermediate Tutorial of mcgsTpc
Equipment Overview
mcgsTpc H Series
② ④
⑤
⑤
Application Environment
Working Temperature:0℃~50℃
Working Humidity:5%~90%
Storage Temperature:-10℃~60℃
Display Specifications
Display size:7 inches
Display materials:TFT color LCD
Display Color:65535colors
Resolution:800×480
Backlight Life:50,000hours
⑤
Product Attributes
CPU Board:ARM embedded CPU,GHz 400MHz
Memory:64M SDRAM
Storage Device:64M NAND FLASH
Touch Screen:resistance-type
Interface::1×RS232/RS485、2×USB、1×LAN
Expansion interface:2×RS232、1×RS232/485/422、
1×RS485
Product Specifications
Power: 24V DC
Permitted Range: 19.2V~28.8V
Panel size: 226.5mm×163mm
Pore of Cabinet: 215mm×152mm
净 重: 1.6kg/1.7kg(E/H)
Front of TPC7063E/H
TPC7063E/H
①Power
②COM
③USB
④Ethernet
⑤Expansion
Interface
Back of TPC7063H
Note:TPC7063E with expansion interface ⑤;TPC7063H
without expansion interface⑤。
Interface of TPC7063E/H
Product Attributes
CPU Board:ARM embedded CPU,GHz 400MHz
Memory:64M SDRAM
Storage Device:64M NAND FLASH
Touch Screen:resistance-type
Interface:1×RS232、 1×RS232/RS485、2×USB、
1×LAN、1063H scalable CAN bus
Expansion interface:1×RS232、1×RS232/RS485
(eligibility)
Product Specifications
Power: 24V DC
Permitted Range:: 19.2V~28.8V
Panel size: 315mm×239mm
Pore of Cabinet: 303mm×226mm
净 重: 2.1kg/2.2kg(E/H)
Front of TPC1063E/H
①Power
②COM1
③COM2
④USB1
⑤USB2
⑥Ethernet
⑦Expansion
interface
① ⑦ ③ ② ⑥ ⑤ ④
TPC1063E/H
Back of TPC1063H
Note:TPC7063E with expansion interface ⑦;TPC1063H without
expansion interface⑦
Interface ofTPC1063H
Display Specifications
Display size:10.4 inches
Display materials:TFT color
LCD
Display Color:65535colors
Resolution 640×480
背光寿命:50,000小时
Application Environment
Working Temperature:0℃~50℃
Working Humidity:5%~90%
Storage Temperature:-10℃~60℃

Intermediate Tutorial of mcgsTpc 43
Equipment Overview
mcgsTpc H Series
Product Attributes
CPU Board:ARM embedded CPU,GHz 400MHz
Memory:64M SDRAM
Storage Device:64M NAND FLASH
Touch Screen:resistance-type
Interface: 3×RS232,1×RS232/RS485,2×USB and
1×LAN
Product Specifications
Power:24V DC
Permitted Range:19.2V~28.8V
Panel size:323mm×246mm
Pore of Cabinet:303mm×226mm
Weight: 3.9kg
Front of TPC1262H Back of TPC1262H
①Power
②COM1
③COM2
④USB1
⑤USB2
⑥Ethernet
⑦Expansion
interface
TPC1262H
Interface of TPC1262H
Display Specifications
Display size:12.1inches
Display materials:TFT color LCD
Display Color:65535 colors
Resolution:800×600
Background life:50,000hours
Application Environment
Working Temperature:0℃~50℃
Working Humidity:5%~90%
Storage Temperature:-10℃~60℃
Product Attributes
CPU Board:ARM embedded CPU,GHz 400MHz
Memory:64M SDRAM
Storage Device:64M NAND FLASH
Touch Screen:resistance-type
Interface::3×RS232,1×RS232/RS485,2×USB and
1×LAN
Product Specifications
Power: 24V DC
Permitted Range: 19.2V~28.8V
Panel size: 420mm×310mm
Pore of Cabinet: 384mm×284mm
Weight: 6.1kg
Front of TPC1561H Back of TPC1561H
①Power
②COM1
③COM2
④USB1
⑤USB2
⑥Ethernet
⑦Expansion
interface ① ③ ⑦ ②
④ ⑤
TPC1561H
Interface of TPC1561H
⑥
Display Specifications
Display size:15 inches
Display materials::TFT color
LCD
Display Color:65535 colors
Resolution:1024×768
Background life:50,000hours
Application Environment
Working Temperature:0℃~50℃
Working Humidity:5%~90%
Storage Temperature:-10℃~60℃

Quality of the World, Price of China and Local Service
Beijing Kunlun Tongtai
Customer Information Form
Name Departm
ent
Company Name E-mail
Address Post
Code
Tel: Fax
No.
Cell
phone
Industry
□ Textile Machinery □ Power □ Rubber Machinery □ Plastics
Machinery
□ Printing & Packaging Machinery □ HVAC □ Glass Machinery □
Track Traffic
□ Environmental Protection Equipment □ Energy Metallurgy □
Numerical Control Machine □ Others
Nature of Users □ Equipment Manufacturers □ System Integrators □ Institutes
□ Colleges □ Trade □ Others
Company Size
Total staffs Gross product thousands Industrial ranking_______
Annual output of equipment piece Types of equipment_______ Price of
equipment thousands
Amount of screen devices used (annually) pieces Amount of screen devices
not used (annually) pieces
The hardware
you use?
Touch Screen: Brand Model No. Amount Price
Brand Model No. Amount Price
PLC: Brand Model No. Amount Price
Brand Model No. Amount Price
Others: Brand Model No. Amount Price
What features of
HMI do you
most focus on?
The product features you pay attention to finally
□Brand □Quality □Price □Appearance □Certification
□Functions □Interface □Ease for use □Openness
□Others
You expectations to main features of product:

Quality of the World, Price of China and Local Service
Which products
of Kunlun
Tongtai are you
interested in?
□ MCGS: All Chinese Control Configuration Software
Model No. Amount Price
□ mcgsTPC: embedded integration touch screen
Model No. Amount Price
□ mcgsEPC: Embedded integration controller
Model No. Amount Price
Which services
of Kunlun
Tongtai do you
hope to enjoy?
Free materials: □Color Pages □MCGS Developed Vision □7062K Junior Tutorial
: □7062K Study DV □Electronic Journal of Kunlun Tongtai
Free training: □7062K Junior Training □7062K Intermediate & Advanced Training
□7062K Onsite Training
Charging Training: □MCGS Comprehensive Training □mcgsEPC Development of
Training
Learning Tools: □TPC7062K Learning Package □TPC7062KTraining Package
Special Services: □Software Configuration Services □Driver Program
Development □System Program Guidance
After filling the form, please fold it down along the dotted line and fax it to Kunlun Tongtai (010-62979059) to
participate in lottery draw activity monthly held by Kunlun Tongtai! For more details and award notice, please
browse: www.mcgs.com.cn www.gongkong.com

Quality of the World, Price of China and Local Service
Beijing Branch
The 6th
floor, No.7 Yanhua Building, Shangdi 6th
Street,
Haidian District, Beijing
Tel:010-62979682 Fax:010-62979059
Shanghai Office Room 301, No. 5, 500th Nong, Qinzhou
Road, Shanghai (opposite to Guangda Exhibitions) Tel:
021-64361488 Fax: 021-64366048
Shenzhen Office C/D, 14th floor, Block C, Shennan
Garden, Nanshan Science & Technology Park,
Shenzhen Tel:0755-26501649 Fax: 0755-26508397
Jinan Customer Service Center 6-401 No. 3 Building,,
Block B, No. 750 of Shunhua Road, High-tech
Development Zone, Jinan Tel: 0531-87199936 Fax:
0531-88685669
Xi’an Office Room 301, Block A, Zhengxin Building,
No. 5, Gaoxin 1st road, High-tech Zone, Xi’an Tel:
029-82098920 Fax:029-82098910
Chengdu Manufacturing Center Room 203, 2nd
Floor, Block A, Pfister Enterprise Park, Longtan
District, Chengdu Tel : 028-86180260
Fax:028-86180260
TPC7062 FCC Certification TPC7062 CE Certification ISO9001 Quality Management System Certification
TPC7063 FCC Certification TPC7063 CE Certification ISO9001 Quality Management System Certification