Embed Size (px)
Citation preview

Installation and Configuration Guide Version 12.0.00 Second Edition
CA JCLCheck™ Common Component
This Documentation, which includes embedded help systems and electronically distributed materials, (hereinafter referred to as the “Documentation”) is for your informational purposes only and is subject to change or withdrawal by CA at any time. This Documentation is proprietary information of CA and may not be copied, transferred, reproduced, disclosed, modified or duplicated, in whole or in part, without the prior written consent of CA.
If you are a licensed user of the software product(s) addressed in the Documentation, you may print or otherwise make available a reasonable number of copies of the Documentation for internal use by you and your employees in connection with that software, provided that all CA copyright notices and legends are affixed to each reproduced copy.
The right to print or otherwise make available copies of the Documentation is limited to the period during which the applicable license for such software remains in full force and effect. Should the license terminate for any reason, it is your responsibility to certify in writing to CA that all copies and partial copies of the Documentation have been returned to CA or destroyed.
TO THE EXTENT PERMITTED BY APPLICABLE LAW, CA PROVIDES THIS DOCUMENTATION “AS IS” WITHOUT WARRANTY OF ANY KIND, INCLUDING WITHOUT LIMITATION, ANY IMPLIED WARRANTIES OF MERCHANTABILITY, FITNESS FOR A PARTICULAR PURPOSE, OR NONINFRINGEMENT. IN NO EVENT WILL CA BE LIABLE TO YOU OR ANY THIRD PARTY FOR ANY LOSS OR DAMAGE, DIRECT OR INDIRECT, FROM THE USE OF THIS DOCUMENTATION, INCLUDING WITHOUT LIMITATION, LOST PROFITS, LOST INVESTMENT, BUSINESS INTERRUPTION, GOODWILL, OR LOST DATA, EVEN IF CA IS EXPRESSLY ADVISED IN ADVANCE OF THE POSSIBILITY OF SUCH LOSS OR DAMAGE.
The use of any software product referenced in the Documentation is governed by the applicable license agreement and such license agreement is not modified in any way by the terms of this notice.
The manufacturer of this Documentation is CA.
Provided with “Restricted Rights.” Use, duplication or disclosure by the United States Government is subject to the restrictions set forth in FAR Sections 12.212, 52.227-14, and 52.227-19(c)(1) - (2) and DFARS Section 252.227-7014(b)(3), as applicable, or their successors.
Copyright © 2014 CA. All rights reserved. All trademarks, trade names, service marks, and logos referenced herein belong to their respective companies.
CA Technologies Product References
This document references the following CA Technologies products:
■ CA Chorus™ Software Manager (CA MSM)
■ CA Workload Automation CA 7® Edition (CA WA CA 7 Edition)
■ CA Workload Automation Restart Option for z/OS Schedulers (CA WA Restart Option for z/OS Schedulers)
■ CA Scheduler® Job Management (CA Scheduler)
■ CA Workload Automation ESP Edition (CA WA ESP Edition)
■ CA Endevor® Software Change Manager (CA Endevor SCM)
■ CA APCDOC™ Automated Job Documentation (CA APCDOC)
■ CA Dispatch™ (CA Dispatch)
■ CA ACF2™ (CA ACF2)
■ CA Top Secret® (CA Top Secret)
■ CA ASM2® Backup and Restore (CA ASM2)
■ CA 1® Tape Management (CA 1)
■ CA TLMS® Tape Management (CA TLMS)
■ CA Roscoe® Interactive Environment (CA Roscoe)
■ CA Librarian® (CA Librarian)
■ CA PanAPT® (CA PanAPT)
■ CA Panvalet® (CA Panvalet)

Contact CA Technologies
Contact CA Support
For your convenience, CA Technologies provides one site where you can access the information that you need for your Home Office, Small Business, and Enterprise CA Technologies products. At http://ca.com/support, you can access the following resources:
■ Online and telephone contact information for technical assistance and customer services
■ Information about user communities and forums
■ Product and documentation downloads
■ CA Support policies and guidelines
■ Other helpful resources appropriate for your product
Providing Feedback About Product Documentation
If you have comments or questions about CA Technologies product documentation, you can send a message to [email protected].
To provide feedback about CA Technologies product documentation, complete our short customer survey which is available on the CA Support website at http://ca.com/docs.

Documentation Changes
The following documentation updates have been made since the last release of this documentation:
Documentation Fixes - Second Edition
■ Establish CA JCLCheck Common Component as APF Authorized (see page 43):
– Removed information regarding the following two incorrect TSO authorization table entries: Authorized Command and Authorized Program.
– Removed the entire paragraph regarding ISPF Version 2.2 and above.
– Added a paragraph regarding the Authorized TSO Service Facility.
■ Removed chapter 5—Installing Your Product from Tape.
■ Updated the installation file names.

Contents 7
Contents
Chapter 1: Overview 9
Audience ...................................................................................................................................................................... 9
Overview ...................................................................................................................................................................... 9
How the Installation Process Works........................................................................................................................... 10
Chapter 2: Preparing for Installation 13
Hardware Requirements ............................................................................................................................................ 13
Software Requirements ............................................................................................................................................. 13
Security Requirements ............................................................................................................................................... 14
Storage Requirements ................................................................................................................................................ 15
Target Libraries ................................................................................................................................................... 15
Distribution Libraries ........................................................................................................................................... 16
Other Requirements ................................................................................................................................................... 16
JCL Procedures .................................................................................................................................................... 16
Documentation ................................................................................................................................................... 17
Concurrent Releases .................................................................................................................................................. 17
Chapter 3: Installing Your Product Using CA MSM 19
How to Use CA MSM: Scenarios ................................................................................................................................. 19
How to Acquire a Product ................................................................................................................................... 19
How to Install a Product ...................................................................................................................................... 20
How to Maintain Existing Products ..................................................................................................................... 21
How to Deploy a Product .................................................................................................................................... 22
How to Configure a Product ................................................................................................................................ 23
Access CA MSM Using the Web-Based Interface ....................................................................................................... 24
Chapter 4: Installing Your Product from Pax-Enhanced ESD 25
How to Install a Product Using Pax-Enhanced ESD .................................................................................................... 25
How the Pax-Enhanced ESD Download Works ................................................................................................... 27
ESD Product Download Window ......................................................................................................................... 27
Allocate and Mount a File System .............................................................................................................................. 30
Create a Product Directory from the Pax File ............................................................................................................ 33
Sample Job to Execute the Pax Command (Unpackage.txt) ............................................................................... 34
Copy Installation Files to z/OS Data Sets .................................................................................................................... 34
How to Install Products Using Native SMP/E JCL ....................................................................................................... 36

8 Installation and Configuration Guide
Prepare the SMP/E Environment for Pax Installation ......................................................................................... 36
Run the Installation Jobs for a Pax Installation ................................................................................................... 37
Clean Up the USS Directory ........................................................................................................................................ 38
Apply Maintenance .................................................................................................................................................... 39
HOLDDATA .......................................................................................................................................................... 40
Chapter 5: How to Configure Without CA MSM 43
Summary of Configuration Steps ............................................................................................................................... 43
Establish CA JCLCheck Common Component as APF Authorized ........................................................................ 43
Customize CAZ2UTAB (unit name table) ............................................................................................................. 45
Chapter 6: Migration Information 47
Migration Considerations ........................................................................................................................................... 47

Chapter 1: Overview 9
Chapter 1: Overview
This guide describes how to install and implement CA JCLCheck Common Component.
This section contains the following topics:
Audience (see page 9) Overview (see page 9) How the Installation Process Works (see page 10)
Audience
Readers of this book must have knowledge in the following areas:
■ JCL
■ TSO/ISPF
■ z/OS environment and installing software in this environment
■ z/OS UNIX System Services
■ Your organization's IT environment, enterprise structure, and region structure
Consult with the following personnel, as required:
■ Systems programmer for z/OS and VTAM definitions
■ Storage administrator for DASD allocations
Overview
This document provides first-time installation instructions for the CA JCLCheck Common Component as shipped with a hosting CA Technologies product.
The CA JCLCheck Common Component is a subset version of CA JCLCheck, designed to provide z/OS JCL statement syntax and execution validation functions to other CA Technologies products. The execution parameters that are required for this interface are explained in the documentation that is provided with each CA Technologies product using this interface. If you want the full features of CA JCLCheck, contact your CA Customer Relationship Manager.
Important! If you have installed the full CA JCLCheck product, do not install the CA JCLCheck Common Component.

How the Installation Process Works
10 Installation and Configuration Guide
How the Installation Process Works
CA Technologies has standardized product installations across all mainframe products. Installation uses the following process:
■ Acquisition—Transports the software to your z/OS system.
■ Installation using SMP/E—Optionally creates a new CSI environment and runs the RECEIVE, APPLY and ACCEPT steps. The software is untailored.
■ Deployment—Copies the target libraries to another system or LPAR.
■ Configuration—Creates customized load modules, bringing the software to an executable state.
CA MSM provides a web-based interface to make the standardized installation process easier. Using CA MSM, someone with limited knowledge of JCL and SMP/E can install a product.
Note: If you do not have CA MSM, you can download it from the Download Center at the CA Support Online website. Follow the installation instructions in the CA Mainframe Software Manager documentation bookshelf on the CA Mainframe Software Manager product page. The standardized installation process can also be completed manually.
To install your product, do the following:
1. Prepare for the installation by confirming that your site meets all installation requirements (see page 13).
2. Use one of the following methods to acquire the product:
■ Download the software from CSO using CA MSM (see page 19).
■ Download the software from CSO using Pax-Enhanced Electronic Software Delivery (ESD) (see page 25).
3. Perform an SMP/E installation using one of the following methods:
■ If you used CA MSM to acquire the product, start the SMP/E step from the SMP/E Environments tab in CA MSM.
■ If you used ESD to acquire the product, you can install the product manually or use the Insert New Product option in CA MSM to complete the SMP/E install.
Note: If a CA Recommended Service (CA RS) package is published for your product, install it before continuing with deployment.
4. Deploy the target libraries using one of the following methods:
■ If you are using CA MSM, deployment is required; it is a prerequisite for configuration.
■ If you are using a manual process, deployment is an optional step.
Note: Deployment is considered part of starting your product.

How the Installation Process Works
Chapter 1: Overview 11
5. Configure your product using CA MSM or manually.
Note: Configuration is considered part of starting your product.


Chapter 2: Preparing for Installation 13
Chapter 2: Preparing for Installation
This section describes what you need to know and do before you install the product.
This section contains the following topics:
Hardware Requirements (see page 13) Software Requirements (see page 13) Security Requirements (see page 14) Storage Requirements (see page 15) Other Requirements (see page 16) Concurrent Releases (see page 17)
Hardware Requirements
CA JCLCheck Common Component operates under all levels of the z/OS operating systems that IBM supports.
CA JCLCheck Common Component does not modify the operating system in any way. CA JCLCheck Common Component automatically adapts itself to the local generic and esoteric unit names. CA JCLCheck Common Component loads the system device name and mask, and eligible device tables, or CA JCLCheck Common Component interfaces with the documented scheduler service routines. Other than these tasks, the operating system, and other local dependencies are specified entirely in the CA JCLCheck Common Component tables. CA JCLCheck Common Component is re-entrant; therefore, it can be placed in the Link Pack Area (LPA) of z/OS systems.
CA JCLCheck Common Component and its modules must be in authorized libraries when one of the following features are selected: AUTOPROC, CA ASM2, automatic destination checking, HCD, or Security Interface support. Certain exceptions apply, as noted elsewhere in this document. CA Technologies recommends running CA JCLCheck from an authorized library.
To run CA JCLCheck Common Component, allocate a virtual region size of at least 512 KB.
Software Requirements
The following software is required for CA JCLCheck Common Component:
■ IBM supported release of z/OS
■ SMP/E

Security Requirements
14 Installation and Configuration Guide
TSO and ISPF Version Compatibility
For CA JCLCheck Common Component to run authorized in the TSO environment, TSO/E is required.
Compatibility with other CA Technologies Products
The following table lists the CA Technologies products that you can use with CA JCLCheck Common Component.
Product Minimum Release Level
CA WA CA 7 Edition Release 11
CA WA Restart Option for z/OS Schedulers Release 3.0
CA Scheduler Release 11.0
CA WA ESP Edition Release 11.3
CA APCDOC Release 1.3
CA Dispatch Any currently supported release
CA ACF2 Release 9.0
CA Top Secret Release 9.0
CA ASM2 Release 4.2
CA 1 Release 12.6
CA TLMS Release 12.6
CA Roscoe Release 6.0
CA Librarian Release 4.3
CA PanAPT Release 3.1
CA Panvalet Release 14.5
Security Requirements
To complete the tasks in this guide, you need the following security privilege:
■ Superuser authority if you need to mount a zFS or HFS file system.

Storage Requirements
Chapter 2: Preparing for Installation 15
Storage Requirements
Ensure that you have the following storage available:
■ If installing with ESD, 25 cylinders for the downloaded files
■ For installation and setup:
– Installation = 80 cylinders
– SMP/E temporary libraries = 25 cylinders
Target Libraries
The following table shows the minimum storage requirements for the SMP/E target libraries that are required to execute CA JCLCheck Common Component. The file space requirements are in terms of tracks for 3390 type DASD.
Library Name Blksize Tracks (prim,sec)
Dir Blks Description
CAI.CAZ2DBRM 27920 3,3 12 DB2 database request module library
CAI.CAZ2JCL 27920 14,14 12 Sample JCL library
CAI.CAZ2LOAD 32760 512,61 216 Load library
CAI.CAZ2MAC 27920 45,45 50 Macro library
CAI.CAZ2PROC 27920 11,11 12 Supplied procedures
CAI.CAZ2SAMP 27920 16,10 24 Sample program source library
CAI.CAZ2SCST 27920 11,11 12 MSM SCS template library
CAI.CAZ2SRC 27920 52,52 12 Source library
CAI.CAZ2XML 27998 32,32 12 MSM product XML library

Other Requirements
16 Installation and Configuration Guide
Distribution Libraries
The following table lists the amount of disk space that is required to install the distribution libraries:
Library Name Blksize Tracks (prim,sec)
Dir Blks Description
CAI.AAZ2DBRM 27920 3,3 12 DB2 Database request module library
CAI.AAZ2JCL 27920 14,14 12 Sample JCL library
CAI.AAZ2MAC 27920 45,45 50 Macro library
CAI.AAZ2MOD0 32760 63,63 76 Module library
CAI.AAZ2PROC 27920 11,11 12 Supplied procedures
CAI.AAZ2SAMP 27920 16,10 24 Sample program source library
CAI.AAZ2SCST 27920 11,11 12 MSM SCS template library
CAI.AAZ2SRC 27920 52,52 12 Source library
CAI.AAZ2XML 27998 32,32 12 MSM product XML library
Other Requirements
The following requirements assist you in preparing for installation of CA JCLCheck Common Component:
■ JCL Procedures (see page 16)
■ Documentation (see page 17)
JCL Procedures
During the product installation, you modify and copy all JCL procedures into the CAI Common Procedure library, CAZ2PROC. Later, during normal execution of the product, CA JCLCheck Common Component uses these procedures. We recommend that you add the CAZ2PROC library to the system PROCLIB concatenation. After the system IPL, the procedures are readily available.

Concurrent Releases
Chapter 2: Preparing for Installation 17
Documentation
CA Technologies provide the following documentation to help you install, customize, maintain, and use CA JCLCheck Common Component:
■ Installation and Configuration Guide
Concurrent Releases
You can install this release of CA JCLCheck Common Component and continue to use an older release in another SMP/E environment. If you plan to continue to run a previous release, consider the following points:
■ If you acquired your product with Pax ESD, select different target and distribution zones for your new release from where your current release is installed. The new zones use different libraries than your current release.
Note: CA MSM installs a product into a new SMP/E environment by default. You can select an existing SMP/E environment from your working set. For more information, see the online help that is included in CA MSM..
■ Define DDDEF entries in your new zones to point SMP/E to the proper libraries for installation. Ensure that they point to the new release libraries.


Chapter 3: Installing Your Product Using CA MSM 19
Chapter 3: Installing Your Product Using CA MSM
These topics provide information to get you started managing your product using CA MSM. You can use the online help included in CA MSM to get additional information.
Before using these topics, you must already have CA MSM installed at your site. If you do not have CA MSM installed, you can download it from the Download Center at the CA Support Online website, which also contains links to the complete documentation for CA MSM.
How to Use CA MSM: Scenarios
Imagine that your organization has started using CA MSM to simplify the installation of CA Technologies products and unify their management. You have also licensed a new CA Technologies product. In addition, you have a number of existing CSIs from previously installed CA Technologies products.
You can use the following scenarios to guide you through the process:
1. Acquire the new product (see page 19).
2. Install the new product (see page 20).
3. Maintain products already installed in your environment (see page 21).
4. Deploy the product to your target systems (see page 22).
5. Configure the deployed product to your target systems (see page 23).
How to Acquire a Product
The Product Acquisition Service (PAS) facilitates the acquisition of mainframe products and the service for those products, such as program temporary fixes (PTFs). PAS retrieves information about products to which your site is entitled. Then it records these entitlements in a software inventory that is maintained on your driving system.
You can use the PAS component of CA MSM to acquire a CA Technologies product.

How to Use CA MSM: Scenarios
20 Installation and Configuration Guide
Follow these steps:
1. Set up a CA Support Online account.
To use CA MSM to acquire or download a product, you must have a CA Support Online account. If you do not have an account, you can create one on the CA Support Online website.
2. Determine the CA MSM URL for your site.
To access CA MSM (see page 24), you require its URL. You can get the URL from your site's CA MSM administrator and log in using your z/OS credentials. When you log in for the first time, you are prompted to create a CA MSM account with your credentials for the CA Support Online website. This account enables you to download product packages.
3. Log in to CA MSM and go to the Software Catalog page to locate the product that you want to manage.
After you log in to CA MSM, you can see the products to which your organization is entitled on the Software Catalog tab.
If you cannot find the product you want to acquire, update the catalog. CA MSM refreshes the catalog through the CA Support Online website using the site IDs associated with your credentials for the CA Support Online website.
4. Download the product installation packages.
After you find your product in the catalog, you can download the product installation packages.
CA MSM downloads (acquires) the packages (including any maintenance packages) from the CA FTP site.
After the acquisition process completes, the product is ready for you to install or maintain.
How to Install a Product
The Software Installation Service (SIS) facilitates the installation and maintenance of mainframe products in the software inventory of the driving system. This facilitation includes browsing downloaded software packages, managing SMP/E consolidated software inventories on the driving system, and automating installation tasks.
You can use the SIS component of CA MSM to install a CA Technologies product.
Follow these steps:
1. Initiate product installation and review product information.
2. Select an installation type.
3. Review installation prerequisites if any are presented.
How to Use CA MSM: Scenarios
Chapter 3: Installing Your Product Using CA MSM 21
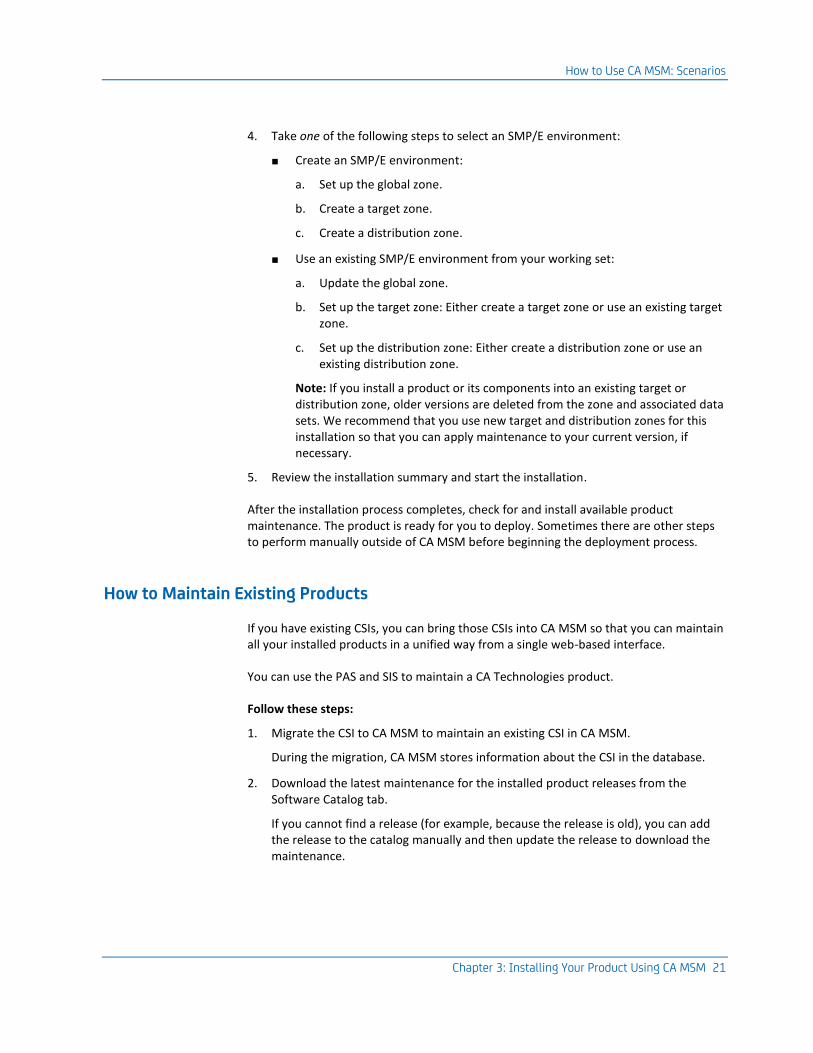
4. Take one of the following steps to select an SMP/E environment:
■ Create an SMP/E environment:
a. Set up the global zone.
b. Create a target zone.
c. Create a distribution zone.
■ Use an existing SMP/E environment from your working set:
a. Update the global zone.
b. Set up the target zone: Either create a target zone or use an existing target zone.
c. Set up the distribution zone: Either create a distribution zone or use an existing distribution zone.
Note: If you install a product or its components into an existing target or distribution zone, older versions are deleted from the zone and associated data sets. We recommend that you use new target and distribution zones for this installation so that you can apply maintenance to your current version, if necessary.
5. Review the installation summary and start the installation.
After the installation process completes, check for and install available product maintenance. The product is ready for you to deploy. Sometimes there are other steps to perform manually outside of CA MSM before beginning the deployment process.
How to Maintain Existing Products
If you have existing CSIs, you can bring those CSIs into CA MSM so that you can maintain all your installed products in a unified way from a single web-based interface.
You can use the PAS and SIS to maintain a CA Technologies product.
Follow these steps:
1. Migrate the CSI to CA MSM to maintain an existing CSI in CA MSM.
During the migration, CA MSM stores information about the CSI in the database.
2. Download the latest maintenance for the installed product releases from the Software Catalog tab.
If you cannot find a release (for example, because the release is old), you can add the release to the catalog manually and then update the release to download the maintenance.

How to Use CA MSM: Scenarios
22 Installation and Configuration Guide
3. Apply the maintenance.
Note: You can also install maintenance to a particular CSI from the SMP/E Environments tab.
After the maintenance process completes, the product is ready for you to deploy. You may have to perform other steps manually outside of CA MSM before beginning the deployment process.
How to Deploy a Product
The Software Deployment Service (SDS) facilitates the mainframe product deployment from the software inventory of the driving system to the target system. This facilitation includes deploying installed products that are policy-driven with a set of appropriate transport mechanisms across a known topology.
You can use the SDS component of CA MSM to deploy a CA Technologies product that you have already acquired and installed.
Follow these steps:
1. Set up the system registry:
a. Determine the systems you have at your enterprise.
b. Set up remote credentials for those systems.
c. Set up the target systems (non-sysplex, sysplex or monoplex, shared DASD cluster, and staging), and validate them.
d. Add network information, including data destination information, to each system registry entry.
2. Set up methodologies.
3. Create the deployment, which includes completing each step in the New Deployment wizard.
After creating the deployment, you can save it and change it later by adding and editing systems, products, custom data sets, and methodologies, or you can deploy directly from the wizard.
Note: If you must deploy other products to the previously defined systems using the same methodologies, you must create a separate deployment.
4. Deploy the product, which includes taking a snapshot, transmitting to target, and deploying (unpacking) to your mainframe environment.
After the deployment process completes, the product is ready for you to configure. You may have to perform other steps manually outside of CA MSM before beginning the configuration process.

How to Use CA MSM: Scenarios
Chapter 3: Installing Your Product Using CA MSM 23
How to Configure a Product
The Software Configuration Service (SCS) facilitates the mainframe product configuration from the software inventory of the driving system to targeted z/OS operating systems.
You can use the SCS component of CA MSM to configure a CA Technologies product that you have already acquired, installed, and deployed.
Follow these steps:
1. Select a deployed product to configure from the Deployments tab to open the Create Configuration wizard.
2. Create the configuration, which includes completing each step in the Create Configuration wizard, including the following:
a. Define a configuration name and select a target system.
b. Select configuration functions and options.
c. Define system preferences.
d. Create target settings.
e. Select and edit resources.
3. Build the configuration. The last step of the Create Configuration wizard lets you build the configuration.
4. Implement the configuration. The implementation process in CA MSM is a step-by-step process that carefully guides you and provides detailed instructions to start, stop, and manage the steps of the implementation process.
After the configuration process completes, the product is ready for you to use. You may have to perform other steps manually outside of CA MSM.
Note: You cannot use CA MSM to configure a product to a staging system.

Access CA MSM Using the Web-Based Interface
24 Installation and Configuration Guide
Access CA MSM Using the Web-Based Interface
You access CA MSM using the web-based interface. Obtain the URL of CA MSM from the CA MSM administrator.
Follow these steps:
1. Start your web browser, and enter the access URL.
The login page appears.
Note: If the Notice and Consent Banner appears, read and confirm the provided information.
2. Enter your z/OS login user name and password, and click the Log in button.
The initial page appears. If you log in for the first time, you are prompted to define your account on the CA Support Online website.
Note: For more information about the interface, click the online help link at the top right corner of the page.
3. Click New.
You are prompted for the credentials to use on the CA Support Online website.
Important! The account to which the credentials apply must have the Product Display Options set to BRANDED PRODUCTS. You can view and update your account preferences by logging in to the CA Support Online website and clicking My Account. You need the correct setting to use CA MSM to download product information and packages.
4. Specify the credentials, click OK, and then click Next.
You are prompted to review your user settings.
Note: These settings are available on the User Settings page.
5. Change the settings or keep the defaults, and then click Finish.
A dialog shows the progress of the configuration task. You can click Show Results to view the details of the actions in a finished task.
Important! If your site uses proxies, review your proxy credentials on the User Settings, Software Acquisition page.

Chapter 4: Installing Your Product from Pax-Enhanced ESD 25
Chapter 4: Installing Your Product from Pax-Enhanced ESD
This section contains the following topics:
How to Install a Product Using Pax-Enhanced ESD (see page 25) Allocate and Mount a File System (see page 30) Create a Product Directory from the Pax File (see page 33) Copy Installation Files to z/OS Data Sets (see page 34) How to Install Products Using Native SMP/E JCL (see page 36) Clean Up the USS Directory (see page 38) Apply Maintenance (see page 39)
How to Install a Product Using Pax-Enhanced ESD
This section describes the Pax-Enhanced ESD process. We recommend that you read this overview and follow the entire procedure the first time you complete a Pax-Enhanced ESD installation. For experienced UNIX users, the Pax-Enhanced ESD Quick Reference Guide has sufficient information for subsequent installations.
Important! Downloading pax files for the SMP/E installation as part of the Pax-Enhanced ESD process requires write authority to the UNIX System Services (USS) directories that are used for the ESD process.
If you prefer not to involve all CA Technologies product installers with z/OS UNIX System Services, assign a group familiar with USS to perform Steps 1 through 4 and provide the list of the unpacked MVS data sets to the product installer. USS is not required for the actual SMP/E RECEIVE of the product or for any of the remaining installation steps.
To install files using Pax-Enhanced ESD, use the following process:
1. Allocate and mount the file system. This process requires a USS directory to receive the pax file and to perform the unpack steps. We recommend that you allocate and mount a file system that is dedicated to Pax-Enhanced ESD and create the directory in this file system. Ensure that all users who will be working with pax files have write authority to the directory.

How to Install a Product Using Pax-Enhanced ESD
26 Installation and Configuration Guide
2. Copy the product pax files into your USS directory. To download files, choose one of the following options:
■ Download a zip file from CA Support Online to your PC, unzip the file, and then upload the product pax files to your USS file system.
■ FTP the pax files from CA Support Online directly to your USS directory.
Note: Perform Steps 3 through 6 for each pax file that you upload to your USS directory.
3. Create a product directory from the pax file. Set the current working directory to the directory containing the pax file, and create a directory in your USS directory by entering the following command:
pax -rvf pax-filename
4. Use the SMP/E GIMUNZIP utility to create z/OS installation data sets. The file UNZIPJCL in the directory that the pax command created in Step 3 contains a sample JCL to GIMUNZIP the installation package. Edit and submit the UNZIPJCL JCL.
5. Receive the SMP/E package. Use the data sets that GIMUNZIP created in Step 4. Perform a standard SMP/E RECEIVE using the SMPPTFIN and SMPHOLD (if applicable) DASD data sets. Also, specify the high-level qualifier for the RELFILEs on the RFPREFIX parameter of the RECEIVE command.
6. Proceed with product installation. Consult product-specific documentation, including AREADME files and installation notes to complete the product installation.
7. (Optional) Clean up the USS directory. Delete the pax file, the directory that the pax command created, all of the files in it, and the SMP/E RELFILEs, SMPMCS, and HOLDDATA data sets.
More Information:
Allocate and Mount a File System (see page 30) Create a Product Directory from the Pax File (see page 33)

How to Install a Product Using Pax-Enhanced ESD
Chapter 4: Installing Your Product from Pax-Enhanced ESD 27
How the Pax-Enhanced ESD Download Works
Important! To download pax files for the SMP/E installation as part of the Pax-Enhanced ESD process, you must have write authority to the UNIX System Services (USS) directories used for the ESD process and available USS file space before you start the procedures in this guide.
Use the following process to download files using Pax-Enhanced ESD:
1. Log in to https://support.ca.com/, and click Download Center.
The CA Support Online web page appears.
2. Under Download Center, select Products from the first drop-down list, and specify the product, release, and genlevel (if applicable), and click Go.
The CA Product Download window appears.
3. Download an entire CA Technologies product software package or individual pax files to your PC or mainframe. If you download a zip file, you must unzip it before continuing.
For both options, The ESD Product Download Window (see page 27) topic explains how the download interface works.
Note: For traditional installation downloads, see the Traditional ESD User Guide. Go to https://support.ca.com/, log in, and click Download Center. A link to the guide appears under the Download Help heading.
4. Perform the steps to install the product based on the product-specific steps.
The product is installed on the mainframe.
ESD Product Download Window
You can download CA Technologies product ESD packages multiple ways. Your choices depend on the size of the individual files and the number of files that you want to download. You can download the complete product with all components, or you can select individual pax and documentation files for your product or component.

How to Install a Product Using Pax-Enhanced ESD
28 Installation and Configuration Guide
The following illustration shows sample product files. The illustration lists all components of the product. You can use the Download Cart by selecting one or more components that you need, or selecting the check box for Add All to cart. If you prefer to immediately download a component, click the Download link.

How to Install a Product Using Pax-Enhanced ESD
Chapter 4: Installing Your Product from Pax-Enhanced ESD 29
Clicking the link for an individual component takes you to the Download Method page.
Depending on the size and quantity of ordered product files, the Download Method screen could also have these options:
Note: For mainframe downloads using this HTTP method, click the Learn More link.
The HTTP method lets you start downloading immediately. The FTP method takes you to the Review Orders page that displays your order, first in a Pending status changing to Ready when your order has been processed.
Preferred FTP uses the new content delivery network (CDN). Alternate FTP uses the CA Technologies New York-based FTP servers.

Allocate and Mount a File System
30 Installation and Configuration Guide
The Create a Zip File option first creates the zip, and when ready, offers the options that the Zip Download Request examples show in the next illustration.
Allocate and Mount a File System
You can use the zSeries File System (zFS) or hierarchical file system (HFS) for ESD downloads.
This procedure describes how to perform the following tasks:
■ Allocate a zFS or an HFS.
■ Create a mount point in an existing maintenance USS directory of your choice.
■ Mount the file system on the newly created mount point.
Note: You must have either SUPERUSER authority, or the required SAF profile setting to allow you to issue the USS mount command for the file system.
■ Optionally, permit write access to anyone in the same group as the person who created the directory.
Important! USS commands are case-sensitive.

Allocate and Mount a File System
Chapter 4: Installing Your Product from Pax-Enhanced ESD 31
Follow these steps:
1. Allocate the file system by customizing one of the following samples to your site requirements:
■ On a zFS, use the following sample:
//DEFINE EXEC PGM=IDCAMS
//SYSPRINT DD SYSOUT=*
//SYSUDUMP DD SYSOUT=*
//AMSDUMP DD SYSOUT=*
//SYSIN DD *
DEFINE CLUSTER ( +
NAME(your_zFS_data_set_name) +
STORAGECLASS(class) +
LINEAR +
CYL(primary secondary) +
SHAREOPTIONS(3,3) +
)
/*
//FORMAT EXEC PGM=IOEAGFMT,REGION=0M,
// PARM=('-aggregate your_zFS_data_set_name -compat')
//SYSPRINT DD SYSOUT=*
//SYSUDUMP DD SYSOUT=*
//STDOUT DD SYSOUT=*
//STDERR DD SYSOUT=*
//CEEDUMP DD SYSOUT=*
//*
■ On an HFS, use the following sample:
//ALCHFS EXEC PGM=IEFBR14
//CAESD DD DSN=yourHFS_data_set_name,
// DISP=(NEW,CATLG,DELETE),UNIT=3390,
// DSNTYPE=HFS,SPACE=(CYL,(primary,secondary,1))
The file system is allocated.
Note: Ensure that the zFS or HFS data set name that you use conforms to your data set naming conventions for USS file systems. If the allocation of the file system data set fails, it is because of environmental settings not allowing for the allocation. On an HFS, try using the ISPF 3.2 Data Set Utility to allocate your HFS data set.

Allocate and Mount a File System
32 Installation and Configuration Guide
2. Create a mount point for the file system. This example shows how to create a /CA/CAESD directory in an existing directory, /u/maint. From the TSO OMVS shell, enter the following commands:
cd /u/maint/
mkdir CA
cd CA
mkdir CAESD
Note: This document refers to this structure as yourUSSESDdirectory.
The mount point is created.
3. Mount the file system by customizing one of the following samples to your site requirements:
■ On a zFS, use the following sample:
MOUNT FILESYSTEM('your_zFS_data_set_name')
MOUNTPOINT('yourUSSESDdirectory')
TYPE(ZFS) MODE(RDWR)
PARM(AGGRGROW)
■ On an HFS, use the following sample:
MOUNT FILESYSTEM('your_HFS_data_set_name')
MOUNTPOINT('yourUSSESDdirectory')
TYPE(HFS) MODE(RDWR)
The file system is mounted.
4. (Optional) Set security permissions for the directory. You can use the chmod command to let other users access the ESD directory and its files. For example, to allow write access to the ESD directory for other users in your USS group, from the TSO OMVS shell, enter the following command:
chmod -R 775 /yourUSSESDdirectory/
Write access is granted.
Note: For more information about the chmod command, see the IBM z/OS UNIX System Services User Guide (SA22-7802).

Create a Product Directory from the Pax File
Chapter 4: Installing Your Product from Pax-Enhanced ESD 33
Create a Product Directory from the Pax File
Use the sample job attached to the PDF file as Unpackage.txt to extract the product pax file into a product installation directory.
Important! To simplify the Pax-Enhanced ESD process, the PDF version of this guide includes a sample JCL job that you can copy directly to the mainframe. To access this job, click the paper clip icon at the left of the PDF reader. A window displaying attachments opens. Double-click the file to view the sample JCL.
Follow these steps:
1. Supply a valid JOB statement.
2. Replace yourUSSESDdirectory with the name of the USS directory that you use for ESD downloads.
The job points to your specific directory.
3. Replace paxfile.pax.Z with the name of the pax file.
The job points to your specific pax file.
4. Submit the job.
The job runs and creates the product directory.
Note: If the PARM= statement exceeds 71 characters, uncomment and use the second form of UNPAXDIR instead. This sample job uses an X in column 72 to continue the PARM= parameters to a second line.

Copy Installation Files to z/OS Data Sets
34 Installation and Configuration Guide
Sample Job to Execute the Pax Command (Unpackage.txt)
The following text appears in the attached Unpackage.txt JCL file:
//ESDUNPAX JOB (ACCOUNTNO),'UNPAX ESD PACKAGE ',
// MSGCLASS=X,CLASS=A,NOTIFY=&SYSUID
//*********************************************************************
//* This sample job can be used to invoke the pax command to create *
//* the product-specific installation directory. *
//* *
//* This job must be customized as follows: *
//* 1. Supply a valid JOB statement. *
//* 2. Replace "yourUSSESDdirectory" with the name of the USS *
//* directory used on your system for ESD downloads. *
//* 3. Replace "paxfile.pax.Z" with the name of the pax file. *
//* NOTE: If you continue the PARM= statement on a second line, make *
//* sure the 'X' continuation character is in column 72. *
//*********************************************************************
//UNPAXDIR EXEC PGM=BPXBATCH,
// PARM='sh cd /yourUSSESDdirectory/; pax -rvf paxfile.pax.Z'
//*UNPAXDIR EXEC PGM=BPXBATCH,
//* PARM='sh cd /yourUSSESDdirectory/; pax X
//* -rvf paxfile.pax.Z'
//STDOUT DD SYSOUT=*
//STDERR DD SYSOUT=*
Copy Installation Files to z/OS Data Sets
Use this procedure to invoke the SMP/E GIMUNZIP utility to create MVS data sets from the files in the product-specific directory.
The file UNZIPJCL in the product directory contains a sample job to GIMUNZIP the installation package. You edit and submit the UNZIPJCL job to create z/OS data sets.

Copy Installation Files to z/OS Data Sets
Chapter 4: Installing Your Product from Pax-Enhanced ESD 35
Follow these steps:
1. Locate and read the product readme file or installation notes, if applicable, which resides in the product-specific directory that the pax command created. This file contains the product-specific details that you require to complete the installation procedure.
You have identified the product-specific installation details.
2. Use ISPF EDIT or TSO ISHELL to edit the UNZIPJCL sample job. You can perform this step in one of the following ways:
■ Use ISPF EDIT. Specify the full path name of the UNZIPJCL file.
■ Use TSO ISHELL. Navigate to the UNZIPJCL file and use the E line command to edit the file.
The job is edited.
3. Change the SMPDIR DD PATH to the product-specific directory created by the pax command.
Your view is of the product-specific directory.
4. If ICSF is not active, perform the following steps:
a. Change the SMPJHOME DD PATH to your Java runtime directory. This directory varies from system to system.
b. Perform one of the following steps:
■ Change the SMPCPATH DD PATH to your SMP/E Java application classes directory, typically /usr/lpp/smp/classes/.
■ Change HASH=YES to HASH=NO on the GIMUNZIP parameter.
One of the following occurs: ICSF is active or you are using Java.
5. Change all occurrences of yourHLQ to the high-level qualifier (HLQ) for z/OS data sets that the installation process uses. We suggest that you use a unique HLQ for each expanded pax file to identify uniquely the package. Do not remove CAI after yourHLQ. Do not use the same value for yourHLQ as you use for the SMP/E RELFILEs.
All occurrences of yourHLQ are set to your high-level qualifier for z/OS data sets.
6. Submit the UNZIPJCL job.
The UNZIPJCL job completes with a zero return code. Messages GIM69158I and GIM48101I in the output and IKJ56228I in the JES log are acceptable.
GIMUNZIP creates z/OS data sets with the high-level qualifier that you specified in the UNZIPJCL job. You use these data sets to perform the product installation. The pax file and product-specific directory are no longer needed.
Note: For more information, see the IBM SMP/E for z/OS Reference (SA22-7772).

How to Install Products Using Native SMP/E JCL
36 Installation and Configuration Guide
How to Install Products Using Native SMP/E JCL
The following steps describe the process to install products using native SMP/E JCL:
1. Allocate product data sets and SMP/E data sets.
2. Create SMP/E CSI.
3. Receive base functions.
4. Apply base functions.
5. Accept base functions.
6. Configure the product according to your site requirements.
Prepare the SMP/E Environment for Pax Installation
The members that are used in this procedure prepare the data sets, initialize the zones, and create the DDDEFs for CA JCLCheck Common Component.
Set the NULLFILE HLQ and use it for the IMS, HSSR, and CICS DDDEF specifications if valid libraries do not exist in your environment.
For information about the members, see the comments in the JCL.
Follow these steps:
1. Customize the macro AZ2SEDIT with your site-specific information and then copy the macro to your SYSPROC location. Replace the rightmost parameters for each ISREDIT CHANGE command. Each time you edit an installation member, type AZ2SEDIT on the command line, and press Enter to replace the defaults with your specifications.
The macro is ready to customize the yourHLQ.SAMPJCL members.
Note: Set the DASD HLQ to the same value specified for yourHLQ for the unzip to DASD ESD JCL.
Note: The following steps include instructions to execute the AJ6SEDIT macro each time you open a new SAMPJCL member. To edit all SAMPJCL members simultaneously, read and follow the instructions in the AJ6EDALL member.
2. Open the SAMPJCL member AZ22ALL in an edit session and execute the AZ2SEDIT macro from the command line.
AZ22ALL is customized.
3. Submit AZ22ALL.
This job produces the following results:
■ The target and distribution data sets for CA JCLCheck Common Component are created.

How to Install Products Using Native SMP/E JCL
Chapter 4: Installing Your Product from Pax-Enhanced ESD 37
■ Unique SMPLTS, SMPMTS, SMPSCDS, and SMPSTS data sets for this target zone are created.
4. Open the SAMPJCL member AZ23CSI in an edit session and execute the AZ2SEDIT macro from the command line.
AZ23CSI is customized.
5. Submit AZ23CSI.
This job produces the following results:
■ The CSI data set is defined.
■ The SMPPTS and SMPLOG data sets are allocated.
■ The global, target, and distribution zones are initialized.
■ The DDDEF entries for your product are created.
■ The DDDEFs for the required SMP/E data sets are created.
Run the Installation Jobs for a Pax Installation
Submit and run these SAMPJCL members in sequence. Do not proceed with any job until the previous job has completed successfully.
Follow these steps:
1. Open the SAMPJCL member AZ24RECD in an edit session, and execute the AZ2SEDIT macro from the command line.
Note: Comment out any unwanted FMIDs.
AZ24RECD is customized.
2. Submit the yourHLQ.SAMPJCL member AZ24RECD to receive SMP/E base functions.
CA JCLCheck Common Component is received and now resides in the global zone.
3. Open the SAMPJCL member AZ25APP in an edit session, and execute the AZ2SEDIT macro from the command line.
Note: Comment out any unwanted FMIDs.
AZ25APP is customized.
4. Submit the yourHLQ.SAMPJCL member AZ25APP to apply SMP/E base functions.
Your product is applied and now resides in the target libraries.
5. Open the SAMPJCL member AZ26ACC in an edit session, and execute the AZ2SEDIT macro from the command line.
Note: Comment out any unwanted FMIDs.
AZ26ACC is customized.

Clean Up the USS Directory
38 Installation and Configuration Guide
6. Submit the yourHLQ.SAMPJCL member AZ26ACC to accept SMP/E base functions.
Your product is accepted and now resides in the distribution libraries.
Clean Up the USS Directory
Important! This procedure is optional. Do not use this procedure until you complete the entire installation process.
To free file system disk space for subsequent downloads after downloading and processing the pax files for your CA Technologies product, we recommend removing the files from your USS directory and deleting unnecessary MVS data sets. You can delete the following items:
■ Pax file
■ Product-specific directory that the pax command created and all of the files in it
■ SMP/E RELFILEs, SMPMCS, and HOLDDATA MVS data sets
These data sets have the HLQ that you assigned in the UNZIPJCL job.
Note: Retain non-SMP/E installation data sets such as yourHLQ.INSTALL.NOTES for future reference.
Follow these steps:
1. Navigate to your Pax-Enhanced ESD USS directory.
Your view is of the applicable USS directory.
2. Delete the pax file by entering the following command:
rm paxfile
paxfile
Specifies the name of the CA Technologies pax file that you downloaded.
The pax file is deleted.
3. Delete the product-specific directory by entering the following command:
rm -r product-specific_directory
product-specific_directory
Specifies the product-specific directory that the pax command created.
The product-specific directory is deleted.
Note: You can also use TSO ISHELL to navigate to the pax file and product-specific directory, and delete them using the D line command.

Apply Maintenance
Chapter 4: Installing Your Product from Pax-Enhanced ESD 39
Apply Maintenance
CA Support Online has maintenance and HOLDDATA published since the installation data was created. After the maintenance process completes, the product is ready to deploy.
Follow these steps:
1. Check CA Support Online and download any PTFs and HOLDDATA published since this release was created. If the base release was created recently, no PTFs or HOLDATA will have been published yet.
2. Transfer the downloaded files to two separate FB 80 sequential data sets. Use one data set to contain the PTFs and the other to contain the HOLDDATA.
The PTFs and HOLDDATA become accessible to the yourHLQ.SAMPJCL maintenance members.
3. The AZ2SEDIT macro was customized in the installation steps. Verify that you still have the values from the base installation.
4. Open the SAMPJCL member AZ27RECP in an edit session and execute the AZ2SEDIT macro from the command line.
AZ27RECP is customized with your JOB statement, CSI location, and zone names.
5. Customize the AZ27RECP SMPPTFIN and SMPHOLD DD statements to reference the FB 80 data sets for the PTFs and HOLDDATA.
6. Submit AZ27RECP.
The PTFs and HOLDDATA are received.
7. Open the SAMPJCL member AZ28APYP in an edit session and execute the AZ2SEDIT macro from the command line.
AZ28APYP is customized.
8. Submit AZ28APYP.
The PTFs are applied.
9. (Optional) Open the SAMPJCL member AZ29ACCP in an edit session and execute the AZ2SEDIT macro from the command line.
AZ29ACCP is customized.
10. (Optional) Submit yourHLQ.SAMPJCL member AZ29ACCP.
The PTFs are accepted.
Note: You do not have to submit the job at this time. You can accept the PTFs according to your site policy.

Apply Maintenance
40 Installation and Configuration Guide
HOLDDATA
When you apply maintenance, you typically encounter SMP/E HOLDDATA. We use HOLDDATA to notify your SMP/E system of SYSMODs that have errors or special conditions. We support system and external HOLDDATA.
System HOLDDATA
System HOLDDATA indicates data that is an in-stream part of the SYSMOD, informing you of special conditions. The following reasons are used with SYSTEM HOLDDATA for your product:
ACTION
Indicates that you must perform special processing before or after you apply this SYSMOD.
AO
Affects automated operations. It changes either the message identifier or the displacement of a field inside the message.
DB2BIND
Indicates that DBRMs have changed and packages need to be rebound.
DDDEF
Indicates that data sets and DDDEFs are being added or modified.
DELETE
Deletes the SYSMOD load module. You cannot reverse this type of SYSMOD with the SMP/E RESTORE command.
DEP
Indicates a dependency for this SYSMOD that you must externally verify.
DOC
Indicates a documentation change with this SYSMOD.
EXIT
Indicates that changes delivered by this SYSMOD require reassembly of user exits.
EXRF
Indicates that the SYSMOD must be installed in both the Active and Alternate Extended Recovery Facility Systems.
IPL
Indicates that an IPL is required for this SYSMOD to take effect. This is used only when there is no alternative for dynamic activation.

Apply Maintenance
Chapter 4: Installing Your Product from Pax-Enhanced ESD 41
MULTSYS
Apply this SYSMOD to multiple systems for either pre-conditioning, coexistence, or exploitation.
Code a bypass operand on your APPLY command to install SYSMODs that have internal holds. Code the bypass operand only after you have performed the required action, or if you are performing the action after the APPLY, if that is appropriate.
External HOLDDATA
External HOLDDATA is not part of the PTF. The HOLDDATA resides in a separate file. The HOLDDATA is commonly used for SYSMODs that have been distributed and later are discovered to cause problems.
Download the external HOLDDATA from CA Support to a DASD file, and allocate the file to the SMPHOLD DD statement. To take care of the external HOLDDATA, receive it into your SMP/E environment. SMP/E receives the HOLDDATA from CA-supplied jobs.
If a SYSMOD has an unresolved hold error, SMP/E does not install it unless you add a bypass to your APPLY command. You can bypass an error hold in situations that are not applicable to you. Error holds that are not applicable to you can include a problem that happens only with a hardware device that you do not have or in a product feature that you do not use.
When CA Technologies publishes a SYSMOD that resolves the hold, the resolving SYSMOD supersedes the hold error. This action lets you apply the original SYSMOD in conjunction with the fixing SYSMOD.
A special HOLDDATA class that is called ERREL exists. We have determined that the problem fixed by the SYSMOD is more important than the one that it causes. We recommend that you apply these SYSMODs.
The only manual task is running a REPORT ERRSYSMODS. This report identifies the following:
■ Any held SYSMODs already applied to your system
■ Any resolving SYSMODs that are in RECEIVE status
SMP/E identifies the SYSMOD to apply to correct the situation.


Chapter 5: How to Configure Without CA MSM 43
Chapter 5: How to Configure Without CA MSM
The topic in this section describes the manual tasks you perform if you are not configuring your product using CA MSM.
Summary of Configuration Steps
The following list summarizes the steps involved in configuring CA JCLCheck Common Component. Use these steps if you do not currently have a version of the full CA JCLCheck product installed.
1. Establish CA JCLCheck Common Component as APF Authorized (see page 43).
2. Customize CAZ2UTAB (see page 45).
Establish CA JCLCheck Common Component as APF Authorized
An increasing number of CA JCLCheck Common Component options require authorization to accomplish their purpose. We recommend that you place CA JCLCheck Common Component modules in a common load library with other CA Technologies products and that the library is APF authorized. This way, you do not have to concern yourself whether options need authorization. You insulate yourself from future changes that could require authorization.
Note: For more information about using these options, see the Runtime Options in the Command Reference Guide.
The following options require APF authorization:
Option Qualifier
ASM2 All options
AUTOPROC All options
HCD All options

Summary of Configuration Steps
44 Installation and Configuration Guide
Note: Authorization is also required for processing JCLLIB statements as HCD is used to support this statement.
Loading ISPF Support: CA JCLCheck Common Component does not support the ISPLLIB option of ISPF. CA JCLCheck Common Component programs are only loaded from LINKLIST, JOBLIB, STEPLIB, or TSOLIB!
CA ASM2, AUTOPROC, and HCD require CA JCLCheck Common Component to run authorized. CA ASM2 support allows CA JCLCheck Common Component to identify those data sets that are under CA ASM2. AUTOPROC is the automatic PROCLIB recognition option. HCD activates hardware configuration definition support for dynamically defined devices. If you select any one of these options, authorize CA JCLCheck Common Component modules (link with AC=1) and put them in an Authorized Program Facility (APF) library. Also, if CA JCLCheck Common Component is to run authorized in a TSO environment, TSO/E and a TSO authorization update is required.
To accomplish this APF requirement, do one of the following tasks:
■ Copy CA JCLCheck Common Component load modules to an APF library or a linklist library
■ Add CAI.CAZ2LOAD to either the APF list (IEAPFxx) or the linklist (LNKLSTxx).
We recommend that you use a linklist library that is also named in the APF list of the system. Be aware when non-authorized libraries are concatenated with authorized libraries, authorization is turned off for all of the libraries in the concatenation.
Important! CA JCLCheck Common Component load modules have numerous ALIAS names. Do not attempt to copy CA JCLCheck Common Component load modules using an online utility from one library to another. Instead, if you must copy the load modules, always tailor then run the CAZ2JCL member AJ6CAPF in batch. If you do not copy the base module with all of its aliases in one operation, then you create multiple load modules. These modules could cause execution and maintenance problems.
To authorize CA JCLCheck Common Component within TSO/E, update the Authorized TSO Service Facility table:
AUTHTSF—Authorized TSO Service Facility Add CAZ2CTSO
Entries for AUTHTSF are specified in the IKJTSOxx member of SYS1.PARMLIB. You can update the IKJTSO00 tables without an IPL by using the IBM TSO PARMLIB command.
If the PARMLIB command is used, TSO/ISPF users that are currently logged on have to log out and log back in again before their TSO session uses the updated AUTHTSF definition.

Summary of Configuration Steps
Chapter 5: How to Configure Without CA MSM 45
TSO/E option
When running under ISPF (which is not authorized), CA JCLCheck Common Component automatically recognizes that TSO/E is installed and uses the TSOLNK TSO service facility to obtain authority. You do not have to specify this option. This option is ignored when running CA JCLCheck Common Component in batch. When running under an ISPF environment, be aware that the TSOLNK service is strictly a TSO service, ISPF does not provide it. Therefore, this service does not recognize any modules in an ISPLLIB concatenation.
Customize CAZ2UTAB (unit name table)
Use the CAZ2UTAB CSECT to determine device types for the DD statement UNIT=value when using the NORUNTIM option or the CA JCLCheck Common Component. CAZ2UTAB controls the validations that are performed, which are unique to a specific device type, for example, space allocation.
The CAZ2UTAB CSECT supplies unit name/device type equivalences. Unit names not defined in CAZ2UTAB are processed as 3390 direct-access devices.
The CSECT consists of one or more 10-byte entries, and a single X'FF' byte terminates it. Each entry consists of an 8-byte unit name and a 2-byte device type code. Device type codes correspond to the last 2 bytes of the UCBTYP field, as documented in various IBM manuals.
Some of the more common codes include:
Device Type Hex String
2305 2006
3330 (model1) 2009
3340 200A
3350 200B
3375 200C
3330-I (model 2) 200D
3380 200E
3390 200F
9345 2004

Summary of Configuration Steps
46 Installation and Configuration Guide
The default CAZ2UTAB CSECT supplied with CA JCLCheck contains the following entries:
CAZ2UTAB CSECT
DC CL8'3420',X'8003'
DC CL8'3480',X'8080'
DC CL8'3490',X'8081'
DC CL8'3590',X'8083'
DC CL8'3590-1',X'8083'
DC CL8'CART',X'8080'
DC CL8'SYSDA',X'200F'
DC CL8'SYSALLDA',X'200F'
DC CL8'DISK',X'200F'
DC CL8'3380',X'200E'
DC CL8'3390',X'200F'
DC X'FF' END OF TABLE
END
For the JCL to RECEIVE and APPLY the customizations to CAZ2UTAB, refer to the member MZ2C045 in CAZ2JCL.

Chapter 6: Migration Information 47
Chapter 6: Migration Information
This section contains the following topics:
Migration Considerations (see page 47)
Migration Considerations
If you have installed another CA Technologies product, you may have already installed the CA JCLCheck Common Component. CA JCLCheck Common Component Version 12.0 is a replacement for Version 11.0. We recommend that you install CA JCLCheck Common Component V12.0 into separate SMP CSI zones and separate SMP target libraries. This enables your V11.0 to remain functional while you complete the installation and verification of V12.0.