Embed Size (px)
Citation preview
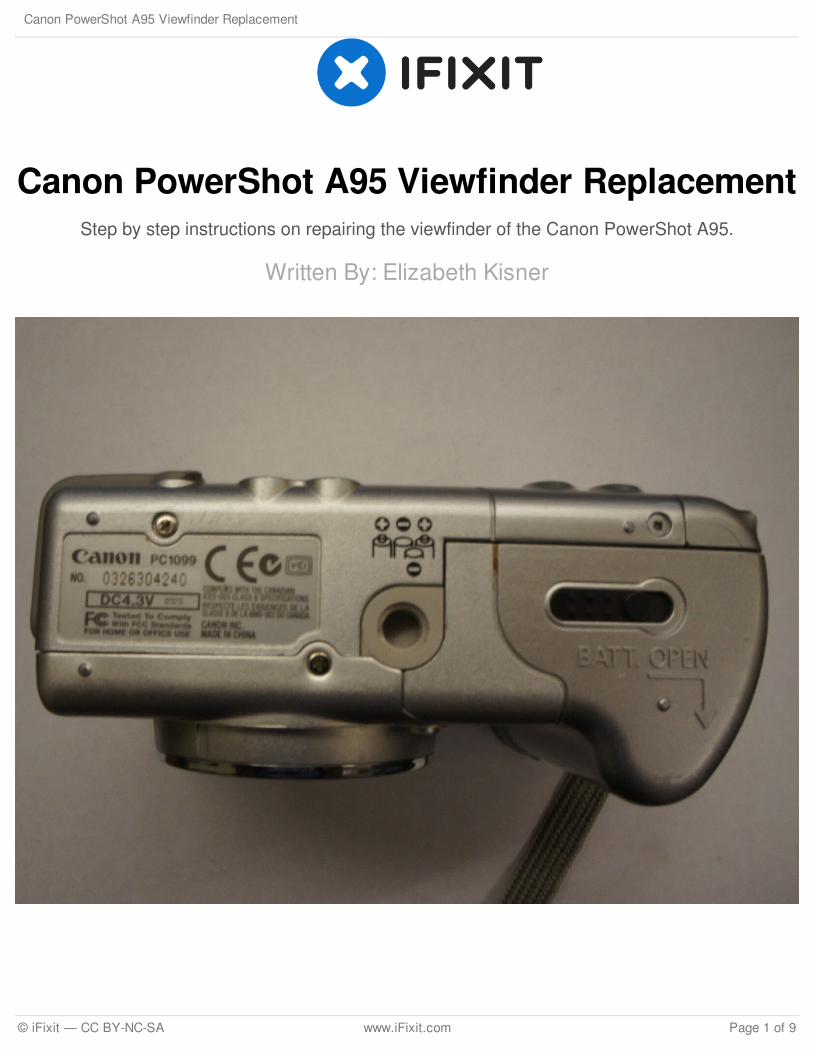
Canon PowerShot A95 Viewfinder ReplacementStep by step instructions on repairing the viewfinder of the Canon PowerShot A95.
Written By: Elizabeth Kisner
Canon PowerShot A95 Viewfinder Replacement
© iFixit — CC BY-NC-SA www.iFixit.com Page 1 of 9
INTRODUCTION
This guide will allow you to repair or replace the viewfinder of the Canon PowerShot A95.
TOOLS:Phillips #00 Screwdriver (1)
A magnetic screwdriver is preferable but notnecessary.
Spudger (1)
iFixit Opening Tools (1)
Canon PowerShot A95 Viewfinder Replacement
© iFixit — CC BY-NC-SA www.iFixit.com Page 2 of 9
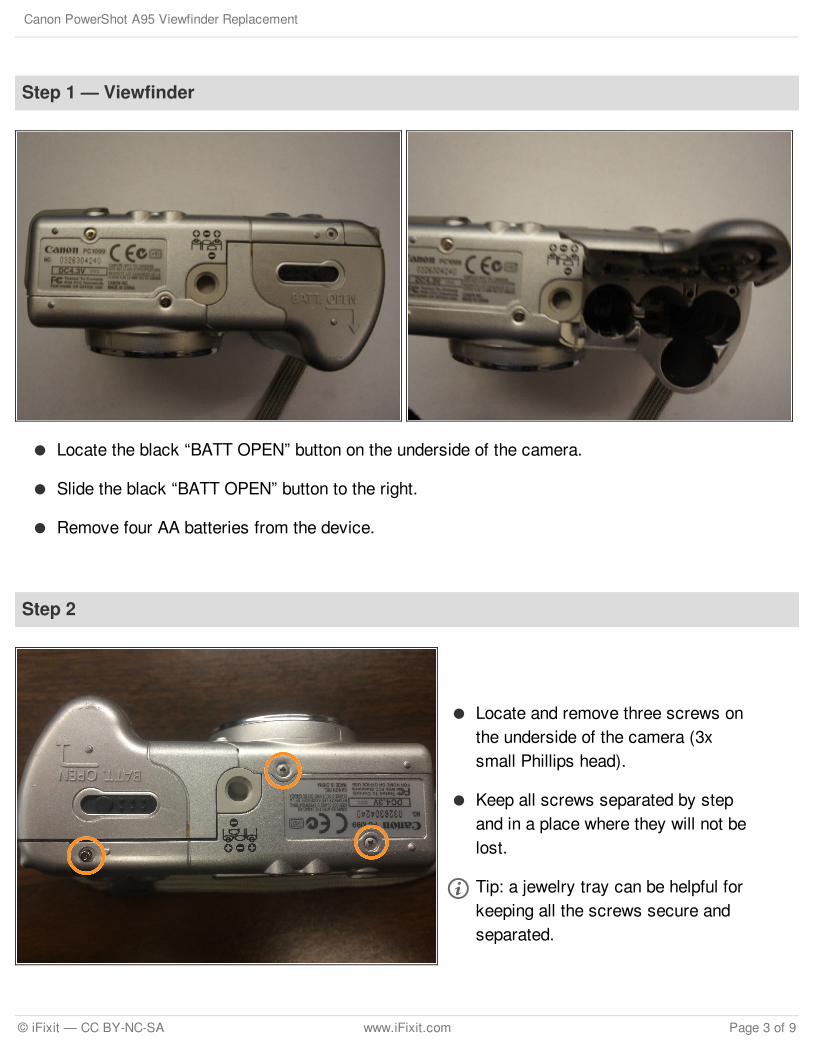
Step 1 — Viewfinder
Locate the black “BATT OPEN” button on the underside of the camera.
Slide the black “BATT OPEN” button to the right.
Remove four AA batteries from the device.
Step 2
Locate and remove three screws onthe underside of the camera (3xsmall Phillips head).
Keep all screws separated by stepand in a place where they will not belost.
Tip: a jewelry tray can be helpful forkeeping all the screws secure andseparated.
Canon PowerShot A95 Viewfinder Replacement
© iFixit — CC BY-NC-SA www.iFixit.com Page 3 of 9
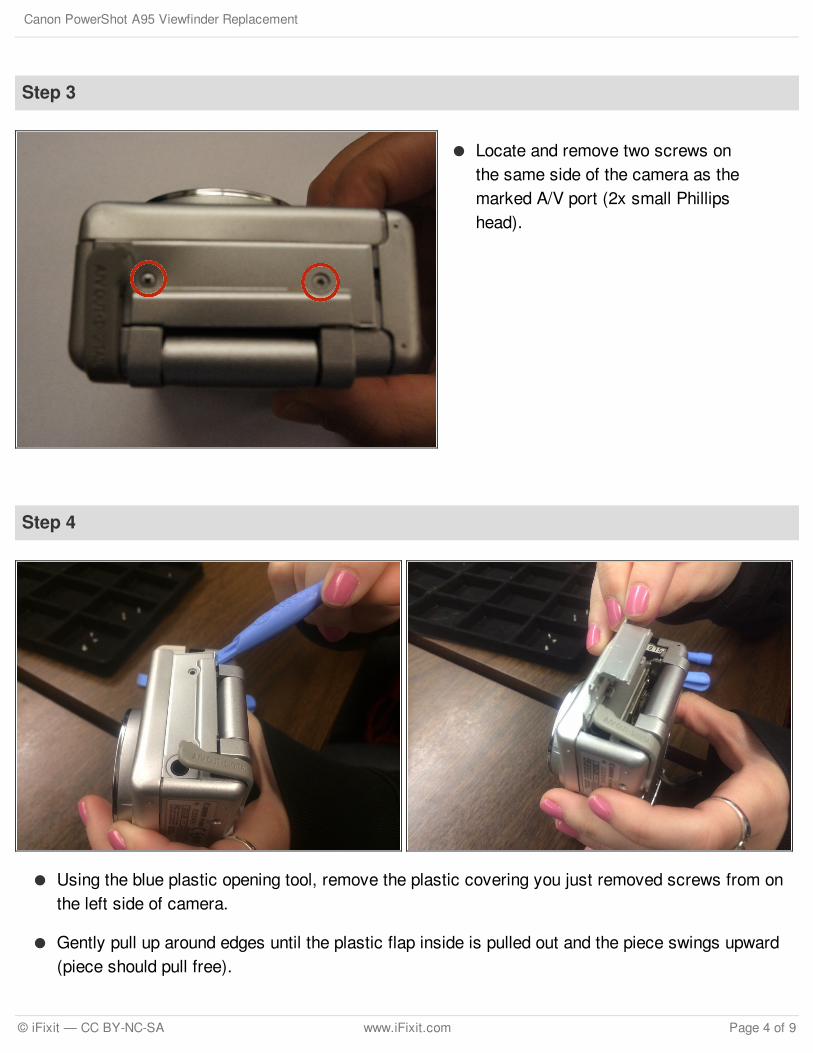
Step 3
Locate and remove two screws onthe same side of the camera as themarked A/V port (2x small Phillipshead).
Step 4
Using the blue plastic opening tool, remove the plastic covering you just removed screws from onthe left side of camera.
Gently pull up around edges until the plastic flap inside is pulled out and the piece swings upward(piece should pull free).
Canon PowerShot A95 Viewfinder Replacement
© iFixit — CC BY-NC-SA www.iFixit.com Page 4 of 9

Step 5
Remove indicated screw holdingfront of camera in place.
Step 6
Push against the memory card cover in order to pull it outward toward you to reveal a screwunderneath.
Remove this screw (Phillips head).
Canon PowerShot A95 Viewfinder Replacement
© iFixit — CC BY-NC-SA www.iFixit.com Page 5 of 9
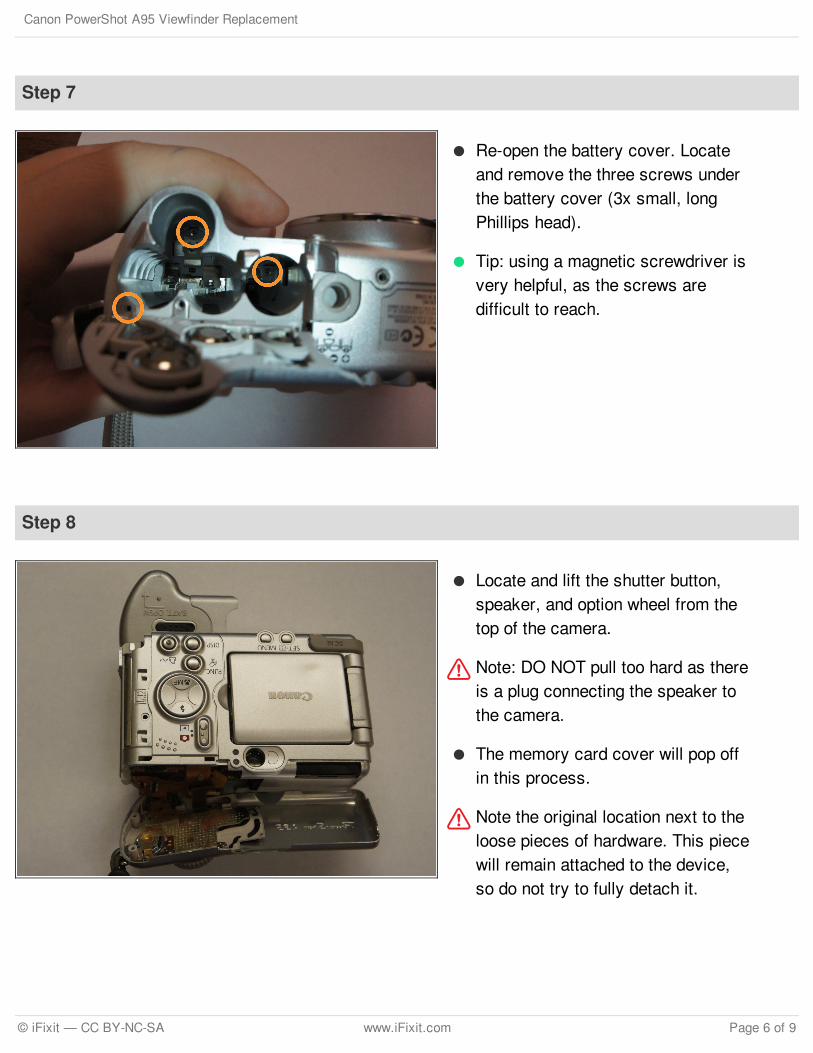
Step 7
Re-open the battery cover. Locateand remove the three screws underthe battery cover (3x small, longPhillips head).
Tip: using a magnetic screwdriver isvery helpful, as the screws aredifficult to reach.
Step 8
Locate and lift the shutter button,speaker, and option wheel from thetop of the camera.
Note: DO NOT pull too hard as thereis a plug connecting the speaker tothe camera.
The memory card cover will pop offin this process.
Note the original location next to theloose pieces of hardware. This piecewill remain attached to the device,so do not try to fully detach it.
Canon PowerShot A95 Viewfinder Replacement
© iFixit — CC BY-NC-SA www.iFixit.com Page 6 of 9
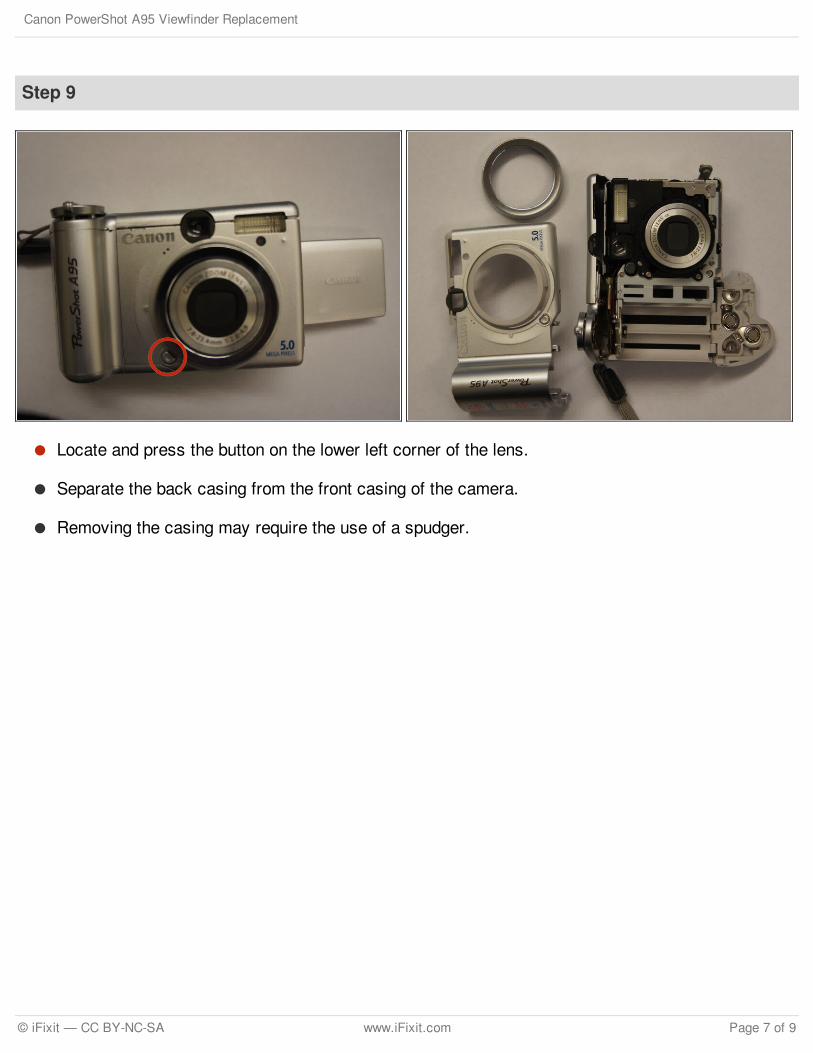
Step 9
Locate and press the button on the lower left corner of the lens.
Separate the back casing from the front casing of the camera.
Removing the casing may require the use of a spudger.
Canon PowerShot A95 Viewfinder Replacement
© iFixit — CC BY-NC-SA www.iFixit.com Page 7 of 9

To reassemble your device, follow these instructions in reverse order.
Step 10
Twist the LCD screen so it is perpendicular to the camera and snap the back casing off.
This piece will remain attached to the device, so do not try to fully detach it.
Step 11
Carefully jiggle the viewfinder until it comes loose from the camera.
Canon PowerShot A95 Viewfinder Replacement
© iFixit — CC BY-NC-SA www.iFixit.com Page 8 of 9

This document was last generated on 2017-06-26 09:06:28 AM.
Canon PowerShot A95 Viewfinder Replacement
© iFixit — CC BY-NC-SA www.iFixit.com Page 9 of 9