Embed Size (px)
Citation preview

Virginia Panel Corporation 1
Ver. 2.7 CASS USER’S MANUAL
CASS Interface System Parts — Section 1
Receiver
VPC P/N CASS P/N Description310 115 101 1899AS265-01 CASS Receiver Interface, accepts 19 Modules
Interface Device
VPC P/N CASS P/N Description410 113 101 1899AS279-01 CASS ID Frame, accepts 19 Modules
Receiver Modules
VPC P/N CASS P/N Description510 113 120 1899AS266-02 Power Module (RCVR), 76 Positions, for Discrete Wiring (40, 20 AMP and 36, 10 AMP Hi-Density for 14 AWG)510 113 121 1899AS269-02 Coaxial Module (RCVR), 64 Positions, for Discrete Wiring or for side PCB Mount510 113 122 1899AS271-02 Coaxial Module (RCVR), 64 Positions, for Center PCB Mount510 113 124 1899AS275-02 Signal Module (RCVR) with 210 Contacts for Right Angle PCB Mounting510 113 125 1899AS273-02 Signal Module (RCVR), 210 Positions, for Discrete Wiring
ID Modules
VPC P/N CASS P/N Description510 114 106 1899AS286-01 Signal Module (ID), 210 Positions, for Discrete Wiring510 114 107 1899AS280-01 Power Module (ID), 76 Positions, for Discrete Wiring (40, 20 AMP and 36, 10 AMP Hi-Density for 14 AWG)510 114 108 1899AS283-01 Coaxial Module (ID), 64 Positions, for Discrete Wiring510 114 109 1899AS285-01 Coaxial Module (ID), 64 Positions, for Center PCB Mounting
Blank Modules
VPC P/N CASS P/N Description510 113 106 1899AS288-01 Blank Module for ID and Receiver
Receiver Contacts
VPC P/N CASS P/N Description610 104 114 1899AS270-01 Mini Coaxial Contact (RCVR), 50 OHM, for RG316610 104 141 1899AS270-02 Mini Coaxial Contact (RCVR), 50 OHM, for RG178610 104 142 2038AS397-01 Mini Coaxial Contact (RCVR), 50 OHM, Solder Sleeve for RG316 or RG178610 110 122 1899AS276-01 Hi-Density Signal Contact (RCVR), for PCB Mounting Row #1610 110 123 1899AS276-02 Hi-Density Signal Contact (RCVR), for PCB Mounting Row #2610 110 124 1899AS276-03 Hi-Density Signal Contact (RCVR), for PCB Mounting Row #3610 110 125 1899AS274-01 Hi-Density Signal Contact (RCVR), for Crimp or Solder, 50µ AU610 110 174 1899AS268-01 Hi-Density Power Contact (RCVR), 10 AMP for 14 AWG610 116 112 1899AS267-01 Mini Power Contact (RCVR), 65 AMP for 8 AWG
* Indicates that no CASS P/N has been assigned to this part

2 VMCASSUS
CASS USER’S MANUAL Ver. 2.7
CASS Interface System Parts — Section 1
ID Contacts
VPC P/N CASS P/N Description610 103 115 1899AS284-01 Mini Coaxial Contact (ID), for RG316 - 30µ AU610 103 130 1899AS284-02 Mini Coaxial Contact (ID), for RG178 - 30µ AU610 103 157 1899AS284-03 Mini Coaxial Contact (ID), for RG178 - 50µ AU610 103 159 1899AS284-04 Mini Coaxial Contact (ID), for RG316 - 50µ AU610 103 140 2038AS396-01 Mini Coaxial Contact (ID), Solder Sleeve® for RG316 or RG178 - 30µ AU610 103 158 2038AS396-02 Mini Coaxial Contact (ID), Solder Sleeve® for RG316 or RG178 - 50µ AU610 110 108 1899AS287-01 Hi-Density Signal Contact (ID), for Crimp or Solder, 30µ AU610 110 172 1899AS282-01 Hi-Density Power Contact (ID), 10 AMP for 14 AWG610 110 146 1899AS287-02 Hi-Density Signal Contact (ID), for Crimp or Solder610 110 173 1899AS282-02 Hi-Density Power Contact (ID), 10 AMP for 14 AWG, 50µ AU610 115 124 2038AS418-01 Mini Power Contact (ID), 50 AMP for 8 AWG
Crimping Tools & Accessories
VPC P/N CASS P/N Description910 101 102 * MS31 Microcrimp Tool for Hi-Density Power Contact (ID & Receiver)910 101 103 * Microcrimp Tool for Hi-Density Signal Contact (ID & Receiver)910 101 115 * Hex Crimp Tool for Mini Coax Contact910 104 107 * Locating Die for Hi-Density Signal Contact (ID & Receiver)910 104 116 * Locating Die for Hi-Density Receiver Power Contact910 104 118 * Locating Die for Hi-Density ID Power Contact
Insertion & Extraction Tools
VPC P/N CASS P/N Description910 110 102 * Extraction Tool for Signal Contact (ID & Receiver)910 112 104 * Extraction Tool for Mini Coax and Power Contacts (ID & Receiver)
Quality Control Tools & Accessories
VPC P/N CASS P/N Description910 121 119 * Center Conductor Forming Tool for female Mini Coax Contact910 121 126 * Outer Shield Conductor Forming Tool for Male Mini Coax Contact910 121 131 * Weight Gage Kit for female Mini Coax Contact910 121 142 * Outer Shield Conductor Expanding Tool for Male Mini Coax Contact910 121 143 2038AS393 Center Conductor Enlargement Tool for Female Mini Coax Contact910 121 155 * Weight Gage Kit for male Mini Coax Contact910 121 156 * Inspection Gage Kit to verify depth setting for center conductor on female Mini Coax Contact910 121 157 * Inspection Gage to verify depth setting of conductor on male Mini Coax Contact
Soldering Tools & Accessories
VPC P/N CASS P/N Description910 121 144 * Solder Kit for Solder Sleeve Mini Coax Contact910 121 147 * Super Heater Gun with Reflector for Solder Sleeve Mini Coax Contact910 121 148 * Mini Heater Gun with Reflector for Solder Sleeve Mini Coax Contact910 121 149 * Holding Fixture Adapter for Solder Sleeve Mini Coax Contact
* Indicates that no CASS P/N has been assigned to this part

Virginia Panel Corporation 3
Ver. 2.7 CASS USER’S MANUAL
Installation/Removal — Section 2
Receiver Module Installation/Removal
Place the Module in the Receiver until the upper and lower module screws touch the mating holes in the inner frame of the Receiver.
Using a 3/16” socket wrench, tighten the top screw while pushing lightly against the face of the module. Tighten the bottom screw. Torque the screw until it is 3 to 4 inch pounds (clamping load 175 to 200 pounds).
To remove, loosen the bottom screw completely. Then loosen top screw to remove module assembly.
Caution - Improper installation/removal could result in the failure of the Jackscrew!
ID Module Installation/Removal
Install the Module in the ID until the upper and lower module screws touch the mating holes in the inner frame of the ID.
Using a 7/64” hex wrench, tighten the top screw while pushing lightly agianst the face of the module. Tighten the bottom screw. Torque the screw until it is 3 to 4 inch pounds (clamping load 175 to 200 pounds).
To remove, loosen the bottom screw completely. Then loosen top screw to remove module assembly.
Receiver Hi-Density Contact Removal
Remove the two cap securing screws using a Phillips screwdriver (the Module does not have to be removed from the system). Re-move the cap. Place the Signal Contact Extraction Tool (VPC P/N 910 110 102) over the Contact to be removed/replaced until the Tool touches the face of the Module - releasing the locking tab. Press on Tool. The spring action in the Tool will extract the Contact. Replace the Contact (if needed), cap and screws. CAUTION - rotate tool slightly prior to pushing out contact to ensure that the retaining ring’s ears have collapsed.
When replacing the upper portion of the two piece Module, torque both screws 3 to 4 inch pounds using a Phillips screwdriver. Torque above 4 inch pounds can cause serious damage to Module lower portion.
In order to maintain contact, float wires should be restrained a minimum of 2 inches from the back face of the Module by us-ing a strain relief plate.
ID Hi-Density Contact Removal
Place the Signal ID Extraction Tool (VPC P/N 910 110 102) over the Contact to be removed/replaced until the Tool touches the face of the Module - releasing the locking tab. Press on Tool. The spring action in the Tool will extract the Contact. On the rear side of the Module, grasp the Contact with your fingers and hold it while removing the Extraction Tool. This will avoid pulling the Contact back into a locked position. CAUTION - rotate tool slightly prior to pushing out contact to ensure that the retaining ring’s ears have collapsed.

4 VMCASSUS
CASS USER’S MANUAL Ver. 2.7
Installation/Removal — Section 2
Receiver Contact Removal from Mini Coaxial and Power Modules
For extraction of the Mini Coaxial and Power contacts remove the Module Cap, modules 510 113 120/1899AS266-02, 510 113 121/1899AS269-02 and 510 113 122/1899AS271-02 use three .086-56 UNC socket head cap screws (510 113 120/1899AS266-02 has an additional two screws due to the extra Hi-Density Power contacts’ cap). Remove the socket head cap screws and the Cap. Use the Coaxial/Power Receiver Contact Extraction Tool (VPC P/N 910 112 104) and insert firmly over the Contact by applying pressure with the shaft. Apply pressure with the handle area only when the Tool has slipped over the retaining ring and has collapsed the tabs (twisting the lower portion of the tool will ensure that the tabs have collapsed). On the rear side of the Module, grasp the Contact with your fingers and hold it while removing the Tool. This will avoid pulling the Contact back into the locked positon.
ID Contact Removal from Mini Coaxial and Power Modules
Use of the Coaxial/Power Receiver Contact Extraction Tool (VPC P/N 910 112 104): With the Tool held straight and parallel to the contacts, apply pressure to the handle area after the Tool has slipped over the retaining ring and has collapsed the locking tabs(twisting the lower portion of the tool will ensure that the locking tabs have collapsed). Damage can occur to the contacts if the Tool is not held parallel to the contacts.
CAUTIONNever probe a contact without using a
mating contact/patchcord as a probe to avoid damaging the contact(s) being tested.

Virginia Panel Corporation 5
Ver. 2.7 CASS USER’S MANUAL
General Operating Procedures and Precautions — Section 3
Mounting an Enclosure on an ID - The CASS specification requires stainless steel screws be used in certain IDs (P/N 410 113 111, 410 113 117 and 410 113 118), which has been known to cause self-locking helicoils to seize or pull out. It is recommended when us-ing heat treated unplated or stainless steel screws, an anti-seize compound, e.g., molybden disulfide, must be used in order to mini-mize galling and assure maximum cycle life.
Engaging ID with Receiver
Listed below are the required steps to be taken prior to the engagement of the ID and Receiver.
1. The handle of the Receiver has been designed in such a way as to provide maximum leverage by allowing the handle to extend. The user can extend the Receiver’s handle by pushing the slotted handle part up until it extends above the Receiver. The handle may now allow itself to be rotated to the lowered position, allowing the ID to be inserted.
2. Prior to engaging an ID with the Receiver for the first time, the user must check to see if all the Modules (ID and Receiver) have been installed properly. This would involve the inspection of the Module ends - ensuring the even height of all Module ends relative to one- another. While checking this, the user should verify the positioning of the modules themselves. It is crucial for all modules to be installed properly! Improper installation will cause damage to the modules and possibly to the ID and/or Receiver. All ID Modules have to match the Receiver Modules. This means that upon engaging, an ID Module will mate with its respective Receiver Module (Power ID to mate with Power Receiver, etc.).
3. The ID, upon being inspected, is now ready for engagement with the Receiver. The Receiver should be checked one last time for any foreign objects that may hinder the engagement. The top rollers of the ID may then be placed onto the Receiver’s built-in “hangers” with the handle in the closed (and handle not extended) position. The ID may be engaged with the Receiver only if properly lined up - meaning that the ID must be placed onto the Receiver in the upright position. Care should be taken to have the top/side notch of the ID align for “mating” with the keying tab on the top of the Receiver.
4. Due to additional equipment being added onto the ID, the user may find that the ID and Receiver will not line up as described above. One reason may be that the additional weight on the ID will cause it to pull away from the Receiver at the top. The user should apply pressure to the top of the ID to counter the weight that is pulling the top of the ID away from the Receiver (with the Receiver handle in the “open” position). The user may then carefully engage the system by raising the handle until the handle makes contact with the Receiver. The handle may now be allowed to slide down to it’s storage position.
In the event of complications, such as improper alignment of modules or the ID, a trained technician should be notified immediately to avoid any damage to the system. This should also apply to any difficulties that may be experienced during engagement.
NOTE: The ID and Receiver have been cycled 36,000 times with a 25 lb. weight attached to the ID (extended 6 inches from center of ID) without having any of the contacts breaking continuity or having any parts of the system fail or show significant signs of wear. This life cycle test data may change if the weight of the ID is increased.
CAUTION
• When engaging the ID with the Receiver, caution must be taken to ensure that the ID is parallel with the Receiver upon engagement and that the ID rollers are engaged at the same time!
• All power supplies for the system should be properly disconnected prior to handling. Caution should always be used when engaging, making sure that all foreign objects are removed from the system.
6 VMCASSUS
CASS USER’S MANUAL Ver. 2.7
General Maintenance — Section 4
Care & Maintenance of Interface Device (ID)
The CASS Interface System has been designed to be maintenance free, yet care does need to be taken when handling the ID.
Micro-Switch Removal & Installation
The CASS Interface System has been designed to be maintenance free. The only maintenance that is needed for the system to con-tinue functioning effortlessly is the Micro-switch. For replacement of the Microswitch the following steps need to be followed.
1. Disengage the ID from the Receiver (remove the ID completely). 2. With the Receiver Handle still in the open position (Handle down), unscrew the two plate retaining screws (using a Phillips screwdriver) that are located immediately above the top right engaging mechanism/slot - this will expose the Microswitch. 3. Remove the necessary Modules so that the Microswitch retaining screws may be accessed. 4. Unscrew the retaining screws (using a Phillips screwdriver) removing each as they are loosened (caution should be used so that the screw(s) don’t fall into the system). 5. Carefully remove the Microswitch for continuity testing.
For Microswitch installation, repeat steps 1-5 in reverse order.
Microswitch is P/N 010025.
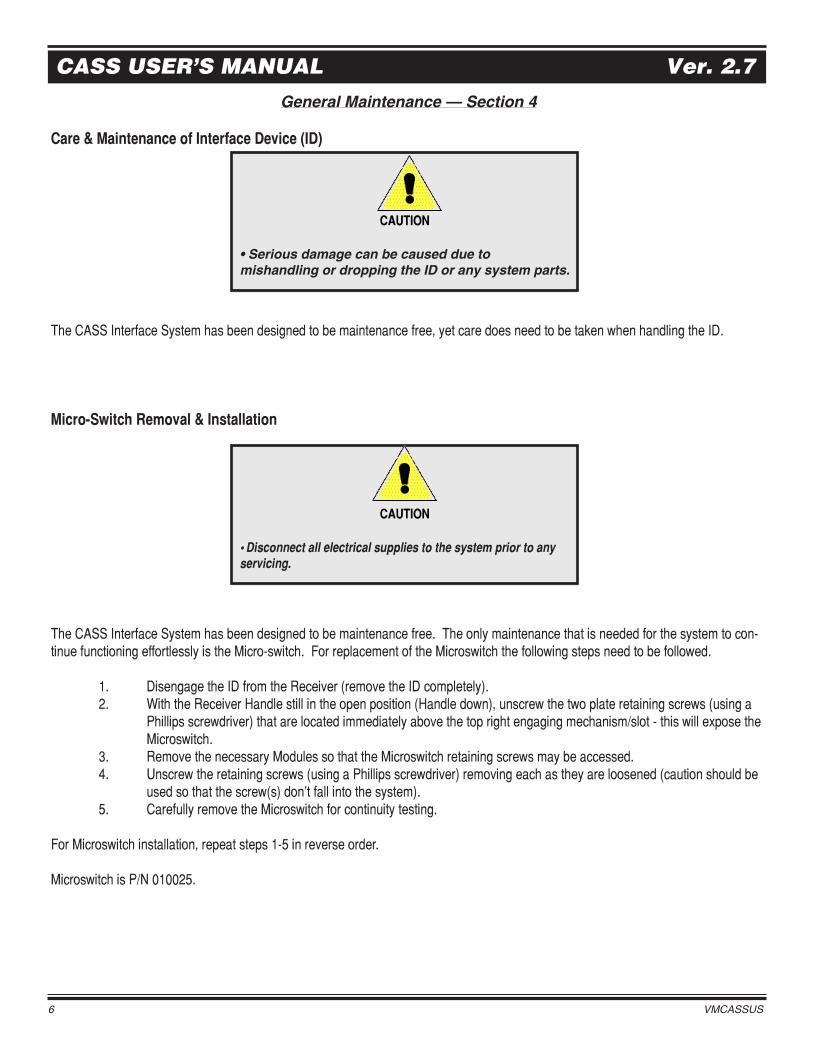
CAUTION
• Disconnect all electrical supplies to the system prior to any servicing.
CAUTION
• Serious damage can be caused due to mishandling or dropping the ID or any system parts.

Virginia Panel Corporation 7
Ver. 2.7 CASS USER’S MANUAL
Wiring Assembly Requirements — Section 5
Virginia Panel Corporation has been providing the ATE market with quality parts and accessories for several years. It is VPC’s goal to continue to provide high performance and quality parts.
To ensure that the same level of quality is maintained, VPC expects from its Interface System users that all components used in operating, servicing and adjusting meet certain guidelines. These guidelines are available from VPC directly and are supplied with the Interface Systems.
VPC, in its attempt to perfect its product lines, takes field studies seriously. Observations have revealed that some users are not fol-lowing VPC’s procedures and are not using VPC tools for the proper assembly of the VPC Contacts. The user must strickly adhere to/follow the Assembly Instruction Sheets that are available from and provided by VPC.
The following Assembly Instructions Sheets are available:
Description VPC P/N CASS P/N
Hi-Density
Hi-Density Signal ID 610 110 108 1899AS287-01
Hi-Density Signal Receiver 610 110 125 1899AS274-01
Hi-Density Power Receiver 610 110 174 1899AS268-01
Hi-Density Power ID 610 110 172 1899AS282-01
Hi-Density Signal ID 610 110 146 1899AS287-02
Hi-Density Power ID 610 110 173 1899AS282-02
Solder Sleeve
Solder Sleeve Mini Coaxial ID for RG316 610 103 140 2038AS396-01
Solder Sleeve Mini Coaxial ID for RG178 610 103 140 2038AS396-01
Solder Sleeve Mini Coaxial Receiver for RG316 610 104 142 2038AS397-01
Solder Sleeve Mini Coaxial Receiver for RG178 610 104 142 2038AS397-01
Solder Sleeve Mini Coaxial ID for RG316 610 103 158 2038AS396-02
Solder Sleeve Mini Coaxial ID for RG178 610 103 158 2038AS396-02
Mini Coaxial
Mini Coaxial Receiver Terminal (50 OHM) for RG316 610 104 114 1899AS270-01
Mini Coaxial Receiver Terminal (50 OHM) for RG178 610 104 141 1899AS270-02
Mini Coaxial ID Terminal (50 OHM) for RG316 610 103 115 1899AS284-01
Mini Coaxial ID Terminal (50 OHM) for RG178 610 103 130 1899AS284-02
Mini Coaxial ID Terminal (50 OHM) for RG178 610 103 157 1899AS284-03
Mini Coaxial ID Terminal (50 OHM) for RG316 610 103 159 1899AS284-04

8 VMCASSUS
CASS USER’S MANUAL Ver. 2.7
Fig. B
Wiring Assembly Instructions — Section 5P/N 610 110 108, 610 110 125, 610 110 146
CASS P/N 1899AS287-01, 1899AS274-01, 1899AS287-02
Set up crimp tool P/N 910 101 103 (Fig. A) by loosening the latch locking screw (counter-clockwise, until turning stops). Remove any previously used crimp contact locator. Insert the open end of crimp contact locator P/N 910 104 107 into crimp tool contact locator retainer. Slide the retaining latch toward contact locator until contact locator is securely locked into place. The contact locator may have to be twisted to allow latch to retain contact locator. Tighten latch locking screw.
Using the table below, adjust the crimp tool setting by pulling adjusting knob and turning it at the same time (clockwise increases, counter-clockwise decreases setting) until the desired setting is achieved on the microcrimp indicator.
*Recommended maximum wire gauge is 22 AWG, however, 18 AWG and 20 AWG will work when crimped properly. It is preferred that wire 26 AWG or smaller be soldered.
Using the table above, determine the strip length according to wire gauge. Strip wire. Fully insert stripped wire into contact P/N 610 110 146/1899AS287-02 or P/N 610 110 108/1899AS287-01 (Fig. B) P/N 610 110 125/1899AS274-01 (Fig. C). With the crimp tool in the open position, insert the prepared contact and wire through the indenter opening. While keeping the wire fully inserted into the contact, squeeze the handles of the crimp tool until a positive stop is reached. Tool will release and return into fully “open” position. Remove crimped contact and wire.
NOTE: Always drop female contact (without wire attached) into contact locator, allowing it to orient/seat itself properly - squeeze handles of crimp tool slightly to hold contact in position while inserting wire. Note that tool cannot be opened without completing cycle. Never attempt to disassemble tool. Never tighten or loosen stop nuts on back of tool.
Fig. A
Wire Gauge Strip Length +.05 -0.0 Crimp Max Crimp Min. Pullout force (lbs.)
18* .25 .043 .041 10
20* .25 .037 .033 10
22 .19 .033 .029 10
Fig. C
P/N 610 110 108/1899AS287-01/ 610 110 146/1899AS287-02
P/N 610 110 125/1899AS274-01

Virginia Panel Corporation 9
Ver. 2.7 CASS USER’S MANUAL
Wiring Assembly Instructions — Section 5P/N 610 110 172 & 610 110 173
CASS P/N 1899AS282-01 & 1899AS282-02
Set up crimp tool P/N 910 101 102 (Fig. A) by loosening the latch locking screw (counter-clockwise, until turning stops). Remove any previously used crimp contact locator. Insert the open end of crimp contact locator P/N 910 104 118 into crimp tool contact locator retainer. Slide the retaining latch toward contact locator until contact locator is securely locked into place. The contact locator may have to be twisted to allow latch to retain contact locator. Tighten latch locking screw.
Using the table below, adjust the crimp tool setting by pulling adjusting knob and turning it at the same time (clockwise increases, counter-clockwise decreases setting) until the desired setting is achieved on the microcrimp indicator.
Using the table above, determine the strip length according to wire gauge. Strip wire. Fully insert stripped wire into contact P/N 610 110 172/1899AS282-01 or P/N 610 110 173/1899AS282-02 (Fig. B). With the crimp tool in the open position, insert the prepared contact and wire through the indenter opening. While keeping the wire fully inserted into the contact, squeeze the handles of the crimp tool until a positive stop is reached. Tool will release and return into fully “open” position. Remove crimped contact and wire.
NOTE: Observe precision ratchet action by opening and closing tool fully several times. Note that tool cannot be opened without completing cycle. Never attempt to disassemble tool. Never tighten or loosen stop nuts on back of tool.
Fig. B
Wire Gauge Strip Length +.05 -0.0 Crimp Max. Crimp Min. Pullout Force (lb.)
14 .20 .063 .059 10
16 .20 .059 .055 10
18 .20 .055 .051 10
2-20 .20 .055 .050 10
2-22 .20 .046 .042 10
1-22 & 1-24 .20 .041 .037 8
Fig. A

10 VMCASSUS
CASS USER’S MANUAL Ver. 2.7
Wiring Assembly Instructions — Section 5P/N 610 110 174
CASS P/N 1899AS268-01
Set up crimp tool P/N 910 101 102 (Fig. A) by loosening the latch locking screw (counter-clockwise, until turning stops). Remove any previously used crimp contact locator. Insert the open end of crimp contact locator P/N 910 104 116 into crimp tool contact locator retainer. Slide the retaining latch toward contact locator until contact locator is securely locked into place. The contact locator may have to be twisted to allow latch to retain contact locator. Tighten latch locking screw.
Using the table below, adjust the crimp tool setting by pulling adjusting knob and turning it at the same time (clockwise increases, counter-clockwise decreases setting) until the desired setting is achieved on the microcrimp indicator.
Using the table above, determine the strip length according to wire gauge. Strip wire. Fully insert stripped wire into contact P/N 610 110 174/1899AS268-01 (Fig. B). With the crimp tool in the open position, insert the prepared contact and wire through the indenter opening. While keeping the wire fully inserted into the contact, squeeze the handles of the crimp tool until a positive stop is reached. Tool will release and return into fully “open” position. Remove crimped contact and wire.
NOTE: Always drop female contact (without wire attached) into contact locator, allowing it to orient/seat itself properly - squeeze handles of crimp tool slightly to hold contact in position while inserting wire. Note that tool cannot be opened without completing cycle. Never attempt to disassemble tool. Never tighten or loosen stop nuts on back of tool.
Wire Gauge Strip Length +.05 -0.0 Crimp Max. Crimp Min. Pullout Force (lbs.)
14 .20 .063 .059 10
16 .20 .059 .055 10
Fig. B
Fig. A

Virginia Panel Corporation 11
Ver. 2.7 CASS USER’S MANUAL
Wiring Assembly Instructions — Section 5VPC P/N 610 103 140/CASS P/N 2038AS396-01
P/N 610 103 158/CASS P/N 2038AS396-02 - RG316
PARTS REQUIRED:
•Solder Kit for Mini Coax includes holding fixture and adapter (P/N 910 121 144) •Adapter (for those who already own a holding fixture) (P/N 910 121 149)•Steinel Heat Gun with Reflector (P/N 910 121 160) or Raychem MiniGun Heater with Reflector (P/N 910 121 148)•Mini Coax Contact (ID) Solder Sleeve (P/N 610 103 140 or 610 103 158)
INSTRUCTIONS:1. Prepare the coaxial cable to the dimensions shown (Fig. A).
2. Straighten the center conductor making sure the stranded center conductor is twisted into its original lay.
3. Pretin stranded center conductor with Sn63 solder per QQ-S-571. Use RMA flux per MIL- F-14256 (Alpha #611 or equivalent).
4. Make sure the shield braid is trimmed evenly and no loose strands are extending out across the exposed dielectric or cable jacket.
5. Smooth the braid ends flat against the cable dielectric.
6. Slip the contact over the end of the prepared cable, and carefully push the contact onto the cable until it stops. Rotating the contact slightly during cable insertion will help prevent the braid from catching.
7. Inspect for proper insertion (Fig. B). The center conductor must be visible through one of the forward inspection windows. The distance from the rear of the contact outer body to the cable jacket insulation should be .065±.015.
8. Install the adapter onto the holding fixture (Fig. C). Insert a contact in the adapter side marked “P” for pin and set up the dimensions as shown in Figure C.
9. Insert the contact/cable assembly into the adapter. Clamp the cable in the holding fix-ture. The cable must remain fully inserted in the contact and the contact must be fully inserted in the adapter (for the adapter to act as a heat sink). The cable must be straight between the contact and the cable clamp.
10. Attach the appropriate reflector to the heating tool (see separate Heat Gun instruction sheet included with tool for tool operation and safety precautions).
11. Using the holding fixture, position the contact in the heating tool reflector, with the forward inspection window centered in the reflector. Continue heating until the small solder preform in the forward inspection window has melted and flowed. The large solder preform in the rear inspection window should have melted and flowed by this time; if it has not, direct hot air at the rear inspection window until it does.
12. If contact is UNDERHEATED, there will be visible remnants of the original shapes of the solder preforms. An underheated contact must be reheated. If contact is OVERHEATED, solder will wick away from the joint areas, leaving no solder fillets. An overheated contact must be removed and a new contact installed.
13. After the contact has cooled for at least 10 seconds, remove the contact and cable from the holding fixture.
14. Inspect the completed termination for correct assembly. The cable shield must extend into the contact at least as far as the front edge revised 6/11/02
Fig.

12 VMCASSUS
CASS USER’S MANUAL Ver. 2.7
Wiring Assembly Instructions — Section 5VPC P/N 610 103 140/CASS P/N 2038AS396-01
P/N 610 103 158/CASS P/N 2038AS396-02-RG178
PARTS REQUIRED:•Solder Kit for Mini Coax includes holding fixture and adapter (P/N 910 121 144) •Adapter (for those who already own a holding fixture) (P/N 910 121 149)•Steinel Heat Gun with Reflector (P/N 910 121 160) or Raychem MiniGun Heater with Reflector (P/N 910 121 148)•Mini Coax Contact (ID) Solder Sleeve (P/N 610 103 140 or 610 103 158)
INSTRUCTIONS:1. Strip the coaxial cable to the dimensions shown (Fig. A).
2. Straighten the center conductor making sure the stranded center conductor is twisted into its original lay.
3. Pretin stranded center conductor with Sn63 solder per QQ-S-571. Use RMA flux per MIL-F-14256 (Alpha #611 or equivalent).
4. Fold the center conductor back on itself as shown (Fig. B).
5. Make sure the shield braid is trimmed evenly and no loose strands are extending out across the exposed dielectric or cable jacket. 6. Smooth the braid ends flat against the cable jacket. 7. Slip the contact over the end of the prepared cable, and carefully push the contact onto the cable until it stops. Rotating the contact slightly during cable insertion will help prevent the braid from catching.
8. Inspect for proper insertion (Fig. C). The center conductor must be visible through one of the forward inspection windows. The distance from the rear of the contact outer body to the cable jacket insulation should be .015±.015.
9. Install the adapter onto the holding fixture (Fig. D). Insert a contact in the adapter side marked “P” for Pin and set up the dimensions as shown in Figure D.
10. Insert the contact/cable assembly into the adapter. Clamp the cable in the holding fixture. The cable must remain fully inserted in the contact and the contact must be fully inserted in the adapter (for the adapter to act as a heat sink). The cable must be straight between the contact and the cable clamp.
11. Attach the appropriate reflector to the heating tool (see separate Heat Gun instruction sheet included with tool for tool operation and safety precau tions).
12. Using the holding fixture, position the contact in the heating tool reflector, with the forward inspection window centered in the reflector. Continue heating until the small solder preform in the forward inspection window has melted and flowed. The large solder preform in the rear inspection window should have melted and flowed by this time; if it has not, direct hot air at the rear inspection window until it does.
13. If contact is UNDERHEATED, there will be visible remnants of the origi-nal shapes of the solder preforms. An underheated contact must be reheated. If contact is OVERHEATED, solder will wick away from the joint areas, leaving no solder fillets. An overheated contact must be removed and a new contact installed.
14. After the contact has cooled for at least 10 seconds, remove the contact and cable from the holding fixture.
revised 2/06/02

Virginia Panel Corporation 13
Ver. 2.7 CASS USER’S MANUAL
Wiring Assembly Instructions — Section 5
VPC P/N 610 104 142 - CASS P/N 2038AS397-01 RG316
PARTS REQUIRED:
•Solder Kit for Mini Coax includes holding fixture and adapter (P/N 910 121 144) •Adapter (for those who already own a holding fixture) (P/N 910 121 149)•Steinel Heat Gun with Reflector (P/N 910 121 160) or Raychem MiniGun Heater with Reflector (P/N 910 121 148)•Mini Coax Contact (Receiver) Solder Sleeve (P/N 610 104 142)
INSTRUCTIONS:1. Prepare the coaxial cable to the dimensions shown (Fig. A).
2. Straighten the center conductor making sure the stranded center conductor is twisted into its original lay.
3. Pretin stranded center conductor with Sn63 solder per QQ-S-571. Use RMA flux per MIL-F-14256 (Alpha #611 or equivalent).
4. Make sure the shield braid is trimmed evenly and no loose strands are extending out across the exposed dielectric or cable jacket.
5. Smooth the braid ends flat against the cable dielectric.
6. Slip the contact over the end of the prepared cable, and carefully push the contact onto the cable until it stops. Rotating the contact slightly during cable insertion will help prevent the braid from catching.
7. Inspect for proper insertion (Fig. B). The center conductor must be visible through one of the forward inspection windows. The distance from the rear of the contact outer body to the cable jacket insulation should be .065±.015.
8. Install the adapter onto the holding fixture (Fig. C). Insert a contact in the adapter side marked “S” for Socket and set up the dimensions as shown in Figure C.
9. Insert the contact/cable assembly into the adapter. Clamp the cable in the holding fixture. The cable must remain fully inserted in the contact and the contact must be fully inserted in the adapter (for the adapter to act as a heat sink). The cable must be straight between the contact and the cable clamp. 10. Attach the appropriate reflector to the heating tool (See separate instructions sheet included with tool for tool operation and safety precautions).
11. Using the holding fixture, position the contact in the heating tool reflector, with the forward inspection window centered in the reflector. Continue heating until the small solder preform in the forward inspection window has melted and flowed. The large solder preform in the rear inspection window should have melted and flowed by this time; if it has not, direct hot air at the rear inspection window until it does.
12. If contact is UNDERHEATED, there will be visible remnants of the original shapes of the solder preforms. An underheated contact must be reheated. If contact is OVERHEATED, solder will wick away from the joint areas, leaving no solder fillets. An overheated contact must be removed and a new contact installed.
13. After the contact has cooled for at least 10 seconds, remove the contact and cable from the holding fixture.
14. Inspect the completed termination for correct assembly. The cable shield must extend into the contact at least as far as the front edge of the rear inspection windows. The center conductor must be visible through one of the forward inspection windows.
revised 2/06/02

14 VMCASSUS
CASS USER’S MANUAL Ver. 2.7
Wiring Assembly Instructions — Section 5
VPC P/N 610 104 142 - CASS P/N 2038AS397-01 RG178
PARTS REQUIRED:•Solder Kit for Mini Coax includes holding fixture and adapter (P/N 910 121 144)•Adapter (for those who already own a holding fixture) (P/N 910 121 149)•Steinel Heat Gun with Reflector (P/N 910 121 160) or Raychem MiniGun Heater with Reflector (P/N 910 121 148)•Mini Coax Contact (Receiver) Solder Sleeve (P/N 610 104 142)
INSTRUCTIONS:1. Strip the coaxial cable to the dimensions shown (Fig. A).
2. Straighten the center conductor making sure the stranded center conductor is twisted into its original lay.
3. Pretin stranded center conductor with Sn63 solder per QQ-S-571. Use RMA flux per MIL-F-14256 (Alpha #611 or equivalent).
4. Fold the center conductor back on itself as shown (Fig. B).
5. Make sure the shield braid is trimmed evenly and no loose strands extend out across the exposed dielectric or cable jacket. 6. Smooth the braid ends flat against the cable jacket. 7. Slip the contact over the end of the prepared cable, and carefully push the contact onto the cable until it stops. Rotating the contact slightly during cable insertion will help prevent the braid from catching.
8. Inspect for proper insertion (Fig. C). The center conductor must be visible through one of the forward inspection windows. The distance from the rear of the contact outer body to the cable jacket insulation should be .015±.015.
9. Install the adapter onto the holding fixture (Fig. D). Insert a contact in the adapter side marked “S” for socket and set up the dimensions as shown in Figure D.
10. Insert the contact/cable assembly into the adapter. Clamp the cable in the holding fixture. The cable must remain fully inserted in the contact and the contact must be fully inserted in the adapter (for the adapter to act as a heat sink). The cable must be straight between the contact and the cable clamp.
11. Attach the appropriate reflector to the heating tool (See separate Heat Gun instruction sheet included with tool for tool operation and safety precautions).
12. Using the holding fixture, position the contact in the heating tool reflector, with the forward inspection window centered in the reflector. Continue heating until the small solder preform in the forward inspection window has melted and flowed. The large solder preform in the rear inspection window should have melted and flowed by this time; if it has not, direct hot air at the rear inspection window until it does.
13. If contact is UNDERHEATED, there will be visible remnants of the original shapes of the solder preforms. An underheated contact must be reheated. If contact is OVERHEATED, solder will wick away from the joint areas, leaving no solder fillets. An overheated contact must be removed and a new contact installed.
14. After the contact has cooled for at least 10 seconds, remove the contact and cable from the holding fixture.15. Inspect the completed termination for correct assembly. The cable shield must extend into the contact at least as far as the front edge of the rear inspection windows. The center conductor must be visible through one of the forward inspection windows. revised 2/06/02

Virginia Panel Corporation 15
Ver. 2.7 CASS USER’S MANUAL
Wiring Assembly Instructions — Section 5
VPC P/N 610 104 114 - CASS P/N 1899AS270-01 RG316
VPC Tools Required
For the assembly of the Mini-Coaxial Contact VPC P/N 610 104 114/CASS P/N 1899AS270-01 the following parts are required by VPC:
Tools:
P/N Description
910 121 143 Center conductor enlargement tool for female mini coax contact910 121 119 Center conductor forming tool for mini coax contact910 101 115 Hex crimp tool kit for mini coax contact254108 Hex crimp tool die (part of 910 101 115)254117 Hex crimp tool handle (part of 910 101 115)
Gages & Weights
P/N Description
910 121 156 Inspection gage to verify depth setting of center conductor on female mini coax contact910 121 131 Weight gage kit for female mini coax contact432026000 4.0 oz. weight - part of kit P/N 910 121 131 with tip “B” (432046102)432025000 0.5 oz. weight - part of kit P/N 910 121 131 with tip “A” (432044102)
revised 11/21/01
CAUTIONNever probe a contact without using a
mating contact/patchcord as a probe to avoid damaging the contact(s) being tested.

16 VMCASSUS
CASS USER’S MANUAL Ver. 2.7
WiringAssembly Instructions — Section 5
VPC P/N 610 104 114 - CASS P/N 1899AS270-01 - RG316
1. Strip the outer insulation, cut braid and expose the conductor wire as shown (Fig. A).
2. Slide the crimp ring onto the wire (Fig.B).
3. Turn braid back over outer insulation (Fig. C).
4. Solder wire into center conductor and clean (Fig. D). Cut a 3/16” long piece of solder and place it into the center conductor. Apply heat, using a soldering iron, on the outside of the contact until the solder melts. Insert wire into contact while heat is still being applied until an acceptable solder joint is obtained. Note: Center conductor and dielectric must touch.
5. Slide shield conductor over center conductor until the center conductor stops in the Teflon® shield (Fig. E). Note: Shield Conductor and Teflon® insulator are supplied as an assembly.
Fig. A
Fig. B
Fig. E
Fig. C
revised 01/04/04con’t page 17
Fig. D

Virginia Panel Corporation 17
Ver. 2.7 CASS USER’S MANUAL
Fig. G
Fig. F
Fig. J
Fig. H
Wiring Assembly Instructions — Section 5
VPC P/N 610 104 114 - CASS P/N 1899AS270-01 - RG316
6. Calibrate gage P/N 910 121 156 (Fig. F) by loosening the dial face retaining screw until the dial face allows itself to be turned. In-sert the calibration plug (P/N 414 854 104) into base of gage. While keeping constant pressure on the plug, adjust the dial by rotating it such that the pointer points to “0”. Re-tighten retaining screw. Adjust locating markers to “80” and “40”.
7. Check .06 ± .02 dimensions (Fig. G) with P/N 910 121 156 (Fig. F). Push the contact onto the pressure plunger of the gage (Fig. F). After attaining positive stop and while holding firm pressure, push plunger on top of dial (to push collar over Teflon), read the dial on the gage. Go to step 8 if the indicator is between the two marker bands (“80” & “40”). Repeat steps 1-6 should the range of dimensions not meet the criterion.
8. Check minimum extraction force of 1/2 ounce with 432025000 Assembly (Fig. H). Slide female center conductor over approximately 3/4 of the length of the tip in the weight gage (Fig. I).
The weight gage should remain mated with the center conductor as the center conductor is slowly lifted and suspended in the air. If weight gage remains mated, move to step 9.
If weight gage falls off, the extracrtion force is too low and the center conductor needs to be closed with the center conductor forming tool (P/N 910 121 119) (Fig. J). Recheck 1/2 ounce retention force.
Fig. I
revised 11/21/01con’t page 18

18 VMCASSUS
CASS USER’S MANUAL Ver. 2.7
Wiring Assembly Instructions — Section 5
VPC P/N 610 104 114 - CASS P/N 1899AS270-01 - RG316
9. Check maximum extraction force of 4 ounces with 432026000. Slide female center conductor over approximately 3/4 of the length of the tip in the weight gage (Fig. K). The weight gage should fall off the contact as the contact is slowly lifted and suspended in the air. If weight gage falls off move to step 10. If weight gage remains mated with contact, the extraction force is too high and the center conductor needs to be opened with the center conductor enlarging tool (P/N 910 121 143) (Fig. L).
To enlarge the center conductor, remove it from shield assembly and gently insert the Enlarging Tool into the Center Conductor. Insert Enlarging Tool until Center Conductor stops on shoulder. Be careful not to break or fracture Center Conductor. Recheck 0.5 and 4 ounce retention force - go to step 8.
10. Turn braid back toward the front of the shield conductor (Fig. M).
11. If braid extends beyond shoulder, trim braid back to face of shoulder.
12. Slide crimp ring into position over the braid.
13. Crimp using the Hex Crimp Tool (P/N 910 101 115) (Fig. N) - in Hex Position A for the larger end first and in Hex position B for the smaller section of the crimp ring of 1899AS270-01 (Fig. O). To ensure proper crimp position, slide shield conductor over pin on locator (Fig. P). Wire must not be allowed to pull on center conductor during crimping (for example, long wire hanging down to floor).
Fig. L
Fig. M
Fig. K
Fig. N
Fig. P
Fig. O
Use Caution when using this tool. Insert and remove tool inline with contact to advoid breaking tip of tool or contact!
con’t page 19revised 11/21/01

Virginia Panel Corporation 19
Ver. 2.7 CASS USER’S MANUAL
Wiring Assembly Instructions — Section 5
VPC P/N 610 104 114 - CASS P/N 1899AS270-01 - RG316
14. Repeat step 7 to verify .06 ±.02 dimension with P/N 910 121 156.
15. During installation of contact into module listen for retaining clip ears to spring out, then push on front of contact to ensure that it is locked into position.

20 VMCASSUS
CASS USER’S MANUAL Ver. 2.7
Wiring Assembly Instructions — Section 5
VPC P/N 610 104 141 - CASS P/N 1899AS270-02 - RG178
VPC Tools Required
For the assembly of the Mini-Coaxial Contact VPC P/N 610 104 141/CASS P/N 1899AS270-02 the following parts are required by VPC:
Tools: P/N Description
910 121 143 Center conductor enlargement tool for female mini coax contact910 121 119 Center conductor forming tool for mini coax contact910 101 115 Hex crimp tool kit for mini coax contact254108 Hex crimp tool die (part of 910 101 115)254117 Hex crimp tool handle (part of 910 101 115)
Gages & Weights:
P/N Description910 121 156 Inspection gage to verify depth setting of center conductor on female mini coax contact910 121 131 Weight gage kit for female mini coax contact432026000 4.0 oz. weight - part of kit P/N 910 121 131 with tip “B” (432046102)432025000 0.5 oz. weight - part of kit P/N 910 121 131 with tip “A” (432044102)
revised 11/21/01
CAUTIONNever probe a contact without using a
mating contact/patchcord as a probe to avoid damaging the contact(s) being tested.

Virginia Panel Corporation 21
Ver. 2.7 CASS USER’S MANUAL
Fig. A
Fig. B
Fig. D
Fig. E
Fig. C
Wiring Assembly Instructions — Section 5
VPC P/N 610 104 141 - CASS P/N 1899AS270-02 - RG178
1. Strip the outer insulation, cut braid and expose the conductor wire as shown (Fig. A).
2. Slide the crimp ring onto the wire (Fig.B).
3. Turn braid back over outer insulation (Fig. C).
4. Solder wire into center conductor and clean (Fig. C). Note: Center conductor and dielectric must touch.
5. Slide the spacer tube over dielectric to edge of the braid (Fig. D). Heat spacer tube with a heat gun until it has shrunk to hold on to dielectric.
6. Slide shield conductor over center conductor until the center conductor stops in the Teflon® shield. To ensure that coaxial cable has been fully inserted into contact, ensure that a gap is between shielding and contact when achieving positive stop (Fig. E). Note: Shield Conductor and Teflon® insulator are supplied as an assembly.
con’t page 22revised 11/21/01

22 VMCASSUS
CASS USER’S MANUAL Ver. 2.7
Fig. F
Fig. G
Fig. H
Fig. J
Wiring Assembly Instructions — Section 5
VPC P/N 610 104 141- CASS P/N 1899AS270-02 - RG178
7. Calibrate gage P/N 910 121 156 (Fig. F) by loosening the dial face retaining screw until the dial face allows itself to be turned. Insert the calibration plug (P/N 414854104) into base of gage. While keeping constant pressure on the plug, adjust the dial by rotating it such that the pointer points to “0”. Re-tighten retaining screw. Adjust locating markers to “80” and “40”.
8. Check .06 ± .02 dimensions (Fig. G). Push the contact onto the pressure plunger of the gage (Fig. F). After attaining positive stop and while holding firm pressure, push plunger on top of dial (to push collar over Teflon), read the dial on the gage.
Go to step 9 if the indicator is between the two marker bands (“80” & “40”). Repeat steps 1-6 should the range of dimensions not meet the criterion.
9. Check minimum extraction force of 0.5 ounce with 432025000 Assembly (Fig. H). Slide female center conductor over approximately 3/4 of the length of the tip in the weight gage (Fig. I). The weight gage should remain mated with the center conductor as the center conductor is slowly lifted and suspended in the air. If weight gage remains mated, move to step 10.
If weight gage falls off, the extraction force is too low and the center conductor needs to be closed with the center conductor forming tool (P/N 910 121 119) (Fig. J). Recheck 0.5 ounce retention force.
Fig. I
con’t page 23revised 11/21/01

Virginia Panel Corporation 23
Ver. 2.7 CASS USER’S MANUAL
Wiring Assembly Instructions — Section 5
VPC P/N 610 104 141 - CASS P/N 1899AS270-02 - RG178
10. Check maximum extraction force of 4 ounces with tip “B” 432046102 in 432025000 attached to 432026000. Slide female center conductor over approximately 3/4 of the length of the tip in the weight gage (Fig. K). The weight gage should fall off the contact as the contact is slowly lifted and suspended in the air. If weight gage falls off move to step 11. If weight gage remains mated with contact, the extraction force is too high and the center conductor needs to be opened with the center conductor enlarging tool (P/N 910 121 143) (Fig. L).
To enlarge the center conductor, remove it from shield assembly and gently insert the Enlarging Tool into the Center Conductor. Insert Enlarging Tool until Center Conductor stops on shoulder. Be careful not to break or fracture Center Conductor. Recheck 0.5 and 4 ounce retention force - go to step 9.
11. Turn braid back toward the front of the shield conductor (Fig. M).
12. If braid extends beyond shoulder, trim braid back to face of shoulder.
13. Slide crimp ring into position over the braid.
14. Crimp using the Hex Crimp Tool (P/N 910 101 115) (Fig. N) - in Hex Position A for the larger end first and in Hex position C for the smaller section of the crimp ring of 1899AS270-02 (Fig. O). To ensure proper crimp position, slide shield conductor over pin on locator (Fig. P). Wire must not be allowed to pull on center conductor during crimping (for example, long wire hanging down to floor).
Fig. L
Use caution when using this tool. Insert and remove tool in-line with contact to avoid breaking tip of tool or contact!
Fig. M
Fig. K
Fig. N
Fig. P
Fig. O
con’t page 24revised 11/21/01
24 VMCASSUS
CASS USER’S MANUAL Ver. 2.7
Wiring Assembly Instructions — Section 5
VPC P/N 610 104 141 - CASS P/N 1899AS270-02 - RG178
15. Repeat step 8 to verify .06 ± .02 dimension with P/N 910 121 156.
16. During installation of contact into module listen for retaining clip ears to spring out, then push on front of contact to ensure that it is locked into position.

Virginia Panel Corporation 25
Ver. 2.7 CASS USER’S MANUAL
Wiring Assembly Instructions — Section 5
P/N 610 103 115 - CASS P/N 1899AS284-01 - RG316
P/N 610 103 159 - CASS P/N 1899AS284-04 - RG316
VPC Tools Required
For the assembly of the Mini-Coaxial Contact(s) VPC P/N 610 103 115/CASS P/N 1899AS284-01 and/or P/N 610 103 159/1899AS284-04 the following parts are required by VPC:
Tools:
P/N Description
910 121 142 Outer shield conductor expanding tool for male mini coax contact910 121 126 Outer shield conductor forming tool for male mini coax contact910 101 115 Hex crimp tool kit for mini coax contact254108 Hex crimp tool die - part of 910 101 115254117 Hex crimp tool handle - part of 910 101 115
Gages & Weights:
P/N Description
910 121 157 Inspection gage to verify depth setting of center conductor on male mini coax contact910 121 155 Weight gage kit for male mini coax contact414853000 20 oz. weight - part of kit P/N 910 121 155 414852000 3 oz. weight - part of kit P/N 910 121 155
revised 11/21/01
CAUTIONNever probe a contact without using a
mating contact/patchcord as a probe to avoid damaging the contact(s) being tested.

26 VMCASSUS
CASS USER’S MANUAL Ver. 2.7
Fig. A
Fig. B
Fig. C
Fig. E
Fig. F
Wiring Assembly Instructions — Section 5P/N 610 103 115 - CASS P/N 1899AS284-01 - RG316
P/N 610 103 159 - CASS P/N 1899AS284-04 - RG316
1. Strip the outer insulation, cut braid and expose the conductor wire as shown (Fig. A).
2. Slide the crimp ring onto the wire (Fig.B).
3. Turn braid back over outer insulation (Fig. C).
4. Solder wire into center conductor and clean (Fig. D). Cut a 3/16” long piece of solder and place it into the center conductor. Apply heat, using a soldering iron, on the outside of the contact until the solder melts. Insert wire into contact while heat is still being applied until an acceptable solder joint is obtained. Note: Center conductor and dielectric must touch.
5. Slide shield conductor over center conductor until the center conductor stops in the Teflon® shield (Fig. E). Note: Shield Conductor and Teflon® insulator are supplied as an assembly.
6. Turn braid back toward the front of the shield conductor (Fig. F). If braid extends beyond shoulder, trim back to face of shoulder.
con’t page 27revised 01/05/04
Fig. D

Virginia Panel Corporation 27
Ver. 2.7 CASS USER’S MANUAL
Fig. G
Fig. H
Fig. J
Fig. K
Fig. I
Wiring Assembly Instructions — Section 5P/N 610 103 115 - CASS P/N 1899AS284-01 - RG316
P/N 610 103 159 - CASS P/N 1899AS284-04 - RG316
7. Calibrate gage P/N 910 121 157 (Fig. G) by loosening the dial face retaining screw until the dial face allows itself to be turned. Insert the calibration plug (P/N 414855103) into base of gage. While keeping constant pressure on the plug, adjust the dial by rotating it such that the pointer points to “0”. Re-tighten retaining screw. Adjust locating markers to “90” and “20”.
8. Check .01 + .01 -.02 dimension (Fig. H) by using P/N 910 121 157 (Fig. G). Insert contact into gage until contact stops. If pointer is between the two markers (“90” & “20”), go to step 9. If the pointer is out of the range of the two markers, check dimensions and/or repeat steps 1-7.
9. Slide crimp ring into position over the braid (Fig. I).
10. Crimp using the Hex Crimp Tool 910 101 115 ( Fig. J) - in Hex Position A for the larger end first and in Hex position B for the smaller section of the crimp ring for 1899AS284-01 (Fig. I). To ensure proper crimp position, slide shield conductor over pin on locator (Fig. K).Wire must not be allowed to pull on the center conductor during crimping (for example, long wire hanging down to floor).
con’t page 28revised 11/21/01

28 VMCASSUS
CASS USER’S MANUAL Ver. 2.7
Fig. N
Fig. L
Fig. M
Fig. Q
Fig. PFig. O
Wiring Assembly Instructions — Section 5P/N 610 103 115 - CASS P/N 1899AS284-01 - RG316
P/N 610 103 159 - CASS P/N 1899AS284-04 - RG316
11. Check minimum extraction force of 3 ounces with P/N 414852000 (Fig. L). Slide contact into tip of weight gage. Insert approximately .15” into tip - be careful not to insert chamfer of contact into tip of weight gage. (Fig M). The weight gage should remain mated with the contact as the contact is slowly lifted and suspended in the air. If weight gage remains mated move to step 12.
If weight gage falls off, the extraction force is too low and the shield conductor needs to be opened up withthe outer shield conductor enlarging tool P/N 910 121 142 (Fig. N).
To enlarge the shield conductor, gently insert the enlarging tool into the contact. Be careful not to bend the contact center conductor. Once inserted into the contact, pivot the enlarging tool to increase the shield diameter. Repeat until 3 ounce weight gage can be held by contact.
12. Check maximum extraction force of 20 ounces with P/N 414853000 (Fig. O).
Slide contact into tip of weight gage. Insert approximately .15” into tip - be careful not to insert chamfer of contact into tip of weight gage (Fig. P).
The weight gage should fall off the contact as the contact is slowly lifted and suspended in the air. If weight gage falls off move to step 13. If weight gage remains mated with contact, the extraction force is too high and the shield conductor needs to be closed with the outer shield conductor forming tool P/N 910 121 126 (Fig. Q).
Squeezing the tool handles will reposition the contact legs. This procedure should be done in three different locations (approximately 120o apart) on the same shield to obtain proper sizing. Repeat steps 11 and 12.
con’t page 29revised 11/21/01

Virginia Panel Corporation 29
Ver. 2.7 CASS USER’S MANUAL
Wiring Assembly Instructions — Section 5P/N 610 103 115 - CASS P/N 1899AS284-01 - RG316
P/N 610 103 159 - CASS P/N 1899AS284-04 - RG316
13. Use P/N 910 121 157 to check .010 + .01 -.02 dimension (See step 8).
14. During installation of contact into module listen for retaining clip ears to spring out, then push on front of contact to ensure that it is locked into position.

30 VMCASSUS
CASS USER’S MANUAL Ver. 2.7
Wiring Assembly Instructions — Section 5P/N 610 103 130 - CASS P/N 1899AS284-02 - RG178
P/N 610 103 157 - CASS P/N 1899AS284-03 - RG178
VPC Tools Required
For the assembly of the Mini-Coaxial Contact VPC P/N 610 103 130/CASS P/N 1899AS284-02 and VPC P/N 610 103 157/CASS P/N 1899AS284-03 the following parts are required by VPC:
Tools:
P/N Description
910 121 142 Outer shield conductor expanding tool for male mini coax contact910 121 126 Outer shield conductor forming tool for male mini coax contact910 101 115 Hex crimp tool kit for mini coax contact254108 Hex crimp tool die part of 910 101 115254117 Hex crimp tool handle part of 910 101 115
Gages & Weights: P/N Description
910 121 157 Inspection gage to verify depth setting of conductor on male mini coax contact910 121 155 Weight gage kit for male mini coax contact414853000 20 oz. weight - part of kit P/N 910 121 155414852000 3 oz. weight - part of kit P/N 910 121 155
revised 11/21/01
CAUTIONNever probe a contact without using a
mating contact/patchcord as a probe to avoid damaging the contact(s) being tested.

Virginia Panel Corporation 31
Ver. 2.7 CASS USER’S MANUAL
Fig. A
Fig. C
Fig. D
Fig. F
Fig. E
Fig. B
Wiring Assembly Instructions — Section 5P/N 610 103 130 - CASS P/N 1899AS284-02 - RG178
P/N 610 103 157 - CASS P/N 1899AS284-03 - RG178
1. Strip the outer insulation, cut braid and expose the conductor wire as shown (Fig. A).
2. Slide the crimp ring onto the wire (Fig.B).
3. Turn braid back over outer insulation (Fig. C).
4. Solder wire into center conductor and clean (Fig. C). Note: Center conductor and dielectric must touch.
5. Slide the spacer tube over dielectric to edge of the braid (Fig. D). Heat spacer tube with a heat gun until it has shrunk to hold on to dielectric.
6. Slide shield conductor over center conductor until the center conductor stops in the Teflon® shield. To ensure that coaxial cable has been fully inserted into contact, ensure that a gap is between shielding and contact when achieving positive stop (Fig. E) Note: Shield Conductor and Teflon® insulator are supplied as an assembly.
7. Turn braid back toward the front of the shield conductor (Fig. F). If braid extends beyond shoulder, trim back to face of shoulder.
con’t page 32revised 11/21/01

32 VMCASSUS
CASS USER’S MANUAL Ver. 2.7
Fig. G
Fig. H
Fig. I
Fig. K
Fig. J
Wiring Assembly Instructions — Section 5P/N 610 103 130 - CASS P/N 1899AS284-02 - RG178
P/N 610 103 157 - CASS P/N 1899AS284-03 - RG178
8. Calibrate gage P/N 910 121 157 (Fig. G) by loosening the dial face retaining screw until the dial face allows itself to be turned. Insert the calibration plug (P/N 414 855 103) into base of gage. While keeping constant pressure on the plug, adjust the dial by rotating it such that thepointer points to “0”. Re-tighten retaining screw. Adjust locating markers to “90” and “20”.
9. Check .01 + .01 -.02 dimensions (Fig. H) by using P/N 910 121 157 (Fig. I). Insert contact into gage and push contact into collar until contact stops. If pointer is between the two markers, go to step 10. If the pointer is out of the range of the two markers, check dimensions and/or repeat steps 1-7.
10. Slide crimp ring into position over the braid (Fig. I).
11. Crimp using the Hex Crimp Tool (Fig. J) - in Hex Position A for the larger end first, and in Hex Position C for the smaller section of the crimp ring for 1899AS284-02 (Fig. I). To ensure proper crimp position, slide shield conductor over pin on locator (Fig. K). Wire must not be allowed to pull on the center conductor during crimping ( for example, long wire hanging down to floor).
con’t page 33revised 11/21/01

Virginia Panel Corporation 33
Ver. 2.7 CASS USER’S MANUAL
Fig. L Fig. MFig. N
Fig. Q Fig. O
Fig. P
Wiring Assembly Instructions — Section 5P/N 610 103 130 - CASS P/N 1899AS284-02 - RG178
P/N 610 103 157 - CASS P/N 1899AS284-03 - RG178
12. Check minimum extraction force of 3 ounces with P/N 414 852 000 (Fig L). Slide contact into tip of weight gage. Insert approximately .15” into tip - be careful not to insert chamfer of contact into tip of weight gage. (Fig. M). The weight gage should remain mated with the contact as the contact is slowly lifted and suspended in the air. If weight gage remains mated move to step 13.
If weight gage falls off, the extraction force is too low and the shield conductor needs to be opened with the outer shield conductor enlarging tool (P/N 910 121 142) (Fig. N).
To enlarge the shield conductor, gently insert the enlarging tool into the contact. Be careful not to bend the contact center conductor. Once inserted into the contact, pivot the enlarging tool to increase the shield diameter. Repeat until 3 ounce weight gage can be held by contact.
13. Check maximum extraction force of 20 ounces with P/N 414853000 (Fig. O).
Slide contact into tip of weight gage. Insert approximately .15” into tip - be careful not to insert chamfer of contact into tip of weight gage (Fig. P).
The weight gage should fall off the contact as the contact is slowly lifted and suspended in the air.If weight gage falls off move to step 14. If weight gage remains mated with contact, the extraction force is too high and the shield conductor needs to be closed with the outer shield conductor forming tool P/N 910 121 126 (Fig. Q).
Squeezing the tool handles will reposition the contact legs. This procedure should be done in three different locations (approximately 120o apart) on the same shield to obtain proper sizing. Repeat steps 12 and 13.
con’t page 34revised 11/21/01

34 VMCASSUS
CASS USER’S MANUAL Ver. 2.7
Wiring Assembly Instructions — Section 5P/N 610 103 130 - CASS P/N 1899AS284-02 - RG178
P/N 610 103 157 - CASS P/N 1899AS284-03 - RG178
14. Use P/N 910 121 157 to check .010 +.010 -.020 dimension ( See step 9).
15. During installation of contact into module listen for retaining clip ears to spring out, then push on front of contact to ensure that it is locked into position.

Virginia Panel Corporation 35
Ver. 2.7 CASS USER’S MANUAL
Trouble-Shooting and Solutions — Section 6
• ID or Receiver Modules are Installed up-side-down
! The orientation of the Modules is critical! Those Modules that are improperly installed will need to be removed and oriented properly ( See Section 2). ! Forceful engagement of the Receiver and the ID may result in serious damage to multiple parts of the system (Modules, Receiver, ID and Contacts)!
• ID Engagement Bearings/Studs are not lining up with the Engagement Slots of the Receiver
! Check the alignment of the ID Frame. There is a possibility that the ID Frame will have misaligned itself if it is dropped (See enclosed diagrams). Contact Virginia Panel Corporation - user adjustments to System, unless authorized, will void the warranty. ! Forceful engagement of the Receiver and the ID may result in serious damage to multiple parts of the system (Modules, Receiver, ID and Contacts)!
• ID Frame is not lined up while in the process of engagement with the Receiver
! This may indicate that the ID was dropped and is out of alignment or that a Module is not mating with its intended Module. Remove and inspect the ID for alignment (See enclosed diagrams). Contact Virginia Panel Corporation - user adjustments to System, unless authorized, will void the warranty. ! Check for foreign objects/tools. ! Verify the orientation of the Receiver and ID Modules (See Section 2). ! Inspect the mating of Modules - Power ID Module to mate with Power Receiver Module, etc. (See Section 2). ! Forceful engagement of the Receiver and the ID may result in serious damage to multiple parts of the system (Modules, Receiver, ID and Contacts)!
• Excessive force on the Handle is needed to engage system
! This may indicate that the ID was dropped and is out of alignment or that a Module is not mating with its intended Module. Remove and inspect the ID for alignment (See enclosed diagrams). Contact Virginia Panel Corporation - user adjustments to System, unless authorized, will void the warranty. ! Check for foreign objects/tools. ! A damaged Contact(s) may provide enough resistance to notice. Upon replacing a Contact in the ID, the mating Contact on the other side (Receiver Contact) should also be inspected and replaced if necessary (See Section 2). ! Verify the orientation of the Receiver and ID Modules (See Section 2). ! Inspect the mating of Modules - Power ID Module to mate with Power Receiver Module, etc. (See Section 2). ! Forceful engagement of the Receiver and the ID may result in serious damage to multiple parts of the system ( Modules, Receiver, ID and Contacts)!

36 VMCASSUS
CASS USER’S MANUAL Ver. 2.7
Trouble-Shooting and Solutions — Section 6
ID will not engage with the Receiver after diagnosing the above problems
! Check the System for foreign objects. ! Check the alignment of the ID Frame. There is possibility that the ID Frame could have misaligned itself if it was dropped (See enclosed diagrams). Contact Virginia Panel Corporation - user adjustments to System, unless authorized, will void the warranty.
No continuity upon engagement
! Upon replacing a Contact in the ID, the mating Contact on the Receiver side (Receiver Contact) should also be inspected and replaced if necessary (See Section 2). ! Check Wiring - replace if necessary.
A “short” in the wiring upon engagement
! A damaged Contact(s) may provide enough resistance to notice. Upon replacing a Contact in the ID, the mating Contact on the Receiver side (Receiver Contact) should also be inspected and replaced if necessary (See Section 2). ! Check wiring - replace if necessary.
Receiver and ID will not disengage
! This may indicate that the Engagement Mechanism within the Receiver is faulty - contact Virginia Panel Corporation immediately - user adjustments to System, unless authorized, will void the warranty.
VPC may be contacted at the following telephone number and address:
Virginia Panel Corporation 1400 New Hope Road Waynesboro, VA 22980
Tel: (540) 932 - 3300 Fax: (540) 932 - 3369

Virginia Panel Corporation 37
Ver. 2.7 CASS USER’S MANUAL
Product Cross Reference — Section 7
The purpose of the cross-reference tables are to provide the user with quick identification of necessary parts and/or tools. It matches the tools with their respective parts for more comprehensive replacements, insertions or configurations.
Receiver Modules Crimp Tools & Dies ExtractionTools
Misc.Tools Q.C. Tools
ReceiverContacts &Patchcords
510 1
13 12
4/189
9AS2
75-0
2
510 1
13 12
5/189
9AS2
73-0
2
510 1
13 12
0/189
9AS2
66-0
2
510 1
13 12
1/189
9AS2
69-0
2
510 1
13 12
2/189
9AS2
71-0
2
910 1
01 10
2
910 1
01 10
3
910 1
01 11
5
910 1
04 10
7
910 1
04 11
6
910 1
10 10
2
910 1
12 10
4
910 1
21 11
9
910 1
21 14
3/203
8AS3
93
910 1
21 15
6
910 1
21 13
1
610 104 1141899AS270-01 • • • • • • • •
610 104 1411899AS270-02 • • • • • • • •
610 110 1221899AS276-01 ••
610 110 1231899AS276-02 ••
610 110 1241899AS276-03 • •
610 110 1251899AS274-01 • • • • •
610 110 1741899AS268-01 • • • • •
610 116 1121899AS267-01 ••

38 VMCASSUS
CASS USER’S MANUAL Ver. 2.7
Product Cross Reference — Section 7
ID Modules Crimp Tools & DiesExtraction
ToolsMisc.Tools
Q.C.Tools
ID Contacts &Patchcords
510 1
14 10
6/189
9AS2
86-0
1
510 1
14 10
7/189
9AS2
80-0
1
510 1
14 10
8/189
9AS2
83-0
1
510 1
14 10
9/189
9AS2
85-0
1
910 1
01 10
2
910 1
01 10
3
910 1
01 11
5
910 1
04 10
7
910 1
04 11
8
910 1
10 10
2
910 1
12 10
4
910 1
21 12
6
910 1
21 14
2/203
8AS3
94
910 1
21 15
5
910 1
21 15
7
610 103 1151899AS284-01 • • • • • • • •
610 103 1301899AS284-02 • • • • • • • •
610 110 1081899AS287-01 • • • • •
610 110 1721899AS282-01 • • • • •
610 115 1242038AS418-01 • •

Virginia Panel Corporation 39
Ver. 2.7 CASS USER’S MANUAL
Product Cross Reference — Section 7
40 VMCASSUS
CASS USER’S MANUAL Ver. 2.7
Diagrams - Section 8
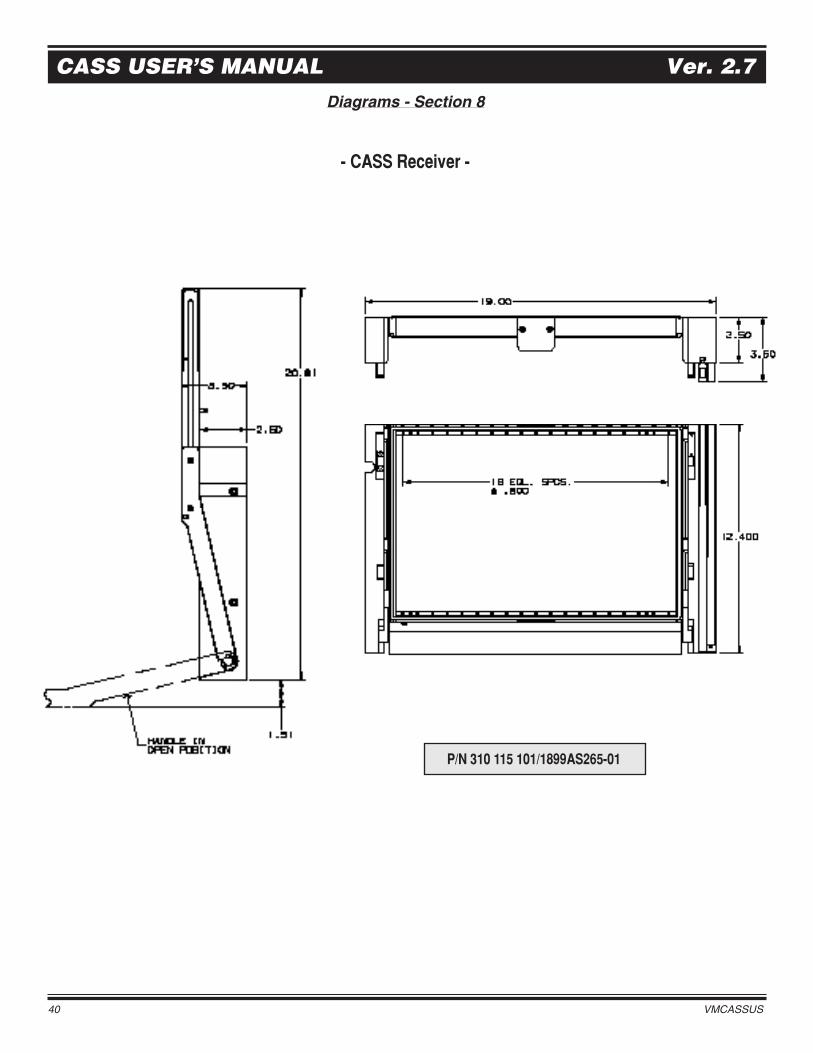
- CASS Receiver -
P/N 310 115 101/1899AS265-01

Virginia Panel Corporation 41
Ver. 2.7 CASS USER’S MANUAL
Diagrams - Section 8
- CASS Interface Device -
P/N 410 113 101/1899AS279-01

42 VMCASSUS
CASS USER’S MANUAL Ver. 2.7
Diagrams - Section 8
- CASS Receiver Modules -
P/N 510 113 122/1899AS271-02P/N 510 113 124/1899AS275-02P/N 510 113 125/1899AS273-02 P/N 510 113 121/1899AS269-02
P/N 510 113 120/1899AS266-02

Virginia Panel Corporation 43
Ver. 2.7 CASS USER’S MANUAL
Diagrams - Section 8
- CASS ID Modules -
P/N 510 114 109/1899AS285-01 P/N 510 114 106/1899AS286-01 P/N 510 114 107/1899AS280-01
P/N 510 114 108/1899AS283-01 P/N 510 113 106/1899AS288-01

Virginia Panel Corporation’sCASS User’s Manual
Installations, Operations,and General User Guide
Official Edition - 2.7Updated February 1998
Updated November 21, 2001Updated February 6, 2002Updated January 5, 2004
Updated May 18, 2007

OBJECTIVE
The following is a Consolidated Automated Support System (CASS) Interface System User’s Manual. It has been written to educate CASS users of the required set-up, operations and trouble-shooting procedures of the Interface System.
The objective of the User’s Manual is to aid the user in the everyday operations of the Interface System(s).
The Contents of this Manual are based on the field and Life-Cycle Test observations.
BACKGROUND
Virginia Panel Corporation (VPC) has long been recognized for the design and manufacture of Modular Interface Systems. Since developing the industry’s first hybrid Modular Interface System in 1968, VPC has been dedicated to providing its customers with the most effective, economical and dependable methods of interconnecting test devices.
VPC’s introduction of the CASS is the next stepping stone for an interface providing high pin density, small footprint, multipletermination methods and high quality at an economical price.
Ver. 2.7 CASS USER’S MANUAL
Virginia Panel Corporation i

TABLE OF CONTENTS
Section 1 CASS Interface System Parts 1
- To be used in the identification of part(s) or part number(s). - Replacement reference guide.
Section 2 Installation/Removal of Modules and Contacts 3
- Describes the step-by-step required instructions on the removal and installation of the Modules and Contacts.
Section 3 Engaging Interface Device With Receiver 5
- Discusses the proper operation/engagement of the CASS Receiver and ID - Cover all necessary precautions prior to engagement.
Section 4 General Maintenance 6
- Removal and Installation of Micro-Switch.
Section 5 Contact Assembly Requirements 7
- This Section is about the required tools and parts needed to operate the Interface System at an optimum level of performance by following step-by-step wiring instructions.
Section 6 Trouble-Shooting and Solutions 35
- Possible trouble areas and the simple required necessary actions.
Section 7 Product Cross Reference Tables 37
- Provides the user with quick access to tools needed for removal and installation of contacts, crimping and associated equipment.
Section 8 Diagrams 40
- Diagrams of the Receiver, ID and Modules (dimensions and part numbers are specified) to be used in identifying and inspecting parts of the System.
CASS USER’S MANUAL Ver. 2.7
ii VMCASSUS