Embed Size (px)
Citation preview
35CAst iRon Chef
CAst iRon Chef
RATIONALE FOR ADVENTUREIn this adventure, Webelos Scouts will learn about good nutrition, how to safely cook meals in the outdoors, and how to balance meal planning and finances.
TAKEAWAYS FOR CUB SCOUTS• Making healthy food choices
• Food safety
• The proper way to lay and light a fire
• Planning and managing a budget
• A Scout is trustworthy, thrifty.COMPASS
CHARACTER
COMPASS
CHARACTER
COMPASS
CHARACTER
COMPASS
CHARACTER
ADVENTURE REQUIREMENTSDo all of these:
1. At an approved time in an outdoor location and using tinder, kindling, and fuel wood, demonstrate how to build a fire; light the fire, unless prohibited by local fire restrictions. After allowing the flames to burn safely, safely extinguish the flames with minimal impact to the fire site.
2. Set personal nutritional goals. Keep a food journal for one week; review your journal to determine if the goals were met.
3. Plan a menu for a balanced meal for your den or family. Determine the budget for the meal. Shop for the items on your menu while staying within your budget.
4. Prepare a balanced meal for your den or family; utilize one of the methods below for preparation of part of your meal:
a. Camp stove
b. Dutch oven
c. Box oven
d. Solar oven
e. Open campfire or charcoal
5. Demonstrate an understanding of food safety practices while preparing the meal.
NOTES TO DEN LEADER
Parts of Meetings 1 and 3 must take place in outdoor locations where a fire can be safely built and lit.
At Meeting 1, Scouts will practice building and lighting a fire. Make sure not to violate local restrictions, and choose a place that is free of flammable materials—around, above, and below. All wood can catch fire, so steer clear of tree roots and limbs as well as any building overhangs.
Meeting 2 will be a den outing to a local grocery store where Scouts will shop and purchase the items for their meal. Submit a tour and activity plan, if required, and work with families to plan transportation to and from the store. Make sure activity consent forms are distributed, signed, and collected.
The Scouts will cook the meal at Meeting 3. This involves lots of activity and the boys will want to enjoy their meal without feeling rushed, so for best results you may want to schedule a campout or hold the meeting on a weekend afternoon. If it’s a campout, again, submit a tour and activity plan, if required, confirm transportation, and make sure activity consent forms are distributed, signed, and collected.
See the Appendix for optional den meeting activities, including openings, gatherings, and closings.
Webelos Handbook, page 36
36 WEBELOS
MeetinG 1 PlAnPREPARATION AND MATERIALS NEEDED• U.S. and den flags
• Thank-you notes for anyone who helps with the outing
• The Outdoor Code, written in large print on a poster board
• Pencils or pens
• Printed copies of the food journal (1 per Scout, see Meeting 1 Resources)
• Items for building a practice fire:
— Tinder, kindling, and fuel wood
— Matches or a lighter
— Fire extinguisher or bucket of sand, mud, or water
— Non-burnable container for the fire, such as a metal or aluminum trash can lid placed on bricks or cinder blocks
• Establish a budget for the meal Scouts will cook at Meeting 3, so they can plan the menu. Check to see if anyone has food allergies.
GATHERING• While waiting for everyone to arrive, have each Scout practice laying an individual cook fire, but make
sure he understands that he is not to actually light the fire.
OPENING• Conduct a flag ceremony of your choosing that includes the Pledge of Allegiance and, as appropriate,
the Scout Oath and Scout Law.
• Optional: Lead Scouts in a roll call. As each Scout's name is called, have him respond with one item needed for cooking in the outdoors.
TALK TIME• Introduce the Cast Iron Chef adventure to the den. Build interest by describing the goals of the ad-
venture and some of the activities that are planned.
• Carry out business items for the den.
• Allow time for sharing among Webelos Scouts.
• Remind the boys that “a Scout is trustworthy,” and one way to show this is by following the Outdoor Code when building, using, and extinguishing a fire. Emphasize that a fire should only be built in a safe environment and under the supervision of an adult.
• Discuss the purpose of a food journal and how it might help in making nutritious food choices. Re-view food guidelines, and identify resources on nutrition in the Webelos Handbook or at www.choosemyplate.gov/.
• Ask each Webelos Scout to bring a small, agreed-upon amount of money to contribute to the cost of the food they will purchase next week. Staying within a budget is a skill they will use next year as they plan, purchase, and prepare food as part of their patrol in Boy Scouting.
37CAst iRon Chef
ACTIVITIES
◆Activity 1: Menu Planning (Requirement 3)• Have Scouts compile a menu of foods they will need to cook a meal at Meeting 3. (See Meeting 3
Resources for a few recipes and for tips on the various cooking methods.) Find out if there are any food allergies in the den, and lead a discussion about why this is important. At the top of the menu, write the total budget you decided on; then save the menu to make copies for the den outing.
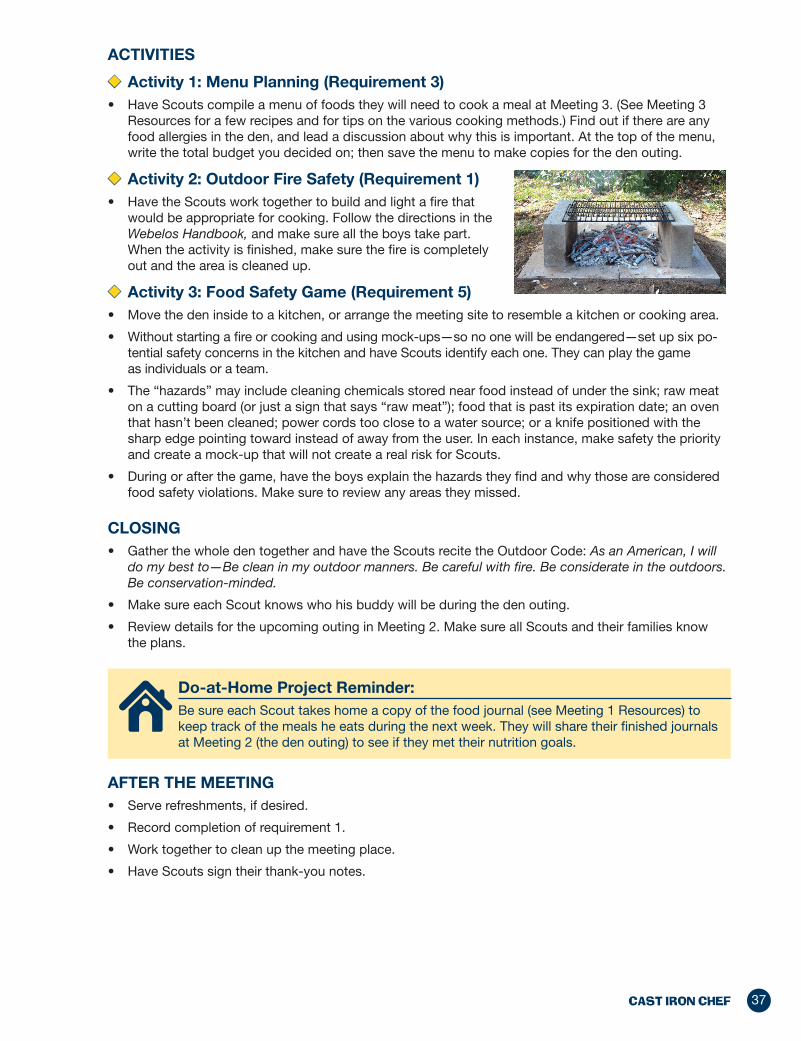
◆Activity 2: Outdoor Fire Safety (Requirement 1)• Have the Scouts work together to build and light a fire that
would be appropriate for cooking. Follow the directions in the Webelos Handbook, and make sure all the boys take part. When the activity is finished, make sure the fire is completely out and the area is cleaned up.
◆Activity 3: Food Safety Game (Requirement 5)• Move the den inside to a kitchen, or arrange the meeting site to resemble a kitchen or cooking area.
• Without starting a fire or cooking and using mock-ups—so no one will be endangered—set up six po-tential safety concerns in the kitchen and have Scouts identify each one. They can play the game as individuals or a team.
• The “hazards” may include cleaning chemicals stored near food instead of under the sink; raw meat on a cutting board (or just a sign that says “raw meat”); food that is past its expiration date; an oven that hasn’t been cleaned; power cords too close to a water source; or a knife positioned with the sharp edge pointing toward instead of away from the user. In each instance, make safety the priority and create a mock-up that will not create a real risk for Scouts.
• During or after the game, have the boys explain the hazards they find and why those are considered food safety violations. Make sure to review any areas they missed.
CLOSING• Gather the whole den together and have the Scouts recite the Outdoor Code: As an American, I will
do my best to—Be clean in my outdoor manners. Be careful with fire. Be considerate in the outdoors. Be conservation-minded.
• Make sure each Scout knows who his buddy will be during the den outing.
• Review details for the upcoming outing in Meeting 2. Make sure all Scouts and their families know the plans.
Do-at-Home Project Reminder:Be sure each Scout takes home a copy of the food journal (see Meeting 1 Resources) to keep track of the meals he eats during the next week. They will share their finished journals at Meeting 2 (the den outing) to see if they met their nutrition goals.
AFTER THE MEETING• Serve refreshments, if desired.
• Record completion of requirement 1.
• Work together to clean up the meeting place.
• Have Scouts sign their thank-you notes.
38 WEBELOS
MeetinG 1 ResouRCesTALK TIME
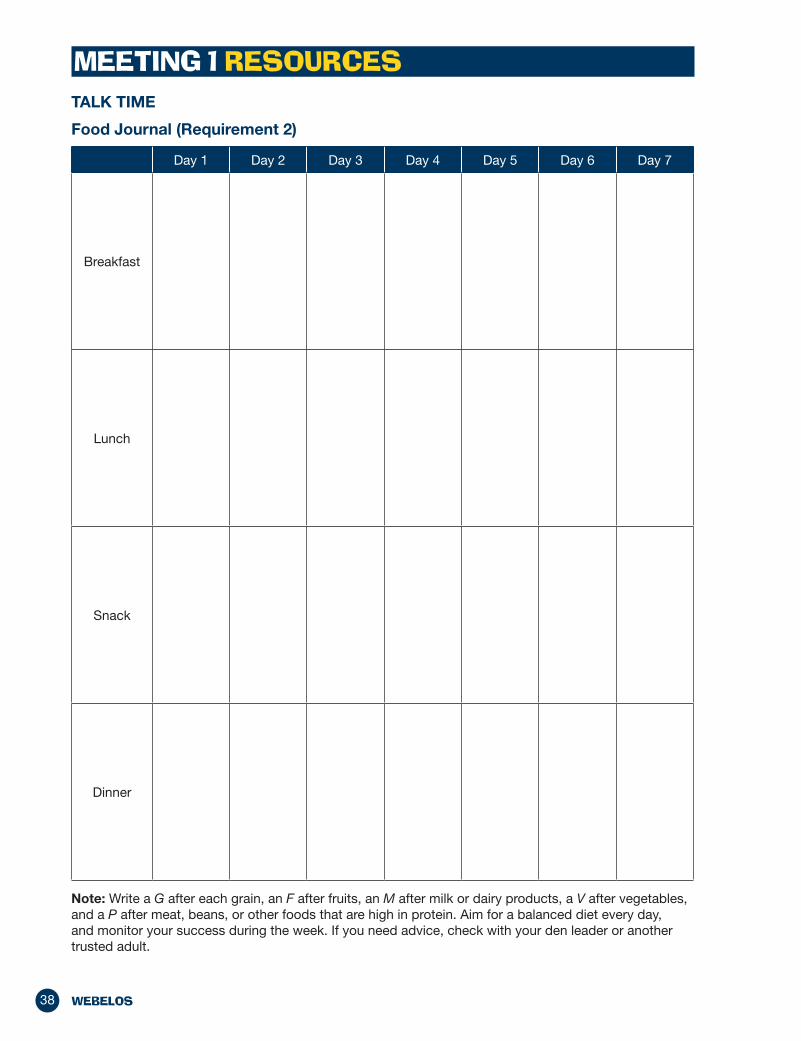
Food Journal (Requirement 2)
Day 1 Day 2 Day 3 Day 4 Day 5 Day 6 Day 7
Breakfast
Lunch
Snack
Dinner
Note: Write a G after each grain, an F after fruits, an M after milk or dairy products, a V after vegetables, and a P after meat, beans, or other foods that are high in protein. Aim for a balanced diet every day, and monitor your success during the week. If you need advice, check with your den leader or another trusted adult.
39CAst iRon Chef
MeetinG 2 PlAn (den outing)PREPARATION AND MATERIALS NEEDED• Calculators, notepads, and pens
• Copies of menu prepared by den at the last meeting
• Make sure you carry a list of contact numbers for the Scouts and all adults going on the outing.
• Confirm that a tour and activity plan has been submitted, if required, and that transportation to and from the store is in place. Secure signed activity consent forms.
• Unit den leader should have in possession (if required by local council practices) the tour and activity plan and a copy of the Guide to Safe Scouting.
GATHERING• As Scouts arrive at the store, assign buddies. Have buddy pairs share with each other the food
journals they created over the past week. Have them try to identify one nutritious food they each listed and one food they have in common.
OPENING• Recite the Scout Law and ask Scouts to name points of the law they will demonstrate during
the outing.
• Remind the boys that it is important to stay together and be on their best behavior.
TALK TIME• Carry out business items for the den.
• Collect food journals from the Webelos Scouts, and ask them how things went with the project. Did the buddy pairs have any nutritious foods in common? By the end of the seven days, did they find them-selves eating healthier meals than when they started? If so, did eating better make them feel better?
ACTIVITIES
◆Activity 1: Shopping for Good Nutrition (Requirement 3)• Divide the den into small teams, making sure to keep the buddy pairs together.
• Give each team a copy of the menu and a calculator, notepad, and pen. Remind them that “a Scout is thrifty,” and ask them to demonstrate that by keeping their choices within the budget.
• Challenge the teams to find a good choice for each item on the menu, reminding them to also look for nutritional value. Say: Sometimes paying a little bit more for a quality item is OK. For example, you might pay more for a pound of ground sirloin than regular ground beef, but the taste and the fact that the sirloin is healthier might make it worth the extra cost.
• After about half an hour, bring the den together in a corner of the store to compare notes and vote on the items to purchase. Meanwhile, an adult or the den chief will calculate the final cost. Make sure the items you select can be properly stored or refrigerated until Meeting 3, when the boys will cook the meal.
• Be sure to compliment the Scouts on being thrifty while also making healthy food choices!
CLOSING• Once the groceries are purchased and packed, gather everyone in a friendship circle for a closing reflection.
• Have the den recite the Scout Law again, and review how well they did at demonstrating the points of the Law during the outing.
• If Meeting 3 will be a campout, confirm the plan with families, including transportation, all the necessary clothing, and any additional items they need to bring.
40 WEBELOS
Do-at-Home Project Reminder:If the food is being stored in separate places, make sure everyone remembers to bring it to Meeting 3.
AFTER THE MEETING• Serve refreshments, if desired and appropriate.
• Record completion of requirements 2 and 3.
• Have Scouts give their thank-you notes to those who assisted with the outing, including the store manager and any employees who were especially helpful.
MeetinG 3 PlAnPREPARATION AND MATERIALS NEEDED• U.S. and den flags
• Items for the meal: food, beverages, plates, cups, silverware and cookware, cooking utensils, cooking thermometer, etc.
• Items for food hygiene and cleanup: water, soap, dish soap, bleach, dishcloths, towels, napkins or paper towels, trash bags, three buckets or basins for cleaning, etc.
• Depending on the cooking method the den chooses—open fire or charcoal, or a camp stove, Dutch oven, box oven, or solar oven—make sure all needed materials will be there. These may include wood or coals, liquid fuel or propane, aluminum foil, etc.
• If the meeting will be a campout, remind the Webelos to bring camping gear, including the Scout Basic Essentials listed in the Webelos Handbook. Confirm that a tour and activity plan has been submitted, if required, and activity consent forms are distributed, signed, and collected.
• No matter where the meal will be cooked, follow the same safety instructions as before.
GATHERING• Set up a food safety game—similar to the one at the first meeting—for Scouts to play as they arrive.
OPENING• Conduct a flag ceremony of your choosing that includes the Pledge of Allegiance.
• Then have the Webelos stand in a circle. Moving around the circle have each boy say one point of the Scout Law until all 12 points have been shared. You may wish to let the Law go around the circle two or three times so Scouts can increase their speed at reciting it.
TALK TIME• Carry out business items for the den.
• Allow time for sharing among Webelos Scouts.
• Lead the boys in a discussion about the food journals they kept for this adventure. Did they develop any good eating habits that they plan to continue? Were they introduced to some foods they had never eaten?
• Before preparing the meal, review the safety rules the den learned at Meeting 1.

41CAst iRon Chef
ACTIVITIES
◆Activity 1: Cooking and Eating the Meal• As the Webelos are cooking their meal according to the safety rules, ask them why each rule is
important to follow. Make sure each Scout has a chance to answer at least two questions before the cooking is finished. (See sample questions in the Meeting 3 Resources.)
• When the meal is prepared and ready to eat, have the Scouts say grace (see samples in Meeting 3 Resources).
◆Activity 2: CleanupScouts will then use the three basins or buckets to wash dishes (see Meeting 3 Resources for directions). Make sure all the boys take part in this.
CLOSING• Gather the den in a circle and recite the Outdoor Code.
AFTER THE MEETING• Record completion of requirements 4 and 5.
MeetinG 3 ResouRCesACTIVITIES
◆Activity 1: Cooking the Meal
Sample Safety Questions
1. Why is it important to wash your hands before preparing food? (to keep from getting others sick)
2. How long should you spend washing your hands? (at least 20 seconds)
3. How can you check the temperature of foods like meat or poultry? (using a food thermometer)
4. Where can you find the temperatures that foods should be cooked to in order to be safe to eat? (cookbooks)
5. What is the problem with putting cooked chicken on the same plate where raw chicken was prepared? (the plate needs to be washed first)
6. What should you do first before beginning to prepare food? (wash hands)
7. Explain one way to safely thaw food. (refrigerator, cold water, microwave)
8. How long is it safe to leave food out at room temperature? (no more than two hours)
Outdoor Cooking Tips
(from BALOO: Basic Adult Leader Outdoor Orientation, No. 34162)
• Handy fire starters can be made by placing one charcoal briquette in each section of a paper egg carton. Cover with melted wax, and tear apart to use.
• Place a burger fresh from the grill into the bun and put it in a plastic bag for about a minute. The bun will be steamed warm.
• Put a kettle of water on the fire to heat while you are preparing your food and eating, and your dish water will be ready when you are.
• Freeze meat when putting in a cooler. It will last longer and help keep your other food cold. Make hamburger patties in advance and layer with paper.
• Give yourself plenty of time to start a fire and wait for the briquettes or wood to be ready.
• Don’t forget to rub the outside of pans with liquid soap before putting on the fire; they’ll clean up much more easily.
42 WEBELOS
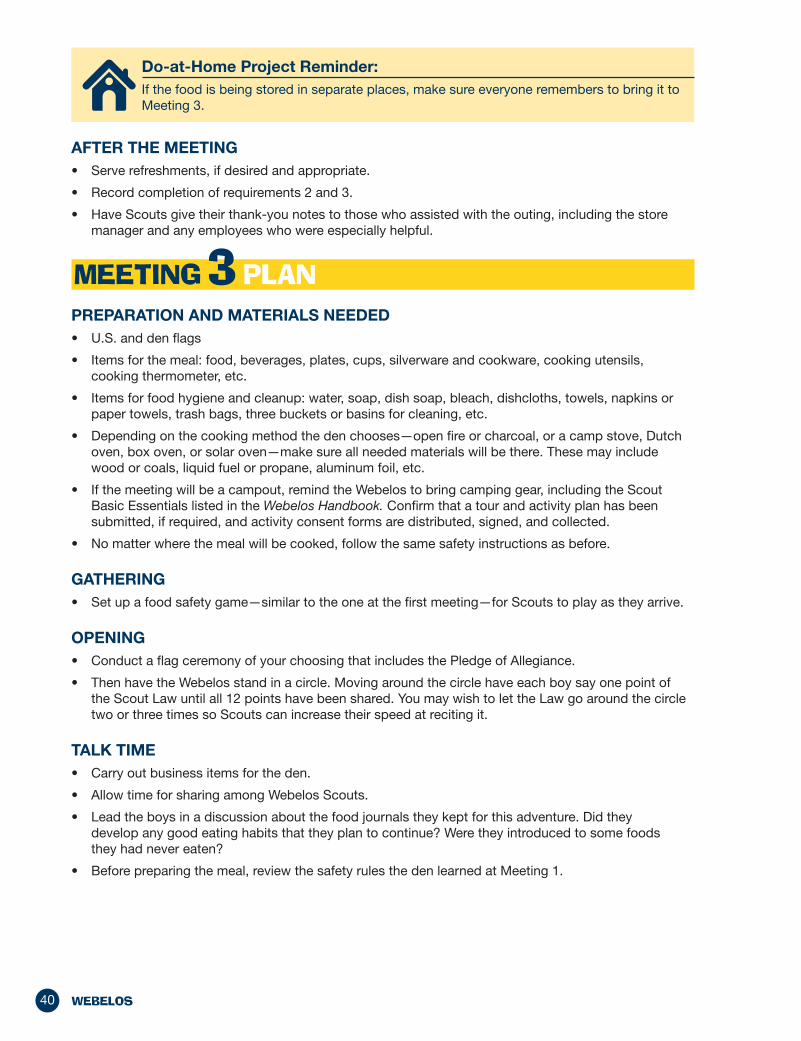
Camp Stoves
• Only use camp stoves that are commercially manufactured. (Chemical- fueled equipment that is handcrafted, homemade, modified, or installed beyond the manufacturer’s stated design limitations or use is prohibited by Boy Scouts of America.)
• An adult knowledgeable in the use of the camp stove should supervise the Scouts using the stove at all times.
• The stove should only be operated following the manufacturer’s directions.
• All chemical fuel should be stored at a safe distance (a minimum of 20 feet) from the operating stove.
• Stoves should be allowed to cool before refilling fuel or changing fuel cylinders.
• If a stove uses liquid gas, refill it at a safe distance from any flame sources, including other stoves and campfires. A commercial camp stove fuel should be used for safety and performance. Pour through a filter funnel. Recap both the fuel tank and the fuel container before igniting.
• Never fuel a stove indoors. Do not operate a camp stove in a non-ventilated area. It is recommended to utilize the stove outdoors. If it is used indoors, make sure that you have both high and low ventilation.
• Place the stove on a level, secure surface before operating.
• Periodically check fittings on compressed-gas stoves and on pressurized liquid gas stoves for leakage, using soap solution before lighting.
• Do not hover over the stove when lighting it. Keep your head and body to one side. Open the stove valve quickly for two full turns and light carefully, with your head, fingers, and hands to the side of the burner. Then adjust down.
• Never leave a lighted stove unattended.
• Do not overload the stovetop with heavy pots and large frying pans. If pots over 2 quarts are necessary, set up a separate grill with legs to hold the pot, and place the stove under the grill.
• Take empty fuel containers home for disposal. Do NOT place in a fire as they will explode.
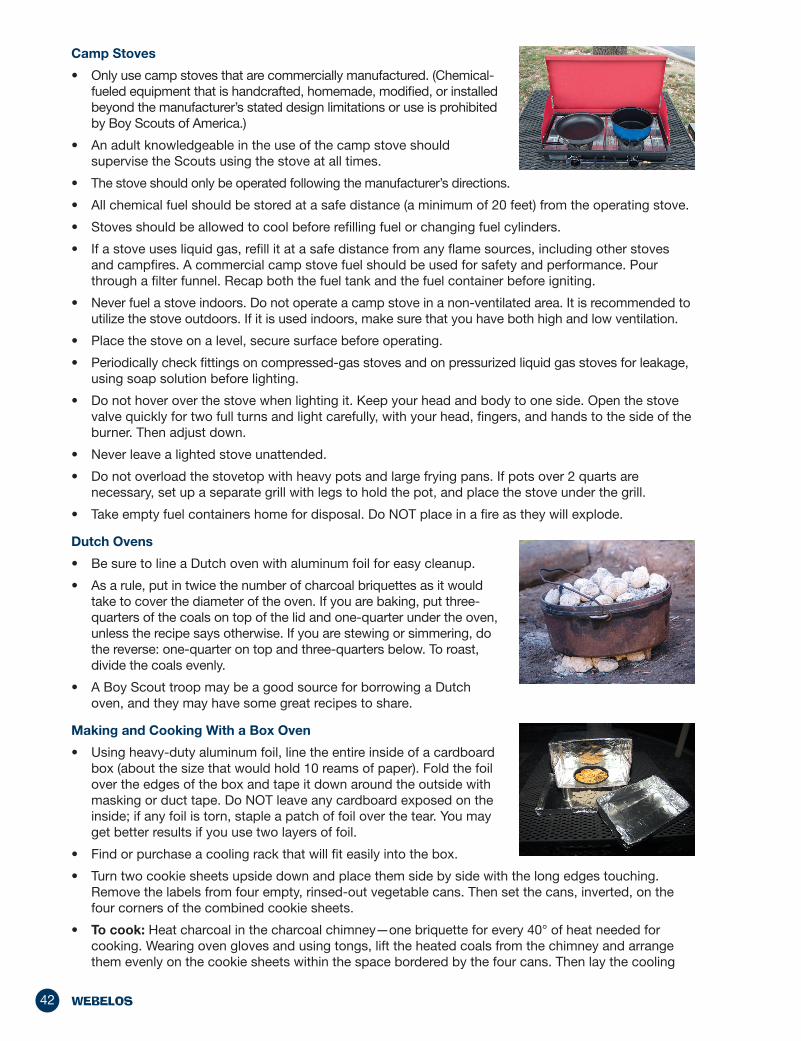
Dutch Ovens
• Be sure to line a Dutch oven with aluminum foil for easy cleanup.
• As a rule, put in twice the number of charcoal briquettes as it would take to cover the diameter of the oven. If you are baking, put three- quarters of the coals on top of the lid and one-quarter under the oven, unless the recipe says otherwise. If you are stewing or simmering, do the reverse: one-quarter on top and three-quarters below. To roast, divide the coals evenly.
• A Boy Scout troop may be a good source for borrowing a Dutch oven, and they may have some great recipes to share.
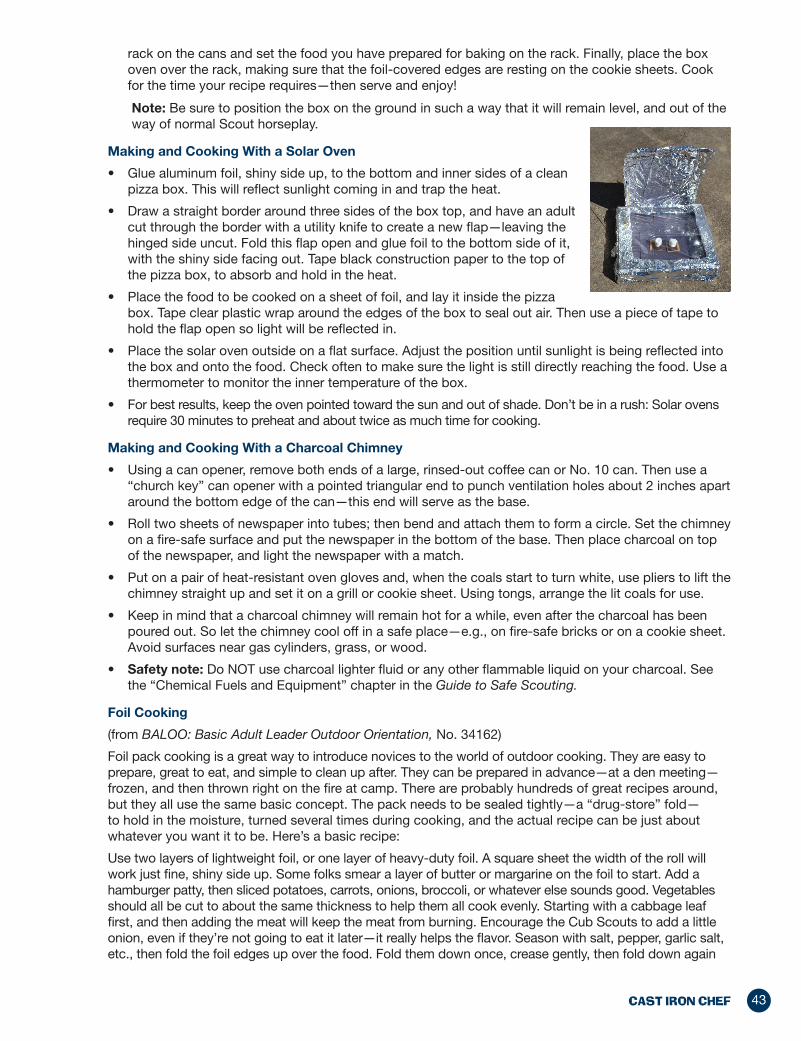
Making and Cooking With a Box Oven
• Using heavy-duty aluminum foil, line the entire inside of a cardboard box (about the size that would hold 10 reams of paper). Fold the foil over the edges of the box and tape it down around the outside with masking or duct tape. Do NOT leave any cardboard exposed on the inside; if any foil is torn, staple a patch of foil over the tear. You may get better results if you use two layers of foil.
• Find or purchase a cooling rack that will fit easily into the box.
• Turn two cookie sheets upside down and place them side by side with the long edges touching. Remove the labels from four empty, rinsed-out vegetable cans. Then set the cans, inverted, on the four corners of the combined cookie sheets.
• To cook: Heat charcoal in the charcoal chimney—one briquette for every 40° of heat needed for cooking. Wearing oven gloves and using tongs, lift the heated coals from the chimney and arrange them evenly on the cookie sheets within the space bordered by the four cans. Then lay the cooling
43CAst iRon Chef
rack on the cans and set the food you have prepared for baking on the rack. Finally, place the box oven over the rack, making sure that the foil-covered edges are resting on the cookie sheets. Cook for the time your recipe requires—then serve and enjoy!
Note: Be sure to position the box on the ground in such a way that it will remain level, and out of the way of normal Scout horseplay.
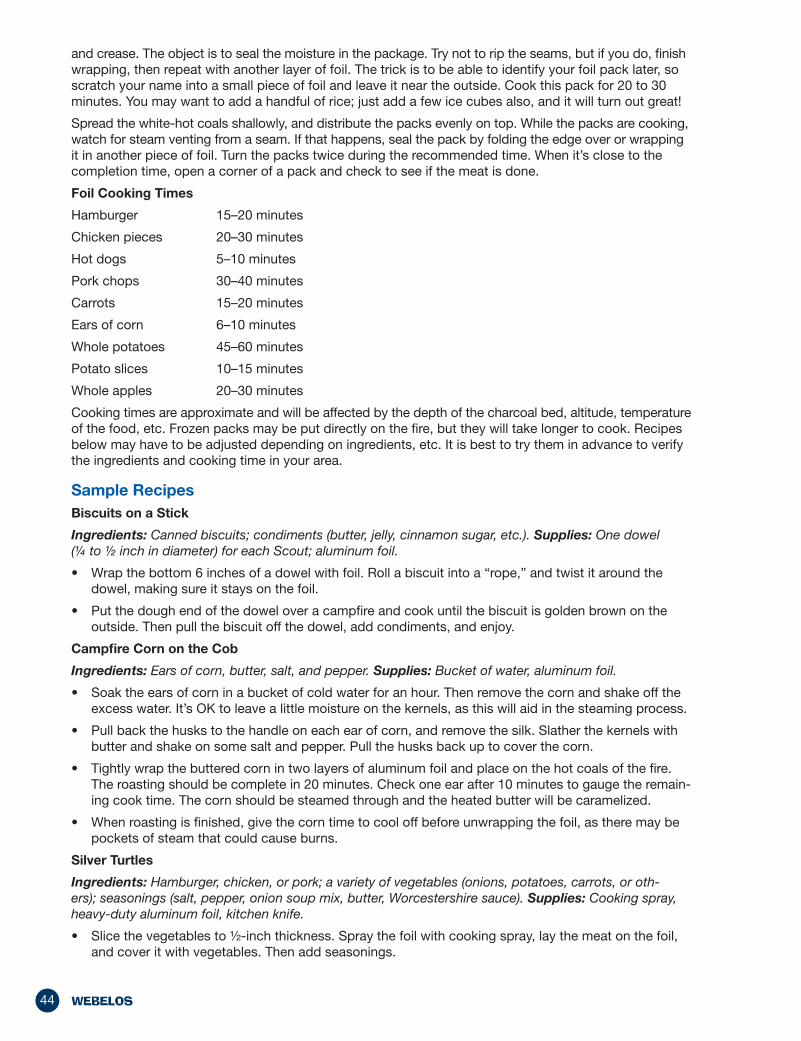
Making and Cooking With a Solar Oven
• Glue aluminum foil, shiny side up, to the bottom and inner sides of a clean pizza box. This will reflect sunlight coming in and trap the heat.
• Draw a straight border around three sides of the box top, and have an adult cut through the border with a utility knife to create a new flap—leaving the hinged side uncut. Fold this flap open and glue foil to the bottom side of it, with the shiny side facing out. Tape black construction paper to the top of the pizza box, to absorb and hold in the heat.
• Place the food to be cooked on a sheet of foil, and lay it inside the pizza box. Tape clear plastic wrap around the edges of the box to seal out air. Then use a piece of tape to hold the flap open so light will be reflected in.
• Place the solar oven outside on a flat surface. Adjust the position until sunlight is being reflected into the box and onto the food. Check often to make sure the light is still directly reaching the food. Use a thermometer to monitor the inner temperature of the box.
• For best results, keep the oven pointed toward the sun and out of shade. Don’t be in a rush: Solar ovens require 30 minutes to preheat and about twice as much time for cooking.
Making and Cooking With a Charcoal Chimney
• Using a can opener, remove both ends of a large, rinsed-out coffee can or No. 10 can. Then use a “church key” can opener with a pointed triangular end to punch ventilation holes about 2 inches apart around the bottom edge of the can—this end will serve as the base.
• Roll two sheets of newspaper into tubes; then bend and attach them to form a circle. Set the chimney on a fire-safe surface and put the newspaper in the bottom of the base. Then place charcoal on top of the newspaper, and light the newspaper with a match.
• Put on a pair of heat-resistant oven gloves and, when the coals start to turn white, use pliers to lift the chimney straight up and set it on a grill or cookie sheet. Using tongs, arrange the lit coals for use.
• Keep in mind that a charcoal chimney will remain hot for a while, even after the charcoal has been poured out. So let the chimney cool off in a safe place—e.g., on fire-safe bricks or on a cookie sheet. Avoid surfaces near gas cylinders, grass, or wood.
• Safety note: Do NOT use charcoal lighter fluid or any other flammable liquid on your charcoal. See the “Chemical Fuels and Equipment” chapter in the Guide to Safe Scouting.
Foil Cooking
(from BALOO: Basic Adult Leader Outdoor Orientation, No. 34162)
Foil pack cooking is a great way to introduce novices to the world of outdoor cooking. They are easy to prepare, great to eat, and simple to clean up after. They can be prepared in advance—at a den meeting—frozen, and then thrown right on the fire at camp. There are probably hundreds of great recipes around, but they all use the same basic concept. The pack needs to be sealed tightly—a “drug-store” fold— to hold in the moisture, turned several times during cooking, and the actual recipe can be just about whatever you want it to be. Here’s a basic recipe:
Use two layers of lightweight foil, or one layer of heavy-duty foil. A square sheet the width of the roll will work just fine, shiny side up. Some folks smear a layer of butter or margarine on the foil to start. Add a hamburger patty, then sliced potatoes, carrots, onions, broccoli, or whatever else sounds good. Vegetables should all be cut to about the same thickness to help them all cook evenly. Starting with a cabbage leaf first, and then adding the meat will keep the meat from burning. Encourage the Cub Scouts to add a little onion, even if they’re not going to eat it later—it really helps the flavor. Season with salt, pepper, garlic salt, etc., then fold the foil edges up over the food. Fold them down once, crease gently, then fold down again
44 WEBELOS
and crease. The object is to seal the moisture in the package. Try not to rip the seams, but if you do, finish wrapping, then repeat with another layer of foil. The trick is to be able to identify your foil pack later, so scratch your name into a small piece of foil and leave it near the outside. Cook this pack for 20 to 30 minutes. You may want to add a handful of rice; just add a few ice cubes also, and it will turn out great!
Spread the white-hot coals shallowly, and distribute the packs evenly on top. While the packs are cooking, watch for steam venting from a seam. If that happens, seal the pack by folding the edge over or wrapping it in another piece of foil. Turn the packs twice during the recommended time. When it’s close to the completion time, open a corner of a pack and check to see if the meat is done.
Foil Cooking Times
Hamburger 15–20 minutes
Chicken pieces 20–30 minutes
Hot dogs 5–10 minutes
Pork chops 30–40 minutes
Carrots 15–20 minutes
Ears of corn 6–10 minutes
Whole potatoes 45–60 minutes
Potato slices 10–15 minutes
Whole apples 20–30 minutes
Cooking times are approximate and will be affected by the depth of the charcoal bed, altitude, temperature of the food, etc. Frozen packs may be put directly on the fire, but they will take longer to cook. Recipes below may have to be adjusted depending on ingredients, etc. It is best to try them in advance to verify the ingredients and cooking time in your area.
Sample RecipesBiscuits on a Stick
Ingredients: Canned biscuits; condiments (butter, jelly, cinnamon sugar, etc.). Supplies: One dowel (¼ to ½ inch in diameter) for each Scout; aluminum foil.
• Wrap the bottom 6 inches of a dowel with foil. Roll a biscuit into a “rope,” and twist it around the dowel, making sure it stays on the foil.
• Put the dough end of the dowel over a campfire and cook until the biscuit is golden brown on the outside. Then pull the biscuit off the dowel, add condiments, and enjoy.
Campfire Corn on the Cob
Ingredients: Ears of corn, butter, salt, and pepper. Supplies: Bucket of water, aluminum foil.
• Soak the ears of corn in a bucket of cold water for an hour. Then remove the corn and shake off the excess water. It’s OK to leave a little moisture on the kernels, as this will aid in the steaming process.
• Pull back the husks to the handle on each ear of corn, and remove the silk. Slather the kernels with butter and shake on some salt and pepper. Pull the husks back up to cover the corn.
• Tightly wrap the buttered corn in two layers of aluminum foil and place on the hot coals of the fire. The roasting should be complete in 20 minutes. Check one ear after 10 minutes to gauge the remain-ing cook time. The corn should be steamed through and the heated butter will be caramelized.
• When roasting is finished, give the corn time to cool off before unwrapping the foil, as there may be pockets of steam that could cause burns.
Silver Turtles
Ingredients: Hamburger, chicken, or pork; a variety of vegetables (onions, potatoes, carrots, or oth-ers); seasonings (salt, pepper, onion soup mix, butter, Worcestershire sauce). Supplies: Cooking spray, heavy-duty aluminum foil, kitchen knife.
• Slice the vegetables to ½-inch thickness. Spray the foil with cooking spray, lay the meat on the foil, and cover it with vegetables. Then add seasonings.
45CAst iRon Chef
• Fold the foil to enclose the food in a tightly sealed pouch, then place it over your fire and cook for 35–45 minutes. Turn the foil once when cooking is half done.
• Unwrap or cut open the foil. Allow time for cooling, and enjoy!
Dutch Oven Dump Cake
Ingredients: Yellow cake mix; two 30-ounce cans of sliced peaches, drained; one can of lemon-lime soft drink; cinnamon for seasoning; ice cream (optional). Supplies: 24 charcoal briquettes; 12-inch Dutch oven.
• Pour the peaches into the bottom of the Dutch oven and spread evenly in the pan. Spread the dry cake mix on top of the peaches, and sprinkle with cinnamon. Pour in the soft drink, and stir to mix completely. Then place the lid on the oven.
• Bake for 45 minutes to one hour with 12 briquettes spread evenly on the lid and the others spread evenly on the bottom. Every 15 minutes, rotate the oven 90 degrees in one direction and rotate the lid 90 degrees in the opposite direction. Serve warm with ice cream, if desired. Serves 8–10.
Interfaith Graces
Morning GraceGracious giver of all good,Thee we thank for rest and food.Grant that all we do or say,In thy service be this day. Amen.
Noon GraceFather, for this noonday meal,We wish to speak the thanks we feel.Health and strength we have from thee.Help us, Lord, to faithful be. Amen.
Evening GraceTireless guardian on our way,Thou has kept us well this day.While we thank thee, we request,Care continue, pardon rest. Amen.
Sea Base GraceBless the creatures of the sea.Bless this person I call me.Bless these keys, You made so grand.Bless the sun that warms this land.Bless the fellowship we feelAs we gather for this meal. Amen.
Philmont GraceFor food, for raiment,For life, for opportunities,For friendship and fellowship,We thank thee, O Lord. Amen.
Northern Tier GraceFor food, for raiment,For life and opportunity,For sun and rain,For water and portage trails,For friendship and fellowship,We thank thee, O Lord. Amen.
Summit GraceFor this time and this place,For your goodness and grace,For each friend we embrace,We thank thee, O Lord. Amen.
Gilwell GraceO Lord, the giver of all good.We thank thee for our daily food.May Scouting friends, and Scouting ways,Help us to serve thee all our days. Amen.
Sid Richardson Camp GraceFor the food we eat, for the friends we meet,For the lives we live each day.For the challenges we find, for peace of mind,We thank-you, Lord, today. Amen.
Johnny Appleseed GraceThe Lord is good to meAnd so I thank the LordFor giving me the things I need,The sun and rain and the appleseed.The Lord is good to me. Amen.
Upon completion of the Cast Iron Chef adventure, your Webelos Scouts will have earned the adventure pin shown here. Make sure they are recognized for their completion by present-ing the adventure pins, to be worn on their uniforms, as soon as possible according to your pack’s tradition.