Embed Size (px)
Citation preview
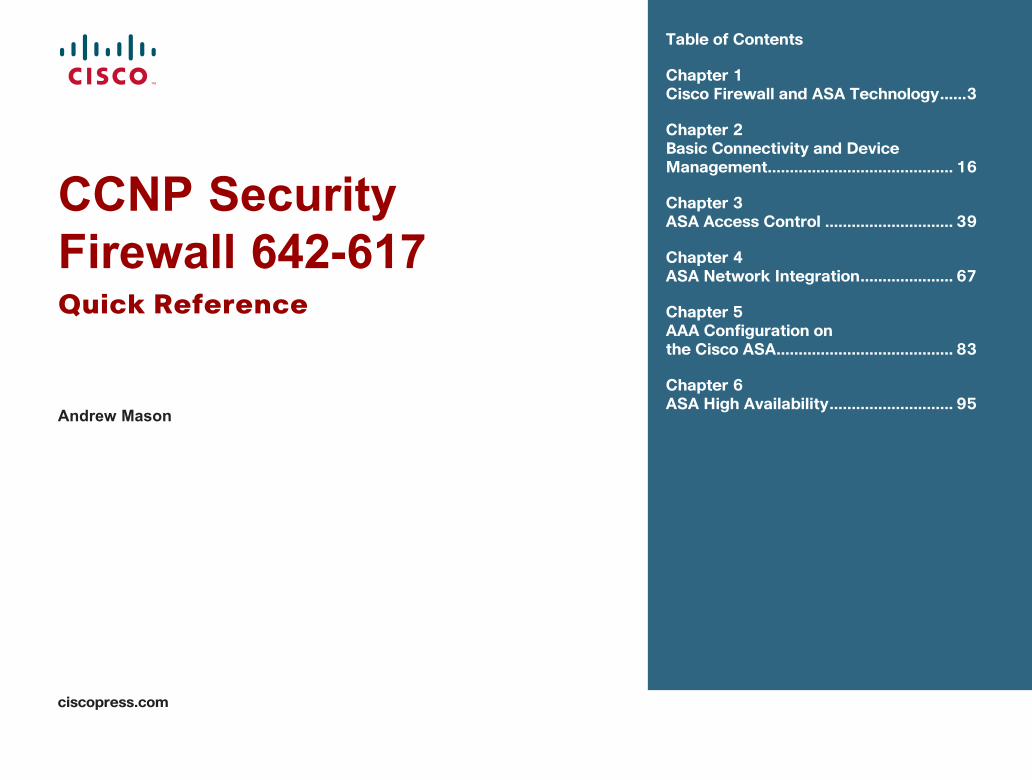
CCNP Security Firewall 642-617Quick Reference
Table of Contents
Chapter 1 Cisco Firewall and ASA Technology ......3
Chapter 2 Basic Connectivity and Device Management .......................................... 16
Chapter 3 ASA Access Control ............................. 39
Chapter 4 ASA Network Integration ..................... 67
Chapter 5 AAA Configuration on the Cisco ASA ........................................ 83
Chapter 6 ASA High Availability ............................ 95
Andrew Mason
ciscopress.com
About the AuthorAndrew G. Mason, CCIE No. 7144, CISSP, is a security consultant and co-founder of the UK based RandomStorm Limited. Andrew has 19 years experience in the IT industry, working in Internet security for the past several years. He is involved in the design and implementation of security deployments for numerous clients based upon Cisco technology. He is also a CHECK Team Leader and leads penetration tests for many UK and international clients.
About the Technical Editor:Max Leitch, CCIE No. 20178, is a network and security architect/engineer and an independent consultant. He holds CCNP, CCDP, CCSP, and CCIE Security certifications.
[ 2 ]
© 2011 Cisco Systems Inc. All rights reserved. This publication is protected by copyright. Please see page 110 for more details.
CCNP Security Firewall 642-617 Quick Reference
Section 2:
Basic Connectivity and Device Management
This section starts to look at the configuration of the Cisco ASA and covers the fundamentals for providing basic connectivity and device management. This section covers basic command-line interface (CLI) configuration, but mainly focuses on configuring the ASA through the graphical Adaptive Security Device Manager (ASDM).
CLi and ASDM ConnectionYou can configure a Cisco ASA in two ways: through the CLI or through the ASDM.
Both the CLI and ASDM offer benefits for configuration, and people disagree as to the best method. The CLI versus GUI configuration argument has been around since the days of UNIX versus Windows. The CLI is fast, after you have mastered it, but the GUI is intuitive and easier to configure, especially with the wizard quick-configuration options now available.
ASDM is the preferred configuration method for the ASA. Various configuration wizards exist within ASDM that are not available via the CLI alone. The logging and monitoring functionality that the ASDM provides cannot be replicated within the CLI.
Command Line interface (CLi)The CLI is the historic way in which all Cisco devices were configured. This is a command-based interface similar to a UNIX- or DOS-based operating system.
[ 16 ]
© 2011 Cisco Systems Inc. All rights reserved. This publication is protected by copyright. Please see page 110 for more details.
CCNP Security Firewall 642-617 Quick Reference
[ 17 ]
© 2011 Cisco Systems Inc. All rights reserved. This publication is protected by copyright. Please see page 110 for more details.
Section 2: Basic Connectivity and Device Management
Commands are typed through a terminal connection to the ASA, and these are then written to the configuration. The CLI is powerful and fast, but learning how to use the CLI is like learning another language.
You can either connect to the CLI through the console port using a console cable or by using Telnet or Secure Shell (SSH). A Cisco console cable is provided with every ASA because this is the normal initial method to connect to the device for the initial configuration.
Using a console cable is an out-of-band connection, and using Telnet or SSH is an in-band connection.
When you first purchase an ASA, you need to configure the ASA through the CLI to configure the initial network settings that enable you to connect to the device using ASDM, which is provided through a web interface, so basic IP settings need to be initially configured.
When you initially connect to an ASA, you are greeted with the following prompt:
ciscoasa>
This is an unprivileged mode and is represented by the > after the hostname.
Entering enable at this prompt places you into privileged EXEC mode, and you see the following prompt:
ciscoasa#
From privileged EXEC mode, you can then enter the configuration mode to enter configuration commands into the ASA. The show and debug commands to monitor and troubleshoot the ASA are also entered in privileged EXEC mode. This is similar to the EXEC modes found within IOS on a Cisco router or switch.
ASDMASDM is an acronym for the ASA Security Device Manager (ASDM), which it is the main graphical way to configure, manage, and monitor your ASA Firewall.
You access the ASDM through a web browser. ASDM is a Java-based application, so any modern browser that supports
NOTEBecause Telnet is sent in clear text and SSH is an encrypted session, you should always use SSH to connect to any net-work device.
NOTEYou can use the quick-configuration system to configure the initial pa-rameters of the ASA to facilitate ASDM connec-tion, but the basic con fig-uration commands without using the quick configura-tion are provided.
[ 18 ]
© 2011 Cisco Systems Inc. All rights reserved. This publication is protected by copyright. Please see page 110 for more details.
Section 2: Basic Connectivity and Device Management
Java will suffice (for instance, Safari, Firefox, Chrome, or Internet Explorer). The connection to ASDM is over SSL, so the configuration is always encrypted between the client and the ASA through the web browser.
Because you have to connect to ASDM through a browser interface, you must configure an IP address on the inside interface to enable you to connect your browser to it. The next section covers interface configuration in more depth.
In addition to setting the IP address, you must enter some other basic configuration commands via the CLI to the ASA to configure the initial connection to the ASDM.
You now run through the necessary commands on an ASA that has a default blank configuration. The commands shown are the bare minimum to enable a connection to the ASDM and are as far as you need to take the CLI in most cases. Because this is an ASA with a blank configuration, the only way to connect is via the CLI using a serial connection.
The first step is to assign an IP address to the inside interface of the ASA. The inside interface is the interface on the inside or trusted part of your network. The outside interface is the interface on the outside or untrusted part of your network.
Toentertheseconfigurationcommands,youneedtobeinconfigurationmodeontheASA.Fromthispointforward,youshould beinconfigurationmode;thepromptshowswhichconfigurationmodeisrequired:
ciscoasa# configuration terminal
ciscoasa(config)# interface vlan 1
ciscoasa(config-if)# ip address 192.168.1.254 255.255.255.0
Because this VLAN is going to be the inside network, you now need to name the VLAN interface as the inside interface:
Ciscoasa(config-if)# nameif inside
INFO: Security level for “inside” set to 100 by default.
When the nameif command is entered, because the value is inside, the default security level of 100 is attributed to the VLAN interface. In contrast to this, the default security level of 0 would be applied to the interface if you name the interface outside.
VLAN1 is now configured as the inside interface with the IP address of 192.168.1.254/24. By default, all ports are in VLAN1, so you now need to tell the ASA 5505 which physical Ethernet port is the inside connection. In this example, you use
NOTEFor these examples, the configuration from a Cisco ASA 5505 is used, which has a built-in eight-port switch with no fixed inter-faces. IP addresses on the ASA 5505 are configured to VLAN interfaces, and then the VLANs are as-signed to the Ethernet interfaces. For other ASA models, the IP address is added straight to the corresponding Ethernet interface.
[ 19 ]
© 2011 Cisco Systems Inc. All rights reserved. This publication is protected by copyright. Please see page 110 for more details.
Section 2: Basic Connectivity and Device Management
Ethernet0/1 as the inside interface, so enter the following commands to bring up Ethernet0/1 because by default all ports are in an administrative shutdown mode:
ciscoasa(config)# interface ethernet0/1
ciscoasa(config-if)# no shutdown
Running a show interface for Ethernet0/1 now displays the following:
ciscoasa# show interface ethernet0/1
Interface Ethernet0/1 “”, is up, line protocol is up
Hardware is 88E6095, BW 100 Mbps, DLY 100 usec
Auto-Duplex(Full-duplex), Auto-Speed(100 Mbps)
Available but not configured via nameif
MAC address 001b.53a0.4e91, MTU not set
IP address unassigned
16423 packets input, 1256399 bytes, 0 no buffer
Received 896 broadcasts, 0 runts, 0 giants
0 input errors, 0 CRC, 0 frame, 0 overrun, 0 ignored, 0 abort
0 L2 decode drops
0 switch ingress policy drops
6518 packets output, 5096677 bytes, 0 underruns
0 output errors, 0 collisions, 0 interface resets
0 babbles, 0 late collisions, 0 deferred
0 lost carrier, 0 no carrier
0 rate limit drops
0 switch egress policy drops
You can see that the interface is up. You can now ping the inside interface of the ASA 5505 from a workstation connected to the 192.168.1.0/24 network and ping workstations on the 192.168.1.0/24 network from the ASA 5505.

[ 20 ]
© 2011 Cisco Systems Inc. All rights reserved. This publication is protected by copyright. Please see page 110 for more details.
Section 2: Basic Connectivity and Device Management
The next step is to configure a secure password on the ASA. You can provide access to the web-based administration interface of the ASA, so ensure that it is protected and locked down with authentication.
By default there is no password set on the ASA, and anybody can connect to it via the console connection if they have physical access to the device.
Set an enable password on the ASA:
ciscoasa(config)# enable password securepassword
The preceding line creates the enable password securepassword. Obviously, you would replace this with a secure, strong password in line with your corporate password policy.
At this point, the interface is up and has a valid IP address configured. However, you must complete a couple more steps to facilitate a connection to the ASDM. Running a browser to https://192.168.1.254 at this point returns with a Page Not Found error message.
The ASA has a built-in web server. This is what serves the ASDM to users requesting it through their browsers. By default, this web server is not enabled.
The internal web server in the ASA is enabled with the following command:
ciscoasa(config)# http server enable
This enables the HTTP server on the ASA, but if you tried a connection to the ASDM, you still could not connect. This failure to connect results because the ASA operates in a closed policy, unlike the HTTPS server on a router.
On the ASA, all connections to the HTTP server are denied by default, and you must enter a configuration command to specify the IP addresses that are allowed to access the ASDM. On a router, by default all IP addresses can connect to the HTTP server, and you must create an access list to restrict this access.
In this example, you want to allow the entire inside network access to the ASDM:
ciscoasa(config)# http 192.168.1.0 255.255.255.0 inside
The preceding command enables all hosts on the 192.168.1.0/24 network, which is located on the inside interface, access to the
[ 110 ]
© 2011 Cisco Systems Inc. All rights reserved. This publication is protected by copyright.
CCNP Security Firewall 642-617 Quick Reference
CCNP Security Firewall 642-617 Quick referenceAndrew Mason
Technical Editor: Max Leitch
Copyright © 2011 Pearson EducationPublished by:Cisco Press800 East 96th Street Indianapolis, IN 46240 USAAll rights reserved. No part of this book may be reproduced or transmitted in any form or by any means, electronic or mechanical, including photocopying, recording, or by any information storage and retrieval system, without written permission from the publisher, except for the inclusion of brief quotations in a review.First Printing January 2011ISBN-10: 0-13-256643-5ISBN-13: 978-0-13-256643-8
Warning and DisclaimerThis book is designed to provide information about the CCNP Security Firewall exam. Every effort has been made to make this book as complete and as accurate as possible, but no warranty or fitness is implied.The information is provided on an “as is” basis. The authors, Cisco Press, and Cisco Systems, Inc. shall have neither liability nor responsibility to any person or entity with respect to any loss or damages arising from the information contained in this book or from the use of the discs or programs that may accompany it.The opinions expressed in this book belong to the author and are not necessarily those of Cisco Systems, Inc
Trademark AcknowledgmentsAlltermsmentionedinthisebookthatareknowntobetrademarksorservicemarkshavebeenappropriatelycapital-ized.CiscoPressorCiscoSystems,Inc.cannotattesttotheaccuracyofthisinformation.Useofaterminthisebookshouldnotberegardedasaffectingthevalidityofanytrademarkorservicemark.
Feedback InformationAtCiscoPress,ourgoalistocreatein-depthtechnicalebooksofthehighestqualityandvalue.Eachebookiscraftedwithcareandprecision,undergoingrigorousdevelopmentthatinvolvestheuniqueexpertiseofmembersoftheprofessionaltechnicalcommunity.
Readerfeedbackisanaturalcontinuationofthisprocess.Ifyouhaveanycommentsonhowwecouldimprovethequalityofthisebook,orotherwisealterittobettersuityourneeds,youcancontactusthroughemailatfeedback@ciscopress.com.PleasebesuretoincludetheebooktitleandISBNinyourmessage.
Wegreatlyappreciateyourassistance.
Corporate and Government SalesThepublisheroffersexcellentdiscountsonthisebookwhenorderedinquantityforbulkpurchasesorspecialsales,whichmayincludeelectronicversionsand/orcustomcoversandcontentparticulartoyourbusiness,traininggoals,marketingfocus,andbrandinginterests.Formoreinformation,pleasecontact:U.S. Corporate and Government Sales [email protected].
ForsalesoutsidetheUnitedStatespleasecontact:International [email protected]
Cisco has more than 200 offices worldwide. Addresses, phone numbers, and fax numbers are listed on the Cisco Website at www.cisco.com/go/offices.
CCDE, CCENT, Cisco Eos, Cisco HealthPresence, the Cisco logo, Cisco Lumin, Cisco Nexus, Cisco StadiumVision, Cisco TelePresence, Cisco WebEx, DCE, and Welcome to the Human Network are trademarks; Changing the Way We Work, Live, Play, and Learn and Cisco Store are service marks; and Access Registrar, Aironet, AsyncOS, Bringing the Meeting To You, Catalyst, CCDA, CCDP, CCIE, CCIP, CCNA, CCNP, CCSP, CCVP, Cisco, the
Cisco Certified Internetwork Expert logo, Cisco IOS, Cisco Press, Cisco Systems, Cisco Systems Capital, the Cisco Systems logo, Cisco Unity, Collaboration Without Limitation, EtherFast, EtherSwitch, Event Center, Fast Step, Follow Me Browsing, FormShare, GigaDrive, HomeLink, Internet Quotient, IOS, iPhone, iQuick Study, IronPort, the IronPort logo, LightStream, Linksys, MediaTone, MeetingPlace, MeetingPlace Chime Sound, MGX, Networkers, Networking Academy, Network Registrar, PCNow, PIX, PowerPanels, ProConnect, ScriptShare, SenderBase, SMARTnet, Spectrum Expert, StackWise, The Fastest Way to Increase Your Internet Quotient, TransPath, WebEx, and the WebEx logo are registered trademarks of Cisco Systems, Inc. and/or its affiliates in the United States and certain other countries.
All other trademarks mentioned in this document or website are the property of their respective owners. The use of the word partner does not imply a partnership relationship between Cisco and any other company. (0812R)
Cisco has more than 200 offices worldwide. Addresses, phone numbers, and fax numbers are listed on the Cisco Website at www.cisco.com/go/offices.
CCDE, CCENT, Cisco Eos, Cisco HealthPresence, the Cisco logo, Cisco Lumin, Cisco Nexus, Cisco StadiumVision, Cisco TelePresence, Cisco WebEx, DCE, and Welcome to the Human Network are trademarks; Changing the Way We Work, Live, Play, and Learn and Cisco Store are service marks; and Access Registrar, Aironet, AsyncOS, Bringing the Meeting To You, Catalyst, CCDA, CCDP, CCIE, CCIP, CCNA, CCNP, CCSP, CCVP, Cisco, the Cisco Certified Internetwork Expert logo, Cisco IOS, Cisco Press, Cisco Systems, Cisco Systems Capital, the Cisco Systems logo, Cisco Unity, Collaboration Without Limitation, EtherFast, EtherSwitch, Event Center, Fast Step, Follow Me Browsing, FormShare, GigaDrive, HomeLink, Internet Quotient, IOS, iPhone, iQuick Study, IronPort, the IronPort logo, LightStream, Linksys, MediaTone, MeetingPlace, MeetingPlace Chime Sound, MGX, Networkers, Networking Academy, Network Registrar, PCNow, PIX, PowerPanels, ProConnect, ScriptShare, SenderBase, SMARTnet, Spectrum Expert, StackWise, The Fastest Way to Increase Your Internet Quotient, TransPath, WebEx, and the WebEx logo are registered trademarks of Cisco Systems, Inc. and/or its affiliates in the United States and certain other countries.
All other trademarks mentioned in this document or website are the property of their respective owners. The use of the word partner does not imply a partnership relationship between Cisco and any other company. (0812R)
Americas HeadquartersCisco Systems, Inc.San Jose, CA
Asia Pacific HeadquartersCisco Systems (USA) Pte. Ltd.Singapore
Europe HeadquartersCisco Systems International BVAmsterdam, The Netherlands
Americas HeadquartersCisco Systems, Inc.San Jose, CA
Asia Pacific HeadquartersCisco Systems (USA) Pte. Ltd.Singapore
Europe HeadquartersCisco Systems International BVAmsterdam, The Netherlands