Embed Size (px)
Citation preview
CD34 Enumeration in the Clinical Laboratory Vera S. Donnenberg, Ph.D., Assistant Professor of Surgery Deborah L. Griffin, M.S., Manager QA Cellular Therapies
Learning Objectives
• To understand and perform daily instrument setup and quality assessment
• To understand the theoretical basis for single-platform flow cytometric
determination of absolute counts (bead calibration, lyse no-wash)
• To understand the “ISHAGE” gating strategy for detection of CD34 cells, and the
exclusion of non-viable cells by dye uptake
• To stain, acquire and interpret a “process control” sample
• To stain, acquire and interpret an unknown sample
• To relate absolute hematopoietic CD34 count to endothelial and mesenchymal
lineages of the human adult bone marrow
Contents 2. Introduction to CD34 Enumeration
3. Vera and Debe’s short cut
4. SOP: QC Daily Start-up, Shutdown and Maintenance
5. SOP: CD34 staining CD Chex Process Control Sample
6. SOP: CD34 Staining with Stem-Kit
7. Hematopoietic, Endothelial and Mesenchymal Stem Cell Analysis of Human
Adult Bone Marrow
8. Reprint: Donnenberg AD, Koch EK, Griffin DL, Stanczak HM, Kiss JE, Carlos
TM, BuchBarker DM, Yeager AM. Viability of Cryopreserved BM Progenitor
Cells Stored for More than a Decade. Cytotherapy 4(2):157-163, 2002.
9. Product Insert: Flow-Check Fluorospheres
10. Product Insert: Flow-Set Fluorospheres
11. Product Insert: CaliBRITE Beads
12. Product Insert: CD-Chex CD34
13. Product Insert: Stem-Kit
Page of 48 1
Introduction
Vera S. Donnenberg, PhD Assistant Professor of Surgery University of Pittsburgh Hillman Cancer Research Pavilion L2.35 5117 Centre Ave Pittsburgh PA 15213 Phone 412.623.3266 Fax 412.623.7778 [email protected]
Deborah L. Griffin, MS Manager, QA Cellular Therapies University of Pittsburgh Medical Center Hillman Cancer Center Suite 1a 5150 Centre Ave Pittsburgh PA 15232 Phone 412.623.1590 Fax 412.623.7778 [email protected]
Hematopoietic Progenitor Cell Enumeration CD34 progenitor cells usually comprise 1% or less of a bone marrow or mobilized
peripheral blood progenitor cell product. According to our release criteria, a pure, potent
and safe product would have an adequate progenitor cell dose (5 x 10⁶ CD34/kg), high
viability (>99%) and be negative for bacterial or fungal contamination. A single platform,
bead-calibrated assay was used to assess CD34 purity, absolute CD34 content and CD34
viability (Figure), using the landmark gating strategy of Sutherland (1). Absolute white
cell count (WBC) was also measured using CD45 to identify leukocytes. CD34 and WBC
viability was determined by exclusion of the fluorescent agent 7-amino-actinomycin D
(2).
Single platform assays include those using a volumetric approach (3), and those that are
calibrated with reference to beads of a known concentration. The later approach will be
demonstrated. Product, added as precisely as possible using a positive displacement
pipette, is incubated with antibodies. Red cells, if present, are lysed by addition of
ammonium chloride. Before acquisition, a precise volume of uniform beads of known
concentration (StemCount, Beckman-Coulter) is added. Since the sample is never
washed, there is no possibility of cell loss. The number of events of interest counted
Page of 48 2
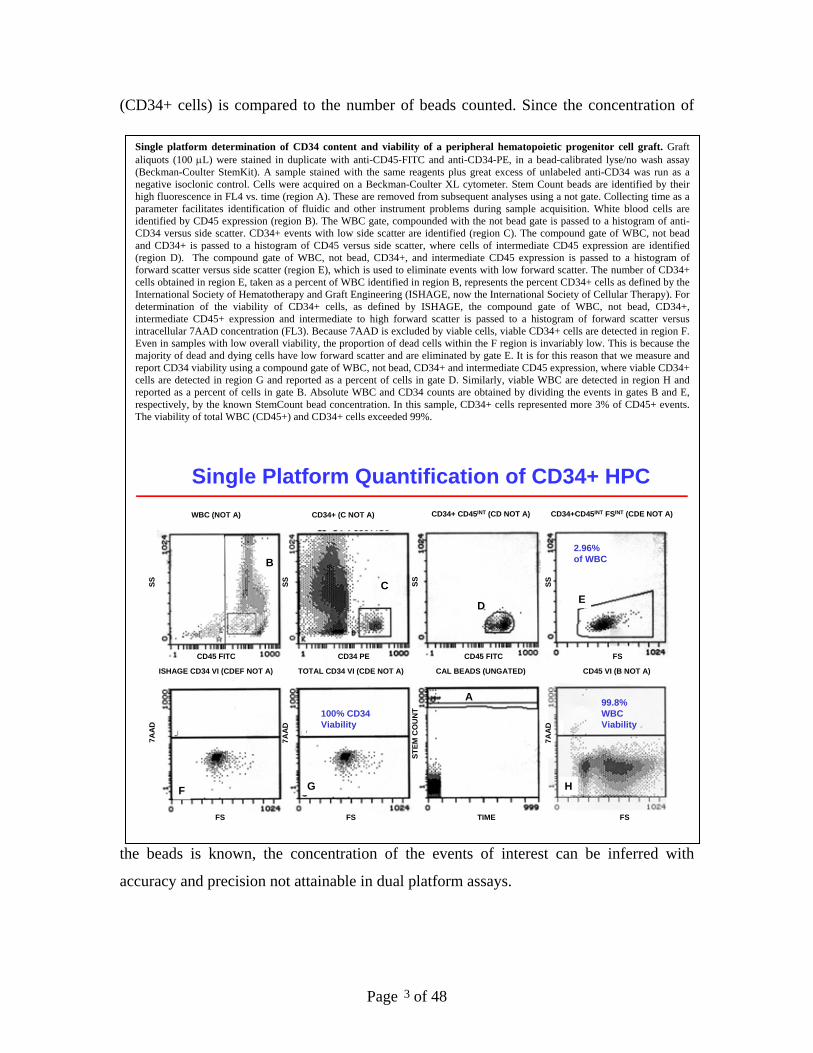
(CD34+ cells) is compared to the number of beads counted. Since the concentration of
the beads is known, the concentration of the events of interest can be inferred with
accuracy and precision not attainable in dual platform assays.
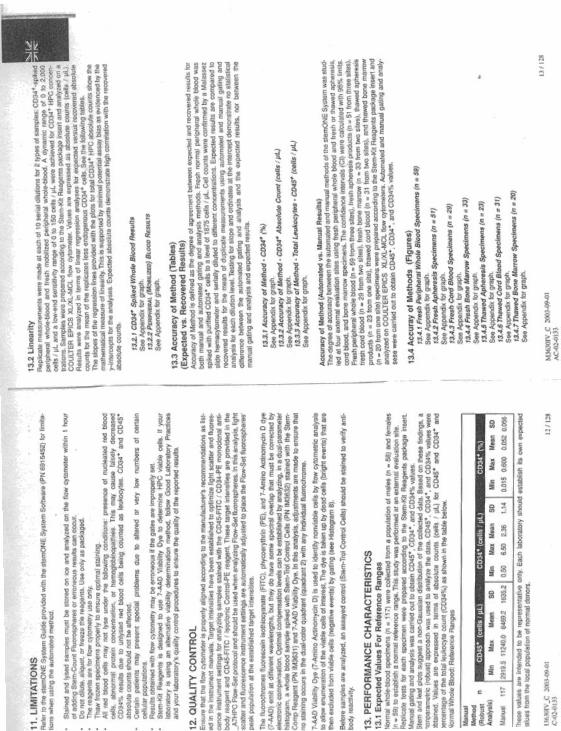
Single platform determination of CD34 content and viability of a peripheral hematopoietic progenitor cell graft. Graft aliquots (100 μL) were stained in duplicate with anti-CD45-FITC and anti-CD34-PE, in a bead-calibrated lyse/no wash assay (Beckman-Coulter StemKit). A sample stained with the same reagents plus great excess of unlabeled anti-CD34 was run as a negative isoclonic control. Cells were acquired on a Beckman-Coulter XL cytometer. Stem Count beads are identified by their high fluorescence in FL4 vs. time (region A). These are removed from subsequent analyses using a not gate. Collecting time as a parameter facilitates identification of fluidic and other instrument problems during sample acquisition. White blood cells are identified by CD45 expression (region B). The WBC gate, compounded with the not bead gate is passed to a histogram of anti-CD34 versus side scatter. CD34+ events with low side scatter are identified (region C). The compound gate of WBC, not bead and CD34+ is passed to a histogram of CD45 versus side scatter, where cells of intermediate CD45 expression are identified (region D). The compound gate of WBC, not bead, CD34+, and intermediate CD45 expression is passed to a histogram of forward scatter versus side scatter (region E), which is used to eliminate events with low forward scatter. The number of CD34+ cells obtained in region E, taken as a percent of WBC identified in region B, represents the percent CD34+ cells as defined by the International Society of Hematotherapy and Graft Engineering (ISHAGE, now the International Society of Cellular Therapy). For determination of the viability of CD34+ cells, as defined by ISHAGE, the compound gate of WBC, not bead, CD34+, intermediate CD45+ expression and intermediate to high forward scatter is passed to a histogram of forward scatter versus intracellular 7AAD concentration (FL3). Because 7AAD is excluded by viable cells, viable CD34+ cells are detected in region F. Even in samples with low overall viability, the proportion of dead cells within the F region is invariably low. This is because the majority of dead and dying cells have low forward scatter and are eliminated by gate E. It is for this reason that we measure and report CD34 viability using a compound gate of WBC, not bead, CD34+ and intermediate CD45 expression, where viable CD34+ cells are detected in region G and reported as a percent of cells in gate D. Similarly, viable WBC are detected in region H and reported as a percent of cells in gate B. Absolute WBC and CD34 counts are obtained by dividing the events in gates B and E, respectively, by the known StemCount bead concentration. In this sample, CD34+ cells represented more 3% of CD45+ events. The viability of total WBC (CD45+) and CD34+ cells exceeded 99%.
CD45 FITC CD45 FITCCD34 PE FS
FSFSFS TIME
SS SS SSSS
7AA
D
7AA
D
7AA
D
STEM
CO
UN
T
A
B
C
D E
F G H
WBC (NOT A) CD34+ (C NOT A) CD34+ CD45INT (CD NOT A) CD34+CD45INT FSINT (CDE NOT A)
ISHAGE CD34 VI (CDEF NOT A) TOTAL CD34 VI (CDE NOT A) CAL BEADS (UNGATED) CD45 VI (B NOT A)
100% CD34 Viability
99.8% WBC Viability
2.96% of WBC
Single Platform Quantification of CD34+ HPC
Page of 48 3
Quality Control
Perhaps the least glamorous, but most important aspect of modern flow cytometry is the
emphasis on quality control (QC). Like those pesky experimental controls, essential
quality control measures are necessary for the valid interpretation of flow cytometric data.
The instrument-related elements of a quality control program are shown in Table 1. The
College of American Pathologists (CAP), which administers a quality assurance program
for clinical flow cytometry laboratories, states that quality assurance measures must cover
specimen and result integrity throughout pre-analytical, analytical and post-analytical
processes. CAP provides a helpful checklist covering the areas that must be addressed by
a quality assurance program. As a part of their accreditation process, laboratories also
participate in surveys conducted twice or three times per year, in which blood samples are
aliquoted and sent by express mail to participating laboratories. The results are tabulated
and compared to the results of other laboratories using similar instrumentation and
methods.
Although the level of quality control required in clinical laboratories may be overkill in
the research setting, the careful investigator would do well to review the CAP checklist
and decide which standards should be adopted.
Page of 48 4
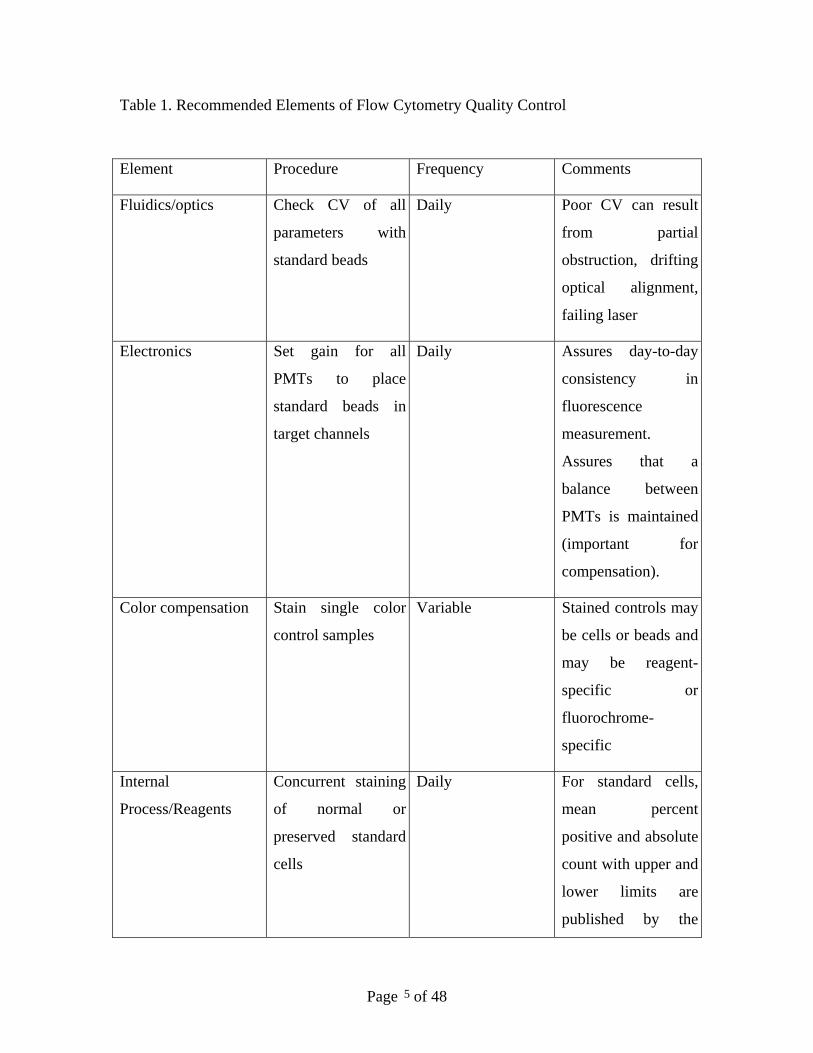
Table 1. Recommended Elements of Flow Cytometry Quality Control
Element Procedure Frequency Comments
Fluidics/optics Check CV of all
parameters with
standard beads
Daily Poor CV can result
from partial
obstruction, drifting
optical alignment,
failing laser
Electronics Set gain for all
PMTs to place
standard beads in
target channels
Daily Assures day-to-day
consistency in
fluorescence
measurement.
Assures that a
balance between
PMTs is maintained
(important for
compensation).
Color compensation Stain single color
control samples
Variable Stained controls may
be cells or beads and
may be reagent-
specific or
fluorochrome-
specific
Internal
Process/Reagents
Concurrent staining
of normal or
preserved standard
cells
Daily For standard cells,
mean percent
positive and absolute
count with upper and
lower limits are
published by the
Page of 48 5
vendor
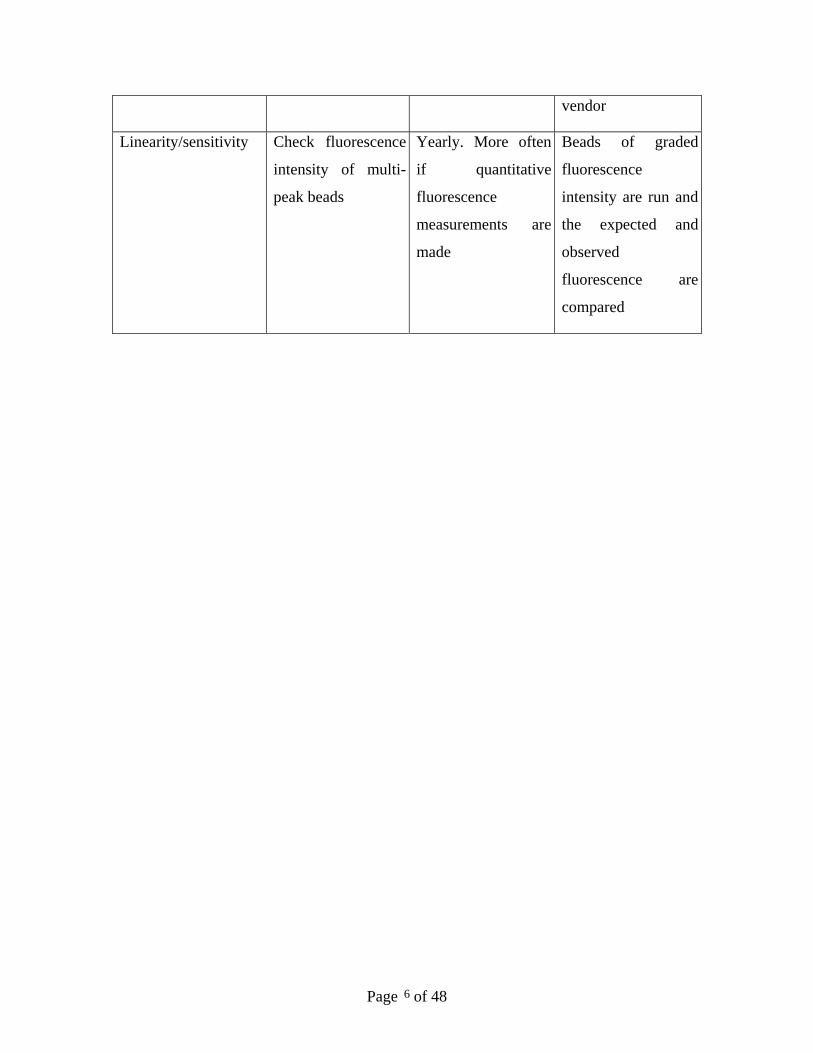
Linearity/sensitivity Check fluorescence
intensity of multi-
peak beads
Yearly. More often
if quantitative
fluorescence
measurements are
made
Beads of graded
fluorescence
intensity are run and
the expected and
observed
fluorescence are
compared
Page of 48 6
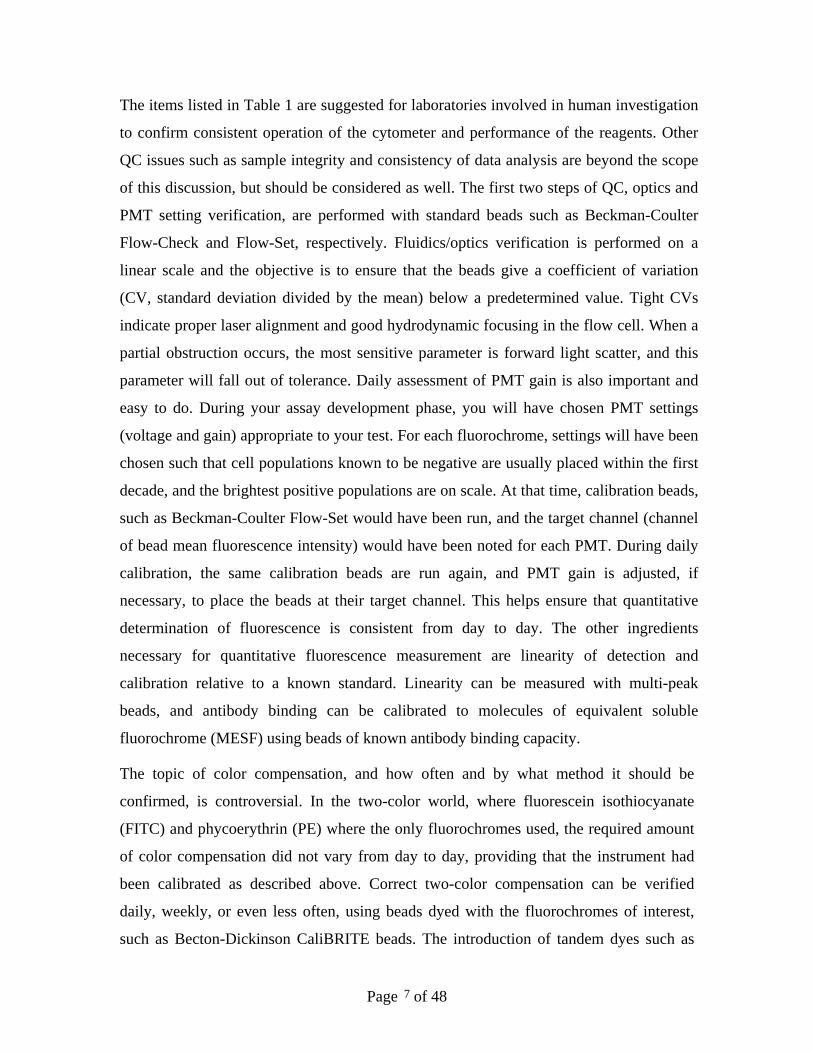
The items listed in Table 1 are suggested for laboratories involved in human investigation
to confirm consistent operation of the cytometer and performance of the reagents. Other
QC issues such as sample integrity and consistency of data analysis are beyond the scope
of this discussion, but should be considered as well. The first two steps of QC, optics and
PMT setting verification, are performed with standard beads such as Beckman-Coulter
Flow-Check and Flow-Set, respectively. Fluidics/optics verification is performed on a
linear scale and the objective is to ensure that the beads give a coefficient of variation
(CV, standard deviation divided by the mean) below a predetermined value. Tight CVs
indicate proper laser alignment and good hydrodynamic focusing in the flow cell. When a
partial obstruction occurs, the most sensitive parameter is forward light scatter, and this
parameter will fall out of tolerance. Daily assessment of PMT gain is also important and
easy to do. During your assay development phase, you will have chosen PMT settings
(voltage and gain) appropriate to your test. For each fluorochrome, settings will have been
chosen such that cell populations known to be negative are usually placed within the first
decade, and the brightest positive populations are on scale. At that time, calibration beads,
such as Beckman-Coulter Flow-Set would have been run, and the target channel (channel
of bead mean fluorescence intensity) would have been noted for each PMT. During daily
calibration, the same calibration beads are run again, and PMT gain is adjusted, if
necessary, to place the beads at their target channel. This helps ensure that quantitative
determination of fluorescence is consistent from day to day. The other ingredients
necessary for quantitative fluorescence measurement are linearity of detection and
calibration relative to a known standard. Linearity can be measured with multi-peak
beads, and antibody binding can be calibrated to molecules of equivalent soluble
fluorochrome (MESF) using beads of known antibody binding capacity.
The topic of color compensation, and how often and by what method it should be
confirmed, is controversial. In the two-color world, where fluorescein isothiocyanate
(FITC) and phycoerythrin (PE) where the only fluorochromes used, the required amount
of color compensation did not vary from day to day, providing that the instrument had
been calibrated as described above. Correct two-color compensation can be verified
daily, weekly, or even less often, using beads dyed with the fluorochromes of interest,
such as Becton-Dickinson CaliBRITE beads. The introduction of tandem dyes such as
Page of 48 7
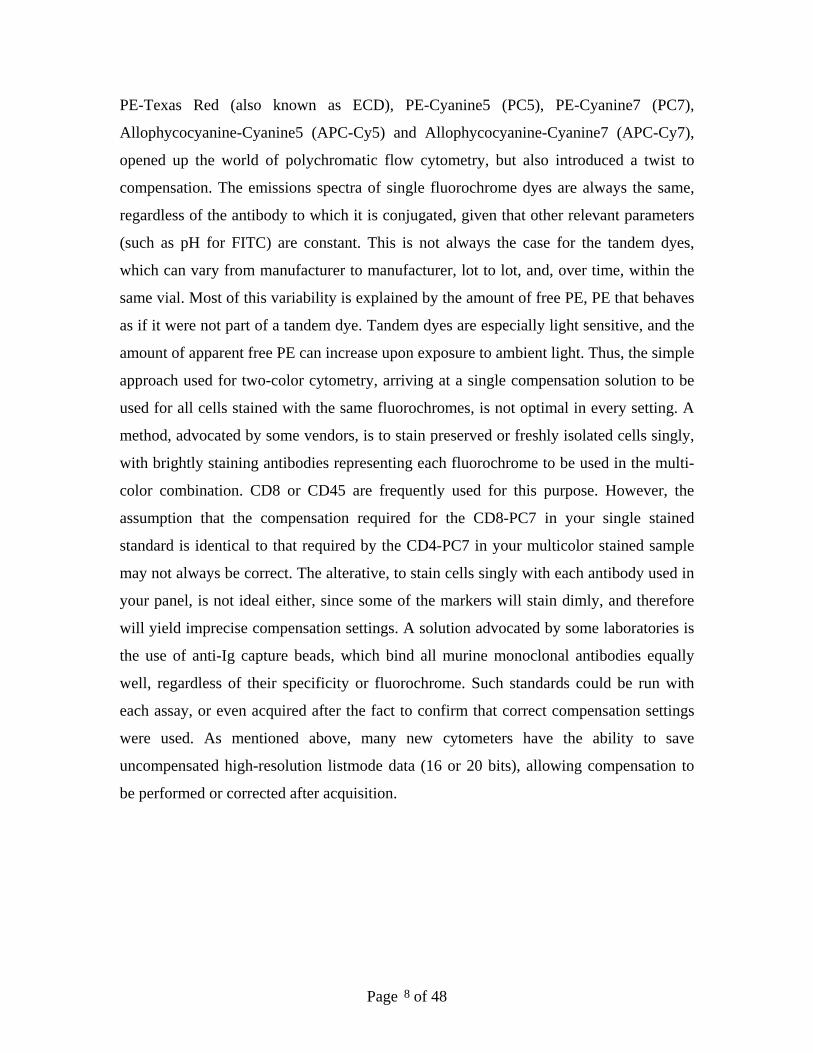
PE-Texas Red (also known as ECD), PE-Cyanine5 (PC5), PE-Cyanine7 (PC7),
Allophycocyanine-Cyanine5 (APC-Cy5) and Allophycocyanine-Cyanine7 (APC-Cy7),
opened up the world of polychromatic flow cytometry, but also introduced a twist to
compensation. The emissions spectra of single fluorochrome dyes are always the same,
regardless of the antibody to which it is conjugated, given that other relevant parameters
(such as pH for FITC) are constant. This is not always the case for the tandem dyes,
which can vary from manufacturer to manufacturer, lot to lot, and, over time, within the
same vial. Most of this variability is explained by the amount of free PE, PE that behaves
as if it were not part of a tandem dye. Tandem dyes are especially light sensitive, and the
amount of apparent free PE can increase upon exposure to ambient light. Thus, the simple
approach used for two-color cytometry, arriving at a single compensation solution to be
used for all cells stained with the same fluorochromes, is not optimal in every setting. A
method, advocated by some vendors, is to stain preserved or freshly isolated cells singly,
with brightly staining antibodies representing each fluorochrome to be used in the multi-
color combination. CD8 or CD45 are frequently used for this purpose. However, the
assumption that the compensation required for the CD8-PC7 in your single stained
standard is identical to that required by the CD4-PC7 in your multicolor stained sample
may not always be correct. The alterative, to stain cells singly with each antibody used in
your panel, is not ideal either, since some of the markers will stain dimly, and therefore
will yield imprecise compensation settings. A solution advocated by some laboratories is
the use of anti-Ig capture beads, which bind all murine monoclonal antibodies equally
well, regardless of their specificity or fluorochrome. Such standards could be run with
each assay, or even acquired after the fact to confirm that correct compensation settings
were used. As mentioned above, many new cytometers have the ability to save
uncompensated high-resolution listmode data (16 or 20 bits), allowing compensation to
be performed or corrected after acquisition.
Page of 48 8
Literature Cited
1. Sutherland DR. Anderson L. Keeney M. Nayar R. Chin-Yee I. The ISHAGE guidelines for CD34+ cell determination by flow cytometry. International Society of Hematotherapy and Graft Engineering. Journal of Hematotherapy. 5(3):213-26, 1996.
2. Donnenberg AD. Koch EK. Griffin DL. Stanczak HM. Kiss JE. Carlos TM.
Buchbarker DM. Yeager AM. Viability of cryopreserved BM progenitor cells stored for more than a decade. Cytotherapy. 4(2):157-63, 2002.
3. O'Gorman MR. Gelman R. Inter- and intrainstitutional evaluation of automated
volumetric capillary cytometry for the quantitation of CD4- and CD8-positive T lymphocytes in the peripheral blood of persons infected with human immunodeficiency virus. Site Investigators and the NIAID New CD4 Technologies Focus Group. Clinical & Diagnostic Laboratory Immunology. 4(2):173-9, 1997.
Page of 48 9
CD34 STAINING OF CELLS
1) Label 3 tubes with patient name and: Tube 1> 45/34, Tube 2> 45/34, Tube3> Isotube.
2) Add 20μl of Stem-Kit antibody to appropriate tube, i.e., 45/34 to tubes 1 & 2 and 45/isoclonic control to tube 3.
3) Add 20μl of 7AAD to each tube.
4) Pipet 100μl of patient sample to all 3 tubes.
a) Using the same Eppendorf repeat pipettor (positive displacement) for the addition of sample and fluorospheres, draw blood into 500μl repeat tip.
b) Wipe tip with Kimwipe.
c) * Click pipettor once for priming, ejecting sample into original sample container. Precision is necessary for specimen pipetting or erroneous results may occur.
5) Cap all tubes and incubate for 20 minutes in the dark at room temperature.
6) After 20 minute incubation, add 2ml of lysing solution to each tube and vortex.
7) Cap tubes and incubate for 10 minutes at room temperature in the dark.
8) Add 100μl of fluorospheres to all 3 tubes
a) Gently swirl the bottle of Stem Count Fluorospheres. Tap the fluorospheres lightly on the vortex but do not vortex vigorously as this may cause erroneous cell counts. Using the same Eppendorf repeat pipettor (positive displacement) as for the addition of sample, draw fluorospheres into 500μl repeat tip.
b) Wipe tip with Kimwipe.
c) * Click Pipettor once for priming. Precision is necessary for pipetting of beads or erroneous results may occur.
9) Before acquisition on the flow cytometer, label a 4th tube as blank and add 2ml of distilled water to it. This blank can be used for multiple samples.
10) Samples are now ready for flow cytometric analysis.
Page of 48 10
CD 34 ACQUISITION ON THE XL IN SYSTEM II
1. To run CD34 Stem-kit tubes: under Panel choose Stem Kit-7AAD, click Okay.
2. Vortex Tube 1, which is CD45/CD34.
3. Place tube on sample port.
4. Instrument will stop acquiring when 75,000 events have been collected in Gate B or 999 seconds have elapsed. Watch event number.
5. After 1st tube is collected, Enter Specimen ID box will appear.
6. Sample port will lower. Remove tube and wait for flashing green: Insert Sample Tube.
7. Repeat with Tube 2 Do not change any gates. The gates are set on Tube 1 and will remain the same for all remaining tubes for that patient. Just make sure beads are within gate or cells have not shifted, if necessary push Prime button and restart acquisition.
8. The next tube is the blank containing only distilled water. This will prevent any carry-over to the isotube.
9. The final tube will be the isotube, CD45/Isoclonic. This tube will stain all white blood cells but you should see little to no staining of CD34+.
10. Following acquisition, a report screen will appear. Click PRINT at the bottom right of screen. You should receive 4 sheets; Tube 1, Tube 2, Isotube and Final Report.
Page of 48 11
University of Pittsburgh Medical Center University of Pittsburgh Cancer Institute/Children’s Hospital of Pittsburgh
HSC Laboratories
Adult Program Pediatric Program 5117 Centre Ave 3460 5th Avenue
Pittsburgh PA 15213 Pittsburgh PA 15213
Procedure Name: 1999-11-R8 QC DAILY START-UP, SHUT DOWN AND MAINTENANCE PROCEDURES FOR COULTER XL-MCL PRIMARY AND BACK-UP INSTRUMENTS
Date Adopted: May 26, 1999
Date Revised: September 12, 2006 Revision number: 8
Author: Griffin DL, Koch EK, Shierer-Fochler S, Albert D. Donnenberg
Supersedes Procedure: NA
Distribution: Adult and Pediatric HSC Laboratories
Laboratory Director Date
Medical Director Date
Supervisor Date
Technologist Annual Review
Date Signature
University of Pittsburgh Medical Center University of Pittsburgh Cancer Institute/Children’s Hospital of Pittsburgh
Page of 48 12
HSC Laboratories
Adult Program Pediatric Program 5117 Centre Ave 3460 5th Avenue
Pittsburgh PA 15213 Pittsburgh PA 15213
1999-11-R8 QC DAILY START-UP, SHUT DOWN AND MAINTENANCE PROCEDURES FOR COULTER XL-MCL PRIMARY AND BACK-UP INSTRUMENTS
Principle A Daily Start-Up procedure including quality control checks is essential to ensure that the flow cytometer is working accurately and precisely.
Flow-Check fluorospheres are used to check the stability of the optical and fluidic
systems. Flow Set fluorospheres are used to set the voltage settings to predetermined
values. CaliBRITE beads are used to set compensation between FL1 and FL2.
The Daily Shut-Down procedure ensures that the machine is free of debris and
biohazardous materials.
All documentation referring to Flow Cytometry reagents and instruments shall be
available in close proximity to the flow cytometer. This ensures that the technical staff
operating the equipment is able to effectively utilize the instrument.
Reagents and Supplies
Supplies Supplier Catalog number
Coulter-Clenz Coulter 8546929
Clorox Bleach, unscented UPMC Stores 01026
Deionized water Millipore wall tap
12x75 Tubes Falcon 2052
CaliBRITE beads Becton Dickinson 349502
PBS GIBCO 12377-016
Flow Check Beads Beckman-Coulter 6605359
Flow Set Beads Beckman-Coulter 6607007
Page of 48 13
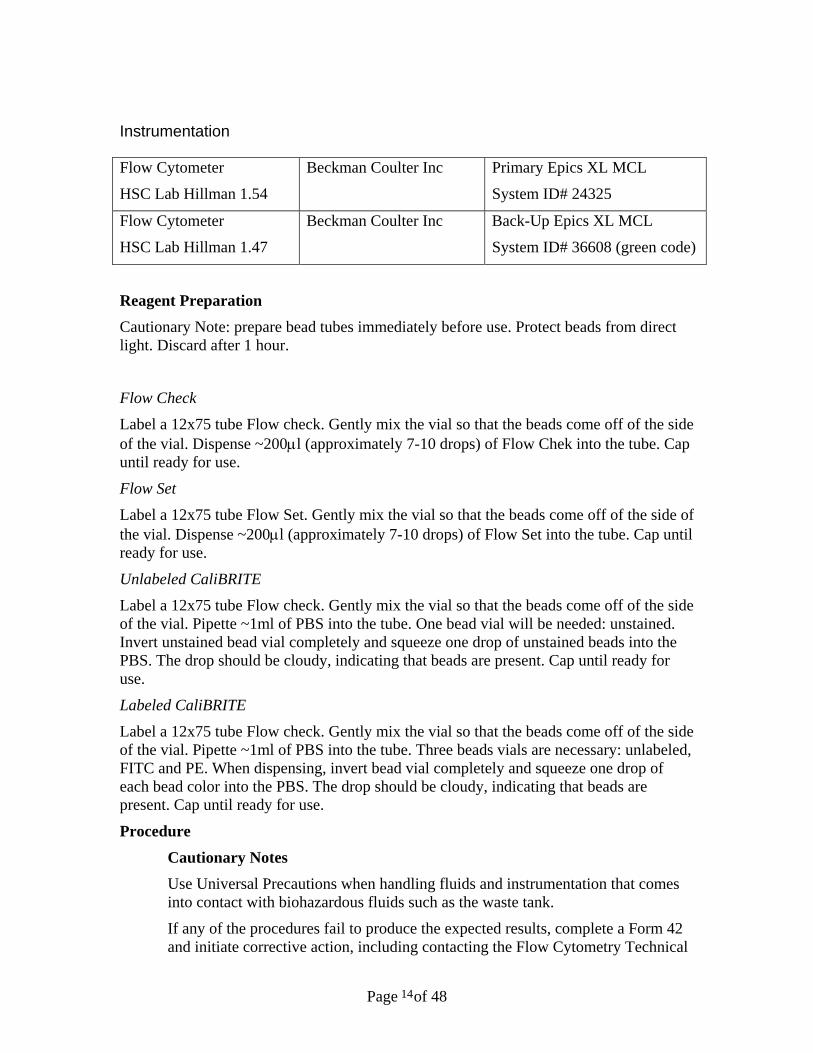
Instrumentation
Flow Cytometer
HSC Lab Hillman 1.54
Beckman Coulter Inc Primary Epics XL MCL
System ID# 24325
Flow Cytometer
HSC Lab Hillman 1.47
Beckman Coulter Inc Back-Up Epics XL MCL
System ID# 36608 (green code)
Reagent Preparation Cautionary Note: prepare bead tubes immediately before use. Protect beads from direct light. Discard after 1 hour.
Flow Check
Label a 12x75 tube Flow check. Gently mix the vial so that the beads come off of the side of the vial. Dispense ~200μl (approximately 7-10 drops) of Flow Chek into the tube. Cap until ready for use.
Flow Set
Label a 12x75 tube Flow Set. Gently mix the vial so that the beads come off of the side of the vial. Dispense ~200μl (approximately 7-10 drops) of Flow Set into the tube. Cap until ready for use.
Unlabeled CaliBRITE
Label a 12x75 tube Flow check. Gently mix the vial so that the beads come off of the side of the vial. Pipette ~1ml of PBS into the tube. One bead vial will be needed: unstained. Invert unstained bead vial completely and squeeze one drop of unstained beads into the PBS. The drop should be cloudy, indicating that beads are present. Cap until ready for use.
Labeled CaliBRITE
Label a 12x75 tube Flow check. Gently mix the vial so that the beads come off of the side of the vial. Pipette ~1ml of PBS into the tube. Three beads vials are necessary: unlabeled, FITC and PE. When dispensing, invert bead vial completely and squeeze one drop of each bead color into the PBS. The drop should be cloudy, indicating that beads are present. Cap until ready for use.
Procedure
Cautionary Notes Use Universal Precautions when handling fluids and instrumentation that comes into contact with biohazardous fluids such as the waste tank.
If any of the procedures fail to produce the expected results, complete a Form 42 and initiate corrective action, including contacting the Flow Cytometry Technical
Page of 48 14
Supervisor or the Beckman Coulter Service Center to have a Service Representative schedule service, as needed. Should it be necessary to run the back-up instrument in an emergency see below for detailed methods specific to the instrument in 1.47 Hillman. These instructions are below the section “Emergency Service Call.”
Detailed Methods
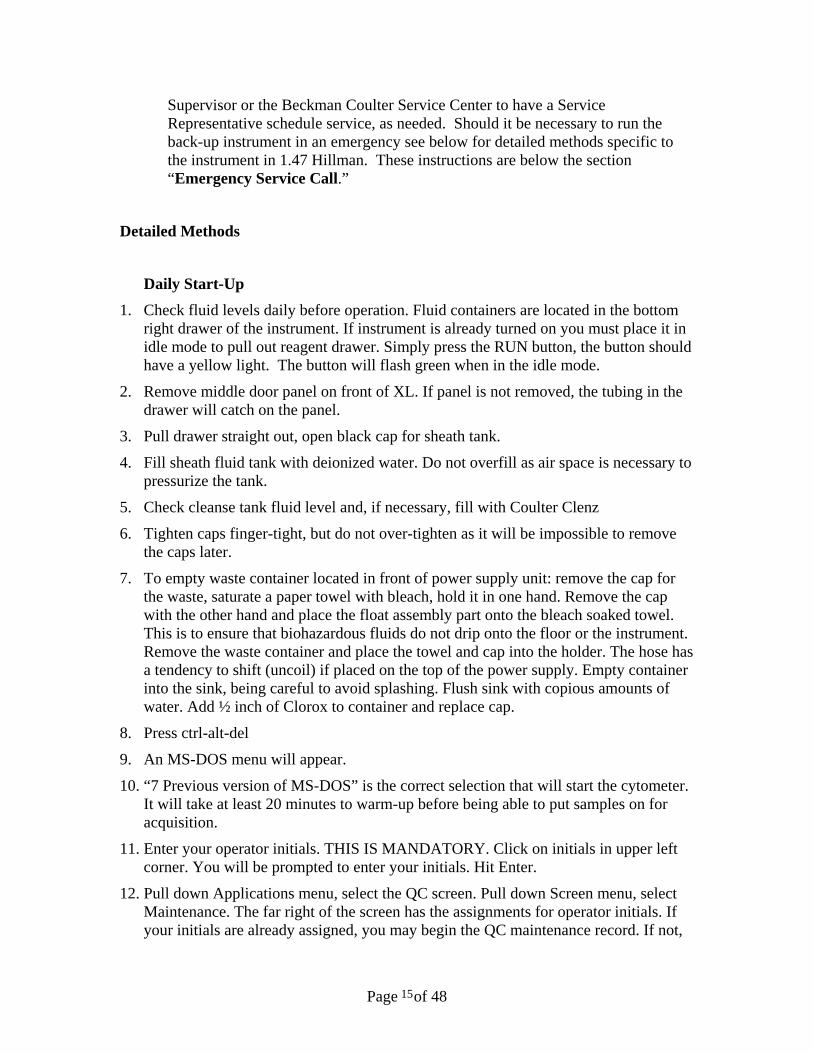
Daily Start-Up 1. Check fluid levels daily before operation. Fluid containers are located in the bottom
right drawer of the instrument. If instrument is already turned on you must place it in idle mode to pull out reagent drawer. Simply press the RUN button, the button should have a yellow light. The button will flash green when in the idle mode.
2. Remove middle door panel on front of XL. If panel is not removed, the tubing in the drawer will catch on the panel.
3. Pull drawer straight out, open black cap for sheath tank.
4. Fill sheath fluid tank with deionized water. Do not overfill as air space is necessary to pressurize the tank.
5. Check cleanse tank fluid level and, if necessary, fill with Coulter Clenz
6. Tighten caps finger-tight, but do not over-tighten as it will be impossible to remove the caps later.
7. To empty waste container located in front of power supply unit: remove the cap for the waste, saturate a paper towel with bleach, hold it in one hand. Remove the cap with the other hand and place the float assembly part onto the bleach soaked towel. This is to ensure that biohazardous fluids do not drip onto the floor or the instrument. Remove the waste container and place the towel and cap into the holder. The hose has a tendency to shift (uncoil) if placed on the top of the power supply. Empty container into the sink, being careful to avoid splashing. Flush sink with copious amounts of water. Add ½ inch of Clorox to container and replace cap.
8. Press ctrl-alt-del
9. An MS-DOS menu will appear.
10. “7 Previous version of MS-DOS” is the correct selection that will start the cytometer. It will take at least 20 minutes to warm-up before being able to put samples on for acquisition.
11. Enter your operator initials. THIS IS MANDATORY. Click on initials in upper left corner. You will be prompted to enter your initials. Hit Enter.
12. Pull down Applications menu, select the QC screen. Pull down Screen menu, select Maintenance. The far right of the screen has the assignments for operator initials. If your initials are already assigned, you may begin the QC maintenance record. If not,
Page of 48 15

chose a color block that is not assigned. There are 6 items located on the Power Supply that must be checked during Start-Up:
Open Power Supply door (front)
Value must be entered into Maintenance Spreadsheet for the following two gauges. If they do not fall within the normal ranges established by Coulter, make adjustments according to the Coulter Manual. • System Pressure Check that the system pressure gauge reads 30+2 psi • System Vacuum Check that system vacuum gauge reads at least 17 in. Hg. The following parts must be checked to ensure that they are free from damage and accumulated fluids or waste. See the Coulter Manual if these parts need adjustment or replacement. • Vacuum Filter • Air Filter • Vacuum Trap • Air Trap Record compliance with the Start-up Checklist by marking the appropriate boxes on the Maintenance Screen.
13. Pull down Application menu, select Acquisition. Pull down Settings menu, select
protocol Pro2>_QFLOW CHECK BEADS. Click Region button, ensure that lot numbers are current. Modify lot numbers if necessary to match product in use.
14. Select protocol Pro2>_AStem FLOW BEADS. Click Region button, ensure that lot numbers are current. Modify lot numbers if necessary to match product in use.
15. Pull down Application menu, select Acquisition. Pull down Panel menu, select WeeklyQC/2COLOR COMP panel in Panel>Pro2> WeeklyQC/2COLOR COMP or Daily Morning QC panel in Panel>Pro2>Daily Morning QC
16. Status will read: Start-up in Process until initialization is completed.
17. Instrument is ready when status reads: Insert Sample Tube. If a Panel or Protocol is NOT selected, instrument will continue to read Start-up in Process. The instrument takes a minimum of 19 minutes to warm up the laser. Remove diH2O tube when sample stage drops. Press Prime at least twice to flush the system before running the first tube.
18. Gently mix the Flow Check and Flow Set vials so that the beads come off of the side of the vial. The beads have settled by gravity and will be visible as an orange band. Swirl the buffer in the vial until the band has disappeared. Do NOT over-vortex the beads. Gentle swirling by hand is usually sufficient to resuspend the beads.
19. Prepare three tubes:
• 200 μl Flow Check beads.
• 200 μl Flow Set Beads
• 1 ml diH2O
Page of 48 16

20. Prime cytometer before running first tube. Acquire Flow Check beads on LOW flow rate, check fluidic stability as data acquires. The machine will prompt when the next tube is needed. Inspect that histograms 1-5 have PASSED.
21. Acquire Flow Set beads on MEDIUM flow rate. Ensure that the peak positin values(PkPosX) are within the prespecified ranges in Region ID. The machine will prompt when the next tube is needed.
22. The machine will prompt when the next tube is needed.
23. Acquire diH2O. The XL will most likely display a message that read “Unable to Autogate. Please Acknowledge”. Click to acknowledge. Ensure that the number of events within the autogate is less than 100.
24. All three tubes MUST pass for samples to be run. Initial and date the printouts.
Weekly Start-Up with Compensation 1. Compensation must be set on the first day that the flow cytometer is used during a
normal business week.
2. Follow steps 1-15 above, preparing the cytometer.
3. Remove the beads from the refrigerator and gently swirl the container to resuspend the beads. The beads will not be visible through the vial.
4. Prepare the following tubes as above: 1) 200 �l Flow Check beads 2) 200 �l Flow Set Beads 3) Unstained CaliBRITE beads 4) stained CaliBRITE beads
5. Prime cytometer before running first tube. Acquire Flow Check beads on LOW flow rate, check fluidic stability as data acquires. The machine will prompt when the next tube is needed. Inspect that histograms 1-5 have PASSED.
6. Acquire Flow Set beads on MEDIUM flow rate. Ensure that the peak positin values(PkPosX) are within the prespecified ranges in Region ID. The machine will prompt when the next tube is needed.
7. Acquire Unlabeled CaliBRITE beads on MEDIUM flow rate. Ensure that the population is falling within the negative quadrant in Histogram 2. The machine will prompt when the next tube is needed.
8. Acquire U/FITC/PE CaliBRITE beads on MEDIUM flow rate. Compare the mean fluorescence (MnI X) in Quadrant 1 (B1) with (MnI X) in Quadrant 3 (B3) population. Compare the mean fluorescence (MnI Y) in Quadrant 4 (B4) with (MnI Y) in Quadrant 3 (B3) population. The difference should be no greater than ??
9. The machine will prompt when the next tube is needed.
10. Acquire diH2O
11. All five tubes MUST pass for samples to be run.
Page of 48 17
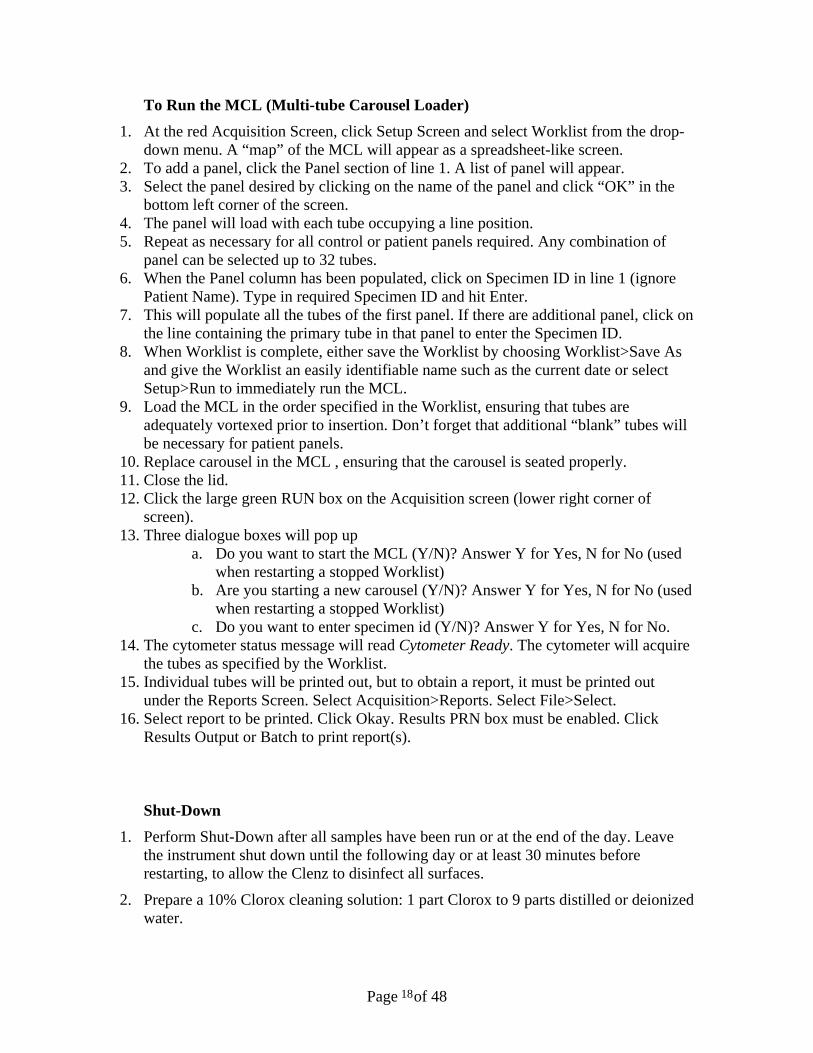
To Run the MCL (Multi-tube Carousel Loader) 1. At the red Acquisition Screen, click Setup Screen and select Worklist from the drop-
down menu. A “map” of the MCL will appear as a spreadsheet-like screen. 2. To add a panel, click the Panel section of line 1. A list of panel will appear. 3. Select the panel desired by clicking on the name of the panel and click “OK” in the
bottom left corner of the screen. 4. The panel will load with each tube occupying a line position. 5. Repeat as necessary for all control or patient panels required. Any combination of
panel can be selected up to 32 tubes. 6. When the Panel column has been populated, click on Specimen ID in line 1 (ignore
Patient Name). Type in required Specimen ID and hit Enter. 7. This will populate all the tubes of the first panel. If there are additional panel, click on
the line containing the primary tube in that panel to enter the Specimen ID. 8. When Worklist is complete, either save the Worklist by choosing Worklist>Save As
and give the Worklist an easily identifiable name such as the current date or select Setup>Run to immediately run the MCL.
9. Load the MCL in the order specified in the Worklist, ensuring that tubes are adequately vortexed prior to insertion. Don’t forget that additional “blank” tubes will be necessary for patient panels.
10. Replace carousel in the MCL , ensuring that the carousel is seated properly. 11. Close the lid. 12. Click the large green RUN box on the Acquisition screen (lower right corner of
screen). 13. Three dialogue boxes will pop up
a. Do you want to start the MCL (Y/N)? Answer Y for Yes, N for No (used when restarting a stopped Worklist)
b. Are you starting a new carousel (Y/N)? Answer Y for Yes, N for No (used when restarting a stopped Worklist)
c. Do you want to enter specimen id (Y/N)? Answer Y for Yes, N for No. 14. The cytometer status message will read Cytometer Ready. The cytometer will acquire
the tubes as specified by the Worklist. 15. Individual tubes will be printed out, but to obtain a report, it must be printed out
under the Reports Screen. Select Acquisition>Reports. Select File>Select. 16. Select report to be printed. Click Okay. Results PRN box must be enabled. Click
Results Output or Batch to print report(s).
Shut-Down 1. Perform Shut-Down after all samples have been run or at the end of the day. Leave
the instrument shut down until the following day or at least 30 minutes before restarting, to allow the Clenz to disinfect all surfaces.
2. Prepare a 10% Clorox cleaning solution: 1 part Clorox to 9 parts distilled or deionized water.
Page of 48 18

3. Prepare fresh daily or the solution could contain contaminants or the chlorine could evaporate and decrease effectiveness.
4. You will need 9 tubes: • 2 tubes with 2mL 10% Clorox • 7 tubes with 2mL of distilled or deionized water.
5. Under acquisition, choose panel>select>change dir>..>pro3>click okay
6. Click on Cleaning panel
7. Check that cytometer status reads: Insert sample tube
8. Panel order will be: Clorox, water, water, water
9. Place the 1st tube on the sample port. When tube is done, Specimen ID window will pop up. Hit return to get rid of window.
10. Continue with the next water tube when status reads: Insert Sample Tube and is flashing
11. Continue until all tubes have been run.
12. Place the remaining four tubes in a carousel in the MCL, same order as before: Clorox, water, water, water.
13. Press AUTO button. Two prompt windows will appear, hit return to eliminate the windows.
14. When MCL is done, remove the tubes.
15. To clean the Vacuum Line press the RUN button to take the system out of Run mode. The RUN light blinks green when the unit is in IDLE mode.
16. Fill a cleaning adapter reservoir with ~ 5 ml of distilled water.
17. Install the adapter just as a sample tube is installed on the sample stage. The water is aspirated in the vacuum line. Repeat.
18. Prepare two adapters with diH2O and place in carousel. Simultaneously hit the AUTO and CLEANSE buttons. Both adapters will be aspirated and the cleanse cycle will be run. The Cleanse cycle affects both the Manual and MCL sample ports and does not need to be run in each mode. When the cleanse cycle ends the CLEANSE button indicator turns off and the RUN button indicator flashes. The cytometer status message reads Cytometer Ready. Place a fresh tube of diH2O on the sample stage for shut down.
19. Wipe down all exposed surfaces of the instrument with 10 % Clorox or Dispatch and then with 70% ethanol.
20. The Sample Probe for the Manual and MCL sample ports must be wiped with a gauze pad saturated with Clorox and then wiped clean with gauze saturated with diH2O. Push up on the manual sample stage to expose the probe. For the MCL, push up the round sample head to expose the sample probe.
21. Record Shut-Down procedures done in Maintenance:
Page of 48 19

• Bleach • Vacuum Line • Sample Head • Cleanse
22. Under Applications click Exit
23. Exit to DOS> hit Y
24. Type XLOFF to shutdown the XL at the MS DOS prompt.
Weekly/Monthly/Bimonthly Cleaning/Yearly PM
Air Filters
1. Clean the air filters once a week after the shut down procedure. There are 5 air filters:
• Cytometer back panel-2 • Power supply-inside front door-1 • Power supply-back panel-2
2. Make sure instrument is turned off at the computer.
3. Pull off each filter cover (they are not screwed in). They are made of flexible plastic and will snap out when pulled.
4. Pinch and pull out each filter. Handle gently to avoid damage.
5. Rinse each filter in water and squeeze excess water out.
6. Let dry for 30 minutes. Use paper towels to check that each filter is completely dry.
7. Return each filter to its holder and put each filter cover back on.
Fluid Supply Containers
Remove and clean the sheath fluid container once a month.
1. To remove a reagent container, put the instrument in idle mode by pressing the RUN button. It will flash green.
2. Remove the cytometer center front panel.
3. Pull out the reagent drawer.
4. Disconnect the tubing on the top of the container by pushing in on the metal clips on the connectors.
5. Disconnect the sensor at the back of the drawer by sliding its sleeve to the right (slide to the left if removing Clenz container). The sensor for the sheath container is on the right; for the cleaning agent container, on the left.
6. Remove container and empty.
7. Fill with 100-200mL of sterile deionized water.
8. Cap and swirl container, rinsing all surfaces.
Page of 48 20
9. Empty and replace the container into the cytometer.
10. Reconnect sensor and top tubing.
11. Fill with fresh, sterile deionized water.
Remove and clean the cleaning agent container every 60 days.
1. Follow steps 1-6 above to remove and clean Clenz container.
2. Fill with 50-100mL of fresh Coulter Clenz cleaning agent.
3. Cap and swirl container, rinsing all surfaces.
4. Empty and replace the container into the cytometer.
5. Reconnect sensor and top tubing.
6. Fill with fresh Coulter Clenz.
7. Record on the XL’s Computer Maintenance Checklist all maintenance performed. The instrument will code the checklist with your initials and personal color.
Yearly Preventative Maintenance (PM) Service Call 1. Refer to the HSC Laboratory QC Master List for the date that the PM is due.
2. Schedule the PM with Coulter by calling 1-800-526-7694. Give them our System ID # 24325 and the CMI Insurance number #CMI5375.
3. After the Coulter Service Representative completes the PM, record the date and your initials on the HSC Laboratory Master List.
4. FAX the PM service report to Rich Davis at 724-230-0137.
5. File the original service report in the Flow Cytometry Equipment and QC Procedure Manual.
Emergency Service Call 1. Determine that a service call is necessary after reviewing XL error messages and
Troubleshooting manual.
2. Schedule the service with Coulter by calling 1-800-526-7694. Give them our System ID # 24325 and the CMI Insurance number #CMI5375. Indicate that this is an emergency and the machine is for clinical use.
3. After the Coulter Service Representative completes the service, sign and date the service report.
4. FAX the service report to Rich Davis at 724-230-0137.
5. File the original service report and any supporting documentation in the Flow Cytometry Equipment and QC Procedure Manual.
Page of 48 21

Operation of Back-Up Instrument 1. Check the “green machine” (room 1.47 Hillman) schedule and block out time as
soon as possible. This schedule is found on-line in Outlook. Open public folders and then open UPCI Flow Cytometry. Schedule time on the green machine.
2. The instrument will always require our weekly 2-color compensation start-up panel. Take all necessary beads for this procedure to room 1.47.
3. The green machine is located in the farthest left corner on room 1.47 Hillman and is system ID# 36608. When you arrive the machine should be on the windows (Windows 98) operating system.
4. Exit out of the Expo 32 Software by hitting the X in the upper right hand corner of the window.
5. Double click on the System II Software Icon. (A red and green square with the Roman Numeral II) Our familiar System II Screen will appear.
6. Click on “Panel.” The directory that appears is Pro3 and not our familiar Pro2.
7. Click on the “select directory” blue button.
8. Click on the double dots (..) to go up a directory.
9. Select “Pro2” directory and then click on the “OK” blue button. Our Flow Cytometry Directory appears.
10. Run the weekly 2-color compensation panel according to the detailed methods listed above in the section Weekly Start-Up with Compensation.
11. Run CD Chex CD34 and /or CD Chex Plus Controls as needed.
12. Run patient samples.
13. The next morning ask Cassie or Erin in Room 1.45 Hillman to burn a CD of our data from the back-up machine.
14. Load the data from the CD on to our primary instrument for permanent storage.
References
Operator’s Manual Epics XL-MCL, Coulter Corporation. 1996.
Special Procedures and Troubleshooting Manual, Coulter Corporation. 1996.
Appendices
Page of 48 22

Revision Change Rationale CFR/FACT/CAP/PADH Standards
Start Date End Date
1 NCCLS format
D5.212
2 Address Change
Move from MUH to SHY hospital.
3 Address Change
Move from SHY to HCC
05/13/03 10/21/03
4 New Terminology, Revision Chart Modification
FACT standards, second edition; addition of the inclusive dates of use
D8.230, A3.000, D5.600
10/21/03 01/30/04
5 Addition of CAP terminology
FLO.30250; FLO.30260; FLO.25250
01/30/04 11/05/04
6 Addition of MCL procedure
Lack of information in procedure
11/05/04 3/29/05
7 Addition of Flow Set and Flow Check beads to reagents
Inadvertently omitted
3/29/05 09/12/06
8 Title page format change
Annual review 09/12/06
Page of 48 23
University of Pittsburgh Medical Center University of Pittsburgh Cancer Institute/Children’s Hospital of Pittsburgh
HSC Laboratories
Adult Program Pediatric Program 5117 Centre Avenue 3705 5th Avenue Pittsburgh, PA 15213 Pittsburgh, PA 15213
Procedure Name: 1999-07-R7 QC PROCEDURE FOR CD34 AND CD3 STAINING WITH CD CHEX (PLUS)
Date Adopted: March 1999
Date Revised: July 12, 2006 Revision number: 8
Author: Griffin DL, Koch E
Supersedes Procedure: NA
Distribution: Adult and Pediatric HSC Laboratories
Laboratory Director Date
Medical Director Date
Supervisor Date
QA Manager Date
Technologist Annual Review Date Signature
Page of 48 24

University of Pittsburgh Medical Center University of Pittsburgh Cancer Institute/Children’s Hospital of Pittsburgh
HSC Laboratories
Adult Program Pediatric Program 5117 Centre Avenue 3705 5th Avenue Pittsburgh, PA 15213 Pittsburgh, PA 15213
Page of 48 25
X:\UPCIFLOW\FLOW COURSE 2007\CD34 lab 2007\for Jada\temp.doc
1999-07-R7 QC PROCEDURE FOR CD34 AND CD3 STAINING WITH CD CHEX (PLUS)
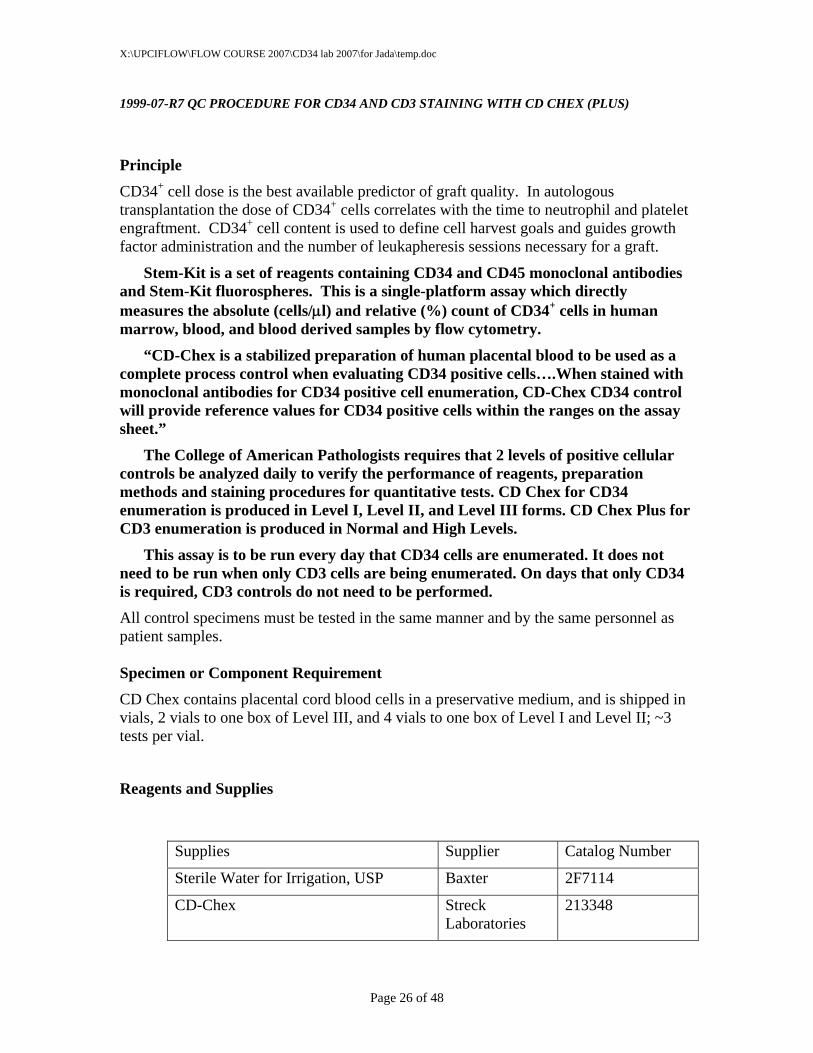
Principle CD34+ cell dose is the best available predictor of graft quality. In autologous transplantation the dose of CD34+ cells correlates with the time to neutrophil and platelet engraftment. CD34+ cell content is used to define cell harvest goals and guides growth factor administration and the number of leukapheresis sessions necessary for a graft.
Stem-Kit is a set of reagents containing CD34 and CD45 monoclonal antibodies and Stem-Kit fluorospheres. This is a single-platform assay which directly measures the absolute (cells/μl) and relative (%) count of CD34+ cells in human marrow, blood, and blood derived samples by flow cytometry.
“CD-Chex is a stabilized preparation of human placental blood to be used as a complete process control when evaluating CD34 positive cells….When stained with monoclonal antibodies for CD34 positive cell enumeration, CD-Chex CD34 control will provide reference values for CD34 positive cells within the ranges on the assay sheet.”
The College of American Pathologists requires that 2 levels of positive cellular controls be analyzed daily to verify the performance of reagents, preparation methods and staining procedures for quantitative tests. CD Chex for CD34 enumeration is produced in Level I, Level II, and Level III forms. CD Chex Plus for CD3 enumeration is produced in Normal and High Levels.
This assay is to be run every day that CD34 cells are enumerated. It does not need to be run when only CD3 cells are being enumerated. On days that only CD34 is required, CD3 controls do not need to be performed. All control specimens must be tested in the same manner and by the same personnel as patient samples. Specimen or Component Requirement CD Chex contains placental cord blood cells in a preservative medium, and is shipped in vials, 2 vials to one box of Level III, and 4 vials to one box of Level I and Level II; ~3 tests per vial.
Reagents and Supplies
Supplies Supplier Catalog Number
Sterile Water for Irrigation, USP Baxter 2F7114
CD-Chex Streck Laboratories
213348
Page 26 of 48
X:\UPCIFLOW\FLOW COURSE 2007\CD34 lab 2007\for Jada\temp.doc
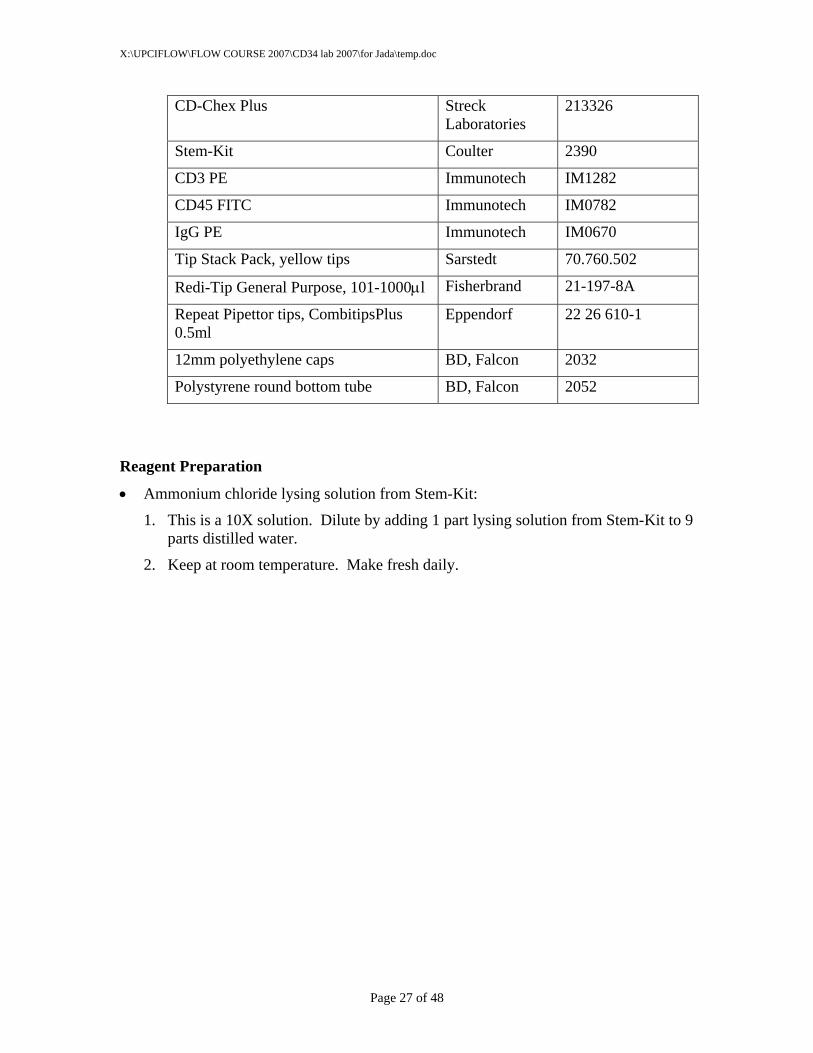
CD-Chex Plus Streck Laboratories
213326
Stem-Kit Coulter 2390
CD3 PE Immunotech IM1282
CD45 FITC Immunotech IM0782
IgG PE Immunotech IM0670
Tip Stack Pack, yellow tips Sarstedt 70.760.502
Redi-Tip General Purpose, 101-1000μl Fisherbrand 21-197-8A
Repeat Pipettor tips, CombitipsPlus 0.5ml
Eppendorf 22 26 610-1
12mm polyethylene caps BD, Falcon 2032
Polystyrene round bottom tube BD, Falcon 2052
Reagent Preparation
• Ammonium chloride lysing solution from Stem-Kit:
1. This is a 10X solution. Dilute by adding 1 part lysing solution from Stem-Kit to 9 parts distilled water.
2. Keep at room temperature. Make fresh daily.
Page 27 of 48
X:\UPCIFLOW\FLOW COURSE 2007\CD34 lab 2007\for Jada\temp.doc
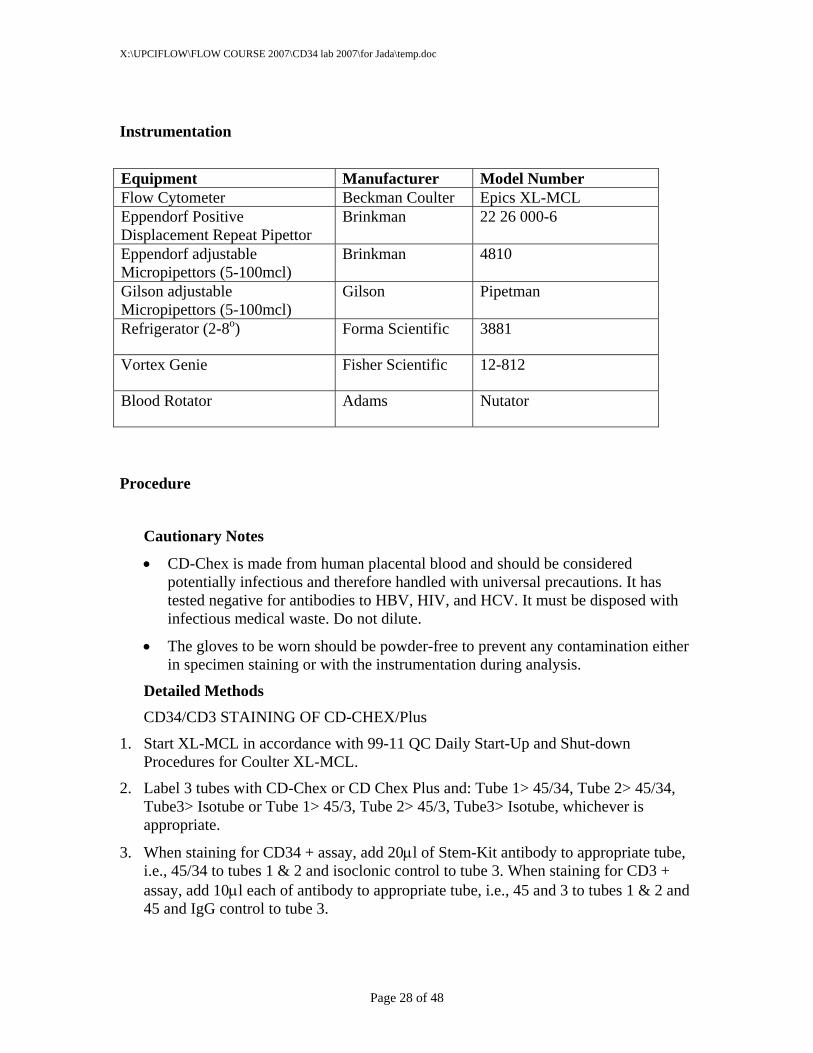
Instrumentation
Equipment Manufacturer Model Number Flow Cytometer Beckman Coulter Epics XL-MCL Eppendorf Positive Displacement Repeat Pipettor
Brinkman 22 26 000-6
Eppendorf adjustable Micropipettors (5-100mcl)
Brinkman 4810
Gilson adjustable Micropipettors (5-100mcl)
Gilson Pipetman
Refrigerator (2-8o) Forma Scientific 3881
Vortex Genie Fisher Scientific 12-812
Blood Rotator Adams Nutator
Procedure
Cautionary Notes
• CD-Chex is made from human placental blood and should be considered potentially infectious and therefore handled with universal precautions. It has tested negative for antibodies to HBV, HIV, and HCV. It must be disposed with infectious medical waste. Do not dilute.
• The gloves to be worn should be powder-free to prevent any contamination either in specimen staining or with the instrumentation during analysis.
Detailed Methods CD34/CD3 STAINING OF CD-CHEX/Plus
1. Start XL-MCL in accordance with 99-11 QC Daily Start-Up and Shut-down Procedures for Coulter XL-MCL.
2. Label 3 tubes with CD-Chex or CD Chex Plus and: Tube 1> 45/34, Tube 2> 45/34, Tube3> Isotube or Tube 1> 45/3, Tube 2> 45/3, Tube3> Isotube, whichever is appropriate.
3. When staining for CD34 + assay, add 20μl of Stem-Kit antibody to appropriate tube, i.e., 45/34 to tubes 1 & 2 and isoclonic control to tube 3. When staining for CD3 + assay, add 10μl each of antibody to appropriate tube, i.e., 45 and 3 to tubes 1 & 2 and 45 and IgG control to tube 3.
Page 28 of 48
X:\UPCIFLOW\FLOW COURSE 2007\CD34 lab 2007\for Jada\temp.doc
4. Set Eppendorf repeat pipettor to “5”, which will deliver 50μl/click. Using the same Eppendorf repeat pipettor (positive displacement) for both the addition of CD Chex and fluorospheres, draw CD-Chex/Plus into 500μl repeat tip.
5. Wipe tip with Kimwipe.
6. Click pipettor once (50μl), returning CD-Chex to vial, for priming. Precision is necessary during this step or erroneous results may occur.
7. Add 2 clicks (100μl) of CD-Chex/Plus to all 3 tubes.
8. Cap all tubes and incubate for 20 minutes in the dark at room temperature.
9. Remove fluorospheres from the Stem-Kit and vortex gently. Leave at room temperature for 30 minutes prior to addition.
10. Dilute Stem-Kit lysing solution using a 1:10 dilution with distilled water (see Reagent Preparation). 6ml of lysing solution is needed
11. After 20 minute incubation, add 2ml of lysing solution to each tube and vortex.
12. Cap tubes and incubate for 10 minutes at room temperature in the dark.
13. After 10 minutes, tubes can be held at this point for 2 hours at 2- 80 in the dark or processed immediately.
14. When ready to acquire, using the same Eppendorf repeat pipettor (positive displacement) as for the addition of sample, draw fluorospheres into 500μl repeat tip.
15. Wipe tip with Kimwipe.
16. Click Pipettor once, returning fluorospheres to vial, for priming. Precision is necessary during this step or erroneous results may occur.
17. Add 100μl of fluorospheres to all 3 tubes using the same pipette that was used to add CD-Chex to tubes.
18. After addition of fluorospheres, tubes must be acquired within 1 hour. Store at 2-8oC or place tubes in ice tray.
19. Before acquisition on the flow cytometer, label a 4th tube as blank and add 2ml of distilled water to it. This blank can be used for multiple samples.
20. Confirm that the Stem Count Fluorospheres concentration factor has been correctly entered into the cytometer. This number can be found on the fluorosphere vial as a whole number (ex: 994 fluorospheres/uL.) Refer to 1999-11-R9 QC Daily Start-Up, Shut Down and Maintenance Procedures for Coulter XL-MCL Primary and Back-Up Instruments for instructions to perform this function.
21. CD-Chex sample is now ready for flow cytometric analysis.
CD 34 ACQUISITION AND ANALYSIS OF CD-CHEX ON THE XL-MCL
Page 29 of 48
X:\UPCIFLOW\FLOW COURSE 2007\CD34 lab 2007\for Jada\temp.doc
11. To run CD34 Stem-kit tubes: under Panel choose CD CHEX CONTROL or CD CHEX PLUS CONTROL, whichever is applicable, Hit Okay.
12. On the right of the screen (gray section), the panel you selected will appear with the order in which the tubes should be run.
13. Vortex Tube 1, which is CD45/CD34.
14. Check Status (lower right gray section) to make sure Insert Sample Tube is flashing green.
15. Open door to sample port and place tube on sample port. Close door (instrument will proceed even if door remains open). Instrument will lift sample port up into sampling chamber.
16. Status will read: Sample tube detected.
17. You will see a series of 8 histograms. CD-Chex cells are expected to have dim CD45+, bright CD34+ and low to moderate side scatter (SS). Gating strategy is setup according to ISHAGE Guidelines for CD34+ Cell Determination by Flow Cytometry. CD-Chex Plus cells are expected to have dim CD45+, bright CD3+ and low to moderate side scatter (SS). Gating strategy is also setup according to ISHAGE Guidelines for CD34+ Cell Determination by Flow Cytometry
18. The 1st histogram is CD45 vs. SS and is gated on not M to remove beads from view. CD45 stains all human white blood cells but not red cells, platelets and other debris. Click on this 1st Region to enlarge. Adjust Region A to include only those cells that stain CD45+. Click on the letter, this will allow you to adjust Region. Instrument will automatically update data so you do not need to restart. Region E is tracking Region C and can not be adjusted. This may help to determine how far to the left to adjust Region A.
19. If at any point you want to go back and view a Region, click on 8 Hist button at bottom of screen in blue and then touch the screen to be viewed, this will enlarge it.
20. Click on Next Hist button at bottom of screen in blue.
21. This 2nd histogram is CD34 or CD3 vs. SS. It is gated on Region A not M so you are looking at only the cells that are CD45+. The population of interest now is CD34+ or CD3+. Adjust Region B to include only CD34+ or CD3+ with low to moderate SS.
22. Click on Next Hist button at bottom of screen in blue.
23. This screen is gated on A, B not M. Region C should include a cluster of dim CD45+ events with low to moderate SS. Cells that tend to have brighter staining with slightly higher SS should be avoided.
24. Click on Next Hist button at bottom of screen in blue.
25. This histogram is gated on Regions A, B and C not M. Adjust Region D if necessary to include all clustered events with low SS and intermediate to high forward scatter. If specimen has low viability you will see these dead cells clustering to the left of the Region having very low forward scatter. The cells located in this Region are considered to be the “true” CD34 or CD3 cells. The %positive of CD-Chex will vary
Page 30 of 48

X:\UPCIFLOW\FLOW COURSE 2007\CD34 lab 2007\for Jada\temp.doc
from lot to lot, but will average about 0.5%, which should give a visible population. The %positive of CD-Chex Plus will vary from lot to lot, but will average about 70%.
26. Click on Next Hist button at bottom of screen in blue.
27. This histogram is gated on Region not M. It shows CD34+or CD3+/dim CD45 cells located in the upper right quadrant, I2.
28. Click on Next Hist button at bottom of screen in blue.
29. This histogram is gated on Region not M. It is a threshold check to determine if valid events are being lost due to the discriminator.
30. Click on Next Hist button at bottom of screen in blue.
31. This histogram is ungated. Region G should include the Stem-Count Fluorospheres singlets only. It will be labeled as CAL to allow automatic calculation of absolute numbers of CD34+ or CD3+. If beads are falling out of this region, push Prime button located on right of sample port. Region M includes all beads and cannot be adjusted during acquisition. Events within Region M will be excluded in all other gates because they would be counted as white blood cells and affect the absolute counts.
32. Click on Next Hist button at bottom of screen in blue.
33. This histogram is ungated. It shows FSC v. Stem-count beads. If beads start to fall out of Region H, Prime and Restart.
34. Instrument will stop acquiring when 75,000 events have been collected in Region B or 999 seconds have elapsed.
35. All adjustments need to be made before 75,000 events have been collected. You may need to watch event number. This is located in gray area under STOPS, HIST 2 in yellow. If it is getting close to 75,000 and adjustments still need to be made, HIT Restart at bottom of screen and acquisition will start again.
36. After 1st tube is collected, Enter Specimen ID box will appear. Enter CD CHEX, the lot number and the expiration date and hit Return.
37. Sample port will lower. Remove tube and wait for flashing green: Insert Sample Tube.
38. Place Tube 2 on sample port. It is also CD45/CD34 or CD45/CD3. Do not change any Regions. The Regions are set on Tube 1 and will remain the same for all remaining tubes for that patient. Just make sure beads are within region or cells have not shifted, if necessary push Prime button and restart acquisition.
39. When acquisition is complete, sample port will lower. Remove tube and wait for flashing green: Insert Sample Tube.
40. The next tube is the blank containing only distilled water. This will prevent any carry-over to the isotube.
41. When acquisition is complete, sample port will lower. Remove tube and wait for flashing green: Insert Sample Tube.
Page 31 of 48
X:\UPCIFLOW\FLOW COURSE 2007\CD34 lab 2007\for Jada\temp.doc
42. The final tube will be the isotube, CD45/Isoclonic. This tube will stain all white blood cells but you should see little to no staining of CD34+ or CD3+.
43. Following acquisition, a report screen will appear. Click PRINT at the bottom right of screen. You should receive 5 sheets; Tube 1, Tube 2, Isotube and Final Report.
Procedure Notes
Staining
• A minimum of 600μl of CD-Chex is needed per assay, although more is preferable to allow priming of pipettor. Do NOT combine two vials of CD-Chex as erroneous results may occur.
• Do not allow CD-Chex or CD Chex Plus to remain on the inner tube walls. The concentration of each sample must be identical, and each sample must have the same amount of antibody added. The same pipette must be used for the addition of CD-Chex or CD Chex Plus and fluorospheres.
• The fluorospheres can have a tendency to clump so it is important to warm them to room temperature and vortex them gently to avoid this.
• The blank is used to avoid carryover contamination detrimental to rare event analysis.
Limitations of the Procedure
• It is assumed that the monoclonal antibody reactivity for CD34 is cell-type specific, unambiguous, reproducible, and is characteristic of stem cells.
• The correct Stem-Count fluorospheres assayed concentration is reflected in the samples. This concentration factor is found on the Stem Count Fluorospheres Vial Label as a whole number (ex. 994 fluorospheres/uL) Refer to 1999-11-R9 QC Daily Start-Up, Shut Down and Maintenance Procedures for Coulter XL-MCL Primary and Back-Up Instruments for instructions to perform this function.
• All reagents must be free from microbial contamination.
• Because flow cytometry requires far more operator judgment than routine laboratory tests, standardization is a relative function and must be established within each institution.
Results Reporting
1. Enter results into Computer spreadsheet. See 99-06 Procedure for Flow Cytometry Data Entry.
Page 32 of 48
X:\UPCIFLOW\FLOW COURSE 2007\CD34 lab 2007\for Jada\temp.doc
2. Open BMP Flow Cytometry workbook.xls.
3. Enter data from report form in CD CHEX SHEET or CD CHEX PLUS, whichever is appropriate.
4. Spreadsheet items in blue will calculate automatically.
5. Check that these results fall within the ranges established by Streck Laboratories, INC. A statistically valid mean and range has been established by Streck for quality control purposes.
6. Initial and date the report sheet of the results.
7. Insert result sheets into the appropriate Flow Cytometry QC binder.
8. Results of controls must be verified for acceptability before reporting patient results.
9. If quality control results exceed defined tolerance limits, a Form 42 must be completed and corrective action initiated. This may include retaining the sample, opening a new sample or reagent kit, or reviewing flow cytometer operation.
10. All results of control runs must be recorded in the Excel workbook and kept in the appropriate binder. At the end of the year, once annual QC reporting is complete, the binders from two years previous are to be sent to Iron Mountain for storage.
Quality Control
• Flow Check Beads and Flow Set Beads must be run every day that the cytometer is used. See daily Start-up/Shut-down and Linearity Flow Check sections of the Flow Cytometry Procedure Manual.
• When opening a new lot, enter the new lot number, expected values and ranges into the computer spreadsheet. Overlap testing must be performed and results approved prior to use of new lot.
References CD-Chex Assay & Instructional Information insert, Streck Laboratories, Inc. August 1998
CAP Flow Cytometry Standards, January 2003
Page 33 of 48

X:\UPCIFLOW\FLOW COURSE 2007\CD34 lab 2007\for Jada\temp.doc
Appendices
CFR FACT PADH CAP AABB FLO.23737;FLO.23925
FLO.24100;FLO.24230 FLO.24250;FLO.24300
Revision Change Rationale Standards Start Date End Date
0 Creation New procedure. A2.220
1 Brought into NCCLS format
All procedures required to be in a standard format.
A2.212
2 Address Change
Move from MUH to SHY hospital.
3 Address Change
Move from SHY hospital to HCC.
05/13/03 10/23/03
4 New Terminology, Revision Chart Modification
FACT standards, second edition; addition of the inclusive dates of use
D8.230, A3.000, D5.600
10/23/03 09/21/04
5 Addition of CAP terminology
Specific terminology FLO.23800; FLO.23925; FLO.24100; FLO.24230; FLO.24250; FLO.24300
09/21/04 09/26/06
6 Addition of standards chart, addition of 3rd level CD34 control
CAP self evaluation; annual review
FLO.23737;FLO.23925 FLO.24100;FLO.24230 FLO.24250;FLO.24300
09/26/06 07/24/07
7 Addition of Stem Count Bead Calibration
07/24/07
Page 34 of 48
X:\UPCIFLOW\FLOW COURSE 2007\CD34 lab 2007\for Jada\temp.doc
University of Pittsburgh Medical Center University of Pittsburgh Cancer Institute/Children’s Hospital of Pittsburgh
HSC Laboratories
Adult Program Pediatric Program 5117 Centre Avenue 3705 5th Avenue Pittsburgh, PA 15213 Pittsburgh, PA 15213
Procedure Name: 1999-04-R8 PROCEDURE FOR CD34 STAINING WITH STEM-KIT
Date Adopted: March 1999
Date Revised: July 12, 2006 Revision number: 8
Authors: Donnenberg AD, Griffin DL, Scheirer-Fochler S., Koch EK, Moore LR
Supersedes Procedure: NA
Distribution: Adult and Pediatric HSC Laboratories
Laboratory Director Date
Medical Director Date
Supervisor Date
QA Manager Date
Technologist Annual Review
Date Signature
Page 35 of 48

X:\UPCIFLOW\FLOW COURSE 2007\CD34 lab 2007\for Jada\temp.doc
University of Pittsburgh Medical Center University of Pittsburgh Cancer Institute/Children’s Hospital of Pittsburgh
HSC Laboratories
Adult Program Pediatric Program 5117 Centre Avenue 3705 5th Avenue Pittsburgh, PA 15213 Pittsburgh, PA 15213
Page 36 of 48
X:\UPCIFLOW\FLOW COURSE 2007\CD34 lab 2007\for Jada\temp.doc
1999-04-R8 PROCEDURE FOR CD34 STAINING WITH STEM-KIT Principle CD34+ cell dose is the best available predictor of graft quality. In autologous transplantation the dose of CD34+ cells correlates with the time to neutrophil and platelet engraftment1-4. CD34+ cell content is used to define cell harvest goals and guides growth factor administration and the number of leukapheresis sessions necessary for a graft.
Stem-Kit is a set of reagents containing CD34 and CD45 monoclonal antibodies and Stem-Kit fluorospheres5. This is a single-platform assay, which directly measures the absolute (cells/μl) and relative (%) count of CD34+ cells in human marrow, blood, and blood-derived samples by flow cytometry. Beckman-Coulter modified the Stem-Kit in 2003 to measure viability of CD34+ cells and total leukocytes. Cell viability is measured by exclusion of the vital dye 7-aminoactinomycin D6. The gating strategy follows the ISHAGE recommendations7.
Specimen or Component Requirement
• Specimen Type. Leukapheresis components, bone marrow aspirates, peripheral blood, cord blood, purified CD34+ cells.
• Collection method. Samples will be anticoagulated as follows: ACDA (leukapheresis products), sodium heparin (green top tube, whole blood samples, cord blood specimens, bone marrow samples). Purified CD34+ cells do not require additional anticoagulant but must be suspended in PBS + 5% Calf Serum (FCS) + 0.01% azide, in place of the lysing solution (see below).
• Specimen Preparation. Upon receipt all specimens will be registered and issued a Unique Component Number. A WBC count will be performed on all components and products using the Coulter AcT Diff 2. Stem cell components will be concentrated, as required, prior to obtaining the WBC. The product volume and patient actual body weight (kg) will be recorded.
• Criteria for Specimen Rejection. Minimum acceptable sample volume is 1 mL. Specimens must be assayed within 24 hours of collection or cell processing. The technician will contact the attending physician, nursing personnel or alternate if the specimen volume is less than 1 mL, clotted or mislabeled.
Page 37 of 48
X:\UPCIFLOW\FLOW COURSE 2007\CD34 lab 2007\for Jada\temp.doc
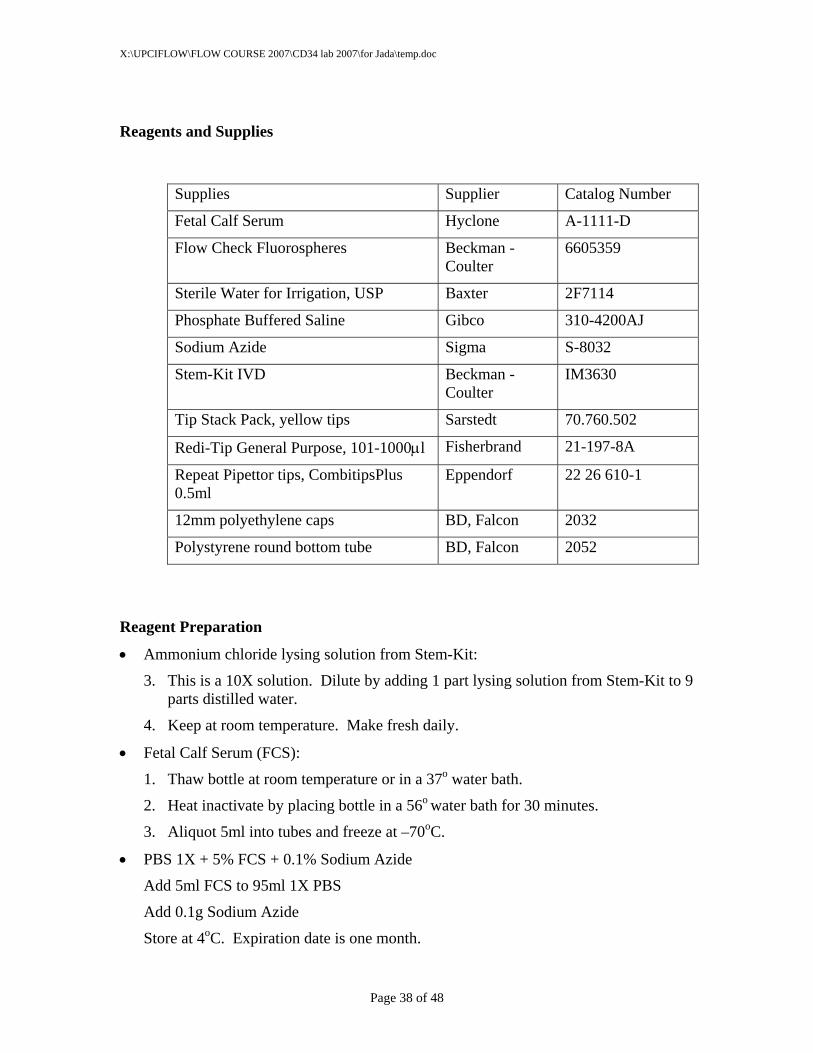
Reagents and Supplies
Supplies Supplier Catalog Number
Fetal Calf Serum Hyclone A-1111-D
Flow Check Fluorospheres Beckman -Coulter
6605359
Sterile Water for Irrigation, USP Baxter 2F7114
Phosphate Buffered Saline Gibco 310-4200AJ
Sodium Azide Sigma S-8032
Stem-Kit IVD Beckman -Coulter
IM3630
Tip Stack Pack, yellow tips Sarstedt 70.760.502
Redi-Tip General Purpose, 101-1000μl Fisherbrand 21-197-8A
Repeat Pipettor tips, CombitipsPlus 0.5ml
Eppendorf 22 26 610-1
12mm polyethylene caps BD, Falcon 2032
Polystyrene round bottom tube BD, Falcon 2052
Reagent Preparation
• Ammonium chloride lysing solution from Stem-Kit:
3. This is a 10X solution. Dilute by adding 1 part lysing solution from Stem-Kit to 9 parts distilled water.
4. Keep at room temperature. Make fresh daily.
• Fetal Calf Serum (FCS):
1. Thaw bottle at room temperature or in a 37o water bath.
2. Heat inactivate by placing bottle in a 56o water bath for 30 minutes.
3. Aliquot 5ml into tubes and freeze at –70oC.
• PBS 1X + 5% FCS + 0.1% Sodium Azide
Add 5ml FCS to 95ml 1X PBS
Add 0.1g Sodium Azide
Store at 4oC. Expiration date is one month.
Page 38 of 48
X:\UPCIFLOW\FLOW COURSE 2007\CD34 lab 2007\for Jada\temp.doc
Instrumentation Equipment Manufacturer Model Number Flow Cytometer Beckman Coulter Epics XL-MCL Eppendorf Positive Displacement Repeat Pipettor
Brinkman 22 26 000-6
Eppendorf adjustable Micropipettors (5-100mcl)
Brinkman 4810
Gilson adjustable Micropipettors (5-100mcl)
Gilson Pipetman
Refrigerator (2-8o) Forma Scientific 3881
Vortex Genie Fisher Scientific 12-812
Blood Rotator Adams Nutator
Procedure
Cautionary Notes
• All specimens should be considered potentially infectious and therefore handled with universal precautions.
• The gloves to be worn should be powder-free to prevent any contamination either in specimen staining or with the instrumentation during analysis.
• 7-AAD is very toxic by inhalation, in contact with skin and if swallowed. It may cause cancer, heritable genetic damage, and harm to unborn child.
• See Appendix for copy of Beckman Coulter’s section on Laser Safety.
• Dilution of specimens with a low protein concentration must be performed using a protein-enriched buffer. Low protein concentrations may lead to Stem-Count Fluorospheres clumping and give erroneously high absolute cell count numbers.
• Stem Kit is purchased as a complete unit with a lot number and an expiration date. Stem Kit is to be used as the specific unit as shipped and received. Never combine parts of multiple kits or substitute reagents.
Detailed Methods CD34 STAINING OF CELLS
22. Start XL-MCL so that it has warmed up by the time it is to be used. Follow Daily Start-Up/Shut-down Procedure.
Page 39 of 48
X:\UPCIFLOW\FLOW COURSE 2007\CD34 lab 2007\for Jada\temp.doc
23. Obtain 0.5 ml post-volume-reduced product from bag by sterile sampling from port if it is a HPC, Apheresis or HPC, Marrow product. Dilute a 50 μl aliquot with PBS, run aliquot on ACT DIFF 2, multiply result by dilution factor and record on CD34+ Enumeration Worksheet.
24. If it is a reference sample, run on ACT DIFF 2 straight. Record on CD34+ Enumeration Worksheet.
25. If WBC is > 25 X 106, sample will need to be diluted using the following calculations.
sample WBC X 106 = dilution factor (DF) 25 X 106
DF X volume of sample (usually 0.1) = ***
*** - volume used (usually 0.1) = ml of PBS to add for dilution
26. Label 3 tubes with patient name and: Tube 1> 45/34, Tube 2> 45/34, Tube3> Isotube.
27. Remove fluorospheres from the Stem-Kit. Leave at room temperature for 30 minutes prior to addition.
28. Add 20μl of Stem-Kit antibody to appropriate tube, i.e., 45/34 to tubes 1 & 2 and 45/isoclonic control to tube 3.
29. Add 20μl of 7AAD to each tube.
30. Using the same Eppendorf repeat pipettor (positive displacement) for the addition of sample and fluorospheres, draw diluted blood into 500μl repeat tip.
31. Wipe tip with Kimwipe.
32. * Click pipettor once for priming, ejecting sample into original sample container. Precision is necessary for specimen pipetting or erroneous results may occur.
33. Add 100μl of patient sample to all 3 tubes.
34. Cap all tubes and incubate for 20 minutes in the dark at room temperature.
35. Dilute Stem-Kit lysing solution using a 1:10 dilution with distilled water (see Reagent Preparation). 2ml of lysing solution is needed per tube. If specimen is purified or enriched for CD34+ cells or is a thawed component, do not add lysing solution. Instead add 2ml of PBS containing 5% calf serum and 0.1% sodium azide.
36. After 20 minute incubation, add 2ml of lysing solution to each tube and vortex.
37. Cap tubes and incubate for 10 minutes at room temperature in the dark.
38. After 10 minutes, tubes can be held at this point for 2 hours at 2- 8o in the dark or processed immediately.
Page 40 of 48
X:\UPCIFLOW\FLOW COURSE 2007\CD34 lab 2007\for Jada\temp.doc
39. When ready to acquire, gently swirl the bottle of Stem Count Fluorospheres. Tap the fluorospheres lightly on the vortex but do not vortex vigorously as this may cause erroneous cell counts. Using the same Eppendorf repeat pipettor (positive displacement) as for the addition of sample, draw fluorospheres into 500μl repeat tip.
40. Wipe tip with Kimwipe.
41. * Click Pipettor once for priming. Precision is necessary for pipetting of beads or erroneous results may occur.
42. Add 100μl of fluorospheres to all 3 tubes.
43. After addition of fluorospheres, tubes must be acquired within 1 hour. Store at 2-8oC or place tubes in ice tray.
44. Before acquisition on the flow cytometer, label a 4th tube as blank and add 2ml of distilled water to it. This blank can be used for multiple samples.
45. Confirm that the Stem Count Fluorospheres concentration factor has been correctly entered into the cytometer. This number can be found on the fluorosphere vial as a whole number (ex: 994 fluorospheres/uL.) Refer to 1999-11-R9 QC Daily Start-Up, Shut Down and Maintenance Procedures for Coulter XL-MCL Primary and Back-Up Instruments for instructions to perform this function.
46. Samples are now ready for flow cytometric analysis.
CD 34 ACQUISITION AND ANALYSIS ON THE XL-MCL
44. To run CD34 Stem-kit tubes: under Panel choose Stem Kit-7AAD, click Okay.
45. On the right of the screen (gray section), the panel you selected will appear with the order in which the tubes should be run.
46. Vortex Tube 1, which is CD45/CD34.
47. Check Status (lower right hand corner of screen) to make sure Insert Sample Tube is flashing green.
48. Open door to sample port and place tube on sample port. Close door (instrument will proceed even if door remains open). Instrument will lift sample port up into sampling chamber.
49. Status will read: Sample tube detected.
50. You will see a series of 8 histograms. Stem cells are expected to have dim CD45+, bright CD34 + and low to moderate side scatter (SS). Gating strategy is setup according to ISHAGE Guidelines for CD34+ Cell Determination by Flow Cytometry. See examples, Section 10:Samples.
51. The 1st histogram is CD45 vs. SS. CD45 stains all human white blood cells but not red cells, platelets and other debris. Click on this 1st gate to enlarge. Adjust Gate A to include only those cells that stain CD45 +. Click on the letter, this will allow you to
Page 41 of 48
X:\UPCIFLOW\FLOW COURSE 2007\CD34 lab 2007\for Jada\temp.doc
adjust gate. Instrument will automatically update data so you do not need to restart. Gate E is tracking Gate C and can not be adjusted. This may help to determine how far to the left to adjust Gate A.
52. If at any point you want to go back and view a gate, click on 8 Hist button at bottom of screen in blue and then click on the screen to be viewed, this will enlarge it.
53. Click on Next Hist button at bottom of screen in blue.
54. This 2nd histogram is CD34 vs. SS. It is gated on Gate A so you are looking at only the cells that are CD45+. The population of interest now is CD34+. Adjust Gate B to include only CD34+ with low to moderate SS.
55. Click on Next Hist button at bottom of screen in blue.
56. This screen is gated on A & B. Gate C should include a cluster of dim CD45+ events with low to moderate SS. Cells that tend to have brighter staining with slightly higher SS should be avoided.
57. Click on Next Hist button at bottom of screen in blue.
58. This histogram is gated on Gates A, B and C. Adjust Gate D if necessary to include all clustered events with low SS and intermediate to high forward scatter. If specimen has low viability you will see these dead cells clustering to the left of the gate having very low forward scatter. The cells located in this gate are considered to be the “true” CD34 cells.
59. Click on Next Hist button at bottom of screen in blue.
60. This histogram is gated on Gates A, B, C, and D. It reflects the viability of CD34+ cells located in Gate D. Gate J represents non-viable cells. Gate H represents viable cells.
61. Click on Next Hist button at bottom of screen in blue.
62. This histogram is gated on Gates A, B and C. It reflects the viability of all CD34+ cells (located in Gate C). Gate P represents non-viable cells. Gate O represents viable cells.
63. Click on Next Hist button at bottom of screen in blue.
64. Gate G should include the Stem-Count Fluorospheres singlets only. It will be labeled as CAL to allow automatic calculation of absolute numbers of CD34+. If beads are falling out of this region, push Prime button located on right of sample port. Gate M includes all beads and can not be adjusted during acquisition. Events within Gate M will be excluded in all other gates because they would be counted as white blood cells and affect the absolute counts.
65. Click on Next Hist button at bottom of screen in blue.
66. This histogram is gated on Gate A. It reflects the viability of all CD45+ cells (located in Gate A) or total viability. Gate L represents non-viable cells. Gate I represents viable cells.
67. Instrument will stop acquiring when 75,000 events have been collected in Gate B or 999 seconds have elapsed.
Page 42 of 48
X:\UPCIFLOW\FLOW COURSE 2007\CD34 lab 2007\for Jada\temp.doc
68. All adjustments need to be made before 75,000 events have been collected. You may need to watch event number. This is located in gray area under STOPS, HIST 2 in yellow. If it is getting close to 75,000 and adjustments still need to be made, HIT RESTART at bottom of screen and acquisition will start again.
69. After 1st tube is collected, Enter Specimen ID box will appear. Enter patient’s name (Last name, First Initial) followed by their Social Security/Medical Record Number, Specimen type (HPCA, PB or HPCM) and number of collection (e.g. HPCA2 would be the second HPCA collection), UCN # and hit Return.
70. Sample port will lower. Remove tube and wait for flashing green: Insert Sample Tube.
71. Vortex Tube 2 lightly and place on sample port. It is also CD45/CD34. Do not change any gates. The gates are set on Tube 1 and will remain the same for all remaining tubes for that patient. Just make sure beads are within gate or cells have not shifted, if necessary push Prime button and restart acquisition.
72. When acquisition is complete, sample port will lower. Remove tube and wait for flashing green: Insert Sample Tube.
73. The next tube is the blank containing only distilled water. This will prevent any carry-over to the isotube.
74. When acquisition is complete, sample port will lower. Remove tube and wait for flashing green: Insert Sample Tube.
75. The final tube will be the isotube, CD45/Isoclonic. This tube will stain all white blood cells but you should see little to no staining of CD34+.
76. Following acquisition, a report screen will appear. Click PRINT at the bottom right of screen. You should receive 4 sheets; Tube 1, Tube 2, Isotube and Final Report.
Procedure Notes
Staining
• A minimum of 600μl of diluted sample is needed per assay. If 600 μl is not available, increase the sample volume with PBS-A and record the dilution factor.
• There should be no sample on the inner tube walls. If traces of sample are observed, discard and repeat staining.
• The same pipettor must be used for the addition of patient sample and fluorospheres.
• All reagents must be free from microbial contamination.
• The fluorospheres can have a tendency to clump so it is important to warm them to room temperature and vortex them gently prior to use.
Page 43 of 48
X:\UPCIFLOW\FLOW COURSE 2007\CD34 lab 2007\for Jada\temp.doc
• The blank is used to avoid carryover contamination detrimental to rare event analysis.
Limitations of the Procedure
• It is assumed that the monoclonal antibody reactivity for CD34 is cell-type specific, unambiguous, reproducible, and is characteristic of progenitor cells.
• The known Stem-Count fluorosphere concentration serves as a reference standard. An error in this determination will result in a proportionate error in the sample results. The correct Stem-Count fluorospheres assayed concentration is reflected in the samples. This concentration factor is found on the Stem Count Fluorospheres Vial Label as a whole number (ex. 994 fluorospheres/uL) Refer to 1999-11-R9 QC Daily Start-Up, Shut Down and Maintenance Procedures for Coulter XL-MCL Primary and Back-Up Instruments for instructions to perform this function.
• Because flow cytometry requires far more operator judgment than routine
laboratory tests, the placement of gates and regions must be reviewed periodically for inter- and intra-operator consistency.
Results Reporting
11. A sample worksheet for CD34 Enumeration is located in the Appendix and in Section 10: Samples.
12. Fill out Input Data at top of worksheet; this comes from Patient Chart and Processing Worksheet.
13. Dilution Factor, see step 4 in CD34 STAINING.
14. To fill in XL Dilute Mean WBC/ml: Locate Mean White Blood Cell Count (Cells/μl) on report form. Divide this number by 1000 for WBC/ml.
15. Average CD34 Count is located on report form under cells/μl.
16. Proceed with calculations 1-4 on the worksheet.
17. Calculation #5 uses the WBC per μl not ml and does not need to be divided by 1000. It can be taken directly off the report.
18. Record the results of the calculations.
19. Have results verified by coworker or supervisor.
20. Enter results into Computer spreadsheet.
21. Open BMP flow cytometry workbook.
22. Enter data from report form.
23. Spreadsheet items in blue will calculate automatically.
Page 44 of 48
X:\UPCIFLOW\FLOW COURSE 2007\CD34 lab 2007\for Jada\temp.doc
24. Check that these results match the worksheet results done by hand.
25. Record required calculated results in Cell Enumeration Worksheet located in the front of Patient Chart.
26. If ISHAGE viability of CD34+ cells is <99% then the sample must be reanalyzed in LISTMODE and the gating corrected.
27. Record required calculated results in CD34 Cell Enumeration Report Form. Print and place into first section of Patient Chart for Director review.
28. Report results by verbal notification and fax or email CD34 Enumeration Report Form to appropriate nurse coordinator and the Director of Therapeutic Hemapheresis.
Quality Control
• Flow Check Beads must be run every day that the cytometer is used. See Daily Start-up/Shut-down sections of the Flow Cytometry Procedure Manual.
• CD CHEX Control Cells (Low, Normal, and High) must be run once each day that CD34 enumeration is performed. See CD CHEX section of the Flow Cytometry Procedure Manual.
• Results cannot be reported out until they have been entered into the computer. The specialist must compare the hand-calculated results to the computer results before they are reported.
References 1. de Magalhaes-Silverman M. Donnenberg AD. Lister J. Rybka W. Wilson J. Ball E.
Factors influencing mobilization and engraftment in patients with metastatic breast cancer undergoing PBSC transplantation. [Journal Article] Journal of Hematotherapy. 8(2):167-72, 1999.
2. Kiss JE. Rybka WB. Winkelstein A. deMagalhaes-Silverman M. Lister J. D'Andrea P. Ball ED. Relationship of CD34+ cell dose to early and late hematopoiesis following autologous peripheral blood stem cell transplantation. [Clinical Trial. Journal Article] Bone Marrow Transplantation. 19(4):303-10, 1997
3. Shpall EJ. Champlin R. Glaspy JA. Effect of CD34+ peripheral blood progenitor cell dose on hematopoietic recovery. [Review] [57 refs] [Journal Article. Review. Review, Tutorial] Biology of Blood & Marrow Transplantation. 4(2):84-92, 1998.
4. Messner HA. Human hematopoietic progenitor in bone marrow and peripheral blood. [Review] [15 refs] [Journal Article. Review. Review, Tutorial] Stem Cells. 16 Suppl 1:93-6, 1998.
5. Immunotech/Coulter Stem-Kit data sheet, Cat. No. 2390, July 30,1997.
Page 45 of 48
X:\UPCIFLOW\FLOW COURSE 2007\CD34 lab 2007\for Jada\temp.doc
6. Donnenberg AD, Koch EK, Griffin DL, Stanczak HM, Kiss JE, Carlos TM, Buchbarker DM, Yeager AM. Viability of cryopreserved BM progenitor cells stored for more than a decade. Cytotherapy. 4(2):157-63, 2002.
7. Sutherland DR. Anderson L. Keeney M. Nayar R. Chin-Yee I. The ISHAGE guidelines for CD34+ cell determination by flow cytometry. International Society of Hematotherapy and Graft Engineering. [Guideline. Journal Article] Journal of Hematotherapy. 5(3):213-26, 1996.
Page 46 of 48
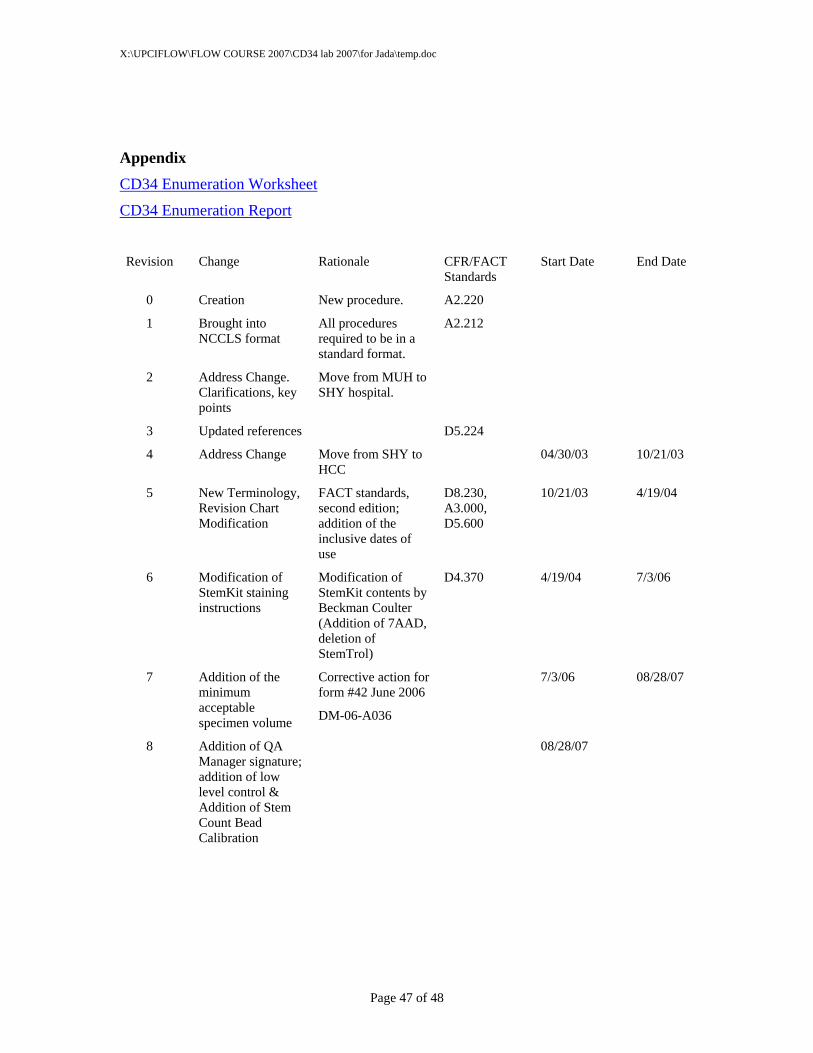
X:\UPCIFLOW\FLOW COURSE 2007\CD34 lab 2007\for Jada\temp.doc
Appendix CD34 Enumeration Worksheet
CD34 Enumeration Report
Revision Change Rationale CFR/FACT
Standards Start Date End Date
0 Creation New procedure. A2.220
1 Brought into NCCLS format
All procedures required to be in a standard format.
A2.212
2 Address Change. Clarifications, key points
Move from MUH to SHY hospital.
3 Updated references D5.224
4 Address Change Move from SHY to HCC
04/30/03 10/21/03
5 New Terminology, Revision Chart Modification
FACT standards, second edition; addition of the inclusive dates of use
D8.230, A3.000, D5.600
10/21/03 4/19/04
6 Modification of StemKit staining instructions
Modification of StemKit contents by Beckman Coulter (Addition of 7AAD, deletion of StemTrol)
D4.370 4/19/04 7/3/06
7 Addition of the minimum acceptable specimen volume
Corrective action for form #42 June 2006
DM-06-A036
7/3/06 08/28/07
8 Addition of QA Manager signature; addition of low level control & Addition of Stem Count Bead Calibration
08/28/07
Page 47 of 48
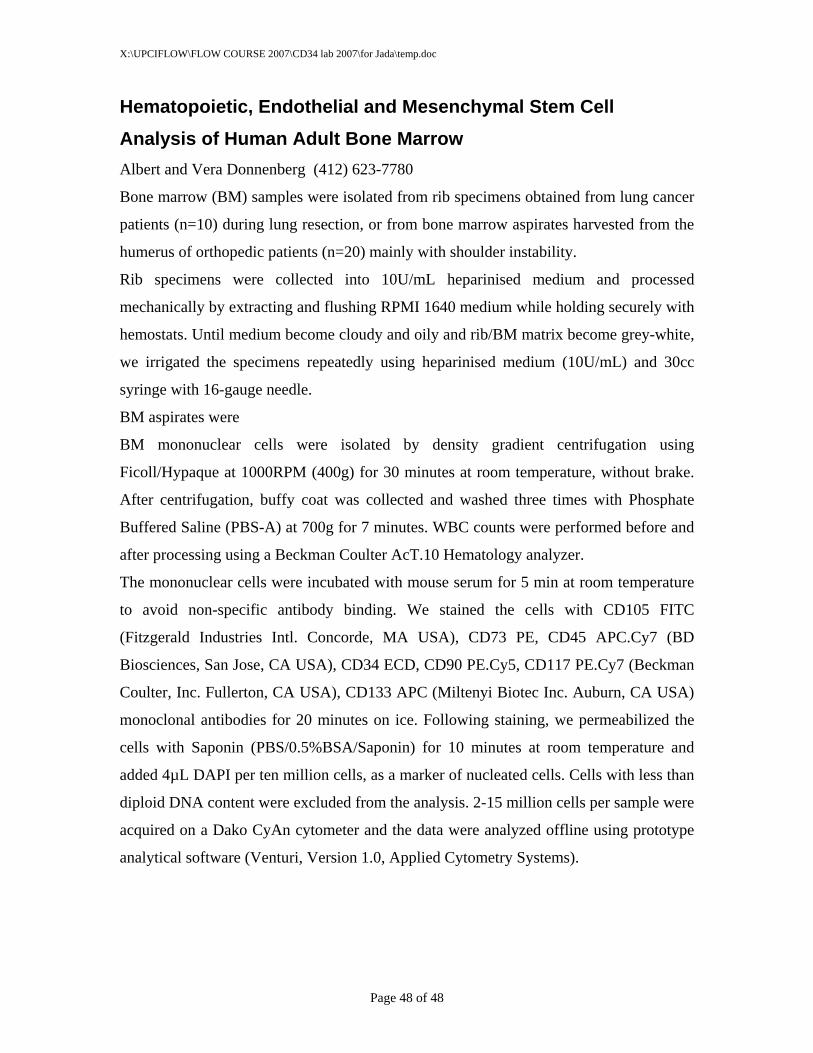
X:\UPCIFLOW\FLOW COURSE 2007\CD34 lab 2007\for Jada\temp.doc
Hematopoietic, Endothelial and Mesenchymal Stem Cell Analysis of Human Adult Bone Marrow Albert and Vera Donnenberg (412) 623-7780
Bone marrow (BM) samples were isolated from rib specimens obtained from lung cancer
patients (n=10) during lung resection, or from bone marrow aspirates harvested from the
humerus of orthopedic patients (n=20) mainly with shoulder instability.
Rib specimens were collected into 10U/mL heparinised medium and processed
mechanically by extracting and flushing RPMI 1640 medium while holding securely with
hemostats. Until medium become cloudy and oily and rib/BM matrix become grey-white,
we irrigated the specimens repeatedly using heparinised medium (10U/mL) and 30cc
syringe with 16-gauge needle.
BM aspirates were
BM mononuclear cells were isolated by density gradient centrifugation using
Ficoll/Hypaque at 1000RPM (400g) for 30 minutes at room temperature, without brake.
After centrifugation, buffy coat was collected and washed three times with Phosphate
Buffered Saline (PBS-A) at 700g for 7 minutes. WBC counts were performed before and
after processing using a Beckman Coulter AcT.10 Hematology analyzer.
The mononuclear cells were incubated with mouse serum for 5 min at room temperature
to avoid non-specific antibody binding. We stained the cells with CD105 FITC
(Fitzgerald Industries Intl. Concorde, MA USA), CD73 PE, CD45 APC.Cy7 (BD
Biosciences, San Jose, CA USA), CD34 ECD, CD90 PE.Cy5, CD117 PE.Cy7 (Beckman
Coulter, Inc. Fullerton, CA USA), CD133 APC (Miltenyi Biotec Inc. Auburn, CA USA)
monoclonal antibodies for 20 minutes on ice. Following staining, we permeabilized the
cells with Saponin (PBS/0.5%BSA/Saponin) for 10 minutes at room temperature and
added 4µL DAPI per ten million cells, as a marker of nucleated cells. Cells with less than
diploid DNA content were excluded from the analysis. 2-15 million cells per sample were
acquired on a Dako CyAn cytometer and the data were analyzed offline using prototype
analytical software (Venturi, Version 1.0, Applied Cytometry Systems).
Page 48 of 48
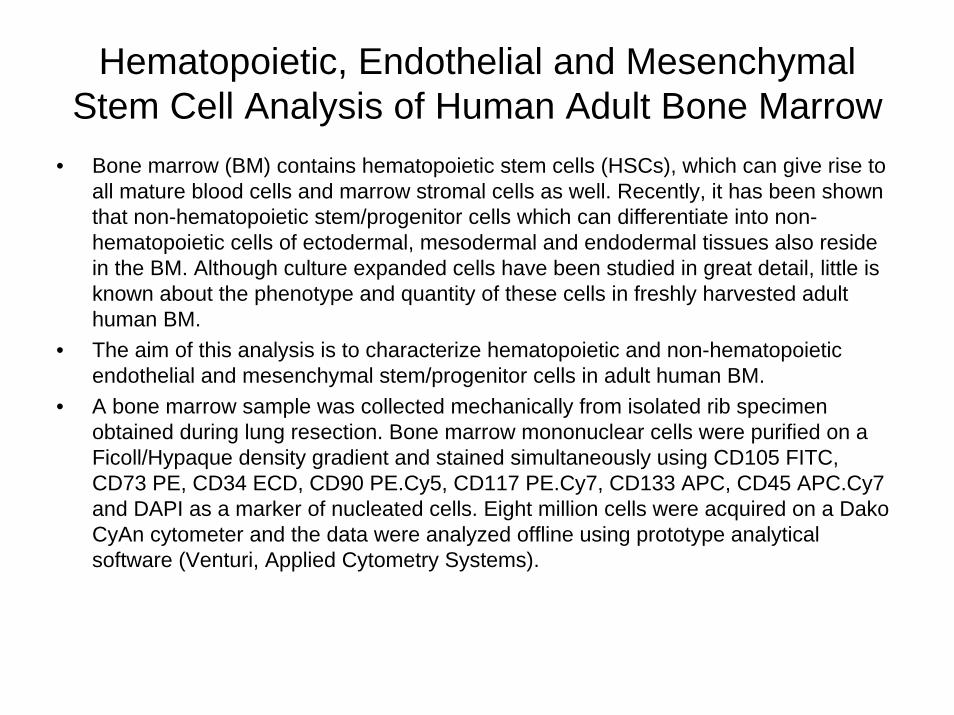
Hematopoietic, Endothelial and Mesenchymal Stem Cell Analysis of Human Adult Bone Marrow
• Bone marrow (BM) contains hematopoietic stem cells (HSCs), which can give rise to all mature blood cells and marrow stromal cells as well. Recently, it has been shown that non-hematopoietic stem/progenitor cells which can differentiate into non-hematopoietic cells of ectodermal, mesodermal and endodermal tissues also reside in the BM. Although culture expanded cells have been studied in great detail, little is known about the phenotype and quantity of these cells in freshly harvested adult human BM.
• The aim of this analysis is to characterize hematopoietic and non-hematopoietic endothelial and mesenchymal stem/progenitor cells in adult human BM.
• A bone marrow sample was collected mechanically from isolated rib specimen obtained during lung resection. Bone marrow mononuclear cells were purified on a Ficoll/Hypaque density gradient and stained simultaneously using CD105 FITC, CD73 PE, CD34 ECD, CD90 PE.Cy5, CD117 PE.Cy7, CD133 APC, CD45 APC.Cy7 and DAPI as a marker of nucleated cells. Eight million cells were acquired on a Dako CyAn cytometer and the data were analyzed offline using prototype analytical software (Venturi, Applied Cytometry Systems).
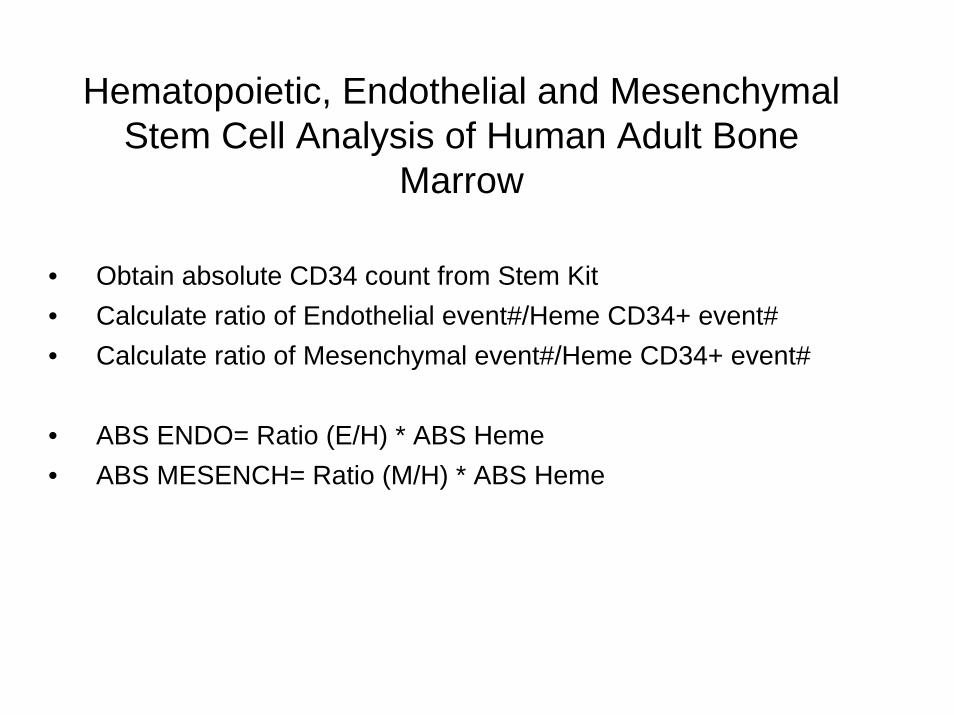
Hematopoietic, Endothelial and Mesenchymal Stem Cell Analysis of Human Adult Bone
Marrow
• Obtain absolute CD34 count from Stem Kit• Calculate ratio of Endothelial event#/Heme CD34+ event#• Calculate ratio of Mesenchymal event#/Heme CD34+ event#
• ABS ENDO= Ratio (E/H) * ABS Heme• ABS MESENCH= Ratio (M/H) * ABS Heme

1. Background noise reduction: singlets, nucleated events of “healthy” scatter (FSC and SSC)
FSCFS P
ulse
Wid
th
DAPI Log
SS
C L
og
FSC
SS
C L
og
Singlets Nucleated Total Cell Events
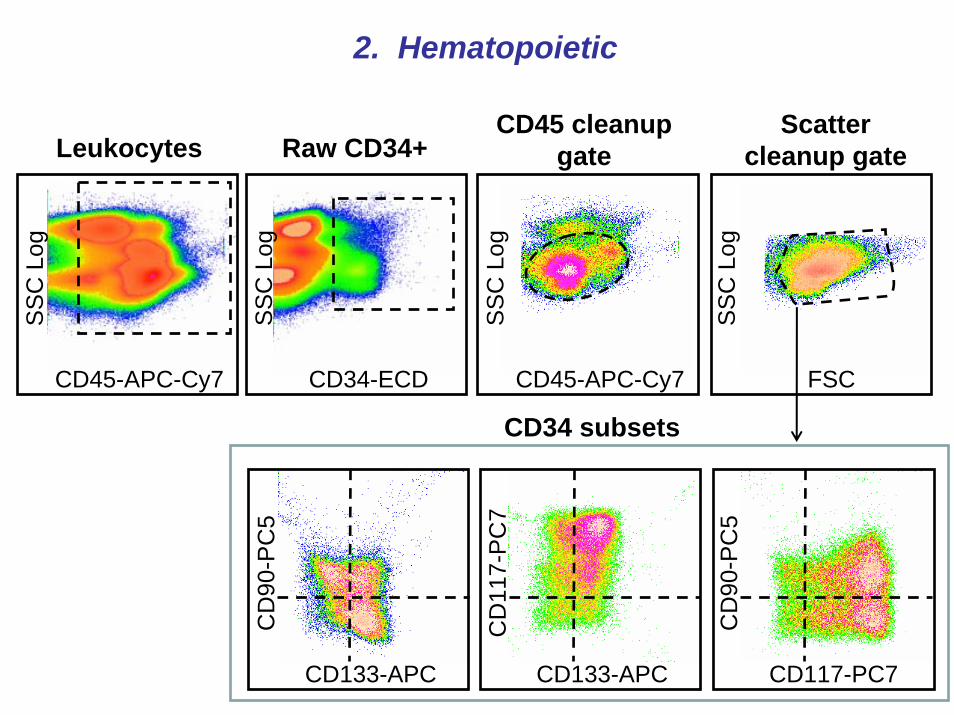
2. Hematopoietic
CD45-APC-Cy7
SS
C L
og
CD34-ECD
SS
C L
og
CD45-APC-Cy7
SS
C L
og
FSC
SS
C L
og
CD133-APC
CD
90-P
C5
CD133-APC
CD
117-
PC
7
CD117-PC7
CD
90-P
C5
LeukocytesScatter
cleanup gate
CD34 subsets
CD45 cleanup gateRaw CD34+
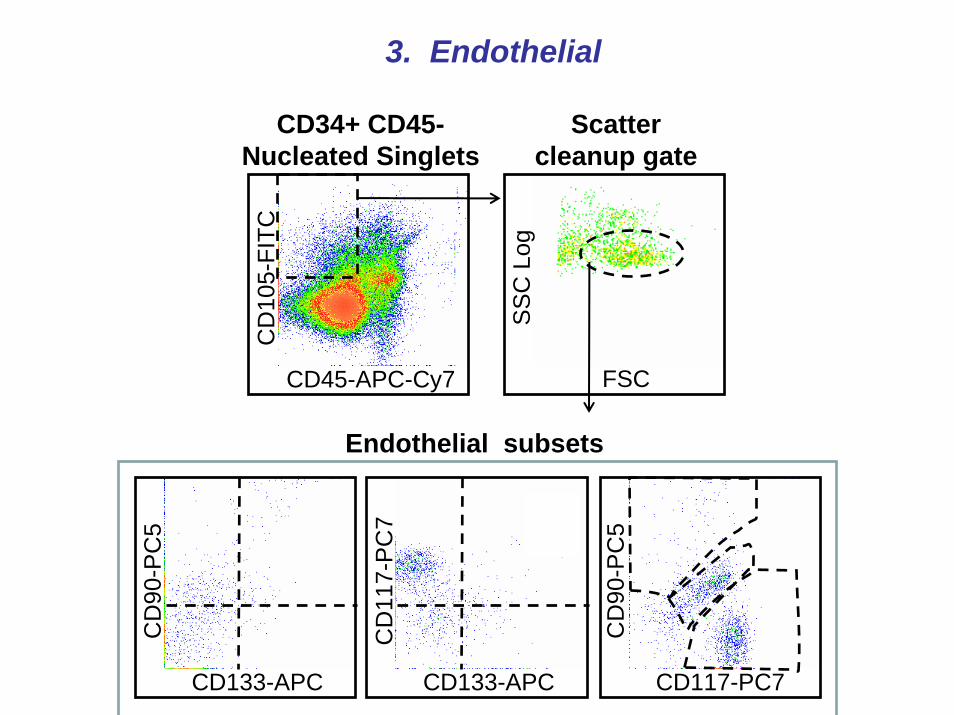
3. Endothelial
CD45-APC-Cy7
CD
105-
FITC
FSC
SS
C L
og
CD133-APC
CD
90-P
C5
CD133-APC
CD
117-
PC
7
CD117-PC7
CD
90-P
C5
Endothelial subsets
CD34+ CD45-Nucleated Singlets
Scatter cleanup gate
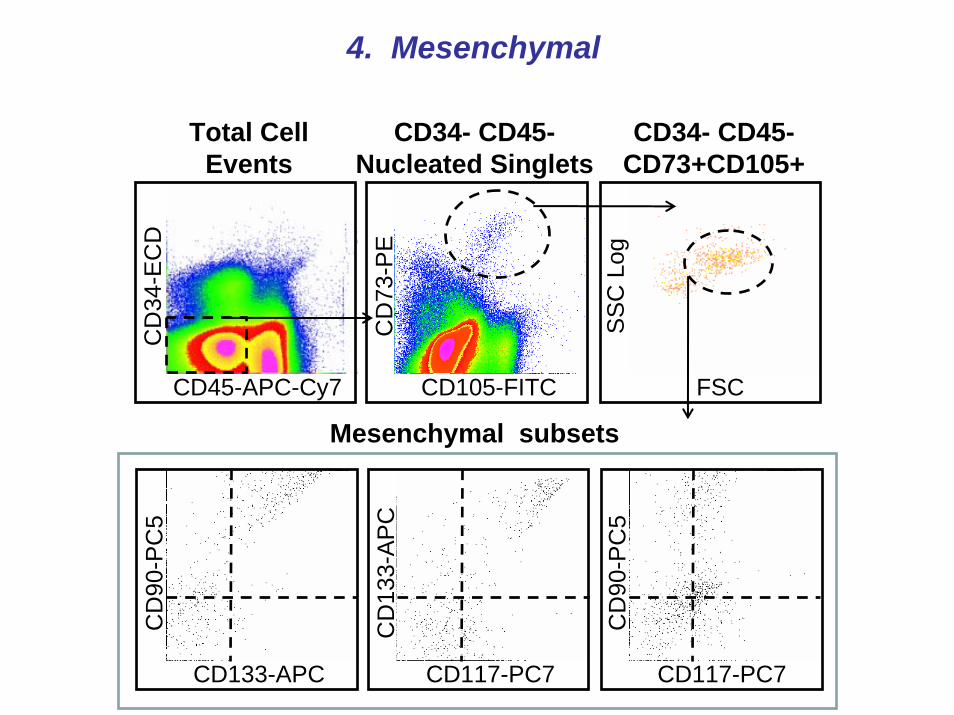
4. Mesenchymal
CD45-APC-Cy7
CD
34-E
CD
CD105-FITCC
D73
-PE
FSC
SS
C L
og
CD133-APC
CD
90-P
C5
CD117-PC7
CD
133-
AP
C
CD117-PC7
CD
90-P
C5
Total Cell Events
CD34- CD45-Nucleated Singlets
CD34- CD45-CD73+CD105+
Mesenchymal subsets
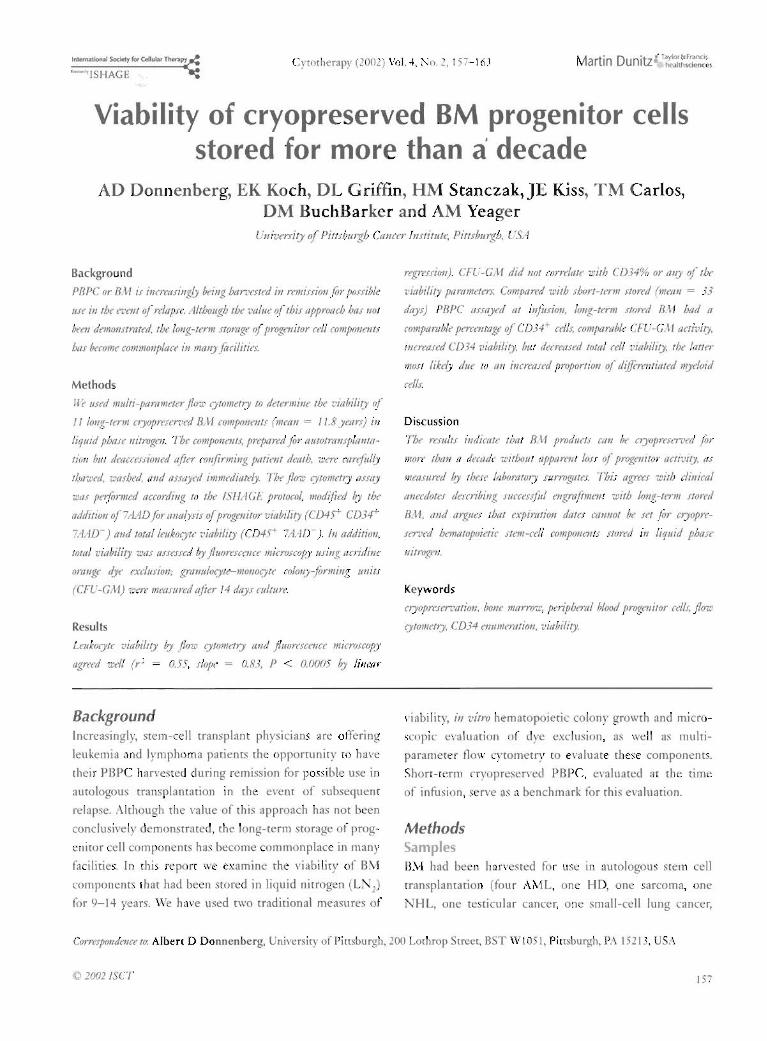
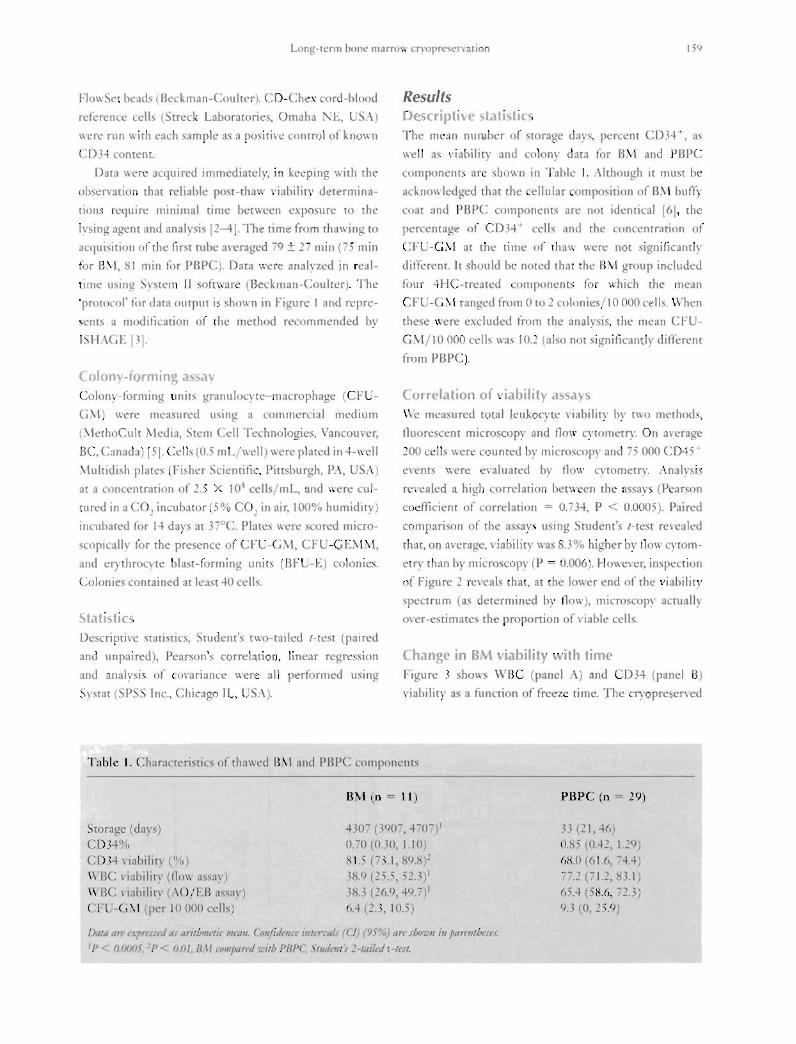
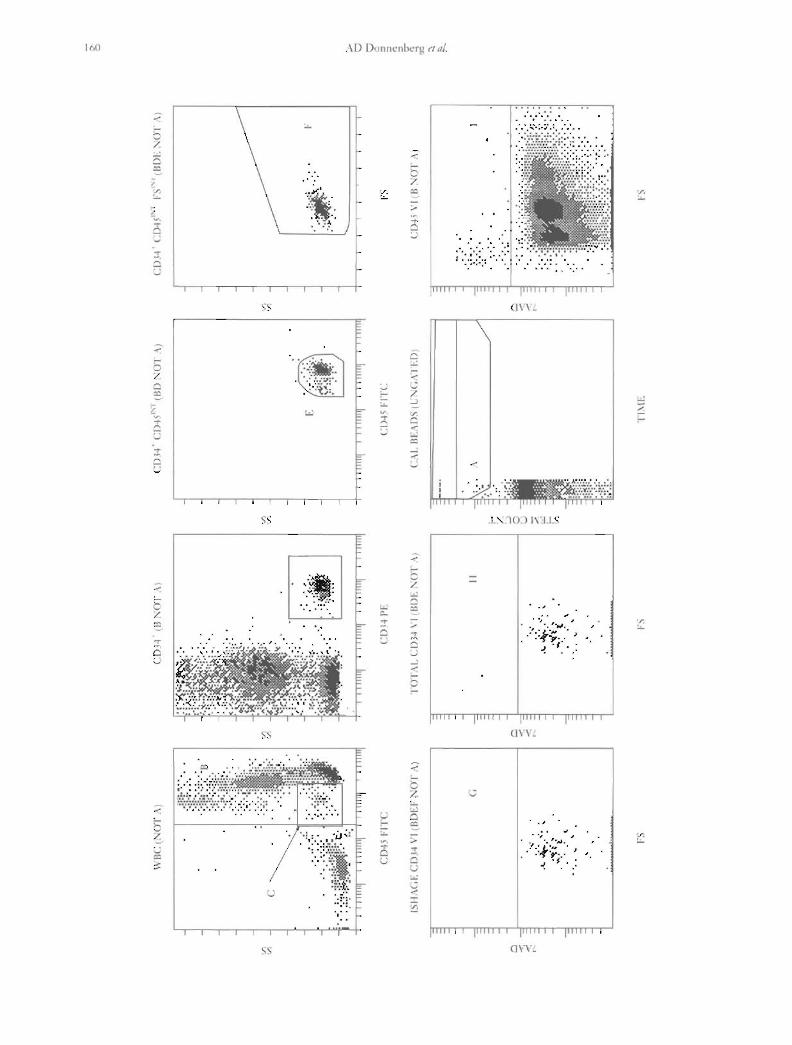
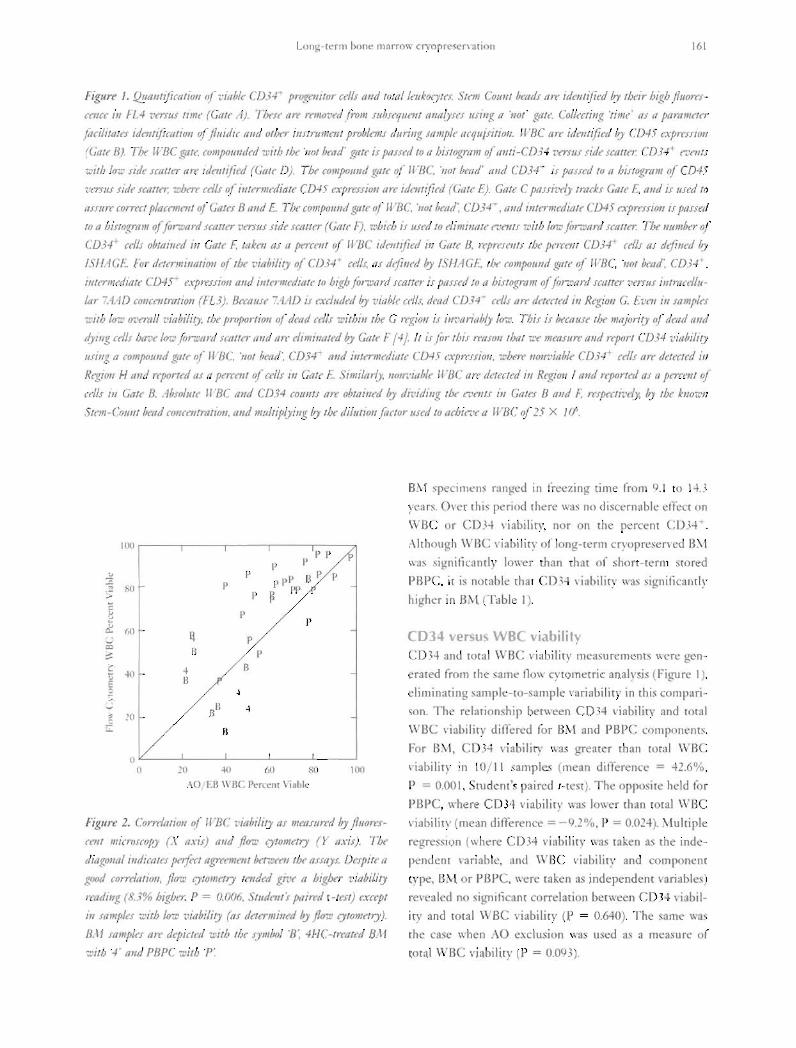
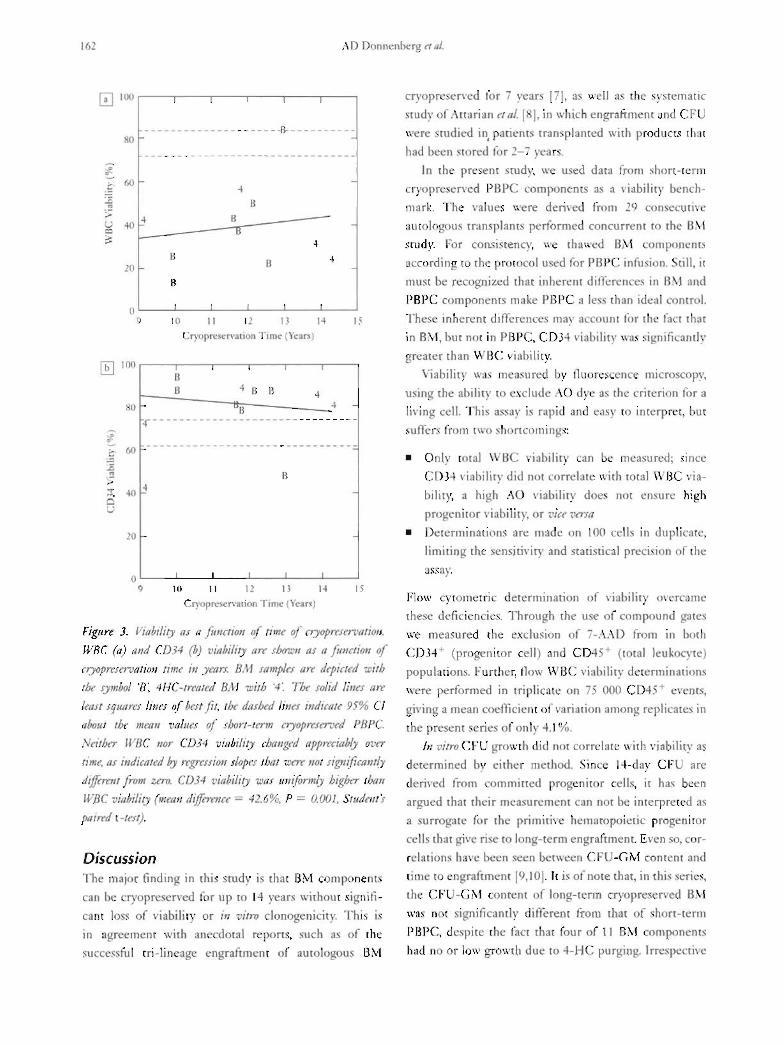
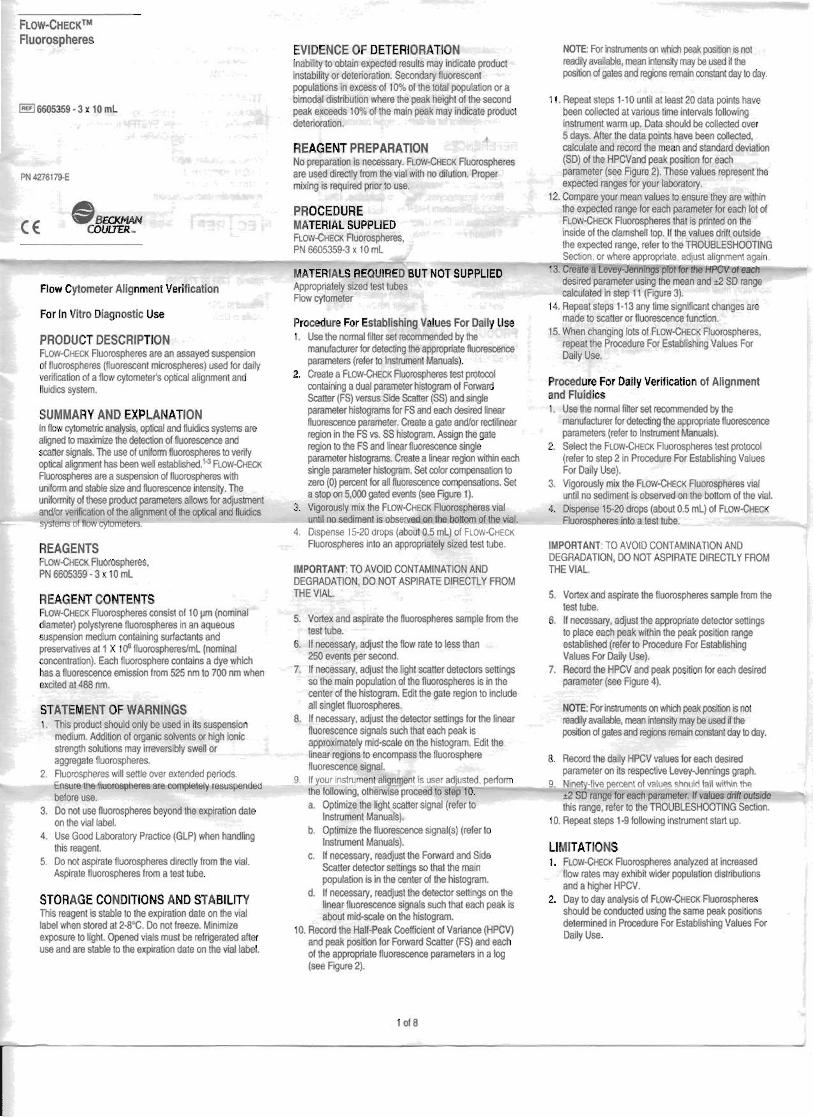
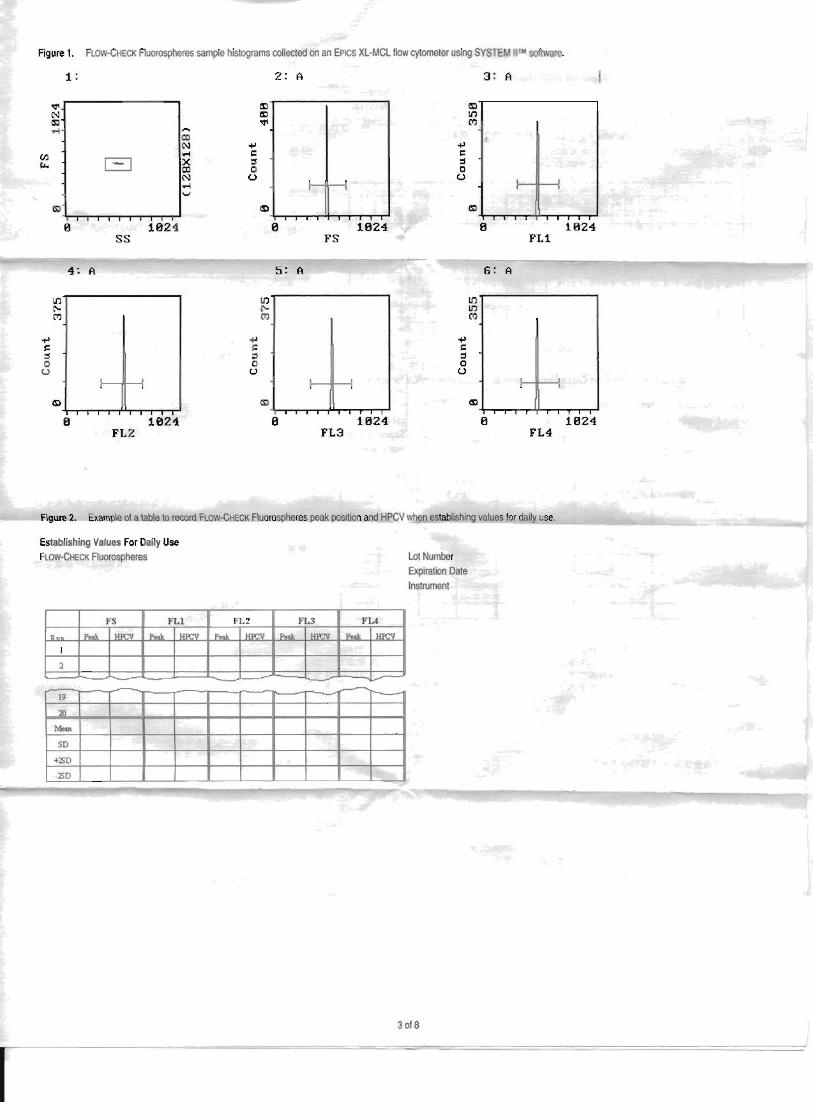
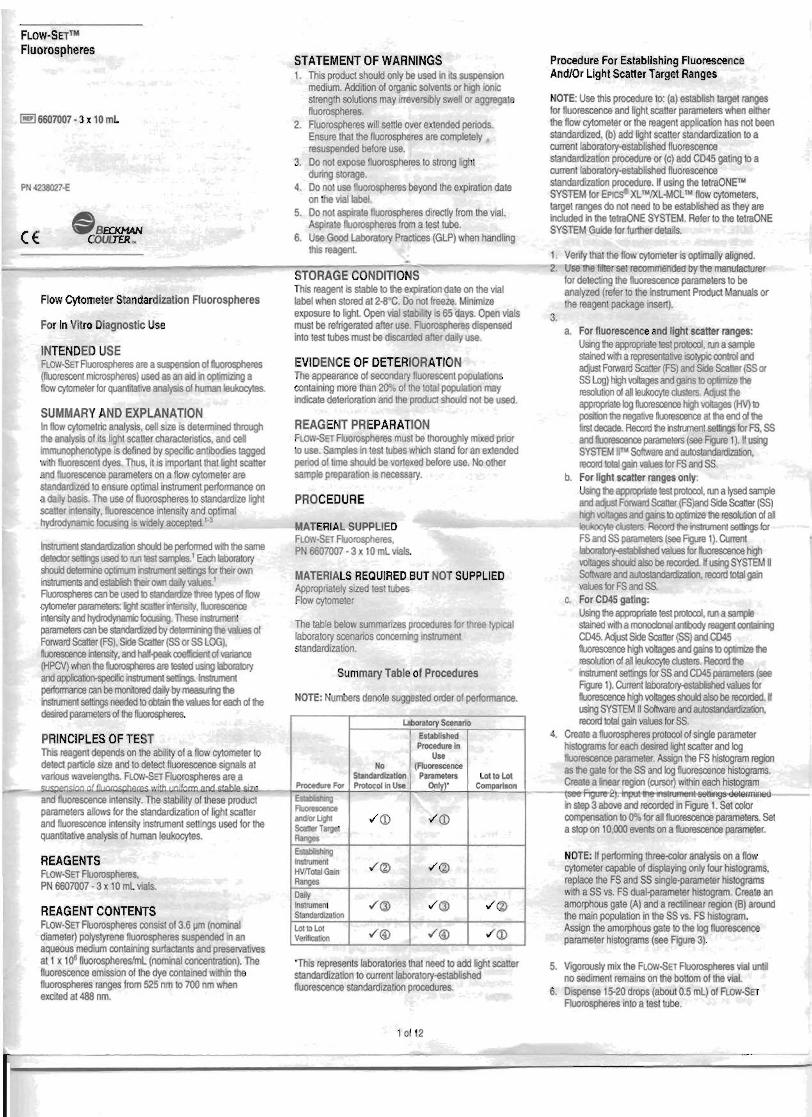
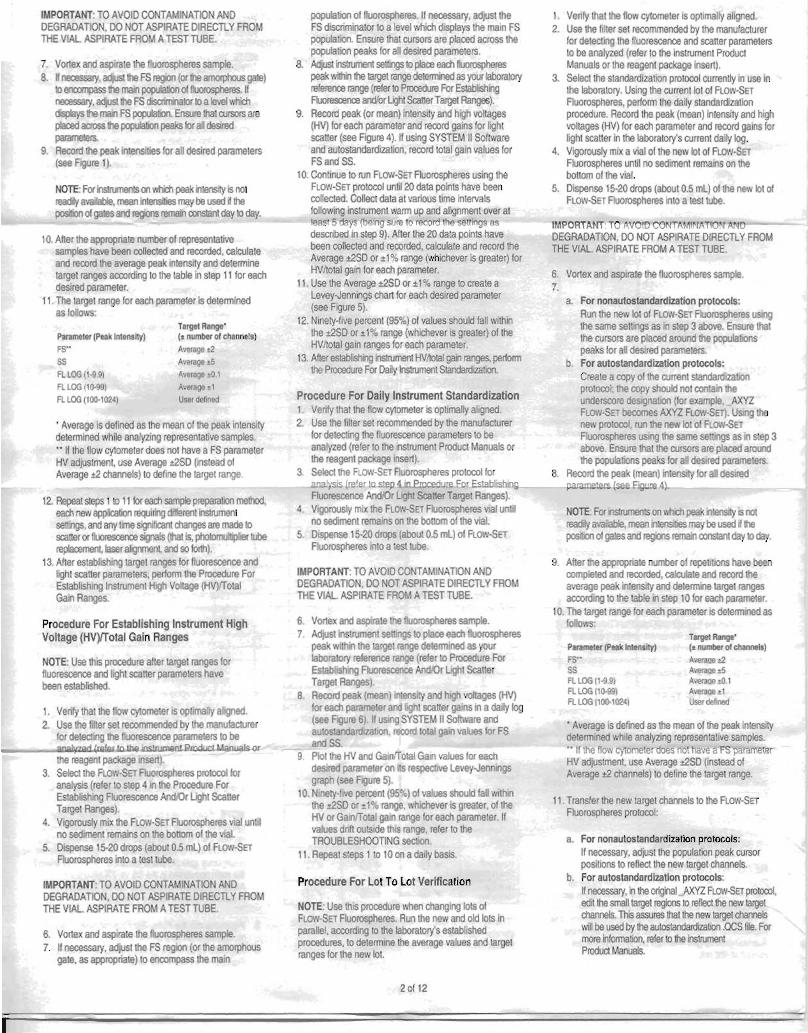
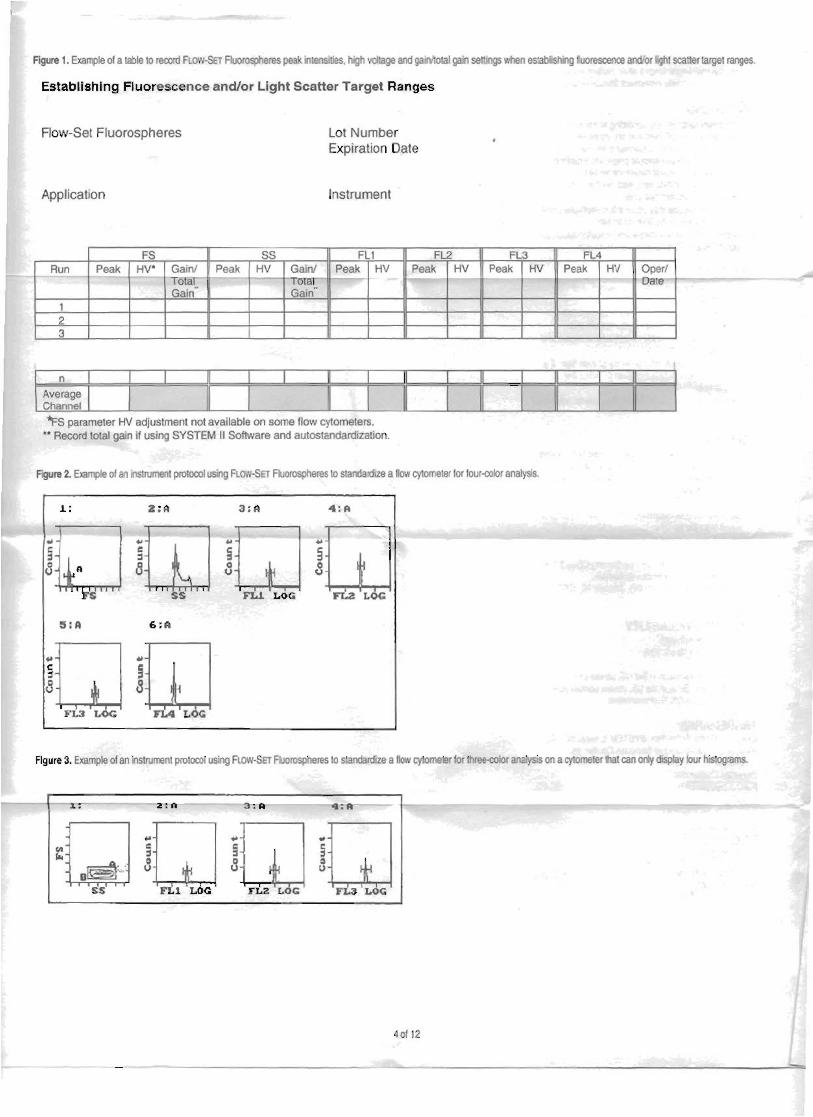
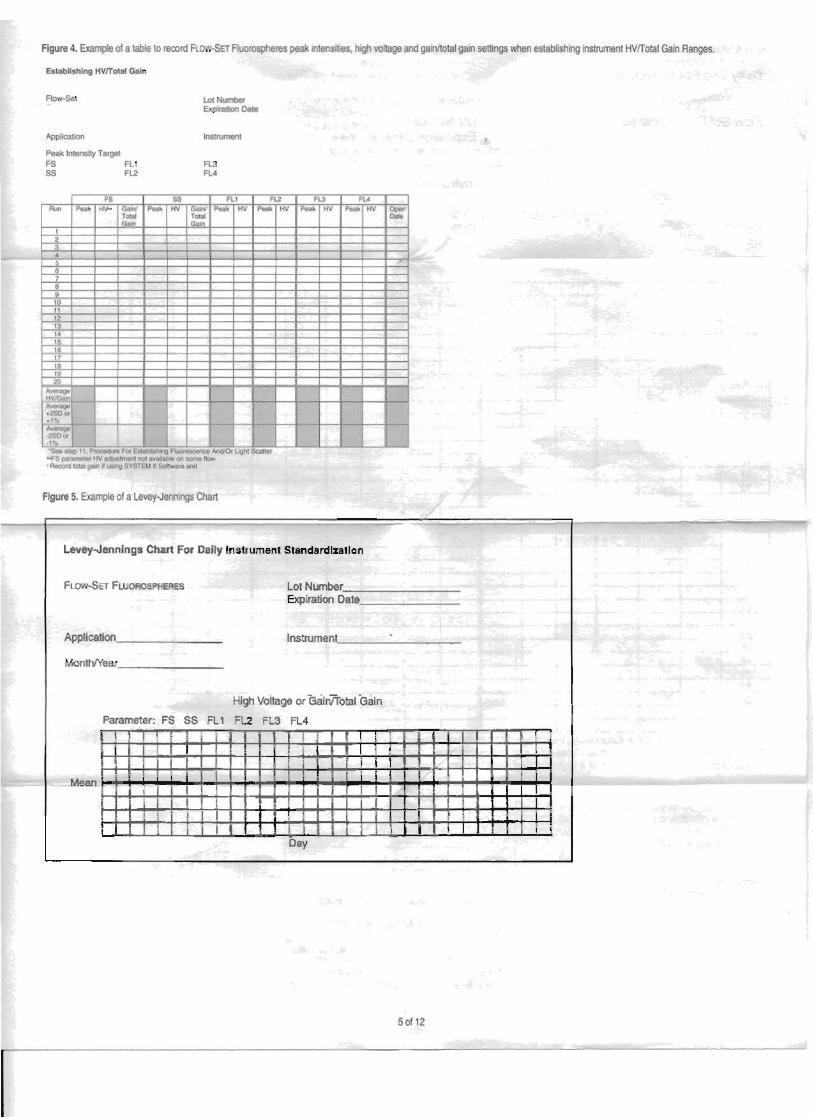
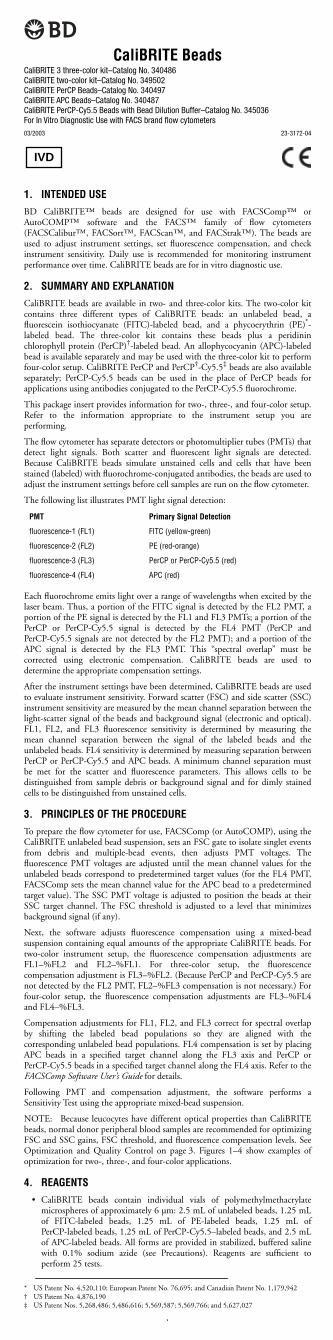
CaliBRITE BeadsCaliBRITE 3 three-color kit–Catalog No. 340486CaliBRITE two-color kit–Catalog No. 349502CaliBRITE PerCP Beads–Catalog No. 340497CaliBRITE APC Beads–Catalog No. 340487CaliBRITE PerCP-Cy5.5 Beads with Bead Dilution Buffer–Catalog No. 345036For In Vitro Diagnostic Use with FACS brand flow cytometers
03/2003 23-3172-04
IVD
1. INTENDED USEBD CaliBRITE™ beads are designed for use with FACSComp™ orAutoCOMP™ software and the FACS™ family of flow cytometers(FACSCalibur™, FACSort™, FACScan™, and FACStrak™). The beads areused to adjust instrument settings, set fluorescence compensation, and checkinstrument sensitivity. Daily use is recommended for monitoring instrumentperformance over time. CaliBRITE beads are for in vitro diagnostic use.
2. SUMMARY AND EXPLANATIONCaliBRITE beads are available in two- and three-color kits. The two-color kitcontains three different types of CaliBRITE beads: an unlabeled bead, afluorescein isothiocyanate (FITC)-labeled bead, and a phycoerythrin (PE)*-labeled bead. The three-color kit contains these beads plus a peridininchlorophyll protein (PerCP)†-labeled bead. An allophycocyanin (APC)-labeledbead is available separately and may be used with the three-color kit to performfour-color setup. CaliBRITE PerCP and PerCP†-Cy5.5‡ beads are also availableseparately; PerCP-Cy5.5 beads can be used in the place of PerCP beads forapplications using antibodies conjugated to the PerCP-Cy5.5 fluorochrome.
This package insert provides information for two-, three-, and four-color setup.Refer to the information appropriate to the instrument setup you areperforming.
The flow cytometer has separate detectors or photomultiplier tubes (PMTs) thatdetect light signals. Both scatter and fluorescent light signals are detected.Because CaliBRITE beads simulate unstained cells and cells that have beenstained (labeled) with fluorochrome-conjugated antibodies, the beads are used toadjust the instrument settings before cell samples are run on the flow cytometer.
The following list illustrates PMT light signal detection:
Each fluorochrome emits light over a range of wavelengths when excited by thelaser beam. Thus, a portion of the FITC signal is detected by the FL2 PMT, aportion of the PE signal is detected by the FL1 and FL3 PMTs; a portion of thePerCP or PerCP-Cy5.5 signal is detected by the FL4 PMT (PerCP andPerCP-Cy5.5 signals are not detected by the FL2 PMT); and a portion of theAPC signal is detected by the FL3 PMT. This “spectral overlap” must becorrected using electronic compensation. CaliBRITE beads are used todetermine the appropriate compensation settings.
After the instrument settings have been determined, CaliBRITE beads are usedto evaluate instrument sensitivity. Forward scatter (FSC) and side scatter (SSC)instrument sensitivity are measured by the mean channel separation between thelight-scatter signal of the beads and background signal (electronic and optical).FL1, FL2, and FL3 fluorescence sensitivity is determined by measuring themean channel separation between the signal of the labeled beads and theunlabeled beads. FL4 sensitivity is determined by measuring separation betweenPerCP or PerCP-Cy5.5 and APC beads. A minimum channel separation mustbe met for the scatter and fluorescence parameters. This allows cells to bedistinguished from sample debris or background signal and for dimly stainedcells to be distinguished from unstained cells.
3. PRINCIPLES OF THE PROCEDURETo prepare the flow cytometer for use, FACSComp (or AutoCOMP), using theCaliBRITE unlabeled bead suspension, sets an FSC gate to isolate singlet eventsfrom debris and multiple-bead events, then adjusts PMT voltages. Thefluorescence PMT voltages are adjusted until the mean channel values for theunlabeled beads correspond to predetermined target values (for the FL4 PMT,FACSComp sets the mean channel value for the APC bead to a predeterminedtarget value). The SSC PMT voltage is adjusted to position the beads at theirSSC target channel. The FSC threshold is adjusted to a level that minimizesbackground signal (if any).
Next, the software adjusts fluorescence compensation using a mixed-beadsuspension containing equal amounts of the appropriate CaliBRITE beads. Fortwo-color instrument setup, the fluorescence compensation adjustments areFL1–%FL2 and FL2–%FL1. For three-color setup, the fluorescencecompensation adjustment is FL3–%FL2. (Because PerCP and PerCP-Cy5.5 arenot detected by the FL2 PMT, FL2–%FL3 compensation is not necessary.) Forfour-color setup, the fluorescence compensation adjustments are FL3–%FL4and FL4–%FL3.
Compensation adjustments for FL1, FL2, and FL3 correct for spectral overlapby shifting the labeled bead populations so they are aligned with thecorresponding unlabeled bead populations. FL4 compensation is set by placingAPC beads in a specified target channel along the FL3 axis and PerCP orPerCP-Cy5.5 beads in a specified target channel along the FL4 axis. Refer to theFACSComp Software User’s Guide for details.
Following PMT and compensation adjustment, the software performs aSensitivity Test using the appropriate mixed-bead suspension.
NOTE: Because leucocytes have different optical properties than CaliBRITEbeads, normal donor peripheral blood samples are recommended for optimizingFSC and SSC gains, FSC threshold, and fluorescence compensation levels. SeeOptimization and Quality Control on page 3. Figures 1–4 show examples ofoptimization for two-, three-, and four-color applications.
4. REAGENTS• CaliBRITE beads contain individual vials of polymethylmethacrylate
microspheres of approximately 6 µm: 2.5 mL of unlabeled beads, 1.25 mLof FITC-labeled beads, 1.25 mL of PE-labeled beads, 1.25 mL ofPerCP-labeled beads, 1.25 mL of PerCP-Cy5.5–labeled beads, and 2.5 mLof APC-labeled beads. All forms are provided in stabilized, buffered salinewith 0.1% sodium azide (see Precautions). Reagents are sufficient toperform 25 tests.
* US Patent No. 4,520,110; European Patent No. 76,695; and Canadian Patent No. 1,179,942† US Patent No. 4,876,190‡ US Patent Nos. 5,268,486; 5,486,616; 5,569,587; 5,569,766; and 5,627,027
PMT Primary Signal Detection
fluorescence-1 (FL1) FITC (yellow-green)
fluorescence-2 (FL2) PE (red-orange)
fluorescence-3 (FL3) PerCP or PerCP-Cy5.5 (red)
fluorescence-4 (FL4) APC (red)
1
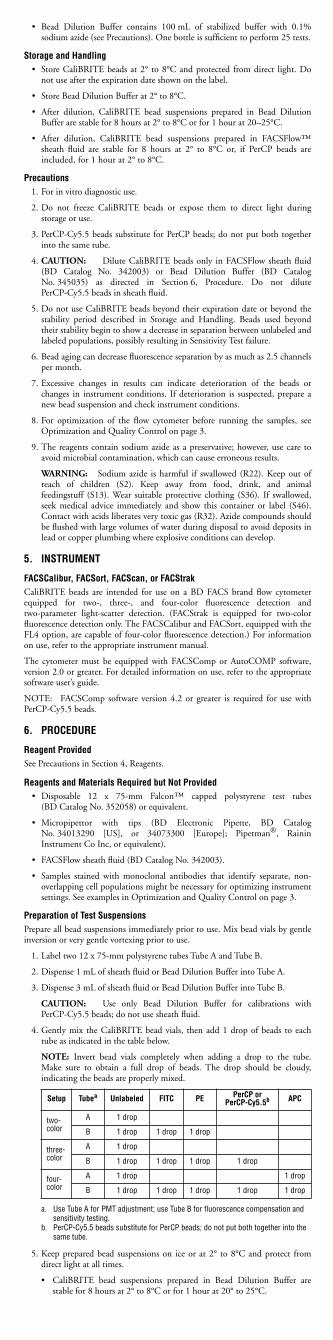
• Bead Dilution Buffer contains 100 mL of stabilized buffer with 0.1%sodium azide (see Precautions). One bottle is sufficient to perform 25 tests.
Storage and Handling• Store CaliBRITE beads at 2° to 8°C and protected from direct light. Do
not use after the expiration date shown on the label.
• Store Bead Dilution Buffer at 2° to 8°C.
• After dilution, CaliBRITE bead suspensions prepared in Bead DilutionBuffer are stable for 8 hours at 2° to 8°C or for 1 hour at 20–25°C.
• After dilution, CaliBRITE bead suspensions prepared in FACSFlow™sheath fluid are stable for 8 hours at 2° to 8°C or, if PerCP beads areincluded, for 1 hour at 2° to 8°C.
Precautions1. For in vitro diagnostic use.
2. Do not freeze CaliBRITE beads or expose them to direct light duringstorage or use.
3. PerCP-Cy5.5 beads substitute for PerCP beads; do not put both togetherinto the same tube.
4. CAUTION: Dilute CaliBRITE beads only in FACSFlow sheath fluid(BD Catalog No. 342003) or Bead Dilution Buffer (BD CatalogNo. 345035) as directed in Section 6, Procedure. Do not dilutePerCP-Cy5.5 beads in sheath fluid.
5. Do not use CaliBRITE beads beyond their expiration date or beyond thestability period described in Storage and Handling. Beads used beyondtheir stability begin to show a decrease in separation between unlabeled andlabeled populations, possibly resulting in Sensitivity Test failure.
6. Bead aging can decrease fluorescence separation by as much as 2.5 channelsper month.
7. Excessive changes in results can indicate deterioration of the beads orchanges in instrument conditions. If deterioration is suspected, prepare anew bead suspension and check instrument conditions.
8. For optimization of the flow cytometer before running the samples, seeOptimization and Quality Control on page 3.
9. The reagents contain sodium azide as a preservative; however, use care toavoid microbial contamination, which can cause erroneous results.
WARNING: Sodium azide is harmful if swallowed (R22). Keep out ofreach of children (S2). Keep away from food, drink, and animalfeedingstuff (S13). Wear suitable protective clothing (S36). If swallowed,seek medical advice immediately and show this container or label (S46).Contact with acids liberates very toxic gas (R32). Azide compounds shouldbe flushed with large volumes of water during disposal to avoid deposits inlead or copper plumbing where explosive conditions can develop.
5. INSTRUMENT
FACSCalibur, FACSort, FACScan, or FACStrakCaliBRITE beads are intended for use on a BD FACS brand flow cytometerequipped for two-, three-, and four-color fluorescence detection andtwo-parameter light-scatter detection. (FACStrak is equipped for two-colorfluorescence detection only. The FACSCalibur and FACSort, equipped with theFL4 option, are capable of four-color fluorescence detection.) For informationon use, refer to the appropriate instrument manual.
The cytometer must be equipped with FACSComp or AutoCOMP software,version 2.0 or greater. For detailed information on use, refer to the appropriatesoftware user’s guide.
NOTE: FACSComp software version 4.2 or greater is required for use withPerCP-Cy5.5 beads.
6. PROCEDURE
Reagent ProvidedSee Precautions in Section 4, Reagents.
Reagents and Materials Required but Not Provided• Disposable 12 x 75-mm Falcon™ capped polystyrene test tubes
(BD Catalog No. 352058) or equivalent.
• Micropipettor with tips (BD Electronic Pipette, BD CatalogNo. 34013290 [US], or 34073300 [Europe]; Pipetman®, RaininInstrument Co Inc, or equivalent).
• FACSFlow sheath fluid (BD Catalog No. 342003).
• Samples stained with monoclonal antibodies that identify separate, non-overlapping cell populations might be necessary for optimizing instrumentsettings. See examples in Optimization and Quality Control on page 3.
Preparation of Test SuspensionsPrepare all bead suspensions immediately prior to use. Mix bead vials by gentleinversion or very gentle vortexing prior to use.
1. Label two 12 x 75-mm polystyrene tubes Tube A and Tube B.
2. Dispense 1 mL of sheath fluid or Bead Dilution Buffer into Tube A.
3. Dispense 3 mL of sheath fluid or Bead Dilution Buffer into Tube B.
CAUTION: Use only Bead Dilution Buffer for calibrations withPerCP-Cy5.5 beads; do not use sheath fluid.
4. Gently mix the CaliBRITE bead vials, then add 1 drop of beads to eachtube as indicated in the table below.
NOTE: Invert bead vials completely when adding a drop to the tube.Make sure to obtain a full drop of beads. The drop should be cloudy,indicating the beads are properly mixed.
5. Keep prepared bead suspensions on ice or at 2° to 8°C and protect fromdirect light at all times.
• CaliBRITE bead suspensions prepared in Bead Dilution Buffer arestable for 8 hours at 2° to 8°C or for 1 hour at 20° to 25°C.
Setup Tubea
a. Use Tube A for PMT adjustment; use Tube B for fluorescence compensation and sensitivity testing.
Unlabeled FITC PE PerCP or PerCP-Cy5.5b
b. PerCP-Cy5.5 beads substitute for PerCP beads; do not put both together into the same tube.
APC
two-color
A 1 drop
B 1 drop 1 drop 1 drop
three-color
A 1 drop
B 1 drop 1 drop 1 drop 1 drop
four-color
A 1 drop 1 drop
B 1 drop 1 drop 1 drop 1 drop 1 drop
2

3
• CaliBRITE bead suspensions prepared in FACSFlow sheath fluid arestable for 8 hours at 2° to 8°C or, if PerCP beads are included, for1 hour at 2° to 8°C. Do not dilute PerCP-Cy5.5 beads in sheath fluid.
System SetupFor detailed information on using FACSComp or AutoCOMP software withCaliBRITE beads for instrument setup, refer to the FACSComp Software User’sGuide or the AutoCOMP Software Reference Manual.
1. Adjust PMT voltage settings using Tube A.
2. Adjust fluorescence compensation using Tube B.
3. Perform a Sensitivity Test using Tube B.
4. Generate a printout of the Sensitivity Test results and keep the printouts ina log book. Record PMT voltages and channel separations obtained foreach parameter in a daily log sheet.
5. Optimize settings for your sample, as needed.
Instrument settings might need to be manually optimized before runningcells. Visually inspect dot plots for proper PMT gains, compensation, andFSC threshold (see Figures 1–5 in the following section, Optimization andQuality Control).
Optimization and Quality ControlBecause leucocytes have different optical properties than CaliBRITE beads,optimization of instrument settings with cell samples is important. Prepare ablood sample daily from a normal donor. Use the same staining method and runin parallel with the test samples. Optimize instrument settings following two-color setup using a blood sample stained with any combination of monoclonalantibodies that identifies separate non-overlapping cell populations such asFITC-labeled and PE-labeled monoclonal antibodies. Optimization followingthree- and four-color setup can vary depending on the application. SeeFigures 1–5 for examples. Always refer to the appropriate application note orreagent package insert.
NOTE: Different immunophenotyping preparation methods might requiredifferent optimization procedures. It might be necessary to adjust the FSC andSSC amplifiers so that all leucocyte populations are on scale, and to adjustcompensation and threshold settings (see Figure 1).
Optimizing ScatterFigure 1 shows a lysed whole blood (LWB) sample from a normal donor beforeand after optimization. Notice populations with a lower FSC signal thanlymphocytes (debris, for example) can be excluded by increasing the FSCthreshold level.
Figure 1 FSC vs SSC dot plots before and after optimization
Optimizing CompensationFigure 2 shows a normal peripheral LWB sample before and after FL1 vs FL2compensation adjustment. The FL2–%FL1 compensation level is adjusted sothe FITC (FL1) population is aligned along the y-axis with the unlabeled beadpopulation. The FL1–%FL2 compensation level is adjusted so the PE (FL2)population is aligned along the x-axis with the unlabeled bead population.
Figure 2 FL1 vs FL2 dot plots of normal donor peripheral LWB stained with CD3 FITC/CD19 PE
Figure 3 shows a normal peripheral blood sample before and after FL3 vs FL2compensation adjustment. The FL3–%FL2 compensation level is adjusted sothe PE (FL2) population is aligned along the x-axis with the negativepopulation. FL2–%FL3 compensation is not necessary.
Figure 3 FL3 vs FL2 dot plots of normal donor peripheral LWB stained with IgG1 FITC/CD8 PE/IgG1 PerCP using a lyse/wash method
Figures 4 and 5 show a normal peripheral blood sample before and after FL3 vsFL4 compensation adjustment. In Figure 4, the FL4–%FL3 compensation levelis adjusted so the PerCP-stained population is moved from the center of the plotto the x-axis. Adjustment is similar for PerCP-Cy5.5–stained samples. Therequired FL4–%FL3 compensation level is usually less than that for PerCP.
FSC gain too low FSC gain too high
optimized scatter and thresholdSSC gain too low
FSC threshold too low
optimized compensationovercompensationundercompensation
before compensation optimized compensation
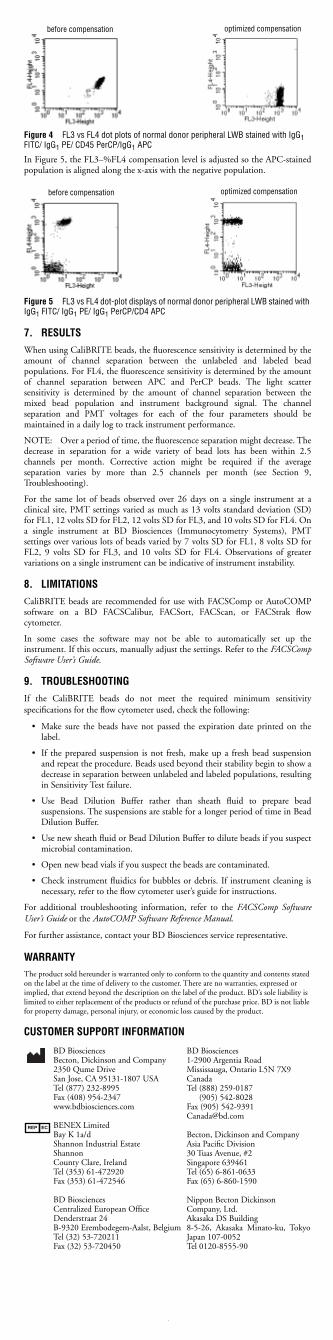
Figure 4 FL3 vs FL4 dot plots of normal donor peripheral LWB stained with IgG1 FITC/ IgG1 PE/ CD45 PerCP/IgG1 APC
In Figure 5, the FL3–%FL4 compensation level is adjusted so the APC-stainedpopulation is aligned along the x-axis with the negative population.
Figure 5 FL3 vs FL4 dot-plot displays of normal donor peripheral LWB stained
with IgG
1
FITC/ IgG
1
PE/ IgG
1
PerCP/CD4 APC
7. RESULTS
When using CaliBRITE beads, the fluorescence sensitivity is determined by theamount of channel separation between the unlabeled and labeled beadpopulations. For FL4, the fluorescence sensitivity is determined by the amountof channel separation between APC and PerCP beads. The light scattersensitivity is determined by the amount of channel separation between themixed bead population and instrument background signal. The channelseparation and PMT voltages for each of the four parameters should bemaintained in a daily log to track instrument performance.
NOTE: Over a period of time, the fluorescence separation might decrease. Thedecrease in separation for a wide variety of bead lots has been within 2.5channels per month. Corrective action might be required if the averageseparation varies by more than 2.5 channels per month (see Section 9,Troubleshooting).
For the same lot of beads observed over 26 days on a single instrument at aclinical site, PMT settings varied as much as 13 volts standard deviation (SD)for FL1, 12 volts SD for FL2, 12 volts SD for FL3, and 10 volts SD for FL4. Ona single instrument at BD Biosciences (Immunocytometry Systems), PMTsettings over various lots of beads varied by 7 volts SD for FL1, 8 volts SD forFL2, 9 volts SD for FL3, and 10 volts SD for FL4. Observations of greatervariations on a single instrument can be indicative of instrument instability.
8. LIMITATIONS
CaliBRITE beads are recommended for use with FACSComp or AutoCOMPsoftware on a BD FACSCalibur, FACSort, FACScan, or FACStrak flowcytometer.
In some cases the software may not be able to automatically set up theinstrument. If this occurs, manually adjust the settings. Refer to the
FACSCompSoftware User’s Guide
.
9. TROUBLESHOOTING
If the CaliBRITE beads do not meet the required minimum sensitivityspecifications for the flow cytometer used, check the following:
• Make sure the beads have not passed the expiration date printed on thelabel.
• If the prepared suspension is not fresh, make up a fresh bead suspensionand repeat the procedure. Beads used beyond their stability begin to show adecrease in separation between unlabeled and labeled populations, resultingin Sensitivity Test failure.
• Use Bead Dilution Buffer rather than sheath fluid to prepare beadsuspensions. The suspensions are stable for a longer period of time in BeadDilution Buffer.
• Use new sheath fluid or Bead Dilution Buffer to dilute beads if you suspectmicrobial contamination.
• Open new bead vials if you suspect the beads are contaminated.
• Check instrument fluidics for bubbles or debris. If instrument cleaning isnecessary, refer to the flow cytometer user’s guide for instructions.
For additional troubleshooting information, refer to the
FACSComp SoftwareUser’s Guide
or the
AutoCOMP Software Reference Manual
.
For further assistance, contact your BD Biosciences service representative.
WARRANTY
The product sold hereunder is warranted only to conform to the quantity and contents stated on the label at the time of delivery to the customer. There are no warranties, expressed or implied, that extend beyond the description on the label of the product. BD’s sole liability is limited to either replacement of the products or refund of the purchase price. BD is not liable for property damage, personal injury, or economic loss caused by the product.
CUSTOMER SUPPORT INFORMATION
before compensation optimized compensation
before compensation optimized compensation
BD Biosciences1-2900 Argentia RoadMississauga, Ontario L5N 7X9CanadaTel (888) 259-0187
(905) 542-8028Fax (905) [email protected]
Becton, Dickinson and CompanyAsia Pacific Division30 Tuas Avenue, #2Singapore 639461Tel (65) 6-861-0633Fax (65) 6-860-1590
Nippon Becton DickinsonCompany, Ltd.Akasaka DS Building8-5-26, Akasaka Minato-ku, TokyoJapan 107-0052Tel 0120-8555-90
BD BiosciencesBecton, Dickinson and Company2350 Qume DriveSan Jose, CA 95131-1807 USATel (877) 232-8995Fax (408) 954-2347www.bdbiosciences.com
BENEX LimitedBay K 1a/dShannon Industrial EstateShannonCounty Clare, IrelandTel (353) 61-472920Fax (353) 61-472546
BD BiosciencesCentralized European OfficeDenderstraat 24B-9320 Erembodegem-Aalst, BelgiumTel (32) 53-720211Fax (32) 53-720450
REP EC
4
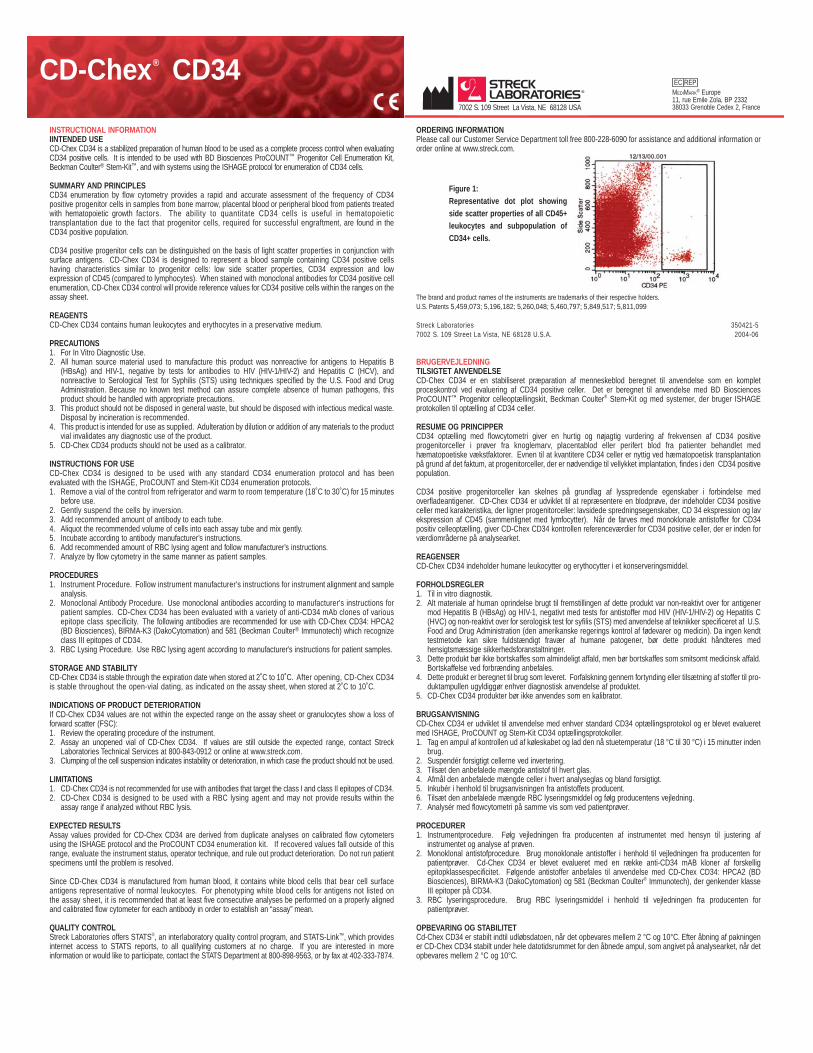
INSTRUCTIONAL INFORMATION IINTENDED USECD-Chex CD34 is a stabilized preparation of human blood to be used as a complete process control when evaluatingCD34 positive cells. It is intended to be used with BD Biosciences ProCOUNT™ Progenitor Cell Enumeration Kit,Beckman Coulter® Stem-Kit™, and with systems using the ISHAGE protocol for enumeration of CD34 cells.
SUMMARY AND PRINCIPLESCD34 enumeration by flow cytometry provides a rapid and accurate assessment of the frequency of CD34positive progenitor cells in samples from bone marrow, placental blood or peripheral blood from patients treatedwith hematopoietic growth factors. The ability to quantitate CD34 cells is useful in hematopoietictransplantation due to the fact that progenitor cells, required for successful engraftment, are found in theCD34 positive population.
CD34 positive progenitor cells can be distinguished on the basis of light scatter properties in conjunction withsurface antigens. CD-Chex CD34 is designed to represent a blood sample containing CD34 positive cellshaving characteristics similar to progenitor cells: low side scatter properties, CD34 expression and lowexpression of CD45 (compared to lymphocytes). When stained with monoclonal antibodies for CD34 positive cellenumeration, CD-Chex CD34 control will provide reference values for CD34 positive cells within the ranges on theassay sheet.
REAGENTSCD-Chex CD34 contains human leukocytes and erythocytes in a preservative medium.
PRECAUTIONS 1. For In Vitro Diagnostic Use.2. All human source material used to manufacture this product was nonreactive for antigens to Hepatitis B
(HBsAg) and HIV-1, negative by tests for antibodies to HIV (HIV-1/HIV-2) and Hepatitis C (HCV), andnonreactive to Serological Test for Syphilis (STS) using techniques specified by the U.S. Food and DrugAdministration. Because no known test method can assure complete absence of human pathogens, thisproduct should be handled with appropriate precautions.
3. This product should not be disposed in general waste, but should be disposed with infectious medical waste.Disposal by incineration is recommended.
4. This product is intended for use as supplied. Adulteration by dilution or addition of any materials to the productvial invalidates any diagnostic use of the product.
5. CD-Chex CD34 products should not be used as a calibrator.
INSTRUCTIONS FOR USECD-Chex CD34 is designed to be used with any standard CD34 enumeration protocol and has beenevaluated with the ISHAGE, ProCOUNT and Stem-Kit CD34 enumeration protocols.1. Remove a vial of the control from refrigerator and warm to room temperature (18˚C to 30˚C) for 15 minutes
before use.2. Gently suspend the cells by inversion.3. Add recommended amount of antibody to each tube.4. Aliquot the recommended volume of cells into each assay tube and mix gently.5. Incubate according to antibody manufacturer’s instructions.6. Add recommended amount of RBC lysing agent and follow manufacturer’s instructions.7. Analyze by flow cytometry in the same manner as patient samples.
PROCEDURES1. Instrument Procedure. Follow instrument manufacturer's instructions for instrument alignment and sample
analysis.2. Monoclonal Antibody Procedure. Use monoclonal antibodies according to manufacturer's instructions for
patient samples. CD-Chex CD34 has been evaluated with a variety of anti-CD34 mAb clones of variousepitope class specificity. The following antibodies are recommended for use with CD-Chex CD34: HPCA2(BD Biosciences), BIRMA-K3 (DakoCytomation) and 581 (Beckman Coulter® Immunotech) which recognizeclass III epitopes of CD34.
3. RBC Lysing Procedure. Use RBC lysing agent according to manufacturer’s instructions for patient samples.
STORAGE AND STABILITYCD-Chex CD34 is stable through the expiration date when stored at 2˚C to 10˚C. After opening, CD-Chex CD34is stable throughout the open-vial dating, as indicated on the assay sheet, when stored at 2˚C to 10˚C.
INDICATIONS OF PRODUCT DETERIORATIONIf CD-Chex CD34 values are not within the expected range on the assay sheet or granulocytes show a loss offorward scatter (FSC):1. Review the operating procedure of the instrument.2. Assay an unopened vial of CD-Chex CD34. If values are still outside the expected range, contact Streck
Laboratories Technical Services at 800-843-0912 or online at www.streck.com.3. Clumping of the cell suspension indicates instability or deterioration, in which case the product should not be used.
LIMITATIONS1. CD-Chex CD34 is not recommended for use with antibodies that target the class I and class II epitopes of CD34.2. CD-Chex CD34 is designed to be used with a RBC lysing agent and may not provide results within the
assay range if analyzed without RBC lysis.
EXPECTED RESULTSAssay values provided for CD-Chex CD34 are derived from duplicate analyses on calibrated flow cytometersusing the ISHAGE protocol and the ProCOUNT CD34 enumeration kit. If recovered values fall outside of thisrange, evaluate the instrument status, operator technique, and rule out product deterioration. Do not run patientspecimens until the problem is resolved.
Since CD-Chex CD34 is manufactured from human blood, it contains white blood cells that bear cell surfaceantigens representative of normal leukocytes. For phenotyping white blood cells for antigens not listed onthe assay sheet, it is recommended that at least five consecutive analyses be performed on a properly alignedand calibrated flow cytometer for each antibody in order to establish an “assay” mean.
QUALITY CONTROLStreck Laboratories offers STATS®, an interlaboratory quality control program, and STATS-Link™, which providesinternet access to STATS reports, to all qualifying customers at no charge. If you are interested in moreinformation or would like to participate, contact the STATS Department at 800-898-9563, or by fax at 402-333-7874.
ORDERING INFORMATIONPlease call our Customer Service Department toll free 800-228-6090 for assistance and additional information ororder online at www.streck.com.
The brand and product names of the instruments are trademarks of their respective holders.U.S. Patents 5,459,073; 5,196,182; 5,260,048; 5,460,797; 5,849,517; 5,811,099
Streck Laboratories 350421-57002 S. 109 Street La Vista, NE 68128 U.S.A. 2004-06
BRUGERVEJLEDNINGTILSIGTET ANVENDELSECD-Chex CD34 er en stabiliseret præparation af menneskeblod beregnet til anvendelse som en kompletproceskontrol ved evaluering af CD34 positive celler. Det er beregnet til anvendelse med BD BiosciencesProCOUNT™ Progenitor celleoptællingskit, Beckman Coulter® Stem-Kit og med systemer, der bruger ISHAGEprotokollen til optælling af CD34 celler.
RESUME OG PRINCIPPERCD34 optælling med flowcytometri giver en hurtig og nøjagtig vurdering af frekvensen af CD34 positiveprogenitorceller i prøver fra knoglemarv, placentablod eller perifert blod fra patienter behandlet medhæmatopoetiske vækstfaktorer. Evnen til at kvantitere CD34 celler er nyttig ved hæmatopoetisk transplantationpå grund af det faktum, at progenitorceller, der er nødvendige til vellykket implantation, findes i den CD34 positivepopulation.
CD34 positive progenitorceller kan skelnes på grundlag af lysspredende egenskaber i forbindelse medoverfladeantigener. CD-Chex CD34 er udviklet til at repræsentere en blodprøve, der indeholder CD34 positiveceller med karakteristika, der ligner progenitorceller: lavsidede spredningsegenskaber, CD 34 ekspression og lavekspression af CD45 (sammenlignet med lymfocytter). Når de farves med monoklonale antistoffer for CD34positiv celleoptælling, giver CD-Chex CD34 kontrollen referenceværdier for CD34 positive celler, der er inden forværdiområderne på analysearket.
REAGENSERCD-Chex CD34 indeholder humane leukocytter og erythocytter i et konserveringsmiddel.
FORHOLDSREGLER1. Til in vitro diagnostik.2. Alt materiale af human oprindelse brugt til fremstillingen af dette produkt var non-reaktivt over for antigener
mod Hepatitis B (HBsAg) og HIV-1, negativt med tests for antistoffer mod HIV (HIV-1/HIV-2) og Hepatitis C(HVC) og non-reaktivt over for serologisk test for syfilis (STS) med anvendelse af teknikker specificeret af U.S.Food and Drug Administration (den amerikanske regerings kontrol af fødevarer og medicin). Da ingen kendttestmetode kan sikre fuldstændigt fravær af humane patogener, bør dette produkt håndteres medhensigtsmæssige sikkerhedsforanstaltninger.
3. Dette produkt bør ikke bortskaffes som almindeligt affald, men bør bortskaffes som smitsomt medicinsk affald.Bortskaffelse ved forbrænding anbefales.
4. Dette produkt er beregnet til brug som leveret. Forfalskning gennem fortynding eller tilsætning af stoffer til pro-duktampullen ugyldiggør enhver diagnostisk anvendelse af produktet.
5. CD-Chex CD34 produkter bør ikke anvendes som en kalibrator.
BRUGSANVISNINGCD-Chex CD34 er udviklet til anvendelse med enhver standard CD34 optællingsprotokol og er blevet evalueretmed ISHAGE, ProCOUNT og Stem-Kit CD34 optællingsprotokoller.1. Tag en ampul af kontrollen ud af køleskabet og lad den nå stuetemperatur (18 °C til 30 °C) i 15 minutter inden
brug.2. Suspendér forsigtigt cellerne ved invertering.3. Tilsæt den anbefalede mængde antistof til hvert glas.4. Afmål den anbefalede mængde celler i hvert analyseglas og bland forsigtigt.5. Inkubér i henhold til brugsanvisningen fra antistoffets producent.6. Tilsæt den anbefalede mængde RBC lyseringsmiddel og følg producentens vejledning.7. Analysér med flowcytometri på samme vis som ved patientprøver.
PROCEDURER1. Instrumentprocedure. Følg vejledningen fra producenten af instrumentet med hensyn til justering af
instrumentet og analyse af prøven.2. Monoklonal antistofprocedure. Brug monoklonale antistoffer i henhold til vejledningen fra producenten for
patientprøver. Cd-Chex CD34 er blevet evalueret med en række anti-CD34 mAB kloner af forskelligepitopklassespecificitet. Følgende antistoffer anbefales til anvendelse med CD-Chex CD34: HPCA2 (BDBiosciences), BIRMA-K3 (DakoCytomation) og 581 (Beckman Coulter® Immunotech), der genkender klasseIII epitoper på CD34.
3. RBC lyseringsprocedure. Brug RBC lyseringsmiddel i henhold til vejledningen fra producenten forpatientprøver.
OPBEVARING OG STABILITETCd-Chex CD34 er stabilt indtil udløbsdatoen, når det opbevares mellem 2 °C og 10°C. Efter åbning af pakningener CD-Chex CD34 stabilt under hele datotidsrummet for den åbnede ampul, som angivet på analysearket, når detopbevares mellem 2 °C og 10°C.
CD-Chex® CD34EC REP
MEDIMARK® Europe11, rue Emile Zola, BP 233238033 Grenoble Cedex 2, France
®
7002 S. 109 Street La Vista, NE 68128 USA
Figure 1:Representative dot plot showingside scatter properties of all CD45+leukocytes and subpopulation ofCD34+ cells.