Embed Size (px)
Citation preview
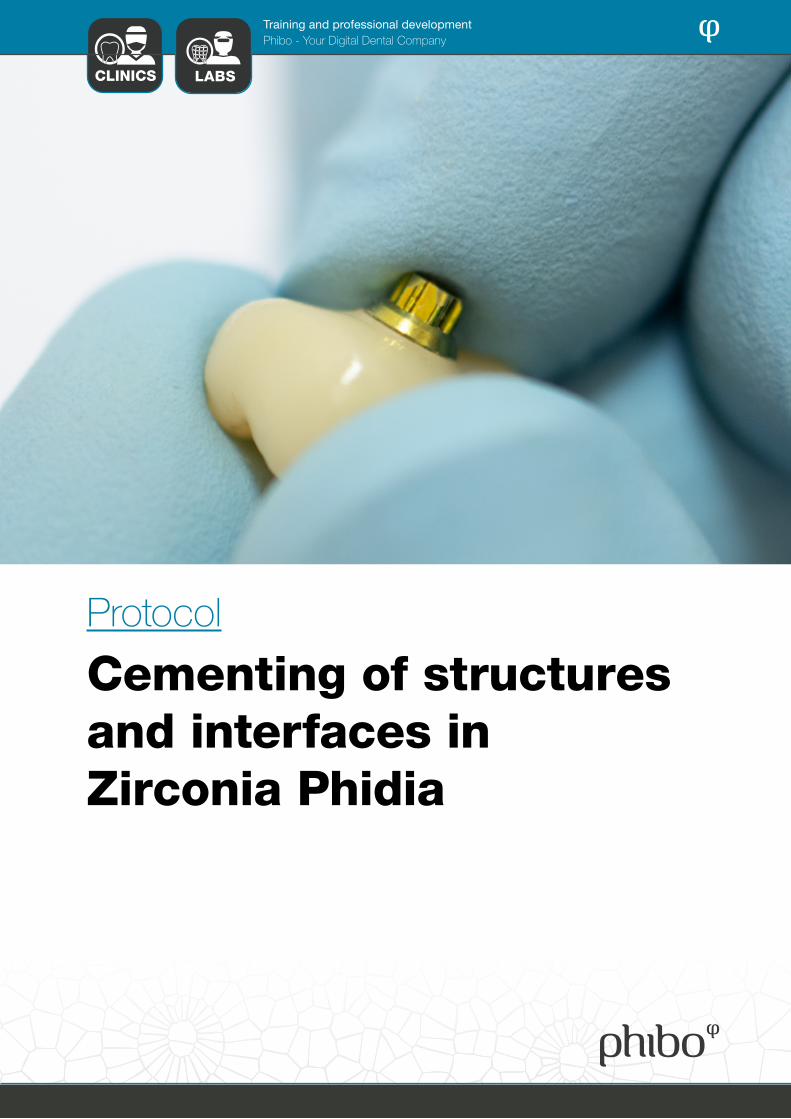
Protocol
Cementing of structures and interfaces in Zirconia Phidia
CLINICS
Training and professional developmentPhibo - Your Digital Dental Company
LABS
3
Cementing of structures and interfaces in Zirconia Phidia
2
Cementing of structures and interfaces in
Zirconia Phidia
1. Preliminary considerations for Phidia Zirconia and Phidia Zirconia with internal scratching .................................... 4
2 .Preliminary considerations for Axis Interface ........................................................................................................................ 4
3. Tools ............................................................................................................................................................................................... 5
4. Steps to take: Structure cementing on natural teeth ........................................................................................................ 6
5. Steps to take: Interface cementing ........................................................................................................................................ 8
Table of contentsProtocol
Cementing of structures and interfaces in Zirconia Phidia
5
Cementing of structures and interfaces in Zirconia Phidia
4
Cementing of structures and interfaces in
Zirconia Phidia
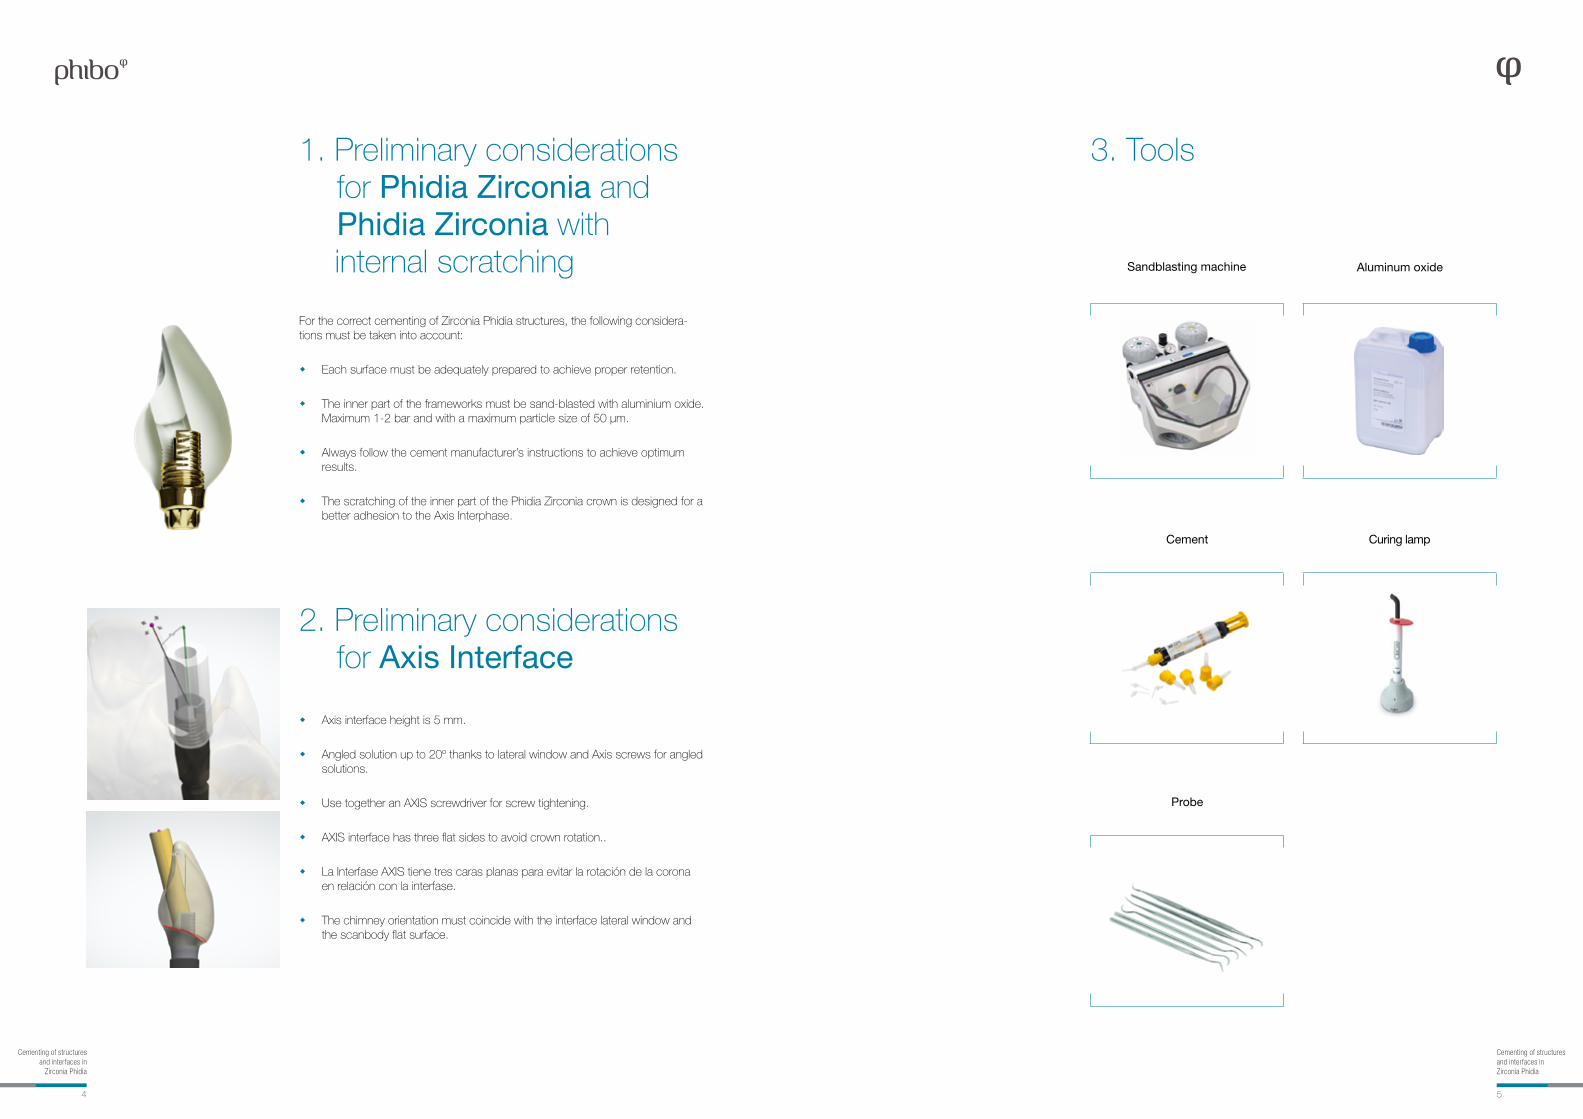
For the correct cementing of Zirconia Phidia structures, the following considera-tions must be taken into account:
w Each surface must be adequately prepared to achieve proper retention.
w The inner part of the frameworks must be sand-blasted with aluminium oxide. Maximum 1-2 bar and with a maximum particle size of 50 μm.
w Always follow the cement manufacturer’s instructions to achieve optimum results.
w The scratching of the inner part of the Phidia Zirconia crown is designed for a better adhesion to the Axis Interphase.
w Axis interface height is 5 mm.
w Angled solution up to 20º thanks to lateral window and Axis screws for angled solutions.
w Use together an AXIS screwdriver for screw tightening.
w AXIS interface has three flat sides to avoid crown rotation..
w La Interfase AXIS tiene tres caras planas para evitar la rotación de la corona en relación con la interfase.
w The chimney orientation must coincide with the interface lateral window and the scanbody flat surface.
1. Preliminary considerations for Phidia Zirconia and Phidia Zirconia with
internal scratching
2. Preliminary considerations for Axis Interface
Sandblasting machine
Cement
Probe
Curing lamp
Aluminum oxide
3. Tools
7
Cementing of structures and interfaces in Zirconia Phidia
6
Cementing of structures and interfaces in
Zirconia Phidia
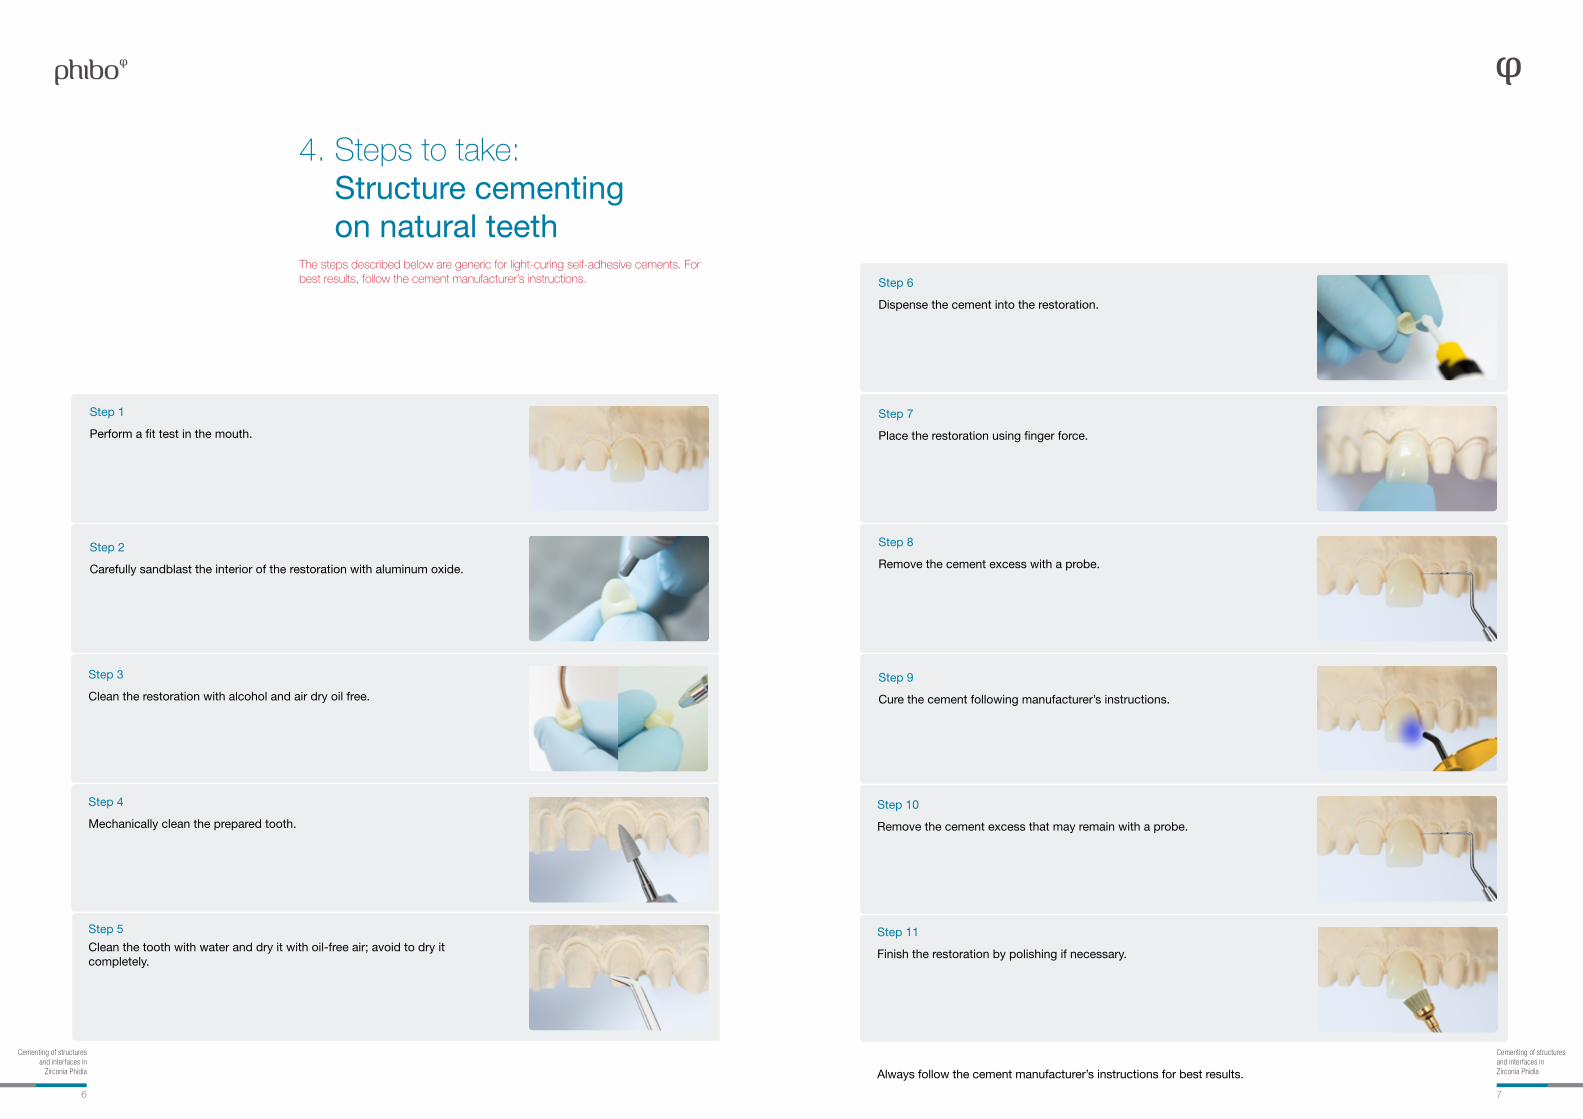
Step 7
Place the restoration using finger force.
Step 6
Dispense the cement into the restoration.
Step 8
Remove the cement excess with a probe.
Step 1
Perform a fit test in the mouth.
Step 9
Cure the cement following manufacturer’s instructions.
Step 2
Carefully sandblast the interior of the restoration with aluminum oxide.
Step 10
Remove the cement excess that may remain with a probe.
Step 3
Clean the restoration with alcohol and air dry oil free.
Step 11
Finish the restoration by polishing if necessary.
Step 4
Mechanically clean the prepared tooth.
Step 5
Clean the tooth with water and dry it with oil-free air; avoid to dry it completely.
4. Steps to take: Structure cementing on natural teethThe steps described below are generic for light-curing self-adhesive cements. For best results, follow the cement manufacturer’s instructions.
Always follow the cement manufacturer’s instructions for best results.
9
Cementing of structures and interfaces in Zirconia Phidia
8
Cementing of structures and interfaces in
Zirconia Phidia
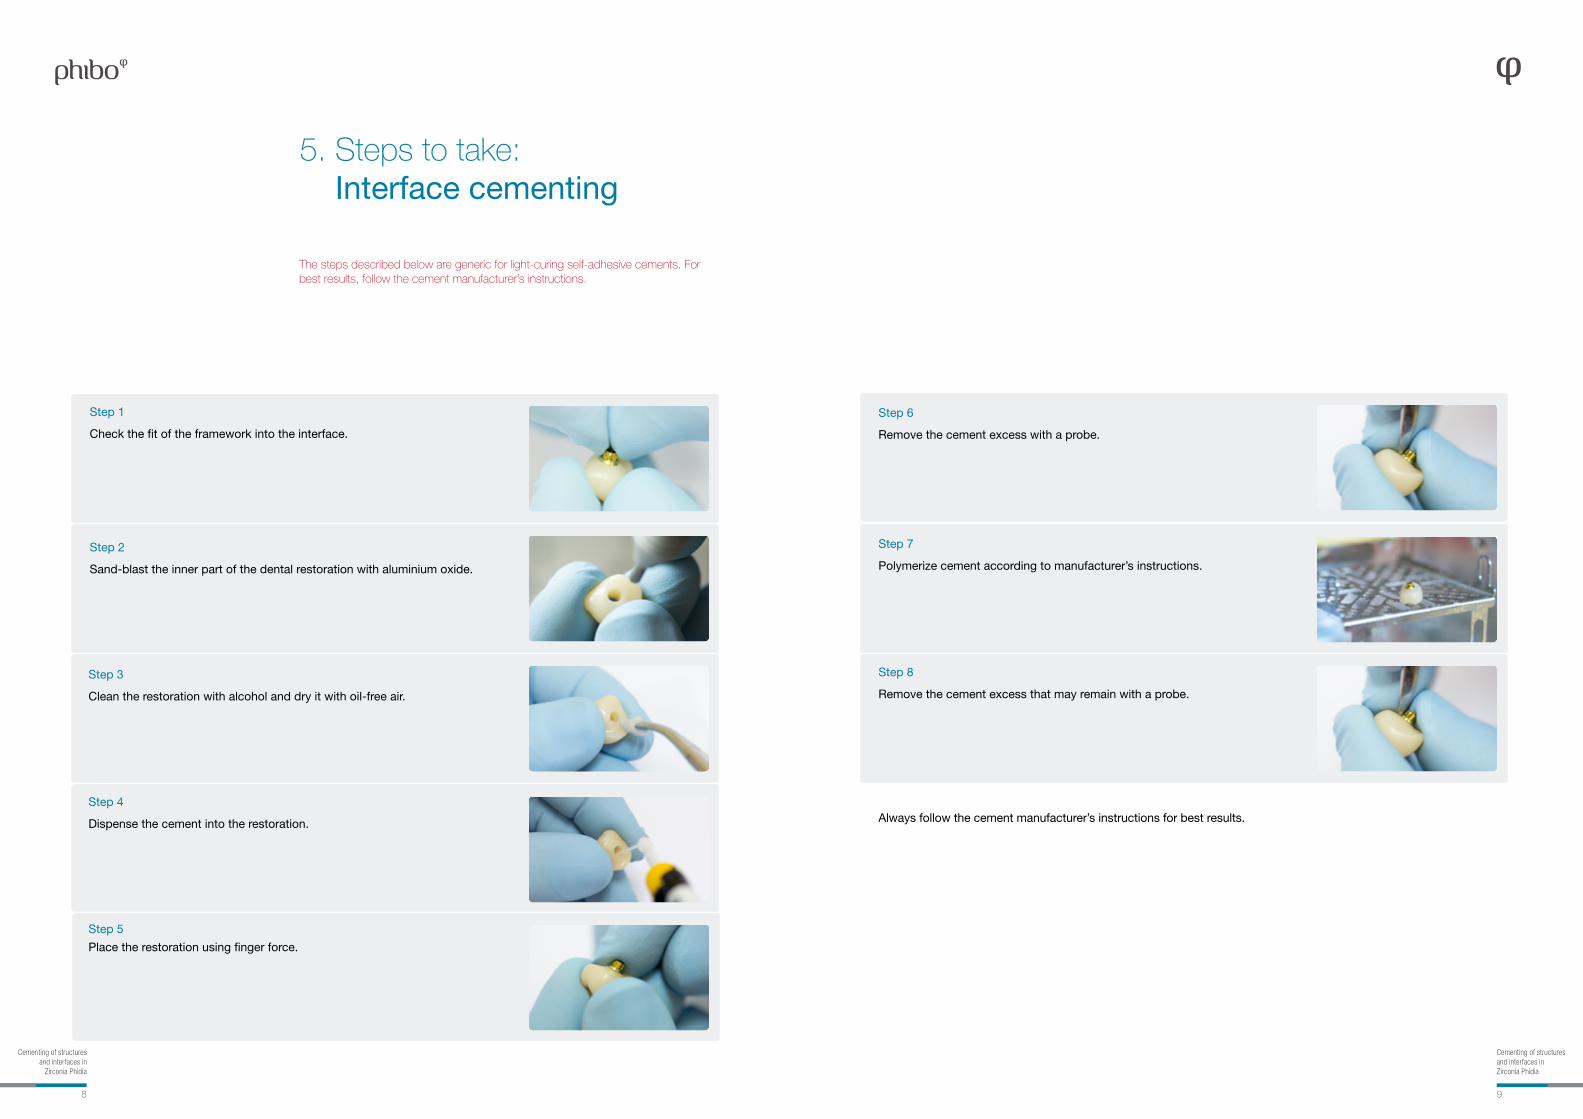
Step 1
Check the fit of the framework into the interface.
Step 2
Sand-blast the inner part of the dental restoration with aluminium oxide.
Step 3
Clean the restoration with alcohol and dry it with oil-free air.
Step 4
Dispense the cement into the restoration.
Step 5
Place the restoration using finger force.
5. Steps to take: Interface cementing
Step 7
Polymerize cement according to manufacturer’s instructions.
Step 6
Remove the cement excess with a probe.
Step 8
Remove the cement excess that may remain with a probe.
The steps described below are generic for light-curing self-adhesive cements. For best results, follow the cement manufacturer’s instructions.
Always follow the cement manufacturer’s instructions for best results.

11
Cementing of structures and interfaces in Zirconia Phidia
10
Cementing of structures and interfaces in
Zirconia Phidia
Phibo HQ
Pol. Ind. Mas d’en CisaGato Pérez, 3-908181 Sentmenat (Barcelona) SpainT: +34 937 151 958
phibo.com
REF: PROTCEMPHIEN-rev001_20201222
Protocol
Cementing of structures and interfaces in Zirconia Phidia