Embed Size (px)
Citation preview

Page | 1 User Manual for DSC Enrollment in CPSMS
Central Plan Scheme Monitoring System
Government of India
Digital Signature Enrollment
User Manual

Page | 2 User Manual for DSC Enrollment in CPSMS
Version Control Ver. Date Name Role Summary of Changes
v0.1 28/06/2013 Preeti Dhill Business Analyst Original Document
V0.2 01/07/2013 Preeti Dhill Business Analyst Documented Update DSC and Deactivate DSC process & Add Signatory Configuration & Digital Account Enrolment

Page | 3 User Manual for DSC Enrollment in CPSMS
Users who need to use digital signature, need to first enroll it on the CPSMS portal through DSC (Digital
Signature Certificate) Enrollment module. Digital Signature can be enrolled by the users performing the
following roles in CPSMS
User Type Approving Authority
Agency Checker Type User Funding Agency
Program Division Checker Type User PrAO
Drawing and Disbursing Officer PrAO
Pay and Account Officer PrAO
Once enrollment request is initiated by the user, it goes to the Approving Authority as per the above
mentioned table.
Prerequisite to enroll Digital Signature
To enroll digital signature the following are the key requirements on the system of the user:
Digital Signature driver and java plug-in 1.7.0.0 or higher version is already installed
Digital signature of Class II or Class III
Clear DSC History from your system
Please use the following option to make sure that only desired DSC certificate is installed in your
computer.
In the Internet Explorer (IE), follow the following links
Tools> Internet Options > Content > Certificates.
It will show the list of certificates which are installed in the machine. Please remove all the undesired
certificates from your machine.
If you are using browser other than IE, you need to perform this activity by following similar steps
Page | 4 User Manual for DSC Enrollment in CPSMS
Request Initiation for Enrollment of Digital Signature
Following are the steps:
Masters> DSC Management> Enroll DSC
Following screen will appear:
Page | 5 User Manual for DSC Enrollment in CPSMS
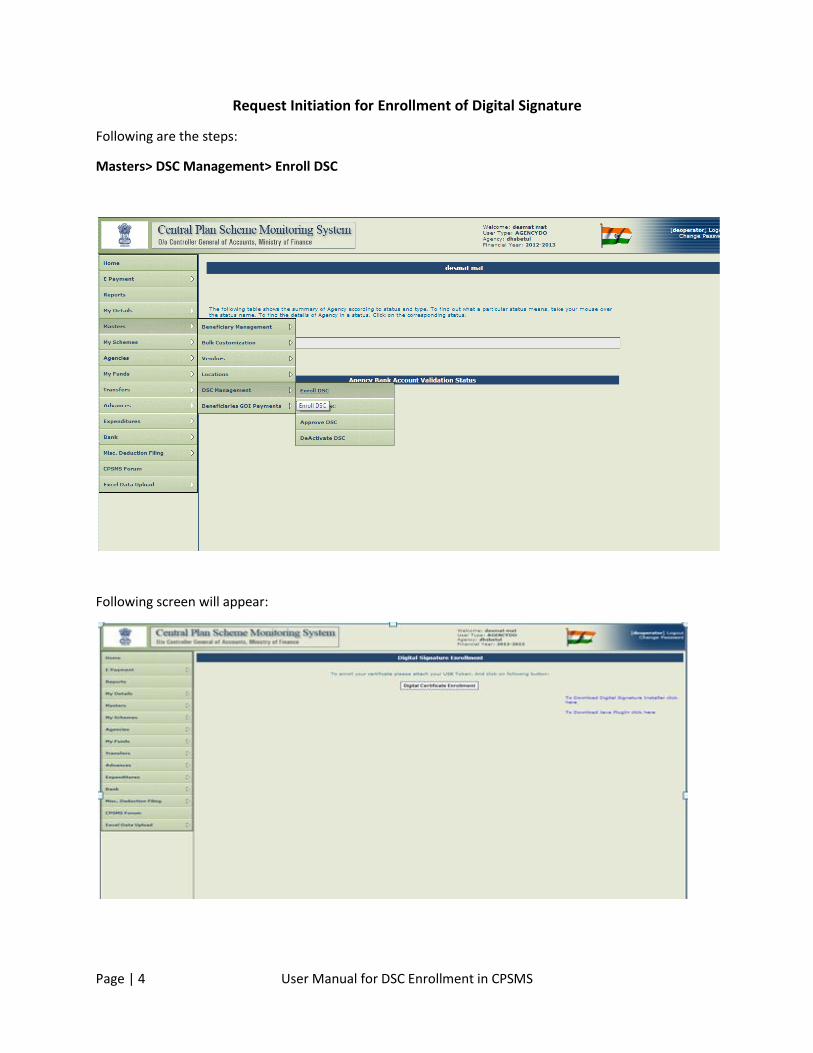
If DSC driver is not already installed in the system, please use the hyperlink available in the page to
download and install the driver.
Similarly if the appropriate JAVA version is not installed in the system as mentioned in the pre-requisite,
please use the link available in the above mentioned page to download and install it.
Click on button Digital certificate enrollment
Screen will display the certificates which are installed/connected with the computer. Select the relevant
certificate and click on “OK”

Page | 6 User Manual for DSC Enrollment in CPSMS
User will be prompted for “PIN”, enter the relevant pin number and click on “OK”.
Once the pin has been successfully entered, following message will be displayed “File has been
successfully signed”
User will be prompted to “View Certificate Details and Proceed for Enrollment”

Page | 7 User Manual for DSC Enrollment in CPSMS
On clicking the “View Certificate Details and Proceed for Enrollment”, the following screen will be
displayed:
User needs to select from the schemes mapped to him from the dropdown and also define the purpose
for the same. Click on ADD button. This will ensure that the signature enrolled can be used only for the
selected scheme and purpose. User can add more than one Scheme and Purpose.
After all the schemes and their respective purpose have been added, click on “Enroll”.
Successfully enrolled signature requests will go to the approving authority for approval of Digital
signature.
Page | 8 User Manual for DSC Enrollment in CPSMS
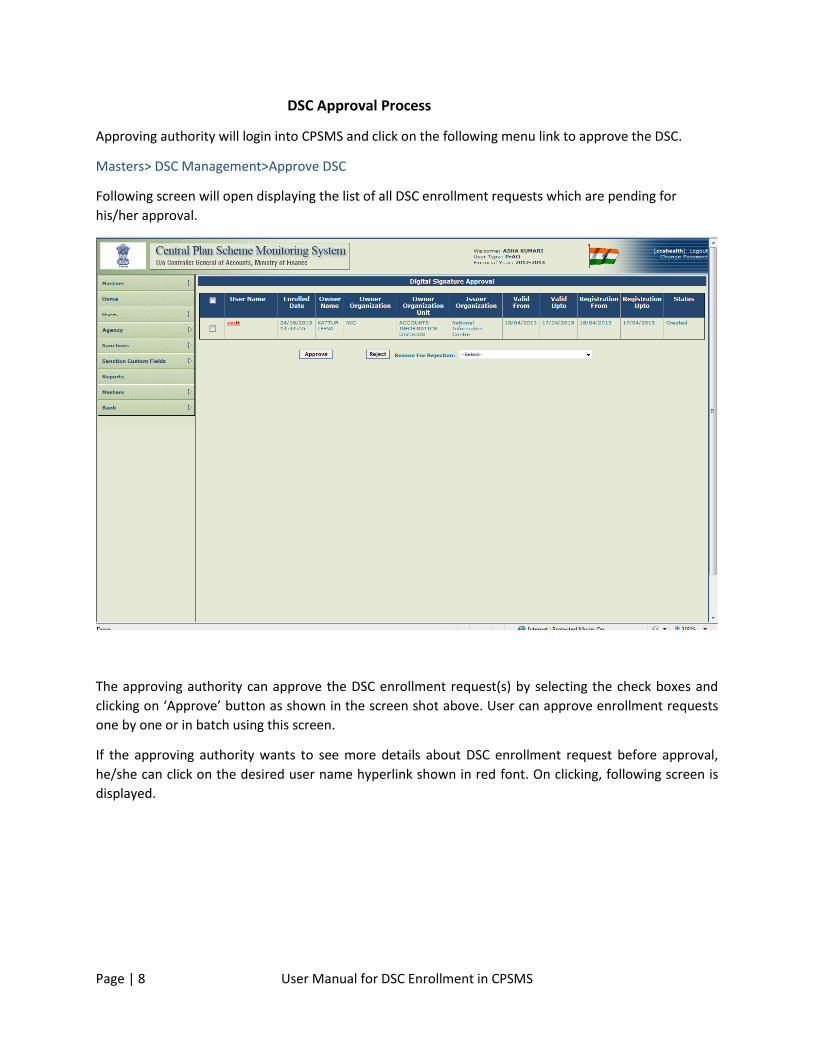
DSC Approval Process
Approving authority will login into CPSMS and click on the following menu link to approve the DSC.
Masters> DSC Management>Approve DSC
Following screen will open displaying the list of all DSC enrollment requests which are pending for
his/her approval.
The approving authority can approve the DSC enrollment request(s) by selecting the check boxes and
clicking on ‘Approve’ button as shown in the screen shot above. User can approve enrollment requests
one by one or in batch using this screen.
If the approving authority wants to see more details about DSC enrollment request before approval,
he/she can click on the desired user name hyperlink shown in red font. On clicking, following screen is
displayed.

Page | 9 User Manual for DSC Enrollment in CPSMS
User needs to click on ‘Approve’ button to approve the DSC enrollment request. User can also reject the
DSC enrollment request by choosing the reason for rejection from the available list and clicking on
‘Reject’ button.
Edit/Update Digital Signature
Following are the steps:
Masters> DSC Management> Enrolled DSC
User will go to the following screen

Page | 10 User Manual for DSC Enrollment in CPSMS
User can view the details of all the signatures enrolled against the user who is logged in.
List of enrolled Digital Signatures will be displayed, with an option to update/view them
User can click on “update” button, the following screen will be displayed. User can update the scheme
and purpose for which a signature is enrolled in CPSMS. Once all the changes have been made click on
“Submit” button.
Successfully updated signature requests will go to the approving authority for approval of Digital
signature.

Page | 11 User Manual for DSC Enrollment in CPSMS
Deactivate Digital Signature
This page will be used to de-activate the signature of the user, in any of the following scenarios:
who leaves office, or
the signature whose “valid up to” date has been crossed, or
Is revoked by the digital signature issuing authority.
Following are the steps:
Masters> DSC Management> Enrolled DSC
User will go to the following screen
User can view the details of all the signatures enrolled against the user who is logged in.
List of enrolled Digital Signatures will be displayed with an option to “Deactivate” them.
User can select the digital signature he wants to deactivate, from the dropdown select the “Reason for
Deactivation” and click on “Deactivate” button.

Page | 12 User Manual for DSC Enrollment in CPSMS
Signature will be deactivated successfully.

Page | 13 User Manual for DSC Enrollment in CPSMS
Digital Signature Configuration Process
Signatory Configuration
Bank>Signatory Configuration
On clicking the “Signatory Configuration”, the following screen will be displayed:
Case 1: Login as Agency Administrator
Step1 - Add Account Limits
Enter the Minimum Debit Amount (per Batch) & Maximum Debit Amount per batch & enter the Number
of Levels and Click on “Save” Button.
Note: Level is the number signatories required to Sign a payment file. If You Enter level as “1”, only one
Signatory is required to sign the file.
If you choose “2” the two Signatories are required to sign a File.
Click on the “+” Button to Add the Signatories in who shall be Authorized to Sign File within above
entered range.
Page | 14 User Manual for DSC Enrollment in CPSMS
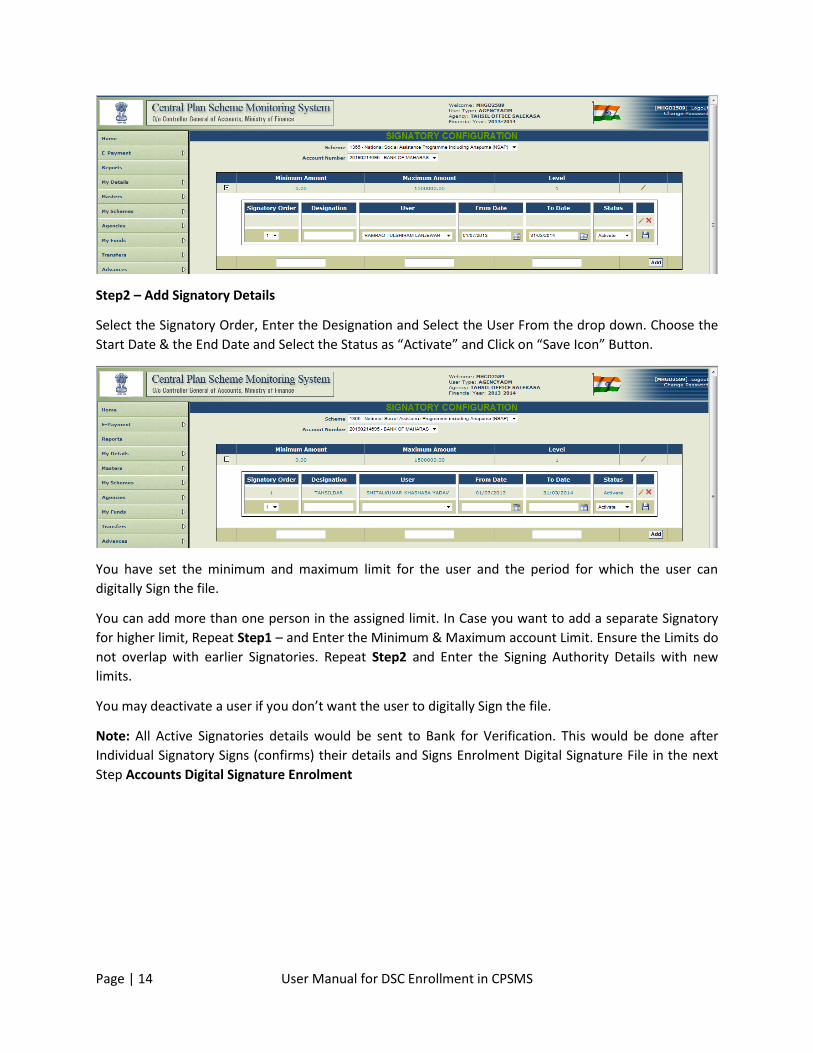
Step2 – Add Signatory Details
Select the Signatory Order, Enter the Designation and Select the User From the drop down. Choose the
Start Date & the End Date and Select the Status as “Activate” and Click on “Save Icon” Button.
You have set the minimum and maximum limit for the user and the period for which the user can
digitally Sign the file.
You can add more than one person in the assigned limit. In Case you want to add a separate Signatory
for higher limit, Repeat Step1 – and Enter the Minimum & Maximum account Limit. Ensure the Limits do
not overlap with earlier Signatories. Repeat Step2 and Enter the Signing Authority Details with new
limits.
You may deactivate a user if you don’t want the user to digitally Sign the file.
Note: All Active Signatories details would be sent to Bank for Verification. This would be done after
Individual Signatory Signs (confirms) their details and Signs Enrolment Digital Signature File in the next
Step Accounts Digital Signature Enrolment

Page | 15 User Manual for DSC Enrollment in CPSMS
Accounts Digital Signature Enrolment
Bank>Account DSC Enrolment
The Signing Authority now logs in and goes to the “Account DSC Enrolment” Screen.
The Approving Authority can now view the Signing Authority Name, Bank and the Account Number, the
period and Digitally Signing limit for the Bank.
Click on “Sign File” Button to send the request to the corresponding Bank to verify the particulars of the
Signing Authority.
The system would now prompt you to insert the USB with Digital Signature. Insert the USB containing
the Digital Signature.

Page | 16 User Manual for DSC Enrollment in CPSMS
The System now detects the Digital Signature attached. Click “Yes” for to allow System to proceed
further.
The System would now prompt to enter the pin to Digitally Sign the File. Enter your pin.
Once the Sample file is digitally signed the system prompts the message “Digitally Signed Successfully”.

Page | 17 User Manual for DSC Enrollment in CPSMS
Upon successful completion, the system now displays the signed file in the below grid and the Bank
Validation Status. The Bank Validation Status “Active” indicates that the User can now Digitally Sign the
file.
This completes the Enrolment process for DSC with a bank for the user.