Embed Size (px)
Citation preview
Ch 3

File Types and File Extensions
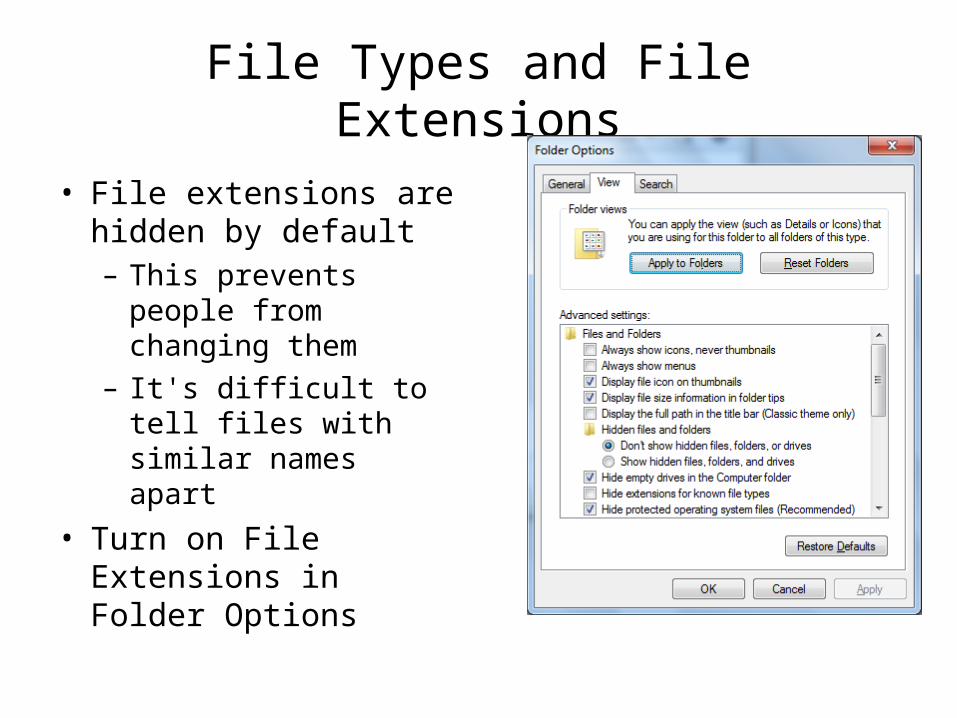
• File extensions are hidden by default– This prevents people
from changing them– It's difficult to tell files
with similar names apart
• Turn on File Extensions in Folder Options
File Types and the Registry
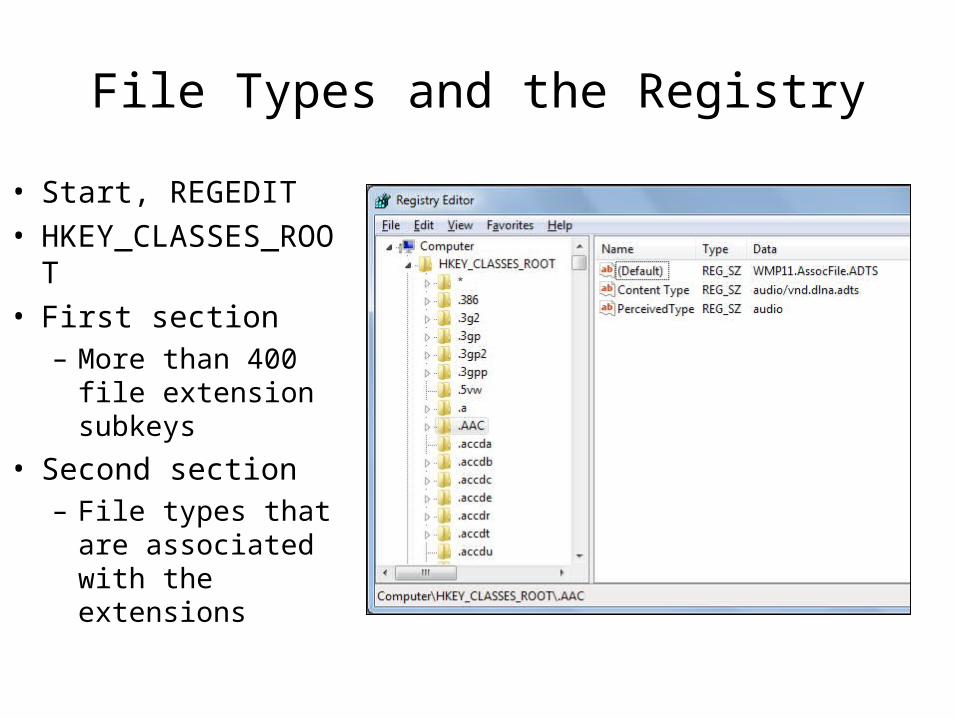
• Start, REGEDIT
• HKEY_CLASSES_ROOT
• First section– More than 400
file extension subkeys
• Second section– File types that are
associated with the extensions
The Structure of HKEY_CLASSES_ROOT
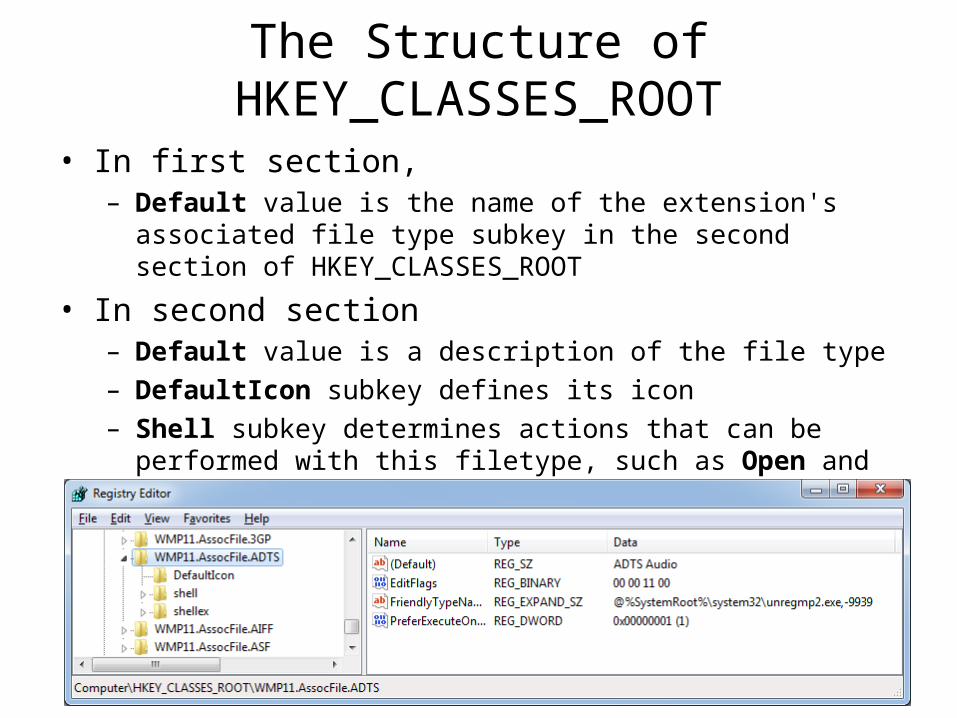
• In first section, – Default value is the name of the extension's associated file type
subkey in the second section of HKEY_CLASSES_ROOT
• In second section– Default value is a description of the file type– DefaultIcon subkey defines its icon– Shell subkey determines actions that can be performed with this
filetype, such as Open and Print

(Not in this chapter, but important to know now)
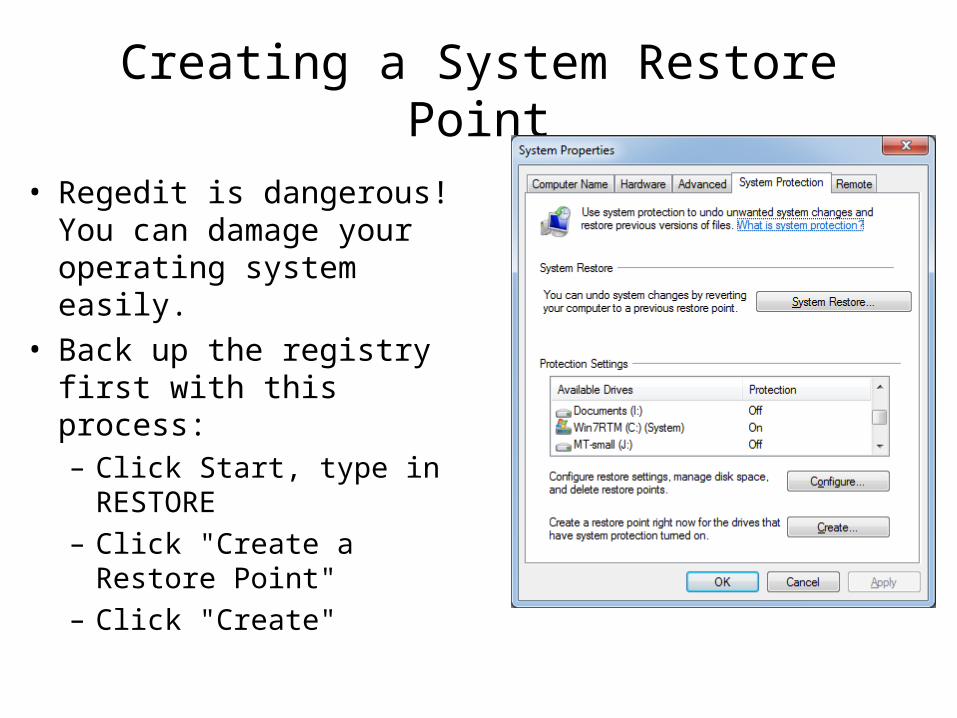
Creating a System Restore Point
• Regedit is dangerous! You can damage your operating system easily.
• Back up the registry first with this process:– Click Start, type in
RESTORE– Click "Create a Restore
Point"– Click "Create"
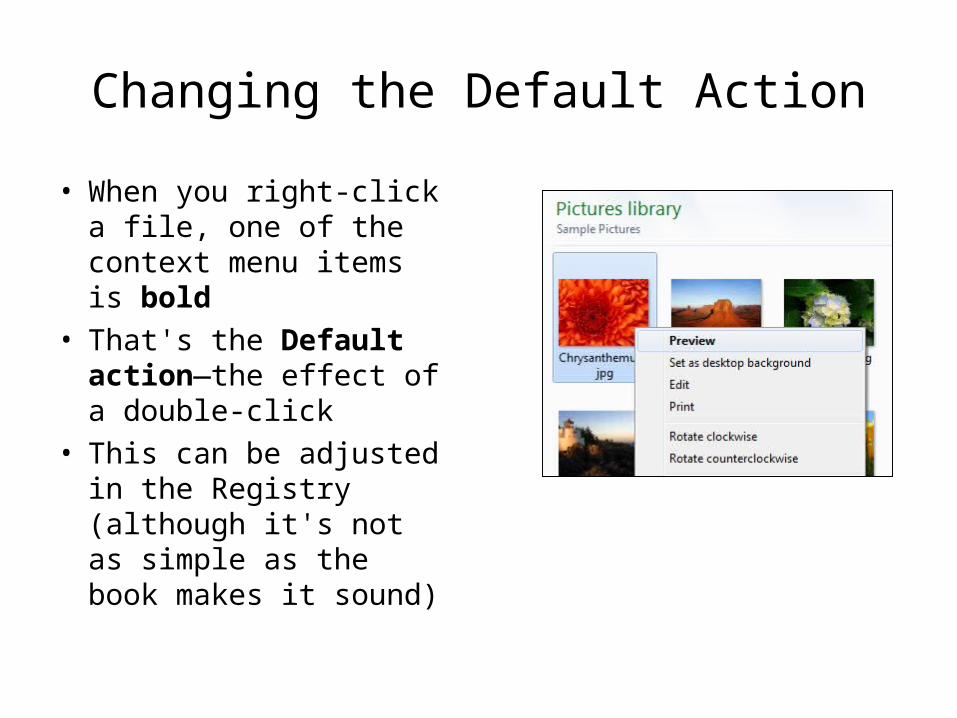
Changing the Default Action
• When you right-click a file, one of the context menu items is bold
• That's the Default action—the effect of a double-click
• This can be adjusted in the Registry (although it's not as simple as the book makes it sound)
Associating an Extension with a Different Application
• Suppose your images are all opening in a new graphics program you loaded, but you want them to open in some other program
• You can do this in three ways– Right-click, Open With– Task Pane (also called Command Bar) (see next
slide)– Set Associations: Start, ASSOC, click "Change the
file type associated with a file extension"

Task Pane (also called Command Bar)

Open With
• All three methods bring you here:
• Use the little down-arrow button to fill the lower pane
• Use the Browse button if the program you want is not visible
• Check the "Always use the selected program to open this kind of file" box
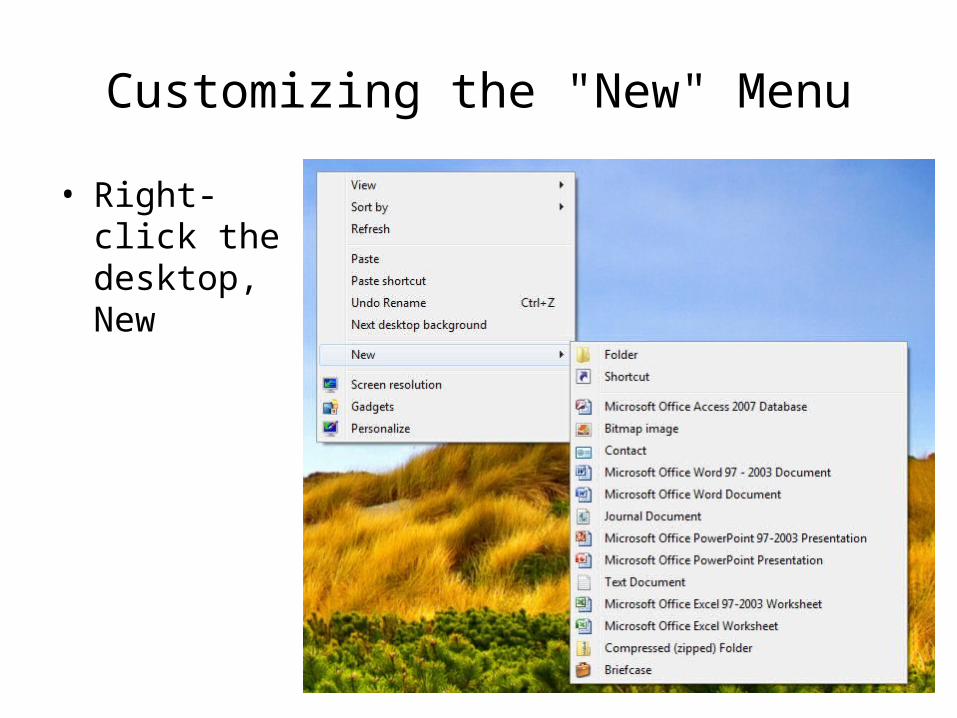
Customizing the "New" Menu
• Right-click the desktop, New
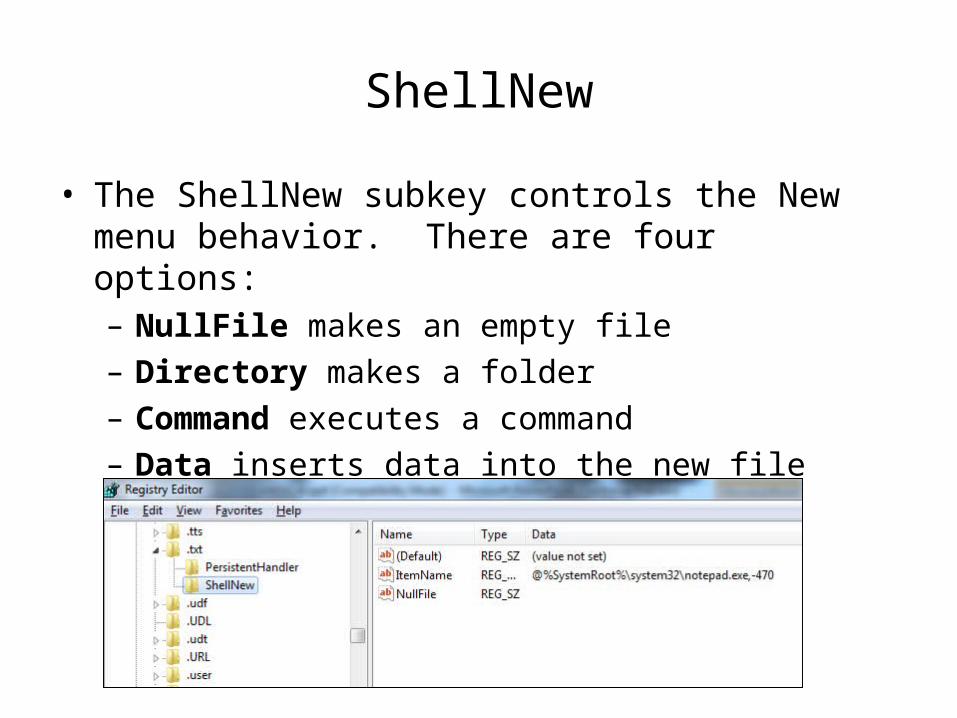
ShellNew
• The ShellNew subkey controls the New menu behavior. There are four options:– NullFile makes an empty file– Directory makes a folder– Command executes a command– Data inserts data into the new file
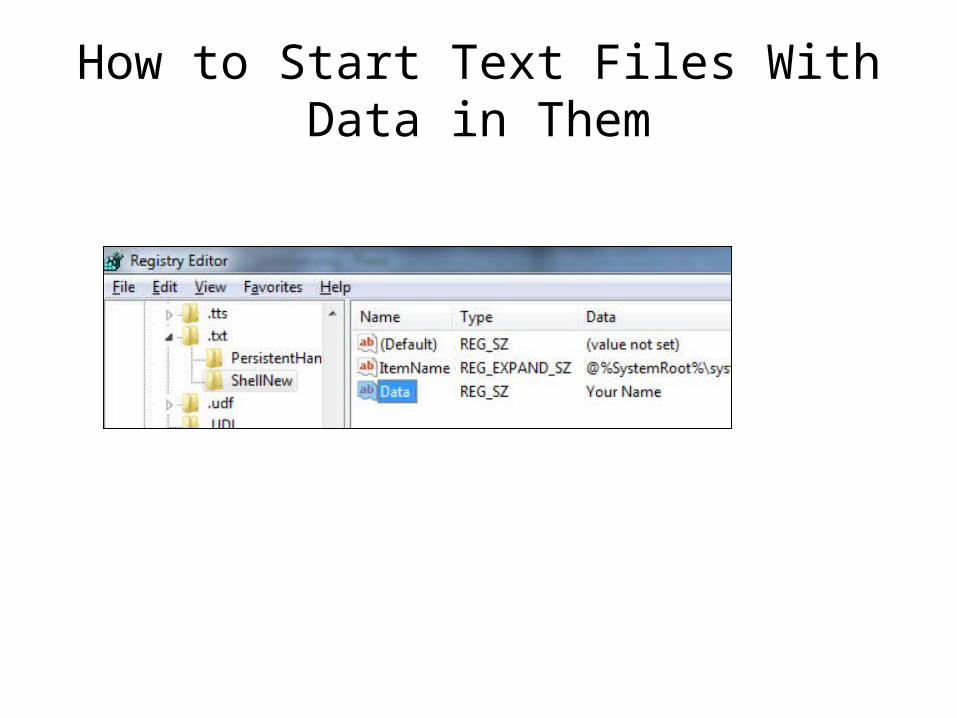
How to Start Text Files With Data in Them

Ch 4
Boot Configuration Data (BCD)
• BCD replaced the earlier boot.ini file used by Windows XP and earlier versions, because:– BCD works on both BIOS-based and the newer EFI-based
machines• EFI (Extensible Firmware Interface) is a replacement for
BIOS, developed by Intel (link Ch 4a)– It supports boot applications that run during boot time, like
Windows Boot Manager, Windows OS Loader, and Windows Memory Tester (links Ch 4b, 4c)
– Boot options can be configured with scripts
Four Ways to Modify BCD Store
• Startup and Recovery
• System Configuration
• BCDEDIT
• BCD WMI
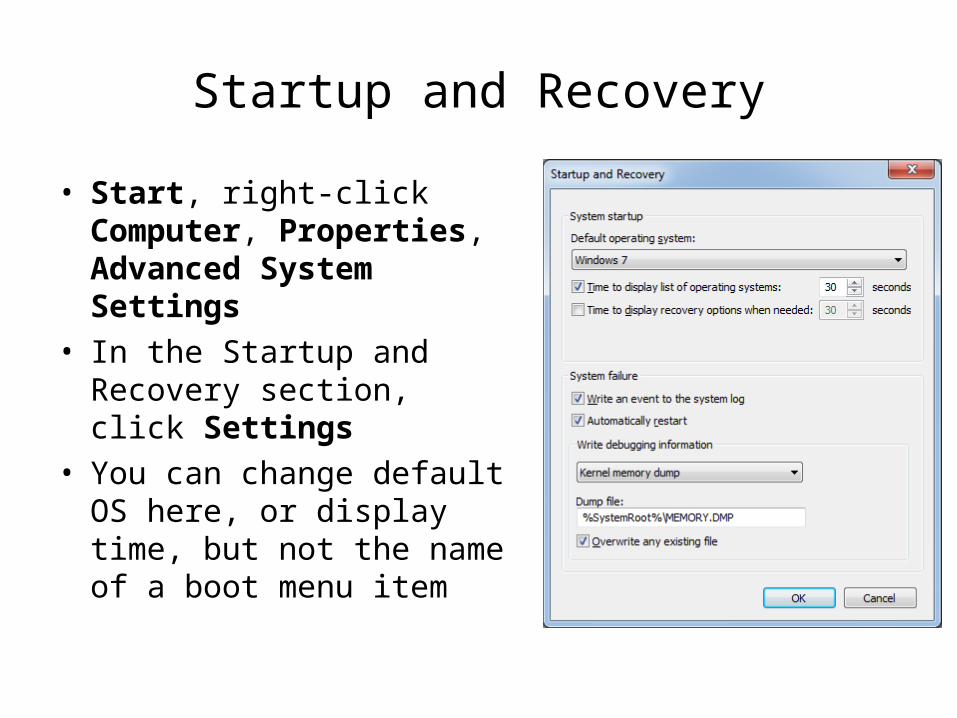
Startup and Recovery
• Start, right-click Computer, Properties, Advanced System Settings
• In the Startup and Recovery section, click Settings
• You can change default OS here, or display time, but not the name of a boot menu item

System Configuration
• Start, MSCONFIG, Boot tab
• You can select Safe Boot features here
Safe Boot Options
• Minimal: Same as "Safe Mode"—bare minimum device drivers
• Minimal (Alternate Shell)—Safe Mode and also no GUI—Command Prompt only– Other shells besides cmd.exe can be specified in the
Registry (see p. 67 of textbook)
• Active Directory Repair—only applies to domain controllers, not Windows 7
• Network—Safe Mode With Networking

Safe Boot Options
• No GUI Boot—doesn't display graphical progress bar during boot, but does boot the Windows GUI later
• Boot Log—records bootup process to ntbtlog.txt in %systemroot%
• Base Video—VGA Mode (640x480)
• OS Boot Information—Displays detailed information about each driver that loads
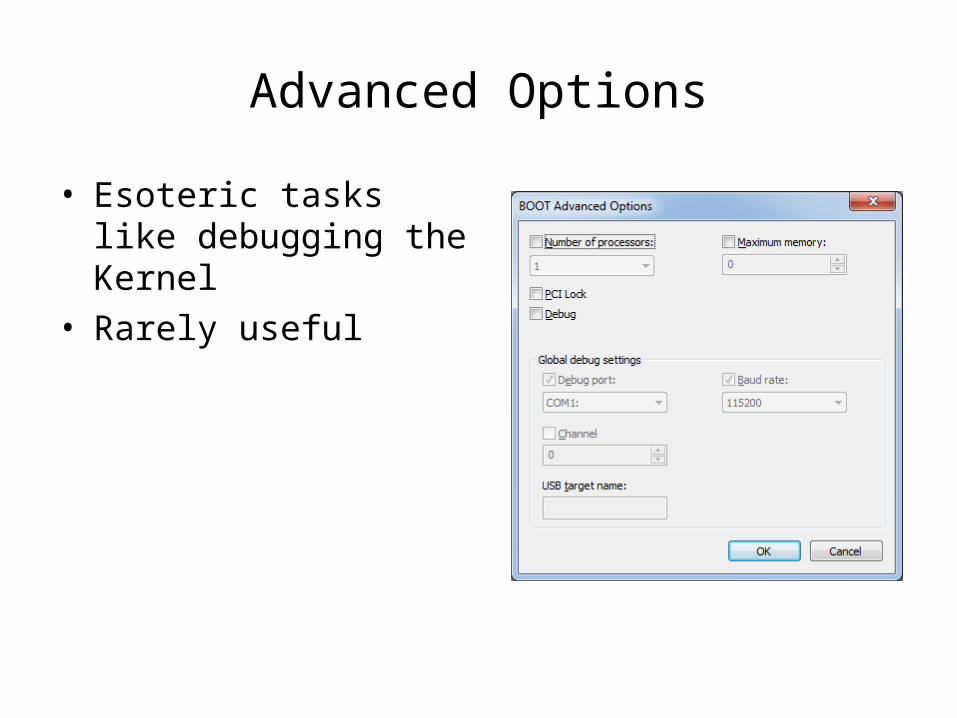
Advanced Options
• Esoteric tasks like debugging the Kernel
• Rarely useful
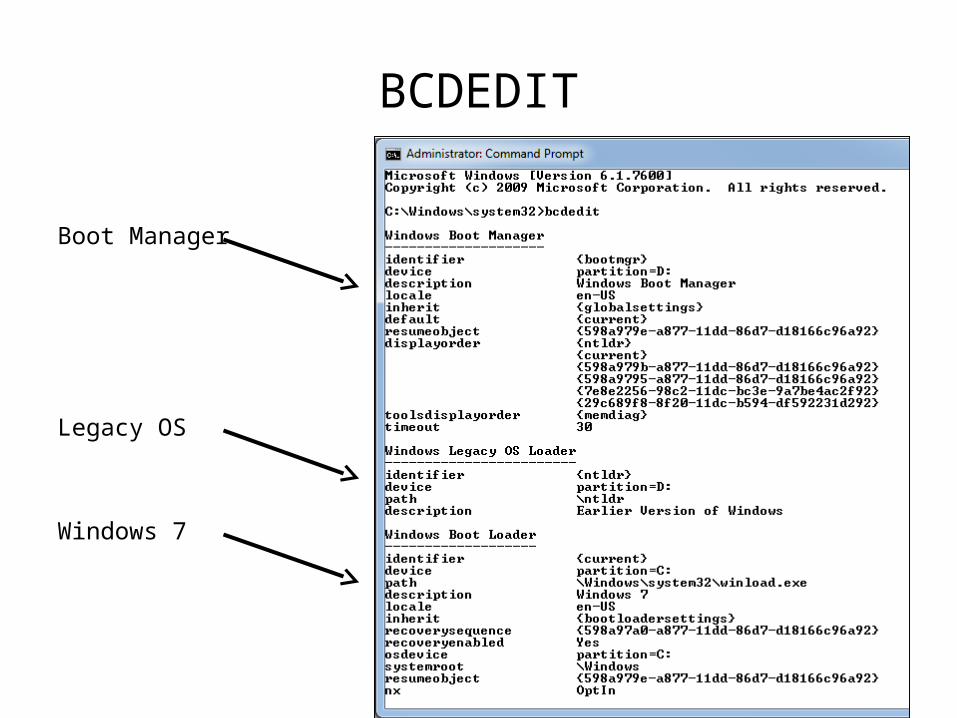
BCDEDIT
Boot Manager
Legacy OS
Windows 7
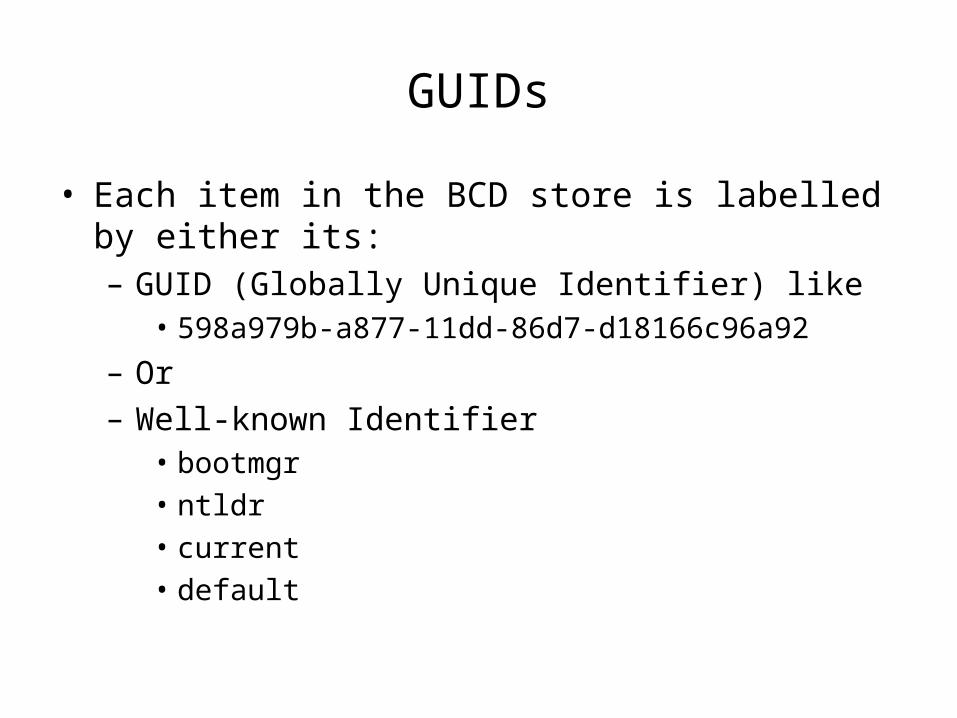
GUIDs
• Each item in the BCD store is labelled by either its:– GUID (Globally Unique Identifier) like
• 598a979b-a877-11dd-86d7-d18166c96a92
– Or– Well-known Identifier
• bootmgr
• ntldr
• current
• default
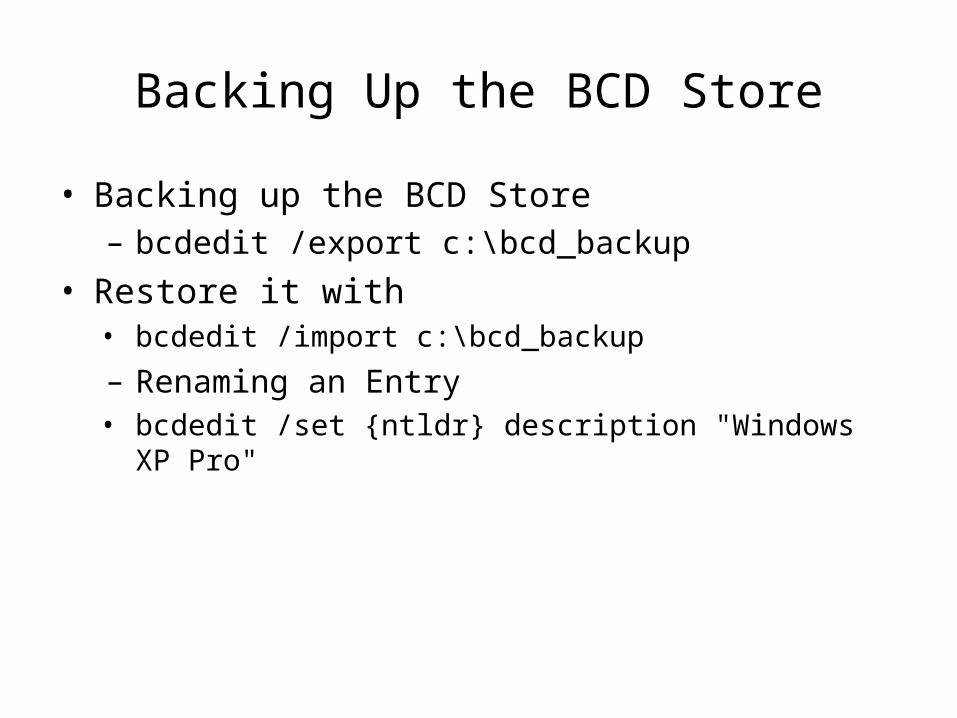
Backing Up the BCD Store
• Backing up the BCD Store– bcdedit /export c:\bcd_backup
• Restore it with• bcdedit /import c:\bcd_backup
– Renaming an Entry• bcdedit /set {ntldr} description "Windows XP Pro"
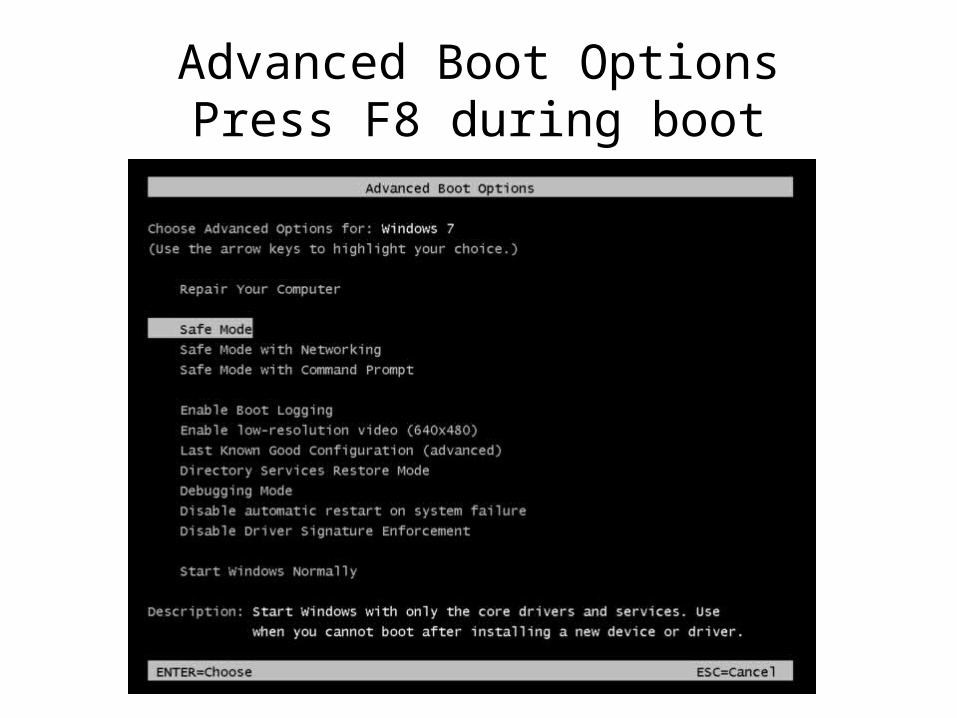
Advanced Boot OptionsPress F8 during boot
New Items
• Most of these are the same as the MSCONFIG Safe Boot options, except:– Repair Your Computer—opens System Recovery
Options, which can be used to do a System Restore, Restore from a system image, and more
– Last Known Good Configuration—restores a small portion of the Registry to a previously saved version
– Disable Automatic Restart on System Failure—to stop repeated crashes
– Disable Driver Signature Enforcement—Prevent Windows 7 64-bit from requiring signed drivers (link Ch 4d)

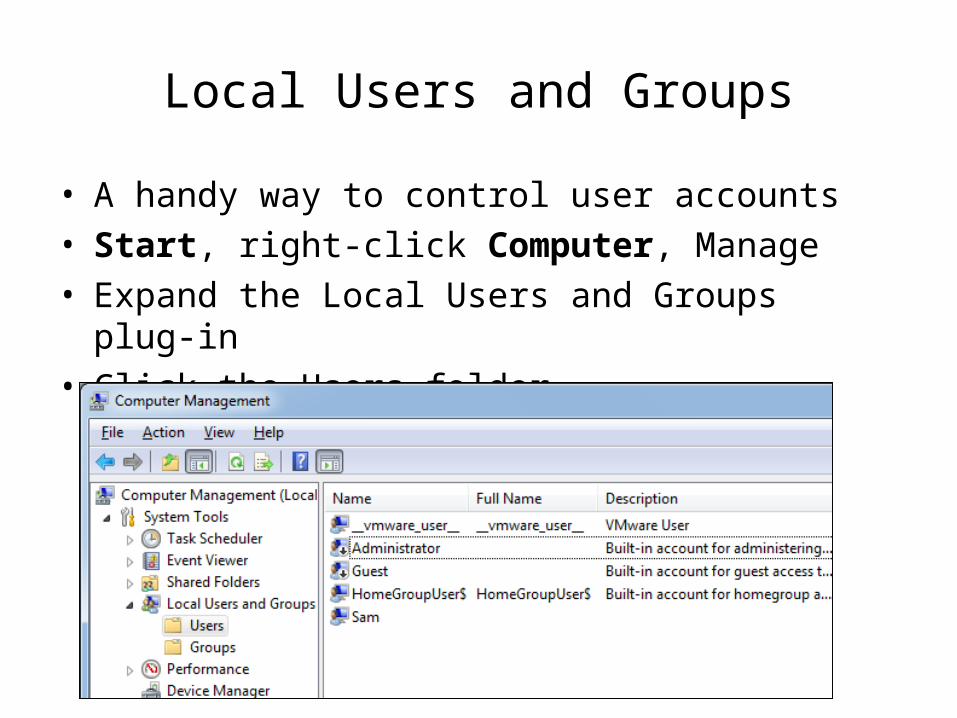
Local Users and Groups
• A handy way to control user accounts
• Start, right-click Computer, Manage
• Expand the Local Users and Groups plug-in
• Click the Users folder

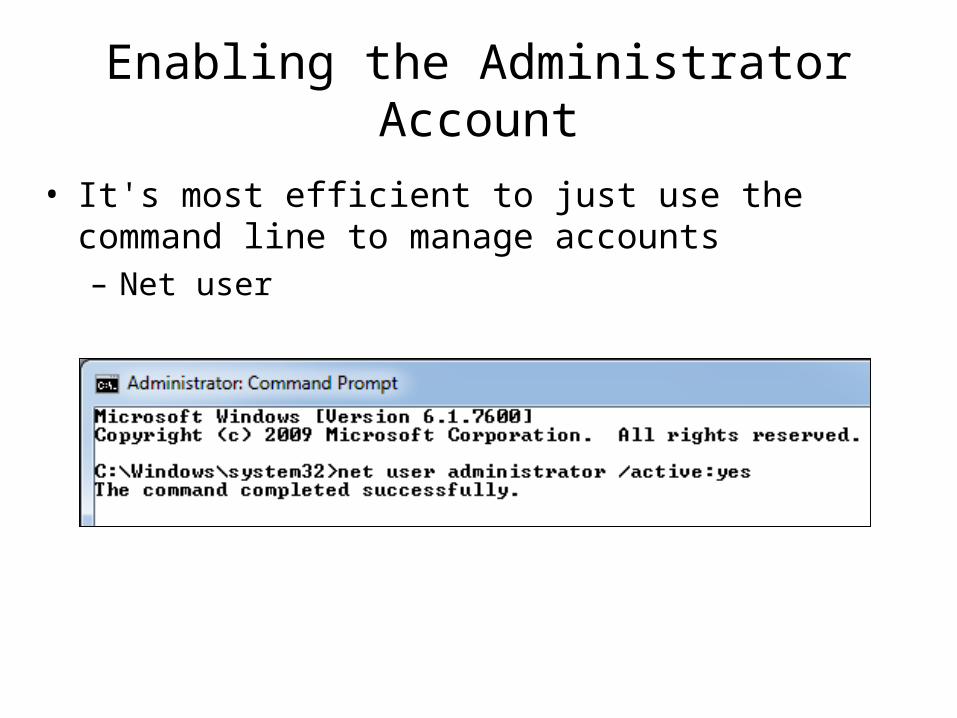
Enabling the Administrator Account
• In the Local Users and Groups plug-in, in the Users folder, right-click Administrator, Properties
• Enable it here
Enabling the Administrator Account
• It's most efficient to just use the command line to manage accounts– Net user
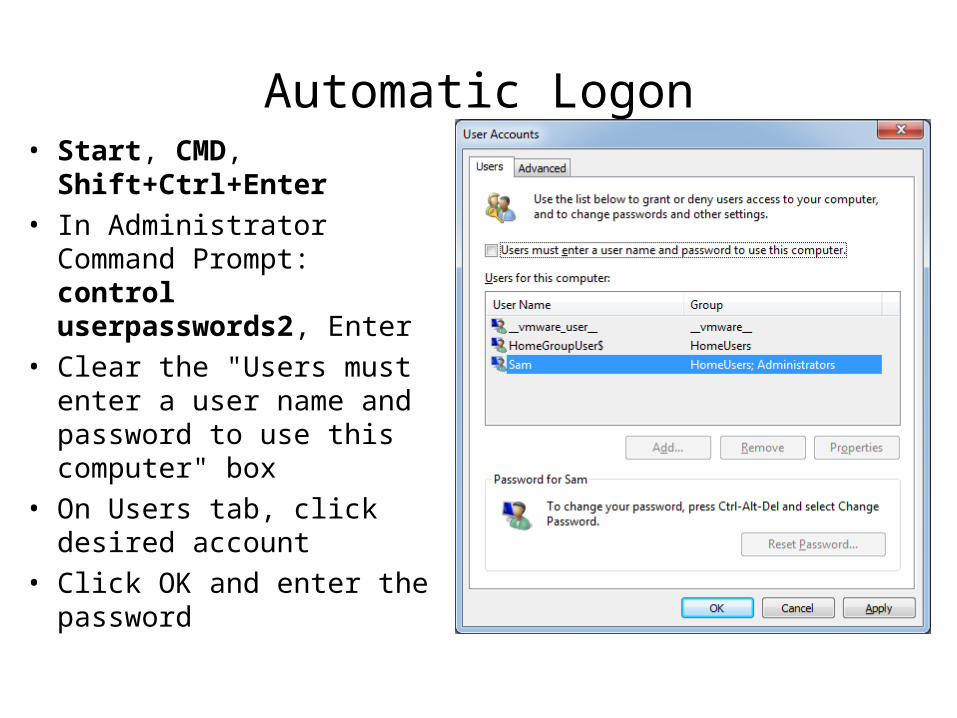
Automatic Logon• Start, CMD,
Shift+Ctrl+Enter• In Administrator Command
Prompt: control userpasswords2, Enter
• Clear the "Users must enter a user name and password to use this computer" box
• On Users tab, click desired account
• Click OK and enter the password

Issues With Automatic Logon
• It's obviously insecure, especially on a laptop
• You can't launch userpasswords2 from the Search box anymore, so the first step on page 79 doesn't work anymore
• If the account has a password, when the screen saver comes on, it may require the password anyway to recover– So it would be best to use an account with no
password to automatically logon
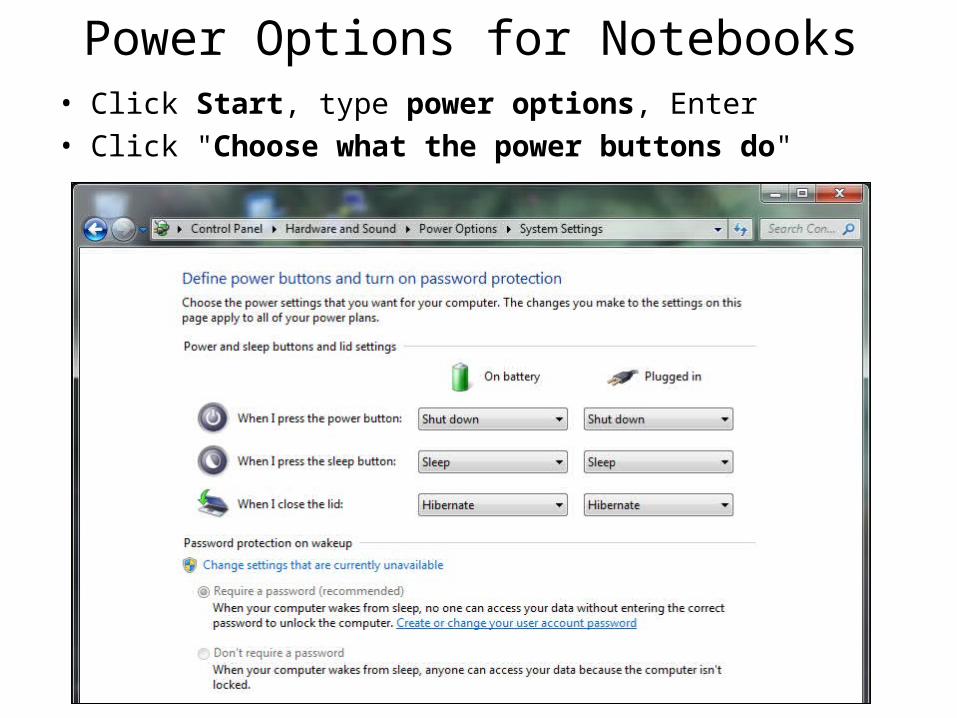
Power Options for Notebooks• Click Start, type power options, Enter• Click "Choose what the power buttons do"

Ch 5
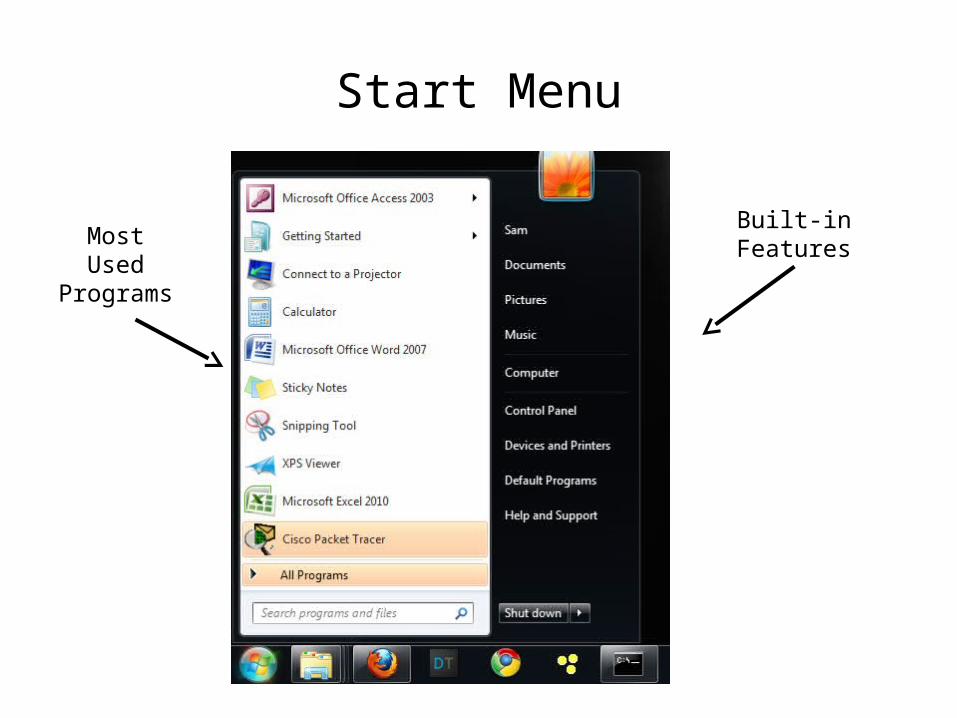
Start Menu
MostUsed
Programs
Built-inFeatures
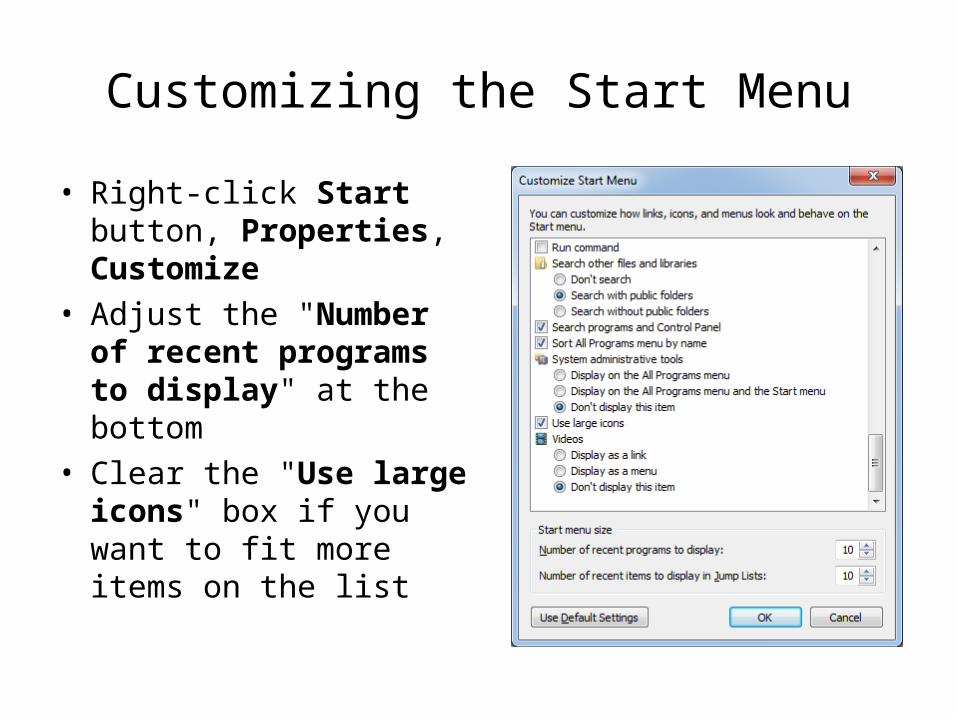
Customizing the Start Menu
• Right-click Start button, Properties, Customize
• Adjust the "Number of recent programs to display" at the bottom
• Clear the "Use large icons" box if you want to fit more items on the list
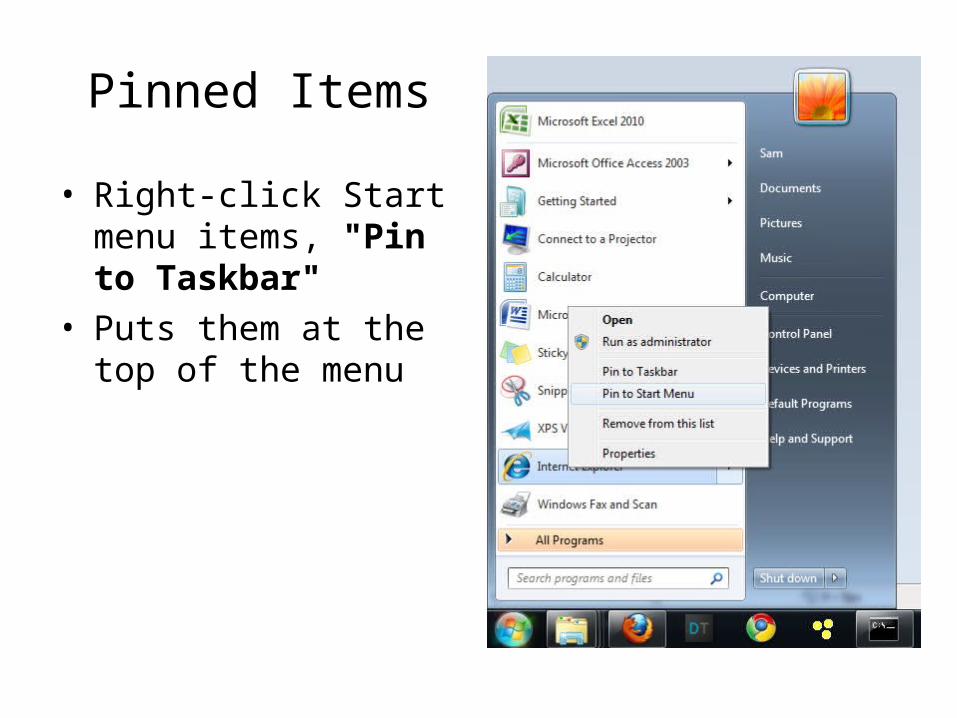
Pinned Items
• Right-click Start menu items, "Pin to Taskbar"
• Puts them at the top of the menu
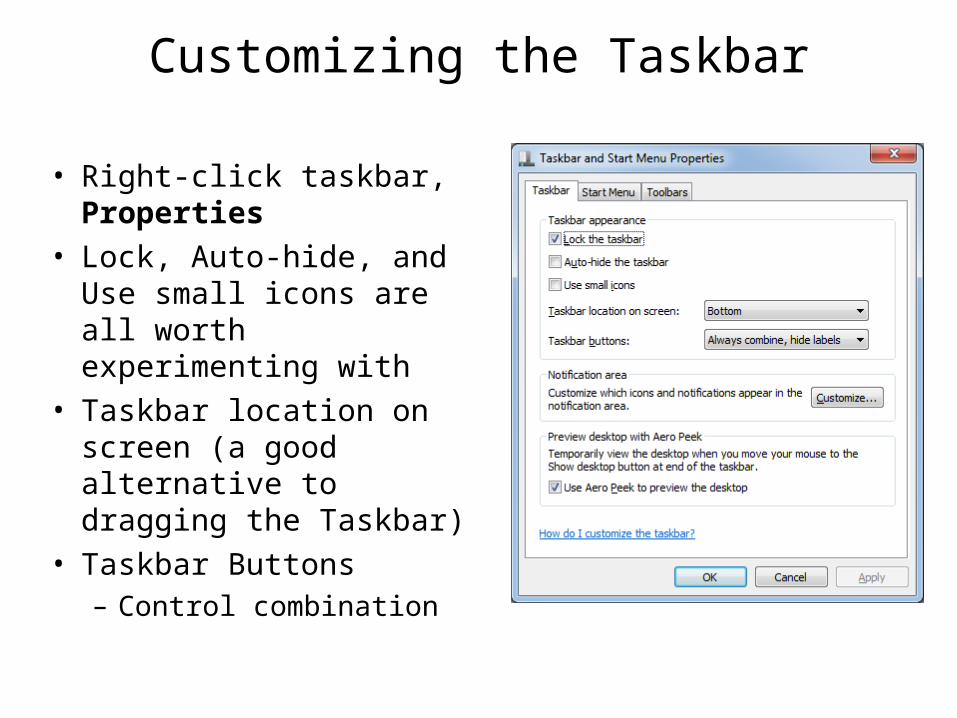
Customizing the Taskbar
• Right-click taskbar, Properties
• Lock, Auto-hide, and Use small icons are all worth experimenting with
• Taskbar location on screen (a good alternative to dragging the Taskbar)
• Taskbar Buttons– Control combination

Pinning a Program to the Taskbar
• Drag an icon to the Taskbar and drop it there
• To remove it, right-click the item, and Unpin it

Jump List
• Right-click menu of a Taskbar button to see the 10 most recently-used documents or destinations
• You can also pin items here, and adjust the number of items shown (see page 101 of the textbook)
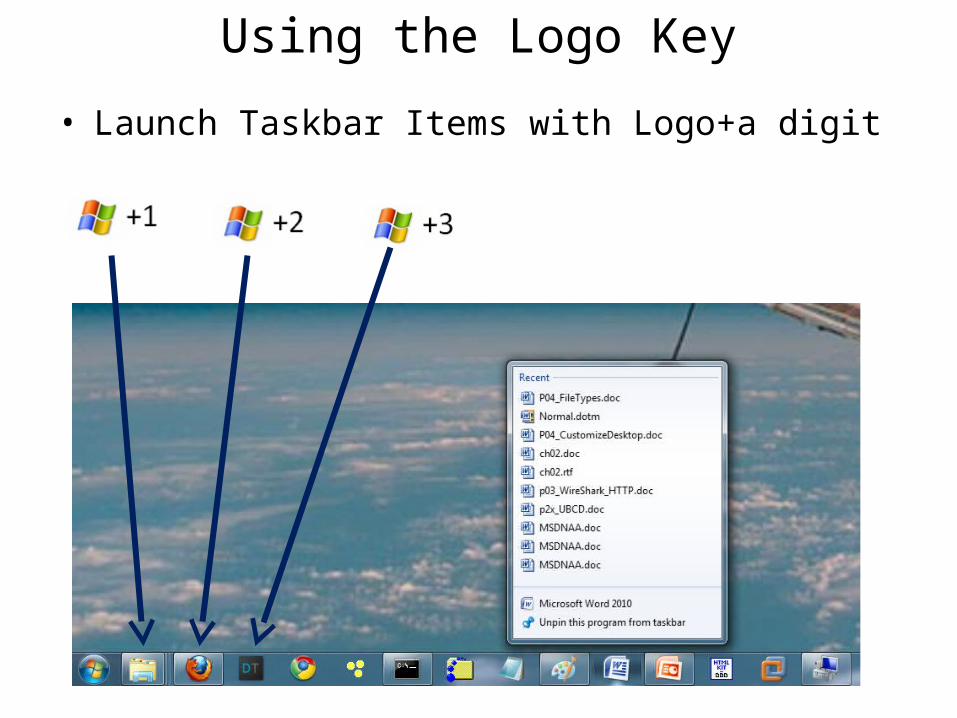
Using the Logo Key
• Launch Taskbar Items with Logo+a digit
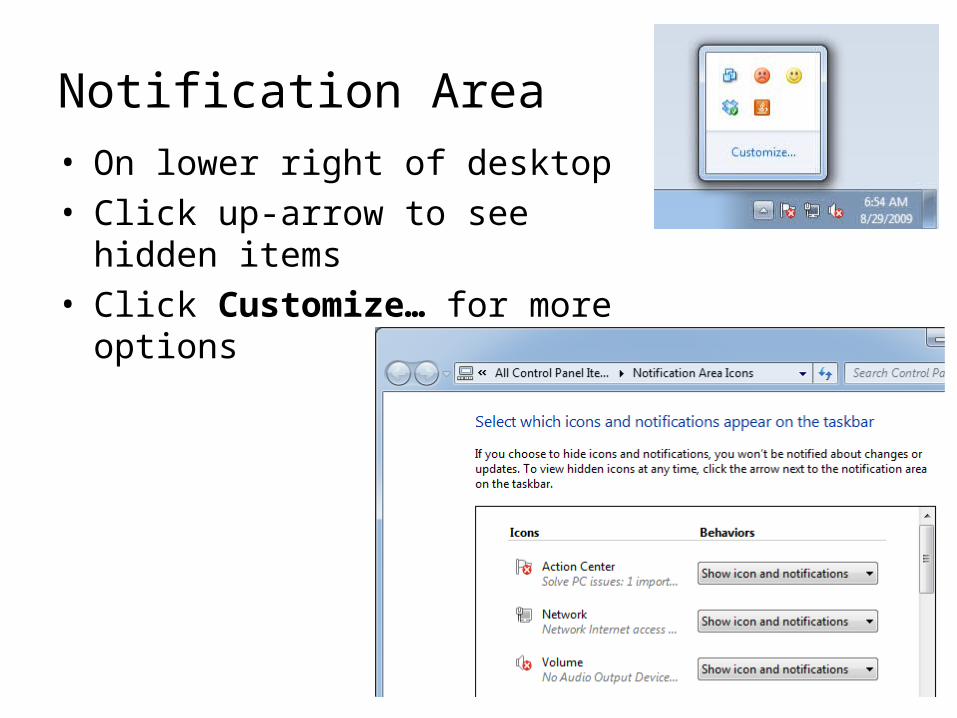
Notification Area• On lower right of desktop
• Click up-arrow to see hidden items
• Click Customize… for more options

Taskbar Toolbars
• Right-click Taskbar
• Point to Toolbars
• Activate the toolbars you want
• Desktop toolbar may be useful if you keep things on the Desktop
![[MS DOCX]: Word Extensions to the Office Open XML (.docx ......[MS-DOCX] — Word Extensions to the Office Open XML (.docx) File Format 2.2.4](https://img.pdfslide.net/doc/110x75/6139ff100051793c8c00cb27/ms-docx-word-extensions-to-the-office-open-xml-docx-ms-docx-a-word.jpg)


![[MS-PPTX]: PowerPoint (.pptx) Extensions to the Office ...MS-PPTX].pdf · [MS-PPTX]: PowerPoint (.pptx) Extensions to the Office Open XML File Format ... PowerPoint (.pptx) Extensions](https://img.pdfslide.net/doc/110x75/5ae7f6357f8b9a6d4f8ed3a1/ms-pptx-powerpoint-pptx-extensions-to-the-office-ms-pptxpdfms-pptx.jpg)


![[MS-XLSX]: Excel (.xlsx) Extensions to the Office Open XML … · 2017. 1. 19. · Excel (.xlsx) Extensions to the Office Open XML SpreadsheetML File Format](https://img.pdfslide.net/doc/110x75/60b1ba9f81099f0e7470dff8/ms-xlsx-excel-xlsx-extensions-to-the-office-open-xml-2017-1-19-excel.jpg)


![[MS-DOCX]: Word Extensions to the Office Open XML (.docx) File …download.microsoft.com/.../[MS-DOCX].pdf · · 2015-09-03Word Extensions to the Office Open XML (.docx) File Format](https://img.pdfslide.net/doc/110x75/5a7556437f8b9aa3618c60c3/ms-docx-word-extensions-to-the-office-open-xml-docx-file-ms-docxpdf.jpg)