Embed Size (px)
Citation preview
EXTENDED SERVICE OPTIONS DOCUMENT IMAGING MODULE
Copyright 2010 The Computer Manager, Inc. 18 - 1
CHAPTER 18
DOCUMENT IMAGING MODULE
18.0 OVERVIEW
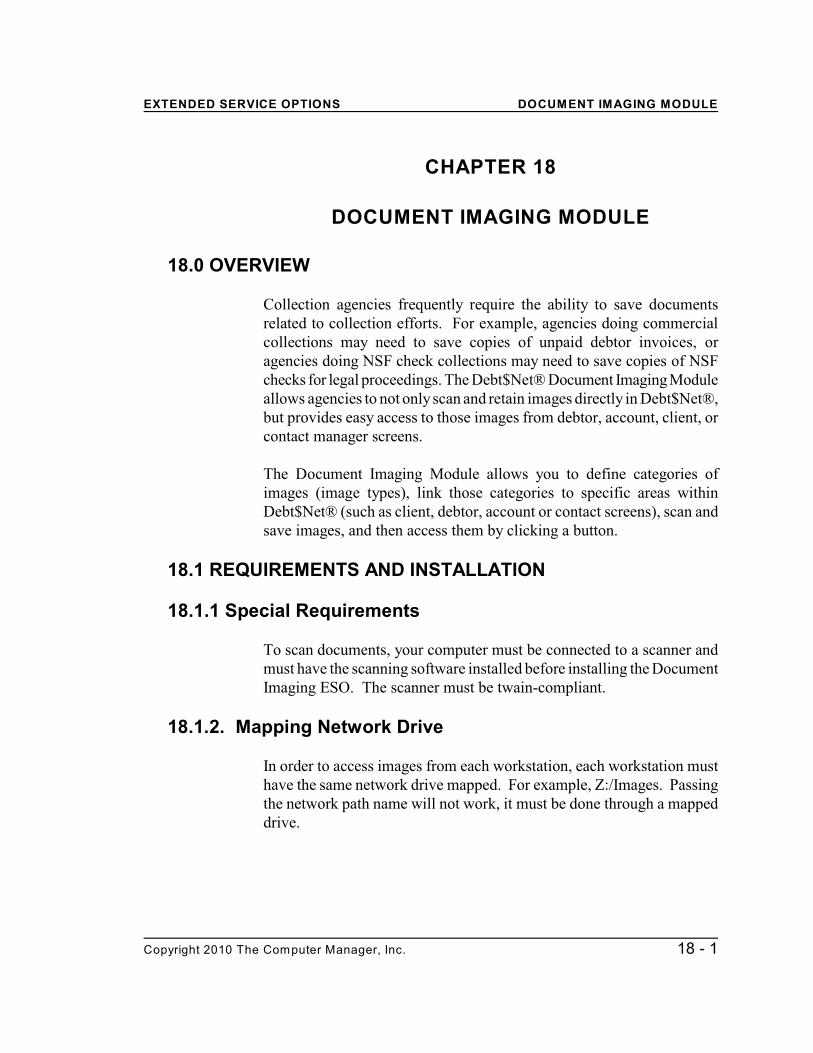
Collection agencies frequently require the ability to save documentsrelated to collection efforts. For example, agencies doing commercialcollections may need to save copies of unpaid debtor invoices, oragencies doing NSF check collections may need to save copies of NSFchecks for legal proceedings. The Debt$Net® Document Imaging Moduleallows agencies to not only scan and retain images directly in Debt$Net®,but provides easy access to those images from debtor, account, client, orcontact manager screens.
The Document Imaging Module allows you to define categories ofimages (image types), link those categories to specific areas withinDebt$Net® (such as client, debtor, account or contact screens), scan andsave images, and then access them by clicking a button.
18.1 REQUIREMENTS AND INSTALLATION
18.1.1 Special Requirements
To scan documents, your computer must be connected to a scanner andmust have the scanning software installed before installing the DocumentImaging ESO. The scanner must be twain-compliant.
18.1.2. Mapping Network Drive
In order to access images from each workstation, each workstation musthave the same network drive mapped. For example, Z:/Images. Passingthe network path name will not work, it must be done through a mappeddrive.
DOCUMENT IMAGING MODULE EXTENDED SERVICE OPTIONS
18 - 2 Copyright 2010 The Computer Manager, Inc.
18.1.3 Installation
The Document Image ESO is easily installed on your computer using theinstallation program on the supplied CD. You must first exit Debt$Net®and have all users log off the system. This is required so that the ESOinstalls and updates the menu options correctly. Then, follow the stepsbelow.
1. Insert the Document Imaging ESO CD into the CD-ROM drive.The installation process should self-start. Follow the directionsprovided by the Install Shield. Choose TYPICAL install for thecomputer that has the scanner attached. Choose COMPACTinstall for all other computers that will be viewing scannedimages.
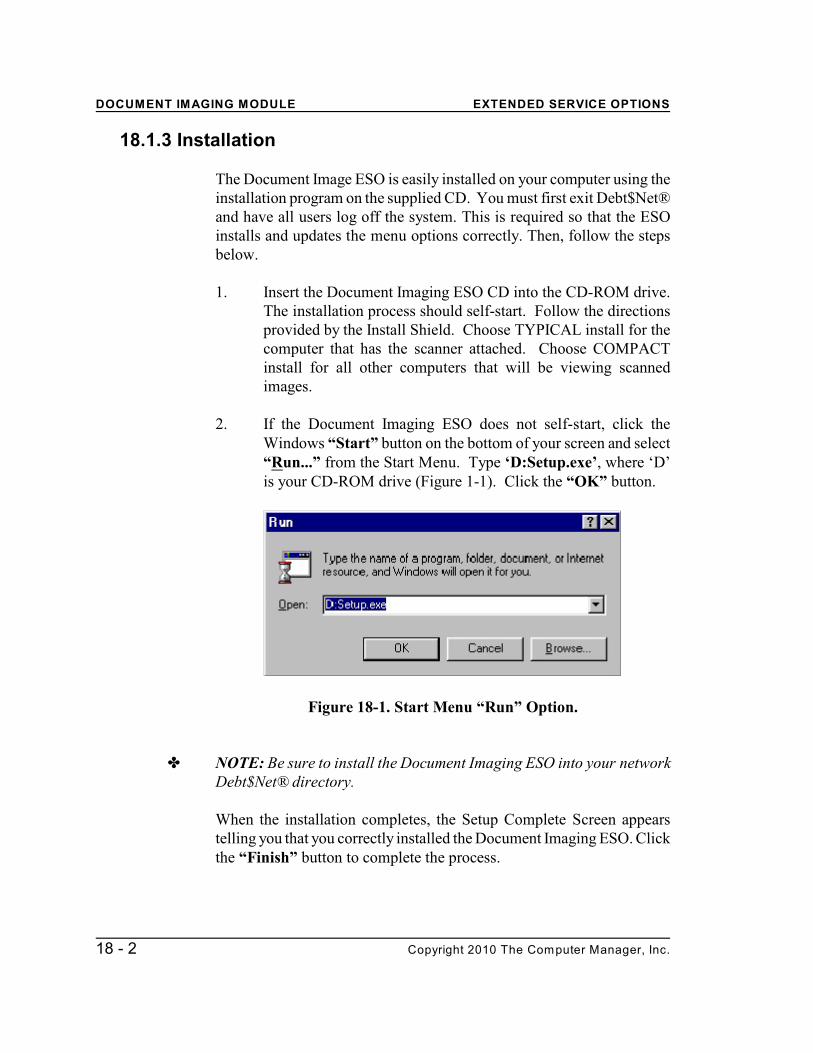
2. If the Document Imaging ESO does not self-start, click theWindows “Start” button on the bottom of your screen and select“Run...” from the Start Menu. Type ‘D:Setup.exe’, where ‘D’is your CD-ROM drive (Figure 1-1). Click the “OK” button.
Figure 18-1. Start Menu “Run” Option.
e NOTE: Be sure to install the Document Imaging ESO into your networkDebt$Net® directory.
When the installation completes, the Setup Complete Screen appearstelling you that you correctly installed the Document Imaging ESO. Clickthe “Finish” button to complete the process.

EXTENDED SERVICE OPTIONS DOCUMENT IMAGING MODULE
Copyright 2010 The Computer Manager, Inc. 18 - 3
18.2 AGENCY FILE MAINTENANCE DEFAULTS
The first step before using the Document Imaging ESO is to set up thedefault file type and directory. To do this, select “Agency FileMaintenance” from the Utilities menu. Click on the ESO tab. You willsee two additional fields which have been added to the tab during theinstallation process (Figure 18-2).
Figure 18-2. Agency File Maintenance ESO Tab.
In the field “Image File Type”, enter the file extension for the image typeyou want to use as default (e.g., JPG, BMP, PDF, or TIF). As with otherdefaults in Debt$Net®, you can change the image type when a documentis scanned. However, this is the image type that you will typically use.
In the field “Image File Path”, enter the directory to default to for storageof your image files. Hit “Save” to capture the changes and default values.
DOCUMENT IMAGING MODULE EXTENDED SERVICE OPTIONS
18 - 4 Copyright 2010 The Computer Manager, Inc.
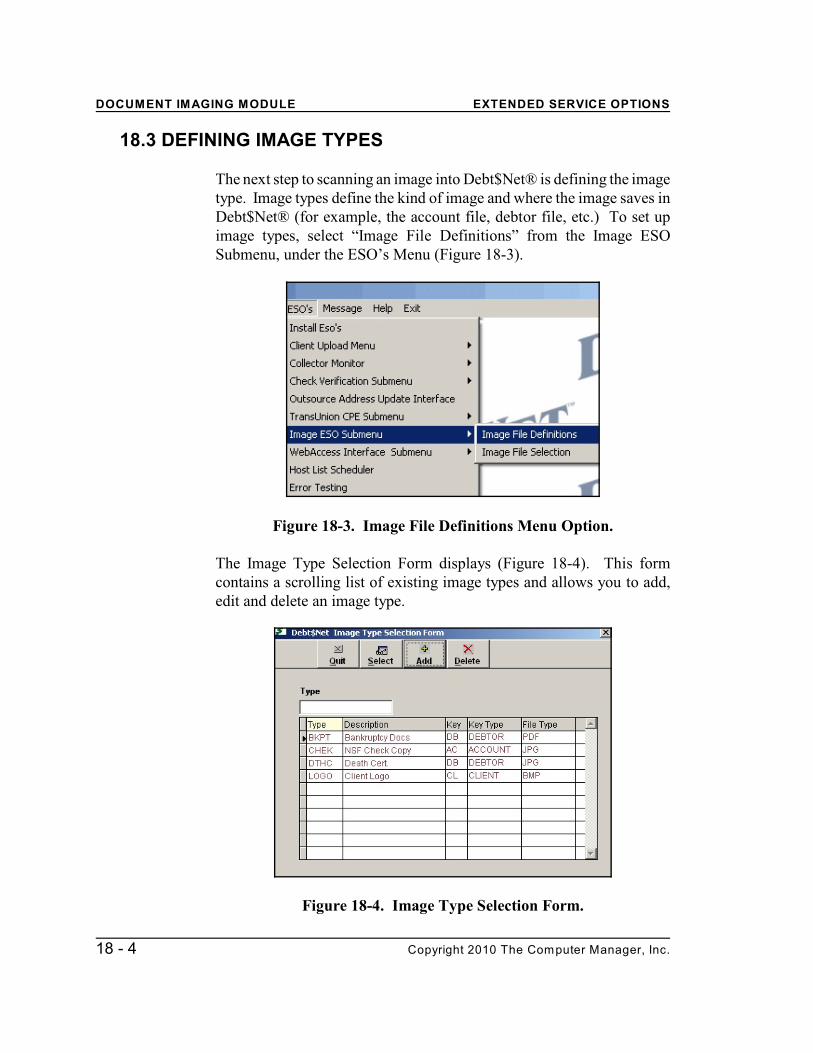
18.3 DEFINING IMAGE TYPES
The next step to scanning an image into Debt$Net® is defining the imagetype. Image types define the kind of image and where the image saves inDebt$Net® (for example, the account file, debtor file, etc.) To set upimage types, select “Image File Definitions” from the Image ESOSubmenu, under the ESO’s Menu (Figure 18-3).
Figure 18-3. Image File Definitions Menu Option.
The Image Type Selection Form displays (Figure 18-4). This formcontains a scrolling list of existing image types and allows you to add,edit and delete an image type.
Figure 18-4. Image Type Selection Form.

EXTENDED SERVICE OPTIONS DOCUMENT IMAGING MODULE
Copyright 2010 The Computer Manager, Inc. 18 - 5
To add a new image type, select the “Add” button. The Debt$Net®Image Definition Edit Form displays (Figure 18-5).
Figure 18-5. Debt$Net™ Image Definition Form.
Enter a unique four-character image type label in the “Type” field,followed by a short description of the image type in the “Description”field. Select the type of Debt$Net® file to link the image to from the“Key” drop down list. The list contains four options: AC (Account File);DB (Debtor File); CL (Client File); and CN (Contact Manager File). Forexample, if you select AC, the image saves in the account file and isavailable through the Account Maintenance Screen. After entering a Key,the Key Type (ACCOUNT, DEBTOR, CLIENT, or CONTACT) willdisplay. Select the image type (e.g., JPG, BMP, PDF, or TIF) for theimage. TIFF image types are used for multiple page documents. Checkthe box “Show Scanner Interface” if you want the scanner interfacewindow to open each time a document is scanned. Leave blank if youwant Debt$Net® to use the default settings to scan. Select “Save” tosave your new image type or “Quit” to exit the screen without saving.You return to the Image Type Selection Form.
To modify an existing image type, highlight it in the Image TypeSelection Form scroll list or enter the type name in the “Type” field onthe Image Type Selection Form. Click the “Select” button. The
DOCUMENT IMAGING MODULE EXTENDED SERVICE OPTIONS
18 - 6 Copyright 2010 The Computer Manager, Inc.
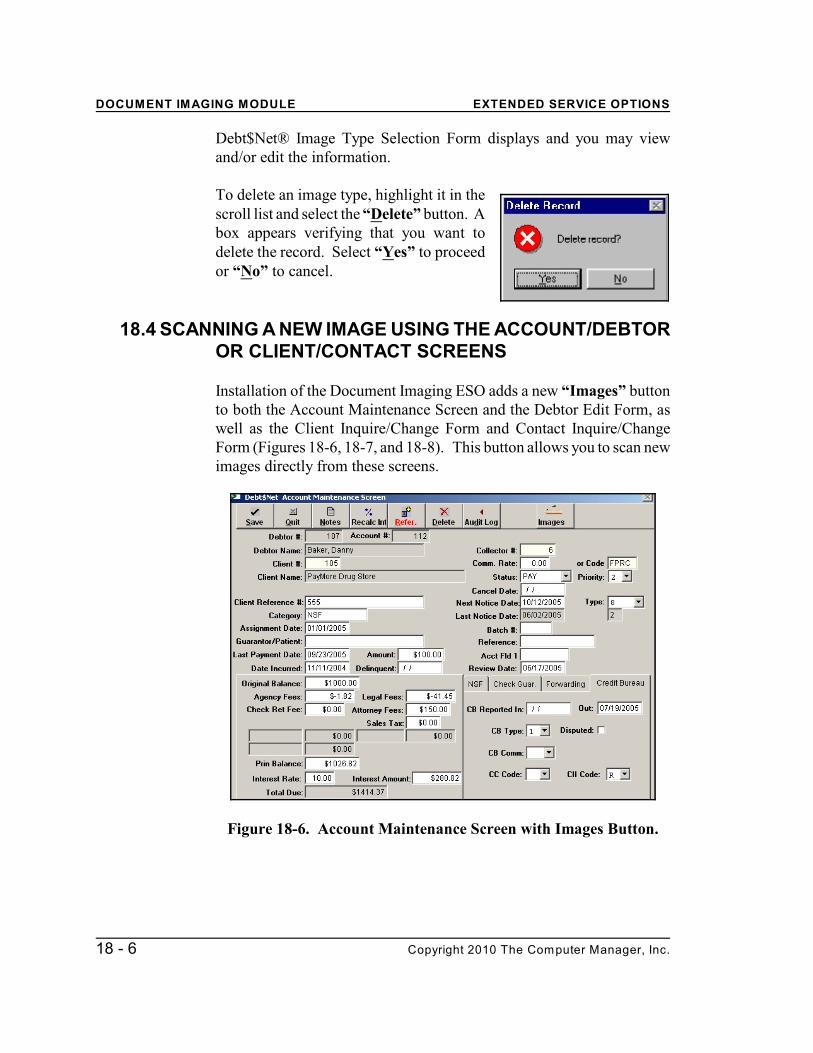
Debt$Net® Image Type Selection Form displays and you may viewand/or edit the information.
To delete an image type, highlight it in thescroll list and select the “Delete” button. Abox appears verifying that you want todelete the record. Select “Yes” to proceedor “No” to cancel.
18.4 SCANNING A NEW IMAGE USING THE ACCOUNT/DEBTOROR CLIENT/CONTACT SCREENS
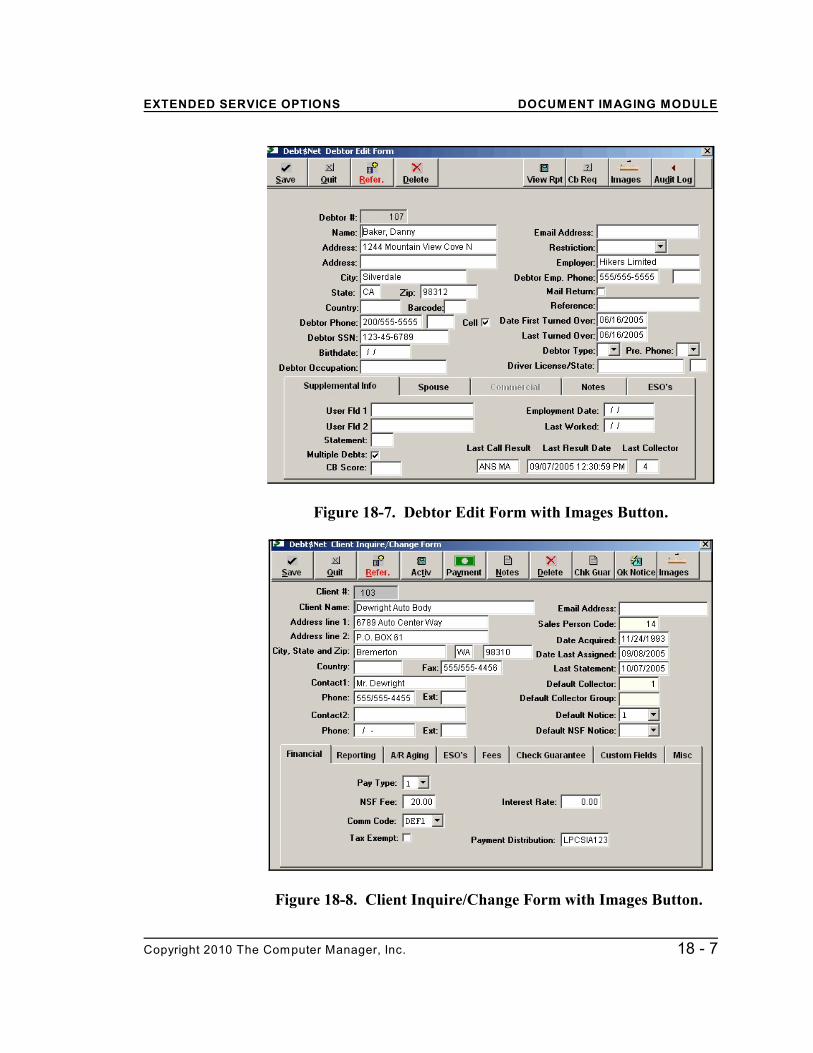
Installation of the Document Imaging ESO adds a new “Images” buttonto both the Account Maintenance Screen and the Debtor Edit Form, aswell as the Client Inquire/Change Form and Contact Inquire/ChangeForm (Figures 18-6, 18-7, and 18-8). This button allows you to scan newimages directly from these screens.
Figure 18-6. Account Maintenance Screen with Images Button.
EXTENDED SERVICE OPTIONS DOCUMENT IMAGING MODULE
Copyright 2010 The Computer Manager, Inc. 18 - 7
Figure 18-7. Debtor Edit Form with Images Button.
Figure 18-8. Client Inquire/Change Form with Images Button.
DOCUMENT IMAGING MODULE EXTENDED SERVICE OPTIONS
18 - 8 Copyright 2010 The Computer Manager, Inc.
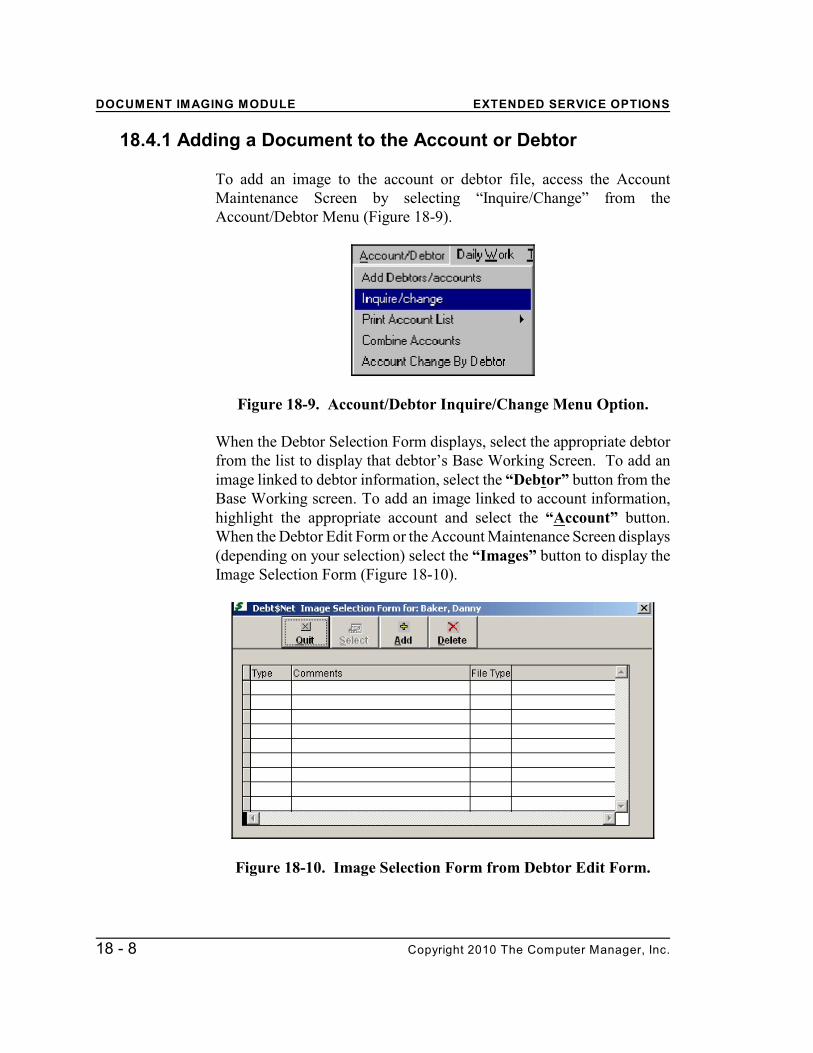
18.4.1 Adding a Document to the Account or Debtor
To add an image to the account or debtor file, access the AccountMaintenance Screen by selecting “Inquire/Change” from theAccount/Debtor Menu (Figure 18-9).
Figure 18-9. Account/Debtor Inquire/Change Menu Option.
When the Debtor Selection Form displays, select the appropriate debtorfrom the list to display that debtor’s Base Working Screen. To add animage linked to debtor information, select the “Debtor” button from theBase Working screen. To add an image linked to account information,highlight the appropriate account and select the “Account” button.When the Debtor Edit Form or the Account Maintenance Screen displays(depending on your selection) select the “Images” button to display theImage Selection Form (Figure 18-10).
Figure 18-10. Image Selection Form from Debtor Edit Form.
EXTENDED SERVICE OPTIONS DOCUMENT IMAGING MODULE
Copyright 2010 The Computer Manager, Inc. 18 - 9
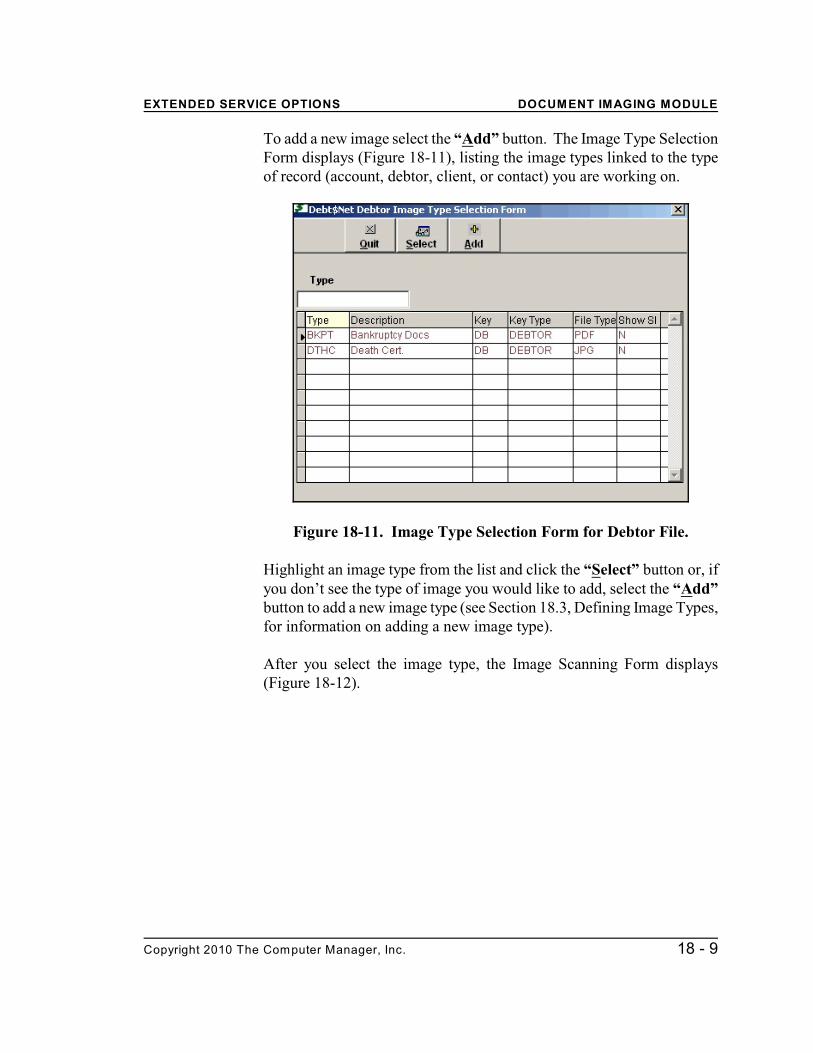
To add a new image select the “Add” button. The Image Type SelectionForm displays (Figure 18-11), listing the image types linked to the typeof record (account, debtor, client, or contact) you are working on.
Figure 18-11. Image Type Selection Form for Debtor File.
Highlight an image type from the list and click the “Select” button or, ifyou don’t see the type of image you would like to add, select the “Add”button to add a new image type (see Section 18.3, Defining Image Types,for information on adding a new image type).
After you select the image type, the Image Scanning Form displays(Figure 18-12).
DOCUMENT IMAGING MODULE EXTENDED SERVICE OPTIONS
18 - 10 Copyright 2010 The Computer Manager, Inc.
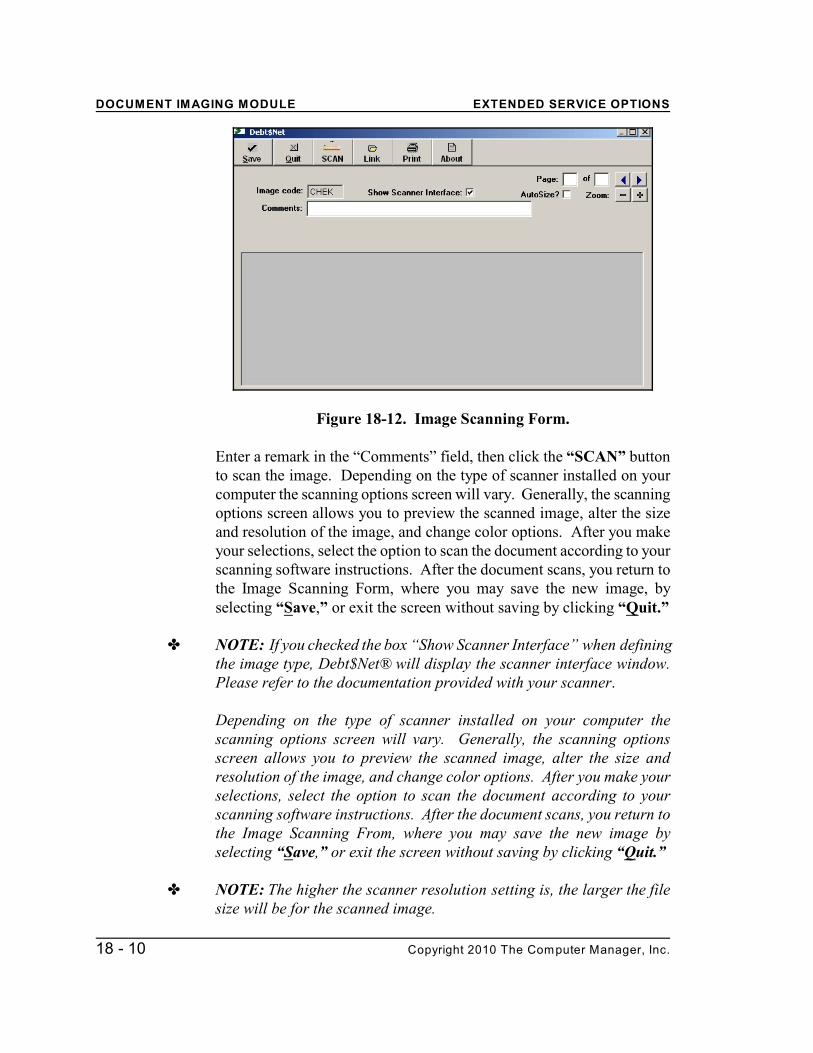
Figure 18-12. Image Scanning Form.
Enter a remark in the “Comments” field, then click the “SCAN” buttonto scan the image. Depending on the type of scanner installed on yourcomputer the scanning options screen will vary. Generally, the scanningoptions screen allows you to preview the scanned image, alter the sizeand resolution of the image, and change color options. After you makeyour selections, select the option to scan the document according to yourscanning software instructions. After the document scans, you return tothe Image Scanning Form, where you may save the new image, byselecting “Save,” or exit the screen without saving by clicking “Quit.”
e NOTE: If you checked the box “Show Scanner Interface” when definingthe image type, Debt$Net® will display the scanner interface window.Please refer to the documentation provided with your scanner.
Depending on the type of scanner installed on your computer thescanning options screen will vary. Generally, the scanning optionsscreen allows you to preview the scanned image, alter the size andresolution of the image, and change color options. After you make yourselections, select the option to scan the document according to yourscanning software instructions. After the document scans, you return tothe Image Scanning From, where you may save the new image byselecting “Save,” or exit the screen without saving by clicking “Quit.”
e NOTE: The higher the scanner resolution setting is, the larger the filesize will be for the scanned image.
EXTENDED SERVICE OPTIONS DOCUMENT IMAGING MODULE
Copyright 2010 The Computer Manager, Inc. 18 - 11
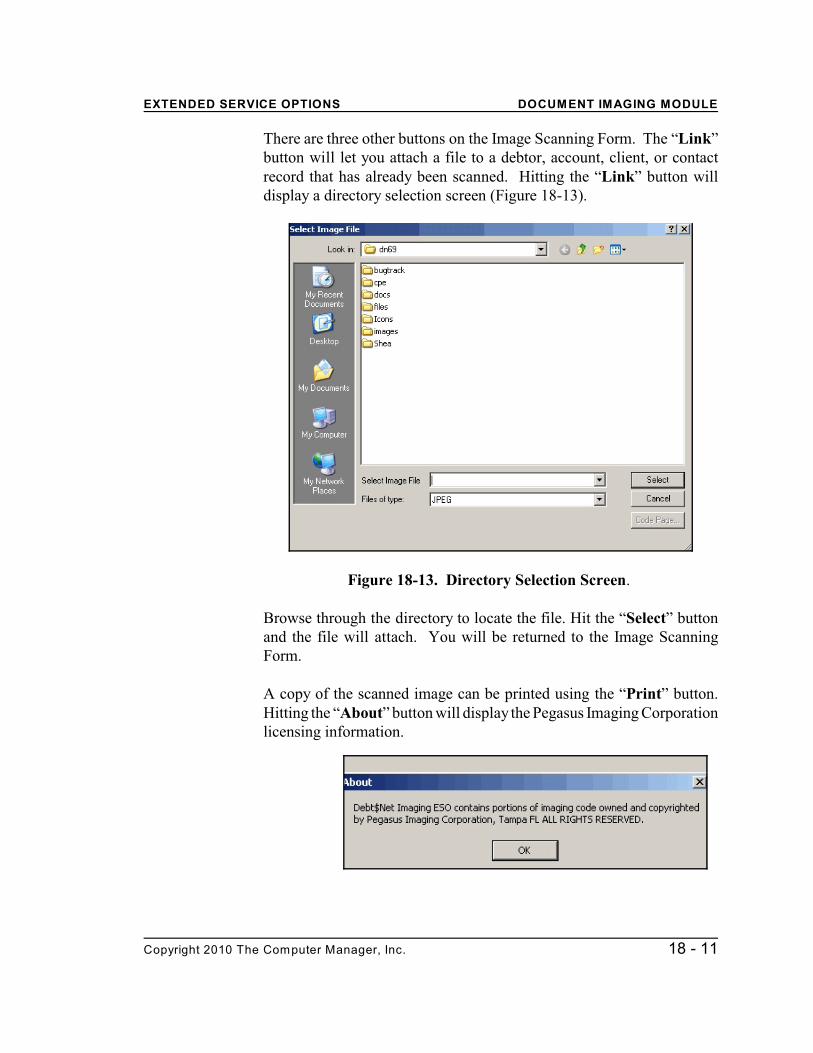
There are three other buttons on the Image Scanning Form. The “Link”button will let you attach a file to a debtor, account, client, or contactrecord that has already been scanned. Hitting the “Link” button willdisplay a directory selection screen (Figure 18-13).
Figure 18-13. Directory Selection Screen.
Browse through the directory to locate the file. Hit the “Select” buttonand the file will attach. You will be returned to the Image ScanningForm.
A copy of the scanned image can be printed using the “Print” button.Hitting the “About” button will display the Pegasus Imaging Corporationlicensing information.
DOCUMENT IMAGING MODULE EXTENDED SERVICE OPTIONS
18 - 12 Copyright 2010 The Computer Manager, Inc.
18.4.2 Adding a Document to the Client or Contact
To add a document to the client or contact screen select the appropriatesubmenu option (Client Inquire/Change or Maintain Contact File) fromthe Debt$Net® main menu. When the client or contact scrolling listdisplays, select the designated client or contact. Select the Image button,and proceed as described in Section 18.4.1 to scan the document.
18.5 SCANNING A NEW IMAGE USING THE ESO’S MENU
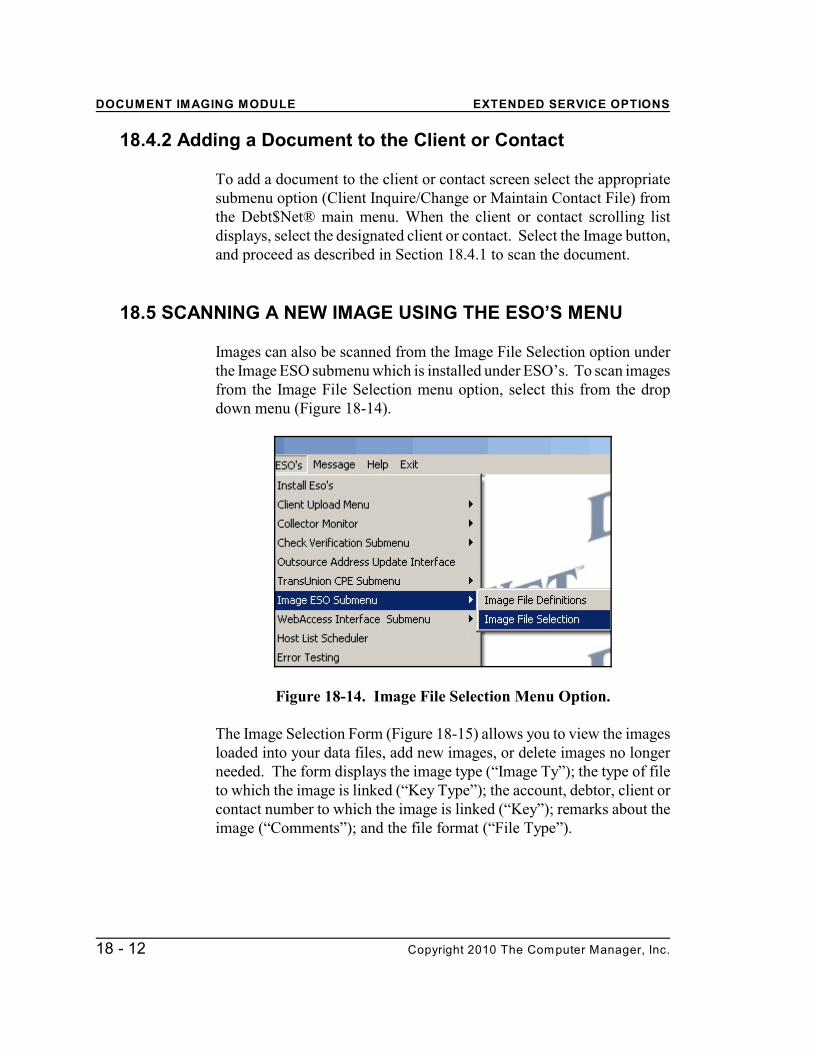
Images can also be scanned from the Image File Selection option underthe Image ESO submenu which is installed under ESO’s. To scan imagesfrom the Image File Selection menu option, select this from the dropdown menu (Figure 18-14).
Figure 18-14. Image File Selection Menu Option.
The Image Selection Form (Figure 18-15) allows you to view the imagesloaded into your data files, add new images, or delete images no longerneeded. The form displays the image type (“Image Ty”); the type of fileto which the image is linked (“Key Type”); the account, debtor, client orcontact number to which the image is linked (“Key”); remarks about theimage (“Comments”); and the file format (“File Type”).
EXTENDED SERVICE OPTIONS DOCUMENT IMAGING MODULE
Copyright 2010 The Computer Manager, Inc. 18 - 13
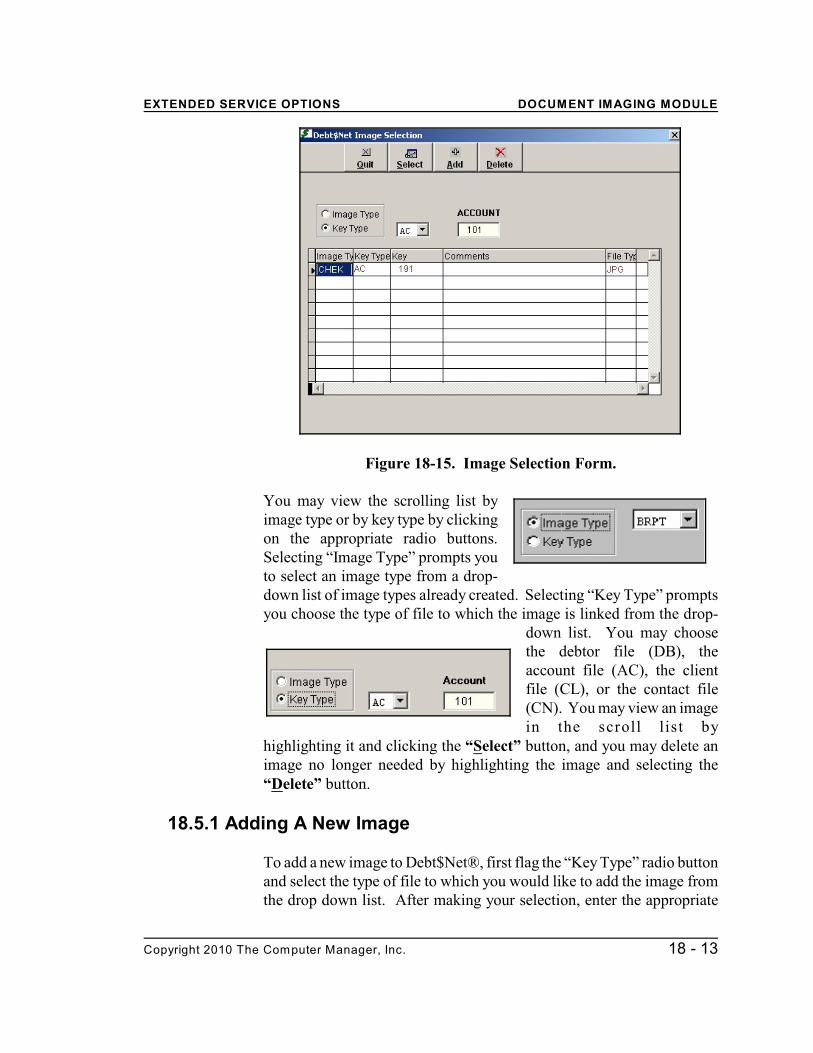
Figure 18-15. Image Selection Form.
You may view the scrolling list byimage type or by key type by clickingon the appropriate radio buttons.Selecting “Image Type” prompts youto select an image type from a drop-down list of image types already created. Selecting “Key Type” promptsyou choose the type of file to which the image is linked from the drop-
down list. You may choosethe debtor file (DB), theaccount file (AC), the clientfile (CL), or the contact file(CN). You may view an imagein the scroll list by
highlighting it and clicking the “Select” button, and you may delete animage no longer needed by highlighting the image and selecting the“Delete” button.
18.5.1 Adding A New Image
To add a new image to Debt$Net®, first flag the “Key Type” radio buttonand select the type of file to which you would like to add the image fromthe drop down list. After making your selection, enter the appropriate
DOCUMENT IMAGING MODULE EXTENDED SERVICE OPTIONS
18 - 14 Copyright 2010 The Computer Manager, Inc.
debtor, account or client number in the field (now labeled, “Debtor,”“Account,” “Client”, or “Contact” depending on your previousselection). Right click the field to select from a selection list.
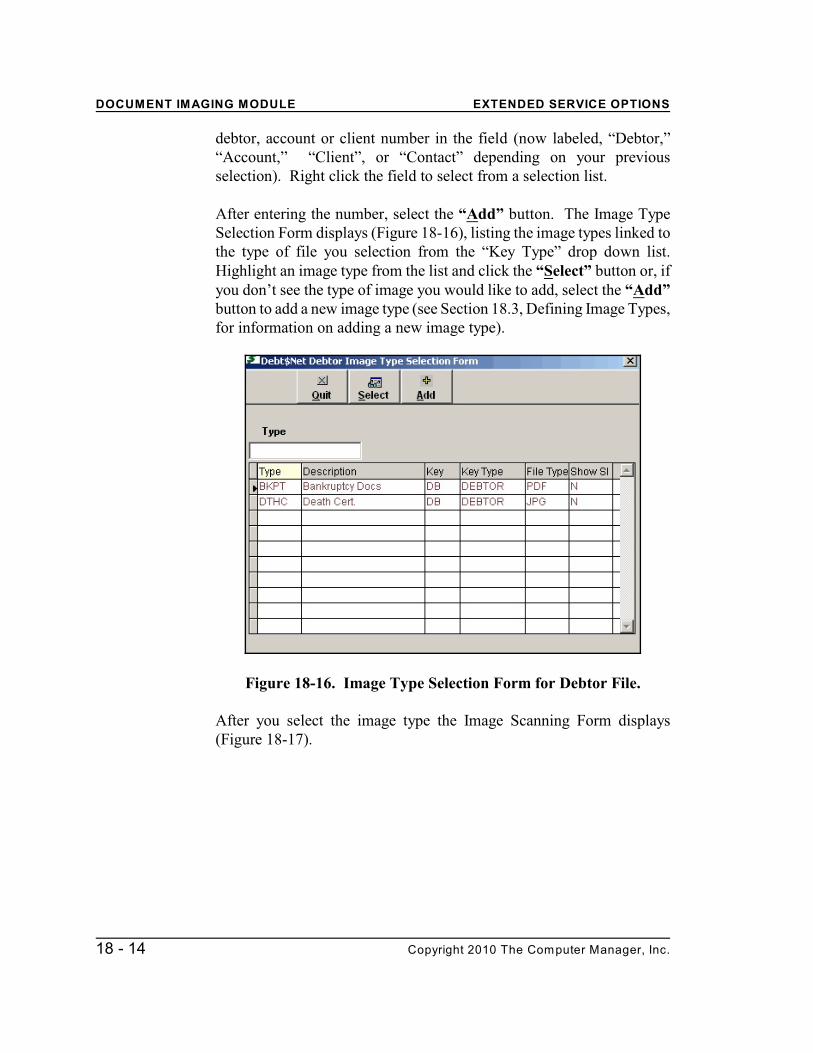
After entering the number, select the “Add” button. The Image TypeSelection Form displays (Figure 18-16), listing the image types linked tothe type of file you selection from the “Key Type” drop down list.Highlight an image type from the list and click the “Select” button or, ifyou don’t see the type of image you would like to add, select the “Add”button to add a new image type (see Section 18.3, Defining Image Types,for information on adding a new image type).
Figure 18-16. Image Type Selection Form for Debtor File.
After you select the image type the Image Scanning Form displays(Figure 18-17).
EXTENDED SERVICE OPTIONS DOCUMENT IMAGING MODULE
Copyright 2010 The Computer Manager, Inc. 18 - 15
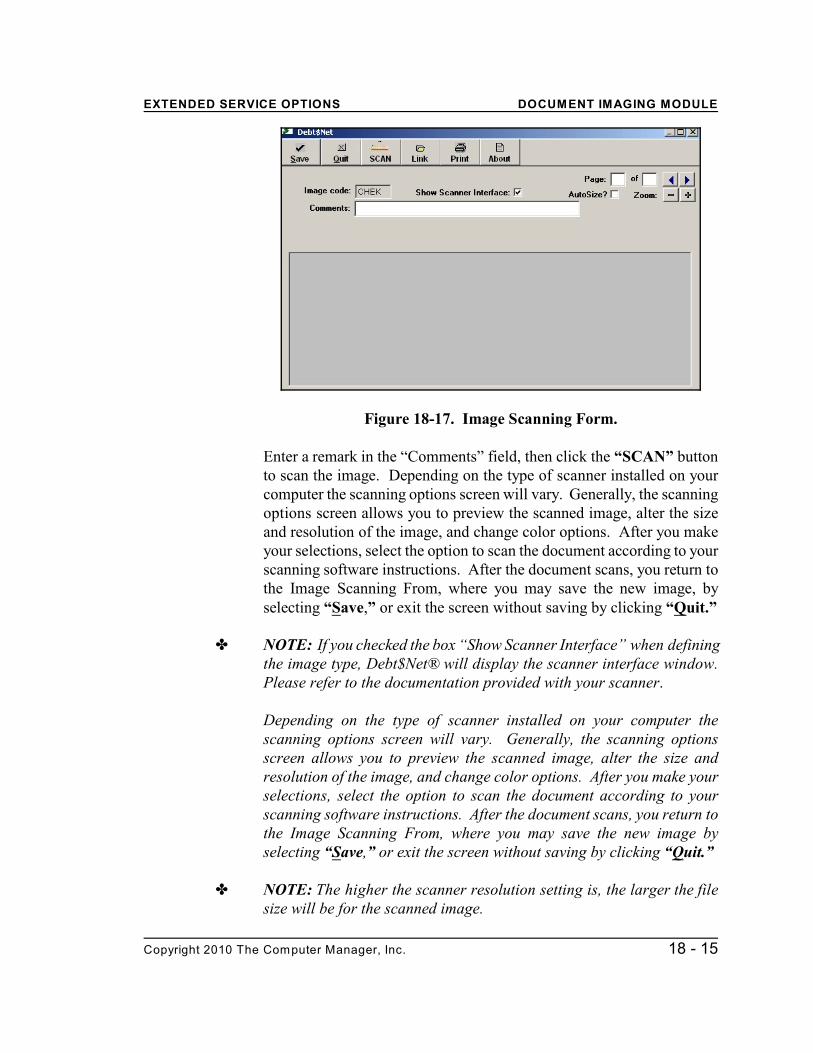
Figure 18-17. Image Scanning Form.
Enter a remark in the “Comments” field, then click the “SCAN” buttonto scan the image. Depending on the type of scanner installed on yourcomputer the scanning options screen will vary. Generally, the scanningoptions screen allows you to preview the scanned image, alter the sizeand resolution of the image, and change color options. After you makeyour selections, select the option to scan the document according to yourscanning software instructions. After the document scans, you return tothe Image Scanning From, where you may save the new image, byselecting “Save,” or exit the screen without saving by clicking “Quit.”
e NOTE: If you checked the box “Show Scanner Interface” when definingthe image type, Debt$Net® will display the scanner interface window.Please refer to the documentation provided with your scanner.
Depending on the type of scanner installed on your computer thescanning options screen will vary. Generally, the scanning optionsscreen allows you to preview the scanned image, alter the size andresolution of the image, and change color options. After you make yourselections, select the option to scan the document according to yourscanning software instructions. After the document scans, you return tothe Image Scanning From, where you may save the new image byselecting “Save,” or exit the screen without saving by clicking “Quit.”
e NOTE: The higher the scanner resolution setting is, the larger the filesize will be for the scanned image.

DOCUMENT IMAGING MODULE EXTENDED SERVICE OPTIONS
18 - 16 Copyright 2010 The Computer Manager, Inc.
There are three other buttons on the Image Scanning Form. The “Link”button will let you attach a file to a debtor, account, client, or contactrecord that has already been scanned. Hitting the “Link” button willdisplay a directory selection screen (Figure 18-18).
Figure 18-18. Directory Selection Screen.
Browse through the directory to locate the file. Hit the “Select” buttonand the file will attach. You will be returned to the Image ScanningForm.
A copy of the scanned image can be printed using the “Print” button.Hitting the “About” button will display the Pegasus Imaging Corporationl i c e n s i n ginformation.