Embed Size (px)
Citation preview

143
10CHAPTER
How to Fill a Cavity
An abscess occurs when germs from tooth decay start an infection on the inside of the tooth. If you cover up an abscess with filling material, it will make the problem worse. Pressure builds up inside the filled tooth, causing even more pain and swelling.
If a tooth has an abscess, take it out (see the next chapter), unless you can give special nerve treatment (root canal treatment).
When someone’s tooth hurts, you do not always need to take it out. There may be a way to treat it and keep it. Always ask yourself whether a bad tooth really needs to come out.
This chapter is about filling cavities. Cavities are the holes that tooth decay makes in the teeth.
From this chapter, you can learn:
• When to fill the cavity, or when to take out the tooth.
• How to place a temporary cement filling.
• How to place a permanent filling using Atraumatic Restorative Treatment (ART).
WHEN NOT TO PLACE A FILLINGDo not fill a cavity if you think there is an abscess in the tooth. Look for these signs of an abscess:
• The face is swollen.
• There is a gum bubble near the root of the tooth (page 74).
• The tooth hurts constantly, even when the person tries to sleep.
• The tooth hurts sharply when you tap it gently.
143
144
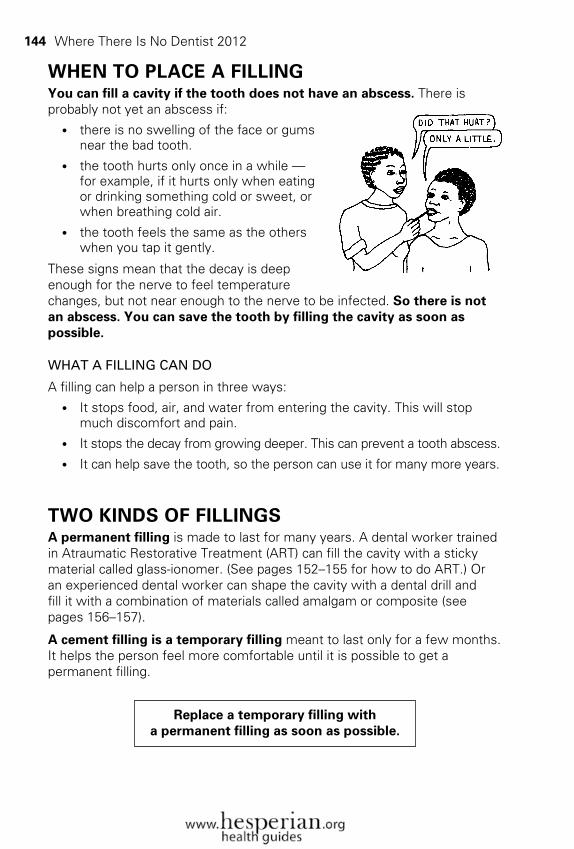
WHEN TO PLACE A FILLINGYou can fill a cavity if the tooth does not have an abscess. There is probably not yet an abscess if:
• there is no swelling of the face or gums near the bad tooth.
• the tooth hurts only once in a while —for example, if it hurts only when eating or drinking something cold or sweet, or when breathing cold air.
• the tooth feels the same as the others when you tap it gently.
These signs mean that the decay is deep enough for the nerve to feel temperature changes, but not near enough to the nerve to be infected. So there is not an abscess. You can save the tooth by filling the cavity as soon as possible.
What a Filling Can Do
A filling can help a person in three ways:
• It stops food, air, and water from entering the cavity. This will stop much discomfort and pain.
• It stops the decay from growing deeper. This can prevent a tooth abscess.
• It can help save the tooth, so the person can use it for many more years.
TWO KINDS OF FILLINGSA permanent filling is made to last for many years. A dental worker trained in Atraumatic Restorative Treatment (ART) can fill the cavity with a sticky material called glass-ionomer. (See pages 152–155 for how to do ART.) Or an experienced dental worker can shape the cavity with a dental drill and fill it with a combination of materials called amalgam or composite (see pages 156–157).
A cement filling is a temporary filling meant to last only for a few months. It helps the person feel more comfortable until it is possible to get a permanent filling.
Replace a temporary filling with a permanent filling as soon as possible.
Where There Is No Dentist 2012
145
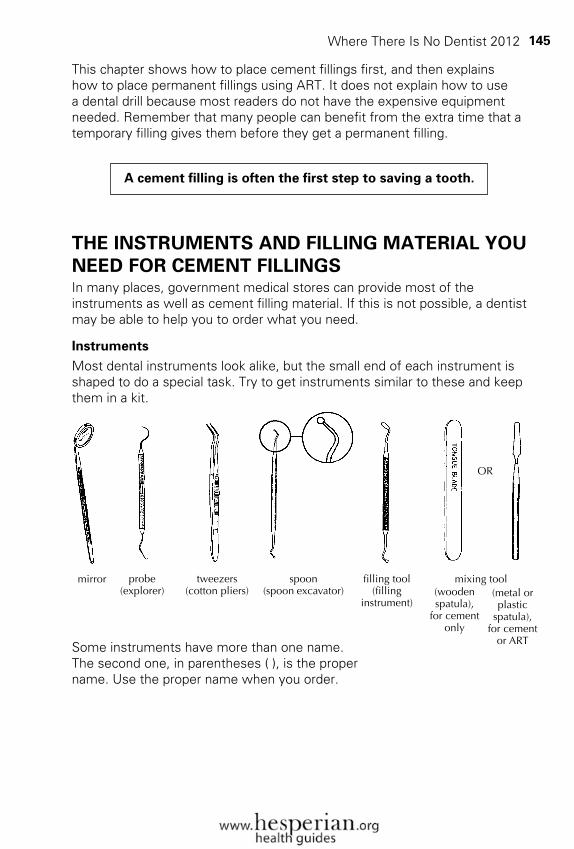
THE INSTRUMENTS AND FILLING MATERIAL YOU NEED FOR CEMENT FILLINGSIn many places, government medical stores can provide most of the instruments as well as cement filling material. If this is not possible, a dentist may be able to help you to order what you need.
InstrumentsMost dental instruments look alike, but the small end of each instrument is shaped to do a special task. Try to get instruments similar to these and keep them in a kit.
(wooden spatula),
for cement only
mirror probe (explorer)
tweezers (cotton pliers)
spoon (spoon excavator)
filling tool (filling
instrument)
Some instruments have more than one name. The second one, in parentheses ( ), is the proper name. Use the proper name when you order.
OR
A cement filling is often the first step to saving a tooth.
This chapter shows how to place cement fillings first, and then explains how to place permanent fillings using ART. It does not explain how to use a dental drill because most readers do not have the expensive equipment needed. Remember that many people can benefit from the extra time that a temporary filling gives them before they get a permanent filling.
(metal or plastic
spatula), for cement
or ART
mixing tool
Where There Is No Dentist 2012
146
To place a cement filling, follow these 5 steps (pages 147–150):
1. Keep the cavity dry.
2. Lift out the soft decay.
3. Mix the cement.
4. Press the cement into the cavity.
5. Remove the extra cement from around the cavity and the tooth.
your syringe, needle, and local anesthetic (in case a tooth hurts)
your instruments: mirror, probe, tweezers, spoon, filling tool, mixing tool
oil of cloves (eugenol) and zinc oxide
lots of cotton: cotton rolls, gauze, or cotton wool
smooth glass to mix cement
HOW TO PLACE THE CEMENT FILLINGLay out on a clean cloth:
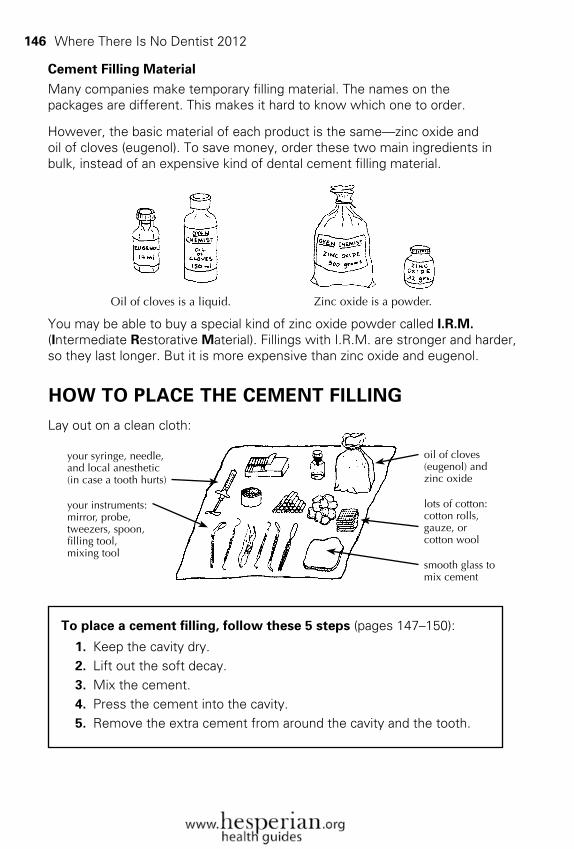
You may be able to buy a special kind of zinc oxide powder called I.R.M. (Intermediate Restorative Material). Fillings with I.R.M. are stronger and harder, so they last longer. But it is more expensive than zinc oxide and eugenol.
Oil of cloves is a liquid. Zinc oxide is a powder.
Cement Filling MaterialMany companies make temporary filling material. The names on the packages are different. This makes it hard to know which one to order.
However, the basic material of each product is the same—zinc oxide and oil of cloves (eugenol). To save money, order these two main ingredients in bulk, instead of an expensive kind of dental cement filling material.
Where There Is No Dentist 2012
147
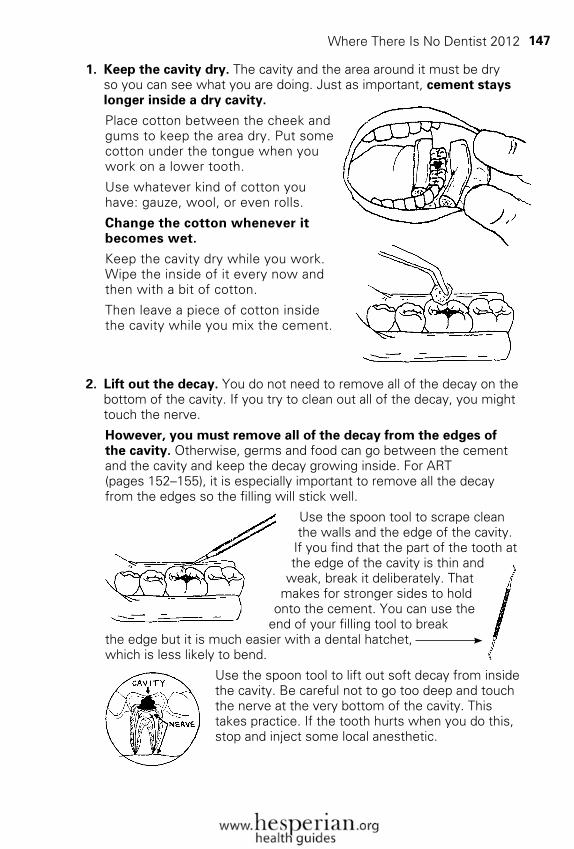
1. Keep the cavity dry. The cavity and the area around it must be dry so you can see what you are doing. Just as important, cement stays longer inside a dry cavity.
Place cotton between the cheek and gums to keep the area dry. Put some cotton under the tongue when you work on a lower tooth.
Use whatever kind of cotton you have: gauze, wool, or even rolls.
Change the cotton whenever it becomes wet.
Keep the cavity dry while you work. Wipe the inside of it every now and then with a bit of cotton.
Then leave a piece of cotton inside the cavity while you mix the cement.
2. Lift out the decay. You do not need to remove all of the decay on the bottom of the cavity. If you try to clean out all of the decay, you might touch the nerve.
However, you must remove all of the decay from the edges of the cavity. Otherwise, germs and food can go between the cement and the cavity and keep the decay growing inside. For ART (pages 152–155), it is especially important to remove all the decay from the edges so the filling will stick well.
Use the spoon tool to scrape clean the walls and the edge of the cavity.
If you find that the part of the tooth at the edge of the cavity is thin and
weak, break it deliberately. That makes for stronger sides to hold
onto the cement. You can use the end of your filling tool to break
the edge but it is much easier with a dental hatchet, which is less likely to bend.
Use the spoon tool to lift out soft decay from inside the cavity. Be careful not to go too deep and touch the nerve at the very bottom of the cavity. This takes practice. If the tooth hurts when you do this, stop and inject some local anesthetic.
Where There Is No Dentist 2012
148
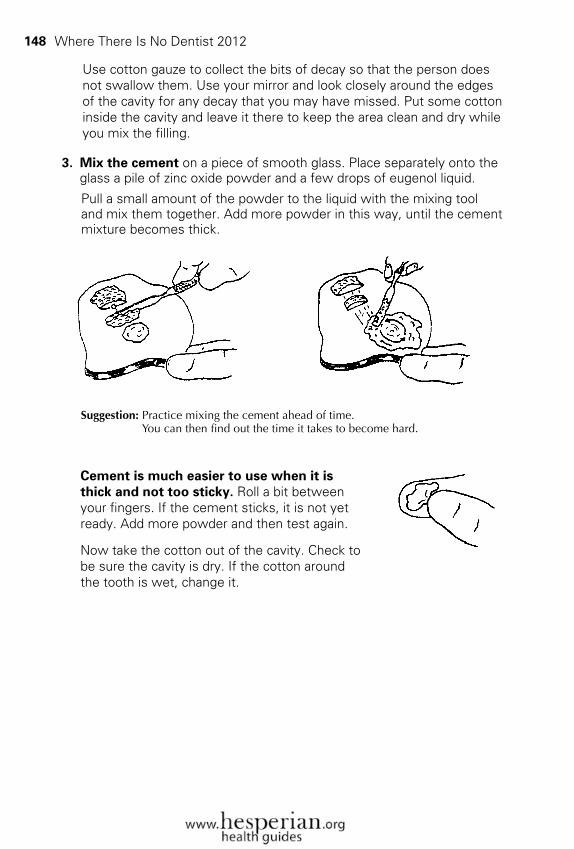
Cement is much easier to use when it is thick and not too sticky. Roll a bit between your fingers. If the cement sticks, it is not yet ready. Add more powder and then test again.
Now take the cotton out of the cavity. Check to be sure the cavity is dry. If the cotton around the tooth is wet, change it.
3. Mix the cement on a piece of smooth glass. Place separately onto the glass a pile of zinc oxide powder and a few drops of eugenol liquid.
Pull a small amount of the powder to the liquid with the mixing tool and mix them together. Add more powder in this way, until the cement mixture becomes thick.
Use cotton gauze to collect the bits of decay so that the person does not swallow them. Use your mirror and look closely around the edges of the cavity for any decay that you may have missed. Put some cotton inside the cavity and leave it there to keep the area clean and dry while you mix the filling.
Suggestion: Practice mixing the cement ahead of time. You can then find out the time it takes to become hard.
Where There Is No Dentist 2012
149
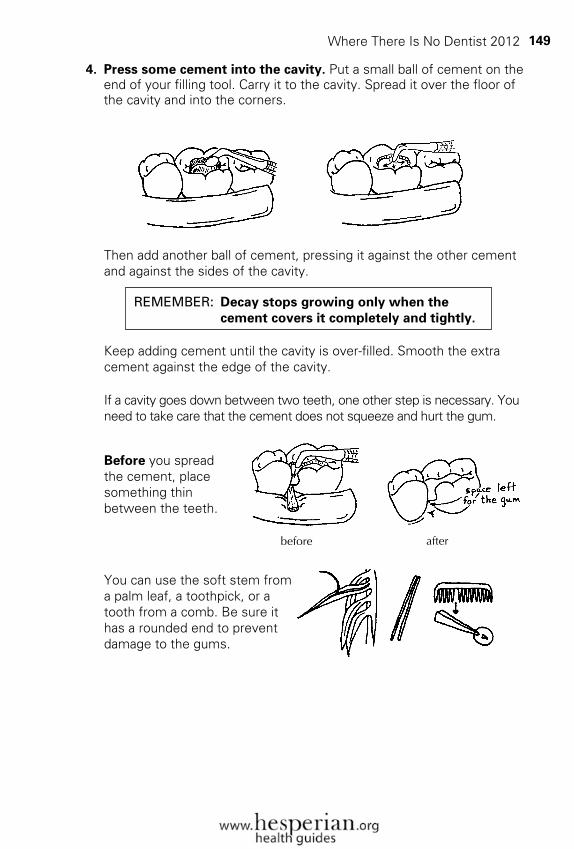
You can use the soft stem from a palm leaf, a toothpick, or a tooth from a comb. Be sure it has a rounded end to prevent damage to the gums.
4. Press some cement into the cavity. Put a small ball of cement on the end of your filling tool. Carry it to the cavity. Spread it over the floor of the cavity and into the corners.
afterbefore
Then add another ball of cement, pressing it against the other cement and against the sides of the cavity.
Before you spread the cement, place something thin between the teeth.
REMEMBER: Decay stops growing only when the cement covers it completely and tightly.
Keep adding cement until the cavity is over-filled. Smooth the extra cement against the edge of the cavity.
If a cavity goes down between two teeth, one other step is necessary. You need to take care that the cement does not squeeze and hurt the gum.
Where There Is No Dentist 2012
150
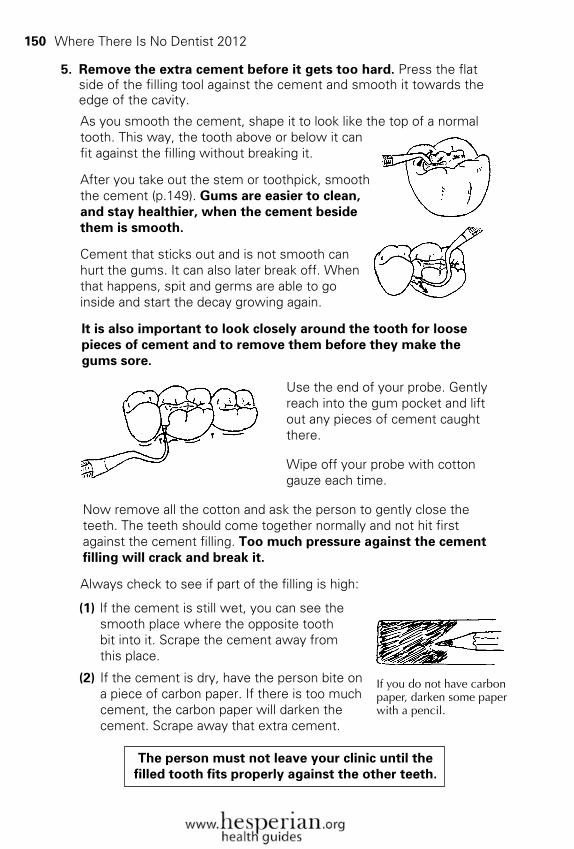
5. Remove the extra cement before it gets too hard. Press the flat side of the filling tool against the cement and smooth it towards the edge of the cavity.
As you smooth the cement, shape it to look like the top of a normal tooth. This way, the tooth above or below it can fit against the filling without breaking it.
After you take out the stem or toothpick, smooth the cement (p.149). Gums are easier to clean, and stay healthier, when the cement beside them is smooth.
Cement that sticks out and is not smooth can hurt the gums. It can also later break off. When that happens, spit and germs are able to go inside and start the decay growing again.
It is also important to look closely around the tooth for loose pieces of cement and to remove them before they make the gums sore.
Use the end of your probe. Gently reach into the gum pocket and lift out any pieces of cement caught there.
Wipe off your probe with cotton gauze each time.
Now remove all the cotton and ask the person to gently close the teeth. The teeth should come together normally and not hit first against the cement filling. Too much pressure against the cement filling will crack and break it.
Always check to see if part of the filling is high:
(1) lf the cement is still wet, you can see the smooth place where the opposite tooth bit into it. Scrape the cement away from this place.
(2) If the cement is dry, have the person bite on a piece of carbon paper. If there is too much cement, the carbon paper will darken the cement. Scrape away that extra cement.
If you do not have carbon paper, darken some paper with a pencil.
The person must not leave your clinic until the filled tooth fits properly against the other teeth.
Where There Is No Dentist 2012
151
AFTER YOU FINISH PLACING THE FILLINGExplain to the person how to take care of the filling so it will not break:
• Do not eat or drink anything for 1 hour—let the filling get hard and strong.
• Try not to use that tooth for biting or chewing after getting a cement filling. Until there is a permanent filling, the cement and sides of the cavity are weak. They cannot take much pressure.
If the tooth hurts more after you place the filling, there is probably an abscess. Take out the tooth. If you cannot take out the tooth immediately because of swelling, take out the filling to relieve the pressure, and take out the tooth after you treat the swelling (page 93).
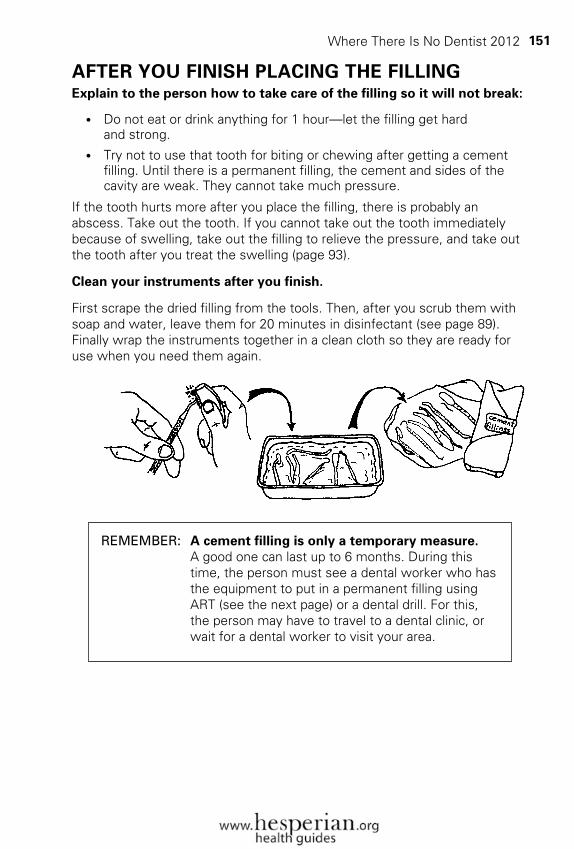
Clean your instruments after you finish.
First scrape the dried filling from the tools. Then, after you scrub them with soap and water, leave them for 20 minutes in disinfectant (see page 89). Finally wrap the instruments together in a clean cloth so they are ready for use when you need them again.
REMEMBER: A cement filling is only a temporary measure. A good one can last up to 6 months. During this time, the person must see a dental worker who has the equipment to put in a permanent filling using ART (see the next page) or a dental drill. For this, the person may have to travel to a dental clinic, or wait for a dental worker to visit your area.
Where There Is No Dentist 2012
152
HOW TO PLACE A PERMANENT FILLING USING ART Atraumatic Restorative Treatment (ART) is a way to place a permanent filling without using an expensive dental drill. This method was invented in Tanzania, East Africa, and it is now being used by dental workers in many parts of the world.
The process for placing a permanent filling using ART is similar to placing a temporary cement filling, but instead of cement you use a sticky material called glass ionomer. Once glass ionomer is in the cavity, it releases fluoride (page 226) and helps prevent new cavities from forming.
thE instRuMEnts anD Filling MatERial you nEED FoR aRt
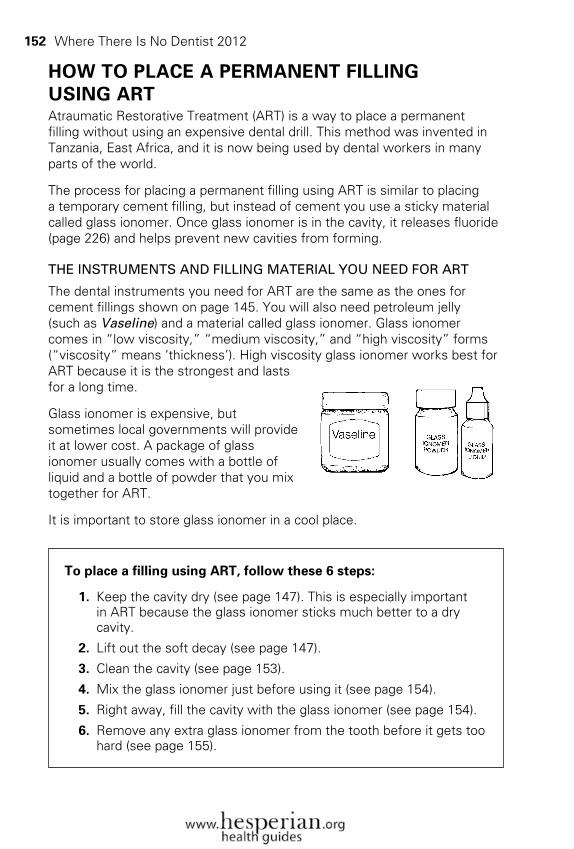
The dental instruments you need for ART are the same as the ones for cement fillings shown on page 145. You will also need petroleum jelly (such as Vaseline) and a material called glass ionomer. Glass ionomer comes in “low viscosity,” “medium viscosity,” and “high viscosity” forms (“viscosity” means ‘thickness’). High viscosity glass ionomer works best for ART because it is the strongest and lasts for a long time.
Glass ionomer is expensive, but sometimes local governments will provide it at lower cost. A package of glass ionomer usually comes with a bottle of liquid and a bottle of powder that you mix together for ART.
It is important to store glass ionomer in a cool place.
To place a filling using ART, follow these 6 steps:
1. Keep the cavity dry (see page 147). This is especially important in ART because the glass ionomer sticks much better to a dry cavity.
2. Lift out the soft decay (see page 147).
3. Clean the cavity (see page 153).
4. Mix the glass ionomer just before using it (see page 154).
5. Right away, fill the cavity with the glass ionomer (see page 154).
6. Remove any extra glass ionomer from the tooth before it gets too hard (see page 155).
Where There Is No Dentist 2012
153
Follow steps 1 and 2 on pages 147 to 148. Then return here for steps 3 to 6.
3. Clean the cavity. After you have removed the decay, clean the cavity so that the glass ionomer will stick well. The best way to do this is with the liquid from the glass ionomer.
Put one drop of glass ionomer liquid on the glass slab. Using the tweezers, pick up a piece of cotton, dampen it in water, then dip it into the glass ionomer liquid. Use the cotton to clean the cavity.
Use another piece of cotton dipped only in water to wash the cavity out. Use a new piece of cotton to wipe out the cavity and dry it.
Put a piece of cotton inside the cavity while you mix the glass ionomer. This will keep the cavity dry.
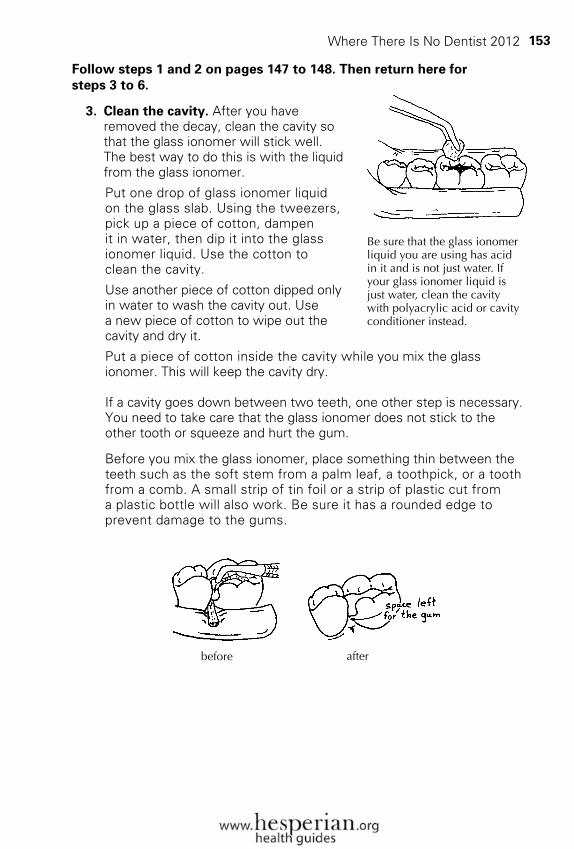
If a cavity goes down between two teeth, one other step is necessary. You need to take care that the glass ionomer does not stick to the other tooth or squeeze and hurt the gum.
Before you mix the glass ionomer, place something thin between the teeth such as the soft stem from a palm leaf, a toothpick, or a tooth from a comb. A small strip of tin foil or a strip of plastic cut from a plastic bottle will also work. Be sure it has a rounded edge to prevent damage to the gums.
Be sure that the glass ionomer liquid you are using has acid in it and is not just water. If your glass ionomer liquid is just water, clean the cavity with polyacrylic acid or cavity conditioner instead.
afterbefore
Where There Is No Dentist 2012
154
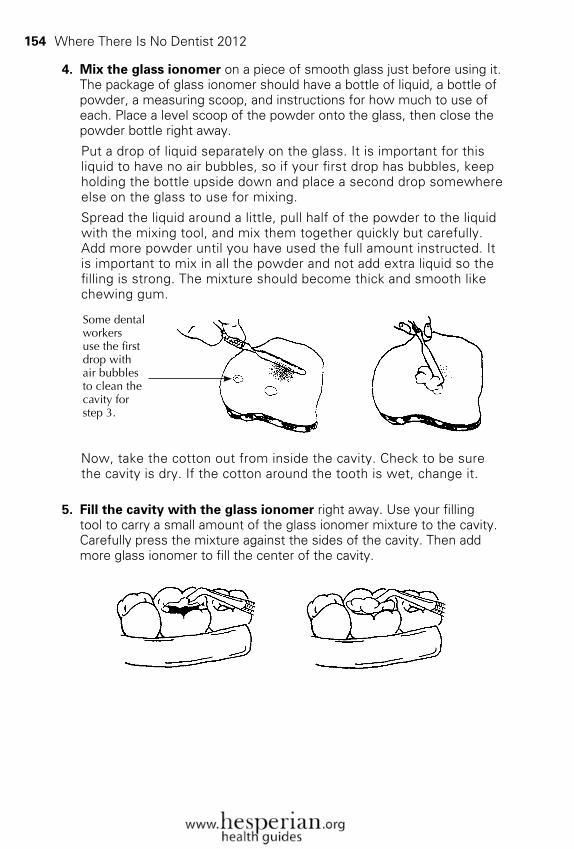
4. Mix the glass ionomer on a piece of smooth glass just before using it. The package of glass ionomer should have a bottle of liquid, a bottle of powder, a measuring scoop, and instructions for how much to use of each. Place a level scoop of the powder onto the glass, then close the powder bottle right away.
Put a drop of liquid separately on the glass. It is important for this liquid to have no air bubbles, so if your first drop has bubbles, keep holding the bottle upside down and place a second drop somewhere else on the glass to use for mixing.
Spread the liquid around a little, pull half of the powder to the liquid with the mixing tool, and mix them together quickly but carefully. Add more powder until you have used the full amount instructed. It is important to mix in all the powder and not add extra liquid so the filling is strong. The mixture should become thick and smooth like chewing gum.
Now, take the cotton out from inside the cavity. Check to be sure the cavity is dry. If the cotton around the tooth is wet, change it.
5. Fill the cavity with the glass ionomer right away. Use your filling tool to carry a small amount of the glass ionomer mixture to the cavity. Carefully press the mixture against the sides of the cavity. Then add more glass ionomer to fill the center of the cavity.
Some dental workers use the first drop with air bubbles to clean the cavity for step 3.
Where There Is No Dentist 2012
155
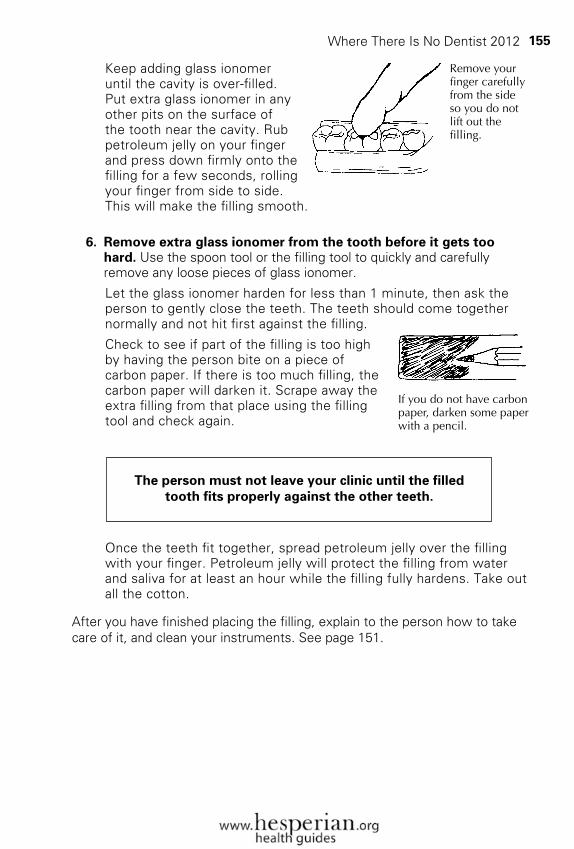
Keep adding glass ionomer until the cavity is over-filled. Put extra glass ionomer in any other pits on the surface of the tooth near the cavity. Rub petroleum jelly on your finger and press down firmly onto the filling for a few seconds, rolling your finger from side to side. This will make the filling smooth.
6. Remove extra glass ionomer from the tooth before it gets too hard. Use the spoon tool or the filling tool to quickly and carefully remove any loose pieces of glass ionomer.
Let the glass ionomer harden for less than 1 minute, then ask the person to gently close the teeth. The teeth should come together normally and not hit first against the filling.
Check to see if part of the filling is too high by having the person bite on a piece of carbon paper. If there is too much filling, the carbon paper will darken it. Scrape away the extra filling from that place using the filling tool and check again.
Once the teeth fit together, spread petroleum jelly over the filling with your finger. Petroleum jelly will protect the filling from water and saliva for at least an hour while the filling fully hardens. Take out all the cotton.
After you have finished placing the filling, explain to the person how to take care of it, and clean your instruments. See page 151.
The person must not leave your clinic until the filled tooth fits properly against the other teeth.
If you do not have carbon paper, darken some paper with a pencil.
Remove your finger carefully from the side so you do not lift out the filling.
Where There Is No Dentist 2012
156
PERMANENT FILLINGS USING A DENTAL DRILLThis chapter has shown how to place a temporary filling with cement and a permanent filling with ART. This book does not give full instructions for placing permanent fillings with a dental drill, but if you have been trained to use a dental drill, see pages 217 and 221-222 for ideas about getting equipment and resources.
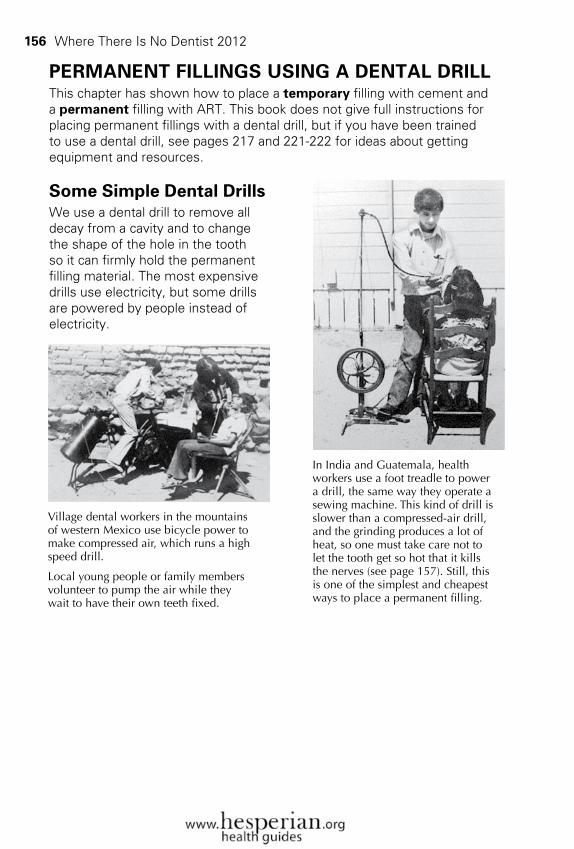
Some Simple Dental DrillsWe use a dental drill to remove all decay from a cavity and to change the shape of the hole in the tooth so it can firmly hold the permanent filling material. The most expensive drills use electricity, but some drills are powered by people instead of electricity.
Village dental workers in the mountains of western Mexico use bicycle power to make compressed air, which runs a high speed drill.
Local young people or family members volunteer to pump the air while they wait to have their own teeth fixed.
In India and Guatemala, health workers use a foot treadle to power a drill, the same way they operate a sewing machine. This kind of drill is slower than a compressed-air drill, and the grinding produces a lot of heat, so one must take care not to let the tooth get so hot that it kills the nerves (see page 157). Still, this is one of the simplest and cheapest ways to place a permanent filling.
Where There Is No Dentist 2012
157
How a Dental Drill Works
Even if you have the equipment, it is essential that you learn how to make permanent fillings from a person who has experience using a dental drill.
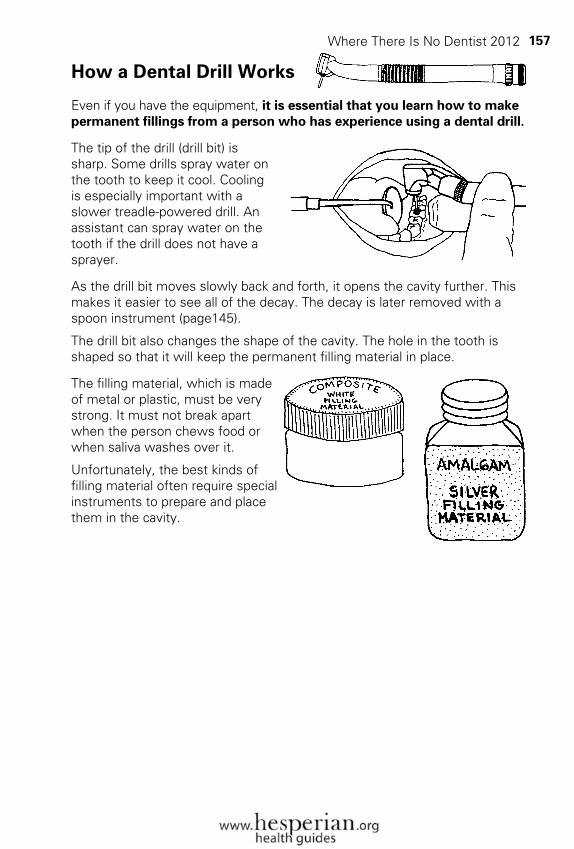
The tip of the drill (drill bit) is sharp. Some drills spray water on the tooth to keep it cool. Cooling is especially important with a slower treadle-powered drill. An assistant can spray water on the tooth if the drill does not have a sprayer.
As the drill bit moves slowly back and forth, it opens the cavity further. This makes it easier to see all of the decay. The decay is later removed with a spoon instrument (page145).
The drill bit also changes the shape of the cavity. The hole in the tooth is shaped so that it will keep the permanent filling material in place.
The filling material, which is made of metal or plastic, must be very strong. It must not break apart when the person chews food or when saliva washes over it.
Unfortunately, the best kinds of filling material often require special instruments to prepare and place them in the cavity.
Where There Is No Dentist 2012