Embed Size (px)
Citation preview
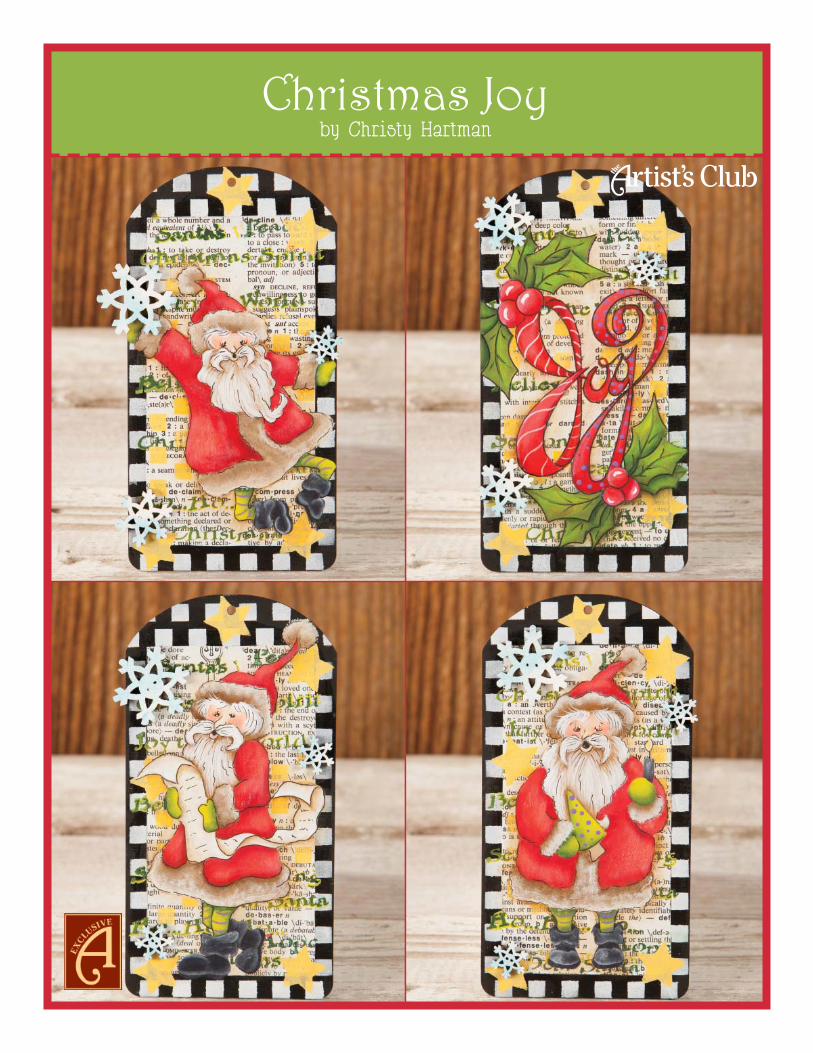
Christmas Joyby Christy Hartman
Christmas JoyBy Christy Hartman
Palette: Deco Art Americana AcrylicsAsphaltum #13180 Bright Yellow #13227Fawn #13242 Hauser Dark Green #13133Hauser Medium Green #13132 Hi-Lite Flesh #13024Lamp Black #13067 Lavender #13034 Light Buttermilk #13164 Melon #13245Moon Yellow #13007 Napa Red #13165Olive Green #13056 Peony Pink #13215Shading Flesh #13137 Snow White #13001Watermelon Slice #13557 Winter Blue #13190Glamour Dust Glitter PaintTurquoise Sparkle #13596Hot Shots/NeonsFiery Red #18000 Thermal Green #18016
Surface: Rectangle Ornament #62951 (4 were used)Snowfl ake Buttons #62856
Misc. Supplies:Deco Art Decou-Page Matte #83209Deco Art Dura-Clear Matte Varnish #87395Deco Art Multi-Purpose Wood Sealer #87392Deco Art Wood Glue #70246Mini Christmas Words Stencil #70879Checkerboard Stencil #70841Large Sanding Pad - Fine/Medium #70796Foam Brush 1” – set of 4 #70171Identi Pen Black #70830Saral Wax FreeTransfer Paper (Sampler Pack) #82069 Sharp Scissors/Craft KnifeSoft Grip Embossing & Stylus – set of 3 #70125Tack Cloth #70104Book Paper cut to 5” tall and 2 ½” wide (any book paper works including paper out of old paper-back books, dictionary, etc)
Brushes: Papillon by the Artist’s ClubRound, size 2 #20158; size 4 #20161Shader, size 8 #20129Filbert Comb, size 1/8” #20104Glaze Wash, size 1” #20103Highlighter Set #20173Script Liner, size 18/0 #201361
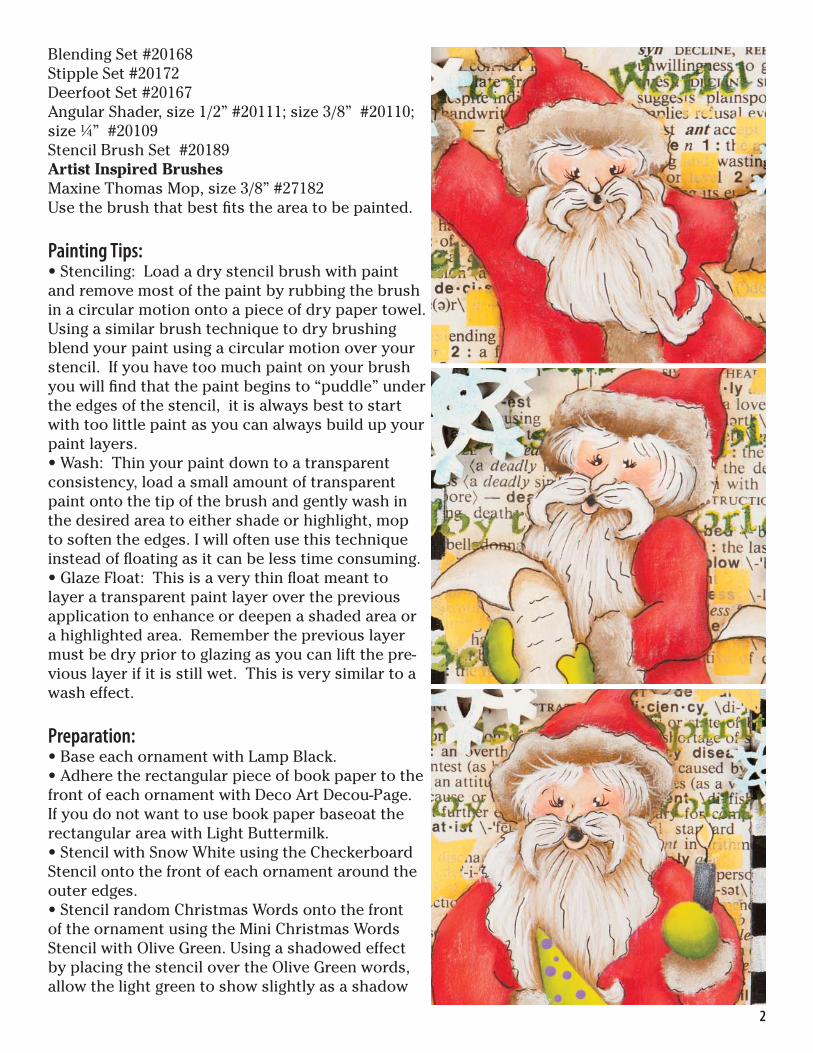
Blending Set #20168Stipple Set #20172Deerfoot Set #20167Angular Shader, size 1/2” #20111; size 3/8” #20110; size ¼” #20109Stencil Brush Set #20189Artist Inspired BrushesMaxine Thomas Mop, size 3/8” #27182Use the brush that best fi ts the area to be painted.
Painting Tips: • Stenciling: Load a dry stencil brush with paint and remove most of the paint by rubbing the brush in a circular motion onto a piece of dry paper towel. Using a similar brush technique to dry brushing blend your paint using a circular motion over your stencil. If you have too much paint on your brush you will fi nd that the paint begins to “puddle” under the edges of the stencil, it is always best to start with too little paint as you can always build up your paint layers. • Wash: Thin your paint down to a transparent consistency, load a small amount of transparent paint onto the tip of the brush and gently wash in the desired area to either shade or highlight, mop to soften the edges. I will often use this technique instead of fl oating as it can be less time consuming. • Glaze Float: This is a very thin fl oat meant to layer a transparent paint layer over the previous application to enhance or deepen a shaded area or a highlighted area. Remember the previous layer must be dry prior to glazing as you can lift the pre-vious layer if it is still wet. This is very similar to a wash effect.
Preparation: • Base each ornament with Lamp Black.• Adhere the rectangular piece of book paper to the front of each ornament with Deco Art Decou-Page. If you do not want to use book paper baseoat the rectangular area with Light Buttermilk. • Stencil with Snow White using the Checkerboard Stencil onto the front of each ornament around the outer edges. • Stencil random Christmas Words onto the front of the ornament using the Mini Christmas Words Stencil with Olive Green. Using a shadowed effect by placing the stencil over the Olive Green words, allow the light green to show slightly as a shadow
2
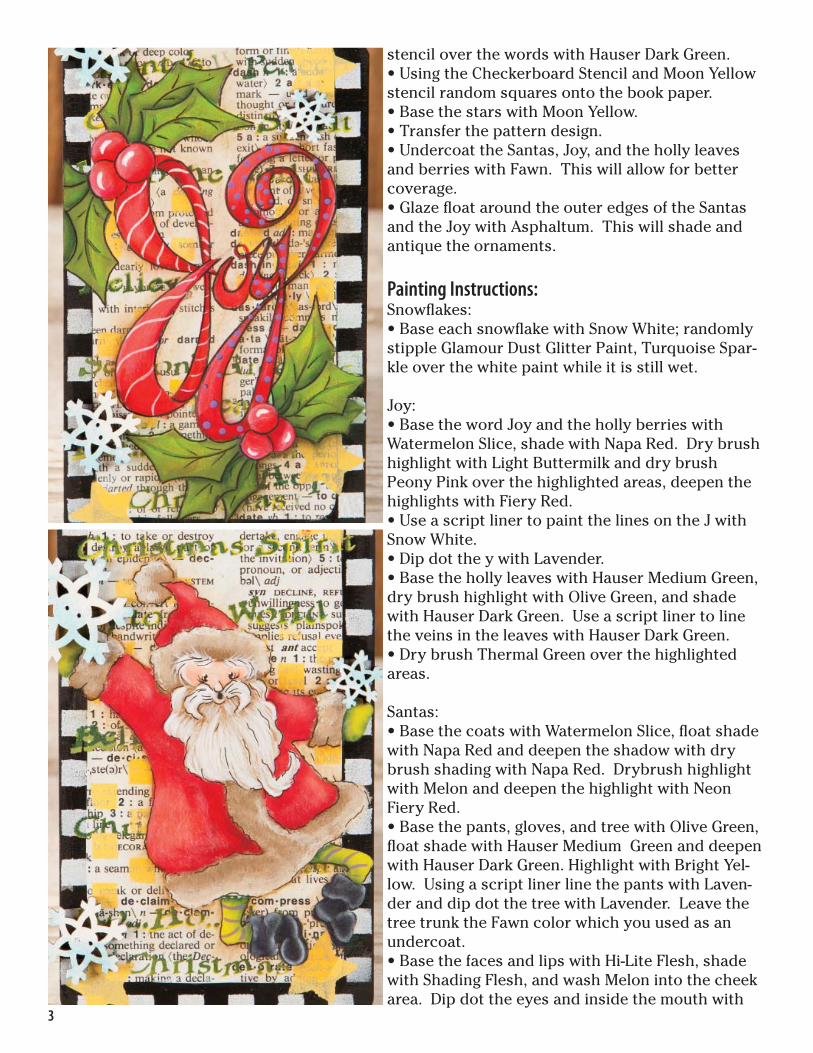
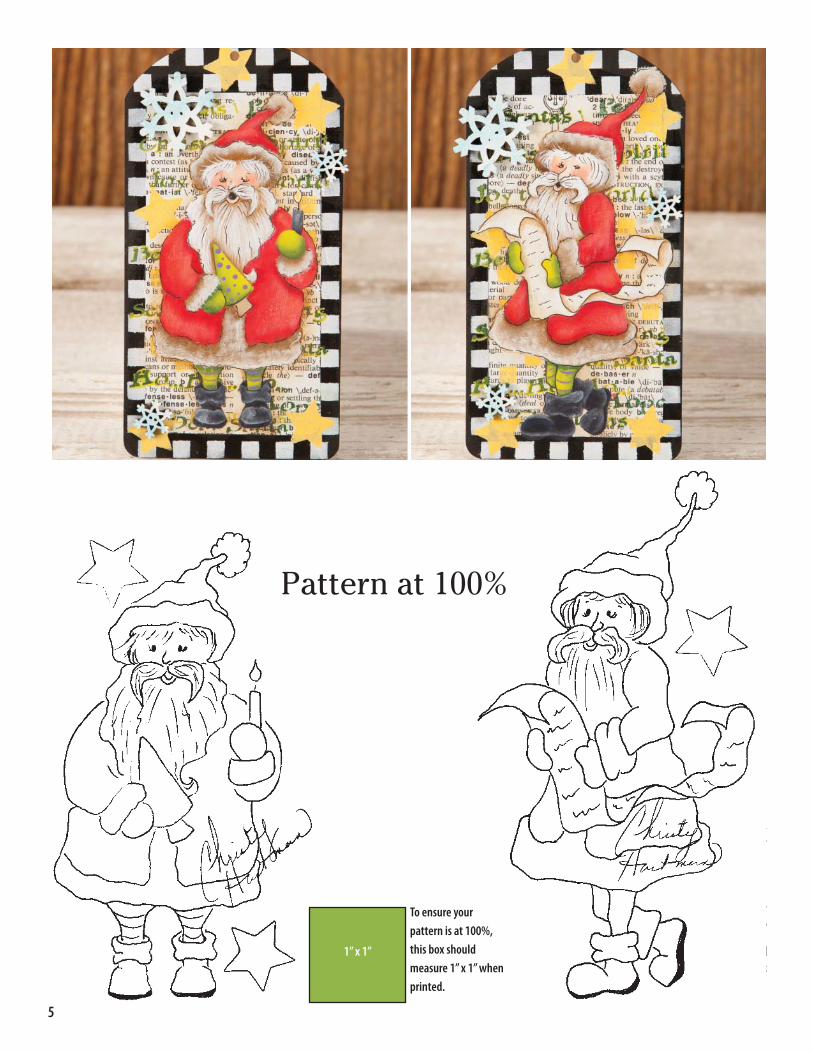
stencil over the words with Hauser Dark Green. • Using the Checkerboard Stencil and Moon Yellow stencil random squares onto the book paper. • Base the stars with Moon Yellow. • Transfer the pattern design. • Undercoat the Santas, Joy, and the holly leaves and berries with Fawn. This will allow for better coverage. • Glaze fl oat around the outer edges of the Santas and the Joy with Asphaltum. This will shade and antique the ornaments.
Painting Instructions: Snowfl akes:• Base each snowfl ake with Snow White; randomly stipple Glamour Dust Glitter Paint, Turquoise Spar-kle over the white paint while it is still wet.
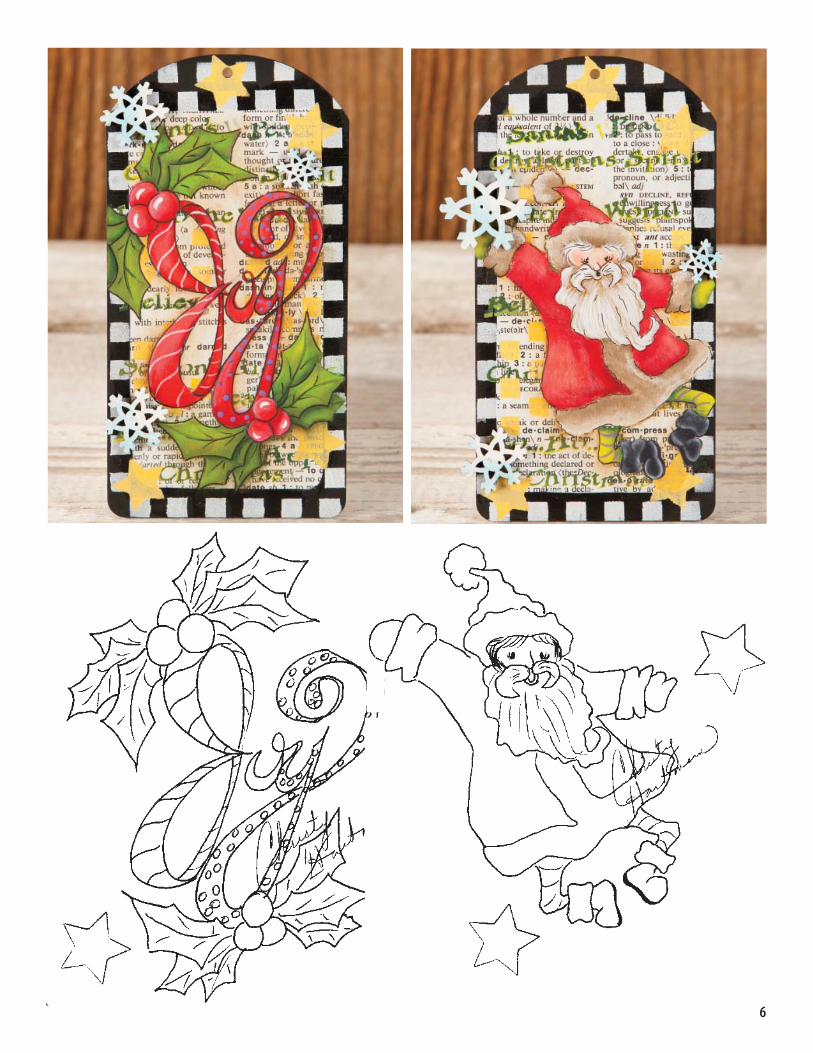
Joy: • Base the word Joy and the holly berries with Watermelon Slice, shade with Napa Red. Dry brush highlight with Light Buttermilk and dry brush Peony Pink over the highlighted areas, deepen the highlights with Fiery Red. • Use a script liner to paint the lines on the J with Snow White.• Dip dot the y with Lavender. • Base the holly leaves with Hauser Medium Green, dry brush highlight with Olive Green, and shade with Hauser Dark Green. Use a script liner to line the veins in the leaves with Hauser Dark Green.• Dry brush Thermal Green over the highlighted areas.
Santas:• Base the coats with Watermelon Slice, fl oat shade with Napa Red and deepen the shadow with dry brush shading with Napa Red. Drybrush highlight with Melon and deepen the highlight with Neon Fiery Red. • Base the pants, gloves, and tree with Olive Green, fl oat shade with Hauser Medium Green and deepen with Hauser Dark Green. Highlight with Bright Yel-low. Using a script liner line the pants with Laven-der and dip dot the tree with Lavender. Leave the tree trunk the Fawn color which you used as an undercoat. • Base the faces and lips with Hi-Lite Flesh, shade with Shading Flesh, and wash Melon into the cheek area. Dip dot the eyes and inside the mouth with
3
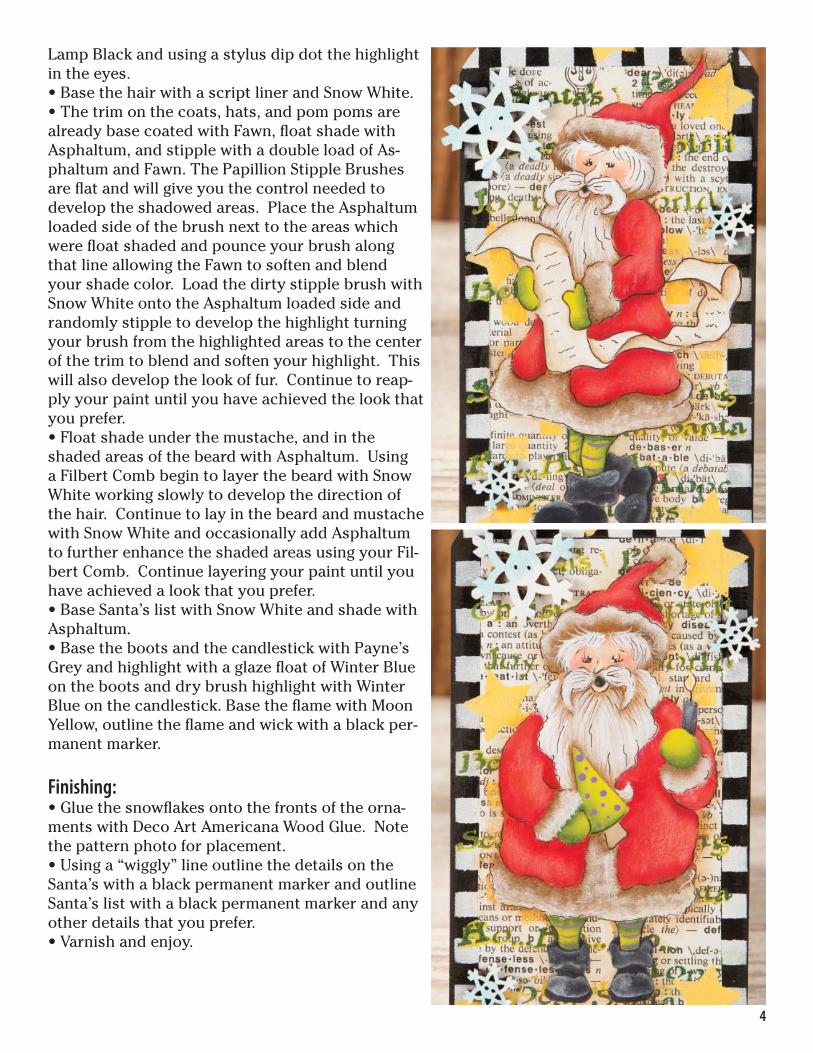
Lamp Black and using a stylus dip dot the highlight in the eyes. • Base the hair with a script liner and Snow White. • The trim on the coats, hats, and pom poms are already base coated with Fawn, fl oat shade with Asphaltum, and stipple with a double load of As-phaltum and Fawn. The Papillion Stipple Brushes are fl at and will give you the control needed to develop the shadowed areas. Place the Asphaltum loaded side of the brush next to the areas which were fl oat shaded and pounce your brush along that line allowing the Fawn to soften and blend your shade color. Load the dirty stipple brush with Snow White onto the Asphaltum loaded side and randomly stipple to develop the highlight turning your brush from the highlighted areas to the center of the trim to blend and soften your highlight. This will also develop the look of fur. Continue to reap-ply your paint until you have achieved the look that you prefer. • Float shade under the mustache, and in the shaded areas of the beard with Asphaltum. Using a Filbert Comb begin to layer the beard with Snow White working slowly to develop the direction of the hair. Continue to lay in the beard and mustache with Snow White and occasionally add Asphaltum to further enhance the shaded areas using your Fil-bert Comb. Continue layering your paint until you have achieved a look that you prefer. • Base Santa’s list with Snow White and shade with Asphaltum. • Base the boots and the candlestick with Payne’s Grey and highlight with a glaze fl oat of Winter Blue on the boots and dry brush highlight with Winter Blue on the candlestick. Base the fl ame with Moon Yellow, outline the fl ame and wick with a black per-manent marker.
Finishing: • Glue the snowfl akes onto the fronts of the orna-ments with Deco Art Americana Wood Glue. Note the pattern photo for placement. • Using a “wiggly” line outline the details on the Santa’s with a black permanent marker and outline Santa’s list with a black permanent marker and any other details that you prefer. • Varnish and enjoy.
4
5
1” x 1”
To ensure your pattern is at 100%, this box should measure 1” x 1” when printed.
Pattern at 100%
6
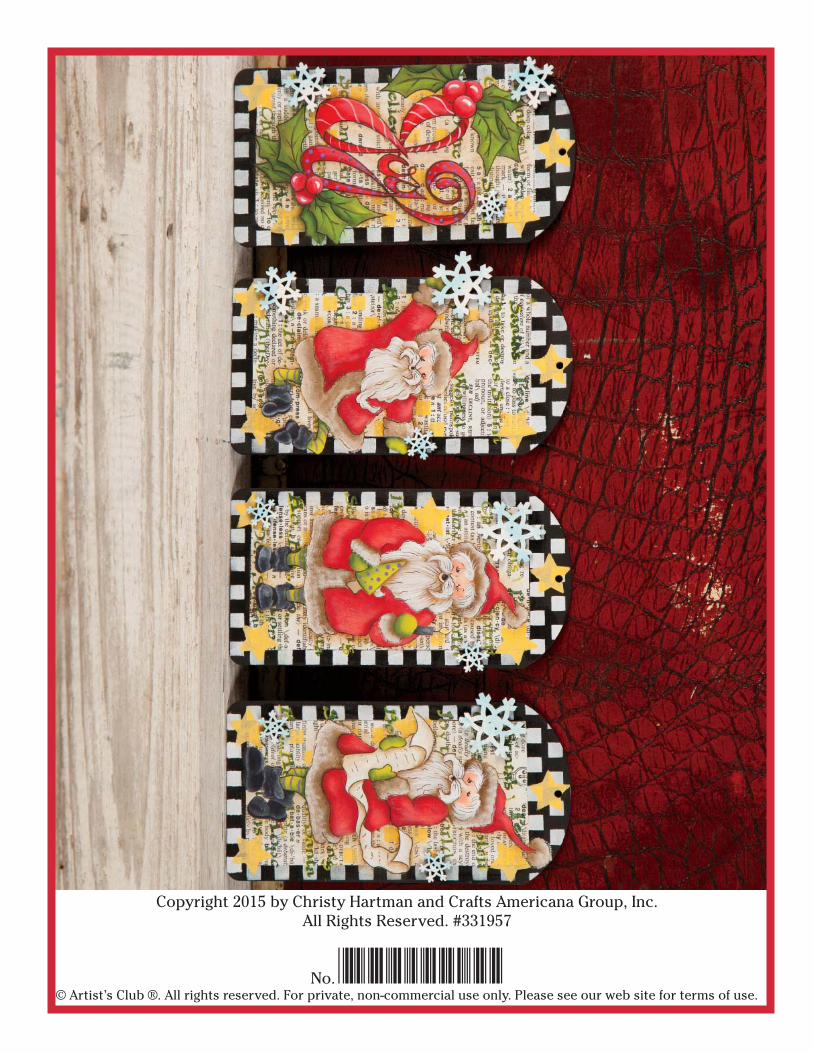
Copyright 2015 by Christy Hartman and Crafts Americana Group, Inc. All Rights Reserved. #331957
No. *A331957*© Artist’s Club ®. All rights reserved. For private, non-commercial use only. Please see our web site for terms of use.