Embed Size (px)
Citation preview
Circular Curve Information: Angles Bearings & Arcs
BEARINGS: the direction of a line specified by a given angle between the line and an established meridian, usually the north-south axis.
An angle less than or equal to 90∘measured from the North end or South end of a meridian to the east or west (includes quadrant identifier).
For Example, N 24∘06’ 15” E
We will measure and note all our tangents with a BEARING & a Length
North
South
West East
N24∘06’ 15”E
1Tuesday, April 27, 2010
What do we do for this Project with Bearings?
All tangents from the starting point on the left side of the sheet and between curves including the ending tangent need to be labeled with bearings and length.
You get the bearings by measuring the angle with a protractor or in ACAD from the north south meridian.
Label the bearings in degrees and minutes read from your protractor, or degrees,minutes & seconds in ACAD. Note, protractor measurements are is not very accurate but we must get the practice and familiarity.
Also label the length of the tangent in feet and inches using the decimal format. Approximate the inches as best you can reading from your scale, or give them accurately in ACAD.
2Tuesday, April 27, 2010
Circular Curve Information:Tangents
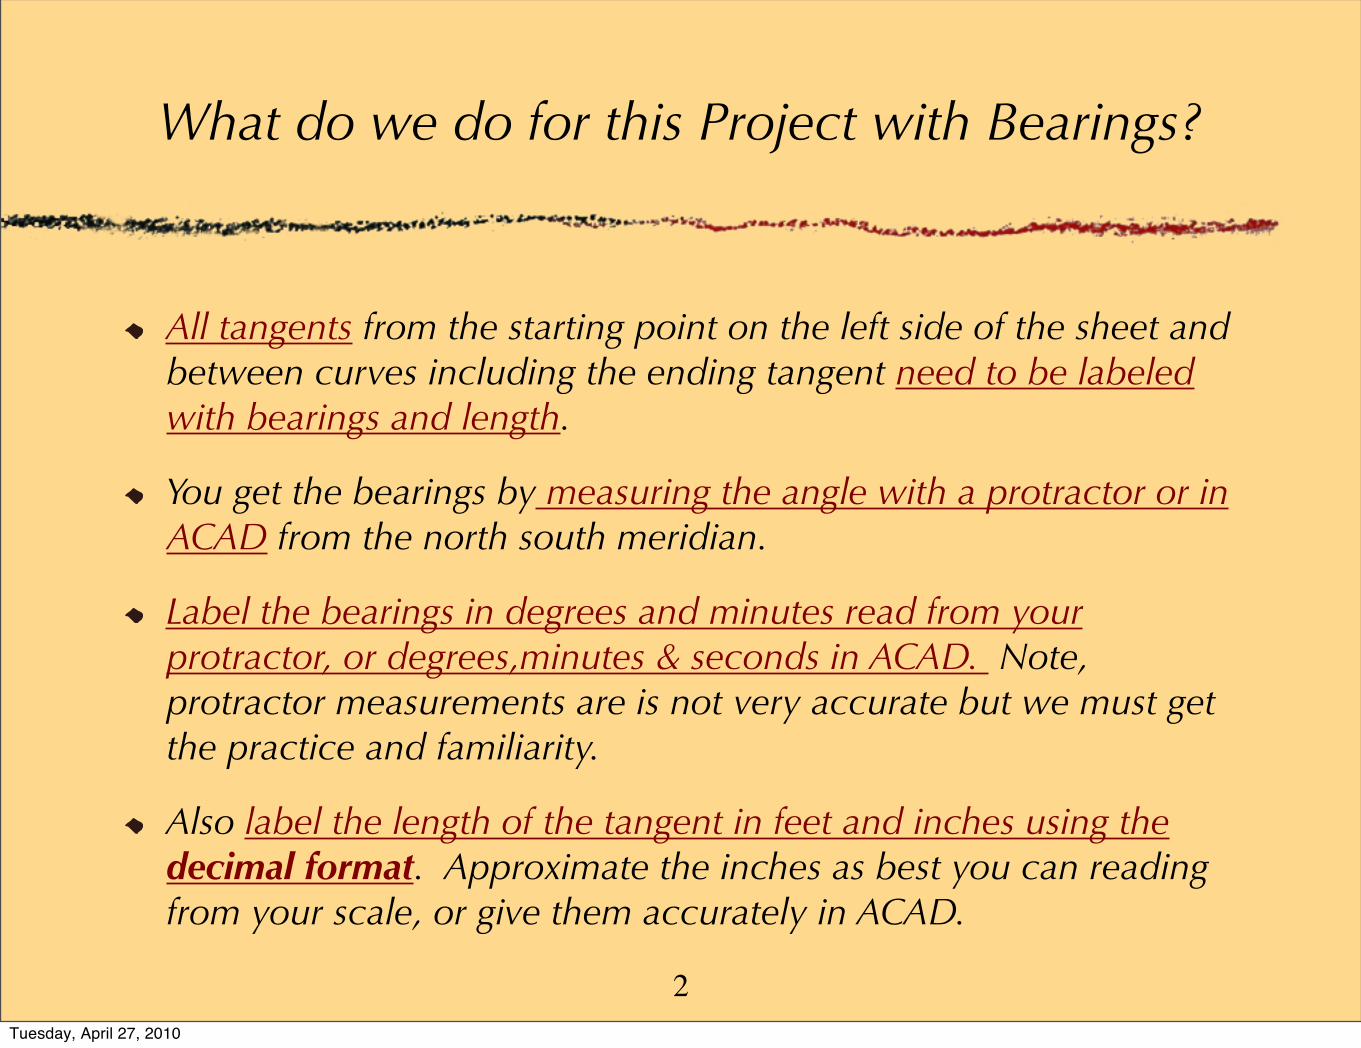
Tangents: All tangents on our road project need a bearing & a length.
Measured and Noted along the Center Line of an element ~ our road in this case
Denotes a direction & distance of travel, from a starting point to an ending point with a bearing and a length.
N24
∘06’
15”
E46
1.50
Gives length of tangent line in feet and decimals of a foot. Here, 461’ 6”
Gives direction of tangent relative to the the North South Meridian
3Tuesday, April 27, 2010
Calculations ~ The Length of Curve (L)
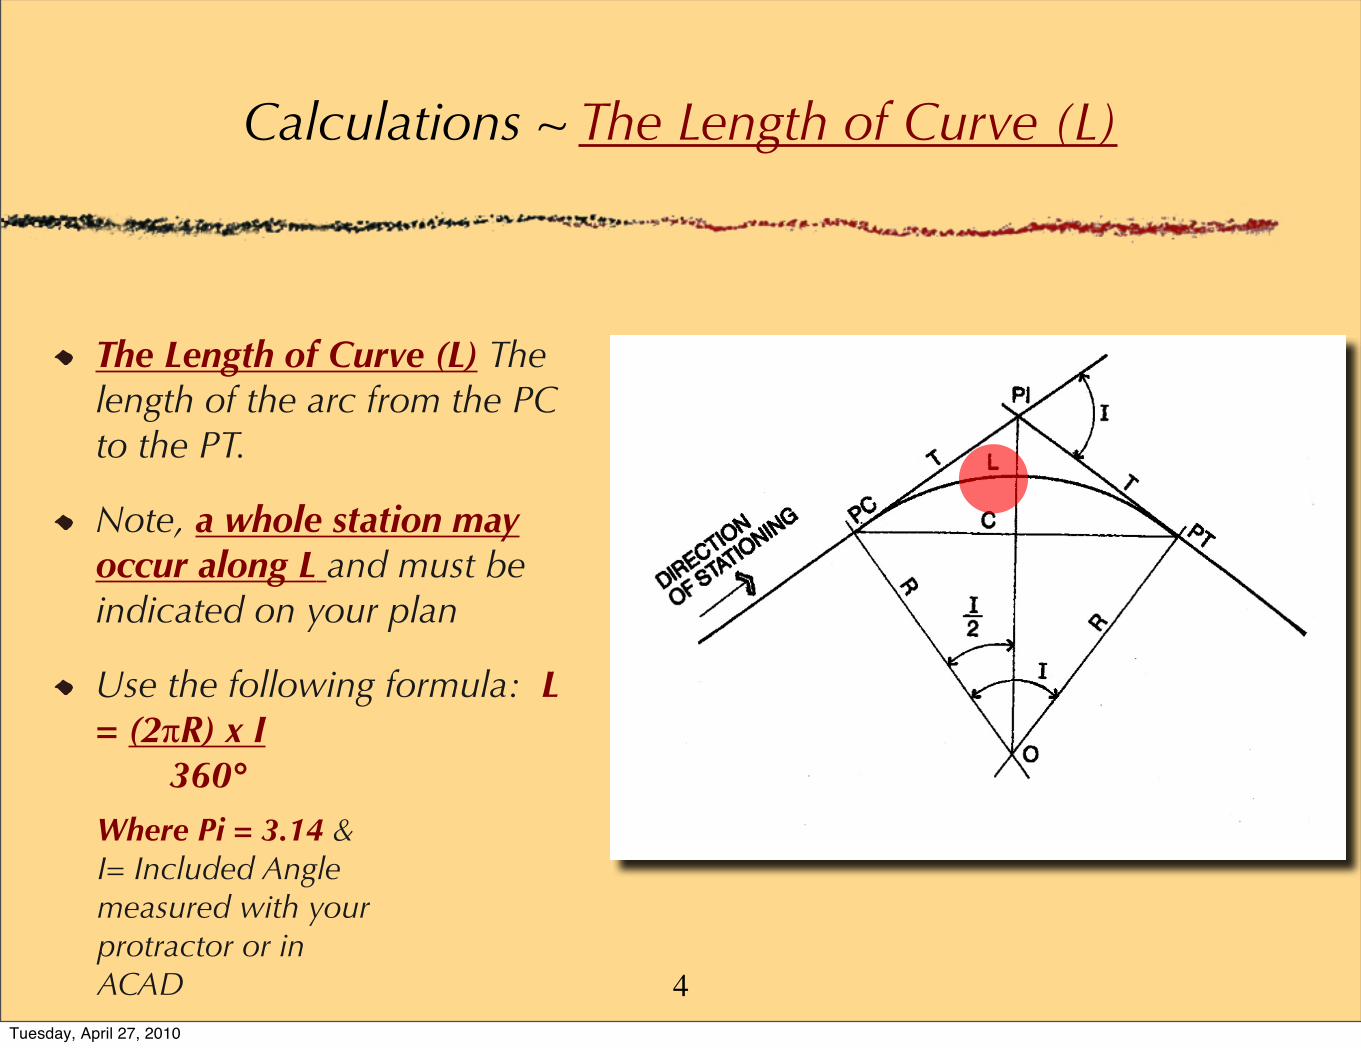
The Length of Curve (L) The length of the arc from the PC to the PT.
Note, a whole station may occur along L and must be indicated on your plan
Use the following formula: L = (2πR) x I
360°Where Pi = 3.14 & I= Included Angle measured with your protractor or in ACAD 4
Tuesday, April 27, 2010
What to Measure? What to Calculate
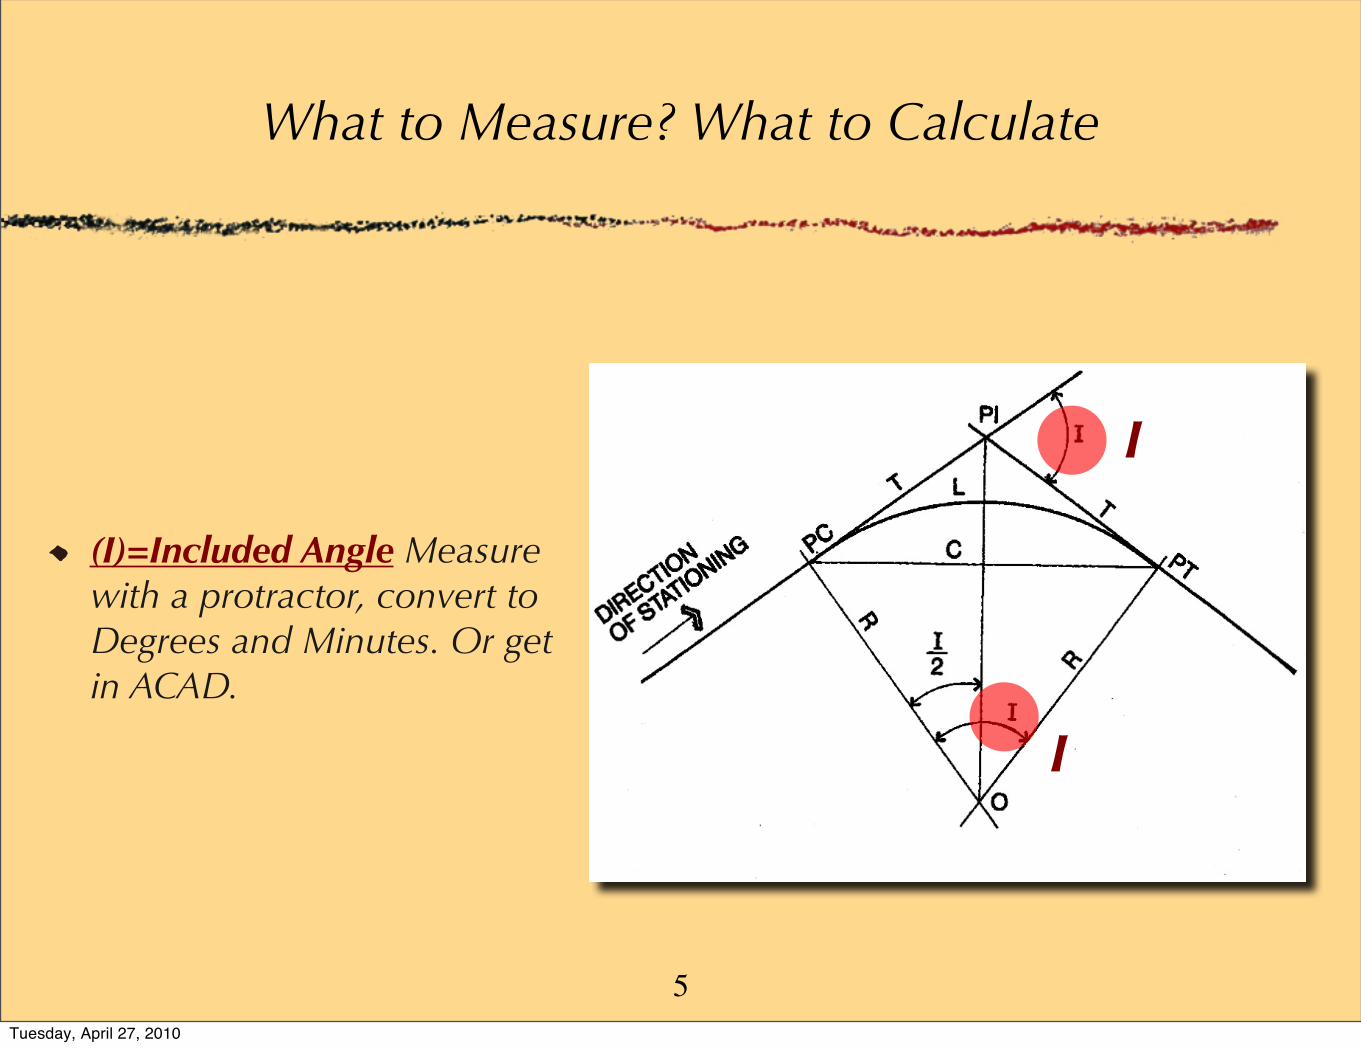
(I)=Included Angle Measure with a protractor, convert to Degrees and Minutes. Or get in ACAD.
I
I
5Tuesday, April 27, 2010
What to Measure? What to Calculate
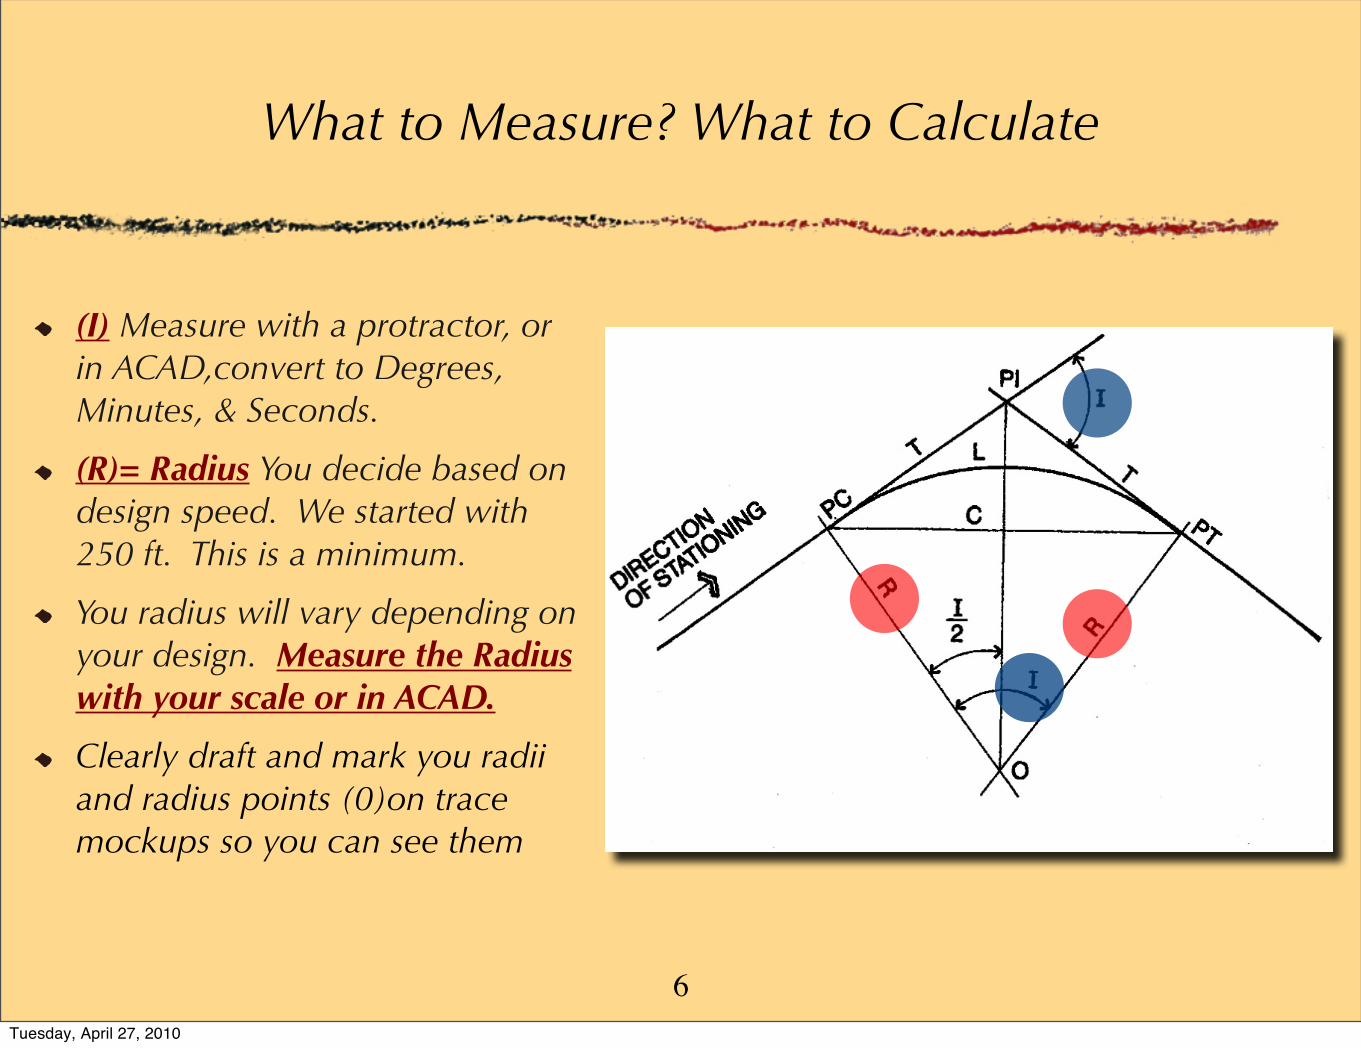
(I) Measure with a protractor, or in ACAD,convert to Degrees, Minutes, & Seconds.
(R)= Radius You decide based on design speed. We started with 250 ft. This is a minimum.
You radius will vary depending on your design. Measure the Radius with your scale or in ACAD.
Clearly draft and mark you radii and radius points (0)on trace mockups so you can see them
6Tuesday, April 27, 2010
What to Measure? What to Calculate
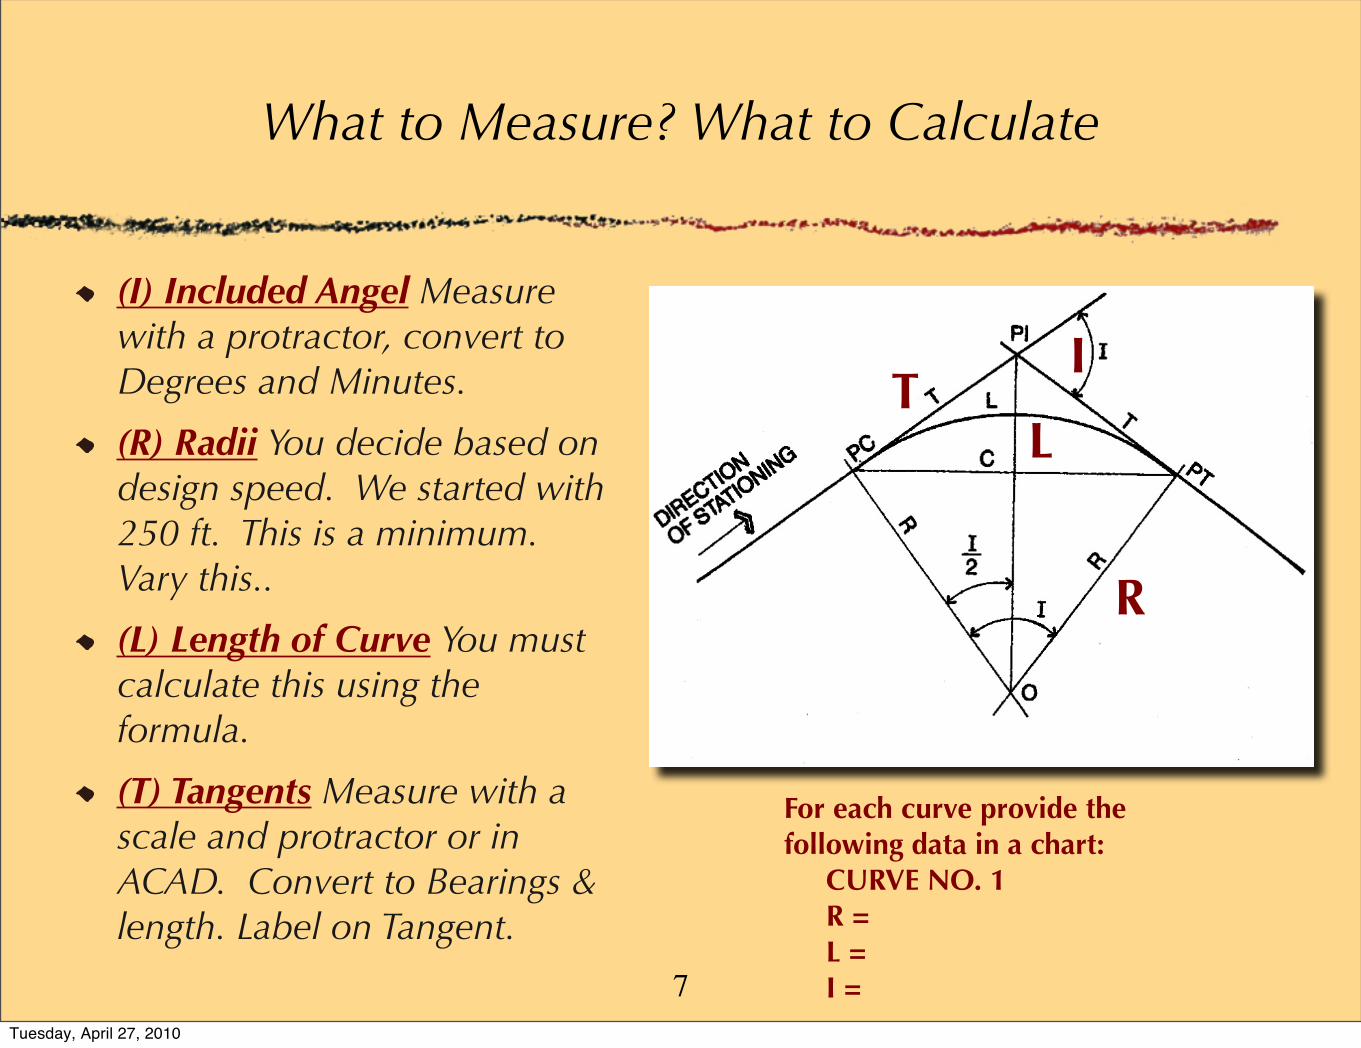
(I) Included Angel Measure with a protractor, convert to Degrees and Minutes.
(R) Radii You decide based on design speed. We started with 250 ft. This is a minimum. Vary this..
(L) Length of Curve You must calculate this using the formula.
(T) Tangents Measure with a scale and protractor or in ACAD. Convert to Bearings & length. Label on Tangent.
IT
L
R
For each curve provide the following data in a chart: CURVE NO. 1 R = L = I = 7
Tuesday, April 27, 2010
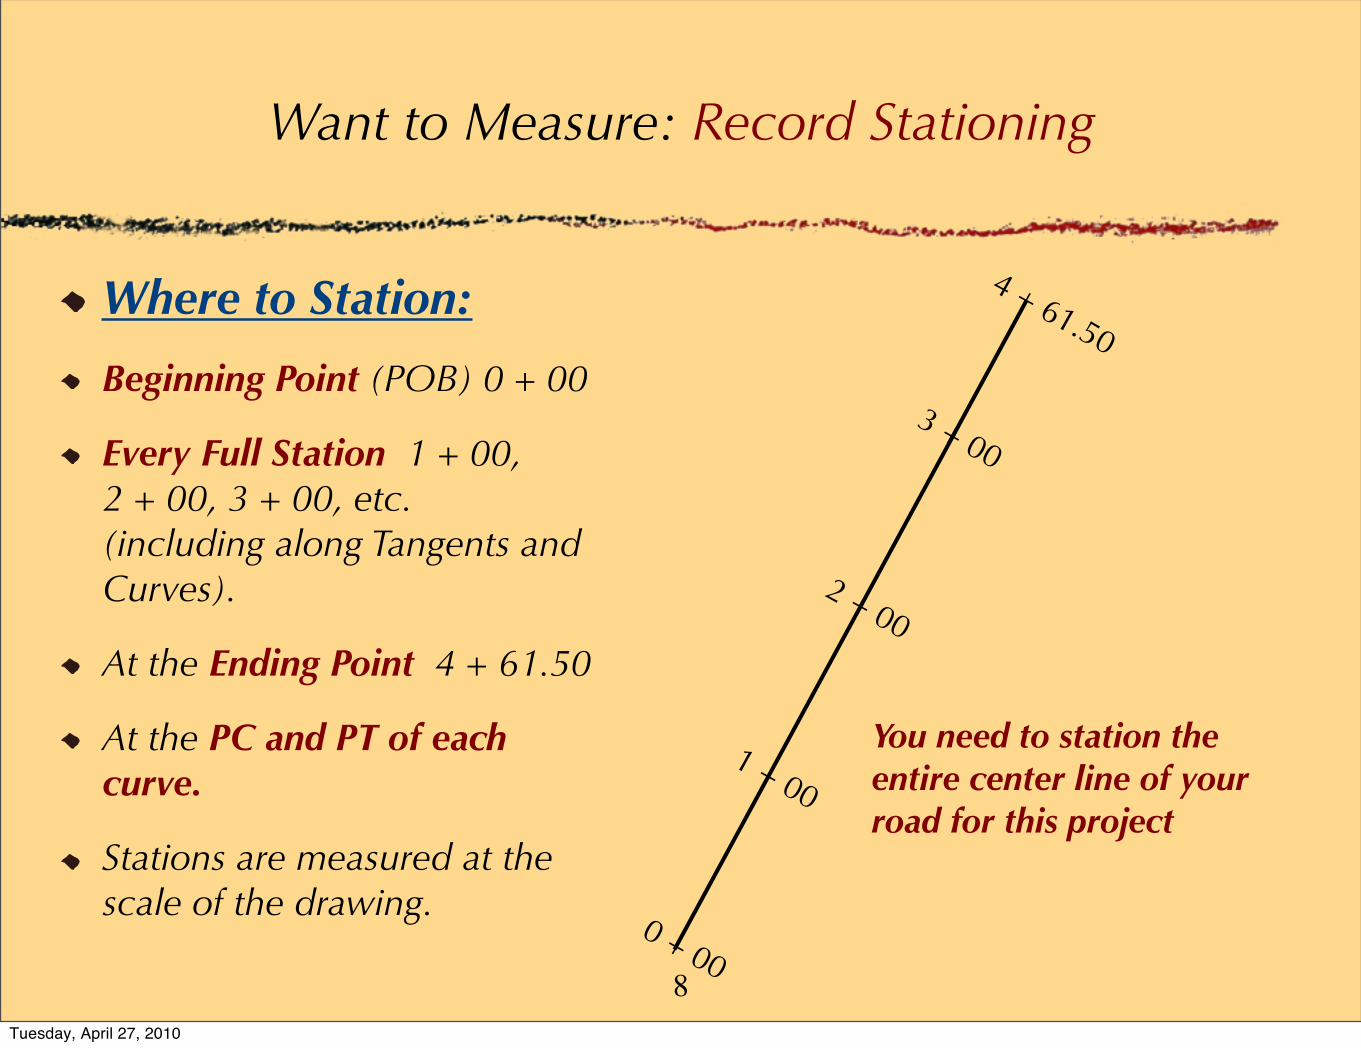
Want to Measure: Record Stationing
Where to Station:
Beginning Point (POB) 0 + 00
Every Full Station 1 + 00, 2 + 00, 3 + 00, etc. (including along Tangents and Curves).
At the Ending Point 4 + 61.50
At the PC and PT of each curve.
Stations are measured at the scale of the drawing.
1 + 00
0 + 00
2 + 00
3 + 00
4 + 61.50
You need to station the entire center line of your road for this project
8Tuesday, April 27, 2010
Notes on Grading the Road
Avoid multiple changes in the slope of your road.
Go for long continuous gradients with as few changes in longitudinal slope of the road as is practical
Consider the balance of cut and fill when determining the slopes of your road
Remember when you change the grade of your road, the cross slope contour angles of shoulders and side walk will change
Drain run off on adjacent land areas away from the road
9Tuesday, April 27, 2010
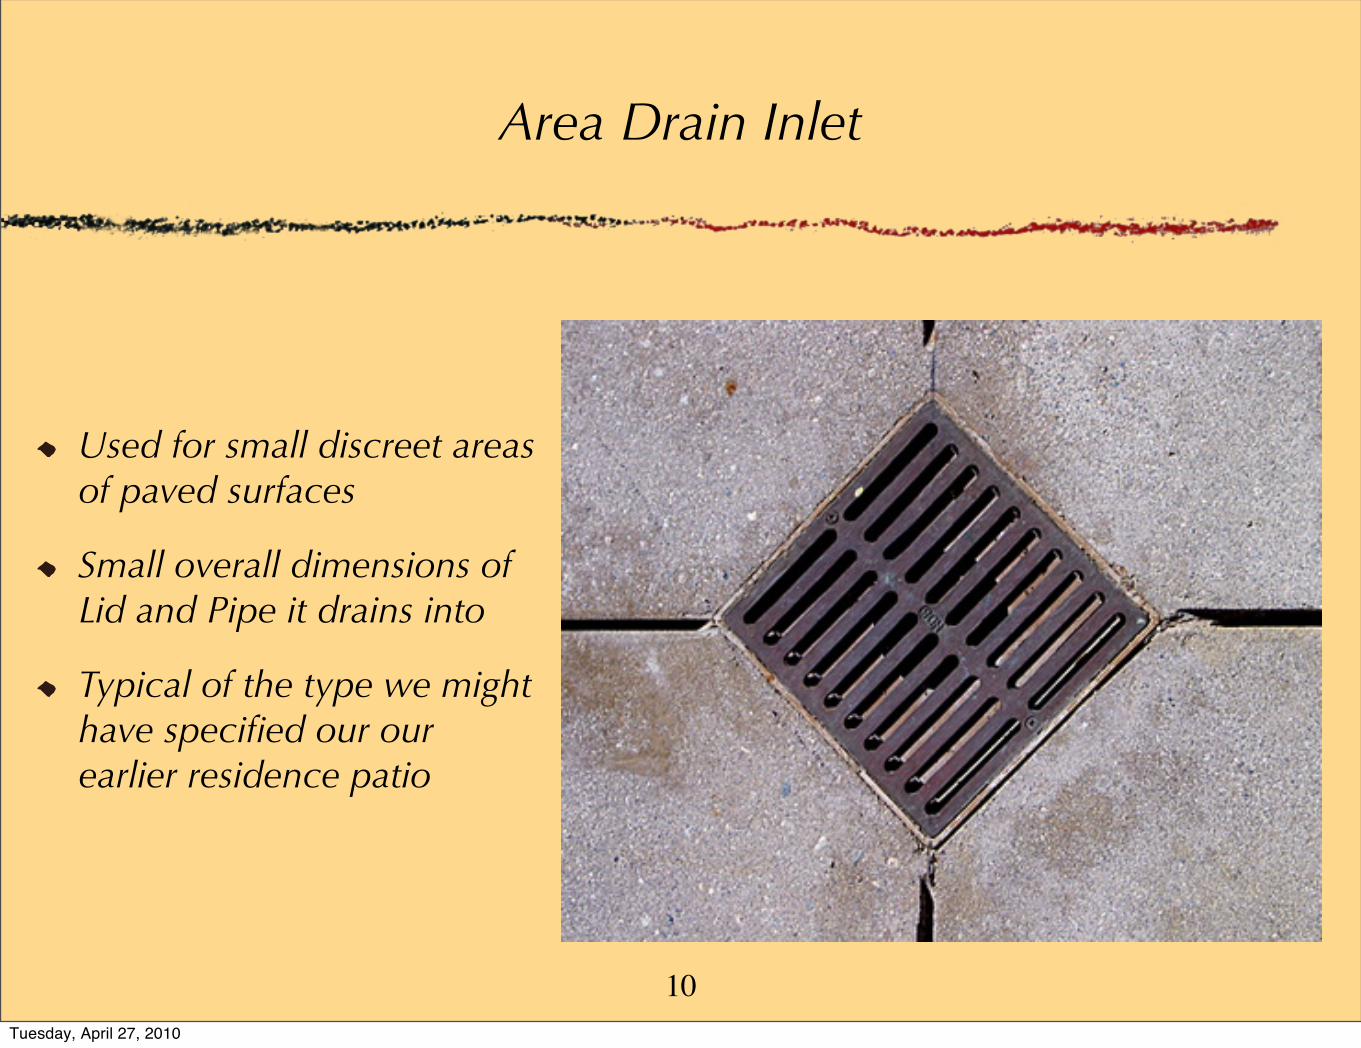
Area Drain Inlet
Used for small discreet areas of paved surfaces
Small overall dimensions of Lid and Pipe it drains into
Typical of the type we might have specified our our earlier residence patio
10Tuesday, April 27, 2010
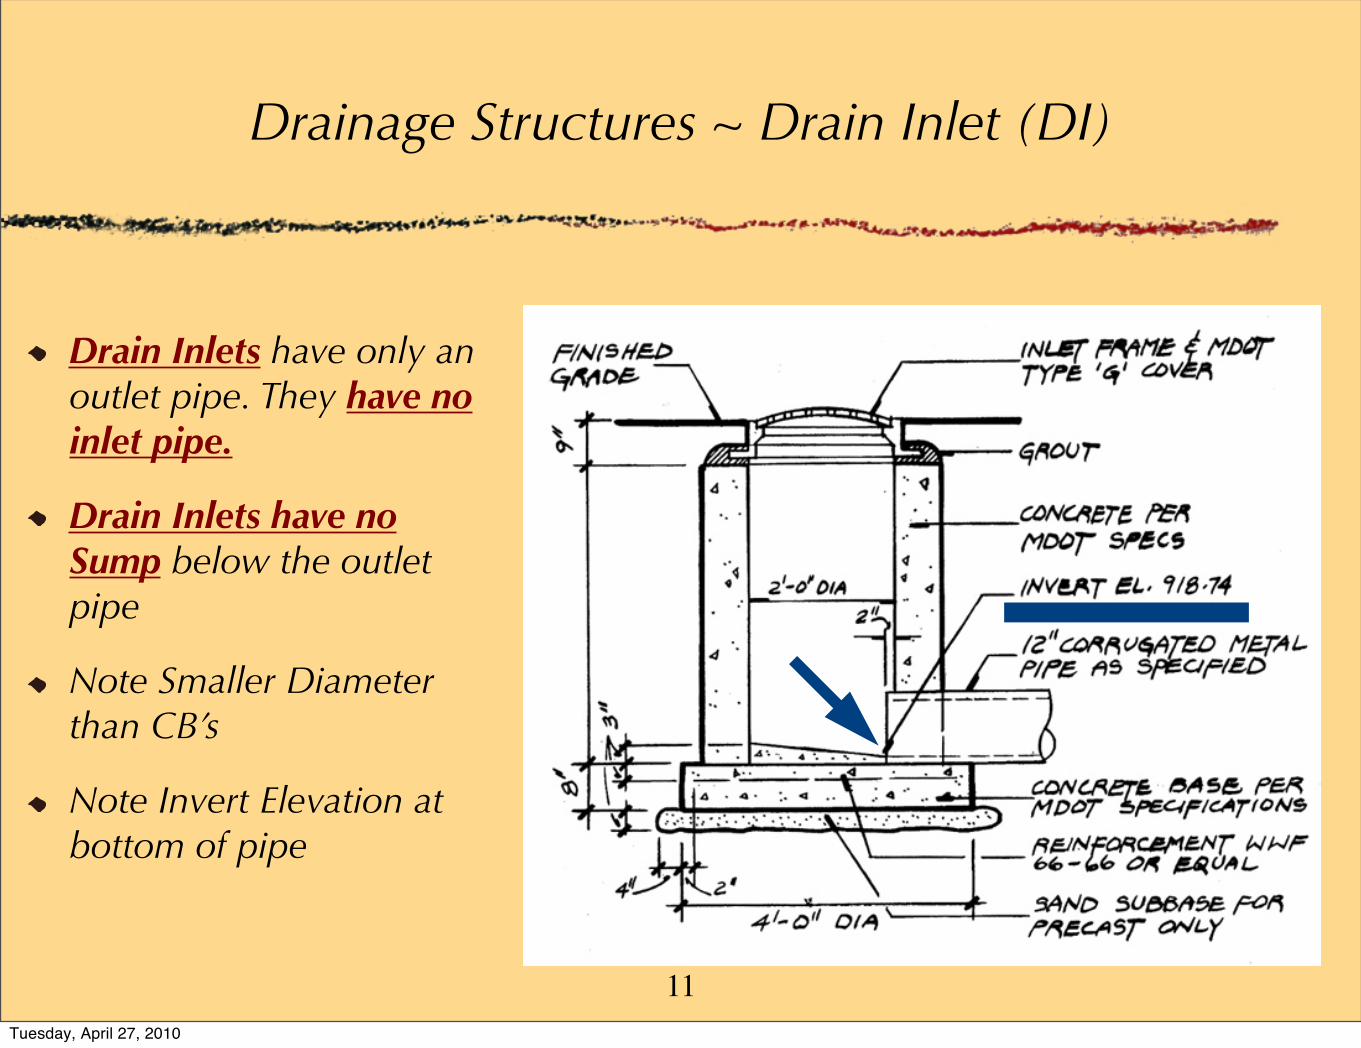
Drainage Structures ~ Drain Inlet (DI)
Drain Inlets have only an outlet pipe. They have no inlet pipe.
Drain Inlets have no Sump below the outlet pipe
Note Smaller Diameter than CB’s
Note Invert Elevation at bottom of pipe
11Tuesday, April 27, 2010
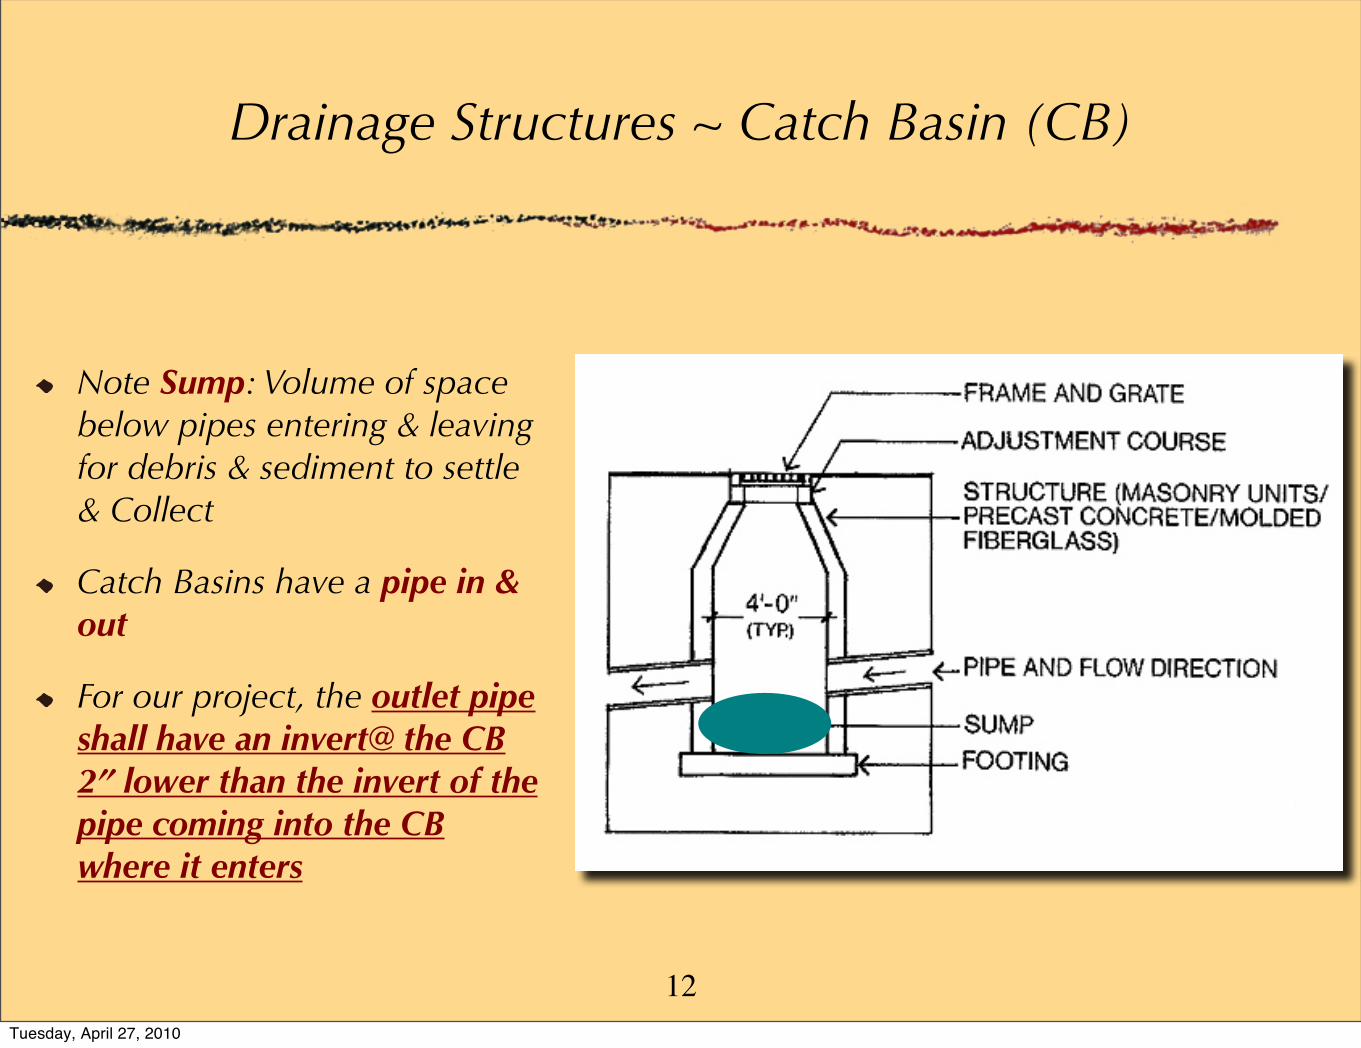
Drainage Structures ~ Catch Basin (CB)
Note Sump: Volume of space below pipes entering & leaving for debris & sediment to settle & Collect
Catch Basins have a pipe in & out
For our project, the outlet pipe shall have an invert@ the CB 2” lower than the invert of the pipe coming into the CB where it enters
12Tuesday, April 27, 2010
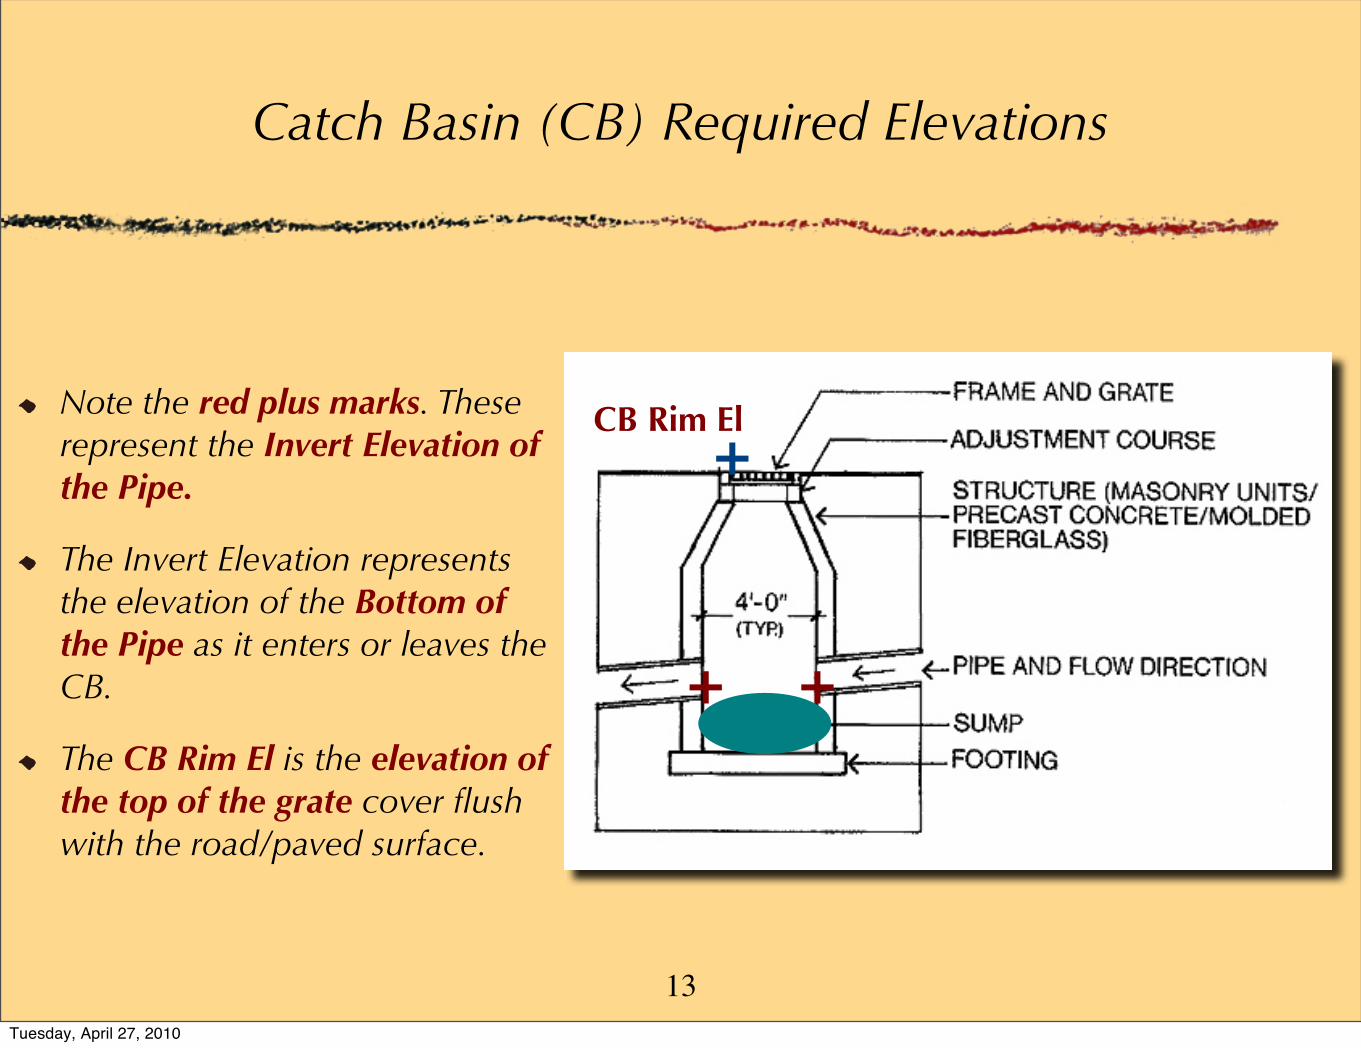
Catch Basin (CB) Required Elevations
Note the red plus marks. These represent the Invert Elevation of the Pipe.
The Invert Elevation represents the elevation of the Bottom of the Pipe as it enters or leaves the CB.
The CB Rim El is the elevation of the top of the grate cover flush with the road/paved surface.
+ +
+CB Rim El
13Tuesday, April 27, 2010
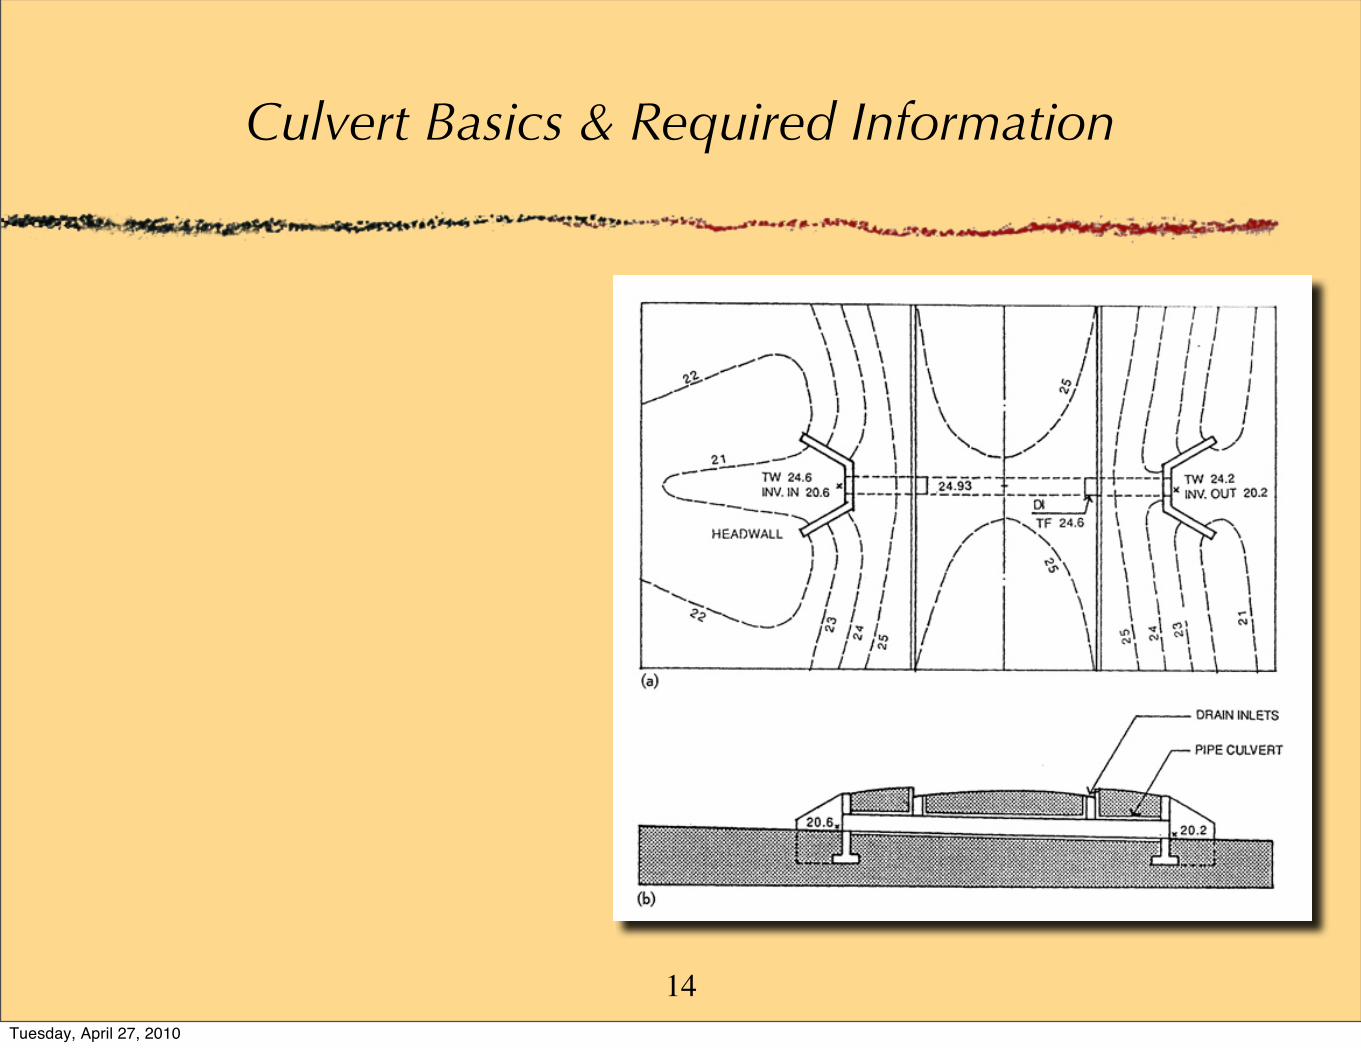
Culvert Basics & Required Information
14Tuesday, April 27, 2010
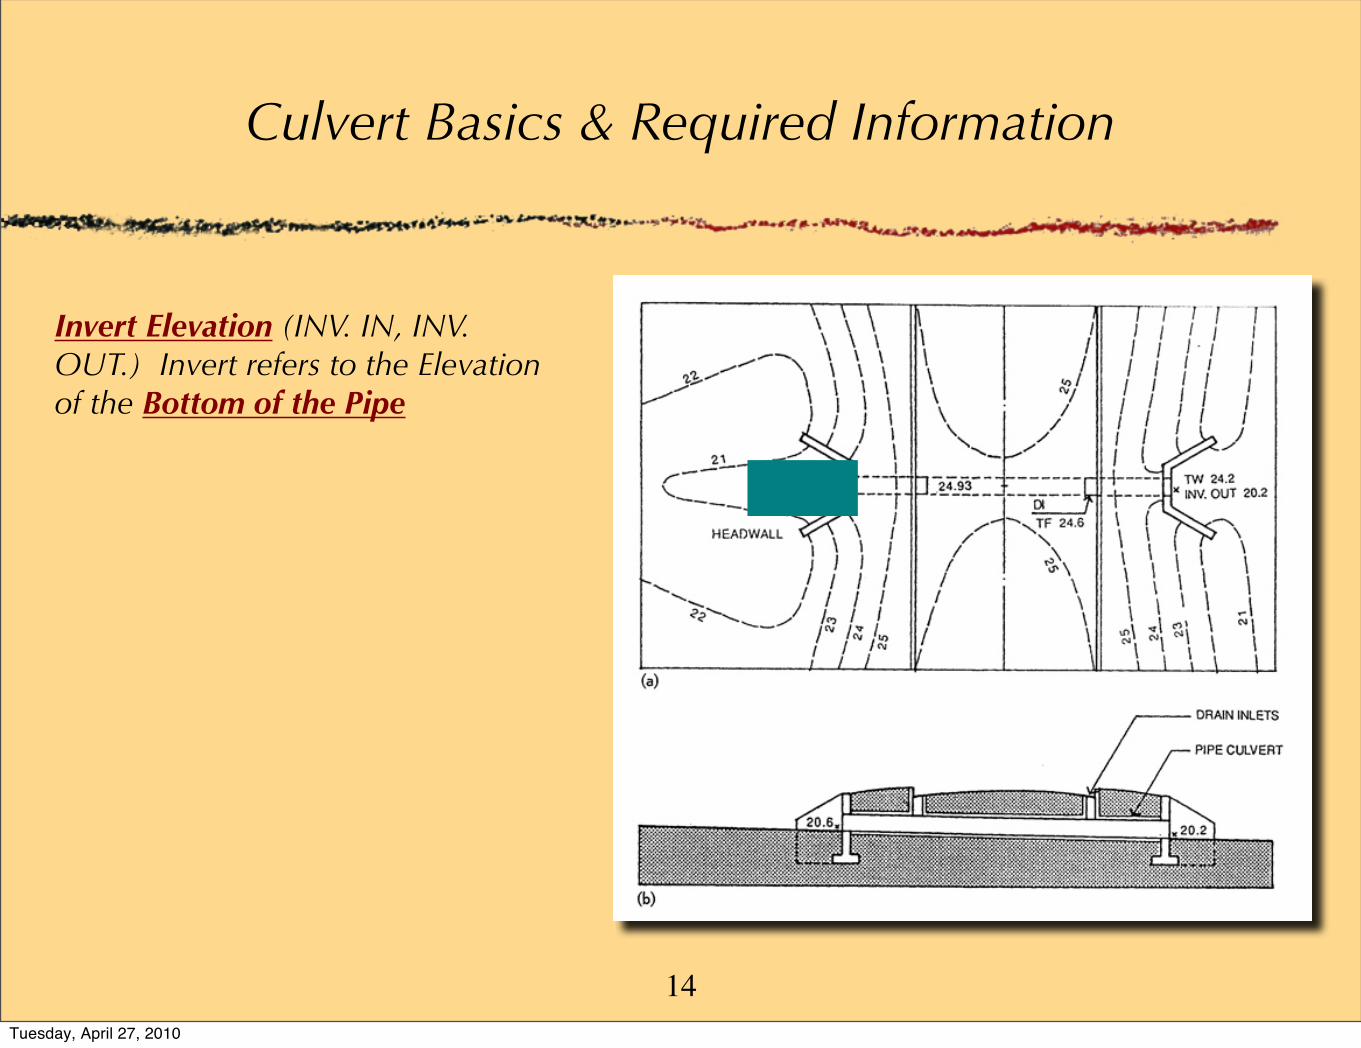
Culvert Basics & Required Information
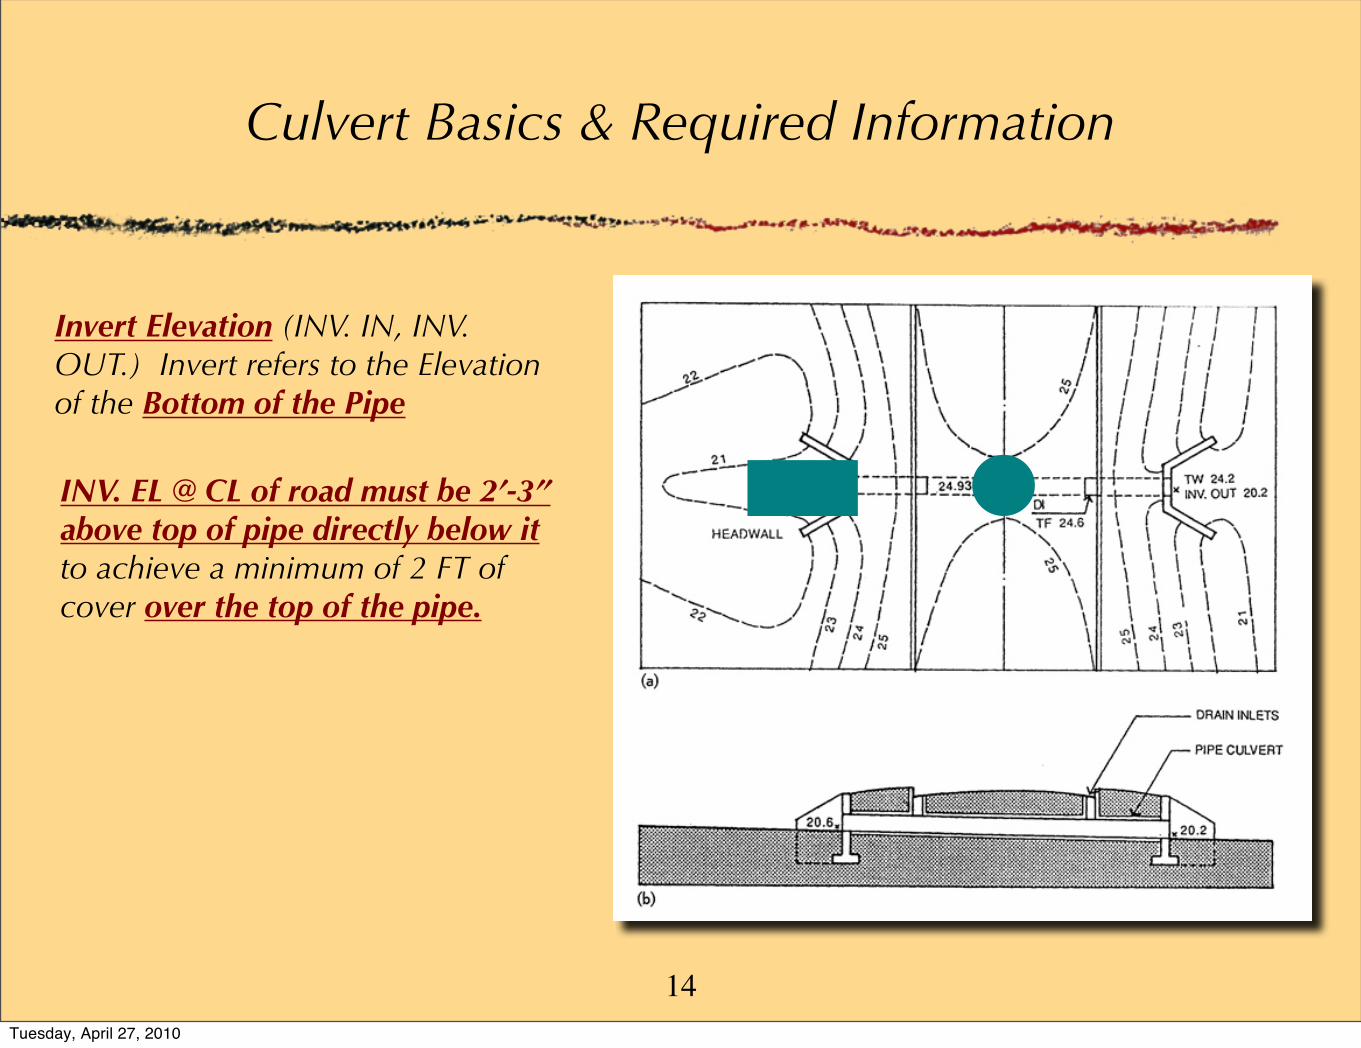
Invert Elevation (INV. IN, INV. OUT.) Invert refers to the Elevation of the Bottom of the Pipe
14Tuesday, April 27, 2010
Culvert Basics & Required Information
Invert Elevation (INV. IN, INV. OUT.) Invert refers to the Elevation of the Bottom of the Pipe
INV. EL @ CL of road must be 2’-3” above top of pipe directly below it to achieve a minimum of 2 FT of cover over the top of the pipe.
14Tuesday, April 27, 2010
Culvert Basics & Required Information
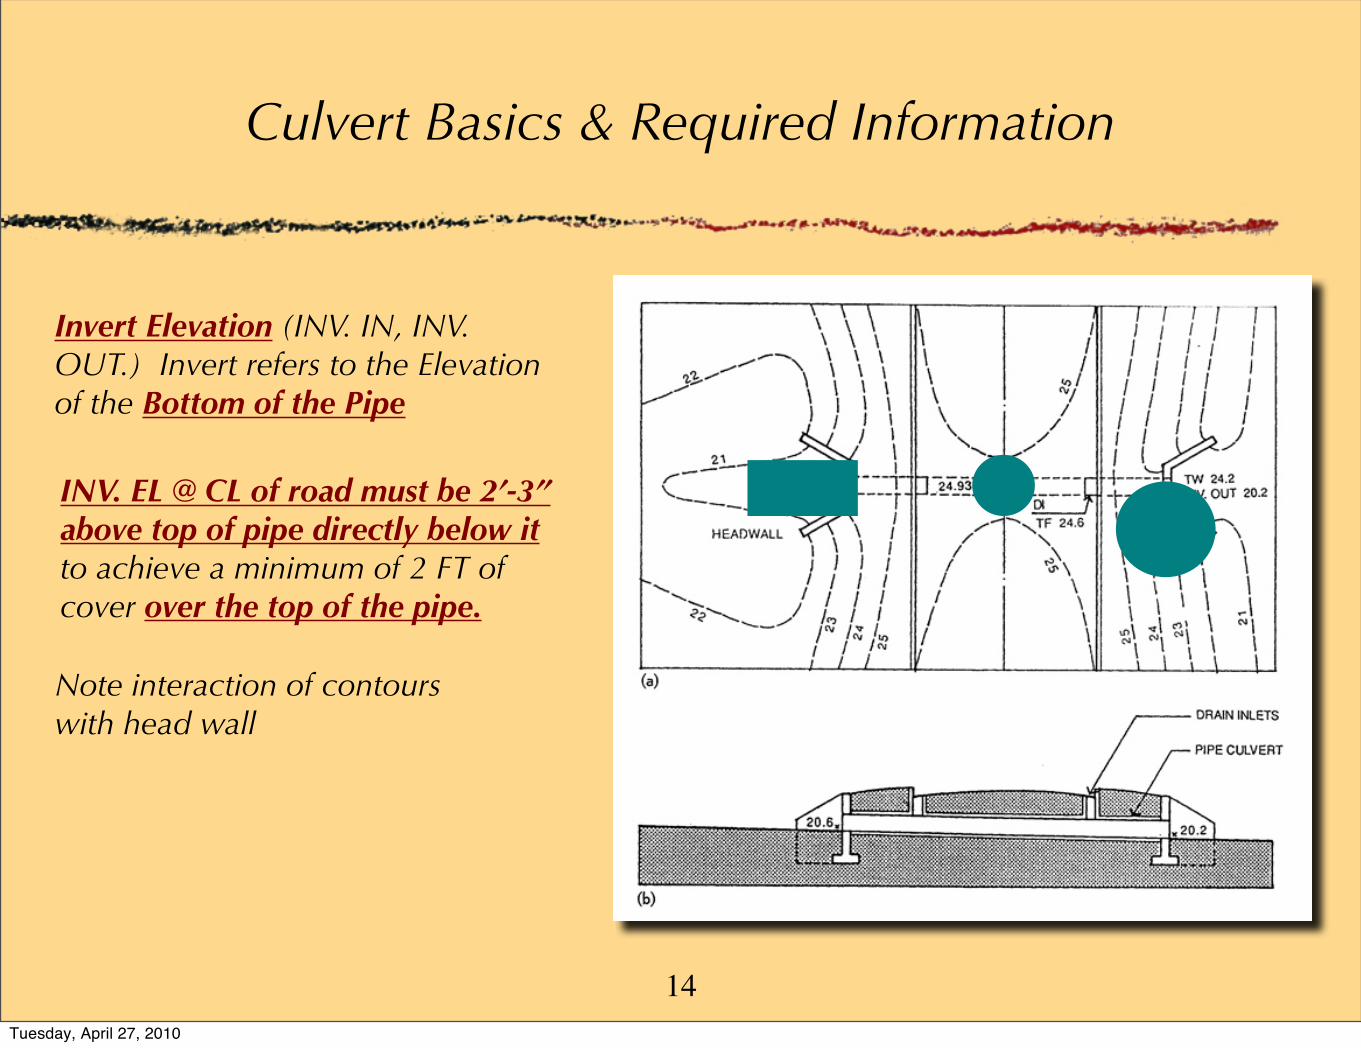
Invert Elevation (INV. IN, INV. OUT.) Invert refers to the Elevation of the Bottom of the Pipe
INV. EL @ CL of road must be 2’-3” above top of pipe directly below it to achieve a minimum of 2 FT of cover over the top of the pipe.
Note interaction of contours with head wall
14Tuesday, April 27, 2010
Culvert Basics & Required Information
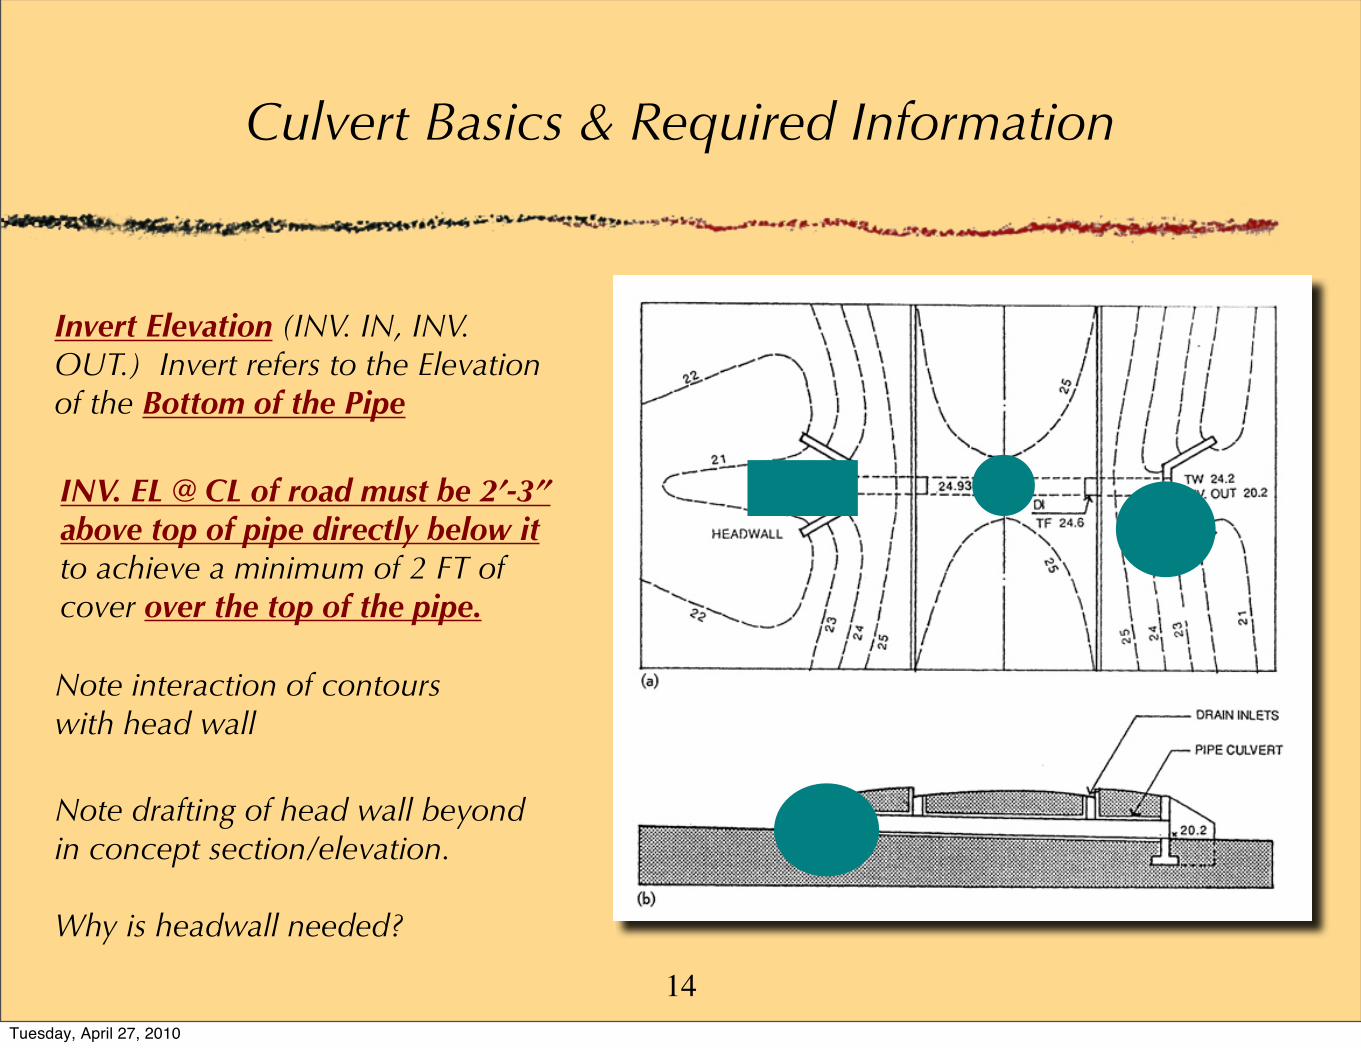
Invert Elevation (INV. IN, INV. OUT.) Invert refers to the Elevation of the Bottom of the Pipe
INV. EL @ CL of road must be 2’-3” above top of pipe directly below it to achieve a minimum of 2 FT of cover over the top of the pipe.
Note drafting of head wall beyond in concept section/elevation.
Why is headwall needed?
Note interaction of contours with head wall
14Tuesday, April 27, 2010
Culvert Basics ~ Understanding what is Happening
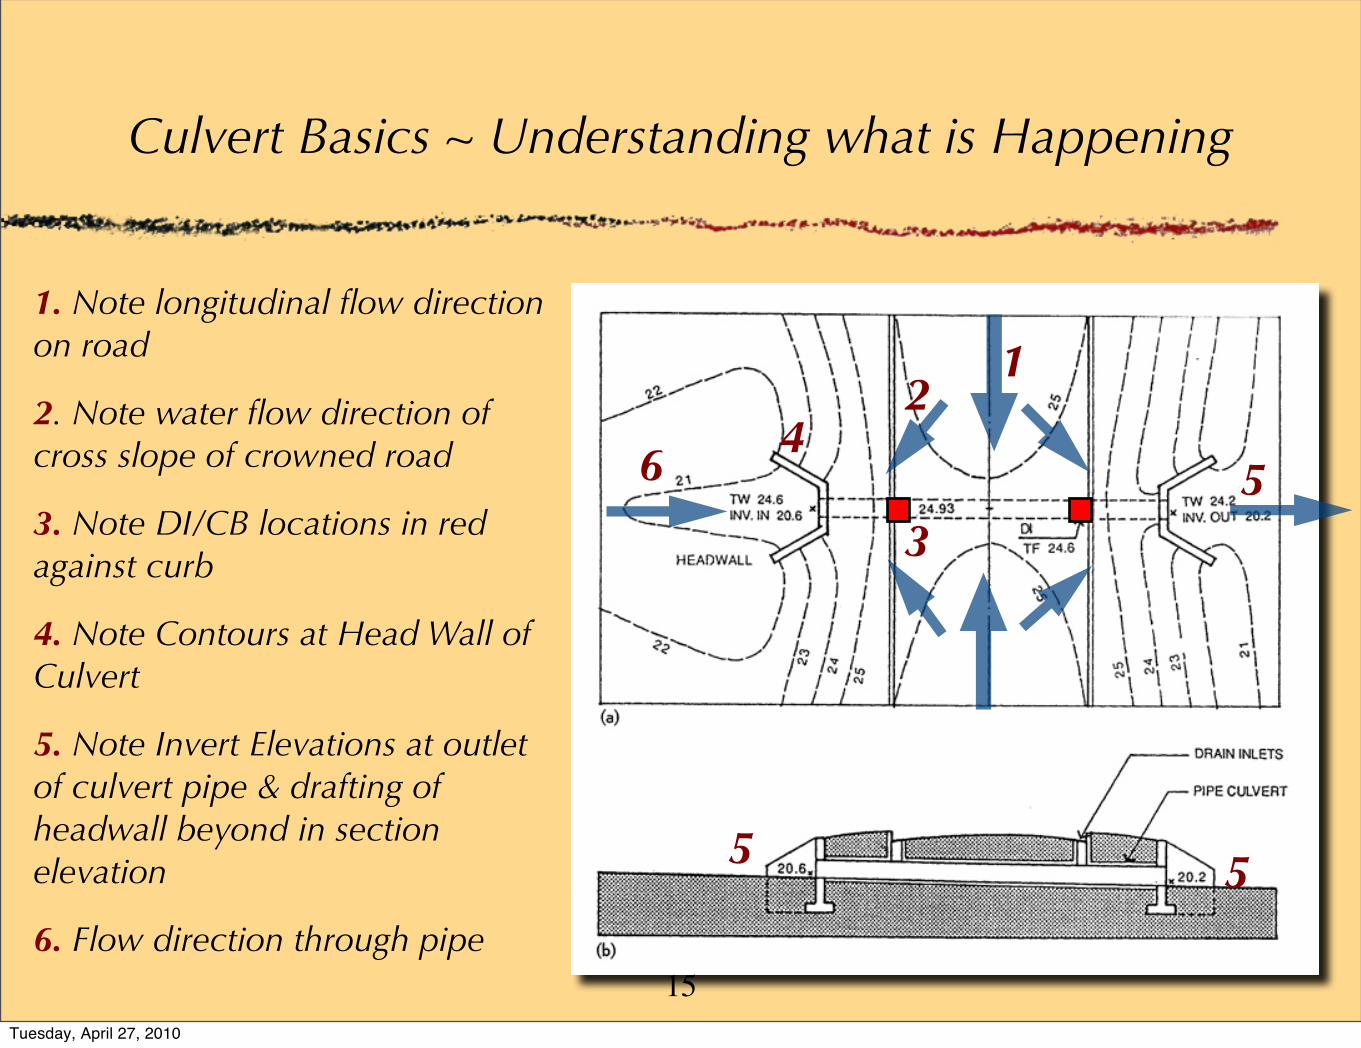
1. Note longitudinal flow direction on road
2. Note water flow direction of cross slope of crowned road
3. Note DI/CB locations in red against curb
4. Note Contours at Head Wall of Culvert
5. Note Invert Elevations at outlet of culvert pipe & drafting of headwall beyond in section elevation
6. Flow direction through pipe
1
5
42
35
5
6
15Tuesday, April 27, 2010
Notes on Grading the Road
Avoid excessive changes in the slope of your road.
Go for long continuous gradients with as few changes in longitudinal slope of the road as is practical. Keep the change between slopes as minimal as you reasonably can
Consider the balance of cut and fill when determining the slopes of your road
Remember when you change the grade of your road, the cross slope of shoulders and side walk will change
Drain run off on adjacent land areas away from the road
16Tuesday, April 27, 2010

End of Today’s Presentation
17Tuesday, April 27, 2010