Embed Size (px)
Citation preview

Cisco Nexus 3548 Switch NX-OS System Management Command Reference First Published: April 2013 Last Modified: May 2013
Cisco Systems, Inc. www.cisco.com
Cisco has more than 200 offices worldwide. Addresses, phone numbers, and fax numbers are listed on the Cisco website at www.cisco.com/go/offices.
Text Part Number: OL-27851-02

THE SPECIFICATIONS AND INFORMATION REGARDING THE PRODUCTS IN THIS MANUAL ARE SUBJECT TO CHANGE WITHOUT NOTICE. ALL STATEMENTS, INFORMATION, AND RECOMMENDATIONS IN THIS MANUAL ARE BELIEVED TO BE ACCURATE BUT ARE PRESENTED WITHOUT WARRANTY OF ANY KIND, EXPRESS OR IMPLIED. USERS MUST TAKE FULL RESPONSIBILITY FOR THEIR APPLICATION OF ANY PRODUCTS.
THE SOFTWARE LICENSE AND LIMITED WARRANTY FOR THE ACCOMPANYING PRODUCT ARE SET FORTH IN THE INFORMATION PACKET THAT SHIPPED WITH THE PRODUCT AND ARE INCORPORATED HEREIN BY THIS REFERENCE. IF YOU ARE UNABLE TO LOCATE THE SOFTWARE LICENSE OR LIMITED WARRANTY, CONTACT YOUR CISCO REPRESENTATIVE FOR A COPY.
The Cisco implementation of TCP header compression is an adaptation of a program developed by the University of California, Berkeley (UCB) as part of UCB’s public domain version of the UNIX operating system. All rights reserved. Copyright © 1981, Regents of the University of California.
NOTWITHSTANDING ANY OTHER WARRANTY HEREIN, ALL DOCUMENT FILES AND SOFTWARE OF THESE SUPPLIERS ARE PROVIDED “AS IS” WITH ALL FAULTS. CISCO AND THE ABOVE-NAMED SUPPLIERS DISCLAIM ALL WARRANTIES, EXPRESSED OR IMPLIED, INCLUDING, WITHOUT LIMITATION, THOSE OF MERCHANTABILITY, FITNESS FOR A PARTICULAR PURPOSE AND NONINFRINGEMENT OR ARISING FROM A COURSE OF DEALING, USAGE, OR TRADE PRACTICE.
IN NO EVENT SHALL CISCO OR ITS SUPPLIERS BE LIABLE FOR ANY INDIRECT, SPECIAL, CONSEQUENTIAL, OR INCIDENTAL DAMAGES, INCLUDING, WITHOUT LIMITATION, LOST PROFITS OR LOSS OR DAMAGE TO DATA ARISING OUT OF THE USE OR INABILITY TO USE THIS MANUAL, EVEN IF CISCO OR ITS SUPPLIERS HAVE BEEN ADVISED OF THE POSSIBILITY OF SUCH DAMAGES.
Cisco and the Cisco logo are trademarks or registered trademarks of Cisco and/or its affiliates in the U.S. and other countries. To view a list of Cisco trademarks, go to this URL: www.cisco.com/go/trademarks. Third-party trademarks mentioned are the property of their respective owners. The use of the word partner does not imply a partnership relationship between Cisco and any other company. (1110R)
Any Internet Protocol (IP) addresses and phone numbers used in this document are not intended to be actual addresses and phone numbers. Any examples, command display output, network topology diagrams, and other figures included in the document are shown for illustrative purposes only. Any use of actual IP addresses or phone numbers in illustrative content is unintentional and coincidental.
Cisco Nexus 3548 Switch NX-OS System Management Command Reference © 2012-2013 Cisco Systems, Inc. All rights reserved.

OL-27851-02
C O N T E N T S
Preface ix
Audience ix
Document Conventions ix
Related Documentation x
Documentation Feedback xi
Obtaining Documentation and Submitting a Service Request xi
New and Changed Information xiii
System Management Commands SM-1
abort (Call Home) SM-2
abort (session) SM-3
action cli SM-4
action counter SM-6
action event-default SM-8
action policy-default SM-10
action reload SM-12
action snmp-trap SM-14
action syslog SM-16
alert-group (Call Home) SM-18
callhome SM-20
callhome send diagnostic SM-21
callhome test SM-22
clear hardware profile buffer monitor SM-23
clear logging logfile SM-24
clear logging nvram SM-25
clear logging onboard SM-26
clear logging session SM-27
clear ntp session SM-28
clear ntp statistics SM-29
clear ptp counters SM-30
clear scheduler logfile SM-31
iiiCisco Nexus 3548 Switch NX-OS System Management Command Reference

Contents
clock protocol SM-32
commit (Call Home) SM-33
commit (session) SM-34
contract-id (Call Home) SM-35
customer-id (Call Home) SM-36
description SM-37
description (SPAN, ERSPAN) SM-38
destination ip (ERSPAN) SM-40
destination interface (ERSPAN) SM-41
destination-profile (Call Home) SM-42
diagnostic bootup level SM-45
distribute (Call Home) SM-46
duplicate-message throttle (Call Home) SM-47
email-contact (Call Home) SM-48
enable (Call Home) SM-49
feature ptp SM-51
feature scheduler SM-52
hardware profile buffer monitor SM-53
hardware profile forwarding-mode warp SM-55
ip access-list (session) SM-56
ip domain-list SM-57
ip domain-lookup SM-59
ip domain-name SM-60
ip host SM-62
ip name-server SM-63
ip port access-group (session) SM-65
logging abort SM-66
logging commit SM-67
logging console SM-68
logging distribute SM-69
logging event SM-70
logging event port SM-71
logging level SM-72
logging logfile SM-74
logging module SM-76
ivCisco Nexus 3548 Switch NX-OS System Management Command Reference
OL-27851-02

Contents
logging monitor SM-77
logging server SM-78
logging timestamp SM-80
monitor erspan origin ip-address SM-81
monitor session SM-82
ntp SM-84
ntp abort SM-86
ntp commit SM-87
ntp distribute SM-88
ntp sync-retry SM-89
periodic-inventory (Call Home) SM-90
phone-contact (Call Home) SM-92
ptp SM-93
ptp announce SM-94
ptp delay-request minimum interval SM-96
ptp domain SM-98
ptp priority1 SM-99
ptp priority2 SM-100
ptp source SM-101
ptp sync interval SM-103
ptp vlan SM-105
rmon alarm SM-107
rmon event SM-109
rmon hcalarm SM-111
scheduler SM-113
show callhome SM-115
show callhome destination-profile SM-116
show callhome transport-email SM-118
show callhome user-def-cmds SM-119
show diagnostic bootup level SM-120
show diagnostic result SM-121
show hardware profile buffer monitor SM-122
show hardware profile forwarding-mode SM-126
show hosts SM-127
show logging console SM-128
vCisco Nexus 3548 Switch NX-OS System Management Command Reference
OL-27851-02

Contents
show logging info SM-129
show logging last SM-130
show logging level SM-131
show logging logfile SM-133
show logging module SM-134
show logging monitor SM-135
show logging nvram SM-136
show logging onboard SM-137
show logging pending SM-141
show logging pending-diff SM-142
show logging session status SM-143
show logging server SM-144
show logging status SM-145
show logging timestamp SM-146
show monitor session SM-147
show ntp peer-status SM-149
show ntp peers SM-150
show ntp statistics SM-151
show ntp timestamp-status SM-152
show ptp brief SM-153
show ptp clock SM-154
show ptp clock foreign-masters-record SM-156
show ptp corrections SM-158
show ptp parent SM-159
show ptp port SM-161
show ptp time-property SM-163
show rmon SM-164
show running-config SM-166
show running-config callhome SM-168
show running-config exclude-provision SM-169
show running-config interface SM-171
show running-config monitor SM-172
show scheduler SM-174
show snmp community SM-176
show snmp context SM-177
viCisco Nexus 3548 Switch NX-OS System Management Command Reference
OL-27851-02

Contents
show snmp engineID SM-178
show snmp group SM-179
show snmp host SM-180
show snmp sessions SM-181
show snmp trap SM-182
show snmp user SM-183
show startup-config SM-184
show startup-config callhome SM-185
show startup-config exclude-provision SM-186
show startup-config ptp SM-187
show startup-config vtp SM-189
show tech-support callhome SM-190
shut (ERSPAN) SM-191
site-id (Call Home) SM-192
snmp-server community SM-193
snmp-server contact SM-195
snmp-server context SM-196
snmp-server enable traps SM-198
snmp-server enable traps link SM-201
snmp-server enable traps vtp SM-203
snmp-server globalEnforcePriv SM-204
snmp-server host SM-205
snmp-server location SM-207
snmp-server mib community-map SM-208
snmp-server tcp-session SM-210
snmp-server user SM-211
snmp trap link-status SM-213
source (SPAN, ERSPAN) SM-215
source ip (ERSPAN) SM-217
streetaddress (Call Home) SM-218
switch-priority (Call Home) SM-219
tag SM-220
terminal event-manager bypass SM-221
transport email (Call Home) SM-222
verify (session) SM-224
viiCisco Nexus 3548 Switch NX-OS System Management Command Reference
OL-27851-02

Contents
vrf (ERSPAN) SM-225
viiiCisco Nexus 3548 Switch NX-OS System Management Command Reference
OL-27851-02
Preface
This preface describes the audience, organization, and conventions of the Cisco Nexus 3548 Switch NX-OS System Management Command Reference . It also provides information on how to obtain related documentation.
This preface includes the following sections:
• Audience, page ix
• Document Conventions, page ix
• Related Documentation, page x
• Documentation Feedback, page xi
• Obtaining Documentation and Submitting a Service Request, page xi
AudienceThis publication is for experienced network administrators who configure and maintain Cisco Nexus Series switches.
Document ConventionsCommand descriptions use these conventions:
Convention Description
boldface font Commands and keywords are in boldface.
italic font Arguments for which you supply values are in italics.
[ ] Elements in square brackets are optional.
[ x | y | z ] Optional alternative keywords are grouped in brackets and separated by vertical bars.
string A nonquoted set of characters. Do not use quotation marks around the string or the string will include the quotation marks.
ixCisco Nexus 3548 Switch NX-OS System Management Command Reference
OL-27851-02

Screen examples use these conventions:
This document uses the following conventions:
Note Means reader take note. Notes contain helpful suggestions or references to material not covered in the manual.
Caution Means reader be careful. In this situation, you might do something that could result in equipment damage or loss of data.
Related DocumentationDocumentation for the Cisco Nexus 3000 Series Switch is available at the following URL:
http://www.cisco.com/en/US/products/ps11541/tsd_products_support_series_home.html
The documentation set is divided into the following categories:
Release Notes
The release notes are available at the follwing URL:
http://www.cisco.com/en/US/products/ps11541/prod_release_notes_list.html
Installation and Upgrade Guides
The installation and upgrade guides are available at the following URL:
http://www.cisco.com/en/US/products/ps11541/prod_installation_guides_list.html
Command References
The command references are available at the following URL:
http://www.cisco.com/en/US/products/ps11541/prod_command_reference_list.html
Technical References
The technical references are available at the following URL:
http://www.cisco.com/en/US/products/ps11541/prod_technical_reference_list.html
screen font Terminal sessions and information that the switch displays are in screen font.
boldface screen font
Information that you must enter is in boldface screen font.
italic screen font Arguments for which you supply values are in italic screen font.
< > Nonprinting characters, such as passwords, are in angle brackets.
[ ] Default responses to system prompts are in square brackets.
!, # An exclamation point (!) or a pound sign (#) at the beginning of a line of code indicates a comment line.
xCisco Nexus 3548 Switch NX-OS System Management Command Reference
OL-27851-02

Configuration Guides
The configuration guides are available at the following URL:
http://www.cisco.com/en/US/products/ps11541/products_installation_and_configuration_guides_list.html
Error and System Messages
The system message reference guide is available at the following URL:
http://www.cisco.com/en/US/products/ps11541/products_system_message_guides_list.html
Documentation FeedbackTo provide technical feedback on this document, or to report an error or omission, please send your comments to [email protected]. We appreciate your feedback.
Obtaining Documentation and Submitting a Service RequestFor information on obtaining documentation, submitting a service request, and gathering additional information, see the monthly What’s New in Cisco Product Documentation, which also lists all new and revised Cisco technical documentation:
http://www.cisco.com/en/US/docs/general/whatsnew/whatsnew.html
Subscribe to the What’s New in Cisco Product Documentation as an RSS feed and set content to be delivered directly to your desktop using a reader application. The RSS feeds are a free service. Cisco currently supports RSS Version 2.0.
xiCisco Nexus 3548 Switch NX-OS System Management Command Reference
OL-27851-02

xiiCisco Nexus 3548 Switch NX-OS System Management Command Reference
OL-27851-02

New and Changed Information
This chapter provides release-specific information for each new and changed feature in the Cisco Nexus 3548 Switch NX-OS System Management Command Reference . The latest version of this document is available at the following Cisco website:
http://www.cisco.com/en/US/products/ps11541/tsd_products_support_series_home.html
To check for additional information about this Cisco NX-OS Release, see the Cisco Nexus 3000 Series Switch Release Notes available at the following Cisco website:
http://www.cisco.com/en/US/products/ps11541/prod_release_notes_list.html
Table 1 summarizes the new and changed features for release 6.x and tells you where they are documented.
xiiiCisco Nexus 3548 Switch NX-OS System Management Command Reference
OL-27851-02

Chapter New and Changed Information
Table 1 New and Changed Information for Release 6.x
Feature DescriptionChanged in Release Where Documented
ERSPAN This feature was introduced.
The monitor session command was updated to include the erspan-destination and erspan-source keywords.
6.0(2)A1(1) description (SPAN, ERSPAN)
destination ip (ERSPAN)
destination interface (ERSPAN)
monitor erspan origin ip-address
monitor session
shut (ERSPAN)
source (SPAN, ERSPAN)
source ip (ERSPAN)
vrf (ERSPAN)
show monitor session
show running-config monitor
Precision Time Protocol (PTP)
This feature was introduced. 6.0(2)A1(1) clear ptp counters
clock protocol
feature scheduler
ptp announce
ptp delay-request minimum interval
ptp domain
ptp priority1
ptp priority2
ptp source
ptp sync interval
ptp vlan
show ptp brief
show ptp clock
show ptp clock foreign-masters-record
show ptp corrections
show ptp parent
show ptp port
show ptp time-property
show scheduler
show startup-config ptp
-xivCisco Nexus 3548 Switch NX-OS System Management Command Reference
OL-27851-02

System Management Commands
This chapter describes the Cisco NX-OS system management commands available on the Cisco Nexus 3548 switch.
1Cisco Nexus 3548 Switch NX-OS System Management Command Reference
OL-27851-02

System Management Commandsabort (Call Home)
abort (Call Home)To discard Call Home configuration changes and release the Cisco Fabric Services (CFS) lock, use the abort command.
abort
Syntax Description This command has no arguments or keywords.
Command Default None
Command Modes Callhome configuration mode
Command History
Usage Guidelines Use this command if you are the CFS lock owner or if you are logged into the device that holds the CFS lock.
Examples This example shows how to discard Call Home configuration changes:
switch(config-callhome)# abort switch(config-callhome)#
Related Commands
Release Modification
5.0(3)A1(1) This command was introduced.
Command Description
show callhome Displays Call Home configuration information.
show running-config callhome
Displays the running configuration information for Call Home.
2Cisco Nexus 3548 Switch NX-OS System Management Command Reference
OL-27851-02

System Management Commandsabort (session)
abort (session)To discard the current configuration session, use the abort command.
abort
Syntax Description This command has no arguments or keywords.
Command Default None
Command Modes Session configuration mode
Command History
Examples This example shows how to abort the current configuration session:
switch# configure session MySession1 switch(config-s)# abort switch#
Related Commands
Release Modification
5.0(3)A1(1) This command was introduced.
Command Description
commit Commits a session.
configure session Creates a configuration session.
show configuration session
Displays the contents of the session.
verify Verifies a session.
3Cisco Nexus 3548 Switch NX-OS System Management Command Reference
OL-27851-02

System Management Commandsaction cli
action cliTo configure a virtual shell (VSH) command string to be executed when an Embedded Event Manager (EEM) applet is triggered, use the action cli command. To disable the VSH command string, use the no form of this command.
action label num1 [.num2] cli [local] vsh_cmd
no action label num1 [.num2] cli
Syntax Description
Defaults None
Command Modes Embedded event manager configuration mode
Command History
Usage Guidelines This command does not require a license.
Examples This example shows how to configure a VSH command string to be executed when an EEM applet is triggered:
switch# configure terminal switch(config)# event manager applet cli-applet switch(config-applet)# action 1.1 cli show versionswitch(config-applet)#
Related Commands
label num1 [.num2] Unique identifier that can be any string value. Actions are sorted and run in an ascending alphanumeric sequence using the label as the sort key. The range for num1 is from 1 to 16 and the range for num2 is from 0 to 9.
local (Optional) Specifies the action is to be executed in the same module on which the event occurs.
vsh_cmd VSH command string to be executed when the applet is triggered.
Release Modification
5.0(3)A1(1) This command was introduced.
Command Description
action counter Sets or modifies a named counter when an Embedded Event Manager (EEM) applet is triggered.
action event-default Specifies that the default action for the event is to be performed when an Embedded Event Manager (EEM) applet is triggered.
action policy-default Enables the default action of the policy being overridden.
4Cisco Nexus 3548 Switch NX-OS System Management Command Reference
OL-27851-02

System Management Commandsaction cli
action snmp-trap Specifies the generation of a Simple Network Management Protocol (SNMP) trap when an Embedded Event Manager (EEM) applet is triggered.
action syslog Configures a syslog message to generate when an Embedded Event Manager (EEM) applet is triggered.
Command Description
5Cisco Nexus 3548 Switch NX-OS System Management Command Reference
OL-27851-02

System Management Commandsaction counter
action counterTo set or modify a named counter when an Embedded Event Manager (EEM) applet is triggered, use the action counter command. To restore the default value to the counter, use the no form of this command.
action label num1 [.num2] counter name name value value op {dec | inc | nop | set}
no action label num1 [.num2] counter name name
Syntax Description
Defaults None
Command Modes Embedded event manager configuration mode
Command History
Usage Guidelines This command does not require a license.
Examples This example shows how to set the counter count1 to the value in $variable when the EEM counter-applet is triggered:
switch# configure terminal switch(config)# event manager applet counter-applet switch(config-applet)# action 1.2 counter name count1 value $variable op dec switch(config-applet)#
label num1 [.num2] Unique identifier that can be any string value. Actions are sorted and run in an ascending alphanumeric sequence using the label as the sort key. The range for num1 is from 1 to 16 and the range for num2 is from 0 to 9.
name name Specifies the name of the counter. This identifier can be any string value up to 28 characters.
value value Specifies the value of the counter. This identifier must be an integer value and can be in the range of 0 to 2147483647 or a $-prefixed name (for parameter substitution).
op Specifies the operation to perform upon the counter.
dec Decrements the counter by the specified value.
inc Increments the counter by the specified value.
nop Does nothing; using this keyword just displays the specified value.
set Sets the counter to the specified value.
Release Modification
5.0(3)A1(1) This command was introduced.
6Cisco Nexus 3548 Switch NX-OS System Management Command Reference
OL-27851-02

System Management Commandsaction counter
Related Commands Command Description
action cli Configures a virtual shell (VSH) command string to be executed when an Embedded Event Manager (EEM) applet is triggered.
action event-default Specifies that the default action for the event is to be performed when an Embedded Event Manager (EEM) applet is triggered.
action policy-default Enables the default action of the policy being overridden.
action reload Specifies the action of reloading the Cisco Nexus 3548 switch software when an Embedded Event Manager (EEM) applet is triggered.
action snmp-trap Specifies the generation of a Simple Network Management Protocol (SNMP) trap when an Embedded Event Manager (EEM) applet is triggered.
action syslog Configures a syslog message to generate when an Embedded Event Manager (EEM) applet is triggered.
7Cisco Nexus 3548 Switch NX-OS System Management Command Reference
OL-27851-02
System Management Commandsaction event-default
action event-defaultTo specify that the default action for the event is to be performed when an Embedded Event Manager (EEM) applet is triggered, use the action event-default command. To disable the default action, use the no form of this command.
action label num1 [.num2] event-default
no action num1 [.num2] event-default
Syntax Description
Defaults None
Command Modes Embedded event manager configuration mode
Command History
Usage Guidelines If you want to allow the triggered event to process any default actions, you must configure the EEM policy to allow the default action. For example, if you match a CLI command in a match statement, you must add the event-default statement to the EEM policy or EEM does not allow the CLI command to execute. You can use the terminal event-manager bypass command to allow all EEM policies with CLI matches to execute the CLI command.
This command does not require a license.
Examples This example shows how to specify that the default action for the event is to be performed when an EEM applet is triggered:
switch# configure terminal switch(config)# event manager applet default-applet switch(config-applet)# action 1.1 event-default switch(config-applet)#
Related Commands
label num1 [.num2] Unique identifier that can be any string value. Actions are sorted and run in an ascending alphanumeric sequence using the label as the sort key. The range for num1 is from 1 to 16 and the range for num2 is from 0 to 9.
Release Modification
5.0(3)A1(1) This command was introduced.
Command Description
action cli Configures a virtual shell (VSH) command string to be executed when an Embedded Event Manager (EEM) applet is triggered.
action counter set or modify a named counter when an Embedded Event Manager (EEM) applet is triggered.
8Cisco Nexus 3548 Switch NX-OS System Management Command Reference
OL-27851-02

System Management Commandsaction event-default
action policy-default Enables the default action of the policy being overridden.
action snmp-trap Specifies the generation of a Simple Network Management Protocol (SNMP) trap when an Embedded Event Manager (EEM) applet is triggered.
action syslog Configures a syslog message to generate when an Embedded Event Manager (EEM) applet is triggered.
Command Description
9Cisco Nexus 3548 Switch NX-OS System Management Command Reference
OL-27851-02

System Management Commandsaction policy-default
action policy-defaultTo enable the default action of the policy being overridden, use the action policy-default command. To remove the default action, use the no form of this command.
action label num1 [.num2] policy-default
no action label num1 [.num2] policy-default
Syntax Description
Defaults None
Command Modes Embedded event manager configuration mode
Command History
Usage Guidelines This command does not require a license.
Examples This example shows how to enable the default action of a policy being overridden when an EEM applet is triggered:
switch# configure terminal switch(config)# event manager applet default-applet switch(config-applet)# action 1.0 policy-default switch(config-applet)#
Related Commands
label num1 [.num2] Unique identifier that can be any string value. Actions are sorted and run in an ascending alphanumeric sequence using the label as the sort key. The range for num1 is from 1 to 16 and the range for num2 is from 0 to 9.
Release Modification
5.0(3)A1(1) This command was introduced.
Command Description
action cli Configures a virtual shell (VSH) command string to be executed when an Embedded Event Manager (EEM) applet is triggered.
action counter set or modify a named counter when an Embedded Event Manager (EEM) applet is triggered.
action event-default Specifies that the default action for the event is to be performed when an Embedded Event Manager (EEM) applet is triggered.
action snmp-trap Specifies the generation of a Simple Network Management Protocol (SNMP) trap when an Embedded Event Manager (EEM) applet is triggered.
action syslog Configures a syslog message to generate when an Embedded Event Manager (EEM) applet is triggered.
10Cisco Nexus 3548 Switch NX-OS System Management Command Reference
OL-27851-02

System Management Commandsaction policy-default
11Cisco Nexus 3548 Switch NX-OS System Management Command Reference
OL-27851-02

System Management Commandsaction reload
action reloadTo specify the action of reloading the Cisco Nexus 3548 switch software when an Embedded Event Manager (EEM) applet is triggered, use the action reload command. To remove the action of reloading the Cisco Nexus 3548 switch software, use the no form of this command.
action label num1 [.num2] reload
no action label num1 [.num2] reload
Syntax Description
Defaults None
Command Modes Embedded event manager configuration mode
Command History
Usage Guidelines This command does not require a license.
Examples This example shows how to specify the action of reloading the Cisco Nexus 3548 switch software when an EEM applet is triggered:
switch# configure terminal switch(config)# event manager applet reload-applet switch(config-applet)# action 1.5 reload switch(config-applet)#
Related Commands
label num1 [.num2] Unique identifier that can be any string value. Actions are sorted and run in an ascending alphanumeric sequence using the label as the sort key. The range for num1 is from 1 to 16 and the range for num2 is from 0 to 9.
Release Modification
5.0(3)A1(1) This command was introduced.
Command Description
action cli Configures a virtual shell (VSH) command string to be executed when an Embedded Event Manager (EEM) applet is triggered.
action counter set or modify a named counter when an Embedded Event Manager (EEM) applet is triggered.
action event-default Specifies that the default action for the event is to be performed when an Embedded Event Manager (EEM) applet is triggered.
action policy-default Enables the default action of the policy being overridden.
12Cisco Nexus 3548 Switch NX-OS System Management Command Reference
OL-27851-02

System Management Commandsaction reload
action snmp-trap Specifies the generation of a Simple Network Management Protocol (SNMP) trap when an Embedded Event Manager (EEM) applet is triggered.
action syslog Configures a syslog message to generate when an Embedded Event Manager (EEM) applet is triggered.
Command Description
13Cisco Nexus 3548 Switch NX-OS System Management Command Reference
OL-27851-02
System Management Commandsaction snmp-trap
action snmp-trapTo specify the generation of a Simple Network Management Protocol (SNMP) trap when an Embedded Event Manager (EEM) applet is triggered, use the action snmp-trap command. To disable the SNMP trap, use the no form of this command.
action label num1 [.num2] snmp-trap [intdata1 integer] [intdata2 integer] [strdata string]
no action label num1 [.num2] snmp-trap [intdata1 integer] [intdata2 integer] [strdata string]
Syntax Description
Defaults None
Command Modes Embedded event manager configuration mode
Command History
Usage Guidelines This command does not require a license.
Examples This example shows how to specify an SNMP trap to generate when an EEM applet is triggered:
switch# configure terminal switch(config)# event manager applet snmp-applet switch(config-applet)# action 1.7 snmp-trap strdata "EEM detected server failure" switch(config-applet)#
label num1 [.num2] Unique identifier that can be any string value. Actions are sorted and run in an ascending alphanumeric sequence using the label as the sort key. The range for num1 is from 1 to 16 and the range for num2 is from 0 to 9.
intdata1 integer (Optional) Specifies an integer to be sent in the SNMP trap message to the SNMP agent. The integer can be any number up to 80 characters.
intdata2 integer (Optional) Specifies a second integer to be sent in the SNMP trap message to the SNMP agent. The second integer can be any number up to 80 characters.
strdata string (Optional) Specifies a string to be sent in the SNMP trap message to the SNMP agent. If the string contains embedded blanks, enclose it in double quotation marks. The string can be any alphanumeric string up to 80 characters.
Release Modification
5.0(3)A1(1) This command was introduced.
14Cisco Nexus 3548 Switch NX-OS System Management Command Reference
OL-27851-02

System Management Commandsaction snmp-trap
Related Commands Command Description
action cli Configures a virtual shell (VSH) command string to be executed when an Embedded Event Manager (EEM) applet is triggered.
action counter Sets or modifies a named counter when an Embedded Event Manager (EEM) applet is triggered.
action event-default Specifies that the default action for the event is to be performed when an Embedded Event Manager (EEM) applet is triggered.
action policy-default Enables the default action of the policy being overridden.
action reload Specifies the action of reloading the Cisco Nexus 3548 switch software when an Embedded Event Manager (EEM) applet is triggered.
action syslog Configures a syslog message to generate when an Embedded Event Manager (EEM) applet is triggered.
15Cisco Nexus 3548 Switch NX-OS System Management Command Reference
OL-27851-02

System Management Commandsaction syslog
action syslogTo configure a syslog message to generate when an Embedded Event Manager (EEM) applet is triggered, use the action syslog command. To disable the syslog message, use the no form of this command.
action label num1 [.num2] syslog [priority {priority | priority-string}] msg message-text
no action label num1 [.num2] syslog [priority {priority | priority-string}] msg message-text
Syntax Description
Defaults None
Command Modes Embedded event manager configuration mode
Command History
Usage Guidelines Messages written to the syslog from an EEM applet are not screened for EEM syslog events, which might lead to recursive EEM syslog events. Messages that are sent from an EEM applet include the applet name for identification.
This command does not require a license.
label num1 [.num2] Unique identifier that can be any string value. Actions are sorted and run in an ascending alphanumeric sequence using the label as the sort key. The range for num1 is from 1 to 16 and the range for num2 is from 0 to 9.
priority (Optional) Specifies the priority level of the syslog messages. If this keyword is not selected, all syslog messages are set at the informational priority level. If this keyword is selected, the priority level argument must be defined.
priority Priority level as follows:
• emergencies—Specifies the system is unusable.
• alerts—Specifies immediate action is needed.
• critical—Specifies critical conditions.
• errors—Specifies error conditions.
• warnings— Specifies warning conditions.
• notifications—Specifies normal but significant conditions.
• informational—Specifies informational messages. This is the default.
• debugging—Specifies debugging messages.
priority-string $-prefixed parameter that you previously set to a priority level.
msg message-text Specifies the message to be logged. The message-text can contain any alphanumeric string up to 256 characters.
Release Modification
5.0(3)A1(1) This command was introduced.
16Cisco Nexus 3548 Switch NX-OS System Management Command Reference
OL-27851-02

System Management Commandsaction syslog
Examples This example shows how to configure a syslog message to save when an EEM applet is triggered:
switch# configure terminal switch(config)# event manager applet syslog-applet switch(config-applet)# action 1.7 syslog priority critical msg cpu usage highswitch(config-applet)#
Related Commands Command Description
action cli Configures a virtual shell (VSH) command string to be executed when an Embedded Event Manager (EEM) applet is triggered.
action counter set or modify a named counter when an Embedded Event Manager (EEM) applet is triggered.
action event-default Specifies that the default action for the event is to be performed when an Embedded Event Manager (EEM) applet is triggered.
action policy-default Enables the default action of the policy being overridden.
action reload Specifies the action of reloading the Cisco Nexus 3548 switch software when an Embedded Event Manager (EEM) applet is triggered.
action snmp-trap Specifies the generation of a Simple Network Management Protocol (SNMP) trap when an Embedded Event Manager (EEM) applet is triggered.
17Cisco Nexus 3548 Switch NX-OS System Management Command Reference
OL-27851-02

System Management Commandsalert-group (Call Home)
alert-group (Call Home)To configure a CLI show command for an alert group, use the alert-group command. To remove a CLI command from an alert group, use the no form of this command.
alert-group alert user-def-cmd CLI-command
no alert-group alert user-def-cmd CLI-command
Syntax Description
Command Default None
Command Modes Callhome configuration mode
Command History
Usage Guidelines You can customize predefined alert groups to execute additional CLI show commands when specific events occur and send that show output with the Call Home message. You can assign a maximum of five user-defined CLI show commands to an alert group.
You must enclose the show command in double quotes. Only valid show commands are accepted.
alert Alert group. The alert group can be one of the following:
• All—All alert groups
• Cisco-TAC—Cisco TAC events
• Configuration—Configuration events
• Diagnostic—Diagnostic events
• EEM—EEM events
• Environmental—Power, fan, temperature-related events
• Inventory—Inventory status events
• License—Licensing events
• Linecard-Hardware—Linecard-related events
• Supervisor-Hardware—Supervisor-related events
• Syslog-group-port—Syslog message events filed by port manager
• System—Software-related events
• Test—User-generated test events
user-def-cmd Specifies a CLI command for an alert group.
CLI-command CLI show command. The command can be a maximum of 512 characters.
Release Modification
5.0(3)A1(1) This command was introduced.
18Cisco Nexus 3548 Switch NX-OS System Management Command Reference
OL-27851-02

System Management Commandsalert-group (Call Home)
Note You cannot add user-defined CLI show commands to the CiscoTAC-1 destination profile.
You can add show commands only to full text and XML destination profiles. Short text destination profiles do not support additional show commands because they only allow 128 bytes of text.
Examples This example shows how to add a show command output to a Call Home message sent for an alert group:
switch(config-callhome)# alert-group configuration user-def-cmd “show running-config” switch(config-callhome)#
Related Commands Command Description
copy running-config startup-config
Saves this configuration change.
show callhome user-def-cmd
Displays information about all user-defined show commands added to alert groups.
19Cisco Nexus 3548 Switch NX-OS System Management Command Reference
OL-27851-02

System Management Commandscallhome
callhomeTo configure the Cisco Smart Call Home service and enter the callhome configuration mode, use the callhome command.
callhome
Syntax Description This command has no arguments or keywords.
Command Default None
Command Modes Global configuration mode
Command History
Usage Guidelines You must configure the e-mail, phone, and street address information for Call Home. You can optionally configure the contract ID, customer ID, site ID, and switch priority information.
Examples This example shows how to enter callhome configuration mode:
switch# configure terminalswitch(config)# callhome switch(config-callhome)#
Related Commands
Release Modification
5.0(3)A1(1) This command was introduced.
Command Description
email-contact Configures the e-mail address.
show callhome Displays a summary of the Call Home configuration.
snmp-server contact Configures the SNMP contact (sysContact).
20Cisco Nexus 3548 Switch NX-OS System Management Command Reference
OL-27851-02

System Management Commandscallhome send diagnostic
callhome send diagnosticTo send a specified Call Home test message to all configured destinations, use the callhome send diagnostic command.
callhome send diagnostic
Syntax Description This command has no arguments or keywords.
Command Default None
Command Modes Callhome configuration mode
Command History
Usage Guidelines You can generate a test message to test your Call Home communications using the callhome send diagnostic command.
Examples This example shows how to configure Call Home to send test messages to all configured destinations:
switch# configure terminalswitch(config)# callhomeswitch(config-callhome)# callhome send diagnostic switch(config-callhome)#
Related Commands
Release Modification
5.0(3)A1(1) This command was introduced.
Command Description
show callhome Displays Call Home configuration information.
show running-config callhome
Displays the running configuration information for Call Home.
21Cisco Nexus 3548 Switch NX-OS System Management Command Reference
OL-27851-02

System Management Commandscallhome test
callhome testTo send a Call Home test message to all configured destinations, use the callhome test command.
callhome test [inventory]
Syntax Description
Command Default None
Command Modes EXEC mode
Command History
Examples This example shows how to send a Call Home test message to all configured destinations:
switch# callhome test trying to send test callhome messagesuccessfully sent test callhome messageswitch#
This example shows how to send a Call Home inventory message to all configured destinations:
switch# callhome test inventory trying to send test callhome inventory messagesuccessfully sent test callhome inventory messageswitch#
Related Commands
inventory (Optional) Specifies that a Call Home inventory message be sent for testing the Call Home configuration.
Release Modification
5.0(3)A1(1) This command was introduced.
Command Description
show callhome Displays Call Home configuration information.
show running-config callhome
Displays the running configuration information for Call Home.
22Cisco Nexus 3548 Switch NX-OS System Management Command Reference
OL-27851-02

System Management Commandsclear hardware profile buffer monitor
clear hardware profile buffer monitorTo clear the buffer monitoring data, use the clear hardware profile buffer monitor command.
clear hardware profile buffer monitor
Syntax Description This command has no arguments or keywords.
Command Modes Global configuration
Command History
Examples This example shows how to clear the buffer monitoring data:
switch(config)# clear hardware profile buffer monitorswitch(config)#
Related Commands
Release Modification
5.0(3)A1(1) This command was introduced.
Command Description
show hardware buffer monitor
Displays buffer monitoring data.
23Cisco Nexus 3548 Switch NX-OS System Management Command Reference
OL-27851-02

System Management Commandsclear logging logfile
clear logging logfileTo clears the contents of the log file, use the clear logging logfile command.
clear logging logfile
Syntax Description This command has no arguments or keywords.
Command Default None
Command Modes EXEC mode
Command History
Examples This example shows how to clear the logging logfile:
switch# clear logging logfile switch#
Related Commands
Release Modification
5.0(3)A1(1) This command was introduced.
Command Description
show logging logfile Displays the messages in the log file.
24Cisco Nexus 3548 Switch NX-OS System Management Command Reference
OL-27851-02
System Management Commandsclear logging nvram
clear logging nvramTo clear the NVRAM logs, use the clear logging nvram command.
clear logging nvram
Syntax Description This command has no arguments or keywords.
Command Default None
Command Modes EXEC mode
Command History
Examples This example shows how to clear the NVRAM logs:
switch# clear logging nvramswitch#
Related Commands
Release Modification
5.0(3)A1(1) This command was introduced.
Command Description
show logging nvram Displays the NVRAM logs.
25Cisco Nexus 3548 Switch NX-OS System Management Command Reference
OL-27851-02
System Management Commandsclear logging onboard
clear logging onboardTo clear the onboard failure logging (OBFL) entries in the persistent log, use the clear logging onboard command.
clear logging onboard [environmental-history] [exception-log] [obfl-log] [stack-trace]
Syntax Description
Command Default None
Command Modes EXEC mode
Command History
Examples This example shows how to clear the OBFL environmental history entries:
switch# clear logging onboard environmental-history switch#
This example shows how to clear the OBFL exception-log entries:
switch# clear logging onboard exception-logswitch#
This example shows how to clear the OBFL (boot-uptime/device-version/obfl-history) entries:
switch# clear logging onboard obfl-logswitch#
This example shows how to clear the OBFL stack trace entries:
switch# clear logging onboard stack-traceswitch#
Related Commands
environmental-history (Optional) Clears the OBFL environmental history.
exception-log (Optional) Clears the OBFL exception log entries.
obfl-log (Optional) Clears the OBFL (boot-uptime/device-version/obfl-history).
stack-trace (Optional) Clears the OBFL stack trace entries.
Release Modification
5.0(3)A1(1) This command was introduced.
Command Description
show logging onboard Displays onboard failure logs.
26Cisco Nexus 3548 Switch NX-OS System Management Command Reference
OL-27851-02

System Management Commandsclear logging session
clear logging sessionTo clear the current logging session, use the clear logging session command.
clear logging session
Syntax Description This command has no arguments or keywords.
Command Default None
Command Modes EXEC mode
Command History
Examples This example shows how to clear the current logging session:
switch# clear logging sessionswitch#
Related Commands
Release Modification
5.0(3)A1(1) This command was introduced.
Command Description
show logging session Displays the logging session status.
27Cisco Nexus 3548 Switch NX-OS System Management Command Reference
OL-27851-02

System Management Commandsclear ntp session
clear ntp sessionTo clear the Network Time Protocol (NTP) session, use the clear ntp session command.
clear ntp session
Syntax Description This command has no arguments or keywords.
Command Default None
Command Modes EXEC mode
Command History
Examples This example shows how to discard the NTP Cisco Fabric Services (CFS) distribution session in progress:
switch# clear ntp sessionswitch#
Related Commands
Release Modification
5.0(3)A1(1) This command was introduced.
Command Description
show ntp Displays NTP information.
28Cisco Nexus 3548 Switch NX-OS System Management Command Reference
OL-27851-02

System Management Commandsclear ntp statistics
clear ntp statisticsTo clear the Network Time Protocol (NTP) session, use the clear ntp statistics command.
clear ntp statistics {all-peers | io | local | memory}
Syntax Description
Command Default None
Command Modes EXEC mode
Command History
Examples This example shows how to discard the NTP I/O statistics:
switch# clear ntp statistics ioswitch#
Related Commands
all-peers Clears all peer transaction statistics.
io Clears I/O statistics.
local Clears local statistics.
memory Clears memory statistics.
Release Modification
5.0(3)A1(1) This command was introduced.
Command Description
show ntp Displays NTP information.
29Cisco Nexus 3548 Switch NX-OS System Management Command Reference
OL-27851-02

System Management Commandsclear ptp counters
clear ptp countersTo clear the Precision Time Protocol (PTP) packet counters, use the clear ptp counters command.
clear ptp counters {all | interface ethernet slot/port}
Syntax Description
Command Default None
Command Modes EXEC mode
Command History
Usage Guidelines This command does not require a license.
Examples This example shows how to clear all PTP counters:
switch# clear ptp counters allswitch#
Related Commands
all Clears all PTP counters.
interface Clears PTP counters from an interface.
ethernet slot/port Clears PTP counters from an IEEE 802.3z Ethernet interface. The slot number is from 1 to 255 and the port number is from 1 to 128.
Release Modification
6.0(2)A1(1) This command was introduced.
Command Description
feature ptp Enables PTP on the switch.
show running-config ptp
Displays the PTP running system configuration information.
30Cisco Nexus 3548 Switch NX-OS System Management Command Reference
OL-27851-02

System Management Commandsclear scheduler logfile
clear scheduler logfileTo clear the scheduler log file, use the clear scheduler logfile command.
clear scheduler logfile
Syntax Description This command has no arguments or keywords.
Defaults None
Command Modes Global configuration mode
Command History
Usage Guidelines This command does not require a license.
Examples This example shows how clear the scheduler log file:
switch# configure terminalswitch(config)# clear schedueler logfileswitch(config)#
Related Commands
Release Modification
5.0(3)A1(1) This command was introduced.
Command Description
show scheduler Displays the scheduler configuration.
31Cisco Nexus 3548 Switch NX-OS System Management Command Reference
OL-27851-02
System Management Commandsclock protocol
clock protocolTo set the synchronization protocol for the clock to a protocol, use the clock protocol command. To remove the clock protocol, use the no form of this command.
clock protocol {none | ntp | ptp}
no clock protocol {none | ntp | ptp}
Syntax Description
Command Default None
Command Modes Global configuration mode
Command History
Usage Guidelines This command does not require a license.
Examples This example shows how to set the synchronization protocol for the clock to NTP:
switch# configure terminalswitch(config)# clock protocol ntpswitch(config)#
This example shows how to set the synchronization protocol for the clock to PTP:
switch# configure terminalswitch(config)# clock protocol ptpswitch(config)#
Related Commands
none Specifies that the clock can be set manually.
ntp Specifies that the clock be set to the Network Time Protocol (NTP).
ptp Specifies that the clock be set to the Precision Time Protocol (PTP).
Release Modification
6.0(2)A1(1) This command was introduced.
Command Description
feature ptp Enables PTP on the switch.
show ptp clock Displays the PTP clock information.
show running-config ptp
Displays the PTP running system configuration information.
32Cisco Nexus 3548 Switch NX-OS System Management Command Reference
OL-27851-02

System Management Commandscommit (Call Home)
commit (Call Home)To commit Call Home configuration changes and distribute the changes to call Cisco Fabric Services (CFS)-enabled devices, use the commit command.
commit
Syntax Description This command has no arguments or keywords.
Command Default None
Command Modes Callhome configuration mode
Command History
Examples This example shows how to commit CFS Call Home configuration changes:
switch# configure terminalswitch(config)# callhomeswitch(config-callhome)# commitswitch(config-callhome)#
Related Commands
Release Modification
5.0(3)A1(1) This command was introduced.
Command Description
show callhome Displays Call Home configuration information.
show running-config callhome
Displays the running configuration information for Call Home.
33Cisco Nexus 3548 Switch NX-OS System Management Command Reference
OL-27851-02

System Management Commandscommit (session)
commit (session)To commit the current configuration session, use the commit command.
commit
Syntax Description This command has no arguments or keywords.
Command Default None
Command Modes Session configuration mode
Command History
Examples This example shows how to commit the current session:
switch# configure session MySessionswitch(config-s)# commit switch(config-s)#
Related Commands
Release Modification
5.0(3)A1(1) This command was introduced.
Command Description
configure session Creates a configuration session.
show configuration session
Displays the contents of the session.
verify Verifies a session.
34Cisco Nexus 3548 Switch NX-OS System Management Command Reference
OL-27851-02

System Management Commandscontract-id (Call Home)
contract-id (Call Home)To configure the optional contract number for the customer, use the contract-id command. To remove a contract number, use the no form of this command.
contract-id contract-number
no contract-id
Syntax Description
Command Default None
Command Modes Callhome configuration mode
Command History
Usage Guidelines You can configure the customer identification information that Cisco Smart Call Home should use. The service agreement includes the customer identification information, such as the customer ID, contract ID, and site ID.
Examples This example shows how to configure the contract number for the customer:
switch# configure terminalswitch(config)# callhome switch(config-callhome)# contract-id 12095134-1706 switch(config-callhome)#
Related Commands
contract-number Contract number. The contract number can be up to 255 alphanumeric characters in free format.
Release Modification
5.0(3)A1(1) This command was introduced.
Command Description
customer-id Configures the customer number for the switch.
show callhome Displays a summary of the Call Home configuration.
35Cisco Nexus 3548 Switch NX-OS System Management Command Reference
OL-27851-02

System Management Commandscustomer-id (Call Home)
customer-id (Call Home)To configure the optional unique identification number for the customer, use the customer-id command. To remove a customer number, use the no form of this command.
customer-id customer-no
no customer-id
Syntax Description
Command Default None
Command Modes Callhome configuration mode
Command History
Usage Guidelines You can configure the customer identification information that Cisco Smart Call Home should use. The service agreement includes the customer identification information, such as the customer ID, contract ID, and site ID.
Examples This example shows how to configure a customer number:
switch# configure terminalswitch(config)# callhomeswitch(config-callhome)# customer-id AXC-1203switch(config-callhome)#
Related Commands
customer-no Customer number, as specified in the service agreement. The customer number can be up to 255 alphanumeric characters in free format.
Release Modification
5.0(3)A1(1) This command was introduced.
Command Description
site-id Configures the site number for the switch.
show callhome Displays a summary of the Call Home configuration.
36Cisco Nexus 3548 Switch NX-OS System Management Command Reference
OL-27851-02

System Management Commandsdescription
descriptionTo add a description to a user policy, use the description command. To remove the policy description, use the no form of this command.
description policy-description
no description policy-description
Syntax Descriptiona
Defaults None
Command Modes Applet configuration mode
Command History
Usage Guidelines This command does not require a license.
Examples This example shows how to add a description to a user policy:
switch# configure terminalswitch(config)# event manager applet monitorShutdownswitch(config-applet)# description “Monitors interface shutdown“
This example shows how to remove the policy description:
switch(config-applet)# no description “Monitors interface shutdown“switch(config-applet)#
Related Commands
policy-description Policy description. The description can be any case-sensitive, alphanumeric string up to 80 characters enclosed by quotation marks.
Release Modification
5.0(3)A1(1) This command was introduced.
Command Description
description Configures a descriptive string for the policy.
event Configures the event statement for the policy.
show event-manager policy state
Correlates multiple events in the policy.
tag Displays information about the status of the configured policy.
37Cisco Nexus 3548 Switch NX-OS System Management Command Reference
OL-27851-02

System Management Commandsdescription (SPAN, ERSPAN)
description (SPAN, ERSPAN)To add a description to an Ethernet Switched Port Analyzer (SPAN) or an Encapsulated Remote Switched Port Analyzer (ERSPAN) session configuration, use the description command. To remove the description, use the no form of this command.
description description
no description
Syntax Description
Command Default No description is added.
Command Modes SPAN session configuration mode ERSPAN session configuration mode
Command History
Usage Guidelines The description command is meant to provide a reminder in the configuration to describe what certain SPAN sessions are used for. The description appears in the output of the show monitor session and show running-config monitor commands.
Examples This example shows how to add a description for a SPAN session:
switch# configure terminalswitch(config)# monitor session 9 type localswitch(config-monitor)# description A Local SPAN sessionswitch(config-monitor)#
This example shows how to add a description for an ERSPAN session:
switch# configure terminalswitch(config)# monitor session 9 type erspan-sourceswitch(config-erspan-src)# description An ERSPAN sessionswitch(config-erspan-src)#
description String description of the SPAN session configuration. This string is limited to 80 characters.
Release Modification
5.0(3)A1(1) This command was introduced.
6.0(2)A1(1) ERSPAN support was added.
38Cisco Nexus 3548 Switch NX-OS System Management Command Reference
OL-27851-02

System Management Commandsdescription (SPAN, ERSPAN)
Related Commands Command Description
destination (SPAN session)
Configures a destination SPAN port.
monitor session Creates a new SPAN session configuration.
show monitor session Displays SPAN session configuration information.
show running-config monitor
Displays the running configuration information of a SPAN session.
source (SPAN session) Configures a source SPAN port.
39Cisco Nexus 3548 Switch NX-OS System Management Command Reference
OL-27851-02

System Management Commandsdestination ip (ERSPAN)
destination ip (ERSPAN)To configure an Encapsulated Remote Switched Port Analyzer (ERSPAN) destination IP address, use the destination command. To remove the destination ERSPAN IP address, use the no form of this command.
destination ip ip_address
no destination ip ip_address
Syntax Description
Command Default None
Command Modes ERSPAN source configuration mode
Command History
Usage Guidelines You can configure only one destination IP address for an ERSPAN source session.
This command does not require a license.
Examples This example shows how to configure an ERSPAN destination IP address:
switch# configure terminalswitch(config)# monitor session 1 type erspan-sourceswitch(config-erspan-src)# destination ip 192.0.3.1switch(config-erspan-src)#
Related Commands
ip_address IPv4 address in the format A.B.C.D.
Release Modification
6.0(2A1(1) This command was introduced.
Command Description
monitor session Creates a new SPAN session configuration.
show monitor session Displays SPAN session configuration information.
show running-config monitor
Displays the running configuration information of a SPAN session.
source (SPAN session) Configures a source SPAN port.
source (ERSPAN session)
Configures a source VLAN interface.
40Cisco Nexus 3548 Switch NX-OS System Management Command Reference
OL-27851-02

System Management Commandsdestination interface (ERSPAN)
destination interface (ERSPAN)To configure interfaces for an Encapsulated Remote Switched Port Analyzer (ERSPAN) destination, use the destination interface command. To remove the interfaces from an ERSPAN session, use the no form of this command.
destination interface ethernet slot/port
no destination interface ethernet slot/port
Syntax Description
Command Default None
Command Modes ERSPAN destination configuration mode
Command History
Usage Guidelines The destination port should be previously configured as a switchport monitor.
This command does not require a license.
Examples This example shows how to configure an ERSPAN destination interface:
switch# configure terminalswitch(config)# monitor session 1 type erspan-destinationswitch(config-erspan-dst)# destination interface ethernet 1/5switch(config-erspan-dst)#
Related Commands
ethernet Specifies the Ethernet interface.
slot/port Ethernet interface slot number and port number. The slot number is from 1 to 255, and the port number is from 1 to 128.
Release Modification
6.0(2)A1(1) This command was introduced.
Command Description
monitor session Creates a new SPAN session configuration.
show monitor session Displays SPAN session configuration information.
show running-config monitor
Displays the running configuration information of a SPAN session.
source (SPAN session) Configures a source SPAN port.
source (ERSPAN session)
Configures a source VLAN interface.
41Cisco Nexus 3548 Switch NX-OS System Management Command Reference
OL-27851-02

System Management Commandsdestination-profile (Call Home)
destination-profile (Call Home)To create a user-defined destination profile, modify a predefined or user-defined destination profile, or configure the message format for that new destination profile, use the destination-profile command. To remove the destination profile, use the no form of this command.
destination-profile {CiscoTAC-1 | {{full-txt-destination | short-txt-destination}{message-level level | message-size size}}} {alert-group alert | email-addr email-address | http url | transport-method {email | http}}
destination-profile profile-name [alert-group alert | email-addr email-address | format {XML | full-txt | short-txt} | http url | message-level level | message-size size | transport-method {email | http}]
no destination-profile
Syntax Description CiscoTAC-1 Configures a destination profile for Extensible Markup Language (XML) messages.
full-txt-destination Configures a destination profile for plain text messages.
short-txt-destination Configures a destination profile for short text message.
message-level level Specifies the Call Home message severity level. The range is from 0 to 9, with 0 being the lowest urgency, and 9 the highest urgency.
message-size size Specifies the maximum message size. The range is as follows:
• full-txt-destination—From 0 to 5000000, and the default is 2500000.
• short-txt-destination—From 0 to 100000, and the default is 4000.
• CiscoTAC-1—5000000, which is not changeable.
alert-group alert Associates one or more alert groups with a destination profile. The alert group can be one of the following:
• All—All alert groups
• Cisco-TAC—Cisco TAC events
• Configuration—Configuration events
• Diagnostic—Diagnostic events
• EEM—EEM events
• Environmental—Power, fan, and temperature-related events
• Inventory—Inventory status events
• License—Licensing events
• Linecard-Hardware—Linecard-related events
• Supervisor-Hardware—Supervisor-related events
• Syslog-group-port—Syslog message events filed by the port manager
• System—Software-related events
• Test—User-generated test events
email-addr Specifies the e-mail address to which the alert should be sent.
42Cisco Nexus 3548 Switch NX-OS System Management Command Reference
OL-27851-02

System Management Commandsdestination-profile (Call Home)
Command Default Message format: XML.
Message size: 2500000 for full-txt-destination, 4000 for short-txt-destination, and 4000000 for XML format.
Message level: 0
Alert group: All for full-text-destination and short-text-destination profiles. The cisco-tac alert group for the CiscoTAC-1 destination profile.
Command Modes Callhome configuration mode
Command History
Usage Guidelines You can modify the following attributes for a predefined or user-defined destination profile:
• Destination e-mail address—The e-mail address to which the alert should be sent.
• Message formatting—The message format used for sending the alert (full text, short text, or XML).
• Message level—The Call Home message severity level for this destination profile.
• Message size—The allowed length of a Call Home message sent to the e-mail addresses in this destination profile.
Note You cannot modify or delete the CiscoTAC-1 destination profile.
email-address E-mail address in email address format. The address can be a maximum of 255 alphanumeric characters and cannot contain white spaces; for example, [email protected].
http url Specifies the HTTP or HTTPS URL. The url can be a maximum of 255 alphanumeric characters and cannot contain white spaces; for example,
http://site.com/services/callserv
https://site2.com/serv/CALL
transport-method Specifies the transport method for sending Call Home messages.
email Specifies that Call Home messages be sent through e-mail.
http Specifies that Call Home messages be sent using HTTP.
profile-name User-defined profile name. The profile name can be a maximum of 31 alphanumeric characters.
format (Optional) Specifies the Call Home message format. The default is XML.
XML Specifies that the Call Home message format is XML.
full-txt Specifies that the Call Home message format is plain text.
short-txt Specifies that the Call Home message format is a short text message.
Release Modification
5.0(3)A1(1) This command was introduced.
43Cisco Nexus 3548 Switch NX-OS System Management Command Reference
OL-27851-02

System Management Commandsdestination-profile (Call Home)
The Cisco Nexus 3548 switch does not generate an alert if the Call Home severity level of the alert is lower than the message severity level set for the destination profile.
Table 1-1 lists each Call Home message level keyword.
Examples This example shows how to create a user-defined Call Home destination profile to send Call Home messages through e-mail:
switch# configure terminalswitch(config)# callhomeswitch(config-callhome)# destination-profile myProfile alert-group Configuration email-addr [email protected] message-level 3 transport-method emailswitch(config-callhome)#
Related Commands
Table 1-1 Call Home Message Severity Level
Call Home Level Keyword Description
9 Catastrophic Network-wide catastrophic failure.
8 Disaster Significant network impact.
7 Fatal System is unusable.
6 Critical Critical conditions that indicate that immediate attention is needed.
5 Major Major conditions.
4 Minor Minor conditions.
3 Warning Warning conditions.
2 Notification Basic notification and informational messages.
1 Normal Normal event signifying return to normal state.
0 Debugging Debugging messages.
Command Description
callhome Configures a Call Home service.
copy running-config startup-config
Saves this configuration change.
show callhome Displays Call Home configuration information.
show callhome destination-profile
Displays Call Home information for a destination profile.
44Cisco Nexus 3548 Switch NX-OS System Management Command Reference
OL-27851-02
System Management Commandsdiagnostic bootup level
diagnostic bootup levelTo configure the bootup diagnostic level to trigger diagnostics when the device boots, use the diagnostic bootup level command. To remove bootup diagnostic level configuration, use the no form of this command.
diagnostic bootup level {bypass | complete}
no diagnostic bootup level {bypass | complete}
Syntax Description
Command Default Complete
Command Modes Global configuration mode
Command History
Examples This example shows how to configure the bootup diagnostics level to trigger the complete diagnostics:
switch# configure terminalswitch(config)# diagnostic bootup level complete switch(config)#
This example shows how to remove the bootup diagnostics level configuration:
switch# configure terminalswitch(config)# no diagnostic bootup level complete switch(config)#
Related Commands
bypass Specifies that all bootup tests are skipped.
complete Specifies that all bootup diagnostics are performed. This is the default value.
Release Modification
5.0(3)A1(1) This command was introduced.
Command Description
show diagnostic bootup level
Displays the bootup diagnostics level.
show diagnostic bootup result
Displays the results of the diagnostics tests.
45Cisco Nexus 3548 Switch NX-OS System Management Command Reference
OL-27851-02

System Management Commandsdistribute (Call Home)
distribute (Call Home)To enable Call Home distribution using Cisco Fabric Services (CFS), use the distribute command. To disable Call Home distribution, use the no form of this command.
distribute
no distribute
Syntax Description This command has no arguments or keywords.
Command Default Disabled
Command Modes Callhome configuration mode
Command History
Examples This example shows how to enable CFS distribution for Call Home:
switch# configure terminalswitch(config)# callhome switch(config-callhome)# distribute switch(config-callhome)#
This example shows how to disable CFS distribution for Call Home:
switch# configure terminalswitch(config)# callhome switch(config-callhome)# no distribute switch(config-callhome)#
Related Commands
Release Modification
5.0(3)A1(1) This command was introduced.
Command Description
show callhome Displays Call Home configuration information.
show running-config callhome
Displays the running configuration information for Call Home.
46Cisco Nexus 3548 Switch NX-OS System Management Command Reference
OL-27851-02

System Management Commandsduplicate-message throttle (Call Home)
duplicate-message throttle (Call Home)To limit the number of duplicate messages received for the same event, use the duplicate-message throttle command. To disable duplicate message throttling for Call Home, use the no form of this command.
duplicate-message throttle
no duplicate-message throttle
Syntax Description This command has no arguments or keywords.
Command Default None
Command Modes Callhome configuration mode
Command History
Usage Guidelines By default, the switch limits the number of duplicate messages received for the same event. If the number of duplicate messages sent exceeds 30 messages within a 2-hour time frame, then the switch discards further messages for that alert type.
Examples This example shows how to enable duplicate alert message throttling for Call Home:
switch# configure terminalswitch(config)# callhome switch(config-callhome)# duplicate-message throttle switch(config-callhome)#
Related Commands
Release Modification
5.0(3)A1(1) This command was introduced.
Command Description
copy running-config startup-config
Saves this configuration change.
show callhome Displays Call Home configuration information.
47Cisco Nexus 3548 Switch NX-OS System Management Command Reference
OL-27851-02

System Management Commandsemail-contact (Call Home)
email-contact (Call Home)To configure the e-mail address for the primary person responsible for the switch, use the email-contact command. To remove an email contact, use the no form of this command.
email-contact email-address
no email-contact
Syntax Description
Command Default None
Command Modes Callhome configuration mode
Command History
Examples This example shows how to configure an e-mail address:
switch# configure terminalswitch(config)# callhome switch(config-callhome)# email-contact [email protected] switch(config-callhome)#
Related Commands
email-address E-mail address. The address can be a maximum of 255 alphanumeric characters in e-mail address format and cannot contain spaces.
Release Modification
5.0(3)A1(1) This command was introduced.
Command Description
copy running-config startup-config
Saves this configuration change.
phone-contact Configures the phone number for the primary person responsible for the switch.
show callhome Displays a summary of the Call Home configuration.
48Cisco Nexus 3548 Switch NX-OS System Management Command Reference
OL-27851-02

System Management Commandsenable (Call Home)
enable (Call Home)To enable the Cisco Smart Call Home service after you have configured the contact information, use the enable command. To disable the Smart Call Home service, use the no form of this command.
enable
no enable
Syntax Description This command has no arguments or keywords.
Command Default Disabled
Command Modes Callhome configuration mode
Command History
Usage Guidelines You must configure an e-mail server. Your switch must have IP connectivity to an e-mail server. You must configure the contact name (SNMP server contact), phone, and street address information before you enable Call Home.
Examples This example shows how to enable the Cisco Smart Call Home service:
switch# configure terminalswitch(config)# callhome switch(config-callhome)# enable contact email address is not configuredcallhome can not be enabled on the switch, because necessary configuration has not been donePlease check if all of following configuration is donecontact person name(sysContact)contact person's emailcontact person's phone numberstreet addrTo configure sysContact, please use snmp-server commandswitch(config-callhome)#
This example shows how to disable the Cisco Smart Call Home service:
switch# configure terminalswitch(config)# callhome switch(config-callhome)# no enable switch(config-callhome)#
Release Modification
5.0(3)A1(1) This command was introduced.
49Cisco Nexus 3548 Switch NX-OS System Management Command Reference
OL-27851-02

System Management Commandsenable (Call Home)
Related Commands Command Description
copy running-config startup-config
Saves this configuration change.
email-contact Configures the e-mail address.
show callhome Displays a summary of the Call Home configuration.
50Cisco Nexus 3548 Switch NX-OS System Management Command Reference
OL-27851-02

System Management Commandsfeature ptp
feature ptpTo enable the Precision Time Protocol (PTP) feature, use the feature ptp command. To disable the PTP feature, use the no form of this command.
feature ptp
no feature ptp
Syntax Description This command has no arguments or keywords.
Command Default Disabled
Command Modes Global configuration mode
Supported User Roles network-admin
Command History
Usage Guidelines This command does not require a license.
Examples This example shows how to enable the PTP feature:
switch# configure terminalswitch(config)# feature ptpswitch(config)#
This example shows how to disable the PTP feature:
switch# configure terminalswitch(config)# no feature ptpswitch(config)#
Related Commands
Release Modification
6.0(2)A1(1) This command was introduced.
Command Description
ptp source Configures the source IP address for all PTP packets.
ptp domain Configures the domain number to use for this clock.
ptp priority1 Configures the priority1 value to use when advertising this clock.
ptp priority2 Configures the priority2 value to use when advertising this clock.
show ptp brief Displays the PTP status.
show ptp clock Displays the properties of the local clock.
51Cisco Nexus 3548 Switch NX-OS System Management Command Reference
OL-27851-02

System Management Commandsfeature scheduler
feature schedulerTo enable the scheduler feature on a Cisco NX-OS device, use the feature scheduler command. To disable the schedule feature, use the no form of this command.
feature scheduler
no feature scheduler
Syntax Description This command has no arguments or keywords.
Defaults Disabled
Command Modes Global configuration mode
Command History
Usage Guidelines This command does not require a license.
Examples This example shows how to enable the scheduler feature on a Cisco NX-OS device:
switch# configure terminalswitch(config)# feature scheduler
This example shows how to disable the scheduler feature on a Cisco NX-OS device:
switch(config)# no feature schedulerswitch(config)#
Related Commands
Release Modification
5.0(3)A1(1) This command was introduced.
Command Description
scheduler Configures maintenance jobs.
52Cisco Nexus 3548 Switch NX-OS System Management Command Reference
OL-27851-02

System Management Commandshardware profile buffer monitor
hardware profile buffer monitorTo enable buffer monitoring, use the hardware profile buffer monitor command. To disable buffer monitoring, use the no form of this command.
hardware profile buffer monitor {unicast | multicast} [sampling interval | threshold value]
no hardware profile buffer monitor {unicast | multicast} [sampling interval | threshold value]
Syntax Descriptionn
Command Modes Global configuration
Command History
Examples The following example shows how to configure Active Buffer Monitoring for unicast traffic with a threshold value of 384 kilobytes and a sampling value of 5000 nanoseconds:
switch# configure terminalswitch(config)# hardware profile buffer monitor unicastswitch(config)# hardware profile buffer monitor threshold 384switch(config)# hardware profile buffer monitor unicast sampling 5000switch(config)# copy running-config startup-config
The following example shows how to configure Active Buffer Monitoring for multicast traffic with a threshold value of 384 kilobytes and a sampling value of 5000 nanoseconds.
switch# configure terminalswitch(config)# hardware profile buffer monitor multicastswitch(config)# hardware profile buffer monitor threshold 384switch(config)# hardware profile buffer monitor multicast sampling 5000
Related Commandss
witch(config)# copy
running-config
startup-config
unicast Specifies to enable unicast mode.
multicast Specifies to enable multicast mode.
sampling Specifies to monitor the hardware profile buffer by sampling data every second. The default sampling interval is 4 milliseconds.
threshold Speicifes to generate a syslog entry when the specified maximum buffer threshold is exceeded. The range is from 384 to 6144 kilobytes with 384 kilobyte increments. The default threshold value is 90% of the total available shared buffer.
interval Sampling interval for hardware. The range is from 10 to 2000000 nanoseconds. The default sampling interval is 4 milliseconds.
value Histogram threshold value. The range is from ? to ? kilobytes.
Release Modification
5.0(3)A1(1) This command was introduced.
53Cisco Nexus 3548 Switch NX-OS System Management Command Reference
OL-27851-02

System Management Commandshardware profile buffer monitor
Command Description
show hardware profile buffer monitor
Displays information about whether warp mode is enabled and displays the host, unicast, multicast, and Layer 2 TCAM sizes.
54Cisco Nexus 3548 Switch NX-OS System Management Command Reference
OL-27851-02

System Management Commandshardware profile forwarding-mode warp
hardware profile forwarding-mode warpTo enable warp mode, use the hardware profile forwarding-mode warp command. To disable warp mode, use the no form of this command.
hardware profile forwarding-mode warp
no hardware profile forwarding-mode warp
Syntax Description This command has no arguments or keywords.
Command Default Disabled.
Command Modes Global configuration
Command History
Usage Guidelines You must reload the Cisco Nexus 3548 switch after enabling the warp mode and also to revert to the factory default from warp mode.
In warp mode, these features are not supported: IP redirect, Egress Routed Access Control Lists (RACLs), Port Access Control Lists (PACLs), and Equal-cost Multipathing (ECMP).
Examples This example shows how to enable warp mode:
switch(config)# hardware profile forwarding-mode warpswitch(config)#
This example shows how to disable warp mode:
switch(config)# no hardware profile forwarding-mode warpWarning: This configuration has been modified and will take effect only after saving the configuration (copy r s) and reload!switch(config)#
Related Commands
Release Modification
5.0(3)A1(1) This command was introduced.
Command Description
show hardware profile forwarding-mode
Displays the warp mode status and the host, unicast, multicast, and Layer 2 TCAM sizes.
55Cisco Nexus 3548 Switch NX-OS System Management Command Reference
OL-27851-02
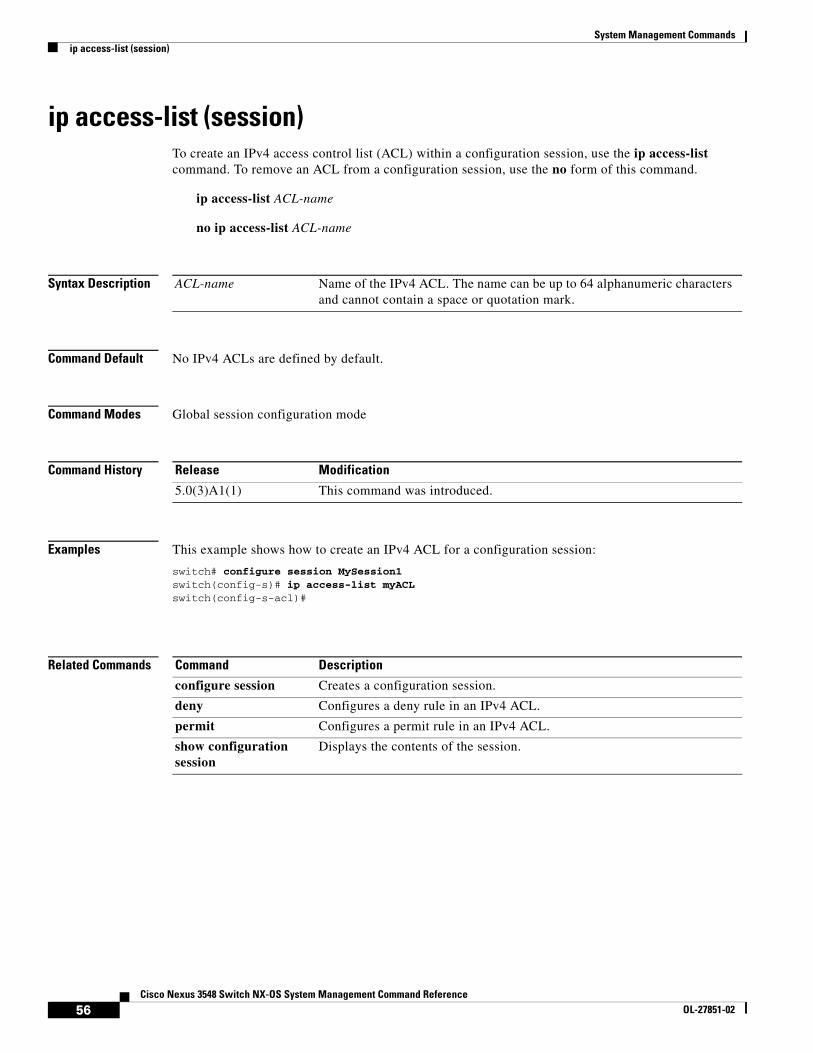
System Management Commandsip access-list (session)
ip access-list (session)To create an IPv4 access control list (ACL) within a configuration session, use the ip access-list command. To remove an ACL from a configuration session, use the no form of this command.
ip access-list ACL-name
no ip access-list ACL-name
Syntax Description
Command Default No IPv4 ACLs are defined by default.
Command Modes Global session configuration mode
Command History
Examples This example shows how to create an IPv4 ACL for a configuration session:
switch# configure session MySession1 switch(config-s)# ip access-list myACL switch(config-s-acl)#
Related Commands
ACL-name Name of the IPv4 ACL. The name can be up to 64 alphanumeric characters and cannot contain a space or quotation mark.
Release Modification
5.0(3)A1(1) This command was introduced.
Command Description
configure session Creates a configuration session.
deny Configures a deny rule in an IPv4 ACL.
permit Configures a permit rule in an IPv4 ACL.
show configuration session
Displays the contents of the session.
56Cisco Nexus 3548 Switch NX-OS System Management Command Reference
OL-27851-02

System Management Commandsip domain-list
ip domain-listTo configure the IP domain list, use the ip domain-list command. To disable the IP domain list, use the no form of the command.
ip domain-list domain-name [use-vrf name]
no ip domain-list domain-name [use-vrf name]
Syntax Description
Command Default None
Command Modes Global configuration mode VRF context configuration mode
Command History
Usage Guidelines Use the ip domain-list command to configure additional domain names for the device. Use the vrf context command to enter the VRF context mode to configure additional domain names for a particular VRF.
Examples This example shows how to configure the IP domain list for the default VRF:
switch# configure terminalswitch(config)# ip domain-list Mysite.comswitch(config)#
This example shows how to configure the IP domain list for the management VRF:
switch# configure terminalswitch(config)# vrf context managementswitch(config-vrf)# ip domain-list Mysite.comswitch(config-vrf)#
This example shows how to configure the IP domain list for the default VRF to use the management VRF as a backup if the domain name cannot be resolved through the default VRF:
switch# configure terminalswitch(config)# vrf context managementswitch(config-vrf)# exit switch(config)# ip domain-name Mysite.com use-vrf management
domain-name Domain name for the IP domain list. The name can be any case-sensitive, alphanumeric string up to 63 characters.
use-vrf name (Optional) Specifies the virtual routing and forwarding (VRF) to use to resolve the domain domain name for the IP domain list. The name can be any case-sensitive, alphanumeric string up to 32 characters.
Release Modification
5.0(3)A1(1) This command was introduced.
57Cisco Nexus 3548 Switch NX-OS System Management Command Reference
OL-27851-02

System Management Commandsip domain-list
switch(config)# ip name-server 192.0.2.1switch(config)# ip domain-list Mysite2.com switch(config)#
Related Commands Command Description
show hosts Displays information about the IP domain name configuration.
58Cisco Nexus 3548 Switch NX-OS System Management Command Reference
OL-27851-02

System Management Commandsip domain-lookup
ip domain-lookupTo enable the Domain Name Server (DNS) lookup feature, use the ip domain-lookup command. Use the no form of this command to disable this feature.
ip domain-lookup
no ip domain-lookup
Syntax Description This command has no arguments or keywords.
Command Default None
Command Modes Global configuration mode
Command History
Usage Guidelines Use the ip domain-lookup command to enable DNS.
Examples This example shows how to configure the DNS server lookup feature:
switch# configure terminalswitch(config)# vrf context managementswitch(config-vrf)# exit switch(config)# ip domain-name Mysite.com use-vrf managementswitch(config)# ip name-server 192.0.2.1switch(config)# ip domain-lookupswitch(config)#
Related Commands
Release Modification
5.0(3)A1(1) This command was introduced.
Command Description
show hosts Displays information about the DNS.
59Cisco Nexus 3548 Switch NX-OS System Management Command Reference
OL-27851-02

System Management Commandsip domain-name
ip domain-nameTo configure a domain name, use the ip domain-name command. To delete a domain name, use the no form of the command.
ip domain-name domain-name [use-vrf name]
no ip domain-name domain-name [use-vrf name]
Syntax Description
Command Default None
Command Modes Global configuration mode VRF context configuration mode
Command History
Usage Guidelines Use the ip domain-name command to configure the domain name for the device. Use the vrf context command to enter the VRF context mode to configure the domain monastery for a particular VRF.
Examples This example shows how to configure the IP domain name for the default VRF:
switch# configure terminalswitch(config)# ip domain-name Mysite.comswitch(config)#
This example shows how to configure the IP domain name for the management VRF:
switch# configure terminalswitch(config)# vrf context managementswitch(config-vrf)# ip domain-name Mysite.comswitch(config-vrf)#
This example shows how to configure the IP domain name for the default VRF to use the management VRF as a backup if the domain name cannot be resolved through the default VRF:
switch# configure terminalswitch(config)# vrf context managementswitch(config-vrf)# exit switch(config)# ip domain-name Mysite.com use-vrf managementswitch(config)#
domain-name Domain name. The name can be any case-sensitive, alphanumeric string up to 63 characters.
use-vrf name (Optional) Specifies the virtual routing and forwarding (VRF) to use to resolve the domain name. The name can be any case-sensitive, alphanumeric string up to 32 characters.
Release Modification
5.0(3)A1(1) This command was introduced.
60Cisco Nexus 3548 Switch NX-OS System Management Command Reference
OL-27851-02

System Management Commandsip domain-name
Related Commands Command Description
ip domain-list Configures the IP domain list.
ip domain-lookup Enables the Domain Name Server (DNS) lookup feature.
show hosts Displays information about the IP domain name configuration.
61Cisco Nexus 3548 Switch NX-OS System Management Command Reference
OL-27851-02

System Management Commandsip host
ip hostTo define static hostname-to-address mappings in the Domain Name System (DNS) hostname cache, use the ip host command. To remove a hostname-to-address mapping, use the no form of this command.
ip host name address1 [address2... address6]
no ip host name address1 [address2... address6]
Syntax Description
Command Default None
Command Modes Global configuration mode
Command History
Usage Guidelines Use the ip host command to add a static host name to DNS.
Examples This example shows how to configure a static hostname:
switch# configure terminalswitch(config)# ip host mycompany.com 192.0.2.1switch(config)#
Related Commands
name Hostname. The name can be any case-sensitive, alphanumeric string up to 80 characters.
address1 IPv4 address in the x.x.x.x format.
address2 ... address6 (Optional) Up to five additional IPv4 addresses in the x.x.x.x format.
Release Modification
5.0(3)A1(1) This command was introduced.
Command Description
show hosts Displays information about the IP domain name configuration.
62Cisco Nexus 3548 Switch NX-OS System Management Command Reference
OL-27851-02

System Management Commandsip name-server
ip name-serverTo configure a name server, use the ip name-server command. To disable this feature, use the no form of the command.
ip name-server ip-address [use-vrf name]
no ip name-server ip-address [use-vrf name]
Syntax Description
Command Default None
Command Modes Global configuration mode VRF context configuration mode
Command History
Usage Guidelines Use the ip name-server command to configure the name server for the device. Use the vrf context command to enter the VRF context mode to configure the domain names for a particular VRF.
Examples This example shows how to configure the IP name server for the default VRF:
switch# configure terminalswitch(config)# vrf context managementswitch(config-vrf)# exit switch(config)# ip domain-name Mysite.com use-vrf managementswitch(config)# ip name-server 192.0.2.1switch(config)#
This example shows how to configure the IP name server for the management VRF:
switch# configure terminalswitch(config)# vrf context managementswitch(config-vrf)# ip name-server 192.0.2.1switch(config-vrf)#
This example shows how to configure the IP name server for the default VRF to use the management VRF as a backup if the IP name server cannot be reached through the default VRF:
switch# configure terminalswitch(config)# vrf context managementswitch(config-vrf)# exit
ip-address IP address for the name server.
use-vrf name (Optional) Specifies the virtual routing and forwarding (VRF) to use to reach the name-server. The name can be any case-sensitive, alphanumeric string up to 32 characters.
Release Modification
5.0(3)A1(1) This command was introduced.
63Cisco Nexus 3548 Switch NX-OS System Management Command Reference
OL-27851-02

System Management Commandsip name-server
switch(config)# ip domain-name Mysite.com use-vrf managementswitch(config)# ip name-server 192.0.2.1 use-vrf managementswitch(config)#
Related Commands Command Description
ip domain-list Defines a list of domains.
ip domain lookup Enables DNS-based host name-to-address translation.
show hosts Displays information about the IP domain name configuration.
vrf context Creates a virtual routing and forwarding (VRF) instance.
64Cisco Nexus 3548 Switch NX-OS System Management Command Reference
OL-27851-02
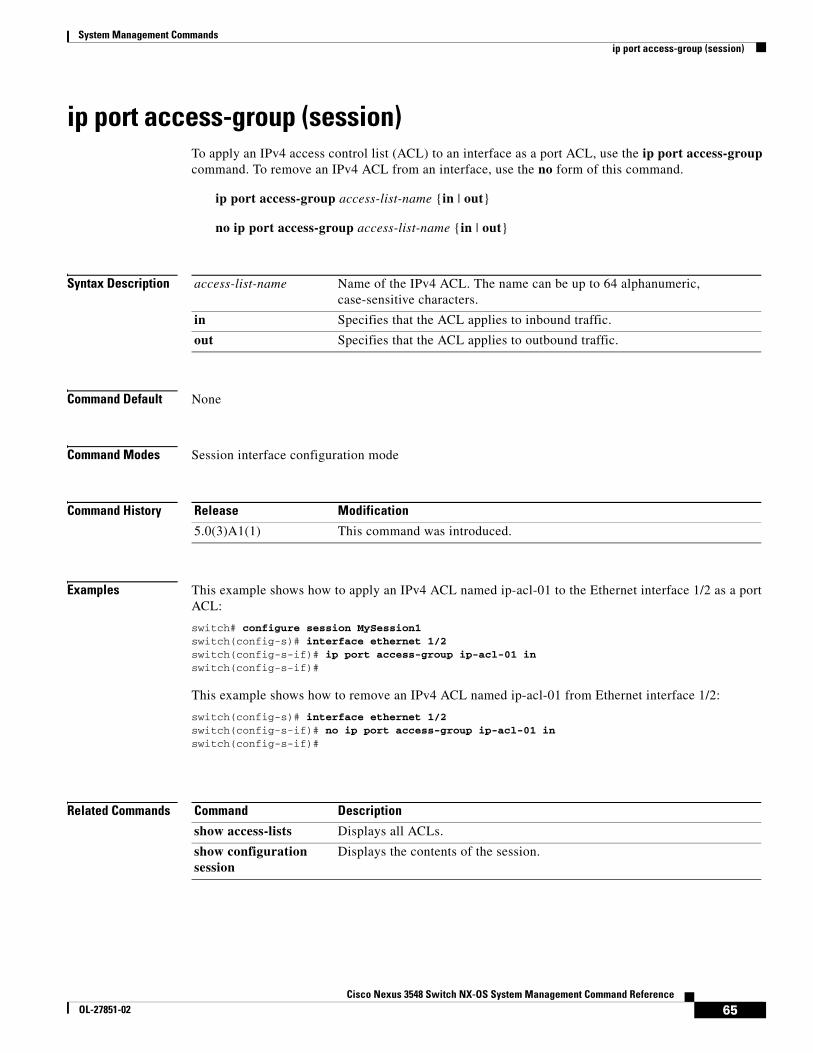
System Management Commandsip port access-group (session)
ip port access-group (session)To apply an IPv4 access control list (ACL) to an interface as a port ACL, use the ip port access-group command. To remove an IPv4 ACL from an interface, use the no form of this command.
ip port access-group access-list-name {in | out}
no ip port access-group access-list-name {in | out}
Syntax Description
Command Default None
Command Modes Session interface configuration mode
Command History
Examples This example shows how to apply an IPv4 ACL named ip-acl-01 to the Ethernet interface 1/2 as a port ACL:
switch# configure session MySession1 switch(config-s)# interface ethernet 1/2 switch(config-s-if)# ip port access-group ip-acl-01 in switch(config-s-if)#
This example shows how to remove an IPv4 ACL named ip-acl-01 from Ethernet interface 1/2:
switch(config-s)# interface ethernet 1/2 switch(config-s-if)# no ip port access-group ip-acl-01 in switch(config-s-if)#
Related Commands
access-list-name Name of the IPv4 ACL. The name can be up to 64 alphanumeric, case-sensitive characters.
in Specifies that the ACL applies to inbound traffic.
out Specifies that the ACL applies to outbound traffic.
Release Modification
5.0(3)A1(1) This command was introduced.
Command Description
show access-lists Displays all ACLs.
show configuration session
Displays the contents of the session.
65Cisco Nexus 3548 Switch NX-OS System Management Command Reference
OL-27851-02

System Management Commandslogging abort
logging abortTo discard the pending changes to the syslog server configuration, use the logging abort command.
logging abort
Syntax Description This command has no arguments or keywords.
Command Default None
Command Modes Global configuration mode
Command History
Examples This example shows how to discard the changes made to the syslog server configuration:
switch# configure terminalswitch(config)# logging distribute switch(config)# logging abort switch(config)#
Related Commands
Release Modification
5.0(3)A1(1) This command was introduced.
Command Description
logging distribute Enables the distribution of the syslog server configuration to network switches using the CFS infrastructure.
show logging pending Displays the pending changes to the syslog server configuration.
show logging status Displays the logging status.
66Cisco Nexus 3548 Switch NX-OS System Management Command Reference
OL-27851-02

System Management Commandslogging commit
logging commitTo commit the pending changes to the syslog server configuration for distribution to the switches in the fabric, use the logging commit command.
logging commit
Syntax Description This command has no arguments or keywords.
Command Default None
Command Modes Global configuration mode
Command History
Examples This example shows how to commit the distribution of the syslog server configuration:
switch# configure terminalswitch(config)# logging distributeswitch(config)# logging commitswitch(config)#
Related Commands
Release Modification
5.0(3)A1(1) This command was introduced.
Command Description
logging distribute Enables the distribution of the syslog server configuration to network switches using the CFS infrastructure.
show logging status Displays the logging status.
67Cisco Nexus 3548 Switch NX-OS System Management Command Reference
OL-27851-02
System Management Commandslogging console
logging consoleTo enable logging messages to the console session, use the logging console command. To disable logging messages to the console session, use the no form of this command.
logging console [severity-level]
no logging console
Syntax Description
Command Default None
Command Modes Global configuration mode
Command History
Examples This example shows how to enable logging messages with a severity level of 4 (warning) or higher to the console session:
switch# configure terminalswitch(config)# logging console 4switch(config)#
Related Commands
severity-level (Optional) Number of the desired severity level at which messages should be logged. Messages at or numerically lower than the specified level are logged. Severity levels are as follows:
• 0—emergency: System unusable
• 1—alert: Immediate action needed
• 2—critical: Critical condition—default level
• 3—error: Error condition
• 4—warning: Warning condition
• 5—notification: Normal but significant condition
• 6—informational: Informational message only
• 7—debugging: Appears during debugging only
Release Modification
5.0(3)A1(1) This command was introduced.
Command Description
show logging console Displays the console logging configuration.
68Cisco Nexus 3548 Switch NX-OS System Management Command Reference
OL-27851-02

System Management Commandslogging distribute
logging distributeTo enable the distribution of the syslog server configuration to network switches using the Cisco Fabric Services (CFS) infrastructure, use the logging distribute command. To disable the distribution, use the no form of this command.
logging distribute
no logging distribute
Syntax Description This command has no arguments or keywords.
Command Default Distribution is disabled.
Command Modes Global configuration mode
Command History
Examples This example shows how to enable the distribution of the syslog server configuration:
switch# configure terminalswitch(config)# logging distribute switch(config)#
This example shows how to disable the distribution of the syslog server configuration:
switch# configure terminalswitch(config)# no logging distribute switch(config)#
Related Commands
Release Modification
5.0(3)A1(1) This command was introduced.
Command Description
logging abort Cancels the pending changes to the syslog server configuration.
logging commit Commits the changes to the syslog server configuration for distribution to the switches in the fabric.
show logging status Displays the logging status.
69Cisco Nexus 3548 Switch NX-OS System Management Command Reference
OL-27851-02
System Management Commandslogging event
logging eventTo log interface events, use the logging event command. To disable logging of interface events, use the no form of this command.
logging event {link-status | trunk-status} {default | enable}
no logging event {link-status | trunk-status} {default | enable}
Syntax Description
Command Default None
Command Modes Global configuration mode Switch profile configuration mode
Command History
Examples This example shows how to log interface events:
switch# configure terminal switch(config)# logging event link-status default switch(config)#
This example shows how to log TRUNK interface events in a switch profile:
switch# configure syncEnter configuration commands, one per line. End with CNTL/Z.switch(config-sync)# switch-profile s5010Switch-Profile started, Profile ID is 1switch(config-sync-sp)# logging event trunk-status default switch(config-sync-sp)#
Related Commands
link-status Specifies to log all UP/DOWN and CHANGE messages.
trunk-status Specifies to log all TRUNK status messages.
default Specifies to the default logging configuration is used by interfaces not explicitly configured.
enable Enables the logging to override the port level configuration.
Release Modification
5.0(3)A1(1) This command was introduced.
5.0(3)A1(1) Support to log interface events was added in switch profiles.
Command Description
show logging Displays the logging status.
show switch-profile Displays information about the switch profile and the configuration revision.
switch-profile Creates or configures a switch profile.
70Cisco Nexus 3548 Switch NX-OS System Management Command Reference
OL-27851-02

System Management Commandslogging event port
logging event portTo log events on an interface, use the logging event port command. To disable logging of interface events, use the no form of this command.
logging event port {link-status | trunk-status} [default]
no logging event port {link-status | trunk-status}
Syntax Description
Command Default None
Command Modes Interface configuration mode
Command History
Examples This example shows how to log interface events:
switch# configure terminalswitch(config)# interface ethernet 1/1switch(config-if)# logging event port link-status defaultswitch(config-if)#
Related Commands
link-status Specifies to log all UP/DOWN and CHANGE messages.
trunk-status Specifies to log all TRUNK status messages.
default (Optional) Specifies the default logging configuration that is used by interfaces not explicitly configured.
Release Modification
5.0(3)A1(1) This command was introduced.
Command Description
show interface Displays the interface configuration information.
show logging Displays the logging status.
71Cisco Nexus 3548 Switch NX-OS System Management Command Reference
OL-27851-02

System Management Commandslogging level
logging levelTo enable logging messages from a defined facility that have the specified severity level or higher, use the logging level command. To disable logging messages from a defined facility, use the no form of this command.
logging level facility severity-level
no logging level facility severity-level
Syntax Description
Command Default None
Command Modes Global configuration mode
Command History
Examples This example shows how to enable logging messages from the AAA facility that have a severity level of 2 or higher:
switch# configure terminalswitch(config)# logging level aaa 2switch(config)#
facility Facility.
To apply the same severity level to all facilities, use the all facility.
severity-level Number of the desired severity level at which messages should be logged. Messages at or numerically lower than the specified level are logged. Severity levels are as follows:
• 0—emergency: System unusable
• 1—alert: Immediate action needed
• 2—critical: Critical condition—default level
• 3—error: Error condition
• 4—warning: Warning condition
• 5—notification: Normal but significant condition
• 6—informational: Informational message only
• 7—debugging: Appears during debugging only
Release Modification
5.0(3)A1(1) This command was introduced.
72Cisco Nexus 3548 Switch NX-OS System Management Command Reference
OL-27851-02

System Management Commandslogging level
Related Commands Command Description
show logging level Displays the facility logging level configuration.
73Cisco Nexus 3548 Switch NX-OS System Management Command Reference
OL-27851-02

System Management Commandslogging logfile
logging logfileTo configure the name of the log file used to store system messages and the minimum severity level to log, use the logging logfile command. To disable logging to the log file, use the no form of this command.
logging logfile logfile-name severity-level [size bytes]
no logging logfile [logfile-name severity-level [size bytes]]]
Syntax Description
Command Default None
Command Modes Global configuration mode
Command History
Examples This example shows how to configure a log file called logfile to store system messages and set its severity level to 4:
switch# configure terminalswitch(config)# logging logfile logfile 4 switch(config)#
logfile-name Name of the log file to be used to store system messages.
severity-level Number of the desired severity level at which messages should be logged. Messages at or numerically lower than the specified level are logged. Severity levels are as follows:
• 0—emergency: System unusable
• 1—alert: Immediate action needed
• 2—critical: Critical condition—default level
• 3—error: Error condition
• 4—warning: Warning condition
• 5—notification: Normal but significant condition
• 6—informational: Informational message only
• 7—debugging: Appears during debugging only
size bytes (Optional) Specifies a maximum file size. The default file size is 4194304 bytes and can be configured from 4096 to 4194304 bytes.
Release Modification
5.0(3)A1(1) This command was introduced.
74Cisco Nexus 3548 Switch NX-OS System Management Command Reference
OL-27851-02

System Management Commandslogging logfile
Related Commands Command Description
show logging logfile Displays the log file.
75Cisco Nexus 3548 Switch NX-OS System Management Command Reference
OL-27851-02

System Management Commandslogging module
logging moduleTo enable module log messages, use the logging module command. To disable module log messages, use the no form of this command.
logging module [severity-level]
no logging module
Syntax Description
Command Default None
Command Modes Global configuration mode
Command History
Usage Guidelines Set a specified severity level or use the default.
Examples This example shows how to enable module log messages:
switch# configure terminalswitch(config)# logging moduleswitch(config)#
Related Commands
severity-level (Optional) Number of the desired severity level at which messages should be logged. Messages at or numerically lower than the specified level are logged. Severity levels are as follows:
• 0—emergency: System unusable
• 1—alert: Immediate action needed
• 2—critical: Critical condition
• 3—error: Error condition
• 4—warning: Warning condition
• 5—notification: Normal but significant condition—default level
• 6—informational: Informational message only
• 7—debugging: Appears during debugging only
Release Modification
5.0(3)A1(1) This command was introduced.
Command Description
show logging module Displays the module logging status.
76Cisco Nexus 3548 Switch NX-OS System Management Command Reference
OL-27851-02

System Management Commandslogging monitor
logging monitorTo enable the device to log messages to the monitor (terminal line), use the logging monitor command. To disable monitor log messages, use the no form of this command.
logging monitor [severity-level]
no logging monitor
Syntax Description
Command Default None
Command Modes Global configuration mode
Command History
Usage Guidelines This configuration applies to Telnet and Secure Shell (SSH) sessions.
Examples This example shows how to enable monitor log messages:
switch# configure terminalswitch(config)# logging monitorswitch(config)#
Related Commands
severity-level (Optional) Number of the desired severity level at which messages should be logged. Messages at or numerically lower than the specified level are logged. Severity levels are as follows:
• 0—emergency: System unusable
• 1—alert: Immediate action needed
• 2—critical: Critical condition—default level
• 3—error: Error condition
• 4—warning: Warning condition
• 5—notification: Normal but significant condition
• 6—informational: Informational message only
• 7—debugging: Appears during debugging only
Release Modification
5.0(3)A1(1) This command was introduced.
Command Description
show logging monitor Displays the status of monitor logging.
77Cisco Nexus 3548 Switch NX-OS System Management Command Reference
OL-27851-02

System Management Commandslogging server
logging serverTo configure a remote syslog server at the specified hostname or IPv4 address, use the logging server command. To disable the remote syslog server, use the no form of this command.
logging server host [severity-level] [facility facility | use-vrf {vrf_name | management}]
no logging server host [severity-level] [facility facility | use-vrf {vrf_name | management}]
Syntax Description
Command Default The default outgoing facility is local7.
The default VRF is management.
Command Modes Global configuration mode
Command History
host Hostname or IPv4 address of the remote syslog server.
severity-level (Optional) Number of the desired severity level at which messages should be logged. Messages at or numerically lower than the specified level are logged. Severity levels are as follows:
• 0—emergency: System unusable
• 1—alert: Immediate action needed
• 2—critical: Critical condition—default level
• 3—error: Error condition
• 4—warning: Warning condition
• 5—notification: Normal but significant condition
• 6—informational: Informational message only
• 7—debugging: Appears during debugging only
facility facility (Optional) Specifies the outgoing facility. The facility can be one of the following: auth, authpriv, cron, daemon, ftp, kernel, local0, local1, local2, local3, local4, local5, local6, local7, lpr, mail, news, syslog, user, uucp
The default outgoing facility is local7.
vrf vrf_name (Optional) Specifies the virtual routing and forwarding (VRF) to be used in the remote server. The name can be a maximum of 32 alphanumeric characters.
management Specifies the management VRF. This is the default VRF.
Release Modification
5.0(3)A1(1) This command was introduced.
78Cisco Nexus 3548 Switch NX-OS System Management Command Reference
OL-27851-02

System Management Commandslogging server
Examples This example shows how to configure a remote syslog server at a specified IPv4 address, using the default outgoing facility:
switch# configure terminalswitch(config)# logging server 192.168.2.253 switch(config)#
This example shows how to configure a remote syslog server at a specified hostname with severity level 5 or higher:
switch# configure terminalswitch(config)# logging server syslogA 5switch(config)#
Related Commands Command Description
show logging server Displays the configured syslog servers.
79Cisco Nexus 3548 Switch NX-OS System Management Command Reference
OL-27851-02

System Management Commandslogging timestamp
logging timestampTo set the logging time-stamp units, use the logging timestamp command. To reset the logging time-stamp units to the default, use the no form of this command.
logging timestamp {microseconds | milliseconds | seconds}
no logging timestamp {microseconds | milliseconds | seconds}
Syntax Description
Command Default None
Command Modes Global configuration mode
Command History
Usage Guidelines By default, the units are seconds.
Examples This example shows how to set the logging time-stamp units to microseconds:
switch# configure terminalswitch(config)# logging timestamp microsecondsswitch(config)#
Related Commands
microseconds Specifies the units to use for logging timestamps in microseconds. The default units are seconds.
milliseconds Specifies the units to use for logging timestamps in milliseconds.
seconds Specifies the units to use for logging timestamps in seconds. The default units are seconds.
Release Modification
5.0(3)A1(1) This command was introduced.
Command Description
show logging timestamp
Displays the logging time-stamp configuration.
80Cisco Nexus 3548 Switch NX-OS System Management Command Reference
OL-27851-02
System Management Commandsmonitor erspan origin ip-address
monitor erspan origin ip-addressTo configure the Encapsulated Remote Switched Port Analyzer (ERSPAN) global origin IP address, use the monitor espan origin ip-address command. To remove the ERSPAN global origin IP address configuration, use the no form of this command.
monitor erspan origin ip-address ip-address [global]
no monitor erspan origin ip-address ip-address [global]
Syntax Description
Command Default None
Command Modes Global configuration mode
Command History
Usage Guidelines When you change the origin IP address, it impacts all the sessions.
Note On a Cisco Nexus 3548 Switch switch, only global origin IP address is supported.
This command does not require a license.
Examples This example shows how to configure the ERSPAN global origin IP address:
switch# configure terminalswitch(config)# monitor erspan origin ip-address 10.1.1.1 globalswitch(config)#
This example shows how to remove the ERSPAN global origin IP address:
switch# configure terminalswitch(config)# no monitor erspan origin ip-address 10.1.1.1 globalswitch(config)#
Related Commands
ip-address IP address.
global (Optional) Specifies the default global configuration.
Release Modification
6.0(2)A1(1) This command was introduced.
Command Description
monitor session Configures a SPAN or an ERSPAN session.
81Cisco Nexus 3548 Switch NX-OS System Management Command Reference
OL-27851-02

System Management Commandsmonitor session
monitor sessionTo create a new Switched Port Analyzer (SPAN) or an Encapsulated Remote Switched Port Analyzer (ERSPAN) session configuration for analyzing traffic between ports, or add to an existing session configuration, use the monitor session command. To clear SPAN sessions, use the no form of this command.
monitor session {session-number [shut | type {local | erspan-destination | erspan-source}] | all shut}
no monitor session {session-number | all} [shut]
Syntax Description
Command Default None
Command Modes Global configuration mode
Command History
Usage Guidelines To ensure that you are working with a completely new session, you can clear the desired session number or all SPAN sessions.
After you create an ERSPAN session, you can describe the session and add interfaces and VLANs as sources and destinations.
This command does not require a license.
Examples This example shows how to create a SPAN session:
switch# configure terminal switch(config)# monitor session 2 switch(config)#
This example shows how to enter the monitor configuration mode for configuring SPAN session number 9 for analyzing traffic between ports:
session-number SPAN session to create or configure. The range is from 1 to 18.
all Specifies to apply configuration information to all SPAN sessions.
shut (Optional) Specifies that the selected session will be shut down for monitoring.
type (Optional) Specifies the type of session to configure.
local Specifies the session type to be local.
erspan-destination Creates an ERSPAN destination session.
erspan-source Creates an ERSPAN source session.
Release Modification
6.0(2)A1(1) This command was introduced.
82Cisco Nexus 3548 Switch NX-OS System Management Command Reference
OL-27851-02

System Management Commandsmonitor session
switch# configure terminalswitch(config)# monitor session 9 type local switch(config-monitor)# description A Local SPAN session switch(config-monitor)# source interface ethernet 1/1 switch(config-monitor)# destination interface ethernet 1/2 switch(config-monitor)# no shutdownswitch(config-monitor)#
This example shows how to configure any SPAN destination interfaces as Layer 2 SPAN monitor ports before activating the SPAN session:
switch# configure terminalswitch(config)# interface ethernet 1/2 switch(config-if)# switchport switch(config-if)# switchport monitor switch(config-if)# no shutdown switch(config-if)#
This example shows how to configure a typical SPAN destination trunk interface:
switch# configure terminalswitch(config)# interface Ethernet1/2 switch(config-if)# switchport switch(config-if)# switchport mode trunk switch(config-if)# switchport monitor switch(config-if)# switchport trunk allowed vlan 10-12 switch(config-if)# no shutdown switch(config-if)#
This example shows how to create an ERSPAN session:
switch# configure terminal switch(config)# monitor session 1 type erspan-sourceswitch(config-erspan-src)#
Related Commands Command Description
description (SPAN, ERSPAN)
Adds a description to identify the SPAN session.
destination (ERSPAN) Configures the destination IP port for an ERSPAN packet.
ip dscp (ERSPAN) Sets the DSCP value for an ERSPAN packet.
ip ttl (ERSPAN) Sets the time-to-live (TTL) value for an ERSPAN packet.
mtu (ERSPAN) Sets the maximum transmission value (MTU) for ERSPAN packets.
show monitor session Displays SPAN session configuration information.
source (SPAN, ERSPAN)
Adds a SPAN source port.
83Cisco Nexus 3548 Switch NX-OS System Management Command Reference
OL-27851-02

System Management Commandsntp
ntpTo configure the Network Time Protocol (NTP) peers and servers for the switch, use the ntp command. To remove configured peers and servers, use the no form of this command.
ntp {peer hostname | server hostname} [prefer] [use-vrf vrf-name]
no ntp {peer hostname | server hostname}
Syntax Description
Command Default None
Command Modes Global configuration mode
Command History
Usage Guidelines You can specify multiple peer associations.
Examples This example shows how to form a server association with a server:
switch# configure terminalswitch(config)# ntp server ntp.cisco.com switch(config)#
This example shows how to form a peer association with a peer:
switch# configure terminalswitch(config)# ntp peer 192.168.10.0switch(config)#
This example shows how to delete an association with a peer:
switch# configure terminalswitch(config)# no ntp peer 192.168.10.0switch(config)#
peer hostname Specifies the hostname or IP address of an NTP peer.
server hostname Specifies the hostname or IP address of the NTP server.
prefer (Optional) Specifies this peer/server as the preferred peer/server.
use-vrf vrf-name (Optional) Specifies the virtual routing and forwarding (VRF) used to reach this peer/server.
Release Modification
5.0(3)A1(1) This command was introduced.
84Cisco Nexus 3548 Switch NX-OS System Management Command Reference
OL-27851-02

System Management Commandsntp
Related Commands Command Description
ntp distribute Enables CFS distribution for NTP.
show ntp Displays NTP information.
85Cisco Nexus 3548 Switch NX-OS System Management Command Reference
OL-27851-02

System Management Commandsntp abort
ntp abortTo discard the Network Time Protocol (NTP) Cisco Fabric Services (CFS) distribution session in progress, use the ntp abort command.
ntp abort
Syntax Description This command has no arguments or keywords.
Command Default None
Command Modes Global configuration mode
Command History
Examples This example shows how to discard the NTP CFS distribution session in progress:
switch# configure terminalswitch(config)# ntp abortswitch(config)#
Related Commands
Release Modification
5.0(3)A1(1) This command was introduced.
Command Description
ntp distribute Enables CFS distribution for NTP.
show ntp Displays NTP information.
86Cisco Nexus 3548 Switch NX-OS System Management Command Reference
OL-27851-02

System Management Commandsntp commit
ntp commitTo apply the pending configuration pertaining to the Network Time Protocol (NTP) Cisco Fabric Services (CFS) distribution session in progress in the fabric, use the ntp commit command.
ntp commit
Syntax Description This command has no arguments or keywords.
Command Default None
Command Modes Global configuration mode
Command History
Examples This example shows how to commit changes to the active NTP configuration:
switch# configure terminalswitch(config)# ntp commitswitch(config)#
Related Commands
Release Modification
5.0(3)A1(1) This command was introduced.
Command Description
ntp distribute Enables CFS distribution for NTP.
show ntp Displays NTP information.
87Cisco Nexus 3548 Switch NX-OS System Management Command Reference
OL-27851-02

System Management Commandsntp distribute
ntp distributeTo enable Cisco Fabric Services (CFS) distribution for Network Time Protocol (NTP), use the ntp distribute command. To disable this feature, use the no form of this command.
ntp distribute
no ntp distribute
Syntax Description This command has no arguments or keywords.
Command Default Disabled
Command Modes Global configuration mode
Command History
Usage Guidelines Before distributing the Fibre Channel timer changes to the fabric, the temporary changes to the configuration must be committed to the active configuration using the ntp commit command.
Examples This example shows how to distribute the active NTP configuration to the fabric:
switch# configure terminalswitch(config)# ntp distribute switch(config)#
Related Commands
Release Modification
5.0(3)A1(1) This command was introduced.
Command Description
ntp commit Commits the NTP configuration changes to the active configuration.
show ntp Displays NTP information.
88Cisco Nexus 3548 Switch NX-OS System Management Command Reference
OL-27851-02

System Management Commandsntp sync-retry
ntp sync-retryTo retry synchronization with the configured Network Time Protocol (NTP) servers, use the ntp sync-retry command.
ntp sync-retry
Syntax Description This command has no arguments or keywords.
Command Default None
Command Modes EXEC mode
Command History
Examples This example shows how to retry synchronization with the configured NTP servers:
switch# ntp sync-retryswitch#
Related Commands
Release Modification
5.0(3)A1(1) This command was introduced.
Command Description
ntp distribute Enables CFS distribution for NTP.
show ntp Displays NTP information.
89Cisco Nexus 3548 Switch NX-OS System Management Command Reference
OL-27851-02
System Management Commandsperiodic-inventory (Call Home)
periodic-inventory (Call Home)To configure the switch to periodically send a message with an inventory of all software services currently enabled and running on the device with hardware inventory information, use the periodic-inventory command. To disable the periodic messages, use the no form of this command.
periodic-inventory notification [interval time-period | timeofday time-of-day]
no periodic-inventory notification [interval time-period | timeofday time-of-day]
Syntax Description
Command Default Interval: 7 days
Command Modes Callhome configuration mode
Command History
Usage Guidelines The switch generates two Call Home notifications: periodic configuration messages and periodic inventory messages.
Examples This example shows how to configure a periodic inventory notification to generate every 5 days:
switch# configure terminalswitch(config)# callhomeswitch(config-callhome)# periodic-inventory notification interval 5 switch(config-callhome)#
This example shows how to disable a periodic inventory notification for Call Home:
switch# configure terminalswitch(config)# callhomeswitch(config-callhome)# no periodic-inventory notification interval 5 switch(config-callhome)#
notification Enables sending periodic software inventory messages.
interval time-period (Optional) Specifies the time period for periodic inventory notification. The time period range is from 1 to 30 days, and the default is 7 days.
timeofday time-of-day (Optional) Specifies the time of day for periodic inventory notification. The time of day is in HH:MM format.
Release Modification
5.0(3)A1(1) This command was introduced.
90Cisco Nexus 3548 Switch NX-OS System Management Command Reference
OL-27851-02

System Management Commandsperiodic-inventory (Call Home)
Related Commands Command Description
copy running-config startup-config
Saves this configuration change.
show callhome Displays Call Home configuration information.
show running-config callhome
Displays the running configuration information for Call Home.
91Cisco Nexus 3548 Switch NX-OS System Management Command Reference
OL-27851-02
System Management Commandsphone-contact (Call Home)
phone-contact (Call Home)To configure the phone number for the primary person responsible for the device, use the phone-contact command. To remove a phone contact, use the no form of this command.
phone-contact phone-no
no phone-contact
Syntax Description
Command Default None
Command Modes Callhome configuration mode
Command History
Examples This example shows how to configure a phone number for the primary person responsible for the device:
switch# configure terminalswitch(config)# callhomeswitch(config-callhome)# phone-contact +1-800-123-4567 switch(config-callhome)#
Related Commands
phone-no Phone number in international phone number format, such as +1-800-123-4567. The phone number can be a maximum of 17 alphanumeric characters and cannot contain spaces.
Note You must use the + prefix before the number.
Release Modification
5.0(3)A1(1) This command was introduced.
Command Description
copy running-config startup-config
Saves this configuration change.
show callhome Displays a summary of the Call Home configuration.
streetaddress Configures the street address for the primary person responsible for the switch.
92Cisco Nexus 3548 Switch NX-OS System Management Command Reference
OL-27851-02
System Management Commandsptp
ptpTo enable the Precision Time Protocol (PTP) on an interface, use the ptp command. To disable PTP on an interface, use the no form of this command.
ptp
no ptp
Syntax Description This command has no arguments or keywords.
Command Default None
Command Modes Interface configuration mode
Command History
Usage Guidelines This command does not require a license.
Examples This example shows how to enable PTP on an interface:
switch# configure terminalswitch(config)# interface ethernet 1/5switch(config-if)# ptpswitch(config-if)#
This example shows how to disable PTP on an interface:
switch# configure terminalswitch(config)# interface ethernet 1/5switch(config-if)# no ptpswitch(config-if)#
Related Commands
Release Modification
6.0(2)A1(1) This command was introduced.
Command Description
feature ptp Enables or disables PTP on the device.
ptp delay-request minimum interval
Configures the minimum interval allowed between PTP delay-request messages when the port is in the master state.
ptp source Configures the source IP address for all PTP packets.
ptp sync interval Configures the interval between PTP synchronization messages on an interface.
ptp vlan Configures the PTP VLAN value on an interface.
93Cisco Nexus 3548 Switch NX-OS System Management Command Reference
OL-27851-02

System Management Commandsptp announce
ptp announceTo configure the interval between Precision Time Protocol (PTP) announce messages on an interface or the number of PTP intervals before a timeout occurs on an interface, use the ptp announce command. To remove the interval configuration for PTP messages, use the no form of this command.
ptp announce {interval seconds | timeout count}
no ptp announce {interval seconds | timeout count}
Syntax Description
Command Default interval 1 timeout 3
Command Modes Interface configuration mode
Command History
Usage Guidelines Make sure that you have globally enabled PTP on the switch and configured the source IP address for PTP communication.
This command does not require a license.
Examples This example shows how to configure the interval between PTP announce messages on an interface:
switch# configure terminalswitch(config)# interface ethernet 1/5switch(config-if)# ptp announce interval 1switch(config-if)#
This example shows how to remove the interval configuration for PTP messages from an interface:
switch# configure terminalswitch(config)# interface ethernet 1/5switch(config-if)# no ptp announce interval 1switch(config-if)#
interval Specifies the interval between Precision Time Protocol (PTP) announce messages on an interface.
seconds Log seconds. The range is from 0 to 4.
timeout Specifies the number of PTP intervals before a timeout occurs on an interface.
count Timeout count. The range is from 2 to 10.
Release Modification
6.0(2)A1(1) This command was introduced.
94Cisco Nexus 3548 Switch NX-OS System Management Command Reference
OL-27851-02

System Management Commandsptp announce
Related Commands Command Description
feature ptp Enables or disables PTP on the device.
ptp Enables or disables PTP on an interface.
ptp delay-request minimum interval
Configures the minimum interval allowed between PTP delay-request messages when the port is in the master state.
ptp source Configures the source IP address for all PTP packets.
ptp sync interval Configures the interval between PTP synchronization messages on an interface.
ptp vlan Configures the PTP VLAN value on an interface.
95Cisco Nexus 3548 Switch NX-OS System Management Command Reference
OL-27851-02

System Management Commandsptp delay-request minimum interval
ptp delay-request minimum intervalTo configure the minimum interval allowed between Precision Time Protocol (PTP) delay-request messages when the port is in the master state, use the ptp delay-request minimum interval command. To remove the minimum interval configuration for PTP delay-request messages, use the no form of this command.
ptp delay-request minimum interval seconds
no ptp delay-request minimum interval seconds
Syntax Description
Command Default None
Command Modes Interface configuration mode
Command History
Usage Guidelines Make sure that you have globally enabled PTP on the switch and configured the source IP address for PTP communication.
This command does not require a license.
Examples This example shows how to configure the minimum interval allowed between PTP delay-request messages:
switch# configure terminalswitch(config)# interface ethernet 1/5switch(config-if)# ptp delay-request minimum interval 3switch(config-if)#
This example shows how to remove the minimum interval configuration for PTP delay-request messages:
switch# configure terminalswitch(config)# interface ethernet 1/5switch(config-if)# no ptp delay-request minimum interval 3switch(config-if)#
Related Commands
seconds Log seconds. The range is from -1 to 6.
Release Modification
6.0(2)A1(1) This command was introduced.
Command Description
feature ptp Enables or disables PTP on the device.
ptp Enables or disables PTP on an interface.
96Cisco Nexus 3548 Switch NX-OS System Management Command Reference
OL-27851-02

System Management Commandsptp delay-request minimum interval
ptp announce Configures the interval between PTP announce messages on an interface or the number of PTP intervals before a timeout occurs on an interface.
ptp source Configures the source IP address for all PTP packets.
ptp sync interval Configures the interval between PTP synchronization messages on an interface.
ptp vlan Configures the PTP VLAN value on an interface.
Command Description
97Cisco Nexus 3548 Switch NX-OS System Management Command Reference
OL-27851-02

System Management Commandsptp domain
ptp domainTo configure a domain number for the Precision Time Protocol (PTP) clock, use the ptp domain command. To remove the domain configuration for the PTP clock, use the no form of this command.
ptp domain domain_number
no ptp domain domain_number
Syntax Description
Command Default 0
Command Modes Global configuration mode
Command History
Usage Guidelines This command does not require a license.
Examples This example shows how to configure a domain number for the PTP clock:
switch# configure terminalswitch(config)# ptp domain 6switch(config)#
This example shows how to remove the PTP domain configuration:
switch# configure terminalswitch(config)# no ptp domain 6switch(config)#
Related Commands
domain_number Domain number. The range is from 0 to 128.
Release Modification
6.0(2)A1(1) This command was introduced.
Command Description
feature ptp Enables or disables PTP on the device.
ptp priority1 Configures the priority1 value to use when advertising this clock.
ptp priority2 Configures the priority2 value to use when advertising this clock.
ptp source Configures the source IP address for all PTP packets.
show ptp brief Displays the PTP status.
show ptp clock Displays the properties of the local clock.
98Cisco Nexus 3548 Switch NX-OS System Management Command Reference
OL-27851-02

System Management Commandsptp priority1
ptp priority1To configure the priority1 value when advertising the Precision Time Protocol (PTP) clock, use the ptp priority1 command. To remove the priority1 value, use the no form of this command.
ptp priority1 priority-number
no ptp priority1 priority-number
Syntax Description
Command Default 255
Command Modes Global configuration mode
Command History
Usage Guidelines This command does not require a license.
Examples This example shows how to configure the priority1 value when advertising the PTP clock:
switch# configure terminalswitch(config)# ptp priority1 10switch(config)#
This example shows how to remove the priority1 value when advertising the PTP clock:
switch# configure terminalswitch(config)# no ptp priority1 10switch(config)#
Related Commands
priority-number Priority number. The range is from 0 to 255.
Release Modification
6.0(2)A1(1) This command was introduced.
Command Description
feature ptp Enables or disables PTP on the switch.
ptp source Configures the source IP address for all PTP packets.
ptp domain Configures the domain number to use for this clock.
ptp priority2 Configures the priority2 value to use when advertising this clock.
show ptp brief Displays the PTP status.
show ptp clock Displays the properties of the local clock.
99Cisco Nexus 3548 Switch NX-OS System Management Command Reference
OL-27851-02

System Management Commandsptp priority2
ptp priority2To configure the priority2 value when advertising the Precision Time Protocol (PTP) clock, use the ptp priority2 command. To remove the priority2 value when advertising the PTP, use the no form of this command.
ptp priority2 priority-number
no ptp priority2 priority-number
Syntax Description
Command Default 255
Command Modes Global configuration mode
Command History
Usage Guidelines This command does not require a license.
Examples This example shows how to configure the priority2 value when advertising the PTP clock:
switch# configure terminalswitch(config)# ptp priority2 1switch(config)#
This example shows how to remove the priority2 value configuration for use when advertising the PTP clock:
switch# configure terminalswitch(config)# no ptp priority2 1switch(config)#
Related Commands
priority-number Priority number. The range is from 0 to 255.
Release Modification
6.0(2)A1(1) This command was introduced.
Command Description
feature ptp Enables or disables PTP on the device.
ptp source Configures the source IP address for all PTP packets.
ptp domain Configures the domain number to use for this clock.
ptp priority1 Configures the priority1 value to use when advertising this clock.
show ptp brief Displays the PTP status.
show ptp clock Displays the properties of the local clock.
100Cisco Nexus 3548 Switch NX-OS System Management Command Reference
OL-27851-02

System Management Commandsptp source
ptp sourceTo configure the global source for all the Precision Time Protocol (PTP) packets, use the ptp source command. To remove the global source for PTP packets, use the no form of this command.
ptp source ip_address [vrf {vrf-name | management]
no ptp source ip_address [vrf {vrf-name | management]
Syntax Description
Command Default None
Command Modes Global configuration mode
Command History
Usage Guidelines This command does not require a license.
Examples This example shows how to configure the global source for all the PTP packets:
switch# configure terminalswitch(config)# ptp source 192.0.1.1switch(config)#
This example shows how to remove the global source configuration for all the PTP packets:
switch# configure terminalswitch(config)# no ptp source 192.0.1.1switch(config)#
Related Commands
ip_address IPv4 address of the source.
vrf Specifies the virtual routing and forwarding (VRF) instance.
vrf-name Name of the VRF. The name can be a maximum of 32 alphanumeric characters and is case sensitive.
management Specifies the management VRF.
Release Modification
6.0(2)A1(1) This command was introduced.
Command Description
feature ptp Enables or disables PTP on the device.
ptp domain Configures the domain number to use for this clock.
ptp priority1 Configures the priority1 value to use when advertising this clock.
ptp priority2 Configures the priority2 value to use when advertising this clock.
101Cisco Nexus 3548 Switch NX-OS System Management Command Reference
OL-27851-02

System Management Commandsptp source
show ptp brief Displays the PTP status.
show ptp clock Displays the properties of the local clock.
Command Description
102Cisco Nexus 3548 Switch NX-OS System Management Command Reference
OL-27851-02

System Management Commandsptp sync interval
ptp sync intervalTo configure the interval between Precision Time Protocol (PTP) synchronization messages on an interface, use the ptp sync interval command. To remove the interval configuration for PTP messages synchronization, use the no form of this command.
ptp sync interval seconds
no ptp sync interval seconds
Syntax Description
Command Default 0
Command Modes Interface configuration mode
Command History
Usage Guidelines Make sure that you have globally enabled PTP on the switch and configured the source IP address for PTP communication.
A Cisco Nexus 3548 Switch switch must be synchronized on the Slave port with a sync log interval value of less than or equal to -3. Any Master ports on the switch that are connected to downlink Cisco Nexus 3548 Switch switches must be configured for a sync log interval value that is less than or equal to -3.
This command does not require a license.
Examples This example shows how to configure the interval between PTP synchronization messages on an interface:
switch# configure terminalswitch(config)# interface ethernet 1/5switch(config-if)# ptp sync interval 1switch(config-if)#
This example shows how to remove the interval configuration for PTP messages synchronization:
switch# configure terminalswitch(config)# interface ethernet 1/5switch(config-if)# no ptp sync interval 1switch(config-if)#
seconds Log seconds. The range is from –6 to 1.
Release Modification
6.0(2)A1(1) This command was introduced.
103Cisco Nexus 3548 Switch NX-OS System Management Command Reference
OL-27851-02

System Management Commandsptp sync interval
Related Commands Command Description
feature ptp Enables or disables PTP on the switch.
ptp Enables or disables PTP on an interface.
ptp announce Configures the interval between PTP announce messages on an interface or the number of PTP intervals before a timeout occurs on an interface.
ptp delay-request minimum interval
Configures the minimum interval allowed between PTP delay-request messages when the port is in the master state.
ptp vlan Configures the PTP VLAN value on an interface.
104Cisco Nexus 3548 Switch NX-OS System Management Command Reference
OL-27851-02
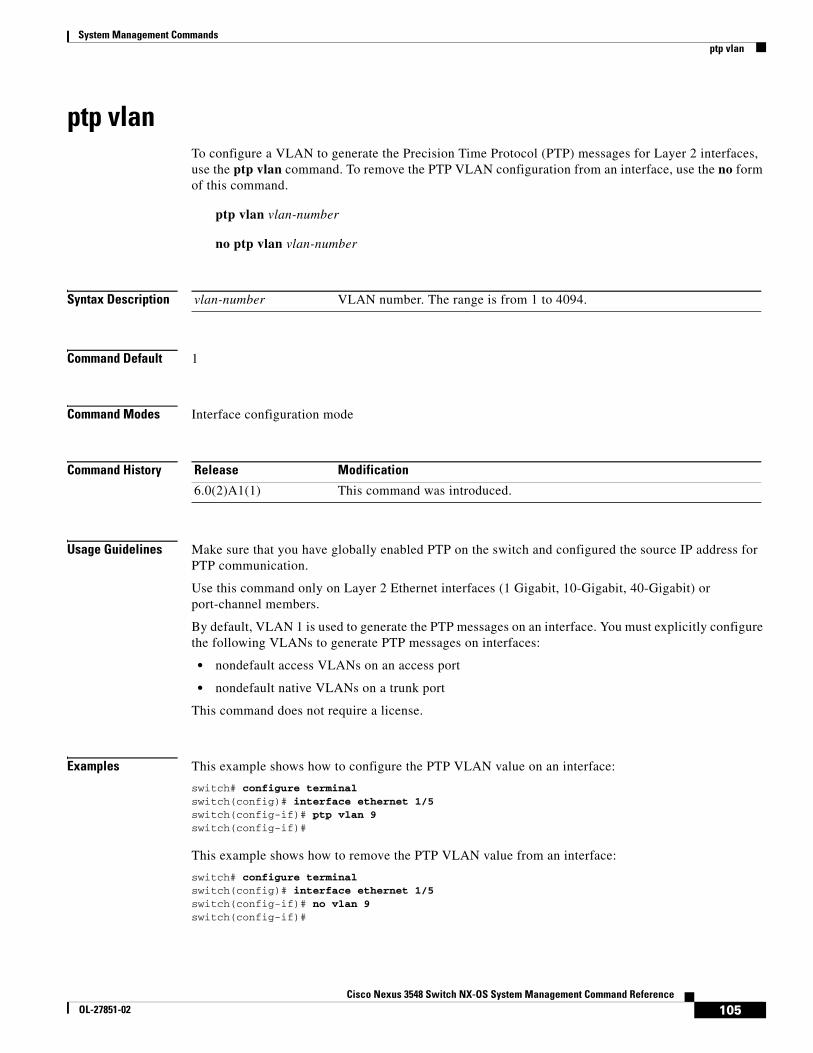
System Management Commandsptp vlan
ptp vlanTo configure a VLAN to generate the Precision Time Protocol (PTP) messages for Layer 2 interfaces, use the ptp vlan command. To remove the PTP VLAN configuration from an interface, use the no form of this command.
ptp vlan vlan-number
no ptp vlan vlan-number
Syntax Description
Command Default 1
Command Modes Interface configuration mode
Command History
Usage Guidelines Make sure that you have globally enabled PTP on the switch and configured the source IP address for PTP communication.
Use this command only on Layer 2 Ethernet interfaces (1 Gigabit, 10-Gigabit, 40-Gigabit) or port-channel members.
By default, VLAN 1 is used to generate the PTP messages on an interface. You must explicitly configure the following VLANs to generate PTP messages on interfaces:
• nondefault access VLANs on an access port
• nondefault native VLANs on a trunk port
This command does not require a license.
Examples This example shows how to configure the PTP VLAN value on an interface:
switch# configure terminalswitch(config)# interface ethernet 1/5switch(config-if)# ptp vlan 9switch(config-if)#
This example shows how to remove the PTP VLAN value from an interface:
switch# configure terminalswitch(config)# interface ethernet 1/5switch(config-if)# no vlan 9switch(config-if)#
vlan-number VLAN number. The range is from 1 to 4094.
Release Modification
6.0(2)A1(1) This command was introduced.
105Cisco Nexus 3548 Switch NX-OS System Management Command Reference
OL-27851-02

System Management Commandsptp vlan
Related Commands Command Description
feature ptp Enables or disables PTP on the switch.
ptp Enables or disables PTP on an interface.
ptp announce Configures the interval between PTP announce messages on an interface or the number of PTP intervals before a timeout occurs on an interface.
ptp delay-request minimum interval
Configures the minimum interval allowed between PTP delay-request messages when the port is in the master state.
ptp sync interval Configures the interval between PTP synchronization messages on an interface.
106Cisco Nexus 3548 Switch NX-OS System Management Command Reference
OL-27851-02

System Management Commandsrmon alarm
rmon alarmTo configure Remote Monitoring (RMON) alarms on any integer-based Simple Network Management Protocol (SNMP) management information base (MIB) object, use the rmon alarm command. To remove an RMON alarm, use the no form of this command.
rmon alarm alarm-no MIB-obj sample-interval {absolute | delta} rising-threshold rising-threshold-value {event-index falling-threshold fall-threshold-value [event-index] [owner name] | falling-threshold fall-threshold-value [event-index] [owner name]}
no rmon alarm alarm-no MIB-obj sample-interval {absolute | delta} rising-threshold rising-threshold-value {event-index falling-threshold fall-threshold-value [event-index] [owner name] | falling-threshold fall-threshold-value [event-index] [owner name]}
Syntax Description
Command Default None
Command Modes Global configuration mode
Command History
alarm-no Alarm number. The range is from 1 to 65535.
MIB-obj MIB object to monitor.
The MIB object must be an existing SNMP MIB object in standard dot notation; for example, 1.3.6.1.2.1.2.2.1.17.83886080.
sample-interval Sample interval at which the switch collects a sample value of the MIB object. The range is from 1 to 700000 seconds.
absolute Specifies the sample type as absolute.
delta Specifies the sample type as delta.
rising-threshold Configures the rising threshold value at which the switch triggers a rising alarm or resets a falling alarm.
rising-threshold-value Rising threshold value. The range is from –2147483648 to 2147483647.
event-index Event or action that the switch takes when an alarm, rising or falling, triggers. The event index range is from 0 to 65535.
falling-threshold Configures the falling threshold value at which the switch triggers a falling alarm or resets a rising alarm.
fall-threshold-value Falling threshold value. The range is from –2147483648 to 2147483647.
Note The falling threshold value must be less than the rising threshold.
owner name (Optional) Specifies an owner for the alarm. The name can be any alphanumeric string.
Release Modification
5.0(3)A1(1) This command was introduced.
107Cisco Nexus 3548 Switch NX-OS System Management Command Reference
OL-27851-02

System Management Commandsrmon alarm
Usage Guidelines Before you use this command, you must have configured an SNMP user and enabled SNMP notifications using the snmp-server user and snmp-server enable traps command, respectively.
You can only configure an RMON alarm on an integer-based SNMP MIB object. The MIB object must be in standard dot notation. For example, 1.3.6.1.2.1.2.2.1.17 represents ifOutOctets.17.
Absolute samples take the current snapshot of the MIB object value. Delta samples take two consecutive samples and calculate the difference between them. For example, you can set a delta type rising alarm on an error counter MIB object. If the error counter delta exceeds this value, you can trigger an event that sends an SNMP notification and logs the rising alarm event. This rising alarm will not occur again until the delta sample for the error counter drops below the falling threshold.
You can associate a particular event to each RMON alarm. RMON supports the following event types:
• SNMP notification—Sends an SNMP risingAlarm or fallingAlarm notification when the associated alarm triggers.
• Log—Adds an entry in the RMON log table when the associated alarm triggers.
• Both—Sends an SNMP notification and adds an entry in the RMON log table when the associated alarm triggers.
You can specify a different event for a falling alarm and a rising alarm.
Examples This example shows how to configure an RMON alarm:
switch(config)# rmon alarm 1 1.3.6.1.2.1.2.2.1.17.83886080 5 delta rising-threshold 5 1 falling-threshold 0 owner testswitch(config)#
Related Commands Command Description
copy running-config startup-config
Saves the running configuration to the startup configuration file.
snmp-server enable traps
Enables SNMP notifications on the switch.
snmp-server user Configures an SNMP user.
show rmon Displays information about RMON alarms and events.
108Cisco Nexus 3548 Switch NX-OS System Management Command Reference
OL-27851-02

System Management Commandsrmon event
rmon eventTo configure Remote Monitoring (RMON) events to associate with RMON alarms, use the rmon event command. To remove an RMON event, use the no form of this command.
rmon event event-index [description string] [log] [trap] [owner name]
no rmon event event-index [description string] [log] [trap] [owner name]
Syntax Description
Command Default None
Command Modes Global configuration mode
Command History
Usage Guidelines Before you use this command, you must have configured an SNMP user and enabled SNMP notifications using the snmp-server user and snmp-server enable traps command, respectively.
You can reuse the same event with multiple RMON alarms.
Examples This example shows how to configure an RMON event:
switch# configure terminalswitch(config)# rmon event 1 owner test switch(config)#
Related Commands
event-index Event or action that the switch takes when an alarm, rising or falling, triggers. The event index range is from 0 to 65535.
description string (Optional) Specifies a description for the event. The description can be any alphanumeric string.
log (Optional) Specifies that an RMON log be generated when the event occurs.
trap (Optional) Specifies that an SNMP trap be generated when the event occurs.
owner name (Optional) Specifies an owner for the alarm. The name can be any alphanumeric string.
Release Modification
5.0(3)A1(1) This command was introduced.
Command Description
copy running-config startup-config
Saves the running configuration to the startup configuration file.
snmp-server enable traps
Enables SNMP notifications on the switch.
109Cisco Nexus 3548 Switch NX-OS System Management Command Reference
OL-27851-02

System Management Commandsrmon event
snmp-server user Configures an SNMP user.
show rmon Displays information about RMON alarms and events.
Command Description
110Cisco Nexus 3548 Switch NX-OS System Management Command Reference
OL-27851-02

System Management Commandsrmon hcalarm
rmon hcalarmTo configure a high-capacity Remote Monitoring (RMON) alarm, use the rmon hcalarm command. To remove a high-capacity RMON alarm, use the no form of this command.
rmon hcalarm alarm-no MIB-obj sample-interval {absolute | delta} startupalarm startup-alarm-type rising-threshold rising-threshold-value event-index falling-threshold fall-threshold-value [event-index] [owner name]
no rmon hcalarm alarm-no MIB-obj sample-interval {absolute | delta} startupalarm startup-alarm-type rising-threshold rising-threshold-value event-index falling-threshold fall-threshold-value [event-index] [owner name]
Syntax Description
Command Default None
Command Modes Global configuration mode
Command History
alarm-no Alarm number. The range is from 1 to 65535.
MIB-obj MIB object to monitor.
The MIB object must be an existing SNMP MIB object in standard dot notation; for example, 1.3.6.1.2.1.2.2.1.17.83886080.
sample-interval Sample interval at which the switch collects a sample value of the MIB object. The range is from 1 to 700000 seconds.
absolute Specifies the sample type as absolute.
delta Specifies the sample type as delta.
startupalarm Configures the startup alarm type.
startup-alarm-type Startup alarm type. The range is from 1 to 3, where 1 is rising, 2 is falling, and 3 is rising or falling.
rising-threshold Configures the rising threshold value at which the switch triggers a rising alarm or resets a falling alarm.
rising-threshold-value Rising threshold value. The range is from 0 to 18446744073709551615.
event-index Event or action that the switch takes when an alarm, rising or falling, triggers. The event index range is from 0 to 65535.
falling-threshold Configures the falling threshold value at which the switch triggers a falling alarm or resets a rising alarm.
fall-threshold-value Falling threshold value. The range is from 0 to 18446744073709551615.
Note The falling threshold value must be less than the rising threshold.
owner name (Optional) Specifies an owner for the alarm. The name can be any alphanumeric string.
Release Modification
5.0(3)A1(1) This command was introduced.
111Cisco Nexus 3548 Switch NX-OS System Management Command Reference
OL-27851-02

System Management Commandsrmon hcalarm
Usage Guidelines Before you use this command, you must have configured an SNMP user and enabled SNMP notifications using the snmp-server user and snmp-server enable traps command, respectively.
You can configure a high-capacity RMON alarm on any integer-based SNMP MIB object. The MIB object must be in standard dot notation. For example, 1.3.6.1.2.1.2.2.1.17 represents ifOutOctets.17.
Absolute samples take the current snapshot of the MIB object value. Delta samples take two consecutive samples and calculate the difference between them. For example, you can set a delta type rising alarm on an error counter MIB object. If the error counter delta exceeds this value, you can trigger an event that sends an SNMP notification and logs the rising alarm event. This rising alarm does not occur again until the delta sample for the error counter drops below the falling threshold.
You can associate a particular event to each high-capacity RMON alarm. RMON supports the following event types:
• SNMP notification—Sends an SNMP risingAlarm or fallingAlarm notification when the associated high-capacity alarm triggers.
• Log—Adds an entry in the RMON log table when the associated high-capacity alarm triggers.
• Both—Sends an SNMP notification and adds an entry in the RMON log table when the associated high-capacity alarm triggers.
You can specify a different event for a falling high-capacity alarm and a rising high-capacity alarm.
Examples This example shows how to configure an RMON high-capacity alarm:
switch# configure terminalswitch(config)# rmon hcalarm 3 1.3.6.1.2.1.2.2.1.17.83886080 5 delta startupalarm 3 rising-threshold 5 1 falling-threshold 3 3 owner test switch(config)#
Related Commands Command Description
copy running-config startup-config
Saves the running configuration to the startup configuration file.
snmp-server enable traps
Enables SNMP notifications on the switch.
snmp-server user Configures an SNMP user.
show rmon Displays information about RMON alarms and events.
112Cisco Nexus 3548 Switch NX-OS System Management Command Reference
OL-27851-02

System Management Commandsscheduler
scheduler To create or schedule a scheduler job, use the scheduler command. To remove a job or scheduled job, use the no form of this command.
scheduler {aaa-authentication [username username] password [0 | 7] password | job name job-name | logfile size filesize | schedule name schedule-name | transport email [from email address] [reply to email address] [smtp-server]}
no scheduler {aaa-authentication [username username] password [0 | 7] password | job name job-name | logfile size filesize | schedule name schedule-name | transport email [from email address] [reply to email address] [smtp-server]}
Syntax Description
Defaults None
Command Modes Job configuration
aaa-authentication Begins an AAA authentication exchange with a remote user.
username username Indicates the remote user is entering a username and specifies the username. A username can be any case-sensitive, alphanumeric string up to 32 characters.
password Indicates the remote user is entering a password for authentication.
0 Indicates the password is in clear text.
7 Indicates the password is encrypted.
password Remote user’s password. A password can be any case-sensitive, alphanumeric string up to 64 characters.
job name job-name Places you into job configuration mode for the specified job name. The job name can be any alphanumeric string up to 31 characters.
logfile Specifies a logfile configuration.
size filesize Specifies the size of the logfile. The range is from 16 to 1024 KB.
schedule Defines a schedule for a job.
name schedule-name Specifies the name of the schedule. The schedule name can be any alphanumeric string up to 31 characters.
transport Specifies transport-related configuration.
email Specifies the e-mail address.
from email address Configures the from e-mail address. An e-mail address can be up to 255 characters in this format: [email protected].
reply-to email address Configures the reply to e-mail address. An e-mail address can be up to 255 character in this format: [email protected].
smtp-server Specifies the Simple Mail Transport Protocol server, which can be a DNS name or an IPv4 address.
113Cisco Nexus 3548 Switch NX-OS System Management Command Reference
OL-27851-02

System Management Commandsscheduler
Command History
Usage Guidelines To use the scheduler command, you must enable the scheduler. To enable the scheduler, use the feature scheduler command.
Remote users must authenticate with the device by using the scheduler aaa-authentication command before using the scheduler command to configure a maintenance job.
Note The commands within a scheduler job must be entered in a single line separated by a semicolon (;).
Usage Guidelines This command does not require a license.
Examples This example shows how to create a scheduler job that saves the running configuration to a file in bootflash and then copies the file from bootflash to a TFTP server. The filename is created using the current timestamp and switch name.
switch(config)# scheduler job name backup-cfgswitch(config-job)# cli var name timestamp $(TIMESTAMP);copy running-config bootflash:/$(SWITCHNAME)-cfg.$(timestamp);copy bootflash:/$(SWITCHNAME)-cfg.$(timestamp) tftp://1.2.3.4/ vrf managementswitch(config-job)# end
switch(config)#
This example shows how to remove a scheduler job:
switch(config)# no scheduler job name backup-cfg
This example shows how to schedule a scheduler job to run daily at 12:00 a.m.:
switch(config)# scheduler schedule name dailyswitch(config-schedule)# job name backup-cfgswitch(config-schedule)# time daily 1:00switch(config-schedule)# endswitch(config)#
This example shows how to remove a scheduler job schedule:
switch(config)# no scheduler schedule name daily
Related Commands
Release Modification
5.0(3)A1(1) This command was introduced.
Command Description
feature scheduler Enables the scheduler.
show scheduler Displays scheduler information.
114Cisco Nexus 3548 Switch NX-OS System Management Command Reference
OL-27851-02

System Management Commandsshow callhome
show callhomeTo display the Call Home configuration information, use the show callhome command.
show callhome [pending | pending-diff | session | status]
Syntax Description
Command Default None
Command Modes EXEC mode
Command History
Examples This example shows how to display the Call Home configuration information:
switch# show callhome callhome disabledCallhome Information:contact person name(sysContact):who@wherecontact person's email:contact person's phone number:street addr:site id:customer id:contract id:ac12switch priority:7duplicate message throttling : enabledperiodic inventory : enabledperiodic inventory time-period : 7 daysperiodic inventory timeofday : 08:00 (HH:MM)Distribution : Disabledswitch#
Related Commands
pending (Optional) Displays the Call Home configuration changes in the pending Cisco Fabric Services (CFS) database.
pending-diff (Optional) Displays the differences between the pending and running Call Home configuration.
session (Optional) Displays the status of the last Call Home CFS command.
status (Optional) Displays the Call Home status.
Release Modification
5.0(3)A1(1) This command was introduced.
Command Description
callhome Configures a Call Home service.
show callhome destination-profile
Displays Call Home information for a destination profile.
115Cisco Nexus 3548 Switch NX-OS System Management Command Reference
OL-27851-02

System Management Commandsshow callhome destination-profile
show callhome destination-profileTo display the Call Home destination profile information, use the show callhome destination-profile command.
show callhome destination-profile [profile {CiscoTAC-1 | profile-name | full-txt-destination | short-txt-destination}]
Syntax Description
Command Default All destination profiles
Command Modes EXEC mode
Command History
Examples This example shows how to display information about the Call Home destination profiles:
switch# show callhome destination-profile
full_txt destination profile informationmaximum message size:2500000message format:full-txtmessage-level:0transport-method:emailemail addresses configured:
url addresses configured:
alert groups configured:all
short_txt destination profile informationmaximum message size:4000message format:short-txtmessage-level:0transport-method:email<--Output truncated-->switch#
profile (Optional) Displays information about a specific destination profile.
CiscoTAC-1 (Optional) Displays information for a CiscoTAC-1 destination profile.
profile profile-name (Optional) Displays information for a user-defined destination profile. The name can be a maximum of 32 alphanumeric characters.
full-txt-destination (Optional) Displays information of a destination profile configured for plain text messages.
short-txt-destination (Optional) Displays information of a destination profile configured for short text messages.
Release Modification
5.0(3)A1(1) This command was introduced.
116Cisco Nexus 3548 Switch NX-OS System Management Command Reference
OL-27851-02

System Management Commandsshow callhome destination-profile
This example shows how to display information about a specific Call Home destination profile:
switch# show callhome destination-profile profile CiscoTAC-1 CiscoTAC-1 destination profile informationmaximum message size:5000000message-level:0transport-method:emailemail addresses configured:
url addresses configured:
alert groups configured:cisco-tac
switch#
Related Commands Command Description
destination-profile Creates a user-defined Call Home destination profile.
show callhome Displays a summary of the Call Home configuration.
117Cisco Nexus 3548 Switch NX-OS System Management Command Reference
OL-27851-02

System Management Commandsshow callhome transport-email
show callhome transport-emailTo display information about the e-mail configuration for Call Home, use the show callhome transport-email command.
show callhome transport-email
Syntax Description This command has no arguments or keywords.
Command Default None
Command Modes EXEC mode
Command History
Examples This example shows how to display the transport configuration for Call Home:
switch# show callhome transport-email from email addr:[email protected] to email addr:[email protected] server:192.168.1.236smtp server port:25switch#
Related Commands
Release Modification
5.0(3)A1(1) This command was introduced.
Command Description
show callhome Displays Call Home configuration information.
show running-config callhome
Displays the running configuration information for Call Home.
118Cisco Nexus 3548 Switch NX-OS System Management Command Reference
OL-27851-02

System Management Commandsshow callhome user-def-cmds
show callhome user-def-cmdsTo display the user-defined CLI show commands added to a Call Home alert group, use the show callhome user-def-cmds command.
show callhome user-def-cmds
Syntax Description This command has no arguments or keywords.
Command Default None
Command Modes EXEC mode
Command History
Examples This example shows how to display the user-defined CLI show commands added to an alert group:
switch# show callhome user-def-cmds User configured commands for alert groups :alert-group configuration user-def-cmd show running-config
switch#
Related Commands
Release Modification
5.0(3)A1(1) This command was introduced.
Command Description
alert-group Adds CLI show commands to a Call Home alert group.
119Cisco Nexus 3548 Switch NX-OS System Management Command Reference
OL-27851-02

System Management Commandsshow diagnostic bootup level
show diagnostic bootup levelTo display the current bootup diagnostic level on the switch, use the show diagnostic bootup level command.
show diagnostic bootup level
Syntax Description This command has no arguments or keywords.
Command Default None
Command Modes EXEC mode
Command History
Examples This example shows how to display the current bootup diagnostic level:
switch# show diagnostic bootup level
Related Commands
Release Modification
5.0(3)A1(1) This command was introduced.
Command Description
diagnostic bootup level Configures the bootup diagnostic level for a faster module bootup time.
show diagnostic result Displays the results of the diagnostics tests.
120Cisco Nexus 3548 Switch NX-OS System Management Command Reference
OL-27851-02

System Management Commandsshow diagnostic result
show diagnostic resultTo display the results of the diagnostic tests, use the show diagnostic result command.
show diagnostic result module {module-no | all}
Syntax Description
Command Default None
Command Modes EXEC mode
Command History
Examples This example shows how to display the diagnostic results for a specific module:
switch# show diagnostic result module 1
Related Commands
module Specifies the module for which diagnostic results are displayed.
module-no Module number. Valid values are 1 to 3.
all Displays the diagnostic results for all modules.
Release Modification
5.0(3)A1(1) This command was introduced.
Command Description
diagnostic bootup level Configures the bootup diagnostic level for a faster module bootup time.
show diagnostic bootup level
Displays the bootup diagnostics level.
121Cisco Nexus 3548 Switch NX-OS System Management Command Reference
OL-27851-02

System Management Commandsshow hardware profile buffer monitor
show hardware profile buffer monitorTo display buffer histogram data, use the show hardware profile buffer monitor command.
show hardware profile buffer monitor [buffer-block block-number | multicast block-number | interface ethernet slot/port] {brief | detail | summary}
Syntax Description
Command Default Displays hardware profile buffer information for the entire device.
Command Modes Global or Exec configuration
Command History
Examples The following example shows how to display summary information for each buffer block and for all of the buffers combined:
switch# show hardware profile buffer monitor summarySummary CLI issued at: 09/18/2012 07:38:39
Maximum buffer utilization detected 1sec 5sec 60sec 5min 1hr ------ ------ ------ ------ ------Buffer Block 1 0KB 0KB 0KB 0KB N/A
Total Shared Buffer Available = 5049 KbytesClass Threshold Limit = 4845 Kbytes============================================================Buffer Block 2 0KB 0KB 0KB 0KB N/A
Total Shared Buffer Available = 5799 KbytesClass Threshold Limit = 5598 Kbytes============================================================Buffer Block 3 0KB 0KB 5376KB 5376KB N/A
buffer-block Specifies to display information about a specific buffer block.
block-number Number of the buffer block.
multicast Specifies to display multicast utilization per memory block.
interface ethernet Specifies to display information about an Ethernet interface.
slot/port Slot and port number of the interface.
brief Specifies to show the maximum buffer utilization per buffer block, unicast utilization for a specific interface, or multicast utilization per memory block.
detail Speicifes to display all information gathered for each interface.
summary Specifies to display maximum buffer utlization per buffer block.
Release Modification
5.0(3)A1(1) This command was introduced.
122Cisco Nexus 3548 Switch NX-OS System Management Command Reference
OL-27851-02

System Management Commandsshow hardware profile buffer monitor
Total Shared Buffer Available = 5799 KbytesClass Threshold Limit = 5598 Kbytes
The following example shows how to display the maximum buffer utilization of each buffer block and each interface for unicast mode:
switch# show hardware profile buffer monitor briefBrief CLI issued at: 09/18/2012 07:38:29
Maximum buffer utilization detected 1sec 5sec 60sec 5min 1hr ------ ------ ------ ------ ------Buffer Block 1 0KB 0KB 0KB 0KB N/A
Total Shared Buffer Avaliable = 5049 KbytesClass Threshold Limit = 4845 Kbytes------------------------------------------------------------Ethernet1/45 0KB 0KB 0KB 0KB N/A Ethernet1/46 0KB 0KB 0KB 0KB N/A Ethernet1/47 0KB 0KB 0KB 0KB N/A Ethernet1/48 0KB 0KB 0KB 0KB N/A Ethernet1/21 0KB 0KB 0KB 0KB N/A Ethernet1/22 0KB 0KB 0KB 0KB N/A Ethernet1/23 0KB 0KB 0KB 0KB N/A Ethernet1/24 0KB 0KB 0KB 0KB N/A Ethernet1/9 0KB 0KB 0KB 0KB N/A Ethernet1/10 0KB 0KB 0KB 0KB N/A Ethernet1/11 0KB 0KB 0KB 0KB N/A Ethernet1/12 0KB 0KB 0KB 0KB N/A Ethernet1/33 0KB 0KB 0KB 0KB N/A Ethernet1/34 0KB 0KB 0KB 0KB N/A Ethernet1/35 0KB 0KB 0KB 0KB N/A Ethernet1/36 0KB 0KB 0KB 0KB N/A ============================================================Buffer Block 2 0KB 0KB 0KB 0KB N/A
Total Shared Buffer Avaliable = 5799 KbytesClass Threshold Limit = 5598 Kbytes------------------------------------------------------------Ethernet1/17 0KB 0KB 0KB 0KB N/A Ethernet1/18 0KB 0KB 0KB 0KB N/A Ethernet1/19 0KB 0KB 0KB 0KB N/A Ethernet1/20 0KB 0KB 0KB 0KB N/A Ethernet1/5 0KB 0KB 0KB 0KB N/A Ethernet1/6 0KB 0KB 0KB 0KB N/A Ethernet1/7 0KB 0KB 0KB 0KB N/A Ethernet1/8 0KB 0KB 0KB 0KB N/A Ethernet1/41 0KB 0KB 0KB 0KB N/A Ethernet1/42 0KB 0KB 0KB 0KB N/A Ethernet1/43 0KB 0KB 0KB 0KB N/A Ethernet1/44 0KB 0KB 0KB 0KB N/A Ethernet1/29 0KB 0KB 0KB 0KB N/A Ethernet1/30 0KB 0KB 0KB 0KB N/A Ethernet1/31 0KB 0KB 0KB 0KB N/A Ethernet1/32 0KB 0KB 0KB 0KB N/A ============================================================Buffer Block 3 0KB 0KB 5376KB 5376KB N/A
Total Shared Buffer Avaliable = 5799 KbytesClass Threshold Limit = 5598 Kbytes------------------------------------------------------------Ethernet1/13 0KB 0KB 0KB 0KB N/A Ethernet1/14 0KB 0KB 0KB 0KB N/A
123Cisco Nexus 3548 Switch NX-OS System Management Command Reference
OL-27851-02
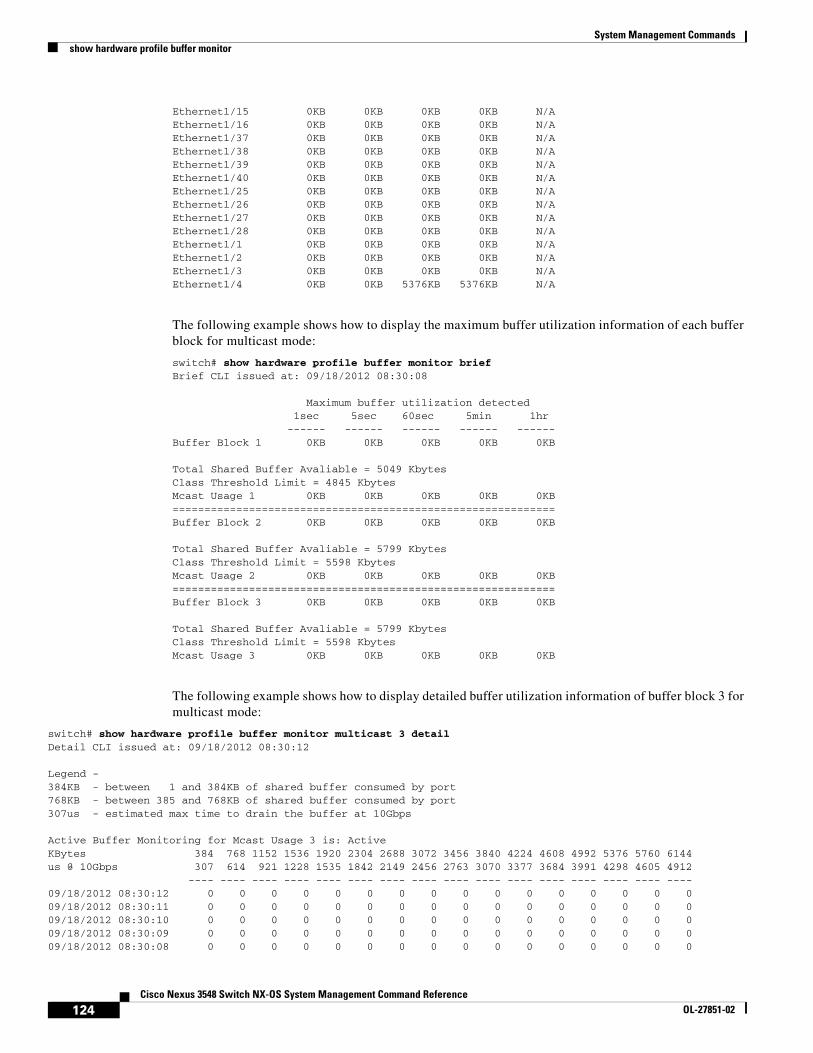
System Management Commandsshow hardware profile buffer monitor
Ethernet1/15 0KB 0KB 0KB 0KB N/A Ethernet1/16 0KB 0KB 0KB 0KB N/A Ethernet1/37 0KB 0KB 0KB 0KB N/A Ethernet1/38 0KB 0KB 0KB 0KB N/A Ethernet1/39 0KB 0KB 0KB 0KB N/A Ethernet1/40 0KB 0KB 0KB 0KB N/A Ethernet1/25 0KB 0KB 0KB 0KB N/A Ethernet1/26 0KB 0KB 0KB 0KB N/A Ethernet1/27 0KB 0KB 0KB 0KB N/A Ethernet1/28 0KB 0KB 0KB 0KB N/A Ethernet1/1 0KB 0KB 0KB 0KB N/A Ethernet1/2 0KB 0KB 0KB 0KB N/A Ethernet1/3 0KB 0KB 0KB 0KB N/A Ethernet1/4 0KB 0KB 5376KB 5376KB N/A
The following example shows how to display the maximum buffer utilization information of each buffer block for multicast mode:
switch# show hardware profile buffer monitor briefBrief CLI issued at: 09/18/2012 08:30:08
Maximum buffer utilization detected 1sec 5sec 60sec 5min 1hr ------ ------ ------ ------ ------Buffer Block 1 0KB 0KB 0KB 0KB 0KB
Total Shared Buffer Avaliable = 5049 KbytesClass Threshold Limit = 4845 KbytesMcast Usage 1 0KB 0KB 0KB 0KB 0KB ============================================================Buffer Block 2 0KB 0KB 0KB 0KB 0KB
Total Shared Buffer Avaliable = 5799 KbytesClass Threshold Limit = 5598 KbytesMcast Usage 2 0KB 0KB 0KB 0KB 0KB ============================================================Buffer Block 3 0KB 0KB 0KB 0KB 0KB
Total Shared Buffer Avaliable = 5799 KbytesClass Threshold Limit = 5598 KbytesMcast Usage 3 0KB 0KB 0KB 0KB 0KB
The following example shows how to display detailed buffer utilization information of buffer block 3 for multicast mode:
switch# show hardware profile buffer monitor multicast 3 detailDetail CLI issued at: 09/18/2012 08:30:12
Legend -384KB - between 1 and 384KB of shared buffer consumed by port768KB - between 385 and 768KB of shared buffer consumed by port307us - estimated max time to drain the buffer at 10Gbps
Active Buffer Monitoring for Mcast Usage 3 is: ActiveKBytes 384 768 1152 1536 1920 2304 2688 3072 3456 3840 4224 4608 4992 5376 5760 6144 us @ 10Gbps 307 614 921 1228 1535 1842 2149 2456 2763 3070 3377 3684 3991 4298 4605 4912 ---- ---- ---- ---- ---- ---- ---- ---- ---- ---- ---- ---- ---- ---- ---- ---- 09/18/2012 08:30:12 0 0 0 0 0 0 0 0 0 0 0 0 0 0 0 0 09/18/2012 08:30:11 0 0 0 0 0 0 0 0 0 0 0 0 0 0 0 0 09/18/2012 08:30:10 0 0 0 0 0 0 0 0 0 0 0 0 0 0 0 0 09/18/2012 08:30:09 0 0 0 0 0 0 0 0 0 0 0 0 0 0 0 0 09/18/2012 08:30:08 0 0 0 0 0 0 0 0 0 0 0 0 0 0 0 0
124Cisco Nexus 3548 Switch NX-OS System Management Command Reference
OL-27851-02

System Management Commandsshow hardware profile buffer monitor
09/18/2012 08:30:07 0 0 0 0 0 0 0 0 0 0 0 0 0 0 0 0 09/18/2012 08:30:06 0 0 0 0 0 0 0 0 0 0 0 0 0 0 0 0 09/18/2012 08:30:05 0 0 0 0 0 0 0 0 0 0 0 0 0 0 0 0 09/18/2012 08:30:04 0 0 0 0 0 0 0 0 0 0 0 0 0 0 0 0 09/18/2012 08:30:03 0 0 0 0 0 0 0 0 0 0 0 0 0 0 0 0
The following example shows how to display detailed buffer data about Ethernet interface 1/4:
switch# show hardware profile buffer monitor interface ethernet 1/4 detailDetail CLI issued at: 09/18/2012 07:38:43
Legend -384KB - between 1 and 384KB of shared buffer consumed by port768KB - between 385 and 768KB of shared buffer consumed by port307us - estimated max time to drain the buffer at 10Gbps
Active Buffer Monitoring for port Ethernet1/4 is: ActiveKBytes 384 768 1152 1536 1920 2304 2688 3072 3456 3840 4224 4608 4992 5376 5760 6144 us @ 10Gbps 307 614 921 1228 1535 1842 2149 2456 2763 3070 3377 3684 3991 4298 4605 4912 ---- ---- ---- ---- ---- ---- ---- ---- ---- ---- ---- ---- ---- ---- ---- ---- 09/18/2012 07:38:42 0 0 0 0 0 0 0 0 0 0 0 0 0 0 0 0 09/18/2012 07:38:41 0 0 0 0 0 0 0 0 0 0 0 0 0 0 0 0 09/18/2012 07:38:40 0 0 0 0 0 0 0 0 0 0 0 0 0 0 0 0 09/18/2012 07:38:39 0 0 0 0 0 0 0 0 0 0 0 0 0 0 0 0 09/18/2012 07:38:38 0 0 0 0 0 0 0 0 0 0 0 0 0 0 0 0 09/18/2012 07:38:37 0 0 0 0 0 0 0 0 0 0 0 0 0 0 0 0 09/18/2012 07:38:36 0 0 0 0 0 0 0 0 0 0 0 0 0 0 0 0 09/18/2012 07:38:35 0 0 0 0 0 0 0 0 0 0 0 0 0 0 0 0 09/18/2012 07:38:34 0 0 0 0 0 0 0 0 0 0 0 0 0 0 0 0 09/18/2012 07:38:33 0 0 0 0 0 0 0 0 0 0 0 0 0 0 0 0 09/18/2012 07:38:32 0 0 0 0 0 0 0 0 0 0 0 0 0 0 0 0 09/18/2012 07:38:31 0 0 0 0 0 0 0 0 0 0 0 0 0 0 0 0 09/18/2012 07:38:30 0 0 0 0 0 0 0 0 0 0 0 0 0 0 0 0 09/18/2012 07:38:29 0 0 0 0 0 0 0 0 0 0 0 0 0 0 0 0 09/18/2012 07:38:28 0 0 0 0 0 0 0 0 0 0 0 0 0 0 0 0 09/18/2012 07:38:27 0 0 0 0 0 0 0 0 0 0 0 0 0 0 0 0 09/18/2012 07:38:26 0 0 0 0 0 0 0 0 0 0 0 0 0 0 0 0 09/18/2012 07:38:25 0 0 0 0 0 0 0 0 0 0 0 0 0 0 0 0 09/18/2012 07:38:24 0 0 0 0 0 0 0 0 0 0 0 0 0 0 0 0 09/18/2012 07:38:23 0 0 0 0 0 0 0 0 0 0 0 0 0 0 0 0 09/18/2012 07:38:22 0 0 0 0 0 0 0 0 0 0 0 0 0 0 0 0 09/18/2012 07:38:21 0 0 0 0 0 0 0 0 0 0 0 0 0 0 0 0 09/18/2012 07:38:20 177 36 0 0 0 0 0 0 0 0 0 0 0 0 0 0 09/18/2012 07:38:19 0 143 107 0 0 0 0 0 0 0 0 0 0 0 0 0 09/18/2012 07:38:18 0 0 72 178 3 0 0 0 0 0 0 0 0 0 0 0 09/18/2012 07:38:17 0 0 0 0 176 74 0 0 0 0 0 0 0 0 0 0 09/18/2012 07:38:16 0 0 0 0 0 105 145 0 0 0 0 0 0 0 0 0 09/18/2012 07:38:15 0 0 0 0 0 0 33 179 38 0 0 0 0 0 0 0 09/18/2012 07:38:14 0 0 0 0 0 0 0 0 140 113 0 0 0 0 0 0 09/18/2012 07:38:13 0 0 0 0 0 0 0 0 0 66 178 6 0 0 0 0 09/18/2012 07:38:12 0 0 0 0 0 0 0 0 0 0 0 173 77 0 0 0 09/18/2012 07:38:11 1 0 0 1 0 0 1 0 0 1 0 0 102 42 0 0 09/18/2012 07:38:10 0 0 0 0 0 0 0 0 0 0 0 0 0 0 0 0
Related Commands Command Description
[no] hardware profile buffer monitor
Enables or disables monitoring of hardware buffer data.
clear hardware profile buffer monitor
Clears the buffer of all hardware profile buffer monitor data.
125Cisco Nexus 3548 Switch NX-OS System Management Command Reference
OL-27851-02

System Management Commandsshow hardware profile forwarding-mode
show hardware profile forwarding-modeTo display the warp mode status and the host, unicast, multicast, and Layer 2 TCAM sizes, use the show hardware profile forwarding-mode command.
show hardware profile forwarding-mode
Syntax Description This command has no arguments or keywords.
Command Modes Global configuration
Command History
Examples This example shows how to display the warp mode status and the host, unicast, multicast, and Layer 2 TCAM sizes.
switch(config)# show hardware profile forwarding-modeswitch(config)#
Related Commands
Release Modification
5.0(3)A1(1) This command was introduced.
Command Description
[no] hardware profile forwarding-mode warp
Enables warp mode.
126Cisco Nexus 3548 Switch NX-OS System Management Command Reference
OL-27851-02
System Management Commandsshow hosts
show hostsTo display the Domain Name Server (DNS) name servers and domain names, use the show hosts command.
show hosts
Syntax Description This command has no arguments or keywords.
Command Default None
Command Modes EXEC mode
Command History
Examples This example shows how to display the IP addresses of the DNS servers that are used to resolve hostnames:
switch# show hosts
Related Commands
Release Modification
5.0(3)A1(1) This command was introduced.
Command Description
ip domain-list Defines a list of domains.
ip domain lookup Enables DNS-based hostname-to-address translation.
ip domain-name Configures a name server.
127Cisco Nexus 3548 Switch NX-OS System Management Command Reference
OL-27851-02

System Management Commandsshow logging console
show logging consoleTo display the console logging configuration, use the show logging console command.
show logging console
Syntax Description This command has no arguments or keywords.
Command Default None
Command Modes EXEC mode
Command History
Examples This example shows how to display the console logging configuration:
switch# show logging console
Related Commands
Release Modification
5.0(3)A1(1) This command was introduced.
Command Description
logging console Configures logging to the console.
128Cisco Nexus 3548 Switch NX-OS System Management Command Reference
OL-27851-02

System Management Commandsshow logging info
show logging infoTo display the logging configuration, use the show logging info command.
show logging info
Syntax Description This command has no arguments or keywords.
Command Default None
Command Modes EXEC mode
Command History
Examples This example shows how to display the logging configuration:
switch# show logging info
Related Commands
Release Modification
5.0(3)A1(1) This command was introduced.
Command Description
logging event Logs interface events.
129Cisco Nexus 3548 Switch NX-OS System Management Command Reference
OL-27851-02

System Management Commandsshow logging last
show logging lastTo display the last number of lines of the logfile, use the show logging last command.
show logging last number
Syntax Description
Command Default None
Command Modes EXEC mode
Command History
Examples This example shows how to display the last 42 lines of the log file:
switch# show logging last 42
Related Commands
number Enters the number of lines to display from 1 to 9999.
Release Modification
5.0(3)A1(1) This command was introduced.
Command Description
logging logfile Configures the name of the log file used to store system messages.
130Cisco Nexus 3548 Switch NX-OS System Management Command Reference
OL-27851-02

System Management Commandsshow logging level
show logging levelTo display the facility logging severity level configuration, use the show logging level command.
show logging level [facility]
Syntax Description
Command Default None
Command Modes EXEC mode
Command History
Examples This example shows how to display the logging severity level configuration:
switch# show logging level Facility Default Severity Current Session Severity-------- ---------------- ------------------------aaa 3 3aclmgr 3 3afm 3 3altos 3 3auth 0 0authpriv 3 3bootvar 5 5callhome 2 2capability 2 2capability 2 2cdp 2 2cert_enroll 2 2cfs 3 3:
<--snip-->:vdc_mgr 6 6vlan_mgr 2 2vmm 5 5vshd 5 5xmlma 3 3zschk 2 2
0(emergencies) 1(alerts) 2(critical)3(errors) 4(warnings) 5(notifications)6(information) 7(debugging)switch#
This example shows how to display the EtherChannel logging severity level configuration:
facility (Optional) Logging facility.
Release Modification
5.0(3)A1(1) This command was introduced.
131Cisco Nexus 3548 Switch NX-OS System Management Command Reference
OL-27851-02

System Management Commandsshow logging level
switch# show logging level port-channel Facility Default Severity Current Session Severity-------- ---------------- ------------------------eth_port_channel 5 5
0(emergencies) 1(alerts) 2(critical)3(errors) 4(warnings) 5(notifications)6(information) 7(debugging)
switch#
This example shows how to display the Address Resolution Protocol (ARP) logging severity level configuration:
switch# show logging level arp Facility Default Severity Current Session Severity-------- ---------------- ------------------------arp 2 2
0(emergencies) 1(alerts) 2(critical)3(errors) 4(warnings) 5(notifications)6(information) 7(debugging)switch#
Related Commands Command Description
logging level Configures the facility logging level.
132Cisco Nexus 3548 Switch NX-OS System Management Command Reference
OL-27851-02

System Management Commandsshow logging logfile
show logging logfileTo display the messages in the log file that were timestamped within the span entered, use the show logging logfile command.
show logging logfile [start-time yyyy mmm dd hh:mm:ss] [end-time yyyy mmm dd hh:mm:ss]
Syntax Description
Command Default None
Command Modes EXEC mode
Command History
Usage Guidelines If you do not enter an end time, the current time is used.
Examples This example shows how to display the messages in the log file that were timestamped within the span shown:
switch# show logging logfile start-time 2008 mar 11 12:10:00
Related Commands
start-time yyyy mmm dd hh:mm:ss
(Optional) Specifies a start time in the format yyyy mmm dd hh:mm:ss. Use three characters for the month (mmm) field, digits for the year (yyyy) and day (dd) fields, and digits separated by colons for the time (hh:mm:ss) field.
end-time yyyy mmm dd hh:mm:ss
(Optional) Specifies an end time in the format yyyy mmm dd hh:mm:ss. Use three characters for the month (mmm) field, digits for the year (yyyy) and day (dd) fields, and digits separated by colons for the time (hh:mm:ss) field.
Release Modification
5.0(3)A1(1) This command was introduced.
Command Description
logging logfile Configures logging to a log file.
133Cisco Nexus 3548 Switch NX-OS System Management Command Reference
OL-27851-02

System Management Commandsshow logging module
show logging moduleTo display the module logging configuration, use the show logging module command.
show logging module
Syntax Description This command has no arguments or keywords.
Command Default None
Command Modes EXEC mode
Command History
Examples This example shows how to display the module logging configuration:
switch# show logging module
Related Commands
Release Modification
5.0(3)A1(1) This command was introduced.
Command Description
logging module Configures module logging.
134Cisco Nexus 3548 Switch NX-OS System Management Command Reference
OL-27851-02

System Management Commandsshow logging monitor
show logging monitorTo display the monitor logging configuration, use the show logging monitor command.
show logging monitor
Syntax Description This command has no arguments or keywords.
Command Default None
Command Modes EXEC mode
Command History
Examples This example shows how to display the monitor logging configuration:
switch# show logging monitor
Related Commands
Release Modification
5.0(3)A1(1) This command was introduced.
Command Description
logging monitor Configures logging on the monitor.
135Cisco Nexus 3548 Switch NX-OS System Management Command Reference
OL-27851-02

System Management Commandsshow logging nvram
show logging nvramTo display the messages in the nonvolatile random access memory (NVRAM) log, use the show logging nvram command.
show logging nvram [last number-lines]
Syntax Description
Command Default None
Command Modes EXEC mode
Command History
Examples This example shows how to display the last 20 messages in the NVRAM log:
switch# show logging nvram last 20
Related Commands
last number-lines (Optional) Specifies the number of lines to display. The number of lines is from 1 to 100.
Release Modification
5.0(3)A1(1) This command was introduced.
Command Description
logging level Enables logging messages from a defined facility.
136Cisco Nexus 3548 Switch NX-OS System Management Command Reference
OL-27851-02

System Management Commandsshow logging onboard
show logging onboardTo display the onboard logging information based on the error type, use the show logging onboard command.
show logging onboard {bcm_used | boot-uptime | device-version | endtime | environmental-history | exception-log | kernel-trace | obfl-history | obfl-logs | stack-trace | starttime | status | trident} [> file | | type]
Syntax Description
Command Default None
Command Modes EXEC mode
Command History
Usage Guidelines The date and time arguments for the starttime and endtime keywords are entered as the date month/day/year (mm/dd/yy), followed by a hyphen, and the time in 24-hour format in hours:minutes:seconds (HH:MM:SS). For example:
• starttime 03/17/08-15:01:57
bcm_used Displays the onboard failure logging (OBFL) BCM usage information.
boot-uptime Displays the OBFL boot and uptime information.
device-version Displays the OBFL device version information.
endtime Displays the OBFL logs until the specified end time in the following format: mm/dd/yy-HH:MM:SS
environmental-history Displays the OBFL environmental history.
exception-log Displays the OBFL exception log.
kernel-trace Displays the OBFL kernel trace information.
obfl-history Displays the OBFL history information.
obfl-logs Displays the OBFL technical support log information.
stack-trace Displays the OBFL kernel stack trace information.
starttime Displays the OBFL logs from the specified start time in the following format: mm/dd/yy-HH:MM:SS
status Displays the OBFL status enable or disable.
trident Displays the OBFL Trident information.
> file (Optional) Redirects the output to a file. See the “Usage Guidelines” section for additional information.
| type (Optional) Filters the output. See the “Usage Guidelines” section for additional information.
Release Modification
5.0(3)A1(1) This command was introduced.
137Cisco Nexus 3548 Switch NX-OS System Management Command Reference
OL-27851-02

System Management Commandsshow logging onboard
• endtime 03/18/08-15:04:57
The valid values for file are as follows:
• bootflash:
• ftp:
• scp:
• sftp:
• tftp:
• volatile:
The valid values for type are as follows:
• begin [-i] [-x] [word]—Begins with the line that matches the text.
– -i—Ignores the case difference when comparing the strings.
– -x—Prints only the lines where the match is a whole line.
– word—Specifies for the expression.
• count [> file | | type]—Counts number of lines.
• egrep | grep print-match—Egrep or Grep. Egrep searches for lines of text that match more sophisticated regular expression syntax than grep. Grep searches for lines of text that match one or many regular expressions, and outputs only the matching lines.
– -A num—Prints the specifies number of lines of context after every matching line. Range: 1 to 999.
– -B num—Prints the specifies number of lines of context before every matching line. Range: 1 to 999.
– -c—Prints a total count of matching lines only.
– -i—Ignores the case difference when comparing the strings.
– -n—Prints each match preceded by its line number.
– -v—Prints only the lines that contain no matches for the word argument.
– -w—Prints only lines where the match is a complete word.
– -x—Prints only the lines where the match is a whole line.
– word—Specifies for the expression.
• exclude [-i] [-x] [word]—Excludes the lines that match.
– -i—Ignores the case difference when comparing the strings.
– -x—Prints only the lines where the match is a whole line.
– word—Specifies for the expression.
• head [-n num]—Stream Editor. The optional -n num keyword and argument allow you to specify the number of lines to print. Range: 0 to 2147483647.
• include [-i] [-x] [word]—Include the lines that match.
– -i—Ignores the case difference when comparing the strings.
– -x—Prints only the lines where the match is a whole line.
– word—Specifies for the expression.
138Cisco Nexus 3548 Switch NX-OS System Management Command Reference
OL-27851-02

System Management Commandsshow logging onboard
• last [num]—Displays the last lines to print. The optional num specifies the number of lines to print. Range: 0 to 9999.
• less [-E | -d]—Quits at the end of the file.
– -E—(Optional) Quits at the end of the file.
– -d—(Optional) Specifies a dumb terminal.
• no-more—Turns off pagination for command output.
• sed command—Stream Editor
• wc—Counts words, lines, and characters.
– -c—(Optional) Specifies the output character count.
– -l—(Optional) Specifies the output line count.
– -w—(Optional) Specifies the output word count.
– >—Redirects it to a file.
– |—Pipes command output to filter.
Use this command to view OBFL data from the system hardware. The OBFL feature is enabled by default and records operating temperatures, hardware uptime, interrupts, and other important events and messages that can assist with diagnosing problems with hardware cards or modules installed in a Cisco router or switch. Data is logged to files stored in nonvolatile memory. When the onboard hardware is started up, a first record is made for each area monitored and becomes a base value for subsequent records.
The OBFL feature provides a circular updating scheme for collecting continuous records and archiving older (historical) records, ensuring accurate data about the system. Data is recorded in one of two formats: continuous information that displays a snapshot of measurements and samples in a continuous file, and summary information that provides details about the data being collected. The message “No historical data to display” is seen when historical data is not available.
Examples This example shows how to display the OBFL boot and uptime information:
switch# show logging onboard boot-uptime
This example shows how to display the OBFL logging device information:
switch# show logging onboard device-version
This example shows how to display the OBFL history information:
switch# show logging onboard obfl-history
The show logging onboard obfl-history command displays the following information:
• Timestamp when OBFL is manually disabled.
• Timestamp when OBFL is manually enabled.
• Timestamp when OBFL data is manually cleared.
This example shows how to display the OBFL kernel stack trace information:
switch# show logging onboard stack-trace
The show logging onboard stack-trace command displays the following information:
• Time in seconds
139Cisco Nexus 3548 Switch NX-OS System Management Command Reference
OL-27851-02

System Management Commandsshow logging onboard
• Time in microseconds
• Error description string
• Current process name and identification
• Kernel jiffies
• Stack trace
Related Commands Command Description
clear logging onboard Clears the OBFL entries in the persistent log.
hw-module logging onboard
Enables or disabled OBFL entries based on the error type.
140Cisco Nexus 3548 Switch NX-OS System Management Command Reference
OL-27851-02

System Management Commandsshow logging pending
show logging pendingTo display the pending changes to the syslog server configuration, use the show logging pending command.
show logging pending
Syntax Description This command has no arguments or keywords.
Command Default None
Command Modes EXEC mode
Command History
Examples This example shows how to display the pending changes to the syslog server configuration:
switch# show logging pending
Related Commands
Release Modification
5.0(3)A1(1) This command was introduced.
Command Description
logging abort Cancels the pending changes to the syslog server configuration.
141Cisco Nexus 3548 Switch NX-OS System Management Command Reference
OL-27851-02

System Management Commandsshow logging pending-diff
show logging pending-diffTo display the differences from the current syslog server configuration to the pending changes of the syslog server configuration, use the show logging pending-diff command.
show logging pending-diff
Syntax Description This command has no arguments or keywords.
Command Default None
Command Modes EXEC mode
Command History
Examples This example shows how to display the pending differences of the syslog server configuration:
switch# show logging pending-diff
Related Commands
Release Modification
5.0(3)A1(1) This command was introduced.
Command Description
logging abort Cancels the pending changes to the syslog server configuration.
142Cisco Nexus 3548 Switch NX-OS System Management Command Reference
OL-27851-02

System Management Commandsshow logging session status
show logging session statusTo display the logging session status, use the show logging session status command.
show logging session status
Syntax Description This command has no arguments or keywords.
Command Default None
Command Modes EXEC mode
Command History
Examples This example shows how to display the logging session status:
switch# show logging session status
Related Commands
Release Modification
5.0(3)A1(1) This command was introduced.
Command Description
logging timestamp Sets the logging time-stamp units.
143Cisco Nexus 3548 Switch NX-OS System Management Command Reference
OL-27851-02

System Management Commandsshow logging server
show logging serverTo display the syslog server configuration, use the show logging server command.
show logging server
Syntax Description This command has no arguments or keywords.
Command Default None
Command Modes EXEC mode
Command History
Examples This example shows how to display the syslog server configuration:
switch# show logging server
Related Commands
Release Modification
5.0(3)A1(1) This command was introduced.
Command Description
logging server Configures a remote syslog server.
144Cisco Nexus 3548 Switch NX-OS System Management Command Reference
OL-27851-02

System Management Commandsshow logging status
show logging statusTo display the logging status, use the show logging status command.
show logging status
Syntax Description This command has no arguments or keywords.
Command Default None
Command Modes EXEC mode
Command History
Examples This example shows how to display the logging status:
switch# show logging status
Related Commands
Release Modification
5.0(3)A1(1) This command was introduced.
Command Description
logging distribute Enables the distribution of the syslog server configuration to network switches using the Cisco Fabric Services (CFS) infrastructure.
145Cisco Nexus 3548 Switch NX-OS System Management Command Reference
OL-27851-02

System Management Commandsshow logging timestamp
show logging timestampTo display the logging time-stamp configuration, use the show logging timestamp command.
show logging timestamp
Syntax Description This command has no arguments or keywords.
Command Default None
Command Modes EXEC mode
Command History
Examples This example shows how to display the logging time-stamp configuration:
switch# show logging timestamp
Related Commands
Release Modification
5.0(3)A1(1) This command was introduced.
Command Description
logging timestamp Configures the logging time stamp granularity.
146Cisco Nexus 3548 Switch NX-OS System Management Command Reference
OL-27851-02

System Management Commandsshow monitor session
show monitor sessionTo display information about the Switched Port Analyzer (SPAN) or Encapsulated Remote Switched Port Analyzer (ERSPAN) sessions, use the show monitor session command.
show monitor session [session | all [brief] | range range [brief]]
Syntax Description
Command Default None
Command Modes EXEC mode
Command History
Examples This example shows how to display information about SPAN session 1:
switch# show monitor session 1session 1---------------description : A Local SPAN sessiontype : localstate : down (No operational src/dst)source intf : rx : Eth1/5 tx : Eth1/5 both : Eth1/5source VLANs : rx :source VSANs : rx :destination ports : Eth1/21
Legend: f = forwarding enabled, l = learning enabled
switch#
This example shows how to display a range of SPAN sessions:
switch# show monitor session range 1-4
session (Optional) Number of the session. The range is from 1 to 18.
all (Optional) Displays all sessions.
brief (Optional) Displays a brief summary of the information.
range range (Optional) Displays a range of sessions. The range is from 1 to 18.
Release Modification
5.0(2)A1(1) This command was introduced.
6.0(2)A1(1) Support for ERSPAN was added.
147Cisco Nexus 3548 Switch NX-OS System Management Command Reference
OL-27851-02

System Management Commandsshow monitor session
This example shows how to display the information about an ERSPAN session on a switch that runs Cisco NX-OS Release 5.0(3)U2(2):
switch# show monitor session 1session 1---------------description : ERSPAN source sessiontype : erspan-sourcestate : down (No valid global IP Address)vrf-name : defaultdestination-ip : 192.0.2.1ip-ttl : 5ip-dscp : 3mtu : 1000origin-ip : origin-ip not specifiedsource intf : rx : Eth1/5 tx : Eth1/5 both : Eth1/5source VLANs : rx :
switch#
Related Commands Command Description
monitor session Displays the contents of the startup configuration file.
show running-config monitor
Displays the running configuration information for SPAN and ERSPAN sessions.
148Cisco Nexus 3548 Switch NX-OS System Management Command Reference
OL-27851-02

System Management Commandsshow ntp peer-status
show ntp peer-statusTo display the status of the Network Time Protocol (NTP) peers, use the show ntp peer-status command.
show ntp peer-status
Syntax Description This command has no arguments or keywords.
Command Default None
Command Modes EXEC mode
Command History
Examples This example shows how to display the peer status for NTP:
switch# show ntp peer-status
Related Commands
Release Modification
5.0(3)A1(1) This command was introduced.
Command Description
show ntp peers Displays information about NTP peers.
149Cisco Nexus 3548 Switch NX-OS System Management Command Reference
OL-27851-02
System Management Commandsshow ntp peers
show ntp peersTo display information about Network Time Protocol (NTP) peers, use the show ntp peers command.
show ntp peers
Syntax Description This command has no arguments or keywords.
Command Default None
Command Modes EXEC mode
Command History
Examples This example shows how to display information about NTP peers:
switch# show ntp peers
Related Commands
Release Modification
5.0(3)A1(1) This command was introduced.
Command Description
show ntp peer-status Displays status information about NTP peers.
150Cisco Nexus 3548 Switch NX-OS System Management Command Reference
OL-27851-02

System Management Commandsshow ntp statistics
show ntp statisticsTo display Network Time Protocol (NTP) statistics, use the show ntp statistics command.
show ntp statistics {io | local | memory | peer {ipaddr address | name name1 [..nameN]}
Syntax Description
Command Default None
Command Modes EXEC mode
Command History
Examples This example shows how to display the statistics for NTP:
switch# show ntp statistics local
Related Commands
io Displays the input-output statistics.
local Displays the counters maintained by the local NTP.
memory Displays the statistics counters related to the memory code.
peer Displays the per-peer statistics counter of a peer.
ipaddr address Displays statistics for the peer with the configured IPv4 address. The IPv4 address format is dotted decimal, x.x.x.x.
name name1 Displays statistics for a named peer.
..nameN (Optional) Displays statistics for one or more named peers.
Release Modification
5.0(3)A1(1) This command was introduced.
Command Description
clear ntp statistics Clears NTP statistics
151Cisco Nexus 3548 Switch NX-OS System Management Command Reference
OL-27851-02

System Management Commandsshow ntp timestamp-status
show ntp timestamp-statusTo display the Network Time Protocol (NTP) time-stamp information, use the show ntp timestamp-status command.
show ntp timestamp-status
Syntax Description This command has no arguments or keywords.
Command Default None
Command Modes EXEC mode
Command History
Examples This example shows how to display the NTP time-stamp status:
switch# show ntp timestamp-status
Related Commands
Release Modification
5.0(3)A1(1) This command was introduced.
Command Description
ntp Configures the NTP peers and servers.
152Cisco Nexus 3548 Switch NX-OS System Management Command Reference
OL-27851-02

System Management Commandsshow ptp brief
show ptp briefTo display a brief status of the Precision Time Protocol (PTP) interfaces, use the show ptp brief command.
show ptp brief
Syntax Description This command has no arguments or keywords.
Command Default None
Command Modes Any command mode
Command History
Usage Guidelines This command does not require a license.
Examples This example shows how to display a brief status of the PTP interfaces:
switch# show ptp brief
PTP port status-----------------------Port State------- --------------Eth1/5 Disabledswitch#
Related Commands
Release Modification
6.0(2)A1(1) This command was introduced.
Command Description
show ptp clock Displays the properties of the local clock.
show ptp clock foreign-masters-record
Displays the state of foreign masters known to the PTP process.
show ptp corrections Displays the last few PTP corrections.
show ptp parent Displays the properties of the PTP parent.
show ptp port Displays the status of the PTP port.
show ptp time-property Displays the properties of the PTP clock.
153Cisco Nexus 3548 Switch NX-OS System Management Command Reference
OL-27851-02

System Management Commandsshow ptp clock
show ptp clockTo display the Precision Time Protocol (PTP) clock information, use the show ptp clock command.
show ptp clock
Syntax Description This command has no arguments or keywords.
Command Default None
Command Modes Any command mode
Command History
Usage Guidelines This command does not require a license.
Examples This example shows how to display the PTP clock information:
switch# show ptp clockPTP Device Type: Boundary clockClock Identity : 54:7f:ee:ff:ff: 2:47:81Clock Domain: 1Number of PTP ports: 0Priority1 : 255Priority2 : 255Clock Quality: Class : 248 Accuracy : 254 Offset (log variance) : 65535Offset From Master : 0Mean Path Delay : 0Steps removed : 0Local clock time:Fri Sep 30 05:57:50 2011switch#
Related Commands
Release Modification
6.0(2)A1(1) This command was introduced.
Command Description
show ptp brief Displays the PTP status.
show ptp clock foreign-masters-record
Displays the state of foreign masters known to the PTP process.
show ptp corrections Displays the last few PTP corrections.
show ptp parent Displays the properties of the PTP parent.
154Cisco Nexus 3548 Switch NX-OS System Management Command Reference
OL-27851-02

System Management Commandsshow ptp clock
show ptp port Displays the status of the PTP port.
show ptp time-property Displays the properties of the PTP clock.
Command Description
155Cisco Nexus 3548 Switch NX-OS System Management Command Reference
OL-27851-02

System Management Commandsshow ptp clock foreign-masters-record
show ptp clock foreign-masters-recordTo display information about the state of foreign masters known to the Precision Time Protocol (PTP) process, use the show ptp clock foreign-masters-record command.
show ptp clock foreign-masters-record [interface ethernet slot/port]
Syntax Description
Command Default None
Command Modes Any command mode
Command History
Usage Guidelines This command does not require a license.
Examples This example shows how to display information about the state of foreign masters known to the PTP process:
switch# show ptp clock foreign-masters-record
This example shows how to display information about the state of foreign masters known to the PTP process for the Ethernet interface 1/5:
switch# show ptp clock foreign-masters-record interface ethernet 1/5
interface (Optional) Specifies an interface.
ethernet Specifies an IEEE 802.3z Ethernet interface.
slot/port Slot number of the Ethernet interface. The slot number is from 1 to 255 and the port number is form 1 to 128.
Release Modification
6.0(2)A1(1) This command was introduced.
156Cisco Nexus 3548 Switch NX-OS System Management Command Reference
OL-27851-02
System Management Commandsshow ptp clock foreign-masters-record
Related Commands Command Description
show ptp brief Displays the PTP status.
show ptp clock Displays the properties of the local clock.
show ptp corrections Displays the last few PTP corrections.
show ptp parent Displays the properties of the PTP parent.
show ptp port Displays the status of the PTP port.
show ptp time-property Displays the properties of the PTP clock.
157Cisco Nexus 3548 Switch NX-OS System Management Command Reference
OL-27851-02

System Management Commandsshow ptp corrections
show ptp correctionsTo display the history of the Precision Time Protocol (PTP) clock corrections on the Ethernet interfaces, use the show ptp corrections command.
show ptp corrections
Syntax Description This command has no arguments or keywords.
Command Default None
Command Modes Any command mode
Command History
Usage Guidelines This command does not require a license.
Examples This example shows how to display the history of the PTP clock corrections on the Ethernet interfaces:
switch# show ptp corrections
Related Commands
Release Modification
6.0(2)A1(1) This command was introduced.
Command Description
show ptp brief Displays the PTP status.
show ptp clock Displays the properties of the local clock.
show ptp clock foreign-masters-record
Displays the state of foreign masters known to the PTP process.
show ptp parent Displays the properties of the PTP parent.
show ptp port Displays the status of the PTP port.
show ptp time-property Displays the properties of the PTP clock.
158Cisco Nexus 3548 Switch NX-OS System Management Command Reference
OL-27851-02

System Management Commandsshow ptp parent
show ptp parentTo display information about the parent and grand master of the Precision Time Protocol (PTP) clock, use the show ptp parent command.
show ptp parent
Syntax Description This command has no arguments or keywords.
Command Default None
Command Modes Any command mode
Command History
Usage Guidelines This command does not require a license.
Examples This example shows how to display information about the parent and grand master of the PTP clock:
switch# show ptp parent
PTP PARENT PROPERTIES
Parent Clock:Parent Clock Identity: 0: 0: 0:ff:ff: 0: 0: 0Parent Port Number: 0Observed Parent Offset (log variance): N/AObserved Parent Clock Phase Change Rate: N/A
Grandmaster Clock:Grandmaster Clock Identity: 0: 0: 0:ff:ff: 0: 0: 0Grandmaster Clock Quality: Class: 248 Accuracy: 254 Offset (log variance): 65535 Priority1: 255 Priority2: 255switch#
Release Modification
6.0(2)A1(1) This command was introduced.
159Cisco Nexus 3548 Switch NX-OS System Management Command Reference
OL-27851-02

System Management Commandsshow ptp parent
Related Commands Command Description
show ptp brief Displays the PTP status.
show ptp clock Displays the properties of the local clock.
show ptp clock foreign-masters-record
Displays the state of foreign masters known to the PTP process.
show ptp corrections Displays the last few PTP corrections.
show ptp port Displays the status of the PTP port.
show ptp time-property Displays the properties of the PTP clock.
160Cisco Nexus 3548 Switch NX-OS System Management Command Reference
OL-27851-02

System Management Commandsshow ptp port
show ptp portTo display information about the Precision Time Protocol (PTP) port, use the show ptp port command.
show ptp port interface ethernet slot/port
Syntax DescriptionT
Command Default None
Command Modes Any command mode
Command History
Usage Guidelines This command does not require a license.
Examples This example shows how to display information about the PTP port on the Ethernet interface 1/5:
switch# show ptp port interface ethernet 1/5PTP Port Dataset: Eth1/5Port identity: clock identity: 0: 5:73:ff:ff:ff:5b: 1Port identity: port number: 4PTP version: 2Port state: DisabledVLAN info: 1Delay request interval(log mean): 2Peer mean path delay: 0Announce interval(log mean): 1Sync interval(log mean): -2Delay Mechanism: End to EndPeer delay request interval(log mean): 0switch#
interface Specifies the interface.
ethernet slot/port Specifies an IEEE 802.3z Ethernet interface. The slot number is from 1 to 255 and the port number is from 1 to 128.
Release Modification
6.0(2)A1(1) This command was introduced.
161Cisco Nexus 3548 Switch NX-OS System Management Command Reference
OL-27851-02

System Management Commandsshow ptp port
Related Commands Command Description
show ptp brief Displays the PTP status.
show ptp clock Displays the properties of the local clock.
show ptp clock foreign-masters-record
Displays the state of foreign masters known to the PTP process.
show ptp corrections Displays the last few PTP corrections.
show ptp parent Displays the properties of the PTP parent.
show ptp time-property Displays the properties of the PTP clock.
162Cisco Nexus 3548 Switch NX-OS System Management Command Reference
OL-27851-02

System Management Commandsshow ptp time-property
show ptp time-propertyTo display the Precision Time Protocol (PTP) clock properties, use the show ptp time-property command.
show ptp time-property
Syntax Description This command has no arguments or keywords.
Command Default None
Command Modes Any command mode
Command History
Usage Guidelines This command does not require a license.
Examples This example shows how to display the PTP clock properties:
switch# show ptp time-propertyPTP CLOCK TIME PROPERTY: Current UTC Offset valid: 0 Current UTC Offset: 0 Leap59: 0 Leap61: 0 Time Traceable: 0 Frequency Traceable: 0 PTP Timescale: 0 Time Source: 0xa0(Internal Oscillator)switch#
Related Commands
Release Modification
6.0(2)A1(1) This command was introduced.
Command Description
show ptp brief Displays the PTP status.
show ptp clock Displays the properties of the local clock.
show ptp clock foreign-masters-record
Displays the state of foreign masters known to the PTP process.
show ptp corrections Displays the last few PTP corrections.
show ptp parent Displays the properties of the PTP parent.
show ptp port Displays the status of the PTP port.
163Cisco Nexus 3548 Switch NX-OS System Management Command Reference
OL-27851-02

System Management Commandsshow rmon
show rmonTo display information about Remote Monitoring (RMON) alarms or high-capacity alarms or events, use the show rmon command.
show rmon {alarms | events | hcalarms | info | logs}
Syntax Description
Command Default None
Command Modes EXEC mode
Command History
Examples This example shows how to display the RMON high-capacity alarms configured on the switch:
switch# show rmon hclarms High Capacity Alarm 3 is active, owned by admin Monitors 1.3.6.1.2.1.2.2.1.17.83886080 every 5 second(s) Taking delta samples, last value was 216340 Rising threshold is 0, assigned to event 3 Falling threshold is 0, assigned to event 0 On startup enable rising alarm Number of Failed Attempts is 0switch#
This example shows how to display the RMON events configured on the switch:
switch# show rmon events Event 5 is active, owned by admin Description is myRMONEvent Event firing causes nothing, last fired neverswitch#
This example shows how to display the RMON configuration information:
switch# show rmon info Maximum allowed 32 bit or 64 bit alarms : 512Number of 32 bit alarms configured : 0Number of 64 bit hcalarms configured : 1switch#
alarms Displays the RMON alarms.
events Displays the RMON events.
hcalarms Displays the RMON high-capacity alarms.
info Displays the RMON configuration information.
logs Displays information about the RMON event logs.
Release Modification
5.0(3)A1(1) This command was introduced.
164Cisco Nexus 3548 Switch NX-OS System Management Command Reference
OL-27851-02

System Management Commandsshow rmon
Related Commands Command Description
rmon alarm Creates RMON alarms.
rmon event Creates RMON events.
rmon hcalarm Creates RMON high-capacity alarms.
show running-config Displays the running configuration.
165Cisco Nexus 3548 Switch NX-OS System Management Command Reference
OL-27851-02

System Management Commandsshow running-config
show running-configTo display the contents of the currently running configuration file, use the show running-config command.
show running-config [all]
Syntax Description
Command Default None
Command Modes EXEC mode
Command History
Examples This example shows how to display information on the running configuration on a switch that runs Cisco NX-OS Release 5.0(3)A1(1):
switch# show running-config
!Command: show running-config!Time: Fri May 28 10:30:02 2010
version 5.0(3)A1(1)feature telnetfeature private-vlan
username adminbackup password 5 ! role network-operatorusername admin password 5 $1$gLP0Z4.z$nA4fMnTcHmdSgQ3ENakm/1 role network-adminip domain-lookuphostname switchslot 1snmp-server user admin network-admin auth md5 0xd727e3e4ed39de2f32841ffa24e4234c priv 0xd727e3e4ed39de2f32841ffa24e4234c localizedkey
vrf context management ip route 0.0.0.0/0 192.168.0.1<--Output truncated-->switch#
This example shows how to display detailed information on the running configuration on a switch that runs Cisco NX-OS Release 5.0(3)A1(1):
switch# show running-config all
all (Optional) Displays the full operating information including default settings.
Release Modification
5.0(3)A1(1) This command was introduced.
166Cisco Nexus 3548 Switch NX-OS System Management Command Reference
OL-27851-02

System Management Commandsshow running-config
This example shows how to display the running configuration on a switch that runs Cisco NX-OS Release 5.0(3)A1(1) and shows the Control Plane Policing (CoPP) policy maps, hardware port modes, and access control list (ACL) ternary content addressable memory (TCAM) changes:
switch# show running-config
!Command: show running-config!Time: Thu Aug 25 07:39:37 2011
version 5.0(3)A1(1)feature telnetno feature sshfeature lldp
username admin password 5 $1$OOV4MdOM$BAB5RkD22YanT4empqqSM0 role network-adminip domain-lookupswitchname switchip access-list my-acl 10 deny ip any 10.0.0.1/32 20 deny ip 10.1.1.1/32 anyclass-map type control-plane match-any copp-arpclass-map type control-plane match-any copp-bpduclass-map type control-plane match-any copp-defaultclass-map type control-plane match-any copp-dhcpclass-map type control-plane match-any copp-filtermatchclass-map type control-plane match-any copp-icmp:<--snip-->:class-map type control-plane match-any copp-ttl1policy-map type control-plane copp-system-policy class copp-default police pps 400 class copp-l2switched police pps 400 class copp-icmp police pps 200:<--snip-->control-plane service-policy input copp-system-policyhardware profile tcam region arpacl 128hardware profile tcam region ifacl 256hardware profile tcam region racl 256hardware profile tcam region vacl 512hardware profile portmode 48x10G+4x40G<--Output truncated-->switch#
Related Commands Command Description
show startup-config Displays the contents of the startup configuration file.
167Cisco Nexus 3548 Switch NX-OS System Management Command Reference
OL-27851-02

System Management Commandsshow running-config callhome
show running-config callhomeTo display the Call Home running configuration, use the show running-config callhome command.
show running-config callhome [all]
Syntax Description
Command Default Displays only the configured information.
Command Modes EXEC mode
Command History
Examples This example shows how to display the Call Home running configuration:
switch# show running-config callhome
This example shows how to display the entire Call Home running configuration, including the default values:
switch# show running-config callhome all
Related Commands
all (Optional) Displays all the default and configured information.
Release Modification
5.0(3)A1(1) This command was introduced.
Command Description
show callhome Displays Call Home configuration information.
168Cisco Nexus 3548 Switch NX-OS System Management Command Reference
OL-27851-02

System Management Commandsshow running-config exclude-provision
show running-config exclude-provisionTo display the running configuration without the configuration for offline preprovisioned interfaces, use the show running-config exclude-provision command.
show running-config exclude-provision
Syntax Description This command has no arguments or keywords.
Command Default None
Command Modes EXEC mode
Command History
Examples This example shows how to display the running configuration without the offline preprovisioned interfaces:
switch# show running-config exclude-provision
!Command: show running-config exclude-provision!Time: Fri May 28 10:35:32 2010
version 5.0(3)A1(1)feature telnetfeature private-vlan
username adminbackup password 5 ! role network-operatorusername admin password 5 $1$gLP0Z4.z$nA4fMnTcHmdSgQ3ENakm/1 role network-adminip domain-lookuphostname switchslot 1snmp-server user admin network-admin auth md5 0xd727e3e4ed39de2f32841ffa24e4234c priv 0xd727e3e4ed39de2f32841ffa24e4234c localizedkey
vrf context management ip route 0.0.0.0/0 192.168.0.1vlan 1vlan 5 private-vlan primaryport-channel load-balance ethernet source-ip
interface Ethernet1/1<--Output truncated-->switch#
Release Modification
5.0(3)A1(1) This command was introduced.
169Cisco Nexus 3548 Switch NX-OS System Management Command Reference
OL-27851-02

System Management Commandsshow running-config exclude-provision
Related Commands Command Description
copy running-config startup-config
Copies the running configuration to the startup configuration.
provision Preprovisions a module in a slot.
show provision Displays the preprovisioned module information.
show startup-config exclude-provision
Displays the startup configuration without the preprovisioning information for offline interfaces.
slot Configures a chassis slot for a predefined module.
170Cisco Nexus 3548 Switch NX-OS System Management Command Reference
OL-27851-02

System Management Commandsshow running-config interface
show running-config interfaceTo display the running configuration information for interfaces, use the show running-config interface command.
show running-config interface [all | ethernet slot/port | loopback if_number | mgmt mgmt_intf | port-channel po_number]
Syntax Description
Command Default Displays only the configured information.
Command Modes EXEC mode
Command History
Examples This example shows how to display the running configuration for a specified Ethernet interface on a switch that runs Cisco NX-OS Release 5.0(3)A1(1):
switch# show running-config interface ethernet 1/5
!Command: show running-config interface Ethernet1/5!Time: Fri Aug 26 04:12:01 2011
version 5.0(3)A1(1)
interface Ethernet1/5 speed auto
switch#
Related Commands
all (Optional) Displays all the default and configured information.
ethernet slot/port Specifies the Ethernet interface and the slot number and port number. The slot number is from 1 to 255, and the port number is from 1 to 128.
loopback if_number Specifies the loopback interface. The loopback interface number is from 0 to 1023.
mgmt mgmt_intf Specifies the management interface. The interface number is 0.
port-channel number Specifies the EtherChannel interface and EtherChannel number. The range is from 1 to 4096.
Release Modification
5.0(3)A1(1) This command was introduced.
Command Description
copy running-config startup-config
Copies the running configuration information to the startup configuration file.
171Cisco Nexus 3548 Switch NX-OS System Management Command Reference
OL-27851-02

System Management Commandsshow running-config monitor
show running-config monitorTo display the running configuration for the Switched Port Analyzer (SPAN) or Encapsulated Remote Switched Port Analyzer (ERSPAN) session, use the show running-config monitor command.
show running-config monitor [all]
Syntax Description
Command Default None
Command Modes EXEC mode
Command History
Examples This example shows how to display information on the running SPAN and ERSPAN configuration:
switch# show running-config monitor
!Command: show running-config monitor!Time: Wed Sep 28 19:11:41 2011
version 5.0(3)U2(2)monitor session 1 type erspan-source description ERSPAN source session vrf default destination ip 192.0.2.1 ip ttl 5 ip dscp 3 source interface Ethernet1/5 both mtu 1000 no shutmonitor session 3 type erspan-destination description ERSPAN destination session source ip 192.0.1.1 destination interface Ethernet1/2
switch#
This example shows how to display detailed information on the running SPAN and ERSPAN configuration:
switch# show running-config monitor all
all (Optional) Displays current SPAN configuration information including default settings.
Release Modification
5.0(2)A1(1) This command was introduced.
6.0(2)A1(1) Support for ERSPAN was added.
172Cisco Nexus 3548 Switch NX-OS System Management Command Reference
OL-27851-02

System Management Commandsshow running-config monitor
Related Commands Command Description
monitor session Configures SPAN or ERSPAN sessions.
show monitor session Displays information about SPAN or ERSPAN sessions.
173Cisco Nexus 3548 Switch NX-OS System Management Command Reference
OL-27851-02

System Management Commandsshow scheduler
show schedulerTo display information about the scheduled maintenance jobs, use the show scheduler command.
show scheduler {config | internal [mem-stats] | job [name jobname] | logfile | schedule [name schedulename]}
Syntax Description
Defaults None
Command Modes Any command mode
Command History
Usage Guidelines This command does not require a license.
Examples This example shows how to display the scheduler configuration:
switch# show scheduler configconfig terminal feature scheduler scheduler logfile size 16end
switch#
Related Commands
config Displays the scheduler configuration information.
internal Provides the internal scheduler information as specified.
mem-stats (Optional) Provides the scheduler internal memory information as specified.
job Displays the job information as specified.
name jobname (Optional) Displays information for the specified scheduler job name. The job name can be any alphanumeric string up to 31 characters.
logfile Displays the scheduler log file as specified.
schedule Displays the scheduler timetable as specified.
name schedulename (Optional) Displays the scheduler timetable for the specified schedule name. The schedule name can be any alphanumeric string up to 31 characters.
Release Modification
5.0(3)A1(1) This command was introduced.
174Cisco Nexus 3548 Switch NX-OS System Management Command Reference
OL-27851-02

System Management Commandsshow scheduler
Command Description
scheduler Configures maintenance jobs.
feature scheduler Enables the scheduler feature for scheduling maintenance jobs.
175Cisco Nexus 3548 Switch NX-OS System Management Command Reference
OL-27851-02

System Management Commandsshow snmp community
show snmp communityTo display the Simple Network Management Protocol (SNMP) community strings configured on the switch, use the show snmp community command.
show snmp community
Syntax Description This command has no arguments or keywords.
Command Default None
Command Modes EXEC mode
Command History
Examples This example shows how to display the SNMP community strings:
switch# show snmp community
Related Commands
Release Modification
5.0(3)A1(1) This command was introduced.
Command Description
snmp-server community
Configures the community access string to permit access to the SNMP protocol.
176Cisco Nexus 3548 Switch NX-OS System Management Command Reference
OL-27851-02

System Management Commandsshow snmp context
show snmp contextTo display the Simple Network Management Protocol (SNMP) contexts configured on the switch, use the show snmp context command.
show snmp context
Syntax Description This command has no arguments or keywords.
Command Default None
Command Modes EXEC mode
Command History
Examples This example shows how to display the SNMP contexts:
switch# show snmp context
Related Commands
Release Modification
5.0(3)A1(1) This command was introduced.
Command Description
snmp-server context Configures an SNMP context.
177Cisco Nexus 3548 Switch NX-OS System Management Command Reference
OL-27851-02

System Management Commandsshow snmp engineID
show snmp engineIDTo display the identification of the local Simple Network Management Protocol (SNMP) engine, use the show snmp engineID command.
show snmp engineID
Syntax Description This command has no arguments or keywords.
Command Default None
Command Modes EXEC mode
Command History
Usage Guidelines An SNMP engine is a copy of SNMP that can reside on a local or remote device. SNMP passwords are localized using the SNMP engine ID of the authoritative SNMP engine.
Examples This example shows how to display the SNMP engine ID:
switch# show snmp engineID
Related Commands
Release Modification
5.0(3)A1(1) This command was introduced.
Command Description
show running-config Displays the running system configuration information.
snmp-server user Configures a new user to a SNMP group.
178Cisco Nexus 3548 Switch NX-OS System Management Command Reference
OL-27851-02
System Management Commandsshow snmp group
show snmp groupTo display the names of the Simple Network Management Protocol (SNMP) groups configured on the switch, use the show snmp group command.
show snmp group
Syntax Description This command has no arguments or keywords.
Command Default None
Command Modes EXEC mode
Command History
Examples This example shows how to display the SNMP groups:
switch# show snmp group
Related Commands
Release Modification
5.0(3)A1(1) This command was introduced.
Command Description
show running-config Displays the running system configuration information.
179Cisco Nexus 3548 Switch NX-OS System Management Command Reference
OL-27851-02

System Management Commandsshow snmp host
show snmp hostTo display the Simple Network Management Protocol (SNMP) host information, use the show snmp host command.
show snmp host
Syntax Description This command has no arguments or keywords.
Command Default None
Command Modes EXEC mode
Command History
Examples This example shows how to display the SNMP host:
switch# show snmp host
Related Commands
Release Modification
5.0(3)A1(1) This command was introduced.
Command Description
snmp-server host Configures an SNMP host.
180Cisco Nexus 3548 Switch NX-OS System Management Command Reference
OL-27851-02

System Management Commandsshow snmp sessions
show snmp sessionsTo display the current Simple Network Management Protocol (SNMP) sessions, use the show snmp sessions command.
show snmp sessions
Syntax Description This command has no arguments or keywords.
Command Default None
Command Modes EXEC mode
Command History
Examples This example shows how to display the SNMP sessions:
switch# show snmp sessions
Related Commands
Release Modification
5.0(3)A1(1) This command was introduced.
Command Description
show running-config Displays the running system configuration information.
181Cisco Nexus 3548 Switch NX-OS System Management Command Reference
OL-27851-02

System Management Commandsshow snmp trap
show snmp trapTo display the Simple Network Management Protocol (SNMP) link trap generation information, use the show snmp trap command.
show snmp trap
Syntax Description This command has no arguments or keywords.
Command Default None
Command Modes EXEC mode
Command History
Examples This example shows how to display the SNMP traps:
switch# show snmp trap
Related Commands
Release Modification
5.0(3)A1(1) This command was introduced.
Command Description
snmp trap link-status Enables SNMP link trap generation.
182Cisco Nexus 3548 Switch NX-OS System Management Command Reference
OL-27851-02

System Management Commandsshow snmp user
show snmp userTo display information on each Simple Network Management Protocol (SNMP) user, use the show snmp user command.
show snmp user
Syntax Description This command has no arguments or keywords.
Command Default None
Command Modes EXEC mode
Command History
Examples This example shows how to display the SNMP users configured on the switch:
switch# show snmp user
This example shows how to display information about a specific SNMP user:
switch# show snmp user admin
Related Commands
Release Modification
5.0(3)A1(1) This command was introduced.
Command Description
snmp-server user Configures a new user to an SNMP group.
183Cisco Nexus 3548 Switch NX-OS System Management Command Reference
OL-27851-02

System Management Commandsshow startup-config
show startup-configTo display the contents of the currently running configuration file, use the show startup-config command.
show startup-config
Syntax Description This command has no arguments or keywords.
Command Default None
Command Modes EXEC mode
Command History
Examples This example shows how to display information from the startup configuration file:
switch# show startup-config
!Command: show startup-config!Time: Fri May 28 11:05:41 2010!Startup config saved at: Fri May 28 11:05:35 2010
version 5.0(3)A1(1)feature telnetfeature private-vlan
username adminbackup password 5 ! role network-operatorusername admin password 5 $1$gLP0Z4.z$nA4fMnTcHmdSgQ3ENakm/1 role network-adminip domain-lookuphostname switchslot 1snmp-server user admin network-admin auth md5 0xd727e3e4ed39de2f32841ffa24e4234c priv 0xd727e3e4ed39de2f32841ffa24e4234c localizedkey<--Output truncated-->switch#
Related Commands
Release Modification
5.0(3)A1(1) This command was introduced.
Command Description
show running-config Displays the contents of the currently running configuration file.
184Cisco Nexus 3548 Switch NX-OS System Management Command Reference
OL-27851-02

System Management Commandsshow startup-config callhome
show startup-config callhomeTo display the startup configuration for Call Home, use the show startup-config callhome command.
show startup-config callhome
Syntax Description This command has no arguments or keywords.
Command Default None
Command Modes EXEC mode
Command History
Examples This example shows how to display the startup configuration for Call Home:
switch# show startup-config callhome
Related Commands
Release Modification
5.0(3)A1(1) This command was introduced.
Command Description
copy running-config startup-config
Saves this configuration change.
show callhome Displays Call Home configuration information.
show running-config callhome
Displays the running configuration information for Call Home.
185Cisco Nexus 3548 Switch NX-OS System Management Command Reference
OL-27851-02

System Management Commandsshow startup-config exclude-provision
show startup-config exclude-provisionTo display the startup configuration that excludes the configuration for offline preprovisioned interfaces, use the show startup-config exclude-provision command.
show startup-config exclude-provision
Syntax Description This command has no arguments or keywords.
Command Default None
Command Modes EXEC mode
Command History
Examples This example shows how to display the startup configuration without the offline preprovisioned interfaces:
switch# show startup-config exclude-provision
Related Commands
Release Modification
5.0(3)A1(1) This command was introduced.
Command Description
provision Preprovisions a module in a slot.
show provision Displays the preprovisioned module information.
show running-config exclude-provision
Displays the running configuration excluding the preprovisioned features.
slot Configures a chassis slot for a predefined module.
186Cisco Nexus 3548 Switch NX-OS System Management Command Reference
OL-27851-02

System Management Commandsshow startup-config ptp
show startup-config ptpTo display the Precision Time Protocol (PTP) startup configuration, use the show startup-config ptp command.
show startup-config ptp [all]
Syntax Description
Command Default Displays only the configured information.
Command Modes EXEC mode
Command History
Examples This example shows how to display the PTP startup configuration:
switch# show startup-config ptp
!Command: show startup-config ptp!Time: Wed Mar 13 08:10:00 2013!Startup config saved at: Wed Mar 13 08:09:56 2013
version 6.0(2)A1(1)feature ptp
ptp domain 1ptp source 192.0.2.1ptp priority1 10ptp priority2 20
interface Ethernet1/5 ptp ptp vlan 5 ptp delay-request minimum interval 2
switch#
This example shows how to display the entire PTP startup configuration, including the default values:
switch# show startup-config ptp all
all (Optional) Displays all the default and configured information.
Release Modification
6.0(2)A1(1) This command was introduced.
187Cisco Nexus 3548 Switch NX-OS System Management Command Reference
OL-27851-02

System Management Commandsshow startup-config ptp
Related Commands Command Description
copy running-config startup-config
Copies the running configuration information to the startup configuration file.
ptp source Configures the global source IP for PTP packets.
188Cisco Nexus 3548 Switch NX-OS System Management Command Reference
OL-27851-02

System Management Commandsshow startup-config vtp
show startup-config vtpTo display the VLAN Trunking Protocol (VTP) configuration from the startup configuration file, use the show startup-config vtp command.
show startup-config vtp
Syntax Description This command has no arguments or keywords.
Command Default None
Command Modes EXEC mode
Command History
Examples This example shows how to display the VTP configuration stored in the startup configuration file:
switch# show startup-config vtp
Related Commands
Release Modification
5.0(3)A1(1) This command was introduced.
Command Description
copy running-config startup-config
Copies the running configuration to the startup configuration file.
feature vtp Enables VTP on the switch.
vtp domain Configures the VTP administrative domain.
vtp file Stores the VTP configuration in a file.
vtp mode Configures a VTP device mode.
189Cisco Nexus 3548 Switch NX-OS System Management Command Reference
OL-27851-02

System Management Commandsshow tech-support callhome
show tech-support callhomeTo display the technical support output for Call Home, use the show tech-support callhome command.
show tech-support callhome
Syntax Description This command has no arguments or keywords.
Command Default None
Command Modes EXEC mode
Command History
Examples This example shows how to display the troubleshooting information for Call Home:
switch# show tech-support callhome
Related Commands
Release Modification
5.0(3)A1(1) This command was introduced.
Command Description
show callhome Displays Call Home configuration information.
show running-config callhome
Displays the running configuration information for Call Home.
190Cisco Nexus 3548 Switch NX-OS System Management Command Reference
OL-27851-02

System Management Commandsshut (ERSPAN)
shut (ERSPAN)To shut down an Encapsulated Remote Switched Port Analyzer (ERSPAN) session, use the shut command. To enable an ERSPAN session, use the no form of this command.
shut
no shut
Syntax Description This command has no arguments or keywords.
Command Default None
Command Modes ERSPAN session configuration mode
Command History
Usage Guidelines This command does not require a license.
Examples This example shows how to shut down an ERSPAN session:
switch# configure terminalswitch(config)# monitor session 1 type erspan-sourceswitch(config-erspan-src)# shutswitch(config-erspan-src)#
This example shows how to enable an ERSPAN session:
switch# configure terminalswitch(config)# monitor session 1 type erspan-sourceswitch(config-erspan-src)# no shutswitch(config-erspan-src)#
Related Commands
Release Modification
6.0(2)A1(1) This command was introduced.
Command Description
monitor session Enters the monitor configuration mode.
show monitor session Displays the virtual SPAN or ERSPAN configuration.
191Cisco Nexus 3548 Switch NX-OS System Management Command Reference
OL-27851-02

System Management Commandssite-id (Call Home)
site-id (Call Home)To configure the optional site number for the customer, use the site-id command. To remove a site number, use the no form of this command.
site-id site-number
no site-id
Syntax Description
Command Default None
Command Modes Callhome configuration mode
Command History
Usage Guidelines You can configure the customer identification information that Cisco Smart Call Home should use. The service agreement includes the customer identification information, such as the customer ID, contract ID, and site ID.
Examples This example shows how to configure a site number:
switch# configure terminalswitch(config)# callhomeswitch(config-callhome)# site-id 10020-1203 switch(config-callhome)#
Related Commands
site-number Site number. The site number can be up to 255 alphanumeric characters in free format.
Release Modification
5.0(3)A1(1) This command was introduced.
Command Description
switch-priority Configures the switch priority for the switch.
show callhome Displays a summary of the Call Home configuration.
192Cisco Nexus 3548 Switch NX-OS System Management Command Reference
OL-27851-02

System Management Commandssnmp-server community
snmp-server communityTo create Simple Network Management Protocol (SNMP) communities for SNMPv1 or SNMPv2c, use the snmp-server community command. To revert to the defaults, sue the no form of this command.
snmp-server community com-name [group grp-name | ro | rw | use-acl acl-name]
no snmp-server community com-name [group grp-name | ro | rw | use-acl acl-name]
Syntax Description
Command Default None
Command Modes Global configuration mode
Command History
Usage Guidelines You can assign an access list (ACL) to a community to filter incoming SNMP requests. If the assigned ACL allows the incoming request packet, SNMP processes the request. If the ACL denies the request, SNMP drops the request and sends a system message.
See the Cisco Nexus 3548 Switch NX-OS Security Configuration Guide for more information on creating ACLs. The ACL applies to IPv4 over UDP and TCP. After creating the ACL, assign the ACL to the SNMP community.
Examples This example shows how to create an SNMP community string and assign an ACL to the community to filter SNMP requests:
switch# configure terminalswitch(config)# snmp-server community public use-acl my_acl_for_public switch(config)#
com-name SNMP community string. The name can be any alphanumeric string up to 32 characters.
group grp-name (Optional) Specifies the group to which the community belongs. The name can be a maximum of 32 characters.
ro (Optional) Specifies read-only access with this community string.
rw (Optional) Specifies read-write access with this community string.
use-acl acl-name (Optional) Specifies the access control list (ACL) to filter SNMP requests. The name can be a maximum of 32 characters.
Release Modification
5.0(3)A1(1) This command was introduced.
193Cisco Nexus 3548 Switch NX-OS System Management Command Reference
OL-27851-02

System Management Commandssnmp-server community
Related Commands Command Description
show snmp community Displays the SNMP community strings.
194Cisco Nexus 3548 Switch NX-OS System Management Command Reference
OL-27851-02

System Management Commandssnmp-server contact
snmp-server contactTo configure the Simple Network Management Protocol (SNMP) contact (sysContact) information, use the snmp-server contact command. To remove the contact information, use the no form of this command.
snmp-server contact [text]
no snmp-server contact [text]
Syntax Description
Command Default No system contact (sysContact) string is set.
Command Modes Global configuration mode
Command History
Examples This example shows how to set an SNMP contact:
switch# configure terminalswitch(config)# snmp-server contact DialSystemOperatorAtBeeper#1235 switch(config)#
This example shows how to remove an SNMP contact:
switch# configure terminalswitch(config)# no snmp-server contact DialSystemOperatorAtBeeper#1235 switch(config)#
Related Commands
text (Optional) String that describes the system contact information. The text can be any alphanumeric string up to 32 characters and cannot contain spaces.
Release Modification
5.0(3)A1(1) This command was introduced.
Command Description
show snmp Displays information about SNMP.
snmp-server location Sets the system location string.
195Cisco Nexus 3548 Switch NX-OS System Management Command Reference
OL-27851-02

System Management Commandssnmp-server context
snmp-server contextTo configure the Simple Network Management Protocol (SNMP) context to logical network entity mapping, use the snmp-server context command. To remove the context, use the no form of this command.
snmp-server context context-name [instance instance-name] [vrf {vrf-name | default | management}] [topology topology-name]
no snmp-server context context-name [instance instance-name] [vrf {vrf-name | default | management}] [topology topology-name]
Syntax Description
Command Default None
Command Modes Global configuration mode
Command History
Usage Guidelines Use the snmp-server context command to map between SNMP contexts and logical network entities, such as protocol instances or VRFs.
Examples This example shows how to map the public1 context to the default VRF:
switch# configure terminalswitch(config)# snmp-server context public1 vrf default switch(config)#
context-name SNMP context. The name can be any alphanumeric string up to 32 characters.
instance instance-name (Optional) Specifies a protocol instance. The name can be any alphanumeric string up to 32 characters.
vrf vrf-name (Optional) Specifies the virtual routing and forwarding (VRF) instance. The name is case sensitive, and can be a maximum of 32 alphanumeric characters.
default Specifies the default VRF.
management Specifies the management VRF.
topology topology-name
(Optional) Specifies the topology. The name can be any alphanumeric string up to 32 characters.
Release Modification
5.0(3)A1(1) This command was introduced.
196Cisco Nexus 3548 Switch NX-OS System Management Command Reference
OL-27851-02

System Management Commandssnmp-server context
Related Commands Command Description
show snmp Displays the SNMP status.
show snmp context Displays information about SNMP contexts.
197Cisco Nexus 3548 Switch NX-OS System Management Command Reference
OL-27851-02

System Management Commandssnmp-server enable traps
snmp-server enable trapsTo enable the Simple Network Management Protocol (SNMP) notifications, use the snmp-server enable traps command. To disable SNMP notifications, use the no form of this command.
snmp-server enable traps [aaa [server-state-change] | callhome [event-notify | smtp-send-fail] | entity {entity_fan_status_change | entity_mib_change | entity_module_inserted | entity_module_removed | entity_module_status_change | entity_power_out_change | entity_power_status_change | entity_unrecognised_module} | fcdomain | fcns | fcs | fctrace | fspf | license [notify-license-expiry | notify-license-expiry-warning | notify-licensefile-missing | notify-no-license-for-feature] | link | rf [redundancy_framework] | rmon [fallingAlarm | hcFallingAlarm | hcRisingAlarm | risingAlarm] | rscn | snmp [authentication] | vsan | zone [default-zone-behavior-change | merge-failure | merge-success | request-reject1 | unsupp-mem]]
no snmp-server enable traps [aaa [server-state-change] | callhome [event-notify | smtp-send-fail] | entity {entity_fan_status_change | entity_mib_change | entity_module_inserted | entity_module_removed | entity_module_status_change | entity_power_out_change | entity_power_status_change | entity_unrecognised_module} | fcdomain | fcns | fcs | fctrace | fspf | license [notify-license-expiry | notify-license-expiry-warning | notify-licensefile-missing | notify-no-license-for-feature] | link | rf [redundancy_framework] | rmon [fallingAlarm | hcFallingAlarm | hcRisingAlarm | risingAlarm] | rscn | snmp [authentication] | vsan | zone [default-zone-behavior-change | merge-failure | merge-success | request-reject1 | unsupp-mem]]
Syntax Description aaa (Optional) Enables notifications for a AAA server state change.
server-state-change (Optional) Specifies the AAA server state change.
callhome (Optional) Enables Cisco Call Home notifications.
event-notify (Optional) Specifies the Cisco Call Home external event notification.
smtp-send-fail (Optional) Specifies the SMTP message send fail notification.
entity (Optional) Enables notifications for a change in the module status, fan status, or power status.
entity_fan_status_change (Optional) Specifies the entity fan status change.
entity_mib_change (Optional) Specifies the entity MIB change.
entity_module_inserted (Optional) Specifies the entity module inserted.
entity_module_removed (Optional) Specifies the entity module removed.
entity_module_status_change (Optional) Specifies the entity module status change.
entity_power_out_change (Optional) Specifies the entity power out change.
entity_power_status_change (Optional) Specifies the entity power status change.
entity_unrecognised_module (Optional) Specifies the entity unrecognized module.
fcdomain (Optional) Enables notifications for the Fibre Channel domain.
fcns (Optional) Enables notifications for the name server.
fcs (Optional) Enables notifications for the fabric configuration server.
fctrace (Optional) Enables notifications for the route to an N port.
198Cisco Nexus 3548 Switch NX-OS System Management Command Reference
OL-27851-02

System Management Commandssnmp-server enable traps
Command Default All notifications
Command Modes Global configuration mode
Command History
Usage Guidelines The snmp-server enable traps command enables both traps and informs, depending on the configured notification host receivers.
fspf (Optional) Enables notifications for the Fabric Shortest Path First (FSPF).
license (Optional) Enables notifications for the license manager.
notify-license-expiry (Optional) Specifies the license expiry notification.
notify-license-expiry-warning (Optional) Specifies the license expiry warning notification.
notify-licensefile-missing (Optional) Specifies the license file missing notification.
notify-no-license-for-feature (Optional) Specifies that a notification is sent when no license needs to be installed for the feature.
link (Optional) Enables notifications for uplink and downlink interfaces.
rf (Optional) Enables notifications for the redundancy framework.
redundancy_framework (Optional) Specifies the Redundancy_Framework (RF) supervisor switchover MIB.
rmon (Optional) Enables notifications for rising, falling, and high-capacity alarms.
fallingAlarm (Optional) Specifies the RMON falling alarm.
hcFallingAlarm (Optional) Specifies the high-capacity RMON falling alarm.
hcRisingAlarm (Optional) Specifies the high-capacity RMON rising alarm.
risingAlarm (Optional) Specifies the RMON rising alarm.
rscn (Optional) Enables RSCN notifications.
snmp (Optional) Enables SNMP authentication notifications.
authentication (Optional) Specifies the SNMP authentication trap.
vsan (Optional) Enables notifications for VSANs.
zone (Optional) Enables zone notifications.
default-zone-behavior-change (Optional) Specifies the default zone behavior change notification.
merge-failure (Optional) Specifies the merge failure notification.
merge-success (Optional) Specifies the merge success notification.
request-reject1 (Optional) Specifies the request reject notification.
unsupp-mem (Optional) Specifies the unsupported member notification.
Release Modification
5.0(3)A1(1) This command was introduced.
199Cisco Nexus 3548 Switch NX-OS System Management Command Reference
OL-27851-02

System Management Commandssnmp-server enable traps
Examples This example shows how to enable SNMP notifications for the server state change:
switch# configure terminalswitch(config)# snmp-server enable traps aaa switch(config)#
This example shows how to disable all SNMP notifications:
switch# configure terminalswitch(config)# no snmp-server enable traps switch(config)#
Related Commands Command Description
snmp-server enable traps link
Enables the Simple Network Management Protocol (SNMP) notifications on link traps.
show snmp trap Displays the SNMP notifications enabled or disabled.
200Cisco Nexus 3548 Switch NX-OS System Management Command Reference
OL-27851-02

System Management Commandssnmp-server enable traps link
snmp-server enable traps linkTo enable the Simple Network Management Protocol (SNMP) notifications on link traps, use the snmp-server enable traps link command. To disable SNMP notifications on link traps, use the no form of this command.
snmp-server enable traps link [notification-type]
no snmp-server enable traps link [notification-type]
Syntax Description
Command Default Disabled
Command Modes Global configuration mode
Command History
notification-type (Optional) Type of notification to enable. If no type is specified, all notifications available on your device are sent. The notification type can be one of the following keywords:
• IETF-extended-linkDown—Enables the Internet Engineering Task Force (IETF) extended link state down notification.
• IETF-extended-linkUp—Enables the IETF extended link state up notification.
• cisco-extended-linkDown—Enables the Cisco extended link state down notification.
• cisco-extended-linkUp—Enables the Cisco extended link state up notification.
• connUnitPortStatusChange—Enables the overall status of the connectivity unit Notification.
• delayed-link-state-change—Enables the delayed link state change.
• fcTrunkIfDownNotify—Enables the Fibre Channel Fabric Element (FCFE) link state down notification.
• fcTrunkIfUpNotify—Enables the FCFE link state up notification.
• fcot-inserted—Specifies that the Fibre Channel optical transmitter (FCOT) hardware has been inserted.
• fcot-removed—Specifies that the FCOT has been removed.
• linkDown—Enables the IETF Link state down notification.
• linkUp—Enables the IETF Link state up notification.
Release Modification
5.0(3)A1(1) This command was introduced.
201Cisco Nexus 3548 Switch NX-OS System Management Command Reference
OL-27851-02

System Management Commandssnmp-server enable traps link
Usage Guidelines This command is disabled by default. Most notification types are disabled.
If you enter this command with no notification-type arguments, the default is to enable all notification types controlled by this command.
Examples This example shows how to enable the SNMP link trap notification on the switch:
switch# configure terminalswitch(config)# snmp-server enable traps linkswitch(config)#
This example shows how to disable the SNMP link trap notification on the switch:
switch# configure terminalswitch(config)# no snmp-server enable traps linkswitch(config)#
Related Commands Command Description
show snmp trap Displays the SNMP notifications enabled or disabled.
202Cisco Nexus 3548 Switch NX-OS System Management Command Reference
OL-27851-02

System Management Commandssnmp-server enable traps vtp
snmp-server enable traps vtpTo enable the Simple Network Management Protocol (SNMP) notifications for a VLAN Trunking Protocol (VTP) domain, use the snmp-server enable traps vtp command. To disable SNMP notifications on a VTP domain, use the no form of this command.
snmp-server enable traps vtp
no snmp-server enable traps vtp
Syntax Description This command has no arguments or keywords.
Command Default None
Command Modes Global configuration mode
Command History
Usage Guidelines The snmp-server enable traps command enables both traps and informs, depending on the configured notification host receivers.
This command does not require a license.
Examples This example shows how to enable SNMP notifications on a VTP domain:
switch(config)# snmp-server enable traps vtp switch(config)#
This example shows how to disable all SNMP notifications on a VTP domain:
switch(config)# no snmp-server enable traps vtp switch(config)#
Related Commands
Release Modification
5.0(3)A1(1) This command was introduced.
Command Description
show snmp trap Displays the SNMP notifications enabled or disabled.
show vtp status Displays VTP information.
203Cisco Nexus 3548 Switch NX-OS System Management Command Reference
OL-27851-02
System Management Commandssnmp-server globalEnforcePriv
snmp-server globalEnforcePrivTo configure Simple Network Management Protocol (SNMP) message encryption for all users, use the snmp-server globalEnforcePriv command. To remove the encryption, use the no form of this command.
snmp-server globalEnforcePriv
no snmp-server globalEnforcePriv
Syntax Description This command has no arguments or keywords.
Command Default The SNMP agent accepts SNMPv3 messages without authentication and encryption.
Command Modes Global configuration mode
Command History
Examples This example shows how to configure SNMP message encryption for all users:
switch# configure terminalswitch(config)# snmp-server globalEnforcePrivswitch(config)#
This example shows how to remove SNMP message encryption for all users:
switch# configure terminalswitch(config)# no snmp-server globalEnforcePrivswitch(config)#
Related Commands
Release Modification
5.0(3)A1(1) This command was introduced.
Command Description
snmp-server user Configures a new user to an SNMP group.
show snmp sessions Displays the current SNMP sessions.
204Cisco Nexus 3548 Switch NX-OS System Management Command Reference
OL-27851-02

System Management Commandssnmp-server host
snmp-server hostTo specify the recipient of a Simple Network Management Protocol (SNMP) notification operation, use the snmp-server host command. To remove the specified host, use the no form of this command.
snmp-server host host-address {community-string | filter-vrf {vrf-name | default | management} | {informs | traps} {community-string | version {1 | 2c | 3 {auth | noauth | priv}} community-string [udp-port port]} | version {1 | 2c | 3 {auth | noauth | priv}} community-string [udp-port port]}
no snmp-server host host-address {community-string | filter-vrf {vrf-name | default | management} | {informs | traps} {community-string | version {1 | 2c | 3 {auth | noauth | priv}} community-string [udp-port port]} | version {1 | 2c | 3 {auth | noauth | priv}} community-string [udp-port port]}
Syntax Description
Command Default Disabled
host-address Name or Internet address of the host.
community-string String sent with the notification operation. The string can be a maximum of 32 alphanumeric characters.
We recommend that you define this string using the snmp-server community command prior to using the snmp-server host command.
filter-vrf vrf-name Specifies the virtual routing and forwarding (VRF) instance. The name is case sensitive and can be a maximum of 32 alphanumeric characters.
default Specifies the default VRF.
management Specifies the management VRF.
informs Sends SNMP informs to this host.
traps Sends SNMP traps to this host.
version Specifies the version of the SNMP used to send the traps. Version 3 is the most secure model, because it allows packet encryption with the priv keyword. If you use the version keyword, one of the following must be specified:
• 1—SNMPv1.
• 2c—SNMPv2C.
• 3—SNMPv3. The following three optional keywords can follow the version 3 keyword:
– auth—Enables Message Digest 5 (MD5) and Secure Hash Algorithm (SHA) packet authentication
– noauth (Default)—The noAuthNoPriv security level. This is the default if the auth, noauth, or priv keyword is not specified.
– priv—Enables Data Encryption Standard (DES) packet encryption (also called “privacy”)
udp-port port (Optional) Specifies the UDP port of the host to use. The port range is from 0 to 65535.
205Cisco Nexus 3548 Switch NX-OS System Management Command Reference
OL-27851-02

System Management Commandssnmp-server host
Command Modes Global configuration mode
Command History
Usage Guidelines SNMP notifications can be sent as traps or inform requests. Traps are unreliable because the receiver does not send acknowledgments when it receives traps. The sender cannot determine if the traps were received. However, an SNMP entity that receives an inform request acknowledges the message with an SNMP response PDU. If the sender never receives the response, the inform request can be sent again. Therefore, informs are more likely to reach their intended destination.
Examples This example shows how to sends the SNMP traps to the host specified by the IPv4 address 192.168.0.10. The community string is defined as my_acl_for_public:
switch# configure terminalswitch(config)# snmp-server community public use-acl my_acl_for_public switch(config)# snmp-server host 192.168.0.10 my_acl_for_public switch(config)#
This example shows how to send all inform requests to the host myhost.cisco.com using the community string my_acl_for_public:
switch# configure terminalswitch(config)# snmp-server enable traps switch(config)# snmp-server host myhost.cisco.com informs version 2c my_acl_for_public switch(config)#
Related Commands
Release Modification
5.0(3)A1(1) This command was introduced.
Command Description
show snmp host Displays information about the SNMP host.
206Cisco Nexus 3548 Switch NX-OS System Management Command Reference
OL-27851-02

System Management Commandssnmp-server location
snmp-server locationTo set the Simple Network Management Protocol (SNMP) system location string, use the snmp-server location command. To remove the location string, use the no form of this command.
snmp-server location [text]
no snmp-server location [text]
Syntax Description
Command Default No system location string is set.
Command Modes Global configuration mode
Command History
Examples This example shows how to set a system location string:
switch# configure terminalswitch(config)# snmp-server location Building 3/Room 21switch(config)#
This example shows how to remove the system location string:
switch# configure terminalswitch(config)# no snmp-server location Building 3/Room 21switch(config)#
Related Commands
text (Optional) String that describes the system location information.
Release Modification
5.0(3)A1(1) This command was introduced.
Command Description
snmp-server contact Sets the SNMP system contact (sysContact) string.
207Cisco Nexus 3548 Switch NX-OS System Management Command Reference
OL-27851-02
System Management Commandssnmp-server mib community-map
snmp-server mib community-mapTo configure a Simple Network Management Protocol (SNMP) context to map to a logical network entity, such as a protocol instance or VRF, use the snmp-server mib community-map command. To remove the mapping, use the no form of this command.
snmp-server mib community-map community-string context context-name
no snmp-server mib community-map community-string context context-name
Syntax Description
Command Default None
Command Modes Global configuration mode
Command History
Examples This example shows how to map an SNMPv2c community named my_acl_for_public to an SNMP context public1:
switch# configure terminalswitch(config)# snmp-server mib community-map my_acl_for_public context public1 switch(config)#
This example shows how to remove the mapping of an SNMPv2c community to an SNMP context:
switch# configure terminalswitch(config)# no snmp-server mib community-map my_acl_for_public context public1 switch(config)#
Related Commands
community-string String sent with the notification operation. The string can be a maximum of 32 alphanumeric characters.
We recommend that you define this string using the snmp-server community command prior to using the snmp-server mib community-map command.
context Specifies the SNMP context to be mapped to the logical network entity.
context-name SNMP context. The name can be any alphanumeric string up to 32 characters.
Release Modification
5.0(3)A1(1) This command was introduced.
Command Description
snmp-server community
Configures an SNMP community.
208Cisco Nexus 3548 Switch NX-OS System Management Command Reference
OL-27851-02
System Management Commandssnmp-server mib community-map
snmp-server context Configures an SNMP context.
show snmp Displays the SNMP status.
Command Description
209Cisco Nexus 3548 Switch NX-OS System Management Command Reference
OL-27851-02

System Management Commandssnmp-server tcp-session
snmp-server tcp-sessionTo enable a one-time authentication for Simple Network Management Protocol (SNMP) over a TCP session, use the snmp-server tcp-session command. To disable the one-time authentication, use the no form of this command.
snmp-server tcp-session [auth]
no snmp-server tcp-session [auth]
Syntax Description
Command Default Disabled
Command Modes Global configuration mode
Command History
Examples This example shows how to enable one-time authentication for SNMP over a TCP session:
switch# configure terminalswitch(config)# snmp-server tcp-session auth switch(config)#
This example shows how to disable one-time authentication for SNMP over a TCP session:
switch# configure terminalswitch(config)# no snmp-server tcp-session auth switch(config)#
Related Commands
auth (Optional) Specifies that one-time authentication for SNMP be enabled over the TCP session.
Release Modification
5.0(3)A1(1) This command was introduced.
Command Description
show snmp Displays the SNMP status.
210Cisco Nexus 3548 Switch NX-OS System Management Command Reference
OL-27851-02

System Management Commandssnmp-server user
snmp-server userTo configure a new user to a Simple Network Management Protocol (SNMP) group, use the snmp-server user command. To remove a user from an SNMP group, use the no form of this command.
snmp-server user username [groupname] [auth {md5 | sha} auth-password [{engineID engine-ID | localizedkey | priv {priv-password | aes-128}}]]
no snmp-server user
Syntax Description
Command Default None
Command Modes Global configuration mode
Command History
Examples This example shows how to configure an SNMP user named authuser with authentication and privacy parameters:
switch# configure terminal
username Name of the user on the host that connects to the agent. The name can be a maximum of 32 alphanumeric characters.
groupname (Optional) Name of the group to which the user is associated. The name can be a maximum of 32 alphanumeric characters.
auth (Optional) Specifies that an authentication level setting will be initiated for the session.
md5 (Optional) Specifies that the HMAC-MD5-96 authentication level be used for the session.
sha (Optional) Specifies that the HMAC-SHA-96 authentication level be used for the session.
auth-password (Optional) Authentication password for the user that enables the agent to receive packets from the host. The password can be a maximum of 130 characters.
engineID engine-ID (Optional) Specifies the SNMP engine ID.
localizedkey (Optional) Specifies whether the passwords are in localized key format.
priv (Optional) Initiates a privacy authentication level setting session.
priv-password (Optional) Privacy password for the user that enables the host to encrypt the content of the message that it sends to the agent. The password can be a maximum of 130 characters.
aes-128 (Optional) Specifies that a 128-bit AES algorithm for privacy be used for the session.
Release Modification
5.0(3)A1(1) This command was introduced.
211Cisco Nexus 3548 Switch NX-OS System Management Command Reference
OL-27851-02

System Management Commandssnmp-server user
switch(config)# snmp-server user authuser publicsecurity auth sha shapwd priv aes-128 switch(config)#
This example shows how to delete an SNMP user:
switch# configure terminalswitch(config)# no snmp-server user authuser switch(config)#
Related Commands Command Description
show snmp user Displays information about one or more SNMP users.
212Cisco Nexus 3548 Switch NX-OS System Management Command Reference
OL-27851-02

System Management Commandssnmp trap link-status
snmp trap link-statusTo enable Simple Network Management Protocol (SNMP) link trap generation on an interface, use the snmp trap link-status command. To disable SNMP link traps, use the no form of this command.
snmp trap link-status
no snmp trap link-status
Syntax Description This command has no arguments or keywords.
Command Default Enabled
Command Modes Interface configuration mode
Command History
Usage Guidelines By default, SNMP link traps are sent when a Layer 2 interface goes up or down. You can disable SNMP link trap notifications on an individual interface. You can use these limit notifications on a flapping interface (an interface that transitions between up and down repeatedly).
You can use this command on the following interfaces:
• Layer 2 interface
• Layer 3 interface
Note Use the no switchport command to configure an interface as a Layer 3 interface.
Examples This example shows how to disable SNMP link-state traps for a specific Layer 2 interface:
switch# configure terminalswitch(config)# interface ethernet 1/1 switch(config-if)# no snmp trap link-status switch(config-if)#
This example shows how to enable SNMP link-state traps for a specific Layer 3 interface:
switch# configure terminalswitch(config)# interface ethernet 1/5 switch(config-if)# no switchport switch(config-if)# snmp trap link-status switch(config-if)#
This example shows how to enable SNMP link-state traps for a specific Layer 2 interface:
switch# configure terminal
Release Modification
5.0(3)A1(1) This command was introduced.
213Cisco Nexus 3548 Switch NX-OS System Management Command Reference
OL-27851-02

System Management Commandssnmp trap link-status
switch(config)# interface ethernet 1/1 switch(config-if)# snmp trap link-status switch(config-if)#
Related Commands Command Description
no switchport Configures an interface as a Layer 3 routed interface.
show snmp trap Displays the SNMP notifications, enabled or disabled.
214Cisco Nexus 3548 Switch NX-OS System Management Command Reference
OL-27851-02

System Management Commandssource (SPAN, ERSPAN)
source (SPAN, ERSPAN)To add an Ethernet Switched Port Analyzer (SPAN) or an Encapsulated Remote Switched Port Analyzer (ERSPAN) source port, use the source command. To remove the source SPAN or ERSPAN port, use the no form of this command.
source {interface {ethernet slot/port | port-channel channel-num} [{both | rx | tx}] | vlan vlan-num}
no source {interface {ethernet slot/port | port-channel channel-num} | vlan vlan-num}
Syntax Description
Command Default None
Command Modes SPAN session configuration mode ERSPAN session configuration mode
Command History
Usage Guidelines A source port (also called a monitored port) is a switched port that you monitor for network traffic analysis. In a single local SPAN session, you can monitor source port traffic such as received (Rx), transmitted (Tx), or bidirectional (both).
A source port can be an Ethernet port, port channel, SAN port channel, or a VLAN port. It cannot be a destination port.
For ERSPAN, if you do not specify both, rx, or tx, the source traffic is analyzed for both directions.
interface Specifies the interface type to use as the source SPAN port.
ethernet slot/port Specifies the IEEE 802.3z Ethernet interface to use as the source SPAN port. The slot number is from 1 to 255 and the port number is from 1 to 128.
port-channel channel-num
Specifies the EtherChannel interface to use as the source SPAN port. The EtherChannel number is from 1 to 4096.
both (Optional) Specifies both ingress and egress traffic on the source port.
Note Applies to ERSPAN source port.
rx (Optional) Specifies only ingress traffic on the source port.
Note Applies to ERSPAN source port.
tx (Optional) Specifies only egress traffic on the source port.
Note Applies to ERSPAN source port.
vlan vlan-num Specifies the VLAN inteface to use as the source SPAN port. The range is from 1 to 3967 and 4048 to 4093.
Release Modification
6.0(2)1A(1) This command was introduced.
215Cisco Nexus 3548 Switch NX-OS System Management Command Reference
OL-27851-02

System Management Commandssource (SPAN, ERSPAN)
Examples This example shows how to configure an Ethernet SPAN source port:
switch# configure terminalswitch(config)# monitor session 9 type localswitch(config-monitor)# description A Local SPAN sessionswitch(config-monitor)# source interface ethernet 1/1switch(config-monitor)#
This example shows how to configure a port channel SPAN source:
switch# configure terminalswitch(config)# monitor session 2switch(config-monitor)# source interface port-channel 5 switch(config-monitor)#
This example shows how to configure an ERSPAN source port to receive traffic on the port:
switch# configure terminalswitch(config)# monitor session 1 type erspan-sourceswitch(config-erspan-src)# source interface ethernet 1/5 rxswitch(config-erspan-src)#
Related Commands Command Description
destination (SPAN, ERSPAN)
Configures a destination SPAN port.
monitor session Creates a new SPAN session configuration.
show monitor session Displays SPAN session configuration information.
show running-config monitor
Displays the running configuration information of a SPAN session.
216Cisco Nexus 3548 Switch NX-OS System Management Command Reference
OL-27851-02

System Management Commandssource ip (ERSPAN)
source ip (ERSPAN)To configure the source IP address for an an Encapsulated Remote Switched Port Analyzer (ERSPAN) destination, use the source ip command. To remove the source IP configuration, use the no form of this command.
source ip ip_address
no source ip ip_address
Syntax Description
Command Default None
Command Modes ERSPAN destination configuration mode
Command History
Usage Guidelines An ERSPAN destination session supports only one source IP address.
Examples This example shows how to configure a source IP address for an ERSPAN session:
switch# configure terminalswitch(config)# monitor session 1 type erspan-destinationswitch(config-erspan-dst)# source ip 192.0.2.1switch(config-erspan-dst)#
Related Commands
ip_address IP address for the ERSPAN session.
Release Modification
6.0(2)1A(1) This command was introduced.
Command Description
monitor session Creates a new SPAN session configuration.
show monitor session Displays SPAN session configuration information.
show running-config monitor
Displays the running configuration information of a SPAN session.
217Cisco Nexus 3548 Switch NX-OS System Management Command Reference
OL-27851-02
System Management Commandsstreetaddress (Call Home)
streetaddress (Call Home)To configure the street address for the primary person responsible for the switch, use the streetaddress command. To remove the street address, use the no form of this command.
streetaddress address
no streetaddress
Syntax Description
Command Default None
Command Modes Callhome configuration mode
Command History
Examples This example shows how to configure the street address for the primary person responsible for the switch:
switch# configure terminalswitch(config)# callhomeswitch(config-callhome)# streetaddress 170 West Tasman Drive, San Jose, CA 95134-1706 switch(config-callhome)#
Related Commands
address Street address. The address can be a maximum of 255 alphanumeric characters and can include white spaces.
Release Modification
5.0(3)A1(1) This command was introduced.
Command Description
contract-id Configures the contract number for the switch.
copy running-config startup-config
Saves this configuration change.
show callhome Displays a summary of the Call Home configuration.
218Cisco Nexus 3548 Switch NX-OS System Management Command Reference
OL-27851-02

System Management Commandsswitch-priority (Call Home)
switch-priority (Call Home)To configure the switch priority for the switch, use the switch-priority command. To remove the switch priority, use the no form of this command.
switch-priority priority-value
no switch-priority
Syntax Description
Command Default Default priority is 7
Command Modes Callhome configuration mode
Command History
Examples This example shows how to configure the switch priority:
switch# configure terminalswitch(config)# callhomeswitch(config-callhome)# switch-priority 5 switch(config-callhome)#
Related Commands
priority-value Switch priority value. The range is from 0 to 7, with 0 being the highest priority and 7 the lowest.
Release Modification
5.0(3)A1(1) This command was introduced.
Command Description
show callhome Displays a summary of the Call Home configuration.
219Cisco Nexus 3548 Switch NX-OS System Management Command Reference
OL-27851-02

System Management Commandstag
tagTo correlate multiple events in the policy, use the tag command.
tag tag {and | andnot | or} tag [and | andnot | or {tag}]{happens occurs in seconds}
Syntax Descriptiona
Defaults None
Command Modes Applet configuration mode
Command History
Usage Guidelines This command does not require a license.
Examples This example shows how to correlate multiple events in the policy:
switch# configuration terminalswitch(config)# event manager applet monitorShutdownswitch(config-applet)# description "Monitors interface shutdown."switch(config-applet)# event cli match "shutdown"switch(config-applet)# tag one or two happens 1 in 10000switch(config-applet)# action 1.0 cli show interface ethernet 3/1
Related Commands
tag Tag name. The tag name can be any alphanumeric string up to 29 characters.
and (Optional) Specifies to use boolean and logic.
andnot (Optional) Specifies to use boolean andnot logic.
or (Optional) Specifies to use boolean or logic.
happens Specifies the number of occurrences before raising the event.
occurs Number of times that the event occurs. The range is from 1 to 4294967295.
in Specifies the number of occurrences that must occur within this time period.
seconds Time in seconds that the next event occurs. The range is from 0 to 4294967295 seconds.
Release Modification
5.0(3)A1(1) This command was introduced.
Command Description
description Configures a descriptive string for the policy.
event Configures the event statement for the policy.
show event-manager policy state
Displays information about the status of the configured policy.
220Cisco Nexus 3548 Switch NX-OS System Management Command Reference
OL-27851-02

System Management Commandsterminal event-manager bypass
terminal event-manager bypassTo specify the command-line interface (CLI) events that match the Embedded Event Manager (EEM) policies to bypass the EEM events, use the terminal event-manager bypass command.
terminal event-manager bypass
Syntax Description This command has no arguments or keywords.
Defaults None
Command Modes Global configuration mode
Command History
Usage Guidelines This command does not require a license.
Examples This example shows how to specify the command-line interface (CLI) events that match the Embedded Event Manager (EEM) policies to bypass the EEM events:
switch# configure terminalswitch(config)# terminal event-manager bypass switch(config)#
Related Commands
Release Modification
5.0(3)A1(1) This command was introduced.
Command Description
action event-default Specifies that the default action for the event is to be performed when an EEM applet is triggered.
221Cisco Nexus 3548 Switch NX-OS System Management Command Reference
OL-27851-02

System Management Commandstransport email (Call Home)
transport email (Call Home)To configure the Simple Mail Transport Protocol (SMTP) server address for the Call Home functionality to work, and optionally the from and reply-to e-mail addresses, use the transport email command. To remove the SMTP server, use the no form of this command.
transport email {from email-addr | mail-server ip-address [port port-no] [priority priority-no] | reply-to email-addr | smtp-server ip-address [port port-no] [use-vrf vrf-name]}
no transport email {from | mail-server ip-address [port port-no] [ priority priority-no] | reply-to | smtp-server}
Syntax Description
Command Default SMTP port number: 25
SMTP server priority: 50
Command Modes Callhome configuration mode
Command History
Examples This example shows how to configure the SMTP server for the Call Home service:
switch# configure terminalswitch(config)# callhomeswitch(config-callhome)# transport email smtp-server 192.0.2.10 use-vrf Red switch(config-callhome)#
from Specifies the e-mail from field for Call Home messages.
email-addr E-mail address. The address can be a maximum of 255 alphanumeric characters and cannot include white spaces; for example, [email protected].
mail-server Configures the SMTP server address for supporting multiple SMTP servers.
ip-address Domain name server (DNS) name, IPv4 address of the SMTP server.
port port-no (Optional) Specifies the SMTP server port. The port number range is from 1 to 65535, and the default port number is 25.
priority priority-no (Optional) Specifies the SMTP server priority. The server priority value range is from 1 to 100, and the default is 50.
reply-to Specifies the reply-to email address.
smtp-server Configures the SMTP server address.
use-vrf vrf-name (Optional) Specifies the virtual routing and forwarding instance (VRF) instance to use when communicating with this SMTP server. The name is case sensitive and has 255 alphanumeric characters.
Release Modification
5.0(3)A1(1) This command was introduced.
222Cisco Nexus 3548 Switch NX-OS System Management Command Reference
OL-27851-02
System Management Commandstransport email (Call Home)
This example shows how to configure the e-mail from and reply-to field for Call Home messages:
switch# configure terminalswitch(config)# callhomeswitch(config-callhome)# transport email smtp-server 192.0.2.10 use-vrf Red switch(config-callhome)# transport email from [email protected] switch(config-callhome)# transport email reply-to [email protected] switch(config-callhome)#
Related Commands Command Description
copy running-config startup-config
Saves this configuration change.
show callhome Displays Call Home configuration information.
show callhome transport-email
Displays information about the e-mail configuration for Call Home.
transport email Configures the SMTP server address for Call Home.
223Cisco Nexus 3548 Switch NX-OS System Management Command Reference
OL-27851-02

System Management Commandsverify (session)
verify (session)To verify the current configuration session, use the verify command.
verify
Syntax Description This command has no arguments or keywords.
Command Default None
Command Modes Session configuration mode
Command History
Examples This example shows how to verify a session:
switch# configure session MySessionswitch(config-s)# verify Failed to start Verification: Session Database already locked, Verify/Commit inProgress.switch(config-s)#
Related Commands
Release Modification
5.0(3)A1(1) This command was introduced.
Command Description
commit Commits a session.
configure session Creates a configuration session.
show configuration session
Displays the contents of the session.
224Cisco Nexus 3548 Switch NX-OS System Management Command Reference
OL-27851-02

System Management Commandsvrf (ERSPAN)
vrf (ERSPAN)To configure a virtual routing and forwarding (VRF) instance for Encapsulated Remote Switched Port Analyzer (ERSPAN) traffic forwarding in the source, use the vrf command. To revert to the default settings, use the no form of this command.
vrf {vrf_name | default | management}
no vrf {vrf_name | default | management}
Syntax Description
Command Default None
Command Modes ERSPAN session configuration mode
Command History
Usage Guidelines This command does not require a license.
Examples This example shows how to configure a VRF instance for the ESRSPAN source:
switch# configure terminalswitch(config)# monitor session 1 type erspan-sourceswitch(config-erspan-src)# vrf defaultswitch(config-erspan-src)#
Related Commands
vrf_name Name of the VRF. The VRF name can be any case-sensitive, alphanumeric string up to 32 characters.
default Specifies the default VRF instance.
management Specifies the management VRF instance.
Release Modification
6.0(2)A1(1) This command was introduced.
Command Description
monitor-session Enters the monitor configuration mode for configuring an ERSPAN session for analyzing traffic between ports.
show monitor session Displays information about the Ethernet Switched Port Analyzer (SPAN) or ERSPAN monitor session.
225Cisco Nexus 3548 Switch NX-OS System Management Command Reference
OL-27851-02

System Management Commandsvrf (ERSPAN)
226Cisco Nexus 3548 Switch NX-OS System Management Command Reference
OL-27851-02