Embed Size (px)
Citation preview
Clinical
Specimens, Collection, handling and transportation SOP
Document Control Summary
Status: Replacement, Collection, handling and transportation of specimen policy
Version: v1.0 Date: November 2016
Author/Owner: Judy Carr, Kenny Laing
Approved by: Policy and Procedures Committee Date: 23 March 2017
Ratified: Policy and Procedures Committee Date: 23 March 2017
Related Trust Strategy and/or Strategic Aims
Provide high quality services, built on best known practice and evaluated through clear process and outcome measures
Implementation Date: January 2017
Review Date: January 2020
Key Words: Samples,
Associated Policy or Standard Operating Procedures
• Infection Prevention and Control Policy
Contents
1. Introduction ..................................................................................................................... 3
2. Purpose ............................................................................................................................ 3
3. Scope ............................................................................................................................... 3
4. Specimen Containers ........................................................................................................ 3
5. Standard Precautions ........................................................................................................ 5
6. Specimen collection for microbiology ................................................................................ 6
7. Storage of Specimens ........................................................................................................ 9
8. Transport of specimens ..................................................................................................... 9
9. Specimen transport boxes ................................................................................................. 9
10. Samples collected by porters/transport staff ..................................................................... 9
11. Carriage of specimens from patients own home ................................................................ 9
12. Vehicles used for transporting specimens ........................................................................ 10
13. Incident reporting ........................................................................................................... 10
14. Leakages ......................................................................................................................... 10
15. Monitoring Compliance with the document ..................................................................... 11
16. References ...................................................................................................................... 11
Appendix 1. Agreed process if specimens are to be transported by road
Appendix 2. Taking Blood Cultures – Summary of Best Practice
Appendix 3. Standard Procedure for taking Blood Cultures Using a winged collection method in Adults
Appendix 4. Standard Procedure for taking Blood Cultures Using a needle and syringe method in Adults
Appendix 5. Taking a blood culture best practice Poster
Change Control – Amendment History
Version Dates Amendments

1. Introduction The SOP aims to provide a framework for the Trust on handling and transporting specimens within the healthcare and community setting. It describes the rationale and guidance.
2. Purpose The aim of this SOP is to provide a standardised approach of handling and transporting specimens and their potential infection risk; therefore, all specimens must be collected using Standard Precautions.
The SOP aims to provide all Trust staff with clear infection prevention and control (IPC) guidance required for the safe collection, handling and transporting of laboratory specimens to reduce the risk of healthcare associated infection.
It is recognised that in the community, specimens are collected in a wide variety of settings including independent contractor premises, and the patient’s home.
Therefore measures to ensure that all specimens are transported in accordance with the European Agreement Concerning the International Carriage of Dangerous Goods by Road (2007) (ADR) and the Carriage of Dangerous Good and Use of Transportable Pressure Equipment Regulations (2007) has been outlined within this document.
Any healthcare worker responsible for handling specimens has a responsibility and duty for the safe collection, handling and transporting of specimens outlined under the Health and Safety at Work Act (1974) and the Control of Substances Hazardous to Health (COSHH) Regulations (2002).
3. Scope This policy applies to all the Trust employees and staff working for and on behalf of the Trust including contractors, voluntary workers, students, locum and agency staff.
4. Specimen Containers The person obtaining the specimen from the patient must ensure that the appropriate specimen primary container, e.g. blood sample tube, universal container, etc., is used for each sample. All containers must be appropriately labelled. Self-adhesive addressograph labels are not acceptable. Only hand written identification is acceptable on the specimen containers.
All specimen request forms must be clearly labelled with the correct patient details which include:
• Patient’s full name • Patient’s address • Patient’s sex
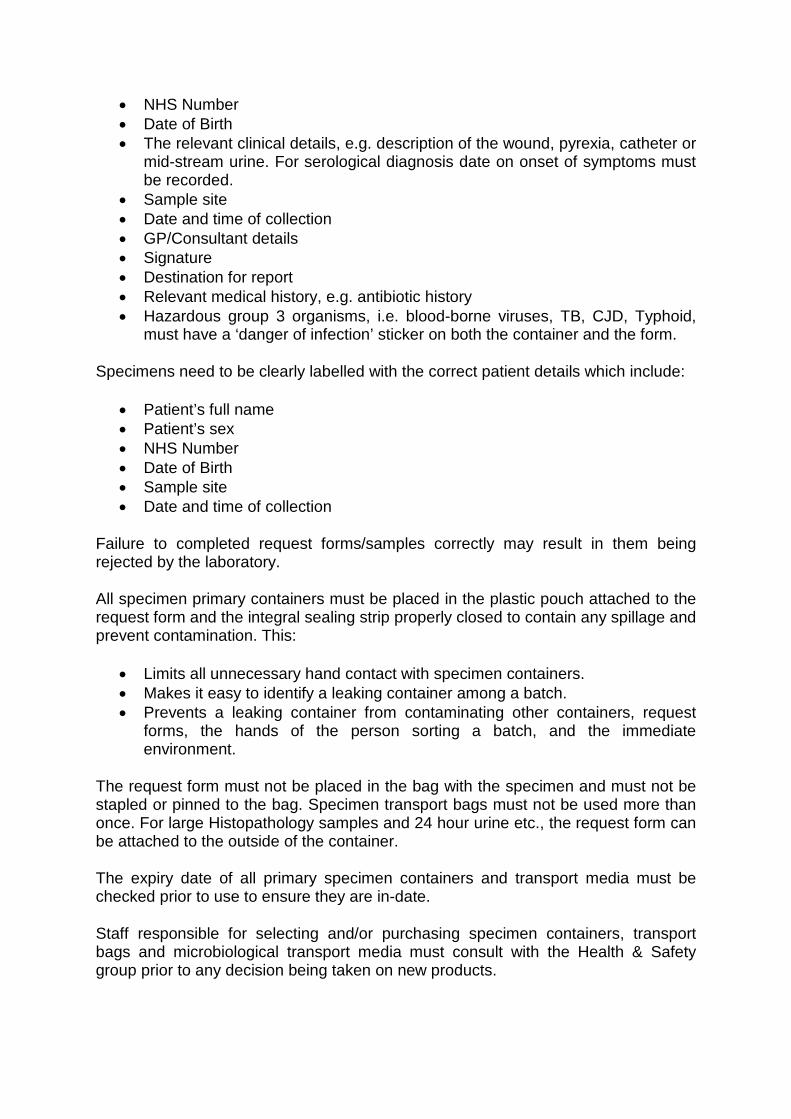
• NHS Number • Date of Birth • The relevant clinical details, e.g. description of the wound, pyrexia, catheter or
mid-stream urine. For serological diagnosis date on onset of symptoms must be recorded.
• Sample site • Date and time of collection • GP/Consultant details • Signature • Destination for report • Relevant medical history, e.g. antibiotic history • Hazardous group 3 organisms, i.e. blood-borne viruses, TB, CJD, Typhoid,
must have a ‘danger of infection’ sticker on both the container and the form.
Specimens need to be clearly labelled with the correct patient details which include:
• Patient’s full name • Patient’s sex • NHS Number • Date of Birth • Sample site • Date and time of collection
Failure to completed request forms/samples correctly may result in them being rejected by the laboratory.
All specimen primary containers must be placed in the plastic pouch attached to the request form and the integral sealing strip properly closed to contain any spillage and prevent contamination. This:
• Limits all unnecessary hand contact with specimen containers. • Makes it easy to identify a leaking container among a batch. • Prevents a leaking container from contaminating other containers, request
forms, the hands of the person sorting a batch, and the immediate environment.
The request form must not be placed in the bag with the specimen and must not be stapled or pinned to the bag. Specimen transport bags must not be used more than once. For large Histopathology samples and 24 hour urine etc., the request form can be attached to the outside of the container.
The expiry date of all primary specimen containers and transport media must be checked prior to use to ensure they are in-date.
Staff responsible for selecting and/or purchasing specimen containers, transport bags and microbiological transport media must consult with the Health & Safety group prior to any decision being taken on new products.
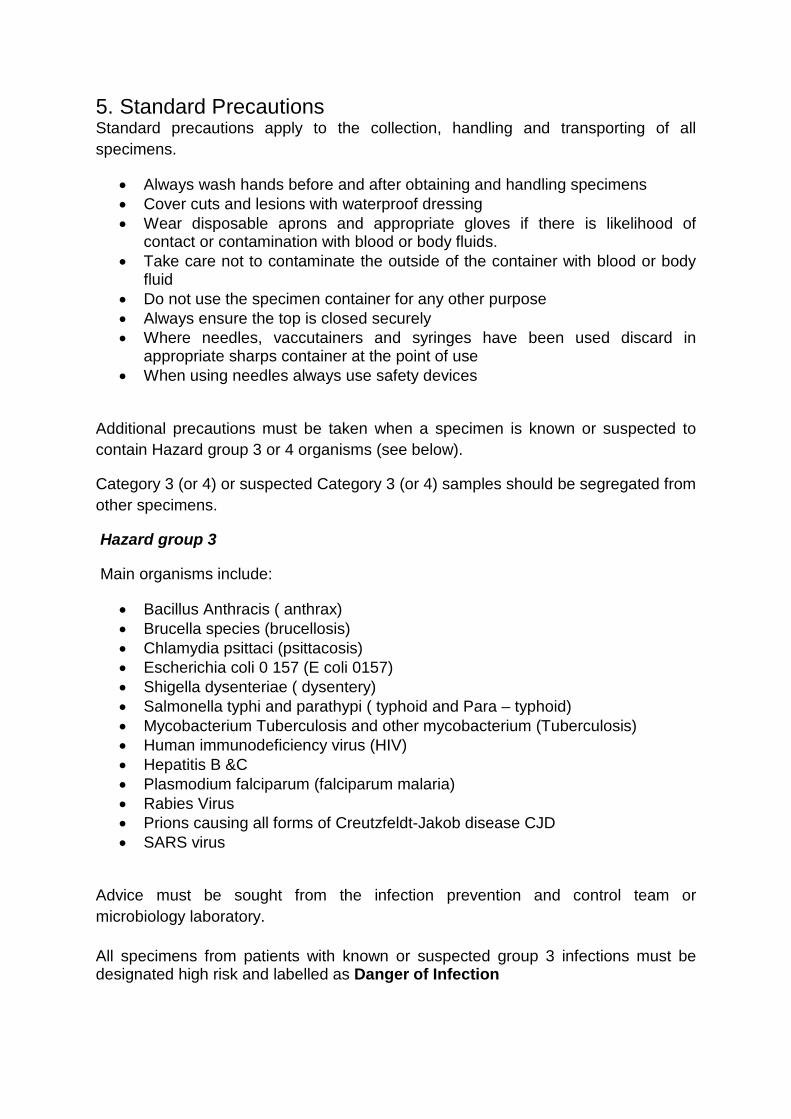
5. Standard Precautions Standard precautions apply to the collection, handling and transporting of all specimens.
• Always wash hands before and after obtaining and handling specimens • Cover cuts and lesions with waterproof dressing • Wear disposable aprons and appropriate gloves if there is likelihood of
contact or contamination with blood or body fluids. • Take care not to contaminate the outside of the container with blood or body
fluid • Do not use the specimen container for any other purpose • Always ensure the top is closed securely • Where needles, vaccutainers and syringes have been used discard in
appropriate sharps container at the point of use • When using needles always use safety devices
Additional precautions must be taken when a specimen is known or suspected to contain Hazard group 3 or 4 organisms (see below).
Category 3 (or 4) or suspected Category 3 (or 4) samples should be segregated from other specimens.
Hazard group 3
Main organisms include:
• Bacillus Anthracis ( anthrax) • Brucella species (brucellosis) • Chlamydia psittaci (psittacosis) • Escherichia coli 0 157 (E coli 0157) • Shigella dysenteriae ( dysentery) • Salmonella typhi and parathypi ( typhoid and Para – typhoid) • Mycobacterium Tuberculosis and other mycobacterium (Tuberculosis) • Human immunodeficiency virus (HIV) • Hepatitis B &C • Plasmodium falciparum (falciparum malaria) • Rabies Virus • Prions causing all forms of Creutzfeldt-Jakob disease CJD • SARS virus
Advice must be sought from the infection prevention and control team or microbiology laboratory.
All specimens from patients with known or suspected group 3 infections must be designated high risk and labelled as Danger of Infection

Hazard group 4
• Main organisms in group 4 are viruses that cause haemorrhagic fevers e.g. Lassa and Ebola virus
• Advice must be sought from the Consultant Microbiologist or Infectious diseases Physician before any specimens are obtained from the patient with suspected haemorrhagic fever
It is the responsibility of the person who requests laboratory examination of the specimen to ensure that both the form and the container are correctly labelled to indicate a danger of infection to both transport/ portering and laboratory staff to enable them to take the necessary precautions.
Each request form relating to a specimen that presents a danger of infection must contain sufficient clinical information to alert laboratory staff to the risk involved in processing the sample. Although the warning label must be clearly visible, the clinical information need not be conspicuous to other people. Specific tests as identified above need to be stated on the request form which must be signed by a relevant medical practitioner in order for them to be completed
6. Specimen collection for microbiology Specimens should only be taken when there are clinical signs of infection and /or when requested to do so by the Health Protection Unit (HPU), Microbiologist, Doctor managing the patients care, IPC team or Occupational Health e.g. in an outbreak investigation. When taking specimens an apron and appropriate gloves if there is likelihood of contact or contamination with blood or body fluids must be worn.
Staff need to observe the principles of ANTT when collecting all specimens in order to avoid contamination of the sample. (See Aseptic Non Touch Technique (ANTT) SOP).
Specimen Container Refrigeration Transport to laboratory
Comments
Wound Swab Cotton tipped swabs (black top)
Yes – overnight only Refrigeration can kill some fastidious organisms and the charcoal transport medium allows cultures to be maintained for a least 24hrs Must be refrigerated within 4 hrs of taking specimen
As soon as possible. Within 24 hrs Transportation of specimens must be followed as described in Appendix 1
Moisten the swab with sterile saline before taking sample Use a “zigzag” motion whilst simultaneously rotating between the fingers.
Ensure samples are taken using an aseptic non touch technique
Sputum Sputum specimen
No - Refrigeration will kill Strep.
As soon as possible Within 24 hrs
In suspected cases of TB 3 samples should be taken
Specimen Container Refrigeration Transport to laboratory
Comments
container
Pnuemoniae, one of the target organisms. Room temperature storage for up to 24hrs is the best option.
Transportation of specimens must be followed as described in Appendix 1
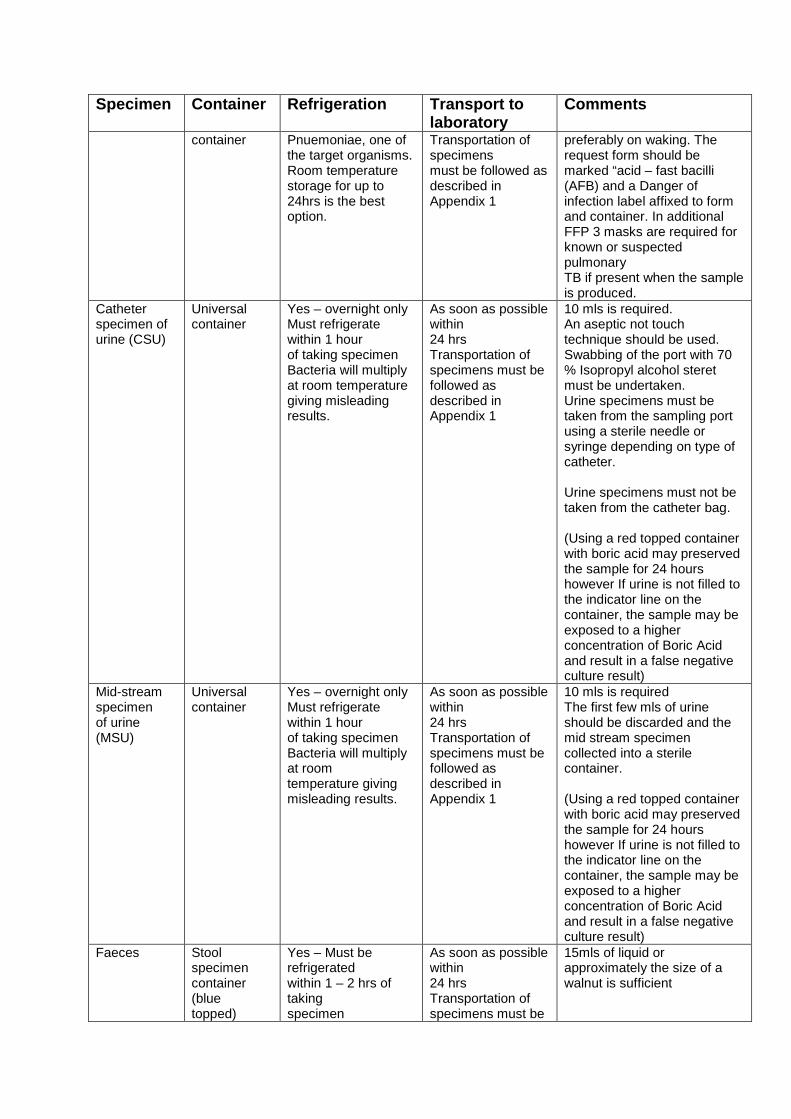
preferably on waking. The request form should be marked “acid – fast bacilli (AFB) and a Danger of infection label affixed to form and container. In additional FFP 3 masks are required for known or suspected pulmonary TB if present when the sample is produced.
Catheter specimen of urine (CSU)
Universal container
Yes – overnight only Must refrigerate within 1 hour of taking specimen Bacteria will multiply at room temperature giving misleading results.
As soon as possible within 24 hrs Transportation of specimens must be followed as described in Appendix 1
10 mls is required. An aseptic not touch technique should be used. Swabbing of the port with 70 % Isopropyl alcohol steret must be undertaken. Urine specimens must be taken from the sampling port using a sterile needle or syringe depending on type of catheter. Urine specimens must not be taken from the catheter bag. (Using a red topped container with boric acid may preserved the sample for 24 hours however If urine is not filled to the indicator line on the container, the sample may be exposed to a higher concentration of Boric Acid and result in a false negative culture result)
Mid-stream specimen of urine (MSU)
Universal container
Yes – overnight only Must refrigerate within 1 hour of taking specimen Bacteria will multiply at room temperature giving misleading results.
As soon as possible within 24 hrs Transportation of specimens must be followed as described in Appendix 1
10 mls is required The first few mls of urine should be discarded and the mid stream specimen collected into a sterile container. (Using a red topped container with boric acid may preserved the sample for 24 hours however If urine is not filled to the indicator line on the container, the sample may be exposed to a higher concentration of Boric Acid and result in a false negative culture result)
Faeces Stool specimen container (blue topped)
Yes – Must be refrigerated within 1 – 2 hrs of taking specimen
As soon as possible within 24 hrs Transportation of specimens must be
15mls of liquid or approximately the size of a walnut is sufficient
Specimen Container Refrigeration Transport to laboratory
Comments
followed as
described in Appendix 1
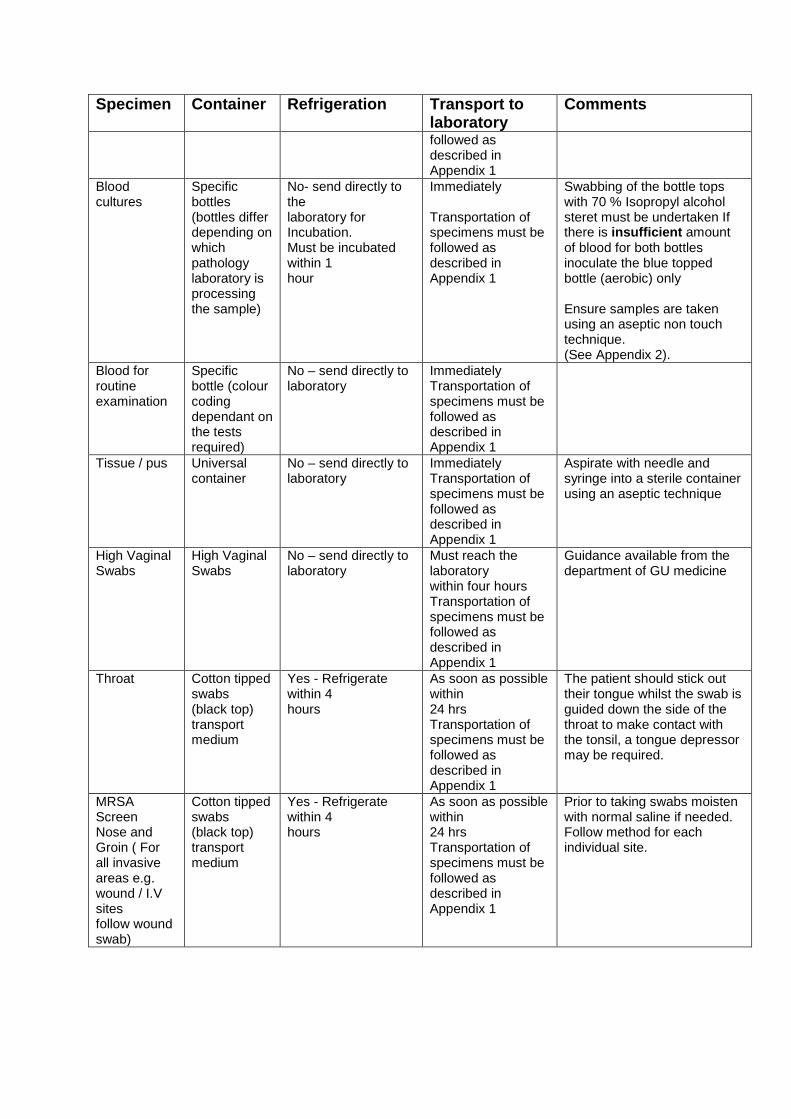
Blood cultures
Specific bottles (bottles differ depending on which pathology laboratory is processing the sample)
No- send directly to the laboratory for Incubation. Must be incubated within 1 hour
Immediately Transportation of specimens must be followed as described in Appendix 1
Swabbing of the bottle tops with 70 % Isopropyl alcohol steret must be undertaken If there is insufficient amount of blood for both bottles inoculate the blue topped bottle (aerobic) only Ensure samples are taken using an aseptic non touch technique. (See Appendix 2).
Blood for routine examination
Specific bottle (colour coding dependant on the tests required)
No – send directly to laboratory
Immediately Transportation of specimens must be followed as described in Appendix 1
Tissue / pus Universal container
No – send directly to laboratory
Immediately Transportation of specimens must be followed as described in Appendix 1
Aspirate with needle and syringe into a sterile container using an aseptic technique
High Vaginal Swabs
High Vaginal Swabs
No – send directly to laboratory
Must reach the laboratory within four hours Transportation of specimens must be followed as described in Appendix 1
Guidance available from the department of GU medicine
Throat
Cotton tipped swabs (black top) transport medium
Yes - Refrigerate within 4 hours
As soon as possible within 24 hrs Transportation of specimens must be followed as described in Appendix 1
The patient should stick out their tongue whilst the swab is guided down the side of the throat to make contact with the tonsil, a tongue depressor may be required.
MRSA Screen Nose and Groin ( For all invasive areas e.g. wound / I.V sites follow wound swab)
Cotton tipped swabs (black top) transport medium
Yes - Refrigerate within 4 hours
As soon as possible within 24 hrs Transportation of specimens must be followed as described in Appendix 1
Prior to taking swabs moisten with normal saline if needed. Follow method for each individual site.
7. Storage of Specimens
Microbiology samples, in particular, deteriorate with time. Proper storage and timely transport can minimise deterioration and it is essential that samples are sent to the laboratory as quickly as possible.
Cerebrospinal fluid (CSF’s), Blood Cultures, Throat swabs for Neisseria meningitidis and cultures for Neisseria gonorrhoea, should be stored at room temperature prior to collection and during transport.
Each department will have their own procedures for the storage and subsequent despatch of samples to the laboratory. Sample storage must adhere to guidance set out above in this SOP.
8. Transport of specimens Transport boxes should be stored in transport vehicles in such a way as to avoid extremes of temperature. For certain samples particular temperature requirements exist which should be checked with Laboratory testing the sample. Where ice is used to maintain low temperature the sender must ensure that the container will maintain the appropriate temperature for the duration of the transportation. Where significant delay is likely, suitable containers should be used e.g. vacuum flasks etc. Under the Health and Safety at work act (1974) all staff have an obligation to protect themselves and others e.g. the public from inadvertent contamination from hazardous substances. All packaging of specimens collected must be identified by the biohazard label Class 6.2 Infectious substances. See below for example
9. Specimen transport boxes Patient samples must be despatched to the laboratory in transport containers which comply with UN3373 requirements. An example is ‘Daniel’s’ red transport boxes which are certified as compliant with P650 (see appendix 1) another example is bio bottles. These containers must be cleaned after each use with detergent and disinfected and after any visible spillage or on a weekly basis using a hyper chloride solution 1000ppm 10. Samples collected by porters/transport staff All specimens collected by porter /transport staff from departments and prison healthcare must be carried in a secure, robust, leak proof container identified by the biohazard label Class 6.2 infectious substances and UN3373 code (Appendix 1).
11. Carriage of specimens from patients own home All clinical staff transporting specimens from a patient’s own home to Healthcare premises, clinic or health centre must be provided with a secure, robust, leak proof container identified by the biohazard label Class 6.2 infectious substances and UN3373 code (Appendix 1).
This container must be identified with a contact telephone number in case the box is lost. Clinical staff must not transport specimens unless such a container is used.
Containers designated for the transport of clinical specimens must never be used for the transportation of any other items.
12. Vehicles used for transporting specimens Vehicles used for the transportation of clinical specimens must have the following available for use in the event of an accidental spillage:
• Appropriate protective clothing (gloves and aprons) • Spillage kit and written instructions (Spillage of Blood and Body Fluid Policy). • Alcohol gel for hand hygiene
In addition, the vehicle must have internal surfaces that can be cleaned down with hot water and detergent in the event of a spillage. If other goods are transported, there must be a physical barrier between “clean” and “dirty” items.
Taxi driver guidelines are given in appendix 3
13. Incident reporting Any incident during transportation that may affect the quality of the specimen or the safety of personnel must be brought to the attention of the IPC Team, who will investigate and advice on the appropriate action. Details of the investigation must be reported to the risk team in The Trust. 14. Leakages The risk of breakage or leakage of chemical or other material is extremely small if the samples are packaged correctly and placed in secure transport boxes. Samples should not be forwarded where a leakage is known to have taken place. It is the responsibility of the clinical staff dealing with the patient to deal with any leakage of this kind.
Where a leakage of bodily fluid occurs during transport the laboratory reception staff will deal with the problem on receipt. Transport and portering staff should not reach inside transport boxes to take out specimen containers in order to empty the boxes. Boxes should be emptied by tipping carefully onto the reception workbench area.
Biomedical Scientist (BMS) staff should keep leakages and breakages under surveillance so that makes or types of containers which are leaking or breaking repeatedly in normal use, or are otherwise unsatisfactory, can be identified. Breakages and repeated leakages must be brought to the attention of the Lead BMS.
Health and Safety guidelines state that leaking samples should be discarded. In this event the requesting source will always be contacted as soon as possible. If the specimen cannot be repeated, or is of particular importance, every attempt will be made to find a safe means to salvage and process the sample.
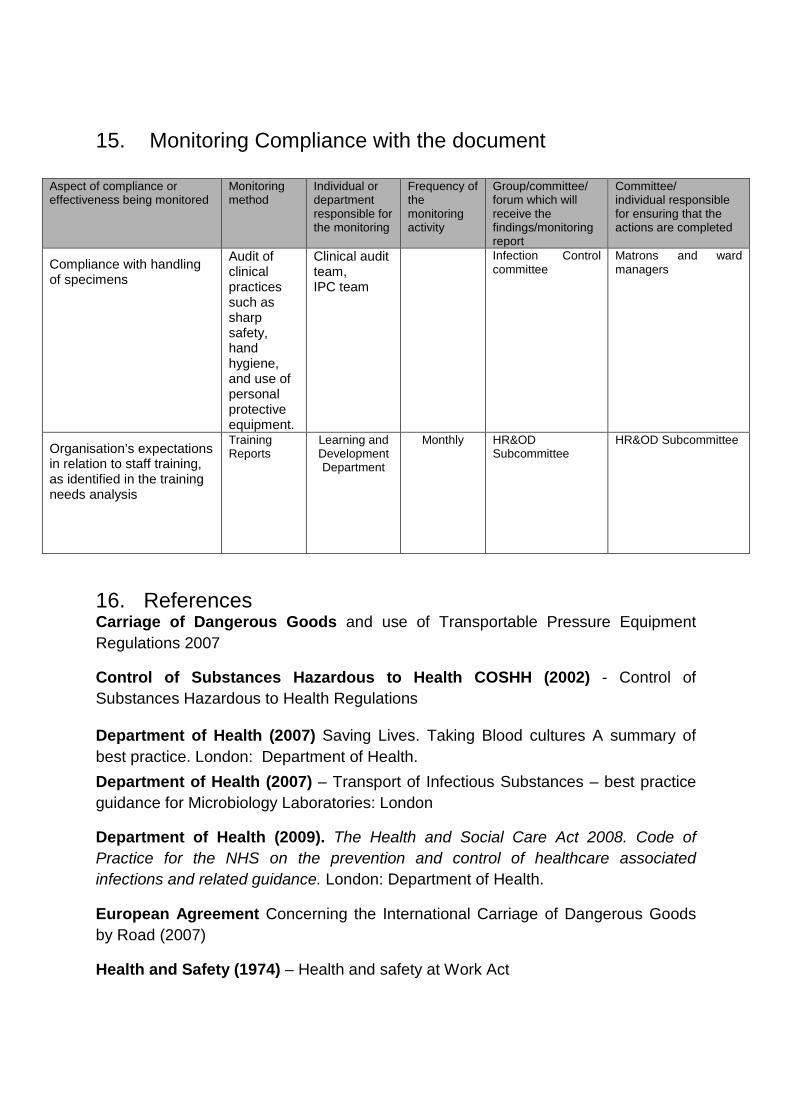
15. Monitoring Compliance with the document
16. References Carriage of Dangerous Goods and use of Transportable Pressure Equipment Regulations 2007
Control of Substances Hazardous to Health COSHH (2002) - Control of Substances Hazardous to Health Regulations
Department of Health (2007) Saving Lives. Taking Blood cultures A summary of best practice. London: Department of Health. Department of Health (2007) – Transport of Infectious Substances – best practice guidance for Microbiology Laboratories: London
Department of Health (2009). The Health and Social Care Act 2008. Code of Practice for the NHS on the prevention and control of healthcare associated infections and related guidance. London: Department of Health.
European Agreement Concerning the International Carriage of Dangerous Goods by Road (2007)
Health and Safety (1974) – Health and safety at Work Act
Aspect of compliance or effectiveness being monitored
Monitoring method
Individual or department responsible for the monitoring
Frequency of the monitoring activity
Group/committee/ forum which will receive the findings/monitoring report
Committee/ individual responsible for ensuring that the actions are completed
Compliance with handling of specimens
Audit of clinical practices such as sharp safety, hand hygiene, and use of personal protective equipment.
Clinical audit team, IPC team
Infection Control committee
Matrons and ward managers
Organisation’s expectations in relation to staff training, as identified in the training needs analysis
Training Reports
Learning and Development Department
Monthly HR&OD Subcommittee
HR&OD Subcommittee
World Health Organisation (2005) - Guidance on the regulations for the Transport of infectious substances
Centre for Disease Control (CDC) 2002. Guideline for Hand Hygiene in Health Care Settings. Recommendations of the Healthcare Infection Control Practice Advisory Committee and the HICPAC/SHEA/APIC/IDSA Healthcare Hygiene Task Force. Prepared by John M Boyce and Didier Pittet.
With thanks to
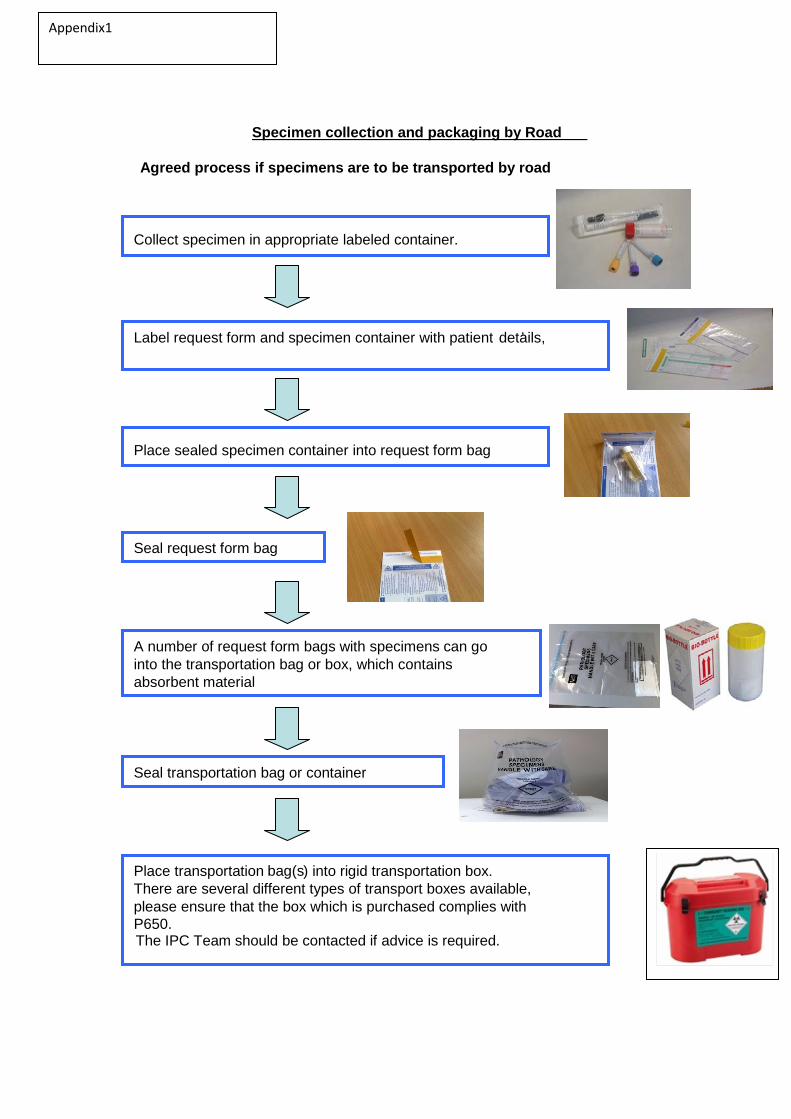
Specimen collection and packaging by Road
Agreed process if specimens are to be transported by road
Collect specimen in appropriate labeled container.
Label request form and specimen container with patient ’ details,
Place sealed specimen container into request form bag
Seal request form bag
A number of request form bags with specimens can go into the transportation bag or box, which contains absorbent material
Place transportation bag(s ) into rigid transportation box. There are several different types of transport boxes available, please ensure that the box which is purchased complies with P650. The IPC Team should be contacted if advice is required.
Seal transportation bag or container
Appendix1
Taking Blood Cultures – Summary of Best Practice
The taking of blood cultures to detect bacteraemia is an important investigation with major implications for the diagnosis of patients with infection and the selection of appropriate treatment. This procedure aims to ensure that blood cultures are taken:
• for the correct indication • at the correct time and • using correct technique in order to prevent contamination of the sample and minimise risk to patients and staff (see SOP )
Only take blood for culture when there is a clinical need to do so and not as routine Blood cultures are taken to identify patients with bacteraemia. There are many signs and symptoms in a patient which may suggest bacteraemia and clinical judgement is required, but the following indicators should be taken into account when assessing a patient for signs of bacteraemia or sepsis: • core temperature out of normal range < 36 - >38 °C; • focal signs of infection • abnormal heart rate (raised), blood pressure (low or raised) or respiratory rate(raised); • chills or rigors; • raised or very low white blood cell count; and • New or worsening delirium. NB: Signs of sepsis may be minimal or absent in the very young and the elderly. Blood cultures should be taken after identification of possible bacteraemia or sepsis and before the administration of antibiotics before the next dose, (Saving lives 2007). All blood cultures should be documented in the patient’s notes, including date, time, site and indications. Competence Blood cultures should only be collected by members of staff (medical, nursing, healthcare assistant, phlebotomist or technician) who have been trained in the collection procedure and whose competence in blood culture collection has been assessed. Always make a fresh stab Do not use existing peripheral lines/cannulae or sites immediately above peripheral lines. Avoid femoral vein puncture because of the difficulty in adequate skin cleansing and disinfection.
Thoroughly disinfect the skin before inserting the needle Thoroughly cleanse the patient’s skin before venepuncture. Use soap and water to clean visibly soiled skin and then clean your own hands. Use a 2% chlorhexidine in 70% isopropyl alcohol to disinfect the patient’s skin and allow to dry. Once disinfected, don’t touch the skin again To avoid cross-contamination from the collector’s fingers (even when gloved), it is vitally important not to palpate the site again once it has been disinfected. Disinfect the culture bottle cap before transferring the sample Ideally, remove the plastic cover immediately before collecting the sample; the top of the bottle will be clean but not sterile. Disinfect the tops of the culture bottles with a 2% chlorhexidine in 70% isopropyl
Appendix 2

alcohol impregnated swab. Allow the alcohol to fully evaporate before proceeding with bottle inoculation. NB: The use of blood collection adapter caps without winged blood collection sets is not recommended. It is not possible to accurately judge sample volume and there is the potential for possible backflow of blood culture media into patient veins.
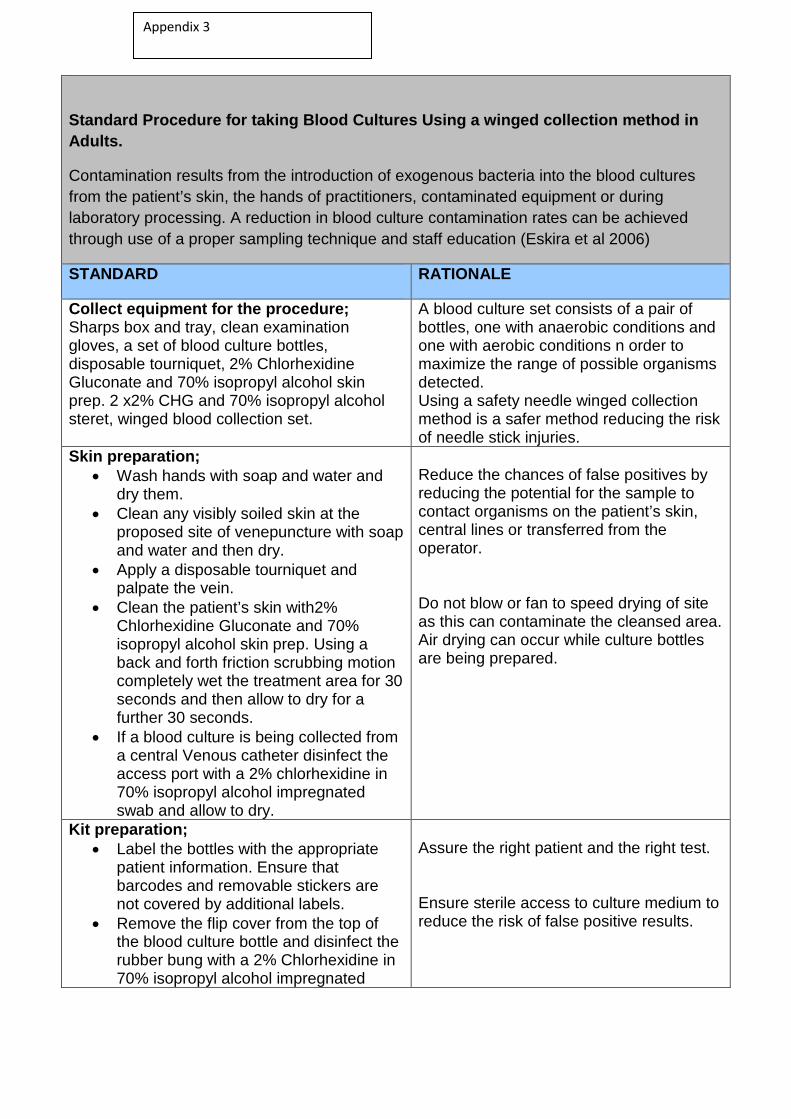
Standard Procedure for taking Blood Cultures Using a winged collection method in Adults.
Contamination results from the introduction of exogenous bacteria into the blood cultures from the patient’s skin, the hands of practitioners, contaminated equipment or during laboratory processing. A reduction in blood culture contamination rates can be achieved through use of a proper sampling technique and staff education (Eskira et al 2006)
STANDARD RATIONALE
Collect equipment for the procedure; Sharps box and tray, clean examination gloves, a set of blood culture bottles, disposable tourniquet, 2% Chlorhexidine Gluconate and 70% isopropyl alcohol skin prep. 2 x2% CHG and 70% isopropyl alcohol steret, winged blood collection set.
A blood culture set consists of a pair of bottles, one with anaerobic conditions and one with aerobic conditions n order to maximize the range of possible organisms detected. Using a safety needle winged collection method is a safer method reducing the risk of needle stick injuries.
Skin preparation; • Wash hands with soap and water and
dry them. • Clean any visibly soiled skin at the
proposed site of venepuncture with soap and water and then dry.
• Apply a disposable tourniquet and palpate the vein.
• Clean the patient’s skin with2% Chlorhexidine Gluconate and 70% isopropyl alcohol skin prep. Using a back and forth friction scrubbing motion completely wet the treatment area for 30 seconds and then allow to dry for a further 30 seconds.
• If a blood culture is being collected from a central Venous catheter disinfect the access port with a 2% chlorhexidine in 70% isopropyl alcohol impregnated swab and allow to dry.
Reduce the chances of false positives by reducing the potential for the sample to contact organisms on the patient’s skin, central lines or transferred from the operator. Do not blow or fan to speed drying of site as this can contaminate the cleansed area. Air drying can occur while culture bottles are being prepared.
Kit preparation; • Label the bottles with the appropriate
patient information. Ensure that barcodes and removable stickers are not covered by additional labels.
• Remove the flip cover from the top of the blood culture bottle and disinfect the rubber bung with a 2% Chlorhexidine in 70% isopropyl alcohol impregnated
Assure the right patient and the right test. Ensure sterile access to culture medium to reduce the risk of false positive results.
Appendix 3
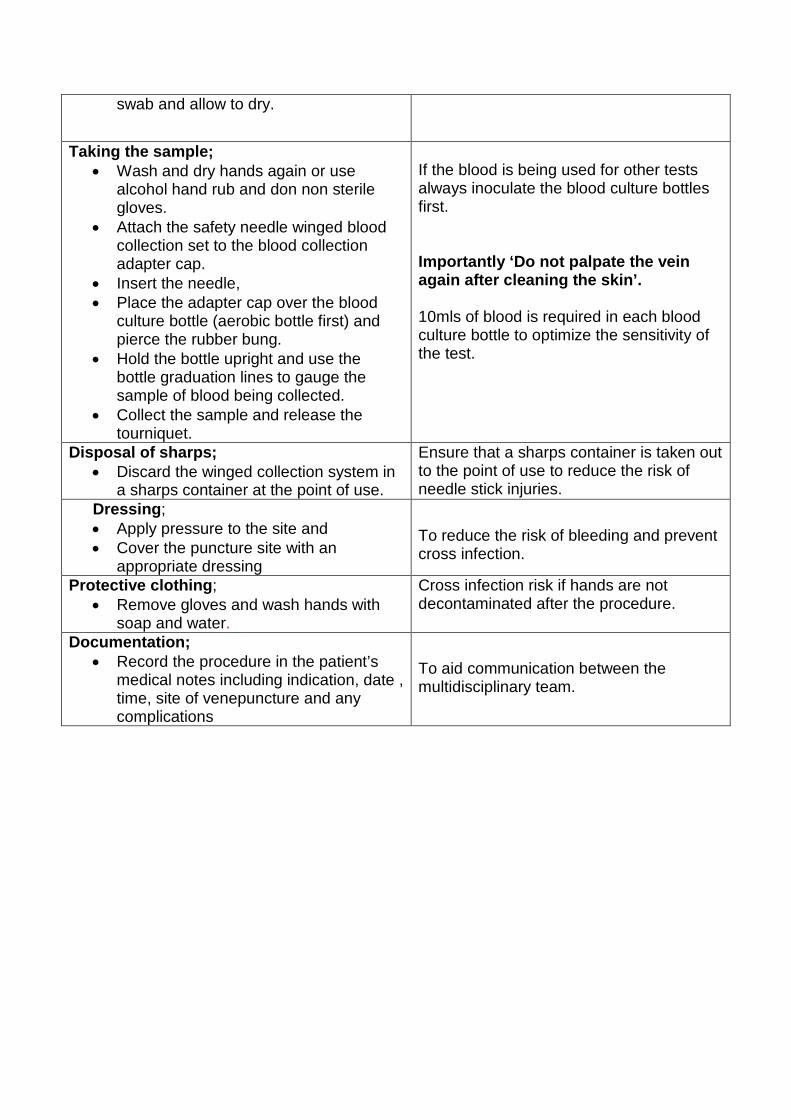
swab and allow to dry.
Taking the sample; • Wash and dry hands again or use
alcohol hand rub and don non sterile gloves.
• Attach the safety needle winged blood collection set to the blood collection adapter cap.
• Insert the needle, • Place the adapter cap over the blood
culture bottle (aerobic bottle first) and pierce the rubber bung.
• Hold the bottle upright and use the bottle graduation lines to gauge the sample of blood being collected.
• Collect the sample and release the tourniquet.
If the blood is being used for other tests always inoculate the blood culture bottles first. Importantly ‘Do not palpate the vein again after cleaning the skin’. 10mls of blood is required in each blood culture bottle to optimize the sensitivity of the test.
Disposal of sharps; • Discard the winged collection system in
a sharps container at the point of use.
Ensure that a sharps container is taken out to the point of use to reduce the risk of needle stick injuries.
Dressing; • Apply pressure to the site and • Cover the puncture site with an
appropriate dressing
To reduce the risk of bleeding and prevent cross infection.
Protective clothing; • Remove gloves and wash hands with
soap and water.
Cross infection risk if hands are not decontaminated after the procedure.
Documentation; • Record the procedure in the patient’s
medical notes including indication, date , time, site of venepuncture and any complications
To aid communication between the multidisciplinary team.
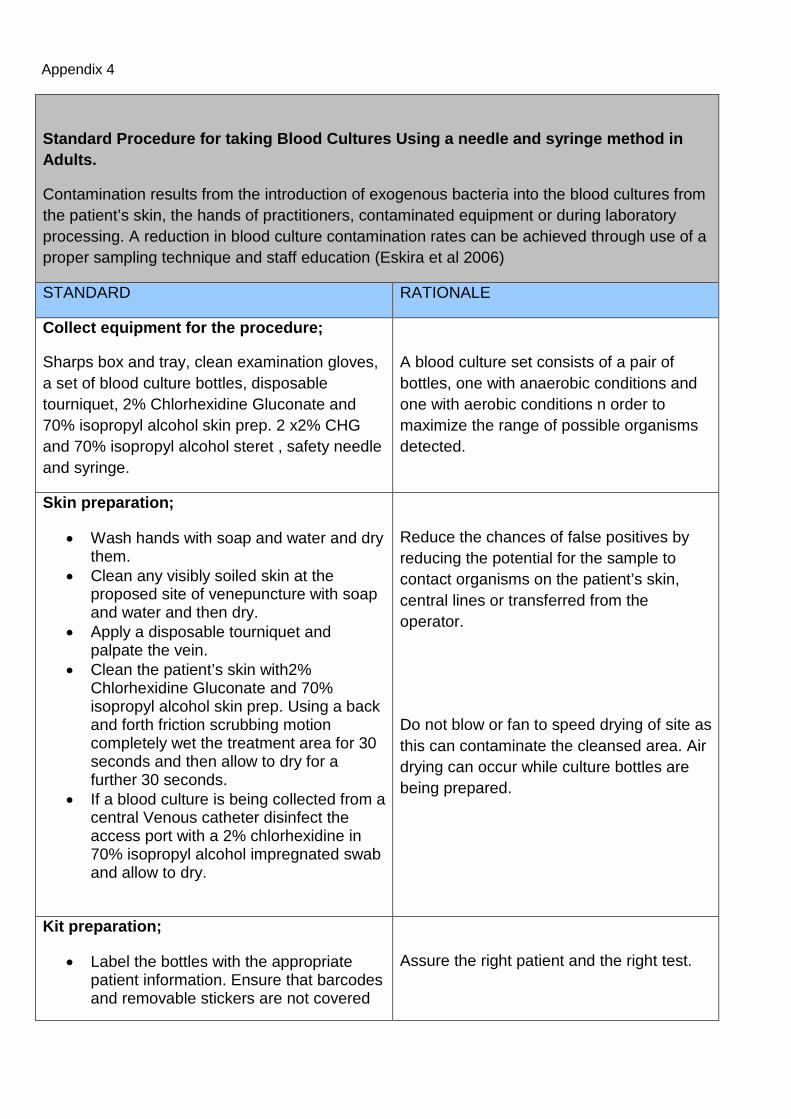
Standard Procedure for taking Blood Cultures Using a needle and syringe method in Adults.
Contamination results from the introduction of exogenous bacteria into the blood cultures from the patient’s skin, the hands of practitioners, contaminated equipment or during laboratory processing. A reduction in blood culture contamination rates can be achieved through use of a proper sampling technique and staff education (Eskira et al 2006)
STANDARD RATIONALE
Collect equipment for the procedure;
Sharps box and tray, clean examination gloves, a set of blood culture bottles, disposable tourniquet, 2% Chlorhexidine Gluconate and 70% isopropyl alcohol skin prep. 2 x2% CHG and 70% isopropyl alcohol steret , safety needle and syringe.
A blood culture set consists of a pair of bottles, one with anaerobic conditions and one with aerobic conditions n order to maximize the range of possible organisms detected.
Skin preparation;
• Wash hands with soap and water and dry them.
• Clean any visibly soiled skin at the proposed site of venepuncture with soap and water and then dry.
• Apply a disposable tourniquet and palpate the vein.
• Clean the patient’s skin with2% Chlorhexidine Gluconate and 70% isopropyl alcohol skin prep. Using a back and forth friction scrubbing motion completely wet the treatment area for 30 seconds and then allow to dry for a further 30 seconds.
• If a blood culture is being collected from a central Venous catheter disinfect the access port with a 2% chlorhexidine in 70% isopropyl alcohol impregnated swab and allow to dry.
Reduce the chances of false positives by reducing the potential for the sample to contact organisms on the patient’s skin, central lines or transferred from the operator.
Do not blow or fan to speed drying of site as this can contaminate the cleansed area. Air drying can occur while culture bottles are being prepared.
Kit preparation;
• Label the bottles with the appropriate patient information. Ensure that barcodes and removable stickers are not covered
Assure the right patient and the right test.
Appendix 4
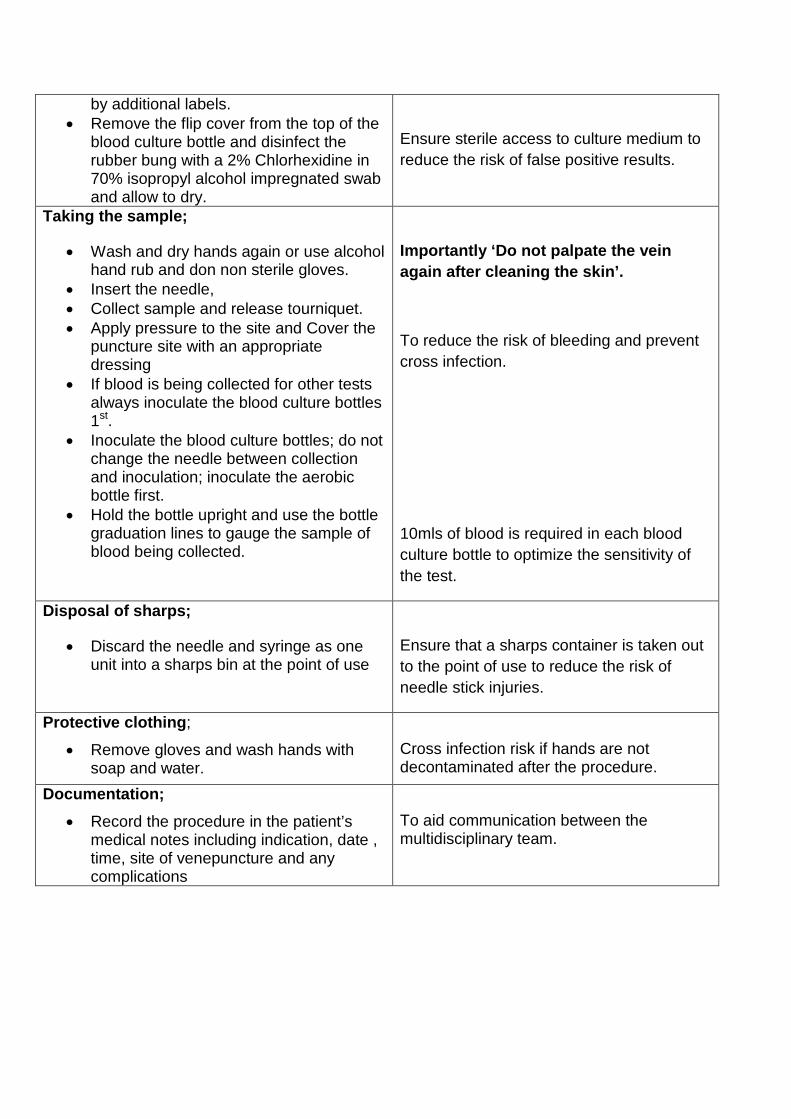
by additional labels. • Remove the flip cover from the top of the
blood culture bottle and disinfect the rubber bung with a 2% Chlorhexidine in 70% isopropyl alcohol impregnated swab and allow to dry.
Ensure sterile access to culture medium to reduce the risk of false positive results.
Taking the sample;
• Wash and dry hands again or use alcohol hand rub and don non sterile gloves.
• Insert the needle, • Collect sample and release tourniquet. • Apply pressure to the site and Cover the
puncture site with an appropriate dressing
• If blood is being collected for other tests always inoculate the blood culture bottles 1st.
• Inoculate the blood culture bottles; do not change the needle between collection and inoculation; inoculate the aerobic bottle first.
• Hold the bottle upright and use the bottle graduation lines to gauge the sample of blood being collected.
Importantly ‘Do not palpate the vein again after cleaning the skin’.
To reduce the risk of bleeding and prevent cross infection.
10mls of blood is required in each blood culture bottle to optimize the sensitivity of the test.
Disposal of sharps;
• Discard the needle and syringe as one unit into a sharps bin at the point of use
Ensure that a sharps container is taken out to the point of use to reduce the risk of needle stick injuries.
Protective clothing;
• Remove gloves and wash hands with soap and water.
Cross infection risk if hands are not decontaminated after the procedure.
Documentation; • Record the procedure in the patient’s
medical notes including indication, date , time, site of venepuncture and any complications
To aid communication between the multidisciplinary team.

Appendix 5