Embed Size (px)
Citation preview
7/27/2019 Colors Patchwork Quilt Tutorial
http://slidepdf.com/reader/full/colors-patchwork-quilt-tutorial 1/6
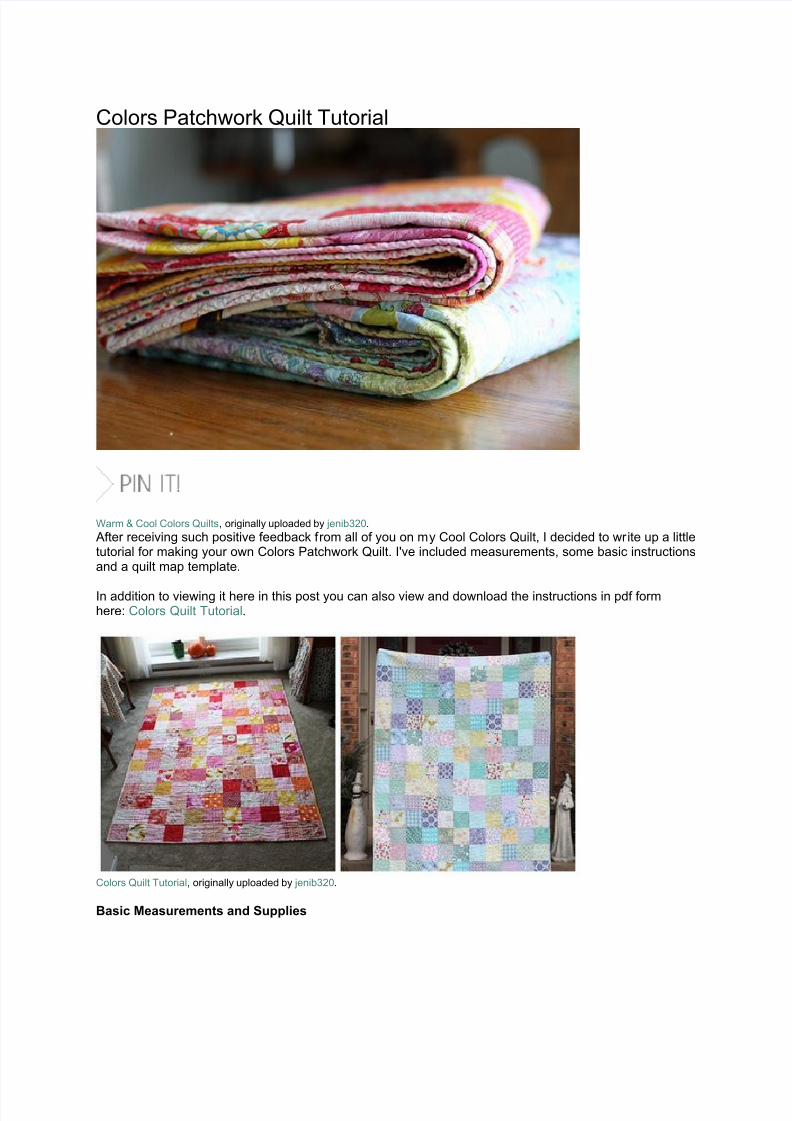
Colors Patchwork Quilt Tutorial
Warm & Cool Colors Quilts, originally uploaded by jenib320. After receiving such positive feedback from all of you on my Cool Colors Quilt, I decided to write up a littletutorial for making your own Colors Patchwork Quilt. I've included measurements, some basic instructionsand a quilt map template.
In addition to viewing it here in this post you can also view and download the instructions in pdf formhere: Colors Quilt Tutorial.
Colors Quilt Tutorial, originally uploaded by jenib320.
Basic Measurements and Supplies

7/27/2019 Colors Patchwork Quilt Tutorial
http://slidepdf.com/reader/full/colors-patchwork-quilt-tutorial 2/6
Size: 165 blocks, 15 rows, 11 columns, 61” x 83” finishedTop: 61” x 83” Back: 69” x 87” Batting: 69” x 87” Binding: 300” of binding Block size: 6” unfinished, 5.5” finished.
40 fabrics, at minimum you will need a little over half a fat quarter or most of a ¼ yard cut of each differentfabric (this does not include the backing or binding).
The Quilt Map (which you can download here)
Instructions
1. First and foremost, you will need to choose 4 colors for your quilt. You may choose to use warm or coolcolor schemes, but this method would also work with any color scheme you’d like! Use the Quilt Map tolay out your colors!
2. After you’ve chosen your 4 colors, rank them in order of importance. You will need a main color,secondary color, and two additional colors. Now, choose 20 fabrics from your main color, 10 different
fabrics from your secondary color, and 5 different fabrics from each of your additional colors. This will giveyou a total of 40 different fabrics.
7/27/2019 Colors Patchwork Quilt Tutorial
http://slidepdf.com/reader/full/colors-patchwork-quilt-tutorial 3/6
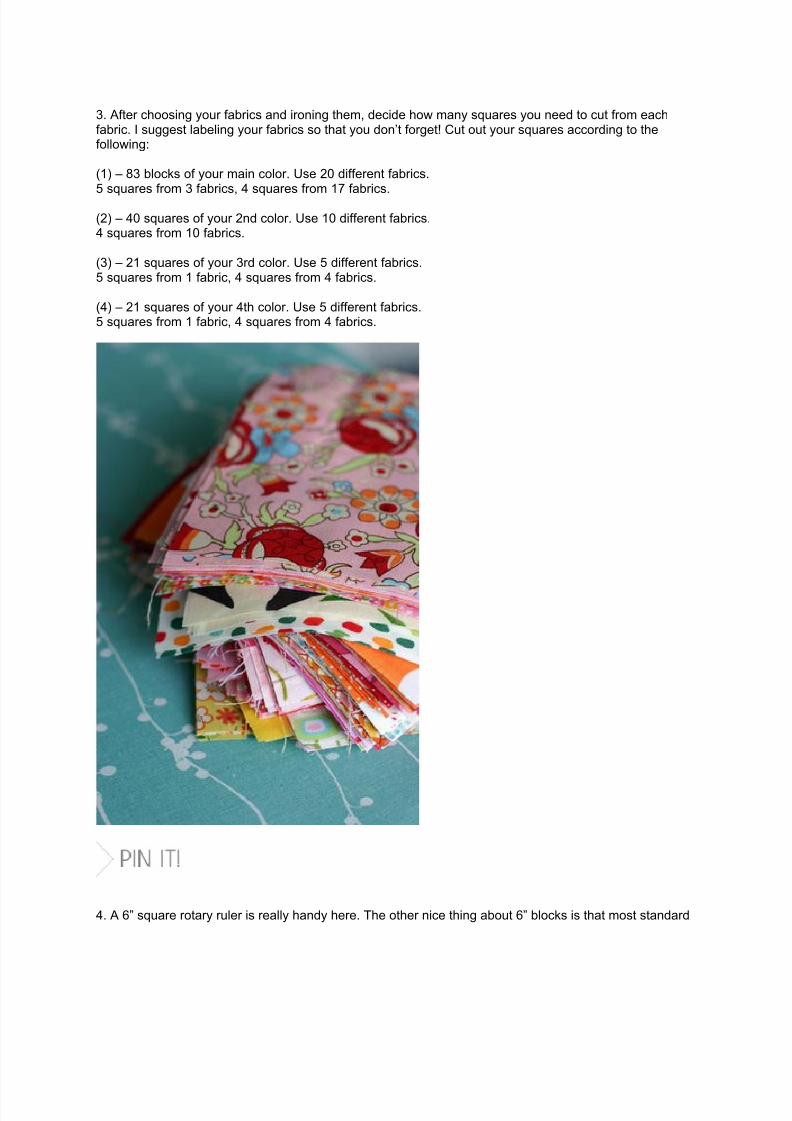
3. After choosing your fabrics and ironing them, decide how many squares you need to cut from eachfabric. I suggest labeling your fabrics so that you don’t forget! Cut out your squares according to thefollowing:
(1) – 83 blocks of your main color. Use 20 different fabrics.5 squares from 3 fabrics, 4 squares from 17 fabrics.
(2) – 40 squares of your 2nd color. Use 10 different fabrics.4 squares from 10 fabrics.
(3) – 21 squares of your 3rd color. Use 5 different fabrics.5 squares from 1 fabric, 4 squares from 4 fabrics.
(4) – 21 squares of your 4th color. Use 5 different fabrics.5 squares from 1 fabric, 4 squares from 4 fabrics.
4. A 6” square rotary ruler is really handy here. The other nice thing about 6” blocks is that most standard

7/27/2019 Colors Patchwork Quilt Tutorial
http://slidepdf.com/reader/full/colors-patchwork-quilt-tutorial 4/6
rotary rulers are 6” x 24”. This allows you to use your ruler as a template and then cut 4 squares fromyour ruler piece.
5. You will end up with a total of 165 squares. With your quilt map in hand, lay out your squares on aclean surface, 15 rows and 11 columns. This process requires a certain amount of patience depending onyour preferences. I decided I did not want any one fabric to appear in the same row or column. While thismay not seem possible, it indeed is! It takes a while to get it just right! I suggest working on it for a bit andthen coming back to it later if possible. If this issue doesn’t bother you, don’t worry about it! Fiddle with theblock placement until you like it!
6. Now that you’re done with your placement, you’ll want to stack up your rows so that you sew them upin the correct order. I choose to stack the squares moving from left to right, starting at the top of my quiltmap.
7. You should now have 15 stacks of 11 squares each. Label the top of each row with a slip of paper attached with a safety pin.
8. Sew your squares together for each row. Depending on your preference iron your seams open, or youmay choose to press towards the right or left. I suggest doing this after you have a few rows completed.This breaks up the sewing a bit and doesn’t leave you with a ton of ironing at the end!
9. Now it’s time to sew your rows together! I suggest sewing your rows together in pairs, 1+2, 3+4, etc.

7/27/2019 Colors Patchwork Quilt Tutorial
http://slidepdf.com/reader/full/colors-patchwork-quilt-tutorial 5/6
You can then sew your pairs together and continue until you’ve finished. This system helps minimize theamount of bulky sewing you’ll have to do. Just like with your rows, don’t forget to press your seams.
10. Time for the backing! For my two quilts, I choose to try and use up leftover fabrics that I used in thefront.
11. I would suggest making your backing about 4” bigger on each side to allow for some shifting duringquilting. This makes your backing piece 69” x 87”. I’ve done two different backings, the first is to split itdown the middle using various sized pieces that are 35” wide, just making sure you e nd up with two35”x87” pieces that are then sewn together. Another option is to piece stripes. Each pieced stripe needsto be 69” long, and the stripes sewn together need to add up to 87”.
12. There are a lot of great tutorials our there for quilting as well as making and sewing on your binding.
You’ll need around 300” of binding. This includes some excess. I choose to use up scraps from cutting upthe squares and do a patchwork binding.

7/27/2019 Colors Patchwork Quilt Tutorial
http://slidepdf.com/reader/full/colors-patchwork-quilt-tutorial 6/6
Quilt, bind, wash, and enjoy!


![Untitled Page [] a quilt for... · Patchwork quilts can be an amazing way to display machine ... colors, and textures, making a unique work of art that ... Pencil and paper for](https://img.pdfslide.net/doc/110x75/5ac5167c7f8b9af91c8d6928/untitled-page-a-quilt-forpatchwork-quilts-can-be-an-amazing-way-to-display.jpg)