Embed Size (px)
Citation preview
Congratulations on your purchase of a GMC Sierra. Please read this information about your vehicle’s features andyour Owner Manual to ensure an outstanding ownership experience. Note that your vehicle may not include all thefeatures described in this booklet. Keep this booklet with your Owner Manual for easy reference.
DRIVER INFORMATIONInstrument Panels . . . . . . . . . . . . .2Instrument Panel Cluster . . . . . . .4Voltmeter Operation . . . . . . . . . . . .5Driver Information Center . . . . . .5
SAFETY & SECURITYRemote Keyless Entry . . . . . . . . . .7Content Theft-Deterrent System . .7OnStar® . . . . . . . . . . . . . . . . . . . . . .7
COMFORT Power Seat Controls . . . . . . . . . . .8Heated Seats . . . . . . . . . . . . . . . . . .8Heated and Cooled Seats . . . . . . .8Memory Settings . . . . . . . . . . . . . .8Adjustable Pedals . . . . . . . . . . . . .9Automatic Climate Controls . . . . .9
ENTERTAINMENTAudio System Features . . . . . . . .10Multiple-Disc CD Player . . . . . . . .13Touch Screen NavigationEntertainment System . . . . . . . . .13
XM® Radio . . . . . . . . . . . . . . . . . . .13Rear Seat Audio and DVD RearSeat Entertainment Systems . . .14Audio Steering Wheel Controls .14Bluetooth® System . . . . . . . . . . . .15
CONVENIENCERemote Vehicle Start . . . . . . . . . .15Cruise Control . . . . . . . . . . . . . . .16Rainsense™ II Windshield Wipers . . . . . . . . . . . . . . . . . . . . . .16Heated Windshield Washer Fluid . . . . . . . . . . . . . . . . . . . . . . . .17Automatic Headlamp System and Interior Lamps . . . . . . . . . . . .17Sunroof . . . . . . . . . . . . . . . . . . . . .18Power Sliding Rear Window . . . .18Ultrasonic Rear Parking Assist .18Universal Home Remote . . . . . . .19Automatic Dimming RearviewMirror . . . . . . . . . . . . . . . . . . . . . . .19Power Foldaway Mirrors . . . . . . .19
Rear Vision Camera . . . . . . . . . . .20Trailer-Tow Mirrors . . . . . . . . . . . .20Folding the Rear Seat . . . . . . . . .20Cargo Management System . . . .20
PERFORMANCE & MAINTENANCE 6-Speed Automatic Transmission Controls . . . . . . . .21StabiliTrak® – Stability ControlSystem . . . . . . . . . . . . . . . . . . . . .21Tire Pressure Monitor . . . . . . . . .21Integrated Trailer Brake ControlSystem . . . . . . . . . . . . . . . . . . . . .22Tighten Gas Cap Message . . . . .22FlexFuel (E85) – Yellow Gas Cap 22Resetting the Oil Life System . . . . . . . . . . . . . . . . . . . . .23
OWNER INFORMATIONSierra Accessories . . . . . . . . . . . .23Roadside Assistance . . . . . . . . . .24My GMLink . . . . . . . . . . . . . . . . . .24
Getting to Know Your Sierra2
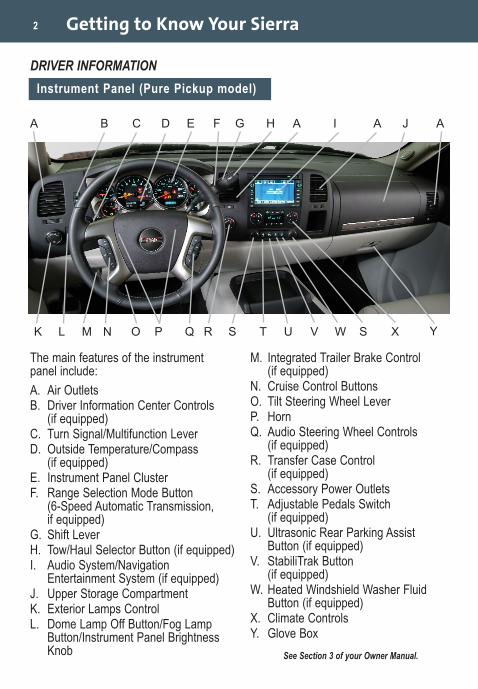
The main features of the instrument panel include:
A. Air OutletsB. Driver Information Center Controls
(if equipped)C. Turn Signal/Multifunction LeverD. Outside Temperature/Compass
(if equipped)E. Instrument Panel ClusterF. Range Selection Mode Button
(6-Speed Automatic Transmission, if equipped)
G. Shift LeverH. Tow/Haul Selector Button (if equipped)I. Audio System/Navigation
Entertainment System (if equipped)J. Upper Storage CompartmentK. Exterior Lamps ControlL. Dome Lamp Off Button/Fog Lamp
Button/Instrument Panel BrightnessKnob See Section 3 of your Owner Manual.
DRIVER INFORMATION
Instrument Panel (Pure Pickup model)
M. Integrated Trailer Brake Control (if equipped)
N. Cruise Control ButtonsO. Tilt Steering Wheel Lever P. HornQ. Audio Steering Wheel Controls
(if equipped)R. Transfer Case Control
(if equipped)S. Accessory Power OutletsT. Adjustable Pedals Switch
(if equipped)U. Ultrasonic Rear Parking Assist
Button (if equipped)V. StabiliTrak Button
(if equipped)W. Heated Windshield Washer Fluid
Button (if equipped)X. Climate ControlsY. Glove Box
A B E F H A I
K L M O P Q R S T
A
U
C J
V W XS
A
Y
D
N
G
3
See Section 3 of your Owner Manual.
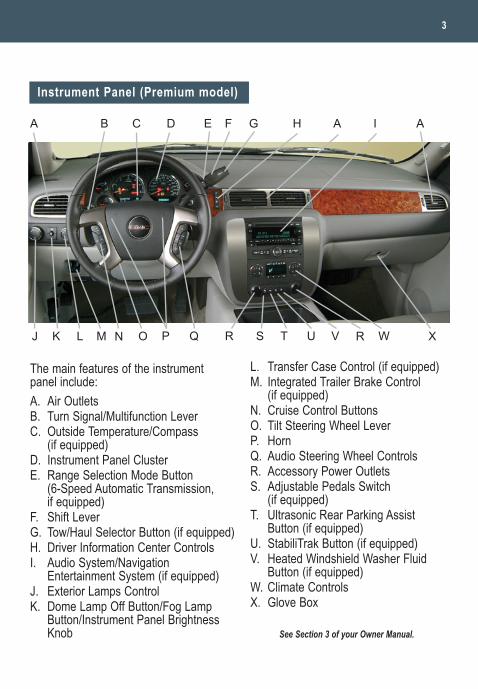
The main features of the instrument panel include:
A. Air OutletsB. Turn Signal/Multifunction LeverC. Outside Temperature/Compass
(if equipped)D. Instrument Panel ClusterE. Range Selection Mode Button
(6-Speed Automatic Transmission, if equipped)
F. Shift LeverG. Tow/Haul Selector Button (if equipped)H. Driver Information Center ControlsI. Audio System/Navigation
Entertainment System (if equipped)J. Exterior Lamps ControlK. Dome Lamp Off Button/Fog Lamp
Button/Instrument Panel BrightnessKnob
Instrument Panel (Premium model)
A B E G H A AIC
J K L O P Q R S XT U V WRN
L. Transfer Case Control (if equipped)M. Integrated Trailer Brake Control
(if equipped)N. Cruise Control ButtonsO. Tilt Steering Wheel Lever P. HornQ. Audio Steering Wheel ControlsR. Accessory Power OutletsS. Adjustable Pedals Switch
(if equipped)T. Ultrasonic Rear Parking Assist
Button (if equipped)U. StabiliTrak Button (if equipped)V. Heated Windshield Washer Fluid
Button (if equipped)W. Climate ControlsX. Glove Box
D
M
F

Getting to Know Your Sierra4
Your vehicle’s instrument panel isequipped with this cluster or one verysimilar to it. The instrument panel clusterincludes these key features:
A. Oil Pressure Gauge (if equipped)B. Fuel Gauge*C. StabiliTrak Warning LightD. Tire Pressure Warning Light
(if equipped)E. Security LightF. Odometer/Driver Information Center/
Outside Temperature/Compass (if equipped)
G. Tow/Haul Mode LightH. Check Engine LightI. TachometerJ. SpeedometerK. Airbag Readiness LightL. Antilock Brake System Warning Light
M. Safety Belt Reminder LightN. Engine Coolant Temperature GaugeO. Voltmeter (if equipped)*Diesel Engine only: If ULTRA-LOWSULFUR DIESEL FUEL ONLY appearson the fuel gauge, your vehicle isequipped with a Diesel Particulate FilterEmissions System. Maintenance mes-sages may be displayed on the DriverInformation Center regarding this sys-tem. See your Diesel Engine OwnerManual for more information.
See Section 3 of your Owner Manual.
Note: The instrument panel cluster isdesigned to let you know about manyimportant aspects of your vehicle’s oper-ation. It is important to read your OwnerManual and become familiar with theinformation being relayed to you by thelights, gauges and indicators, as well aswhat action can be taken to ensuresafety and to prevent damage.
Diesel engine cluster shown.Instrument Panel Cluster
A B D F G HE I K LJ N OMC
5
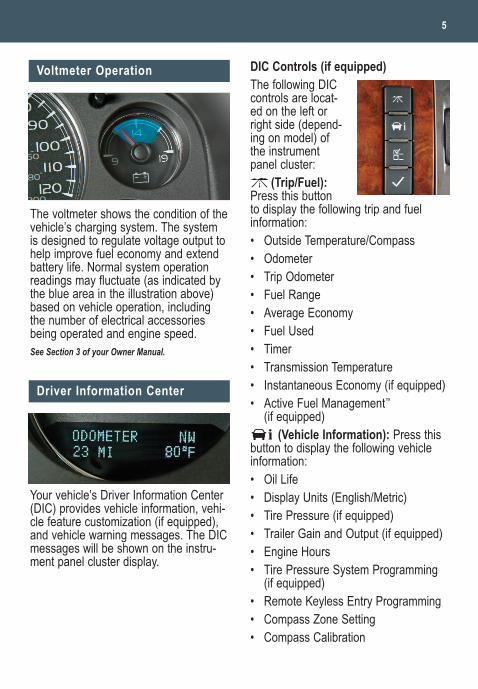
Voltmeter Operation
The voltmeter shows the condition of thevehicle’s charging system. The systemis designed to regulate voltage output tohelp improve fuel economy and extendbattery life. Normal system operationreadings may fluctuate (as indicated bythe blue area in the illustration above)based on vehicle operation, includingthe number of electrical accessoriesbeing operated and engine speed.See Section 3 of your Owner Manual.
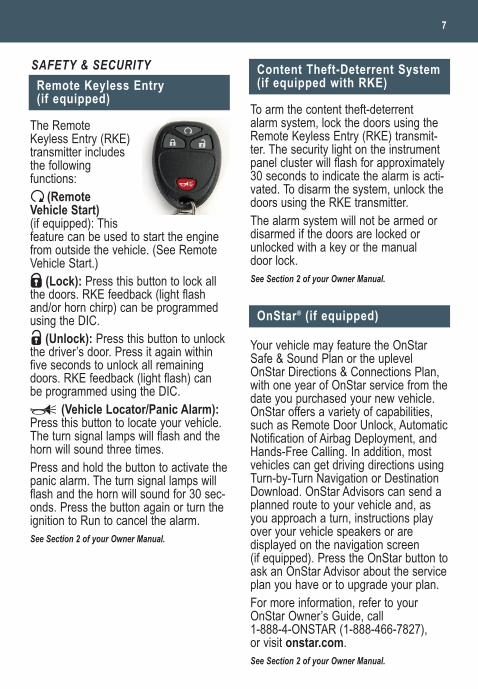
Driver Information Center
Your vehicle’s Driver Information Center(DIC) provides vehicle information, vehi-cle feature customization (if equipped),and vehicle warning messages. The DICmessages will be shown on the instru-ment panel cluster display.
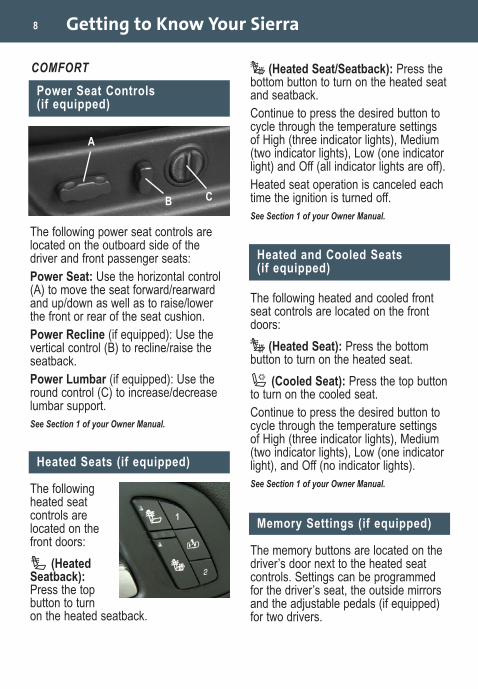
DIC Controls (if equipped)The following DICcontrols are locat-ed on the left orright side (depend-ing on model) ofthe instrumentpanel cluster:
(Trip/Fuel):Press this buttonto display the following trip and fuelinformation:• Outside Temperature/Compass• Odometer• Trip Odometer• Fuel Range• Average Economy• Fuel Used• Timer• Transmission Temperature• Instantaneous Economy (if equipped)• Active Fuel Management™
(if equipped)(Vehicle Information): Press this
button to display the following vehicleinformation:• Oil Life• Display Units (English/Metric)• Tire Pressure (if equipped)• Trailer Gain and Output (if equipped)• Engine Hours• Tire Pressure System Programming
(if equipped)• Remote Keyless Entry Programming• Compass Zone Setting• Compass Calibration

Getting to Know Your Sierra6
(Customization): Press this buttonto scroll through the following custom-ization features:• Display Language• Auto Door Lock• Auto Door Unlock• Remote Door Lock• Remote Door Unlock• Delay Door Lock• Exit Lighting• Approach Lighting• Chime Volume• Park Tilt Mirrors (if equipped)• Easy Exit Seat Recall (if equipped)• Easy Exit Seat Setup (if equipped)• Memory Seat Recall (if equipped)• Remote Start (if equipped)• Factory Settings• Exit Feature Settings
(Set/Reset): Press this button to setor reset DIC information while it is dis-played or to acknowledge a warningmessage.Customization SettingsTo customize features:1. With the vehicle in Park, turn on the
ignition.2. Press the (Customization) button
to display available customizationfeatures.
3. With the desired customizationfeature displayed, press the (Set/Reset) button to access thefeature settings.
4. Press the button to scroll throughthe available settings.
5. With the desired setting displayed,press the button to select it.
6. Press the button to scroll to thenext feature.
7. To exit the Feature Settings menu,press the button until EXITFEATURE SETTINGS is displayedand then press the button; orpress the button or the button.
Compass OperationTo adjust for compass variance whentraveling on a long-distance trip or tocalibrate the compass, refer to yourOwner Manual.Warnings and MessagesThe DIC provides a variety of vehiclewarning messages (depending onoptional equipment) if a problem issensed in a vehicle system. To acknowl-edge a message and clear it from thedisplay, press the (Set/Reset) button.Some urgent messages cannot becleared from the DIC display. If you have a current OnStar subscrip-tion, and a warning message appears,you can press the OnStar button andspeak to an OnStar Advisor. In manyvehicles, OnStar Advisors can accesscertain diagnostic information and cantell you how serious the problem is andwhat you should do about it.
See Section 3 of your Owner Manual.
Note: Your vehicle’s warnings and mes-sages provide critical information thatcan prevent damage to your vehicle.Review your Owner Manual to becomefamiliar with the information displayedand the action required.
7
Remote Keyless Entry (if equipped)
SAFETY & SECURITY
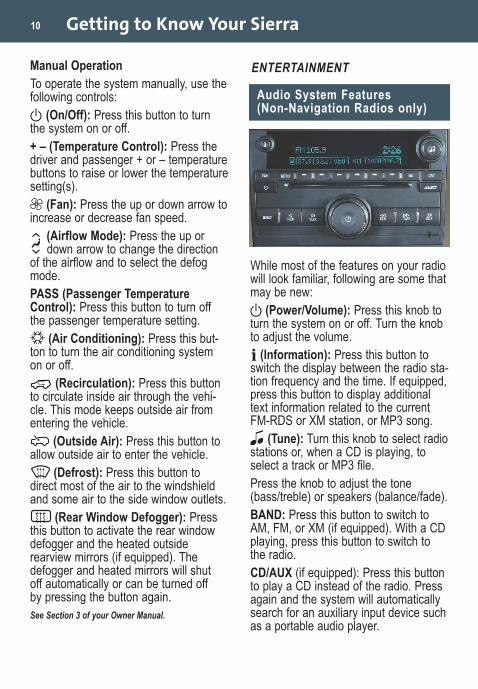
The RemoteKeyless Entry (RKE)transmitter includesthe followingfunctions:
(RemoteVehicle Start)(if equipped): Thisfeature can be used to start the enginefrom outside the vehicle. (See RemoteVehicle Start.)
(Lock): Press this button to lock allthe doors. RKE feedback (light flashand/or horn chirp) can be programmedusing the DIC.
(Unlock): Press this button to unlockthe driver’s door. Press it again withinfive seconds to unlock all remainingdoors. RKE feedback (light flash) canbe programmed using the DIC.
(Vehicle Locator/Panic Alarm):Press this button to locate your vehicle.The turn signal lamps will flash and thehorn will sound three times. Press and hold the button to activate thepanic alarm. The turn signal lamps willflash and the horn will sound for 30 sec-onds. Press the button again or turn theignition to Run to cancel the alarm.See Section 2 of your Owner Manual.
Content Theft-Deterrent System(if equipped with RKE)
To arm the content theft-deterrentalarm system, lock the doors using theRemote Keyless Entry (RKE) transmit-ter. The security light on the instrumentpanel cluster will flash for approximately30 seconds to indicate the alarm is acti-vated. To disarm the system, unlock thedoors using the RKE transmitter. The alarm system will not be armed ordisarmed if the doors are locked orunlocked with a key or the manualdoor lock.See Section 2 of your Owner Manual.
Your vehicle may feature the OnStarSafe & Sound Plan or the uplevelOnStar Directions & Connections Plan,with one year of OnStar service from thedate you purchased your new vehicle.OnStar offers a variety of capabilities,such as Remote Door Unlock, AutomaticNotification of Airbag Deployment, andHands-Free Calling. In addition, mostvehicles can get driving directions usingTurn-by-Turn Navigation or DestinationDownload. OnStar Advisors can send aplanned route to your vehicle and, asyou approach a turn, instructions playover your vehicle speakers or aredisplayed on the navigation screen(if equipped). Press the OnStar button toask an OnStar Advisor about the serviceplan you have or to upgrade your plan.For more information, refer to yourOnStar Owner’s Guide, call 1-888-4-ONSTAR (1-888-466-7827), or visit onstar.com.See Section 2 of your Owner Manual.
OnStar® (if equipped)
Getting to Know Your Sierra8
The following power seat controls arelocated on the outboard side of thedriver and front passenger seats: Power Seat: Use the horizontal control(A) to move the seat forward/rearwardand up/down as well as to raise/lowerthe front or rear of the seat cushion.Power Recline (if equipped): Use thevertical control (B) to recline/raise theseatback.Power Lumbar (if equipped): Use theround control (C) to increase/decreaselumbar support.See Section 1 of your Owner Manual.
Power Seat Controls (if equipped)
COMFORT
A
B C
The followingheated seatcontrols arelocated on thefront doors:
(HeatedSeatback):Press the topbutton to turnon the heated seatback.
Heated Seats (if equipped)
Memory Settings (if equipped)
The memory buttons are located on thedriver’s door next to the heated seatcontrols. Settings can be programmedfor the driver’s seat, the outside mirrorsand the adjustable pedals (if equipped)for two drivers.
(Heated Seat/Seatback): Press thebottom button to turn on the heated seatand seatback.Continue to press the desired button tocycle through the temperature settingsof High (three indicator lights), Medium(two indicator lights), Low (one indicatorlight) and Off (all indicator lights are off). Heated seat operation is canceled eachtime the ignition is turned off.See Section 1 of your Owner Manual.
The following heated and cooled frontseat controls are located on the frontdoors:
(Heated Seat): Press the bottombutton to turn on the heated seat.
(Cooled Seat): Press the top buttonto turn on the cooled seat.Continue to press the desired button tocycle through the temperature settingsof High (three indicator lights), Medium(two indicator lights), Low (one indicatorlight), and Off (no indicator lights).See Section 1 of your Owner Manual.
Heated and Cooled Seats (if equipped)

9
The accelerator and brake pedals canbe adjusted to a comfortable and safeoperating position by using theadjustable pedals switch located onthe instrument panel below the climatecontrols.
Adjustable Pedals (if equipped)
The automatic climate control systemmaintains the desired individual temper-ature for the driver and front seat pas-senger. The system adjusts the airflowmode, fan speed, air conditioning andrecirculation functions to reach the settemperature(s) as quickly as possible.Automatic OperationTo set the automatic mode:1. Press the AUTO button.2. Set the driver’s and front passenger’s
temperature using the + or – temper-ature buttons.
Automatic Climate Controls (if equipped)
Press the toparrow on theswitch to movethe pedalsaway from youand the bottomarrow on theswitch to movethe pedalstoward you.The pedals cannot be adjusted when thevehicle is in Reverse or when cruisecontrol is activated.See Section 2 of your Owner Manual.
To save memory settings:1. Adjust the driver’s seat, outside
mirrors and pedals to a comfortableposition.
2. Press and hold button 1 or 2 until twobeeps sound.
3. Repeat these steps for a seconddriver using the other memory button.
To recall the settings, press memorybutton 1 or 2 with the vehicle in Park. Ifthe Remote Keyless Entry transmitter isused to enter the vehicle and the memo-ry seat recall feature is on (see DriverInformation Center), the settings will berecalled automatically. Easy Exit Seat RecallThe easy exit seat recall button is locat-ed between the two memory buttons.Press the recall button, with the vehiclein Park, to move the driver’s seat to theexit position.If the easy exit seat recall feature is on(see Driver Information Center), auto-matic seat movement will occur whenthe key is removed from the ignition.See Section 1 of your Owner Manual.
Getting to Know Your Sierra10
Manual OperationTo operate the system manually, use thefollowing controls:
(On/Off): Press this button to turnthe system on or off.+ – (Temperature Control): Press thedriver and passenger + or – temperaturebuttons to raise or lower the temperaturesetting(s).
(Fan): Press the up or down arrow toincrease or decrease fan speed.
(Airflow Mode): Press the up ordown arrow to change the direction
of the airflow and to select the defogmode.PASS (Passenger TemperatureControl): Press this button to turn offthe passenger temperature setting.
(Air Conditioning): Press this but-ton to turn the air conditioning systemon or off.
(Recirculation): Press this buttonto circulate inside air through the vehi-cle. This mode keeps outside air fromentering the vehicle.
(Outside Air): Press this button toallow outside air to enter the vehicle.
(Defrost): Press this button todirect most of the air to the windshieldand some air to the side window outlets.
(Rear Window Defogger): Pressthis button to activate the rear windowdefogger and the heated outsiderearview mirrors (if equipped). Thedefogger and heated mirrors will shutoff automatically or can be turned offby pressing the button again.See Section 3 of your Owner Manual.
Audio System Features (Non-Navigation Radios only)
ENTERTAINMENT
While most of the features on your radiowill look familiar, following are some thatmay be new:
(Power/Volume): Press this knob toturn the system on or off. Turn the knobto adjust the volume.
(Information): Press this button toswitch the display between the radio sta-tion frequency and the time. If equipped,press this button to display additionaltext information related to the currentFM-RDS or XM station, or MP3 song.
(Tune): Turn this knob to select radiostations or, when a CD is playing, toselect a track or MP3 file. Press the knob to adjust the tone(bass/treble) or speakers (balance/fade).BAND: Press this button to switch toAM, FM, or XM (if equipped). With a CDplaying, press this button to switch tothe radio.CD/AUX (if equipped): Press this buttonto play a CD instead of the radio. Pressagain and the system will automaticallysearch for an auxiliary input device suchas a portable audio player.
11
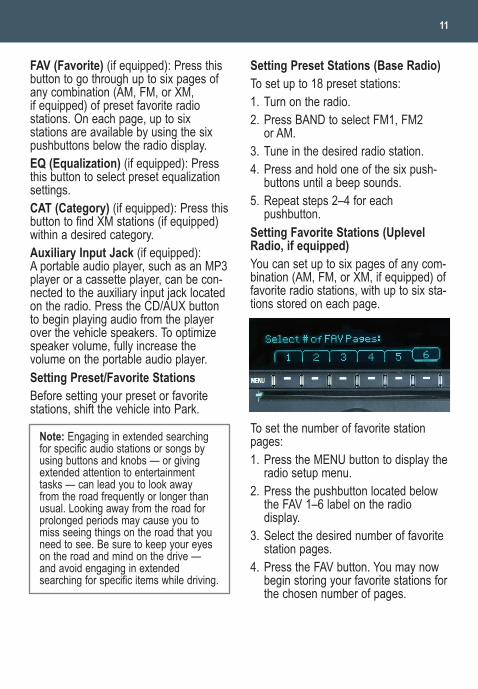
FAV (Favorite) (if equipped): Press thisbutton to go through up to six pages ofany combination (AM, FM, or XM,if equipped) of preset favorite radiostations. On each page, up to sixstations are available by using the sixpushbuttons below the radio display.EQ (Equalization) (if equipped): Pressthis button to select preset equalizationsettings.CAT (Category) (if equipped): Press thisbutton to find XM stations (if equipped)within a desired category.Auxiliary Input Jack (if equipped):A portable audio player, such as an MP3player or a cassette player, can be con-nected to the auxiliary input jack locatedon the radio. Press the CD/AUX buttonto begin playing audio from the playerover the vehicle speakers. To optimizespeaker volume, fully increase thevolume on the portable audio player.Setting Preset/Favorite StationsBefore setting your preset or favoritestations, shift the vehicle into Park.
Note: Engaging in extended searchingfor specific audio stations or songs byusing buttons and knobs — or givingextended attention to entertainmenttasks — can lead you to look awayfrom the road frequently or longer thanusual. Looking away from the road forprolonged periods may cause you tomiss seeing things on the road that youneed to see. Be sure to keep your eyeson the road and mind on the drive —and avoid engaging in extendedsearching for specific items while driving.
Setting Preset Stations (Base Radio)To set up to 18 preset stations:1. Turn on the radio.2. Press BAND to select FM1, FM2
or AM.3. Tune in the desired radio station.4. Press and hold one of the six push-
buttons until a beep sounds.5. Repeat steps 2–4 for each
pushbutton.Setting Favorite Stations (UplevelRadio, if equipped)You can set up to six pages of any com-bination (AM, FM, or XM, if equipped) offavorite radio stations, with up to six sta-tions stored on each page.
To set the number of favorite stationpages:1. Press the MENU button to display the
radio setup menu.2. Press the pushbutton located below
the FAV 1–6 label on the radiodisplay.
3. Select the desired number of favoritestation pages.
4. Press the FAV button. You may nowbegin storing your favorite stations forthe chosen number of pages.
Getting to Know Your Sierra12
To store favorite stations:1. Press the BAND button to select the
band (AM, FM, or XM, if equipped).2. Tune in the desired radio station.3. Press the FAV button to display the
page where the station is to bestored.
4. Press and hold one of the six push-buttons until a beep sounds.
5. Repeat the steps for each pushbuttonon each page.
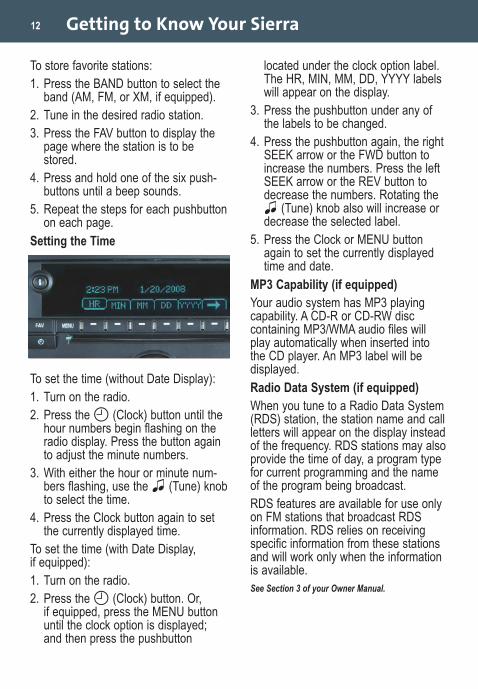
Setting the Time
To set the time (without Date Display):1. Turn on the radio.2. Press the (Clock) button until the
hour numbers begin flashing on theradio display. Press the button againto adjust the minute numbers.
3. With either the hour or minute num-bers flashing, use the (Tune) knobto select the time.
4. Press the Clock button again to setthe currently displayed time.
To set the time (with Date Display, if equipped):1. Turn on the radio.2. Press the (Clock) button. Or,
if equipped, press the MENU buttonuntil the clock option is displayed;and then press the pushbutton
located under the clock option label.The HR, MIN, MM, DD, YYYY labelswill appear on the display.
3. Press the pushbutton under any ofthe labels to be changed.
4. Press the pushbutton again, the rightSEEK arrow or the FWD button toincrease the numbers. Press the leftSEEK arrow or the REV button todecrease the numbers. Rotating the
(Tune) knob also will increase ordecrease the selected label.
5. Press the Clock or MENU buttonagain to set the currently displayedtime and date.
MP3 Capability (if equipped)Your audio system has MP3 playingcapability. A CD-R or CD-RW disccontaining MP3/WMA audio files willplay automatically when inserted intothe CD player. An MP3 label will bedisplayed.Radio Data System (if equipped)When you tune to a Radio Data System(RDS) station, the station name and callletters will appear on the display insteadof the frequency. RDS stations may alsoprovide the time of day, a program typefor current programming and the nameof the program being broadcast.RDS features are available for use onlyon FM stations that broadcast RDSinformation. RDS relies on receivingspecific information from these stationsand will work only when the informationis available.See Section 3 of your Owner Manual.
13
Multiple-Disc CD Player (if equipped)
With the in-dash 6-disc CD player, youcannot directly load a CD as in single-play systems.To load a CD(s):• Press and release the LOAD
button. To load multiple CDs, pressand hold the LOAD button fortwo seconds. Follow the displayprompts to load each CD.
To play a CD: • Press the pushbutton below the
arrow label on the display to selectthe desired CD number.
To eject a CD(s):• Press the EJECT button once to
eject the CD that is currently playing.To eject all CDs, press and hold the
EJECT button for two seconds. If a CD is not removed after several sec-onds, it will be pulled back into the play-er automatically.
See Section 3 of your Owner Manual.
Note: CDs with any affixed labels mayjam in the CD player. Label a CD using apermanent marker. If more than one CDis inserted into the slot at a time, or ifscratched or damaged CDs are played,the CD player could be damaged. Whenusing the CD player, use only CDs ingood condition without labels; load oneCD at a time; and keep the CD playerand the loading slot free of foreignmaterials, liquids or debris.
Touch Screen NavigationEntertainment System (if equipped)
Your vehicle’s Navigation EntertainmentSystem provides you with detailedmaps of all major highways and roadsthroughout the continental United Statesand Canada. The system provides turn-by-turn driving instructions for eachdestination you enter and can help youlocate a variety of points of interest,such as banks, airports and restaurants.Additional navigation assistance is avail-able with Destination Download fromOnStar and real-time XM NavTraffic(if equipped).Refer to your Navigation EntertainmentSystem Owner Manual for operatinginstructions.See Section 3 of your Owner Manual.
XM® Radio (if equipped)
XM Radio offers more than 170 chan-nels of digital-quality sound that goeswherever you go — coast to coast —and real-time XM NavTraffic on the navi-gation system (if equipped) of manyvehicles. After a free three-month trialperiod, service subscription fees apply.Service is based in the continental U.S.and Canada. For more information, visitXM online at www.XMradio.com or call1-800-929-2100.See Section 3 of your Owner Manual.

Getting to Know Your Sierra14
Rear Seat Audio and DVD RearSeat Entertainment Systems (if equipped)
Rear Seat AudioThe Rear Seat Audio (RSA) systemallows front seat and rear seat passen-gers to listen to different entertainmentsources at the same time using the rearseat controls and wired headphones(not supplied). To select an entertainment source(radio, CD, or DVD, if equipped), pressthe SRCE (Source) button. DVD Rear Seat EntertainmentThe Rear Seat Entertainment (RSE)system includes a CD/DVD player aspart of the front radio, a flip-down videoscreen, audio/video jacks, two wirelessheadphones, and a remote control.To play a DVD:1. Turn the ignition to the Accessory or
Run position.2. Push the release button on the DVD
display console and pull down thevideo screen.
3. Insert a DVD into the DVD slot in theradio. It will turn on the video screenand begin playing automatically. Itmay be necessary to press the Playpushbutton on the radio or the remotecontrol to start playing the movie ifthe DVD stops at a menu screen.
Audio Steering Wheel Controls(if equipped)
The following audio controls are locatedon the steering wheel:+ – (Volume): Pull up the + or – buttonto increase or decrease the volume.
(Next/Previous/End): Press the up or down arrow to go to the
next or previous radio station stored asa favorite or, when a CD is playing, tothe next or previous track. Press the
(End) button to end or reject anOnStar or Bluetooth call.
4. To listen to the DVD through thevehicle speakers, press the DVD/CDAUX button. Adjust volume using theradio volume control.To listen to the DVD through theheadphones, select channel 1 andpush the power button on the head-phones. Adjust volume using theheadphone volume control.
5. To control DVD playback, use theremote control or the front radiopushbuttons.
Parental ControlTo enable the Parental Control featureto gain the attention of rear passengersusing headphones, press and hold theradio power button for two seconds.To turn off Parental Control, pressand hold the radio button again for twoseconds.See Section 3 of your Owner Manual.
Note: Aim the remote control at the videoscreen, not the DVD player, for properoperation.
This feature allows you to start theengine from outside the vehicle byusing the Remote Keyless Entry (RKE)transmitter. The remote start capabilitymust be turned on using the DriverInformation Center.The automatic climate control system(if equipped) will default to a heatingor cooling mode based on outside tem-perature, or the manual climate controlsystem will turn on at the same settingas when the vehicle was last turned off.Heated/cooled seats (if equipped)will also turn on based on outsidetemperature.Starting the VehicleTo remote-start the vehicle:1. Aim the RKE transmitter at the vehi-
cle. (Remote Vehicle Start transmitterrange is within approximately 200 feetof the vehicle.)
2. Press and release the (Lock)button on the transmitter.
3. Immediately press and hold the (Remote Vehicle Start) button forabout four seconds. When the park-ing lights flash, release the button.The engine will start and the parkinglamps will remain on. The engine willcontinue running for 10 minutes.
4. Repeat these steps for a 10-minutetime extension. Only two consecutiveremote starts are allowed.
When you enter the vehicle after aremote start, the key must be inserted inthe ignition and turned to the Run posi-tion before driving.
15
Remote Vehicle Start (if equipped)
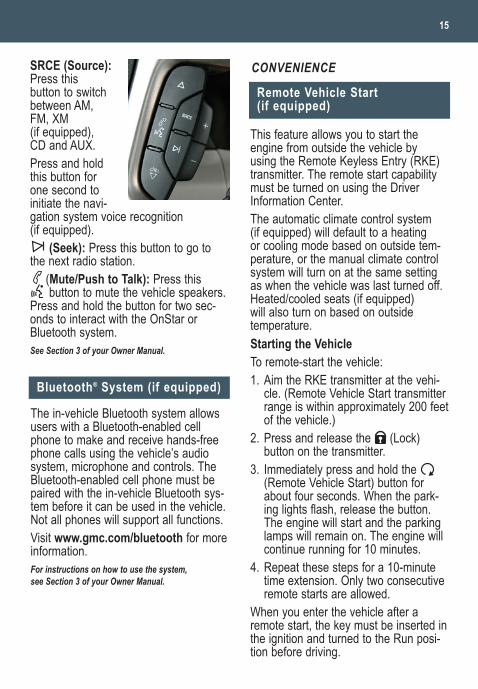
CONVENIENCESRCE (Source):Press thisbutton to switchbetween AM,FM, XM(if equipped),CD and AUX.Press and holdthis button forone second toinitiate the navi-gation system voice recognition(if equipped).
(Seek): Press this button to go tothe next radio station.
(Mute/Push to Talk): Press this button to mute the vehicle speakers.
Press and hold the button for two sec-onds to interact with the OnStar orBluetooth system.See Section 3 of your Owner Manual.
Bluetooth® System (if equipped)
The in-vehicle Bluetooth system allowsusers with a Bluetooth-enabled cellphone to make and receive hands-freephone calls using the vehicle’s audiosystem, microphone and controls. TheBluetooth-enabled cell phone must bepaired with the in-vehicle Bluetooth sys-tem before it can be used in the vehicle.Not all phones will support all functions. Visit www.gmc.com/bluetooth for moreinformation.For instructions on how to use the system, see Section 3 of your Owner Manual.
Getting to Know Your Sierra16
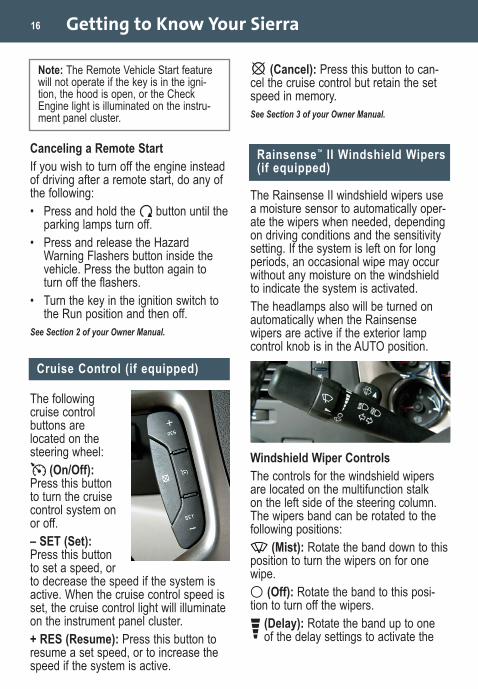
Cruise Control (if equipped)
The followingcruise controlbuttons arelocated on thesteering wheel:
(On/Off):Press this buttonto turn the cruisecontrol system onor off. – SET (Set):Press this buttonto set a speed, orto decrease the speed if the system isactive. When the cruise control speed isset, the cruise control light will illuminateon the instrument panel cluster.+ RES (Resume): Press this button toresume a set speed, or to increase thespeed if the system is active.
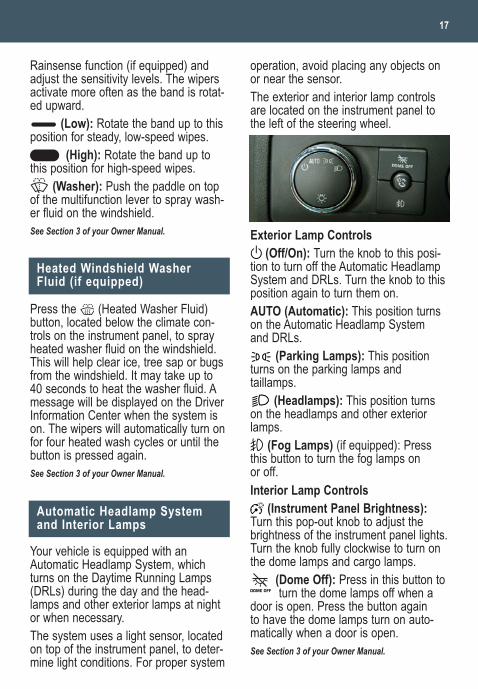
Rainsense™ II Windshield Wipers(if equipped)
The Rainsense II windshield wipers usea moisture sensor to automatically oper-ate the wipers when needed, dependingon driving conditions and the sensitivitysetting. If the system is left on for longperiods, an occasional wipe may occurwithout any moisture on the windshieldto indicate the system is activated.The headlamps also will be turned onautomatically when the Rainsensewipers are active if the exterior lampcontrol knob is in the AUTO position.
Windshield Wiper ControlsThe controls for the windshield wipersare located on the multifunction stalkon the left side of the steering column.The wipers band can be rotated to thefollowing positions:
(Mist): Rotate the band down to thisposition to turn the wipers on for onewipe.
(Off): Rotate the band to this posi-tion to turn off the wipers.
(Delay): Rotate the band up to oneof the delay settings to activate the
Canceling a Remote Start If you wish to turn off the engine insteadof driving after a remote start, do any ofthe following:• Press and hold the button until the
parking lamps turn off.• Press and release the Hazard
Warning Flashers button inside thevehicle. Press the button again toturn off the flashers.
• Turn the key in the ignition switch tothe Run position and then off.
See Section 2 of your Owner Manual.
Note: The Remote Vehicle Start featurewill not operate if the key is in the igni-tion, the hood is open, or the CheckEngine light is illuminated on the instru-ment panel cluster.
(Cancel): Press this button to can-cel the cruise control but retain the setspeed in memory.See Section 3 of your Owner Manual.
operation, avoid placing any objects onor near the sensor.The exterior and interior lamp controlsare located on the instrument panel tothe left of the steering wheel.
Exterior Lamp Controls(Off/On): Turn the knob to this posi-
tion to turn off the Automatic HeadlampSystem and DRLs. Turn the knob to thisposition again to turn them on.AUTO (Automatic): This position turnson the Automatic Headlamp Systemand DRLs.
(Parking Lamps): This positionturns on the parking lamps and taillamps.
(Headlamps): This position turnson the headlamps and other exteriorlamps.
(Fog Lamps) (if equipped): Pressthis button to turn the fog lamps onor off. Interior Lamp Controls
(Instrument Panel Brightness):Turn this pop-out knob to adjust thebrightness of the instrument panel lights.Turn the knob fully clockwise to turn onthe dome lamps and cargo lamps.
(Dome Off): Press in this button toturn the dome lamps off when a
door is open. Press the button againto have the dome lamps turn on auto-matically when a door is open.See Section 3 of your Owner Manual.
17
Heated Windshield Washer Fluid (if equipped)
Press the (Heated Washer Fluid)button, located below the climate con-trols on the instrument panel, to sprayheated washer fluid on the windshield.This will help clear ice, tree sap or bugsfrom the windshield. It may take up to40 seconds to heat the washer fluid. Amessage will be displayed on the DriverInformation Center when the system ison. The wipers will automatically turn onfor four heated wash cycles or until thebutton is pressed again.See Section 3 of your Owner Manual.
Your vehicle is equipped with anAutomatic Headlamp System, whichturns on the Daytime Running Lamps(DRLs) during the day and the head-lamps and other exterior lamps at nightor when necessary.The system uses a light sensor, locatedon top of the instrument panel, to deter-mine light conditions. For proper system
Automatic Headlamp System and Interior Lamps
Rainsense function (if equipped) andadjust the sensitivity levels. The wipersactivate more often as the band is rotat-ed upward.
(Low): Rotate the band up to thisposition for steady, low-speed wipes.
(High): Rotate the band up tothis position for high-speed wipes.
(Washer): Push the paddle on topof the multifunction lever to spray wash-er fluid on the windshield.See Section 3 of your Owner Manual.
Getting to Know Your Sierra18
Power Sliding Rear Window(if equipped)
The power slidingrear window switchis located on theoverhead console.Press and hold theswitch to open therear window. Pulland hold the switch to close the rearwindow.See Section 2 of your Owner Manual.
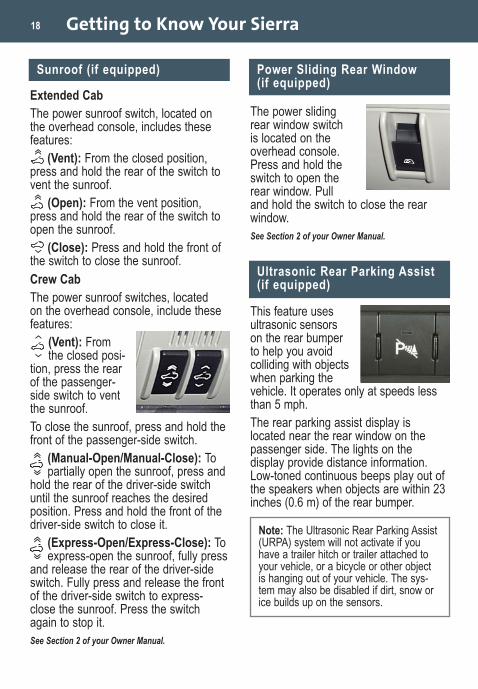
This feature usesultrasonic sensorson the rear bumperto help you avoidcolliding with objectswhen parking thevehicle. It operates only at speeds lessthan 5 mph.The rear parking assist display islocated near the rear window on thepassenger side. The lights on thedisplay provide distance information.Low-toned continuous beeps play out ofthe speakers when objects are within 23inches (0.6 m) of the rear bumper.
Ultrasonic Rear Parking Assist(if equipped)
Extended CabThe power sunroof switch, located onthe overhead console, includes thesefeatures:
(Vent): From the closed position,press and hold the rear of the switch tovent the sunroof.
(Open): From the vent position,press and hold the rear of the switch toopen the sunroof.
(Close): Press and hold the front ofthe switch to close the sunroof.Crew CabThe power sunroof switches, locatedon the overhead console, include thesefeatures:
(Vent): Fromthe closed posi-
tion, press the rearof the passenger-side switch to ventthe sunroof.To close the sunroof, press and hold thefront of the passenger-side switch.
(Manual-Open/Manual-Close): Topartially open the sunroof, press and
hold the rear of the driver-side switchuntil the sunroof reaches the desiredposition. Press and hold the front of thedriver-side switch to close it.
(Express-Open/Express-Close): To express-open the sunroof, fully press
and release the rear of the driver-sideswitch. Fully press and release the frontof the driver-side switch to express-close the sunroof. Press the switchagain to stop it.See Section 2 of your Owner Manual.
Sunroof (if equipped)
Note: The Ultrasonic Rear Parking Assist(URPA) system will not activate if youhave a trailer hitch or trailer attached toyour vehicle, or a bicycle or other objectis hanging out of your vehicle. The sys-tem may also be disabled if dirt, snow orice builds up on the sensors.
19
Universal Home Remote (if equipped)
Automatic DimmingThe automatic dimming feature is turnedon each time the vehicle is started. To
Automatic Dimming RearviewMirror (if equipped)
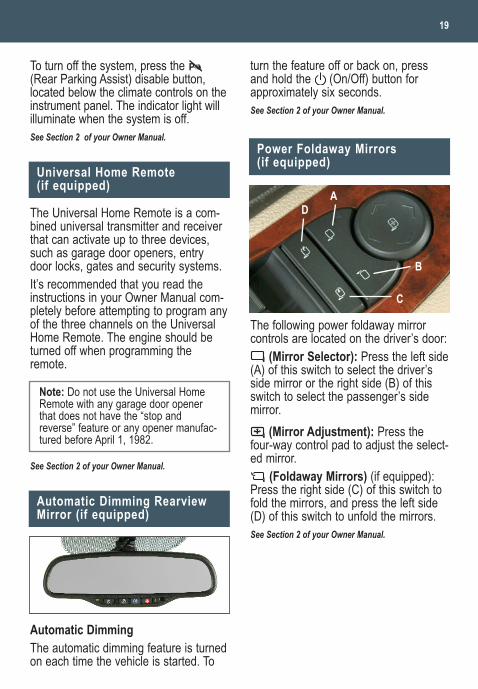
The following power foldaway mirrorcontrols are located on the driver’s door:
(Mirror Selector): Press the left side(A) of this switch to select the driver’sside mirror or the right side (B) of thisswitch to select the passenger’s sidemirror.
(Mirror Adjustment): Press thefour-way control pad to adjust the select-ed mirror.
(Foldaway Mirrors) (if equipped):Press the right side (C) of this switch tofold the mirrors, and press the left side(D) of this switch to unfold the mirrors.See Section 2 of your Owner Manual.
Power Foldaway Mirrors (if equipped)
AD
B
C
The Universal Home Remote is a com-bined universal transmitter and receiverthat can activate up to three devices,such as garage door openers, entrydoor locks, gates and security systems.It’s recommended that you read theinstructions in your Owner Manual com-pletely before attempting to program anyof the three channels on the UniversalHome Remote. The engine should beturned off when programming theremote.
See Section 2 of your Owner Manual.
Note: Do not use the Universal HomeRemote with any garage door openerthat does not have the “stop andreverse” feature or any opener manufac-tured before April 1, 1982.
To turn off the system, press the (Rear Parking Assist) disable button,located below the climate controls on theinstrument panel. The indicator light willilluminate when the system is off.See Section 2 of your Owner Manual.
turn the feature off or back on, pressand hold the (On/Off) button forapproximately six seconds.See Section 2 of your Owner Manual.

Getting to Know Your Sierra20
Folding the Rear Seat (if equipped)
60/40 Split-Bench SeatTo fold either side of the split-benchseat, pull up the seat cushion.To unfold the seat, pull down the seatcushion.
Cargo Management System (if equipped)
The cargo management system is com-posed of three rails located on the frontand sides of the truck bed. It includesfour adjustable cargo tie-downs that canbe placed on the upper and lower slidesof the rail.To adjust a tie-down, pull out the locatorpin and move the tie-down to anotherlocation. Make sure the locator pin linesup with a locator hole on the rail. Oncethe pin is inside the hole, the tie-downwill not move side to side.
The rails are notched at each end toallow the tie-downs to be removed andplaced on another rail. To remove, pullout the locator pin and slide the tie-downto the end of the rail and pull back.
Trailer-Tow Mirrors (if equipped)
The trailer-tow mirrors can be extendedmanually to provide better visibility whentowing a trailer. The lower portion of themirror has a convex (spotter) mirror thatalso can be adjusted manually to pro-vide a better viewing angle.See Section 2 of your Owner Manual.
Rear Vision Camera (if equipped)
When the vehicle is shifted intoReverse, a view of the area behind thevehicle is displayed on the insiderearview mirror or the navigation systemscreen (if equipped).The camera is located near the tailgatehandle. Clean the camera lens withwater and a soft cloth.See Section 2 of your Owner Manual.
Full-Bench SeatTo fold up the full-bench seat, pushdown on the front of the seat cushionwhile pulling down on the release straplocated under the seat cushion. Pull upthe seat cushion until it latches with theseatback.To fold down the full bench seat, pushon the seat cushion and pull the releasestrap. Pull down the seat cushion until itlatches in place.See Section 1 of your Owner Manual.
21
PERFORMANCE & MAINTENANCE
The 6-speed automatic transmission hasa Range Selection Mode feature thatenables the driver to select the rangeof gears desired for the current drivingconditions, such as when driving ondownhill grades.To use this feature, move the shift leverto the Manual (M) position and select alower or higher driving gear using the + / – button on the shift lever. The display on theinstrument panelcluster will showthe current gearselection. The transmis-sion will be limit-ed to the gear selected and lower gears.Gears higher than the gear selected willnot be available.If current vehicle speed is too high ortoo low for the requested gear, the shiftwill not occur.See Section 2 of your Owner Manual.
6-Speed Automatic TransmissionControls (if equipped)
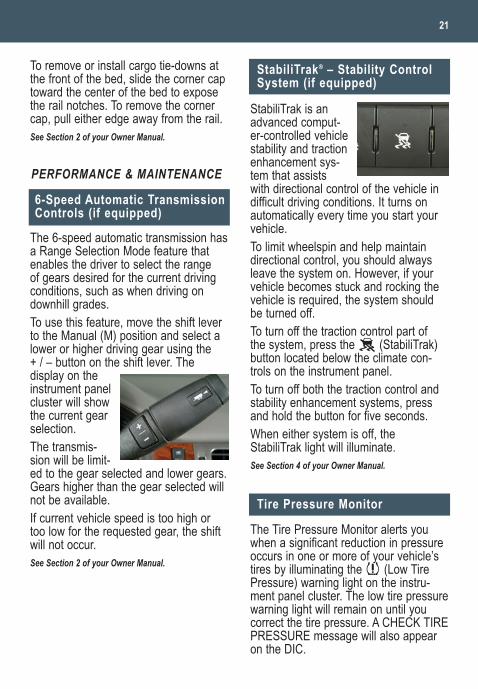
StabiliTrak® – Stability ControlSystem (if equipped)
Tire Pressure Monitor
The Tire Pressure Monitor alerts youwhen a significant reduction in pressureoccurs in one or more of your vehicle’stires by illuminating the (Low TirePressure) warning light on the instru-ment panel cluster. The low tire pressurewarning light will remain on until youcorrect the tire pressure. A CHECK TIREPRESSURE message will also appearon the DIC.
StabiliTrak is anadvanced comput-er-controlled vehiclestability and tractionenhancement sys-tem that assistswith directional control of the vehicle indifficult driving conditions. It turns onautomatically every time you start yourvehicle.To limit wheelspin and help maintaindirectional control, you should alwaysleave the system on. However, if yourvehicle becomes stuck and rocking thevehicle is required, the system shouldbe turned off.To turn off the traction control part ofthe system, press the (StabiliTrak)button located below the climate con-trols on the instrument panel. To turn off both the traction control andstability enhancement systems, pressand hold the button for five seconds.When either system is off, theStabiliTrak light will illuminate.See Section 4 of your Owner Manual.
To remove or install cargo tie-downs atthe front of the bed, slide the corner captoward the center of the bed to exposethe rail notches. To remove the cornercap, pull either edge away from the rail.See Section 2 of your Owner Manual.

The control panel allows you to adjustthe amount of output available to theelectric trailer brakes and to manuallyapply the trailer brakes. ITBC systeminformation is displayed on the DriverInformation Center.The system is pre-wired from thefactory.
See Section 4 of your Owner Manual.
Getting to Know Your Sierra22
Correcting the Tire PressureWhen the low tire pressure warning lightilluminates, you must inflate the tire tothe proper tire pressure (just as youmust refuel the vehicle when the lowfuel warning light illuminates). The Tireand Loading Information label shows thecorrect tire pressure for the tires whenthey’re cold. “Cold” means your vehiclehas been sitting for at least three hoursor driven no more than one mile.You can temporarily clear the DICmessage by acknowledging it withyour DIC controls. However, at the nextvehicle start-up, the DIC message willreappear if the tire pressure has notbeen corrected.During cooler conditions, the low tirepressure warning light may appear whenthe vehicle is first started and then turnoff as you start to drive. This could bean early indicator that your tire pres-sures are getting low and the tires needto be inflated to the proper pressure.
See Section 5 of your Owner Manual.
Note: The Tire Pressure Monitor canalert you about low tire pressure, but itdoesn’t replace normal monthly tiremaintenance.
Integrated Trailer Brake ControlSystem (if equipped)
The controlpanel for theIntegratedTrailer BrakeControl (ITBC)system is locat-ed on theinstrumentpanel to the left of the steering wheel.
If the Tighten Gas Cap message isdisplayed on the Driver InformationCenter (DIC), check that your fuel capis properly installed. If the cap is notsecurely fastened, turn it clockwise untila clicking sound is heard, indicating thatit is properly installed. The DIC messagewill turn off after a few driving trips withthe cap properly installed.See Sections 3 and 5 of your Owner Manual.
Tighten Gas Cap Message
If your vehicle has a yellow gas cap, itwas engineered as a FlexFuel vehiclecapable of running on gasoline or E85fuel. E85 is a blend of 85% ethanol and15% gasoline. E85 is a high-octane,renewable fuel made primarily from corn(see livegreengoyellow.com).
FlexFuel (E85) – Yellow Gas Cap(if equipped)
Note: If the trailer brakes are manuallyapplied, the brake lights do not turn on.
Your FlexFuel vehicle automaticallydetects the current fuel mixture in thefuel tank and adjusts engine settingsaccordingly. You can fill up with gasolineor E85, regardless of which fuel isalready in the tank.E85 is not yet available at all gas sta-tions. E85 holds less energy per gallonthan gasoline, so drivers will experiencelower miles per gallon and cruisingrange when running on E85.
See Section 5 of your Owner Manual.
23
Note: If your vehicle does not have theyellow gas cap, do not use E85.
The Oil Life System calculates engine oillife based on vehicle use and displaysCHANGE ENGINE OIL SOON on theDriver Information Center (DIC) when it’snecessary to change your engine oil andfilter. The Oil Life System should bereset to 100% only following an oilchange.To reset the Oil Life System:1. Turn on the ignition.2. Press the (Vehicle Information)
button until the DIC displays OIL LIFEREMAINING.
3. Press and hold the (Set/Reset)button until 100% is displayed.
4. Turn off the ignition.See Section 5 of your Owner Manual.
Resetting the Oil Life System
OWNER INFORMATION
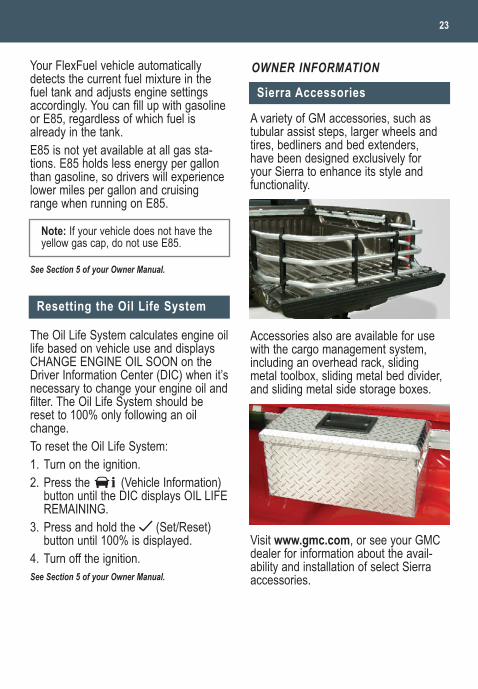
Sierra Accessories
A variety of GM accessories, such astubular assist steps, larger wheels andtires, bedliners and bed extenders,have been designed exclusively foryour Sierra to enhance its style andfunctionality.
Accessories also are available for usewith the cargo management system,including an overhead rack, slidingmetal toolbox, sliding metal bed divider,and sliding metal side storage boxes.
Visit www.gmc.com, or see your GMCdealer for information about the avail-ability and installation of select Sierraaccessories.
Getting to Know Your Sierra24
My GMLink
1-800-GMC-8782(1-800-462-8782)TTY Users: 1-888-889-2438As the proud owner of a new GMC vehicle,you are automatically enrolled in the GMCRoadside Assistance program. This value-added service is intended to provide youwith peace of mind as you drive in the cityor travel the open road. GMC’s Roadside Assistance toll-freenumber is staffed by a team of technicallytrained advisors, who are available 24hours a day, 365 days a year. The advisorscan provide minor repair information ormake arrangements to tow your vehicle tothe nearest GMC dealer.GMC will provide the following servicesfor 5 years/100,000 miles at no expenseto you:• Fuel delivery• Lockout service (identification required)• Tow to nearest dealership for warranty
service• Flat tire assistance• Jump startsIn many instances, mechanical failures arecovered under GMC’s comprehensivewarranty. However, when other servicesare utilized, our advisors will explain anypayment obligations you might incur.
The GMC Owner Center at My GMLink isa complimentary service for GMC owners,a one-stop resource to enhance your GMCownership experience. Exclusive memberbenefits include online service reminders,vehicle maintenance tips, online ownermanual, special privileges and more. Signup today at www.mygmlink.com.
For prompt and efficient assistance whencalling, please provide the following infor-mation to the advisor:• Location of the vehicle• Telephone number and your location• Vehicle model, year and color• Vehicle mileage• Vehicle Identification Number (VIN)• Vehicle license plate numberGMC reserves the right to limit servicesor reimbursement to an owner or driverwhen, in GMC’s judgment, the claimsbecome excessive in frequency or typeof occurrence.
Roadside Assistance and OnStar®
(if equipped)If you have a current OnStar subscription,press the OnStar button and the vehiclewill send your current GPS location to anOnStar Advisor who will speak to you,assess your problem, contact RoadsideAssistance and relay your exact locationso you will get the help you need.
Certain restrictions, precautions and safety procedures apply to your vehicle. Please read your OwnerManual for complete instructions. All information contained herein is based on information available at thetime of printing and is subject to change without notice. Copyright 2008 by GM Corp. All rights reserved.
15911398 A!15911398=A!
Roadside Assistance