Embed Size (px)
Citation preview

Cover Page
Content Server Enterprise Search10g Release 3 (10.1.3.3.0)
March 2007

Content Server Enterprise Search, 10g Release 3 (10.1.3.3.0)Copyright © 2007, Oracle. All rights reserved.
Contributing Authors: Contributing Author, Contributing Author, Contributing Author
Contributors: Contributor, Contributor, Contributor
The Programs (which include both the software and documentation) contain proprietary information; they are provided under a license agreement containing restrictions on use and disclosure and are also protected by copyright, patent, and other intellectual and industrial property laws. Reverse engineering, disassembly, or decompilation of the Programs, except to the extent required to obtain interoperability with other independently created software or as specified by law, is prohibited.
The information contained in this document is subject to change without notice. If you find any problems in the documentation, please report them to us in writing. This document is not warranted to be error-free. Except as may be expressly permitted in your license agreement for these Programs, no part of these Programs may be reproduced or transmitted in any form or by any means, electronic or mechanical, for any purpose.
If the Programs are delivered to the United States Government or anyone licensing or using the Programs on behalf of the United States Government, the following notice is applicable:
U.S. GOVERNMENT RIGHTS Programs, software, databases, and related documentation and technical data delivered to U.S. Government customers are "commercial computer software" or "commercial technical data" pursuant to the applicable Federal Acquisition Regulation and agency-specific supplemental regulations. As such, use, duplication, disclosure, modification, and adaptation of the Programs, including documentation and technical data, shall be subject to the licensing restrictions set forth in the applicable Oracle license agreement, and, to the extent applicable, the additional rights set forth in FAR 52.227-19, Commercial Computer Software--Restricted Rights (June 1987). Oracle USA, Inc., 500 Oracle Parkway, Redwood City, CA 94065.
The Programs are not intended for use in any nuclear, aviation, mass transit, medical, or other inherently dangerous applications. It shall be the licensee's responsibility to take all appropriate fail-safe, backup, redundancy and other measures to ensure the safe use of such applications if the Programs are used for such purposes, and we disclaim liability for any damages caused by such use of the Programs.
Oracle, JD Edwards, PeopleSoft, and Siebel are registered trademarks of Oracle Corporation and/or its affiliates. Other names may be trademarks of their respective owners.
The Programs may provide links to Web sites and access to content, products, and services from third parties. Oracle is not responsible for the availability of, or any content provided on, third-party Web sites. You bear all risks associated with the use of such content. If you choose to purchase any products or services from a third party, the relationship is directly between you and the third party. Oracle is not responsible for: (a) the quality of third-party products or services; or (b) fulfilling any of the terms of the agreement with the third party, including delivery of products or services and warranty obligations related to purchased products or services. Oracle is not responsible for any loss or damage of any sort that you may incur from dealing with any third party.

Table of Contents
Chapter 1: IntroductionOverview . . . . . . . . . . . . . . . . . . . . . . . . . . . . . . . . . . . . . . . . . . . . . . . . . . .1-1
About Content Server. . . . . . . . . . . . . . . . . . . . . . . . . . . . . . . . . . . . . . . . . .1-1
What’s New . . . . . . . . . . . . . . . . . . . . . . . . . . . . . . . . . . . . . . . . . . . . . . . . .1-2
About This Guide . . . . . . . . . . . . . . . . . . . . . . . . . . . . . . . . . . . . . . . . . . . . .1-2Intended Audience. . . . . . . . . . . . . . . . . . . . . . . . . . . . . . . . . . . . . . . . .1-3Conventions. . . . . . . . . . . . . . . . . . . . . . . . . . . . . . . . . . . . . . . . . . . . . .1-3Chapter Overviews . . . . . . . . . . . . . . . . . . . . . . . . . . . . . . . . . . . . . . . .1-4
Chapter 2: Activating Content ServerOverview . . . . . . . . . . . . . . . . . . . . . . . . . . . . . . . . . . . . . . . . . . . . . . . . . . .2-1
Content Server Overview . . . . . . . . . . . . . . . . . . . . . . . . . . . . . . . . . . . . . . .2-1Understanding Master-to-Master Proxied Servers . . . . . . . . . . . . . . . .2-2
Terminology . . . . . . . . . . . . . . . . . . . . . . . . . . . . . . . . . . . . . . . . . .2-2Understanding Outgoing Providers . . . . . . . . . . . . . . . . . . . . . . . . . . . .2-3
Multi-Instance Intercommunication . . . . . . . . . . . . . . . . . . . . . . . . .2-3Change Notification Synchronization . . . . . . . . . . . . . . . . . . . . . . .2-3
User Interface Functions . . . . . . . . . . . . . . . . . . . . . . . . . . . . . . . . . . . .2-4Understanding Security . . . . . . . . . . . . . . . . . . . . . . . . . . . . . . . . . . . . .2-5
Pre-Activation Tasks and Considerations . . . . . . . . . . . . . . . . . . . . . . . . . .2-6
Setting Up Content Server . . . . . . . . . . . . . . . . . . . . . . . . . . . . . . . . . . . . . .2-8Adding a New Virtual Directory . . . . . . . . . . . . . . . . . . . . . . . . . . . . . . .2-8Configuring a Provider on the Master Instance . . . . . . . . . . . . . . . . . .2-10Configuring a Provider on a Proxy Instance . . . . . . . . . . . . . . . . . . . .2-12Enabling Distributed Search Capabilities. . . . . . . . . . . . . . . . . . . . . . .2-13Updating the Master Instance Portal Page . . . . . . . . . . . . . . . . . . . . .2-14
Performing Maintenance Functions . . . . . . . . . . . . . . . . . . . . . . . . . . . . . .2-14Setting Availability of Searchable Instances . . . . . . . . . . . . . . . . . . . .2-14Notifying the Master Instance of Changes. . . . . . . . . . . . . . . . . . . . . .2-15Monitoring Outgoing Providers . . . . . . . . . . . . . . . . . . . . . . . . . . . . . .2-16
Content Server Enterprise Search iii

Table of Contents
Chapter 3: Using Content ServerOverview . . . . . . . . . . . . . . . . . . . . . . . . . . . . . . . . . . . . . . . . . . . . . . . . . . .3-1
Searching for Files Using Content Server . . . . . . . . . . . . . . . . . . . . . . . . . .3-1About Searching for Files . . . . . . . . . . . . . . . . . . . . . . . . . . . . . . . . . . .3-1Home Page with Multiple Instances. . . . . . . . . . . . . . . . . . . . . . . . . . . .3-2Search Page . . . . . . . . . . . . . . . . . . . . . . . . . . . . . . . . . . . . . . . . . . . . .3-3Performing a Quick Search . . . . . . . . . . . . . . . . . . . . . . . . . . . . . . . . . .3-4Performing a Detailed Search . . . . . . . . . . . . . . . . . . . . . . . . . . . . . . . .3-4
Viewing Content Server Results . . . . . . . . . . . . . . . . . . . . . . . . . . . . . . . . .3-5Search Results Page . . . . . . . . . . . . . . . . . . . . . . . . . . . . . . . . . . . . . . .3-5
Multiple-Instance Search Results Table . . . . . . . . . . . . . . . . . . . . .3-6Single-Instance Search Results Table . . . . . . . . . . . . . . . . . . . . . .3-6
Viewing All Results for One Instance. . . . . . . . . . . . . . . . . . . . . . . . . . .3-8
Index
iv Content Server Enterprise Search

C h a p t e r
1.INTRODUCTION
OVERVIEWThis section covers the following topics:
About Content Server (page 1-1)
What’s New (page 1-2)
About This Guide (page 1-2)
ABOUT CONTENT SERVEROracle Content Server supports improved system integration and scalability for high volumes of content. This is accomplished by providing the capability to navigate seemlessly between multiple Content Servers and search distributed content. The servers may be locally placed or remotely positioned in diverse geographic sites. Either way, the scalable flexibility of Content Server enables users to expand their search capabilities.
A typical use for Content Server is when individual departments in a large organization each have their own Content Server instance but need to share information. For example, if a consumer from one department requires information from another department to create a year-end report, that user can search for the specific documents that are needed across several Content Servers. The system administrator determines the number of searchable Content Server instances that are available to each consumer.
Content Server Enterprise Search 1-1
Introduction
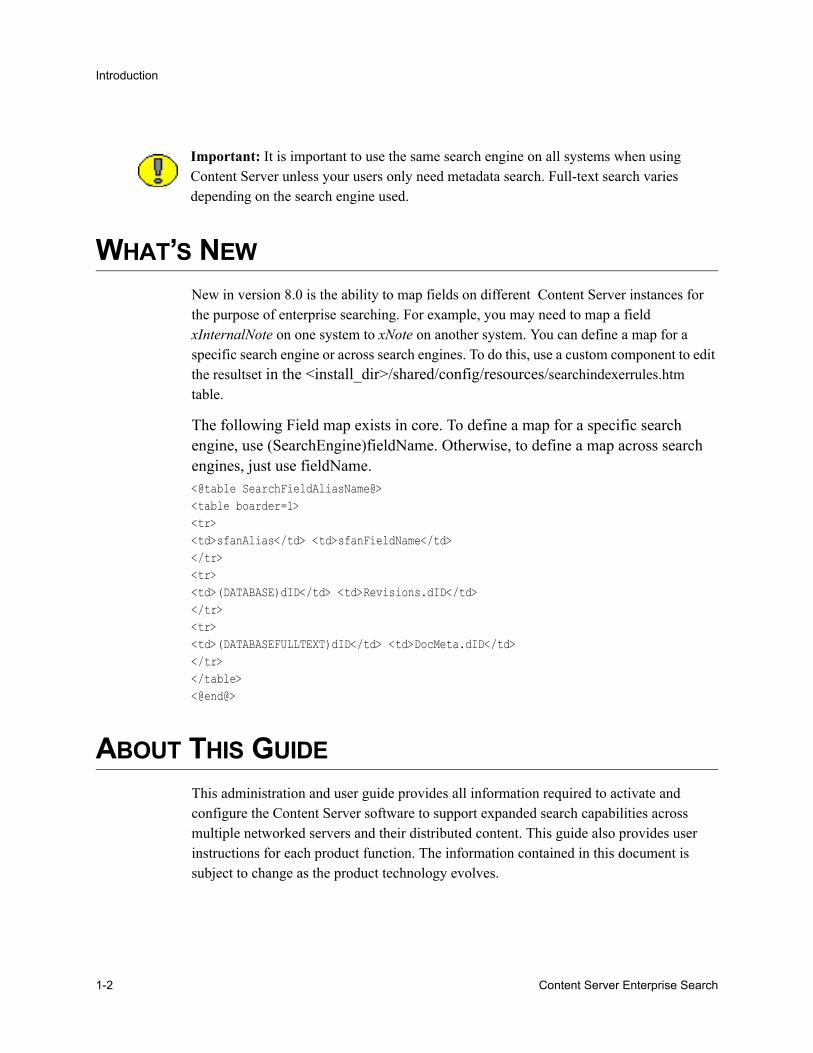
WHAT’S NEWNew in version 8.0 is the ability to map fields on different Content Server instances for the purpose of enterprise searching. For example, you may need to map a field xInternalNote on one system to xNote on another system. You can define a map for a specific search engine or across search engines. To do this, use a custom component to edit the resultset in the <install_dir>/shared/config/resources/searchindexerrules.htm table.
The following Field map exists in core. To define a map for a specific search engine, use (SearchEngine)fieldName. Otherwise, to define a map across search engines, just use fieldName. <@table SearchFieldAliasName@><table boarder=1><tr><td>sfanAlias</td> <td>sfanFieldName</td></tr><tr><td>(DATABASE)dID</td> <td>Revisions.dID</td></tr><tr><td>(DATABASEFULLTEXT)dID</td> <td>DocMeta.dID</td></tr></table><@end@>
ABOUT THIS GUIDEThis administration and user guide provides all information required to activate and configure the Content Server software to support expanded search capabilities across multiple networked servers and their distributed content. This guide also provides user instructions for each product function. The information contained in this document is subject to change as the product technology evolves.
Important: It is important to use the same search engine on all systems when using Content Server unless your users only need metadata search. Full-text search varies depending on the search engine used.
1-2 Content Server Enterprise Search

Introduction
Intended AudienceThis administration and user guide is intended for two primary types of users: consumers who need to find, view and print content items and system administration individuals who are responsible for setting up and maintaining Content Server. In addition, this manual will be useful for database administrators who maintain the integrity of the document information stored in the Content Servers. This document assumes that you are familiar with Universal Content Management products and the architecture of the Content Server.
ConventionsThe following conventions are used throughout this guide:
The notation <Install_Dir>/ is used to refer to the location on your system where the Content Server instance is installed.
Forward slashes (/) are used to separate the directory levels in a path name. A forward slash will always appear after the end of a directory name.
Content Server Enterprise Search 1-3

Introduction
Notes, technical tips, important notices, and cautions use these conventions:
Chapter Overviews
Chapter 2 (Activating Content Server)This chapter provides instructions to activate, setup and configure the applicable software to enable the use of Content Server. It also includes instructions for configuring outgoing providers on master and proxy instances, announcing content changes made in a proxied Content Server instance, and establishing the number of searchable instances and their user availability.
Chapter 3 (Using Content Server)This chapter provides instructions to use Content Server features. These include searching for files using simple, detailed and full-text criteria. It also includes instructions for performing a quick search and viewing the search results for single or multiple Content Server instances.
Symbols Description
This is a note. It is used to bring special attention to information.
This is a technical tip. It is used to identify information that can be used to make your tasks easier.
This is an important notice. It is used to identify a required step or required information.
This is a caution. It is used to identify information that might cause loss of data or serious system problems.
1-4 Content Server Enterprise Search

C h a p t e r
2.ACTIVATING CONTENT SERVER
OVERVIEWThis section covers the following topics:
Content Server Overview (page 2-1)
Pre-Activation Tasks and Considerations (page 2-6)
Setting Up Content Server (page 2-8)
Performing Maintenance Functions (page 2-14)
CONTENT SERVER OVERVIEWContent Server enables users to perform a metadata or full-text search across multiple Content Server instances and have the results displayed on a single results page. Users define their search criteria and select the Content Server instances to be included in the search. Results are returned using the same format as the basic Content Server Query Results page but the found content items are grouped according to the specific instances in which they currently reside.
Content Server supports these expanded search capabilities through the use of system administrator-defined outgoing providers. Properly configured providers for the master and all proxied servers is critical to ensuring proper communication within the system. The defined outgoing providers are required to enable distributed search capabilities as well as to synchronize inter-server notification of system changes pertaining to both content items and users.
Content Server Enterprise Search 2-1

Activating Content Server
Understanding Master-to-Master Proxied ServersMaster/proxied server configurations are necessary when you are setting up a Content Server environment in combination with Content Server. Using the master/proxied server configuration, a number of Content Servers can be set up as logically separate entities, but still be able to search the content databases of all the Content Server instances with a single search query.
A master-to-master proxied server configuration designates one server as the master and one or more others as proxied server(s). Proxied servers are separate Content Server instances that have their own content database, Web Layout, and Vault but share the main communication interface and page delivery engine with the master server. In combination with Content Server, this enables a master server to search across multiple master servers, while the proxied server still has the ability to function as a master and control its own proxied servers.
Terminology
Term Definition
Metadata
Information that you enter in the Check In Form to describe a file. These metadata fields are, typically, found on the Content Information page, Info Update Form, and the Check In Form, such as: File Type, Title, Author, Security Group, and so forth.
Master instanceA master server, or a controlling instance, is usually configured as an outgoing provider on the Provider page. However you can also configure a master as a proxied instance.
Proxied instanceA proxied server, or a controlled instance, is usually configured as an outgoing provider on the Provider page. However, you can also configure a proxied instance as a master instance.
2-2 Content Server Enterprise Search

Activating Content Server
Understanding Outgoing ProvidersA provider is an Application Programming Interface (API) that establishes a connection to outside entities that includes other Content Server instances. The Oracle system allows you to create Several types of providers. However, you will only need to add outgoing providers to fully activate and enable Content Server in your system. The outgoing providers defined for the master and proxied servers allow communication between all Content Server instances. Outgoing providers can also optionally be configured to provide inter-server notification of user or search collection changes.
Multi-Instance IntercommunicationOne of the functions of an outgoing provider is to enable two or more instances of Content Server to communicate with each other. This inter-instance communication is necessary to support distributed search capabilities. Both the master and proxied server(s) have outgoing providers defined. The master instance must have an outgoing provider defined for each proxied instance that requires a connection to enable content database searches. Similarly, each proxied instance must have an outgoing provider defined for the master instance.
Change Notification SynchronizationAn alert option called “Notify Target” is used to inform master instances when changes are made to the Content Information page. This option is applicable only to the outgoing provider type, and you select it on the Creating Outgoing Providers page. You can assign this option either initially during the Content Server implementation, or at any time when adding additional or updating existing outgoing providers. The “target” to receive the notification is typically the master Content Server instance.
The purpose of the Notify Target option is to ensure that proxied instances notify the master instance when user information or content item information changes occur. This ensures that the information between master and proxied instances is automatically synchronized and remains consistent. With properly configured outgoing providers, the master instance monitors each proxied instance for change notifications.
Note: In master-to-master proxied server configurations, using appropriately defined outgoing providers, a server can act as both the master and proxied instance. For example, a proxied master server can function as a proxy to another master but can also control its own proxied servers.
Content Server Enterprise Search 2-3

Activating Content Server
The Notify Target option offers two types of subjects for change notifications:
UsersWhen enabled, the Users option ensures that the proxied content instance associated with this outgoing provider will notify the corresponding master instance when user information changes.
Released DocumentsWhen enabled, the Released Documents option ensures that the proxied content instance associated with this outgoing provider will notify the corresponding master instance when content item information changes.
The Notify Target option proactively notifies the master instance of selected changes and automatically update the applicable information. This means that caching is not used. If, for example, the Released Documents option is enabled, then any time the search collection changes, the master instance is notified about the change. Likewise, enabling the Users option means that new or updated user information is proactively updated. By default, these notification actions override the search and user information caching functions.
User Interface FunctionsWith very few exceptions, the basic functions of Content Server are similar to the Content Server core search functionality. The Content Server pages and navigation procedures are accessed and used the same way as the corresponding Content Server features. The Oracle system distinguishes four types of users and Content Server functionality is based on these user types as follows:
Administrator / sub-administrator functions:Administrators are individuals who set up, maintain, and modify the configuration of the content management system and its user logins. Administrators can also set up sub-level administrators to help manage the system by performing a subset of administrative tasks. The sub-administrators maintain a portion of the system.
Specific Oracle system navigation menu links and their corresponding pages are only visible to those who have administration privileges which enable the users to perform
Important: It is assumed that most customers will want to enable the Notify Target option and one or both of the available subject options. However, if you are trying to streamline your system’s performance, you may not want this option enabled. Conversely, if you continually need the absolute current document versions or user information that is available, you will want these options enabled.
2-4 Content Server Enterprise Search
Activating Content Server
various system management and maintenance tasks. In Content Server, these tasks include:• Adding applicable virtual directories• Configuring outgoing providers• Setting the number of searchable instances available to consumers• Setting up master/proxy content change notifications• Monitoring the Outgoing Providers
For more detailed information about the applicable administrator and sub-administrator functions, refer to Setting Up Content Server (page 2-8) and Performing Maintenance Functions (page 2-14).
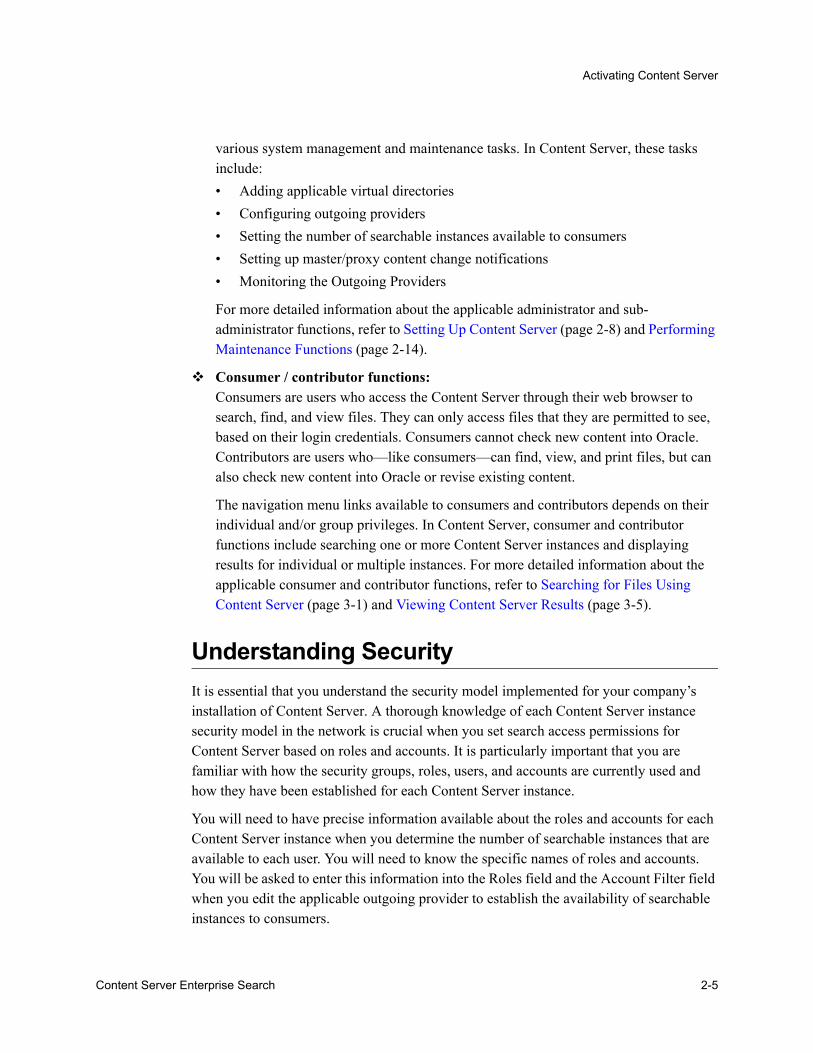
Consumer / contributor functions:Consumers are users who access the Content Server through their web browser to search, find, and view files. They can only access files that they are permitted to see, based on their login credentials. Consumers cannot check new content into Oracle. Contributors are users who—like consumers—can find, view, and print files, but can also check new content into Oracle or revise existing content.
The navigation menu links available to consumers and contributors depends on their individual and/or group privileges. In Content Server, consumer and contributor functions include searching one or more Content Server instances and displaying results for individual or multiple instances. For more detailed information about the applicable consumer and contributor functions, refer to Searching for Files Using Content Server (page 3-1) and Viewing Content Server Results (page 3-5).
Understanding SecurityIt is essential that you understand the security model implemented for your company’s installation of Content Server. A thorough knowledge of each Content Server instance security model in the network is crucial when you set search access permissions for Content Server based on roles and accounts. It is particularly important that you are familiar with how the security groups, roles, users, and accounts are currently used and how they have been established for each Content Server instance.
You will need to have precise information available about the roles and accounts for each Content Server instance when you determine the number of searchable instances that are available to each user. You will need to know the specific names of roles and accounts. You will be asked to enter this information into the Roles field and the Account Filter field when you edit the applicable outgoing provider to establish the availability of searchable instances to consumers.
Content Server Enterprise Search 2-5

Activating Content Server
For more detailed information about setting the available search parameters, refer to Setting Availability of Searchable Instances (page 2-14). For more detailed information about designing, implementing, and configuring security models, refer to the Content Server System Administration Guide and the Content Server Infrastructure, Integration, and Security Guide.
PRE-ACTIVATION TASKS AND CONSIDERATIONSThere are a few tasks and considerations that need to be considered before setting up Content Server and configuring the required outgoing providers. The tasks and considerations below are related to properly setting up your servers and installing Content Server. Make sure that you read, understand, and comply with each of them before setting up Content Server.
Install two or more master Content Servers, all of the same version. (All servers in the network that are designated to be included in the distributed search activities must have a licensed Content Server installed.)
Each Content Server instance must have a unique relative web root name.
Each server must have access to the other server(s) in the network that are selected to be included in the distributed search activities. Also, the server that will be searching the content databases (the designated master server) must have access to the file system of the server(s) that will be providing the data (each proxied server).
Important: If the Content Server instances in your network all use the same relative web root directory (i.e. “stellent”), then you will need to rename the relative web root directories on all but one Content Server instance (the master instance). The relative web root directory names must be changed in the configuration file and on the corresponding web servers and the new names must be unique (such as stellent1, stellent2, etc.). For detailed information about installation requirements for the Content Server software, refer to the Content Server Installation Guide for Microsoft Windows or the Content Server Installation Guide for UNIX.
Note: If your server configuration already consists of a master instance of the Content Server and one or more installed proxied Content Server instances, you will not need to change the relative web root directory name in any of your Content Server instances.
2-6 Content Server Enterprise Search

Activating Content Server
There are several methods you can use to accomplish this. Implement the applicable method depending on your Content Server configuration.
If you are using a master/proxy configuration:• Method 1 — Windows and UNIX:
Make the Web Layout directory (weblayout) of the proxied server accessible to the master Content Server. (This is the most frequently used approach.)
• Method 2— Windows:Create a user account on the proxied server(s) that has access to the IIS services and the weblayout folder of the master server.
• Method 3— Windows:Enable the guest account on the proxied server(s) as follows:
1. Select Start—Settings—Control Panel—Administrative Tools—Computer Management—System Properties.
2. Open the Local Users and Groups directory.
3. Open the Users directory.
4. Right-click on Guest and select Properties. Deselect the checkbox for Account is Disabled and click OK.
If you are using a master/master configuration:• Windows and UNIX:
Make the Web Layout directory (weblayout) of the proxied server accessible to the master Content Server. (This is the most frequently used approach.)
The following information will be necessary to create and add outgoing providers for the master and proxied server(s):
• The server host name (for example, StellentMaster or StellentProxy)
• The complete network IP address (for example, 61.45.14.104) or server host name of each Content Server instance
• The HTTP address (for example, intradoc:90)
• The correct server port on which each outgoing provider communicates with other entities (for example, 4444)
• The correct instance name of each Content Server instance
• The relative web root name of each Content Server instance which is the shortcut name to enter into a browser to access the web page (for example, /stellent_2/)
Content Server Enterprise Search 2-7

Activating Content Server
SETTING UP CONTENT SERVERThe following list summarizes the steps required to set up Content Server:
Create a new virtual directory to the master server’s web server for the proxied server. This enables the master server to browse to the Web Layout directory of the proxied server. Refer to Adding a New Virtual Directory (page 2-8).
Configure an outgoing provider on the master server for each applicable proxied server in the network. This facilitates communication between the master and proxied servers, allows the master server to search the content database of the proxied servers, and enables the master server to receive notifications from the proxied servers about changes in user or content information. Refer to Configuring a Provider on the Master Instance (page 2-10).
Configure an outgoing provider on each applicable proxied server in the network for the master server. This facilitates communication between the master and proxied servers, allows the content database of the proxied servers to be searched by the master server, and enables the proxied servers to send notifications about changes in user or content information to the master server. Refer to Configuring a Provider on a Proxy Instance (page 2-12).
Enable the configuration parameter in the master instance that permits distributed search capabilities across the network of Content Servers. Refer to Enabling Distributed Search Capabilities (page 2-13).
Refresh the Content Server portal pages to reflect the changes related to activating Content Server. Refer to Updating the Master Instance Portal Page (page 2-14).
Adding a New Virtual Directory
Add a new virtual directory for the proxied server to the master server’s web server. The relative web root for the new virtual directory must be the same as the relative web root of the proxied server, and it must point to the weblayout directory of the proxied server.
Important: As mentioned earlier in the Pre-Activation Tasks and Considerations section, each server in the network must have a unique relative web root name. This must be verified before activating Content Server.
2-8 Content Server Enterprise Search

Activating Content Server
To add a new virtual directory:
1. Open the Internet Information Services (IIS) web server on the master server:
Start—Control Panel—Administrative Tools—Internet Information Services.
2. Double-click the server.
3. Access the Virtual Directory Creation Wizard:
a. Open the Web Sites directory.
b. Right-click on Default Web Site.
c. Select New.
d. Select Virtual Directory and click Next.
4. In the Alias field, type the name of the relative web root of the proxied server (the Content Server to be searched). This must exactly match the virtual directory (relative web root) of the proxied server (the machine you are trying to connect to). This Alias must be unique.
For example: If the proxy server has a relative web root of StellentP and the master server has a relative root of StellentM, you would type StellentP into the Alias field.
Click Next.
5. Enter the path to the weblayout directory on the proxied server. (If you mapped a drive to the proxy server you can browse to the weblayout directory on that mapped drive.)
Click Next.
6. Select Next to accept the defaults for the Access Permissions window.
7. Select Finish to complete the creation process.
8. Edit the new virtual directory:
a. Double-click the Default Web Site.
Important: If you are using two Content Server master instances, you will not be able to select the second master’s weblayout directory in step 5. In this case, you must:
1. Ensure that the second master has a unique instance name and a different relative web root than the first master.
2. Ensure that the second master’s weblayout directory is shared. If you are using IIS, the new virtual directory for the second master must point to its weblayout directory via a UNC path (for example, \\<2ndmaster_machine_name>\weblayout).
Content Server Enterprise Search 2-9

Activating Content Server
b. Right-click the new virtual directory (in this case, StellentM) and select Properties.
c. Select the Documents tab. Remove Default.htm, Default.asp, Index.htm, and iisstart.asp from the list.
d. Click the Add button and add portal.htm.
e. Click Apply and then OK.
f. Restart the IIS service.
Configuring a Provider on the Master InstanceTo communicate with the proxied servers and to receive notification of changes, you need to configure an outgoing provider on the master instance for each applicable proxied Content Server instance in the network.
Use the following procedure to configure an outgoing provider on the master instance:
1. Browse to:
Content Server/<instance>/Utilities/SystemProperties.
2. Select the Options tab, enable the Enable Content Server on standard query pages option and click OK.
3. Open a browser window and access the master Content Server’s Administration page. Click the Providers link.
4. In the Create a New Provider section, locate the outgoing provider type and select Add from the Action column.
Note: To successfully implement Content Server in a network with multiple servers configured with independent Content Servers, a master/proxied environmental architecture must exist (i.e. one designated master server and one or more additional configured proxied servers). During the initial installation of a new Content Server, it can be installed as either a master or a proxied instance.
If you initially set up your servers to accommodate Content Server, then your network already has a designated master server. Excluding the master instance of the Content Server, if all additional Content Server instances in your network were installed as proxied Content Server instances, this outgoing provider already exists for each applicable Content Server instance.
2-10 Content Server Enterprise Search
Activating Content Server
5. On the Add Outgoing Provider page, enter applicable information pertaining to the proxied server in the following fields:
• Provider Name (The name of this provider, which will become a subdirectory in the <install_dir>/data/providers/ directory. For example, StellentMaster.)
• Provider Description (A user-friendly description of the provider. For example, Provider allows for searches on proxy from master.)
• Server Host Name (The server host name of the proxy instance. This entry can also be an IP address. For example, StellentProxy.)
• HTTP Server Address (The HTTP address of the proxy instance. For example, StellentProxy.)
• Server Port (The port on which the provider will communicate with the proxy instance. For example, 4444.)
• Instance Name (The instance name of the proxy instance. For example, StellentProxy.)
• Relative Web Root (The shortcut to enter in a browser for the web page. For example, /StellentP/.)
6. In the Server Options section, enable the Proxied option.
7. In the Search Options section, enable the Content Serverable option.
8. Click Add.
9. Restart the master Content Server to activate these changes.
10. When the master Content Server comes back up, return to the Administration page, click the Providers link, and verify that the connection status is good.
Note: Make sure to enter the correct port that the proxied Content Server runs on as well as the instance name of the proxy instance and the relative web root that was created earlier within IIS. For example, /StellentP/. (Refer to Adding a New Virtual Directory (page 2-8).
Content Server Enterprise Search 2-11

Activating Content Server
Configuring a Provider on a Proxy InstanceTo communicate with the master server and to provide notification of changes, you need to configure an outgoing provider on each proxied instance for the master Content Server instance in the network.
Use the following procedure to configure an outgoing provider on each proxy instance:
1. Open a browser window and access the proxy Content Server’s Administration page. Click the Providers link
2. In the Create a New Provider section, locate the outgoing provider type and select Add from the Action column.
3. On the Add Outgoing Provider page, enter applicable information pertaining to the master server in the following fields:
• Provider Name (The name of this provider, which will become a subdirectory in the <install_dir>/data/providers/ directory. For example, StellentProxy.)
• Provider Description (A user-friendly description of the provider. For example, Notifies the master of changes in users/docs.)
• Server Host Name (The server host name of the master instance. This entry can also be an IP address. For example, StellentMaster.)
• HTTP Server Address (The HTTP address of the master instance. For example, StellentMaster.)
Note: To successfully implement Content Server in a network with multiple servers configured with independent Content Servers, a master/proxied environmental architecture must exist (i.e. one designated master server and one or more additional configured proxied servers). During the initial installation of a new Content Server, it can be installed as either a master or a proxied instance.
If you initially set up your servers to accommodate Content Server, then your network already has a designated master server. Excluding the master instance of the Content Server, if all additional Content Server instances in your network were installed as proxied Content Server instances, this outgoing provider already exists for each applicable Content Server instance.
Note: Make sure to enter the correct port that the master Content Server runs on as well as the instance name of the master instance and the correct relative web root. For example, /StellentM/.
2-12 Content Server Enterprise Search

Activating Content Server
• Server Port (The port on which the provider will communicate with the proxy instance. For example, 4444.)
• Instance Name (The instance name of the master instance. For example, StellentMaster.)
• Relative Web Root (The shortcut to enter in a browser for the web page. For example, /StellentM/.)
4. In the Server Options section, enable the Notify Target, Users, and/or Released Documents options.
5. Click Add.
6. Restart the proxied Content Server to activate these changes.
7. When the proxied Content Server comes back up, return to the Administration page, click the Providers link, and verify that the connection status is good.
Enabling Distributed Search CapabilitiesUse the following procedure to enable the distributed search capabilities on the master Content Server instance:
1. In the master Content Server instance, select the Enable Content Server on standard query pages option using one of the following methods:
• Method 1 — Windows:Select Start—All Programs—Content Server—<instance>—Utilities—System Properties. Select the check box on the Options tab and click OK.
• Method 2— Windows and UNIX:From the Content Server Administration page, click Admin Server, click the <instance_name> button, and click General Configuration in the left navigation bar. Select the check box and click Save.
2. Restart the Content Server.
Note: Although the Notify Target option is optional, it is necessary to enable this option (and one or both subject options) if you want the proxied servers in the network to proactively forward notifications to the master instance when changes are made to user information and/or content item information. For more information about these provider options, refer to Understanding Outgoing Providers (page 2-3).
Content Server Enterprise Search 2-13
Activating Content Server
Updating the Master Instance Portal PageAfter Content Server has been activated, the standard Content Server portal page still displays. It is necessary to update the Portal page in the Web Layout Editor on the master Content Server instance to display the user-selectable searchable instances. Setting up the outgoing providers ensures that all of the proxied servers can be accessed.
Update the Portal page on the master Content Server instance using one of the following methods:
Method 1 — Windows:
1. To start the Web Layout Editor on the master server, select Start—All Programs— Content Server—<instance>—Applications—Web Layout Editor
2. In the Options menu select Update Portal.
3. Click OK to complete the rebuild.
Method 2— Windows and UNIX:
1. Click the Web Layout Editor from the Administration page
2. Select Options—Update Portal and click OK
PERFORMING MAINTENANCE FUNCTIONSIn addition to setting up and activating Content Server, administrator tasks also involve maintaining and managing Content Server and Content Server. This section provides the procedures used for the applicable Content Server administrative tasks.
Setting Availability of Searchable InstancesThe system administrator is responsible for determining the number of searchable instances that can be made available to each consumer. Use the following procedure to set these constraints:
1. Navigate to the Providers page from the Administration page.
2. Click the Info link for the instance to include in Content Server.
3. Click Edit.
4. Select Content Serverable.
2-14 Content Server Enterprise Search

Activating Content Server
5. To limit access to those users who have particular roles and/or accounts:
• Enter roles in the Required Roles field.
• Enter accounts in the Account Filter field.
6. Click Update.
7. Restart all re-configured Content Servers.
Notifying the Master Instance of ChangesThe Notify Target option and corresponding subject options can be enabled when the outgoing provider is configured or at any other time. If you did not set these options when you configured the outgoing provider, use the following procedure to alert the master Content Server instance when changes are made to content or users in a proxied instance:
1. In the proxied instance, go to the Providers page.
2. Select the Info link for the incoming provider that connects to the primary server.
3. Click Edit.
4. enable the Notify Target, Users, and/or Released Documents options
5. Click Update.
6. Restart all re-configured Content Servers.
Important: A thorough knowledge of each Content Server instance security model in the network is crucial when you set search access permissions for Content Server based on roles and accounts. It is particularly important that you are familiar with how the security groups, roles, users, and accounts are currently used and how they have been established for each Content Server instance. Be sure to carefully consider the defined roles and accounts in each instance to avoid inadvertently allowing access to users that should not be given view or print privileges.
Note: Although the Notify Target option is optional, it is necessary to enable this option (and one or both subject options) if you want the proxied servers in the network to proactively forward notifications to the master instance when changes are made to user information and/or content item information. For more information about these provider options, refer to Understanding Outgoing Providers (page 2-3).
Content Server Enterprise Search 2-15

Activating Content Server
Monitoring Outgoing ProvidersAdministrators can monitor the outgoing providers using the Providers link on the Content Server Administration page. This link opens the Providers page that displays a list of currently defined outgoing providers. For each defined provider in the list, the Providers page also tabulates the provider type, connection status, and the date of the last recorded activity event. Users can also click the Test link to retry the connection and refresh the field information. Or, users can click the Info link to access the corresponding Provider Information page to review and edit provider information.
For comprehensive information about Oracle providers, provider pages and detailed field descriptions, refer to the About Providers section in the Content Server Managing System Settings and Processes document.
2-16 Content Server Enterprise Search

C h a p t e r
3.USING CONTENT SERVER
OVERVIEWThis chapter covers the following topics:
Searching for Files Using Content Server (page 3-1)
Viewing Content Server Results (page 3-5)
SEARCHING FOR FILES USING CONTENT SERVERWith very few exceptions, the basic functions of Content Server are similar to the Content Server core search functionality. The most noticeable differences are the Search and the Search Results pages. For more information on instances and creating searchable instances, refer to Understanding Outgoing Providers (page 2-3) and Setting Up Content Server (page 2-8).
About Searching for FilesContent Server enables you to perform simple, detailed, and full-text searches over predefined, multiple servers. For example, departments in a large organization using separate Content Server instances may find this functionality especially useful. In this case, when a consumer from one department requires information from another
Important: It is important to use the same search engine on all systems when using Content Server unless your users only need metadata search. Full-text search varies depending on the search engine used.
Content Server Enterprise Search 3-1

Using Content Server
department to create a year-end report, they can access the Search page with Content Server capability and enter the metadata (content name, type, security group, author, and so forth) and select the searchable instances relating to the specific information they need.
Searches on multiple instances can be performed from the Home page for either simple or global searches. Refer to Home Page with Multiple Instances (page 3-2). Or, users can perform searches from the Search page for more detailed or full-text searches. Refer to Search Page (page 3-3).
Home Page with Multiple InstancesThe Home page displays a Search page with a limited number of file information fields. The Search page, when accessed from the Home page, is typically used for quick, global searches. However, with Content Server activated, the Instances option is also available to enable multiple instance search capabilities.
For more information on instances and creating searchable instances, refer to Understanding Outgoing Providers (page 2-3).
Figure 3-1 Simple Search Page on the Home Page
3-2 Content Server Enterprise Search

Using Content Server
Search PageThe complete Search page for Content Server is similar to the core product with enhanced content information search fields, full-text search capability, and the addition of the Searchable Instances option. To access this page, click the Search icon on the Main toolbar.
For more information on instances and creating searchable instances, refer to Understanding Outgoing Providers (page 2-3).
Figure 3-2 Complete Search Page for Content Server
Content Server Enterprise Search 3-3

Using Content Server
Performing a Quick SearchTo perform a quick search, do the following:
1. Click Home on the Main toolbar.
The Search page is displayed.
2. Complete one or all of the file information (metadata) fields. If no file information fields are completed, all records are returned.
3. Select as many of the searchable Instances check boxes as needed.
4. Click Search.
The Search Results page is displayed.
Performing a Detailed SearchTo perform a more detailed or full-text search, do the following:
1. Click Search on the Main toolbar.
The Search page is displayed.
2. Complete as many file information (metadata) fields as necessary on the Search page that describe the documents you want to find.
The more information you can provide, the narrower your search.
3. Select one or more of the Searchable Instances check boxes.
4. Click Search.
The search results table is displayed; multiple search results tables are displayed if you chose more than one instance that matches your query.
5. Click the File Link (file name) in the Description field to view the document.
6. Click Search to perform another search.
3-4 Content Server Enterprise Search
Using Content Server
VIEWING CONTENT SERVER RESULTSWhen using Content Server, the Search Results page may differ slightly from the standard Content Server Search Results page. The number of instances you choose for your search on either the Home page or the Search page determines the number of search results tables displayed. For each instance that matches your query, a table with a maximum of four documents per table is displayed. This is the system default because it helps to keep the Search Results page to a manageable size.
Search Results PageThe Search Results page in Content Server displays one table per instance for results matching the query. Each table contains the first several matches located for that instance. Refer to Multiple-Instance Search Results Table (page 3-6). The hyperlink labeled More, located in the upper-right corner of each table, is used to view the entire list of results associated with an individual search instance. Refer to Single-Instance Search Results Table (page 3-6).
Content Server Enterprise Search 3-5

Using Content Server
Multiple-Instance Search Results TableThe number of results found, in the upper-left corner, matching the query equals the total number of results for all instances searched.
Figure 3-3 Multiple-Instance Search Results Table
Single-Instance Search Results TableIn Content Server, as in the Content Server core product, when you perform a search on a single searchable instance, all the results that relate to your search query are displayed. When you select more than one searchable instance, the Search Results page displays multiple search results tables with a limit of four results per table. However, when there are more than four documents for an individual instance in your search, a link (labeled More) is available at the top of each table which enables you to look at the additional documents that match your query.
Figure 3-3 illustrates the search results table that is displayed when using the More hyperlink. This example displays additional results for the Instance_on_test14 query.
3-6 Content Server Enterprise Search

Using Content Server
Figure 3-4 More Hyperlink Search Results Table
Content Server Enterprise Search 3-7

Using Content Server
Viewing All Results for One InstanceTypically, when you perform a search using Content Server you will be selecting more than one server/instance and the search will result in multiple search results tables. Because each table displayed is limited to four results, the hyperlink More is available, where applicable, to enable you to view all the matches associated with your search query.
To view the additional documents relating to an individual search instance, perform these tasks:
1. On the Search Results page, locate the search results table for the instance you would like to view.
2. Click More.
The Search Results table displays only the results for that instance.
3. Perform one of these actions:
• Click content's name hyperlink or the content's type icon, to view the document.
• Click the Info field to view the Content Information page.
• Click Rev. number to view the document's Revision history for xxx page.
• Click Back to return to the Search Results page.
4. Click More on any additional instance’s search results table to view all of its associated documents.
3-8 Content Server Enterprise Search

A p p e n d i x
AB.THIRD PARTY LICENSES
OVERVIEW
This appendix includes a description of the Third Party Licenses for all the third party products included with this product.
Apache Software License (page B-1)
W3C® Software Notice and License (page B-2)
Zlib License (page B-3)
General BSD License (page B-4)
General MIT License (page B-5)
Unicode License (page B-5)
Miscellaneous Attributions (page B-7)
APACHE SOFTWARE LICENSE
* Copyright 1999-2004 The Apache Software Foundation.
* Licensed under the Apache License, Version 2.0 (the "License");
* you may not use this file except in compliance with the License.
* You may obtain a copy of the License at
* http://www.apache.org/licenses/LICENSE-2.0
*
Content Server Enterprise Search A-1

Third Party Licenses
* Unless required by applicable law or agreed to in writing, software
* distributed under the License is distributed on an "AS IS" BASIS,
* WITHOUT WARRANTIES OR CONDITIONS OF ANY KIND, either express or implied.
* See the License for the specific language governing permissions and
* limitations under the License.
W3C® SOFTWARE NOTICE AND LICENSE
* Copyright © 1994-2000 World Wide Web Consortium,
* (Massachusetts Institute of Technology, Institut National de
* Recherche en Informatique et en Automatique, Keio University).
* All Rights Reserved. http://www.w3.org/Consortium/Legal/
*
* This W3C work (including software, documents, or other related items) is
* being provided by the copyright holders under the following license. By
* obtaining, using and/or copying this work, you (the licensee) agree that
* you have read, understood, and will comply with the following terms and
* conditions:
*
* Permission to use, copy, modify, and distribute this software and its
* documentation, with or without modification, for any purpose and without
* fee or royalty is hereby granted, provided that you include the following
* on ALL copies of the software and documentation or portions thereof,
* including modifications, that you make:
*
* 1. The full text of this NOTICE in a location viewable to users of the
* redistributed or derivative work.
*
* 2. Any pre-existing intellectual property disclaimers, notices, or terms
* and conditions. If none exist, a short notice of the following form
* (hypertext is preferred, text is permitted) should be used within the
* body of any redistributed or derivative code: "Copyright ©
* [$date-of-software] World Wide Web Consortium, (Massachusetts
A-2 Content Server Enterprise Search

Third Party Licenses
* Institute of Technology, Institut National de Recherche en
* Informatique et en Automatique, Keio University). All Rights
* Reserved. http://www.w3.org/Consortium/Legal/"
*
* 3. Notice of any changes or modifications to the W3C files, including the
* date changes were made. (We recommend you provide URIs to the location
* from which the code is derived.)
*
* THIS SOFTWARE AND DOCUMENTATION IS PROVIDED "AS IS," AND COPYRIGHT HOLDERS
* MAKE NO REPRESENTATIONS OR WARRANTIES, EXPRESS OR IMPLIED, INCLUDING BUT
* NOT LIMITED TO, WARRANTIES OF MERCHANTABILITY OR FITNESS FOR ANY PARTICULAR
* PURPOSE OR THAT THE USE OF THE SOFTWARE OR DOCUMENTATION WILL NOT INFRINGE
* ANY THIRD PARTY PATENTS, COPYRIGHTS, TRADEMARKS OR OTHER RIGHTS.
*
* COPYRIGHT HOLDERS WILL NOT BE LIABLE FOR ANY DIRECT, INDIRECT, SPECIAL OR
* CONSEQUENTIAL DAMAGES ARISING OUT OF ANY USE OF THE SOFTWARE OR
* DOCUMENTATION.
*
* The name and trademarks of copyright holders may NOT be used in advertising
* or publicity pertaining to the software without specific, written prior
* permission. Title to copyright in this software and any associated
* documentation will at all times remain with copyright holders.
*
ZLIB LICENSE
* zlib.h -- interface of the 'zlib' general purpose compression library
version 1.2.3, July 18th, 2005
Copyright (C) 1995-2005 Jean-loup Gailly and Mark Adler
This software is provided 'as-is', without any express or implied
warranty. In no event will the authors be held liable for any damages
Content Server Enterprise Search A-3

Third Party Licenses
arising from the use of this software.
Permission is granted to anyone to use this software for any purpose,
including commercial applications, and to alter it and redistribute it
freely, subject to the following restrictions:
1. The origin of this software must not be misrepresented; you must not
claim that you wrote the original software. If you use this software
in a product, an acknowledgment in the product documentation would be
appreciated but is not required.
2. Altered source versions must be plainly marked as such, and must not be
misrepresented as being the original software.
3. This notice may not be removed or altered from any source distribution.
Jean-loup Gailly [email protected]
Mark Adler [email protected]
GENERAL BSD LICENSE
Copyright (c) 1998, Regents of the University of California
All rights reserved.
Redistribution and use in source and binary forms, with or without modification, are permitted provided that the following conditions are met:
"Redistributions of source code must retain the above copyright notice, this list of conditions and the following disclaimer.
"Redistributions in binary form must reproduce the above copyright notice, this list of conditions and the following disclaimer in the documentation and/or other materials provided with the distribution.
"Neither the name of the <ORGANIZATION> nor the names of its contributors may be used to endorse or promote products derived from this software without specific prior written permission.
A-4 Content Server Enterprise Search

Third Party Licenses
THIS SOFTWARE IS PROVIDED BY THE COPYRIGHT HOLDERS AND CONTRIBUTORS "AS IS" AND ANY EXPRESS OR IMPLIED WARRANTIES, INCLUDING, BUT NOT LIMITED TO, THE IMPLIED WARRANTIES OF MERCHANTABILITY AND FITNESS FOR A PARTICULAR PURPOSE ARE DISCLAIMED. IN NO EVENT SHALL THE COPYRIGHT OWNER OR CONTRIBUTORS BE LIABLE FOR ANY DIRECT, INDIRECT, INCIDENTAL, SPECIAL, EXEMPLARY, OR CONSEQUENTIAL DAMAGES (INCLUDING, BUT NOT LIMITED TO, PROCUREMENT OF SUBSTITUTE GOODS OR SERVICES; LOSS OF USE, DATA, OR PROFITS; OR BUSINESS INTERRUPTION) HOWEVER CAUSED AND ON ANY THEORY OF LIABILITY, WHETHER IN CONTRACT, STRICT LIABILITY, OR TORT (INCLUDING NEGLIGENCE OR OTHERWISE) ARISING IN ANY WAY OUT OF THE USE OF THIS SOFTWARE, EVEN IF ADVISED OF THE POSSIBILITY OF SUCH DAMAGE.
GENERAL MIT LICENSE
Copyright (c) 1998, Regents of the Massachusetts Institute of Technology
Permission is hereby granted, free of charge, to any person obtaining a copy of this software and associated documentation files (the "Software"), to deal in the Software without restriction, including without limitation the rights to use, copy, modify, merge, publish, distribute, sublicense, and/or sell copies of the Software, and to permit persons to whom the Software is furnished to do so, subject to the following conditions:
The above copyright notice and this permission notice shall be included in all copies or substantial portions of the Software.
THE SOFTWARE IS PROVIDED "AS IS", WITHOUT WARRANTY OF ANY KIND, EXPRESS OR IMPLIED,
INCLUDING BUT NOT LIMITED TO THE WARRANTIES OF MERCHANTABILITY, FITNESS FOR A
PARTICULAR PURPOSE AND NONINFRINGEMENT. IN NO EVENT SHALL THE AUTHORS OR COPYRIGHT
HOLDERS BE LIABLE FOR ANY CLAIM, DAMAGES OR OTHER LIABILITY, WHETHER IN AN ACTION OF
CONTRACT, TORT OR OTHERWISE, ARISING FROM, OUT OF OR IN CONNECTION WITH THE SOFTWARE
OR THE USE OR OTHER DEALINGS IN THE SOFTWARE.
UNICODE LICENSE
UNICODE, INC. LICENSE AGREEMENT - DATA FILES AND SOFTWARE
Unicode Data Files include all data files under the directories http://www.unicode.org/Public/, http://www.unicode.org/reports/, and http://www.unicode.org/cldr/data/ . Unicode Software includes any source code published in the Unicode Standard or under the directories http://www.unicode.org/Public/, http://www.unicode.org/reports/, and http://www.unicode.org/cldr/data/.
Content Server Enterprise Search A-5

Third Party Licenses
A-6 Content Server Enterprise Search
NOTICE TO USER: Carefully read the following legal agreement. BY DOWNLOADING, INSTALLING, COPYING OR OTHERWISE USING UNICODE INC.'S DATA FILES ("DATA FILES"), AND/OR SOFTWARE ("SOFTWARE"), YOU UNEQUIVOCALLY ACCEPT, AND AGREE TO BE BOUND BY, ALL OF THE TERMS AND CONDITIONS OF THIS AGREEMENT. IF YOU DO NOT AGREE, DO NOT DOWNLOAD, INSTALL, COPY, DISTRIBUTE OR USE THE DATA FILES OR SOFTWARE.
COPYRIGHT AND PERMISSION NOTICE
Copyright © 1991-2006 Unicode, Inc. All rights reserved. Distributed under the Terms of Use in http://www.unicode.org/copyright.html.
Permission is hereby granted, free of charge, to any person obtaining a copy of the Unicode data files and any associated documentation (the "Data Files") or Unicode software and any associated documentation (the "Software") to deal in the Data Files or Software without restriction, including without limitation the rights to use, copy, modify, merge, publish, distribute, and/or sell copies of the Data Files or Software, and to permit persons to whom the Data Files or Software are furnished to do so, provided that (a) the above copyright notice(s) and this permission notice appear with all copies of the Data Files or Software, (b) both the above copyright notice(s) and this permission notice appear in associated documentation, and (c) there is clear notice in each modified Data File or in the Software as well as in the documentation associated with the Data File(s) or Software that the data or software has been modified.
THE DATA FILES AND SOFTWARE ARE PROVIDED "AS IS", WITHOUT WARRANTY OF ANY KIND, EXPRESS OR IMPLIED, INCLUDING BUT NOT LIMITED TO THE WARRANTIES OF MERCHANTABILITY, FITNESS FOR A PARTICULAR PURPOSE AND NONINFRINGEMENT OF THIRD PARTY RIGHTS. IN NO EVENT SHALL THE COPYRIGHT HOLDER OR HOLDERS INCLUDED IN THIS NOTICE BE LIABLE FOR ANY CLAIM, OR ANY SPECIAL INDIRECT OR CONSEQUENTIAL DAMAGES, OR ANY DAMAGES WHATSOEVER RESULTING FROM LOSS OF USE, DATA OR PROFITS, WHETHER IN AN ACTION OF CONTRACT, NEGLIGENCE OR OTHER TORTIOUS ACTION, ARISING OUT OF OR IN CONNECTION WITH THE USE OR PERFORMANCE OF THE DATA FILES OR SOFTWARE.
Except as contained in this notice, the name of a copyright holder shall not be used in advertising or otherwise to promote the sale, use or other dealings in these Data Files or Software without prior written authorization of the copyright holder.
________________________________________Unicode and the Unicode logo are trademarks of Unicode, Inc., and may be registered in some jurisdictions. All other trademarks and registered trademarks mentioned herein are the property of their respective owners

Third Party Licenses
MISCELLANEOUS ATTRIBUTIONS
Adobe, Acrobat, and the Acrobat Logo are registered trademarks of Adobe Systems Incorporated.
FAST Instream is a trademark of Fast Search and Transfer ASA.
HP-UX is a registered trademark of Hewlett-Packard Company.
IBM, Informix, and DB2 are registered trademarks of IBM Corporation.
Jaws PDF Library is a registered trademark of Global Graphics Software Ltd.
Kofax is a registered trademark, and Ascent and Ascent Capture are trademarks of Kofax Image
Products.
Linux is a registered trademark of Linus Torvalds.
Mac is a registered trademark, and Safari is a trademark of Apple Computer, Inc.
Microsoft, Windows, and Internet Explorer are registered trademarks of Microsoft Corporation.
MrSID is property of LizardTech, Inc. It is protected by U.S. Patent No. 5,710,835. Foreign Patents
Pending.
Oracle is a registered trademark of Oracle Corporation.
Portions Copyright © 1994-1997 LEAD Technologies, Inc. All rights reserved.
Portions Copyright © 1990-1998 Handmade Software, Inc. All rights reserved.
Portions Copyright © 1988, 1997 Aladdin Enterprises. All rights reserved.
Portions Copyright © 1997 Soft Horizons. All rights reserved.
Portions Copyright © 1995-1999 LizardTech, Inc. All rights reserved.
Red Hat is a registered trademark of Red Hat, Inc.
Sun is a registered trademark, and Sun ONE, Solaris, iPlanet and Java are trademarks of Sun
Microsystems, Inc.
Sybase is a registered trademark of Sybase, Inc.
UNIX is a registered trademark of The Open Group.
Verity is a registered trademark of Autonomy Corporation plc
Content Server Enterprise Search A-7


I n d e x
AAccount Filter field
Limiting search access to instances, 2-15Administrator
Maintenance functions, 2-14Task descriptions, 2-5User interface functions, 2-4
All resultsViewing for single instance on Results page, 3-8
Audience, 1-3
CCaching
Overriding with Notify Target option, 2-4Change notification
Configuring outgoing provider - master instance, 2-10
Configuring outgoing provider - proxied instance, 2-12
Content item information, 2-3, 2-4Notify Target option, 2-3, 2-13, 2-15Provider enabled, 2-3Released Documents option, 2-4Released Documents option - setting, 2-13, 2-15Setting options, 2-13, 2-15Types of subjects, 2-4User information, 2-3, 2-4Users option, 2-4Users option - setting, 2-13, 2-15
Chapter overviews, 1-4Consumer
Task descriptions, 2-5User interface functions, 2-5
Content item informationChange notification to master, 2-3
Content ServerEnterprise Search pre-activation requirements, 2-6
ContributorTask descriptions, 2-5
User interface functions, 2-5Controlled instance
Proxied instance, 2-2Controlling instance
Master instance, 2-2
DDatabase
Change notification to master, 2-3Detailed search
Description, 3-3Performing, 3-4
Detailed Search pageAccessing and using, 3-3Description, 3-3Example, 3-3Metadata fields, 3-3
DirectoriesRelative web root directory, 2-6Vault, 2-2Virtual directory - adding, 2-8Web Layout, 2-2Web root directory, 2-6
Distributed searchEnabligh search option on master instance, 2-13Enterprise Searchable option - enabling, 2-11Instances option in query, 3-2Provider enabled, 2-3Searchable Instances opton on Search page, 3-3Searching for files, 3-1
EEnterprise Search
Introduction, 1-1Overview, 2-1Pre-activatiion requirements, 2-6Summarized setup steps, 2-8
Enterprise Searchable optionIn outgoing provider - master instance, 2-11
Content Server Enterprise Search Index-1

Index
FFiles
Searching for, 3-1Full-text search
Description, 3-3Performing, 3-4
GGlobal search
Description, 3-2Performing, 3-4
Guest accountInter-server accessibility, 2-7
HHome page
Detailed Search page - accessing, 3-3Simple Search page - accessing, 3-2
Host nameEnterprise Search pre-activation requirements, 2-7In outgoing provider - master instance, 2-11, 2-12
HTTP addressEnterprise Search pre-activation requirements, 2-7In outgoing provider - master instance, 2-11In outgoing provider - proxied instance, 2-12
IIIS web server
Adding new virtural directory, 2-9Inter-server accessibility, 2-7
Instance nameEnterprise Search pre-activation requirements, 2-7In outgoing provider - master instance, 2-11In outgoing provider - proxied instance, 2-13
Instances optionMulti-instance search, 3-2
Inter-server accessEnterprise Search pre-activation requirements, 2-6
Inter-server communicationProvider enabled, 2-3
IP addressEnterprise Search pre-activation requirements, 2-7In outgoing provider - master instance, 2-11In outgoing provider - proxied instance, 2-12
MMaintenance functions
Administrator tasks, 2-14Master instance
Configured as outgoing provider, 2-2Configured provider on proxied instance, 2-12Configuring outgoing provider, 2-10Controlling instance, 2-2Definition, 2-2Enterprise Search pre-activation requirements, 2-6Inter-server accessibility, 2-7, 2-7, 2-10, 2-12Master server, 2-2Monitoring change notifications, 2-3Rebuild Portal page, 2-14Receiving change notification, 2-10Receiving change notifications, 2-12Virtual directory - adding, 2-8
Master serverDefinition, 2-2Master instance, 2-2
MetadataDefinition, 2-2Fields on Search page, 3-3Searching files with, 3-2
Monitoring providersMaster/proxied instances, 2-3Providers page - information and links, 2-16
More hyperlinkLocating, 3-6On Results page, 3-5Table on Results page, 3-6Using, 3-8
Multi-instance searchInstances option in query, 3-2
Multiple instancesDisplaying search results, 3-6Searching one or more instances, 3-2
NNetwork IP address
Enterprise Search pre-activation requirements, 2-7In outgoing provider - master instance, 2-11In outgoing provider - proxied instance, 2-12
Notify Target optionChange notification synchronization, 2-3Content item changes, 2-4, 2-13, 2-15In outgoing provider - proxied instance, 2-13, 2-15Overriding caching functions, 2-4Proactive notification process, 2-4Provider enabled, 2-3System performance impact, 2-4
Index -2 Content Server Enterprise Search

Index
User information changes, 2-4, 2-13, 2-15
OOverview
Features, 2-1Scalability support, 1-1Typical use, 1-1Use of providers, 2-1
PPerformance
Optimizing without change notification, 2-4Port address
Enterprise Search pre-activation requirements, 2-7In outgoing provider - master instance, 2-11In outgoing provider - proxied instance, 2-13
Portal pageRebuilding on master instance, 2-14
Proactive change notificationNotify Target option, 2-4Setting Notify Target option, 2-13, 2-15
ProvidersChange notification, 2-3, 2-13, 2-15Definition, 2-3Inter-server communication, 2-3Master instance, 2-2Monitoring change notifications, 2-3Outgoing, 2-3Outgoing - configuring on master instance, 2-10Outgoing - configuring on proxied instance, 2-12Provider page - Information and links, 2-16Proxied instance, 2-2Uses of, 2-1, 2-3
Providers pageInformation and links, 2-16
Proxied instanceConfigured as outgoing provider, 2-2Configured provider on master instance, 2-10Configuring outgoing provider, 2-12Controlled instance, 2-2Definition, 2-2Enterprise Search pre-activation requirements, 2-6Inter-server accessibility, 2-7, 2-7, 2-10, 2-12Providing change notification, 2-3, 2-10, 2-12Proxied server, 2-2
Proxied serverDefinition, 2-2Proxied instance, 2-2
QQuery
Searching multiple instances, 3-1Viewing search results, 3-5
Quick searchDescription, 3-2Performing, 3-4
RRelative web root directory
Enterprise Search pre-activation requirements, 2-6Enterprise Search pre-activation requirements Web
root directoryEnterprise Search pre-activation
requirements, 2-7In outgoing provider - master instance, 2-11In outgoing provider - proxied instance, 2-13Linking master and proxied servers, 2-8
Released Documents optionChange notification information, 2-4Setting in outgoing provider, 2-13, 2-15
Results pageAccessing and using, 3-5Example - multi-instance search, 3-6Example - using More hyperlink, 3-7More hyperlink, 3-5Overview, 3-5Viewing multi-instance query results, 3-6Viewing single-instance matches, 3-8Viewing single-instance query results, 3-6
Results tablesDisplaying query matches, 3-5
Roles fieldLimiting search access to instances, 2-15
SSearch collection
Change notification to master, 2-3Search page
Detailed - accessing and using, 3-3Detailed - description, 3-3Detailed - example, 3-3Detailed - metadata fields, 3-3Quick search, 3-2Simple - accessing and using, 3-2Simple - description, 3-2Simple - example, 3-2
Search resultsViewing Results page, 3-5
Content Server Enterprise Search Index-3

Index
Searchable instancesEnabling search option on master instance, 2-13Enterprise Searchable option - enabling, 2-11Instances option in query, 3-2Listing on Portal page, 2-14Option on Search page, 3-3Searching for files, 3-1Security considerations, 2-5Selecting for query, 3-1Setting availability, 2-14
Searchable Instances optionOn detailed Search page, 3-3
SearchingDetailed search, 3-1, 3-3Detailed search - performing, 3-4For files, 3-1Full-text search, 3-1, 3-3Full-text search - performing, 3-4Global, 3-1Global - performing, 3-4Global search, 3-2, 3-2Overview, 3-1Quick search, 3-1, 3-2Quick search - performing, 3-4Simple search, 3-1, 3-2Simple search - performing, 3-4Using metadata, 3-2Viewing Results page, 3-5
SecurityConsiderations, 2-5Role and account restrictions, 2-15Setting consumer search restrictions, 2-14
Server host nameEnterprise Search pre-activation requirements, 2-7In outgoing provider - master instance, 2-11In outgoing provider - proxied instance, 2-12
Server instance nameEnterprise Search pre-activation requirements, 2-7In outgoing provider - master instance, 2-11In outgoing provider - proxied instance, 2-13
Server port addressEnterprise Search pre-activation requirements, 2-7In outgoing provider - master instance, 2-11In outgoing provider - proxied instance, 2-13
Setting up Enterprise SearchSummary of Steps, 2-8Summary of steps, 2-8
Simple searchDescription, 3-2Performing, 3-4
Simple Search pageAccessing and using, 3-2Description, 3-2Example, 3-2
Single-instanceDisplayed search results, 3-6Viewing results, 3-8
SubjectsTypes of change notifications, 2-4
System performanceOptimizing without change notification, 2-4
TTables
Displaying query matches on Results page, 3-5Multi-instance search results, 3-6Single-instance search results, 3-6
TerminologyControlled instance, 2-2Controlling instance, 2-2Master instance, 2-2Master server, 2-2Metadata, 2-2Outgoing provider, 2-3Provider, 2-3Proxied instance, 2-2Proxied server, 2-2
UUser information
Change notification to master, 2-3User interface functions
Administrator, 2-4Consumer / contributor, 2-5
Users optionChange notification information, 2-4Setting in outgoing provider, 2-13, 2-15
VVault directory
In master/proxy configuration, 2-2Viewing results
Search Results page, 3-5Virtual directory
Adding, 2-8
WWeb Layout directory
In master/proxy configuration, 2-2Inter-server accessibility, 2-7, 2-7
Web root directory
Index -4 Content Server Enterprise Search

Index
In outgoing provider - master instance, 2-11 In outgoing provider - proxied instance, 2-13
Content Server Enterprise Search Index-5