Embed Size (px)
Citation preview

Convex Profiling and Sharpening by Hand HOW-TO
Outdoors-Magazine.com
http://outdoors-magazine.com
Convex Profiling and
Sharpening by Hand HOW-TO
James
- Skills and guides - DYI, Making things. -
Publication: Tuesday 29 April 2003
Description :How to sharpen well and profile a blade using hand tools..
Copyright (c) Outdoors-Magazine.com under a Creative Commons
Attribution-Non-Commercial-Share Alike License
Copyright © Outdoors-Magazine.com Page 1/12

Convex Profiling and Sharpening by Hand HOW-TO
A follow-up to Sharpening and Reprofiling Traditional Convex Blades and Sharpening experiences.
Purpose
The purpose is to give a proper convex profile to a high quality chopping blade, therefore making it more efficient, orto correct little forging defects found on forged blades. Not to forget having a razor edge.
Tools involved1. 250/1000 [1] Japanese waterstone.2. 1 page of 600 [2] water sand paper3. 1 page of 800 water sand paper4. 1 page of 1000 water sand paper5. A leather strop and green paste6. A cloth to wipe the blade from time to time.7. White (fine) polish compound (optional)8. A few drops of phosphoric acid (or rust remover), to remove the rusty color due to prolongated water contact,
before the polish.
Proximity of water is necessary.
Steps
Drop the stone in water for 10mn.
Meanwhile,the first thing to do is obviously to protect the handle: wrap it in cloth, and use some tape, at the base ofthe handle to hold it. This will avoid scratches.
250
Here the blade has started being ground with the 250. Notice the deep scratches. In the sink is a small Nortonwaterstone, of a grit slightly finer. I have once reprofiled a blade with only this tool and some sand paper!
Copyright © Outdoors-Magazine.com Page 2/12

Convex Profiling and Sharpening by Hand HOW-TO
We start with the 250 grit from the Japanese stone
What we want to do at this stage is to correct the profile defects in the 3 dimensions:
1. warped laterally (going to one side)2. warped vertically (doing local "recurves & bumps")3. thinner or thicker at certain places.4. wrong angles.
At this point, we do not care about sharpening, but about the angle of the edge from 1 mm behind the edge to 2 cmbehind.
So the only way to get things back is to cross the strokes: almost perpendicular (for the lateral waves) and parallel tothe edge length (for the "recurves & bumps", I also stoke the stone along it's length to do this), until bumps havegone, then 45 deg. to the tip and 45 to the handle (thus crossing at a 90 angle to homogeinize). I generally go edgebiting the stone, and not going away.
I try to use the largest (and consistant in speed and presure) movement as possible, meaning that unless I havedecided a specific spot does not need any removal at all, because it is a low, or that there is a high spot that needsmore, I move all the blade length on the stone. Checking and understanding the exact place spots for removal is thekey. it needs frequent checkings, under different angles. Low light, rather than roof light helps seeing the surface, so,look at the blade using "razor" glazes, in the prolongation of the surface. And also you want to keep some tempered
Copyright © Outdoors-Magazine.com Page 3/12

Convex Profiling and Sharpening by Hand HOW-TO
steel on this blade. So a lateral wave can be adjusted by removing steel on the wave, but also just before and afterthe wave, on the other side.
Wether you pull or push is to your convenience (and own coordination of movement). I stroke against the edge, butthe right side, I pull, and the left I push (right hand on the handle, left on the tip) . But I sometimes change hands andit reverses the movement. I do not like circular movement, because it is too localized on the stone and blade, and itdoes not leave a clear trace on the whole length. A clear trace (because the grind is at an angle with the previousones) allows you to see the profile better, and if you change angles often, you can see if the trace is straight (orrather harmoniously curved) along the edge, which provided you kept the angle, is a sign that the profile is constantat a specific distance from the edge. If not staight (or a nice curve), you know were you need to insist.
Do not hesitate to wet the stone often, but leave the slurry on it, it makes it more efficient. Turn the stone from time totime, use it in its lenght, laterally, in its width, to avoid hollowing it in one place only.
The blade awfully scratched, but coming more symetrical. Of course you have to think were to remove metal, andtake care about angles. It goes fast
Imagine you are bringing a square profile to a convex blade profile, you can do this by taking successive bevels outof the square, and bevels on top of the bevels, etc, until the size of the bevel is so little that the form is convex, andthat a bevel is is just a tangeant. When you reprofile a convex blade on a flat stone, you need to imagine theseangles, that will help you. So when you reprofile, you start as if everything was wrong, and check the big first angles,just behind the edge. if they are wrong somewhere, you make them right, and then draw small bevels on top, etc...
Copyright © Outdoors-Magazine.com Page 4/12

Convex Profiling and Sharpening by Hand HOW-TO
Take care that the 250 stone removes a lot very quickly, so only use it at the edge angle if you want to remove achip, and never go over the edge angle, because this will bring lots of work to correct, if it can be corrected! (the edgeangle is obviously fixed by you 22-25 deg. for the golok)
Once the profile seem correct (or better) you can try to hold the blade in one hand, the stone in the other one, andgrind on the whole length without applying pressure, to even the scratches, it will be less work for the next stage:
1000
Once we have successfully reprofiled, it is time to sharpen and start polishing.
Use water to remove all traces from the previous grit, clean the blade, and the stone, and underlaying surfaces. Youdo not want the big grit to contaminate the finer one!
With this stone, we go down to the very edge, and also try to remove all scratches from the bigger grit.
Check often, as it is finer, you may notice spots you missed with the big grit, it it is the case, swap to big grit and backuntil you are satisfied.
The heavy profiling is finished, I switched to the 1000 side of the stone. It is slow to remove the scratches of theprevious grit, the best would be an intermediary grit.
Be patient, this takes time, verify you have removed the scratche from the bigger grit.
Work the edge carefully to flow with the rest of the profile.
Copyright © Outdoors-Magazine.com Page 5/12

Convex Profiling and Sharpening by Hand HOW-TO
Mmmm, I though the image would be better! The work with 1000 grit continues.
More 1000 removal, see the slurry on the blade, in the stone recipient and in the sink?
Copyright © Outdoors-Magazine.com Page 6/12
Convex Profiling and Sharpening by Hand HOW-TO
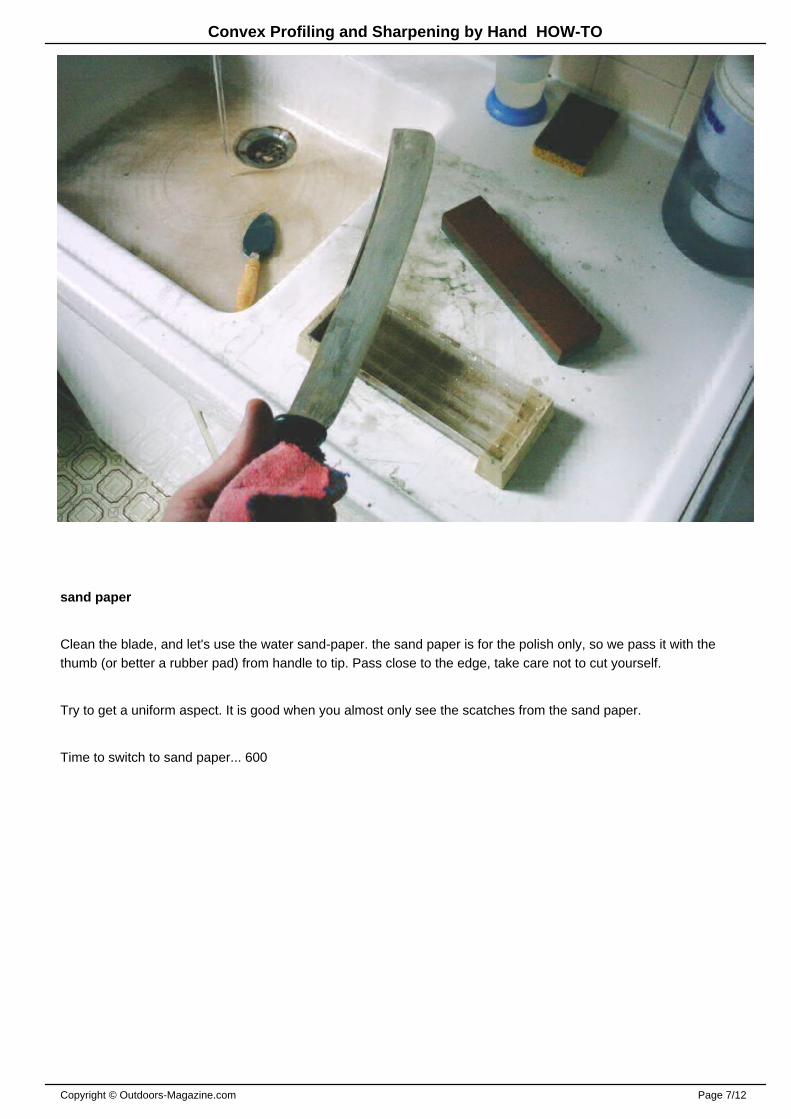
sand paper
Clean the blade, and let's use the water sand-paper. the sand paper is for the polish only, so we pass it with thethumb (or better a rubber pad) from handle to tip. Pass close to the edge, take care not to cut yourself.
Try to get a uniform aspect. It is good when you almost only see the scatches from the sand paper.
Time to switch to sand paper... 600
Copyright © Outdoors-Magazine.com Page 7/12

Convex Profiling and Sharpening by Hand HOW-TO
Then switch to 800, processe the same way. Then 1000.
Instead of 1000, you can buy one on these gum rust erasers, gum loaded with abrasive particles, and use it to leavea "hand rubbed finish"
Sand paper : 1000 It is looking fine now, no? I could leave it like this.
Copyright © Outdoors-Magazine.com Page 8/12

Convex Profiling and Sharpening by Hand HOW-TO
Strop
Before doing this, apply a bit of rust remover at the base of the handle, and rince and dry it well.
If you are really into performances: load the strop with green paste an use it on the blade from back to edge (else youcut the strop). Insist on the edge, but polish the whole blade. This takes some time too. Cross the strokes and applypressure to go faster.
Ok let's have it shine: the stop and green paste. I use the strop on the whole blade. The traces are green paste.
Copyright © Outdoors-Magazine.com Page 9/12

Convex Profiling and Sharpening by Hand HOW-TO
Optionally, finish with a finer polishing paste, and a cloth.
Here it is, very shiny no?
Copyright © Outdoors-Magazine.com Page 10/12

Convex Profiling and Sharpening by Hand HOW-TO
Yes it is fine, it reflects the trees
Copyright © Outdoors-Magazine.com Page 11/12

Convex Profiling and Sharpening by Hand HOW-TO
This is a 2 hours work in total. It is not perfect, because some defects you only notice after the polishing.Nevertheless, it is a much better profile than what I started with. The edge is razor sharp, and scaring, specially for ablade of this size!. This is the first step. The second session, next time a good sharpening is needed will bring itcloser to perfection. There are still some scatches left, which could have disapeared with another 1/2 to 1 hour work.
Warning Sharpening 14" of steel to razor sharpness is dangerous. Accept the risks, protect yourself, or justrenounce.
[1] Japanese grit
[2] US grit
Copyright © Outdoors-Magazine.com Page 12/12