Embed Size (px)
Citation preview

Cozy Cat Tunnel
Cozy Cat TunnelMake your favorite feline friend a fun and cozy spot for taking a "catnap" or playing hide and seek.
Line it with a soft, fuzzy faux fur, and your kitties will be thrilled. Add stylish accent fabric embellished with embroidery, and it will make quite a fashion statement amongst home decor!
Now, if you have a cat, you know that the more expensive the toy, the less likely they are to actually play with it. We've forked over bags and bags of money on pricey catnip wonders only to have little kitty ignore it in favor of a rubber band or twist tie. So we put this cat tunnel to the test with Ms. Chloe (left) who prefers Q-tips to rubber mousies. And guess what? She likes it, she really does!
Supplies needed:
** 1 1/4 yard faux fur** 1 yard outer shell fabric** 1 yard accent fabric (for 2 colors, use 1/2 yard each) ** Cut-away stabilizer** Spray adhesive** Air-erase pen
Designs Used:
** Spoiled Kitty (med), large or small** Cat Track Border
file:///F|/Source/ELProjects/html/pr1313.html (1 of 13)1/29/2007 7:45:04 AM

Cozy Cat Tunnel
All measurements in these instructions include a half-inch seam allowance.
Measure and cut a piece of the outer shell fabric to 25 x 41 inches. We chose a quilted cotton fabric for our tunnel.
Lay the fabric with a short end toward you. Measure the width and the length and divide each by two to find and mark the center point. Then draw a center line through the middle..
Print full-size paper templates of the designs using embroidery software. Trim around the designs for easier placement, and position them along the center line.
We are positioning the Spoiled Kitty design in the center, with the Cat Track Border design starting 1-1/4 inches away on either side.
When all the designs are positioned, mark all of the center points by poking a hole in the center of the template and marking the fabric. Mark the horizontal and vertical axis points as well.
file:///F|/Source/ELProjects/html/pr1313.html (2 of 13)1/29/2007 7:45:04 AM

Cozy Cat Tunnel
Remove the templates and draw lines connecting the vertical axis lines. These lines are for hooping. You may need to draw them out far enough to reach the edge of your hoop
Spray a piece of cut-away stabilizer with adhesive and hoop it with the fabric. Align the marks on the hoop with the lines on the fabric.
file:///F|/Source/ELProjects/html/pr1313.html (3 of 13)1/29/2007 7:45:04 AM

Cozy Cat Tunnel
Attach the hoop to the machine, load the design, align the needle directly over the center point and embroider the design. Repeat the hooping, aligning and embroidering process for each design.
When all of the designs have finished sewing, carefully trim away the excess stabilizer.
file:///F|/Source/ELProjects/html/pr1313.html (4 of 13)1/29/2007 7:45:04 AM

Cozy Cat Tunnel
We chose a fun plaid print and a solid cotton print for our accent fabric.
Cut two 5 x 41-inch strips of each fabric for a total of four strips.
Take strip of each color, and lay them, right sides together. Pin along one long side.
file:///F|/Source/ELProjects/html/pr1313.html (5 of 13)1/29/2007 7:45:04 AM
Cozy Cat Tunnel
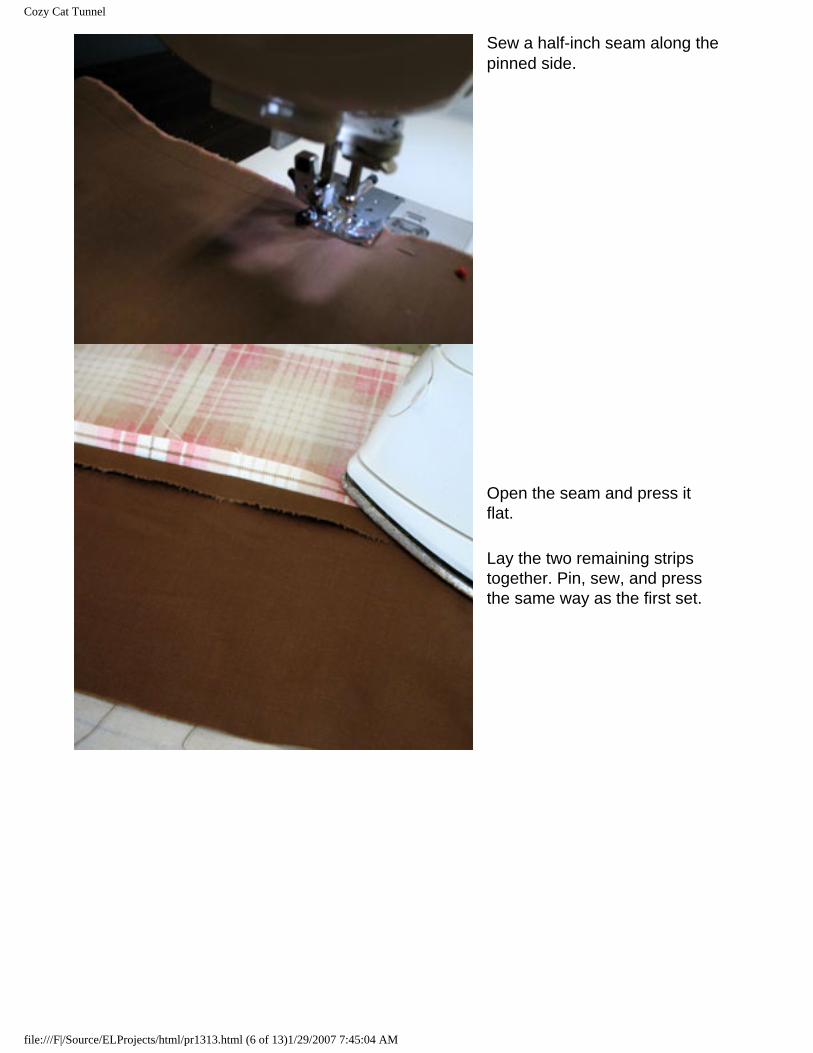
Sew a half-inch seam along the pinned side.
Open the seam and press it flat.
Lay the two remaining strips together. Pin, sew, and press the same way as the first set.
file:///F|/Source/ELProjects/html/pr1313.html (6 of 13)1/29/2007 7:45:04 AM

Cozy Cat Tunnel
Lay the outer shell fabric (with the embroidery) right side up. Decide which color of the accent fabric will be next to the outer shell fabric, and place that side on the outer edge of the outer shell, right sides together. After sewing, that side will be next to the outer shell fabric.
Align the long edges of the accent fabric with edges of the outer shell fabric. Pin in place.
Sew a half-inch seam along both edges. Then open the seams and press.
file:///F|/Source/ELProjects/html/pr1313.html (7 of 13)1/29/2007 7:45:04 AM

Cozy Cat Tunnel
Fold the entire completed outer shell and accent fabric in half, right sides together. Pin in place.
Sew a half-inch seam along the pinned edge.
file:///F|/Source/ELProjects/html/pr1313.html (8 of 13)1/29/2007 7:45:04 AM

Cozy Cat Tunnel
Measure and cut a piece of faux fur, 41x 41 inches.
Fold in half, right sides together, and pin in place.
Sew a half-inch seam along the pinned edge.
file:///F|/Source/ELProjects/html/pr1313.html (9 of 13)1/29/2007 7:45:04 AM
Cozy Cat Tunnel
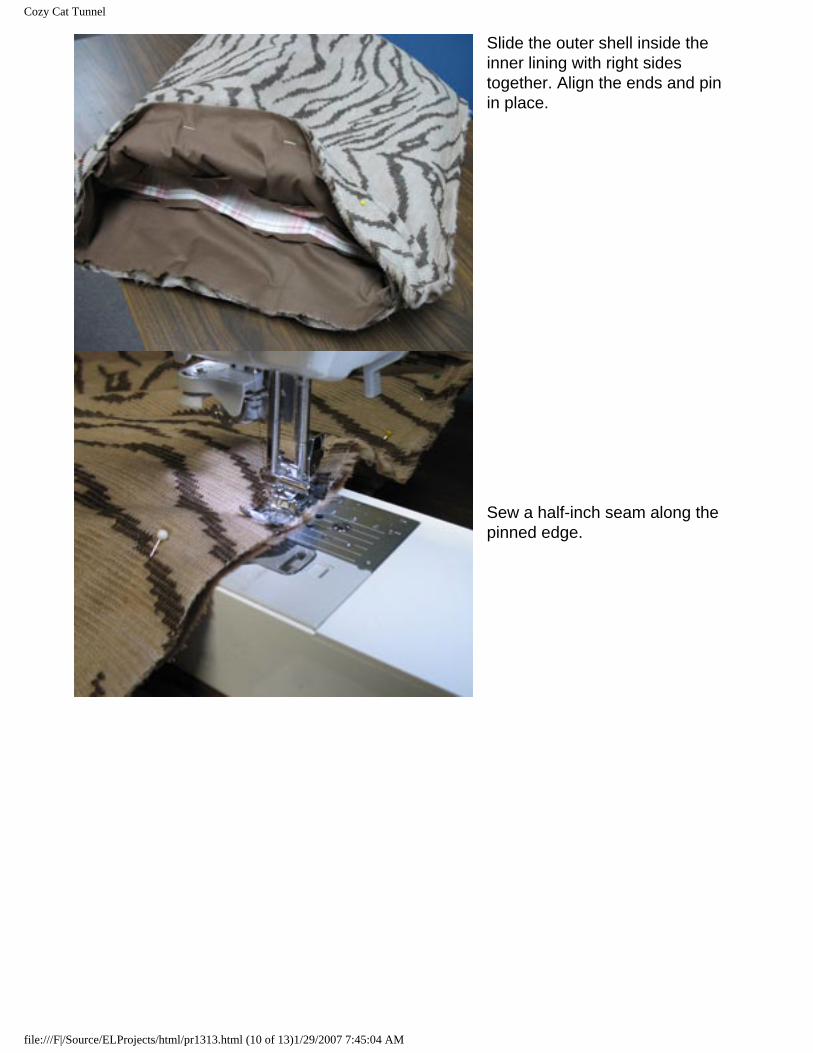
Slide the outer shell inside the inner lining with right sides together. Align the ends and pin in place.
Sew a half-inch seam along the pinned edge.
file:///F|/Source/ELProjects/html/pr1313.html (10 of 13)1/29/2007 7:45:04 AM

Cozy Cat Tunnel
Pull the outer shell out from the inner lining so they are both laying flat.
Pull the outer shell over the inner lining. Pin the sewn end in place.
Top stitch a half-inch seam around the end.
file:///F|/Source/ELProjects/html/pr1313.html (11 of 13)1/29/2007 7:45:04 AM

Cozy Cat Tunnel
On the opposite end, align the inner lining with the outer shell. Fold each layer inward 1/4 inch and pin in place.
Top stitch all around the pinned edge as close to the edge as possible. Then, stitch a 1/2 inch seam all around the end, right next to the first seam.
file:///F|/Source/ELProjects/html/pr1313.html (12 of 13)1/29/2007 7:45:04 AM

Cozy Cat Tunnel
Chloe gives this project two paws up!
The completed cat tunnel is 40 x 20 inches. Chloe is pleasantly plump, adjust the size of the fabric as needed.
Click here for a printable version of these project instructions.
You’ll need to have Adobe Acrobat Reader installed on your computer. If you don't have it, you can download a free copy by clicking on the icon below.
file:///F|/Source/ELProjects/html/pr1313.html (13 of 13)1/29/2007 7:45:04 AM