Embed Size (px)
Citation preview
Creating a
GABLE ROOF
with ArchiCAD
Tutorial by: The CAD Academy
Permission to copy
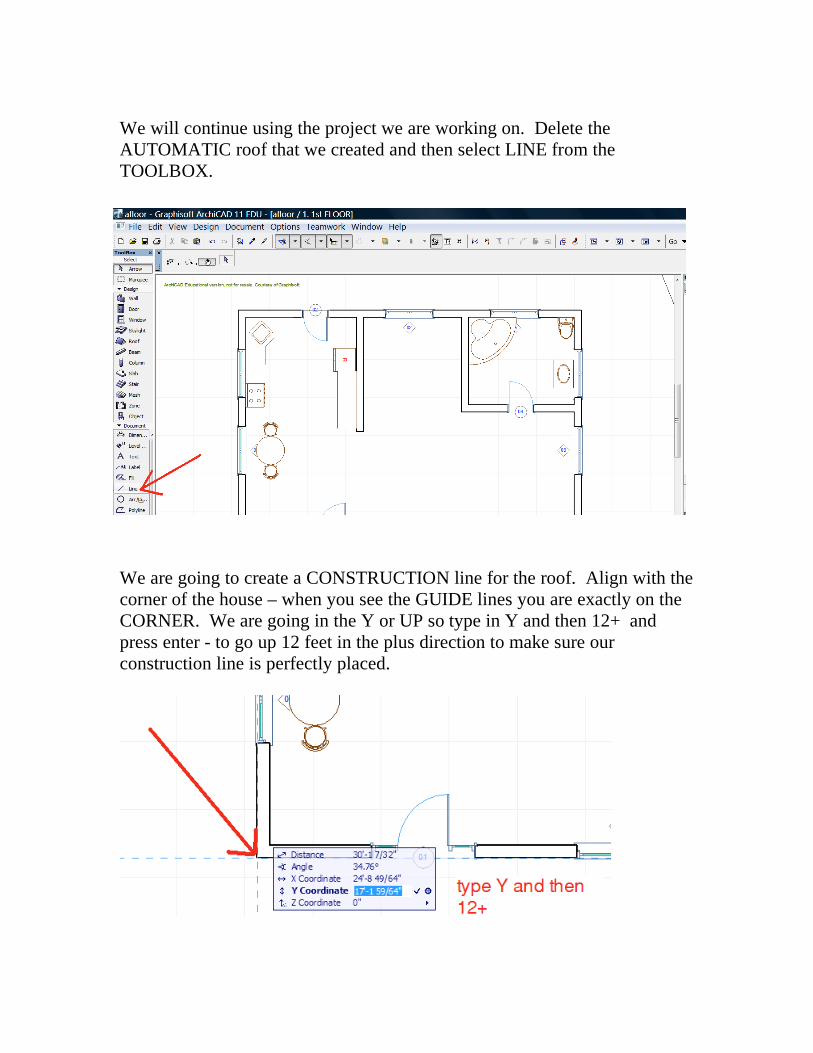
We will continue using the project we are working on. Delete the
AUTOMATIC roof that we created and then select LINE from the
TOOLBOX.
We are going to create a CONSTRUCTION line for the roof. Align with the
corner of the house – when you see the GUIDE lines you are exactly on the
CORNER. We are going in the Y or UP so type in Y and then 12+ and
press enter - to go up 12 feet in the plus direction to make sure our
construction line is perfectly placed.
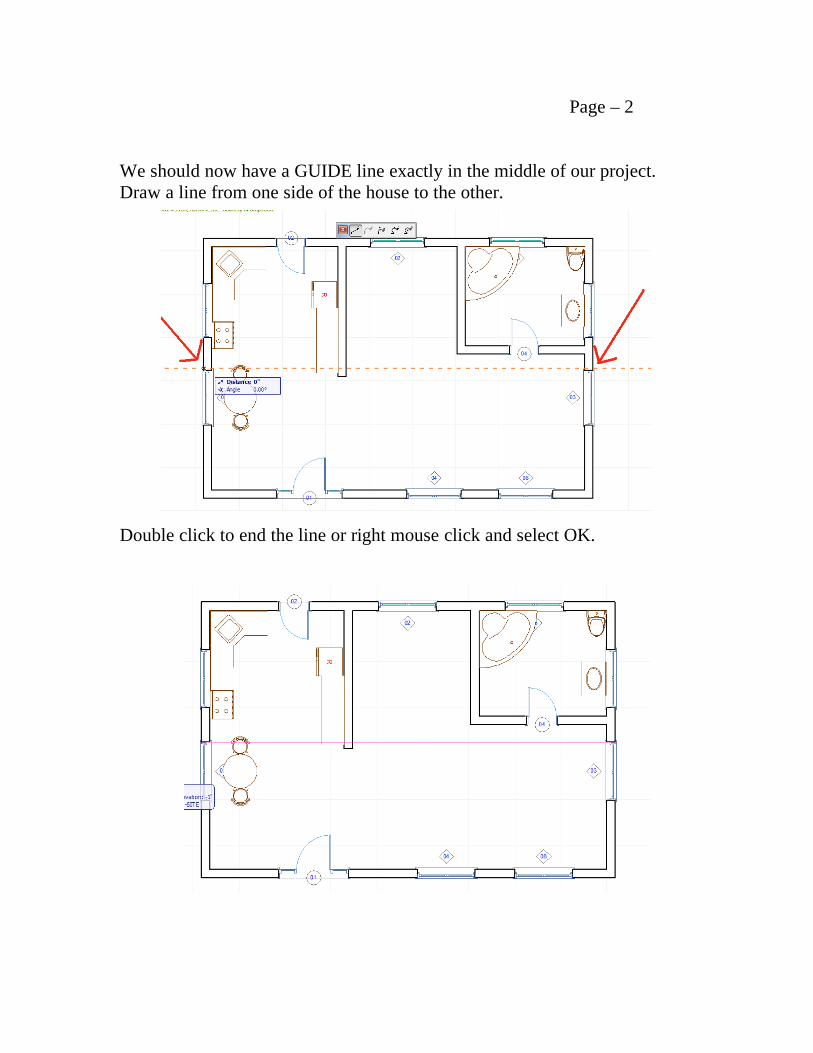
Page – 2
We should now have a GUIDE line exactly in the middle of our project.
Draw a line from one side of the house to the other.
Double click to end the line or right mouse click and select OK.
Page – 3
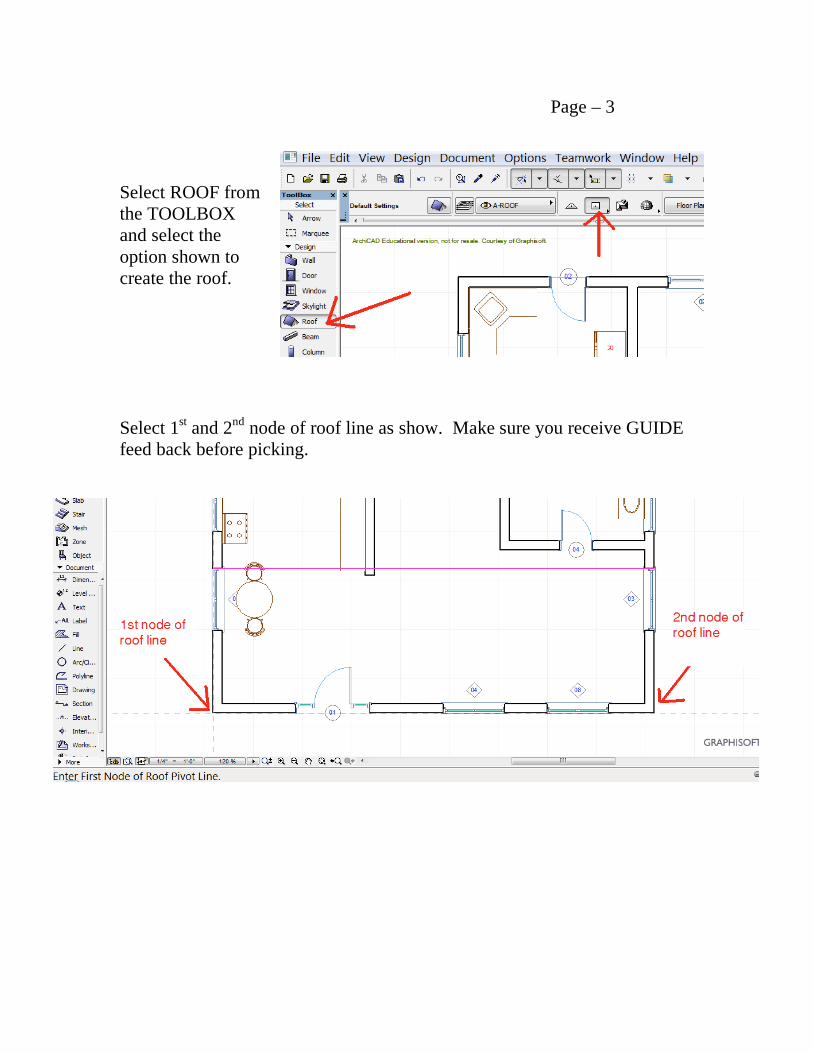
Select ROOF from
the TOOLBOX
and select the
option shown to
create the roof.
Select 1st and 2
nd node of roof line as show. Make sure you receive GUIDE
feed back before picking.
Page – 4
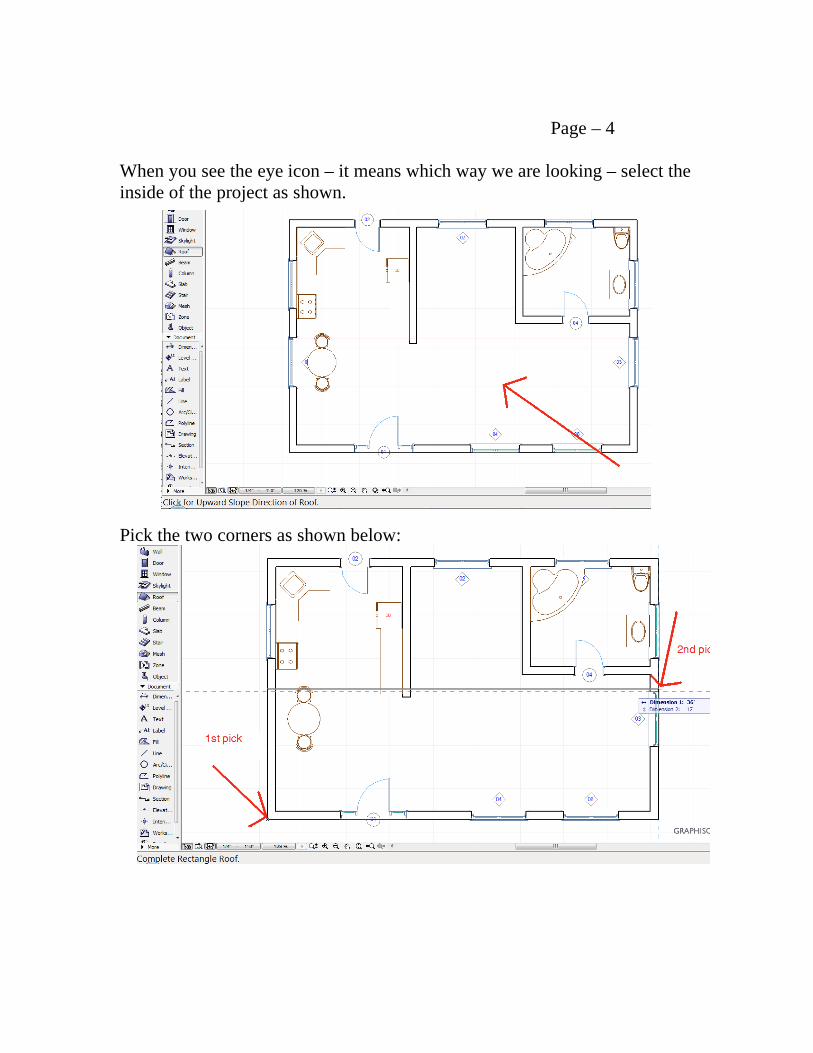
When you see the eye icon – it means which way we are looking – select the
inside of the project as shown.
Pick the two corners as shown below:
Page – 5
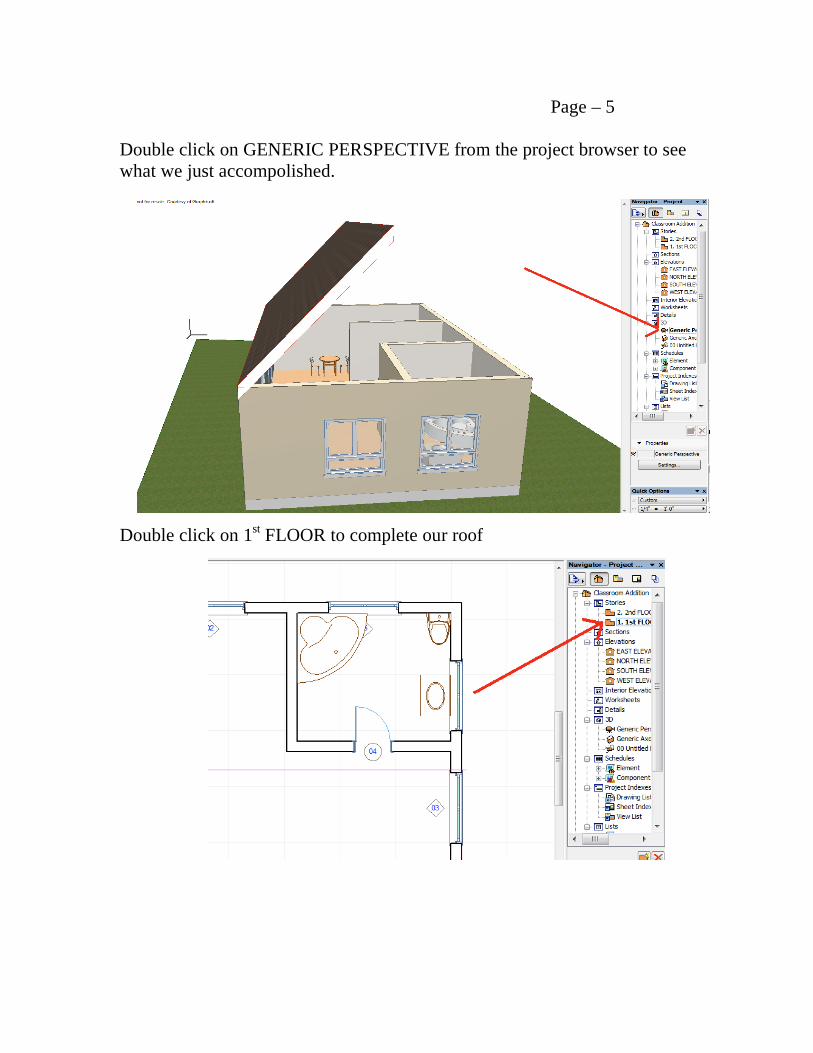
Double click on GENERIC PERSPECTIVE from the project browser to see
what we just accompolished.
Double click on 1st FLOOR to complete our roof
Page – 6
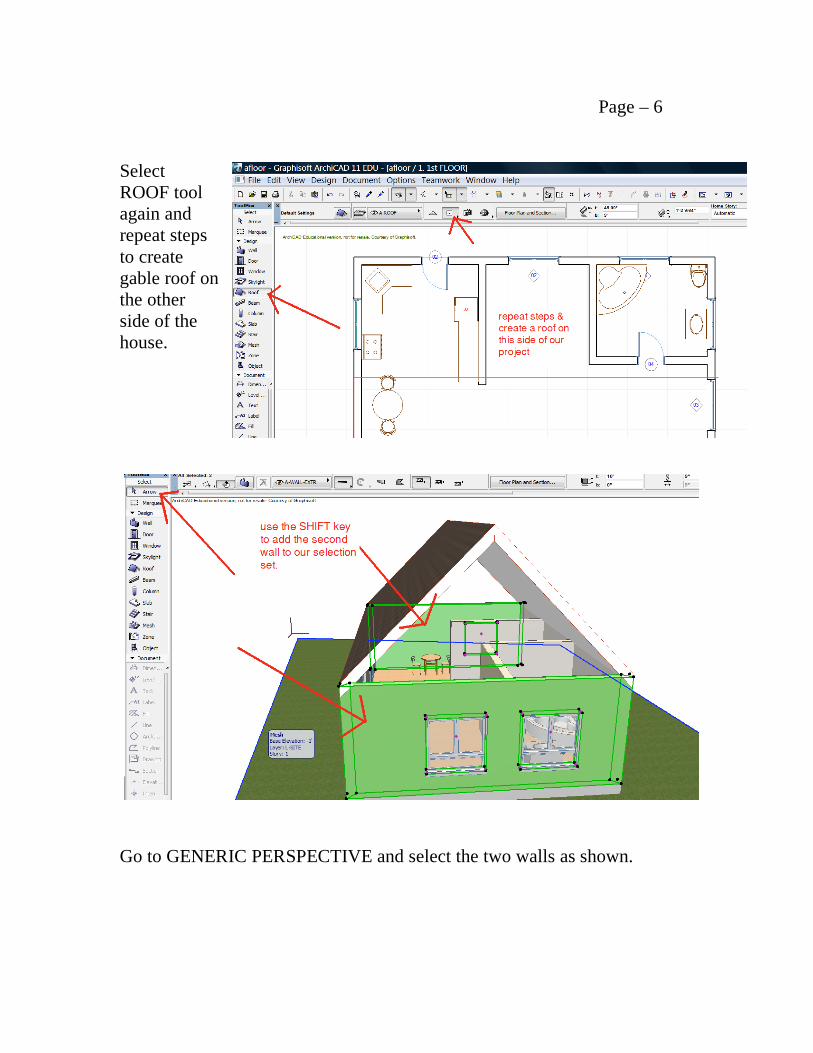
Select
ROOF tool
again and
repeat steps
to create
gable roof on
the other
side of the
house.
Go to GENERIC PERSPECTIVE and select the two walls as shown.
Page – 7
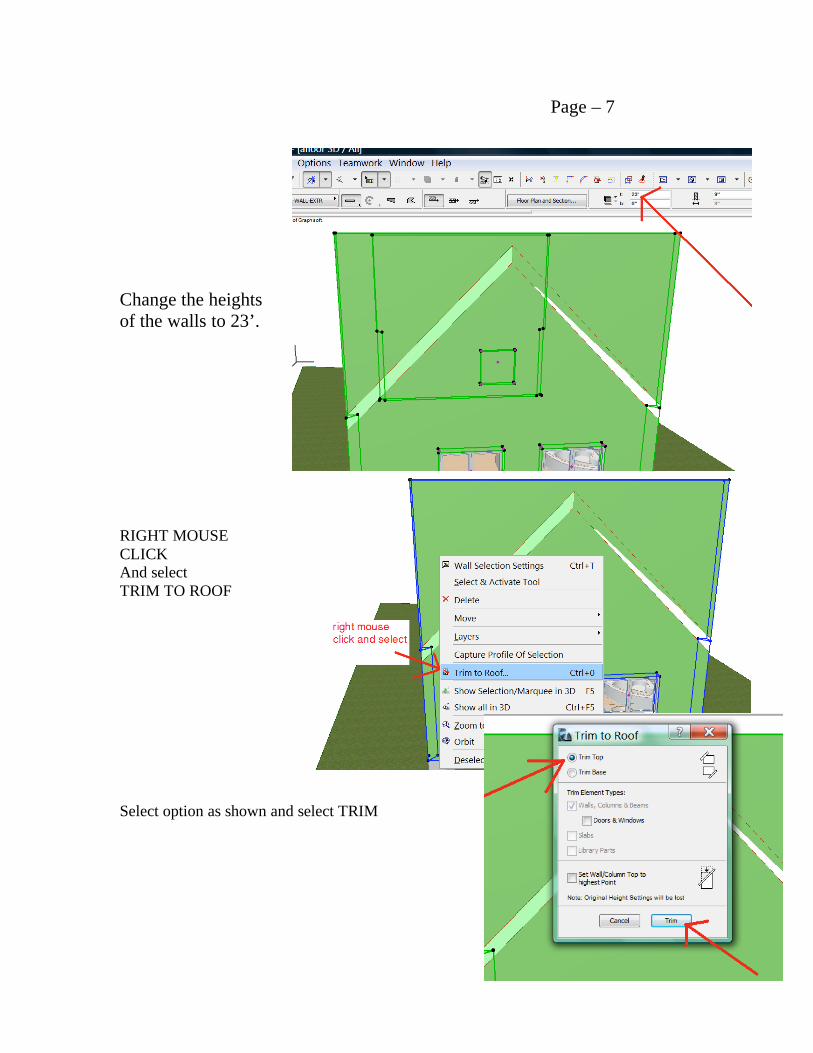
Change the heights
of the walls to 23’.
RIGHT MOUSE
CLICK
And select
TRIM TO ROOF
Select option as shown and select TRIM
Page – 8
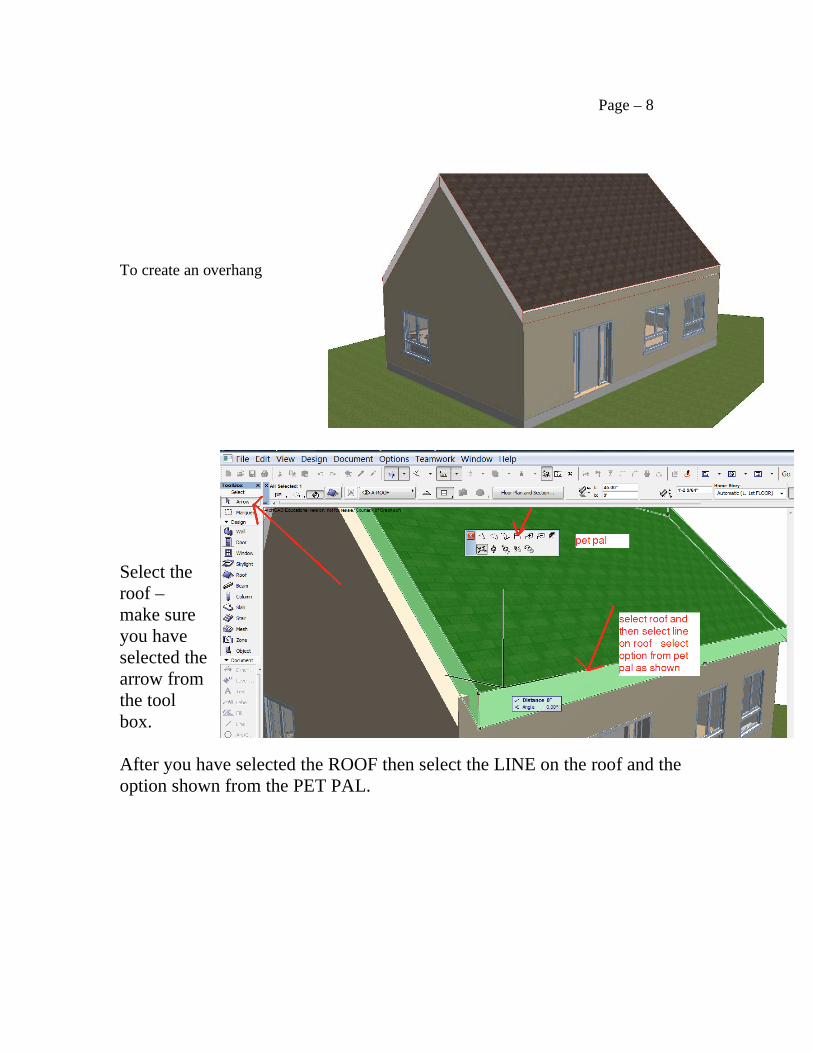
To create an overhang
Select the
roof –
make sure
you have
selected the
arrow from
the tool
box.
After you have selected the ROOF then select the LINE on the roof and the
option shown from the PET PAL.
Page - 9
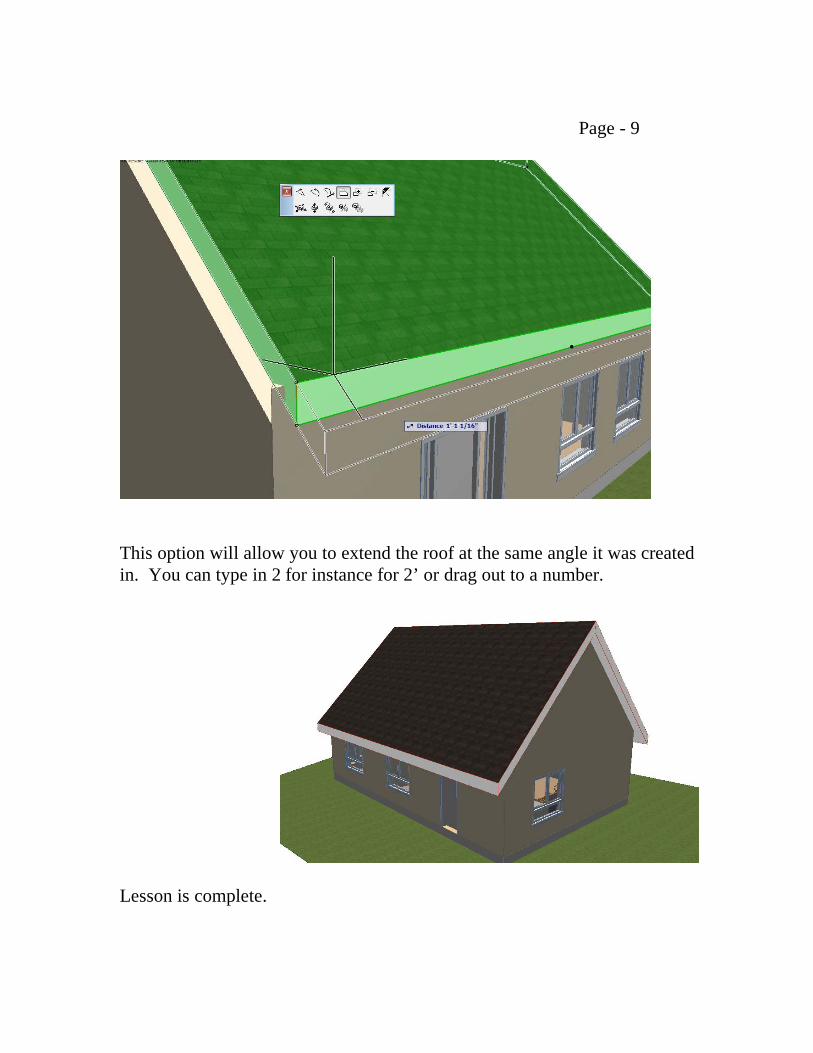
This option will allow you to extend the roof at the same angle it was created
in. You can type in 2 for instance for 2’ or drag out to a number.
Lesson is complete.


![Grand Haven - Poligon · Grand Haven Gabled Hexagon [GHX] Poligon’s Grand Haven Gabled Hexagons (GHX) are six sided shelters with a hip and gable roof, a cupola, optional gable](https://img.pdfslide.net/doc/110x75/5e81e317d8f7ac43bf12c2a6/grand-haven-poligon-grand-haven-gabled-hexagon-ghx-poligonas-grand-haven-gabled.jpg)