Embed Size (px)
Citation preview

Creating a Poster from a PowerPoint PresentationCreating a Poster from a PowerPoint Presentation
Margy IngramLearning Technology Services
University of Wisconsin-Stout
Margy IngramLearning Technology Services
University of Wisconsin-Stout
Prepare PresentationPrepare Presentation Open Microsoft PowerPoint
Go to File > Page Setup, and select: “On-screen Show” for 10” x 7.5” slides “Custom” specify a size up to 11”x17”
Prepare slides Key words Letter size minimum is 24 point Avoid paragraphs and sentences
Determine Size of PosterDetermine Size of Poster Organization’s rules
Size the software will accommodate PowerPoint will allow up to 56”
Size of the printer LTS printer uses roll paper 42” wide One dimension of the poster can be no
more than 41”

Number of Slides NeededNumber of Slides Needed
Once size of poster is known: determine poster layout• arrange in columns• audience can walk from left to right • placement of title
16 slides (7.5”x10”) fit on a 46”x42” poster
20 slides (7.5”x10”) fit on a 56”x42” poster
9 slides (11”x17”) fit on a 56”x42” poster
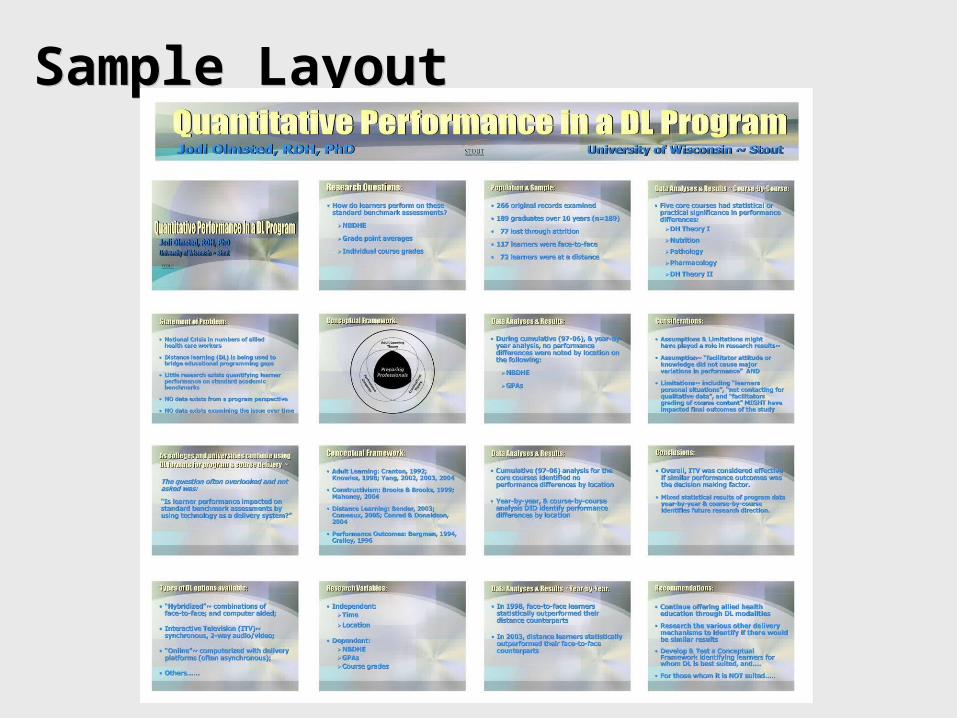
Sample LayoutSample Layout

What About the Title?What About the Title? As part of the poster body -
one of the total number of slides works well when printer uses 36” paper
As a banner with same template Create another presentation Go to file, page set up and specify size• usually the length of the layout x 4” or 5”
As a banner – no template Add title information to large layout by
creating text boxes
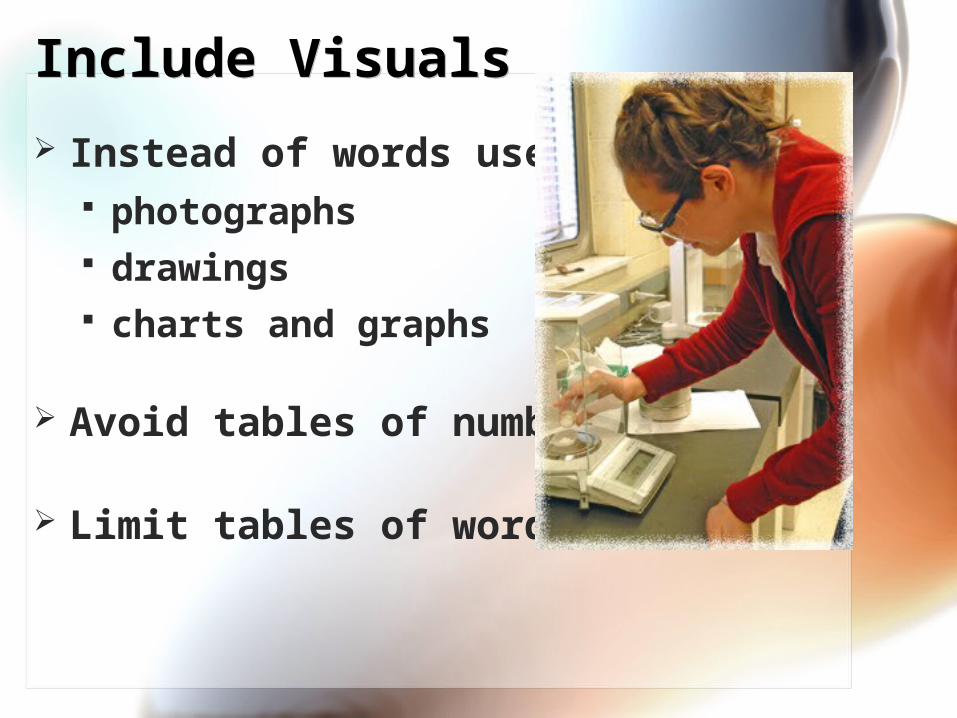
Include VisualsInclude Visuals
Instead of words use: photographs drawings charts and graphs
Avoid tables of numbers
Limit tables of words
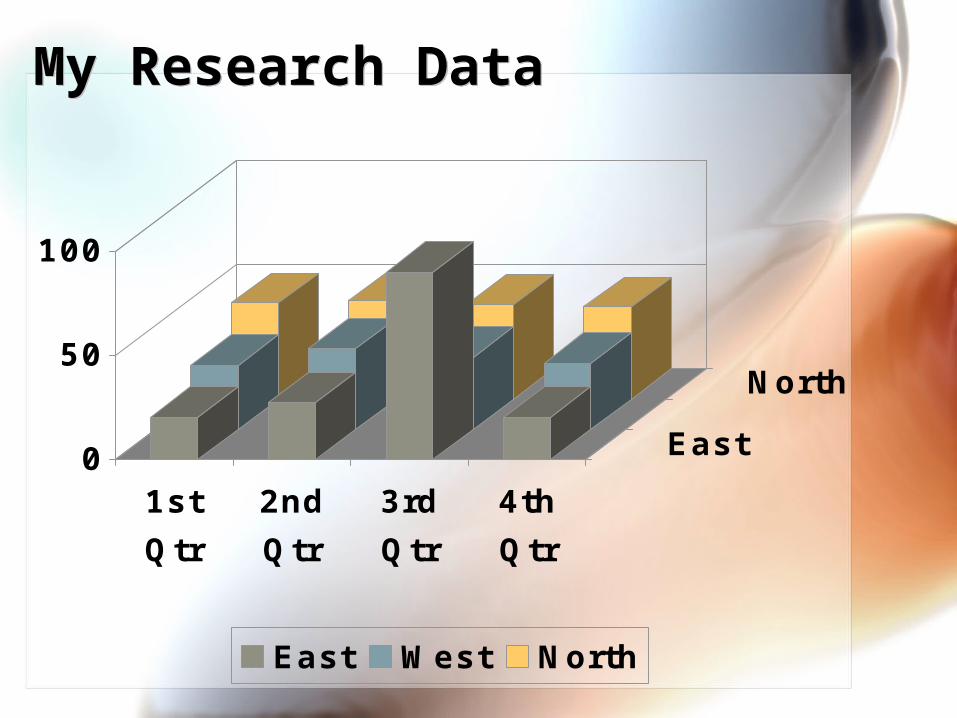
My Research DataMy Research Data
0
50
100
1st
Qtr
2nd
Qtr
3rd
Qtr
4th
Qtr
East
North
East West North
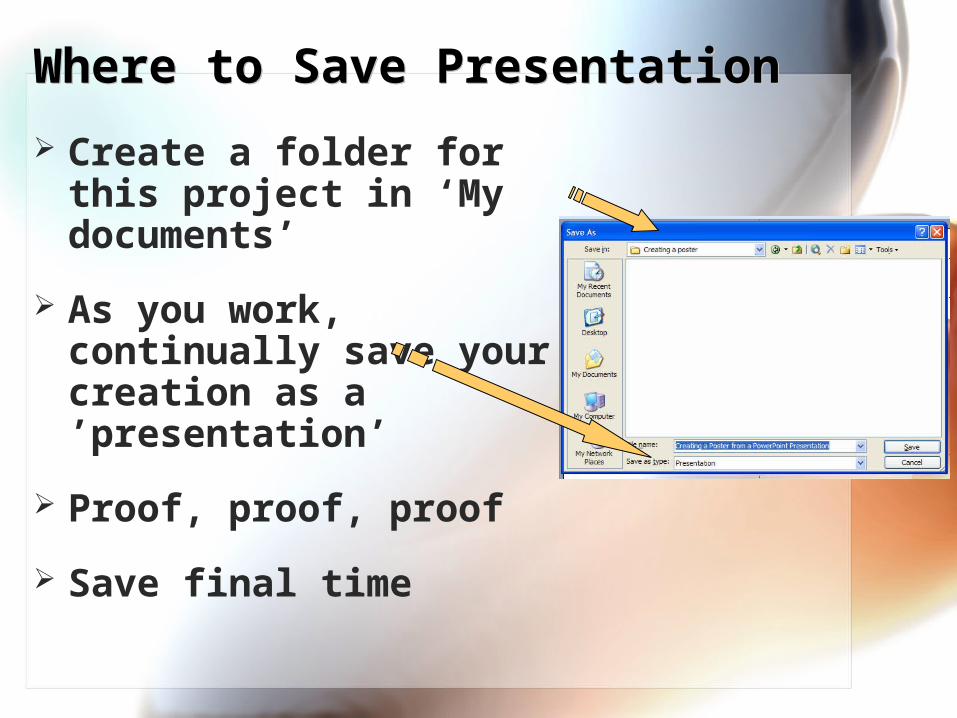
Where to Save PresentationWhere to Save Presentation
Create a folder for this project in ‘My documents’
As you work, continually save your creation as a ’presentation’
Proof, proof, proof
Save final time
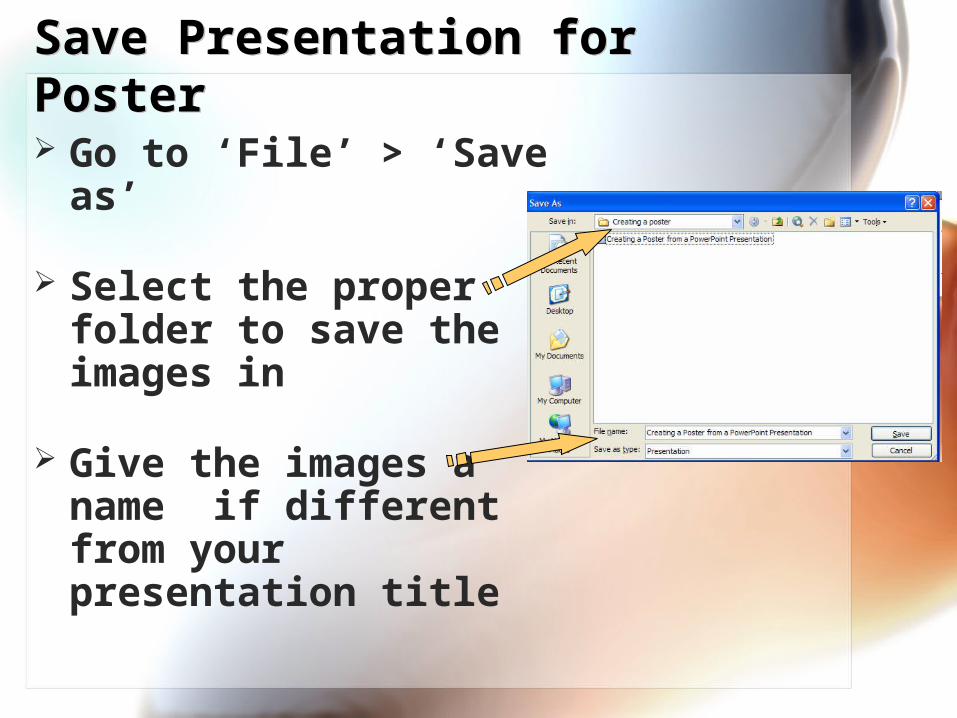
Save Presentation for PosterSave Presentation for Poster
Go to ‘File’ > ‘Save as’
Select the proper folder to save the images in
Give the images a name if different from your presentation title

Save for PosterSave for Poster Go to ‘File’:
‘Save as’>‘save as type:’
Scroll down and select: ‘JPEG File Interchange Format’
Click ‘save’
When prompt appears, click ‘every slide’
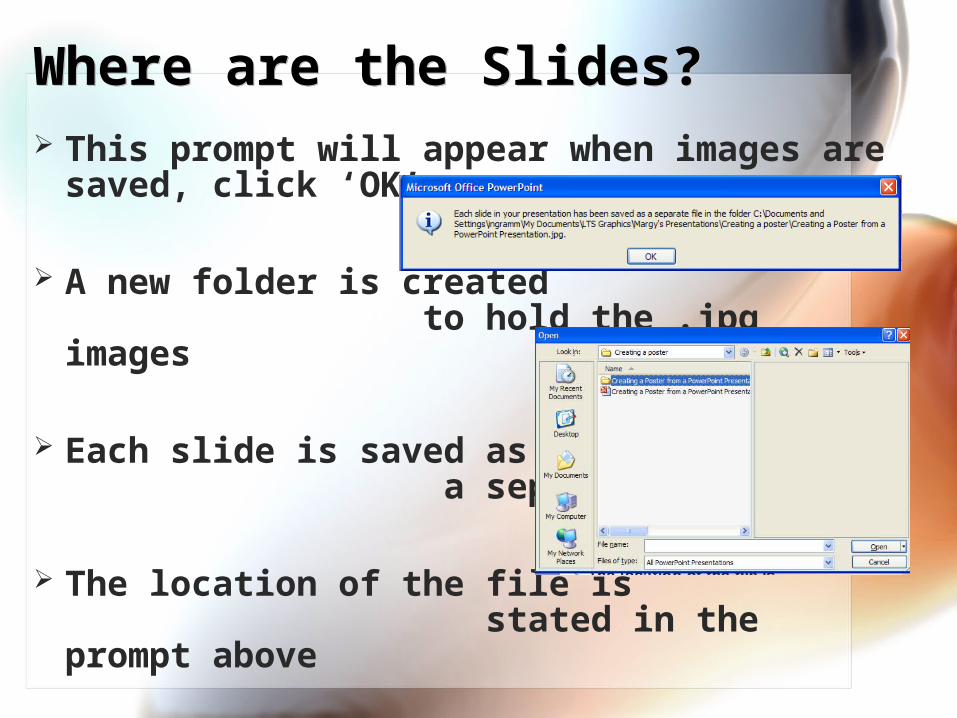
Where are the Slides?Where are the Slides? This prompt will appear when images are
saved, click ‘OK’
A new folder is created to hold the .jpg images
Each slide is saved as a separate .jpg image
The location of the file is stated in the prompt above

What’s Next?What’s Next?
Open a ‘New” PowerPoint presentation
Go to File > Page Setup, and select: ‘Custom’ specify a size up to 42”x56” Click ‘OK’
Select blank content layout
Layout shown will be the entire poster
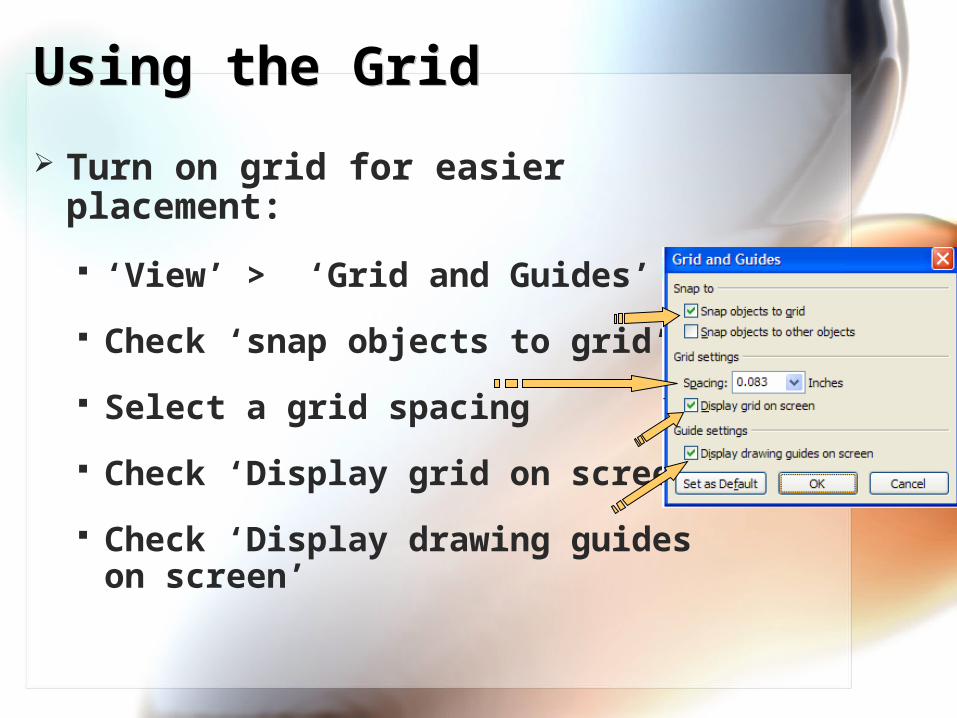
Using the GridUsing the Grid
Turn on grid for easier placement:
‘View’ > ‘Grid and Guides’
Check ‘snap objects to grid’
Select a grid spacing
Check ‘Display grid on screen’
Check ‘Display drawing guides on screen’
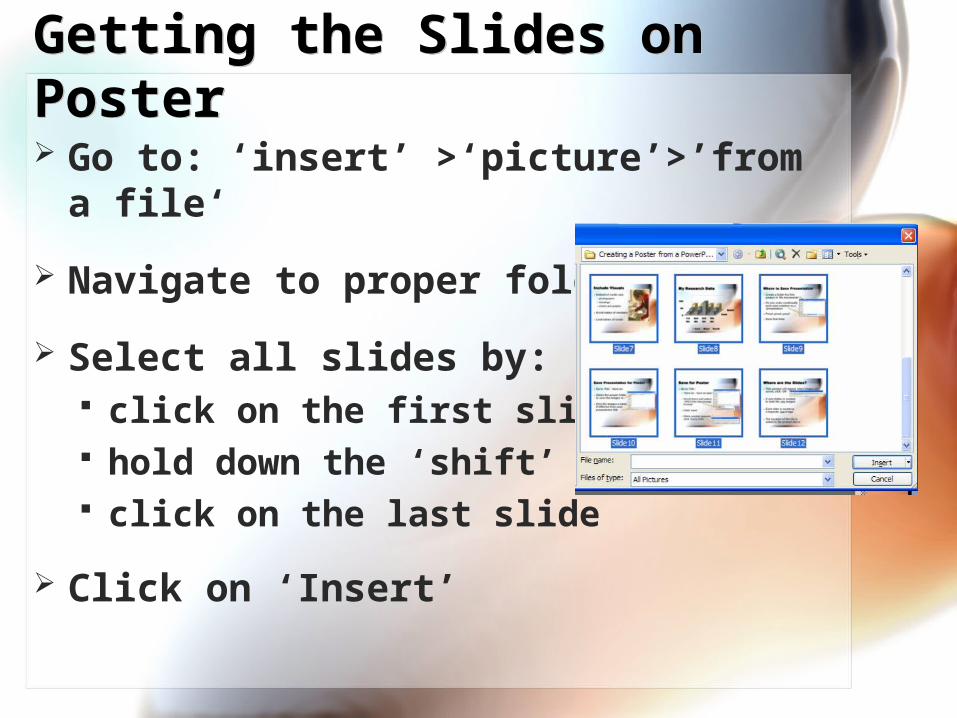
Getting the Slides on PosterGetting the Slides on Poster Go to: ‘insert’ >‘picture’>’from a file‘
Navigate to proper folder
Select all slides by: click on the first slide hold down the ‘shift’ key click on the last slide
Click on ‘Insert’
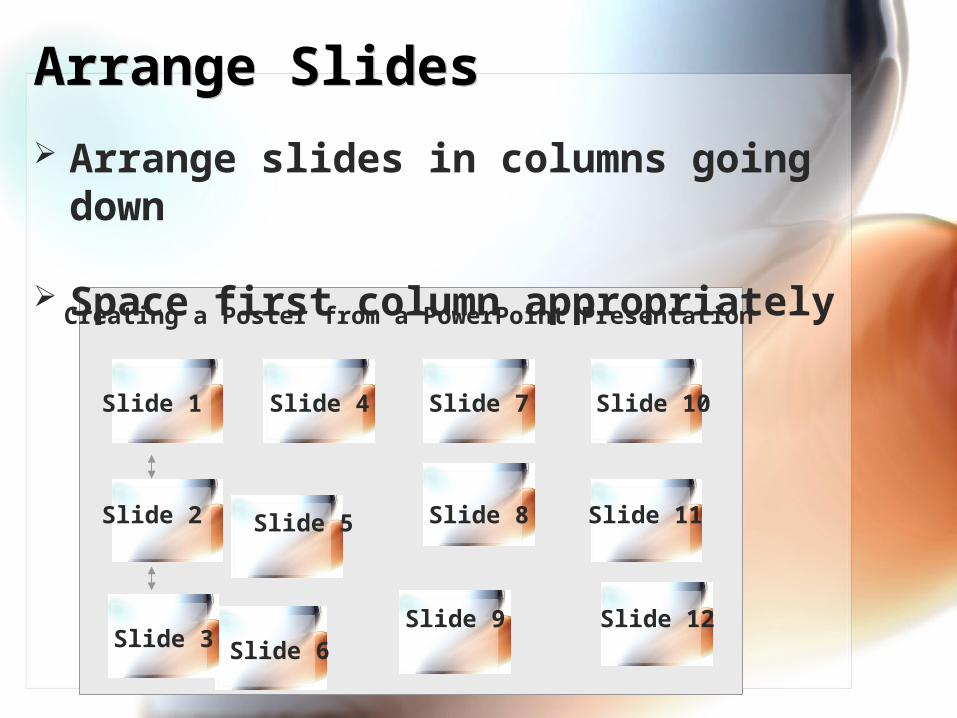
Arrange SlidesArrange Slides
Arrange slides in columns going down
Space first column appropriately
Creating a Poster from a PowerPoint Presentation
Slide 12
Slide 11
Slide 9
Slide 10
Slide 8
Slide 7
Slide 6
Slide 5
Slide 4
Slide 3
Slide 2
Slide 1

Align SlidesAlign Slides Align slides in first column by
holding down the ‘shift’ key and clicking on each slide in the column
go to ‘draw’ > ‘align or distribute’ > ‘align left’ continue for each column
Align slides in first row by holding down the ‘shift’ key and clicking on each
slide in the column go to ‘draw’ > ‘align or distribute’ > ‘align top’ continue for each row

Compress ImagesCompress Images Click on an image and then on the
‘compress’ tool on the picture toolbar
On prompt screen select ‘all pictures in document’ and ‘print’ resolution
Save final version as a presentation

Completed PosterCompleted Poster
Slide 12
Slide 11
Slide 9
Slide 10
Slide 8
Slide 7
Slide 6
Slide 5
Slide 4
Slide 3
Slide 2
Slide 1

Poster Background/TemplatePoster Background/Template Preselect the background or template you will
use for large poster. Use a blank/white background for slides
• Colored text may be used• Include colored charts and visuals
Save as JEPG Interchange Format images
Insert images onto large poster (see previous slide: Getting the Slides on the Poster)
Arrange slides in columns
Continually save as a presentation

Get Rid of the White BackgroundGet Rid of the White Background
Click on image to highlight it
Locate ‘Picture’ toolbar (View>Toolbars>Picture)
Click on ‘Set Transparent Color’ tool
Click on selected image- background will disappear
Repeat for each image