Embed Size (px)
Citation preview
Last updated: 02/12/2013 Page 1 of 27
An Expense Report (ER) is a tool employees use to be reimbursed for travel or other out-of-pocket expenses and account for state travel card transactions. It is a recommended best practice to create, submit, and account for travel card transactions on an Expense Report in SFS within ten days of completed travel.
In this module, you will learn how to create a travel expense report using a blank report. Click SFS Applications. NOTE: All items marked with an * must be completed. NOTE: Save periodically as SFS times out after 20 minutes.
New York State Office of General Services Business Services Center
Empire State Plaza Albany, NY 12242
(Phone) 518-457-4272 (Fax) 518-486-9166
Creating an Expense Report in SFS Using a Blank Report

Page 2 of 27
Next, click SFS Financials (either location).
Click Employee Self-Service.

Page 3 of 27
Click Expense Report under Employee T&E Center.
Click Create to open an Expense Report Entry page.
Page 4 of 27
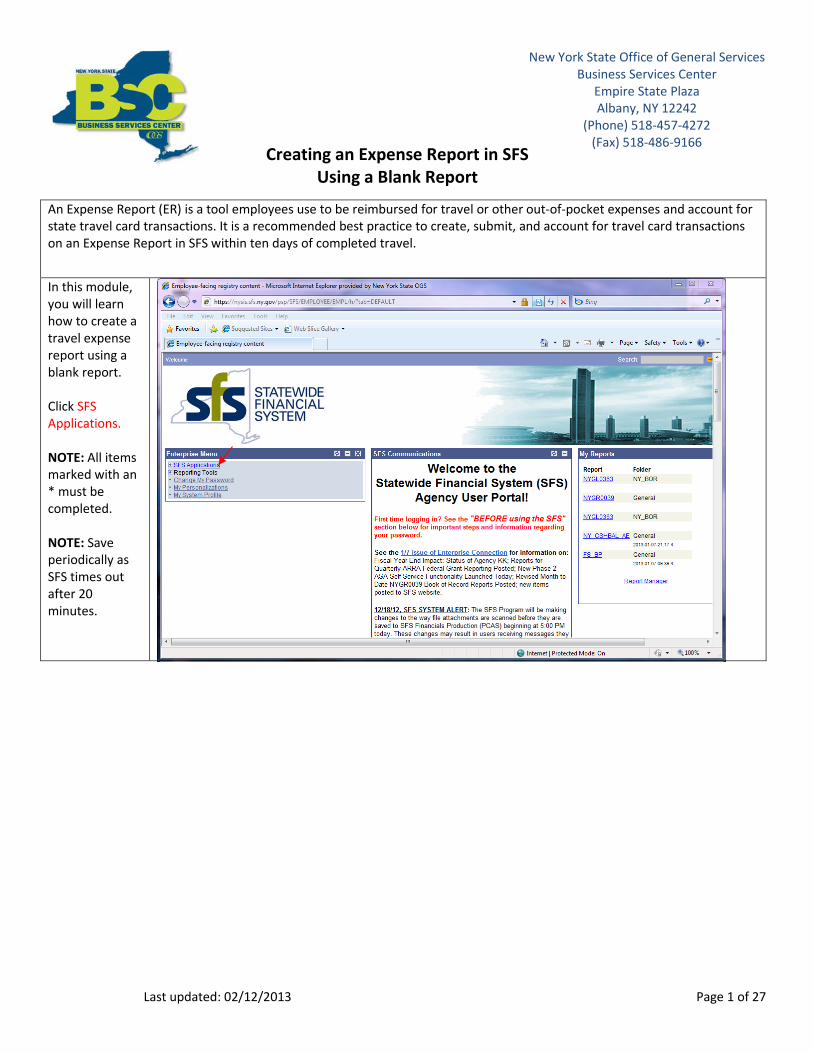
Collapse the menu pagelet – Click the minimize button. This action gives a larger screen for better viewing.
This is the Expense Report Entry page. It is used to create and submit ERs.

Page 5 of 27
The Quick Start list allows the user to select the most efficient creation method. Click the Quick Start drop down arrow. Choose A Blank Report. Click GO.
First, enter a brief description of your trip for this report. Click in the Description field. The description should be specific enough so the expense report can be identified quickly. This field has a 30 character limit. Do NOT use typographical characters, i.e., !@#$%^&()”?>< in any fields.

Page 6 of 27
Click in the Comment field. This field is not mandated by the BSC. Per your agency’s guidelines, enter the justification or purpose of the trip. Additional comments can be added to this field. This field has a 10,000 character limit.
Choose your Business Purpose. Click the drop down arrow. Select the business reason that best fits your travel purpose.
Page 7 of 27
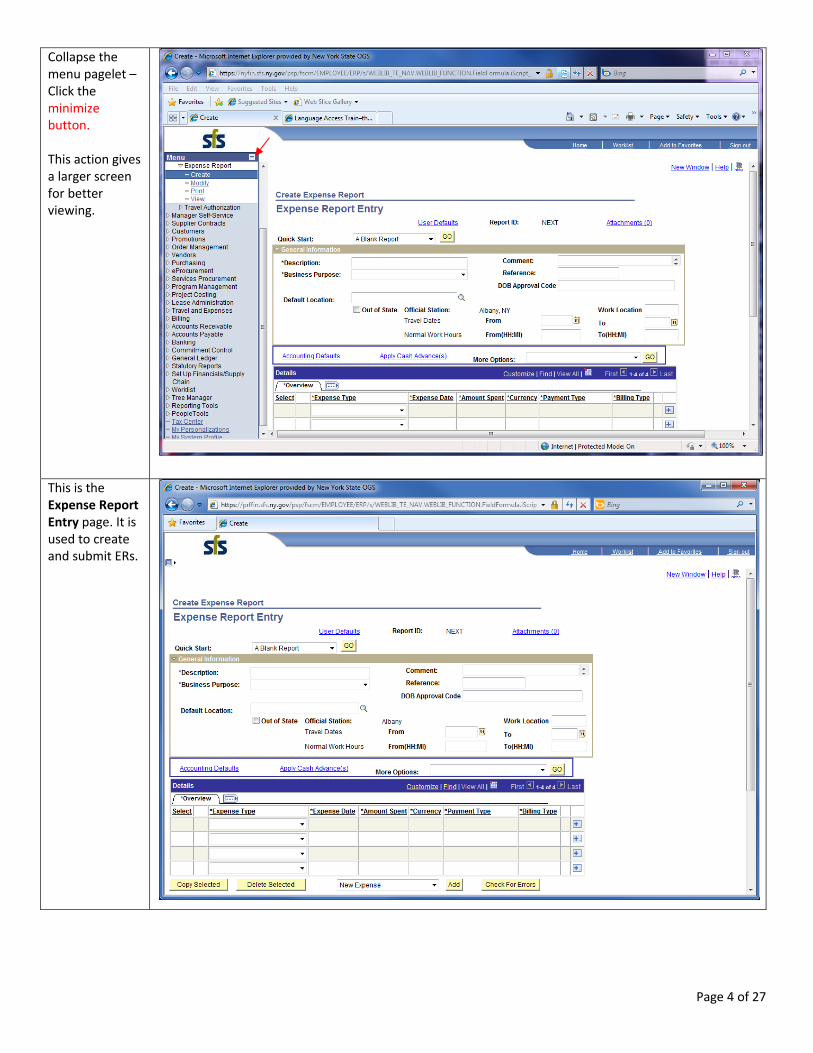
Reference This field can be used for Agency Reference, as necessary. An example would be a travel code that the agency uses. This is an optional field. (This field holds limited characters.)
Out-of-state travel requires DOB approval. NOTE: See DOB B-1184 bulletin at: http://www.budget.ny.gov/guide/bprm/bulletins/b-1184_reissue.html If a DOB Approval Code was obtained for this trip, it must be entered in the DOB Approval Code field.
Page 8 of 27
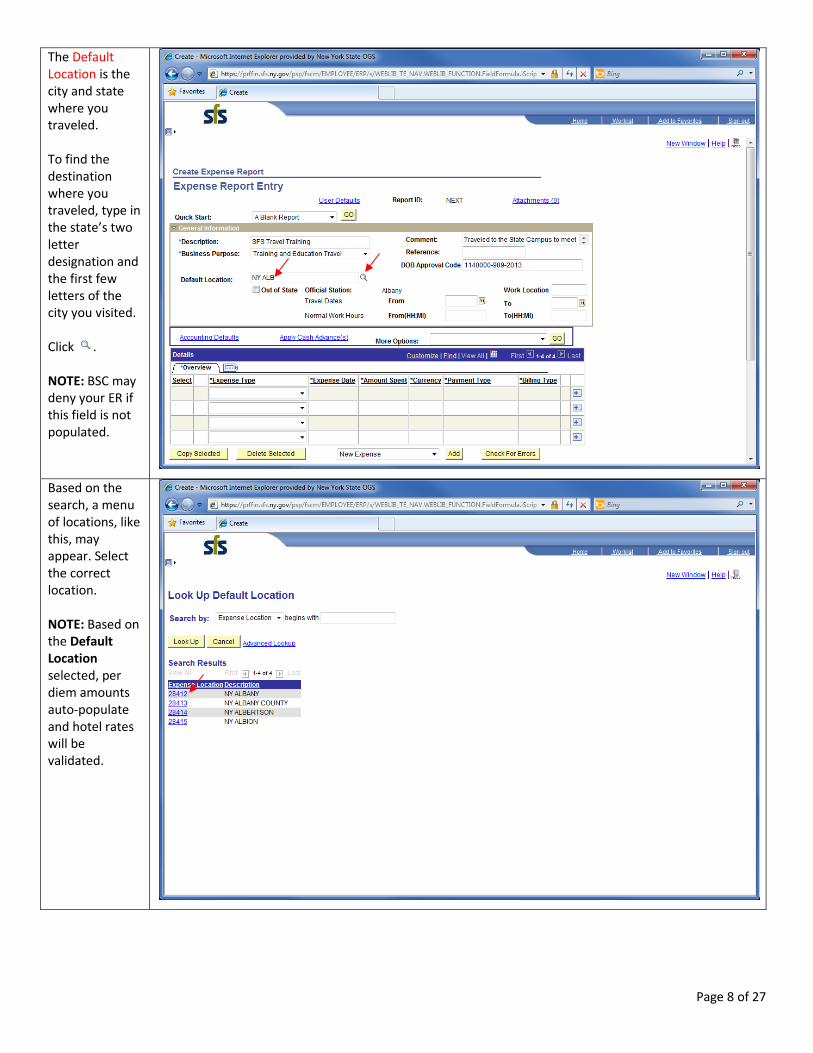
The Default Location is the city and state where you traveled. To find the destination where you traveled, type in the state’s two letter designation and the first few letters of the city you visited. Click . NOTE: BSC may deny your ER if this field is not populated.
Based on the search, a menu of locations, like this, may appear. Select the correct location. NOTE: Based on the Default Location selected, per diem amounts auto-populate and hotel rates will be validated.

Page 9 of 27
If travel is Out of State, click this box.
The Official Station field is used to identify the location the user is officially assigned. NOTE: The information in this field will auto-populate based on your Employee Profile.
Page 10 of 27
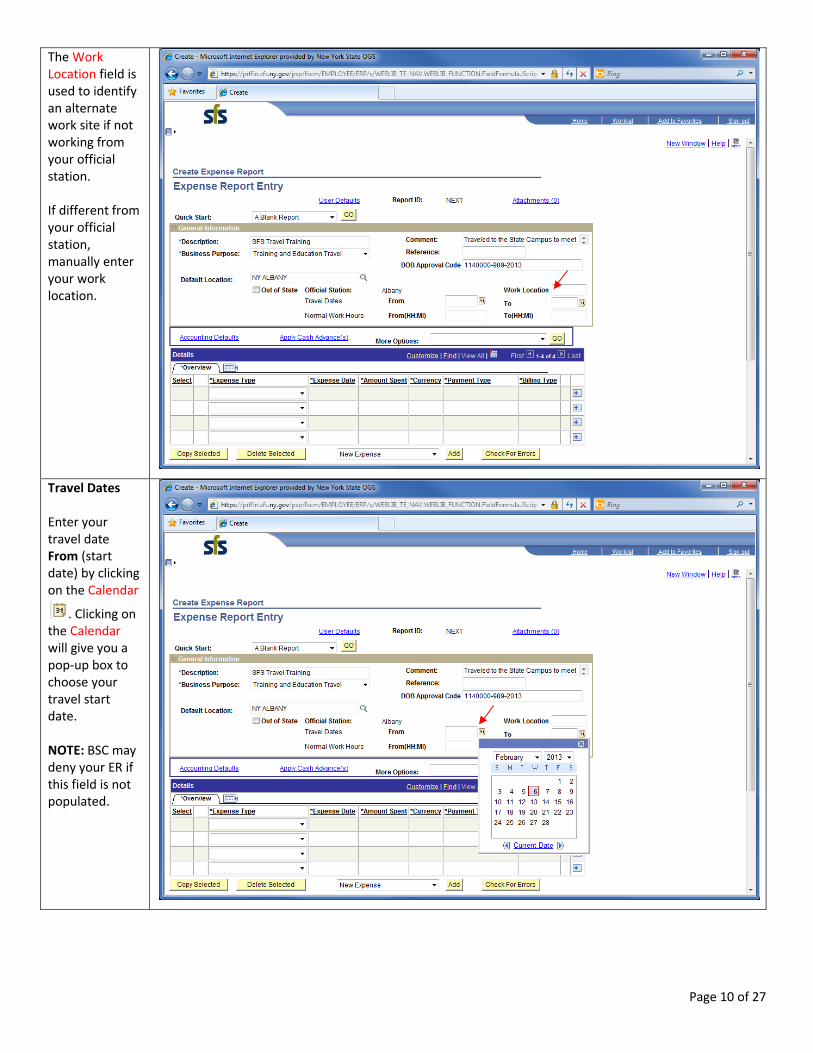
The Work Location field is used to identify an alternate work site if not working from your official station. If different from your official station, manually enter your work location.
Travel Dates Enter your travel date From (start date) by clicking on the Calendar
. Clicking on the Calendar will give you a pop-up box to choose your travel start date. NOTE: BSC may deny your ER if this field is not populated.
Page 11 of 27
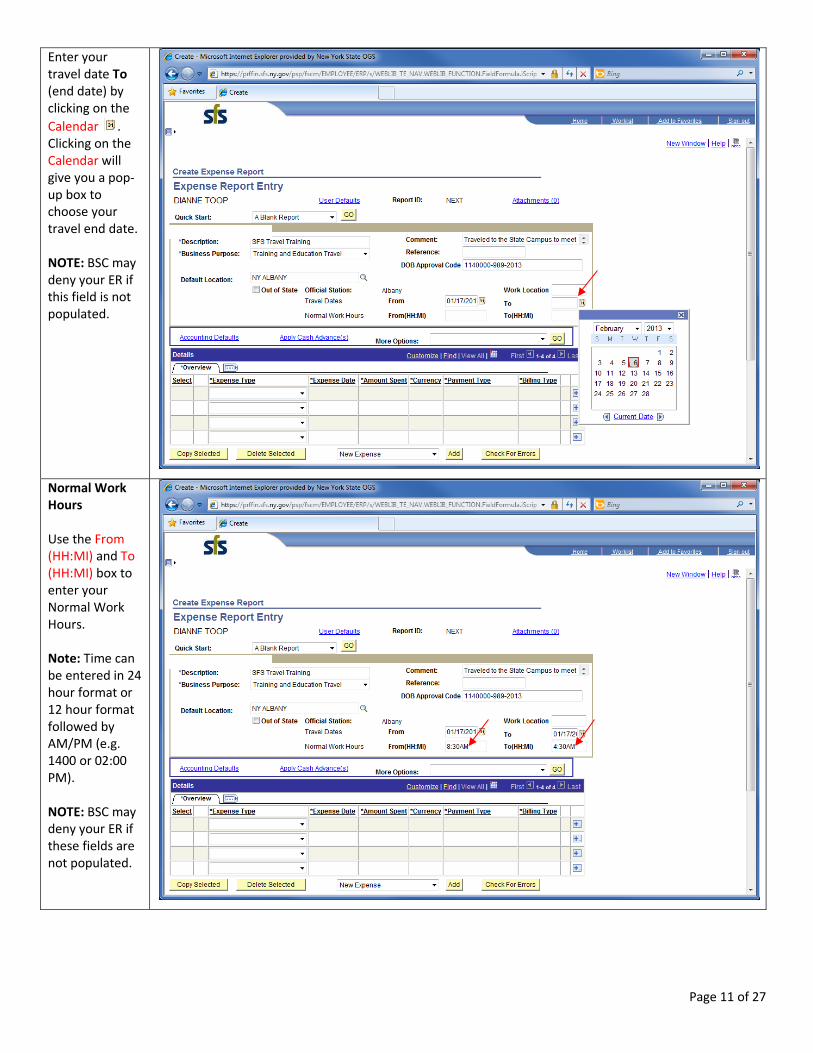
Enter your travel date To (end date) by clicking on the Calendar . Clicking on the Calendar will give you a pop-up box to choose your travel end date. NOTE: BSC may deny your ER if this field is not populated.
Normal Work Hours Use the From (HH:MI) and To (HH:MI) box to enter your Normal Work Hours. Note: Time can be entered in 24 hour format or 12 hour format followed by AM/PM (e.g. 1400 or 02:00 PM). NOTE: BSC may deny your ER if these fields are not populated.
Page 12 of 27
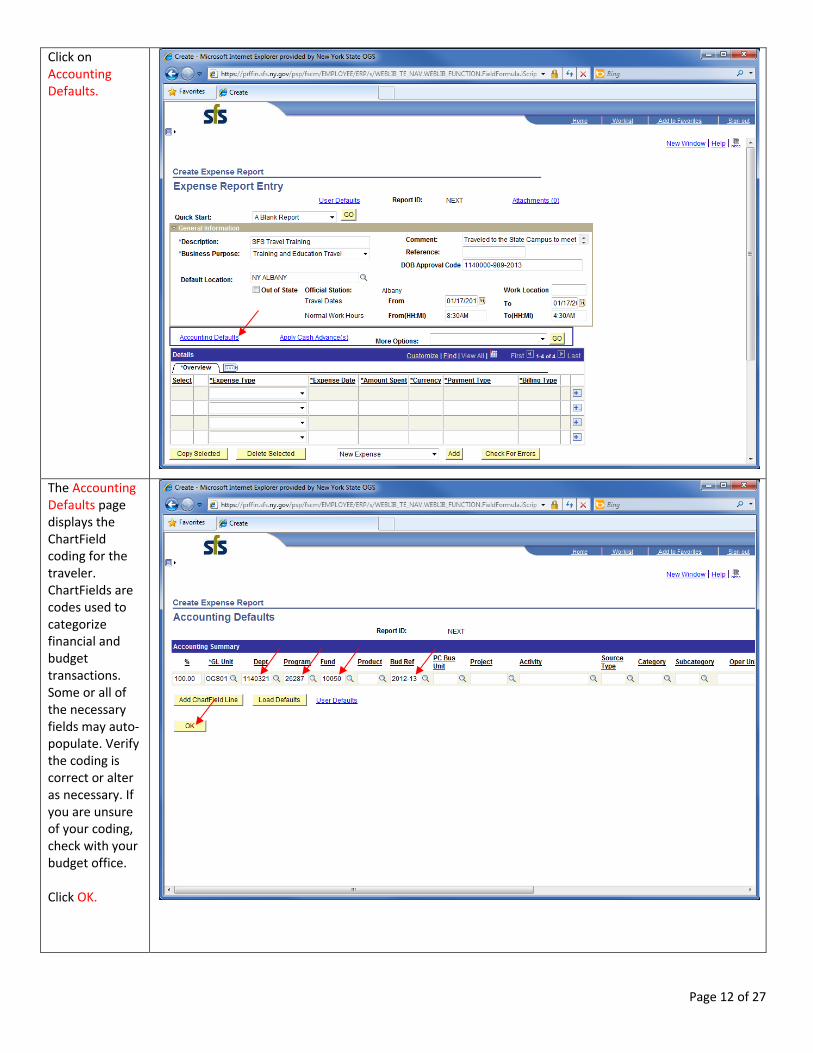
Click on Accounting Defaults.
The Accounting Defaults page displays the ChartField coding for the traveler. ChartFields are codes used to categorize financial and budget transactions. Some or all of the necessary fields may auto-populate. Verify the coding is correct or alter as necessary. If you are unsure of your coding, check with your budget office. Click OK.
Page 13 of 27
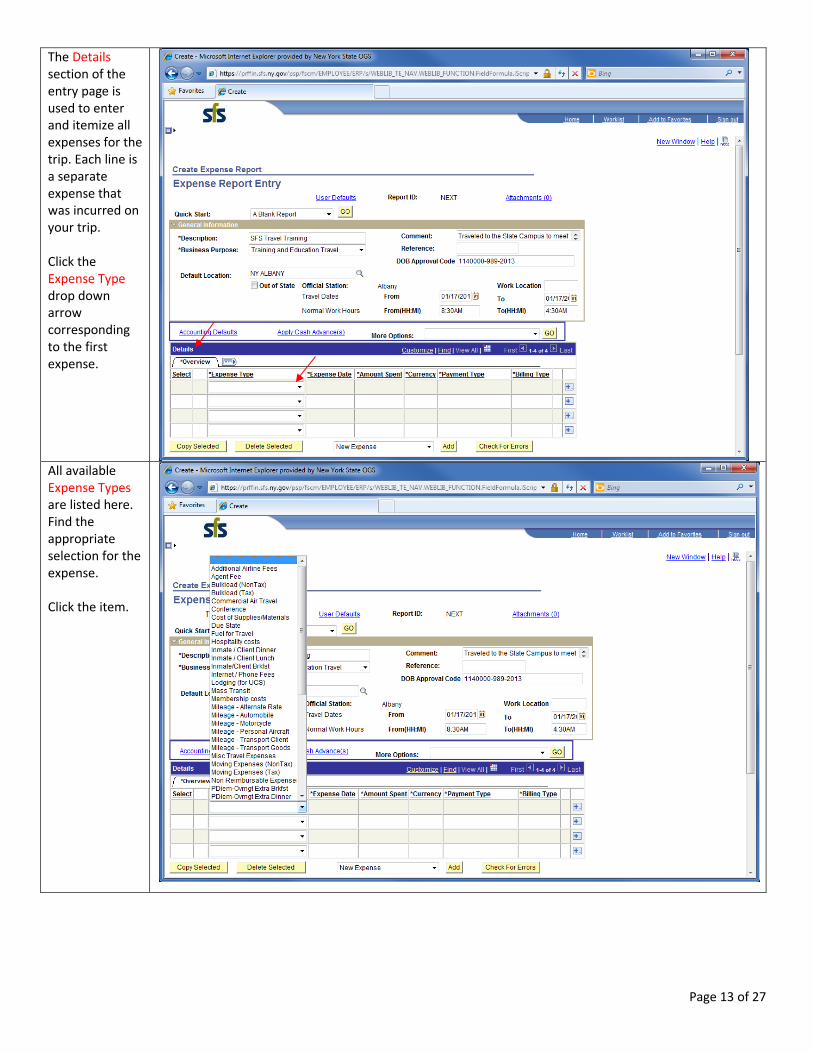
The Details section of the entry page is used to enter and itemize all expenses for the trip. Each line is a separate expense that was incurred on your trip. Click the Expense Type drop down arrow corresponding to the first expense.
All available Expense Types are listed here. Find the appropriate selection for the expense. Click the item.

Page 14 of 27
Next, enter your Expense Date by clicking on the Calendar
.
Clicking on the Calendar will give you a pop-up box to choose your expense date.

Page 15 of 27
Next, enter the Amount Spent on the expense.
Click the Payment Type drop down arrow. There are three Payment Types: 1. AP Prepaid: Indicates an Accounts Payable voucher will be used to pay the merchant. 2. Personal Funds: Indicates an out-of-pocket expense. 3. Travel Card: Indicates the use of the Travel Card. Select the appropriate Payment Type for the expense.

Page 16 of 27
The Billing Type, while indicating it is a mandatory field, does not have any functionality. It can be ignored.
Click the *Detail link NOTE: It is recommended to click the Detail link for every expense entered. There may be additional required information for the item that can only be entered via the Detail link.
Page 17 of 27
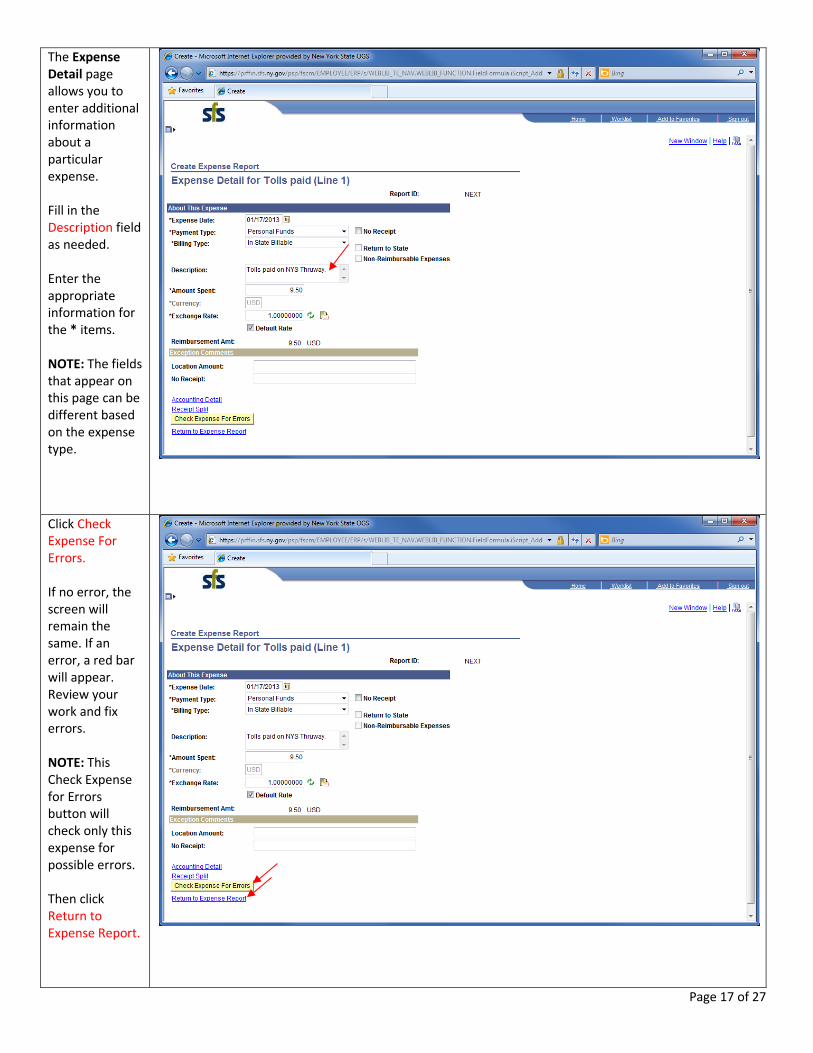
The Expense Detail page allows you to enter additional information about a particular expense. Fill in the Description field as needed. Enter the appropriate information for the * items. NOTE: The fields that appear on this page can be different based on the expense type.
Click Check Expense For Errors. If no error, the screen will remain the same. If an error, a red bar will appear. Review your work and fix errors. NOTE: This Check Expense for Errors button will check only this expense for possible errors. Then click Return to Expense Report.

Page 18 of 27
SFS times out after 20 minutes. Click Save For Later to save your work and continue the ER.
After you have clicked Save For Later, the computer will automatically generate a ten digit Report ID number. This is your reference number for the expense report you have created.

Page 19 of 27
After you have saved your ER, continue entering all additional expenses incurred during travel. A typical expense report will have multiple expense lines representing all travel expenses that were made during travel. Complete a line for each expense of the trip. If you have run out of lines, you can add additional rows.
Click .

Page 20 of 27
If the yellow bar appears, click it and select Temporarily Allow Scripted Windows.
Click again.
Enter the number of rows to add. Click OK.
Page 21 of 27
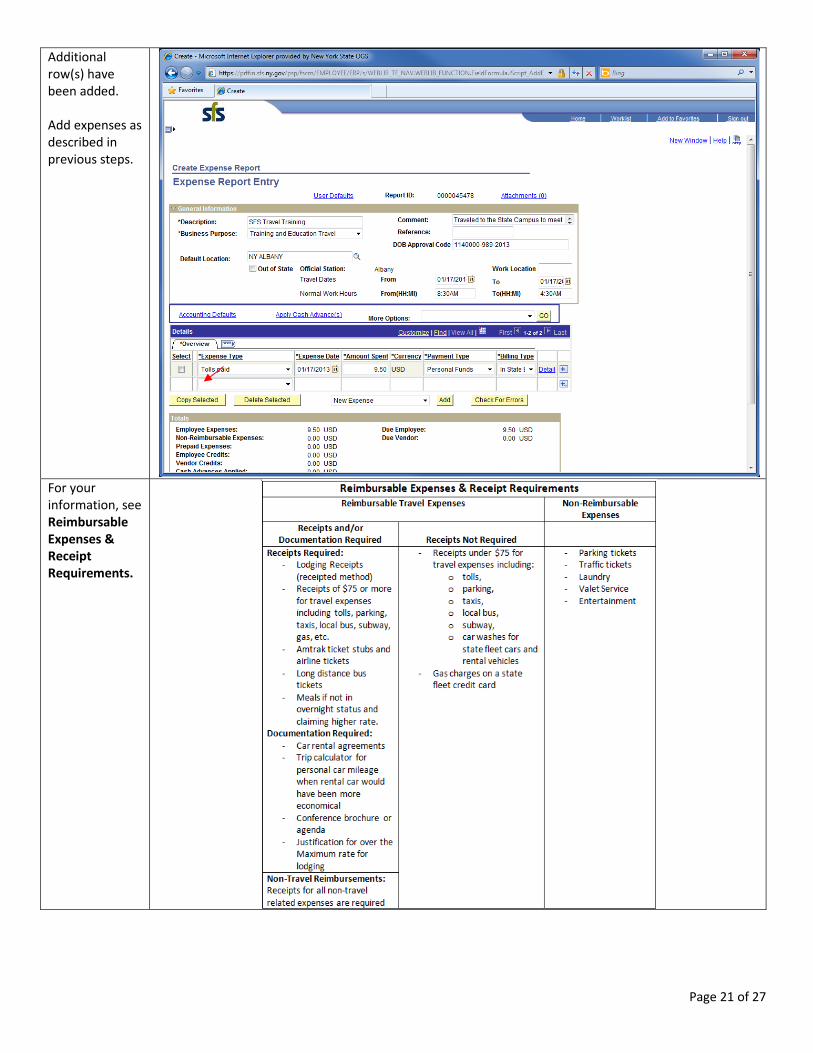
Additional row(s) have been added. Add expenses as described in previous steps.
For your information, see Reimbursable Expenses & Receipt Requirements.

Page 22 of 27
Any required receipts for the trip must be attached to the ER via a scanned document. NOTE: BSC cannot add attachments. Click Attachments. NOTE: BSC may deny your ER if required receipts are not attached.
Click Add Attachment.
Page 23 of 27
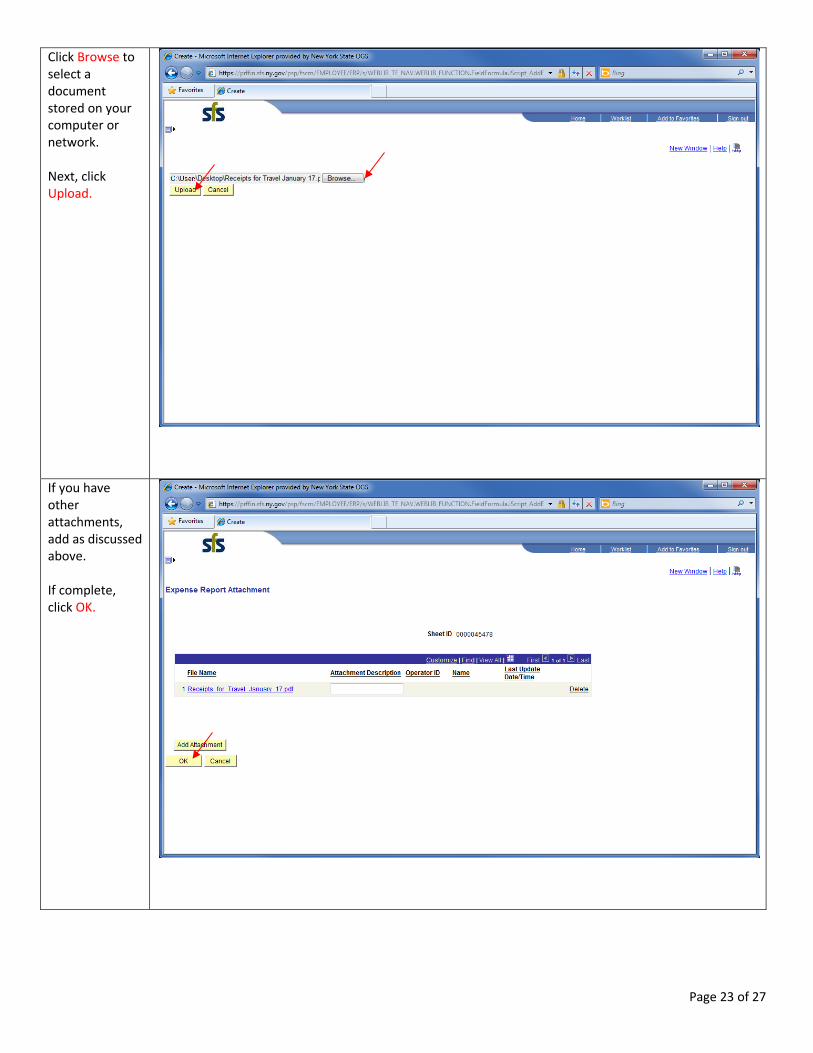
Click Browse to select a document stored on your computer or network. Next, click Upload.
If you have other attachments, add as discussed above. If complete, click OK.
Page 24 of 27
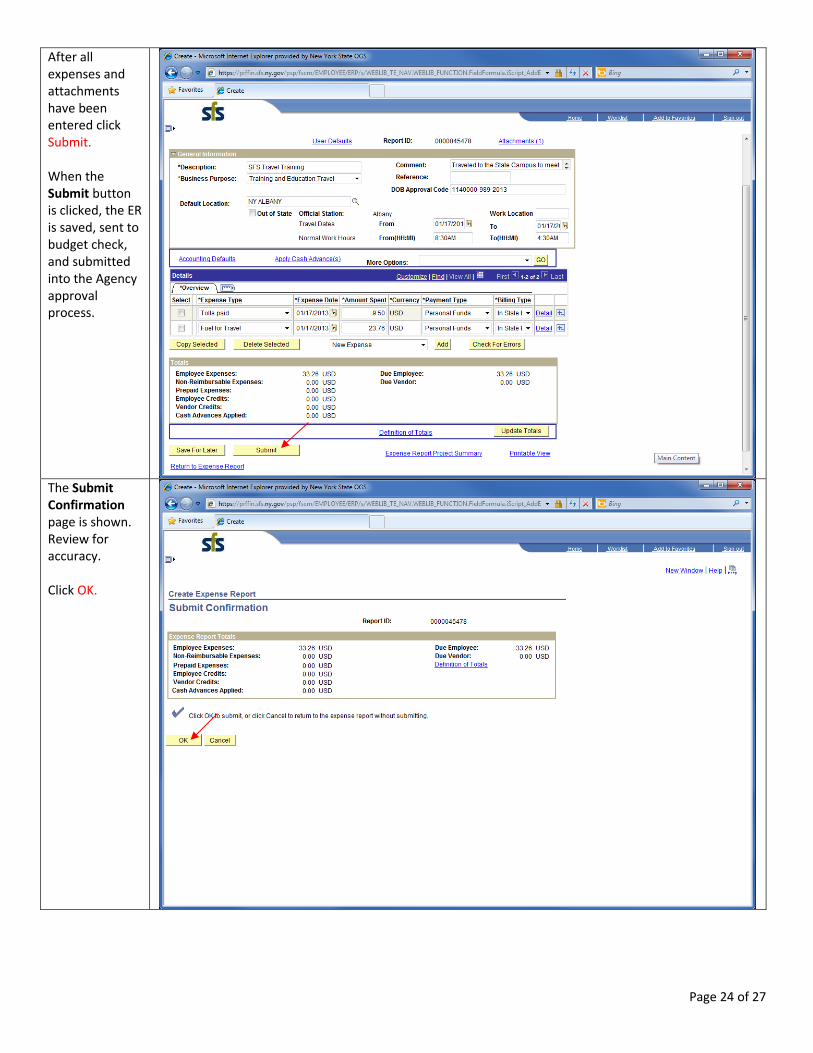
After all expenses and attachments have been entered click Submit. When the Submit button is clicked, the ER is saved, sent to budget check, and submitted into the Agency approval process.
The Submit
Confirmation page is shown. Review for accuracy. Click OK.

Page 25 of 27
The Expense Report Detail shows what you have submitted.