Embed Size (px)
Citation preview

228
CREATING MULTIMEDIA PRESENTATIONS
Lesson Overview
In this lesson, you’ll do the following:
• Add videos and Flash animations to PDF fi les.
• Add sounds to PDF documents.
• Set playback options for videos and Flash
animations.
• Use an image fi le as a poster for a video or Flash
animation.
• Control transitions and presentation timing using
full-screen mode
• Learn about adding widgets to your PDF fi les.
Th is lesson will take approximately 60 minutes to complete. Copy the
Lesson11 folder onto your hard drive if you haven’t already done so.
11

229
<<Art to come>>

230 LESSON 11 Creating Multimedia Presentations
Getting started
In this lesson, you’ll create a presentation about a new environmental bottling
campaign by Aquo, a fi ctitious drink manufacturer. You’ll add video and animation
fi les to three pages, and you’ll control when the video or animation fi le plays and
how it appears on the page. You’ll assemble the pages into a presentation that will
appear in full-screen mode, complete with timed transitions.
1 Start Acrobat 9 Pro.
2 To see what the fi nished fi le looks like, navigate to the Lesson11 folder and open
the Aquo_presentation.pdf fi le. Click Yes if Acrobat warns you that the PDF fi le
will open in full-screen mode.
Acrobat menu bars and toolbars are hidden when you open this fi le because it is set
to open in full-screen mode. Th e pages turn on their own, but you can also use the
right or left arrow keys on your keyboard to move forward or backward through the
presentation. On the CEO bio page, click the headshot of the CEO to play a short
video.
3 When you have fi nished examining the PDF fi le, press Esc or press Ctrl+L
(Windows) or Command+L (Mac OS) to display menus and toolbars. You can
keep this end fi le open for reference while you work on the exercise, or you can
close the fi le by choosing File > Close.
Adding a video fi le to a PDF fi le
In Acrobat 9 Pro, you can add an FLV (Flash video) fi le to a PDF. Th e fi le is com-
pletely embedded within the PDF document, so anyone can view it using Adobe
Reader 9; you do not need a QuickTime player or Flash player to view videos in the
PDF fi le.
When you add a video fi le to a PDF, you can set launch behaviors and other options
that determine how the video fi le appears and plays in the PDF document.
1 Choose File > Open.
2 Navigate to the Lesson11 folder, and select the Aquo_Bottle_Ad.pdf fi le.
3 Choose Multimedia > Video Tool from the Tasks toolbar.
Th e cursor becomes a crosshair.
Note: � You need Acrobat 9 Pro to add movies, sounds, Flash animations, and widgets to your presentations.
Note: � In Acrobat 9 Pro, you can add FLV (Flash video) fi les or F4V ( H.264 encoded video fi les). In Acrobat 9 Pro Extended, you can add videos in a much larger range of formats, and convert them into FLV fi les automatically.

ACROBAT 9 CLASSROOM IN A BOOK 231
4 Drag a box over the right half of the document. Th e Insert Video dialog box
appears.
5 Click Browse, and then navigate to the Lesson11 folder.
6 Select the Aquo_T03_Loop.fl v fi le, and click Open. Th e Aquo_T03_Loop.fl v fi le
is a video fi le of the new Aquo bottle.
7 Select Show Advanced Options in the Insert Video dialog box.
8 Click the Launch Settings tab.

232 LESSON 11 Creating Multimedia Presentations
9 From the Enable When menu, choose Th e Page Containing Th e Content Is
Opened. Make sure Retrieve Poster From Media is selected in the Poster Image
section of the dialog box.
10 Click OK.
An image from the video fi le appears on
the PDF page. A Play button automatically
appears in the bottom-left corner of the
video.
11 Click the Play button to play the video.
12 As the video plays, move the cursor over
the video, and then away from the video.
Playback controls appear at the bottom
of the video when the cursor is over the video.
11 Choose File > Save As. Name the fi le Aquo_Bottle_anim.pdf.
12 Choose File > Close.

ACROBAT 9 CLASSROOM IN A BOOK 233
Adding a Flash animation
You can also add Flash animations (SWF fi les) to Adobe PDFs. You’ll add an ani-
mated header to jazz up an ordinary document.
1 Choose File > Open.
2 In the Lesson11 folder, select the Aquo_FAQ.pdf fi le, and click Open.
3 Choose View > Toolbars > Multimedia.
Acrobat displays the Multimedia toolbar, which contains buttons for the 3D, Flash,
Sound, and Video tools.
4 Select the Flash tool in the Multimedia toolbar. Th e cursor turns into a cross-
hair.
5 Drag a box across the top of the entire document. Th e Insert Flash dialog box
opens.
6 Click Browse, and navigate to the Lesson11 folder.
7 Select Aquo_Header.swf, and click Open.
8 Select Show Advanced Options in the Insert Flash dialog box.
9 Click the Launch Settings tab, and then choose Th e Page Containing Th e
Content Is Visible from the Enable When menu.
Tip: � Use the 3D tool to place a three-dimensional fi le on a PDF page. To learn about working with 3D images in Acrobat, see Lesson 15, "Working with 3D in PDF Files."
234 LESSON 11 Creating Multimedia Presentations
10 Click OK. Th e header appears across the top of the document.
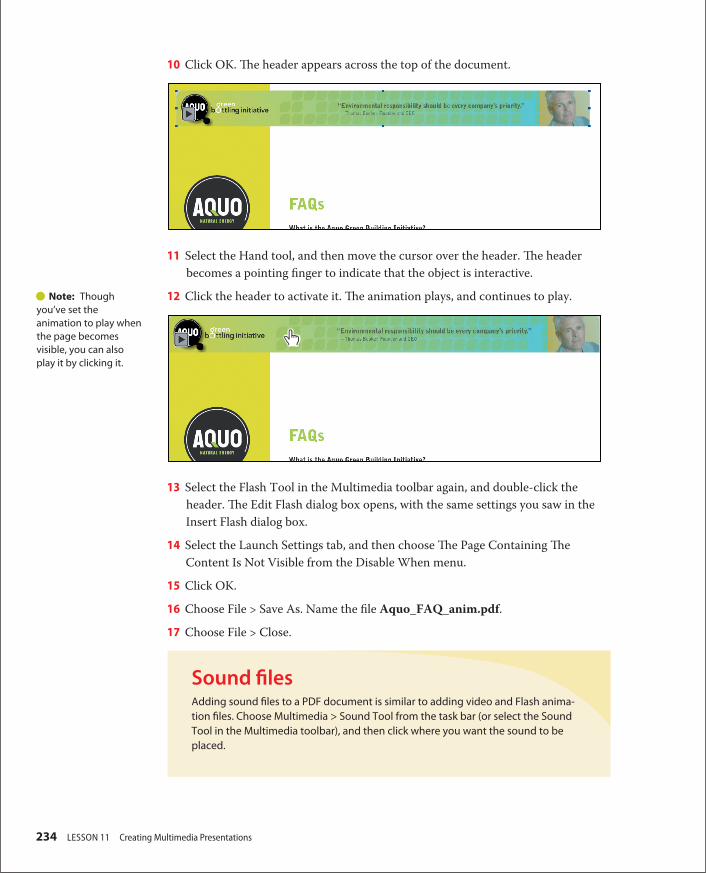
11 Select the Hand tool, and then move the cursor over the header. Th e header
becomes a pointing fi nger to indicate that the object is interactive.
12 Click the header to activate it. Th e animation plays, and continues to play.
13 Select the Flash Tool in the Multimedia toolbar again, and double-click the
header. Th e Edit Flash dialog box opens, with the same settings you saw in the
Insert Flash dialog box.
14 Select the Launch Settings tab, and then choose Th e Page Containing Th e
Content Is Not Visible from the Disable When menu.
15 Click OK.
16 Choose File > Save As. Name the fi le Aquo_FAQ_anim.pdf.
17 Choose File > Close.
Sound fi lesAdding sound fi les to a PDF document is similar to adding video and Flash anima-tion fi les. Choose Multimedia > Sound Tool from the task bar (or select the Sound Tool in the Multimedia toolbar), and then click where you want the sound to be placed.
Note: � Though you’ve set the animation to play when the page becomes visible, you can also play it by clicking it.

ACROBAT 9 CLASSROOM IN A BOOK 235
Assigning a poster fi le for a video or animation
By default, Acrobat displays the opening frame of a video or animation in the PDF
document when the content is not playing. However, you can assign a separate
image fi le to represent the video or animation. Th e image Acrobat displays is called
the poster.
You’ll add a new video to a biography of the CEO and assign an image for its poster.
1 Open the Aquo_CEO.pdf fi le.
2 Select the Video tool in the Multimedia toolbar.
3 Draw a box over the image on the right
side of the page. You’ll add a video of
the company CEO talking about the
initiative.
4 In the Insert Video dialog box, click Browse.
5 Select the CEO_Video.fl v fi le in the Lesson11 folder, and click Open.
6 Select Show Advanced Options in the Insert Video dialog box.
7 Select the Launch Settings tab.
8 In the Poster Image area, select Create Poster From File, and then click Browse.
9 Select the Th omas_Booker_Small.jpg fi le in the Lesson11 folder, and click Open.
10 Select the Controls tab.
11 Choose Play, Stop, Seek, Mute, and Volume from the Skin menu.
Th e skin is the set of playback controls displayed with the video. Acrobat provides
several skin options that determine the level of control you give viewers.
Note: � In Acrobat 9 Pro Extended, you can also assign a specifi c video or animation frame as the poster.
Note: � You have not changed the activation settings because you want the video of the CEO to play only when the viewer clicks it.

236 LESSON 11 Creating Multimedia Presentations
12 Make sure Auto-Hide Controls is selected.
When Auto-Hide is selected, the skin appears only when the cursor is moved over
the video.
13 Click OK. Th e image of the CEO you
selected as a poster appears where the
video is placed on the page.
14 Select the Video tool. Blue handles appear around the video poster
15 Press the Shift key as you drag a corner of the poster to enlarge it so that its
covers the original image. Drag the poster into position over the image.
15 With the Video tool selected, double-click the poster. Th e Edit Video dialog box
opens.
16 Click the Launch Settings tab.
17 Select Play Content In Floating Window from the Playback Style menu.
Acrobat can display video in a particular place on the page or in a fl oating window,
depending on the option you choose here.
18 Click OK.
Tip: � Using the Shift key when resizing a video or animation fi le ensures that the image is adjusted proportionally.
ACROBAT 9 CLASSROOM IN A BOOK 237
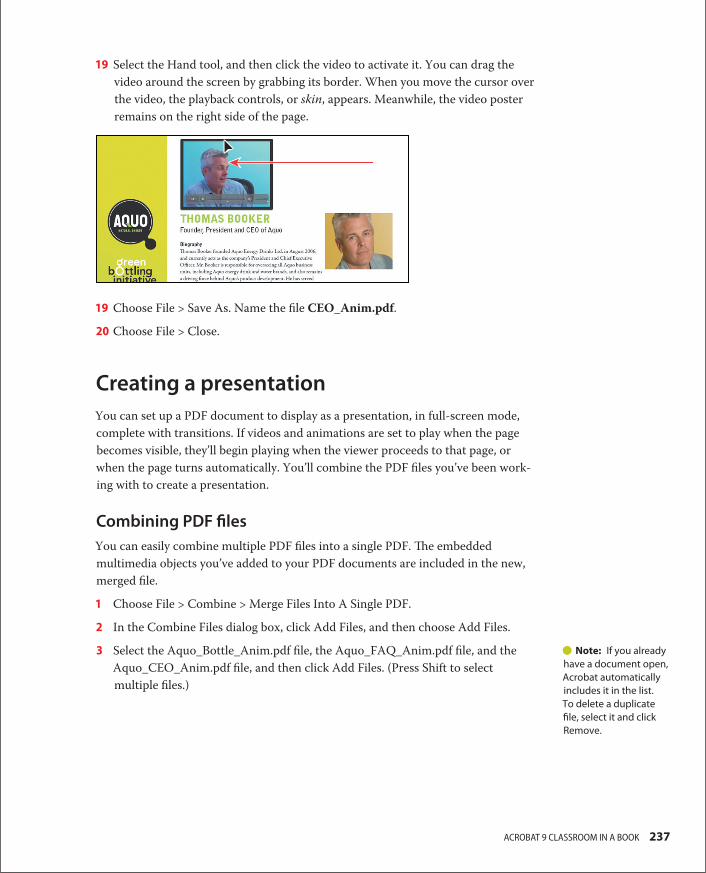
19 Select the Hand tool, and then click the video to activate it. You can drag the
video around the screen by grabbing its border. When you move the cursor over
the video, the playback controls, or skin, appears. Meanwhile, the video poster
remains on the right side of the page.
19 Choose File > Save As. Name the fi le CEO_Anim.pdf.
20 Choose File > Close.
Creating a presentation
You can set up a PDF document to display as a presentation, in full-screen mode,
complete with transitions. If videos and animations are set to play when the page
becomes visible, they’ll begin playing when the viewer proceeds to that page, or
when the page turns automatically. You’ll combine the PDF fi les you’ve been work-
ing with to create a presentation.
Combining PDF fi les
You can easily combine multiple PDF fi les into a single PDF. Th e embedded
multimedia objects you’ve added to your PDF documents are included in the new,
merged fi le.
1 Choose File > Combine > Merge Files Into A Single PDF.
2 In the Combine Files dialog box, click Add Files, and then choose Add Files.
3 Select the Aquo_Bottle_Anim.pdf fi le, the Aquo_FAQ_Anim.pdf fi le, and the
Aquo_CEO_Anim.pdf fi le, and then click Add Files. (Press Shift to select
multiple fi les.)
Note: � If you already have a document open, Acrobat automatically includes it in the list. To delete a duplicate fi le, select it and click Remove.
238 LESSON 11 Creating Multimedia Presentations
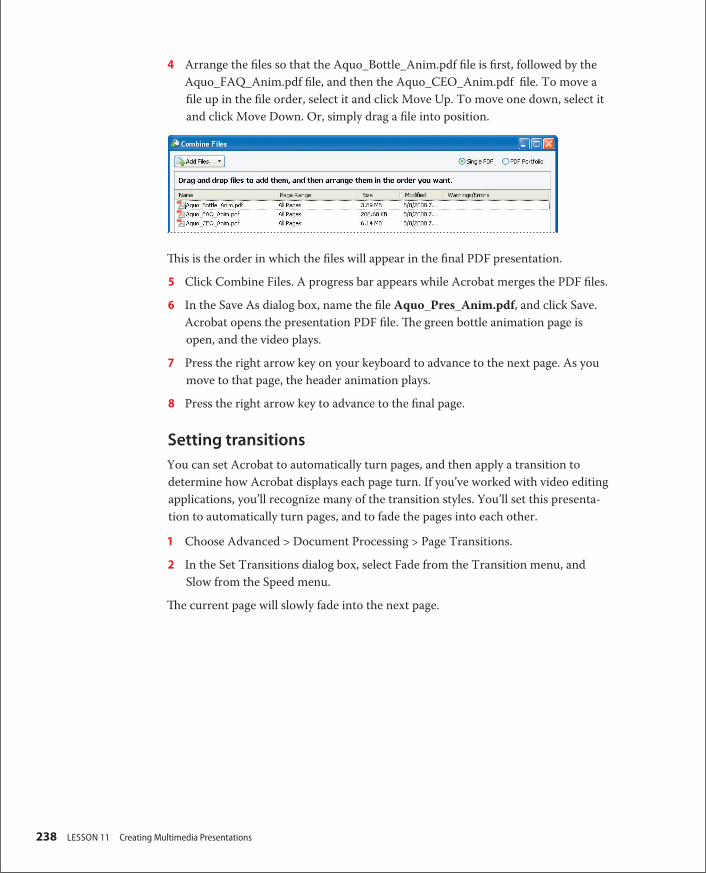
4 Arrange the fi les so that the Aquo_Bottle_Anim.pdf fi le is fi rst, followed by the
Aquo_FAQ_Anim.pdf fi le, and then the Aquo_CEO_Anim.pdf fi le. To move a
fi le up in the fi le order, select it and click Move Up. To move one down, select it
and click Move Down. Or, simply drag a fi le into position.
Th is is the order in which the fi les will appear in the fi nal PDF presentation.
5 Click Combine Files. A progress bar appears while Acrobat merges the PDF fi les.
6 In the Save As dialog box, name the fi le Aquo_Pres_Anim.pdf, and click Save.
Acrobat opens the presentation PDF fi le. Th e green bottle animation page is
open, and the video plays.
7 Press the right arrow key on your keyboard to advance to the next page. As you
move to that page, the header animation plays.
8 Press the right arrow key to advance to the fi nal page.
Setting transitions
You can set Acrobat to automatically turn pages, and then apply a transition to
determine how Acrobat displays each page turn. If you’ve worked with video editing
applications, you’ll recognize many of the transition styles. You’ll set this presenta-
tion to automatically turn pages, and to fade the pages into each other.
1 Choose Advanced > Document Processing > Page Transitions.
2 In the Set Transitions dialog box, select Fade from the Transition menu, and
Slow from the Speed menu.
Th e current page will slowly fade into the next page.

ACROBAT 9 CLASSROOM IN A BOOK 239
3 Select Auto Flip, and then type 10
in the Seconds box.
When Auto Flip is selected, the pages
automatically turn after the number
of seconds you enter. Ten seconds is
enough time for the bottle video and
the header animation to play. Th e
presentation will stop on the last page,
leaving it on the screen so that viewers
have plenty of time to click the video
of the CEO interview and play it in its
entirety.
4 Select All Pages In Document.
5 Click OK.
Specifying full-screen mode
Transitions work only in full-screen mode, so to take advantage of the transition
you've selected, you need to set your presentation to play in full-screen mode.
1 Choose File > Properties.
2 Select the Initial View tab in the Document Properties dialog box.
3 In the Window Options area of the dialog box, select Open In Full Screen Mode.
4 Click OK.
5 Choose File > Save, and then choose File > Close.
6 Choose File > Open, select the Aquo_Pres_Anim.pdf fi le, and click Open.
7 If you see a Full Screen warning dialog box, click Yes.

240 LESSON 11 Creating Multimedia Presentations
Avoiding the full-screen mode warningBy default, Acrobat warns you when a PDF fi le is set to be open in full-screen mode, because it is possible for malicious programmers to create PDF fi les that appear to be other applications. If you click Remember My Choice For This Document, Acrobat will not show the warning again when you open the presentation on this computer.If you are presenting material on your own computer, you can change the prefer-ence so that Acrobat will not display the warning at the beginning of your presenta-tion. To change the preference, choose Edit > Preferences (Windows) or Acrobat > Preferences (Mac OS), and then click Full Screen on the left. Deselect the Alert When Document Requests Full Screen option.
Th e presentation plays, moving from one page to the next with fade transitions
between pages.
8 Click Esc to escape from full-screen mode, and then close the fi le.
Working with widgetsIn addition to Flash animations and videos, you can embed small Flash applications, called widgets, into your PDF document. For example, you could embed a calcula-tor into a document someone would use to determine the cost of goods based on diff erent circumstances. Or an RSS reader that lets your viewer link immediately to a relevant, current blog or news source on a related topic. Some of these applications are available for download at xxxx. Because widgets are SWF fi les, you can use the Flash tool to insert a widget into a document. To learn more about using widgets, see xxx.
ACROBAT 9 CLASSROOM IN A BOOK 241
Review questions
1 How can you add a video or animation to a document in Acrobat 9 Pro?
2 Do recipients of your presentation need special viewing software to play videos or
animations?
3 How can you create a presentation with timed page transitions?
Review answers
1 To add a video or animation to a PDF document, choose Multimedia > Video Tool
(FLV fi le or H.264-encoded video) or Multimedia > Flash Tool (Flash animation).
Th e cursor becomes a crosshair. Click or drag where you want to place the video or
animation, and then set launch, skin, and other properties. (If you’re using Acrobat 9
Pro Extended, you can embed other video formats, as well, and Acrobat can transcode
them to FLV format automatically.)
2 No. Anyone can view embedded video or animation fi les in PDF documents created
in Acrobat 9 Pro, as long as they have Acrobat 9 or Adobe Reader 9. Because Flash
technology is fully integrated with Acrobat 9, no additional software is needed.
3 To add page transitions to a PDF document, choose Advanced > Document
Processing > Page Transitions. Th en, select a page transition style. To turn th epages
automatically, select Auto Flip, and specify how long each page should be displayed.
Presentations must be viewed in full-screen mode for transitions to take eff ect, so select
Open In Full-Screen Mode in the Initial View pane of the Document Properties dialog
box.