Embed Size (px)
Citation preview
Application Note
1 / 5 APP-Creating Polyimide Stencils in CircuitPro.docx Author: LPKF/Chris Ware Valid Since: 4/6/2012
© LPKF
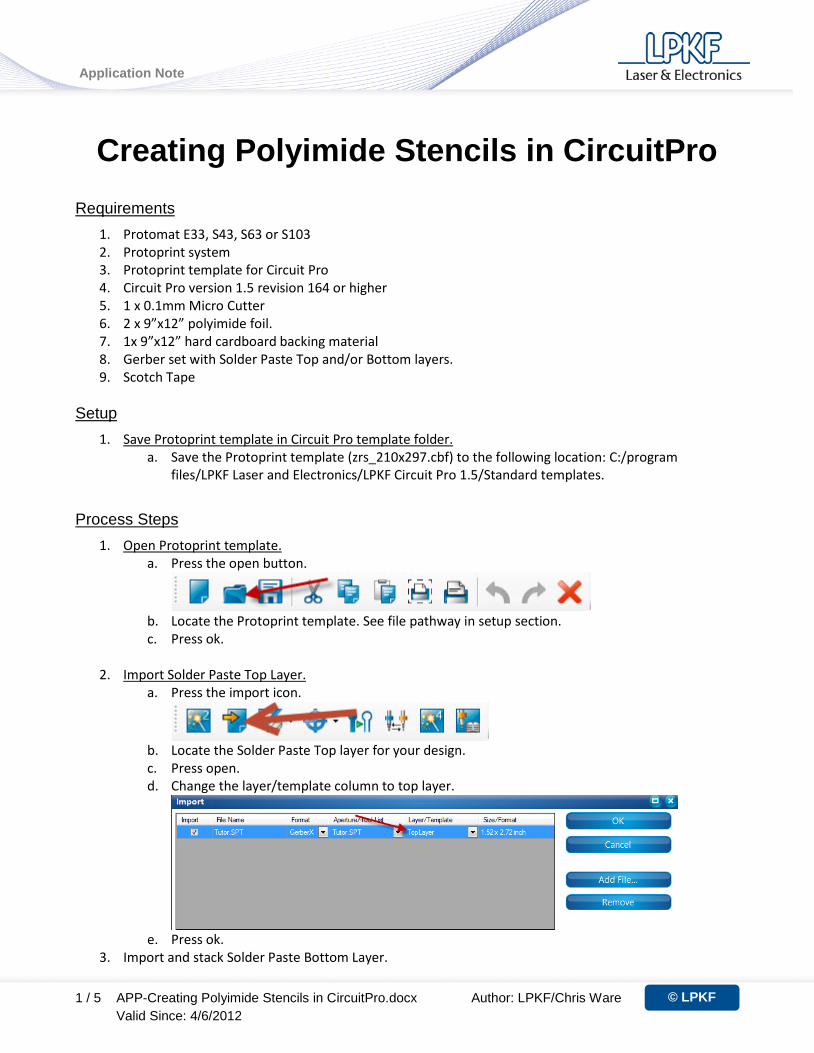
Creating Polyimide Stencils in CircuitPro Requirements
1. Protomat E33, S43, S63 or S103 2. Protoprint system 3. Protoprint template for Circuit Pro 4. Circuit Pro version 1.5 revision 164 or higher 5. 1 x 0.1mm Micro Cutter 6. 2 x 9”x12” polyimide foil. 7. 1x 9”x12” hard cardboard backing material 8. Gerber set with Solder Paste Top and/or Bottom layers. 9. Scotch Tape
Setup
1. Save Protoprint template in Circuit Pro template folder. a. Save the Protoprint template (zrs_210x297.cbf) to the following location: C:/program
files/LPKF Laser and Electronics/LPKF Circuit Pro 1.5/Standard templates. Process Steps
1. Open Protoprint template. a. Press the open button.
b. Locate the Protoprint template. See file pathway in setup section. c. Press ok.
2. Import Solder Paste Top Layer.
a. Press the import icon.
b. Locate the Solder Paste Top layer for your design. c. Press open. d. Change the layer/template column to top layer.
e. Press ok.
3. Import and stack Solder Paste Bottom Layer.
Application Note
2 / 5 APP-Creating Polyimide Stencils in CircuitPro.docx Author: LPKF/Chris Ware Valid Since: 4/6/2012
© LPKF
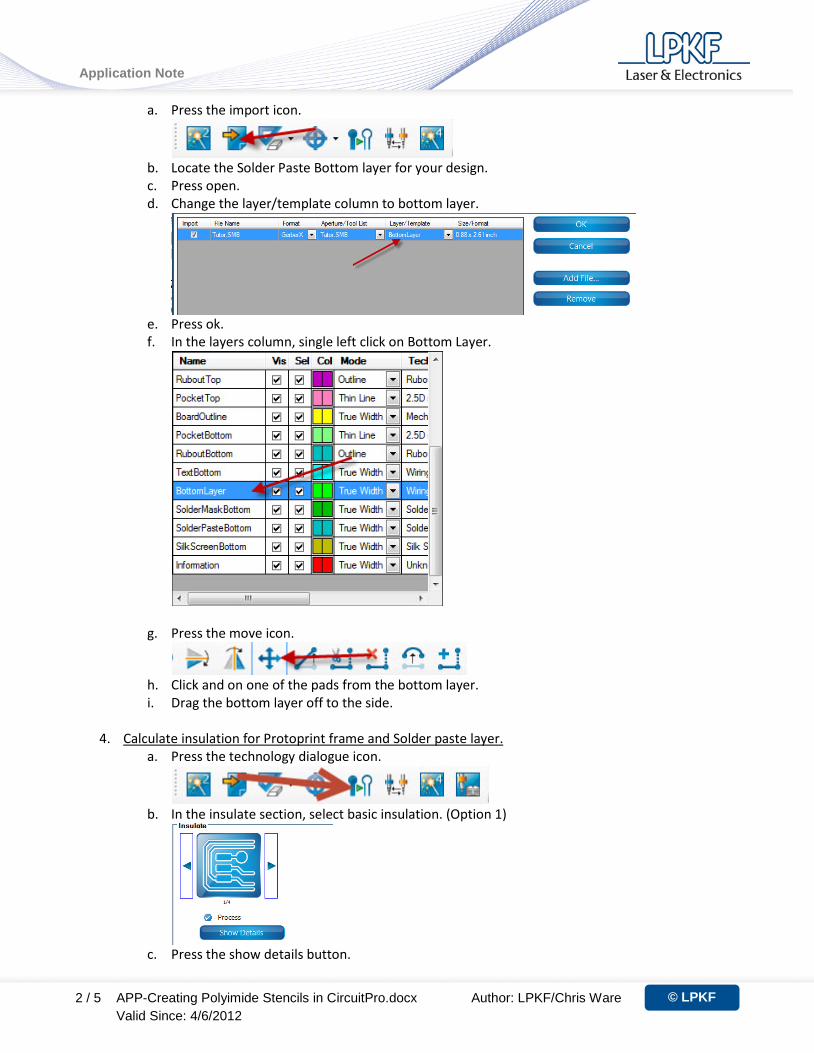
a. Press the import icon.
b. Locate the Solder Paste Bottom layer for your design. c. Press open. d. Change the layer/template column to bottom layer.
e. Press ok. f. In the layers column, single left click on Bottom Layer.
g. Press the move icon.
h. Click and on one of the pads from the bottom layer. i. Drag the bottom layer off to the side.
4. Calculate insulation for Protoprint frame and Solder paste layer.
a. Press the technology dialogue icon.
b. In the insulate section, select basic insulation. (Option 1)
c. Press the show details button.
Application Note
3 / 5 APP-Creating Polyimide Stencils in CircuitPro.docx Author: LPKF/Chris Ware Valid Since: 4/6/2012
© LPKF
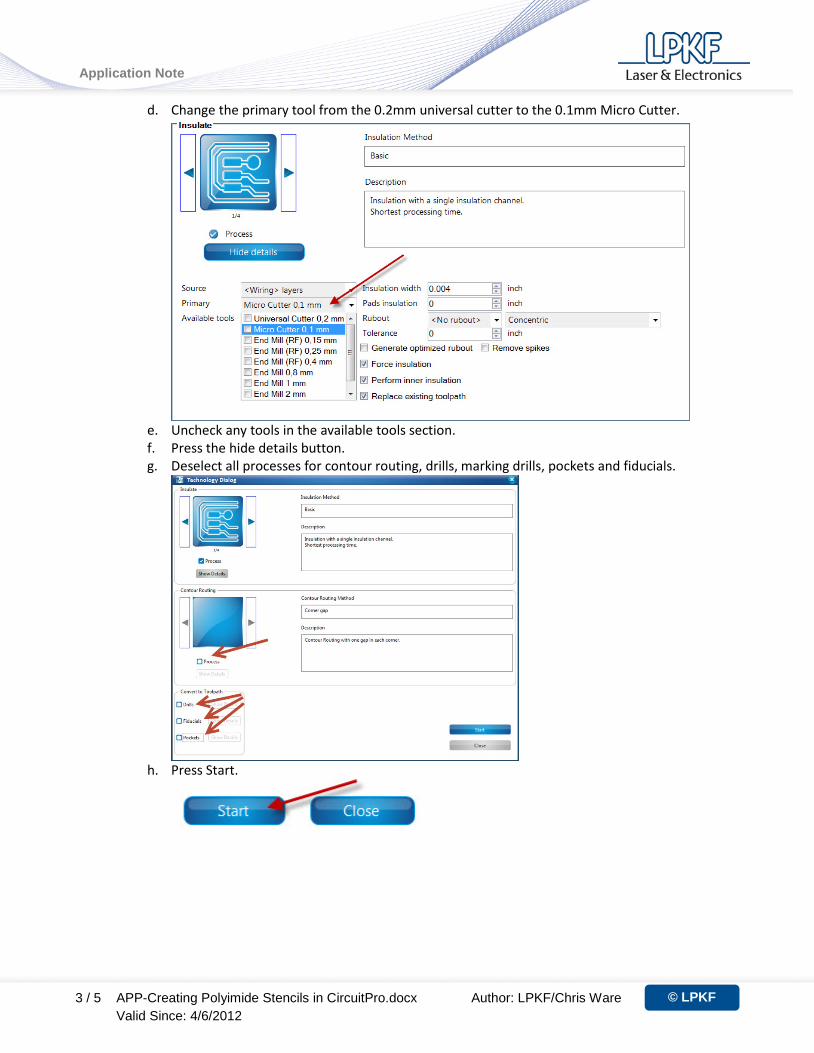
d. Change the primary tool from the 0.2mm universal cutter to the 0.1mm Micro Cutter.
e. Uncheck any tools in the available tools section. f. Press the hide details button. g. Deselect all processes for contour routing, drills, marking drills, pockets and fiducials.
h. Press Start.
Application Note
4 / 5 APP-Creating Polyimide Stencils in CircuitPro.docx Author: LPKF/Chris Ware Valid Since: 4/6/2012
© LPKF
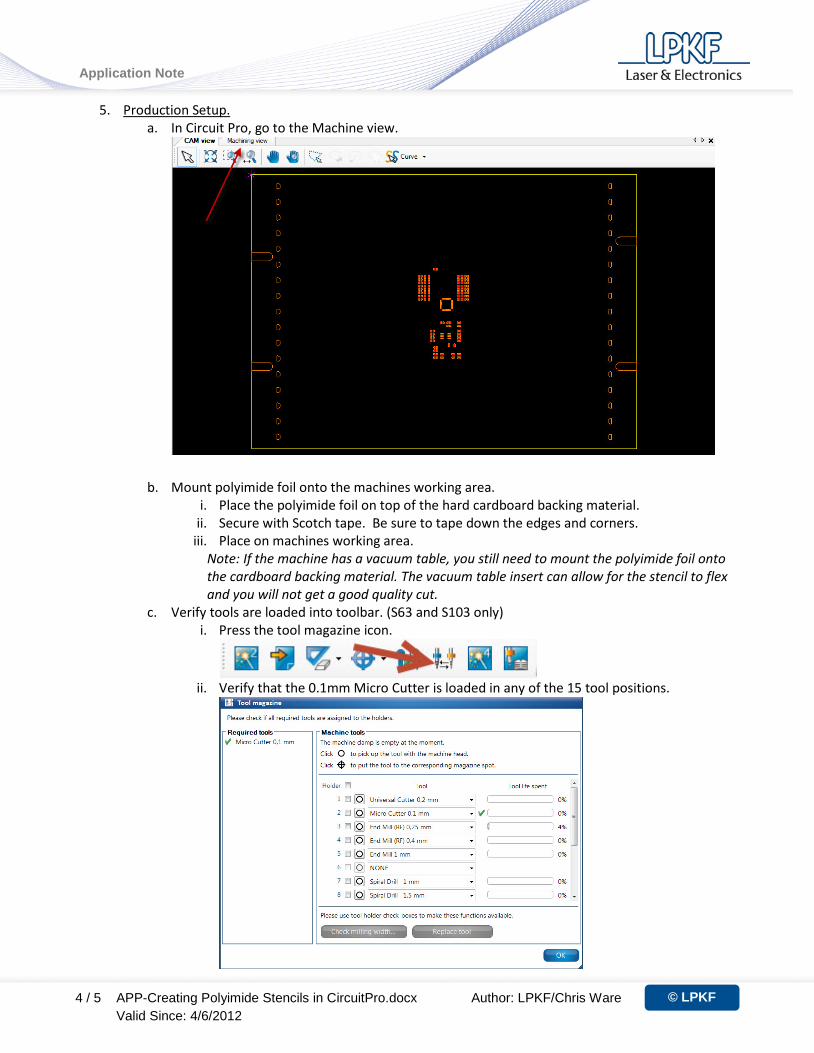
5. Production Setup. a. In Circuit Pro, go to the Machine view.
b. Mount polyimide foil onto the machines working area. i. Place the polyimide foil on top of the hard cardboard backing material.
ii. Secure with Scotch tape. Be sure to tape down the edges and corners. iii. Place on machines working area.
Note: If the machine has a vacuum table, you still need to mount the polyimide foil onto the cardboard backing material. The vacuum table insert can allow for the stencil to flex and you will not get a good quality cut.
c. Verify tools are loaded into toolbar. (S63 and S103 only) i. Press the tool magazine icon.
ii. Verify that the 0.1mm Micro Cutter is loaded in any of the 15 tool positions.
Application Note
5 / 5 APP-Creating Polyimide Stencils in CircuitPro.docx Author: LPKF/Chris Ware Valid Since: 4/6/2012
© LPKF
iii. If the Micro Cutter is not loaded, physically place the tool in an empty tool position. In the drop down menus, specify which tool position has the Micro Cutter.
iv. Press ok.
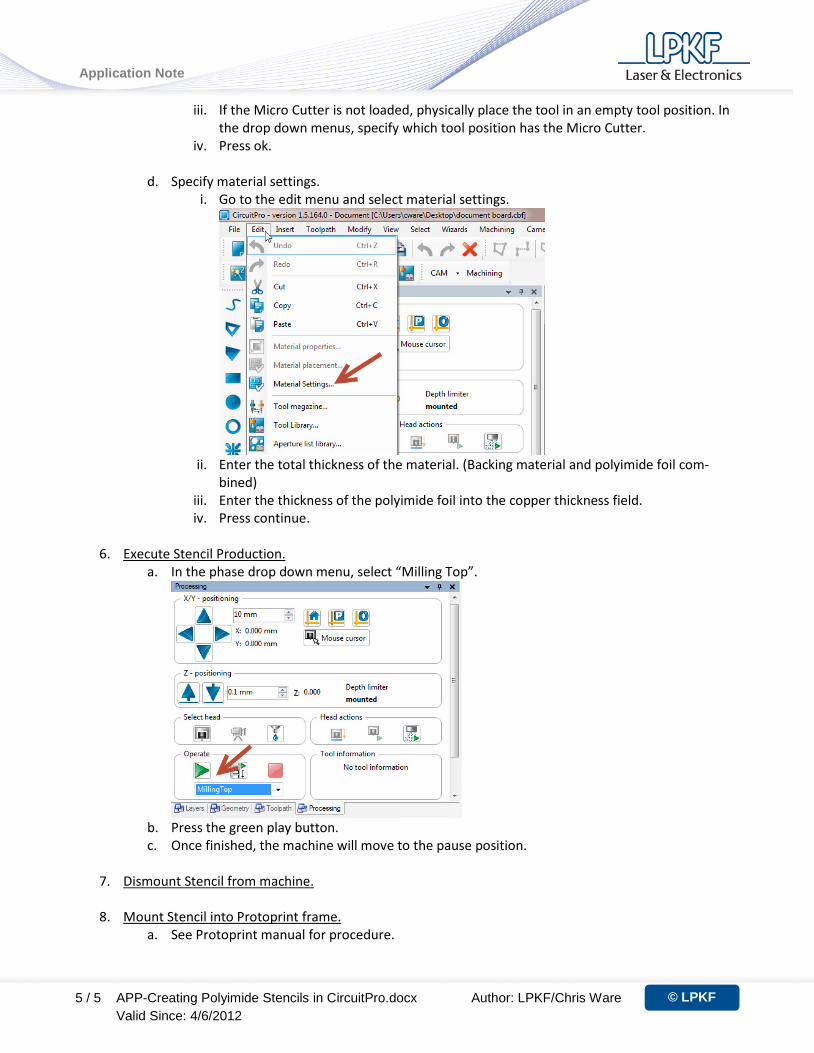
d. Specify material settings. i. Go to the edit menu and select material settings.
ii. Enter the total thickness of the material. (Backing material and polyimide foil com-
bined) iii. Enter the thickness of the polyimide foil into the copper thickness field. iv. Press continue.
6. Execute Stencil Production.
a. In the phase drop down menu, select “Milling Top”.
b. Press the green play button. c. Once finished, the machine will move to the pause position.
7. Dismount Stencil from machine.
8. Mount Stencil into Protoprint frame.
a. See Protoprint manual for procedure.