Embed Size (px)
Citation preview

CSE 237A Winter 2017: Individual Project Part 1 of 2: Environment setup and workload characterization
Detailed Instructions
During the first part of the project, you will setup the development environment for RPi 3, and then measure its performance. The purpose of this document is to help you to prepare your system for the project and measure performance counters by:
- Installing the required tools - Downloading and compiling the kernel source code - Cross-compiling a sample C program and a kernel module - Enabling PMU and ensuring you can read/write values from registers - Analyzing the performance of the provided workload
If any step quits prematurely and shows an error message, log the error and read it. Some common errors can be figured out with a quick web search or by posting to class Piazza page. To help us debug the problem, include the error message and output of the following commands
- uname -a
- lsb_release -a
Common issues: ● Be aware of dashes/spaces/newlines when copying from PDF. When in doubt, try typing out the
whole command manually. ● Run "make mrproper" and "make clean" before reconfiguring and recompiling a kernel.
Follow-up for common error messages (in particular "file not found" / "command not found")
● Google your error first ● Are you on the right machine? ● Are you in the right directory? ● Is your PATH variable set correctly? (In ~/.bashrc?) ● Did you need sudo? ● If you're trying to run a binary - is it executable? ● If you're trying to access an external device - is your external drive mounted correctly? ● Do you have the right packages/dependencies? (Especially if it's a *.h file that's missing)
Asking for help on Piazza:
● The best posts are public, include your last commands, the full error message, and a description of your hardware/OS environment. "It does not work" is not a sufficient post for us to help you. You must state clearly what you tried, and what indicates a failure (e.g. exact error message, LED lights, blank screen, etc).
● If someone makes a suggestion that works for you, please report back! ● If you figure it out on your own, please report back! ● "I solved it" or "I made a mistake" is usually not a helpful end to the discussion. Don't be
embarrassed by your simple mistakes - we all make them. Please describe the solution and help the next person out!
1. Hardware and software requirements - Raspberry Pi 3 - MicroSD card (8-32GB) - MicroSD card reader (external USB reader highly recommended over a built-in one) - Intel ISA, 64-bit machine (x86_64) - Ubuntu 64bit 14.04.3 LTS desktop edition
- You may run it as a virtual machine in VirtualBox. - For package installation commands, root access through sudo command is required. - If you are familiar with Linux and already have other Linux version (e.g., Ubuntu 12.04 LTS), you
might get it to work by using additional repos/packages, however, we cannot support that. - ARM cross-compiler
2. Install Ubuntu You may install Ubuntu 14.04 directly on your machine ("bare metal") or as a virtual machine (VM). If you are NOT familiar with Linux environment, we highly recommend using a VM. If you are already familiar with Linux and have your own Linux machine, you may use it instead.
Option 1: Bare metal instructions (for Windows): Create a bootable USB stick: http://www.ubuntu.com/download/help/createausbstickonwindows Follow official installation instructions: http://www.ubuntu.com/download/desktop/installubuntudesktop Dualbooting Linux and OS X is not supported as a part of this class.
Option 2: VM instructions (Mac or Windows): 1. Download and install a VirtualBox platform package for your machine:
https://www.virtualbox.org/wiki/Downloads. If you are using a USB 3.0 reader, download and install the extension pack as well
2. Download Ubuntu 14.04: From http://releases.ubuntu.com/14.04/ download "64bit PC (AMD64) desktop image" (a large ISO image almost 1GB)
3. Open VirtualBox 4. Click Machine > New… 5. Enter the following:
- Name: ubuntuVM - Type: Linux - Version: Ubuntu (64bit)
6. Set a proper RAM size. For example, if your host machine has 4GB+ RAM, you may allocate 1GB to the virtual machine
7. Create a new virtual hard drive with “VDI format” and “Dynamically allocated” options. Allocate at least 16 GB for the hard drive size.
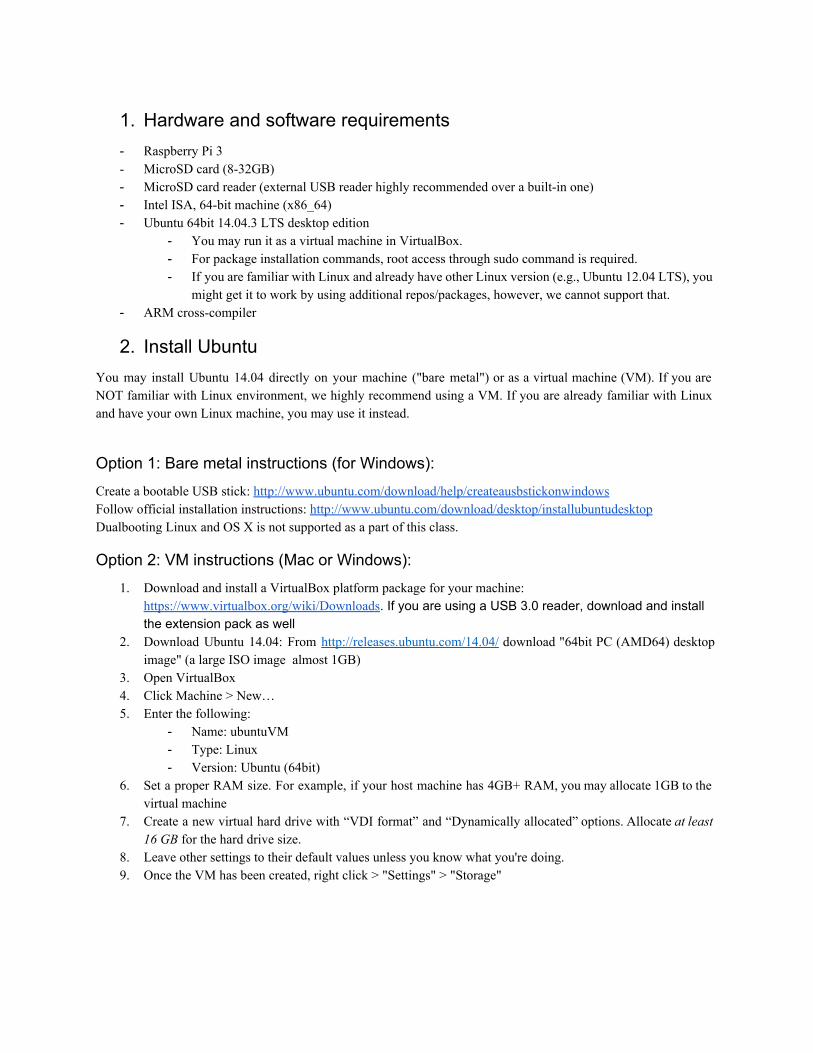
8. Leave other settings to their default values unless you know what you're doing. 9. Once the VM has been created, right click > "Settings" > "Storage"
10. Add the downloaded ISO image as a virtual disk file and click "OK" 11. Start the VM 12. Select "Install Ubuntu" 13. Take default options (including "Erase disk and install Ubuntu" this refers to the virtual disk) 14. After installation completes, repeat Step 8 and remove the ISO file (if any) so that the IDE controller list
reads "empty" again. 15. Restart as prompted by the installer 16. Install Guest Additions (optional):
Guest Additions support many nice features for Ubuntu in VM, including a solution for screen resolution issue. To install the guest additions, click “Devices” > “Insert Guest Additions CD image” in the menu of the virtual machine window, and follow its install instruction. You need to reboot the VM after installing it to apply the changes. If the default CD image for Guest Additions is not completely installed, you may try to install it from Debian packages instead. Open a terminal using CTRL+ALT+T in your VM, and then type: $ sudo apt-get install virtualbox-guest-dkms virtualbox-guest-utils virtualbox-guest-x11
If it gives you an error message: “unmet dependency”, you may try the following: $ sudo apt-get remove libcheese-gtk23
$ sudo apt-get install xserver-xorg-core
$ sudo apt-get install virtualbox-guest-dkms virtualbox-guest-utils virtualbox-guest-x11
3. Build and install kernel for for RPi Parts of this instruction manual are written based on the official guidelines: https://www.raspberrypi.org/documentation/linux/kernel/building.md
3.1. Install git, curl, and libncurses The download of the tool chain and source codes requires git. You can also download files (e.g., the sample C code provided on the class website) from the Internet using curl. You may also need to install libncurses which will be used to customize the kernel build. With root privilege, you can install them as follows: $ sudo apt-get install git curl libncurses5-dev
You can download any required libraries and linux programs in a similar way. For example:
$ sudo apt-get install <ANY_PROGRAM_OR_LIBRARY>
3.2. Install toolchain To compile the Linux kernel for RPi 3 on your machine (i.e., bare metal or VM), you require a suitable Linux cross-compilation toolchain - i.e. a compilation suite to make executable binaries for an ISA different from your host machine. Get tool chains by using the following command: ~$ mkdir ~/RPdev ~$ cd ~/RPdev ~/RPdev$ git clone https://github.com/raspberrypi/tools Add the toolchain path to your PATH. You may put the line in your ~/.bashrc to make it permanent. ~/RPdev$ export PATH=$PATH:~/RPdev/tools/arm-bcm2708/gcc-linaro-arm-linux-gnueabihf-raspbian-x64/bin
3.3. Download kernel source The kernel source for this project is customized for the low-level performance counter access we need. It is different from the standard kernel released with Raspbian. You can clone the repository using git as follows: ~/RPdev$ git clone http://seelab.ucsd.edu/~shepherd/cse237a_rpi3_kernel.git linux
Now, the source code is downloaded in the “~/RPdev/linux” directory.
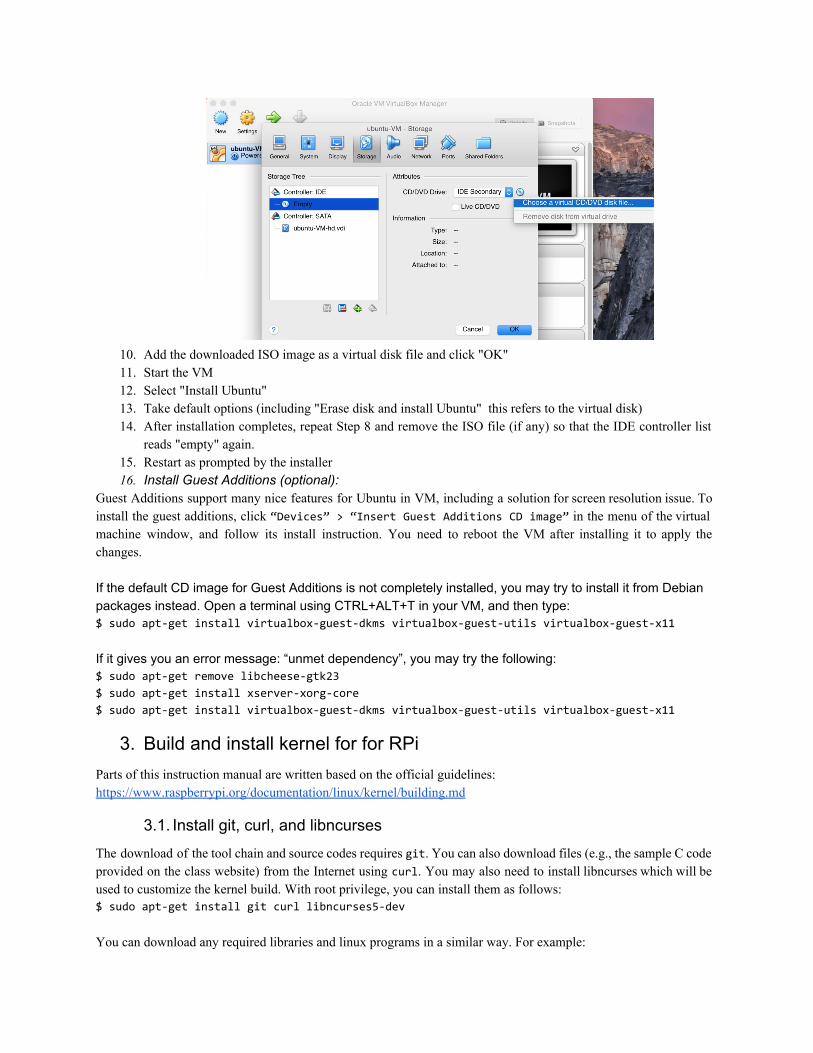
3.4. Build kernel source To build the sources for cross-compilation, there may be extra dependencies (depending on your Ubuntu version) beyond those you've installed by default with Ubuntu. Enter the following commands to build the sources and Device Tree files for RPi 3: ~/RPdev$ cd linux ~/RPdev/linux$ KERNEL=kernel7 ~/RPdev/linux$ make ARCH=arm CROSS_COMPILE=arm-linux-gnueabihf- bcm2709_defconfig Now, you need to change a kernel configuration. This task is typically required to activate/deactivate some optional features of kernel implementation. Here, we will enable “HOTPLUG_CPU” option which allows us to change the number of active processor cores. You can do it using menuconfig: ~/RPdev/linux$ make ARCH=arm CROSS_COMPILE=arm-linux-gnueabihf- menuconfig Navigate to “Kernel features” using arrow keys:
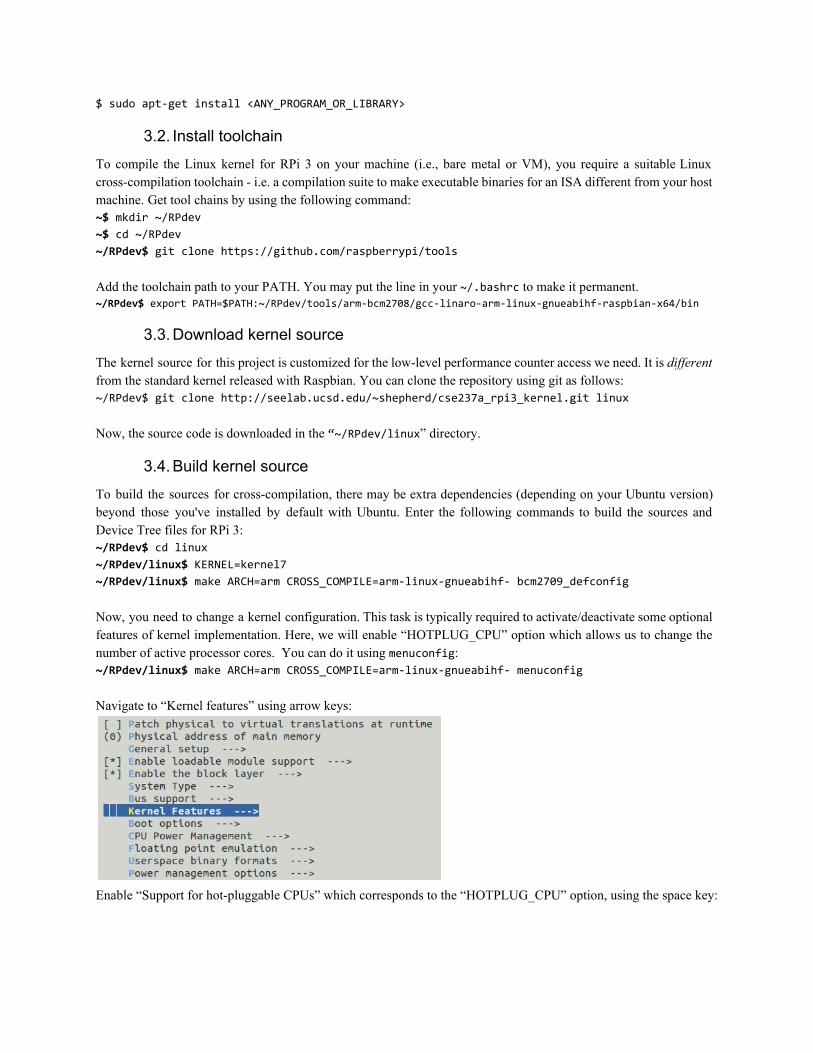
Enable “Support for hot-pluggable CPUs” which corresponds to the “HOTPLUG_CPU” option, using the space key:
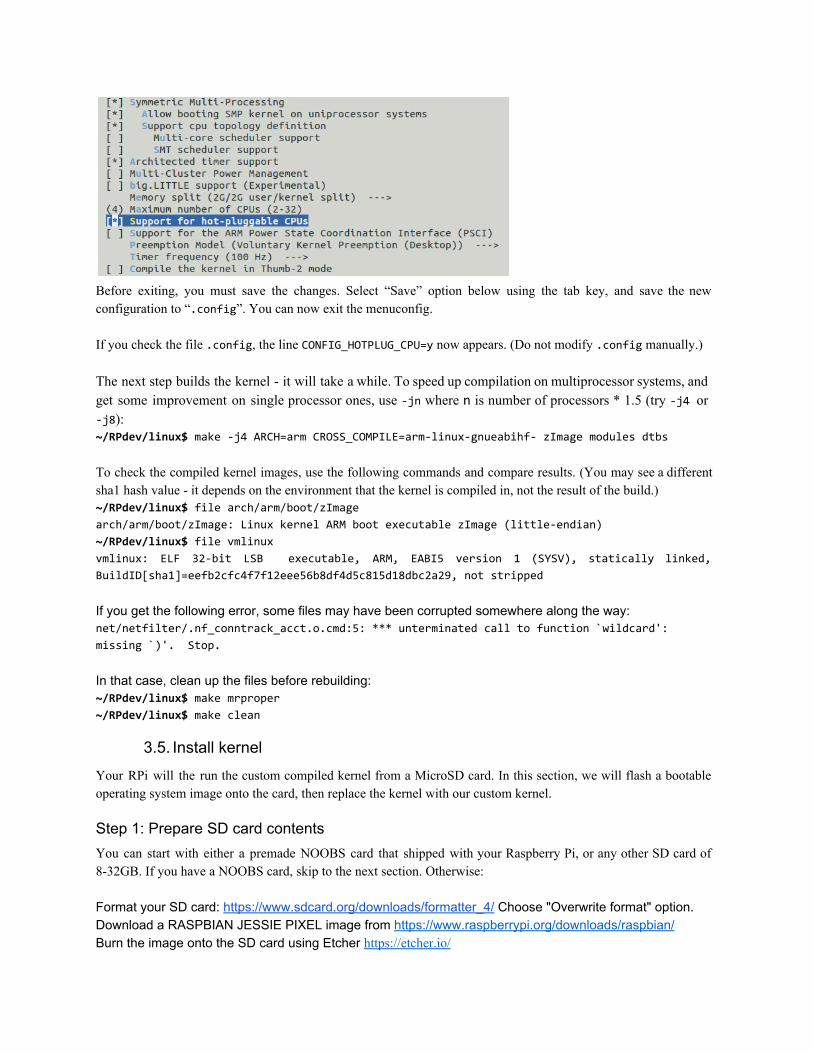
Before exiting, you must save the changes. Select “Save” option below using the tab key, and save the new configuration to “.config”. You can now exit the menuconfig. If you check the file .config, the line CONFIG_HOTPLUG_CPU=y now appears. (Do not modify .config manually.) The next step builds the kernel - it will take a while. To speed up compilation on multiprocessor systems, and get some improvement on single processor ones, use -jn where n is number of processors * 1.5 (try -j4 or -j8): ~/RPdev/linux$ make -j4 ARCH=arm CROSS_COMPILE=arm-linux-gnueabihf- zImage modules dtbs To check the compiled kernel images, use the following commands and compare results. (You may see a different sha1 hash value - it depends on the environment that the kernel is compiled in, not the result of the build.) ~/RPdev/linux$ file arch/arm/boot/zImage arch/arm/boot/zImage: Linux kernel ARM boot executable zImage (little-endian)
~/RPdev/linux$ file vmlinux vmlinux: ELF 32-bit LSB executable, ARM, EABI5 version 1 (SYSV), statically linked,
BuildID[sha1]=eefb2cfc4f7f12eee56b8df4d5c815d18dbc2a29, not stripped If you get the following error, some files may have been corrupted somewhere along the way: net/netfilter/.nf_conntrack_acct.o.cmd:5: *** unterminated call to function `wildcard':
missing `)'. Stop.
In that case, clean up the files before rebuilding: ~/RPdev/linux$ make mrproper ~/RPdev/linux$ make clean
3.5. Install kernel Your RPi will the run the custom compiled kernel from a MicroSD card. In this section, we will flash a bootable operating system image onto the card, then replace the kernel with our custom kernel.
Step 1: Prepare SD card contents You can start with either a premade NOOBS card that shipped with your Raspberry Pi, or any other SD card of 8-32GB. If you have a NOOBS card, skip to the next section. Otherwise: Format your SD card: https://www.sdcard.org/downloads/formatter_4/ Choose "Overwrite format" option. Download a RASPBIAN JESSIE PIXEL image from https://www.raspberrypi.org/downloads/raspbian/ Burn the image onto the SD card using Etcher https://etcher.io/
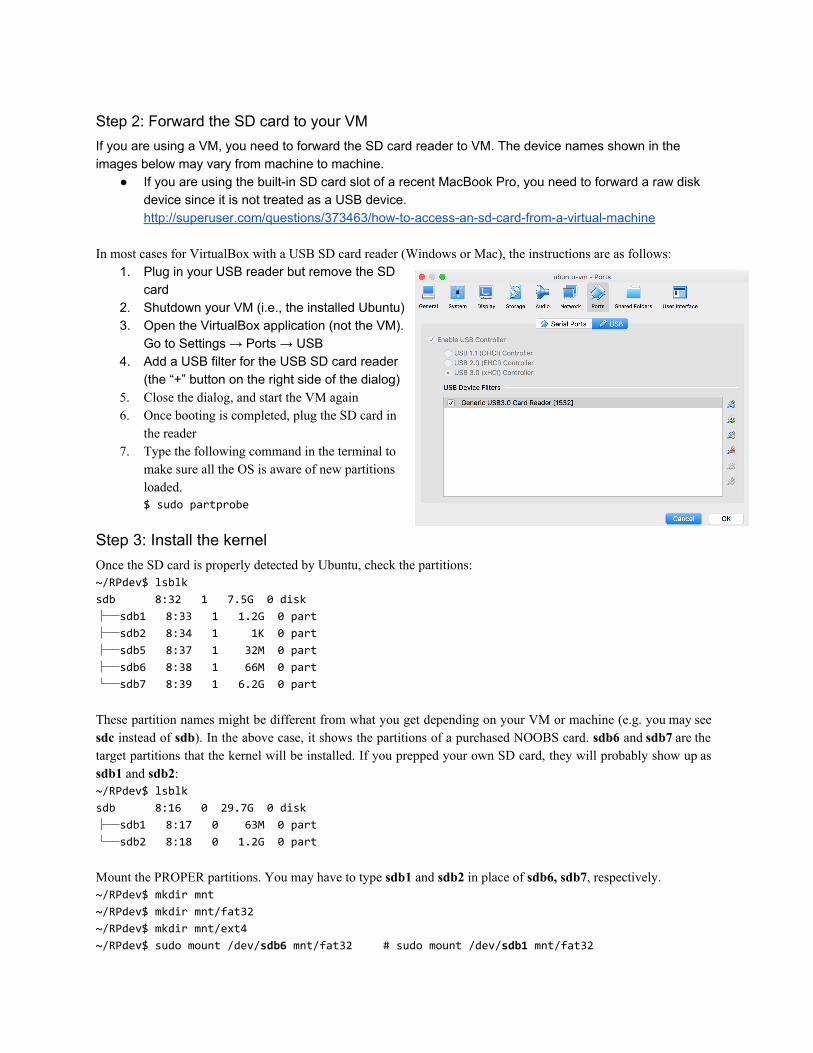
Step 2: Forward the SD card to your VM If you are using a VM, you need to forward the SD card reader to VM. The device names shown in the images below may vary from machine to machine.
● If you are using the built-in SD card slot of a recent MacBook Pro, you need to forward a raw disk device since it is not treated as a USB device. http://superuser.com/questions/373463/how-to-access-an-sd-card-from-a-virtual-machine
In most cases for VirtualBox with a USB SD card reader (Windows or Mac), the instructions are as follows:
1. Plug in your USB reader but remove the SD card
2. Shutdown your VM (i.e., the installed Ubuntu) 3. Open the VirtualBox application (not the VM).
Go to Settings → Ports → USB 4. Add a USB filter for the USB SD card reader
(the “+” button on the right side of the dialog) 5. Close the dialog, and start the VM again 6. Once booting is completed, plug the SD card in
the reader 7. Type the following command in the terminal to
make sure all the OS is aware of new partitions loaded. $ sudo partprobe
Step 3: Install the kernel Once the SD card is properly detected by Ubuntu, check the partitions: ~/RPdev$ lsblk
sdb 8:32 1 7.5G 0 disk
├─sdb1 8:33 1 1.2G 0 part
├─sdb2 8:34 1 1K 0 part
├─sdb5 8:37 1 32M 0 part
├─sdb6 8:38 1 66M 0 part
└─sdb7 8:39 1 6.2G 0 part
These partition names might be different from what you get depending on your VM or machine (e.g. you may see sdc instead of sdb). In the above case, it shows the partitions of a purchased NOOBS card. sdb6 and sdb7 are the target partitions that the kernel will be installed. If you prepped your own SD card, they will probably show up as sdb1 and sdb2: ~/RPdev$ lsblk
sdb 8:16 0 29.7G 0 disk
├─sdb1 8:17 0 63M 0 part
└─sdb2 8:18 0 1.2G 0 part
Mount the PROPER partitions. You may have to type sdb1 and sdb2 in place of sdb6, sdb7, respectively. ~/RPdev$ mkdir mnt
~/RPdev$ mkdir mnt/fat32
~/RPdev$ mkdir mnt/ext4
~/RPdev$ sudo mount /dev/sdb6 mnt/fat32 # sudo mount /dev/sdb1 mnt/fat32
~/RPdev$ sudo mount /dev/sdb7 mnt/ext4 # sudo mount /dev/sdb2 mnt/ext4 Next, install the compiled modules and the new kernel and make it bootable. Enter the second command "sudo…" as one line and make sure there is a space before "INSTALL_MOD_PATH". ~/RPdev$ cd linux
~/RPdev/linux$ sudo env "PATH=$PATH" make ARCH=arm CROSS_COMPILE=arm-linux-gnueabihf-
INSTALL_MOD_PATH=../mnt/ext4 modules_install
~/RPdev/linux$ sudo scripts/mkknlimg arch/arm/boot/zImage ../mnt/fat32/kernel-44.img
~/RPdev/linux$ sudo cp arch/arm/boot/dts/*.dtb ../mnt/fat32/
~/RPdev/linux$ sudo cp arch/arm/boot/dts/overlays/*.dtb* ../mnt/fat32/overlays/
~/RPdev/linux$ sudo cp arch/arm/boot/dts/overlays/README ../mnt/fat32/overlays/
Then, change the configuration so that the system uses the installed “kernel-44.img”. Edit “../mnt/fat32/config.txt” using a text editor, e.g., vi or nano or gedit. You need root privileges. For example, if you’re using vi: ~/RPdev/linux$ sudo vi ../mnt/fat32/config.txt In the opened file, add the line “kernel=kernel-44.img”. Replace the line "kernel=kernel.img" or "kernel=kernel7.img" if it exists. Finally, unmount all the partitions. ~/RPdev/linux$ sudo umount ../mnt/fat32
~/RPdev/linux$ sudo umount ../mnt/ext4
Now, you can plug the microSD card into RPi and turn on its power! To check if the OS boot was successful, type the following in the RPi to check the build date. It should show the date and time when you compiled the kernel. $ uname -a
Linux raspberrypi 4.4.41-v7+ #2 SMP <BUILD_DATE_TIME> armv71 GNU/Linux
Before moving to the next section, we recommend updating firmware and drivers. With a valid internet connection, run this command (may take a while): $ sudo rpi-update
Troubleshooting and hints ● Most common problems: USB devices, unstable power supply. More info:
http://elinux.org/R-Pi_Troubleshooting#Power_.2F_Start-up ● The RPi will automatically boot into a graphical user interface (GUI) with XServer. If you'd like to
boot into the command line next time (so you don't need a mouse), change your options with raspi-config: $ sudo raspi-config
→ 3 Boot Options
→ B1 Desktop / CLI
→ B1 Console
● You may need to change your keyboard settings to English (US) using raspi-config ● cp: error writing ‘../mnt/fat32/bcm2709-rpi-2-b.dtb’: Input/output error
○ Did you mount the partitions twice? (It might have automatically mounted your SD card as something other than mnt/*) Are you out of space? Try some combination of the following: unmount partitions, remove the card, restart the VM and try again.
4. Cross-compile user applications 4.1. Download the sample C application
Sample C code is provided on the class website. Download it into the “~/RPdev/test” directory. ~/RPdev$ mkdir test
~/RPdev$ cd test
~/RPdev/test$ curl -O http://cseweb.ucsd.edu/classes/wi17/cse237A-a/project/part1/test.c
#include <stdio.h> int main() {
printf("Hello RP World!\n"); }
4.2. Compile the application Cross compile the given source code for the RPi target: ~/RPdev/test$ arm-linux-gnueabihf-gcc -o test.out test.c -static
The result should be the executable: “test.out”.
4.3. Verify the executable Verify the file type of the cross-compiled output "test.out" ~/RPdev/test$ file test.out
test.out: ELF 32-bit LSB executable, ARM, EABI5 version 1 (SYSV), statically linked, for
GNU/Linux 2.6.26, BuildID[sha1]=ae94dd0dfb21f476f9c28b122536e63d41ebe7fd, not stripped
The description of “ELF 32-bit LSB executable” and “ARM” indicates that your binary is ready to be executed on the ARM processors of RPi. Your hash value does not have to match the example.
4.4. Check if it really works on RPi First, copy the file to RPi using either a USB pen drive or Internet. If you’re using a USB pen drive, you have to mount the USB drive in RPi after connecting it: $ sudo mkdir /media/usbdrive
$ sudo mount /dev/sda1 /media/usbdrive
$ cp /media/usbdrive/test.out ~/
Then, execute the file: $ cd ~/
$ chmod a+x test.out
$ ./test.out
Hello RP World!
5. Build custom kernel modules A kernel module is an object file that contains procedures to extend the running kernel. You need to develop a kernel module to read performance counters. If you are NOT familiar with kernel modules, we highly recommend
visiting the following link: Linux Kernel Module Programming Guide: http://www.tldp.org/LDP/lkmpg/2.4/html/c147.htm Let’s start with a simple kernel module. Use your Ubuntu host to run all kernel module builds. Source files can be found at http://cseweb.ucsd.edu/classes/wi17/cse237A-a/project/part1/sample_module/
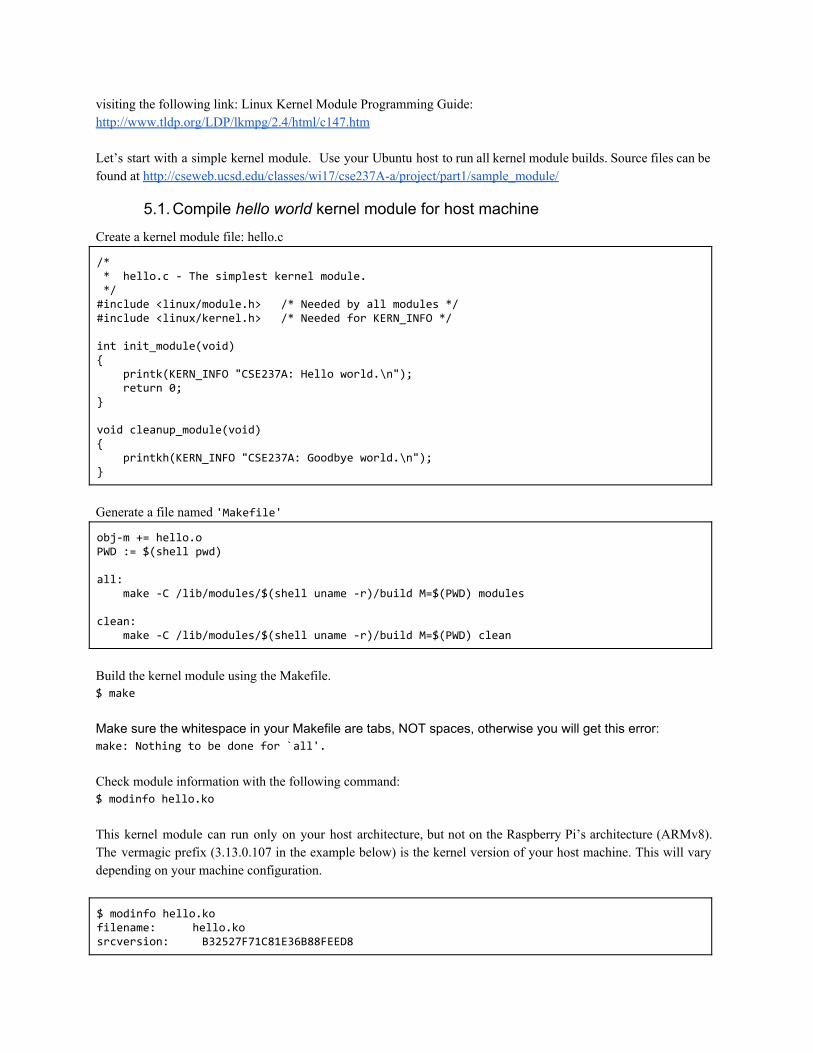
5.1. Compile hello world kernel module for host machine Create a kernel module file: hello.c
/* * hello.c - The simplest kernel module. */ #include <linux/module.h> /* Needed by all modules */ #include <linux/kernel.h> /* Needed for KERN_INFO */ int init_module(void) { printk(KERN_INFO "CSE237A: Hello world.\n"); return 0; } void cleanup_module(void) { printkh(KERN_INFO "CSE237A: Goodbye world.\n"); }
Generate a file named 'Makefile'
obj-m += hello.o PWD := $(shell pwd) all: make -C /lib/modules/$(shell uname -r)/build M=$(PWD) modules clean: make -C /lib/modules/$(shell uname -r)/build M=$(PWD) clean
Build the kernel module using the Makefile. $ make
Make sure the whitespace in your Makefile are tabs, NOT spaces, otherwise you will get this error: make: Nothing to be done for `all'.
Check module information with the following command: $ modinfo hello.ko
This kernel module can run only on your host architecture, but not on the Raspberry Pi’s architecture (ARMv8). The vermagic prefix (3.13.0.107 in the example below) is the kernel version of your host machine. This will vary depending on your machine configuration.
$ modinfo hello.ko filename: hello.ko srcversion: B32527F71C81E36B88FEED8
depends: vermagic: 3.13.0-107-generic SMP mod_unload modversions
Now load this kernel module. To load your kernel module, use the command “insmod” with root privilege (sudo). To unload your kernel module, use “rmmod”. $ sudo insmod hello.ko # load hello.ko
$ sudo rmmod hello # unload hello.ko
You can check the result of the kernel module with “dmesg” command. The function “printk” generates a log for the kernel module. Thus, you can see “CSE237A: Hello world.” and “CSE237A: goodbye world.” messages with dmesg command. To see the last log lines, use “tail” command as follows:
$ sudo insmod hello.ko $ sudo rmmod hello $ dmesg | tail -2 [178474.908145] Hello world. [178479.783346] Goodbye world.
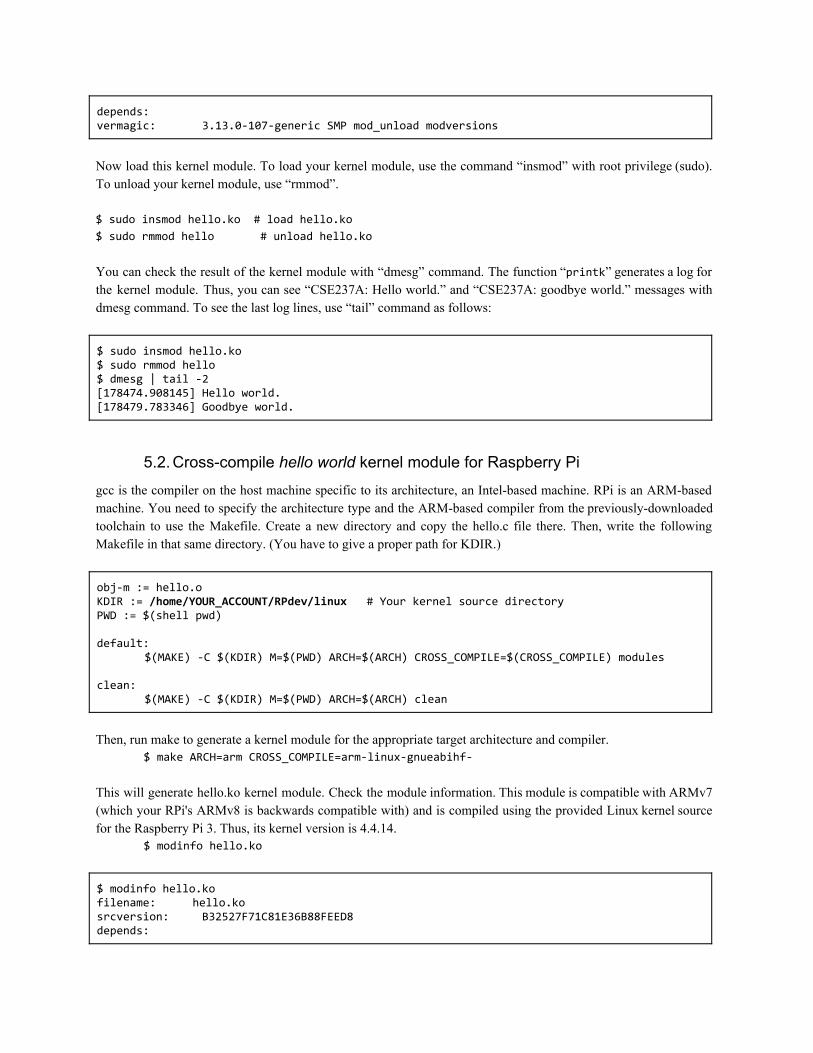
5.2. Cross-compile hello world kernel module for Raspberry Pi gcc is the compiler on the host machine specific to its architecture, an Intel-based machine. RPi is an ARM-based machine. You need to specify the architecture type and the ARM-based compiler from the previously-downloaded toolchain to use the Makefile. Create a new directory and copy the hello.c file there. Then, write the following Makefile in that same directory. (You have to give a proper path for KDIR.)
obj-m := hello.o KDIR := /home/YOUR_ACCOUNT/RPdev/linux # Your kernel source directory PWD := $(shell pwd) default: $(MAKE) -C $(KDIR) M=$(PWD) ARCH=$(ARCH) CROSS_COMPILE=$(CROSS_COMPILE) modules clean: $(MAKE) -C $(KDIR) M=$(PWD) ARCH=$(ARCH) clean
Then, run make to generate a kernel module for the appropriate target architecture and compiler.
$ make ARCH=arm CROSS_COMPILE=arm-linux-gnueabihf-
This will generate hello.ko kernel module. Check the module information. This module is compatible with ARMv7 (which your RPi's ARMv8 is backwards compatible with) and is compiled using the provided Linux kernel source for the Raspberry Pi 3. Thus, its kernel version is 4.4.14.
$ modinfo hello.ko
$ modinfo hello.ko filename: hello.ko srcversion: B32527F71C81E36B88FEED8 depends:
vermagic: 4.4.41-v7+ SMP mod_unload modversions ARMv7
Check the kernel number on RPi.
$ uname -a
If you correctly finished the custom kernel installation in the previous section, you should see:
Linux raspberrypi 4.4.41-v7+ #1 SMP <BUILD_DATE_TIME> armv71 GNU/Linux
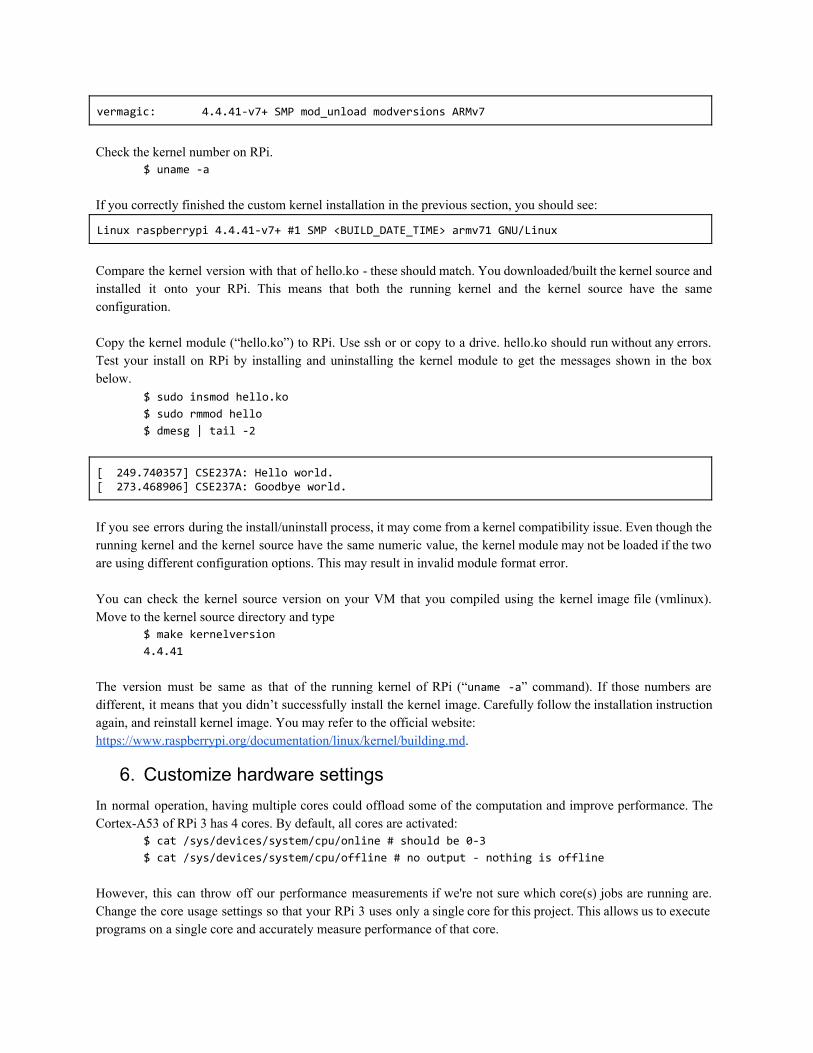
Compare the kernel version with that of hello.ko - these should match. You downloaded/built the kernel source and installed it onto your RPi. This means that both the running kernel and the kernel source have the same configuration. Copy the kernel module (“hello.ko”) to RPi. Use ssh or or copy to a drive. hello.ko should run without any errors. Test your install on RPi by installing and uninstalling the kernel module to get the messages shown in the box below.
$ sudo insmod hello.ko
$ sudo rmmod hello
$ dmesg | tail -2
[ 249.740357] CSE237A: Hello world. [ 273.468906] CSE237A: Goodbye world.
If you see errors during the install/uninstall process, it may come from a kernel compatibility issue. Even though the running kernel and the kernel source have the same numeric value, the kernel module may not be loaded if the two are using different configuration options. This may result in invalid module format error. You can check the kernel source version on your VM that you compiled using the kernel image file (vmlinux). Move to the kernel source directory and type
$ make kernelversion
4.4.41
The version must be same as that of the running kernel of RPi (“uname -a” command). If those numbers are different, it means that you didn’t successfully install the kernel image. Carefully follow the installation instruction again, and reinstall kernel image. You may refer to the official website: https://www.raspberrypi.org/documentation/linux/kernel/building.md.
6. Customize hardware settings In normal operation, having multiple cores could offload some of the computation and improve performance. The Cortex-A53 of RPi 3 has 4 cores. By default, all cores are activated:
$ cat /sys/devices/system/cpu/online # should be 0-3
$ cat /sys/devices/system/cpu/offline # no output - nothing is offline
However, this can throw off our performance measurements if we're not sure which core(s) jobs are running are. Change the core usage settings so that your RPi 3 uses only a single core for this project. This allows us to execute programs on a single core and accurately measure performance of that core.
○ add “maxcpus=1” in /boot/cmdline.txt e.g., “dwc_otg, …, rootwait, …, plymouth.ignore-serial-consoles maxcpus=1”
○ reboot RPi $ sudo reboot
○ Go to /sys/devices/system/cpu and read two files: “online” and “offline”. Each file shows available and unavailable CPUs. $ cat /sys/devices/system/cpu/online # should be 0
$ cat /sys/devices/system/cpu/offline # should be 1-3
Now your RPi 3 uses a single core. Powercycle your RPi 3 (unplug from power, then boot up again). If it fails to boot up due to this maxcpus change, it may have stalled due to CPU resources being starved. Remove your SD card, mount it in your host, and change the value to maxcpus=4 instead. It should boot successfully with all 4 cores in use. Then, on the RPi, change the line to maxcpus=1 and reboot again while connected to power. If this succeeds, you may move on.
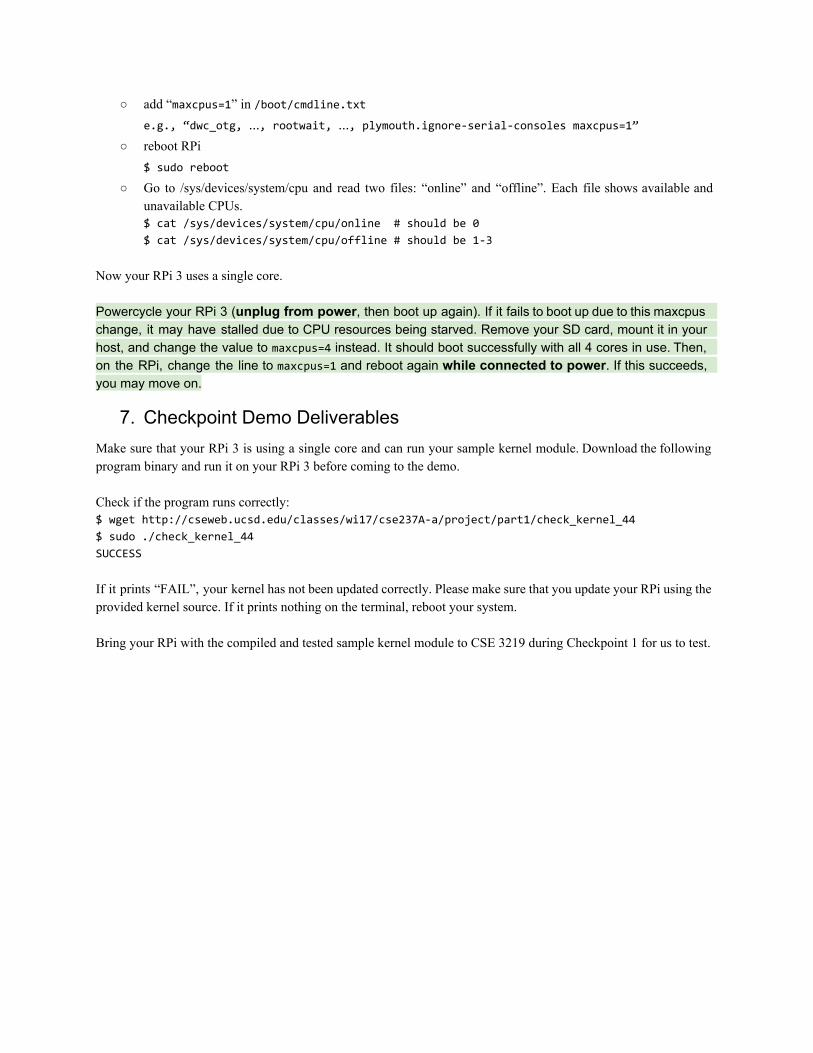
7. Checkpoint Demo Deliverables Make sure that your RPi 3 is using a single core and can run your sample kernel module. Download the following program binary and run it on your RPi 3 before coming to the demo. Check if the program runs correctly: $ wget http://cseweb.ucsd.edu/classes/wi17/cse237A-a/project/part1/check_kernel_44
$ sudo ./check_kernel_44
SUCCESS
If it prints “FAIL”, your kernel has not been updated correctly. Please make sure that you update your RPi using the provided kernel source. If it prints nothing on the terminal, reboot your system. Bring your RPi with the compiled and tested sample kernel module to CSE 3219 during Checkpoint 1 for us to test.
8. Project Part 1 - Performance Monitoring Unit (PMU) The processor (ARMv8 Cortex-A53) includes logic to gather various statistics on the operation of the processor and memory system during runtime, based on the PMUv2 architecture. These events provide useful information about the behavior of the processor that you can use when debugging or profiling code. The processor PMU provides six event counters. Each event counter can measure any of the events available in the processor. Thus, you can access the following counter registers:
- Six 32-bit counters that increment when the corresponding event occurs. - One cycle counter that increments based on the processor clock.
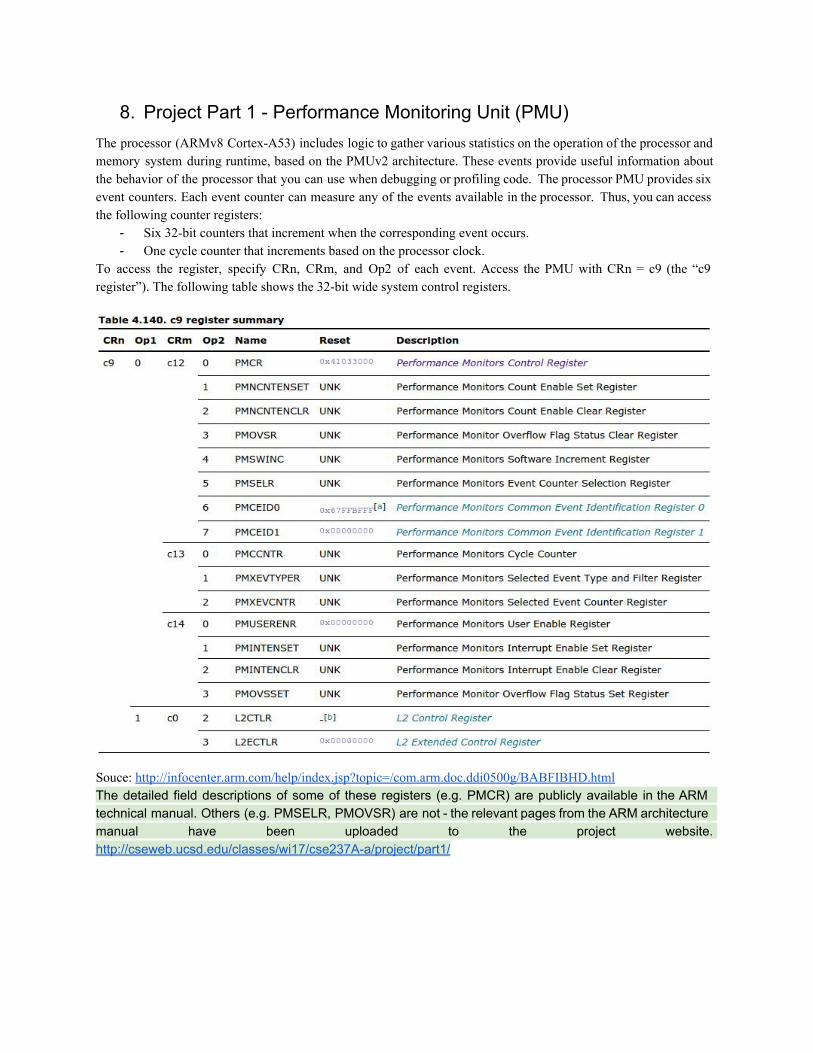
To access the register, specify CRn, CRm, and Op2 of each event. Access the PMU with CRn = c9 (the “c9 register”). The following table shows the 32-bit wide system control registers.
Souce: http://infocenter.arm.com/help/index.jsp?topic=/com.arm.doc.ddi0500g/BABFIBHD.html The detailed field descriptions of some of these registers (e.g. PMCR) are publicly available in the ARM technical manual. Others (e.g. PMSELR, PMOVSR) are not - the relevant pages from the ARM architecture manual have been uploaded to the project website. http://cseweb.ucsd.edu/classes/wi17/cse237A-a/project/part1/
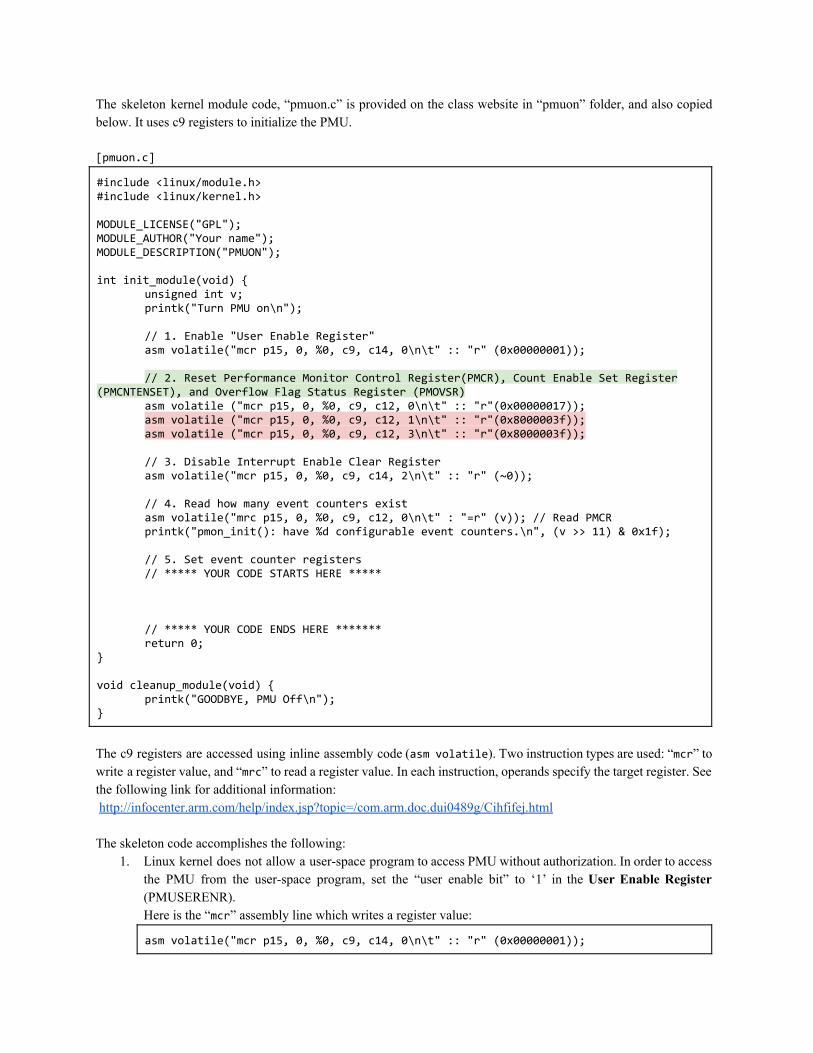
The skeleton kernel module code, “pmuon.c” is provided on the class website in “pmuon” folder, and also copied below. It uses c9 registers to initialize the PMU. [pmuon.c]
#include <linux/module.h> #include <linux/kernel.h> MODULE_LICENSE("GPL"); MODULE_AUTHOR("Your name"); MODULE_DESCRIPTION("PMUON"); int init_module(void) { unsigned int v; printk("Turn PMU on\n"); // 1. Enable "User Enable Register" asm volatile("mcr p15, 0, %0, c9, c14, 0\n\t" :: "r" (0x00000001)); // 2. Reset Performance Monitor Control Register(PMCR), Count Enable Set Register (PMCNTENSET), and Overflow Flag Status Register (PMOVSR) asm volatile ("mcr p15, 0, %0, c9, c12, 0\n\t" :: "r"(0x00000017)); asm volatile ("mcr p15, 0, %0, c9, c12, 1\n\t" :: "r"(0x8000003f)); asm volatile ("mcr p15, 0, %0, c9, c12, 3\n\t" :: "r"(0x8000003f)); // 3. Disable Interrupt Enable Clear Register asm volatile("mcr p15, 0, %0, c9, c14, 2\n\t" :: "r" (~0)); // 4. Read how many event counters exist asm volatile("mrc p15, 0, %0, c9, c12, 0\n\t" : "=r" (v)); // Read PMCR printk("pmon_init(): have %d configurable event counters.\n", (v >> 11) & 0x1f);
// 5. Set event counter registers // ***** YOUR CODE STARTS HERE *****
// ***** YOUR CODE ENDS HERE ******* return 0;
} void cleanup_module(void) {
printk("GOODBYE, PMU Off\n"); }
The c9 registers are accessed using inline assembly code (asm volatile). Two instruction types are used: “mcr” to write a register value, and “mrc” to read a register value. In each instruction, operands specify the target register. See the following link for additional information: http://infocenter.arm.com/help/index.jsp?topic=/com.arm.doc.dui0489g/Cihfifej.html The skeleton code accomplishes the following:
1. Linux kernel does not allow a user-space program to access PMU without authorization. In order to access the PMU from the user-space program, set the “user enable bit” to ‘1’ in the User Enable Register (PMUSERENR). Here is the “mcr” assembly line which writes a register value:
asm volatile("mcr p15, 0, %0, c9, c14, 0\n\t" :: "r" (0x00000001));
From Table 4.140, you can find that the {CRn, CRm, Op2} of PUSERNENR are {c9, c14, 0}. These three variables are the last three parameters of the “mcr” assembly instruction. “0x00000001” corresponds to the placeholder parameter “%0” in the asm volatile function call.
2. Configure the Performance Monitor Control Register (PMCR) to initialize all counters. Initialize the Count Enable Set Register (PMNCNTENSET) and Overflow flag status register (PMOVSR) in a similar way using their {CRn, CRm, Op2} values.
3. Disable the Interrupt Enable Clear Register (PMINTENCLR). The purpose of this register is to determine if any of the Performance Monitor Count Registers and the Cycle Count Register generate an interrupt on overflow. Any interrupt overflow enable bit written with a value of 1 clears the interrupt overflow enable bit to 0.
4. Read PMCR to know how many configurable event counters exist. The “mrc” assembly instruction is used for reading the register value into the “v” variable.
Cross-compile “pmuon.c” to generate the kernel module. Then, copy it to RPi 3. Then, test by loading the kernel module. $ su insmod pmuon.ko
$ dmesg | tail -2
[12643.359697] Turn PMU on [12643.359740] pmuon_init(): have 6 configurable event counters
In the dmesg log you should see that CPU has 6 configurable event counters.
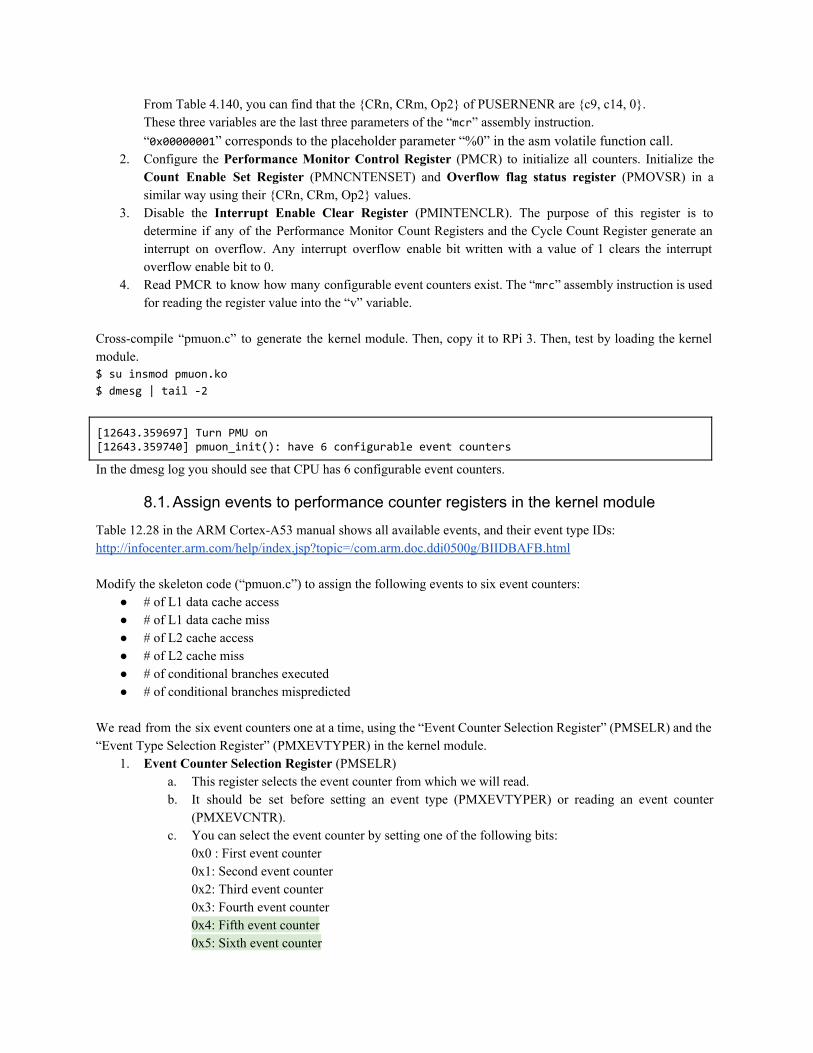
8.1. Assign events to performance counter registers in the kernel module Table 12.28 in the ARM Cortex-A53 manual shows all available events, and their event type IDs: http://infocenter.arm.com/help/index.jsp?topic=/com.arm.doc.ddi0500g/BIIDBAFB.html Modify the skeleton code (“pmuon.c”) to assign the following events to six event counters:
● # of L1 data cache access ● # of L1 data cache miss ● # of L2 cache access ● # of L2 cache miss ● # of conditional branches executed ● # of conditional branches mispredicted
We read from the six event counters one at a time, using the “Event Counter Selection Register” (PMSELR) and the “Event Type Selection Register” (PMXEVTYPER) in the kernel module.
1. Event Counter Selection Register (PMSELR) a. This register selects the event counter from which we will read. b. It should be set before setting an event type (PMXEVTYPER) or reading an event counter
(PMXEVCNTR). c. You can select the event counter by setting one of the following bits:
0x0 : First event counter 0x1: Second event counter 0x2: Third event counter 0x3: Fourth event counter 0x4: Fifth event counter 0x5: Sixth event counter

2. Event Type Selection Register (PMXEVTYPER) a. After setting the PMSELR, specify the event type to count and read with event count registers.
After selecting it, access its actual counter value using PMXEVCNTR. Submit your modified “pmuon.c” source code to select the six events for the event counters.
8.2. Read performance counter events in the user-space program You will read the values of the six event counters during a given user-space program (the workload). Download the user-space program, “memmeasurement.c” and related files (governor_part1.c/.h and Makefile) from the class website (“memmeasurement” directory). Implement code which measures the cycle counter and the six performance counter events for “workload_body()” function. The provided “main()” function performs the following tasks:
1. It initializes the following: a. “set_governor()” changes the CPU governor to “userspace”. When the system uses the
userspace governor, a user program can change the CPU frequency. b. “set_by_max_freq()” changes the CPU frequency to the maximum value. You may alternatively
use “set_by_min_freq()”. RPi 3 supports two available CPU frequency settings. The two functions switch between the 1.2GHz and 600MHz frequency.
c. “workload_init()” prepares an array to be accessed in “workload_body()” function. It also warms up the memory by accessing the array once.
2. Before running the “workload_body()” function, “reset_counter()” resets the cycle counter and the six event counters selected in the kernel module to zero by using PMCR. PMCR can be controlled by the user-space program since the kernel module enables the user enable register (PMUSERENR).
3. The code measures the execution time of “workload_body()” function using a system call, get_time_of_day().
4. After measuring the execution time, “workload_finish()” frees the array and change the governor from “userspace” to the original policy.
Once you install the part 1 kernel module, you can access the performance counter registers in any userspace program executed with root privilege (with sudo). For example, you can compile the original “memmeasurement” program as follows in your linux machine: $ make CROSS_COMPILE=arm-linux-gnueabihf-
Confirm that performance is limited to a single core on your RPi. If not, set maxcpus=1 in /boot/cmdline.txt and reboot before continuing.
$ cat /sys/devices/system/cpu/online # should be 0 Copy the compiled kernel module and the user-space program binary into the RPi 3. Then run the following: $ sudo insmod pmuon.ko
$ sudo ./memmeasurement
Measurement start.
Exe_time: 309217 us at 1200000
$ sudo rmmod pmuon
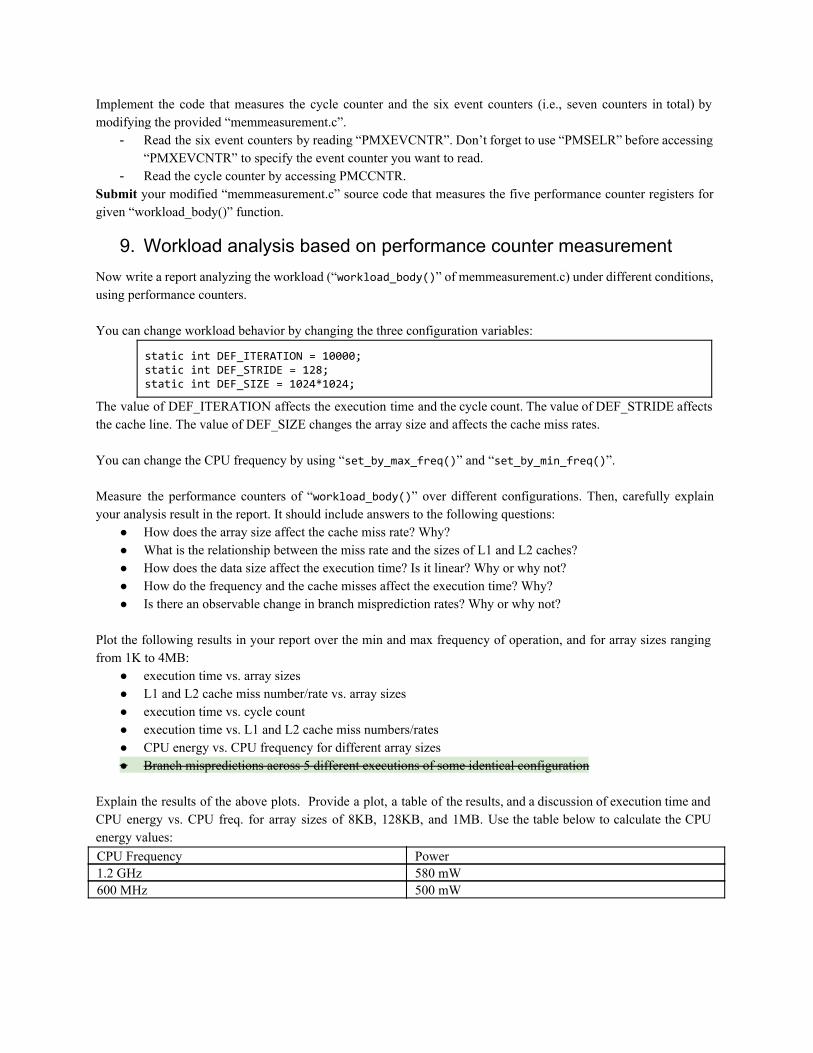
Implement the code that measures the cycle counter and the six event counters (i.e., seven counters in total) by modifying the provided “memmeasurement.c”.
- Read the six event counters by reading “PMXEVCNTR”. Don’t forget to use “PMSELR” before accessing “PMXEVCNTR” to specify the event counter you want to read.
- Read the cycle counter by accessing PMCCNTR. Submit your modified “memmeasurement.c” source code that measures the five performance counter registers for given “workload_body()” function.
9. Workload analysis based on performance counter measurement Now write a report analyzing the workload (“workload_body()” of memmeasurement.c) under different conditions, using performance counters. You can change workload behavior by changing the three configuration variables:
static int DEF_ITERATION = 10000; static int DEF_STRIDE = 128; static int DEF_SIZE = 1024*1024;
The value of DEF_ITERATION affects the execution time and the cycle count. The value of DEF_STRIDE affects the cache line. The value of DEF_SIZE changes the array size and affects the cache miss rates. You can change the CPU frequency by using “set_by_max_freq()” and “set_by_min_freq()”. Measure the performance counters of “workload_body()” over different configurations. Then, carefully explain your analysis result in the report. It should include answers to the following questions:
● How does the array size affect the cache miss rate? Why? ● What is the relationship between the miss rate and the sizes of L1 and L2 caches? ● How does the data size affect the execution time? Is it linear? Why or why not? ● How do the frequency and the cache misses affect the execution time? Why? ● Is there an observable change in branch misprediction rates? Why or why not?
Plot the following results in your report over the min and max frequency of operation, and for array sizes ranging from 1K to 4MB:
● execution time vs. array sizes ● L1 and L2 cache miss number/rate vs. array sizes ● execution time vs. cycle count ● execution time vs. L1 and L2 cache miss numbers/rates ● CPU energy vs. CPU frequency for different array sizes ● Branch mispredictions across 5 different executions of some identical configuration
Explain the results of the above plots. Provide a plot, a table of the results, and a discussion of execution time and CPU energy vs. CPU freq. for array sizes of 8KB, 128KB, and 1MB. Use the table below to calculate the CPU energy values: CPU Frequency Power 1.2 GHz 580 mW 600 MHz 500 mW
10. Individual Project Submission (by 23:59:59 PST) Submit the following via TED:
● Source code of your modified pmuon.c o It must select the six event event counters:
L1 cache access, L1 cache miss, L2 cache access, L2 cache miss, conditional branch executions and conditional branch mispredictionss.
● Source code of your modified memmeasurement.c o It must include the measurement code of the seven performance counters: i.e.,
cycle counter, L1 cache access, L1 cache miss, L2 cache access, L2 cache miss, conditional branch executions and conditional branch mispredictions.
● Report o Maximum 2pgs, 12pt Times New Roman font, excluding figures and table. The figures needed
are specified above, and the table shows execution time and CPU energy vs. CPU freq. for array sizes of 8KB, 128KB, and 1MB.
o Carefully explain what you learned by analyzing the workload over all data and frequency settings. Refer to the prompts in the report above as a guide.
o Do not include your source code in the report.