Embed Size (px)
Citation preview
CSI: Rombalds Moor
Photogrammetry Training 26th March 10:00 Welcome• Overview of equipment• Basic camera use (we'll not be going into great detail)• Imagery requirements
11.00 (ish) Break
• Taking panoramas and using the software• Using the Photography Form• Image Storage• Camera care and strategies• Photography practice (in the Manor House grounds, but weather dependant
12:45 (ish) Finish
CSI: Rombalds Moor
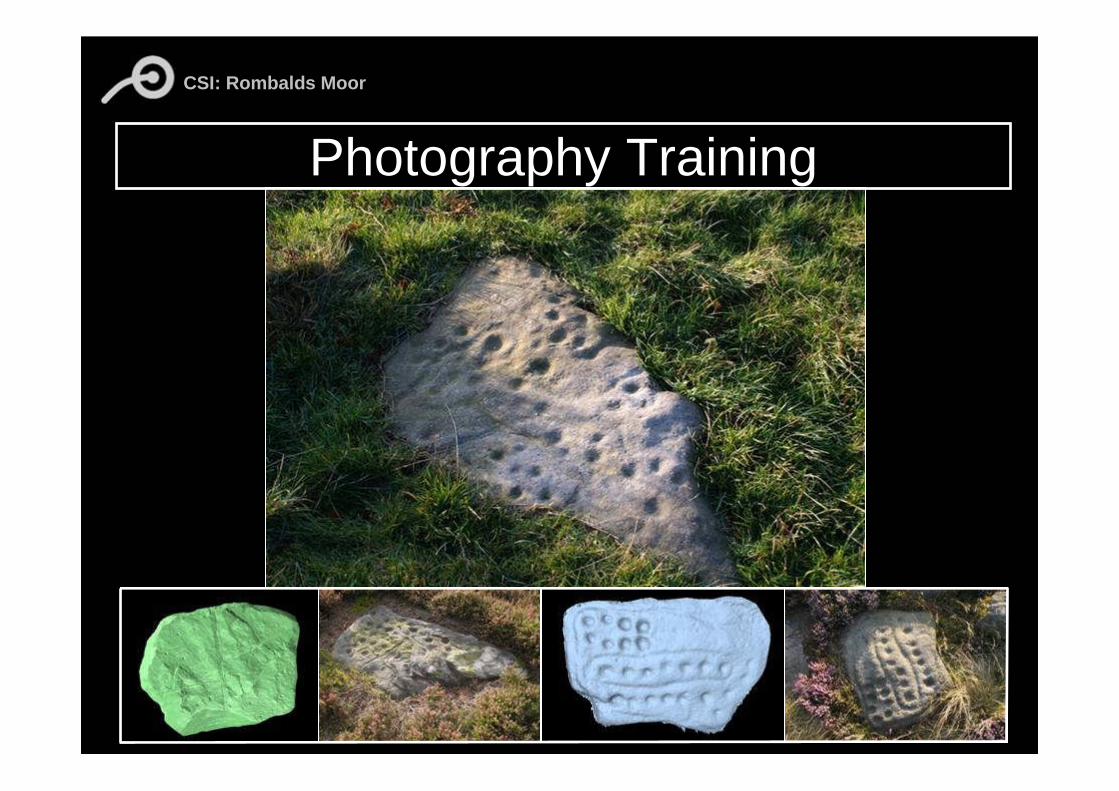
Photography Training
CSI: Rombalds Moor
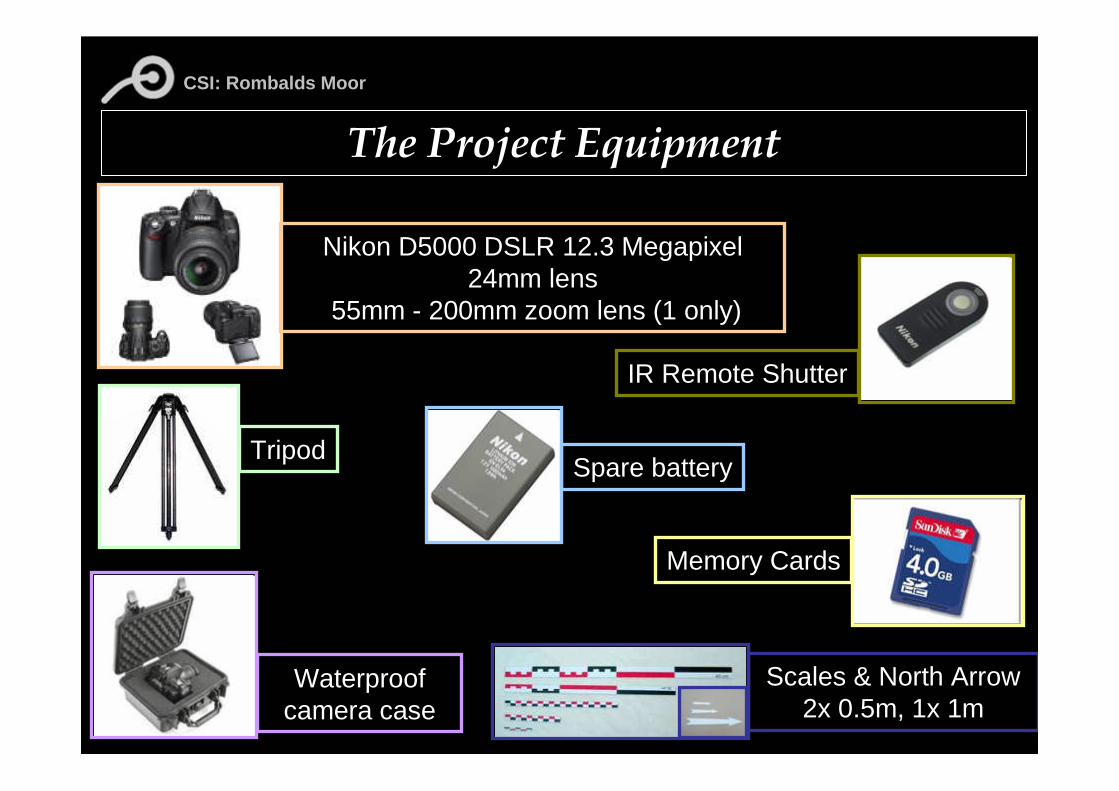
The Project EquipmentNikon D5000 DSLR 12.3 Megapixel
24mm lens 55mm - 200mm zoom lens (1 only)
Tripod
Scales & North Arrow2x 0.5m, 1x 1m
Waterproofcamera case
Spare battery
IR Remote Shutter
Memory Cards

CSI: Rombalds Moor
The Nikon D5000 DSLR• Being a Digital Single-Lens Reflex (DSLR) camera it produces better quality imagery than smaller compact cameras due to the larger image sensor• Allows more control over the image being taken• Has primarily been purchased to capture photogrammetricimagery
Main Features•12.3 Megapixels (4288 x 2848)•2.7" vari-angle LCD Monitor•Live View•720p HD Movie•4fps Continuous Shooting•19 Scene Modes
CSI: Rombalds Moor
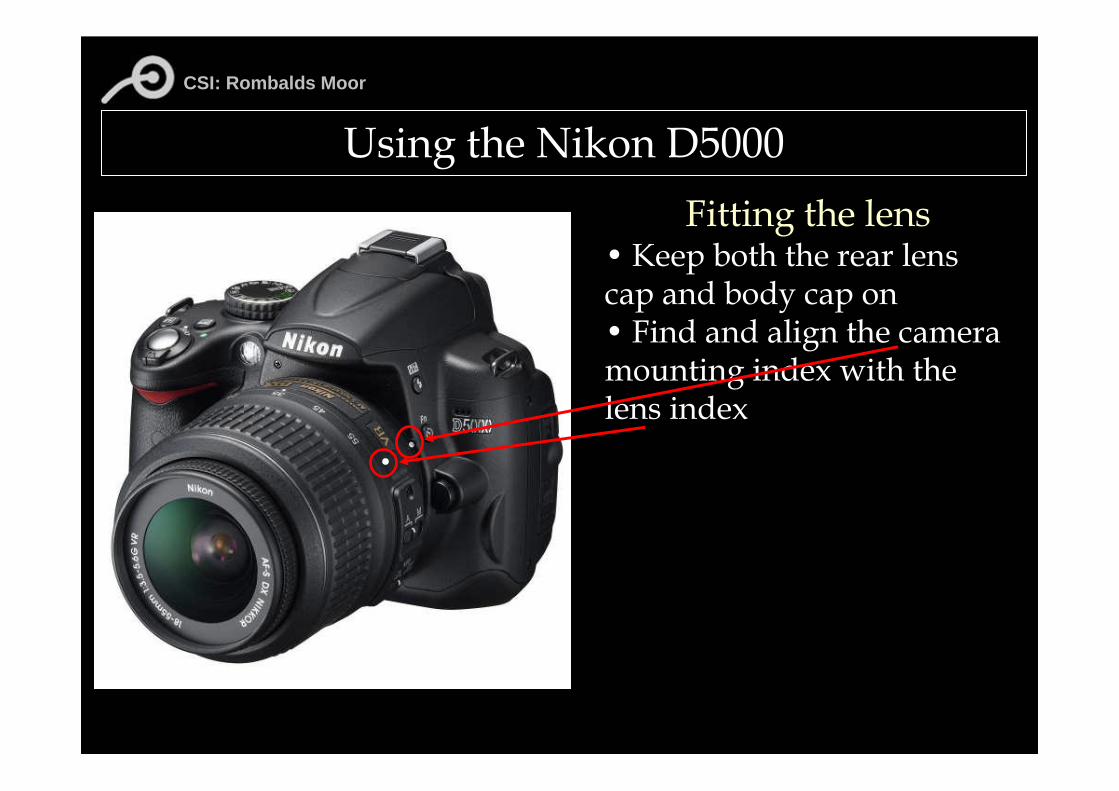
Using the Nikon D5000Fitting the lens
• Keep both the rear lens cap and body cap on• Find and align the camera mounting index with the lens index

CSI: Rombalds Moor
Using the Nikon D5000Fitting the lens
• Keep both the rear lens cap and body cap on• Find and align the camera mounting index with the lens index• Quickly twist off the rear lens cap and camera body cap• Align the index markers and attach the lens to the body, then twist the lens index to an upward position clicking into position
Lens fitting and removal should only be performed when the camera is OFF
and in as dust free environment as possible

CSI: Rombalds Moor
Using the Nikon D5000Fitting the memory card• Camera uses SDHC memory cards• Looking from the back insert memory card with label facing you•Make sure the camera is off whenever you take out or insert memory
CSI: Rombalds Moor
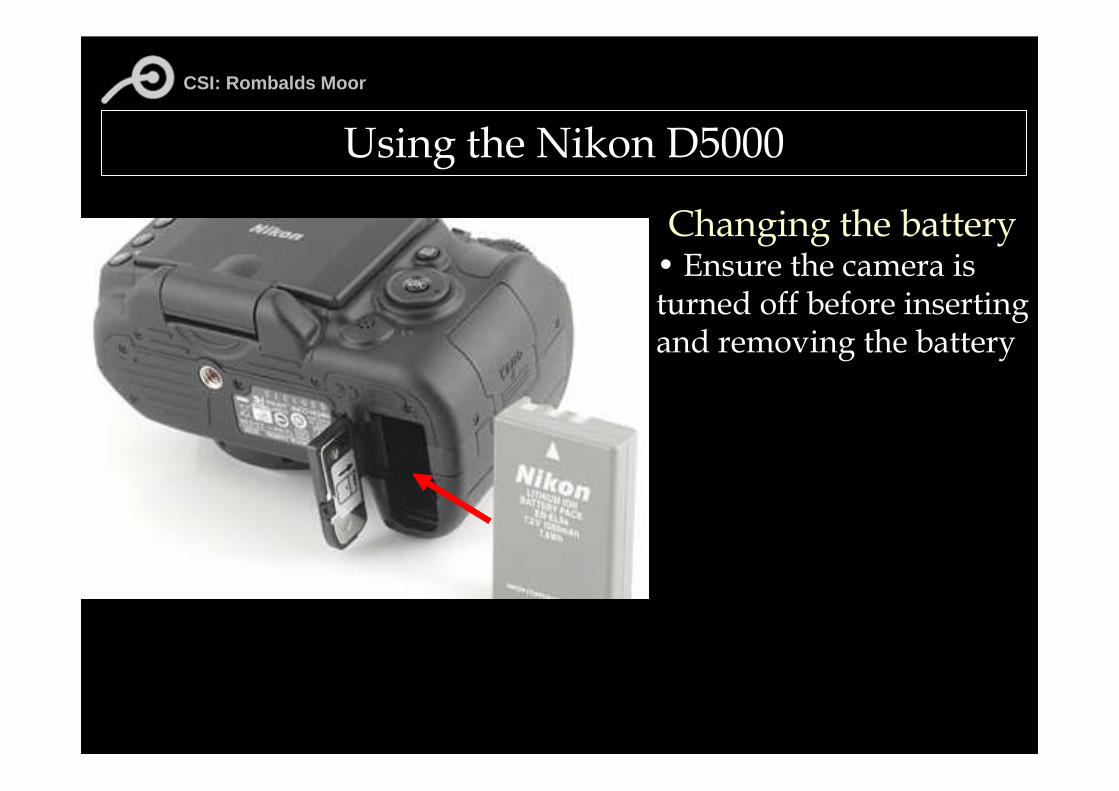
Using the Nikon D5000Changing the battery• Ensure the camera is turned off before inserting and removing the battery
CSI: Rombalds Moor
Using the Nikon D5000
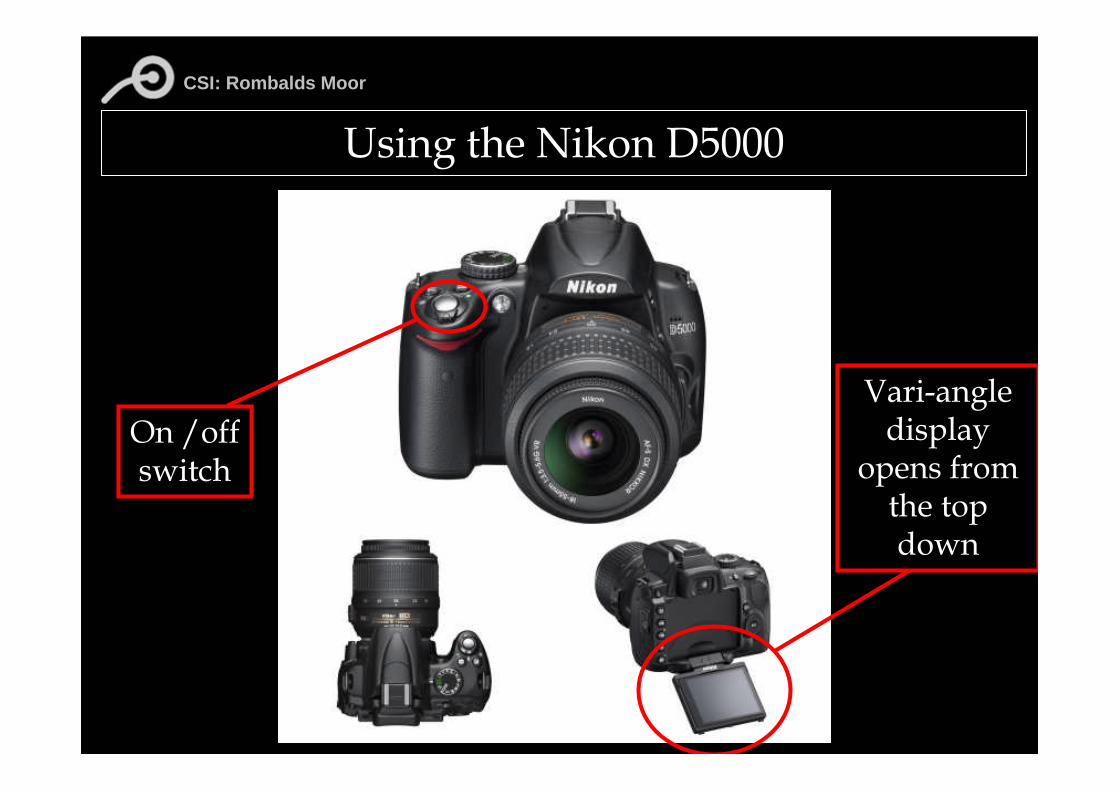
On /offswitch
Vari-angle display
opens from the top down
CSI: Rombalds Moor
Using the Nikon D5000
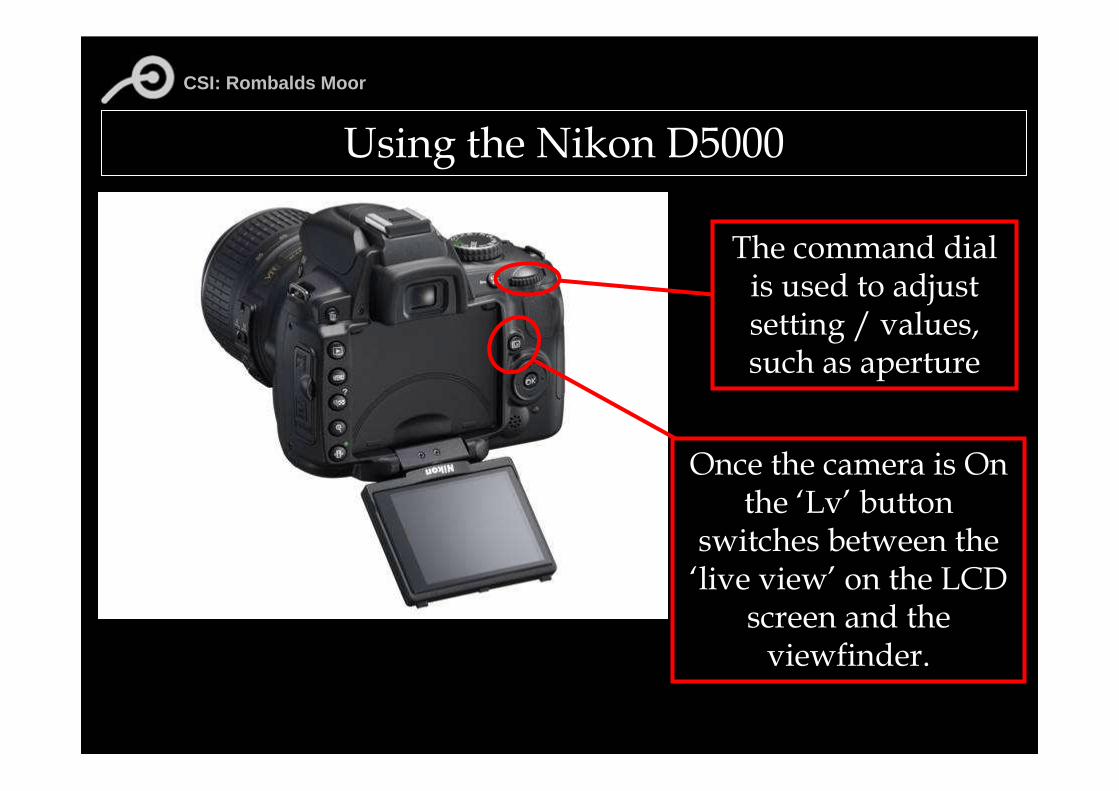
Once the camera is On the ‘Lv’ button
switches between the ‘live view’ on the LCD
screen and the viewfinder.
The command dial is used to adjust setting / values, such as aperture
CSI: Rombalds Moor
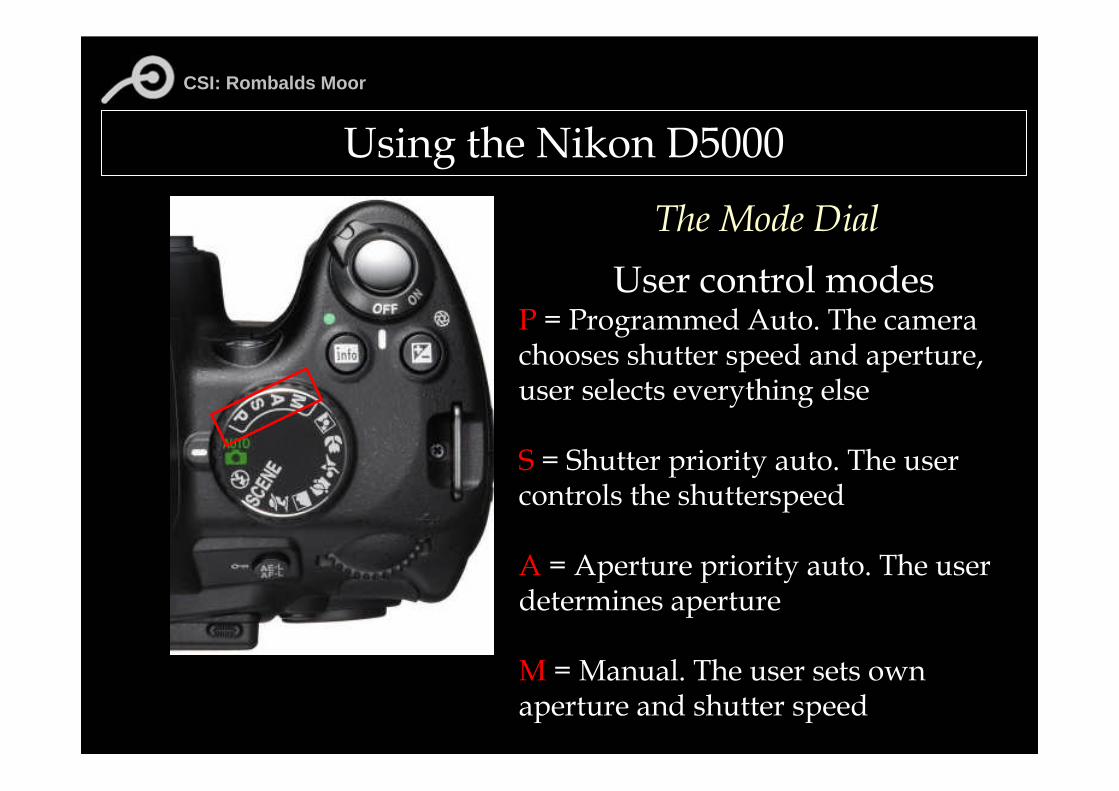
Using the Nikon D5000The Mode Dial
User control modesP = Programmed Auto. The camera chooses shutter speed and aperture, user selects everything elseS = Shutter priority auto. The user controls the shutterspeedA = Aperture priority auto. The user determines apertureM = Manual. The user sets own aperture and shutter speed

CSI: Rombalds Moor
Using the Nikon D5000The Mode DialAuto modes
Auto = Camera decides on best settings for the picture. Turns the camera into a ‘point and shoot’
= Fully automated but with flash disabled
CSI: Rombalds Moor
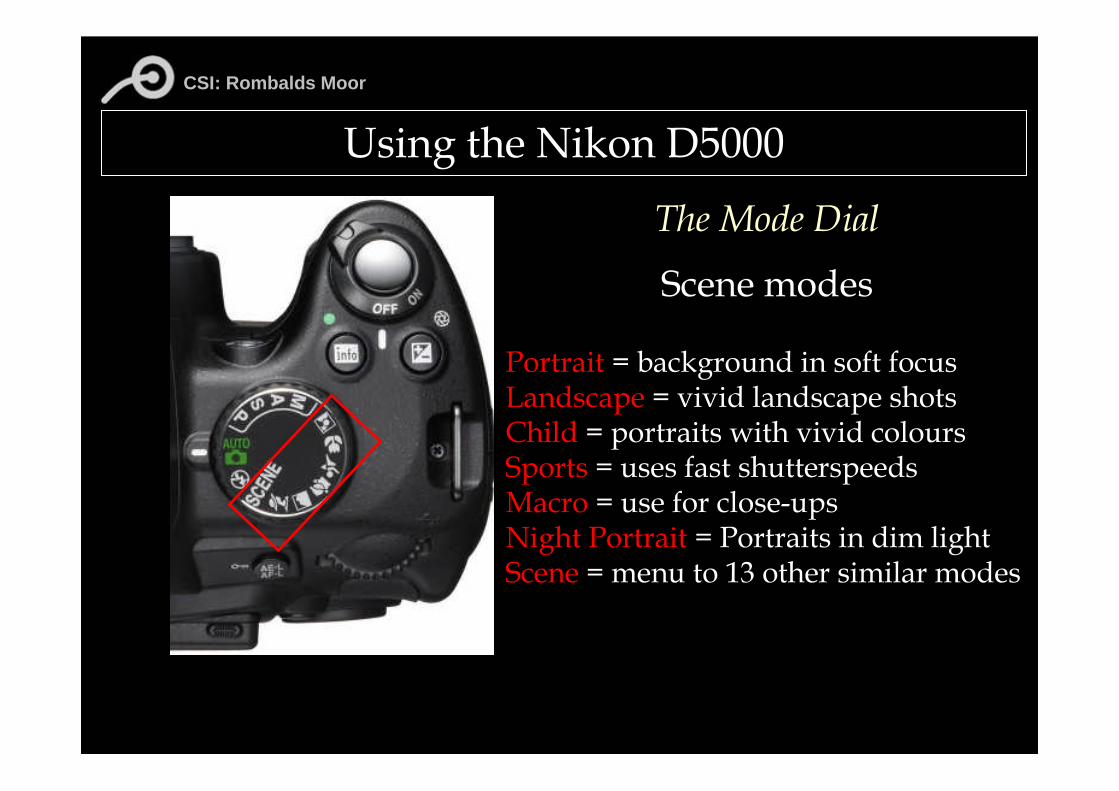
Using the Nikon D5000The Mode DialScene modes
Portrait = background in soft focus Landscape = vivid landscape shotsChild = portraits with vivid coloursSports = uses fast shutterspeedsMacro = use for close-upsNight Portrait = Portraits in dim lightScene = menu to 13 other similar modes
CSI: Rombalds Moor
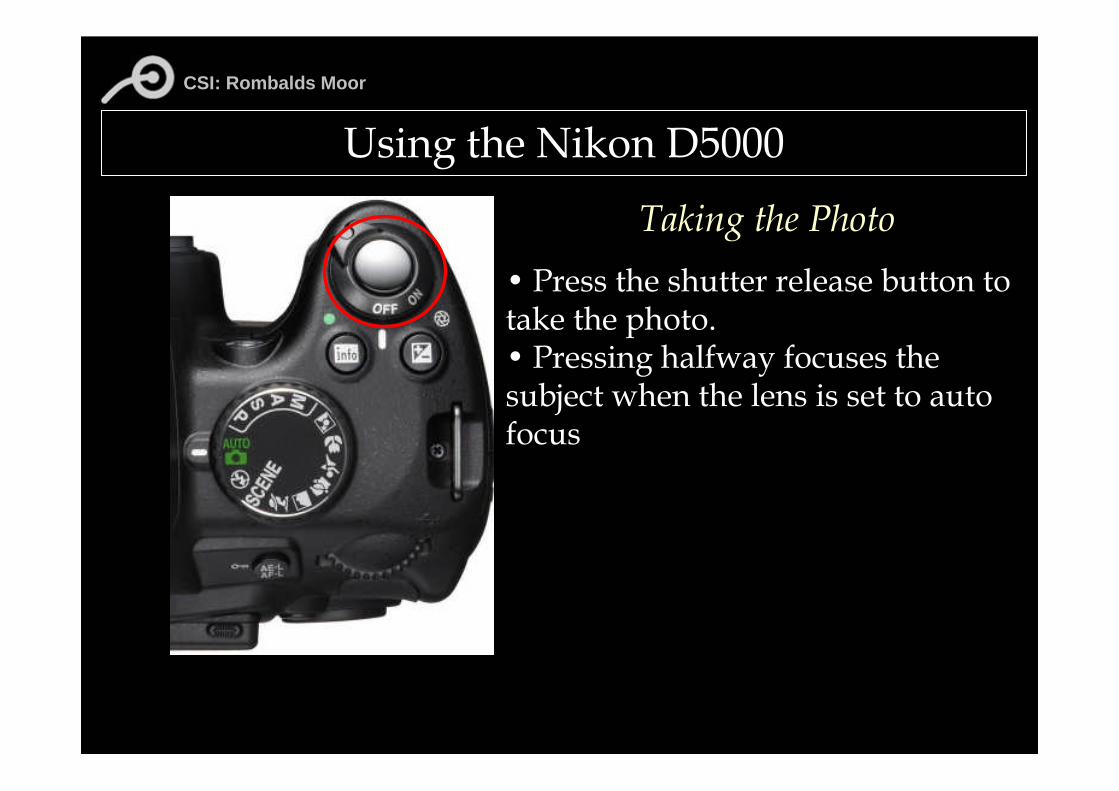
Using the Nikon D5000Taking the Photo
• Press the shutter release button to take the photo. • Pressing halfway focuses the subject when the lens is set to auto focus
CSI: Rombalds Moor
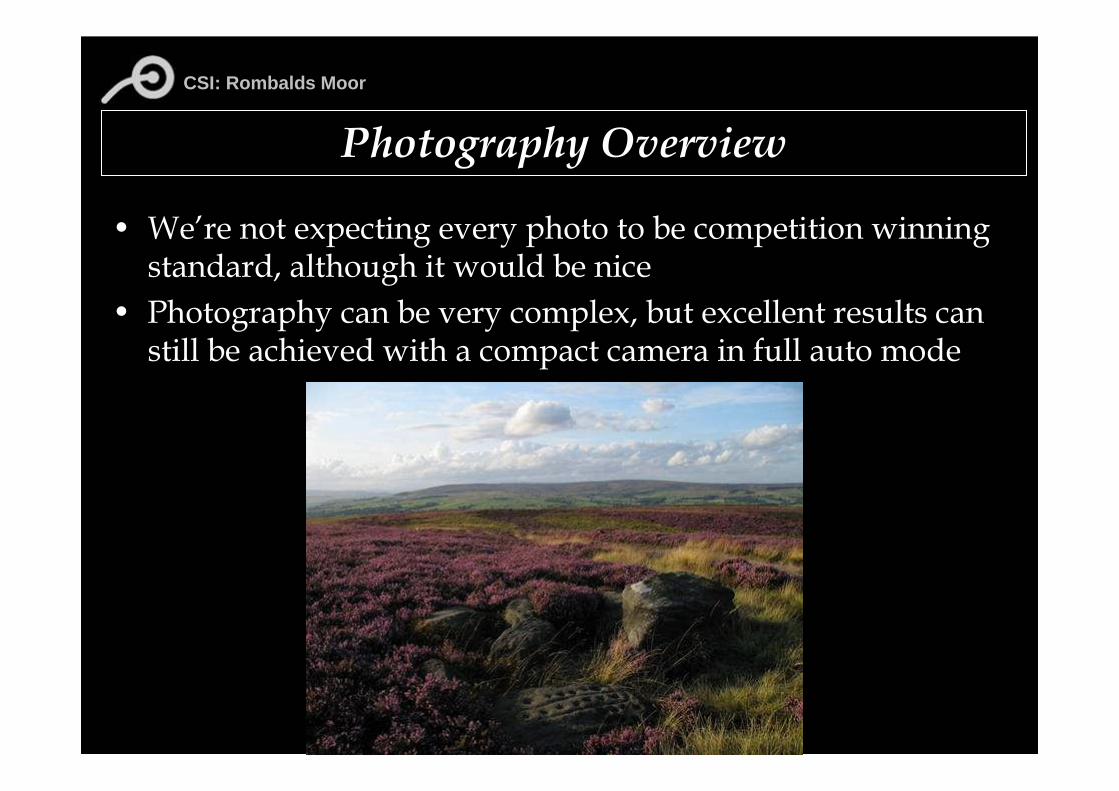
• We’re not expecting every photo to be competition winning standard, although it would be nice
• Photography can be very complex, but excellent results can still be achieved with a compact camera in full auto mode
Photography Overview
CSI: Rombalds Moor
• We’re not expecting every photo to be competition winning standard, although it would be nice
• Photography can be very complex, but excellent results can still be achieved with a compact camera in full auto mode
• However, imagery can be improved by having an understanding of:– Exposure– ISO (sensivity)– Aperture– Shutterspeed– Focal Length
Photography Overview
CSI: Rombalds Moor
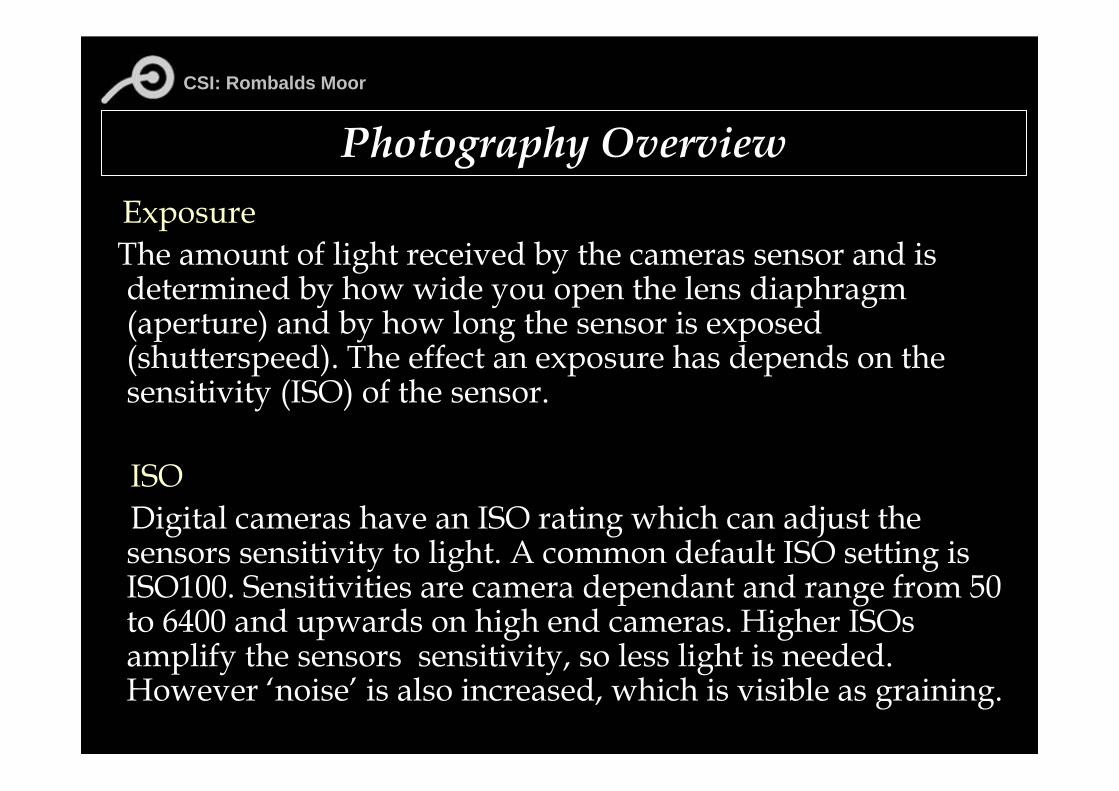
Exposure The amount of light received by the cameras sensor and is determined by how wide you open the lens diaphragm (aperture) and by how long the sensor is exposed (shutterspeed). The effect an exposure has depends on the sensitivity (ISO) of the sensor.
ISODigital cameras have an ISO rating which can adjust the sensors sensitivity to light. A common default ISO setting is ISO100. Sensitivities are camera dependant and range from 50 to 6400 and upwards on high end cameras. Higher ISOsamplify the sensors sensitivity, so less light is needed. However ‘noise’ is also increased, which is visible as graining.
Photography Overview
CSI: Rombalds Moor
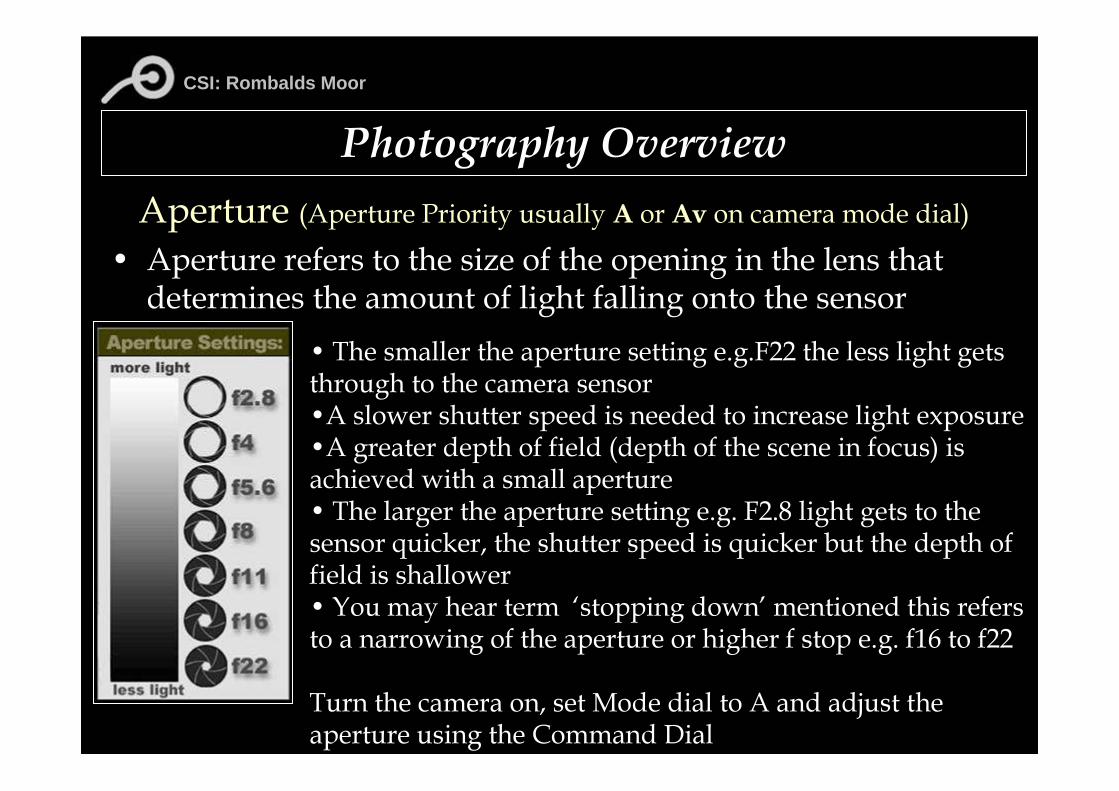
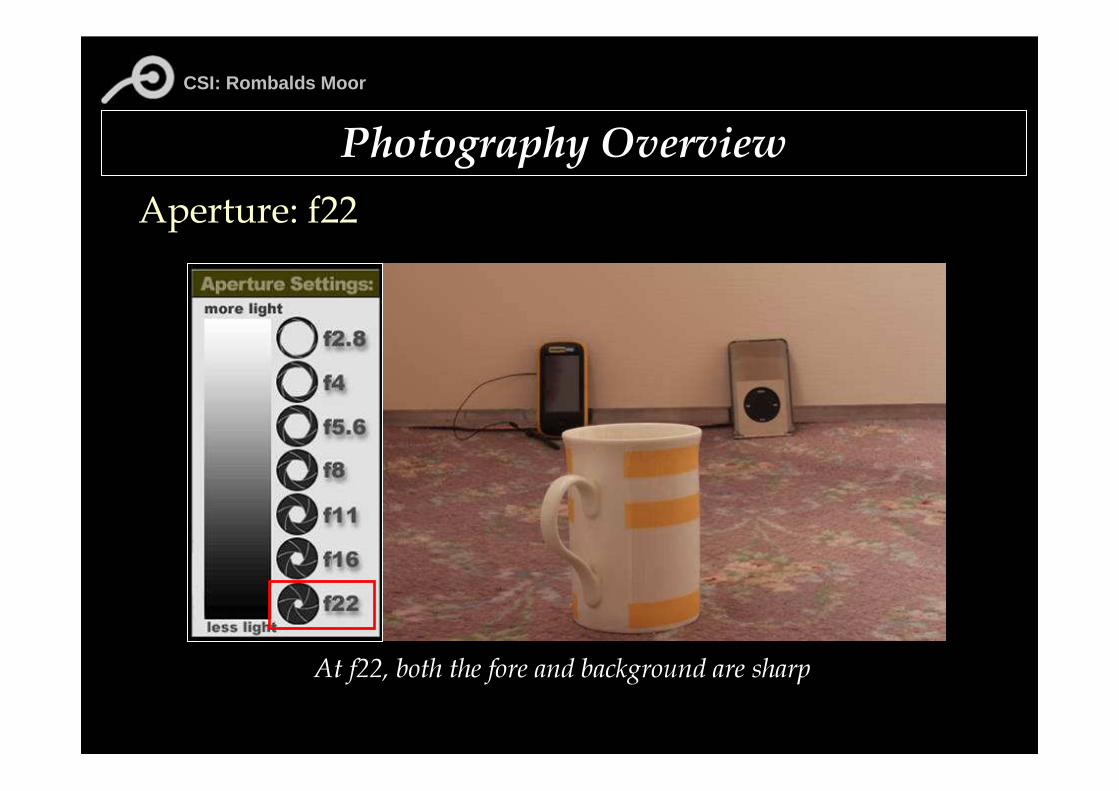
Aperture (Aperture Priority usually A or Av on camera mode dial)• Aperture refers to the size of the opening in the lens that determines the amount of light falling onto the sensor
Photography Overview
• The smaller the aperture setting e.g.F22 the less light gets through to the camera sensor•A slower shutter speed is needed to increase light exposure •A greater depth of field (depth of the scene in focus) is achieved with a small aperture• The larger the aperture setting e.g. F2.8 light gets to the sensor quicker, the shutter speed is quicker but the depth of field is shallower• You may hear term ‘stopping down’ mentioned this refers to a narrowing of the aperture or higher f stop e.g. f16 to f22Turn the camera on, set Mode dial to A and adjust the aperture using the Command Dial
CSI: Rombalds Moor
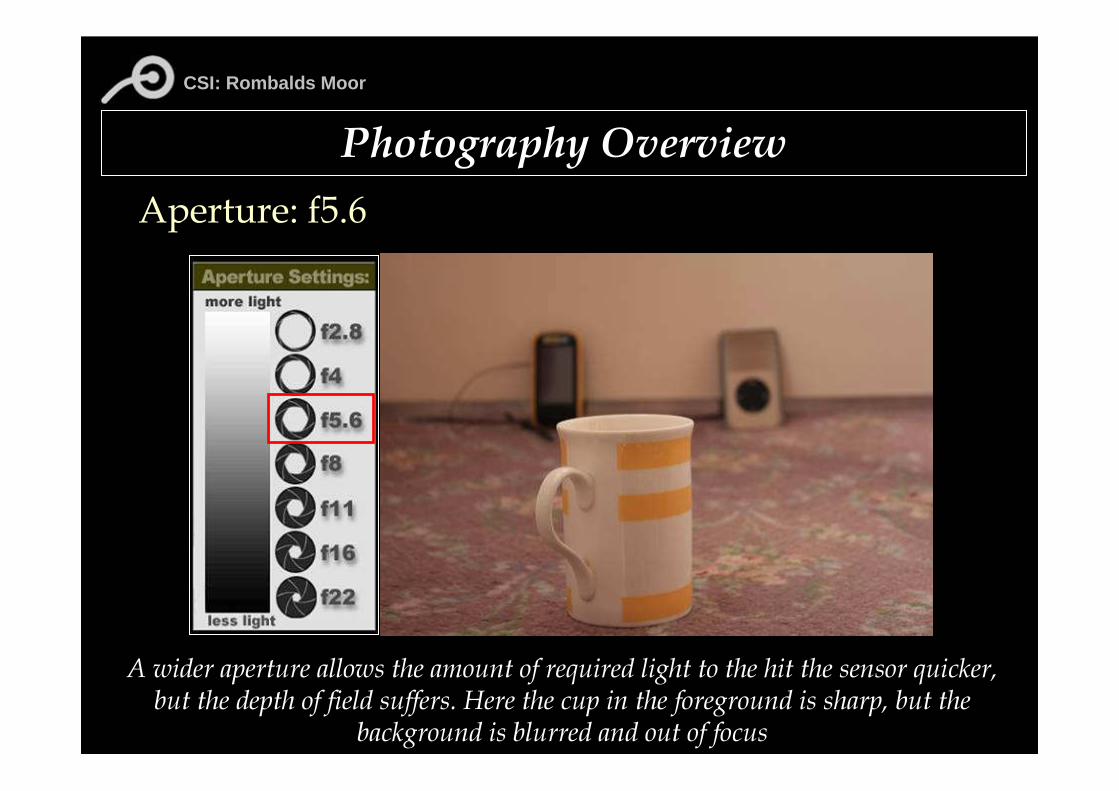
Aperture: f5.6Photography Overview
A wider aperture allows the amount of required light to the hit the sensor quicker, but the depth of field suffers. Here the cup in the foreground is sharp, but the
background is blurred and out of focus
CSI: Rombalds Moor
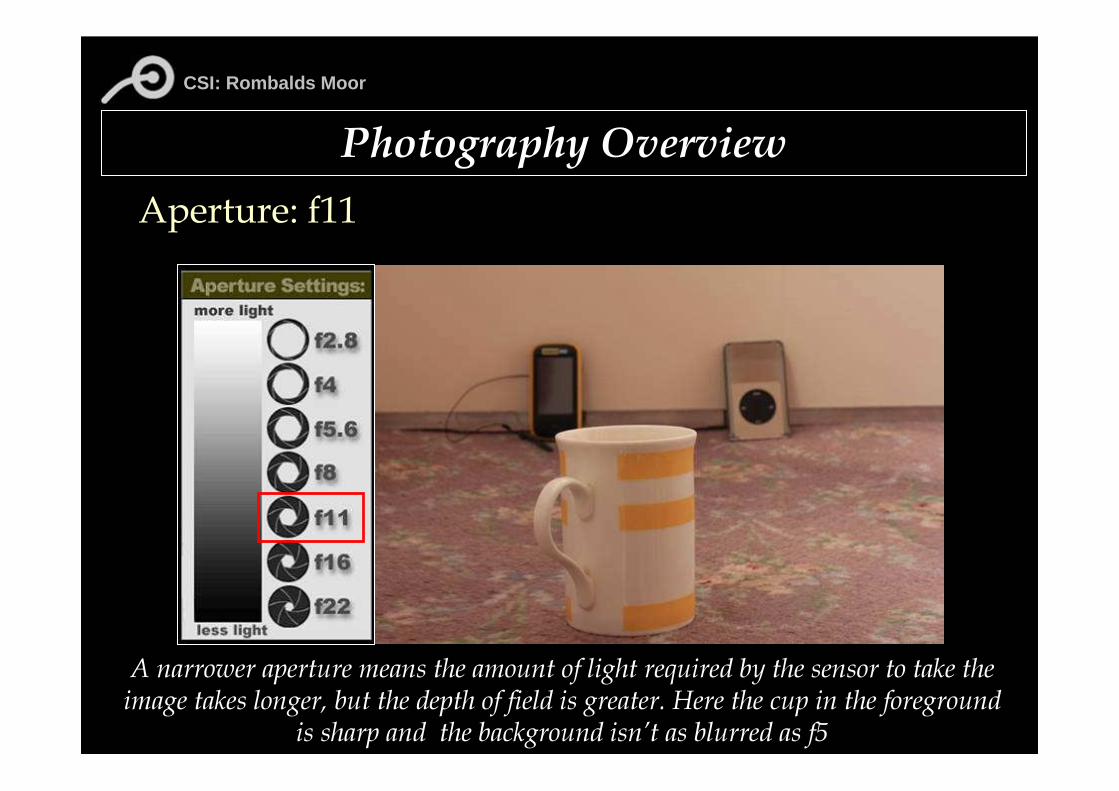
Aperture: f11Photography Overview
A narrower aperture means the amount of light required by the sensor to take the image takes longer, but the depth of field is greater. Here the cup in the foreground
is sharp and the background isn’t as blurred as f5
CSI: Rombalds Moor
Aperture: f22Photography Overview
At f22, both the fore and background are sharp
CSI: Rombalds Moor
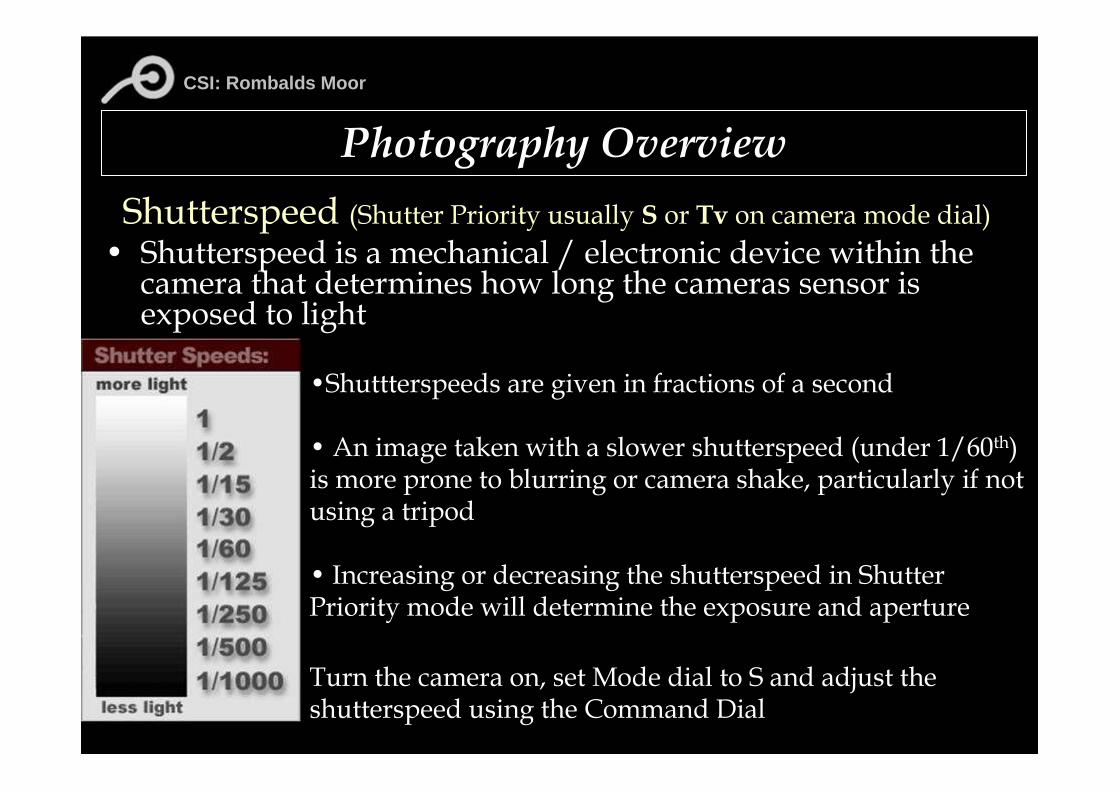
Shutterspeed (Shutter Priority usually S or Tv on camera mode dial)• Shutterspeed is a mechanical / electronic device within the camera that determines how long the cameras sensor is exposed to light
Photography Overview
•Shuttterspeeds are given in fractions of a second• An image taken with a slower shutterspeed (under 1/60th) is more prone to blurring or camera shake, particularly if not using a tripod• Increasing or decreasing the shutterspeed in Shutter Priority mode will determine the exposure and aperture
Turn the camera on, set Mode dial to S and adjust the shutterspeed using the Command Dial

CSI: Rombalds Moor
Focal Length• The focal length is determined by the lens used and is the distance in millimetres from the lens centre to the focal point on the camera sensor– A smaller distance in focal length produces a wider angle of view e.g. 18mm.
– A larger focal length produces a narrower view and also zoom
Photography Overview
CSI: Rombalds Moor
Conventional Photography – Required Shots • Photographs of each panel from the cardinal points (N,E,S,W-ish)• Vertical photograph• Location / context shots• Close up images of unusual motifs or tool marks• Scenic / gallery photographs• Panoramas • Fixed orientation shots (not in trial phase)• Occasional team shots of recording in action
CSI: Rombalds Moor
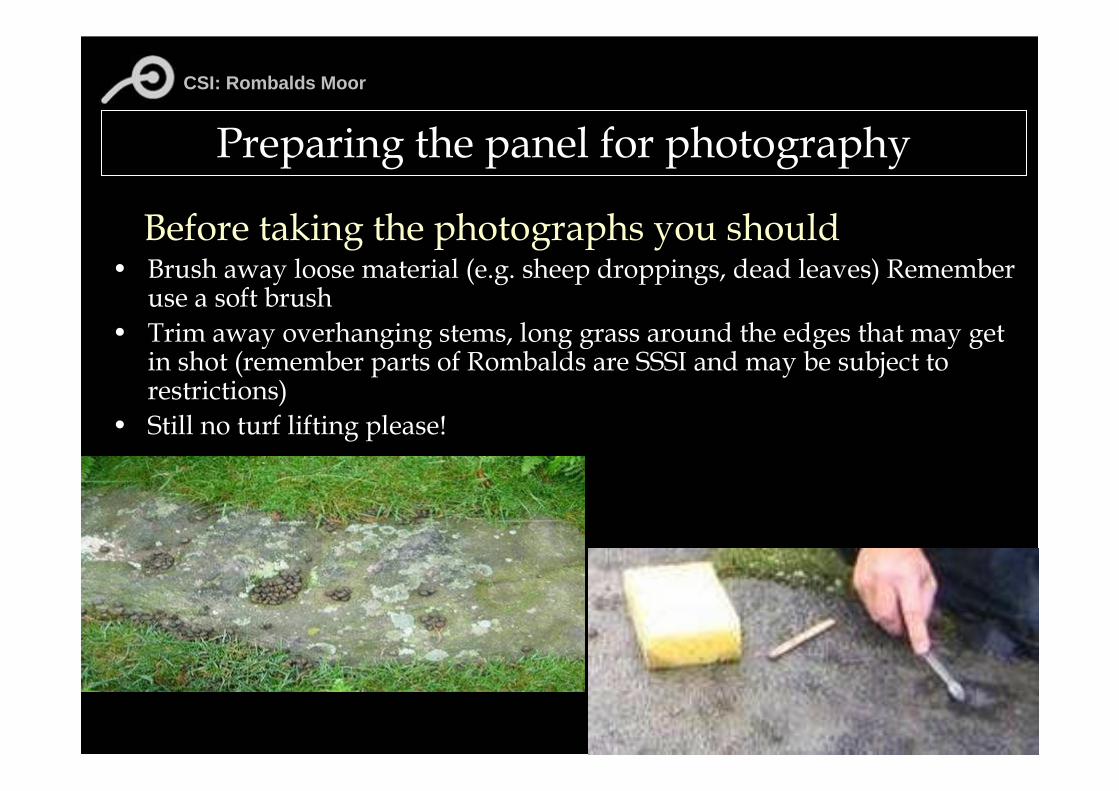
Before taking the photographs you should• Brush away loose material (e.g. sheep droppings, dead leaves) Remember use a soft brush
• Trim away overhanging stems, long grass around the edges that may get in shot (remember parts of Rombalds are SSSI and may be subject to restrictions)
• Still no turf lifting please!
Preparing the panel for photography
CSI: Rombalds Moor
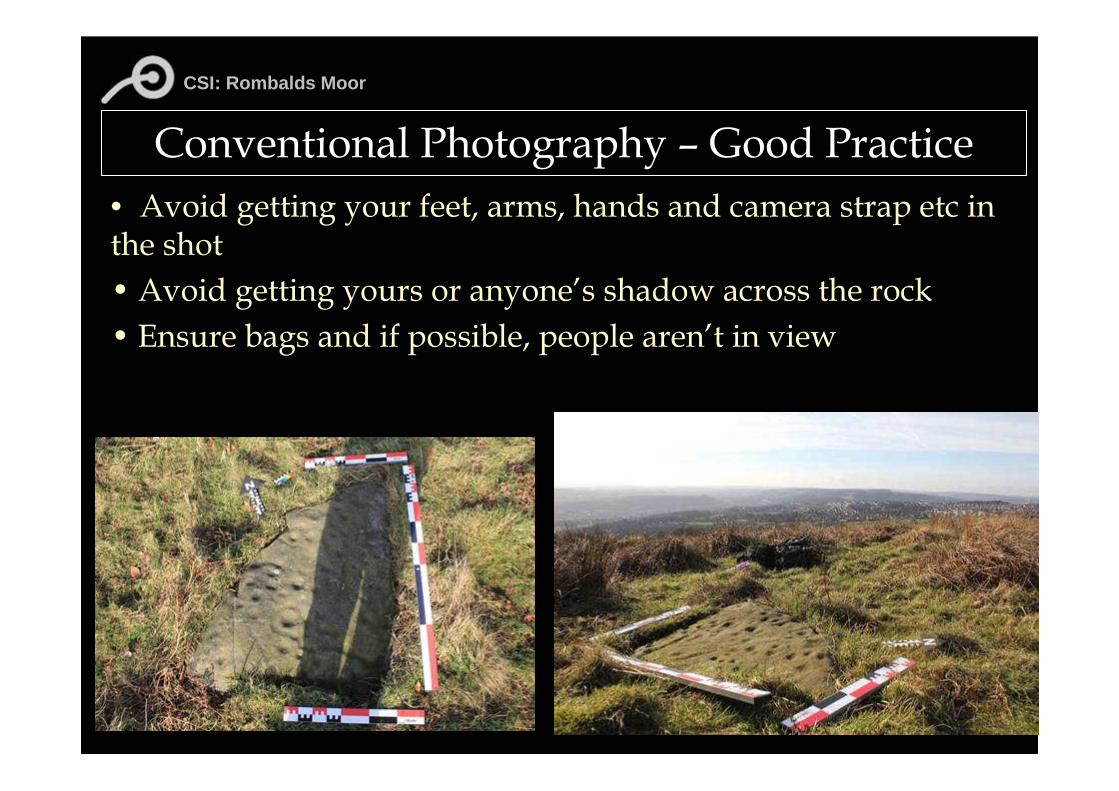
Conventional Photography – Good Practice • Avoid getting your feet, arms, hands and camera strap etc in the shot• Avoid getting yours or anyone’s shadow across the rock • Ensure bags and if possible, people aren’t in view
CSI: Rombalds Moor
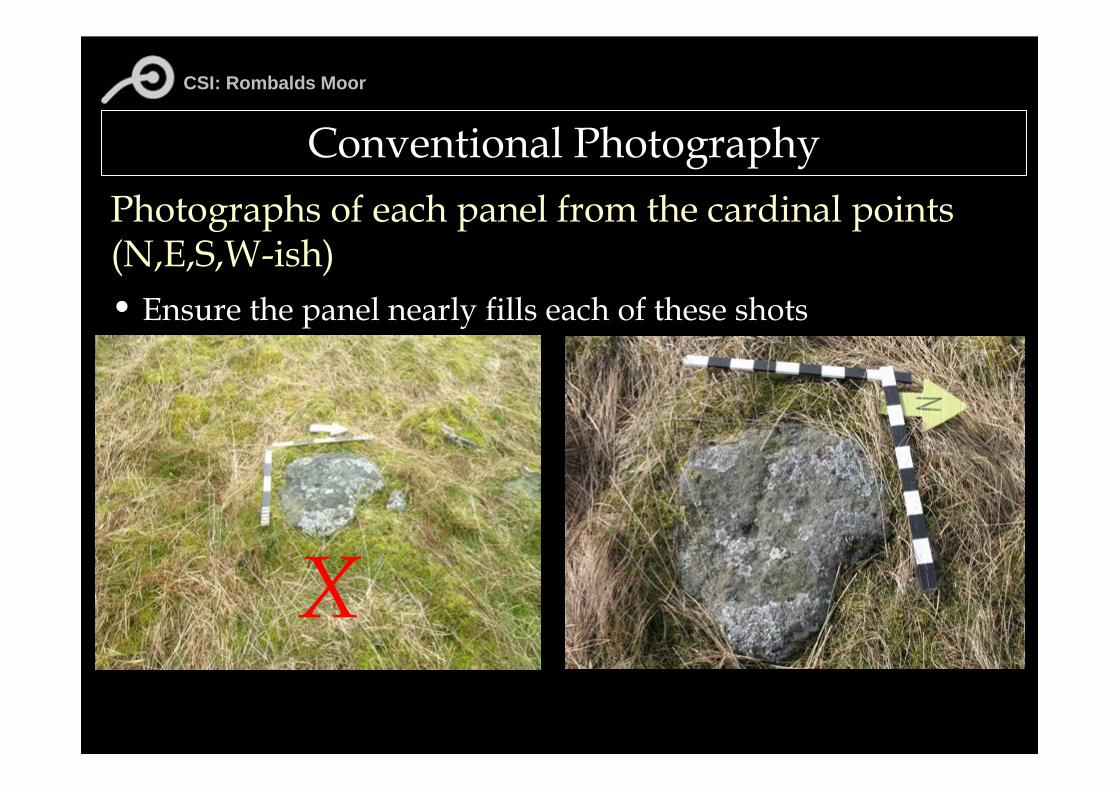
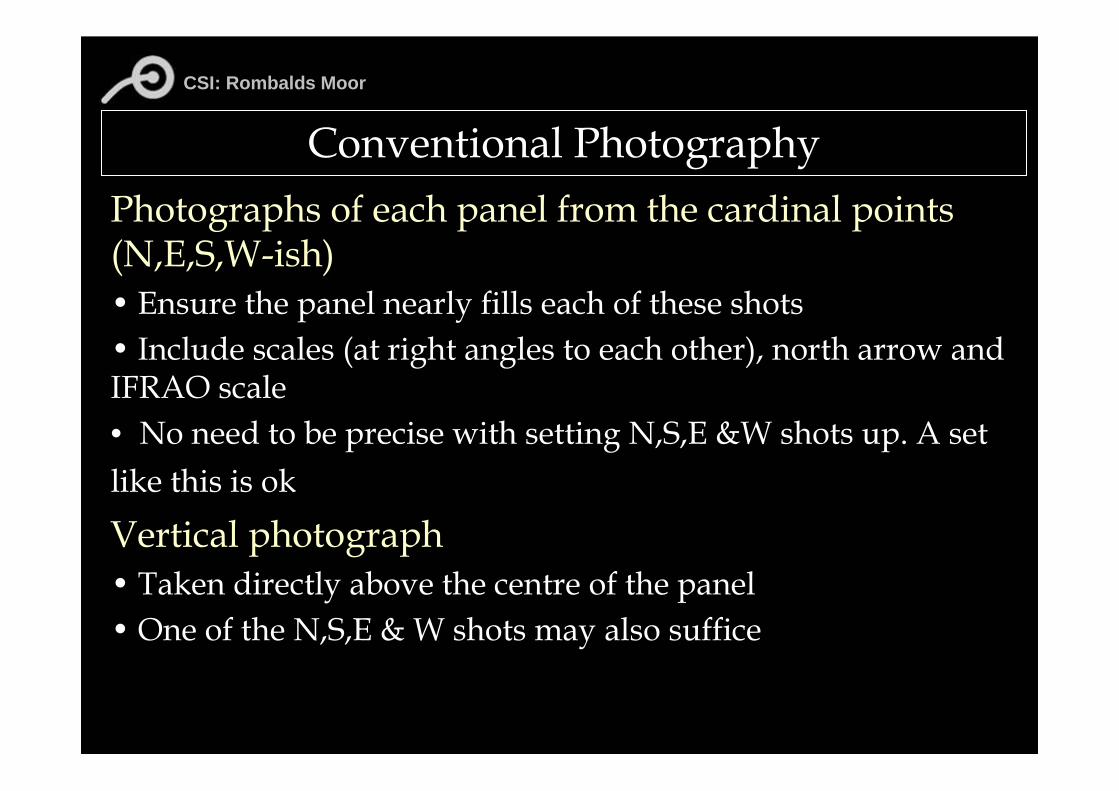
Conventional Photography Photographs of each panel from the cardinal points (N,E,S,W-ish)• Ensure the panel nearly fills each of these shots
X
CSI: Rombalds Moor
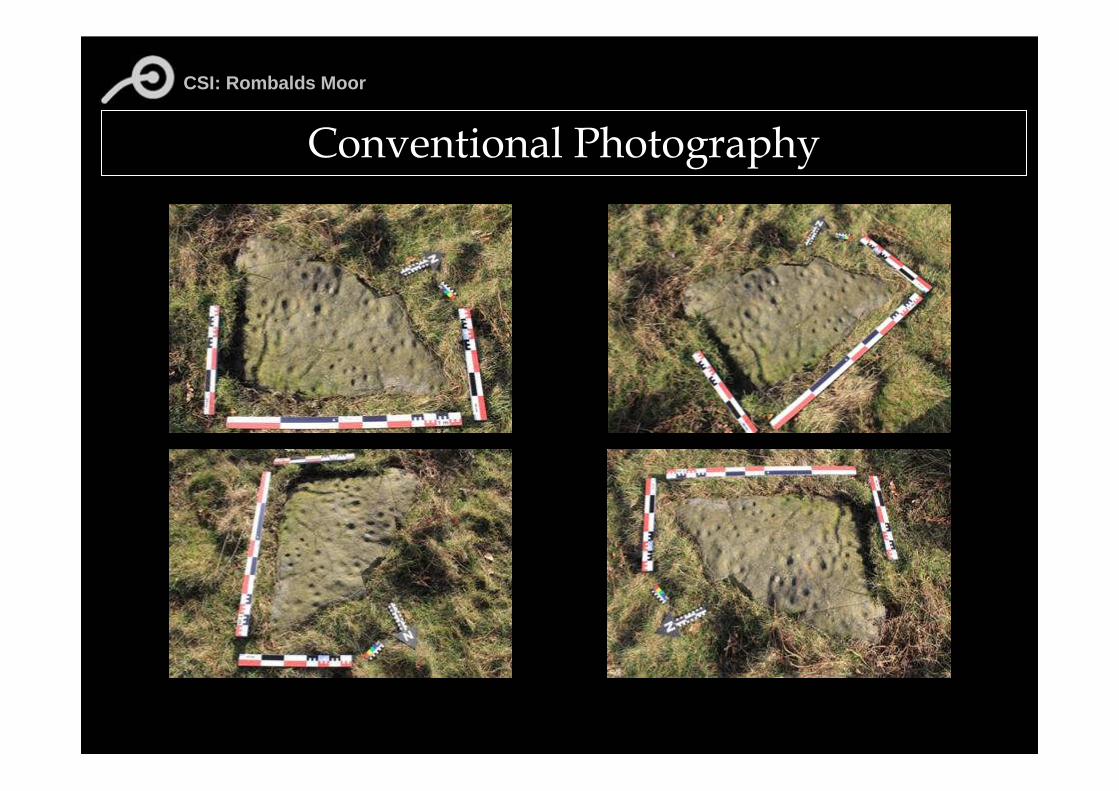
Conventional Photography Photographs of each panel from the cardinal points (N,E,S,W-ish)• Ensure the panel nearly fills each of these shots• Include scales (at right angles to each other), north arrow and IFRAO scale• No need to be precise with setting N,S,E &W shots up. A set like this is ok:
CSI: Rombalds Moor
Conventional Photography
CSI: Rombalds Moor
Conventional Photography Photographs of each panel from the cardinal points (N,E,S,W-ish)• Ensure the panel nearly fills each of these shots• Include scales (at right angles to each other), north arrow andIFRAO scale• No need to be precise with setting N,S,E &W shots up. A set like this is okVertical photograph• Taken directly above the centre of the panel• One of the N,S,E & W shots may also suffice
CSI: Rombalds Moor
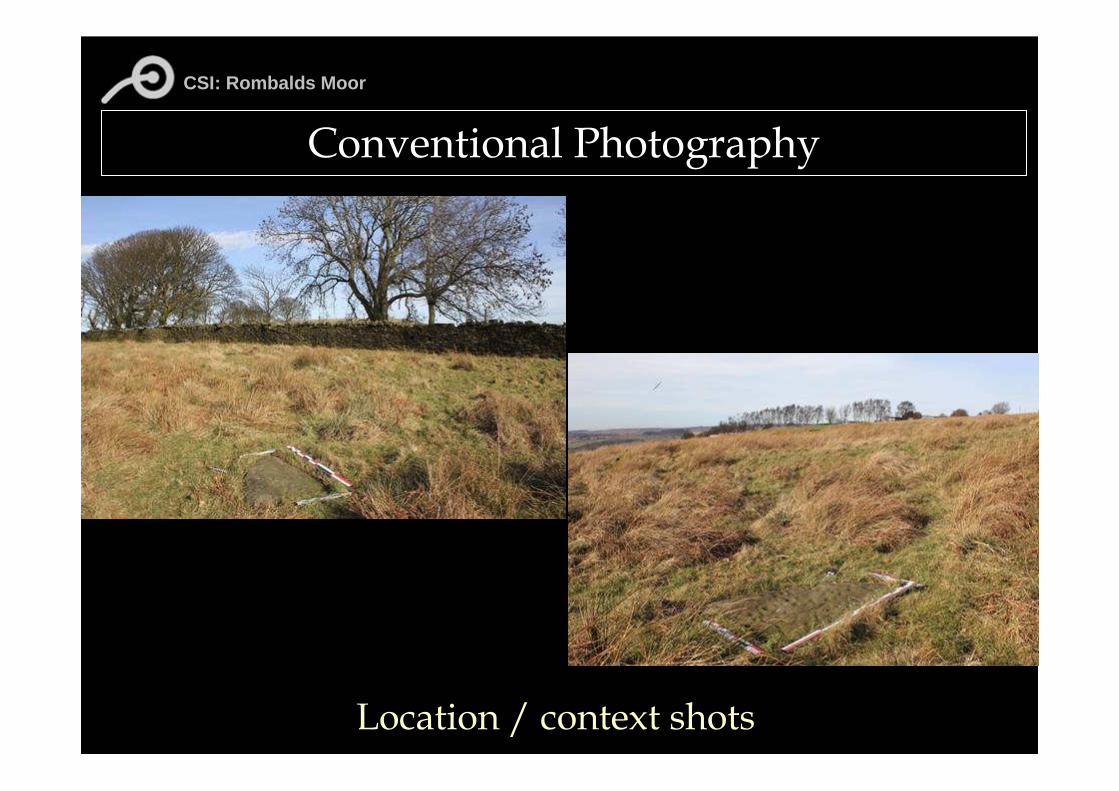
Conventional Photography Location / context shots• Photographs showing the view over the panel towards the horizon in each direction (N,S,E &W)• Include context shots of features close by (walling, cairns etc)• Leave scale bars, N arrow in view• Visibility of motifs isn’t essential, the landscape is the most important aspect of these images
CSI: Rombalds Moor
Conventional Photography
Location / context shots
CSI: Rombalds Moor
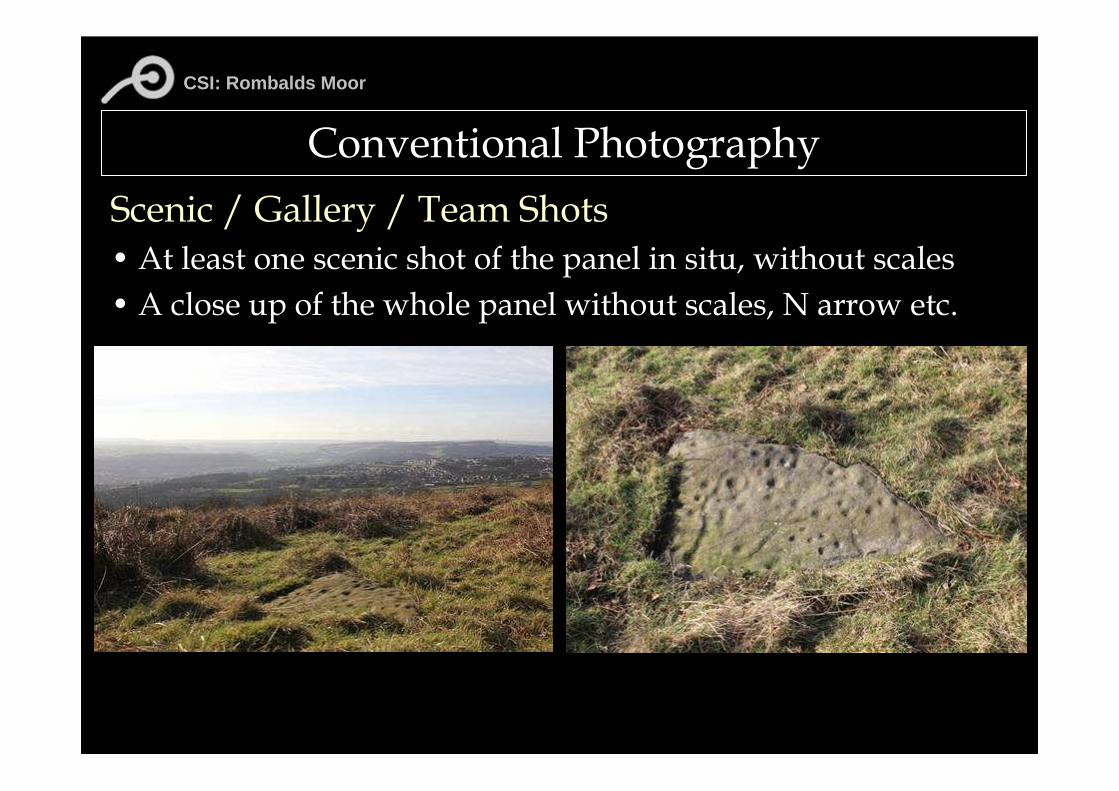
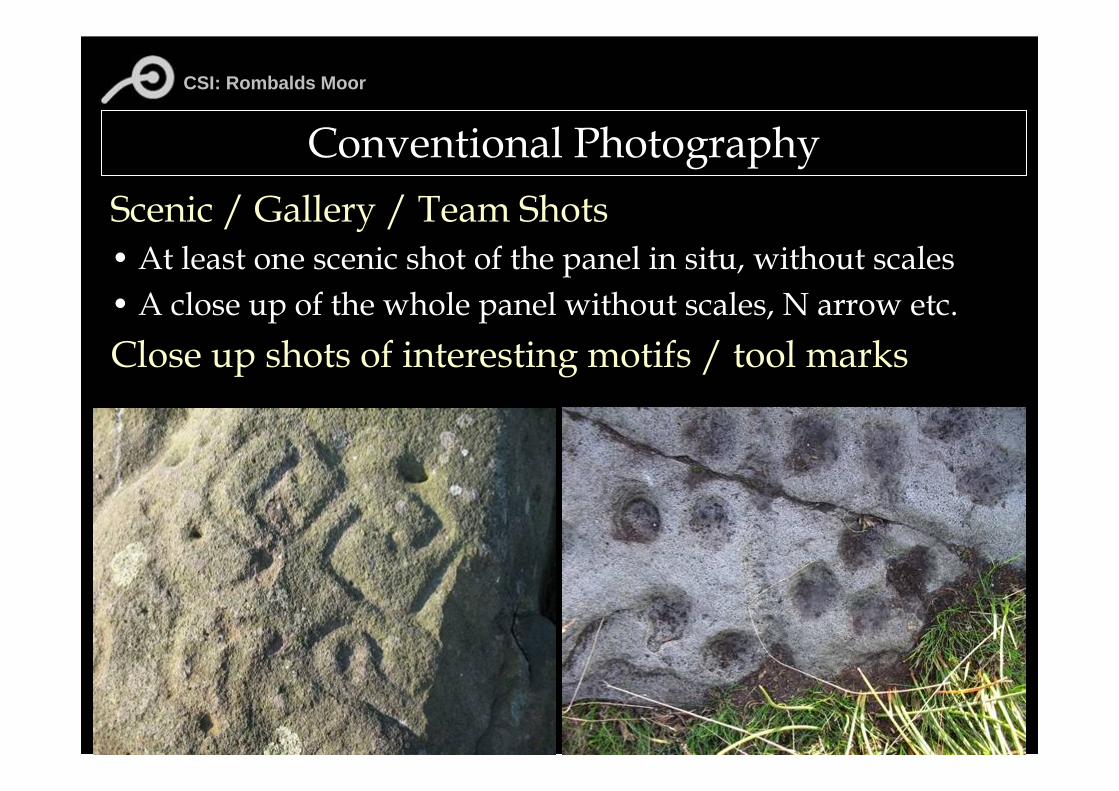
Conventional Photography Scenic / Gallery / Team Shots• At least one scenic shot of the panel in situ, without scales• A close up of the whole panel without scales, N arrow etc.
CSI: Rombalds Moor
Conventional Photography Scenic / Gallery / Team Shots• At least one scenic shot of the panel in situ, without scales• A close up of the whole panel without scales, N arrow etc.Close up shots of interesting motifs / tool marks
CSI: Rombalds Moor
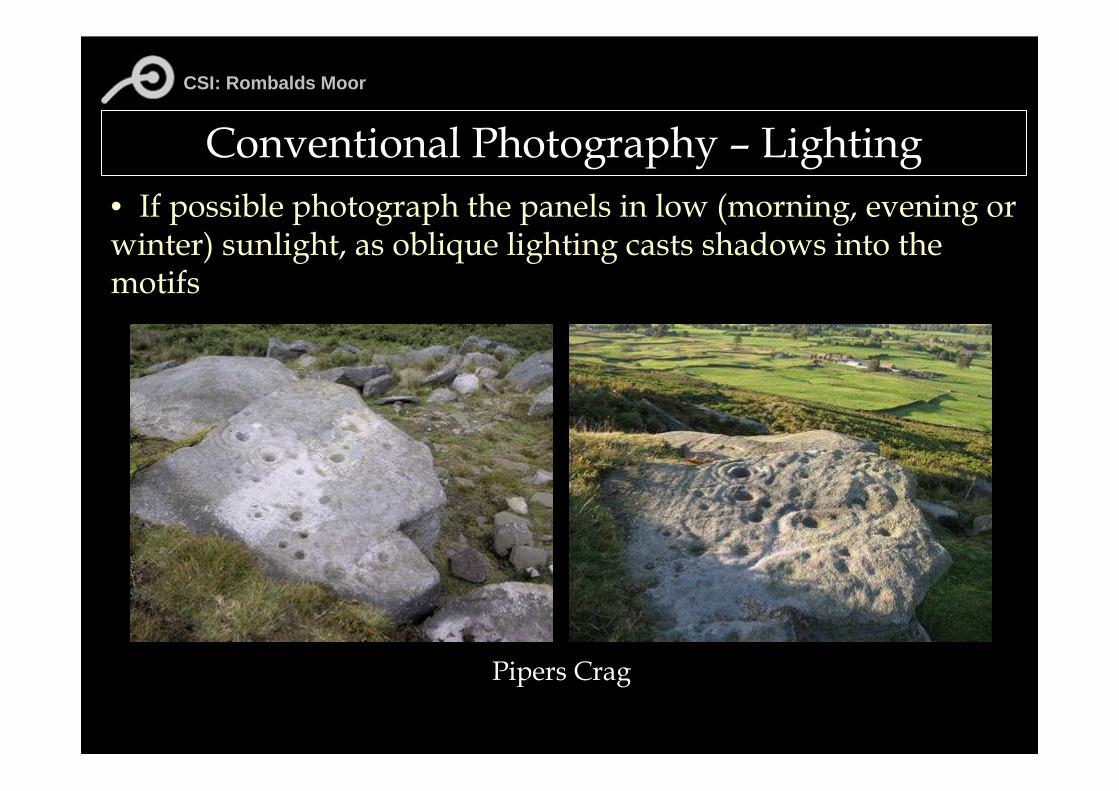
Conventional Photography – Lighting • If possible photograph the panels in low (morning, evening or winter) sunlight, as oblique lighting casts shadows into the motifs
Pipers Crag
CSI: Rombalds Moor
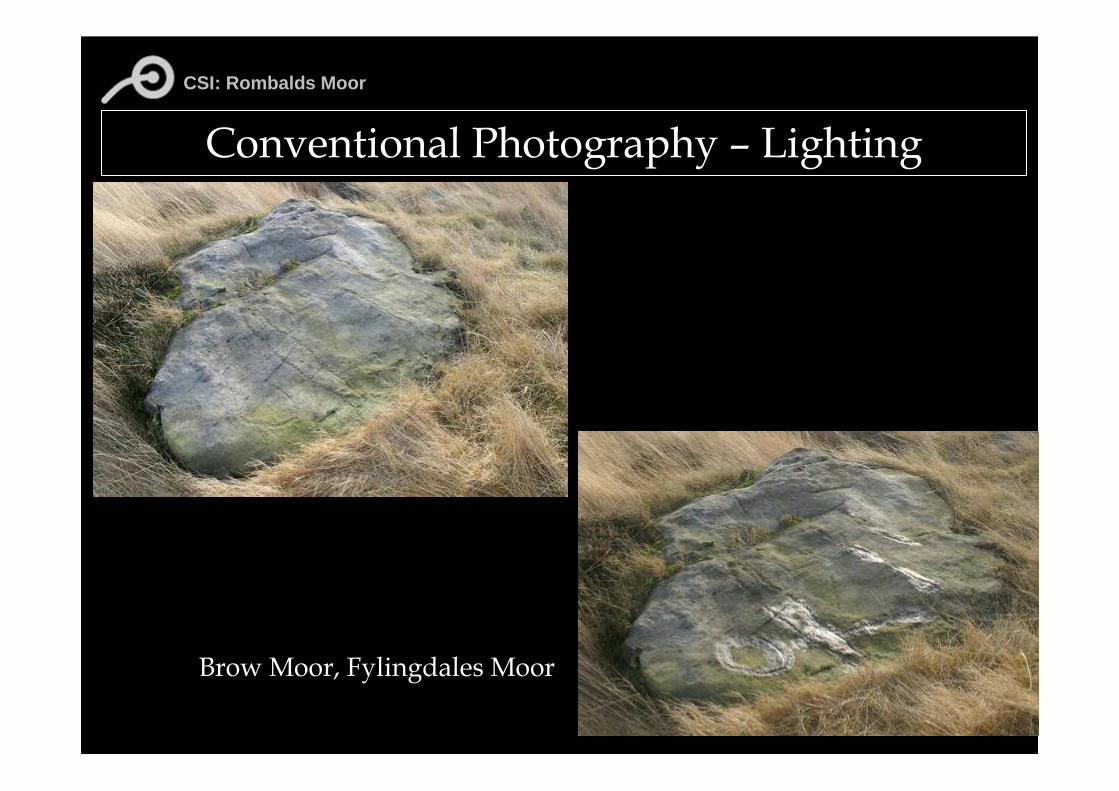
Conventional Photography – Lighting • If possible photograph the panels in low (morning, evening or winter) sunlight, as oblique lighting casts shadows into the motifs• The effect of low lighting increases when panels are wet
CSI: Rombalds Moor
Conventional Photography – Lighting
Brow Moor, Fylingdales Moor
CSI: Rombalds Moor
Conventional Photography – Lighting • If possible photograph the panels in low (morning, evening or winter) sunlight, as oblique lighting casts shadows into the motifs• The effect of low lighting increases when panels are wet • Get the light consistent on the rock surface. If partly cloudy,find the best angle for the shot and wait for the sun • For carvings on vertical or near-vertical surfaces, work out in advance when they will be in sunlight
CSI: Rombalds Moor
Conventional Photography – Lighting
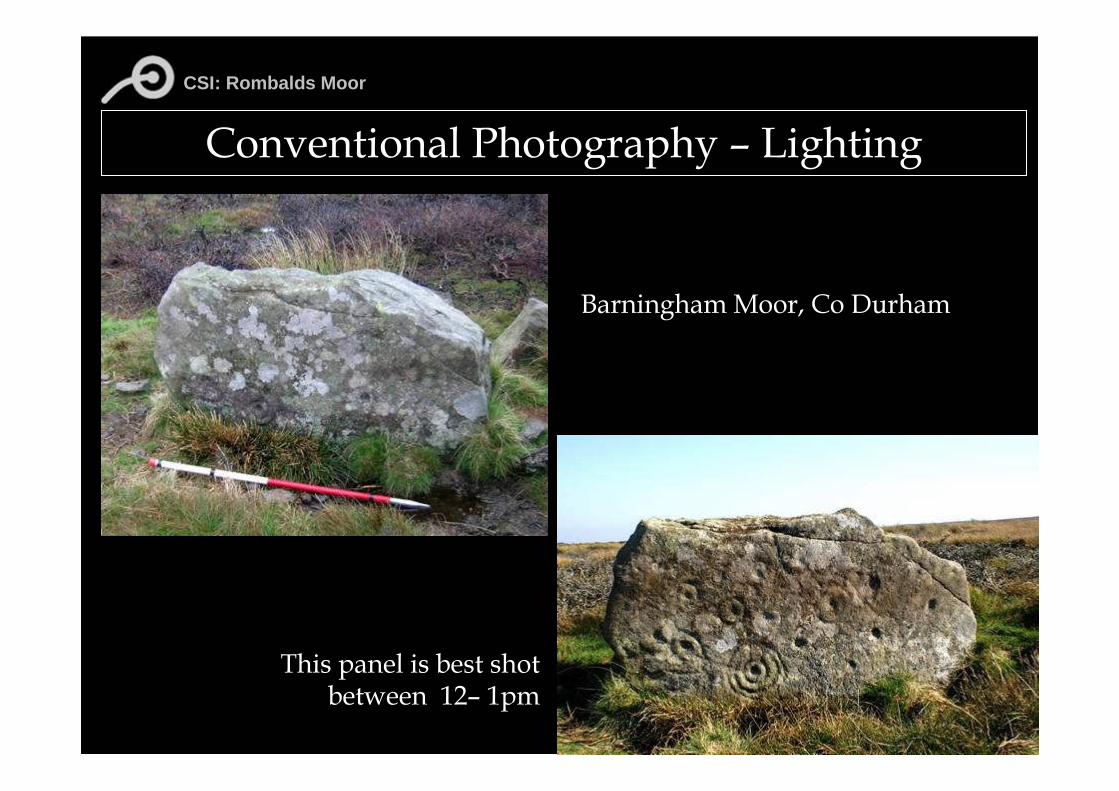
BarninghamMoor, Co Durham
This panel is best shot between 12– 1pm
CSI: Rombalds Moor
Conventional Photography – Lighting • If possible photograph the panels in low (morning, evening or winter) sunlight, as oblique lighting casts shadows into the motifs• The effect of low lighting increases when panels are wet • Get the light consistent on the rock surface. If partly cloudy,find the best angle for the shot and wait for the sun • For carvings on vertical or near-vertical surfaces, work out in advance when they will be in sunlight• Where there is little natural light (e.g. in woodland) a strongtorch can be used to provide artificial oblique lighting to goodeffect

CSI: Rombalds Moor
• Photography taken at night using an artificial light source and a long exposure time on the camera (mounted on a tri-pod and using the self-timer to minimise camera shake) can produce excellent results
• If you have a remote camera flash, positioning the flash near the stones surface to create oblique lighting can also produce excellent results.
Conventional Photography – Lighting
CSI: Rombalds Moor
Conventional Photography – Lighting
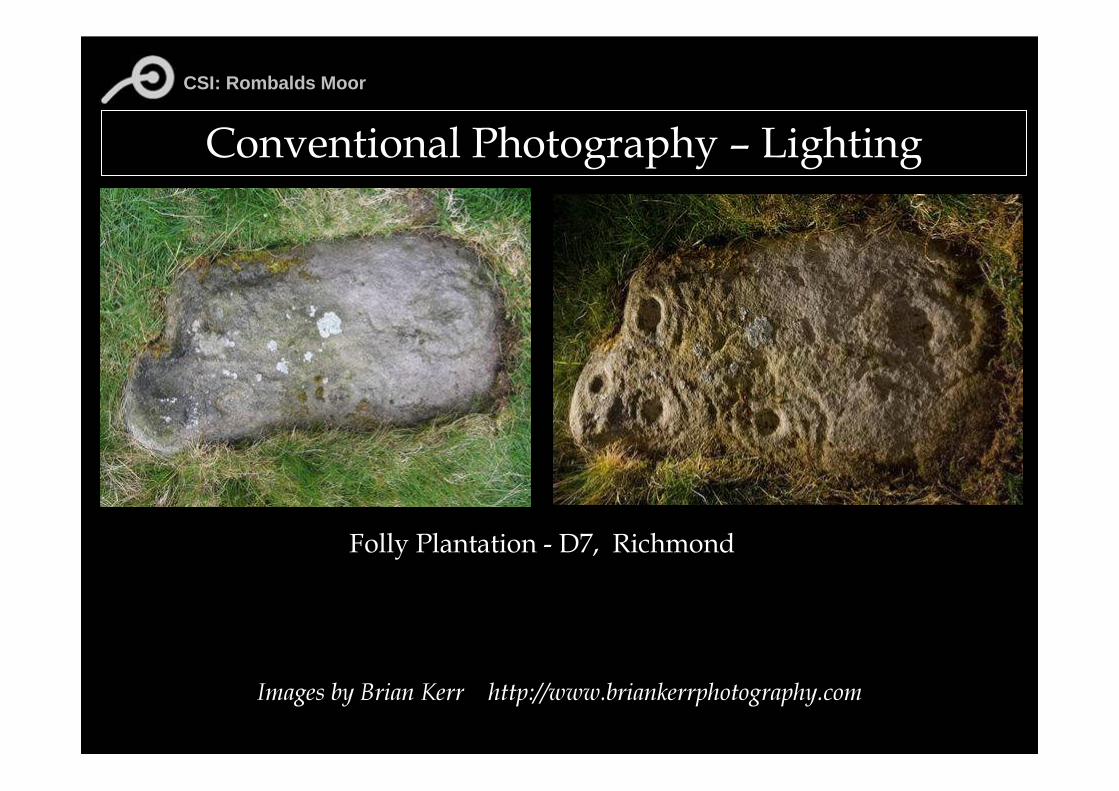
Folly Plantation - D7, Richmond
Images by Brian Kerr http://www.briankerrphotography.com
CSI: Rombalds Moor
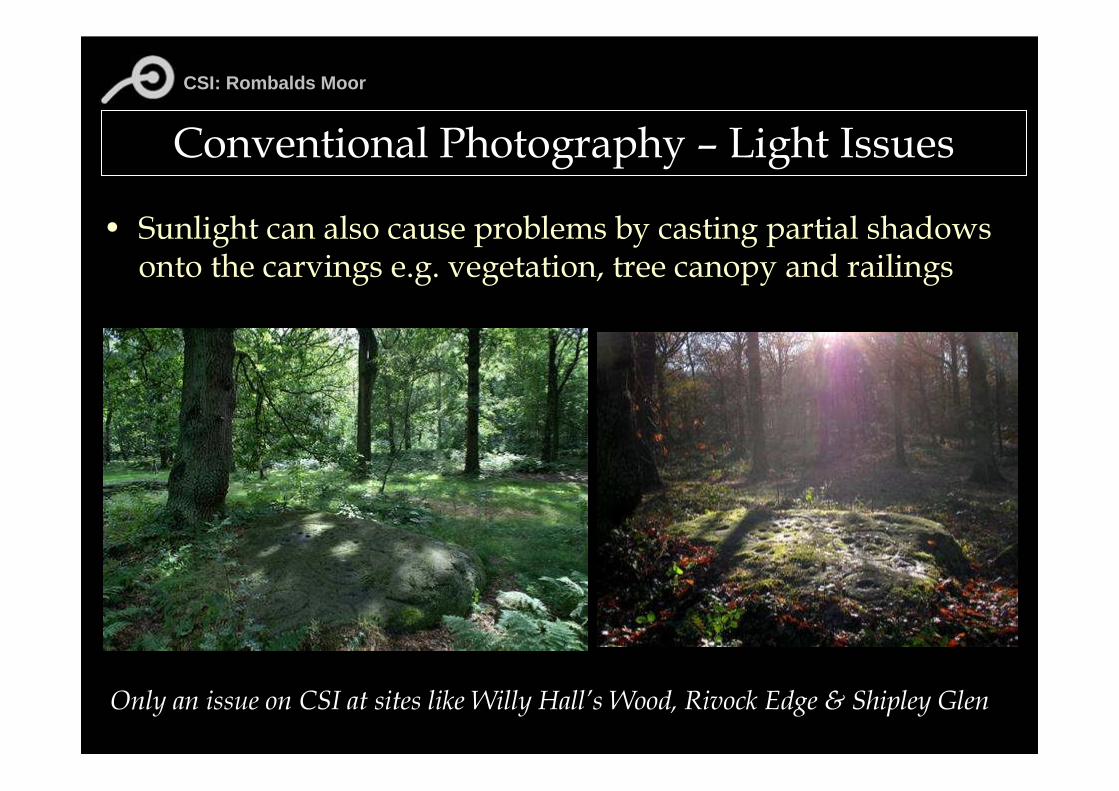
• Sunlight can also cause problems by casting partial shadows onto the carvings e.g. vegetation, tree canopy and railings
Conventional Photography – Light Issues
Only an issue on CSI at sites like Willy Hall’s Wood, Rivock Edge & Shipley Glen
CSI: Rombalds Moor
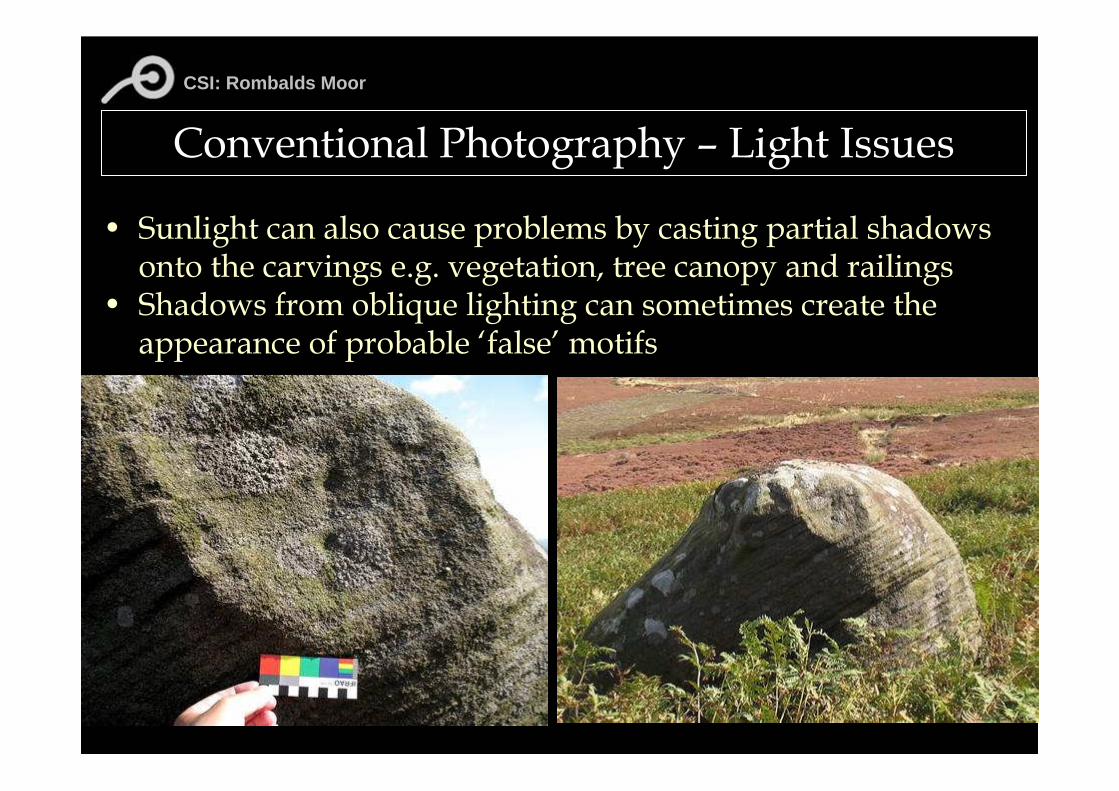
• Sunlight can also cause problems by casting partial shadows onto the carvings e.g. vegetation, tree canopy and railings
• Shadows from oblique lighting can sometimes create the appearance of probable ‘false’ motifs
Conventional Photography – Light Issues
CSI: Rombalds Moor
General Info• Try not to exceed 30 photos of each panel (excluding panoramas and photogrammetry)
• There will be a selection process (by volunteers) for images eventually uploaded to England’s Rock Art database
• Shoot images in RAW + JPEG formats if storage allows, as JPEGs deteriorate with each save / copy
Conventional Photography
CSI: Rombalds Moor
Non Project Camera Use• Project cameras do not need to be used for conventionalphotography, including panoramas, Photosynth (trial)
• Volunteers can use their own cameras, but at own risk• To ensure image management doesn’t become too difficult, max of 2 volunteer cameras per team can be used
Conventional Photography
CSI: Rombalds Moor
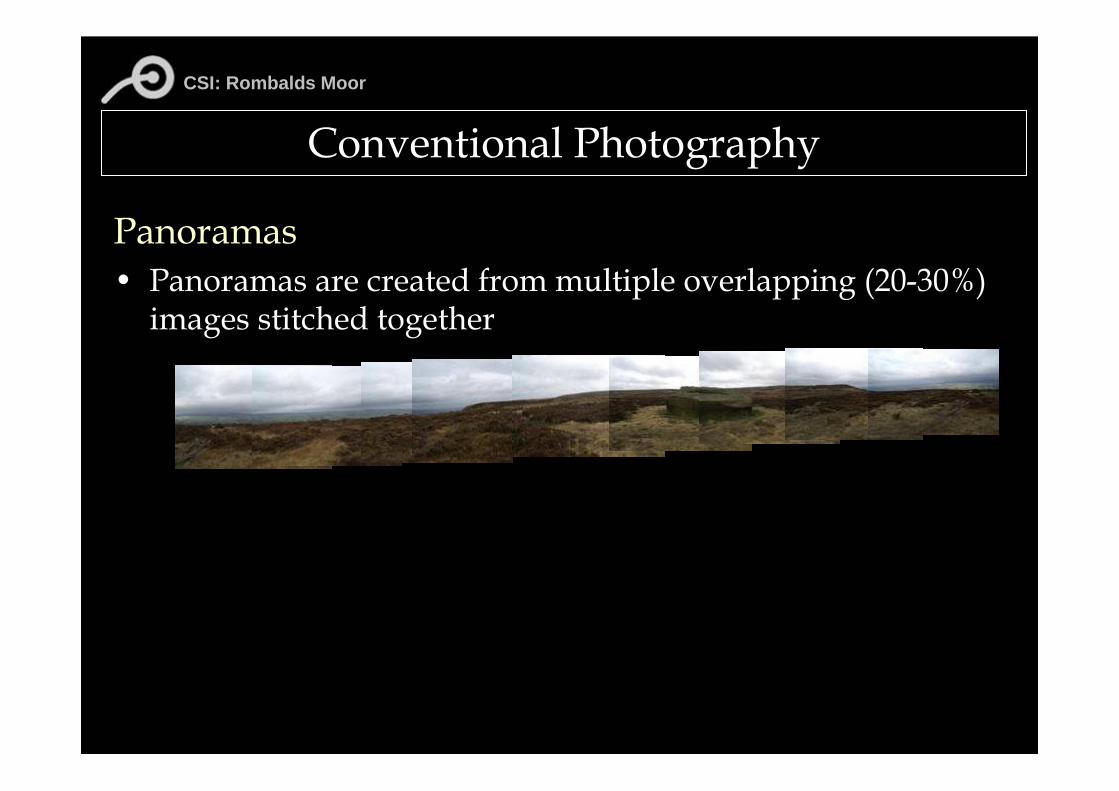
Panoramas• Panoramas are created from multiple overlapping (20-30%) images stitched together
Conventional Photography
CSI: Rombalds Moor
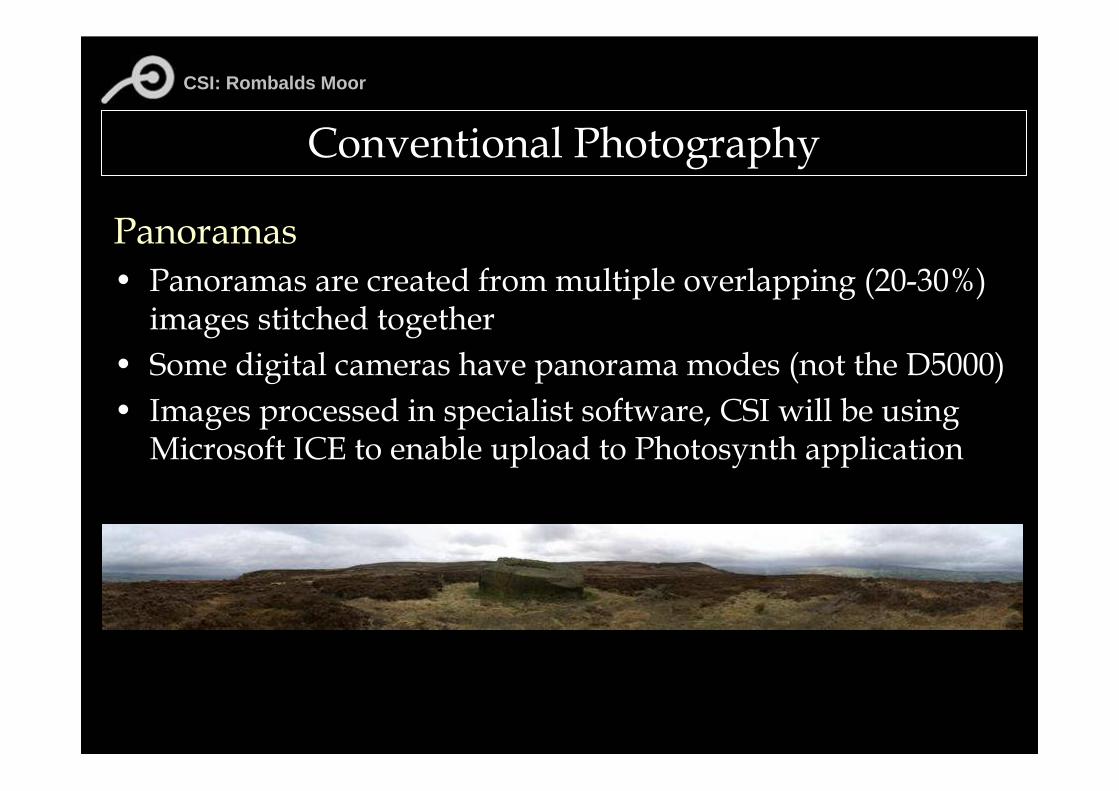
Panoramas• Panoramas are created from multiple overlapping (20-30%) images stitched together
• Some digital cameras have panorama modes (not the D5000)• Images processed in specialist software, CSI will be using Microsoft ICE to enable upload to Photosynth application
Conventional Photography
CSI: Rombalds Moor
Setting up panoramas• Always use a tripod to ensure the camera stays on the same horizontal plane
• As much as possible ensure bags, people and equipment are out of shot
• Position the camera to take in at least one carving, preferably with motifs visible (might not always be possible)
• Use the North arrow / scale bar / ranging rod to identify north (this helps determine when you’ve completed the 360°)
Conventional Photography
CSI: Rombalds Moor
Taking the panoramic imagery• Start with the northern shot first and pan clockwise taking each shot until the arrow/scale / ranging rod is in view• Try and avoid pointing directly into the sun (not always possible)• In bright sunlight, try and minimise shadows by using the remote shutter release (D5000)• In Microsoft Ice and Photosynth more than a single horizontal strip can be stitched together. Adjusting the cameras angle (up and down) and following the procedure above can produce better coverage• Where panels are clustered there is no need to take a panorama for each; one may be sufficient for an area. Take panoramas if the landscape and distant view is significantly different between panels
Conventional Photography
CSI: Rombalds Moor
Processing the panoramas• Stitch imagery using Microsoft Image Composite Editor(ICE)• Save JPEG image and spj file• Upload to Photosynth
A Victim / Helper Please
Conventional Photography
CSI: Rombalds Moor
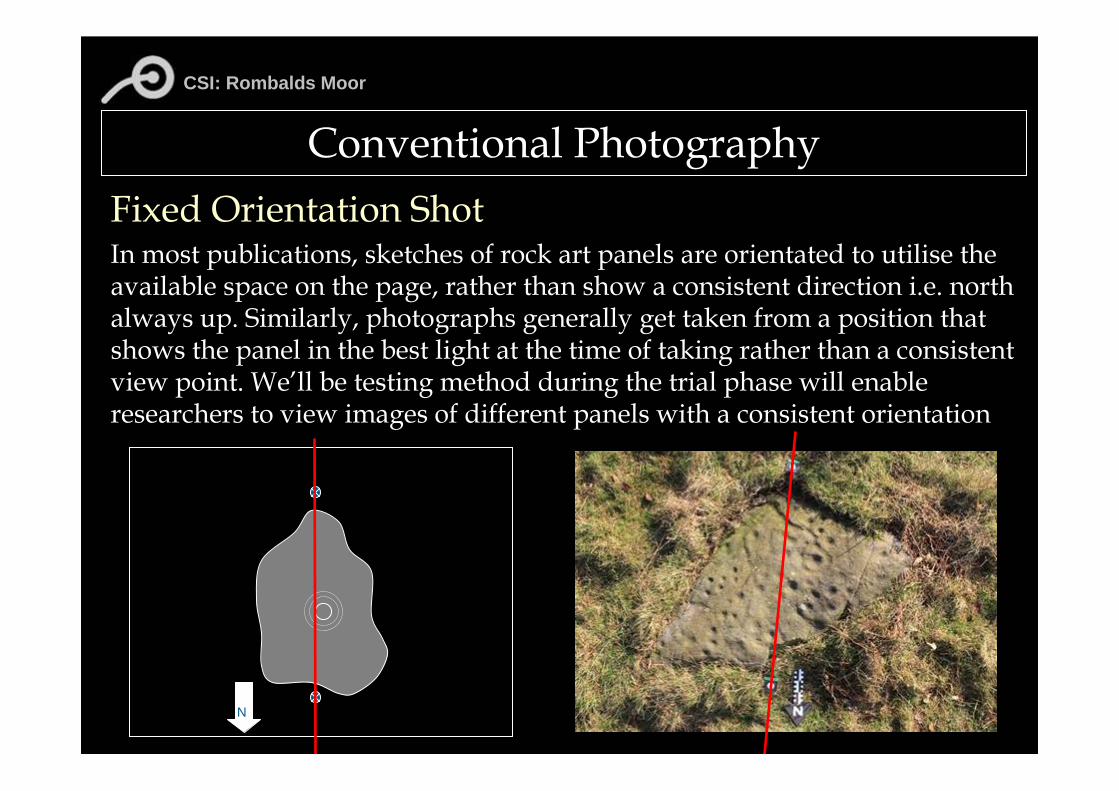
Conventional PhotographyFixed Orientation ShotIn most publications, sketches of rock art panels are orientated to utilise the available space on the page, rather than show a consistent direction i.e. north always up. Similarly, photographs generally get taken from a position that shows the panel in the best light at the time of taking rather than a consistent view point. We’ll be testing method during the trial phase will enable researchers to view images of different panels with a consistent orientation
N
CSI: Rombalds Moor
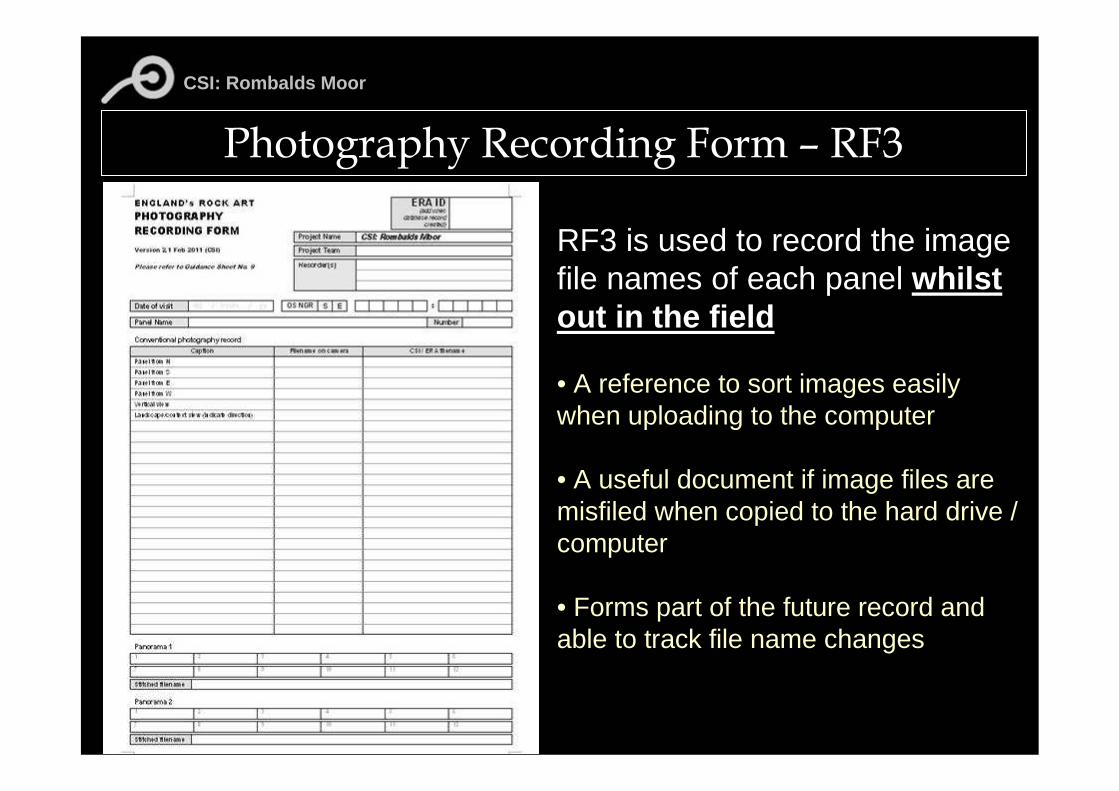
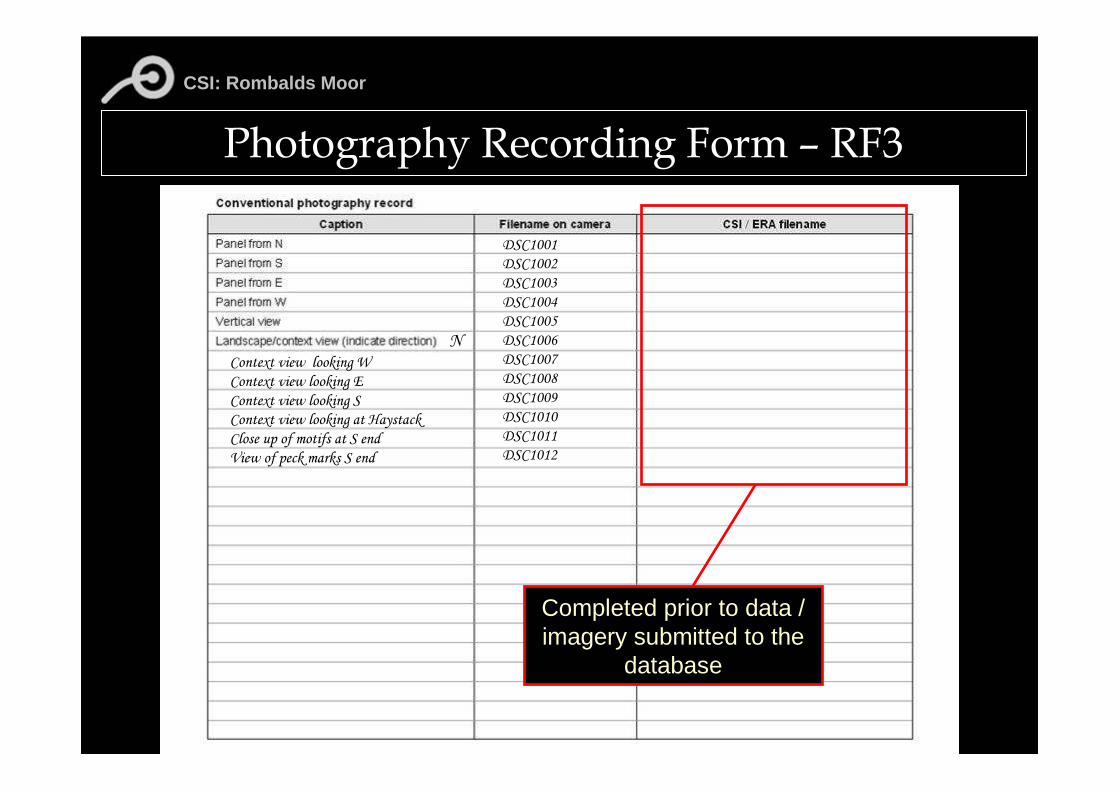
Photography Recording Form – RF3 RF3 is used to record the image file names of each panel whilst out in the field
• A reference to sort images easily when uploading to the computer
• A useful document if image files are misfiled when copied to the hard drive / computer
• Forms part of the future record and able to track file name changes
CSI: Rombalds Moor
Photography Recording Form – RF3
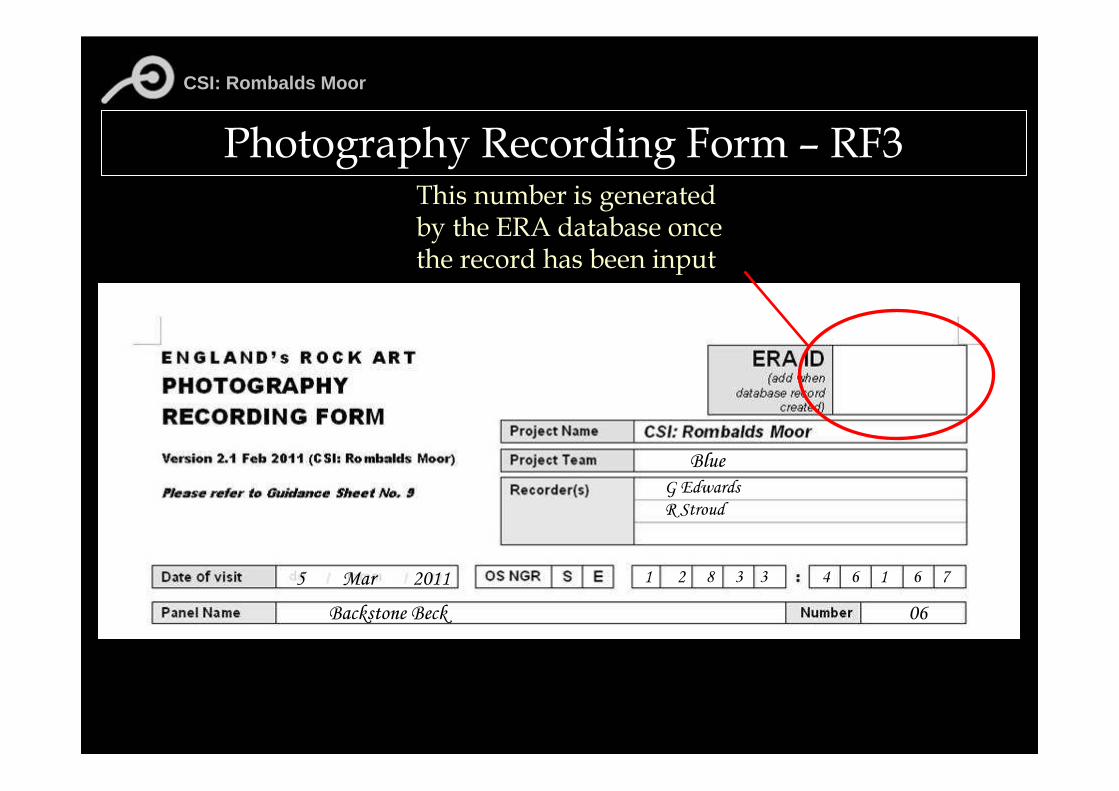
BlueG EdwardsR Stroud
5 Mar 2011 1 2 8 3 3 4 6 1 6 7Backstone Beck 06
This number is generated by the ERA database once the record has been input
CSI: Rombalds Moor
Photography Recording Form – RF3 DSC1001DSC1002DSC1003DSC1004DSC1005DSC1006DSC1007DSC1008DSC1009DSC1010DSC1011DSC1012
NContext view looking WContext view looking EContext view looking SContext view looking at HaystackClose up of motifs at S endView of peck marks S end
Completed prior to data / imagery submitted to the
database
CSI: Rombalds Moor
Photography Recording Form – RF3 DSCN 1001DSCN 1002DSCN 1003DSCN 1004DSCN 1005DSCN 1006DSCN 1007DSCN 1009DSCN 1010DSCN 1011DSCN 1012DSCN 1013
NContext view looking WContext view looking EContext view looking SContext view looking at HaystackClose up of motifs at S endView of peck marks S end
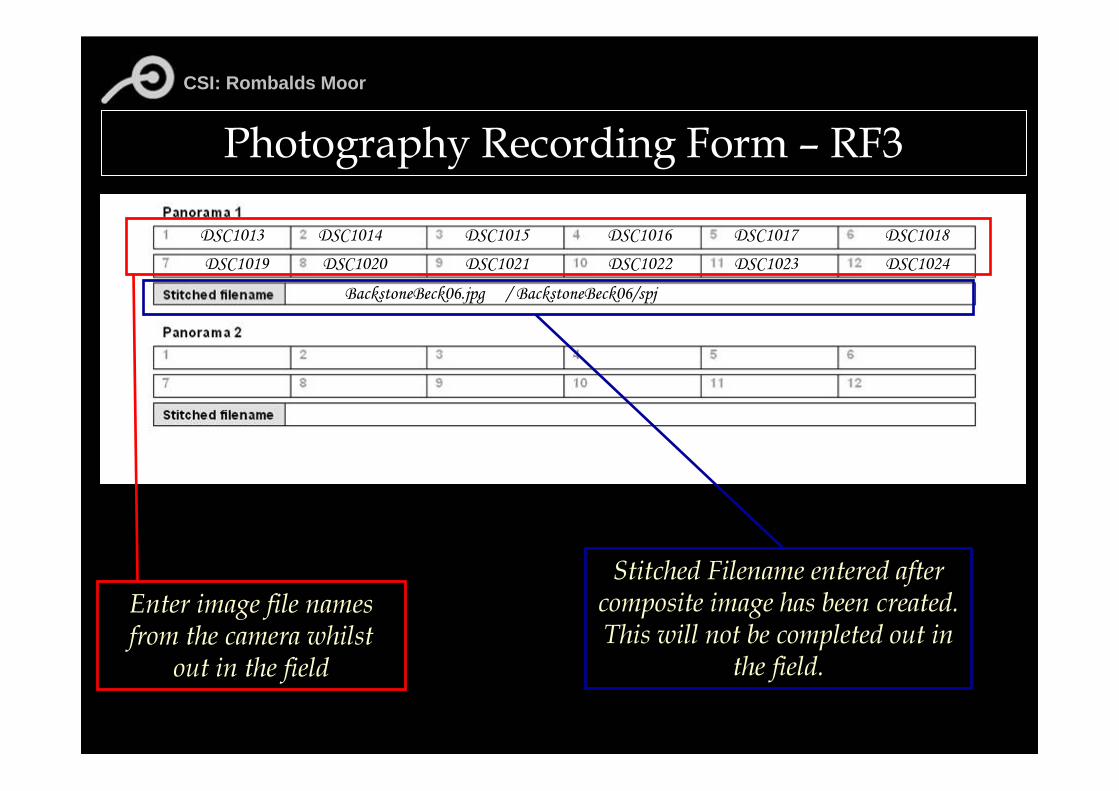
DSC1013 DSC1014 DSC1015 DSC1016 DSC1017 DSC1018 DSC1019 DSC1020 DSC1021 DSC1022 DSC1023 DSC1024
Enter image file names from the camera whilst
out in the field
BackstoneBeck06.jpg / BackstoneBeck06/spj
Stitched Filename entered after composite image has been created. This will not be completed out in
the field.
CSI: Rombalds Moor
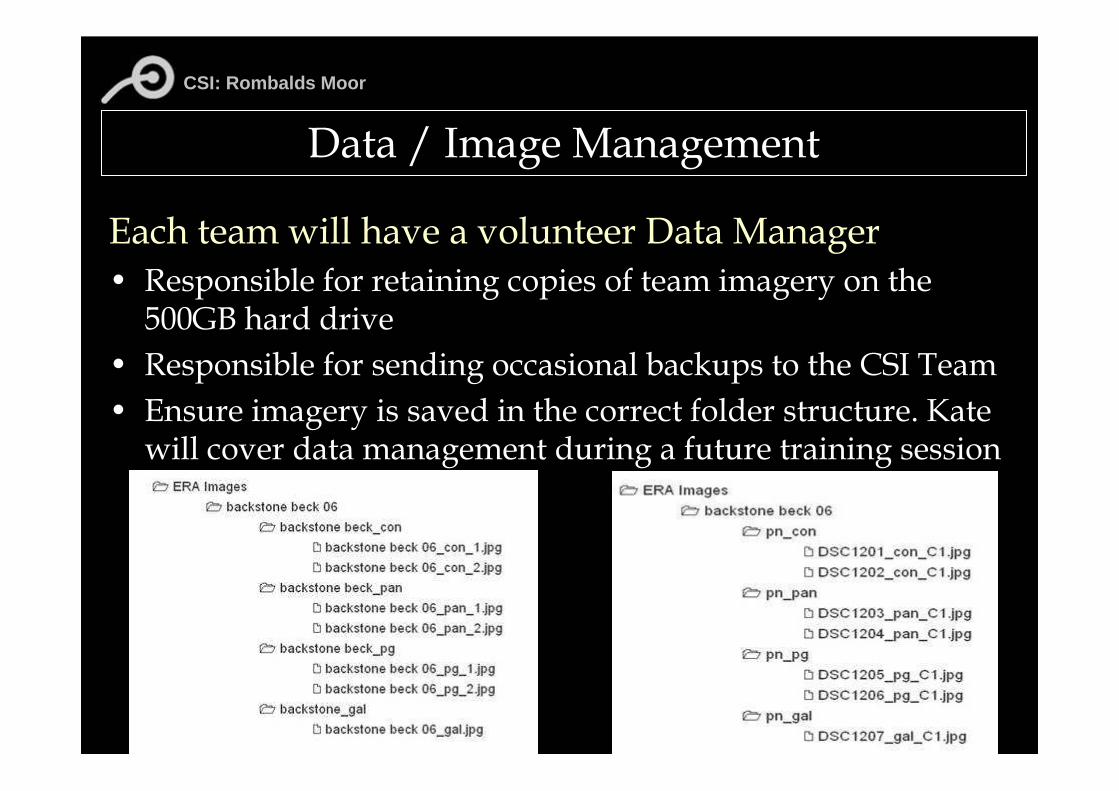
Each team will have a volunteer Data Manager • Responsible for retaining copies of team imagery on the 500GB hard drive
• Responsible for sending occasional backups to the CSI Team• Ensure imagery is saved in the correct folder structure. Kate will cover data management during a future training session
Data / Image Management
CSI: Rombalds Moor
Basic Camera Care• Avoid touching the lens glass or any of the cameras internal components• Do not turn the camera off whilst it is writing data to the memory card• Worth reiterating, do not attach / remove a lens when the camera is on• Do not insert or remove a memory card whilst the camera is onMike Short has written a more in depth guidance sheet on camera and lens care
CSI: Rombalds Moor
Photography Strategy• Issues encountered during NADRAP showed that a good strategy would be for the photography to be completed at the same time as the main recording• If not, ensure the photographer take sketches and past imagery to identify the rocks. GPS can not be relied on 100% of the time
• For conventional photography 2 or 3 people working with each camera seemed to work best. This left 1 member to take the imagery and direct placement of the scales• Ultimately teams will find their best way of workingGuidance on strategies for whole recording are being worked on
CSI: Rombalds Moor
Thanks
Now for taking some pictures