Embed Size (px)
Citation preview

Nortel Communication Server 1000
DECT 4027 and 4070 HandsetsUser Guide
Title page

Revision history
3
Revision history
April 2008
Standard 01.08. This document is issued to support the DECT 4027 and 4070 Handsets and to reflect editorial changes.
March 2008
Standard 01.07. This document is issued to support the DECT 4027 and 4070 Handsets and to reflect editorial changes.
March 2008
Standard 01.06. This document is issued to support the DECT 4027 and 4070 Handsets and to reflect editorial changes.
March 2008
Standard 01.05. This document is issued to support the DECT 4027 and 4070 Handsets and to reflect editorial changes.
February 2008
Standard 01.04. This document is issued to support the DECT 4027 and 4070 Handsets and to reflect editorial changes.
February 2008
Standard 01.03. This document is issued to support the DECT 4027 and 4070 Handsets and to reflect change to the technical content.
February 2008
Standard 01.02. This document is issued to support the DECT 4027 and 4070 Handsets and to reflect change to the technical content and editorial changes.

Revision history
4
January 2008
Standard 01.01. This document is issued to support the DECT 4027 and 4070 Handsets.
Contents
5
Contents
Welcome to Nortel DECT 4027 and 4070 Handsets . . . . . . 13
Feature overview . . . . . . . . . . . . . . . . . . . . . . . . . . . . . . . . . . 13
Regulatory and safety information . . . . . . . . . . . . . . . . . . . . . 14
Safety precautions . . . . . . . . . . . . . . . . . . . . . . . . . . . . . . . . . 15
Getting started . . . . . . . . . . . . . . . . . . . . . . . . . . . . . . . . . . . 17
Installing the MEM card and Bluetooth module . . . . . . . . . . . 17
Installing the battery pack . . . . . . . . . . . . . . . . . . . . . . . . . . . . 17
Installing the charger . . . . . . . . . . . . . . . . . . . . . . . . . . . . . . . 19
Charging the batteries . . . . . . . . . . . . . . . . . . . . . . . . . . . . . . 21Important battery information . . . . . . . . . . . . . . . . . . . . . . 22Charging guidelines . . . . . . . . . . . . . . . . . . . . . . . . . . . . . 22Charging and operating times . . . . . . . . . . . . . . . . . . . . . 23
Charge display . . . . . . . . . . . . . . . . . . . . . . . . . . . . . . . . . . . . 24
Switching the handset on or off . . . . . . . . . . . . . . . . . . . . . . . 25
Display areas . . . . . . . . . . . . . . . . . . . . . . . . . . . . . . . . . . . . . 25Icon line . . . . . . . . . . . . . . . . . . . . . . . . . . . . . . . . . . . . . . 26Dialogue area . . . . . . . . . . . . . . . . . . . . . . . . . . . . . . . . . . 27Soft key line . . . . . . . . . . . . . . . . . . . . . . . . . . . . . . . . . . . 32
Handset controls . . . . . . . . . . . . . . . . . . . . . . . . . . . . . . . . . . . 33Key functions in Idle mode . . . . . . . . . . . . . . . . . . . . . . . . 34Key functions in Call mode . . . . . . . . . . . . . . . . . . . . . . . . 36Key functions in Dialogue mode . . . . . . . . . . . . . . . . . . . . 37Key functions in Menu mode . . . . . . . . . . . . . . . . . . . . . . 38Key functions in Edit mode . . . . . . . . . . . . . . . . . . . . . . . . 39Locking or unlocking the dialpad . . . . . . . . . . . . . . . . . . . 42
DECT system configuration . . . . . . . . . . . . . . . . . . . . . . . . 43
Accessing the Connectivity menu . . . . . . . . . . . . . . . . . . . . . . 43
Contents
6
Subscribing the handset to a DECT system . . . . . . . . . . . . . . 44
Manually selecting the DECT system . . . . . . . . . . . . . . . . . . . 46
Enabling automatic DECT system selection . . . . . . . . . . . . . . 46
Terminating a subscription . . . . . . . . . . . . . . . . . . . . . . . . . . . 47
Editing the system name and phone number . . . . . . . . . . . . . 48
Call features . . . . . . . . . . . . . . . . . . . . . . . . . . . . . . . . . . . . . 50
Make a call . . . . . . . . . . . . . . . . . . . . . . . . . . . . . . . . . . . . . . . 50Dialling a number . . . . . . . . . . . . . . . . . . . . . . . . . . . . . . . 50Using Predial mode . . . . . . . . . . . . . . . . . . . . . . . . . . . . . 51Using Speed dial . . . . . . . . . . . . . . . . . . . . . . . . . . . . . . . 52Using Loudspeaker . . . . . . . . . . . . . . . . . . . . . . . . . . . . . 52Using the telephone book to dial a number . . . . . . . . . . . 53Using the Central Directory to dial a number . . . . . . . . . . 53Making an SOS call . . . . . . . . . . . . . . . . . . . . . . . . . . . . . 55
Answering a call . . . . . . . . . . . . . . . . . . . . . . . . . . . . . . . . . . . 55Answering a call in Normal mode . . . . . . . . . . . . . . . . . . . 56Answering a call using any key . . . . . . . . . . . . . . . . . . . . 56Auto-answering mode . . . . . . . . . . . . . . . . . . . . . . . . . . . 56Muting the ringer . . . . . . . . . . . . . . . . . . . . . . . . . . . . . . . 56Rejecting a call . . . . . . . . . . . . . . . . . . . . . . . . . . . . . . . . . 57
Change settings during a call . . . . . . . . . . . . . . . . . . . . . . . . . 57Adjusting the headset or loudspeaker volume . . . . . . . . . 57Using mute during a call . . . . . . . . . . . . . . . . . . . . . . . . . . 58
Transferring a call . . . . . . . . . . . . . . . . . . . . . . . . . . . . . . . . . . 58
Voice mail . . . . . . . . . . . . . . . . . . . . . . . . . . . . . . . . . . . . . . . . 59Accessing voice mail . . . . . . . . . . . . . . . . . . . . . . . . . . . . 60Defining a Voice mail number . . . . . . . . . . . . . . . . . . . . . 60
Calls list . . . . . . . . . . . . . . . . . . . . . . . . . . . . . . . . . . . . . . . . . 62
All calls list . . . . . . . . . . . . . . . . . . . . . . . . . . . . . . . . . . . . . . . 64Accessing the All calls list . . . . . . . . . . . . . . . . . . . . . . . . 64
Contents
7
Checking the details of calls . . . . . . . . . . . . . . . . . . . . . . . 65Dialling a number . . . . . . . . . . . . . . . . . . . . . . . . . . . . . . . 65Transferring a number to your contacts list . . . . . . . . . . . 66Transferring a number to the caller filter list . . . . . . . . . . . 67Deleting an entry . . . . . . . . . . . . . . . . . . . . . . . . . . . . . . . 68Deleting all entries . . . . . . . . . . . . . . . . . . . . . . . . . . . . . . 68
Answered calls list . . . . . . . . . . . . . . . . . . . . . . . . . . . . . . . . . 69Accessing the Answered calls list . . . . . . . . . . . . . . . . . . 69Checking the details of an answered call . . . . . . . . . . . . . 70Dialling a number . . . . . . . . . . . . . . . . . . . . . . . . . . . . . . . 70Transferring a number to your contacts list . . . . . . . . . . . 71Transferring a number to the caller filter list . . . . . . . . . . . 72Deleting an entry . . . . . . . . . . . . . . . . . . . . . . . . . . . . . . . 73Deleting all entries . . . . . . . . . . . . . . . . . . . . . . . . . . . . . . 74
Dialled calls list . . . . . . . . . . . . . . . . . . . . . . . . . . . . . . . . . . . . 74Accessing the Dialled calls list . . . . . . . . . . . . . . . . . . . . . 75Checking the details of a dialled call . . . . . . . . . . . . . . . . 75Dialling a number . . . . . . . . . . . . . . . . . . . . . . . . . . . . . . . 76Transferring a number to your contacts list . . . . . . . . . . . 76Transferring a number to the caller filter list . . . . . . . . . . 77Deleting an entry . . . . . . . . . . . . . . . . . . . . . . . . . . . . . . . 78Deleting all entries . . . . . . . . . . . . . . . . . . . . . . . . . . . . . . 79
Missed calls list . . . . . . . . . . . . . . . . . . . . . . . . . . . . . . . . . . . . 79Accessing the Missed calls list . . . . . . . . . . . . . . . . . . . . . 81Checking the details of a missed call . . . . . . . . . . . . . . . . 81Dialling a number . . . . . . . . . . . . . . . . . . . . . . . . . . . . . . . 82Transferring a number to your contacts list . . . . . . . . . . . 82Transferring a number to the caller filter list . . . . . . . . . . . 83Deleting an entry . . . . . . . . . . . . . . . . . . . . . . . . . . . . . . . 84Deleting all entries . . . . . . . . . . . . . . . . . . . . . . . . . . . . . . 85
Contacts . . . . . . . . . . . . . . . . . . . . . . . . . . . . . . . . . . . . . . . . 86
Accessing the Contacts menu . . . . . . . . . . . . . . . . . . . . . 87
Contents
8
Adding a new contact . . . . . . . . . . . . . . . . . . . . . . . . . . . . 87Adding a contact number . . . . . . . . . . . . . . . . . . . . . . . . . 88Editing a contact number . . . . . . . . . . . . . . . . . . . . . . . . . 89Deleting a contact number . . . . . . . . . . . . . . . . . . . . . . . . 90Editing a contact name . . . . . . . . . . . . . . . . . . . . . . . . . . . 91Editing a contact ringtone . . . . . . . . . . . . . . . . . . . . . . . . . 91Deleting contacts . . . . . . . . . . . . . . . . . . . . . . . . . . . . . . . 92Speed dial feature . . . . . . . . . . . . . . . . . . . . . . . . . . . . . . 93Transferring numbers to your contacts list . . . . . . . . . . . . 95Transferring phone numbers to the caller filter list . . . . . . 96
Messaging . . . . . . . . . . . . . . . . . . . . . . . . . . . . . . . . . . . . . . . 97
Message limitations . . . . . . . . . . . . . . . . . . . . . . . . . . . . . . . . 97
New messages and drafts . . . . . . . . . . . . . . . . . . . . . . . . . . . 98Accessing the Messaging menu . . . . . . . . . . . . . . . . . . . 98Saving a new message or editing a draft . . . . . . . . . . . . . 99Sending a new message or draft . . . . . . . . . . . . . . . . . . 100Deleting a draft . . . . . . . . . . . . . . . . . . . . . . . . . . . . . . . . 101Deleting all drafts . . . . . . . . . . . . . . . . . . . . . . . . . . . . . . 101
Inbox . . . . . . . . . . . . . . . . . . . . . . . . . . . . . . . . . . . . . . . . . . . 102Accessing the Inbox Messaging menu . . . . . . . . . . . . . . 103Reading an incoming message . . . . . . . . . . . . . . . . . . . 103Replying to an incoming message . . . . . . . . . . . . . . . . . 104Forwarding an incoming message . . . . . . . . . . . . . . . . . 104Saving to the contacts list . . . . . . . . . . . . . . . . . . . . . . . 106Deleting an incoming message . . . . . . . . . . . . . . . . . . . 106Deleting all incoming messages . . . . . . . . . . . . . . . . . . . 107
Sent messages . . . . . . . . . . . . . . . . . . . . . . . . . . . . . . . . . . . 108Accessing the Sent Messaging menu . . . . . . . . . . . . . . 108Reading a sent message . . . . . . . . . . . . . . . . . . . . . . . . 108Forwarding a sent message . . . . . . . . . . . . . . . . . . . . . . 109Deleting a sent message . . . . . . . . . . . . . . . . . . . . . . . . 110Deleting all sent messages . . . . . . . . . . . . . . . . . . . . . . 111

Contents
9
Message settings . . . . . . . . . . . . . . . . . . . . . . . . . . . . . . . . . 111Accessing the Message settings menu . . . . . . . . . . . . . 112Configuring the Overwrite option . . . . . . . . . . . . . . . . . . 112Configuring the Sent message option . . . . . . . . . . . . . . 113
Normal and urgent messages . . . . . . . . . . . . . . . . . . . . . . . 113Normal messages . . . . . . . . . . . . . . . . . . . . . . . . . . . . . 114Urgent messages . . . . . . . . . . . . . . . . . . . . . . . . . . . . . . 114Confirming receipts . . . . . . . . . . . . . . . . . . . . . . . . . . . . 114
Message list full . . . . . . . . . . . . . . . . . . . . . . . . . . . . . . . . . . 115
Calendar . . . . . . . . . . . . . . . . . . . . . . . . . . . . . . . . . . . . . . . 116
Accessing the Calendar feature . . . . . . . . . . . . . . . . . . . 117Changing the calendar format . . . . . . . . . . . . . . . . . . . . 117Selecting a date . . . . . . . . . . . . . . . . . . . . . . . . . . . . . . . 117Adding an appointment . . . . . . . . . . . . . . . . . . . . . . . . . 118Viewing an appointment . . . . . . . . . . . . . . . . . . . . . . . . . 120Editing an appointment . . . . . . . . . . . . . . . . . . . . . . . . . 120Copying an appointment . . . . . . . . . . . . . . . . . . . . . . . . 122Deleting an appointment . . . . . . . . . . . . . . . . . . . . . . . . 123
Accessories . . . . . . . . . . . . . . . . . . . . . . . . . . . . . . . . . . . . 125
Using the Calculator . . . . . . . . . . . . . . . . . . . . . . . . . . . . . . . 125
Using the Stopwatch . . . . . . . . . . . . . . . . . . . . . . . . . . . . . . . 127
Alarms . . . . . . . . . . . . . . . . . . . . . . . . . . . . . . . . . . . . . . . . . 128Assigning a daily alarm . . . . . . . . . . . . . . . . . . . . . . . . . 129Editing a daily alarm . . . . . . . . . . . . . . . . . . . . . . . . . . . . 130Turning off a daily alarm . . . . . . . . . . . . . . . . . . . . . . . . . 131Assigning a recurrent alarm . . . . . . . . . . . . . . . . . . . . . . 131Editing a recurrent alarm . . . . . . . . . . . . . . . . . . . . . . . . 132Turning off a recurrent alarm . . . . . . . . . . . . . . . . . . . . . 134
Telephone settings . . . . . . . . . . . . . . . . . . . . . . . . . . . . . . . 135
General settings . . . . . . . . . . . . . . . . . . . . . . . . . . . . . . . . . . 135
Contents
10
Accessing the General settings menu . . . . . . . . . . . . . . 136Configuring a profile . . . . . . . . . . . . . . . . . . . . . . . . . . . . 136Editing a profile . . . . . . . . . . . . . . . . . . . . . . . . . . . . . . . 138Assigning the time and date . . . . . . . . . . . . . . . . . . . . . . 139Choosing a language . . . . . . . . . . . . . . . . . . . . . . . . . . . 141Configuring shortcuts . . . . . . . . . . . . . . . . . . . . . . . . . . . 143Security options . . . . . . . . . . . . . . . . . . . . . . . . . . . . . . . 143Defining the handset name . . . . . . . . . . . . . . . . . . . . . . 147Resetting settings . . . . . . . . . . . . . . . . . . . . . . . . . . . . . . 147Resetting the memory card . . . . . . . . . . . . . . . . . . . . . . 148Viewing status information . . . . . . . . . . . . . . . . . . . . . . . 149
Audio settings . . . . . . . . . . . . . . . . . . . . . . . . . . . . . . . . . . . . 149Accessing the Sounds and alerts menu . . . . . . . . . . . . . 150Configuring the ring volume . . . . . . . . . . . . . . . . . . . . . . 150Defining the ring external melody . . . . . . . . . . . . . . . . . . 151Defining the ring internal melody . . . . . . . . . . . . . . . . . . 152Defining the Ring unknown call melody . . . . . . . . . . . . . 153Defining the Normal message melody . . . . . . . . . . . . . . 153Defining the Urgent message melody . . . . . . . . . . . . . . 154Defining the Ring emergency melody . . . . . . . . . . . . . . 155Assigning the Increasing ring feature . . . . . . . . . . . . . . . 155Configuring alert volume . . . . . . . . . . . . . . . . . . . . . . . . 155Defining the alert tone melody . . . . . . . . . . . . . . . . . . . . 156Enabling the Increasing alert feature . . . . . . . . . . . . . . . 157Enabling the Vibrator feature . . . . . . . . . . . . . . . . . . . . . 158Enabling the Key sound feature . . . . . . . . . . . . . . . . . . . 158Assigning confirmation sound . . . . . . . . . . . . . . . . . . . . 159Enabling the coverage warning feature . . . . . . . . . . . . . 160Enabling the Charger warning feature . . . . . . . . . . . . . . 161
Display settings . . . . . . . . . . . . . . . . . . . . . . . . . . . . . . . . . . 162Accessing the Display settings menu . . . . . . . . . . . . . . . 162Selecting wallpaper . . . . . . . . . . . . . . . . . . . . . . . . . . . . 162Selecting a theme . . . . . . . . . . . . . . . . . . . . . . . . . . . . . 164

Contents
11
Selecting a startup screen image . . . . . . . . . . . . . . . . . . 165Configuring power save . . . . . . . . . . . . . . . . . . . . . . . . . 167
Call settings . . . . . . . . . . . . . . . . . . . . . . . . . . . . . . . . . . . . . 168Accessing the Calls settings menu . . . . . . . . . . . . . . . . 169Accessing Statistics information . . . . . . . . . . . . . . . . . . . 169Answer mode configuration . . . . . . . . . . . . . . . . . . . . . . 170Caller filter configuration . . . . . . . . . . . . . . . . . . . . . . . . 172Configuring emergency calls . . . . . . . . . . . . . . . . . . . . . 178Assigning the Silent charging feature . . . . . . . . . . . . . . . 180
Connectivity settings . . . . . . . . . . . . . . . . . . . . . . . . . . . . . . . 181Register . . . . . . . . . . . . . . . . . . . . . . . . . . . . . . . . . . . . . 181Deregister . . . . . . . . . . . . . . . . . . . . . . . . . . . . . . . . . . . . 181Selecting a network . . . . . . . . . . . . . . . . . . . . . . . . . . . . 181Bluetooth . . . . . . . . . . . . . . . . . . . . . . . . . . . . . . . . . . . . 182
Accessing additional featuresusing FFC or SPRE codes . . . . . . . . . . . . . . . . . . . . . . . . . 183
Handset accessories . . . . . . . . . . . . . . . . . . . . . . . . . . . . . 185
Installing the belt clip . . . . . . . . . . . . . . . . . . . . . . . . . . . 186Installing the headset . . . . . . . . . . . . . . . . . . . . . . . . . . . 189Installing or removing the memory (MEM) card . . . . . . . 190Bluetooth module installation . . . . . . . . . . . . . . . . . . . . . 194Bluetooth headset installation . . . . . . . . . . . . . . . . . . . . 197
Terms you should know . . . . . . . . . . . . . . . . . . . . . . . . . . 203
Index . . . . . . . . . . . . . . . . . . . . . . . . . . . . . . . . . . . . . . . . . . 205

Contents
12
Welcome to Nortel DECT 4027 and 4070 Handsets
13
Welcome to Nortel DECT 4027 and 4070 Handsets
Nortel Digital Enhanced Cordless Telecommunications (DECT) 4027 and 4070 Handsets are cordless phones with enhanced features suitable for office use. The handsets include a single-press SOS key used to make one-touch calls or send messages to a particular contact number. The DECT 4070 Handset offers a text-messaging facility to send and receive messages. The messaging feature is not enabled on the DECT 4027 Handset.
Nortel DECT 4027 and 4070 Handsets are compatible both with traditional DECT system (based on DMC cards) and new SIP DECT solution.
Feature overview
You can use the features of the Nortel DECT 4027 and 4070 Handsets to perform the following tasks:
• send and receive messages (only for DECT 4070 Handset)
• configure audio and display settings
• assign daily and recurrent alarms
• use the calculator and stopwatch
If the handsets are used as part of Nortel SIP DECT, the following additional features are available:
• automatic update of the time and date settings when switching on the handset
• send and receive messages without DECT Messenger (only for 4070)
• different ring melodies to distinguish between internal and external calls
• central directory
Welcome to Nortel DECT 4027 and 4070 Handsets
14
Regulatory and safety information
Read the following information before you use the Nortel DECT 4027 and 4070 Handsets.
This device complies with the essential requirements and other relevant provisions of the R&TTE Directive 1999/5/EC, the Restriction of Hazardous Substances (RoHS) 2002/95/EC, and the WEEE Directive 2002/95/EC.
You can obtain a copy of the Declaration of Conformity from Nortel using the contact for End user and Private Product as shown in the following Web page:
http://www.nortel.com/corporate/community/environment/life_cycle/declarations.html
CAUTIONLike all cordless telephones, this handset uses radio signals, which do not guarantee a connection under all circumstances. Do not rely exclusively on cordless telephones when making indispensable calls (such as medical emergencies).
Welcome to Nortel DECT 4027 and 4070 Handsets
15
This product complies with IP50, according to IEC 60 529. Use only in countries where authorized.
This equipment complies with EMC requirements of Class B.
Safety precautions
Observe the following safety precautions before you use your handset.
Declaration of Conformity
Hereby, Nortel declares that the Nortel DECT 4027 and 4070 Handsets are in compliance with the essential requirements and other relevant provisions of Directive 1999/5/EC.
CAUTIONModifications to this equipment not approved by Nortel can make this equipment noncompliant with the applied requirements.
Nortel recommends that you use only compatible headsets.
Welcome to Nortel DECT 4027 and 4070 Handsets
16
WARNINGDo not open the handset when it is switched on or connected to the charger; doing so can expose you to high voltage. Only authorised service personnel must perform repairs.
Do not dispose of defective or used batteries in municipal waste. Return old batteries to the battery supplier, a licensed dealer, or a designated collection facility. Do not destroy batteries.
Do not use the handset, remove, install, or charge batteries in hazardous environments (such as explosive environments), hospitals or vehicles.
If your interior handset becomes wet, do not use a blow dryer or oven to dry it. Switch off the handset, remove the battery, shake out excess liquid from the handset, and let it dry for 72 hours at room temperature.
CAUTIONThe handset product contains a magnet. Do not allow metallic objects to come in contact with the magnet, because that can deteriorate audio quality and damage the handset. Do not allow the charger and the battery to come into contact with conductive objects, such as keys, paper clips, rings, or bracelets.
Keep the handset at least 10 centimetres away from other electronic equipment.
WARNINGKeep the charger, handset, and accessories out of reach of small children.
Getting started
17
Getting started
This section describes the tasks you must complete before you use your handset. Install the accessories as described in the following sections:
• “Installing the MEM card and Bluetooth module” (page 17)
• “Installing the battery pack” (page 17)
• “Installing the charger” (page 19)
• “Charging the batteries” (page 21)
• “Charge display” (page 24)
• “Switching the handset on or off” (page 25)
Installing the MEM card and Bluetooth module
If your handset is supplied with a MEM card or Bluetooth module refer to the following section:
• “Installing or removing the memory (MEM) card” (page 190)
• “Bluetooth module installation” (page 194)
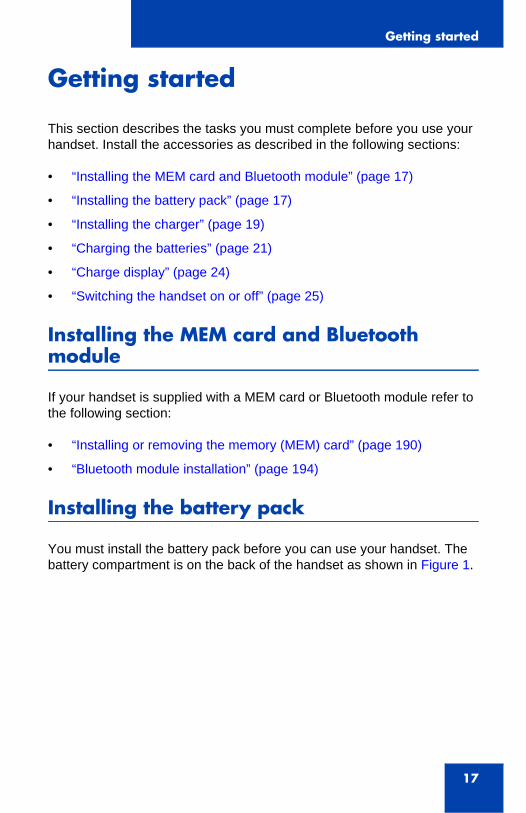
Installing the battery pack
You must install the battery pack before you can use your handset. The battery compartment is on the back of the handset as shown in Figure 1.
Getting started
18
Figure 1: Battery pack
To install a battery pack in your handset, perform the following steps:
1. Place the handset facedown on a flat surface.
2. Remove the battery compartment cover.
3. Push the battery pack into the casing as shown in Figure 2.
4. Press the battery pack down until it locks.
5. Replace the battery cover.
BATTERY PACK
Handset
Battery pack

Getting started
19
Figure 2: Installing the battery pack
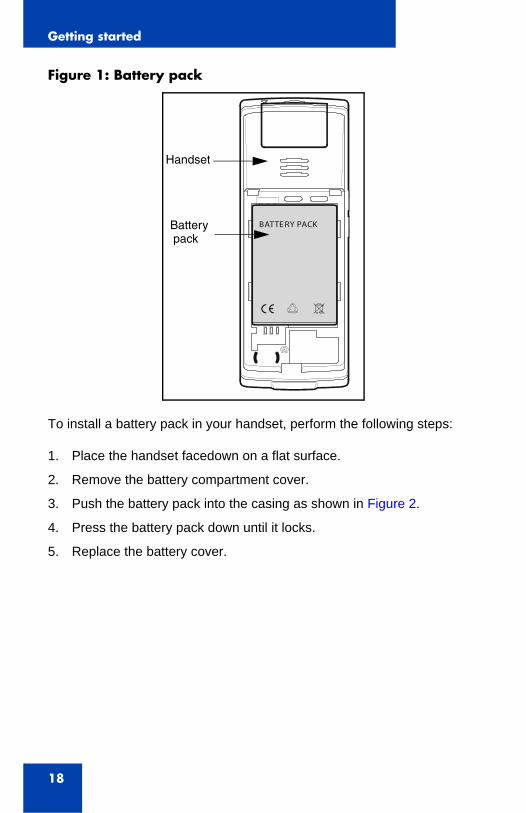
Installing the charger
To install the charger, perform the following steps:
1. Place the charger on a flat surface.
2. Connect the AC adapter cable to the terminal on the bottom of the charger.
3. Connect the adapter to an electrical outlet.
4. Place the handset on the charger as shown in Figure 3.
Handset
Battery pack
Getting started
20
Figure 3: Installing the charger
Handset
Charger
Getting started
21
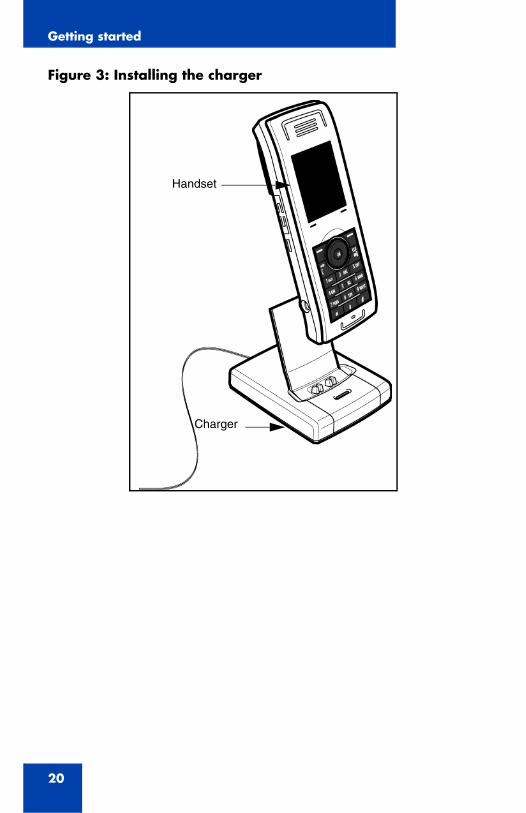
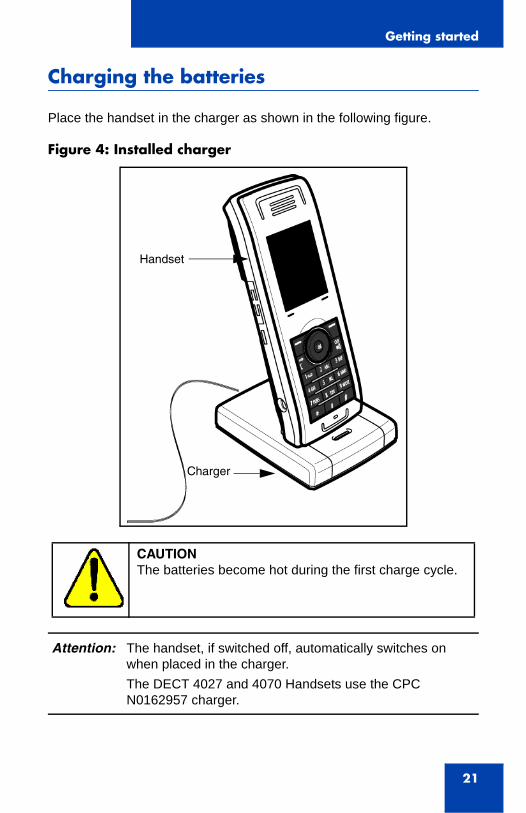
Charging the batteries
Place the handset in the charger as shown in the following figure.
Figure 4: Installed charger
CAUTIONThe batteries become hot during the first charge cycle.
Attention: The handset, if switched off, automatically switches on when placed in the charger.The DECT 4027 and 4070 Handsets use the CPC N0162957 charger.
Handset
Charger
Getting started
22
Important battery informationUse the battery pack only as directed. Heat or cold reduces the performance and service life of the batteries. Handsets with hot or cold batteries can become temporarily out-of-service, even if the batteries are fully charged. Charge the batteries only with the DECT 4027 and 4070 Handset charger supplied with the handset.
Charging guidelinesObserve the following guidelines when you charge your handset:
• Charge the battery for at least 6 hours before you use the handset for the first time. This protective measure extends the service life of the batteries.
• The batteries attain maximum power output only after several charging and discharging cycles.
• Do not leave the handset connected to the charger for more than a month without using it.
• You can charge and discharge the batteries hundreds of times, but eventually they wear out. If the operating time (talk and standby time) becomes significantly shorter than usual, replace the batteries.
• To maintain optimum operating time, periodically discharge the batteries by leaving the handset off the charger and switched on, until the handset switches itself off. Use only this method to discharge the batteries. You can disable the display to accelerate battery discharge. For more information about configuring power save, see “Configuring power save” (page 167).
• Extreme temperatures influence the charging capability of the batteries.
Getting started
23
Charging and operating timesDischarged batteries require 6 hours to completely recharge. Completely charged batteries provide the handset with approximately 8 hours of talk time and 100 hours of standby time.
WARNINGUse only the batteries that Nortel provides or authorises.
Charge the batteries only with the supplied charger.
Do not replace the batteries in potentially explosive environments, such as rooms where flammable liquids or gasses are present.
Do not dispose of batteries in a fire. Recycle or dispose of batteries in accordance with local regulations.
WARNINGYou must charge your handset before you reset the handset time and date. Every time you remove the battery pack or switch the handset off it loses the time and date information; you must manually reset it after you reinstall the battery pack or switch the handset off and on. Your handset displays the battery status accurately after charging for at least 6 hours.
If your system can provide the date and time information to DECT handsets, the date and time settings update automatically when you switch on the handset. Contact your system administrator to determine if you can use this feature.
Attention: You require a mains connection to operate the charger.
Getting started
24
Charge display
The battery charge status appears on the display screen. When the battery is nearly discharged, the battery symbol flashes and a warning tone sounds. If you are on a call, approximately 3 to 5 minutes of talk time exists before the handset switches off. If you are not on a call and the handset is not in the charging station, the message “Battery empty” appears on the display. You cannot make calls while this message appears.
CAUTIONDo not install the charger, handset, and accessories near the following:
• water, moisture, sources of heat, or direct sunlight
• devices that generate strong magnetic fields, electrical appliances, fluorescent lamps, computers, radios, televisions, and fax or telephone terminals
• areas where the handset can be covered or in excessive dust, and areas subject to vibration, shock, or extreme temperature fluctuations
• locations with poor ventilation
CAUTIONUse only the plug-in AC adapter and battery type supplied, and use only approved accessories.
Ensure the mains voltage of the adapter matches the local mains voltage.
Do not use AC adapters that are visibly damaged (cracked or broken) and keep the ventilation slits on the AC adapters free from obstruction.
Attention: The handset, if switched off, automatically switches on when placed in the charger.

Getting started
25
The following table shows the battery charge status icons.
Switching the handset on or off
To switch your handset on or off, perform the following step:
Display areas
The DECT 4027 and 4070 Handsets include a Liquid Crystal Display (LCD) and dialpad backlight display.
The display screen includes the following three areas as shown in Figure 5:
• “Icon line” (page 26)
• “Dialogue area” (page 27)
• “Soft key line” (page 32)
Table 1: Battery charge status icons
Icon Description
empty
less than 33%
more than 33% and less than 75%
more than 75%
1. Long press the Clr key to switch your handset on or off.
Getting started
26
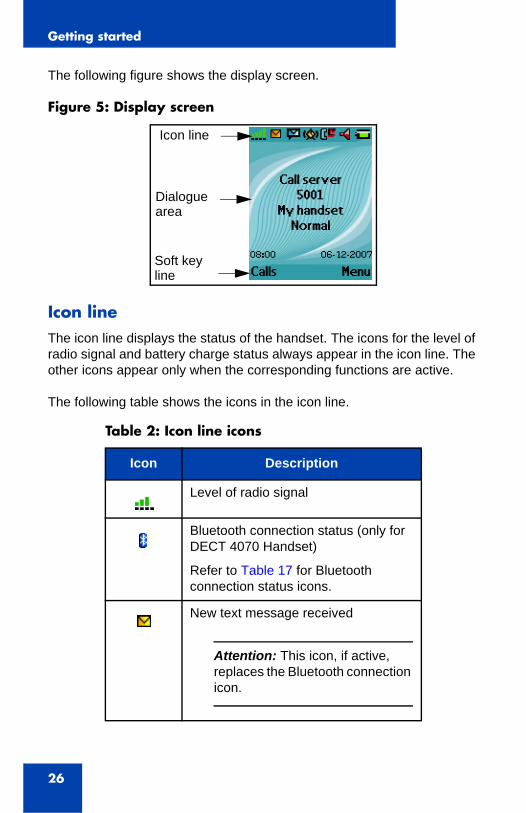
The following figure shows the display screen.
Figure 5: Display screen
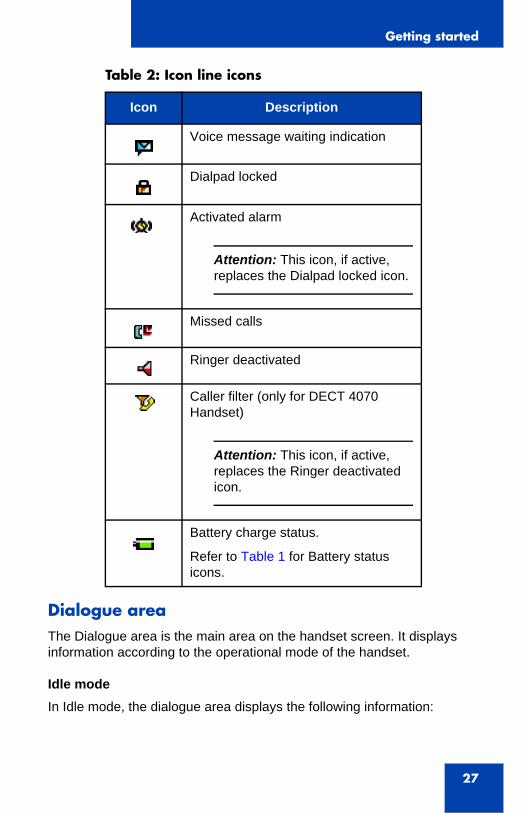
Icon lineThe icon line displays the status of the handset. The icons for the level of radio signal and battery charge status always appear in the icon line. The other icons appear only when the corresponding functions are active.
The following table shows the icons in the icon line.
Table 2: Icon line icons
Icon Description
Level of radio signal
Bluetooth connection status (only for DECT 4070 Handset)
Refer to Table 17 for Bluetooth connection status icons.
New text message received
Attention: This icon, if active, replaces the Bluetooth connection icon.
Icon line
Dialogue area
Soft keyline
Getting started
27
Dialogue areaThe Dialogue area is the main area on the handset screen. It displays information according to the operational mode of the handset.
Idle modeIn Idle mode, the dialogue area displays the following information:
Voice message waiting indication
Dialpad locked
Activated alarm
Attention: This icon, if active, replaces the Dialpad locked icon.
Missed calls
Ringer deactivated
Caller filter (only for DECT 4070 Handset)
Attention: This icon, if active, replaces the Ringer deactivated icon.
Battery charge status.
Refer to Table 1 for Battery status icons.
Table 2: Icon line icons
Icon Description

Getting started
28
• the name of the DECT system
• the Directory Number (DN) of the handset
• the handset name (if configured)
• the name of the active profile
• the time and date
If you leave the range of the DECT system, a “No Network” message appears on the display screen.
The following figure shows the Idle mode screen.
Figure 6: Idle mode screen
For more information about key functions, see “Key functions in Idle mode” (page 34).
Call modeIn Call mode, the dialogue area displays the following information:
• the number and name (if available) of the calling party for an incoming call
• the number and name (if added to your contacts list) of the called party for an outgoing call
• the loudspeaker icon (if enabled)
• the microphone muted icon (if muted)
Getting started
29
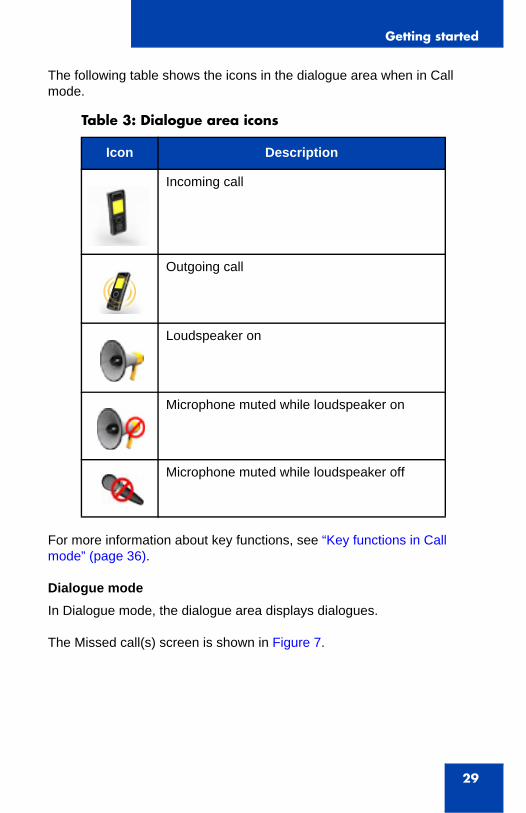
The following table shows the icons in the dialogue area when in Call mode.
For more information about key functions, see “Key functions in Call mode” (page 36).
Dialogue modeIn Dialogue mode, the dialogue area displays dialogues.
The Missed call(s) screen is shown in Figure 7.
Table 3: Dialogue area icons
Icon Description
Incoming call
Outgoing call
Loudspeaker on
Microphone muted while loudspeaker on
Microphone muted while loudspeaker off
Getting started
30
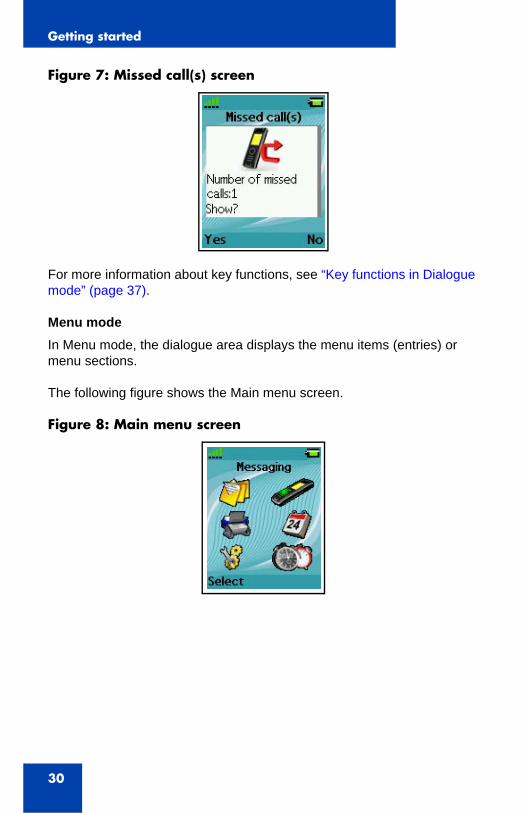
Figure 7: Missed call(s) screen
For more information about key functions, see “Key functions in Dialogue mode” (page 37).
Menu modeIn Menu mode, the dialogue area displays the menu items (entries) or menu sections.
The following figure shows the Main menu screen.
Figure 8: Main menu screen
Getting started
31
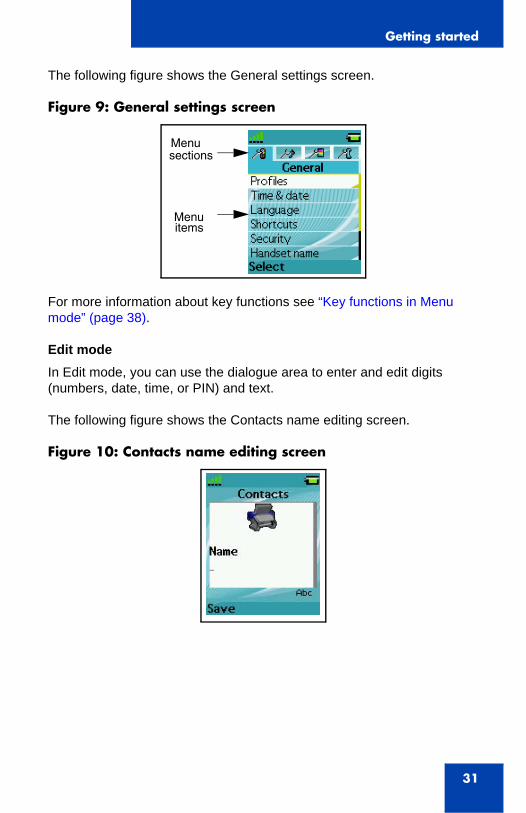
The following figure shows the General settings screen.
Figure 9: General settings screen
For more information about key functions see “Key functions in Menu mode” (page 38).
Edit modeIn Edit mode, you can use the dialogue area to enter and edit digits (numbers, date, time, or PIN) and text.
The following figure shows the Contacts name editing screen.
Figure 10: Contacts name editing screen
Menusections
Menuitems
Getting started
32
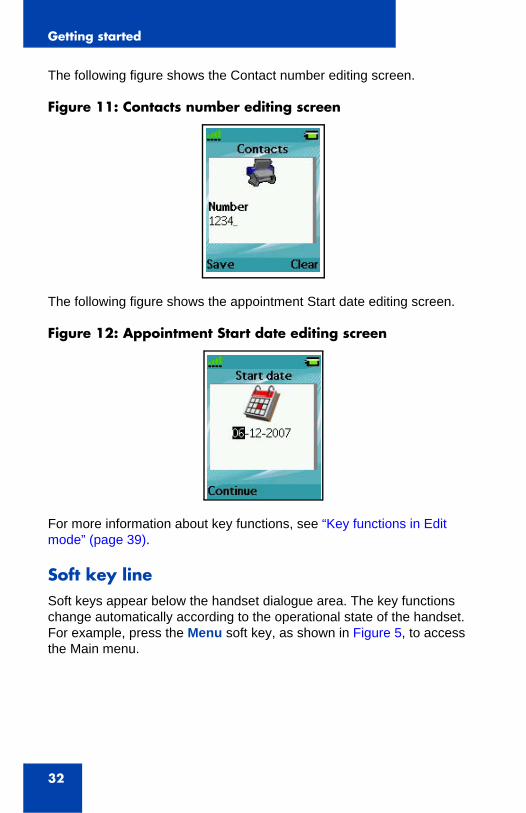
The following figure shows the Contact number editing screen.
Figure 11: Contacts number editing screen
The following figure shows the appointment Start date editing screen.
Figure 12: Appointment Start date editing screen
For more information about key functions, see “Key functions in Edit mode” (page 39).
Soft key lineSoft keys appear below the handset dialogue area. The key functions change automatically according to the operational state of the handset. For example, press the Menu soft key, as shown in Figure 5, to access the Main menu.
Getting started
33
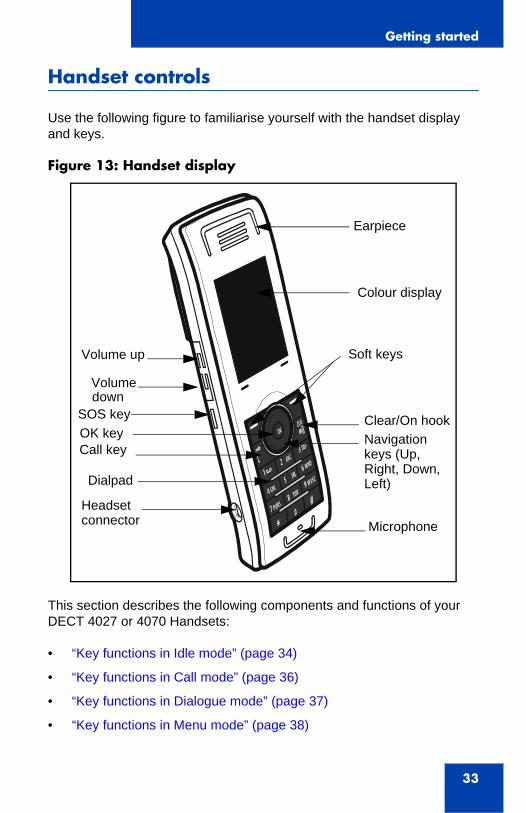
Handset controls
Use the following figure to familiarise yourself with the handset display and keys.
Figure 13: Handset display
This section describes the following components and functions of your DECT 4027 or 4070 Handsets:
• “Key functions in Idle mode” (page 34)
• “Key functions in Call mode” (page 36)
• “Key functions in Dialogue mode” (page 37)
• “Key functions in Menu mode” (page 38)
Earpiece
Colour display
Microphone
Navigation keys (Up,Right, Down,Left)
Headset connector
OK key
Volume up
Volume down
Dialpad
Clear/On hookSOS key
Call key
Soft keys
Getting started
34
• “Key functions in Edit mode” (page 39)
• “Locking or unlocking the dialpad” (page 42)
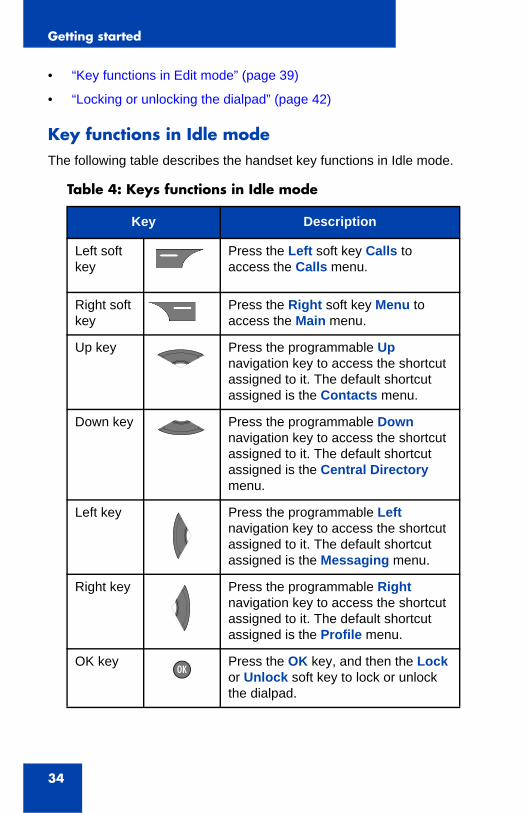
Key functions in Idle modeThe following table describes the handset key functions in Idle mode.
Table 4: Keys functions in Idle mode
Key Description
Left soft key
Press the Left soft key Calls to access the Calls menu.
Right soft key
Press the Right soft key Menu to access the Main menu.
Up key Press the programmable Up navigation key to access the shortcut assigned to it. The default shortcut assigned is the Contacts menu.
Down key Press the programmable Down navigation key to access the shortcut assigned to it. The default shortcut assigned is the Central Directory menu.
Left key Press the programmable Left navigation key to access the shortcut assigned to it. The default shortcut assigned is the Messaging menu.
Right key Press the programmable Right navigation key to access the shortcut assigned to it. The default shortcut assigned is the Profile menu.
OK key Press the OK key, and then the Lock or Unlock soft key to lock or unlock the dialpad.
Getting started
35
For more information about Idle mode, see “Idle mode” (page 27).
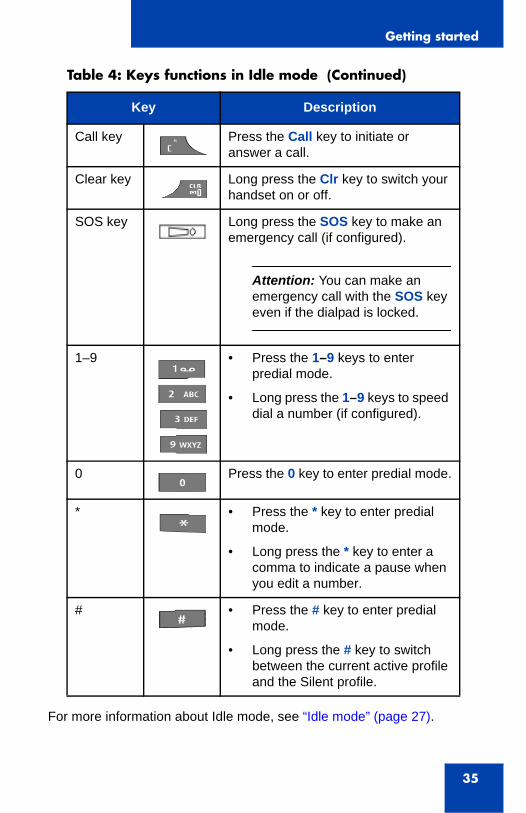
Call key Press the Call key to initiate or answer a call.
Clear key Long press the Clr key to switch your handset on or off.
SOS key Long press the SOS key to make an emergency call (if configured).
Attention: You can make an emergency call with the SOS key even if the dialpad is locked.
1–9 • Press the 1–9 keys to enter predial mode.
• Long press the 1–9 keys to speed dial a number (if configured).
0 Press the 0 key to enter predial mode.
* • Press the * key to enter predial mode.
• Long press the * key to enter a comma to indicate a pause when you edit a number.
# • Press the # key to enter predial mode.
• Long press the # key to switch between the current active profile and the Silent profile.
Table 4: Keys functions in Idle mode (Continued)
Key Description
R
Getting started
36
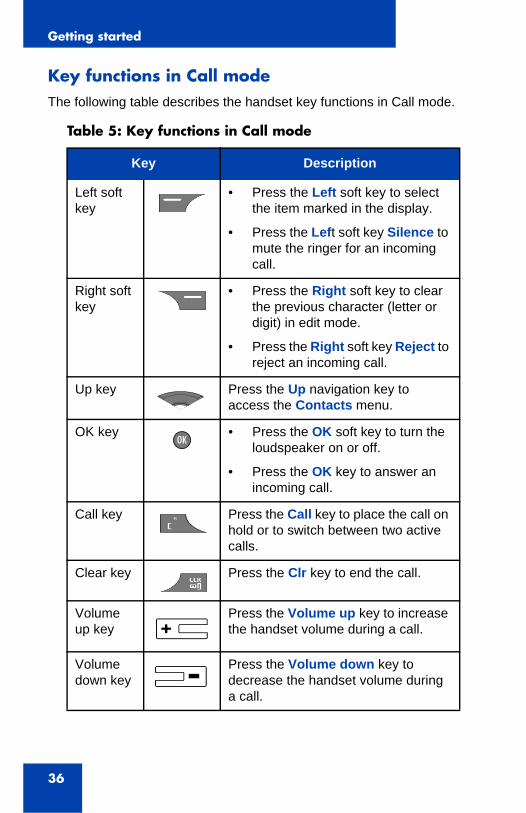
Key functions in Call modeThe following table describes the handset key functions in Call mode.
Table 5: Key functions in Call mode
Key Description
Left soft key
• Press the Left soft key to select the item marked in the display.
• Press the Left soft key Silence to mute the ringer for an incoming call.
Right soft key
• Press the Right soft key to clear the previous character (letter or digit) in edit mode.
• Press the Right soft key Reject to reject an incoming call.
Up key Press the Up navigation key to access the Contacts menu.
OK key • Press the OK soft key to turn the loudspeaker on or off.
• Press the OK key to answer an incoming call.
Call key Press the Call key to place the call on hold or to switch between two active calls.
Clear key Press the Clr key to end the call.
Volume up key
Press the Volume up key to increase the handset volume during a call.
Volume down key
Press the Volume down key to decrease the handset volume during a call.
R
+
Getting started
37
For more information about Call mode, see “Call mode” (page 28).
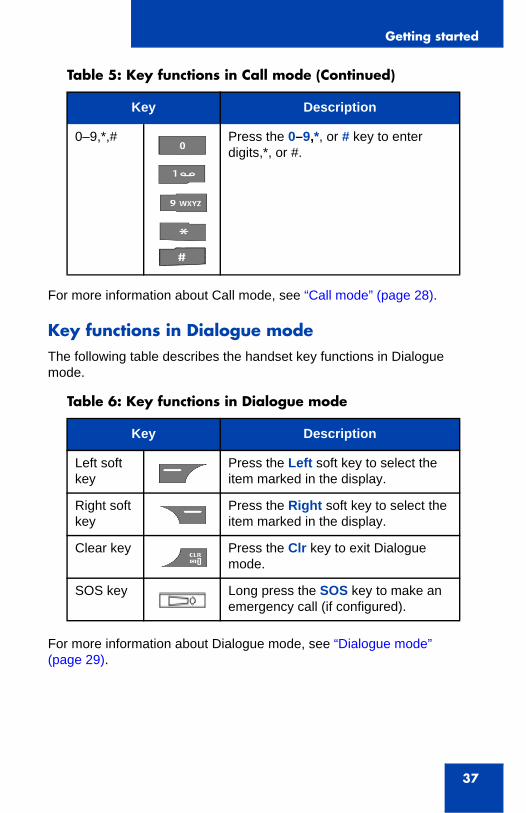
Key functions in Dialogue modeThe following table describes the handset key functions in Dialogue mode.
For more information about Dialogue mode, see “Dialogue mode” (page 29).
0–9,*,# Press the 0–9,*, or # key to enter digits,*, or #.
Table 6: Key functions in Dialogue mode
Key Description
Left soft key
Press the Left soft key to select the item marked in the display.
Right soft key
Press the Right soft key to select the item marked in the display.
Clear key Press the Clr key to exit Dialogue mode.
SOS key Long press the SOS key to make an emergency call (if configured).
Table 5: Key functions in Call mode (Continued)
Key Description
Getting started
38
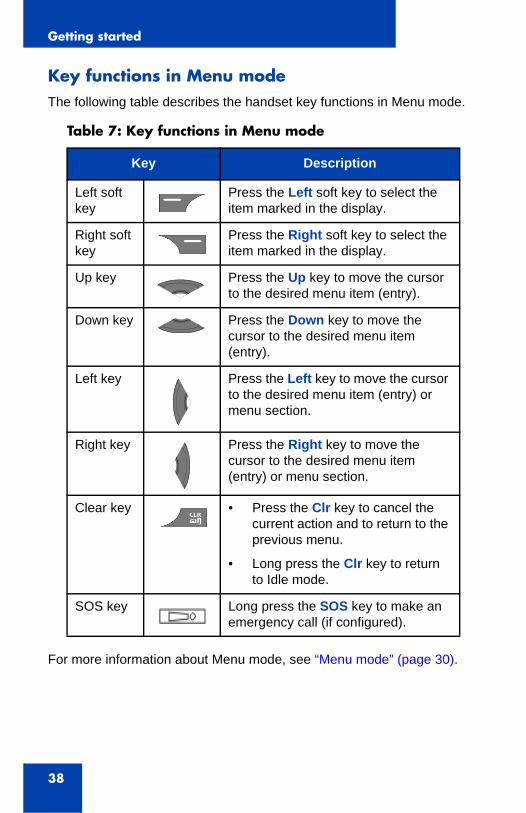
Key functions in Menu modeThe following table describes the handset key functions in Menu mode.
For more information about Menu mode, see “Menu mode” (page 30).
Table 7: Key functions in Menu mode
Key Description
Left soft key
Press the Left soft key to select the item marked in the display.
Right soft key
Press the Right soft key to select the item marked in the display.
Up key Press the Up key to move the cursor to the desired menu item (entry).
Down key Press the Down key to move the cursor to the desired menu item (entry).
Left key Press the Left key to move the cursor to the desired menu item (entry) or menu section.
Right key Press the Right key to move the cursor to the desired menu item (entry) or menu section.
Clear key • Press the Clr key to cancel the current action and to return to the previous menu.
• Long press the Clr key to return to Idle mode.
SOS key Long press the SOS key to make an emergency call (if configured).
Getting started
39
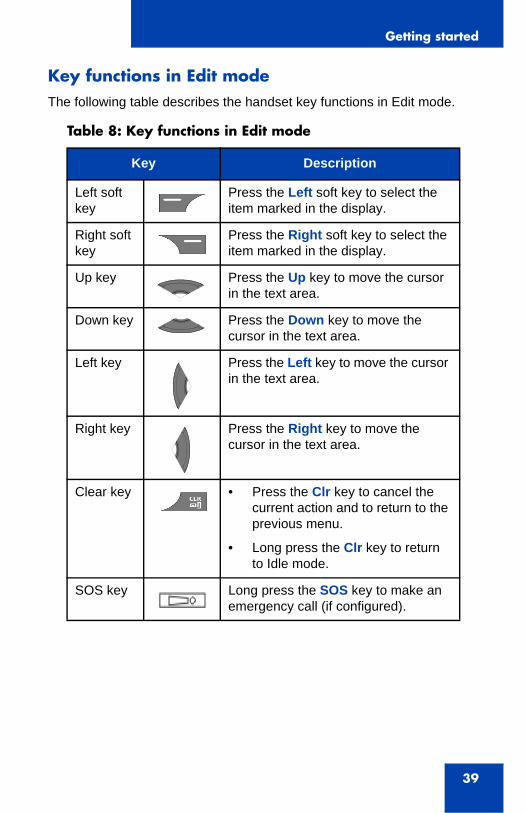
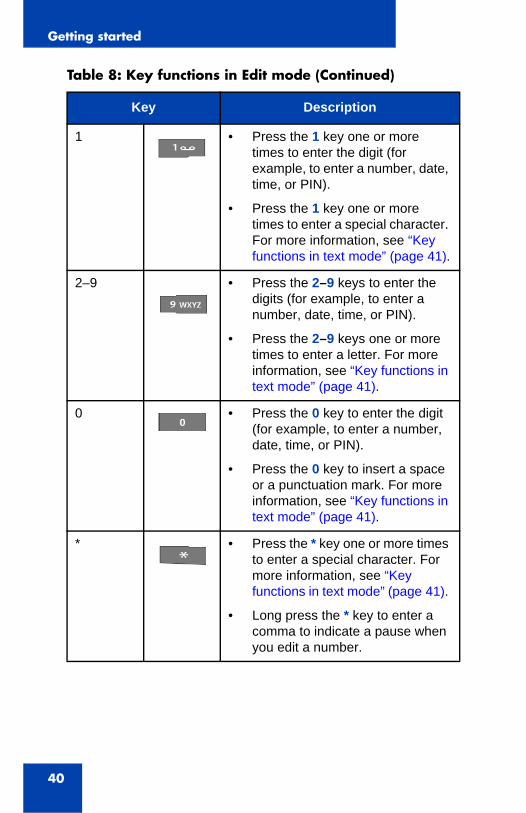
Key functions in Edit modeThe following table describes the handset key functions in Edit mode.
Table 8: Key functions in Edit mode
Key Description
Left soft key
Press the Left soft key to select the item marked in the display.
Right soft key
Press the Right soft key to select the item marked in the display.
Up key Press the Up key to move the cursor in the text area.
Down key Press the Down key to move the cursor in the text area.
Left key Press the Left key to move the cursor in the text area.
Right key Press the Right key to move the cursor in the text area.
Clear key • Press the Clr key to cancel the current action and to return to the previous menu.
• Long press the Clr key to return to Idle mode.
SOS key Long press the SOS key to make an emergency call (if configured).
Getting started
40
1 • Press the 1 key one or more times to enter the digit (for example, to enter a number, date, time, or PIN).
• Press the 1 key one or more times to enter a special character. For more information, see “Key functions in text mode” (page 41).
2–9 • Press the 2–9 keys to enter the digits (for example, to enter a number, date, time, or PIN).
• Press the 2–9 keys one or more times to enter a letter. For more information, see “Key functions in text mode” (page 41).
0 • Press the 0 key to enter the digit (for example, to enter a number, date, time, or PIN).
• Press the 0 key to insert a space or a punctuation mark. For more information, see “Key functions in text mode” (page 41).
* • Press the * key one or more times to enter a special character. For more information, see “Key functions in text mode” (page 41).
• Long press the * key to enter a comma to indicate a pause when you edit a number.
Table 8: Key functions in Edit mode (Continued)
Key Description
Getting started
41
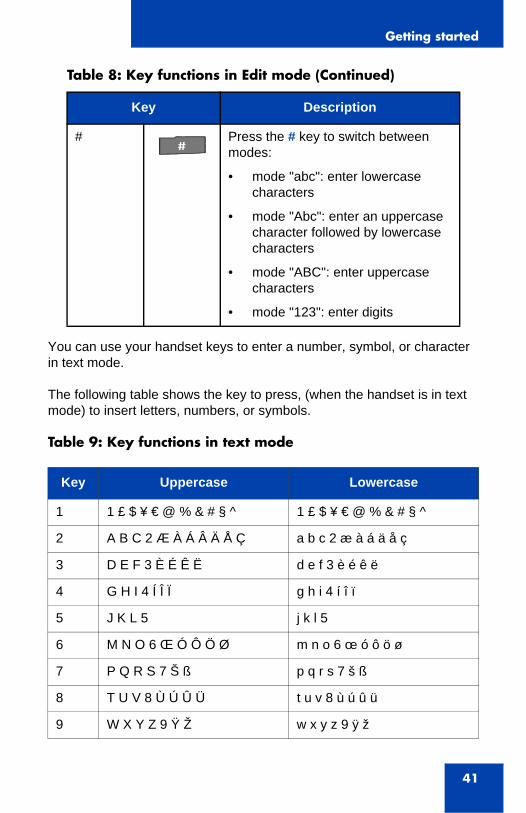
You can use your handset keys to enter a number, symbol, or character in text mode.
The following table shows the key to press, (when the handset is in text mode) to insert letters, numbers, or symbols.
Table 9: Key functions in text mode
# Press the # key to switch between modes:
• mode "abc": enter lowercase characters
• mode "Abc": enter an uppercase character followed by lowercase characters
• mode "ABC": enter uppercase characters
• mode "123": enter digits
Key Uppercase Lowercase
1 1 £ $ ¥ € @ % & # § ^ 1 £ $ ¥ € @ % & # § ^
2 A B C 2 Æ À Á Â Ä Å Ç a b c 2 æ à á ä å ç
3 D E F 3 È É Ê Ë d e f 3 è é ê ë
4 G H I 4 Í Î Ï g h i 4 í î ï
5 J K L 5 j k l 5
6 M N O 6 Œ Ó Ô Ö Ø m n o 6 œ ó ô ö ø
7 P Q R S 7 Š ß p q r s 7 š ß
8 T U V 8 Ù Ú Û Ü t u v 8 ù ú û ü
9 W X Y Z 9 Ÿ Ž w x y z 9 ÿ ž
Table 8: Key functions in Edit mode (Continued)
Key Description
Getting started
42
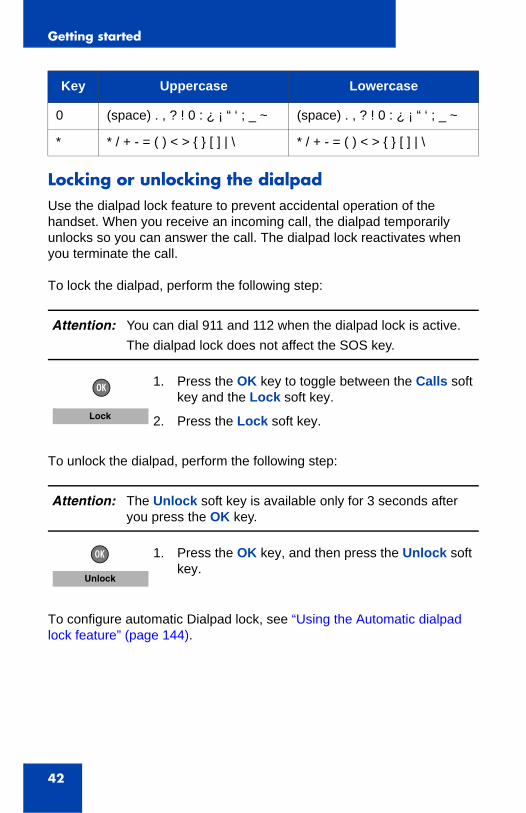
Locking or unlocking the dialpadUse the dialpad lock feature to prevent accidental operation of the handset. When you receive an incoming call, the dialpad temporarily unlocks so you can answer the call. The dialpad lock reactivates when you terminate the call.
To lock the dialpad, perform the following step:
To unlock the dialpad, perform the following step:
To configure automatic Dialpad lock, see “Using the Automatic dialpad lock feature” (page 144).
0 (space) . , ? ! 0 : ¿ ¡ “ ‘ ; _ ~ (space) . , ? ! 0 : ¿ ¡ “ ‘ ; _ ~
* * / + - = ( ) < > { } [ ] | \ * / + - = ( ) < > { } [ ] | \
Attention: You can dial 911 and 112 when the dialpad lock is active.The dialpad lock does not affect the SOS key.
1. Press the OK key to toggle between the Calls soft key and the Lock soft key.
2. Press the Lock soft key.
Attention: The Unlock soft key is available only for 3 seconds after you press the OK key.
1. Press the OK key, and then press the Unlock soft key.
Key Uppercase Lowercase
Lock
Unlock
DECT system configuration
43
DECT system configuration
Use the information in this section to configure your DECT handset to work with a DECT system.
This section describes the following tasks:
• “Accessing the Connectivity menu” (page 43)
• “Subscribing the handset to a DECT system” (page 44)
• “Manually selecting the DECT system” (page 46)
• “Enabling automatic DECT system selection” (page 46)
• “Terminating a subscription” (page 47)
• “Editing the system name and phone number” (page 48)
For more information about using the handset controls, see “Handset controls” (page 33).
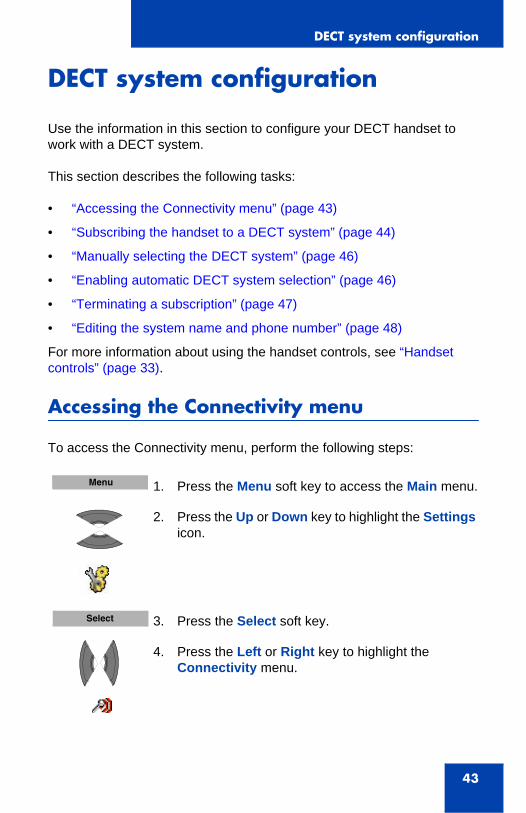
Accessing the Connectivity menu
To access the Connectivity menu, perform the following steps:
1. Press the Menu soft key to access the Main menu.
2. Press the Up or Down key to highlight the Settings icon.
3. Press the Select soft key.
4. Press the Left or Right key to highlight the Connectivity menu.
Menu
Select
DECT system configuration
44
Subscribing the handset to a DECT system
You must subscribe the handset to at least one DECT system before you can use the handset to make a call. The handset can operate with a maximum of four DECT systems, for which the handset stores the name of the system in a subscription record. The subscribed name appears on the handset display whenever the handset enters the range of the DECT system.
Before you subscribe to a DECT system, obtain the following information from your system administrator:
• PARK code: Use a PARK code system ID only if more than one DECT system overlaps in your location.
• DECT system name: The name of the system to which you subscribe. After you enter the system name, it appears on the idle display.
• Phone number: The local phone number assigned to your DECT handset.
To subscribe your handset to a DECT system, perform the following steps:
Attention: If your supplier preinstalls the handset, you need not subscribe your handset to a system. When the handset is not yet subscribed to a system, the message “Register” appears on the display screen.Use the PABX-PIN code to register the handset with a DECT system.
Attention: As soon as you have obtained information about your PIN code, you have only 15 minutes to subscribe the handset set. In 15 minutes the PIN code is deactivated and it is necessary to activate a new one.
1. Open the Connectivity menu as shown in “Accessing the Connectivity menu” (page 43).
DECT system configuration
45
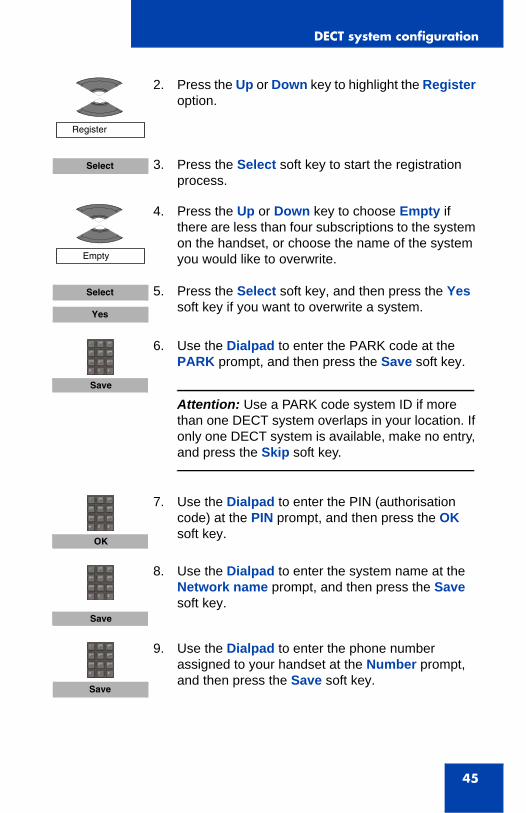
2. Press the Up or Down key to highlight the Register option.
3. Press the Select soft key to start the registration process.
4. Press the Up or Down key to choose Empty if there are less than four subscriptions to the system on the handset, or choose the name of the system you would like to overwrite.
5. Press the Select soft key, and then press the Yes soft key if you want to overwrite a system.
6. Use the Dialpad to enter the PARK code at the PARK prompt, and then press the Save soft key.
Attention: Use a PARK code system ID if more than one DECT system overlaps in your location. If only one DECT system is available, make no entry, and press the Skip soft key.
7. Use the Dialpad to enter the PIN (authorisation code) at the PIN prompt, and then press the OK soft key.
8. Use the Dialpad to enter the system name at the Network name prompt, and then press the Save soft key.
9. Use the Dialpad to enter the phone number assigned to your handset at the Number prompt, and then press the Save soft key.
Register
Select
Empty
Select
Yes
Save
OK
Save
Save
DECT system configuration
46
You can now use the handset to dial and receive calls.
Manually selecting the DECT system
If you subscribe the handset to more than one DECT system, you can manually select which system the handset uses.
To manually subscribe to a DECT system, perform the following steps.:
Enabling automatic DECT system selection
If you subscribe the handset to several DECT systems and you configure the automatic search function, the handset automatically selects the nearest system. As a result, your handset automatically logs on to another subscribed DECT system when you leave the effective range of the current system. If this function is active, the handset will attach to an
10. Press the Clr key one or more times to return to the idle display.
1. Open the Connectivity menu as shown in “Accessing the Connectivity menu” (page 43).
2. Press the Up or Down key to highlight the Network select option.
3. Press the Select soft key.
4. Choose the name of the system from the list, and then press the Select soft key.
The name of the currently active system is highlighted.
5. Press the Clr key one or more times to return to the idle display.
Network select
Select
Select
DECT system configuration
47
available DECT system automatically, independently from the manually selected system.
To automatically subscribe to a DECT system, perform the following steps:
Terminating a subscription
You can terminate a DECT system subscription. You must subscribe to at least one DECT system before you can terminate it.
To terminate a DECT system subscription, perform the following steps:
1. Open the Connectivity menu as shown in “Accessing the Connectivity menu” (page 43).
2. Press the Up or Down key to highlight the Network select option.
3. Press the Select soft key.
4. Choose Auto. select and then press the Select soft key.
The name of the currently active system is highlighted.
5. Press the Clr key one or more times to return to the idle display.
1. Open the Connectivity menu, as shown in “Accessing the Connectivity menu” (page 43).
2. Press the Up or Down key to highlight the Deregister option.
Network select
Select
Auto. select
Select
Deregister
DECT system configuration
48
Editing the system name and phone number
You can change the system name and phone number on your handset.
To edit the system name and phone number, perform the following steps:
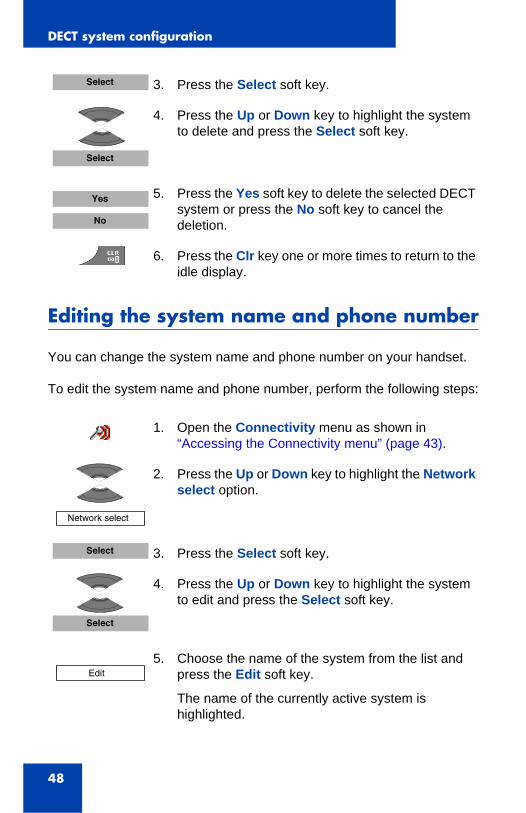
3. Press the Select soft key.
4. Press the Up or Down key to highlight the system to delete and press the Select soft key.
5. Press the Yes soft key to delete the selected DECT system or press the No soft key to cancel the deletion.
6. Press the Clr key one or more times to return to the idle display.
1. Open the Connectivity menu as shown in “Accessing the Connectivity menu” (page 43).
2. Press the Up or Down key to highlight the Network select option.
3. Press the Select soft key.
4. Press the Up or Down key to highlight the system to edit and press the Select soft key.
5. Choose the name of the system from the list and press the Edit soft key.
The name of the currently active system is highlighted.
Select
Select
Yes
No
Network select
Select
Select
Edit
DECT system configuration
49
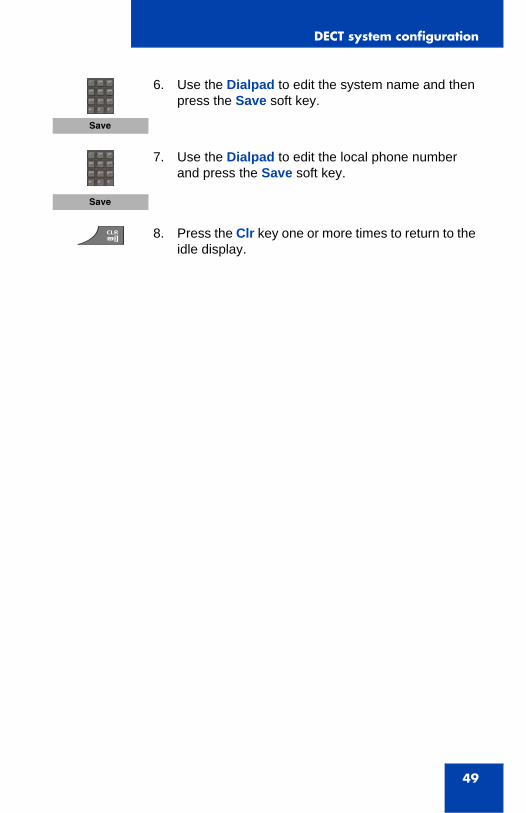
6. Use the Dialpad to edit the system name and then press the Save soft key.
7. Use the Dialpad to edit the local phone number and press the Save soft key.
8. Press the Clr key one or more times to return to the idle display.
Save
Save
Call features
50
Call features
You can use your handset to make and receive calls. You can also use the handset to change the call settings.
Make a call
This section describes the features associated with making a call. You can make a call from your DECT 4027 and 4070 Handsets using any of the following methods:
• “Dialling a number” (page 50)
• “Using Predial mode” (page 51)
• “Using Speed dial” (page 52)
• “Using Loudspeaker” (page 52)
• “Using the telephone book to dial a number” (page 53)
• “Using the Central Directory to dial a number” (page 53)
• “Making an SOS call” (page 55)
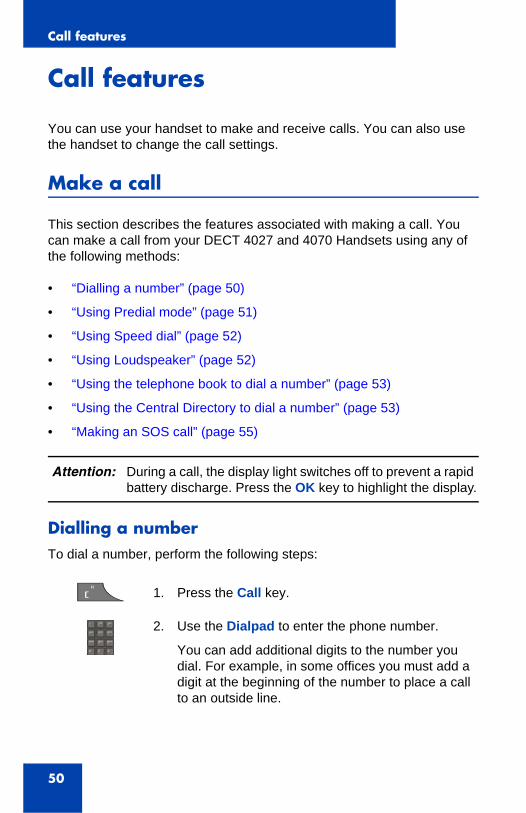
Dialling a numberTo dial a number, perform the following steps:
Attention: During a call, the display light switches off to prevent a rapid battery discharge. Press the OK key to highlight the display.
1. Press the Call key.
2. Use the Dialpad to enter the phone number.
You can add additional digits to the number you dial. For example, in some offices you must add a digit at the beginning of the number to place a call to an outside line.
R
Call features
51
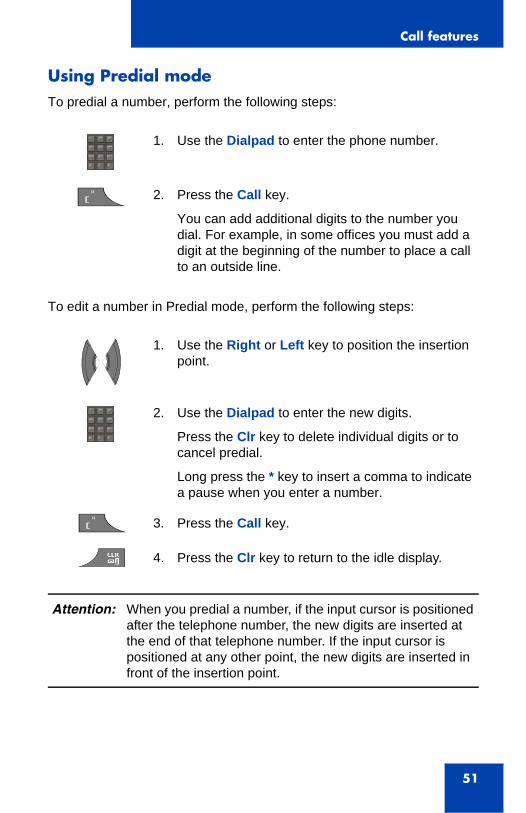
Using Predial modeTo predial a number, perform the following steps:
To edit a number in Predial mode, perform the following steps:
1. Use the Dialpad to enter the phone number.
2. Press the Call key.
You can add additional digits to the number you dial. For example, in some offices you must add a digit at the beginning of the number to place a call to an outside line.
1. Use the Right or Left key to position the insertion point.
2. Use the Dialpad to enter the new digits.
Press the Clr key to delete individual digits or to cancel predial.
Long press the * key to insert a comma to indicate a pause when you enter a number.
3. Press the Call key.
4. Press the Clr key to return to the idle display.
Attention: When you predial a number, if the input cursor is positioned after the telephone number, the new digits are inserted at the end of that telephone number. If the input cursor is positioned at any other point, the new digits are inserted in front of the insertion point.
R
R
Call features
52
Using Speed dialUse the Speed dial feature to make calls by dialling a one-digit code.
To use speed dial, perform the following step:
Using LoudspeakerYour handset includes a Loudspeaker feature to allow several people in a room to listen to a call.
To enable the Loudspeaker feature, perform the following steps:
1. Long press the number key assigned to the phone number.
You can use speed dial only after it is configured. For more information, see “Assigning a speed dial number” (page 93).
1. Make or answer a call.
2. Press the Spk. on soft key to enable the feature.
When the loudspeaker function is active, the handset displays the loudspeaker icon.
• Place the handset upright on a smooth, flat surface, and leave the loudspeaker and microphone free of obstruction.
• Keep your handset approximately 0.5 metres away from yourself while you speak.
3. Press the Volume up or Volume down key to configure the volume.
4. Press the Spk. off soft key to disable the feature.
Spk. on
+
Spk. off
Call features
53
Using the telephone book to dial a numberYour handset allows you to use the telephone book to dial a number.
To use the telephone book to dial a number, perform the following steps:
Using the Central Directory to dial a numberYour handset allows you to use the Central Directory to dial a number. The Central Directory is a database that contains user names and Directory Numbers (DN).
1. Press the Menu soft key to access the Main menu.
2. Press the Up or Down key to highlight the Contacts icon and then press the Select soft key.
3. Press the Up or Down key to select the number you want to dial.
OR
You can also search for a specific name by entering its first characters from the dialpad, (for example entering “B” will move you to the first name in the contacts list starting from "B"). For more information, see Table 9, “Key functions in text mode” (page 41).
4. Press the Call key to make a call.
Attention: The Central Directory feature is available only if provided by your communication system.
Menu
Select
R
Call features
54
To use the Central Directory to dial a number, perform the following steps:
1. Press the Menu soft key to access the Main menu.
2. Press the Up or Down key to highlight the Contacts icon and then press the Select soft key.
3. Press the Up or Down key to select the Central Directory option and press the Select key.
4. Enter the first characters of the required name from the dialpad to speed up searching the directory (for example entering “B” will move you to the first name in the directory starting from "B"). For more information, see Table 9, “Key functions in text mode” (page 41).
OR
proceed to step 5.
5. Press the OK key, and then press the Up or Down key to select the name of the person you want to call.
6. Press the Call key to make a call.
Menu
Select
Central Directory
Select
R
Call features
55
Making an SOS callUse this option to make emergency calls to a specific telephone number. When you press the SOS key, the phone sends a text message or initiates a voice call.
To make an SOS call, perform the following step:
Answering a call
You can use your handset to answer or reject an incoming call. When you receive an incoming call, the ringer sounds and the call alert symbol flashes. This section describes the following features:
• “Answering a call in Normal mode” (page 56)
• “Answering a call using any key” (page 56)
• “Auto-answering mode” (page 56)
• “Muting the ringer” (page 56)
• “Rejecting a call” (page 57)
Attention: The Messaging feature is available only on DECT 4070 Handsets.You must program an SOS number to use the SOS function. For more information, see “Configuring emergency calls” (page 178).
1. Long press the SOS key to dial the number or send a message.
Attention: During a call, the display light switches off to prevent a rapid battery discharge. Press the OK key to highlight the display.
Call features
56
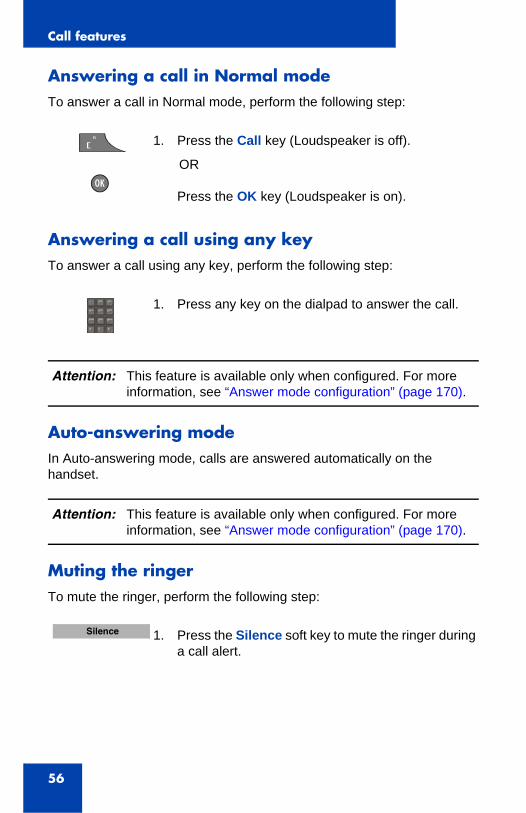
Answering a call in Normal modeTo answer a call in Normal mode, perform the following step:
Answering a call using any keyTo answer a call using any key, perform the following step:
Auto-answering modeIn Auto-answering mode, calls are answered automatically on the handset.
Muting the ringerTo mute the ringer, perform the following step:
1. Press the Call key (Loudspeaker is off).
OR
Press the OK key (Loudspeaker is on).
1. Press any key on the dialpad to answer the call.
Attention: This feature is available only when configured. For more information, see “Answer mode configuration” (page 170).
Attention: This feature is available only when configured. For more information, see “Answer mode configuration” (page 170).
1. Press the Silence soft key to mute the ringer during a call alert.
R
Silence
Call features
57
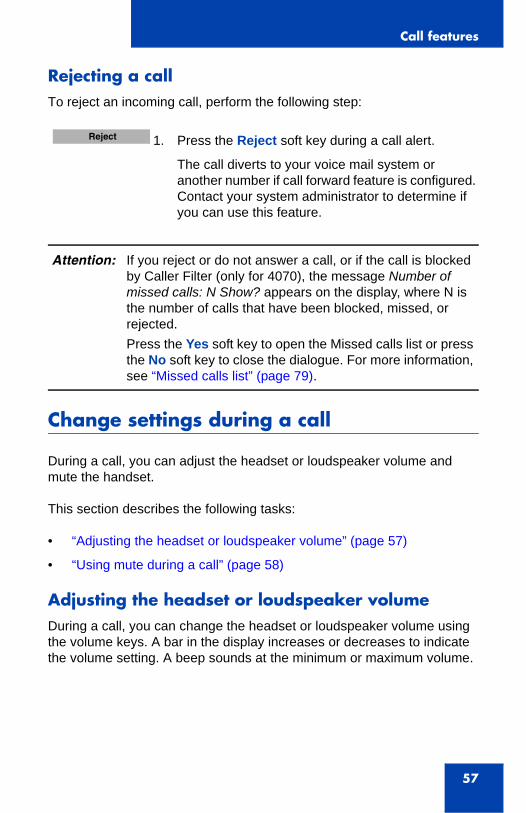
Rejecting a callTo reject an incoming call, perform the following step:
Change settings during a call
During a call, you can adjust the headset or loudspeaker volume and mute the handset.
This section describes the following tasks:
• “Adjusting the headset or loudspeaker volume” (page 57)
• “Using mute during a call” (page 58)
Adjusting the headset or loudspeaker volumeDuring a call, you can change the headset or loudspeaker volume using the volume keys. A bar in the display increases or decreases to indicate the volume setting. A beep sounds at the minimum or maximum volume.
1. Press the Reject soft key during a call alert.
The call diverts to your voice mail system or another number if call forward feature is configured. Contact your system administrator to determine if you can use this feature.
Attention: If you reject or do not answer a call, or if the call is blocked by Caller Filter (only for 4070), the message Number of missed calls: N Show? appears on the display, where N is the number of calls that have been blocked, missed, or rejected.Press the Yes soft key to open the Missed calls list or press the No soft key to close the dialogue. For more information, see “Missed calls list” (page 79).
Reject
Call features
58
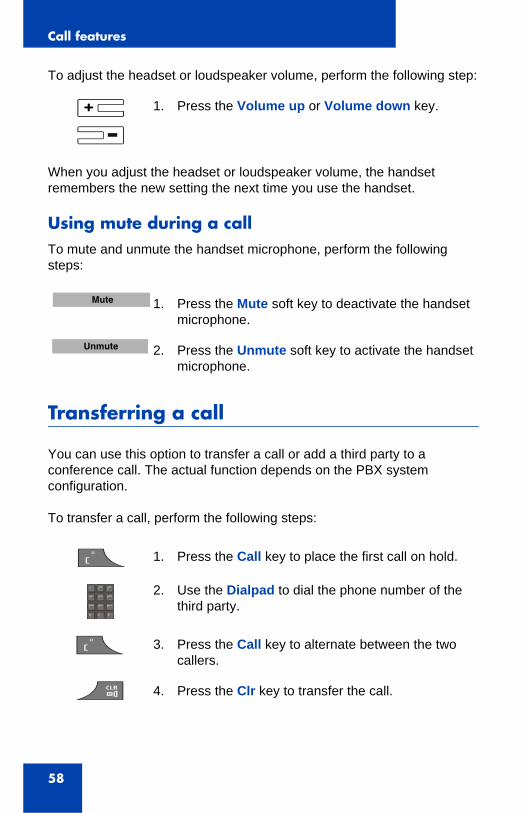
To adjust the headset or loudspeaker volume, perform the following step:
When you adjust the headset or loudspeaker volume, the handset remembers the new setting the next time you use the handset.
Using mute during a callTo mute and unmute the handset microphone, perform the following steps:
Transferring a call
You can use this option to transfer a call or add a third party to a conference call. The actual function depends on the PBX system configuration.
To transfer a call, perform the following steps:
1. Press the Volume up or Volume down key.
1. Press the Mute soft key to deactivate the handset microphone.
2. Press the Unmute soft key to activate the handset microphone.
1. Press the Call key to place the first call on hold.
2. Use the Dialpad to dial the phone number of the third party.
3. Press the Call key to alternate between the two callers.
4. Press the Clr key to transfer the call.
+
Mute
Unmute
R
R
Call features
59
Voice mail
Use the Voice mail feature to listen to voice messages left by calling parties. You receive a voice mail in the following situations:
• if your handset is switched off
• if your handset is busy
• if your handset is out of the coverage area
A new voice message dialogue appears only once, when a caller leaves a first new message in the mailbox. A voice mail symbol appears in the icon line and disappears after you play the message.
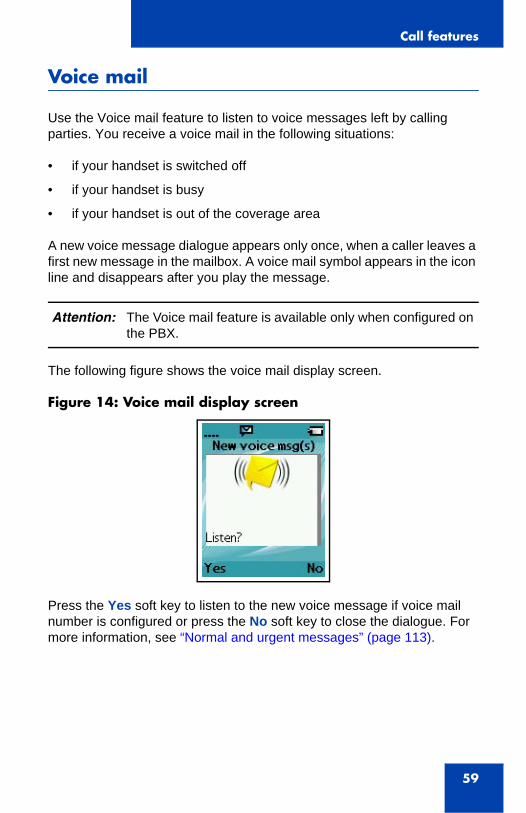
The following figure shows the voice mail display screen.
Figure 14: Voice mail display screen
Press the Yes soft key to listen to the new voice message if voice mail number is configured or press the No soft key to close the dialogue. For more information, see “Normal and urgent messages” (page 113).
Attention: The Voice mail feature is available only when configured on the PBX.
Call features
60
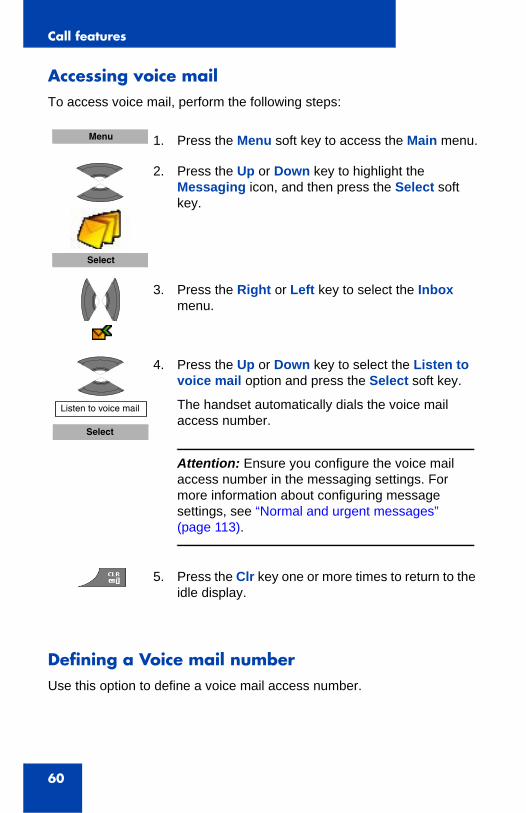
Accessing voice mail To access voice mail, perform the following steps:
Defining a Voice mail numberUse this option to define a voice mail access number.
1. Press the Menu soft key to access the Main menu.
2. Press the Up or Down key to highlight the Messaging icon, and then press the Select soft key.
3. Press the Right or Left key to select the Inbox menu.
4. Press the Up or Down key to select the Listen to voice mail option and press the Select soft key.
The handset automatically dials the voice mail access number.
Attention: Ensure you configure the voice mail access number in the messaging settings. For more information about configuring message settings, see “Normal and urgent messages” (page 113).
5. Press the Clr key one or more times to return to the idle display.
Menu
Select
Listen to voice mail
Select
Call features
61
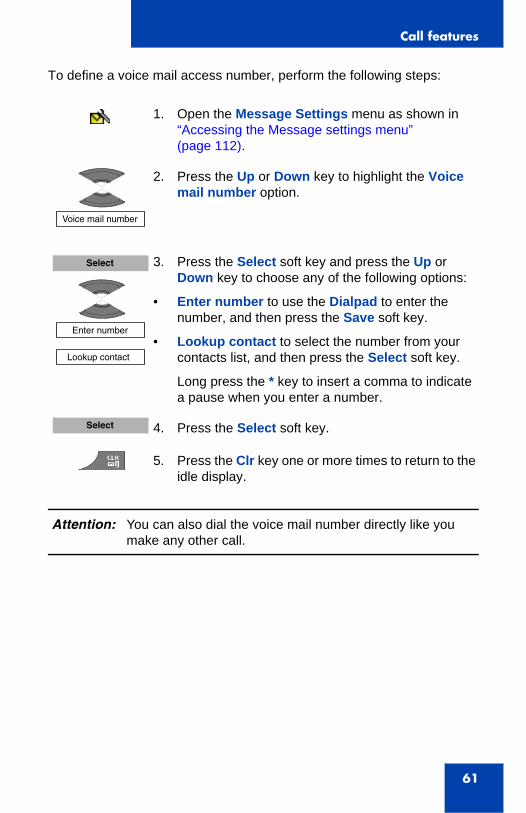
To define a voice mail access number, perform the following steps:
1. Open the Message Settings menu as shown in “Accessing the Message settings menu” (page 112).
2. Press the Up or Down key to highlight the Voice mail number option.
3. Press the Select soft key and press the Up or Down key to choose any of the following options:
• Enter number to use the Dialpad to enter the number, and then press the Save soft key.
• Lookup contact to select the number from your contacts list, and then press the Select soft key.
Long press the * key to insert a comma to indicate a pause when you enter a number.
4. Press the Select soft key.
5. Press the Clr key one or more times to return to the idle display.
Attention: You can also dial the voice mail number directly like you make any other call.
Voice mail number
Select
Enter number
Lookup contact
Select
Calls list
62
Calls list
The Calls list stores information about dialled, answered, or missed calls (maximum 50 entries for all lists).
When there is more than one call to or from a phone number, only the most recent call appears in the appropriate call list.
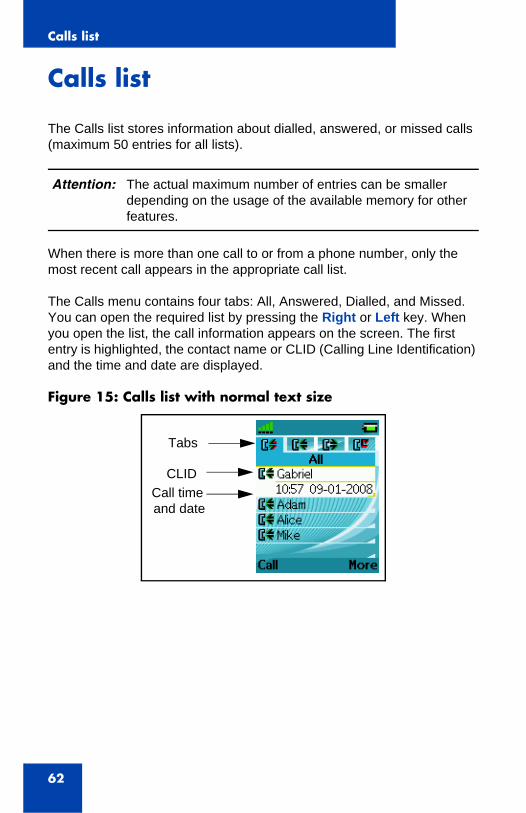
The Calls menu contains four tabs: All, Answered, Dialled, and Missed. You can open the required list by pressing the Right or Left key. When you open the list, the call information appears on the screen. The first entry is highlighted, the contact name or CLID (Calling Line Identification) and the time and date are displayed.
Figure 15: Calls list with normal text size
Attention: The actual maximum number of entries can be smaller depending on the usage of the available memory for other features.
Tabs
CLIDCall time
and date
Calls list
63
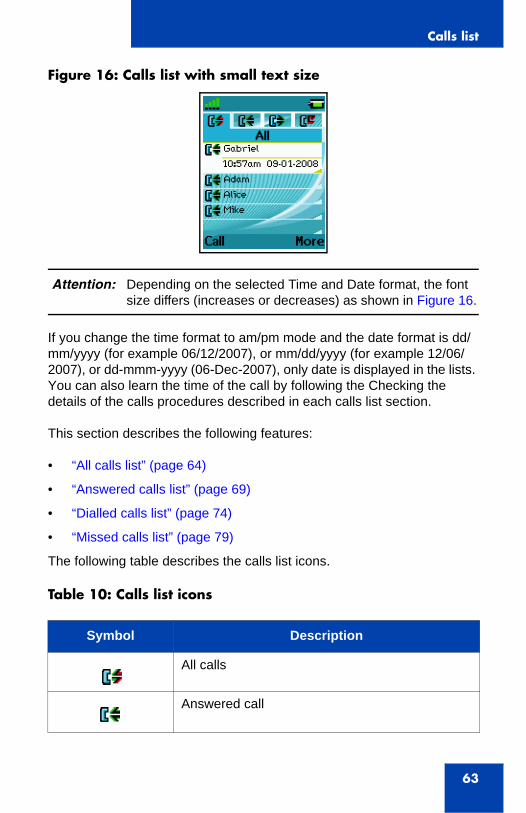
Figure 16: Calls list with small text size
If you change the time format to am/pm mode and the date format is dd/mm/yyyy (for example 06/12/2007), or mm/dd/yyyy (for example 12/06/2007), or dd-mmm-yyyy (06-Dec-2007), only date is displayed in the lists. You can also learn the time of the call by following the Checking the details of the calls procedures described in each calls list section.
This section describes the following features:
• “All calls list” (page 64)
• “Answered calls list” (page 69)
• “Dialled calls list” (page 74)
• “Missed calls list” (page 79)
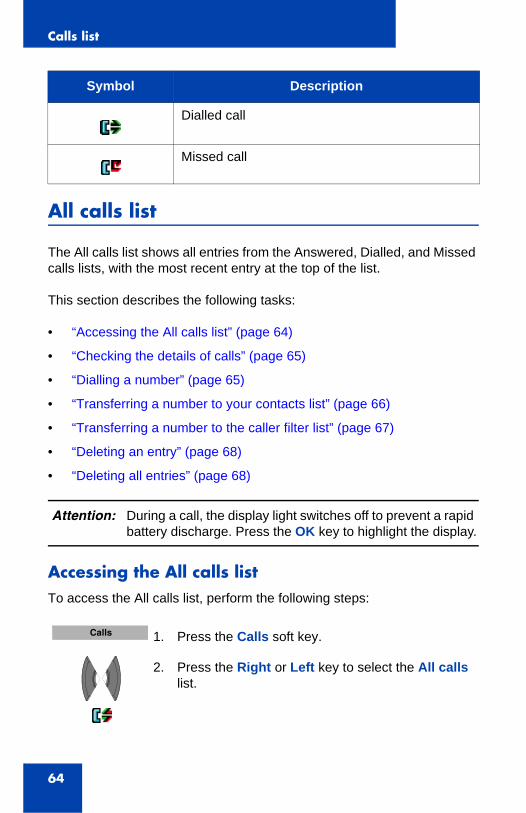
The following table describes the calls list icons.
Table 10: Calls list icons
Attention: Depending on the selected Time and Date format, the font size differs (increases or decreases) as shown in Figure 16.
Symbol Description
All calls
Answered call
Calls list
64
All calls list
The All calls list shows all entries from the Answered, Dialled, and Missed calls lists, with the most recent entry at the top of the list.
This section describes the following tasks:
• “Accessing the All calls list” (page 64)
• “Checking the details of calls” (page 65)
• “Dialling a number” (page 65)
• “Transferring a number to your contacts list” (page 66)
• “Transferring a number to the caller filter list” (page 67)
• “Deleting an entry” (page 68)
• “Deleting all entries” (page 68)
Accessing the All calls listTo access the All calls list, perform the following steps:
Dialled call
Missed call
Attention: During a call, the display light switches off to prevent a rapid battery discharge. Press the OK key to highlight the display.
1. Press the Calls soft key.
2. Press the Right or Left key to select the All calls list.
Symbol Description
Calls
Calls list
65
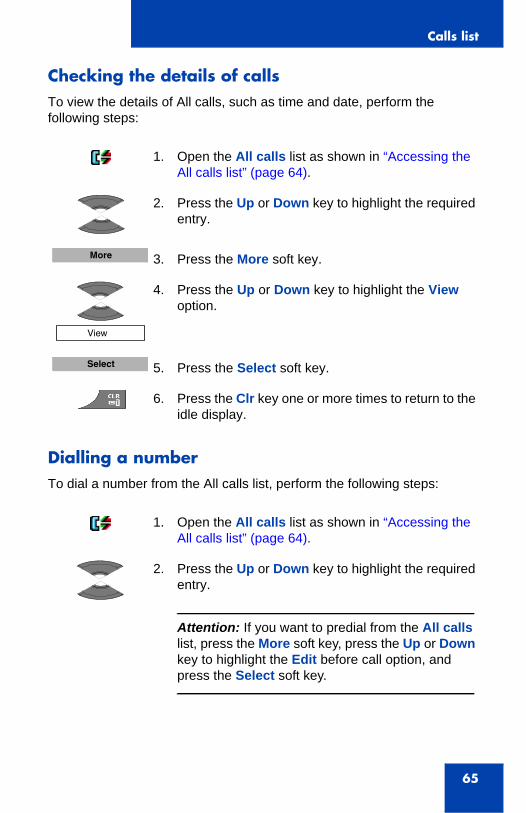
Checking the details of callsTo view the details of All calls, such as time and date, perform the following steps:
Dialling a numberTo dial a number from the All calls list, perform the following steps:
1. Open the All calls list as shown in “Accessing the All calls list” (page 64).
2. Press the Up or Down key to highlight the required entry.
3. Press the More soft key.
4. Press the Up or Down key to highlight the View option.
5. Press the Select soft key.
6. Press the Clr key one or more times to return to the idle display.
1. Open the All calls list as shown in “Accessing the All calls list” (page 64).
2. Press the Up or Down key to highlight the required entry.
Attention: If you want to predial from the All calls list, press the More soft key, press the Up or Down key to highlight the Edit before call option, and press the Select soft key.
More
View
Select
Calls list
66
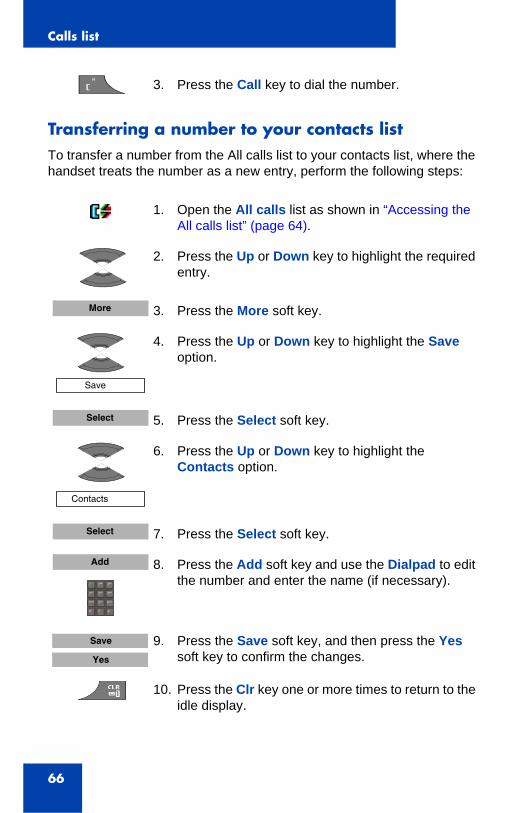
Transferring a number to your contacts listTo transfer a number from the All calls list to your contacts list, where the handset treats the number as a new entry, perform the following steps:
3. Press the Call key to dial the number.
1. Open the All calls list as shown in “Accessing the All calls list” (page 64).
2. Press the Up or Down key to highlight the required entry.
3. Press the More soft key.
4. Press the Up or Down key to highlight the Save option.
5. Press the Select soft key.
6. Press the Up or Down key to highlight the Contacts option.
7. Press the Select soft key.
8. Press the Add soft key and use the Dialpad to edit the number and enter the name (if necessary).
9. Press the Save soft key, and then press the Yes soft key to confirm the changes.
10. Press the Clr key one or more times to return to the idle display.
R
More
Save
Select
Contacts
Select
Add
Save
Yes
Calls list
67
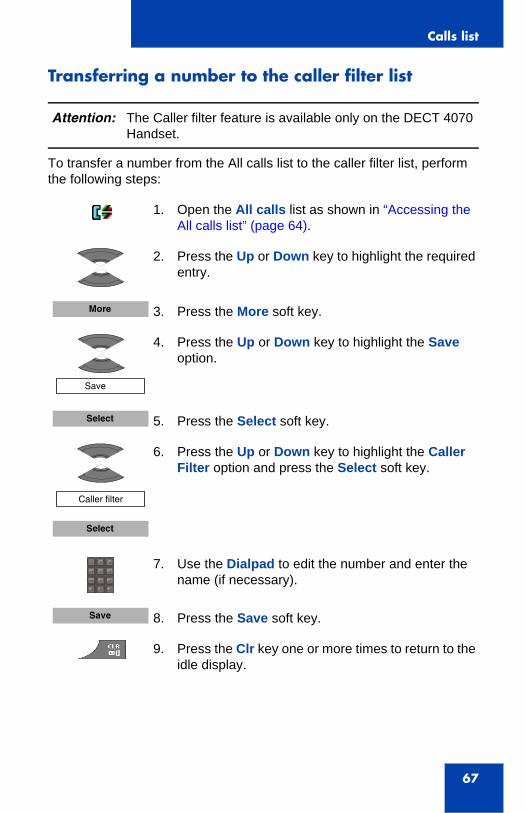
Transferring a number to the caller filter list
To transfer a number from the All calls list to the caller filter list, perform the following steps:
Attention: The Caller filter feature is available only on the DECT 4070 Handset.
1. Open the All calls list as shown in “Accessing the All calls list” (page 64).
2. Press the Up or Down key to highlight the required entry.
3. Press the More soft key.
4. Press the Up or Down key to highlight the Save option.
5. Press the Select soft key.
6. Press the Up or Down key to highlight the Caller Filter option and press the Select soft key.
7. Use the Dialpad to edit the number and enter the name (if necessary).
8. Press the Save soft key.
9. Press the Clr key one or more times to return to the idle display.
More
Save
Select
Caller filter
Select
Save
Calls list
68
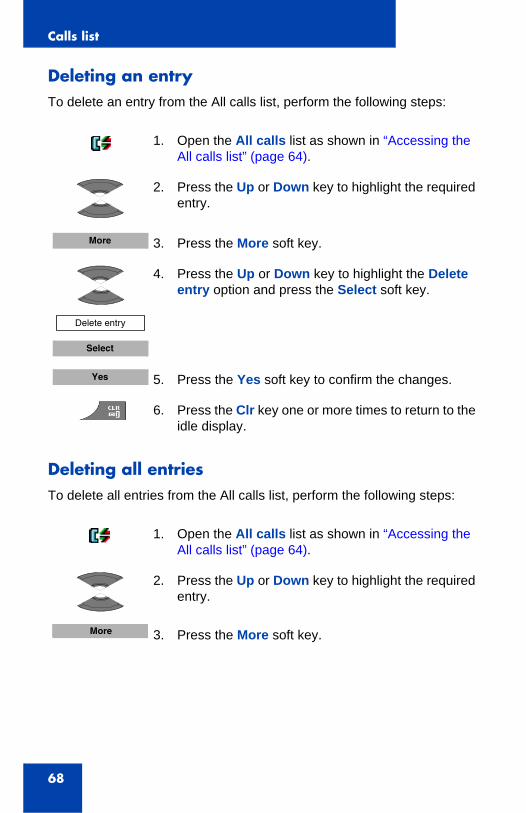
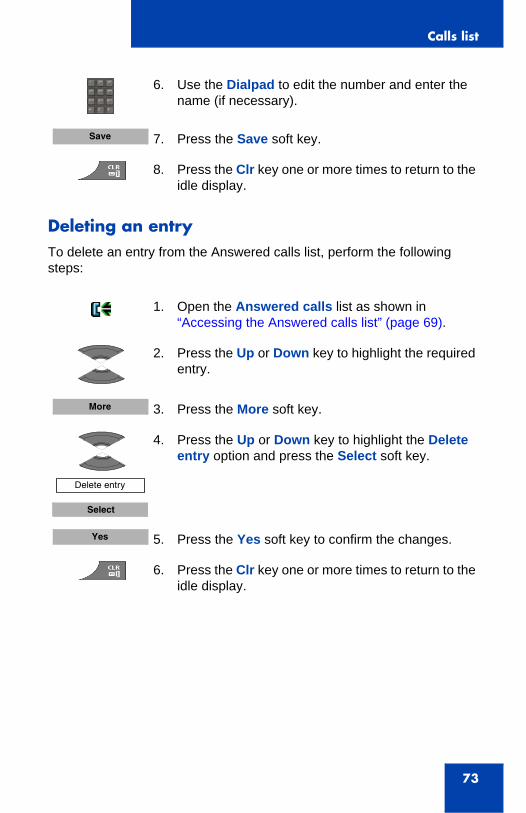
Deleting an entryTo delete an entry from the All calls list, perform the following steps:
Deleting all entriesTo delete all entries from the All calls list, perform the following steps:
1. Open the All calls list as shown in “Accessing the All calls list” (page 64).
2. Press the Up or Down key to highlight the required entry.
3. Press the More soft key.
4. Press the Up or Down key to highlight the Delete entry option and press the Select soft key.
5. Press the Yes soft key to confirm the changes.
6. Press the Clr key one or more times to return to the idle display.
1. Open the All calls list as shown in “Accessing the All calls list” (page 64).
2. Press the Up or Down key to highlight the required entry.
3. Press the More soft key.
More
Delete entry
Select
Yes
More
Calls list
69
Answered calls list
The Answered calls list stores the details of the answered calls, with the most recent entry at the top of the list.
This section describes the following tasks:
• “Accessing the Answered calls list” (page 69)
• “Checking the details of an answered call” (page 70)
• “Dialling a number” (page 70)
• “Transferring a number to your contacts list” (page 71)
• “Transferring a number to the caller filter list” (page 72)
• “Deleting an entry” (page 73)
• “Deleting all entries” (page 74)
Accessing the Answered calls listTo access the Answered calls list, perform the following steps:
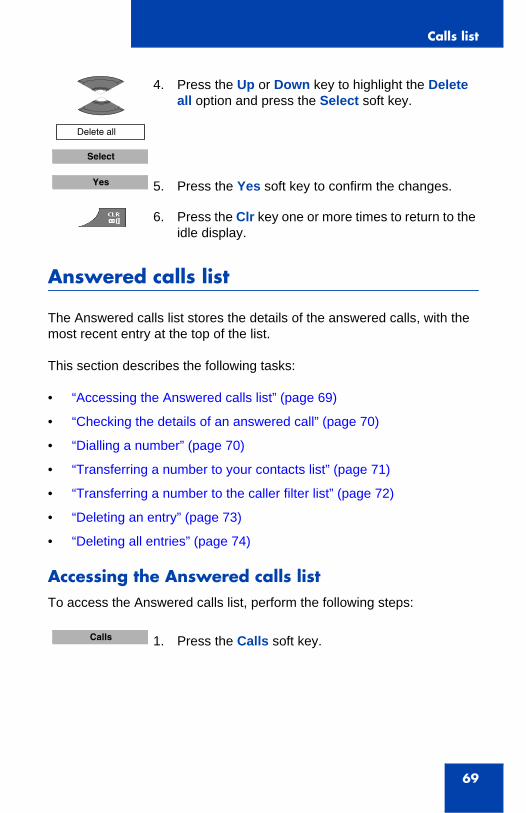
4. Press the Up or Down key to highlight the Delete all option and press the Select soft key.
5. Press the Yes soft key to confirm the changes.
6. Press the Clr key one or more times to return to the idle display.
1. Press the Calls soft key.
Delete all
Select
Yes
Calls
Calls list
70
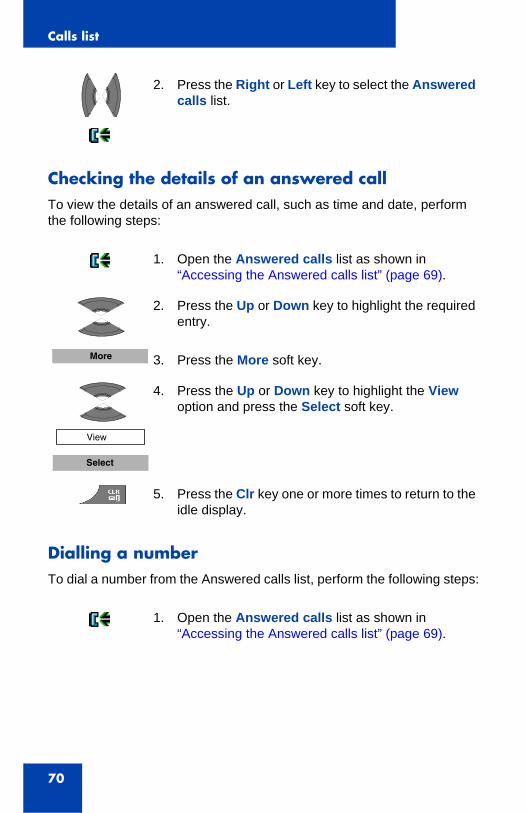
Checking the details of an answered callTo view the details of an answered call, such as time and date, perform the following steps:
Dialling a numberTo dial a number from the Answered calls list, perform the following steps:
2. Press the Right or Left key to select the Answered calls list.
1. Open the Answered calls list as shown in “Accessing the Answered calls list” (page 69).
2. Press the Up or Down key to highlight the required entry.
3. Press the More soft key.
4. Press the Up or Down key to highlight the View option and press the Select soft key.
5. Press the Clr key one or more times to return to the idle display.
1. Open the Answered calls list as shown in “Accessing the Answered calls list” (page 69).
More
View
Select

Calls list
71
Transferring a number to your contacts listTo transfer a number from the Answered calls list to your contacts list, where the handset treats the number as a new entry, perform the following steps:
2. Press the Up or Down key to highlight the required entry.
Attention: If you want to predial from the Answered calls list, press the More soft key, press the Up or Down key to highlight the Edit before call option, and press the Select soft key.
3. Press the Call key to dial the number.
1. Open the Answered calls list as shown in “Accessing the Answered calls list” (page 69).
2. Press the Up or Down key to highlight the required entry.
3. Press the More soft key.
4. Press the Up or Down key to highlight the Save option and press the Select soft key.
5. Press the Up or Down key to highlight the Contacts option and press the Select soft key.
R
More
Save
Select
Contacts
Select
Calls list
72
Transferring a number to the caller filter list
To transfer a number from the Answered calls list to the caller filter list, perform the following steps:
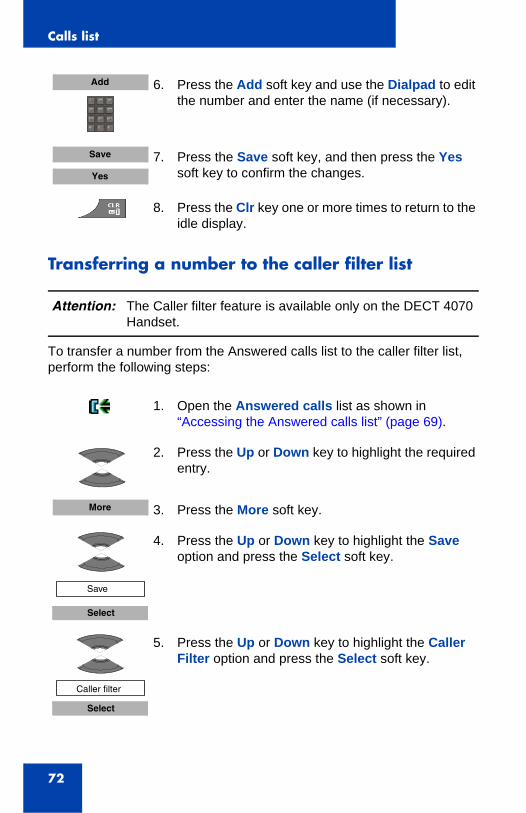
6. Press the Add soft key and use the Dialpad to edit the number and enter the name (if necessary).
7. Press the Save soft key, and then press the Yes soft key to confirm the changes.
8. Press the Clr key one or more times to return to the idle display.
Attention: The Caller filter feature is available only on the DECT 4070 Handset.
1. Open the Answered calls list as shown in “Accessing the Answered calls list” (page 69).
2. Press the Up or Down key to highlight the required entry.
3. Press the More soft key.
4. Press the Up or Down key to highlight the Save option and press the Select soft key.
5. Press the Up or Down key to highlight the Caller Filter option and press the Select soft key.
Add
Save
Yes
More
Save
Select
Caller filter
Select
Calls list
73
Deleting an entryTo delete an entry from the Answered calls list, perform the following steps:
6. Use the Dialpad to edit the number and enter the name (if necessary).
7. Press the Save soft key.
8. Press the Clr key one or more times to return to the idle display.
1. Open the Answered calls list as shown in “Accessing the Answered calls list” (page 69).
2. Press the Up or Down key to highlight the required entry.
3. Press the More soft key.
4. Press the Up or Down key to highlight the Delete entry option and press the Select soft key.
5. Press the Yes soft key to confirm the changes.
6. Press the Clr key one or more times to return to the idle display.
Save
More
Delete entry
Select
Yes
Calls list
74
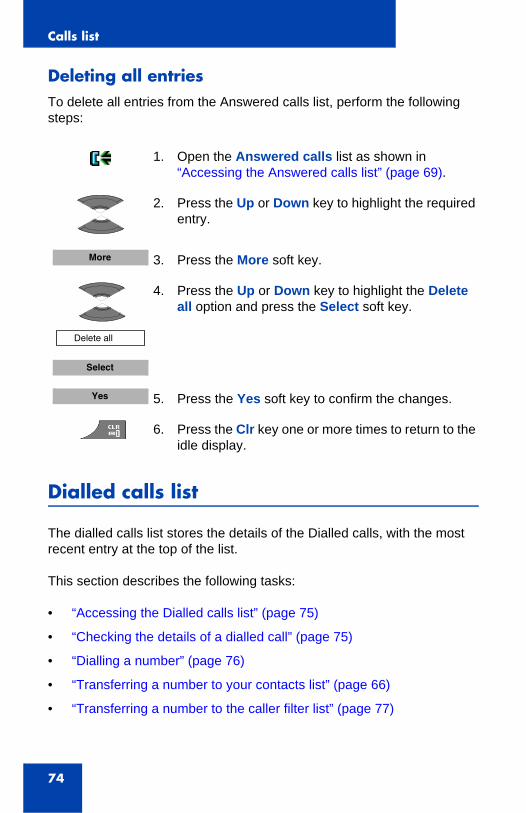
Deleting all entriesTo delete all entries from the Answered calls list, perform the following steps:
Dialled calls list
The dialled calls list stores the details of the Dialled calls, with the most recent entry at the top of the list.
This section describes the following tasks:
• “Accessing the Dialled calls list” (page 75)
• “Checking the details of a dialled call” (page 75)
• “Dialling a number” (page 76)
• “Transferring a number to your contacts list” (page 66)
• “Transferring a number to the caller filter list” (page 77)
1. Open the Answered calls list as shown in “Accessing the Answered calls list” (page 69).
2. Press the Up or Down key to highlight the required entry.
3. Press the More soft key.
4. Press the Up or Down key to highlight the Delete all option and press the Select soft key.
5. Press the Yes soft key to confirm the changes.
6. Press the Clr key one or more times to return to the idle display.
More
Delete all
Select
Yes
Calls list
75
• “Deleting an entry” (page 78)
• “Deleting all entries” (page 79)
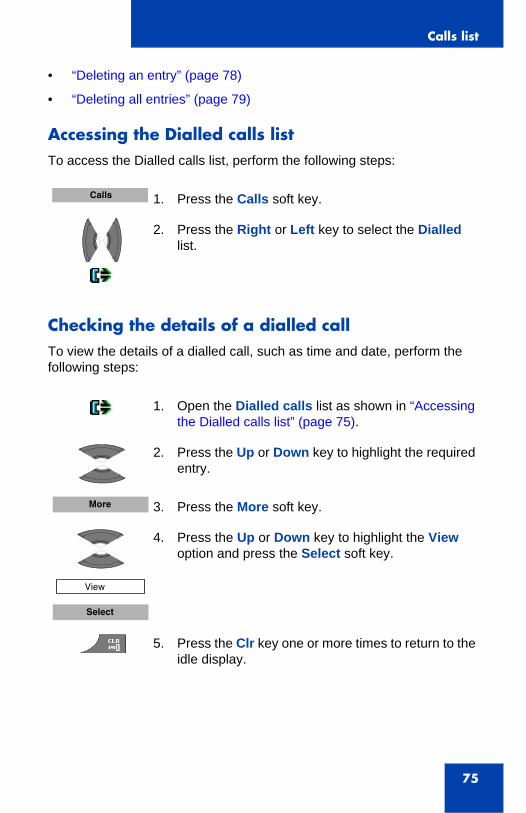
Accessing the Dialled calls listTo access the Dialled calls list, perform the following steps:
Checking the details of a dialled callTo view the details of a dialled call, such as time and date, perform the following steps:
1. Press the Calls soft key.
2. Press the Right or Left key to select the Dialled list.
1. Open the Dialled calls list as shown in “Accessing the Dialled calls list” (page 75).
2. Press the Up or Down key to highlight the required entry.
3. Press the More soft key.
4. Press the Up or Down key to highlight the View option and press the Select soft key.
5. Press the Clr key one or more times to return to the idle display.
Calls
More
View
Select
Calls list
76
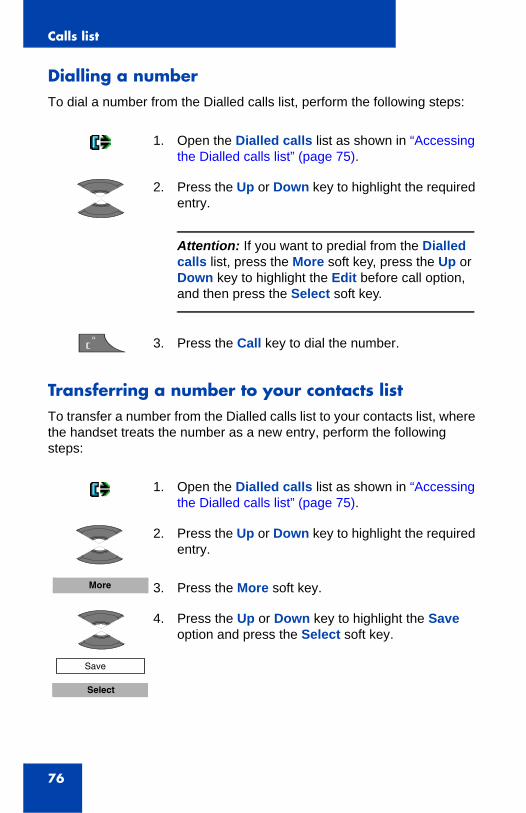
Dialling a number To dial a number from the Dialled calls list, perform the following steps:
Transferring a number to your contacts listTo transfer a number from the Dialled calls list to your contacts list, where the handset treats the number as a new entry, perform the following steps:
1. Open the Dialled calls list as shown in “Accessing the Dialled calls list” (page 75).
2. Press the Up or Down key to highlight the required entry.
Attention: If you want to predial from the Dialled calls list, press the More soft key, press the Up or Down key to highlight the Edit before call option, and then press the Select soft key.
3. Press the Call key to dial the number.
1. Open the Dialled calls list as shown in “Accessing the Dialled calls list” (page 75).
2. Press the Up or Down key to highlight the required entry.
3. Press the More soft key.
4. Press the Up or Down key to highlight the Save option and press the Select soft key.
R
More
Save
Select

Calls list
77
Transferring a number to the caller filter list
To transfer a number from the Dialled calls list to the caller filter list, perform the following steps:
5. Press the Up or Down key to highlight the Contacts option and press the Select soft key.
6. Press the Add soft key and use the Dialpad to edit the number and enter the name (if necessary).
7. Press the Save soft key, and then press the Yes soft key to confirm the changes.
8. Press the Clr key one or more times to return to the idle display.
Attention: The Caller filter feature is available only on the DECT 4070 Handset.
1. Open the Dialled calls list as shown in “Accessing the Dialled calls list” (page 75).
2. Press the Up or Down key to highlight the required entry.
3. Press the More soft key.
4. Press the Up or Down key to highlight the Save option and press the Select soft key.
Contacts
Select
Add
Save
Yes
More
Save
Select
Calls list
78
Deleting an entryTo delete an entry from the Dialled calls list, perform the following steps:
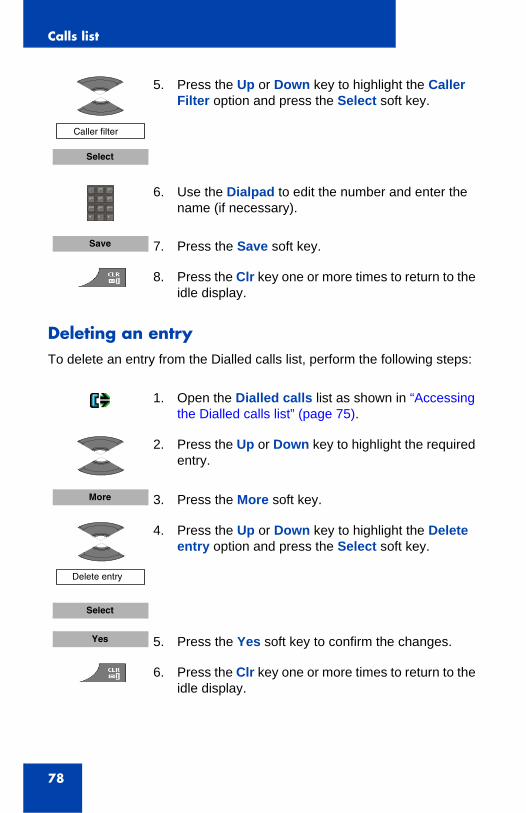
5. Press the Up or Down key to highlight the Caller Filter option and press the Select soft key.
6. Use the Dialpad to edit the number and enter the name (if necessary).
7. Press the Save soft key.
8. Press the Clr key one or more times to return to the idle display.
1. Open the Dialled calls list as shown in “Accessing the Dialled calls list” (page 75).
2. Press the Up or Down key to highlight the required entry.
3. Press the More soft key.
4. Press the Up or Down key to highlight the Delete entry option and press the Select soft key.
5. Press the Yes soft key to confirm the changes.
6. Press the Clr key one or more times to return to the idle display.
Caller filter
Select
Save
More
Delete entry
Select
Yes
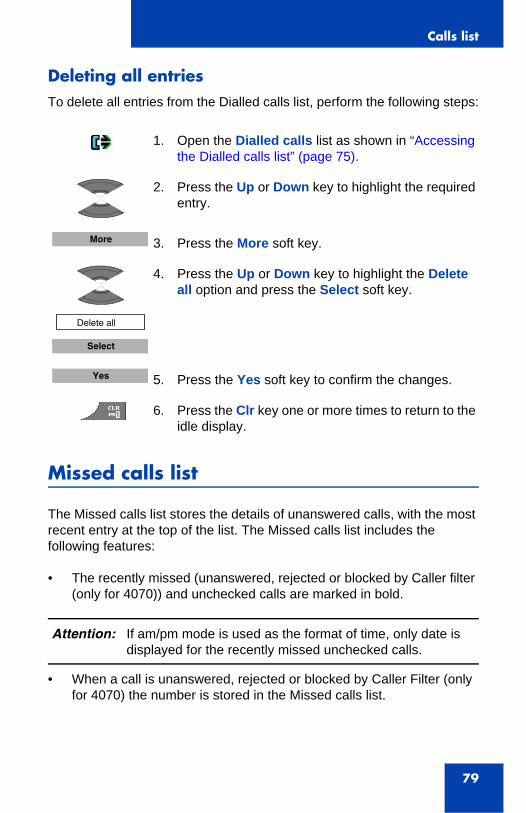
Calls list
79
Deleting all entriesTo delete all entries from the Dialled calls list, perform the following steps:
Missed calls list
The Missed calls list stores the details of unanswered calls, with the most recent entry at the top of the list. The Missed calls list includes the following features:
• The recently missed (unanswered, rejected or blocked by Caller filter (only for 4070)) and unchecked calls are marked in bold.
• When a call is unanswered, rejected or blocked by Caller Filter (only for 4070) the number is stored in the Missed calls list.
1. Open the Dialled calls list as shown in “Accessing the Dialled calls list” (page 75).
2. Press the Up or Down key to highlight the required entry.
3. Press the More soft key.
4. Press the Up or Down key to highlight the Delete all option and press the Select soft key.
5. Press the Yes soft key to confirm the changes.
6. Press the Clr key one or more times to return to the idle display.
Attention: If am/pm mode is used as the format of time, only date is displayed for the recently missed unchecked calls.
More
Delete all
Select
Yes
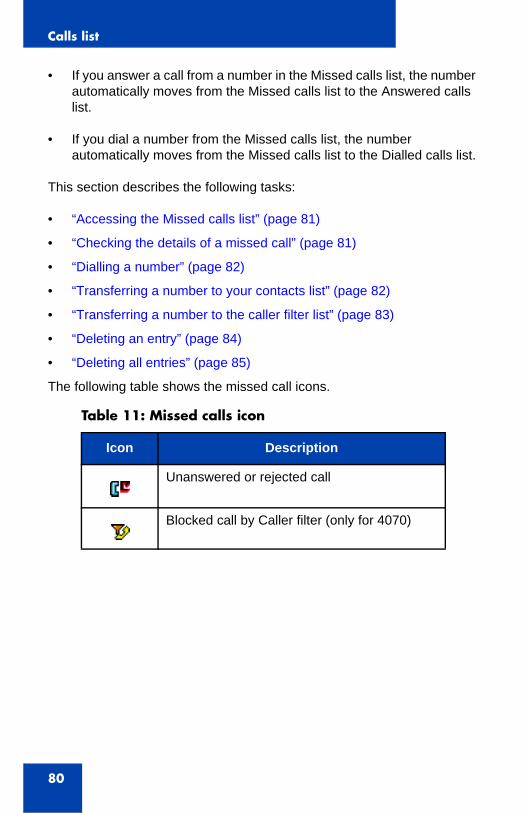
Calls list
80
• If you answer a call from a number in the Missed calls list, the number automatically moves from the Missed calls list to the Answered calls list.
• If you dial a number from the Missed calls list, the number automatically moves from the Missed calls list to the Dialled calls list.
This section describes the following tasks:
• “Accessing the Missed calls list” (page 81)
• “Checking the details of a missed call” (page 81)
• “Dialling a number” (page 82)
• “Transferring a number to your contacts list” (page 82)
• “Transferring a number to the caller filter list” (page 83)
• “Deleting an entry” (page 84)
• “Deleting all entries” (page 85)
The following table shows the missed call icons.
Table 11: Missed calls icon
Icon Description
Unanswered or rejected call
Blocked call by Caller filter (only for 4070)
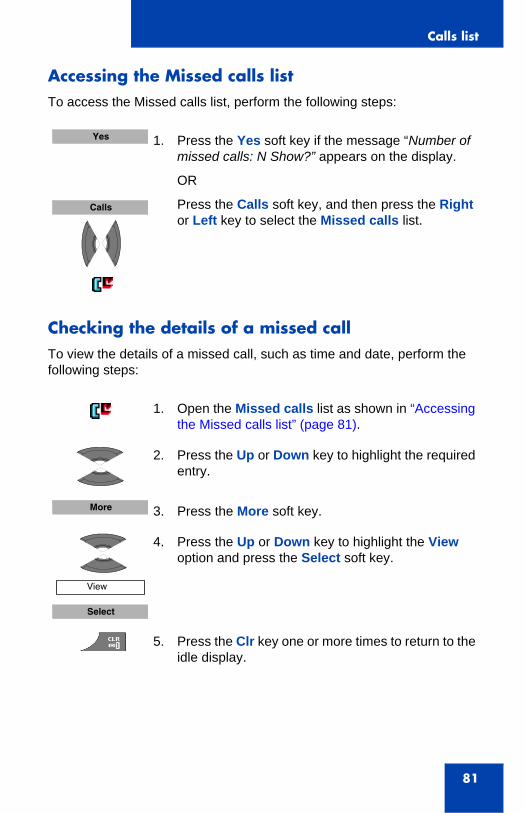
Calls list
81
Accessing the Missed calls listTo access the Missed calls list, perform the following steps:
Checking the details of a missed callTo view the details of a missed call, such as time and date, perform the following steps:
1. Press the Yes soft key if the message “Number of missed calls: N Show?” appears on the display.
OR
Press the Calls soft key, and then press the Right or Left key to select the Missed calls list.
1. Open the Missed calls list as shown in “Accessing the Missed calls list” (page 81).
2. Press the Up or Down key to highlight the required entry.
3. Press the More soft key.
4. Press the Up or Down key to highlight the View option and press the Select soft key.
5. Press the Clr key one or more times to return to the idle display.
Yes
Calls
More
View
Select

Calls list
82
Dialling a numberTo dial a number from the Missed calls list, perform the following steps:
Transferring a number to your contacts listTo transfer a number from the Missed calls list to your contacts list, where the handset treats the number as a new entry, perform the following steps:
1. Open the Missed calls list as shown in “Accessing the Missed calls list” (page 81).
2. Press the Up or Down key to highlight the required entry.
Attention: If you want to predial from the Missed calls list, press the More soft key, press the Up or Down key to highlight the Edit before call option, and press the Select soft key.
3. Press the Call key to dial the number.
1. Open the Missed calls list as shown in “Accessing the Missed calls list” (page 81).
2. Press the Up or Down key to highlight the required entry.
3. Press the More soft key.
4. Press the Up or Down key to highlight the Save option and press the Select soft key.
R
More
Save
Select

Calls list
83
Transferring a number to the caller filter list
To transfer a number from the Missed calls list to the caller filter list, perform the following steps:
5. Press the Up or Down key to highlight the Contacts option and press the Select soft key.
6. Press the Add soft key and use the Dialpad to edit the number and enter the name (if necessary).
7. Press the Save soft key, and then press the Yes soft key to confirm the changes.
8. Press the Clr key one or more times to return to the idle display.
Attention: The Caller filter feature is available only on the DECT 4070 Handset.
1. Open the Missed calls list as shown in “Accessing the Missed calls list” (page 81).
2. Press the Up or Down key to highlight the required entry.
3. Press the More soft key.
4. Press the Up or Down key to highlight the Save option and press the Select soft key.
Contacts
Select
Add
Save
Yes
More
Save
Select

Calls list
84
Deleting an entryTo delete an entry from the Missed calls list, perform the following steps:
5. Press the Up or Down key to highlight the Caller Filter option and press the Select soft key.
6. Use the Dialpad to edit the number and enter the name (if necessary).
7. Press the Save soft key.
8. Press the Clr key one or more times to return to the idle display.
1. Open the Missed calls list as shown in “Accessing the Missed calls list” (page 81).
2. Press the Up or Down key to highlight the required entry.
3. Press the More soft key.
4. Press the Up or Down key to highlight the Delete entry option and press the Select soft key.
5. Press the Yes soft key to confirm the changes.
6. Press the Clr key one or more times to return to the idle display.
Caller filter
Select
Save
More
Delete entry
Select
Yes
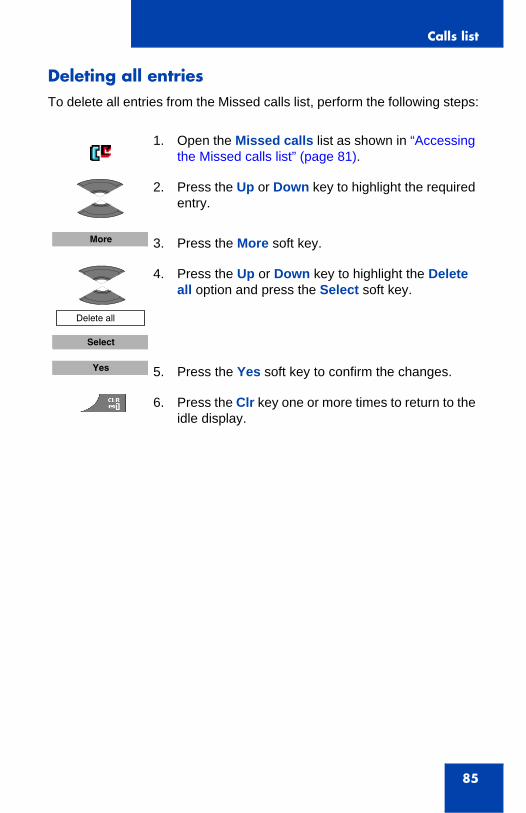
Calls list
85
Deleting all entriesTo delete all entries from the Missed calls list, perform the following steps:
1. Open the Missed calls list as shown in “Accessing the Missed calls list” (page 81).
2. Press the Up or Down key to highlight the required entry.
3. Press the More soft key.
4. Press the Up or Down key to highlight the Delete all option and press the Select soft key.
5. Press the Yes soft key to confirm the changes.
6. Press the Clr key one or more times to return to the idle display.
More
Delete all
Select
Yes
Contacts
86
Contacts
You can use your handset to store contact numbers and names.
The Contacts menu allows you to store a maximum of 50 (without the MEM card) and a maximum of 200 (with the MEM card) phone numbers and names, which you can search alphabetically.
The following restrictions apply:
• Each entry must be a unique name. You can store the same number multiple times if saved under different names.
• Each entry can include a maximum of 16 characters in the name, and a maximum of 32 digits in the contact number.
• Each entry can contain up to 4 numbers. You can identify each number using one of the following types: work, mobile, home, or other.
• If you receive a call from a caller whose number is in the Contact list, the caller name appears on the display.
This section describes the following tasks.
• “Accessing the Contacts menu” (page 87)
• “Adding a new contact” (page 87)
• “Adding a contact number” (page 88)
• “Editing a contact name” (page 91)
• “Editing a contact ringtone” (page 91)
• “Deleting contacts” (page 92)
• “Speed dial feature” (page 93)
• “Transferring numbers to your contacts list” (page 95)
Attention: The actual maximum number of entries can be smaller depending on the usage of the available memory for other features.
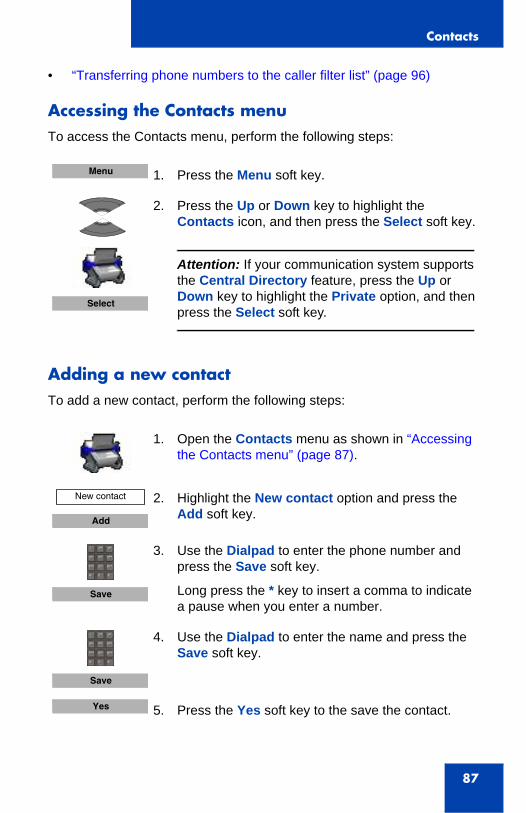
Contacts
87
• “Transferring phone numbers to the caller filter list” (page 96)
Accessing the Contacts menuTo access the Contacts menu, perform the following steps:
Adding a new contactTo add a new contact, perform the following steps:
1. Press the Menu soft key.
2. Press the Up or Down key to highlight the Contacts icon, and then press the Select soft key.
Attention: If your communication system supports the Central Directory feature, press the Up or Down key to highlight the Private option, and then press the Select soft key.
1. Open the Contacts menu as shown in “Accessing the Contacts menu” (page 87).
2. Highlight the New contact option and press the Add soft key.
3. Use the Dialpad to enter the phone number and press the Save soft key.
Long press the * key to insert a comma to indicate a pause when you enter a number.
4. Use the Dialpad to enter the name and press the Save soft key.
5. Press the Yes soft key to the save the contact.
Menu
Select
New contact
Add
Save
Save
Yes
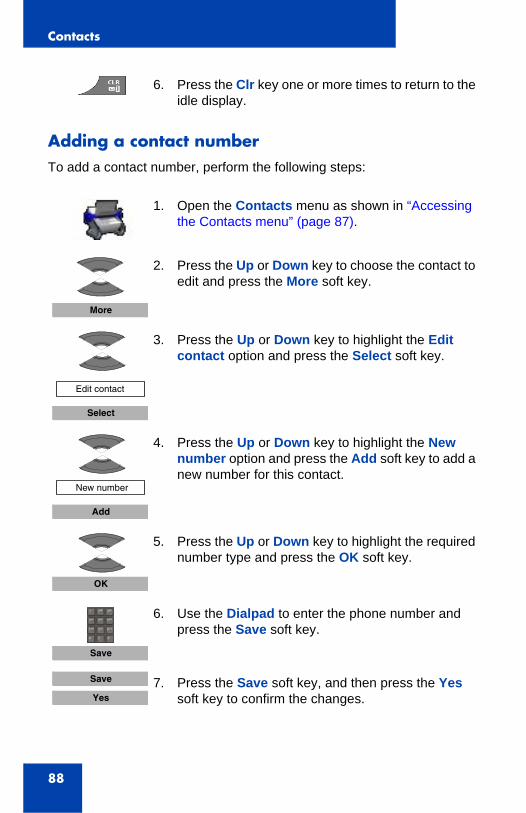
Contacts
88
Adding a contact numberTo add a contact number, perform the following steps:
6. Press the Clr key one or more times to return to the idle display.
1. Open the Contacts menu as shown in “Accessing the Contacts menu” (page 87).
2. Press the Up or Down key to choose the contact to edit and press the More soft key.
3. Press the Up or Down key to highlight the Edit contact option and press the Select soft key.
4. Press the Up or Down key to highlight the New number option and press the Add soft key to add a new number for this contact.
5. Press the Up or Down key to highlight the required number type and press the OK soft key.
6. Use the Dialpad to enter the phone number and press the Save soft key.
7. Press the Save soft key, and then press the Yes soft key to confirm the changes.
More
Edit contact
Select
New number
Add
OK
Save
Save
Yes

Contacts
89
Editing a contact numberTo edit a contact number, perform the following steps:
8. Press the Clr key one or more times to return to the idle display.
1. Open the Contacts menu as shown in “Accessing the Contacts menu” (page 87).
2. Press the Up or Down key to choose the contact to edit and press the More soft key.
3. Press the Up or Down key to highlight the Edit contact option and press the Select soft key.
4. Press the Up or Down key to highlight the number you want to edit, and press the Edit soft key.
5. Press the Up or Down key to highlight the required number type and press the OK soft key.
6. Use the Dialpad to edit the phone number and press the Save soft key.
7. Press the Save soft key, and then press the Yes soft key to confirm the changes.
More
Edit contact
Select
Edit
OK
Save
Save
Yes
Contacts
90
Deleting a contact numberTo delete a contact number, perform the following steps:
8. Press the Clr key one or more times to return to the idle display.
1. Open the Contacts menu as shown in “Accessing the Contacts menu” (page 87).
2. Press the Up or Down key to choose the contact to edit and press the More soft key.
3. Press the Up or Down key to highlight the Edit contact option and press the Select soft key.
4. Press the Up or Down key to highlight the number you want to delete, and press the Edit soft key.
Attention: You can delete the number only if there is more than one number for this contact.
5. Press the OK soft key.
6. Press the Clear soft key to delete the number. Press the Save soft key.
7. Press the Save soft key and then press the Yes soft key to confirm the changes.
8. Press the Clr key one or more times to return to the idle display.
More
Edit contact
Select
Edit
OK
Clear
Save
Save
Yes
Contacts
91
Editing a contact nameTo edit a contact name, perform the following steps:
Editing a contact ringtoneTo change a contact ringtone, perform the following steps:
1. Open the Contacts menu as shown in “Accessing the Contacts menu” (page 87).
2. Press the Up or Down key to choose the contact to edit and press the More soft key.
3. Press the Up or Down key to highlight the Edit contact option and press the Select soft key.
4. Press the Right or Left key to choose the Name menu and press the Edit soft key.
5. Use the Dialpad to edit the contact name and press the Save soft key.
6. Press the Yes soft key to the save the changes.
7. Press the Clr key one or more times to return to the idle display.
1. Open the Contacts menu as shown in “Accessing the Contacts menu” (page 87).
More
Edit contact
Select
Edit
Save
Yes
Contacts
92
Deleting contactsTo delete contacts, perform the following steps:
2. Press the Up or Down key to choose the contact to edit and press the More soft key.
3. Press the Up or Down key to highlight the Edit contact option and press the Select soft key.
4. Press the Right or Left key to choose the Ringtone menu and press the Edit soft key.
5. Press the Up or Down key to highlight the required ringtone and press the Select soft key.
6. Press the Save soft key, and then press the Yes soft key to the save the changes.
Press the Clr key if you do not want to edit a phone number or a name.
7. Press the Clr key one or more times to return to the idle display.
1. Open the Contacts menu as shown in “Accessing the Contacts menu” (page 87).
More
Edit contact
Select
Edit
Select
Save
Yes
Contacts
93
Speed dial featureUse the Speed dial feature to place calls by dialling a one-digit code. To dial a number using Speed dial feature, ensure that your handset is in an idle state and long press the key to which you assigned the number.
This section describes the following tasks:
• “Assigning a speed dial number” (page 93)
• “Reassigning the speed dial number” (page 94)
• “Deleting the speed dial number” (page 95)
Assigning a speed dial numberTo assign a speed dial number, perform the following steps:
2. Press the Up or Down key to choose the contact to delete and press the More soft key.
3. Press the Up or Down key to highlight the Delete contact option and press the Select soft key.
OR
Press the Up or Down key to highlight the Delete all contacts option to delete all contacts and press the Select soft key.
4. Press the Yes soft key to delete the contact.
5. Press the Clr key one or more times to return to the idle display.
Attention: Only the first number added to the contact can be assigned to a Speed Dial key.
1. Open the Contacts menu as shown in “Accessing the Contacts menu” (page 87).
More
Delete contact
Delete all contacts
Select
Yes
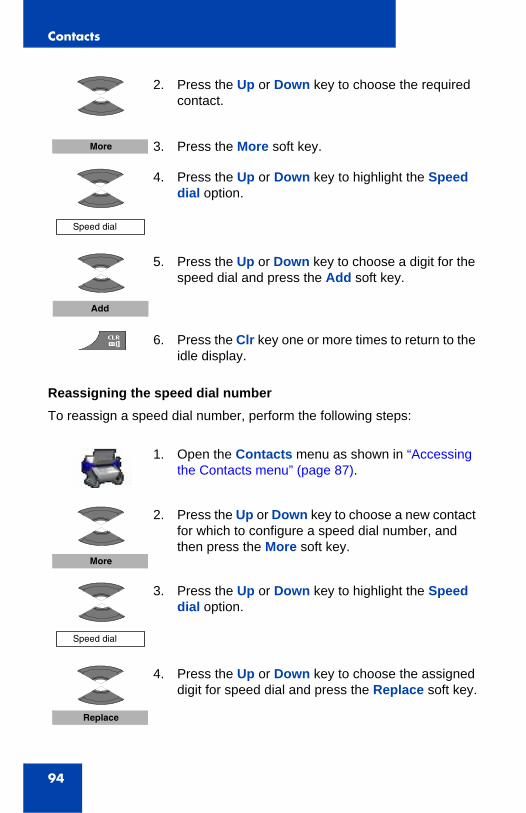
Contacts
94
Reassigning the speed dial numberTo reassign a speed dial number, perform the following steps:
2. Press the Up or Down key to choose the required contact.
3. Press the More soft key.
4. Press the Up or Down key to highlight the Speed dial option.
5. Press the Up or Down key to choose a digit for the speed dial and press the Add soft key.
6. Press the Clr key one or more times to return to the idle display.
1. Open the Contacts menu as shown in “Accessing the Contacts menu” (page 87).
2. Press the Up or Down key to choose a new contact for which to configure a speed dial number, and then press the More soft key.
3. Press the Up or Down key to highlight the Speed dial option.
4. Press the Up or Down key to choose the assigned digit for speed dial and press the Replace soft key.
More
Speed dial
Add
More
Speed dial
Replace
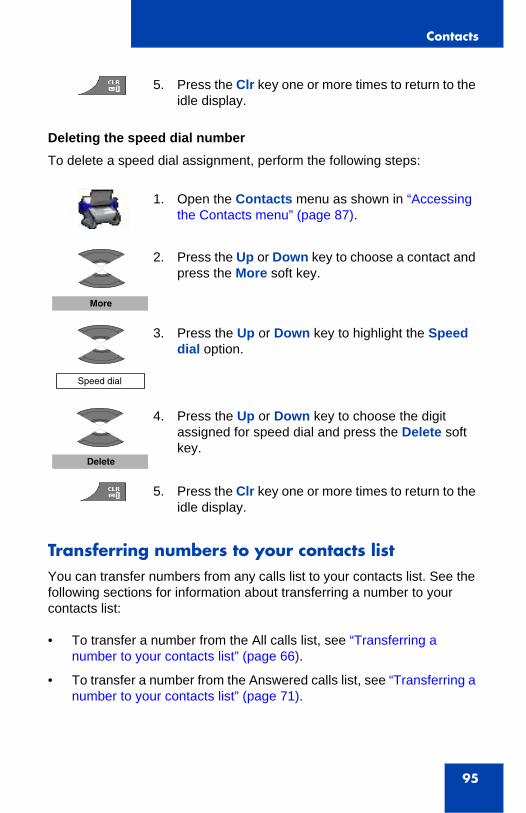
Contacts
95
Deleting the speed dial numberTo delete a speed dial assignment, perform the following steps:
Transferring numbers to your contacts listYou can transfer numbers from any calls list to your contacts list. See the following sections for information about transferring a number to your contacts list:
• To transfer a number from the All calls list, see “Transferring a number to your contacts list” (page 66).
• To transfer a number from the Answered calls list, see “Transferring a number to your contacts list” (page 71).
5. Press the Clr key one or more times to return to the idle display.
1. Open the Contacts menu as shown in “Accessing the Contacts menu” (page 87).
2. Press the Up or Down key to choose a contact and press the More soft key.
3. Press the Up or Down key to highlight the Speed dial option.
4. Press the Up or Down key to choose the digit assigned for speed dial and press the Delete soft key.
5. Press the Clr key one or more times to return to the idle display.
More
Speed dial
Delete
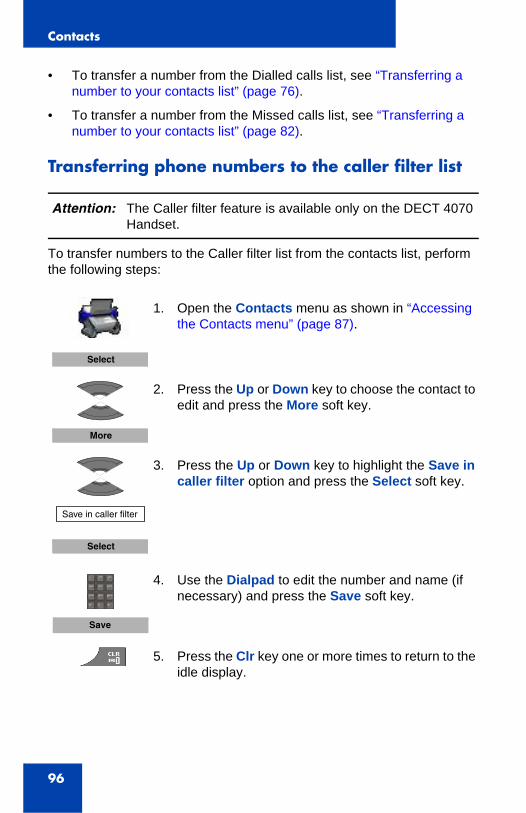
Contacts
96
• To transfer a number from the Dialled calls list, see “Transferring a number to your contacts list” (page 76).
• To transfer a number from the Missed calls list, see “Transferring a number to your contacts list” (page 82).
Transferring phone numbers to the caller filter list
To transfer numbers to the Caller filter list from the contacts list, perform the following steps:
Attention: The Caller filter feature is available only on the DECT 4070 Handset.
1. Open the Contacts menu as shown in “Accessing the Contacts menu” (page 87).
2. Press the Up or Down key to choose the contact to edit and press the More soft key.
3. Press the Up or Down key to highlight the Save in caller filter option and press the Select soft key.
4. Use the Dialpad to edit the number and name (if necessary) and press the Save soft key.
5. Press the Clr key one or more times to return to the idle display.
Select
More
Save in caller filter
Select
Save

Messaging
97
Messaging
You can send and receive text messages using the DECT 4070 Handset.
This section describes the following tasks:
• “Message limitations” (page 97)
• “New messages and drafts” (page 98)
• “Inbox” (page 102)
• “Sent messages” (page 108)
• “Configuring the Sent message option” (page 113)
• “Normal and urgent messages” (page 113)
• “Message list full” (page 115)
Message limitations
The following limitations apply to the Messaging feature:
• The system can store up to 80 messages.
• You can send or receive messages only if your handset is within the coverage area.
• An error beep sounds if the message is undelivered.
Attention: The Messaging feature is not available on the 4027 Handset.
Attention: The Messaging feature is available only if supported by your communication system. Contact your system administrator to determine if you can use this feature.
Attention: The actual maximum number of messages can be smaller depending on the usage of the available memory for other features.
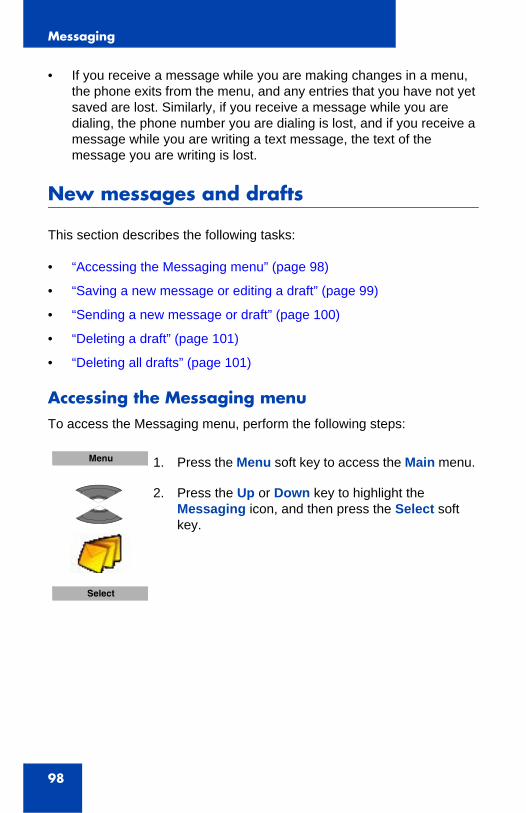
Messaging
98
• If you receive a message while you are making changes in a menu, the phone exits from the menu, and any entries that you have not yet saved are lost. Similarly, if you receive a message while you are dialing, the phone number you are dialing is lost, and if you receive a message while you are writing a text message, the text of the message you are writing is lost.
New messages and drafts
This section describes the following tasks:
• “Accessing the Messaging menu” (page 98)
• “Saving a new message or editing a draft” (page 99)
• “Sending a new message or draft” (page 100)
• “Deleting a draft” (page 101)
• “Deleting all drafts” (page 101)
Accessing the Messaging menuTo access the Messaging menu, perform the following steps:
1. Press the Menu soft key to access the Main menu.
2. Press the Up or Down key to highlight the Messaging icon, and then press the Select soft key.
Menu
Select
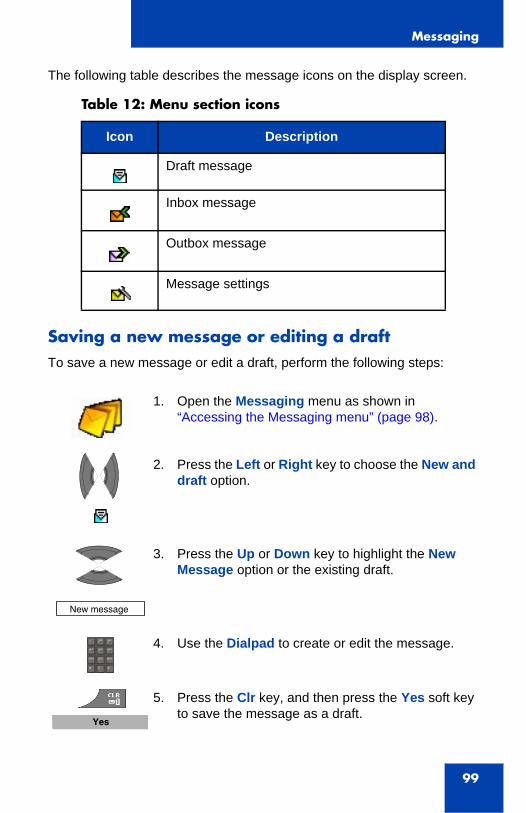
Messaging
99
The following table describes the message icons on the display screen.
Saving a new message or editing a draftTo save a new message or edit a draft, perform the following steps:
Table 12: Menu section icons
Icon Description
Draft message
Inbox message
Outbox message
Message settings
1. Open the Messaging menu as shown in “Accessing the Messaging menu” (page 98).
2. Press the Left or Right key to choose the New and draft option.
3. Press the Up or Down key to highlight the New Message option or the existing draft.
4. Use the Dialpad to create or edit the message.
5. Press the Clr key, and then press the Yes soft key to save the message as a draft.
New message
Yes
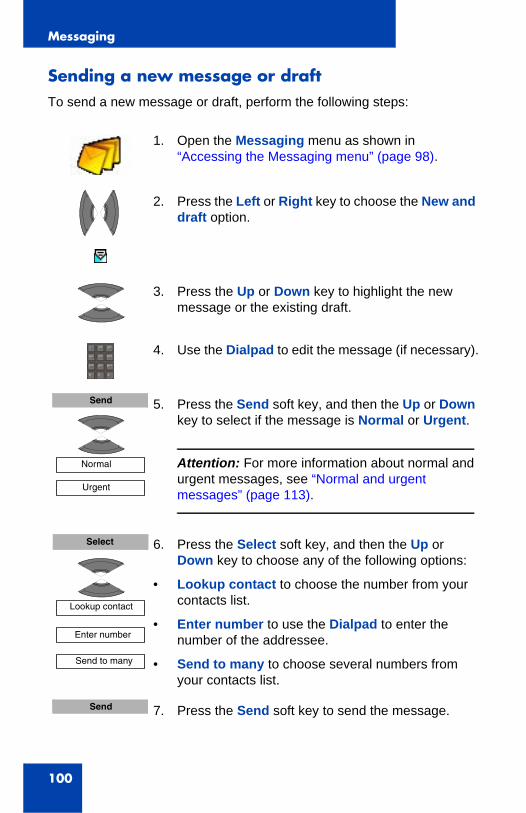
Messaging
100
Sending a new message or draftTo send a new message or draft, perform the following steps:
1. Open the Messaging menu as shown in “Accessing the Messaging menu” (page 98).
2. Press the Left or Right key to choose the New and draft option.
3. Press the Up or Down key to highlight the new message or the existing draft.
4. Use the Dialpad to edit the message (if necessary).
5. Press the Send soft key, and then the Up or Down key to select if the message is Normal or Urgent.
Attention: For more information about normal and urgent messages, see “Normal and urgent messages” (page 113).
6. Press the Select soft key, and then the Up or Down key to choose any of the following options:
• Lookup contact to choose the number from your contacts list.
• Enter number to use the Dialpad to enter the number of the addressee.
• Send to many to choose several numbers from your contacts list.
7. Press the Send soft key to send the message.
Send
Normal
Urgent
Select
Lookup contact
Enter number
Send to many
Send
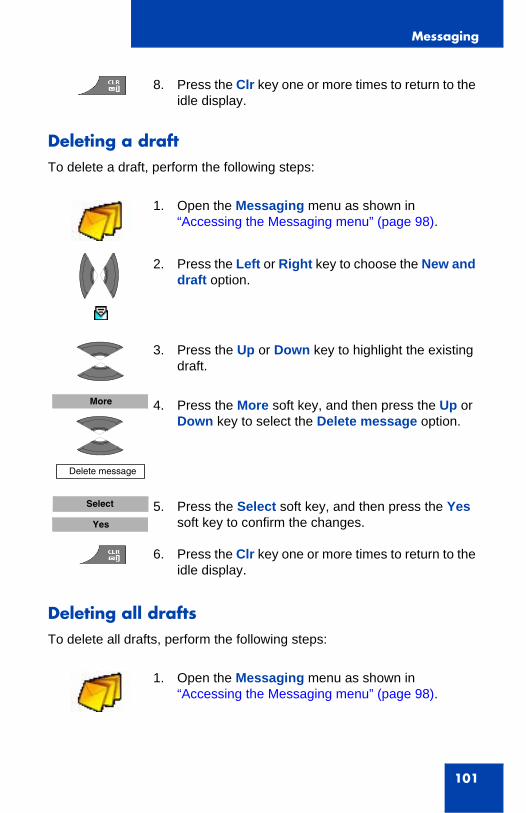
Messaging
101
Deleting a draftTo delete a draft, perform the following steps:
Deleting all draftsTo delete all drafts, perform the following steps:
8. Press the Clr key one or more times to return to the idle display.
1. Open the Messaging menu as shown in “Accessing the Messaging menu” (page 98).
2. Press the Left or Right key to choose the New and draft option.
3. Press the Up or Down key to highlight the existing draft.
4. Press the More soft key, and then press the Up or Down key to select the Delete message option.
5. Press the Select soft key, and then press the Yes soft key to confirm the changes.
6. Press the Clr key one or more times to return to the idle display.
1. Open the Messaging menu as shown in “Accessing the Messaging menu” (page 98).
More
Delete message
Select
Yes
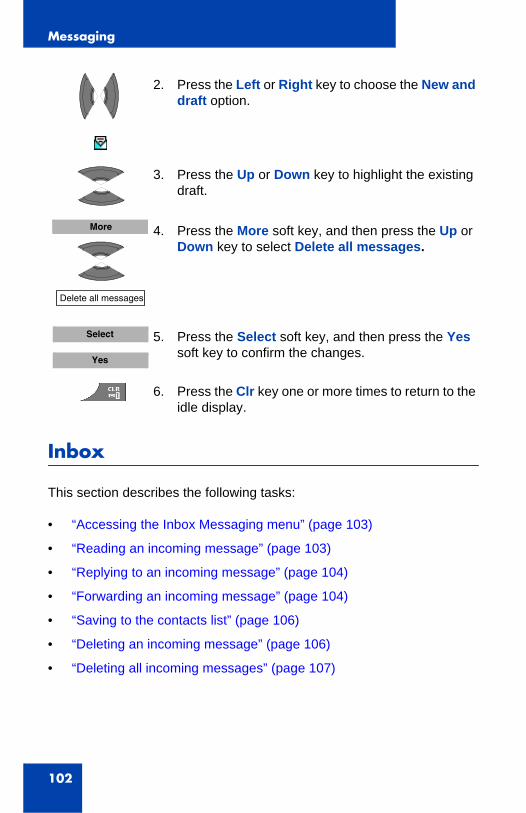
Messaging
102
Inbox
This section describes the following tasks:
• “Accessing the Inbox Messaging menu” (page 103)
• “Reading an incoming message” (page 103)
• “Replying to an incoming message” (page 104)
• “Forwarding an incoming message” (page 104)
• “Saving to the contacts list” (page 106)
• “Deleting an incoming message” (page 106)
• “Deleting all incoming messages” (page 107)
2. Press the Left or Right key to choose the New and draft option.
3. Press the Up or Down key to highlight the existing draft.
4. Press the More soft key, and then press the Up or Down key to select Delete all messages.
5. Press the Select soft key, and then press the Yes soft key to confirm the changes.
6. Press the Clr key one or more times to return to the idle display.
More
Delete all messages
Select
Yes

Messaging
103
Accessing the Inbox Messaging menuTo access the Inbox Messaging menu, perform the following steps:
Reading an incoming messageTo read an incoming message, perform the following steps:
1. Press the Menu soft key to access the Main menu.
2. Press the Up or Down key to highlight the Messaging icon, and then press the Select soft key.
3. Press the Left or Right key to choose the Inbox menu section.
1. Open the Inbox menu as shown in “Accessing the Inbox Messaging menu” (page 103).
2. Press the Up or Down key to highlight the incoming message.
3. Press the Select soft key to read the message.
4. Press the Up or Down key to scroll the text of the message.
5. Press the Clr key one or more times to return to the idle display.
Menu
Select
Select
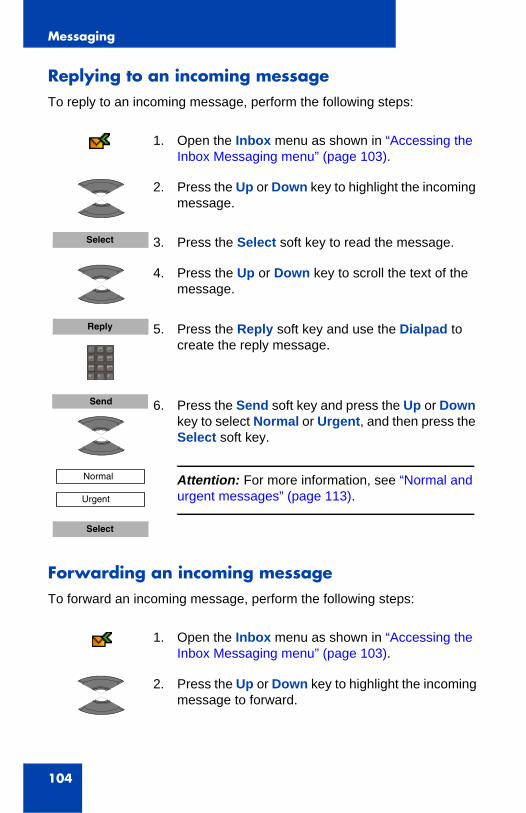
Messaging
104
Replying to an incoming messageTo reply to an incoming message, perform the following steps:
Forwarding an incoming messageTo forward an incoming message, perform the following steps:
1. Open the Inbox menu as shown in “Accessing the Inbox Messaging menu” (page 103).
2. Press the Up or Down key to highlight the incoming message.
3. Press the Select soft key to read the message.
4. Press the Up or Down key to scroll the text of the message.
5. Press the Reply soft key and use the Dialpad to create the reply message.
6. Press the Send soft key and press the Up or Down key to select Normal or Urgent, and then press the Select soft key.
Attention: For more information, see “Normal and urgent messages” (page 113).
1. Open the Inbox menu as shown in “Accessing the Inbox Messaging menu” (page 103).
2. Press the Up or Down key to highlight the incoming message to forward.
Select
Reply
Send
Normal
Urgent
Select

Messaging
105
3. Press the More soft key.
4. Press the Up or Down key to highlight the Forward option.
5. Use the Dialpad to edit the message.
6. Press the Send soft key and then press the Up or Down key to select if the message is Normal or Urgent.
Attention: For more information, see “Normal and urgent messages” (page 113).
7. Press the Select soft key and then the Up or Down key to choose any of the following options:
• Lookup contact to choose the number from your contacts list.
• Enter number to use the Dialpad to enter the number of the addressee.
• Send to many to choose several numbers from your contact list.
8. Press the Send soft key to send the message.
9. Press the Clr key one or more times to return to the idle display.
More
Forward
Send
Normal
Urgent
Select
Lookup contact
Enter number
Send to many
Send

Messaging
106
Saving to the contacts listTo save a number to your contacts list, perform the following steps:
Deleting an incoming messageTo delete an incoming message, perform the following steps:
1. Open the Inbox menu as shown in “Accessing the Inbox Messaging menu” (page 103).
2. Press the Up or Down key to highlight the incoming message.
3. Press the More soft key.
4. Press the Up or Down key to highlight the Save to contacts option.
5. Press the Add soft key and use the dialpad to edit the number and enter the name (if necessary).
6. Press the Save soft key, and then press the Yes soft key to confirm the changes.
7. Press the Clr key one or more times to return to the idle display.
1. Open the Inbox menu as shown in “Accessing the Inbox Messaging menu” (page 103).
2. Press the Up or Down key to highlight the incoming message to delete.
More
Save to contacts
Add
Save
Yes
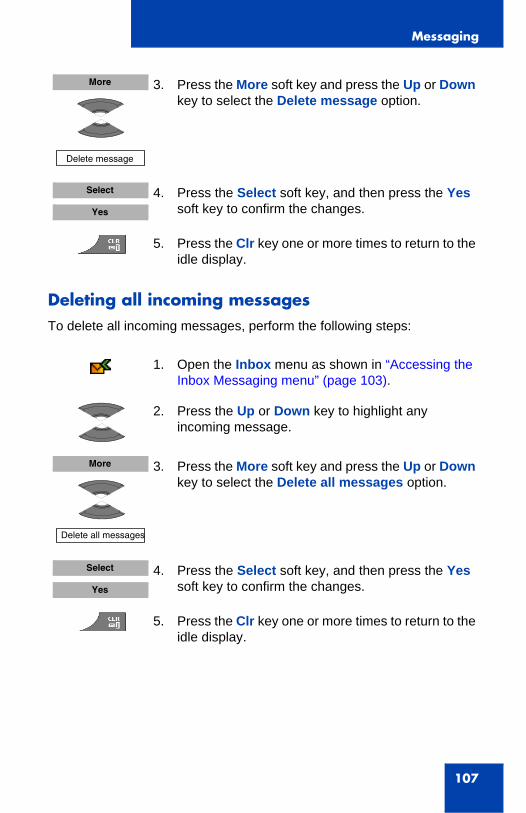
Messaging
107
Deleting all incoming messagesTo delete all incoming messages, perform the following steps:
3. Press the More soft key and press the Up or Down key to select the Delete message option.
4. Press the Select soft key, and then press the Yes soft key to confirm the changes.
5. Press the Clr key one or more times to return to the idle display.
1. Open the Inbox menu as shown in “Accessing the Inbox Messaging menu” (page 103).
2. Press the Up or Down key to highlight any incoming message.
3. Press the More soft key and press the Up or Down key to select the Delete all messages option.
4. Press the Select soft key, and then press the Yes soft key to confirm the changes.
5. Press the Clr key one or more times to return to the idle display.
More
Delete message
Select
Yes
More
Delete all messages
Select
Yes
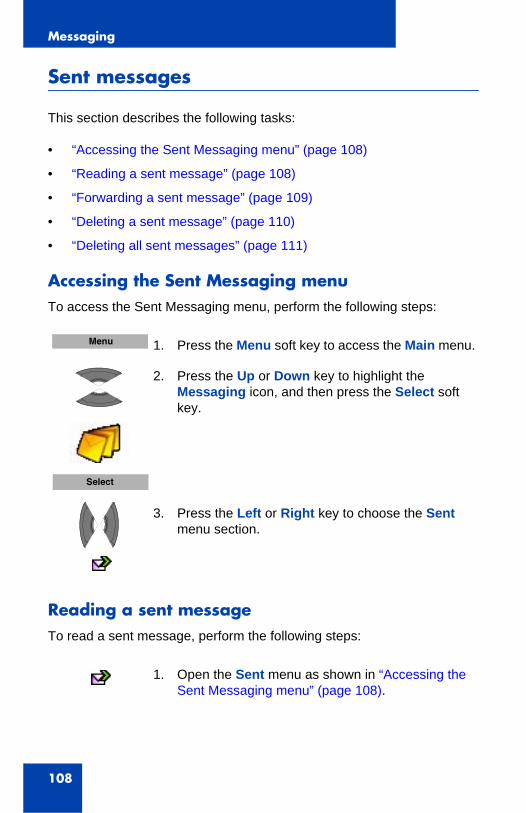
Messaging
108
Sent messages
This section describes the following tasks:
• “Accessing the Sent Messaging menu” (page 108)
• “Reading a sent message” (page 108)
• “Forwarding a sent message” (page 109)
• “Deleting a sent message” (page 110)
• “Deleting all sent messages” (page 111)
Accessing the Sent Messaging menuTo access the Sent Messaging menu, perform the following steps:
Reading a sent messageTo read a sent message, perform the following steps:
1. Press the Menu soft key to access the Main menu.
2. Press the Up or Down key to highlight the Messaging icon, and then press the Select soft key.
3. Press the Left or Right key to choose the Sent menu section.
1. Open the Sent menu as shown in “Accessing the Sent Messaging menu” (page 108).
Menu
Select
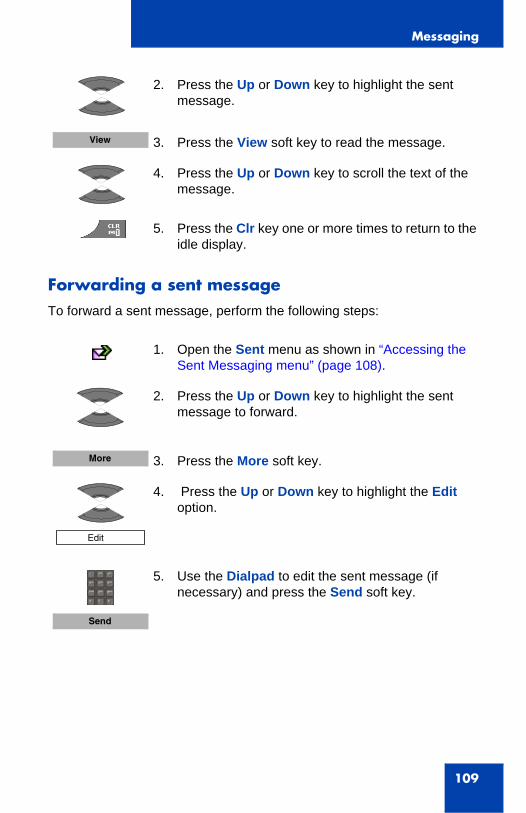
Messaging
109
Forwarding a sent messageTo forward a sent message, perform the following steps:
2. Press the Up or Down key to highlight the sent message.
3. Press the View soft key to read the message.
4. Press the Up or Down key to scroll the text of the message.
5. Press the Clr key one or more times to return to the idle display.
1. Open the Sent menu as shown in “Accessing the Sent Messaging menu” (page 108).
2. Press the Up or Down key to highlight the sent message to forward.
3. Press the More soft key.
4. Press the Up or Down key to highlight the Edit option.
5. Use the Dialpad to edit the sent message (if necessary) and press the Send soft key.
View
More
Edit
Send
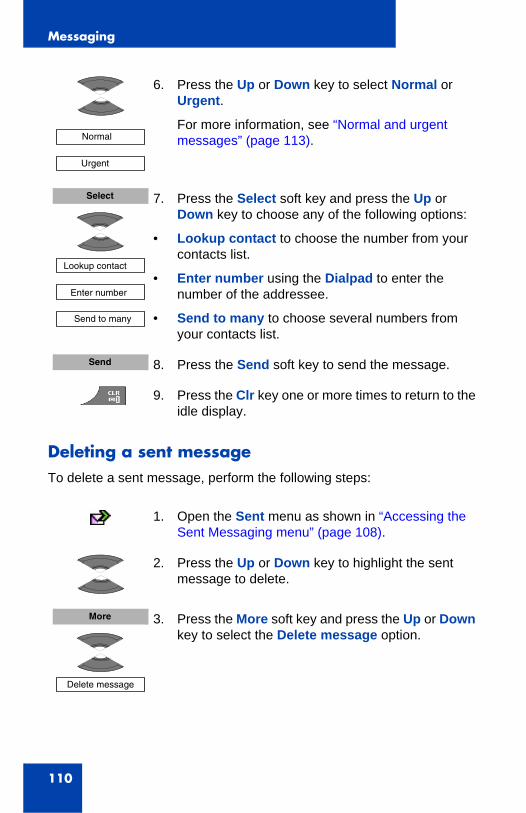
Messaging
110
Deleting a sent messageTo delete a sent message, perform the following steps:
6. Press the Up or Down key to select Normal or Urgent.
For more information, see “Normal and urgent messages” (page 113).
7. Press the Select soft key and press the Up or Down key to choose any of the following options:
• Lookup contact to choose the number from your contacts list.
• Enter number using the Dialpad to enter the number of the addressee.
• Send to many to choose several numbers from your contacts list.
8. Press the Send soft key to send the message.
9. Press the Clr key one or more times to return to the idle display.
1. Open the Sent menu as shown in “Accessing the Sent Messaging menu” (page 108).
2. Press the Up or Down key to highlight the sent message to delete.
3. Press the More soft key and press the Up or Down key to select the Delete message option.
Normal
Urgent
Select
Lookup contact
Enter number
Send to many
Send
More
Delete message
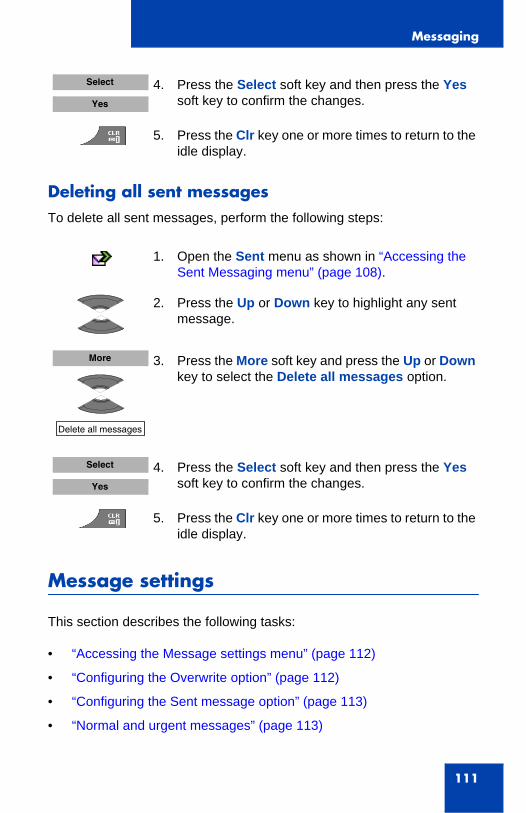
Messaging
111
Deleting all sent messagesTo delete all sent messages, perform the following steps:
Message settings
This section describes the following tasks:
• “Accessing the Message settings menu” (page 112)
• “Configuring the Overwrite option” (page 112)
• “Configuring the Sent message option” (page 113)
• “Normal and urgent messages” (page 113)
4. Press the Select soft key and then press the Yes soft key to confirm the changes.
5. Press the Clr key one or more times to return to the idle display.
1. Open the Sent menu as shown in “Accessing the Sent Messaging menu” (page 108).
2. Press the Up or Down key to highlight any sent message.
3. Press the More soft key and press the Up or Down key to select the Delete all messages option.
4. Press the Select soft key and then press the Yes soft key to confirm the changes.
5. Press the Clr key one or more times to return to the idle display.
Select
Yes
More
Delete all messages
Select
Yes
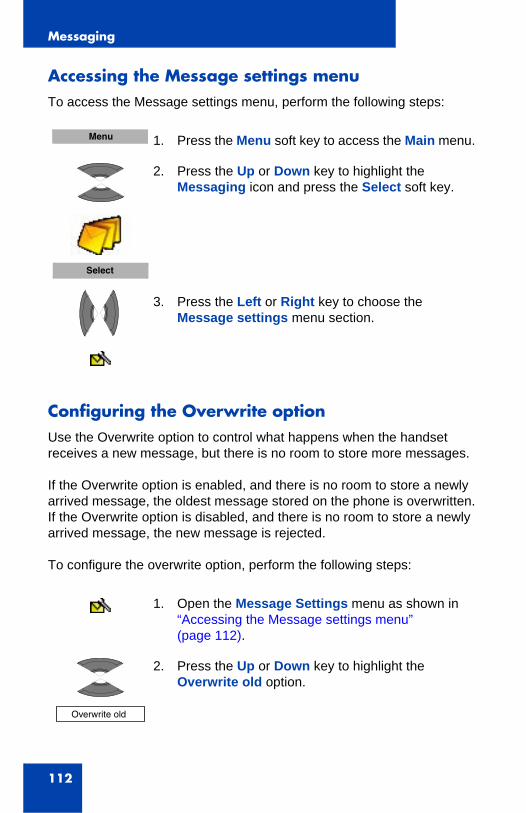
Messaging
112
Accessing the Message settings menuTo access the Message settings menu, perform the following steps:
Configuring the Overwrite optionUse the Overwrite option to control what happens when the handset receives a new message, but there is no room to store more messages.
If the Overwrite option is enabled, and there is no room to store a newly arrived message, the oldest message stored on the phone is overwritten. If the Overwrite option is disabled, and there is no room to store a newly arrived message, the new message is rejected.
To configure the overwrite option, perform the following steps:
1. Press the Menu soft key to access the Main menu.
2. Press the Up or Down key to highlight the Messaging icon and press the Select soft key.
3. Press the Left or Right key to choose the Message settings menu section.
1. Open the Message Settings menu as shown in “Accessing the Message settings menu” (page 112).
2. Press the Up or Down key to highlight the Overwrite old option.
Menu
Select
Overwrite old
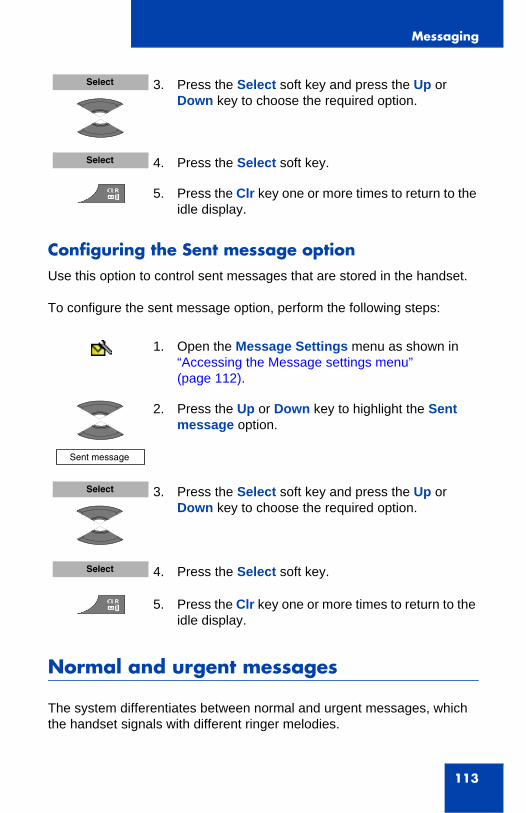
Messaging
113
Configuring the Sent message optionUse this option to control sent messages that are stored in the handset.
To configure the sent message option, perform the following steps:
Normal and urgent messages
The system differentiates between normal and urgent messages, which the handset signals with different ringer melodies.
3. Press the Select soft key and press the Up or Down key to choose the required option.
4. Press the Select soft key.
5. Press the Clr key one or more times to return to the idle display.
1. Open the Message Settings menu as shown in “Accessing the Message settings menu” (page 112).
2. Press the Up or Down key to highlight the Sent message option.
3. Press the Select soft key and press the Up or Down key to choose the required option.
4. Press the Select soft key.
5. Press the Clr key one or more times to return to the idle display.
Select
Select
Sent message
Select
Select
Messaging
114
Normal messagesYou need not confirm normal messages. When you turn on normal message display, normal messages signal on the display immediately upon receipt. If you turn off normal message display, normal messages do not display.
Unless you disable the ringer, the melody for normal messages plays when you receive a message. If you receive a normal message during a call, a short alert tone sounds.
Urgent messagesUrgent messages require receipt confirmation. An activated dialpad lock temporarily deactivates after you receive an urgent message so you can acknowledge the receipt. The handset shows urgent messages immediately on the display.
Unless you disable the ringer, a melody plays when you receive an urgent message. The ringer volume increases to the maximum during the signalling process. If you receive an urgent message during a call, a repeated alert tone sounds.
Confirming receiptsYou must confirm the receipt of an urgent message. If you do not confirm an urgent message within 60 seconds, the initiator receives a message that indicates the message was not delivered.
When you receive an urgent message, choose one of the following options:
1. Press OK or Delete to confirm the receipt of a message.
All other keys remain blocked until you confirm the message with OK or Delete.
OK
Delete
Messaging
115
Message list full
The message list can store a maximum of 80 messages; if it is full, an info message “Storage full” appears on the display and the system handles a new message according to the overwrite setting. For more information about overwrite settings, see “Configuring the Overwrite option” (page 112).
After you configure the overwrite settings, the following actions occur when the message list is full:
• if you turn on Overwrite, the handset deletes the oldest message before it stores the new message.
• if you turn off Overwrite, the handset shows the message but does not store it if the message is urgent, or rejects the message if it is normal.
Calendar
116
Calendar
View the calendar in weekly or monthly format. You can also set up reminders, appointments, and meeting alerts.
The Calendar allows you to store a maximum of 80 (without the MEM card) and a maximum of 100 (with the MEM card) appointments.
This section describes the following tasks:
• “Accessing the Calendar feature” (page 117)
• “Changing the calendar format” (page 117)
• “Selecting a date” (page 117)
• “Adding an appointment” (page 118)
• “Viewing an appointment” (page 120)
• “Editing an appointment” (page 120)
• “Copying an appointment” (page 122)
• “Deleting an appointment” (page 123)
Attention: The actual maximum number of appointments can be smaller depending on the usage of the available memory for other features.
CAUTIONEvery time you remove the battery pack or switch the handset off, it loses the time and date information; you must manually reset it after you reinstall the battery pack or switch the handset off and on.
If you don't set valid time and date, calendar won't function correctly.
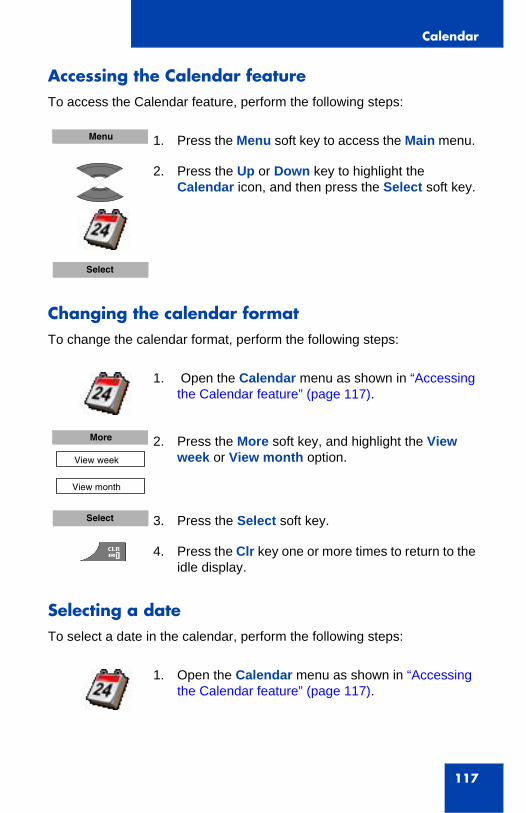
Calendar
117
Accessing the Calendar featureTo access the Calendar feature, perform the following steps:
Changing the calendar formatTo change the calendar format, perform the following steps:
Selecting a dateTo select a date in the calendar, perform the following steps:
1. Press the Menu soft key to access the Main menu.
2. Press the Up or Down key to highlight the Calendar icon, and then press the Select soft key.
1. Open the Calendar menu as shown in “Accessing the Calendar feature” (page 117).
2. Press the More soft key, and highlight the View week or View month option.
3. Press the Select soft key.
4. Press the Clr key one or more times to return to the idle display.
1. Open the Calendar menu as shown in “Accessing the Calendar feature” (page 117).
Menu
Select
More
View week
View month
Select
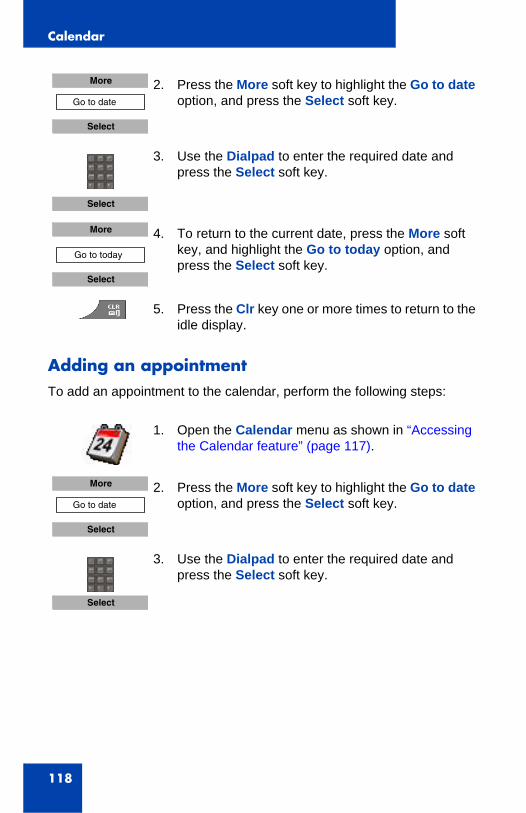
Calendar
118
Adding an appointmentTo add an appointment to the calendar, perform the following steps:
2. Press the More soft key to highlight the Go to date option, and press the Select soft key.
3. Use the Dialpad to enter the required date and press the Select soft key.
4. To return to the current date, press the More soft key, and highlight the Go to today option, and press the Select soft key.
5. Press the Clr key one or more times to return to the idle display.
1. Open the Calendar menu as shown in “Accessing the Calendar feature” (page 117).
2. Press the More soft key to highlight the Go to date option, and press the Select soft key.
3. Use the Dialpad to enter the required date and press the Select soft key.
More
Go to date
Select
Select
More
Go to today
Select
More
Go to date
Select
Select
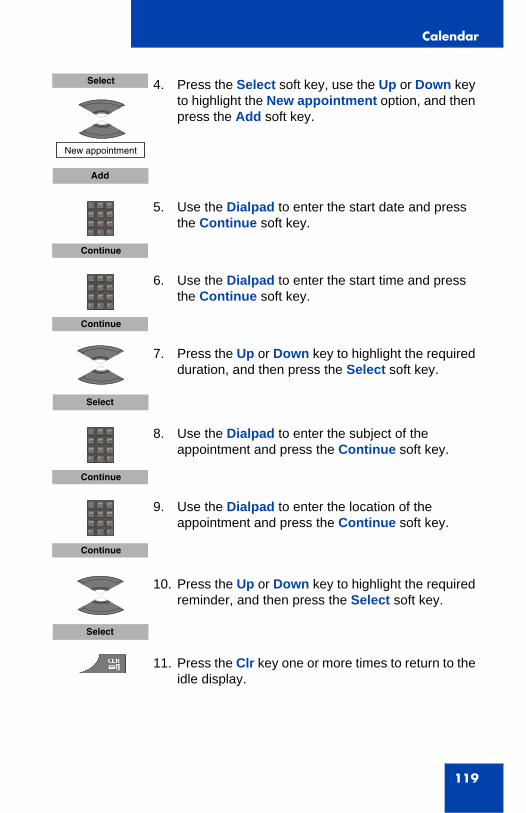
Calendar
119
4. Press the Select soft key, use the Up or Down key to highlight the New appointment option, and then press the Add soft key.
5. Use the Dialpad to enter the start date and press the Continue soft key.
6. Use the Dialpad to enter the start time and press the Continue soft key.
7. Press the Up or Down key to highlight the required duration, and then press the Select soft key.
8. Use the Dialpad to enter the subject of the appointment and press the Continue soft key.
9. Use the Dialpad to enter the location of the appointment and press the Continue soft key.
10. Press the Up or Down key to highlight the required reminder, and then press the Select soft key.
11. Press the Clr key one or more times to return to the idle display.
Select
New appointment
Add
Continue
Continue
Select
Continue
Continue
Select

Calendar
120
Viewing an appointmentTo view an appointment in the calendar, perform the following steps:
Editing an appointmentTo edit an appointment in the calendar, perform the following steps:
1. Open the Calendar menu as shown in “Accessing the Calendar feature” (page 117).
2. Press the More soft key, to highlight the Go to date option, and then press the Select soft key.
3. Use the Dialpad to enter the date of the appointment and press the Select soft key.
4. Press the Select soft key and then press the Up or Down key to highlight the appointment to view, and press the View soft key.
5. Press the Clr key one or more times to return to the idle display.
1. Open the Calendar menu as shown in “Accessing the Calendar feature” (page 117).
2. Press the More soft key, to highlight the Go to date option, and press the Select soft key.
More
Go to date
Select
Select
Select
View
More
Go to date
Select
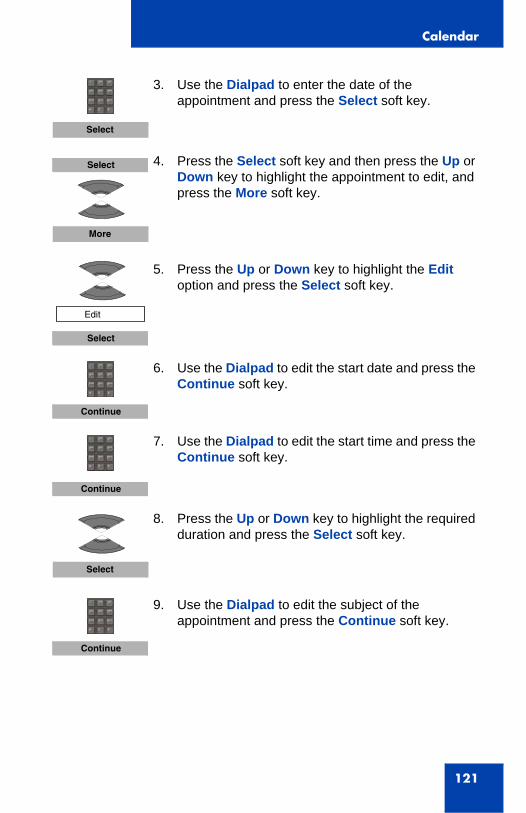
Calendar
121
3. Use the Dialpad to enter the date of the appointment and press the Select soft key.
4. Press the Select soft key and then press the Up or Down key to highlight the appointment to edit, and press the More soft key.
5. Press the Up or Down key to highlight the Edit option and press the Select soft key.
6. Use the Dialpad to edit the start date and press the Continue soft key.
7. Use the Dialpad to edit the start time and press the Continue soft key.
8. Press the Up or Down key to highlight the required duration and press the Select soft key.
9. Use the Dialpad to edit the subject of the appointment and press the Continue soft key.
Select
Select
More
Edit
Select
Continue
Continue
Select
Continue
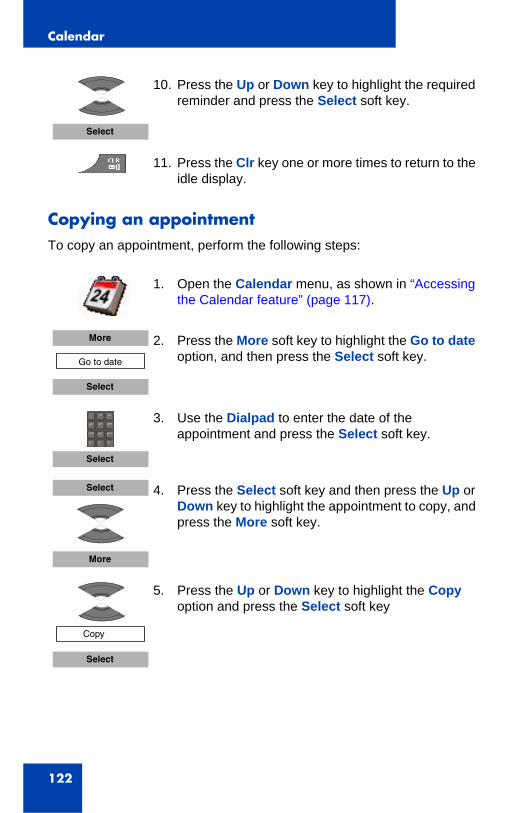
Calendar
122
Copying an appointmentTo copy an appointment, perform the following steps:
10. Press the Up or Down key to highlight the required reminder and press the Select soft key.
11. Press the Clr key one or more times to return to the idle display.
1. Open the Calendar menu, as shown in “Accessing the Calendar feature” (page 117).
2. Press the More soft key to highlight the Go to date option, and then press the Select soft key.
3. Use the Dialpad to enter the date of the appointment and press the Select soft key.
4. Press the Select soft key and then press the Up or Down key to highlight the appointment to copy, and press the More soft key.
5. Press the Up or Down key to highlight the Copy option and press the Select soft key
Select
More
Go to date
Select
Select
Select
More
Copy
Select
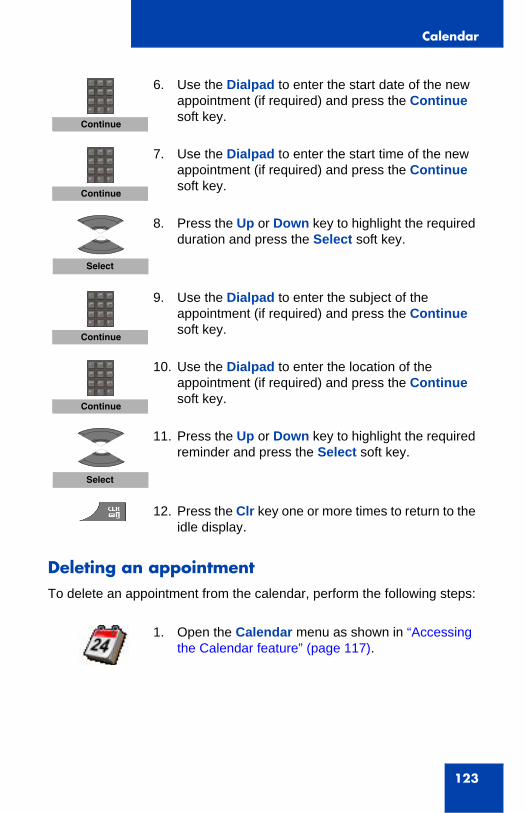
Calendar
123
Deleting an appointmentTo delete an appointment from the calendar, perform the following steps:
6. Use the Dialpad to enter the start date of the new appointment (if required) and press the Continue soft key.
7. Use the Dialpad to enter the start time of the new appointment (if required) and press the Continue soft key.
8. Press the Up or Down key to highlight the required duration and press the Select soft key.
9. Use the Dialpad to enter the subject of the appointment (if required) and press the Continue soft key.
10. Use the Dialpad to enter the location of the appointment (if required) and press the Continue soft key.
11. Press the Up or Down key to highlight the required reminder and press the Select soft key.
12. Press the Clr key one or more times to return to the idle display.
1. Open the Calendar menu as shown in “Accessing the Calendar feature” (page 117).
Continue
Continue
Select
Continue
Continue
Select
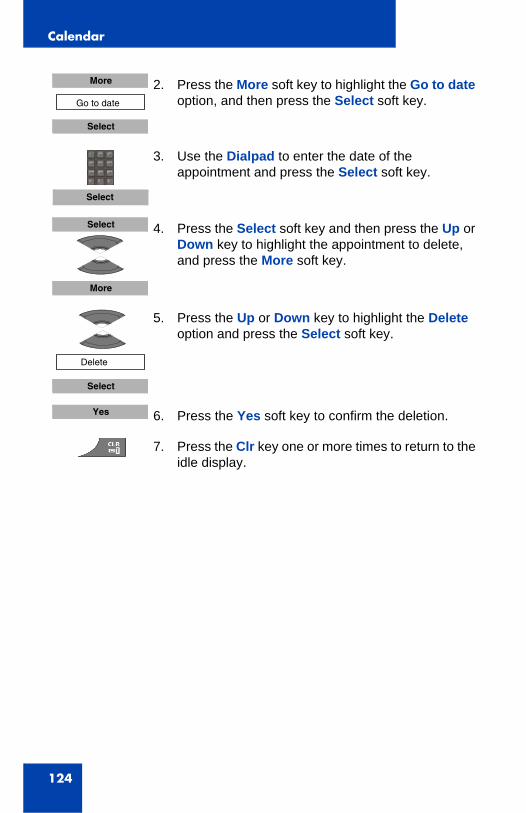
Calendar
124
2. Press the More soft key to highlight the Go to date option, and then press the Select soft key.
3. Use the Dialpad to enter the date of the appointment and press the Select soft key.
4. Press the Select soft key and then press the Up or Down key to highlight the appointment to delete, and press the More soft key.
5. Press the Up or Down key to highlight the Delete option and press the Select soft key.
6. Press the Yes soft key to confirm the deletion.
7. Press the Clr key one or more times to return to the idle display.
More
Go to date
Select
Select
Select
More
Delete
Select
Yes
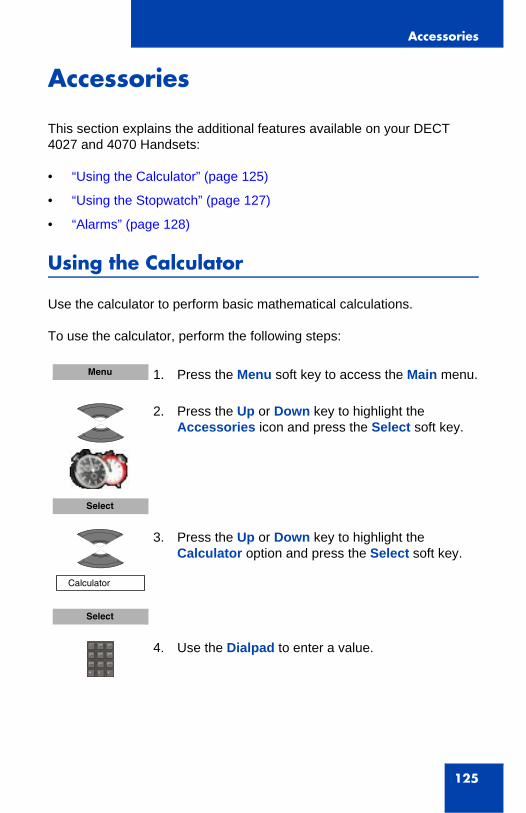
Accessories
125
Accessories
This section explains the additional features available on your DECT 4027 and 4070 Handsets:
• “Using the Calculator” (page 125)
• “Using the Stopwatch” (page 127)
• “Alarms” (page 128)
Using the Calculator
Use the calculator to perform basic mathematical calculations.
To use the calculator, perform the following steps:
1. Press the Menu soft key to access the Main menu.
2. Press the Up or Down key to highlight the Accessories icon and press the Select soft key.
3. Press the Up or Down key to highlight the Calculator option and press the Select soft key.
4. Use the Dialpad to enter a value.
Menu
Select
Calculator
Select
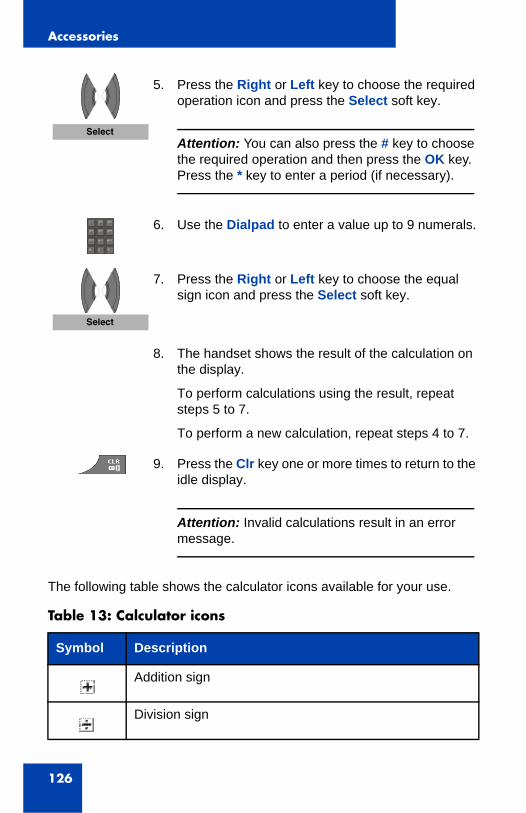
Accessories
126
The following table shows the calculator icons available for your use.
5. Press the Right or Left key to choose the required operation icon and press the Select soft key.
Attention: You can also press the # key to choose the required operation and then press the OK key. Press the * key to enter a period (if necessary).
6. Use the Dialpad to enter a value up to 9 numerals.
7. Press the Right or Left key to choose the equal sign icon and press the Select soft key.
8. The handset shows the result of the calculation on the display.
To perform calculations using the result, repeat steps 5 to 7.
To perform a new calculation, repeat steps 4 to 7.
9. Press the Clr key one or more times to return to the idle display.
Attention: Invalid calculations result in an error message.
Table 13: Calculator icons
Symbol Description
Addition sign
Division sign
Select
Select
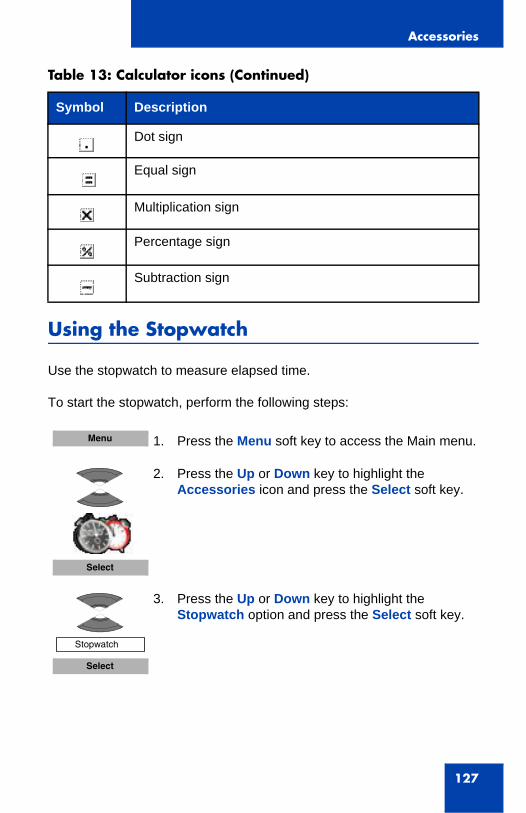
Accessories
127
Using the Stopwatch
Use the stopwatch to measure elapsed time.
To start the stopwatch, perform the following steps:
Dot sign
Equal sign
Multiplication sign
Percentage sign
Subtraction sign
1. Press the Menu soft key to access the Main menu.
2. Press the Up or Down key to highlight the Accessories icon and press the Select soft key.
3. Press the Up or Down key to highlight the Stopwatch option and press the Select soft key.
Table 13: Calculator icons (Continued)
Symbol Description
Menu
Select
Stopwatch
Select
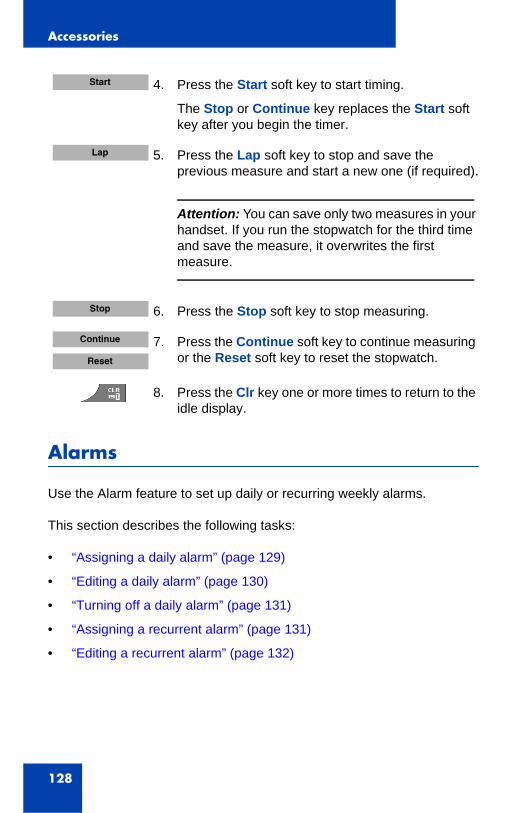
Accessories
128
Alarms
Use the Alarm feature to set up daily or recurring weekly alarms.
This section describes the following tasks:
• “Assigning a daily alarm” (page 129)
• “Editing a daily alarm” (page 130)
• “Turning off a daily alarm” (page 131)
• “Assigning a recurrent alarm” (page 131)
• “Editing a recurrent alarm” (page 132)
4. Press the Start soft key to start timing.
The Stop or Continue key replaces the Start soft key after you begin the timer.
5. Press the Lap soft key to stop and save the previous measure and start a new one (if required).
Attention: You can save only two measures in your handset. If you run the stopwatch for the third time and save the measure, it overwrites the first measure.
6. Press the Stop soft key to stop measuring.
7. Press the Continue soft key to continue measuring or the Reset soft key to reset the stopwatch.
8. Press the Clr key one or more times to return to the idle display.
Start
Lap
Stop
Continue
Reset
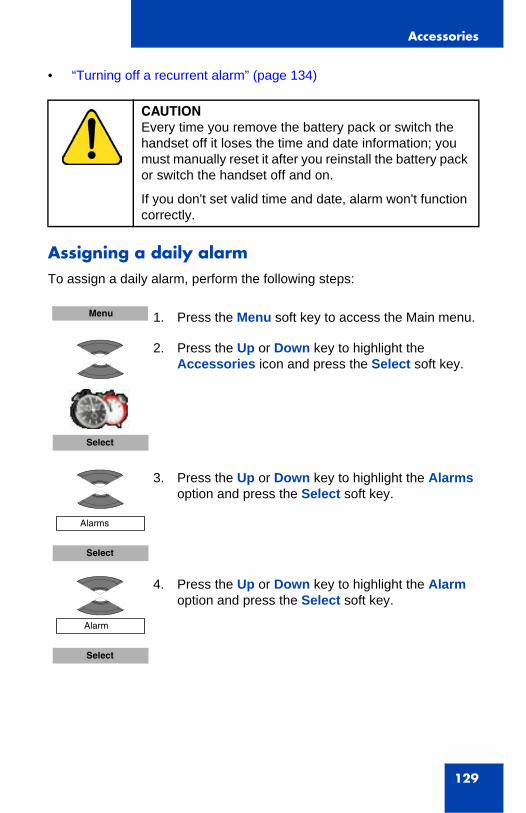
Accessories
129
• “Turning off a recurrent alarm” (page 134)
Assigning a daily alarmTo assign a daily alarm, perform the following steps:
CAUTIONEvery time you remove the battery pack or switch the handset off it loses the time and date information; you must manually reset it after you reinstall the battery pack or switch the handset off and on.
If you don't set valid time and date, alarm won't function correctly.
1. Press the Menu soft key to access the Main menu.
2. Press the Up or Down key to highlight the Accessories icon and press the Select soft key.
3. Press the Up or Down key to highlight the Alarms option and press the Select soft key.
4. Press the Up or Down key to highlight the Alarm option and press the Select soft key.
Menu
Select
Alarms
Select
Alarm
Select
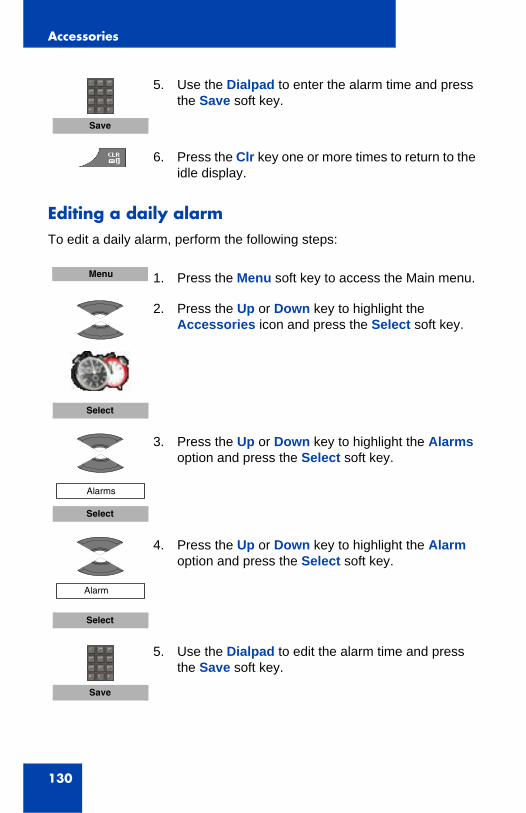
Accessories
130
Editing a daily alarmTo edit a daily alarm, perform the following steps:
5. Use the Dialpad to enter the alarm time and press the Save soft key.
6. Press the Clr key one or more times to return to the idle display.
1. Press the Menu soft key to access the Main menu.
2. Press the Up or Down key to highlight the Accessories icon and press the Select soft key.
3. Press the Up or Down key to highlight the Alarms option and press the Select soft key.
4. Press the Up or Down key to highlight the Alarm option and press the Select soft key.
5. Use the Dialpad to edit the alarm time and press the Save soft key.
Save
Menu
Select
Alarms
Select
Alarm
Select
Save

Accessories
131
Turning off a daily alarmTo turn off a daily alarm, perform the following steps:
Assigning a recurrent alarmTo assign a recurrent alarm, perform the following steps:
6. Press the Clr key one or more times to return to the idle display.
1. Press the Menu soft key to access the Main menu.
2. Press the Up or Down key to highlight the Accessories icon and press the Select soft key.
3. Press the Up or Down key to highlight the Alarms option and press the Select soft key.
4. Press the Up or Down key to highlight the Alarm option and press the Select soft key.
5. Press the Turn off soft key.
6. Press the Clr key one or more times to return to the idle display.
1. Press the Menu soft key to access the Main menu.
Menu
Select
Alarms
Select
Alarm
Select
Turn off
Menu
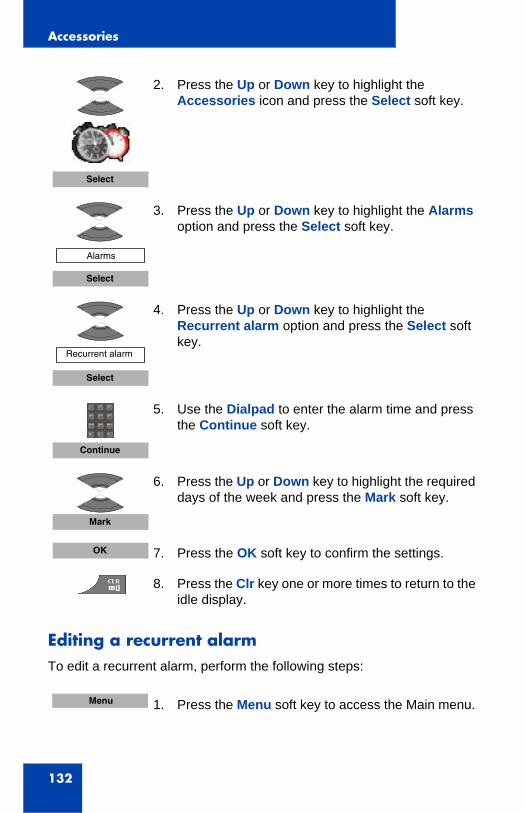
Accessories
132
Editing a recurrent alarmTo edit a recurrent alarm, perform the following steps:
2. Press the Up or Down key to highlight the Accessories icon and press the Select soft key.
3. Press the Up or Down key to highlight the Alarms option and press the Select soft key.
4. Press the Up or Down key to highlight the Recurrent alarm option and press the Select soft key.
5. Use the Dialpad to enter the alarm time and press the Continue soft key.
6. Press the Up or Down key to highlight the required days of the week and press the Mark soft key.
7. Press the OK soft key to confirm the settings.
8. Press the Clr key one or more times to return to the idle display.
1. Press the Menu soft key to access the Main menu.
Select
Alarms
Select
Recurrent alarm
Select
Continue
Mark
OK
Menu

Accessories
133
2. Press the Up or Down key to highlight the Accessories icon and press the Select soft key.
3. Press the Up or Down key to highlight the Alarms option and press the Select soft key.
4. Press the Up or Down key to highlight the Recurrent alarm option and press the Select soft key.
5. Use the Dialpad to edit the alarm time and press the Continue soft key.
6. Press the Up or Down key to highlight the required days of the week and press the Mark soft key.
7. Press the Unmark soft key to unmark a marked day of the week (if necessary).
8. Press the OK soft key to confirm the settings.
9. Press the Clr key one or more times to return to the idle display.
Select
Alarms
Select
Recurrent alarm
Select
Continue
Mark
Unmark
OK
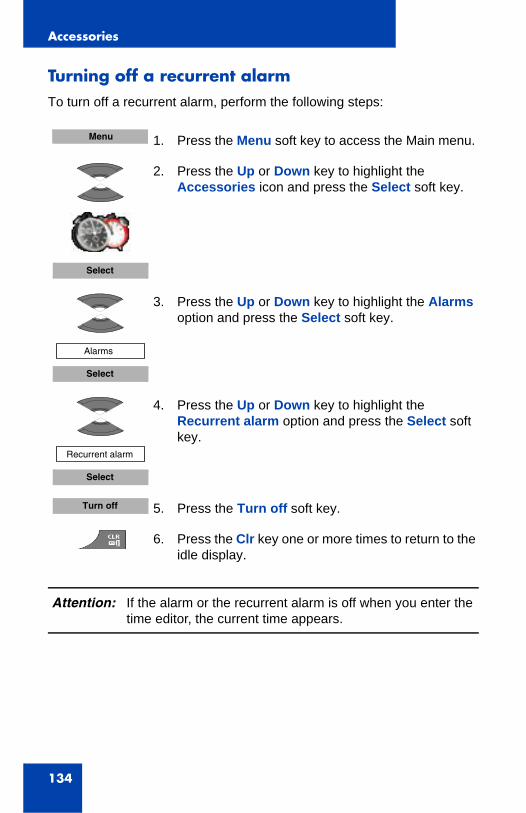
Accessories
134
Turning off a recurrent alarmTo turn off a recurrent alarm, perform the following steps:
1. Press the Menu soft key to access the Main menu.
2. Press the Up or Down key to highlight the Accessories icon and press the Select soft key.
3. Press the Up or Down key to highlight the Alarms option and press the Select soft key.
4. Press the Up or Down key to highlight the Recurrent alarm option and press the Select soft key.
5. Press the Turn off soft key.
6. Press the Clr key one or more times to return to the idle display.
Attention: If the alarm or the recurrent alarm is off when you enter the time editor, the current time appears.
Menu
Select
Alarms
Select
Recurrent alarm
Select
Turn off
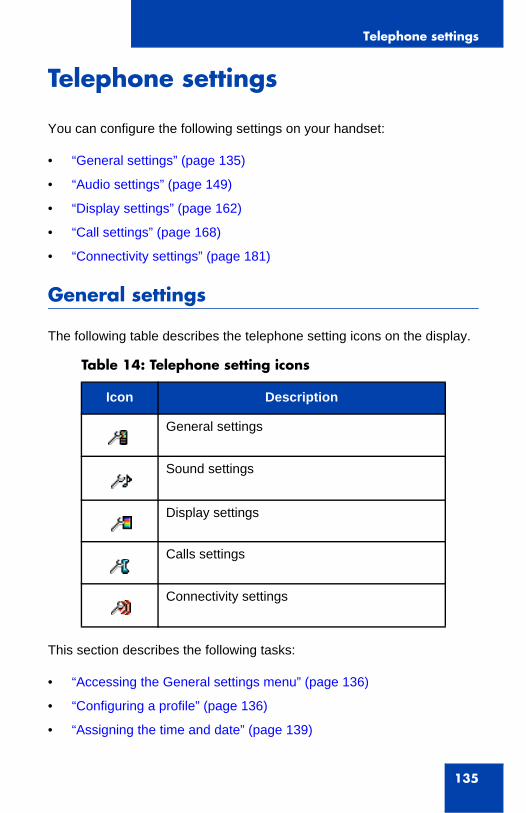
Telephone settings
135
Telephone settings
You can configure the following settings on your handset:
• “General settings” (page 135)
• “Audio settings” (page 149)
• “Display settings” (page 162)
• “Call settings” (page 168)
• “Connectivity settings” (page 181)
General settings
The following table describes the telephone setting icons on the display.
This section describes the following tasks:
• “Accessing the General settings menu” (page 136)
• “Configuring a profile” (page 136)
• “Assigning the time and date” (page 139)
Table 14: Telephone setting icons
Icon Description
General settings
Sound settings
Display settings
Calls settings
Connectivity settings
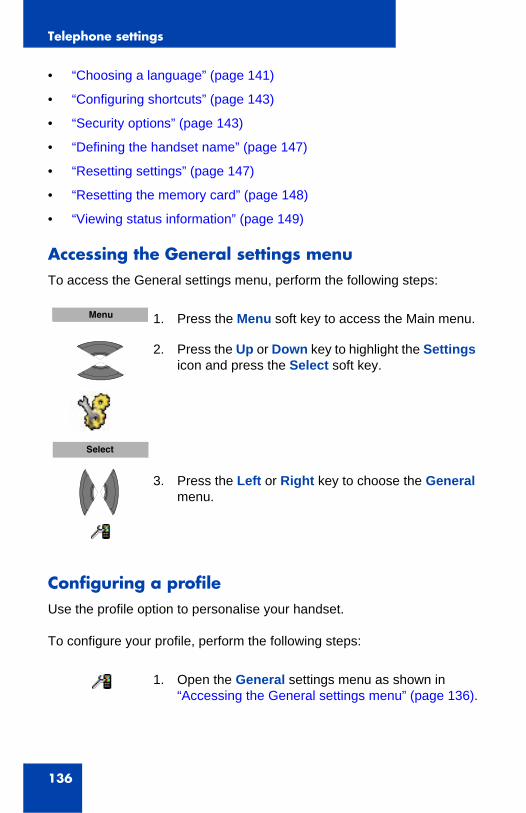
Telephone settings
136
• “Choosing a language” (page 141)
• “Configuring shortcuts” (page 143)
• “Security options” (page 143)
• “Defining the handset name” (page 147)
• “Resetting settings” (page 147)
• “Resetting the memory card” (page 148)
• “Viewing status information” (page 149)
Accessing the General settings menuTo access the General settings menu, perform the following steps:
Configuring a profileUse the profile option to personalise your handset.
To configure your profile, perform the following steps:
1. Press the Menu soft key to access the Main menu.
2. Press the Up or Down key to highlight the Settings icon and press the Select soft key.
3. Press the Left or Right key to choose the General menu.
1. Open the General settings menu as shown in “Accessing the General settings menu” (page 136).
Menu
Select
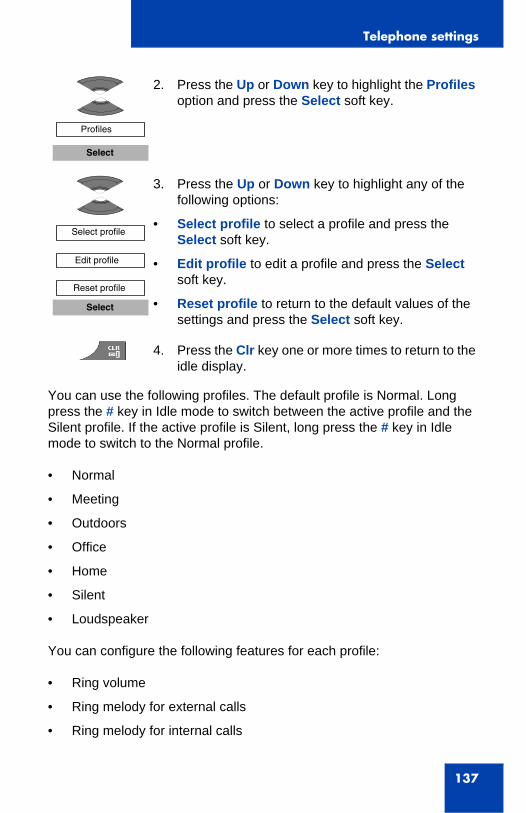
Telephone settings
137
You can use the following profiles. The default profile is Normal. Long press the # key in Idle mode to switch between the active profile and the Silent profile. If the active profile is Silent, long press the # key in Idle mode to switch to the Normal profile.
• Normal
• Meeting
• Outdoors
• Office
• Home
• Silent
• Loudspeaker
You can configure the following features for each profile:
• Ring volume
• Ring melody for external calls
• Ring melody for internal calls
2. Press the Up or Down key to highlight the Profiles option and press the Select soft key.
3. Press the Up or Down key to highlight any of the following options:
• Select profile to select a profile and press the Select soft key.
• Edit profile to edit a profile and press the Select soft key.
• Reset profile to return to the default values of the settings and press the Select soft key.
4. Press the Clr key one or more times to return to the idle display.
Profiles
Select
Select profile
Edit profile
Reset profile
Select
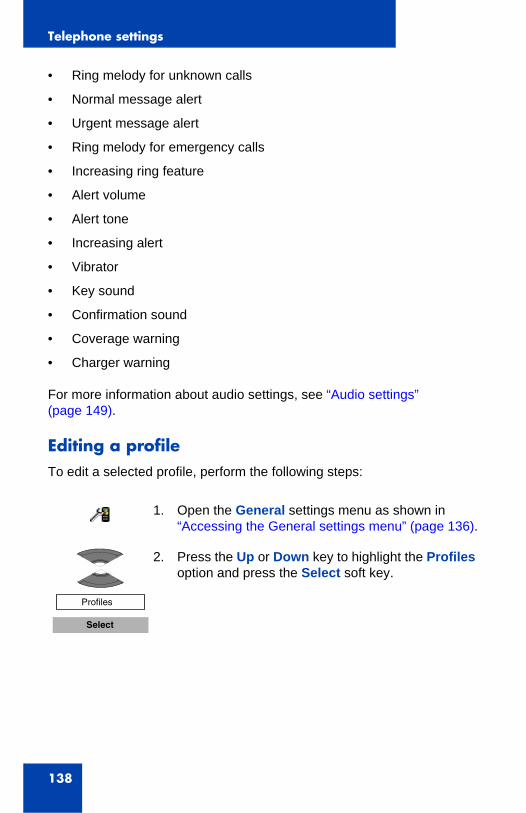
Telephone settings
138
• Ring melody for unknown calls
• Normal message alert
• Urgent message alert
• Ring melody for emergency calls
• Increasing ring feature
• Alert volume
• Alert tone
• Increasing alert
• Vibrator
• Key sound
• Confirmation sound
• Coverage warning
• Charger warning
For more information about audio settings, see “Audio settings” (page 149).
Editing a profileTo edit a selected profile, perform the following steps:
1. Open the General settings menu as shown in “Accessing the General settings menu” (page 136).
2. Press the Up or Down key to highlight the Profiles option and press the Select soft key.
Profiles
Select
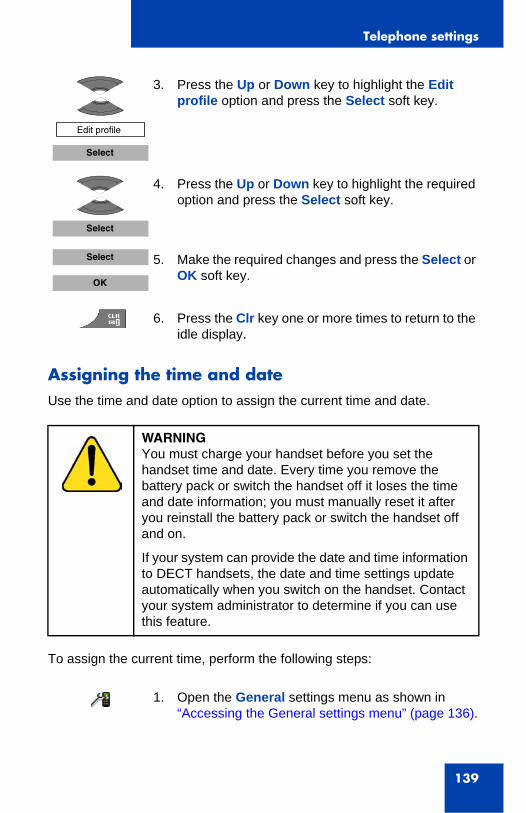
Telephone settings
139
Assigning the time and date Use the time and date option to assign the current time and date.
To assign the current time, perform the following steps:
3. Press the Up or Down key to highlight the Edit profile option and press the Select soft key.
4. Press the Up or Down key to highlight the required option and press the Select soft key.
5. Make the required changes and press the Select or OK soft key.
6. Press the Clr key one or more times to return to the idle display.
WARNINGYou must charge your handset before you set the handset time and date. Every time you remove the battery pack or switch the handset off it loses the time and date information; you must manually reset it after you reinstall the battery pack or switch the handset off and on.
If your system can provide the date and time information to DECT handsets, the date and time settings update automatically when you switch on the handset. Contact your system administrator to determine if you can use this feature.
1. Open the General settings menu as shown in “Accessing the General settings menu” (page 136).
Edit profile
Select
Select
Select
OK

Telephone settings
140
To assign the current date, perform the following steps:
2. Press the Up or Down key to highlight the Time & Date option and press the Select soft key.
3. Press the Up or Down key to highlight the Time option and press the Select soft key.
4. Use the Dialpad to edit the time.
5. Press the More soft key to edit the time format.
6. Press the Up or Down key to highlight the required time format and press the Select soft key.
Attention: Depending on the selected Time and Date format, the font size in the Calls list changes (see “Calls list with normal text size” (page 62)). If you choose am/pm time format in combination with dd/mm/yyyy (mm/dd/yyyy) or dd-mmm-yyyy date format, the entries in the calls list contain information about date only.
7. Press the Save soft key to save the changes.
8. Press the Clr key one or more times to return to the idle display.
1. Open the General settings menu as shown in “Accessing the General settings menu” (page 136).
Time & Date
Select
Time
Select
More
Select
Save
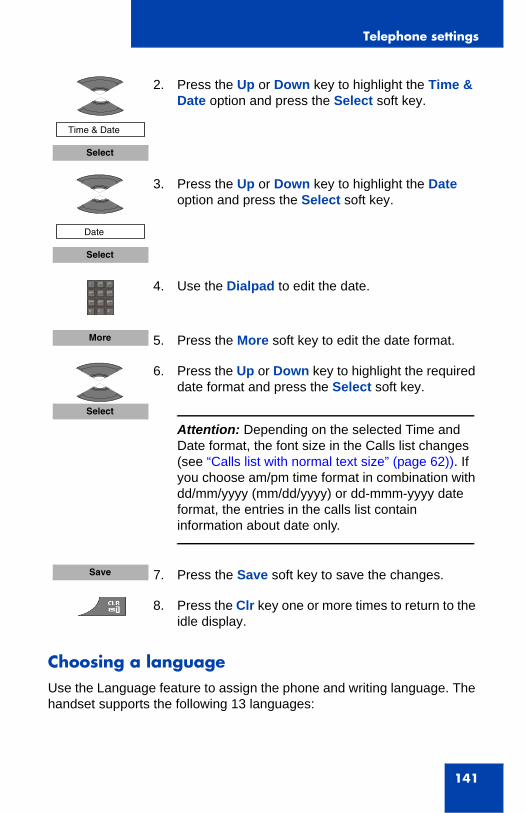
Telephone settings
141
Choosing a languageUse the Language feature to assign the phone and writing language. The handset supports the following 13 languages:
2. Press the Up or Down key to highlight the Time & Date option and press the Select soft key.
3. Press the Up or Down key to highlight the Date option and press the Select soft key.
4. Use the Dialpad to edit the date.
5. Press the More soft key to edit the date format.
6. Press the Up or Down key to highlight the required date format and press the Select soft key.
Attention: Depending on the selected Time and Date format, the font size in the Calls list changes (see “Calls list with normal text size” (page 62)). If you choose am/pm time format in combination with dd/mm/yyyy (mm/dd/yyyy) or dd-mmm-yyyy date format, the entries in the calls list contain information about date only.
7. Press the Save soft key to save the changes.
8. Press the Clr key one or more times to return to the idle display.
Time & Date
Select
Date
Select
More
Select
Save
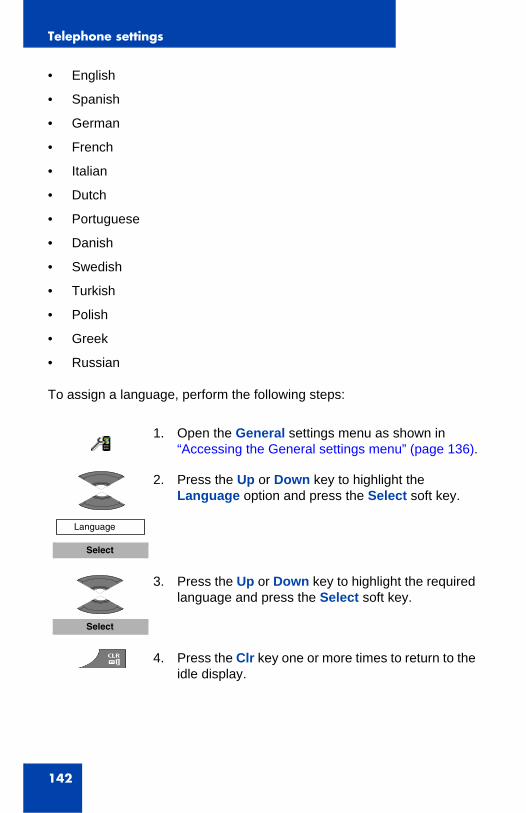
Telephone settings
142
• English
• Spanish
• German
• French
• Italian
• Dutch
• Portuguese
• Danish
• Swedish
• Turkish
• Polish
• Greek
• Russian
To assign a language, perform the following steps:
1. Open the General settings menu as shown in “Accessing the General settings menu” (page 136).
2. Press the Up or Down key to highlight the Language option and press the Select soft key.
3. Press the Up or Down key to highlight the required language and press the Select soft key.
4. Press the Clr key one or more times to return to the idle display.
Language
Select
Select
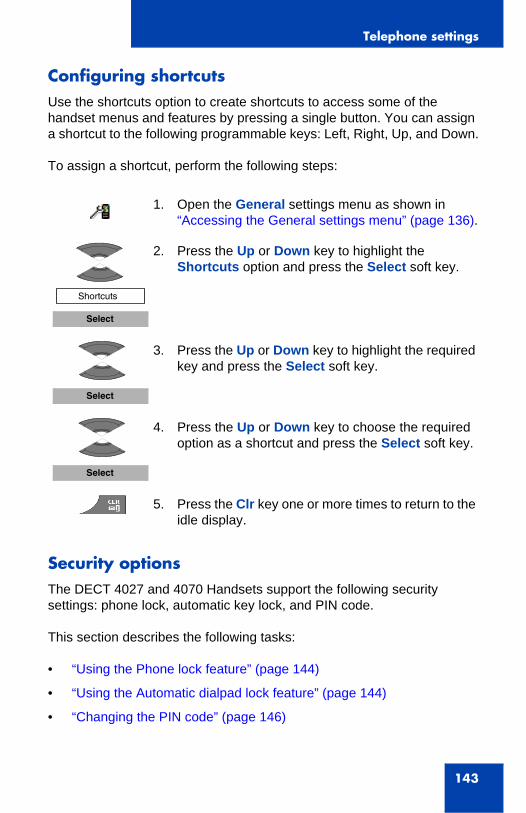
Telephone settings
143
Configuring shortcutsUse the shortcuts option to create shortcuts to access some of the handset menus and features by pressing a single button. You can assign a shortcut to the following programmable keys: Left, Right, Up, and Down.
To assign a shortcut, perform the following steps:
Security optionsThe DECT 4027 and 4070 Handsets support the following security settings: phone lock, automatic key lock, and PIN code.
This section describes the following tasks:
• “Using the Phone lock feature” (page 144)
• “Using the Automatic dialpad lock feature” (page 144)
• “Changing the PIN code” (page 146)
1. Open the General settings menu as shown in “Accessing the General settings menu” (page 136).
2. Press the Up or Down key to highlight the Shortcuts option and press the Select soft key.
3. Press the Up or Down key to highlight the required key and press the Select soft key.
4. Press the Up or Down key to choose the required option as a shortcut and press the Select soft key.
5. Press the Clr key one or more times to return to the idle display.
Shortcuts
Select
Select
Select
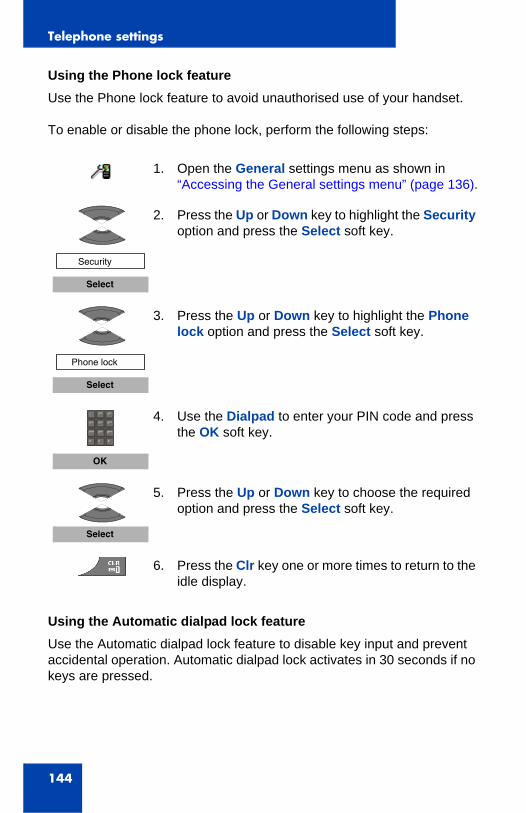
Telephone settings
144
Using the Phone lock featureUse the Phone lock feature to avoid unauthorised use of your handset.
To enable or disable the phone lock, perform the following steps:
Using the Automatic dialpad lock featureUse the Automatic dialpad lock feature to disable key input and prevent accidental operation. Automatic dialpad lock activates in 30 seconds if no keys are pressed.
1. Open the General settings menu as shown in “Accessing the General settings menu” (page 136).
2. Press the Up or Down key to highlight the Security option and press the Select soft key.
3. Press the Up or Down key to highlight the Phone lock option and press the Select soft key.
4. Use the Dialpad to enter your PIN code and press the OK soft key.
5. Press the Up or Down key to choose the required option and press the Select soft key.
6. Press the Clr key one or more times to return to the idle display.
Security
Select
Phone lock
Select
OK
Select
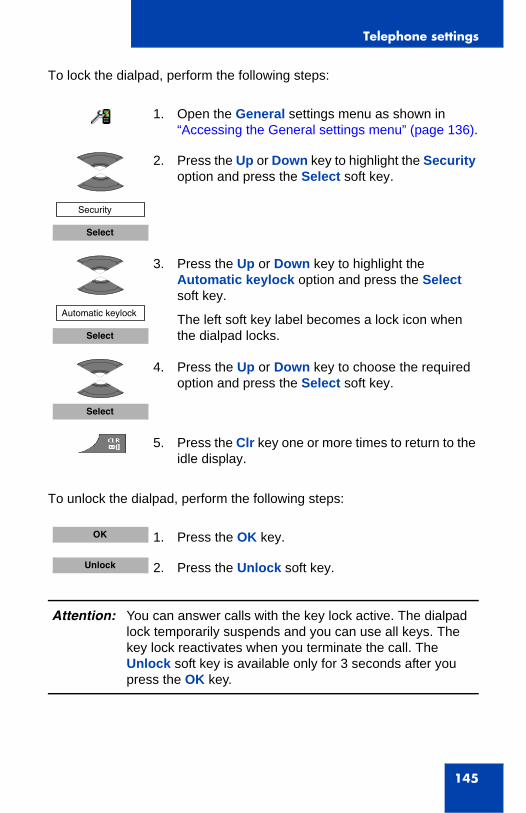
Telephone settings
145
To lock the dialpad, perform the following steps:
To unlock the dialpad, perform the following steps:
1. Open the General settings menu as shown in “Accessing the General settings menu” (page 136).
2. Press the Up or Down key to highlight the Security option and press the Select soft key.
3. Press the Up or Down key to highlight the Automatic keylock option and press the Select soft key.
The left soft key label becomes a lock icon when the dialpad locks.
4. Press the Up or Down key to choose the required option and press the Select soft key.
5. Press the Clr key one or more times to return to the idle display.
1. Press the OK key.
2. Press the Unlock soft key.
Attention: You can answer calls with the key lock active. The dialpad lock temporarily suspends and you can use all keys. The key lock reactivates when you terminate the call. The Unlock soft key is available only for 3 seconds after you press the OK key.
Security
Select
Automatic keylock
Select
Select
OK
Unlock
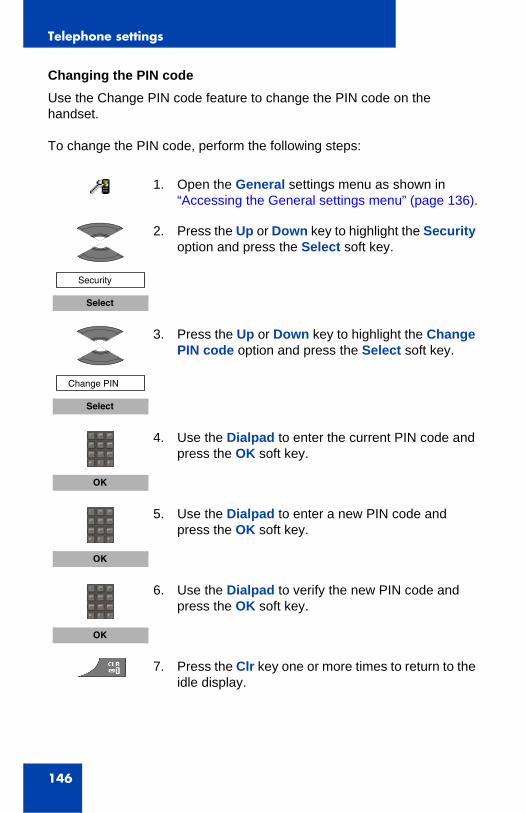
Telephone settings
146
Changing the PIN codeUse the Change PIN code feature to change the PIN code on the handset.
To change the PIN code, perform the following steps:
1. Open the General settings menu as shown in “Accessing the General settings menu” (page 136).
2. Press the Up or Down key to highlight the Security option and press the Select soft key.
3. Press the Up or Down key to highlight the Change PIN code option and press the Select soft key.
4. Use the Dialpad to enter the current PIN code and press the OK soft key.
5. Use the Dialpad to enter a new PIN code and press the OK soft key.
6. Use the Dialpad to verify the new PIN code and press the OK soft key.
7. Press the Clr key one or more times to return to the idle display.
Security
Select
Change PIN
Select
OK
OK
OK
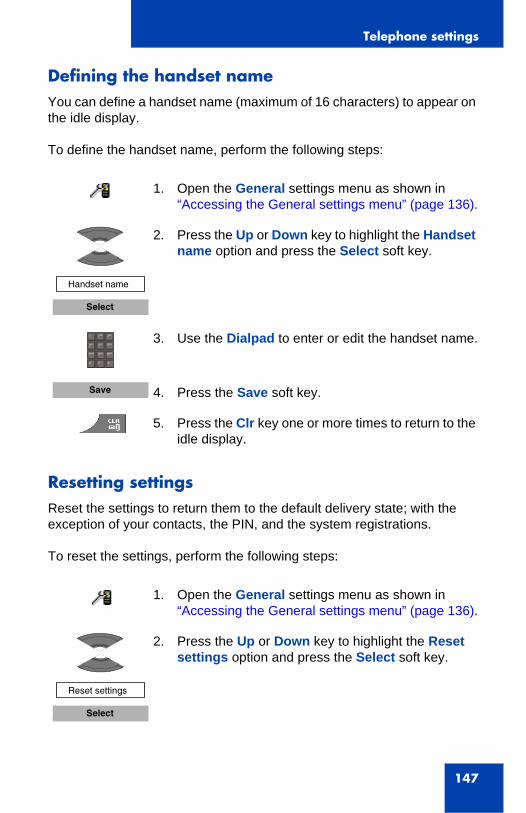
Telephone settings
147
Defining the handset nameYou can define a handset name (maximum of 16 characters) to appear on the idle display.
To define the handset name, perform the following steps:
Resetting settingsReset the settings to return them to the default delivery state; with the exception of your contacts, the PIN, and the system registrations.
To reset the settings, perform the following steps:
1. Open the General settings menu as shown in “Accessing the General settings menu” (page 136).
2. Press the Up or Down key to highlight the Handset name option and press the Select soft key.
3. Use the Dialpad to enter or edit the handset name.
4. Press the Save soft key.
5. Press the Clr key one or more times to return to the idle display.
1. Open the General settings menu as shown in “Accessing the General settings menu” (page 136).
2. Press the Up or Down key to highlight the Reset settings option and press the Select soft key.
Handset name
Select
Save
Reset settings
Select
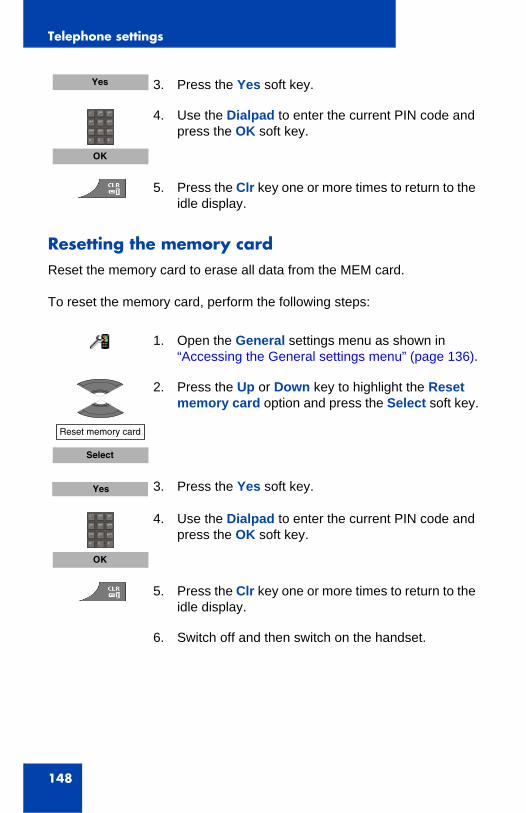
Telephone settings
148
Resetting the memory cardReset the memory card to erase all data from the MEM card.
To reset the memory card, perform the following steps:
3. Press the Yes soft key.
4. Use the Dialpad to enter the current PIN code and press the OK soft key.
5. Press the Clr key one or more times to return to the idle display.
1. Open the General settings menu as shown in “Accessing the General settings menu” (page 136).
2. Press the Up or Down key to highlight the Reset memory card option and press the Select soft key.
3. Press the Yes soft key.
4. Use the Dialpad to enter the current PIN code and press the OK soft key.
5. Press the Clr key one or more times to return to the idle display.
6. Switch off and then switch on the handset.
Yes
OK
Reset memory card
Select
Yes
OK
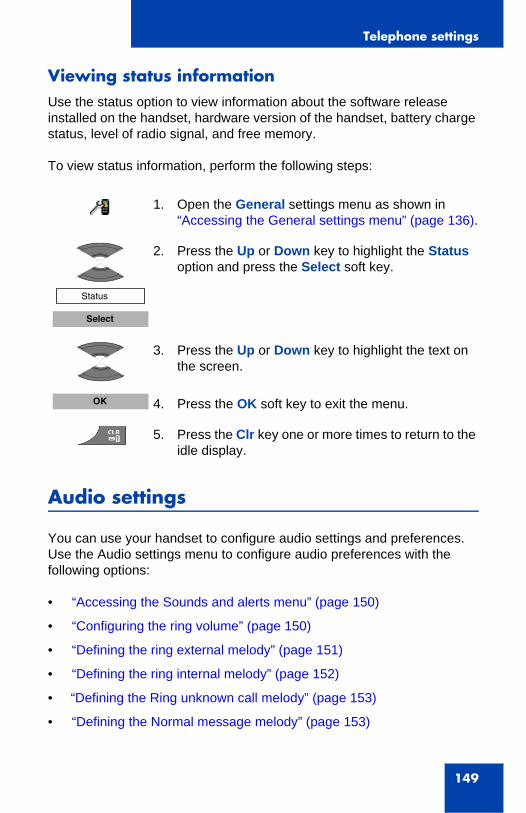
Telephone settings
149
Viewing status informationUse the status option to view information about the software release installed on the handset, hardware version of the handset, battery charge status, level of radio signal, and free memory.
To view status information, perform the following steps:
Audio settings
You can use your handset to configure audio settings and preferences. Use the Audio settings menu to configure audio preferences with the following options:
• “Accessing the Sounds and alerts menu” (page 150)
• “Configuring the ring volume” (page 150)
• “Defining the ring external melody” (page 151)
• “Defining the ring internal melody” (page 152)
• “Defining the Ring unknown call melody” (page 153)
• “Defining the Normal message melody” (page 153)
1. Open the General settings menu as shown in “Accessing the General settings menu” (page 136).
2. Press the Up or Down key to highlight the Status option and press the Select soft key.
3. Press the Up or Down key to highlight the text on the screen.
4. Press the OK soft key to exit the menu.
5. Press the Clr key one or more times to return to the idle display.
Status
Select
OK
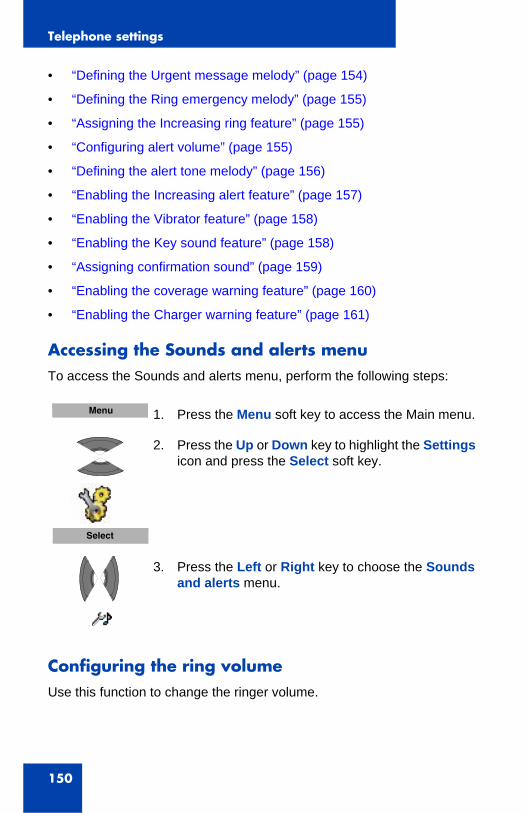
Telephone settings
150
• “Defining the Urgent message melody” (page 154)
• “Defining the Ring emergency melody” (page 155)
• “Assigning the Increasing ring feature” (page 155)
• “Configuring alert volume” (page 155)
• “Defining the alert tone melody” (page 156)
• “Enabling the Increasing alert feature” (page 157)
• “Enabling the Vibrator feature” (page 158)
• “Enabling the Key sound feature” (page 158)
• “Assigning confirmation sound” (page 159)
• “Enabling the coverage warning feature” (page 160)
• “Enabling the Charger warning feature” (page 161)
Accessing the Sounds and alerts menuTo access the Sounds and alerts menu, perform the following steps:
Configuring the ring volumeUse this function to change the ringer volume.
1. Press the Menu soft key to access the Main menu.
2. Press the Up or Down key to highlight the Settings icon and press the Select soft key.
3. Press the Left or Right key to choose the Sounds and alerts menu.
Menu
Select
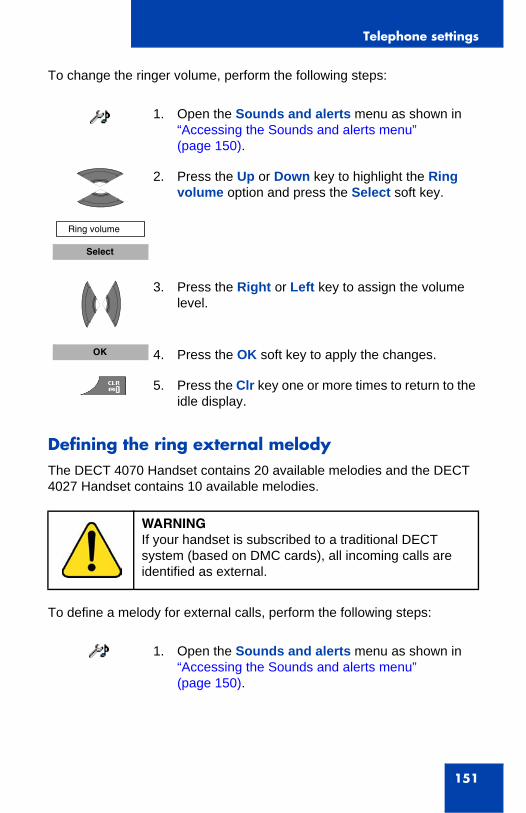
Telephone settings
151
To change the ringer volume, perform the following steps:
Defining the ring external melodyThe DECT 4070 Handset contains 20 available melodies and the DECT 4027 Handset contains 10 available melodies.
To define a melody for external calls, perform the following steps:
1. Open the Sounds and alerts menu as shown in “Accessing the Sounds and alerts menu” (page 150).
2. Press the Up or Down key to highlight the Ring volume option and press the Select soft key.
3. Press the Right or Left key to assign the volume level.
4. Press the OK soft key to apply the changes.
5. Press the Clr key one or more times to return to the idle display.
WARNINGIf your handset is subscribed to a traditional DECT system (based on DMC cards), all incoming calls are identified as external.
1. Open the Sounds and alerts menu as shown in “Accessing the Sounds and alerts menu” (page 150).
Ring volume
Select
OK
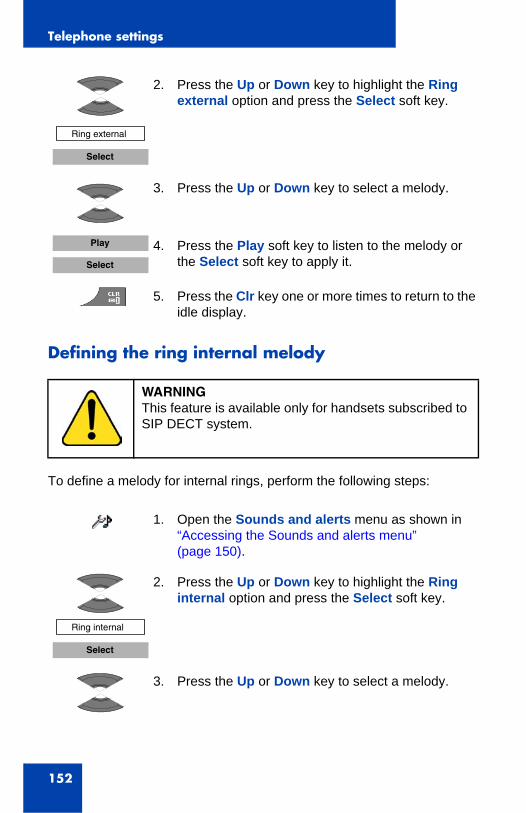
Telephone settings
152
Defining the ring internal melody
To define a melody for internal rings, perform the following steps:
2. Press the Up or Down key to highlight the Ring external option and press the Select soft key.
3. Press the Up or Down key to select a melody.
4. Press the Play soft key to listen to the melody or the Select soft key to apply it.
5. Press the Clr key one or more times to return to the idle display.
WARNINGThis feature is available only for handsets subscribed to SIP DECT system.
1. Open the Sounds and alerts menu as shown in “Accessing the Sounds and alerts menu” (page 150).
2. Press the Up or Down key to highlight the Ring internal option and press the Select soft key.
3. Press the Up or Down key to select a melody.
Ring external
Select
Play
Select
Ring internal
Select
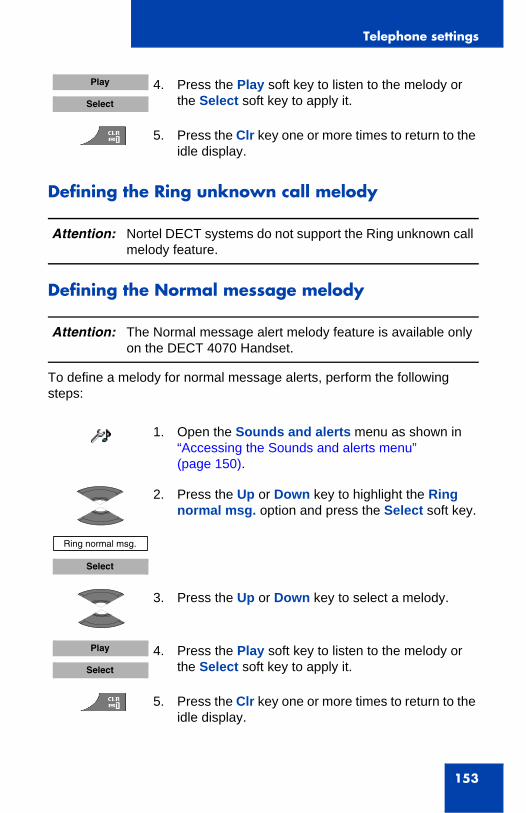
Telephone settings
153
Defining the Ring unknown call melody
Defining the Normal message melody
To define a melody for normal message alerts, perform the following steps:
4. Press the Play soft key to listen to the melody or the Select soft key to apply it.
5. Press the Clr key one or more times to return to the idle display.
Attention: Nortel DECT systems do not support the Ring unknown call melody feature.
Attention: The Normal message alert melody feature is available only on the DECT 4070 Handset.
1. Open the Sounds and alerts menu as shown in “Accessing the Sounds and alerts menu” (page 150).
2. Press the Up or Down key to highlight the Ring normal msg. option and press the Select soft key.
3. Press the Up or Down key to select a melody.
4. Press the Play soft key to listen to the melody or the Select soft key to apply it.
5. Press the Clr key one or more times to return to the idle display.
Play
Select
Ring normal msg.
Select
Play
Select
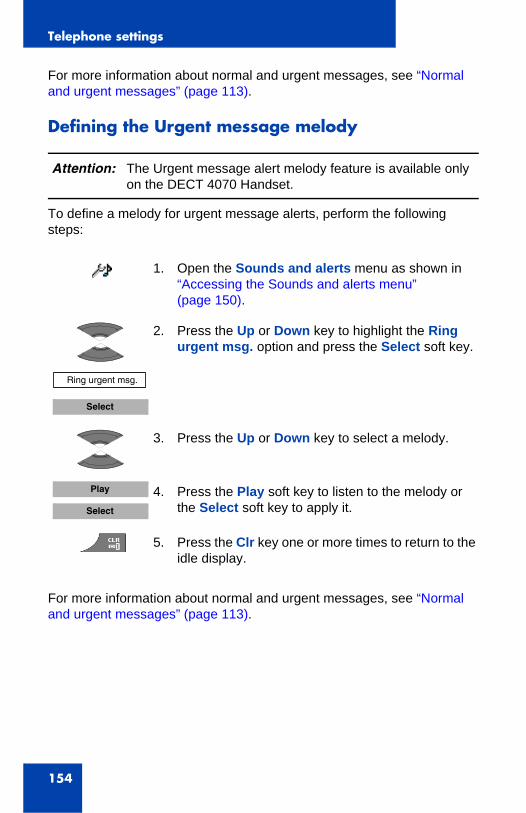
Telephone settings
154
For more information about normal and urgent messages, see “Normal and urgent messages” (page 113).
Defining the Urgent message melody
To define a melody for urgent message alerts, perform the following steps:
For more information about normal and urgent messages, see “Normal and urgent messages” (page 113).
Attention: The Urgent message alert melody feature is available only on the DECT 4070 Handset.
1. Open the Sounds and alerts menu as shown in “Accessing the Sounds and alerts menu” (page 150).
2. Press the Up or Down key to highlight the Ring urgent msg. option and press the Select soft key.
3. Press the Up or Down key to select a melody.
4. Press the Play soft key to listen to the melody or the Select soft key to apply it.
5. Press the Clr key one or more times to return to the idle display.
Ring urgent msg.
Select
Play
Select
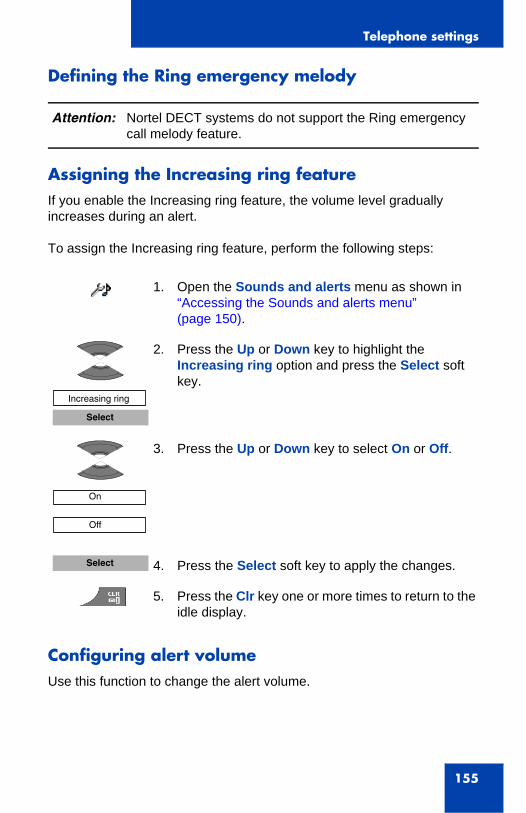
Telephone settings
155
Defining the Ring emergency melody
Assigning the Increasing ring featureIf you enable the Increasing ring feature, the volume level gradually increases during an alert.
To assign the Increasing ring feature, perform the following steps:
Configuring alert volumeUse this function to change the alert volume.
Attention: Nortel DECT systems do not support the Ring emergency call melody feature.
1. Open the Sounds and alerts menu as shown in “Accessing the Sounds and alerts menu” (page 150).
2. Press the Up or Down key to highlight the Increasing ring option and press the Select soft key.
3. Press the Up or Down key to select On or Off.
4. Press the Select soft key to apply the changes.
5. Press the Clr key one or more times to return to the idle display.
Increasing ring
Select
On
Off
Select
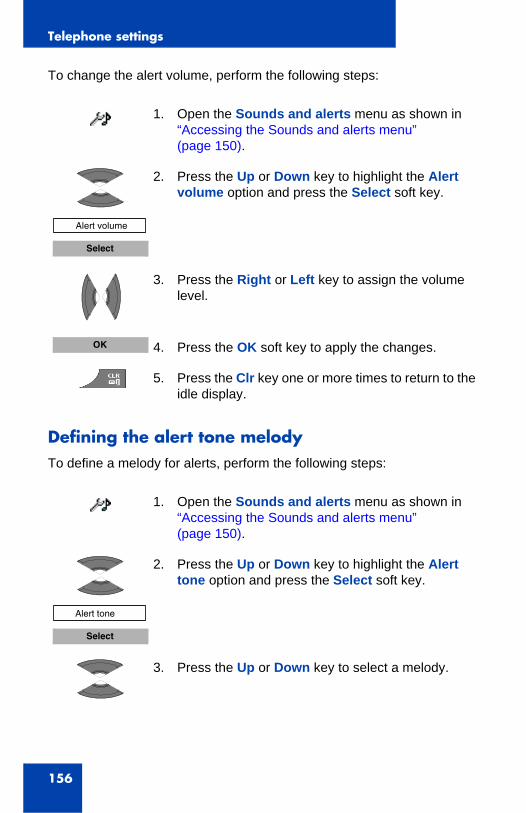
Telephone settings
156
To change the alert volume, perform the following steps:
Defining the alert tone melodyTo define a melody for alerts, perform the following steps:
1. Open the Sounds and alerts menu as shown in “Accessing the Sounds and alerts menu” (page 150).
2. Press the Up or Down key to highlight the Alert volume option and press the Select soft key.
3. Press the Right or Left key to assign the volume level.
4. Press the OK soft key to apply the changes.
5. Press the Clr key one or more times to return to the idle display.
1. Open the Sounds and alerts menu as shown in “Accessing the Sounds and alerts menu” (page 150).
2. Press the Up or Down key to highlight the Alert tone option and press the Select soft key.
3. Press the Up or Down key to select a melody.
Alert volume
Select
OK
Alert tone
Select
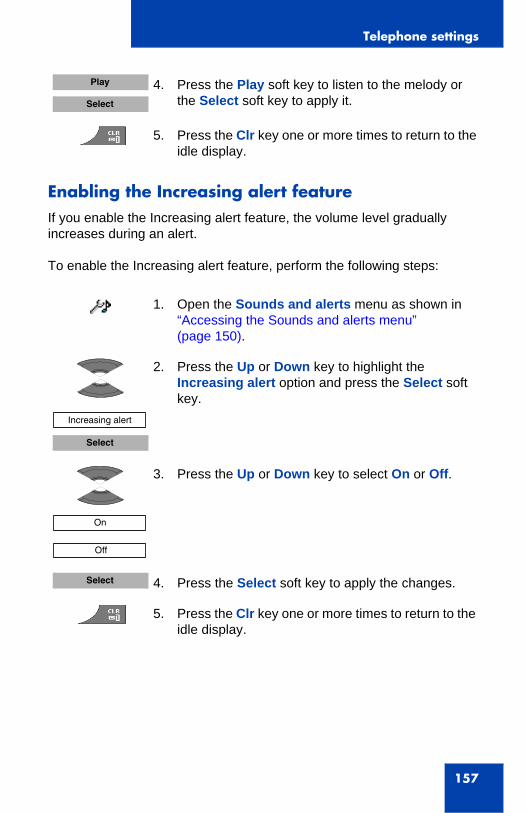
Telephone settings
157
Enabling the Increasing alert featureIf you enable the Increasing alert feature, the volume level gradually increases during an alert.
To enable the Increasing alert feature, perform the following steps:
4. Press the Play soft key to listen to the melody or the Select soft key to apply it.
5. Press the Clr key one or more times to return to the idle display.
1. Open the Sounds and alerts menu as shown in “Accessing the Sounds and alerts menu” (page 150).
2. Press the Up or Down key to highlight the Increasing alert option and press the Select soft key.
3. Press the Up or Down key to select On or Off.
4. Press the Select soft key to apply the changes.
5. Press the Clr key one or more times to return to the idle display.
Play
Select
Increasing alert
Select
On
Off
Select
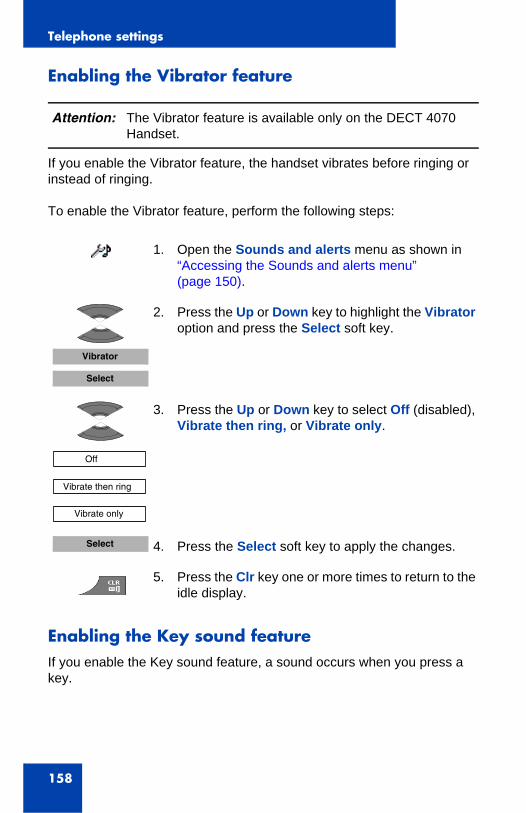
Telephone settings
158
Enabling the Vibrator feature
If you enable the Vibrator feature, the handset vibrates before ringing or instead of ringing.
To enable the Vibrator feature, perform the following steps:
Enabling the Key sound featureIf you enable the Key sound feature, a sound occurs when you press a key.
Attention: The Vibrator feature is available only on the DECT 4070 Handset.
1. Open the Sounds and alerts menu as shown in “Accessing the Sounds and alerts menu” (page 150).
2. Press the Up or Down key to highlight the Vibrator option and press the Select soft key.
3. Press the Up or Down key to select Off (disabled), Vibrate then ring, or Vibrate only.
4. Press the Select soft key to apply the changes.
5. Press the Clr key one or more times to return to the idle display.
Vibrator
Select
Off
Vibrate then ring
Vibrate only
Select

Telephone settings
159
To enable the Key sound feature, perform the following steps:
Assigning confirmation soundYou can assign confirmation sound to indicate if you successfully perform a specific action.
To assign confirmation sound, perform the following steps:
1. Open the Sounds and alerts menu as shown in “Accessing the Sounds and alerts menu” (page 150).
2. Press the Up or Down key to highlight the Key sound option and press the Select soft key.
3. Press the Up or Down key to select Silent (disabled), Click, or Tone (different types of sounds).
4. Press the Select soft key to apply the changes.
5. Press the Clr key one or more times to return to the idle display.
1. Open the Sounds and alerts menu as shown in “Accessing the Sounds and alerts menu” (page 150).
Key sound
Select
Silent
Click
Tone
Select
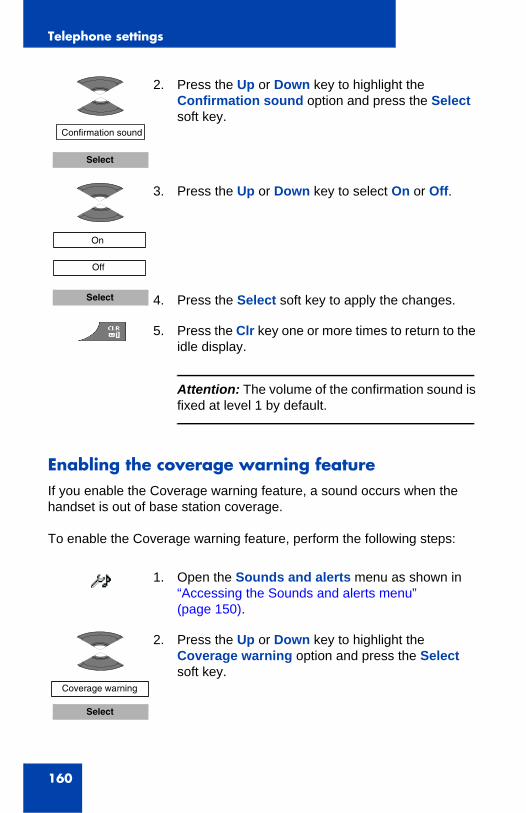
Telephone settings
160
Enabling the coverage warning featureIf you enable the Coverage warning feature, a sound occurs when the handset is out of base station coverage.
To enable the Coverage warning feature, perform the following steps:
2. Press the Up or Down key to highlight the Confirmation sound option and press the Select soft key.
3. Press the Up or Down key to select On or Off.
4. Press the Select soft key to apply the changes.
5. Press the Clr key one or more times to return to the idle display.
Attention: The volume of the confirmation sound is fixed at level 1 by default.
1. Open the Sounds and alerts menu as shown in “Accessing the Sounds and alerts menu” (page 150).
2. Press the Up or Down key to highlight the Coverage warning option and press the Select soft key.
Confirmation sound
Select
On
Off
Select
Coverage warning
Select

Telephone settings
161
Enabling the Charger warning featureIf you enable the Charger warning feature, a sound occurs when the handset is placed in the charger.
To enable the Charger warning feature, perform the following steps:
3. Press the Up or Down key to select On or Off.
4. Press the Select soft key to apply the changes.
5. Press the Clr key one or more times to return to the idle display.
1. Open the Sounds and alerts menu as shown in “Accessing the Sounds and alerts menu” (page 150).
2. Press the Up or Down key to highlight the Charger warning option and press the Select soft key.
3. Press the Up or Down key to select On or Off.
4. Press the Select soft key to apply the changes.
5. Press the Clr key one or more times to return to the idle display.
On
Off
Select
Charger warning
Select
On
Off
Select
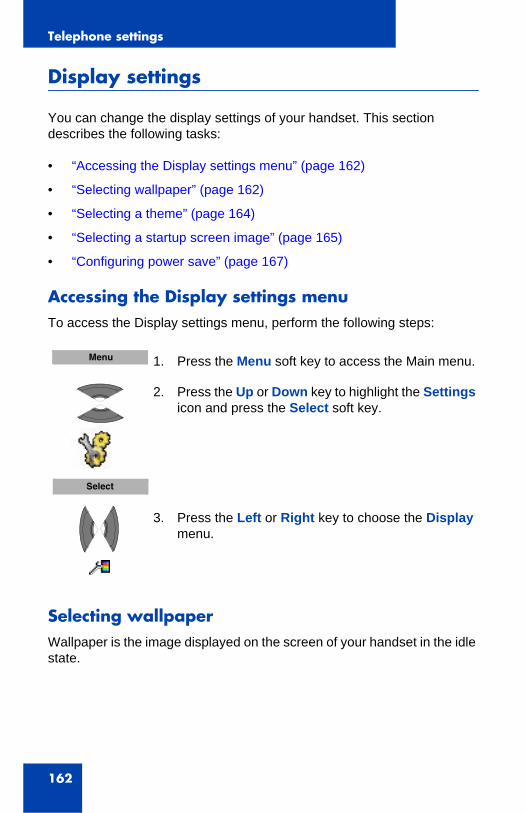
Telephone settings
162
Display settings
You can change the display settings of your handset. This section describes the following tasks:
• “Accessing the Display settings menu” (page 162)
• “Selecting wallpaper” (page 162)
• “Selecting a theme” (page 164)
• “Selecting a startup screen image” (page 165)
• “Configuring power save” (page 167)
Accessing the Display settings menuTo access the Display settings menu, perform the following steps:
Selecting wallpaper Wallpaper is the image displayed on the screen of your handset in the idle state.
1. Press the Menu soft key to access the Main menu.
2. Press the Up or Down key to highlight the Settings icon and press the Select soft key.
3. Press the Left or Right key to choose the Display menu.
Menu
Select
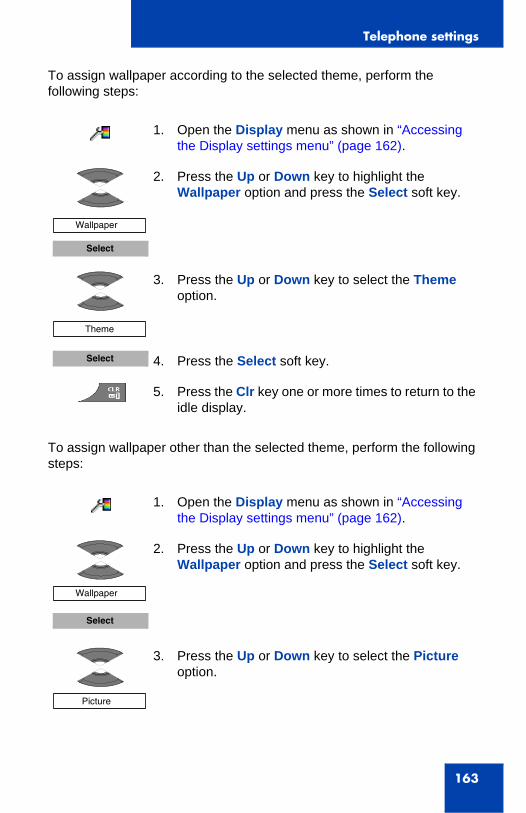
Telephone settings
163
To assign wallpaper according to the selected theme, perform the following steps:
To assign wallpaper other than the selected theme, perform the following steps:
1. Open the Display menu as shown in “Accessing the Display settings menu” (page 162).
2. Press the Up or Down key to highlight the Wallpaper option and press the Select soft key.
3. Press the Up or Down key to select the Theme option.
4. Press the Select soft key.
5. Press the Clr key one or more times to return to the idle display.
1. Open the Display menu as shown in “Accessing the Display settings menu” (page 162).
2. Press the Up or Down key to highlight the Wallpaper option and press the Select soft key.
3. Press the Up or Down key to select the Picture option.
Wallpaper
Select
Theme
Select
Wallpaper
Select
Picture
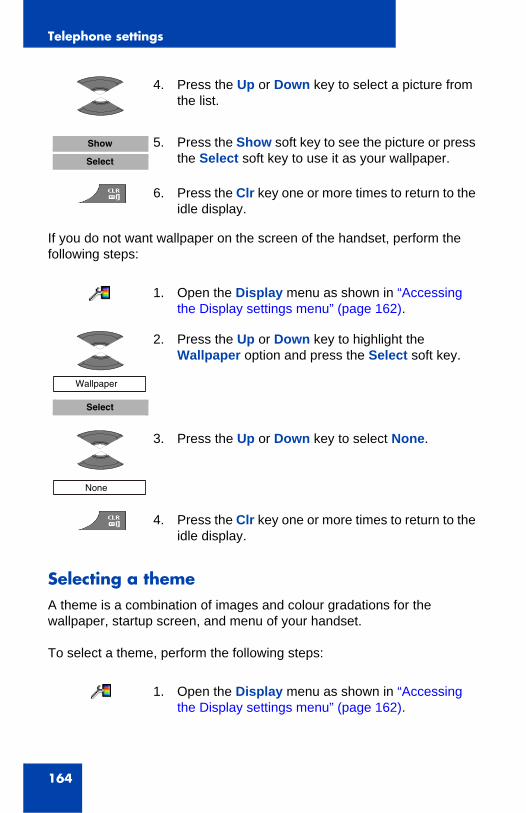
Telephone settings
164
If you do not want wallpaper on the screen of the handset, perform the following steps:
Selecting a theme A theme is a combination of images and colour gradations for the wallpaper, startup screen, and menu of your handset.
To select a theme, perform the following steps:
4. Press the Up or Down key to select a picture from the list.
5. Press the Show soft key to see the picture or press the Select soft key to use it as your wallpaper.
6. Press the Clr key one or more times to return to the idle display.
1. Open the Display menu as shown in “Accessing the Display settings menu” (page 162).
2. Press the Up or Down key to highlight the Wallpaper option and press the Select soft key.
3. Press the Up or Down key to select None.
4. Press the Clr key one or more times to return to the idle display.
1. Open the Display menu as shown in “Accessing the Display settings menu” (page 162).
Show
Select
Wallpaper
Select
None
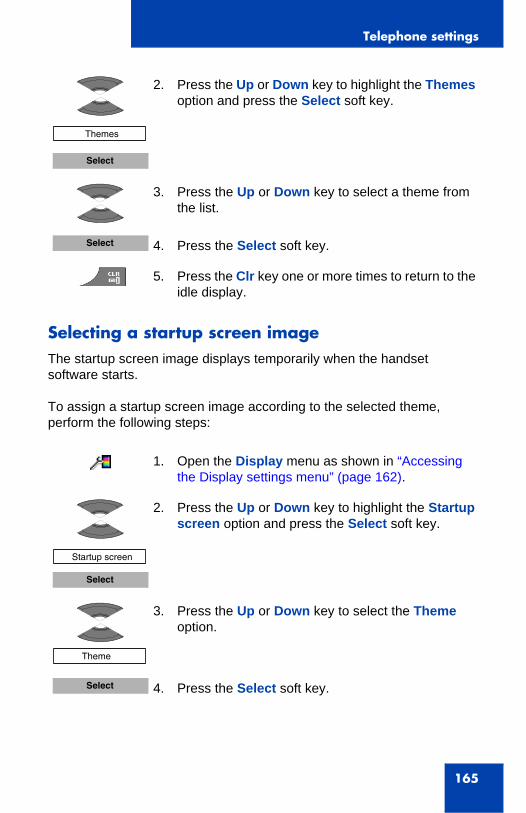
Telephone settings
165
Selecting a startup screen imageThe startup screen image displays temporarily when the handset software starts.
To assign a startup screen image according to the selected theme, perform the following steps:
2. Press the Up or Down key to highlight the Themes option and press the Select soft key.
3. Press the Up or Down key to select a theme from the list.
4. Press the Select soft key.
5. Press the Clr key one or more times to return to the idle display.
1. Open the Display menu as shown in “Accessing the Display settings menu” (page 162).
2. Press the Up or Down key to highlight the Startup screen option and press the Select soft key.
3. Press the Up or Down key to select the Theme option.
4. Press the Select soft key.
Themes
Select
Select
Startup screen
Select
Theme
Select
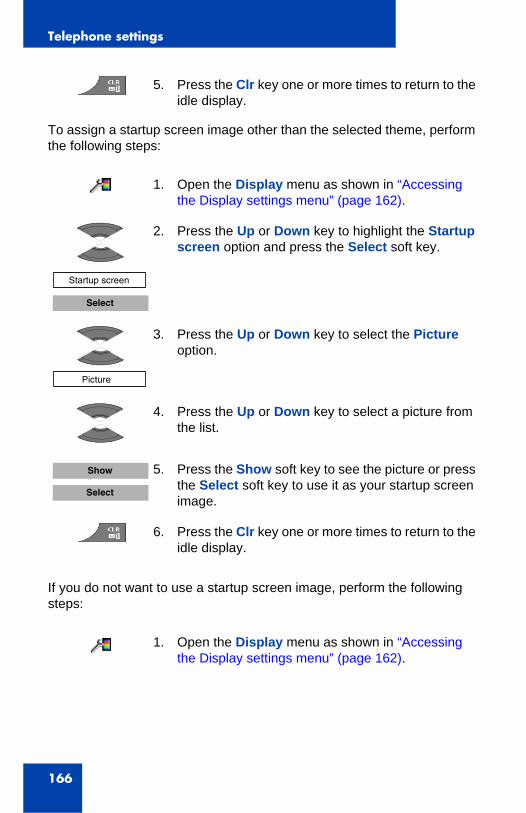
Telephone settings
166
To assign a startup screen image other than the selected theme, perform the following steps:
If you do not want to use a startup screen image, perform the following steps:
5. Press the Clr key one or more times to return to the idle display.
1. Open the Display menu as shown in “Accessing the Display settings menu” (page 162).
2. Press the Up or Down key to highlight the Startup screen option and press the Select soft key.
3. Press the Up or Down key to select the Picture option.
4. Press the Up or Down key to select a picture from the list.
5. Press the Show soft key to see the picture or press the Select soft key to use it as your startup screen image.
6. Press the Clr key one or more times to return to the idle display.
1. Open the Display menu as shown in “Accessing the Display settings menu” (page 162).
Startup screen
Select
Picture
Show
Select
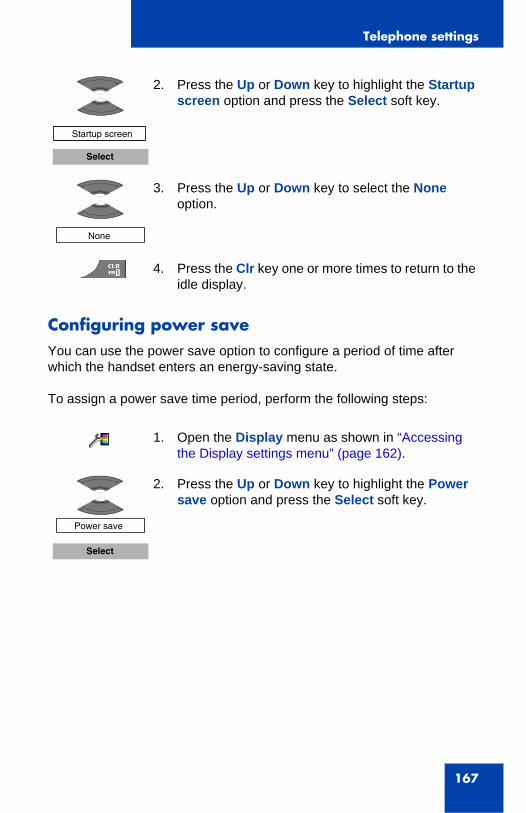
Telephone settings
167
Configuring power save You can use the power save option to configure a period of time after which the handset enters an energy-saving state.
To assign a power save time period, perform the following steps:
2. Press the Up or Down key to highlight the Startup screen option and press the Select soft key.
3. Press the Up or Down key to select the None option.
4. Press the Clr key one or more times to return to the idle display.
1. Open the Display menu as shown in “Accessing the Display settings menu” (page 162).
2. Press the Up or Down key to highlight the Power save option and press the Select soft key.
Startup screen
Select
None
Power save
Select
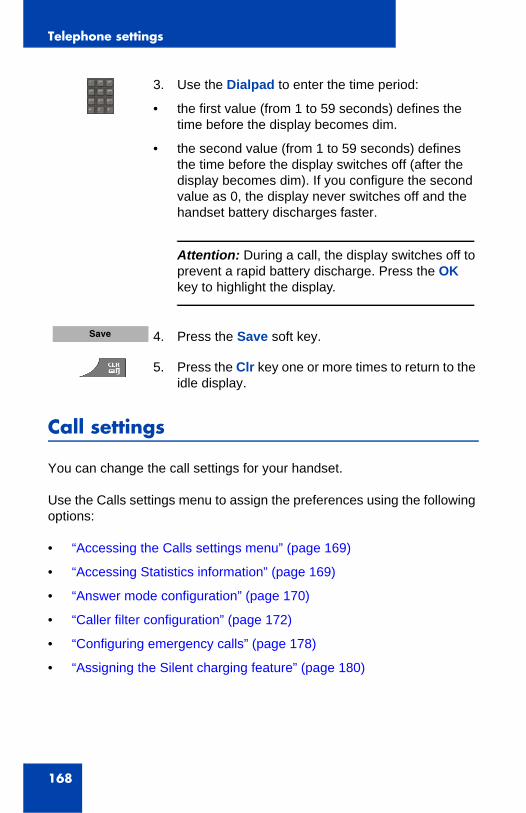
Telephone settings
168
Call settings
You can change the call settings for your handset.
Use the Calls settings menu to assign the preferences using the following options:
• “Accessing the Calls settings menu” (page 169)
• “Accessing Statistics information” (page 169)
• “Answer mode configuration” (page 170)
• “Caller filter configuration” (page 172)
• “Configuring emergency calls” (page 178)
• “Assigning the Silent charging feature” (page 180)
3. Use the Dialpad to enter the time period:
• the first value (from 1 to 59 seconds) defines the time before the display becomes dim.
• the second value (from 1 to 59 seconds) defines the time before the display switches off (after the display becomes dim). If you configure the second value as 0, the display never switches off and the handset battery discharges faster.
Attention: During a call, the display switches off to prevent a rapid battery discharge. Press the OK key to highlight the display.
4. Press the Save soft key.
5. Press the Clr key one or more times to return to the idle display.
Save
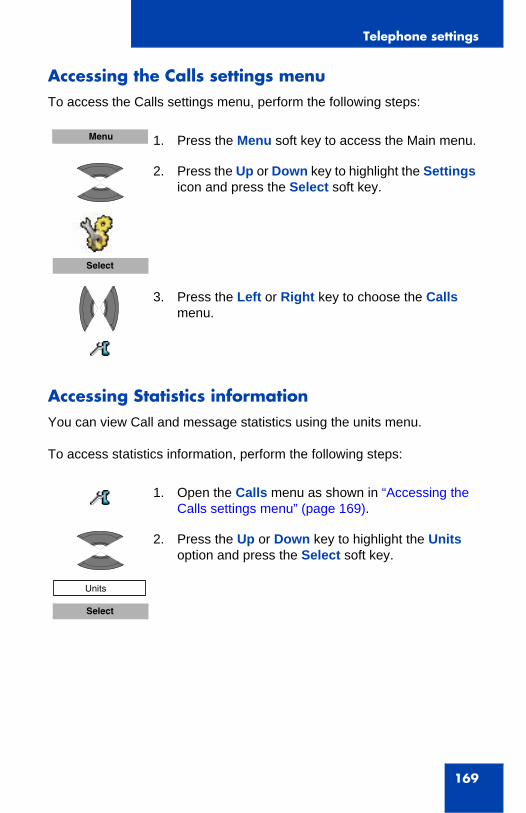
Telephone settings
169
Accessing the Calls settings menuTo access the Calls settings menu, perform the following steps:
Accessing Statistics informationYou can view Call and message statistics using the units menu.
To access statistics information, perform the following steps:
1. Press the Menu soft key to access the Main menu.
2. Press the Up or Down key to highlight the Settings icon and press the Select soft key.
3. Press the Left or Right key to choose the Calls menu.
1. Open the Calls menu as shown in “Accessing the Calls settings menu” (page 169).
2. Press the Up or Down key to highlight the Units option and press the Select soft key.
Menu
Select
Units
Select
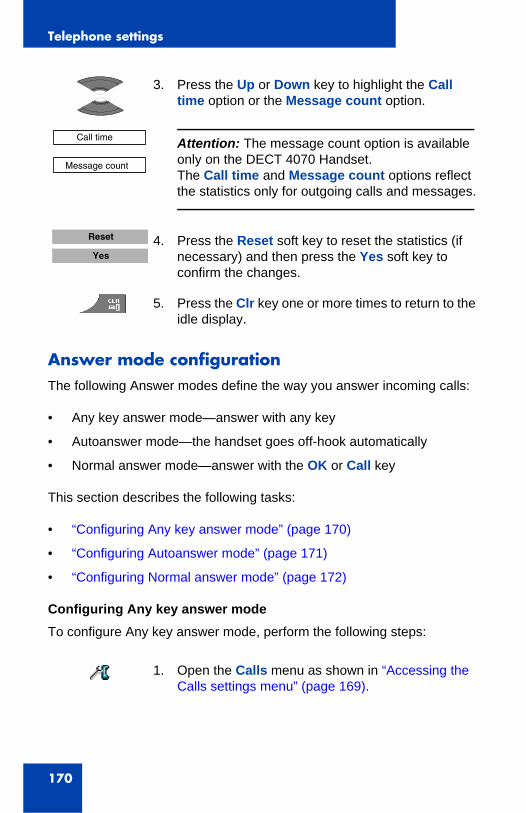
Telephone settings
170
Answer mode configurationThe following Answer modes define the way you answer incoming calls:
• Any key answer mode—answer with any key
• Autoanswer mode—the handset goes off-hook automatically
• Normal answer mode—answer with the OK or Call key
This section describes the following tasks:
• “Configuring Any key answer mode” (page 170)
• “Configuring Autoanswer mode” (page 171)
• “Configuring Normal answer mode” (page 172)
Configuring Any key answer modeTo configure Any key answer mode, perform the following steps:
3. Press the Up or Down key to highlight the Call time option or the Message count option.
Attention: The message count option is available only on the DECT 4070 Handset.The Call time and Message count options reflect the statistics only for outgoing calls and messages.
4. Press the Reset soft key to reset the statistics (if necessary) and then press the Yes soft key to confirm the changes.
5. Press the Clr key one or more times to return to the idle display.
1. Open the Calls menu as shown in “Accessing the Calls settings menu” (page 169).
Call time
Message count
Reset
Yes
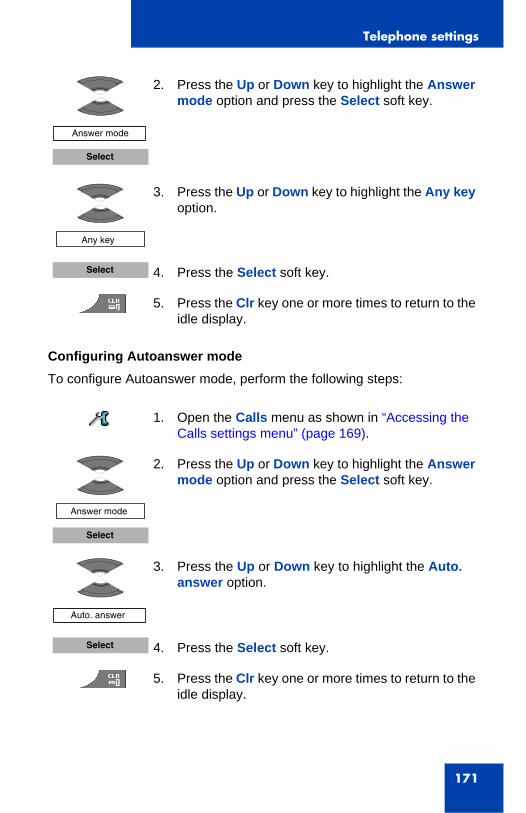
Telephone settings
171
Configuring Autoanswer mode To configure Autoanswer mode, perform the following steps:
2. Press the Up or Down key to highlight the Answer mode option and press the Select soft key.
3. Press the Up or Down key to highlight the Any key option.
4. Press the Select soft key.
5. Press the Clr key one or more times to return to the idle display.
1. Open the Calls menu as shown in “Accessing the Calls settings menu” (page 169).
2. Press the Up or Down key to highlight the Answer mode option and press the Select soft key.
3. Press the Up or Down key to highlight the Auto. answer option.
4. Press the Select soft key.
5. Press the Clr key one or more times to return to the idle display.
Answer mode
Select
Any key
Select
Answer mode
Select
Auto. answer
Select
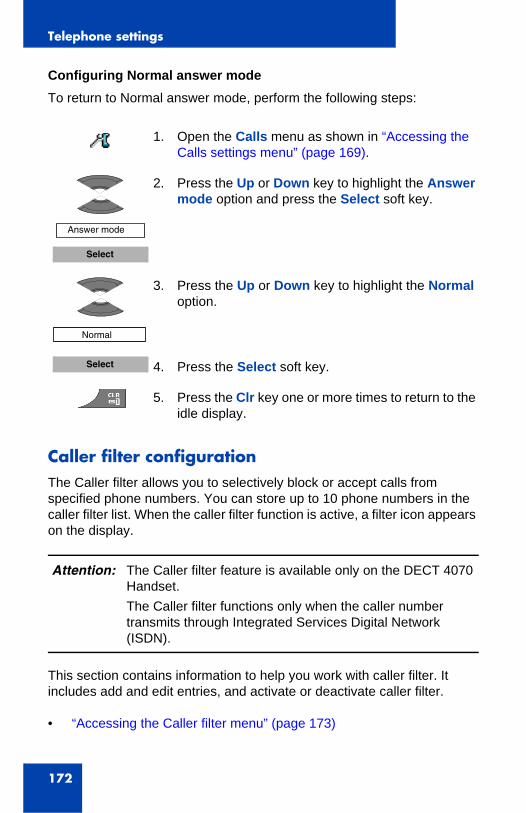
Telephone settings
172
Configuring Normal answer modeTo return to Normal answer mode, perform the following steps:
Caller filter configurationThe Caller filter allows you to selectively block or accept calls from specified phone numbers. You can store up to 10 phone numbers in the caller filter list. When the caller filter function is active, a filter icon appears on the display.
This section contains information to help you work with caller filter. It includes add and edit entries, and activate or deactivate caller filter.
• “Accessing the Caller filter menu” (page 173)
1. Open the Calls menu as shown in “Accessing the Calls settings menu” (page 169).
2. Press the Up or Down key to highlight the Answer mode option and press the Select soft key.
3. Press the Up or Down key to highlight the Normal option.
4. Press the Select soft key.
5. Press the Clr key one or more times to return to the idle display.
Attention: The Caller filter feature is available only on the DECT 4070 Handset.The Caller filter functions only when the caller number transmits through Integrated Services Digital Network (ISDN).
Answer mode
Select
Normal
Select
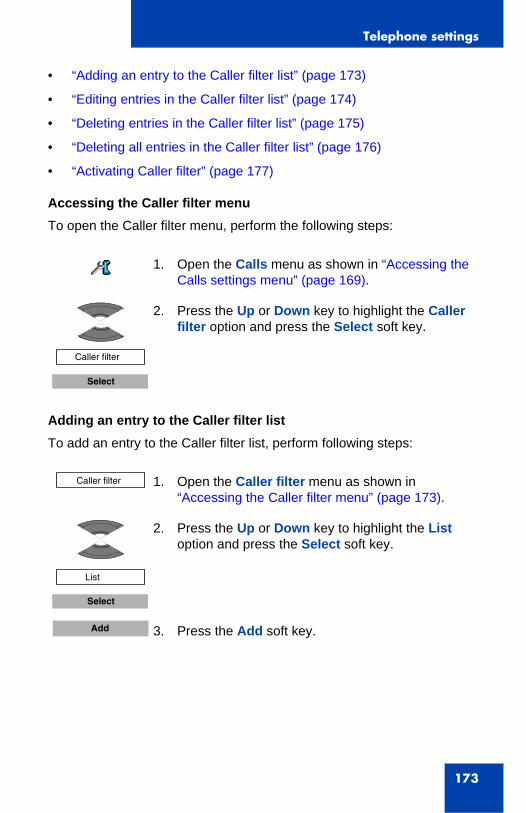
Telephone settings
173
• “Adding an entry to the Caller filter list” (page 173)
• “Editing entries in the Caller filter list” (page 174)
• “Deleting entries in the Caller filter list” (page 175)
• “Deleting all entries in the Caller filter list” (page 176)
• “Activating Caller filter” (page 177)
Accessing the Caller filter menuTo open the Caller filter menu, perform the following steps:
Adding an entry to the Caller filter listTo add an entry to the Caller filter list, perform following steps:
1. Open the Calls menu as shown in “Accessing the Calls settings menu” (page 169).
2. Press the Up or Down key to highlight the Caller filter option and press the Select soft key.
1. Open the Caller filter menu as shown in “Accessing the Caller filter menu” (page 173).
2. Press the Up or Down key to highlight the List option and press the Select soft key.
3. Press the Add soft key.
Caller filter
Select
Caller filter
List
Select
Add
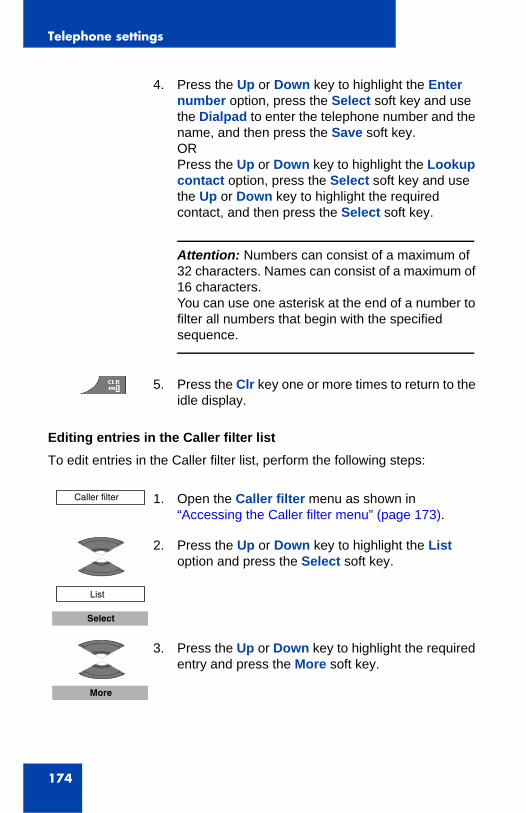
Telephone settings
174
Editing entries in the Caller filter listTo edit entries in the Caller filter list, perform the following steps:
4. Press the Up or Down key to highlight the Enter number option, press the Select soft key and use the Dialpad to enter the telephone number and the name, and then press the Save soft key.ORPress the Up or Down key to highlight the Lookup contact option, press the Select soft key and use the Up or Down key to highlight the required contact, and then press the Select soft key.
Attention: Numbers can consist of a maximum of 32 characters. Names can consist of a maximum of 16 characters.You can use one asterisk at the end of a number to filter all numbers that begin with the specified sequence.
5. Press the Clr key one or more times to return to the idle display.
1. Open the Caller filter menu as shown in “Accessing the Caller filter menu” (page 173).
2. Press the Up or Down key to highlight the List option and press the Select soft key.
3. Press the Up or Down key to highlight the required entry and press the More soft key.
Caller filter
List
Select
More
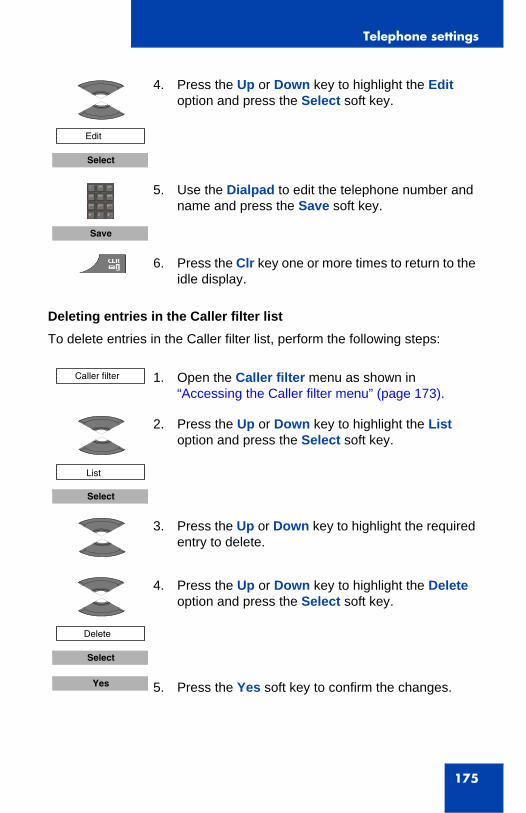
Telephone settings
175
Deleting entries in the Caller filter listTo delete entries in the Caller filter list, perform the following steps:
4. Press the Up or Down key to highlight the Edit option and press the Select soft key.
5. Use the Dialpad to edit the telephone number and name and press the Save soft key.
6. Press the Clr key one or more times to return to the idle display.
1. Open the Caller filter menu as shown in “Accessing the Caller filter menu” (page 173).
2. Press the Up or Down key to highlight the List option and press the Select soft key.
3. Press the Up or Down key to highlight the required entry to delete.
4. Press the Up or Down key to highlight the Delete option and press the Select soft key.
5. Press the Yes soft key to confirm the changes.
Edit
Select
Save
Caller filter
List
Select
Delete
Select
Yes
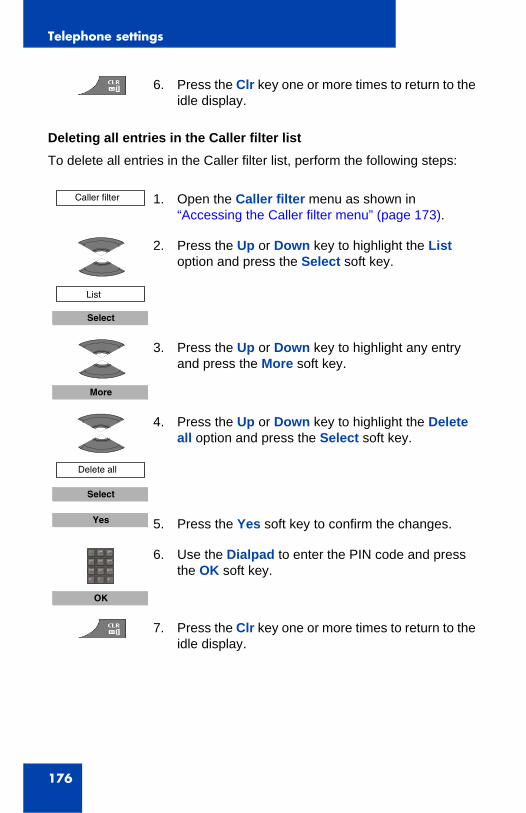
Telephone settings
176
Deleting all entries in the Caller filter listTo delete all entries in the Caller filter list, perform the following steps:
6. Press the Clr key one or more times to return to the idle display.
1. Open the Caller filter menu as shown in “Accessing the Caller filter menu” (page 173).
2. Press the Up or Down key to highlight the List option and press the Select soft key.
3. Press the Up or Down key to highlight any entry and press the More soft key.
4. Press the Up or Down key to highlight the Delete all option and press the Select soft key.
5. Press the Yes soft key to confirm the changes.
6. Use the Dialpad to enter the PIN code and press the OK soft key.
7. Press the Clr key one or more times to return to the idle display.
Caller filter
List
Select
More
Delete all
Select
Yes
OK
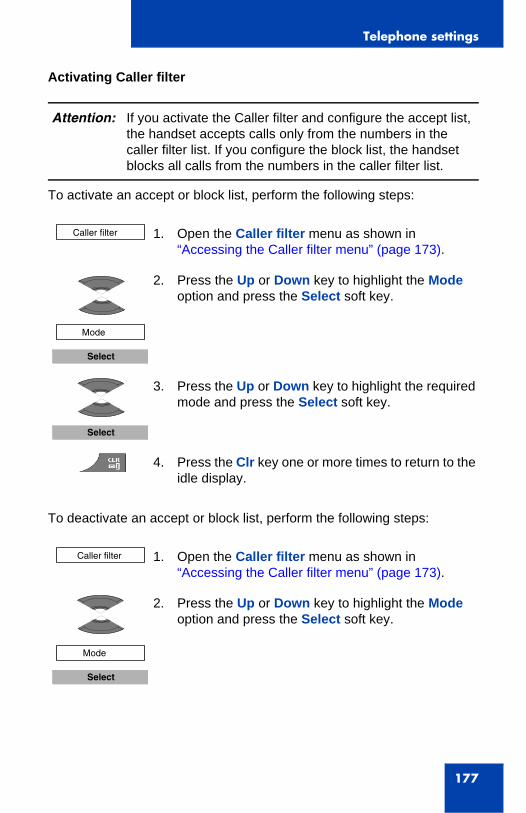
Telephone settings
177
Activating Caller filter
To activate an accept or block list, perform the following steps:
To deactivate an accept or block list, perform the following steps:
Attention: If you activate the Caller filter and configure the accept list, the handset accepts calls only from the numbers in the caller filter list. If you configure the block list, the handset blocks all calls from the numbers in the caller filter list.
1. Open the Caller filter menu as shown in “Accessing the Caller filter menu” (page 173).
2. Press the Up or Down key to highlight the Mode option and press the Select soft key.
3. Press the Up or Down key to highlight the required mode and press the Select soft key.
4. Press the Clr key one or more times to return to the idle display.
1. Open the Caller filter menu as shown in “Accessing the Caller filter menu” (page 173).
2. Press the Up or Down key to highlight the Mode option and press the Select soft key.
Caller filter
Mode
Select
Select
Caller filter
Mode
Select

Telephone settings
178
Configuring emergency callsUse the Emergency call feature to dial a number or send a text message rapidly. Use the Emergency call menu to store an emergency number and a text message. When you press the emergency key, one of the following actions occur:
• If you do not enter a message, the number dials.
• If you define a message (up to 160 characters in length), the handset sends the message to the number.
To assign an emergency call number, perform the following steps:
3. Press the Up or Down key to highlight the Filter off mode and press the Select soft key.
4. Press the Clr key one or more times to return to the idle display.
Attention: The Emergency call feature is available on both DECT 4027 and 4070 Handset, but the message can only be sent from DECT 4070 Handset.You can send text messages only if your system supports this feature. Contact your system administrator to determine if you can use this feature.After you send a message, the handset stores the message in the text message list. For more information, see “Messaging” (page 97).
1. Open the Calls menu as shown in “Accessing the Calls settings menu” (page 169).
Filter off
Select
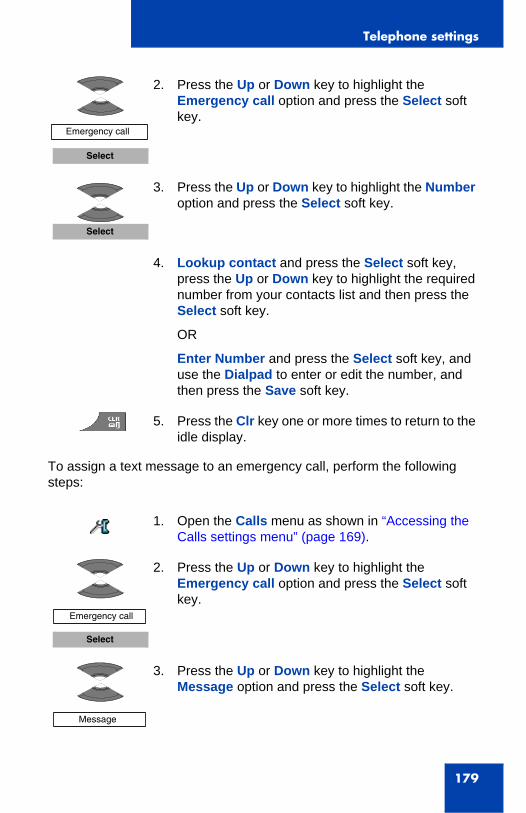
Telephone settings
179
To assign a text message to an emergency call, perform the following steps:
2. Press the Up or Down key to highlight the Emergency call option and press the Select soft key.
3. Press the Up or Down key to highlight the Number option and press the Select soft key.
4. Lookup contact and press the Select soft key, press the Up or Down key to highlight the required number from your contacts list and then press the Select soft key.
OR
Enter Number and press the Select soft key, and use the Dialpad to enter or edit the number, and then press the Save soft key.
5. Press the Clr key one or more times to return to the idle display.
1. Open the Calls menu as shown in “Accessing the Calls settings menu” (page 169).
2. Press the Up or Down key to highlight the Emergency call option and press the Select soft key.
3. Press the Up or Down key to highlight the Message option and press the Select soft key.
Emergency call
Select
Select
Emergency call
Select
Message
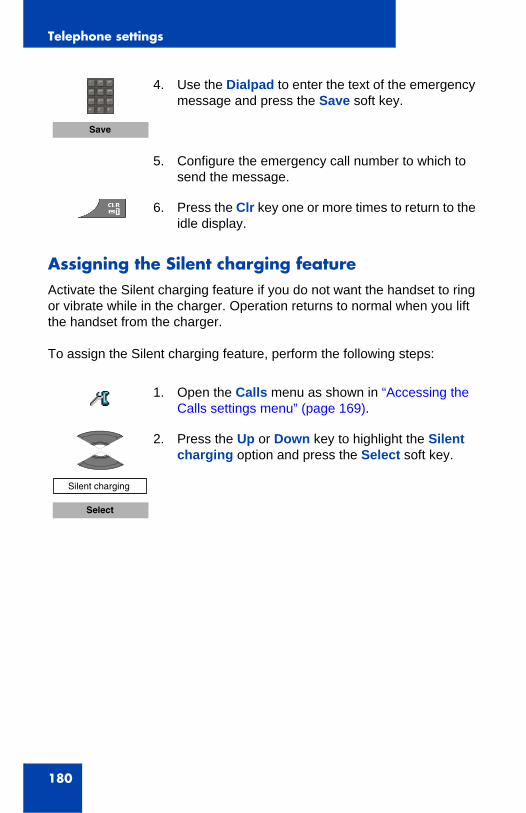
Telephone settings
180
Assigning the Silent charging featureActivate the Silent charging feature if you do not want the handset to ring or vibrate while in the charger. Operation returns to normal when you lift the handset from the charger.
To assign the Silent charging feature, perform the following steps:
4. Use the Dialpad to enter the text of the emergency message and press the Save soft key.
5. Configure the emergency call number to which to send the message.
6. Press the Clr key one or more times to return to the idle display.
1. Open the Calls menu as shown in “Accessing the Calls settings menu” (page 169).
2. Press the Up or Down key to highlight the Silent charging option and press the Select soft key.
Save
Silent charging
Select
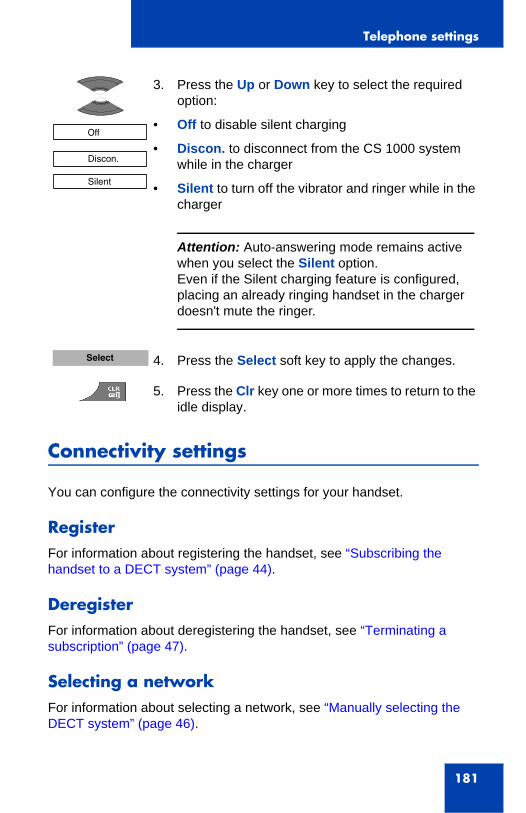
Telephone settings
181
Connectivity settings
You can configure the connectivity settings for your handset.
RegisterFor information about registering the handset, see “Subscribing the handset to a DECT system” (page 44).
DeregisterFor information about deregistering the handset, see “Terminating a subscription” (page 47).
Selecting a networkFor information about selecting a network, see “Manually selecting the DECT system” (page 46).
3. Press the Up or Down key to select the required option:
• Off to disable silent charging
• Discon. to disconnect from the CS 1000 system while in the charger
• Silent to turn off the vibrator and ringer while in the charger
Attention: Auto-answering mode remains active when you select the Silent option.Even if the Silent charging feature is configured, placing an already ringing handset in the charger doesn't mute the ringer.
4. Press the Select soft key to apply the changes.
5. Press the Clr key one or more times to return to the idle display.
Off
Discon.
Silent
Select
Telephone settings
182
Bluetooth
The following sections describe the procedures you can use to configure Bluetooth:
• “Bluetooth module installation” (page 194)
• “Bluetooth headset installation” (page 197)
Attention: The Bluetooth feature is available only on the DECT 4070 Handset.
Accessing additional features using FFC or SPRE codes
183
Accessing additional featuresusing FFC or SPRE codes
Use Flexible Feature Codes (FFC) and Special Prefix (SPRE) codes to access additional features. Contact your system administrator to check if these features are available for your use. You can use the two types of codes as follows:
• FFC codes—dial an FFC to access some of your handset features. To use an FFC, enter the FFC and press the Call key.
• SPRE codes—dial a SPRE code plus a one- or two-digit number to access some of your handset features. The SPRE codes are unique to your system; however, the digits that follow the SPRE are fixed. For example, dial SPRE + 74 to forward all your calls to another number.
To access additional features using FFC or SPRE codes:
Use the following table to list the FFC or SPRE codes assigned by your system administrator.
Attention: FFC and SPRE codes are not applicable to SIP DECT system.
1. Use the Dialpad to enter the FFC or SPRE code while the handset is idle.
2. Press the Call key.
Attention: Contact your system administrator for the specific FFC and SPRE code numbers.
R
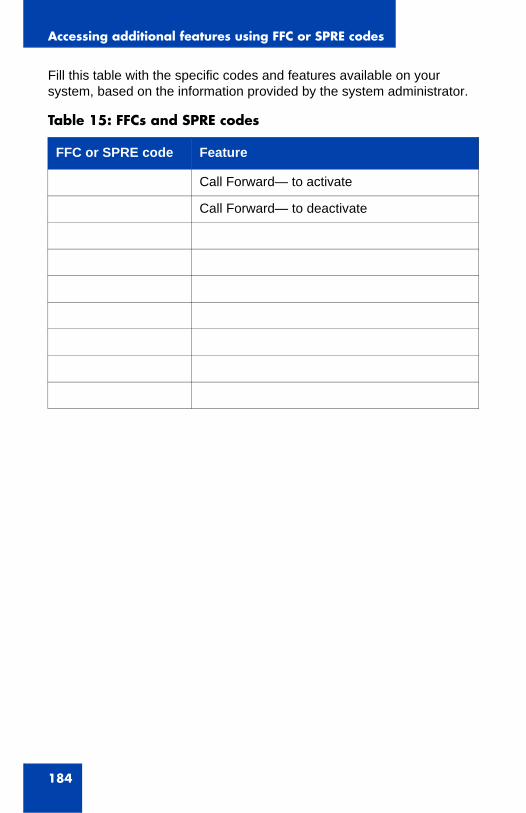
Accessing additional features using FFC or SPRE codes
184
Fill this table with the specific codes and features available on your system, based on the information provided by the system administrator.
Table 15: FFCs and SPRE codes
FFC or SPRE code Feature
Call Forward— to activate
Call Forward— to deactivate

Handset accessories
185
Handset accessories
Nortel provides accessories with your handset. The following table lists the accessories available for the DECT 4027 and 4070 Handsets.
Table 16: List of accessories
Item Description Order code
Multi Charger Multi Charger allows you to charge up to eight DECT 4027 and 4070 Handsets. Universal AC Adapter included.
N0162958
Desktop Charger
Desktop Charger for DECT 4027 and 4070 Handsets.
N0162957
AC Adapter Int
AC Adapter for Desktop Charger— International mains plug.
N0162959
AC Adapter UK
AC Adapter for Desktop Charger— UK mains plug.
N0162962
AC Adapter ANZ
AC Adapter for Desktop Charger— Australia and New Zealand mains plug.
N0162961
Battery Pack Extra handset battery pack for DECT 4027 and 4070 Handsets.
N0165276
Belt Clip Pack
Extra belt clip pack for DECT 4027 and 4070 Handsets.
N0162963
Handset Carry Case
Carry case for DECT 4027 and 4070 Handsets.
N0162964
MEM Card Replacement Memory card for 4027 and 4070 Handsets.
N0162965
Headset Headset for 4027 and 4070 Handsets. A0550712
Handset accessories
186
Installing the belt clipYou can use the belt clip to fasten the handset on a belt (swivel belt clip), shirt or coat pocket (executive clip).
To install the belt clip, perform the following steps:
1. Place the handset facedown on a flat surface.
2. Use the plastic tool to unlock the fastening of the belt clip compartment cover as shown in Figure 17.
The plastic tool is shipped in the box with the handset.
3. Slide out the belt clip compartment cover.
4. Remove the plastic tool.
5. Install the swivel belt clip as shown in Figure 18 or the executive clip as shown in Figure 19.
Bluetooth Module
Bluetooth module for the DECT 4070 Handset.
N0162966
Item Description Order code
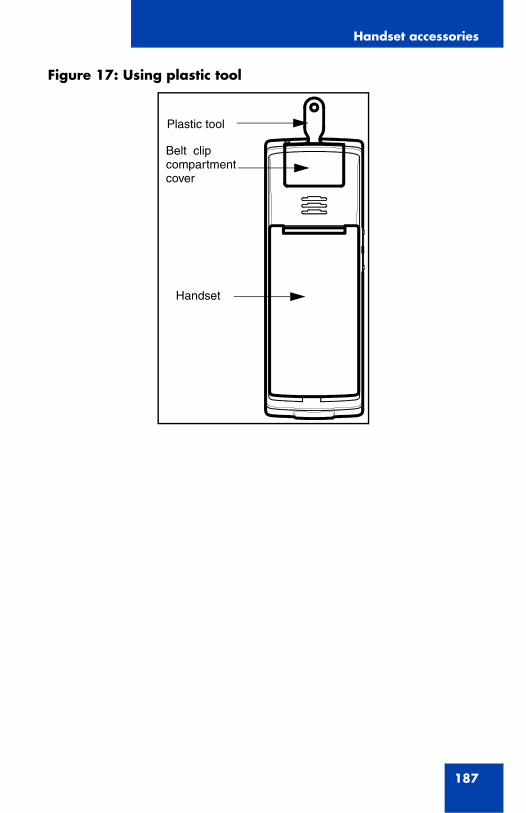
Handset accessories
187
Figure 17: Using plastic tool
Handset
Plastic tool
Belt clip compartmentcover
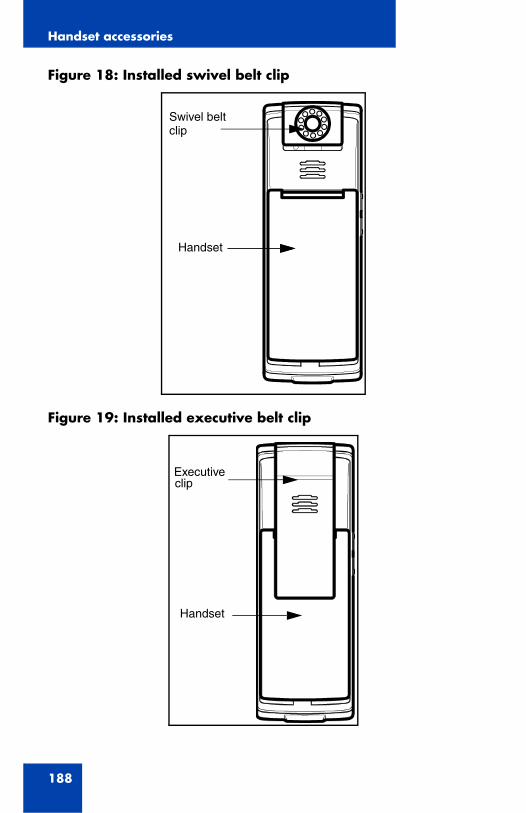
Handset accessories
188
Figure 18: Installed swivel belt clip
Figure 19: Installed executive belt clip
Handset
Swivel belt clip
Executive
Handset
clip
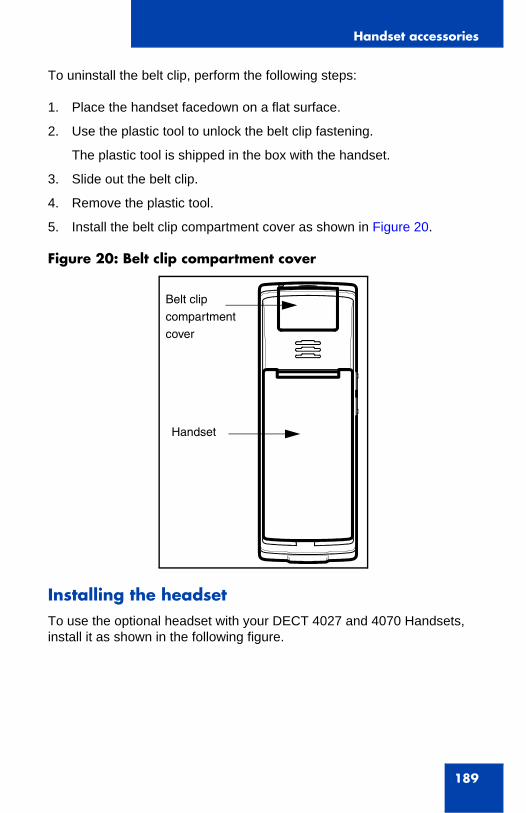
Handset accessories
189
To uninstall the belt clip, perform the following steps:
1. Place the handset facedown on a flat surface.
2. Use the plastic tool to unlock the belt clip fastening.
The plastic tool is shipped in the box with the handset.
3. Slide out the belt clip.
4. Remove the plastic tool.
5. Install the belt clip compartment cover as shown in Figure 20.
Figure 20: Belt clip compartment cover
Installing the headsetTo use the optional headset with your DECT 4027 and 4070 Handsets, install it as shown in the following figure.
Belt clip
compartment
cover
Handset
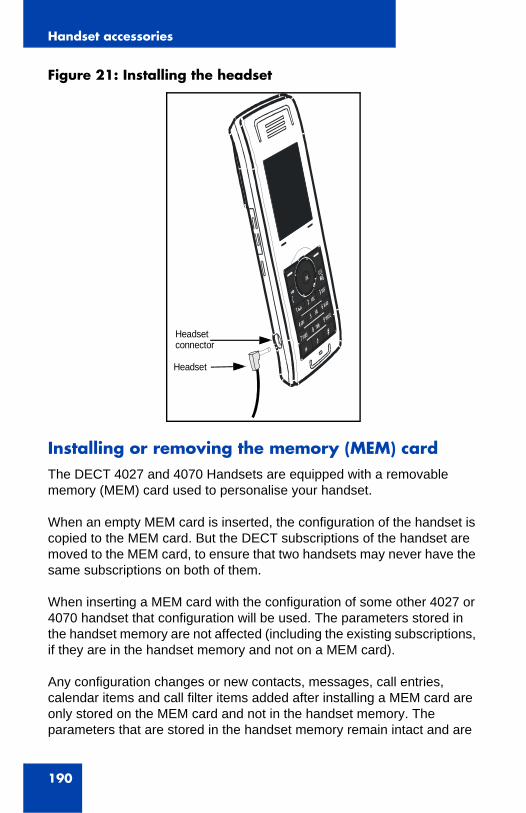
Handset accessories
190
Figure 21: Installing the headset
Installing or removing the memory (MEM) cardThe DECT 4027 and 4070 Handsets are equipped with a removable memory (MEM) card used to personalise your handset.
When an empty MEM card is inserted, the configuration of the handset is copied to the MEM card. But the DECT subscriptions of the handset are moved to the MEM card, to ensure that two handsets may never have the same subscriptions on both of them.
When inserting a MEM card with the configuration of some other 4027 or 4070 handset that configuration will be used. The parameters stored in the handset memory are not affected (including the existing subscriptions, if they are in the handset memory and not on a MEM card).
Any configuration changes or new contacts, messages, call entries, calendar items and call filter items added after installing a MEM card are only stored on the MEM card and not in the handset memory. The parameters that are stored in the handset memory remain intact and are
Headset connector
Headset
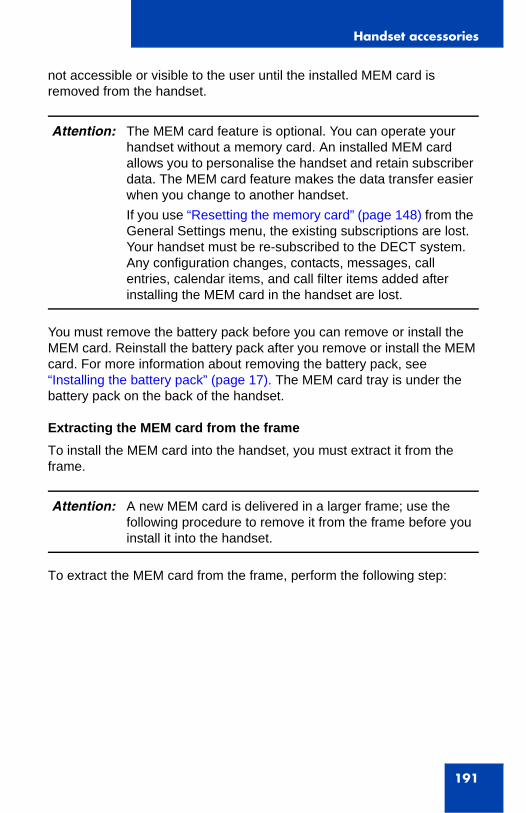
Handset accessories
191
not accessible or visible to the user until the installed MEM card is removed from the handset.
You must remove the battery pack before you can remove or install the MEM card. Reinstall the battery pack after you remove or install the MEM card. For more information about removing the battery pack, see “Installing the battery pack” (page 17). The MEM card tray is under the battery pack on the back of the handset.
Extracting the MEM card from the frameTo install the MEM card into the handset, you must extract it from the frame.
To extract the MEM card from the frame, perform the following step:
Attention: The MEM card feature is optional. You can operate your handset without a memory card. An installed MEM card allows you to personalise the handset and retain subscriber data. The MEM card feature makes the data transfer easier when you change to another handset.If you use “Resetting the memory card” (page 148) from the General Settings menu, the existing subscriptions are lost. Your handset must be re-subscribed to the DECT system. Any configuration changes, contacts, messages, call entries, calendar items, and call filter items added after installing the MEM card in the handset are lost.
Attention: A new MEM card is delivered in a larger frame; use the following procedure to remove it from the frame before you install it into the handset.
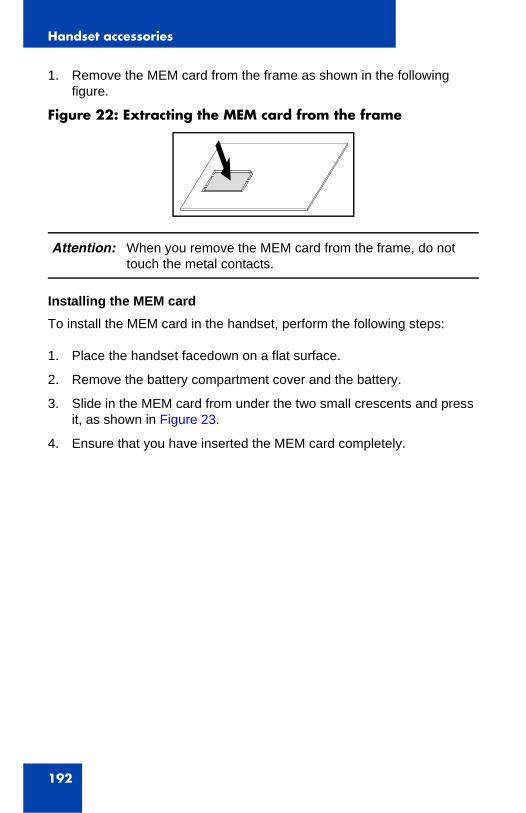
Handset accessories
192
1. Remove the MEM card from the frame as shown in the following figure.
Figure 22: Extracting the MEM card from the frame
Installing the MEM cardTo install the MEM card in the handset, perform the following steps:
1. Place the handset facedown on a flat surface.
2. Remove the battery compartment cover and the battery.
3. Slide in the MEM card from under the two small crescents and press it, as shown in Figure 23.
4. Ensure that you have inserted the MEM card completely.
Attention: When you remove the MEM card from the frame, do not touch the metal contacts.
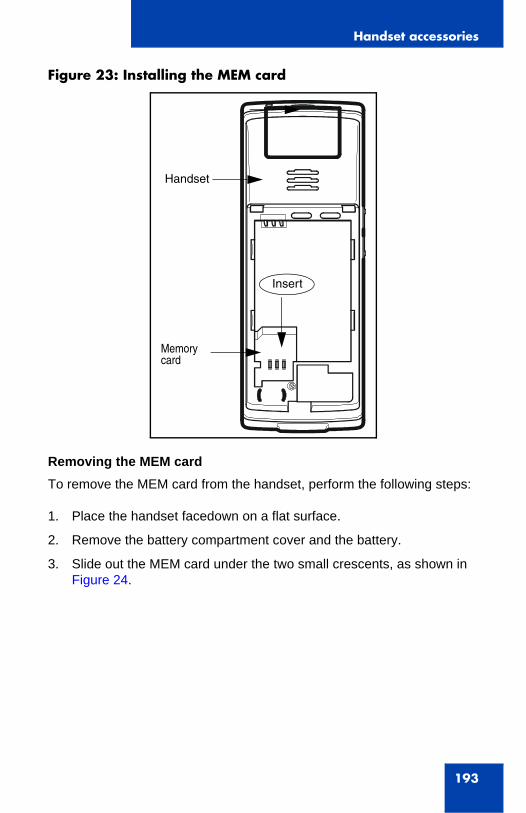
Handset accessories
193
Figure 23: Installing the MEM card
Removing the MEM cardTo remove the MEM card from the handset, perform the following steps:
1. Place the handset facedown on a flat surface.
2. Remove the battery compartment cover and the battery.
3. Slide out the MEM card under the two small crescents, as shown in Figure 24.
Memory card
Handset
Insert
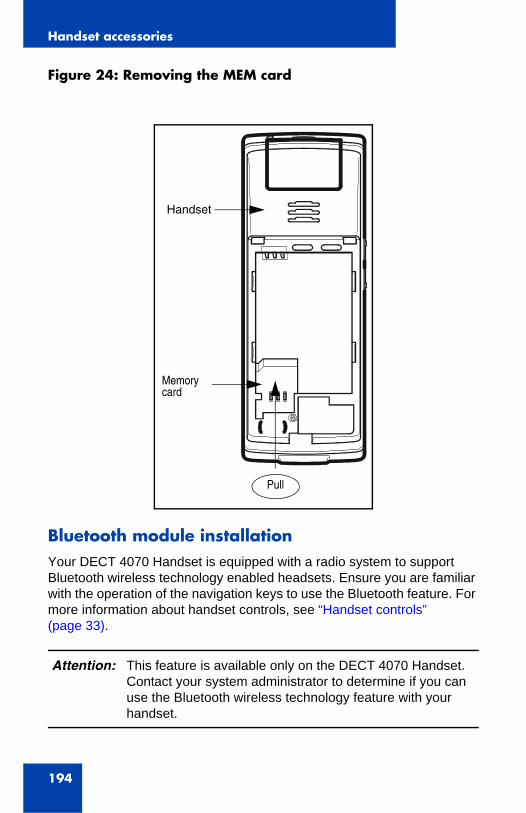
Handset accessories
194
Figure 24: Removing the MEM card
Bluetooth module installationYour DECT 4070 Handset is equipped with a radio system to support Bluetooth wireless technology enabled headsets. Ensure you are familiar with the operation of the navigation keys to use the Bluetooth feature. For more information about handset controls, see “Handset controls” (page 33).
Attention: This feature is available only on the DECT 4070 Handset. Contact your system administrator to determine if you can use the Bluetooth wireless technology feature with your handset.
Memory card
Handset
Pull
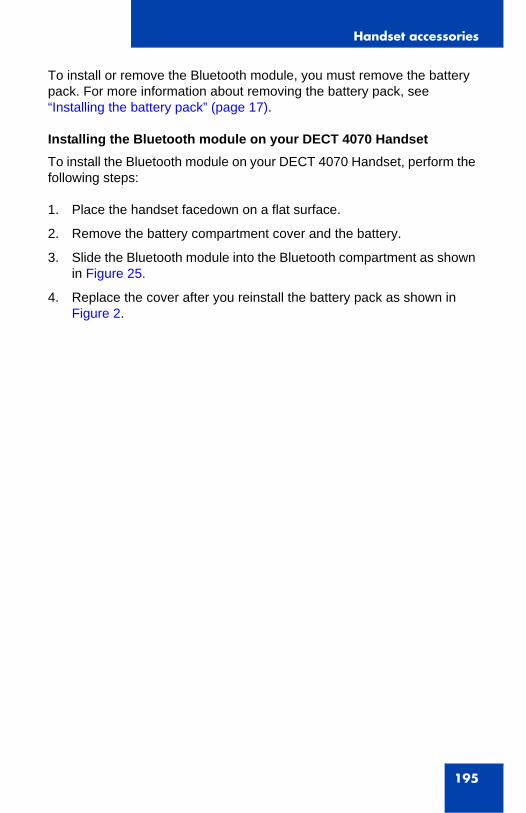
Handset accessories
195
To install or remove the Bluetooth module, you must remove the battery pack. For more information about removing the battery pack, see “Installing the battery pack” (page 17).
Installing the Bluetooth module on your DECT 4070 HandsetTo install the Bluetooth module on your DECT 4070 Handset, perform the following steps:
1. Place the handset facedown on a flat surface.
2. Remove the battery compartment cover and the battery.
3. Slide the Bluetooth module into the Bluetooth compartment as shown in Figure 25.
4. Replace the cover after you reinstall the battery pack as shown in Figure 2.
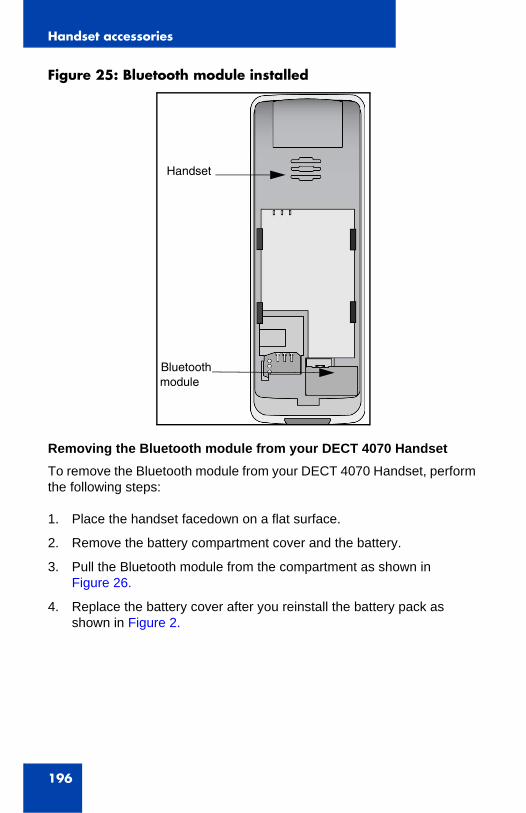
Handset accessories
196
Figure 25: Bluetooth module installed
Removing the Bluetooth module from your DECT 4070 HandsetTo remove the Bluetooth module from your DECT 4070 Handset, perform the following steps:
1. Place the handset facedown on a flat surface.
2. Remove the battery compartment cover and the battery.
3. Pull the Bluetooth module from the compartment as shown in Figure 26.
4. Replace the battery cover after you reinstall the battery pack as shown in Figure 2.
Handset
Bluetoothmodule
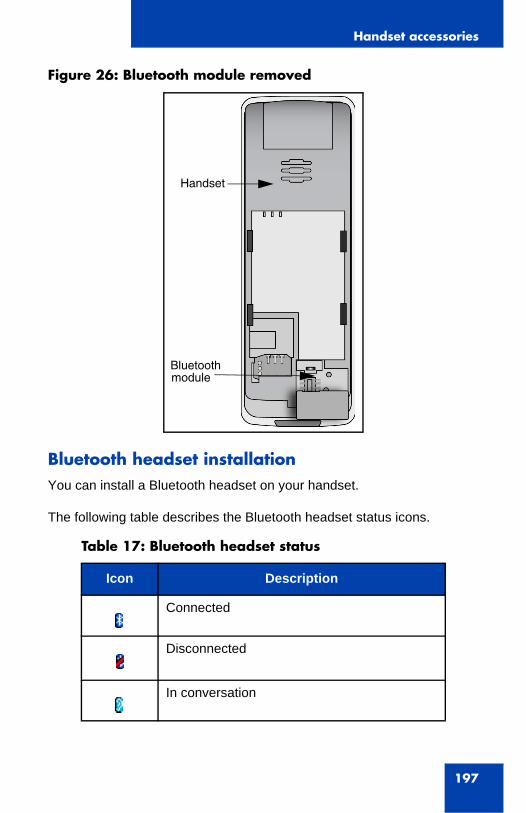
Handset accessories
197
Figure 26: Bluetooth module removed
Bluetooth headset installationYou can install a Bluetooth headset on your handset.
The following table describes the Bluetooth headset status icons.
Table 17: Bluetooth headset status
Icon Description
Connected
Disconnected
In conversation
Handset
Bluetoothmodule
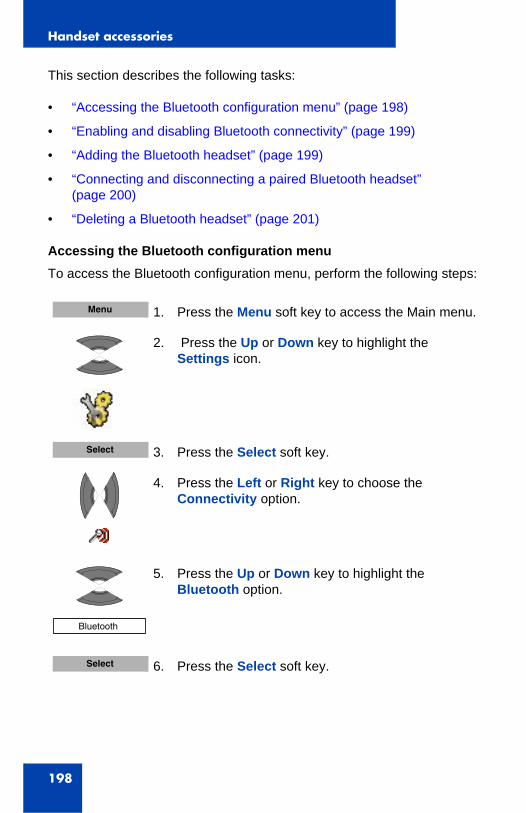
Handset accessories
198
This section describes the following tasks:
• “Accessing the Bluetooth configuration menu” (page 198)
• “Enabling and disabling Bluetooth connectivity” (page 199)
• “Adding the Bluetooth headset” (page 199)
• “Connecting and disconnecting a paired Bluetooth headset” (page 200)
• “Deleting a Bluetooth headset” (page 201)
Accessing the Bluetooth configuration menuTo access the Bluetooth configuration menu, perform the following steps:
1. Press the Menu soft key to access the Main menu.
2. Press the Up or Down key to highlight the Settings icon.
3. Press the Select soft key.
4. Press the Left or Right key to choose the Connectivity option.
5. Press the Up or Down key to highlight the Bluetooth option.
6. Press the Select soft key.
Menu
Select
Bluetooth
Select
Handset accessories
199
Enabling and disabling Bluetooth connectivityTo enable and disable Bluetooth connectivity, perform the following steps:
Adding the Bluetooth headsetTo add the Bluetooth headset, perform the following steps:
1. Open the Bluetooth configuration menu as shown in “Accessing the Bluetooth configuration menu” (page 198).
2. If the first menu option is Disabled, press the Select soft key, and then press the Yes soft key to enable Bluetooth.
OR
If the first menu option is Enabled, press the Select soft key, and then press the Yes soft key to disable Bluetooth.
3. Press the Clr key one or more times to return to the idle display.
1. Open the Bluetooth configuration menu as shown in “Accessing the Bluetooth configuration menu” (page 198).
2. Enable Bluetooth if it is disabled as shown in “Enabling and disabling Bluetooth connectivity” (page 199).
3. Start pairing mode on your Bluetooth headset (refer to the headset documentation).
Bluetooth
R
Bluetooth
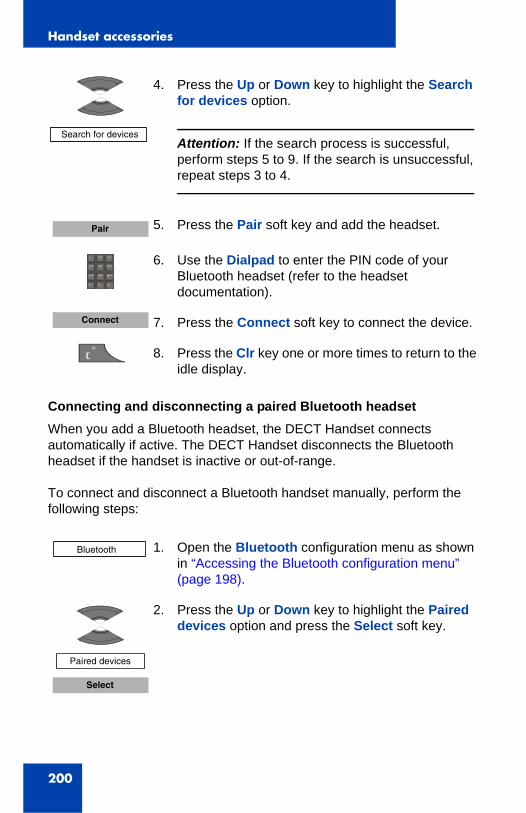
Handset accessories
200
Connecting and disconnecting a paired Bluetooth headsetWhen you add a Bluetooth headset, the DECT Handset connects automatically if active. The DECT Handset disconnects the Bluetooth headset if the handset is inactive or out-of-range.
To connect and disconnect a Bluetooth handset manually, perform the following steps:
4. Press the Up or Down key to highlight the Search for devices option.
Attention: If the search process is successful, perform steps 5 to 9. If the search is unsuccessful, repeat steps 3 to 4.
5. Press the Pair soft key and add the headset.
6. Use the Dialpad to enter the PIN code of your Bluetooth headset (refer to the headset documentation).
7. Press the Connect soft key to connect the device.
8. Press the Clr key one or more times to return to the idle display.
1. Open the Bluetooth configuration menu as shown in “Accessing the Bluetooth configuration menu” (page 198).
2. Press the Up or Down key to highlight the Paired devices option and press the Select soft key.
Search for devices
Pair
Connect
R
Bluetooth
Paired devices
Select
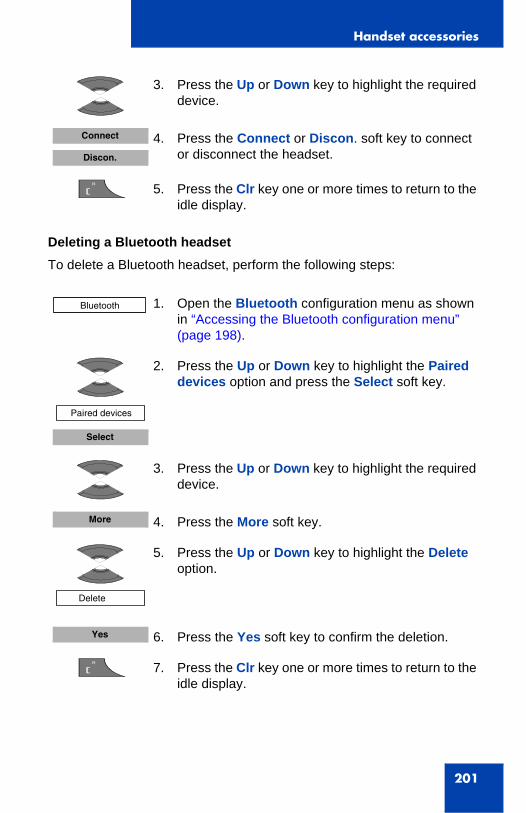
Handset accessories
201
Deleting a Bluetooth headsetTo delete a Bluetooth headset, perform the following steps:
3. Press the Up or Down key to highlight the required device.
4. Press the Connect or Discon. soft key to connect or disconnect the headset.
5. Press the Clr key one or more times to return to the idle display.
1. Open the Bluetooth configuration menu as shown in “Accessing the Bluetooth configuration menu” (page 198).
2. Press the Up or Down key to highlight the Paired devices option and press the Select soft key.
3. Press the Up or Down key to highlight the required device.
4. Press the More soft key.
5. Press the Up or Down key to highlight the Delete option.
6. Press the Yes soft key to confirm the deletion.
7. Press the Clr key one or more times to return to the idle display.
Connect
Discon.
R
Bluetooth
Paired devices
Select
More
Delete
Yes
R

Handset accessories
202
Terms you should know
203
Terms you should know
Nortel Communication Server 1000 (CS 1000)
Your office Private Branch Exchange system.
DECT
Digital Enhanced Cordless Telecommunications
Directory Number (DN)
A number that consists of one to seven digits for a telephone. Also known as an extension number.
Fixed key
The hard-labelled keys on your telephone.
Flexible Feature Code (FFC)
Specialised codes entered using the dialpad that enable features (for example, Ring Again).
Key lock
A feature used to disable key input and prevent accidental operation.
Long Press
Press and hold a key for 2 seconds and then release it.
MEM card
A removable memory card (storage device) for contacts, messages, call logs, and subscriptions.
SIP DECT
Nortel VoIP DECT system that uses the SIP protocol to establish calls.
Terms you should know
204
Soft keys
Two keys located below the display, that have different functions and labels depending on the current operational mode of the handset
System or Switch
Your office communication system.
Traditional DECT
Nortel DECT system based on DMC cards.
Voice mail
A system that allows you to exchange spoken messages with other users.
Index
205
Index
AAccessing additional features using FFC or SPRE codes 183Accessing bluetooth configuration menu 198Accessing contacts menu 87Accessing general settings menu 136Accessing Statistics information 169Accessing the all calls list 64Accessing the answered calls list 69Accessing the Calendar feature 117Accessing the Call settings menu 169Accessing the caller filter menu 173Accessing the connectivity menu 43Accessing the dialled calls list 75Accessing the display settings menu 162Accessing the inbox messaging menu 103Accessing the message settings menu 112Accessing the messaging menu 98Accessing the missed calls list 81Accessing the sent messaging menu 108Accessing the Sounds and Alerts
menu 150Accessing the sounds and alerts menu 149Accessing voice mail 60Accessories 125Activating caller Filter 177Activating caller filter 177Adding a new contact 87Adding an appointment 118Adding an entry to the caller filter list 173Adding bluetooth headset 199Adjusting the ear piece or speaker volume 57Alarms 128All calls list 64Answer mode configuration 170Answered calls list 69Answering a call 55Answering a call in Normal mode 56Answering a call with any key 56Assigning a daily alarm 129Assigning a recurrent alarm 131Assigning a speed dial number 93Assigning confirmation sound 159Assigning the Increasing ring feature 155Assigning the Silent charging feature 180Assigning the time and date 139Audio settings 149
Index
206
Auto-answering mode 56
BBluetooth 182Bluetooth headset installation 197Bluetooth module installation 194
CCalculator 125Calculator icons 126Calendar 116Call mode 28Call settings 168Caller filter configuration 172Caller list icons 63Calling features 50Calls 50Calls list 62Change settings during a call 57Changing PIN code 146Changing the calendar format 117Charge display 24Charging and operating times 23Charging guidelines 22Charging the batteries 21Checking details of the answered call 70Checking details of the call 65Checking details of the dialed call 75Checking details of the dialled call 75Checking details of the missed call 81Choosing a language 141
CLID (Calling Line Identification) 62Components and functions 33Configuring a profile 136Configuring alert volume 155Configuring Any key answer mode 170Configuring Autoanswer mode 171Configuring emergency calls 178Configuring Normal answer mode 172Configuring power save 167Configuring shortcuts 143Configuring the Overwrite option 112Configuring the ring volume 150Configuring the Sent message option 113Confirming receipts 114Connecting and disconnecting paired bluetooth headset 200Connectivity settings 181Contacts 86Copying an appointment 122
DDECT 4027 and 4070 Handsets configuration 43DECT 4027/4070 Handset installation 43DECT system configuration 43DECT system name 44Defining a Voice mail number 60, 113Defining the alert tone melody 156

Index
207
Defining the handset name 147Defining the Normal message melody 153Defining the Ring emergency melody 155Defining the ring external melody 151Defining the ring internal melody 152Defining the Ring unknown call melody 153Defining the Urgent message melody 154Deleting a contact 92Deleting a draft 101Deleting a sent message 110Deleting all drafts 101Deleting all entries 68, 79, 85Deleting all entries in the Caller filter list 176Deleting all incoming messages 107Deleting all sent messages 111Deleting an appointment 123Deleting an entry 68, 73, 78, 84
68Deleting an incoming message 106Deleting bluetooth headset 201Deleting entries in the caller filter list 175Deleting the speed dial number 95Deregister 181Dialled calls list 74Dialling a number 50, 65, 82Dialogue area 27
Dialogue mode 29Directory Number 203Display areas 25Display Characteristics 25Display Settings 162DN 203
EEdit mode 31Editing a contact name 91Editing a contact ringtone 91Editing a daily alarm 130Editing a profile 138Editing a recurrent alarm 132Editing an appointment 120Editing entries in the caller filter list 174Editing the Adding Appointment 120Editing the system name and phone number 48Enabling and disabling bluetooth 199Enabling automatic DECT system selection 46Enabling the Charger warning feature 161Enabling the coverage warning feature 160Enabling the Increasing alert feature 157Enabling the Key sound feature 158Enabling the Vibrator feature 158Extracting the MEM card from the frame 191
Index
208
FFeature overview 13Fixed key 203Flexible Feature 183Flexible Feature Code (FFC) 203Forwarding a sent message 109Forwarding an incoming message 104
GGeneral settings 135Getting started 17
HHandset accessories 185Handset controls 33
IIcon Line 26Icon line 26Idle mode 27Important battery information 22Inbox 102Installation of the belt clip 186Installation of the headset 189Installing and removing battery pack 17Installing or removing the memory (MEM) card 190Installing the battery pack 17, 18Installing the belt clip 186Installing the bluetooth module on DECT 4070 Handset 195Installing the charger 19Installing the MEM card 192
KKey functions in Call mode 36Key functions in Dialogue mode 37Key functions in Edit mode 39Key functions in Idle mode 34Key functions in Menu mode 38Key functions in menu mode 38Key functions in menus 36
LLocking or unlocking the dialpad 42
MMake a call 50Making an SOS call 55Manually selecting the DECT system 46Menu mode 30Message limitations 97Message list full 115Message settings 111Messaging 97Missed calls list 79Muting the ringer 56
NNetwork select 181New messages and drafts 98Normal answer mode configuration 172Normal Messages 113Normal messages 114
Index
209
PPARK code 44power 167
RReading a sent message 108Reading an incoming message 103Reassigning the speed dial number 94Register 181Regulatory and Safety Information 14Regulatory and safety information 14Rejecting a call 57Removing the bluetooth module from your 4070 handset 196Removing the MEM card 193Replying an incoming message 104Resetting settings 147Resetting the memory card 148Ring emergency melody 155Ring external melody 151Ring internal melody 152Ring unknown call melody 153
SSafety precautions 15Saving a new message or editing the draft 99Saving to contacts 106Security options 143Selecting a date 117
Selecting a startup screen image 165Selecting a theme 164Selecting wallpaper 162Sending 100Sending a new message or draft 100Sent message option 113Sent messages 108Soft key line 32Special Prefix 183Speed dial feature 93Subscribing the Handset to a DECT System 44Subscribing the handset to a DECT system 44Switching the handset on or off 25
TTelephone settings 135Transferring a call 58Transferring a number to the caller filter 67, 72, 77, 83Transferring a number to the Caller Filter (only for 4070) 67Transferring a number to the contacts 66, 76, 82Transferring phone numbers to the caller filter list 96, 178Transferring phone numbers to the contacts 95Turning off a daily alarm 131Turning off a recurrent alarm 134
UUrgent messages 114

Index
210
Using 53Using Automatic key lock feature 144Using Loudspeaker 52Using mute during a call 58Using Phone lock feature 144Using Predial 51Using Predial mode 51Using Speed call 52Using Speed dial 52Using the Central Directory to dial a number 53Using the Stopwatch 127Using the telephone book to dial a number 53
VViewing an appointment 120Viewing status information 149Voice mail 59

Nortel Communication Server 1000
DECT 4027 and 4070 HandsetsUser Guide
Copyright © 2008, Nortel Networks.All Rights Reserved.
LEGAL NOTICEWhile the information in this document is believed to be accurate and reliable, except as otherwise expressly agreed to in writing NORTEL PROVIDES THIS DOCUMENT "AS IS" WITHOUT WARRANTY OR CONDITION OF ANY KIND, EITHER EXPRESS OR IMPLIED. The information and/or products described in this document are subject to change without notice.Nortel, Nortel (Logo), the Globemark, SL-1, Meridian 1, and Successionare trademarks of Nortel Networks.All other trademarks are the property of their respective owners.
Publication Number: NN43120-122Document Release: Standard 01.08Date: April 2008
Produced in Canada
To provide feedback or report a problem in this document, go towww.nortel.com/documentfeedback.
www.nortel.com