Embed Size (px)
Citation preview
© Copyright 2002 by Deitel & Associates, Inc. All Rights Reserved.
1Deitel® Dive-Into™ Series: Dive-Into Cygwin and GNU
C++
Objectives• To be able to use Cygwin, a UNIX simulator. • To be able to use a text editor to create C++ source
files• To be able to use GCC to compile and execute C++
applications with single source files.• To be able to use GCC to compile and execute C++
applications with multiple source files. • To be able to use GDB to debug a C++ program.
2 Deitel® Dive-Into™ Series: Dive-Into Cygwin and GNU C++
© Copyright 2002 by Deitel & Associates, Inc. All Rights Reserved.
1.1 IntroductionWelcome to the Cygwin UNIX simulating environment. In this chapter you will learn howto compile and execute C++ programs using the powerful C++ development tool fromGNU—GCC. When you complete this chapter, you will be able to use GCC to begin run-ning applications. This guide is suitable for use as a companion text in a first year universityC++ programming course sequence.
This guide does not teach C++; rather, it is intended to be used as a companion to ourtextbook C++ How To Program, Fourth Edition or any other ANSI/ISO C++ textbook.Many of our readers have asked us to provide a supplement that would introduce the fun-damental command line concepts using GCC and a basic overview of the Cygwin environ-ment. Our readers asked us to use the same “live-code” approach with outputs that weemploy in all our How to Program Series textbooks.
Before proceeding with this chapter, you should be familiar with the topics in Chapter1, “Introduction to Computers and C++ Programming”, Chapter 2, “Control Structures”,Chapter 3, “Functions” and Chapter 6, “Classes and Data Abstraction” of C++ How to Pro-gram, Fourth Edition. We hope you enjoy learning about the Cygwin environment and theGCC command line compiler with this textbook.
1.2 Installing CygwinCygwin is a Windows program that emulates a UNIX environment. It can be used to runUNIX programs and operate the computer as if it were setup as a UNIX machine. The pro-gram is command line based so there is no graphical user interface. Navigation and execu-tion of programs is the same as any UNIX operating system.
1. The necessary setup files can be obtained from the Cygwin Web site atwww.cygwin.com. Download and Save the file to a known place on the localhard drive or simply click Open to execute the file after download is complete.
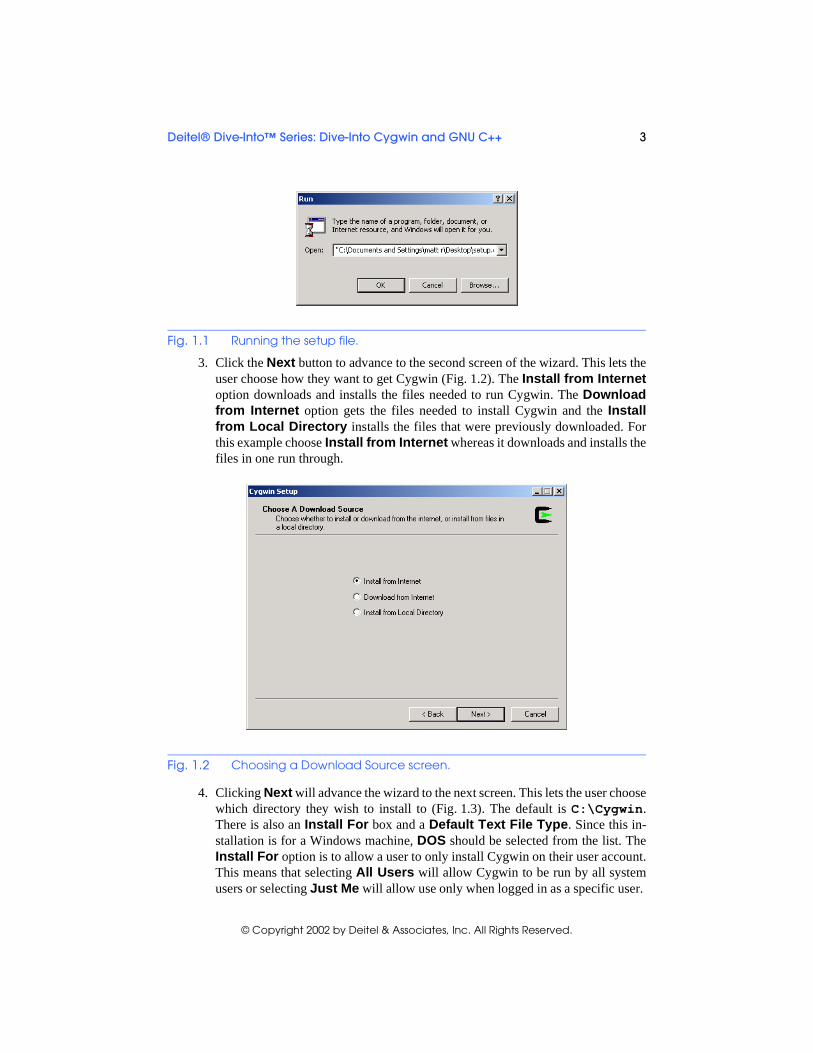
2. The setup file can be run by clicking Start and selecting Run... from the menu(Fig. 1.1). Then enter in the location of the setup file, or click the Browse buttonto select the setup file. Click the OK button to run the Cygwin Setup wizard. Thewizard is used not only to install, but also to update the Cygwin environment.
Outline
1.1 Introduction1.2 Installing Cygwin1.3 Creating a C++ Program1.4 GNU Compiler Collection (GCC)
1.4.1 Compiling and Executing a Program with GCC1.4.2 Compiling Programs with Multiple Source Files
1.5 The STLPort Library1.6 Using the GDB Debugger
1.6.1 Debugging an Application
Deitel® Dive-Into™ Series: Dive-Into Cygwin and GNU C++ 3
© Copyright 2002 by Deitel & Associates, Inc. All Rights Reserved.
3. Click the Next button to advance to the second screen of the wizard. This lets theuser choose how they want to get Cygwin (Fig. 1.2). The Install from Internetoption downloads and installs the files needed to run Cygwin. The Downloadfrom Internet option gets the files needed to install Cygwin and the Installfrom Local Directory installs the files that were previously downloaded. Forthis example choose Install from Internet whereas it downloads and installs thefiles in one run through.
4. Clicking Next will advance the wizard to the next screen. This lets the user choosewhich directory they wish to install to (Fig. 1.3). The default is C:\Cygwin.There is also an Install For box and a Default Text File Type. Since this in-stallation is for a Windows machine, DOS should be selected from the list. TheInstall For option is to allow a user to only install Cygwin on their user account.This means that selecting All Users will allow Cygwin to be run by all systemusers or selecting Just Me will allow use only when logged in as a specific user.
Fig. 1.1 Running the setup file.
Fig. 1.2 Choosing a Download Source screen.

4 Deitel® Dive-Into™ Series: Dive-Into Cygwin and GNU C++
© Copyright 2002 by Deitel & Associates, Inc. All Rights Reserved.
5. Clicking Next brings up the Package Directory screen (Fig. 1.4). This allowsthe user to specify where they would like the install files to be downloaded. Thesefiles may be deleted after installation is complete. Click Next to proceed to thenext step.
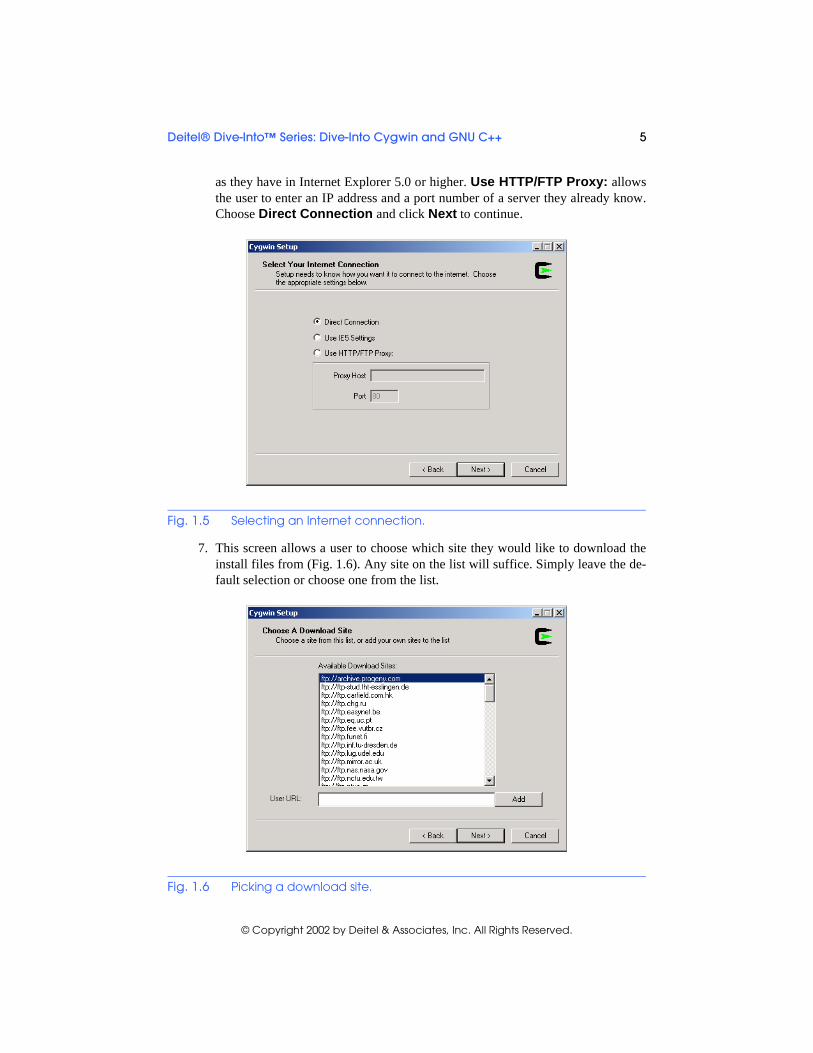
6. The next screen allows the user to configure how they would like the install filesto be obtained (Fig. 1.5). A Direct Connection contacts an FTP site and down-loads the files. By choosing Use IE5 Settings a user can configure the download
Fig. 1.3 Specifying the root directory.
Fig. 1.4 Choosing the package directory.
Deitel® Dive-Into™ Series: Dive-Into Cygwin and GNU C++ 5
© Copyright 2002 by Deitel & Associates, Inc. All Rights Reserved.
as they have in Internet Explorer 5.0 or higher. Use HTTP/FTP Proxy: allowsthe user to enter an IP address and a port number of a server they already know.Choose Direct Connection and click Next to continue.
7. This screen allows a user to choose which site they would like to download theinstall files from (Fig. 1.6). Any site on the list will suffice. Simply leave the de-fault selection or choose one from the list.
Fig. 1.5 Selecting an Internet connection.
Fig. 1.6 Picking a download site.
6 Deitel® Dive-Into™ Series: Dive-Into Cygwin and GNU C++
© Copyright 2002 by Deitel & Associates, Inc. All Rights Reserved.
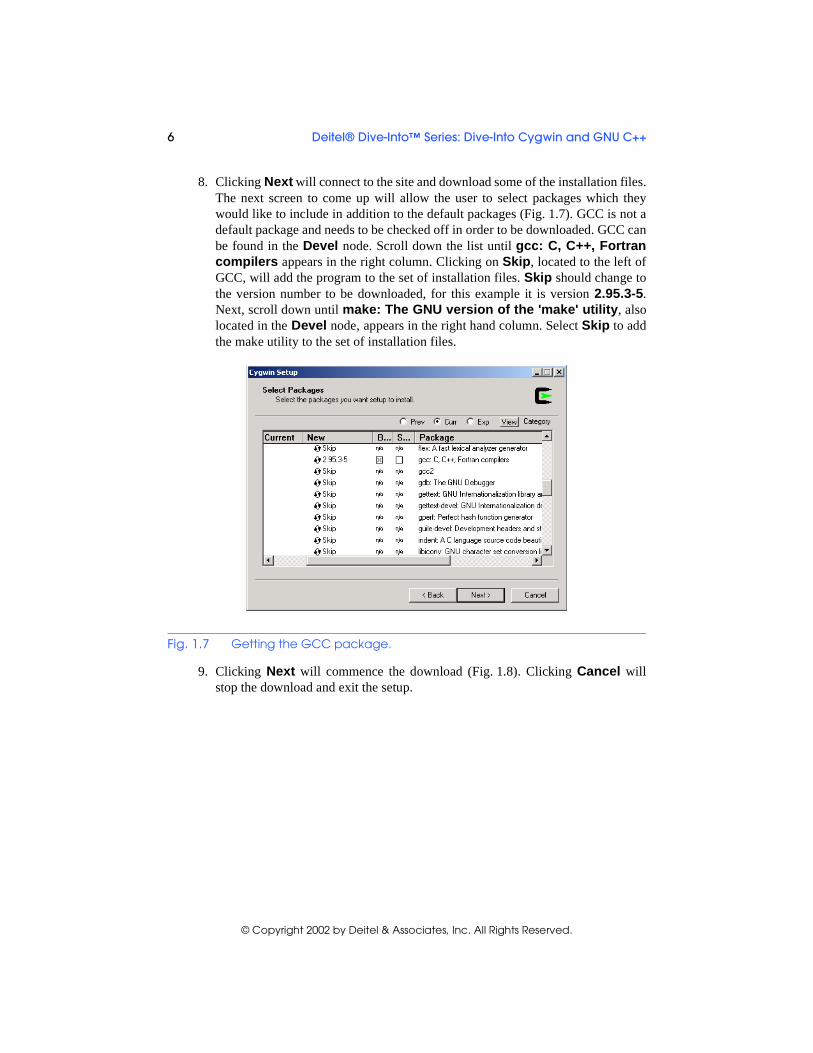
8. Clicking Next will connect to the site and download some of the installation files.The next screen to come up will allow the user to select packages which theywould like to include in addition to the default packages (Fig. 1.7). GCC is not adefault package and needs to be checked off in order to be downloaded. GCC canbe found in the Devel node. Scroll down the list until gcc: C, C++, Fortrancompilers appears in the right column. Clicking on Skip, located to the left ofGCC, will add the program to the set of installation files. Skip should change tothe version number to be downloaded, for this example it is version 2.95.3-5.Next, scroll down until make: The GNU version of the 'make' utility, alsolocated in the Devel node, appears in the right hand column. Select Skip to addthe make utility to the set of installation files.
9. Clicking Next will commence the download (Fig. 1.8). Clicking Cancel willstop the download and exit the setup.
Fig. 1.7 Getting the GCC package.
Deitel® Dive-Into™ Series: Dive-Into Cygwin and GNU C++ 7
© Copyright 2002 by Deitel & Associates, Inc. All Rights Reserved.
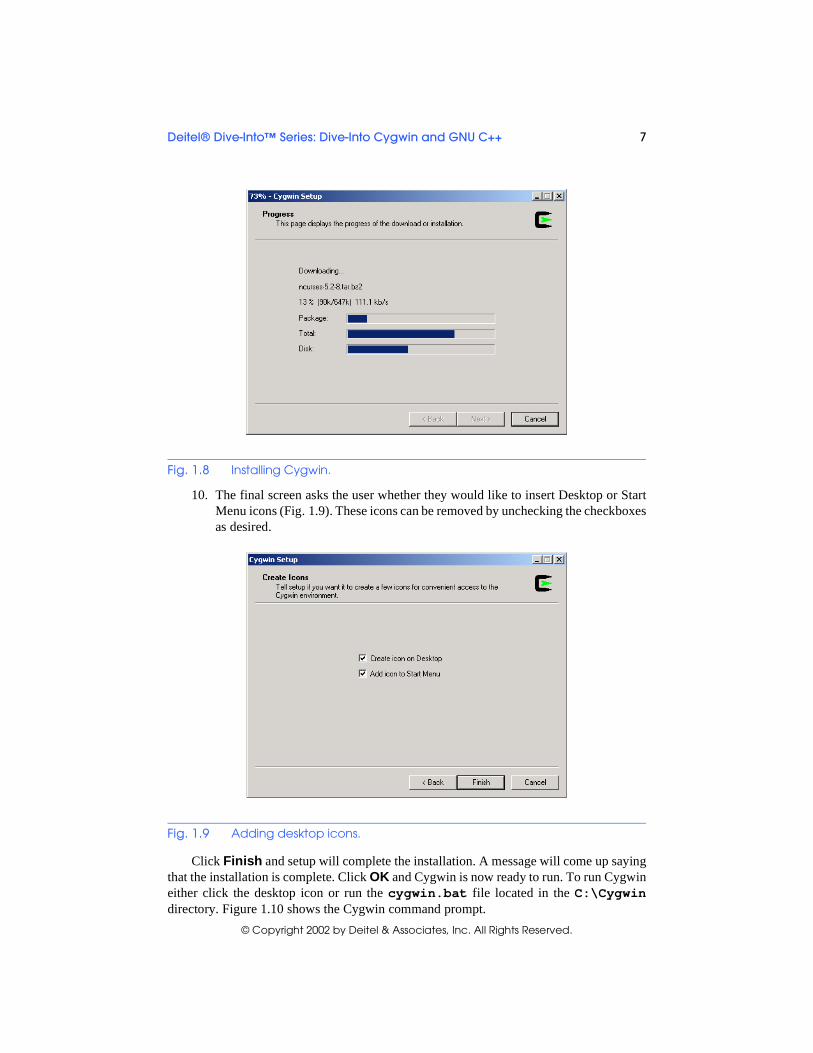
10. The final screen asks the user whether they would like to insert Desktop or StartMenu icons (Fig. 1.9). These icons can be removed by unchecking the checkboxesas desired.
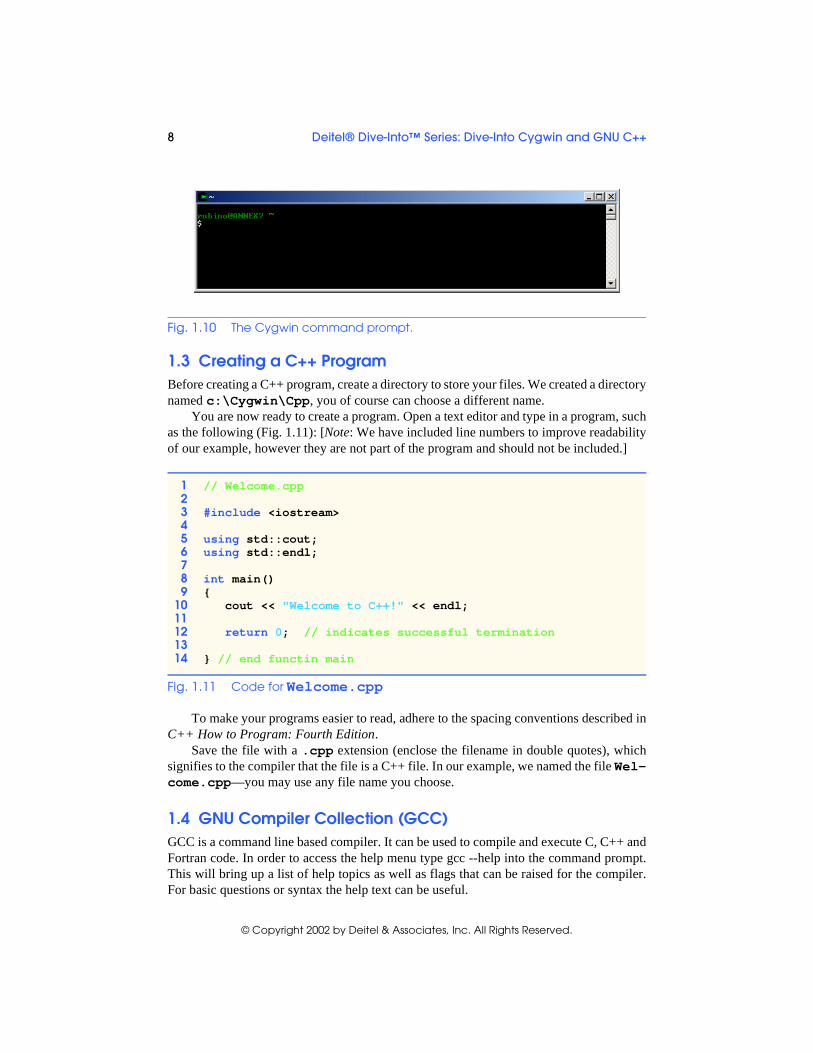
Click Finish and setup will complete the installation. A message will come up sayingthat the installation is complete. Click OK and Cygwin is now ready to run. To run Cygwineither click the desktop icon or run the cygwin.bat file located in the C:\Cygwindirectory. Figure 1.10 shows the Cygwin command prompt.
Fig. 1.8 Installing Cygwin.
Fig. 1.9 Adding desktop icons.
8 Deitel® Dive-Into™ Series: Dive-Into Cygwin and GNU C++
© Copyright 2002 by Deitel & Associates, Inc. All Rights Reserved.
1.3 Creating a C++ ProgramBefore creating a C++ program, create a directory to store your files. We created a directorynamed c:\Cygwin\Cpp, you of course can choose a different name.
You are now ready to create a program. Open a text editor and type in a program, suchas the following (Fig. 1.11): [Note: We have included line numbers to improve readabilityof our example, however they are not part of the program and should not be included.]
To make your programs easier to read, adhere to the spacing conventions described inC++ How to Program: Fourth Edition.
Save the file with a .cpp extension (enclose the filename in double quotes), whichsignifies to the compiler that the file is a C++ file. In our example, we named the file Wel-come.cpp—you may use any file name you choose.
1.4 GNU Compiler Collection (GCC)GCC is a command line based compiler. It can be used to compile and execute C, C++ andFortran code. In order to access the help menu type gcc --help into the command prompt.This will bring up a list of help topics as well as flags that can be raised for the compiler.For basic questions or syntax the help text can be useful.
Fig. 1.10 The Cygwin command prompt.
1 // Welcome.cpp23 #include <iostream>45 using std::cout;6 using std::endl;78 int main()9 {
10 cout << "Welcome to C++!" << endl;1112 return 0; // indicates successful termination1314 } // end functin main
Fig. 1.11 Code for Welcome.cpp

Deitel® Dive-Into™ Series: Dive-Into Cygwin and GNU C++ 9
© Copyright 2002 by Deitel & Associates, Inc. All Rights Reserved.
1.4.1 Compiling and Executing a Program with GCCPlace any files to be compiled or executed within the Cygwin directory. For this examplethe files are placed within C:\Cygwin\Cpp\Ch01.
1. Use the cd command to traverse the directory structure and get to the right folder(/Cpp/Ch01). The steps can be done individually as well as shown in Fig. 1.12.The ls command displays the contents of a folder.
2. Once in the appropriate folder, use the gcc compiler to compile the program. Inorder to do this enter in g++ FileName.cpp -o OutputFileName. Theg++ command signifies that the C++ complier should be used instead of the Ccompiler. FileName is the name of the .cpp file that is to be compiled. The -oflag specifies that the output file should not receive the default name and the Out-putFileName is what the .exe file will be called. If the -o flag is not raised theprogram is compiled as a.exe. For the case of Figure 1.2 (from chapter 1 of C++How to Program, Fourth Edition) the command is g++ Fig01_02.cpp -oFig01_02 (Fig. 1.13). To conform to the ANSI/ISO standards raise the -ansiflag.
3. Cygwin returns the user to the prompt if there are no syntax errors. It would appearas if nothing has changed, but use the ls command to reveal the Fig01_02.exefile. To execute this program enter ./FileName.exe, where FileName is the
Fig. 1.12 Changing to the correct directory.
Fig. 1.13 Compiling Fig01_02.cpp.
10 Deitel® Dive-Into™ Series: Dive-Into Cygwin and GNU C++
© Copyright 2002 by Deitel & Associates, Inc. All Rights Reserved.
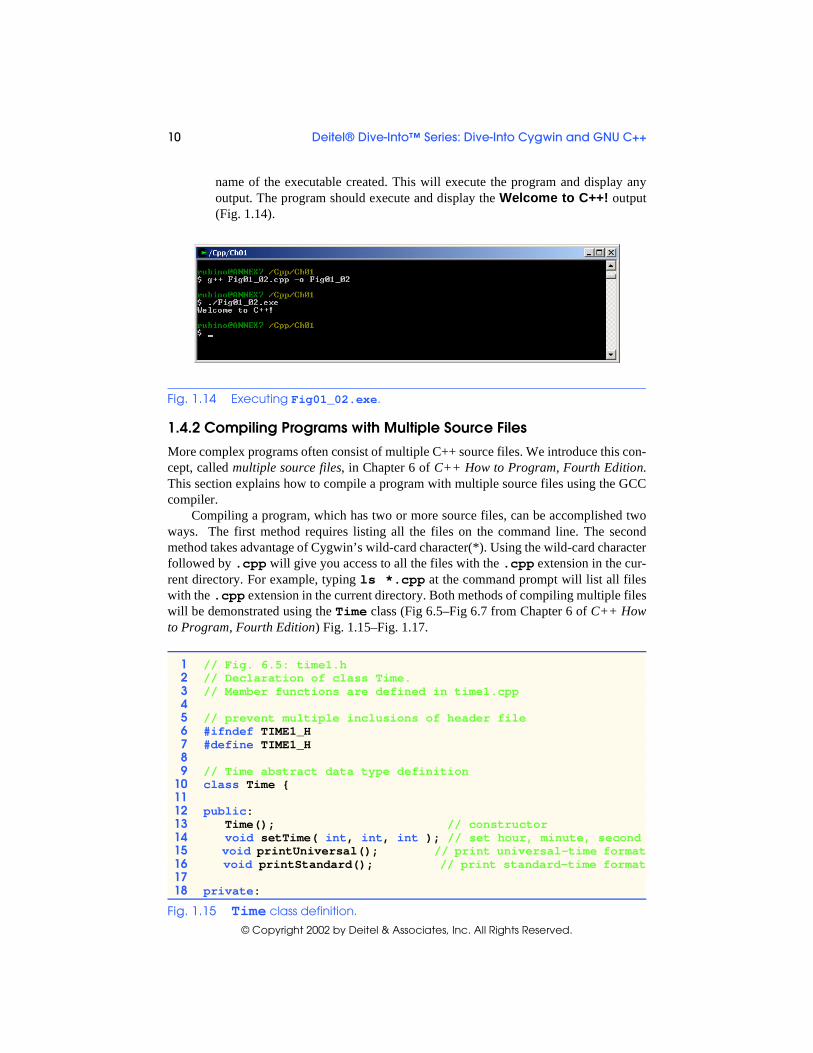
name of the executable created. This will execute the program and display anyoutput. The program should execute and display the Welcome to C++! output(Fig. 1.14).
1.4.2 Compiling Programs with Multiple Source Files
More complex programs often consist of multiple C++ source files. We introduce this con-cept, called multiple source files, in Chapter 6 of C++ How to Program, Fourth Edition.This section explains how to compile a program with multiple source files using the GCCcompiler.
Compiling a program, which has two or more source files, can be accomplished twoways. The first method requires listing all the files on the command line. The secondmethod takes advantage of Cygwin’s wild-card character(*). Using the wild-card characterfollowed by .cpp will give you access to all the files with the .cpp extension in the cur-rent directory. For example, typing ls *.cpp at the command prompt will list all fileswith the .cpp extension in the current directory. Both methods of compiling multiple fileswill be demonstrated using the Time class (Fig 6.5–Fig 6.7 from Chapter 6 of C++ Howto Program, Fourth Edition) Fig. 1.15–Fig. 1.17.
Fig. 1.14 Executing Fig01_02.exe.
1 // Fig. 6.5: time1.h2 // Declaration of class Time.3 // Member functions are defined in time1.cpp45 // prevent multiple inclusions of header file6 #ifndef TIME1_H7 #define TIME1_H89 // Time abstract data type definition
10 class Time {1112 public:13 Time(); // constructor14 void setTime( int, int, int ); // set hour, minute, second15 void printUniversal(); // print universal-time format16 void printStandard(); // print standard-time format1718 private:
Fig. 1.15 Time class definition.

Deitel® Dive-Into™ Series: Dive-Into Cygwin and GNU C++ 11
© Copyright 2002 by Deitel & Associates, Inc. All Rights Reserved.
19 int hour; // 0 - 23 (24-hour clock format)20 int minute; // 0 - 5921 int second; // 0 - 592223 }; // end class Time2425 #endif
1 // Fig. 6.6: time1.cpp2 // Member-function definitions for class Time.3 #include <iostream>45 using std::cout;67 #include <iomanip>89 using std::setfill;
10 using std::setw;1112 // include definition of class Time from time1.h13 #include "time1.h" 1415 // Time constructor initializes each data member to zero.16 // Ensures all Time objects start in a consistent state.17 Time::Time() 18 { 19 hour = minute = second = 0; 2021 } // end Time constructor2223 // Set new Time value using universal time. Perform validity24 // checks on the data values. Set invalid values to zero.25 void Time::setTime( int h, int m, int s )26 {27 hour = ( h >= 0 && h < 24 ) ? h : 0;28 minute = ( m >= 0 && m < 60 ) ? m : 0;29 second = ( s >= 0 && s < 60 ) ? s : 0;3031 } // end function setTime3233 // print Time in universal format34 void Time::printUniversal()35 {36 cout << setfill( '0' ) << setw( 2 ) << hour << ":"37 << setw( 2 ) << minute << ":"38 << setw( 2 ) << second;3940 } // end function printUniversal4142 // print Time in standard format43 void Time::printStandard()
Fig. 1.16 Time class member-function definitions.
Fig. 1.15 Time class definition.

12 Deitel® Dive-Into™ Series: Dive-Into Cygwin and GNU C++
© Copyright 2002 by Deitel & Associates, Inc. All Rights Reserved.
44 {45 cout << ( ( hour == 0 || hour == 12 ) ? 12 : hour % 12 )46 << ":" << setfill( '0' ) << setw( 2 ) << minute47 << ":" << setw( 2 ) << second 48 << ( hour < 12 ? " AM" : " PM" );4950 } // end function printStandard
1 // Fig. 6.7: fig06_07.cpp2 // Program to test class Time.3 // NOTE: This file must be compiled with time1.cpp.4 #include <iostream>56 using std::cout;7 using std::endl;89 // include definition of class Time from time1.h
10 #include "time1.h"1112 int main()13 {14 Time t; // instantiate object t of class Time1516 // output Time object t's initial values17 cout << "The initial universal time is ";18 t.printUniversal(); // 00:00:0019 cout << "\nThe initial standard time is ";20 t.printStandard(); // 12:00:00 AM2122 t.setTime( 13, 27, 6 ); // change time2324 // output Time object t's new values25 cout << "\n\nUniversal time after setTime is ";26 t.printUniversal(); // 13:27:0627 cout << "\nStandard time after setTime is ";28 t.printStandard(); // 1:27:06 PM2930 t.setTime( 99, 99, 99 ); // attempt invalid settings3132 // output t's values after specifying invalid values33 cout << "\n\nAfter attempting invalid settings:"34 << "\nUniversal time: ";35 t.printUniversal(); // 00:00:0036 cout << "\nStandard time: ";37 t.printStandard(); // 12:00:00 AM38 cout << endl;3940 return 0; 4142 } // end main
Fig. 1.17 Program to test class Time.
Fig. 1.16 Time class member-function definitions.
Deitel® Dive-Into™ Series: Dive-Into Cygwin and GNU C++ 13
© Copyright 2002 by Deitel & Associates, Inc. All Rights Reserved.
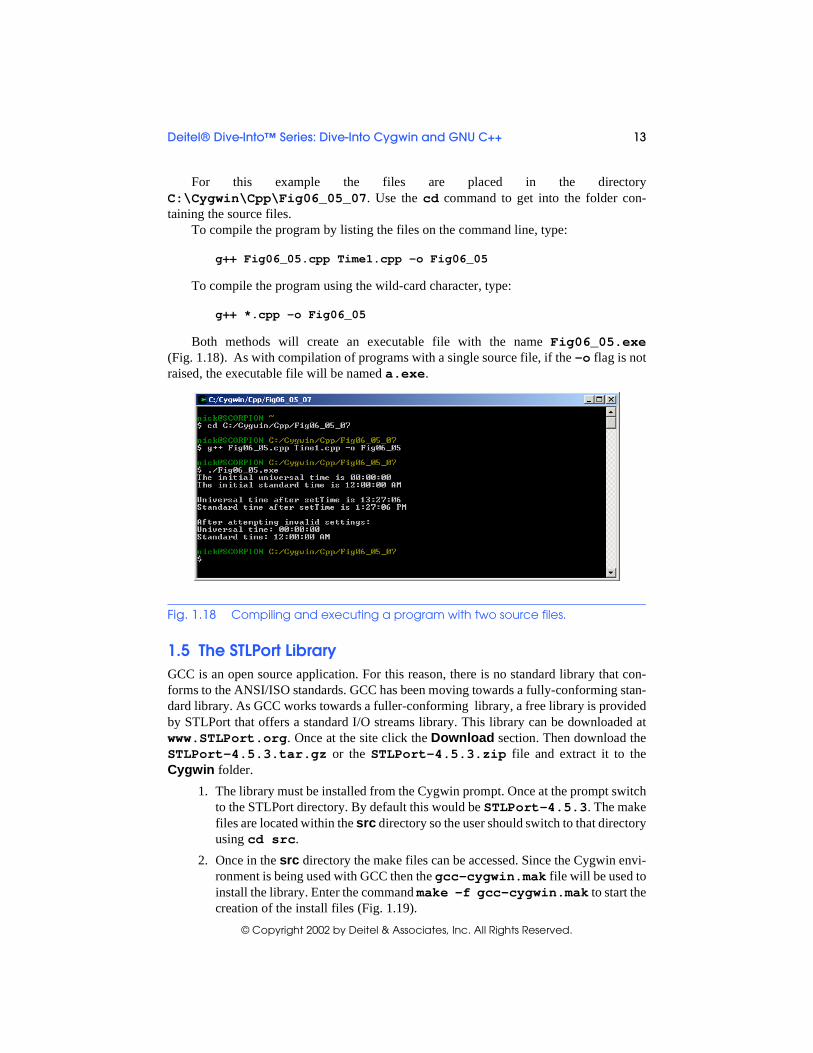
For this example the files are placed in the directoryC:\Cygwin\Cpp\Fig06_05_07. Use the cd command to get into the folder con-taining the source files.
To compile the program by listing the files on the command line, type:
g++ Fig06_05.cpp Time1.cpp -o Fig06_05
To compile the program using the wild-card character, type:
g++ *.cpp -o Fig06_05
Both methods will create an executable file with the name Fig06_05.exe(Fig. 1.18). As with compilation of programs with a single source file, if the -o flag is notraised, the executable file will be named a.exe.
1.5 The STLPort LibraryGCC is an open source application. For this reason, there is no standard library that con-forms to the ANSI/ISO standards. GCC has been moving towards a fully-conforming stan-dard library. As GCC works towards a fuller-conforming library, a free library is providedby STLPort that offers a standard I/O streams library. This library can be downloaded atwww.STLPort.org. Once at the site click the Download section. Then download theSTLPort-4.5.3.tar.gz or the STLPort-4.5.3.zip file and extract it to theCygwin folder.
1. The library must be installed from the Cygwin prompt. Once at the prompt switchto the STLPort directory. By default this would be STLPort-4.5.3. The makefiles are located within the src directory so the user should switch to that directoryusing cd src.
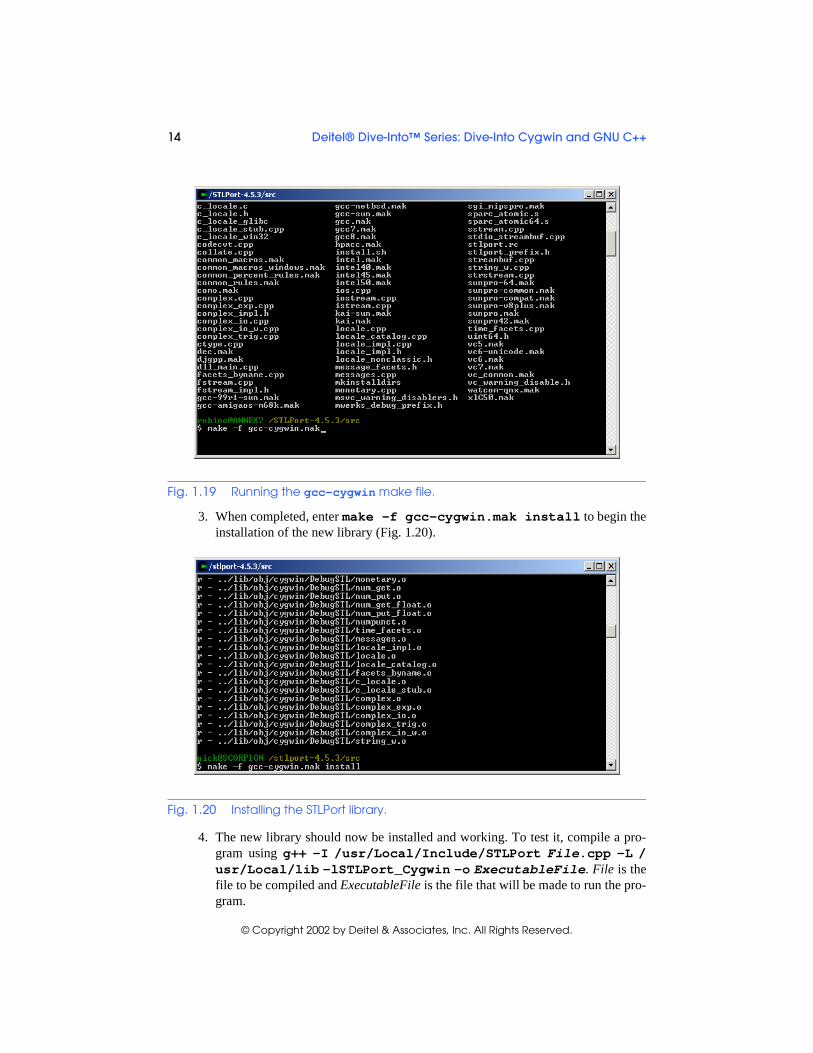
2. Once in the src directory the make files can be accessed. Since the Cygwin envi-ronment is being used with GCC then the gcc-cygwin.mak file will be used toinstall the library. Enter the command make -f gcc-cygwin.mak to start thecreation of the install files (Fig. 1.19).
Fig. 1.18 Compiling and executing a program with two source files.
14 Deitel® Dive-Into™ Series: Dive-Into Cygwin and GNU C++
© Copyright 2002 by Deitel & Associates, Inc. All Rights Reserved.
3. When completed, enter make -f gcc-cygwin.mak install to begin theinstallation of the new library (Fig. 1.20).
4. The new library should now be installed and working. To test it, compile a pro-gram using g++ -I /usr/Local/Include/STLPort File.cpp -L /usr/Local/lib -lSTLPort_Cygwin -o ExecutableFile. File is thefile to be compiled and ExecutableFile is the file that will be made to run the pro-gram.
Fig. 1.19 Running the gcc-cygwin make file.
Fig. 1.20 Installing the STLPort library.
Deitel® Dive-Into™ Series: Dive-Into Cygwin and GNU C++ 15
© Copyright 2002 by Deitel & Associates, Inc. All Rights Reserved.
1.6 Using the GDB DebuggerCygwin provides a debugger tool to help the programmer find run-time logic errors in pro-grams that compile successfully but do not produce expected results. The GDB debuggerallows the programmer to view the executing program and its data as the program runs ei-ther one step at a time or at full speed. The program stops on a selected line of code or upona fatal run-time error. When the programmer does not understand how incorrect results areproduced by a program, running the program one statement at a time and monitoring theintermediate results can help the programmer isolate the cause of the error. The program-mer can then correct the code. To obtain the debugger run the Cygwin setup again andcheck GDB: The GNU Debugger from the Devel node. Proceed to the end of the instal-lation and the debugger will be automatically installed.
To use the debugger, set one or more breakpoints. A breakpoint is a marker set at aspecified line of code that causes the debugger to suspend execution of the program uponreaching that line of code. Breakpoints help the programmer verify that a program is exe-cuting correctly. A breakpoint is set by clicking on the dashes that are located next to theexecutable lines of code. When a breakpoint is set, the appropriate line is marked with a redsquare. Breakpoints are removed by clicking the square, changing it back to a dash. Notethat breakpoints can only be set on lines that are marked with a dash to their left.
Often certain variables are monitored by the programmer during the debugging pro-cess—a process known as setting a watch. The Watch Expressions window allows theprogrammer to watch variables as their values change. Changes are displayed in thewindow after each debugging step. To set a watch open the Watch Expressions windowin the View menu and enter the variable name. A watch is deleted by right clicking on thename and selecting Remove. Variable values can be modified during the debugging pro-cess by editing the Value field.
The main window contains buttons that control the debugging process. These buttonsperform the same actions as the Control menu items. Each button is labeled in Fig. 1.21.The Run button starts the application. To terminate the program prematurely the Kill com-mand, found in the Run menu, can be used. Use the Continue button to run the debuggeruntil the next break point is reached. The Step button executes program statements, oneper click, including code in functions that are called, allowing the programmer to confirmthe proper execution of the function, line-by-line. The Next button executes the next exe-cutable line of code and advances to the following executable line in the program. If theline of code contains a function call, the function is executed in its entirety as one step. Thisallows the programmer to execute the program one line at a time and examine the executionof the program without seeing the details of every function that is called. The Finish buttonallows the programmer to step out of the current function and return control back to the linethat called that function. If you Step into a function that you do not need to examine, clickFinish to return to the caller.

16 Deitel® Dive-Into™ Series: Dive-Into Cygwin and GNU C++
© Copyright 2002 by Deitel & Associates, Inc. All Rights Reserved.
When a project is closed and reopened, any breakpoints set during a previous debug-ging session are lost. You can gather information about breakpoints by clicking Break-points in the View menu. The Breakpoints window displays all the breakpointscurrently set for the program. Each breakpoint can be enabled or disabled by eitherchecking or unchecking the box located to the left of the breakpoint. A disabled breakpointwill still exist in the list of breakpoints, but will not cause the debugger to stop and can bere-enabled at a later time.
The remainder of this section will guide you through the debugging process for asimple C++ application.
1.6.1 Debugging an Application
This section guides the programmer through the debugging process for a simple C++ ap-plication, Debug.cpp (Fig. 1.22). This application obtains a number from the user andcounts from 1 to that number.
Fig. 1.21 Menu icons in the GDB debugger.
1 // Debug.cpp 23 #include <iostream>45 using std::cin;6 using std::cout;7 using std::endl;89 // function that gets an integer from the user
10 int getNumber()11 {12 int number; // holds user input number1314 // ask user for and store number15 cout << "Enter an integer: ";16 cin >> number;17
Fig. 1.22 Code for Debug.cpp.
Run
Step
Next
Finish
Continue
Step Asm Inst
Next Asm Inst
Registers Stack
MemoryWatch Expressions
Local Variables
Breakpoints
Console
Deitel® Dive-Into™ Series: Dive-Into Cygwin and GNU C++ 17
© Copyright 2002 by Deitel & Associates, Inc. All Rights Reserved.
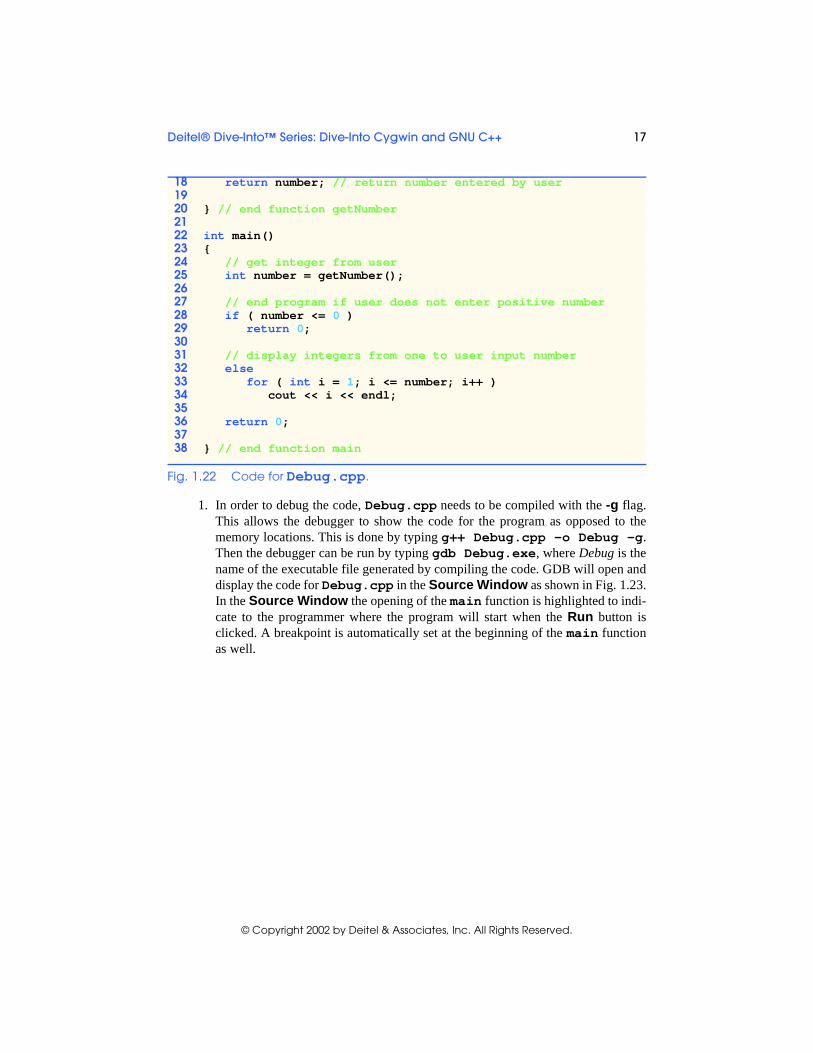
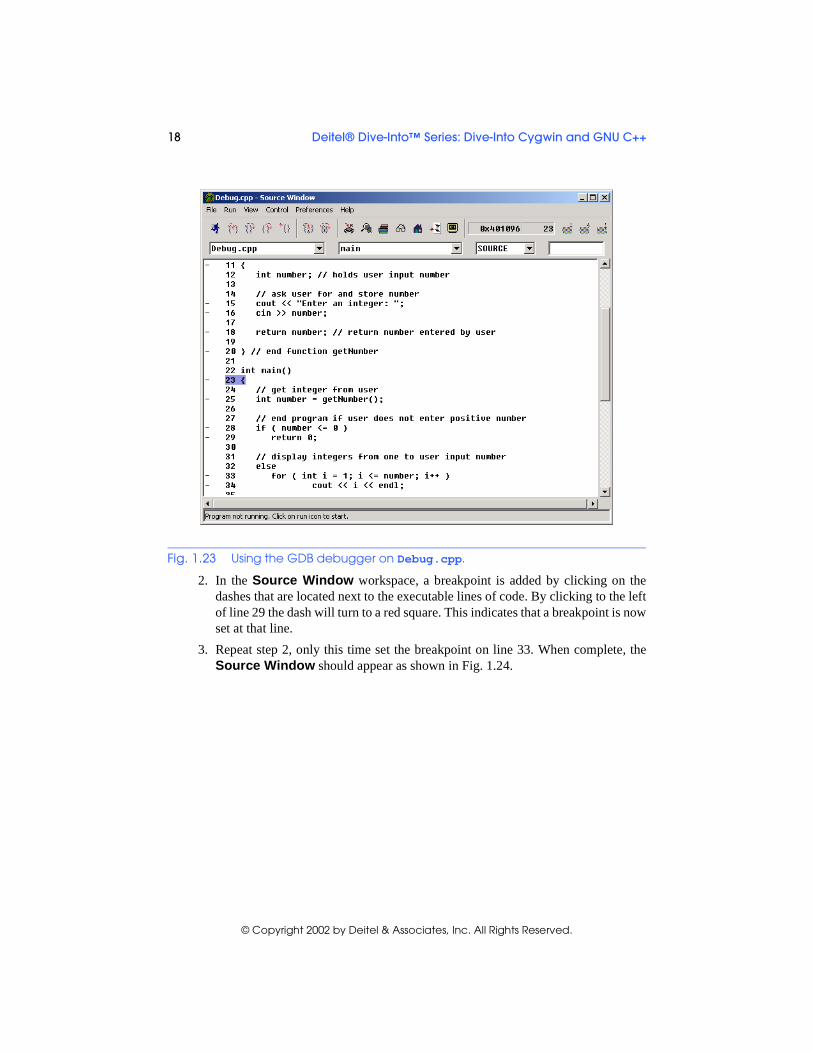
1. In order to debug the code, Debug.cpp needs to be compiled with the -g flag.This allows the debugger to show the code for the program as opposed to thememory locations. This is done by typing g++ Debug.cpp -o Debug -g.Then the debugger can be run by typing gdb Debug.exe, where Debug is thename of the executable file generated by compiling the code. GDB will open anddisplay the code for Debug.cpp in the Source Window as shown in Fig. 1.23.In the Source Window the opening of the main function is highlighted to indi-cate to the programmer where the program will start when the Run button isclicked. A breakpoint is automatically set at the beginning of the main functionas well.
18 return number; // return number entered by user1920 } // end function getNumber2122 int main() 23 {24 // get integer from user25 int number = getNumber();2627 // end program if user does not enter positive number28 if ( number <= 0 )29 return 0;3031 // display integers from one to user input number32 else33 for ( int i = 1; i <= number; i++ )34 cout << i << endl;3536 return 0; 3738 } // end function main
Fig. 1.22 Code for Debug.cpp.
18 Deitel® Dive-Into™ Series: Dive-Into Cygwin and GNU C++
© Copyright 2002 by Deitel & Associates, Inc. All Rights Reserved.
2. In the Source Window workspace, a breakpoint is added by clicking on thedashes that are located next to the executable lines of code. By clicking to the leftof line 29 the dash will turn to a red square. This indicates that a breakpoint is nowset at that line.
3. Repeat step 2, only this time set the breakpoint on line 33. When complete, theSource Window should appear as shown in Fig. 1.24.
Fig. 1.23 Using the GDB debugger on Debug.cpp.
Deitel® Dive-Into™ Series: Dive-Into Cygwin and GNU C++ 19
© Copyright 2002 by Deitel & Associates, Inc. All Rights Reserved.
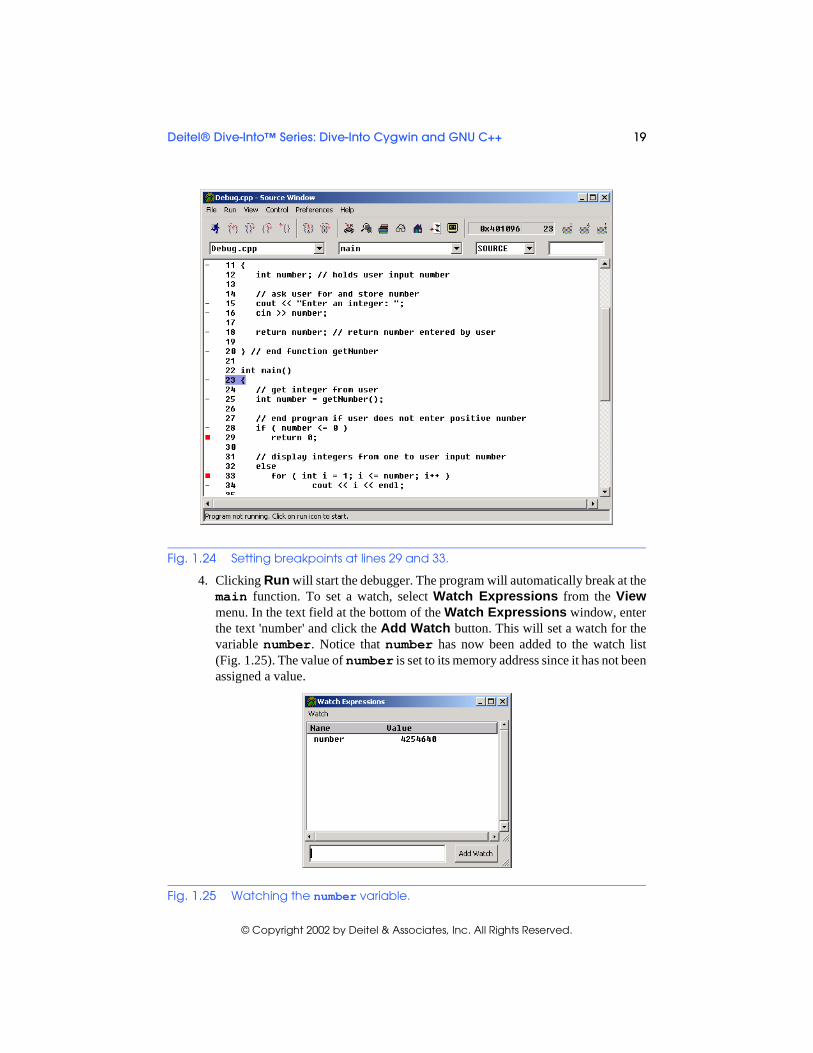
4. Clicking Run will start the debugger. The program will automatically break at themain function. To set a watch, select Watch Expressions from the Viewmenu. In the text field at the bottom of the Watch Expressions window, enterthe text 'number' and click the Add Watch button. This will set a watch for thevariable number. Notice that number has now been added to the watch list(Fig. 1.25). The value of number is set to its memory address since it has not beenassigned a value.
Fig. 1.24 Setting breakpoints at lines 29 and 33.
Fig. 1.25 Watching the number variable.
20 Deitel® Dive-Into™ Series: Dive-Into Cygwin and GNU C++
© Copyright 2002 by Deitel & Associates, Inc. All Rights Reserved.
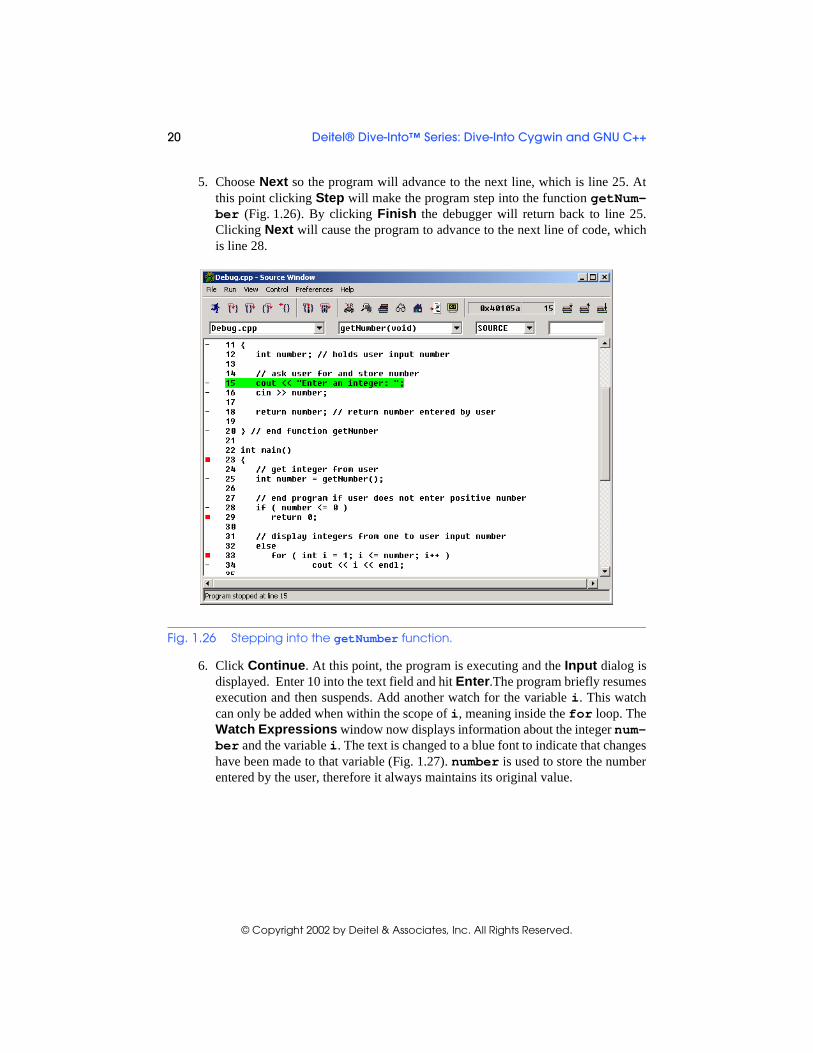
5. Choose Next so the program will advance to the next line, which is line 25. Atthis point clicking Step will make the program step into the function getNum-ber (Fig. 1.26). By clicking Finish the debugger will return back to line 25.Clicking Next will cause the program to advance to the next line of code, whichis line 28.
6. Click Continue. At this point, the program is executing and the Input dialog isdisplayed. Enter 10 into the text field and hit Enter.The program briefly resumesexecution and then suspends. Add another watch for the variable i. This watchcan only be added when within the scope of i, meaning inside the for loop. TheWatch Expressions window now displays information about the integer num-ber and the variable i. The text is changed to a blue font to indicate that changeshave been made to that variable (Fig. 1.27). number is used to store the numberentered by the user, therefore it always maintains its original value.
Fig. 1.26 Stepping into the getNumber function.
Deitel® Dive-Into™ Series: Dive-Into Cygwin and GNU C++ 21
© Copyright 2002 by Deitel & Associates, Inc. All Rights Reserved.
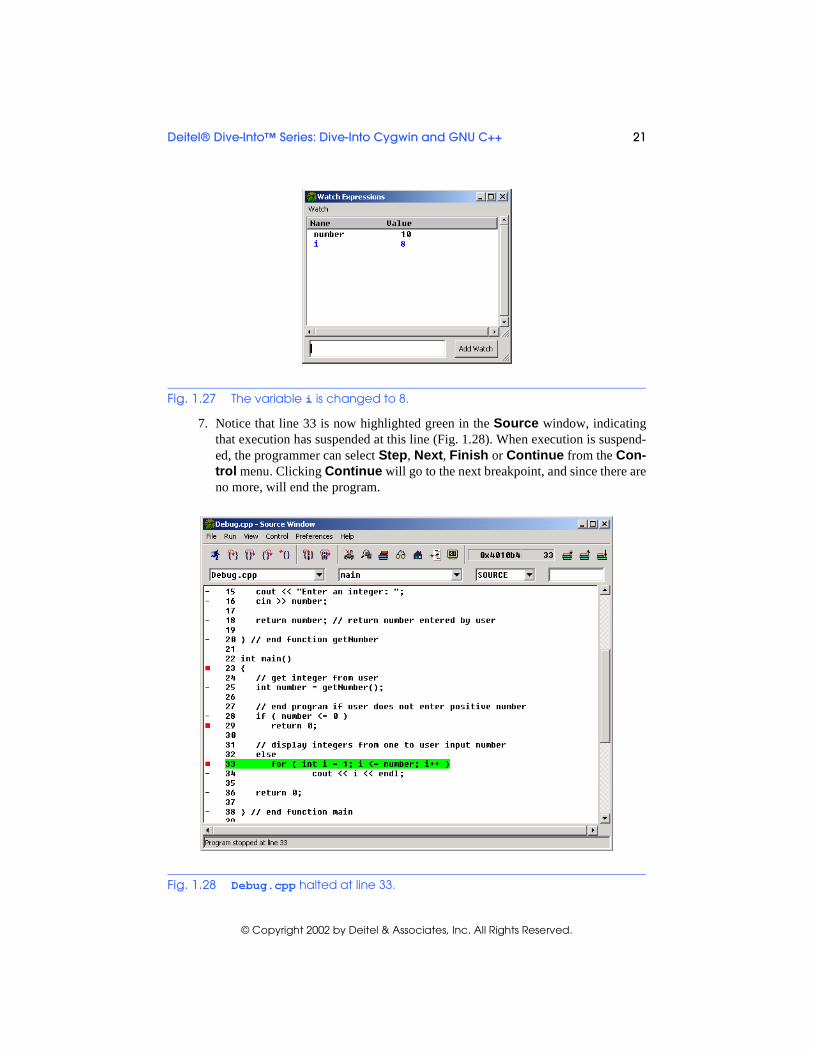
7. Notice that line 33 is now highlighted green in the Source window, indicatingthat execution has suspended at this line (Fig. 1.28). When execution is suspend-ed, the programmer can select Step, Next, Finish or Continue from the Con-trol menu. Clicking Continue will go to the next breakpoint, and since there areno more, will end the program.
Fig. 1.27 The variable i is changed to 8.
Fig. 1.28 Debug.cpp halted at line 33.
22 Deitel® Dive-Into™ Series: Dive-Into Cygwin and GNU C++
© Copyright 2002 by Deitel & Associates, Inc. All Rights Reserved.
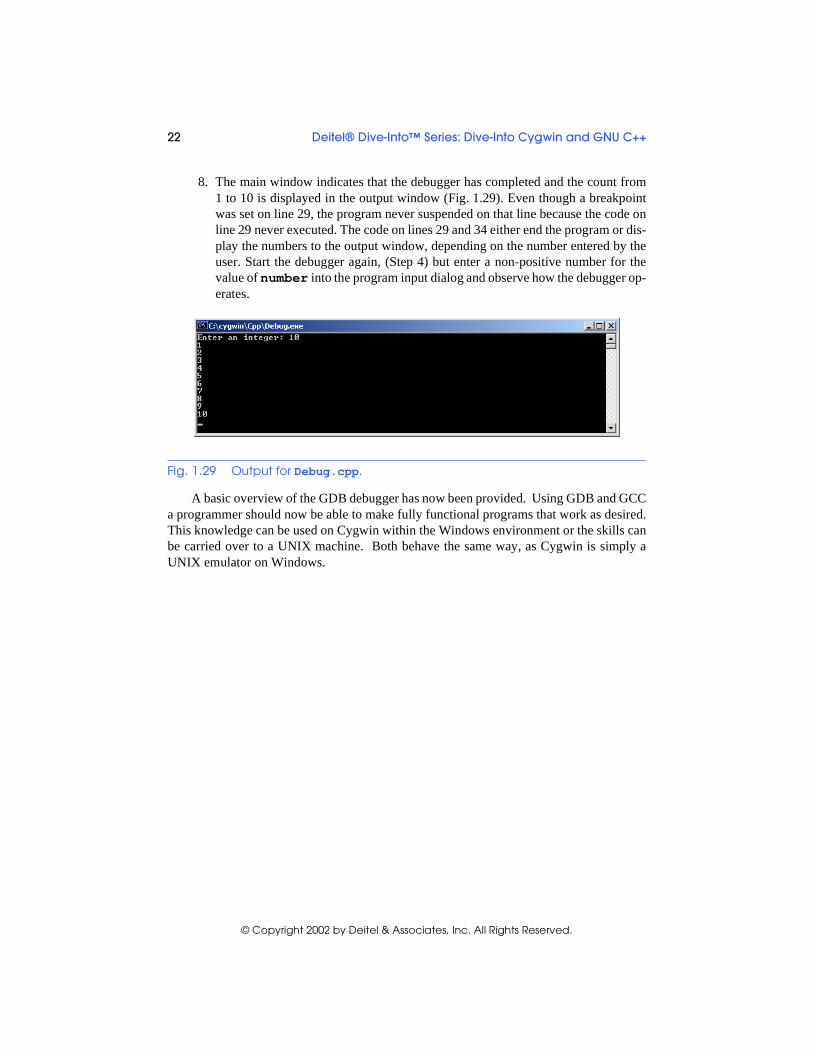
8. The main window indicates that the debugger has completed and the count from1 to 10 is displayed in the output window (Fig. 1.29). Even though a breakpointwas set on line 29, the program never suspended on that line because the code online 29 never executed. The code on lines 29 and 34 either end the program or dis-play the numbers to the output window, depending on the number entered by theuser. Start the debugger again, (Step 4) but enter a non-positive number for thevalue of number into the program input dialog and observe how the debugger op-erates.
A basic overview of the GDB debugger has now been provided. Using GDB and GCCa programmer should now be able to make fully functional programs that work as desired.This knowledge can be used on Cygwin within the Windows environment or the skills canbe carried over to a UNIX machine. Both behave the same way, as Cygwin is simply aUNIX emulator on Windows.
Fig. 1.29 Output for Debug.cpp.