Embed Size (px)
Citation preview
Deploying the Report Manager
Actifio Report Manager 6.2.0
Copyright, Trademarks, and other Legal Matter
© 2010 — 2015 Actifio, Inc. All rights reserved.
Actifio® is a registered trademark of Actifio, Inc. AnyIT™, Dedup Async™, Manage Data Simply™, Virtual Data Pipeline™, VDP™, Protection and Availability Storage Platform™, PAS™, Copy Data Storage Platform™, CDS™, Actifio Sky™ and Actifio One™ are trademarks of Actifio, Inc. All other brands, product names, goods and/or services mentioned herein are trademarks or property of their respective owners.
Actifio believes the information in this publication is accurate as of its publication date. Actifio reserves the right to make changes to information published in this document, including without limitation specifications and product descriptions, at any time and without notice. This document supersedes and replaces all information supplied prior to the publication hereof.
THE INFORMATION IN THIS PUBLICATION IS PROVIDED “AS IS.” ACTIFIO, INC. MAKES NO REPRESENTATIONS OR WARRANTIES OF ANY KIND WITH RESPECT TO THE INFORMATION IN THIS PUBLICATION, AND SPECIFICALLY DISCLAIMS IMPLIED WARRANTIES OF MERCHANTABILITY OR FITNESS FOR A PARTICULAR PURPOSE.
This software and the associated documentation are proprietary and confidential to Actifio. Use, copying, and distribution of any Actifio software described in this publication requires an applicable software license. Any unauthorized use or reproduction of this software and the documentation may be subject to civil and/or criminal liability.
Actifio strives to produce quality documentation and welcomes your feedback. Please send comments and suggestions to [email protected].
Rev. Actifio Report Manager 6.2.0
ii | actifio.com |Deploying the Report Manager
Contents
Preface.......................................................................................................................................... v
Actifio Appliances .........................................................................................................................................v
The Actifio Now Customer Portal ................................................................................................................v
Actifio Support Centers ................................................................................................................................v
Installing and Upgrading the Report Manager ......................................................................... 1
Deploying the OVF Template ...................................................................................................... 3
Changing the Name or IP Address of a Report Manager VM....................................................................4
Increasing the Size of the Report Manager Repository .............................................................................4
Configuring the Report Manager ............................................................................................... 6
Troubleshooting........................................................................................................................... 7
Using the Report Manager.......................................................................................................... 8
Accessing through Actifio Desktop .............................................................................................................8
Accessing through a Web Browser .............................................................................................................9
| actifio.com | Deploying the Report Manager iii

iv | actifio.com |Deploying the Report Manager
|
Preface
This guide presents detailed information on how to deploy the Actifio Report Manager. It also provides information about generating built-in and custom reports.
Your Actifio appliance’s Documentation Library contains detailed, step-by-step, application-specific instructions on how to protect and access your data. Each guide is in PDF format may be viewed, downloaded, and printed on demand. The following guides will be of particular interest:
• Using the Actifio Report Manager
• Getting Started with Actifio Copy Data Management
• Configuring Resources and Settings With the Domain Manager
• Setting Up Users and Roles With the Domain Manager
• Planning and Developing Service Level Agreements
• Virtualizing and Protecting Copy Data with the Application Manager
• Accessing and Recovering Copy Data with the Application Manager
• Restoring Copy Data with the Application Manager
Actifio AppliancesUnless otherwise specified, all features and functions described in this document apply to all Actifio appliances.
The Actifio Now Customer PortalDuring the configuration and initialization of your Actifio appliance your Actifio representative provided you with a user name and password for the Actifio Now customer portal.
From the customer portal you can obtain detailed reports about your Actifio appliance as well as search the portal’s knowledge base for answers to specific questions.
To log into the Actifio Now customer portal:
1. Go to: https://now.actifio.com
2. When prompted, enter the user name and password provided by your Actifio representative.
Actifio Support CentersTo contact an Actifio support representative, you can:
• Send email to: [email protected]
• Call:
From anywhere: +1.315.261.7501
US Toll-Free: +1.855.392.6810
Australia: 0011 800-16165656
Germany: 00 800-16165656
New Zealand: 00 800-16165656
UK: 0 800-0155019
actifio.com | Using the Actifio Report Manager v

vi
| actifio.com |Using the Actifio Report Manager
|
Deploying the Report Manager
The Actifio Report Manager is a browser-based reporting service that enables you to generate standard and custom reports for Actifio appliances.
Note: Users will notice references to “Clusters” in Actifio Report Manager Reports. This is a known issue and will be addressed in a future release. All references to “Clusters” should be interpreted as “Appliance”.
The Actifio Report Manager is an independent component that runs on its own server. The Report Manager’s server must be cross-registered with the Actifio appliances from which it collects data.
This document describes the steps that an Actifio Representative needs to perform at a customer site to enable the above described functionality. It also describes how to install the Report Manager using the OVF file.
After installing the Report Manager server and connecting it to one or more Actifio appliance, the Report Manager icon appears among the Actifio Desktop Services at the bottom of the Actifio Desktop of an Actifio appliance which are connected to the Report Manager.
This document describes:
Installing and Upgrading the Report Manager on page 1
Deploying the OVF Template on page 3
Configuring the Report Manager on page 6
Troubleshooting on page 7
Using the Report Manager on page 8
Installing and Upgrading the Report Manager
The Actifio Report Manager be installed on a separate virtual or physical server. You can install the Report Manager on a physical machine or on a VM. To install on a VM, you must first deploy the virtual machine; see Deploying the OVF Template on page 3 section for details.
To install on a physical machine
1. Open SUSE 11.x or SUSE Linux Enterprise Server 11 SP1 installed on a system with a 64-bit processor anda minimum of 2 GB RAM and minimum of 100 GB disk space.
2. To install the monit package:
o Open a terminal window.
o Download the monit rpm file for the corresponding operating system.
o run the command: rpm -ivh <monit rpm file>
3. Disable the firewall to open the ports for communication: /sbin/SuSEfirewall2 off
Note: Minimum 128 MB of shared memory is required to install PostgreSQL database.
actifio.com | Deploying the Report Manager 1
2
To perform a new installation
1. Obtain the Report Manager installer file from your Actifio representative.
2. Run the installer: sh report.xxx.run
3. Go to the Configuring the Report Manager section to provide the configuration details.
4. Once you configure the Report Manager, access the user console at: https://<ip|hostname> to verifythe successful installation.
To perform an upgrade from a previous version
1. Obtain the Actifio Report Manager upgrade file from your Actifio representative.
2. Upgrade the installer as follows: sh reportupgrade.xxx.run
3. The system restarts automatically after the upgrade and comes up with the new version.
Refreshing caches
This step is required only during first time login to user-console.
1. Access the Actifio Report Manager at: https://<ipaddress of host or vm>
2. After login, select Tools > Refresh and refresh the following components:
o Repository Cache
o System Settings
o Report Data Cache
Establishing Communication Between the Report Manager and an Actifio Appliance
The Report Manager service runs within your Actifio Desktop. To establish communication between the Actifio appliance and the Report Manager, configure the Actifio appliance details in the Report Manager:
1. Log on to the Actifio Report Manager Administrator console.
2. Click Administration.
3. Click the Certificate Config tab.
4. Click the Exchange icon.
5. Enter the Actifio appliance IP address.
6. Enter the password for the Admin user.
7. Click the Exchange button.
| actifio.com |Deploying the Report Manager
Deploying the OVF Template
Deploy the Report Manager as a VM using an OVF template obtained from Actifio Support. The template is a SUSE Linux 11.4 VM with Actifio Report Manager installed.
To deploy the OVF template:
1. Download the Report Manager OVF file from Actifio Support.
Note: You need 2 GB of free disk space to download the OVF file. Once the Report Manager is deployed, the Report Manager VM needs at least 50 GB of free disk space and 2 GB of RAM.
2. Log on to the VMware vCenter using vSphere Client and select the ESX Server on which the ReportManager OVF template needs to be deployed.
3. In the vSphere Client, select File > Deploy OVF Template from the File menu.
4. On the Source step, click Browse, locate and select the file with the template, and click Next.
5. On the OVF Template Details step, review the template details and click Next:
6. On the Name and Location step, specify a name and location for the OVF Template and click Next.
Optionally, edit the name and select the datastore location within the inventory where the VM file resides,and then click Next. The Disk format template displays the datastore information.
7. On the Host / Appliance step, select a host or appliance where you will deploy the OVF Template. ClickNext.
8. On the Disk Format step, select Thin Provision and click Next.
9. Click Next on the Properties step.
10. On the Ready to Complete step, review the selection details of the setups you have configured and selectthe Power on after deployment option.
11. Click Finish to complete the deployment. The VM is powered on and the Report Manager service starts.
It can take a few minutes for all the services to start. Once all the services are started, you will see the IPaddress of the VM on the vSphere Client screen. Wait until you see the IP address on the screen beforeyou go to the next step.
12. Click OK in the confirmation dialog.
At this point, the Report Manager VM is up and running using the automatically assigned IP address byDHCP. However, in almost all installations the Report Manager is assigned a static IP address and hostname, which is used for further configurations of the Report Manager.
13. Go to the Configuring the Report Manager section to provide the configuration details. To change the nameor IP address, see Changing the Name or IP Address of a Report Manager VM on page 4.
| actifio.com | Deploying the Report Manager 3
4
Changing the Name or IP Address of a Report Manager VM
You can use the SuSE Linux YaST tool to change the name and IP address of the VM:
1. Log on to the virtual machine.
2. Open the YaST tool and go to Network Settings.
3. Click on the Ethernet Adapter and add the IP Address, Subnet Mask and Hostname details.
4. Add the Name Server IP address under the Hostname/DNS tab.
5. Add the routing IP address under the Routing tab.
6. Recreate the desired certificates using a new hostname and automatically restart all the required servicesby entering:
# chmod 755 /act/servicetools/config_certs.sh
#/act/servicetools/config_certs.sh
Increasing the Size of the Report Manager Repository
By default, the Report Manager appliance comes with 16 GB of memory, as the data grows, you may need to expand the memory. To increase the size of repository memory:
1. Power off the Report Manager VM.
2. Add the new VMDK to the Report Manager VM.
3. Power on the Report Manager VM.
4. Create a file system and mount it temporarily.
o mkfs /dev/sdb1
o mount /dev/sdb1 /rm_temp
5. Stop all the services on Report Manager VM.
o monit stop all (to stop the services)
o monit summary (to check the status of services)
6. Copy the Report Manager root directory content into the new VMDK.
o cd /data/act
o cp ‐rp ./* /rm_temp/
7. Mount the new VMDK to /data/act and correct the ownership:
o mv /data/act /data/act.OLD (move /data/act into a temporary directory)
o mkdir /data/act (create Report Manager root directory)
o umount /rm_temp (unmount the temporary directory)
o mount /dev/sdb1 /data/act (mount new VMDK to Report Manager root directory)
o chown act /data/act (change ownership to act user)
8. Restart all the services of Report Manager.
o monit start all (to start the services)
o monit summary (to check the status of services)
9. Log on to the Report Manager user and admin console to confirm whether Report Manger works properly.
| actifio.com |Deploying the Report Manager
Accessing the Report Manager from a Web Browser
To access the Report Manager (administrator or user console) from a Web browser:
Enter the IP address of the administrator or user console in a browser's address bar.
o The administrator console is at https://<ip|hostname>:8043
o The the user console is at https://<ip|hostname>.
Enter the admin user name and password.
Click Log In.
| actifio.com | Deploying the Report Manager 5
6
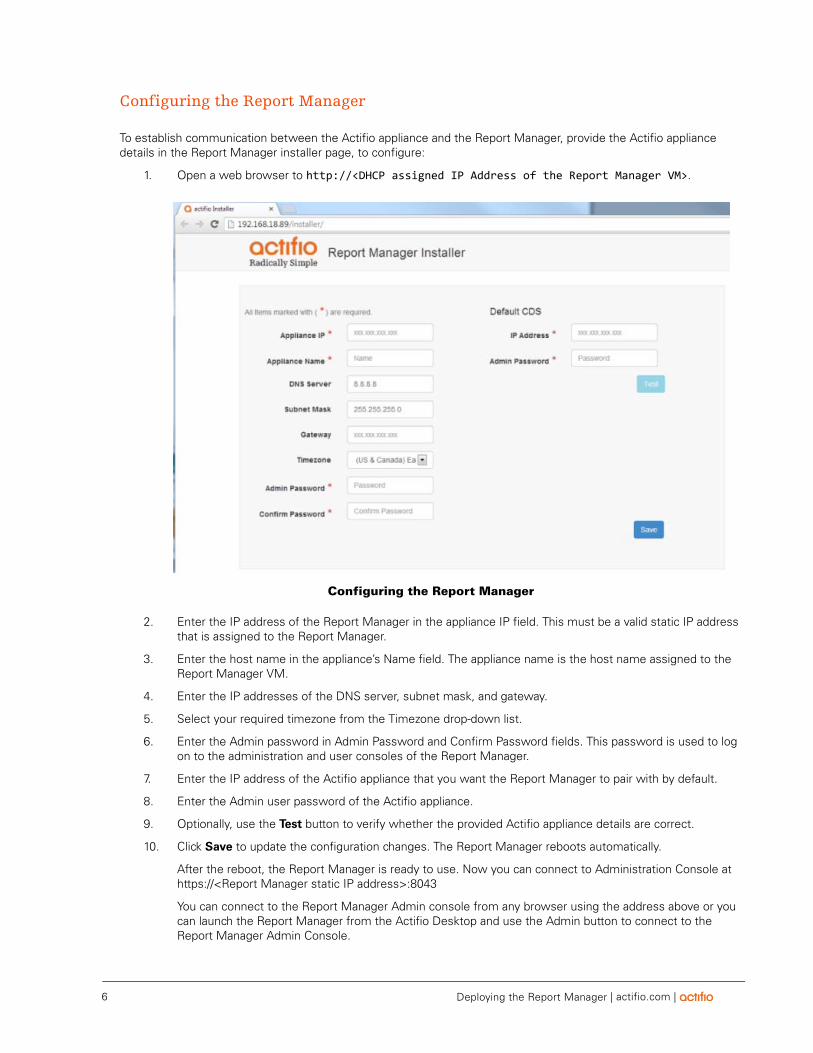
Configuring the Report Manager
To establish communication between the Actifio appliance and the Report Manager, provide the Actifio appliance details in the Report Manager installer page, to configure:
1. Open a web browser to http://<DHCP assigned IP Address of the Report Manager VM>.
Configuring the Report Manager
2. Enter the IP address of the Report Manager in the appliance IP field. This must be a valid static IP addressthat is assigned to the Report Manager.
3. Enter the host name in the appliance’s Name field. The appliance name is the host name assigned to theReport Manager VM.
4. Enter the IP addresses of the DNS server, subnet mask, and gateway.
5. Select your required timezone from the Timezone drop-down list.
6. Enter the Admin password in Admin Password and Confirm Password fields. This password is used to logon to the administration and user consoles of the Report Manager.
7. Enter the IP address of the Actifio appliance that you want the Report Manager to pair with by default.
8. Enter the Admin user password of the Actifio appliance.
9. Optionally, use the Test button to verify whether the provided Actifio appliance details are correct.
10. Click Save to update the configuration changes. The Report Manager reboots automatically.
After the reboot, the Report Manager is ready to use. Now you can connect to Administration Console athttps://<Report Manager static IP address>:8043
You can connect to the Report Manager Admin console from any browser using the address above or youcan launch the Report Manager from the Actifio Desktop and use the Admin button to connect to theReport Manager Admin Console.
| actifio.com |Deploying the Report Manager
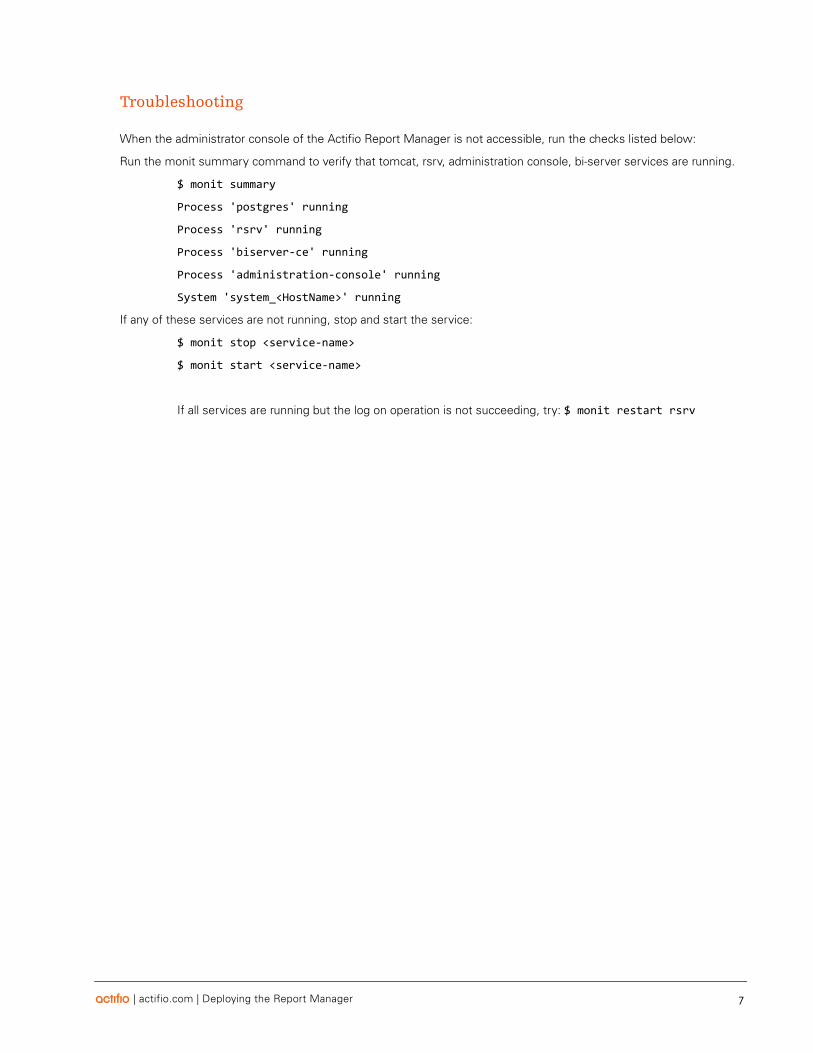
Troubleshooting
When the administrator console of the Actifio Report Manager is not accessible, run the checks listed below:
Run the monit summary command to verify that tomcat, rsrv, administration console, bi-server services are running.
$ monit summary
Process 'postgres' running
Process 'rsrv' running
Process 'biserver‐ce' running
Process 'administration‐console' running
System 'system_<HostName>' running
If any of these services are not running, stop and start the service:
$ monit stop <service‐name>
$ monit start <service‐name>
If all services are running but the log on operation is not succeeding, try: $ monit restart rsrv
| actifio.com | Deploying the Report Manager 7
8
Using the Report Manager
You can access Actifio Report Manager in two ways:
• Accessing through Actifio Desktop on page 8
• Accessing through a Web Browser on page 9
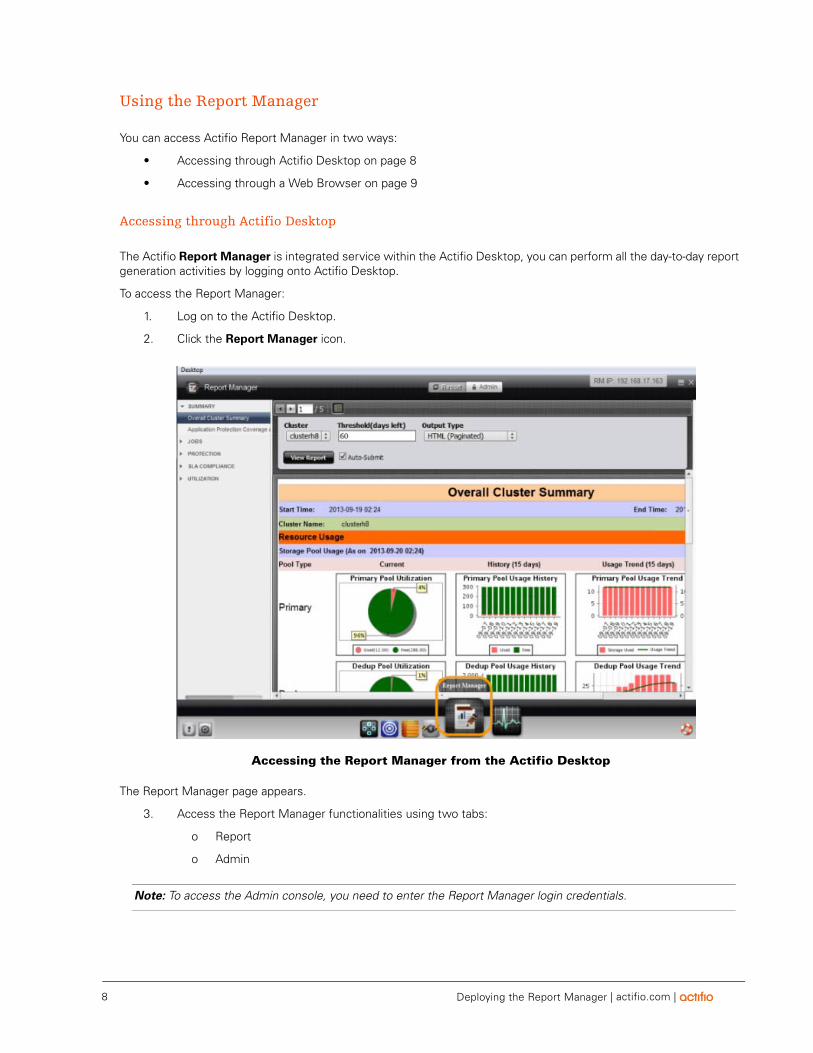
Accessing through Actifio Desktop
The Actifio Report Manager is integrated service within the Actifio Desktop, you can perform all the day-to-day report generation activities by logging onto Actifio Desktop.
To access the Report Manager:
1. Log on to the Actifio Desktop.
2. Click the Report Manager icon.
Accessing the Report Manager from the Actifio Desktop
The Report Manager page appears.
3. Access the Report Manager functionalities using two tabs:
o Report
o Admin
Note: To access the Admin console, you need to enter the Report Manager login credentials.
| actifio.com |Deploying the Report Manager
Accessing through a Web Browser
In order to view the custom reports and to send the scheduled reports through an email, you need to access the Report Manager from a Web browser. These tasks are not accessible when you use Report Manager service from Actifio Desktop.
Supported Web Browsers:
• Microsoft Internet Explorer version 10 and 11.
• Mozilla Firefox
• Apple Safari
• Google Chrome
Actifio Report Manager supports only the admin user. The administrator user account is available on deploying Report Manager.
To access Actifio Report Manager (administrator or user console) from a Web browser:
1. Enter the IP address of the administrator or user console in a browser's address bar.
o The administrator console is at https://<ip|hostname>:8043
o The the user console is at https://<ip|hostname>.
2. Enter the admin user name and password.
3. Click Log In.
Note: Actifio recommends you to use the Report Manager from a Web Browser for a very few procedures as mentioned above.
| actifio.com | Deploying the Report Manager 9

10
| actifio.com |Deploying the Report Manager