Embed Size (px)
Citation preview
Deposition Exhibits Outside The Box
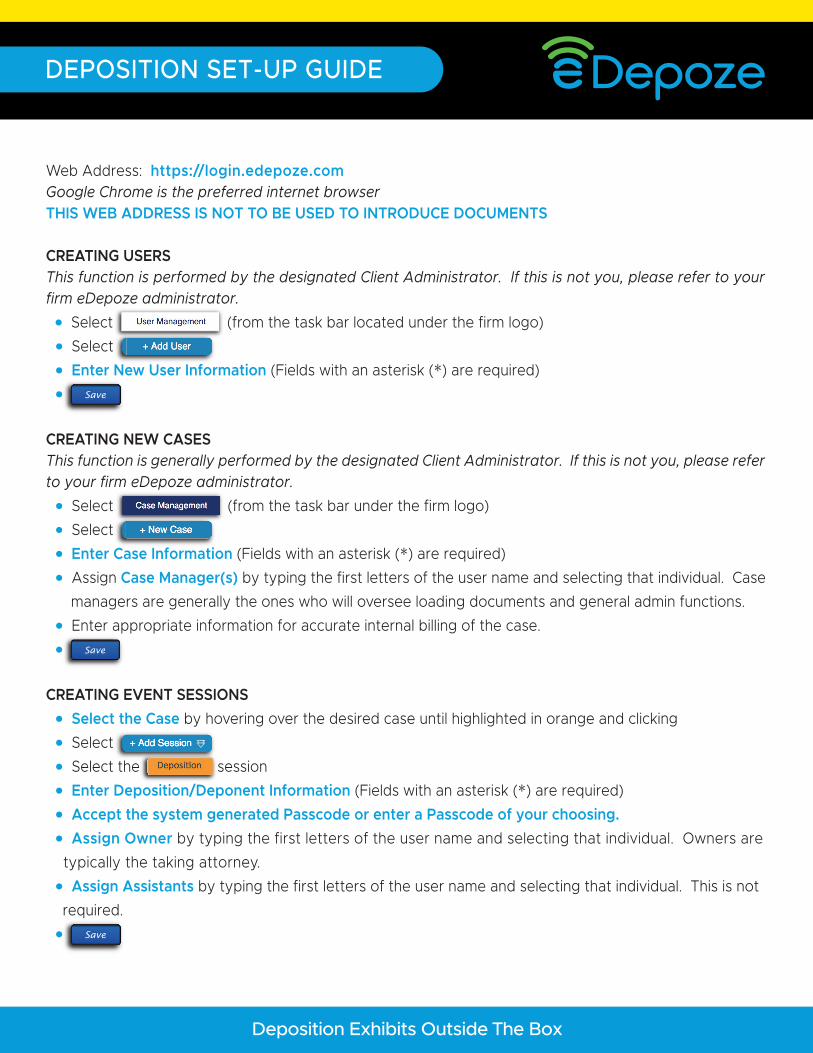
Web Address: https://login.edepoze.comGoogle Chrome is the preferred internet browserTHIS WEB ADDRESS IS NOT TO BE USED TO INTRODUCE DOCUMENTS
CREATING USERSThis function is performed by the designated Client Administrator. If this is not you, please refer to your firm eDepoze administrator. • Select (from the task bar located under the firm logo) • Select • Enter New User Information (Fields with an asterisk (*) are required) • Save
CREATING NEW CASESThis function is generally performed by the designated Client Administrator. If this is not you, please refer to your firm eDepoze administrator. • Select (from the task bar under the firm logo) • Select • Enter Case Information (Fields with an asterisk (*) are required) • Assign Case Manager(s) by typing the first letters of the user name and selecting that individual. Case managers are generally the ones who will oversee loading documents and general admin functions. • Enter appropriate information for accurate internal billing of the case. • Save
CREATING EVENT SESSIONS • Select the Case by hovering over the desired case until highlighted in orange and clicking • Select • Select the session • Enter Deposition/Deponent Information (Fields with an asterisk (*) are required) • Accept the system generated Passcode or enter a Passcode of your choosing. • Assign Owner by typing the first letters of the user name and selecting that individual. Owners are typically the taking attorney. • Assign Assistants by typing the first letters of the user name and selecting that individual. This is not required. • Save
LOADING DOCUMENTS*A suggested practice is to create a folder on your desktop then copy your desired documents to that folder before loading into the eDepoze database*There is a 15MB file size limit per file/document.*The system accepts the following file types: PDF, TXT, TIF, PNG, JPEG,GIF, MP3, WAV, AAC, WMA, MPEG-1, MPEG-2, MPEG-4, WMV, AVI, MOV*The system automatically creates “Case Exhibits”, “Case Transcripts”, “Official Exhibits” and “Transcripts” folders. For more information on these folders contact your Lexcity reseller.• Select your Session by hovering over the desired deposition until highlighted in orange and clicking once• Select “+Folder” to create folders• Name your folder, Save• Click on the folder that was created• Select “+Documents” to add documents• Select Add Files in the lower left corner• Browse for/to the folder where your documents are located• Select individual, selective and/or groups of documents• Click Open• Documents will upload• Select Close when uploading is complete
<!-- Generator: Adobe Illustrator 20.1.0, SVG Export Plug-In -->
<svg version="1.1"
xmlns="http://www.w3.org/2000/svg" xmlns:xlink="http://www.w3.org/1999/xlink"
DEPOSITION SET-UP GUIDE
Save
Save
Save
Deposition Exhibits Outside The Box
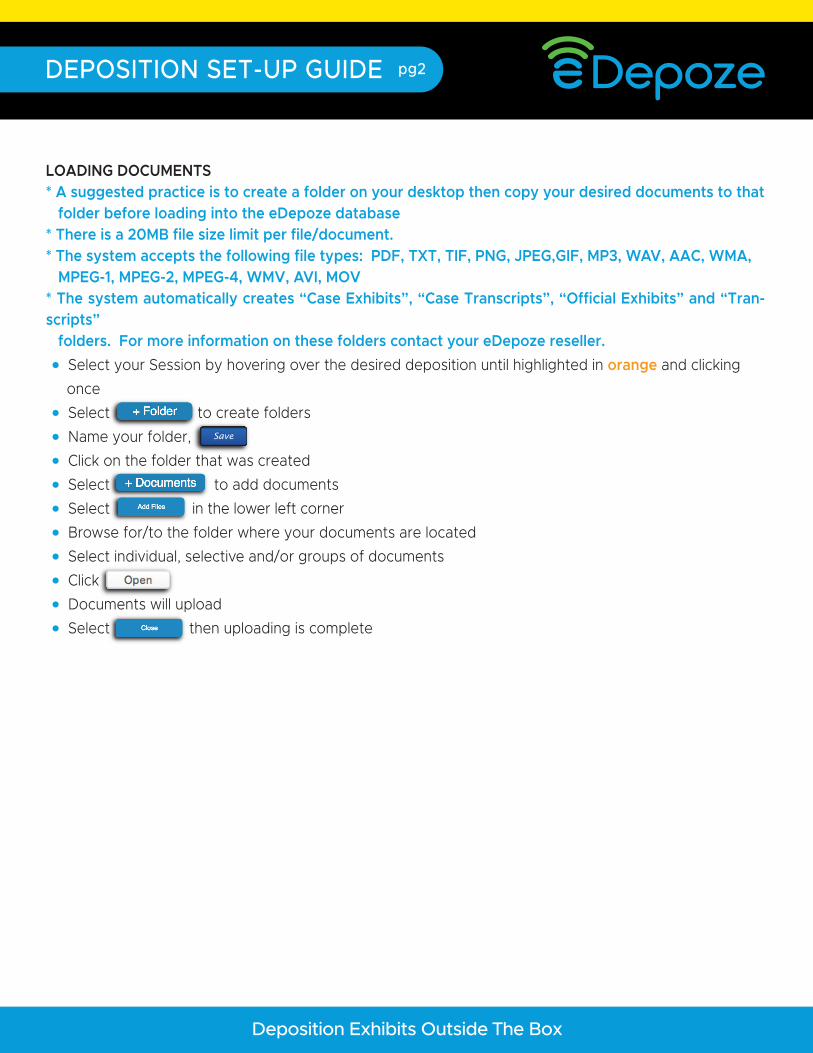
LOADING DOCUMENTS* A suggested practice is to create a folder on your desktop then copy your desired documents to that folder before loading into the eDepoze database* There is a 20MB file size limit per file/document.* The system accepts the following file types: PDF, TXT, TIF, PNG, JPEG,GIF, MP3, WAV, AAC, WMA, MPEG-1, MPEG-2, MPEG-4, WMV, AVI, MOV* The system automatically creates “Case Exhibits”, “Case Transcripts”, “Official Exhibits” and “Tran-scripts” folders. For more information on these folders contact your eDepoze reseller.
• Select your Session by hovering over the desired deposition until highlighted in orange and clicking once
• Select to create folders
• Name your folder,
• Click on the folder that was created
• Select to add documents
• Select in the lower left corner
• Browse for/to the folder where your documents are located
• Select individual, selective and/or groups of documents
• Click
• Documents will upload
• Select then uploading is complete
Save
DEPOSITION SET-UP GUIDE pg2