Embed Size (px)
Citation preview

Design and size sanitary plumbing systems
© Commonwealth of Australia 2015 1
CPCPSN4011B
ACKNOWLEDGEMENTS
National Plumbing Services Training Advisory Group
Plumbing Industry Commission Victoria
© Commonwealth of Australia 2015
Construction and Property Services Industry Skills Council PO Box 151 Belconnen ACT 2616 Tel: 02 6253 0002 www.cpsisc.com.au This work is copyright, but permission is given to trainers and teachers to make copies and contextualise the resources for use within their own training organisation or in a workplace where training is being conducted. This permission does not extend to making copies for use outside the immediate training environment for which they are made, or the making of copies for hire or resale to third parties.
The work was first published in 2006 with the assistance of funding provided by the Commonwealth Government, through the then Department of Education Science and Training (DEST). The 2015 publication has been updated to reflect changes to the national units of competency.
The views expressed in this work do not necessarily represent the views of the Commonwealth of Australia or CPSISC. In addition, the Commonwealth of Australia and CPSISC do not give warranty or accept any legal liability in relation to the content of this work.
The website addresses and other contact information provided in this publication were compiled in good faith and were correct at the time of printing. The updating of these resources was completed by:
National Plumbing and Services Training Advisory Group, with funding and support provided by the Construction and Property Services Industry Skills Council (CPSISC):
This guide was developed in consultation with representatives of the Plumbing Industry by NPSTAG and CPSISC to support the implementation of the CPC08 Construction, Plumbing and Services Training Package.
Design and size sanitary plumbing systems
2 © Commonwealth of Australia 2015
CPCPSN4011B
Acknowledgements
Project reference committee: National Plumbing Services Training Advisory Group
Writer: Terry McEvoy
Technical editor: Michael Hadaj
Instructional designer: Judie Litchfield
Graphic artist: Laura Bito
Word processor: Melissa Rogers

Design and size sanitary plumbing systems
© Commonwealth of Australia 2015 3
CPCPSN4011B
Contents
Before you begin........................................................................................................ 5
Introduction ............................................................................................................... 9
1. Sanitary drainage – the basics ................................................................. 10
1.1 What is a sanitary drainage system? ......................................................... 10
1.2 What is a sanitary plumbing system? ....................................................... 11
1.3 Types of systems .......................................................................................... 13
2. Planning, sizing and layout: the task ..................................................... 15
2.1 Preliminary planning .................................................................................. 15
2.2 Steps in planning, sizing and laying out sanitary pipe work and fixtures ...................................................................................................................... 16
3. Preparation ............................................................................................... 17
3.1 Determine the scope of the project ............................................................ 17
3.2 Consider occupational health and safety ................................................. 17
3.3 Sequence the project tasks .......................................................................... 18
3.4 Select tools and equipment ........................................................................ 18
3.5 Prepare the location where you will complete your planning .............. 18
4. Identifying system requirements ............................................................ 22
4.1 System specifications .................................................................................. 22
4.2 What size system is needed? ...................................................................... 23
4.3 Anticipating problems ................................................................................ 25
4.4 Tools and equipment .................................................................................. 27
4.5 Confirming system requirements .............................................................. 28
5. Sizing the system ..................................................................................... 29
6. Planning a layout ..................................................................................... 32
6.1 Designing and drawing up a layout ......................................................... 32
6.2 Specifying materials .................................................................................... 33
6.3 Documenting the layout ............................................................................. 34
Design and size sanitary plumbing systems
4 © Commonwealth of Australia 2015
CPCPSN4011B
7. End of job procedures .............................................................................. 39
7.1 Restoring the work area ............................................................................. 39
7.2 End of job documentation .......................................................................... 39
7.3 Tools maintenance ....................................................................................... 40
Final assessment activity ................................................................................... 42
Design and size sanitary plumbing systems
© Commonwealth of Australia 2015 5
CPCPSN4011B
Before you begin
Welcome
Welcome to the learning resource for the unit CPCPSN4011B Plan and size sanitary plumbing systems. This resource will help you develop the knowledge and skills you need to demonstrate competence in this unit.
A learning resource such as this is not intended to be the only source of information you use to develop skills and knowledge in the unit it relates to. Your trainer, instructor or supervisor will provide you with additional information and information sources throughout your training.
Flexible delivery
Your trainer, instructor or supervisor for the unit may adapt and deliver this learning resource as required to suit people from a range of backgrounds and in diverse learning environments (such as rural and isolated settings). This will assist in meeting equity principles and conforming to legislative policies.
How to use this resource
This resource addresses the underpinning knowledge and skill development required to help you plan, size and lay out sanitary pipe work and fixtures. It contains:
• information on planning, sizing and laying out sanitary pipe work and fixtures
• activities designed to encourage you to check and confirm your learning along the way and to help you complete the final assessment
• a summary of the final task or tasks you must complete to be assessed as competent in this unit. Your assessor will give you additional specific detail required for your final assessment activity in line with state and territory regulations and industry requirements.
The resource has been developed for use in a variety of ways. Your trainer, instructor or supervisor will advise on how best to use it during your training, which may include:
• trainer-centred, class-based study
• home-based, self-directed study
• activities in the workplace.
Design and size sanitary plumbing systems
6 © Commonwealth of Australia 2015
CPCPSN4011B
To complete the unit CPCPSN4011B Plan and size sanitary plumbing systems, you may be required to:
• read the information in this resource
• complete the resource activities as directed and submit your answers for review or discussion with your trainer, instructor or supervisor
• work with your trainer, instructor or supervisor to practise planning, sizing and laying out sanitary pipe work and fixtures
• read the final assessment summary together with any additional assessment information your assessor provides
• complete the final assessment.
Your assessment in this unit
It is important to note that the role of the assessor in assessing units of competence is quite separate from the role of trainer, instructor or supervisor. Your assessor for this unit may or may not be the same person as the trainer, instructor or supervisor who worked with you during your training. However, your assessment must always meet the requirements of the unit. You will find references to trainers, instructors or supervisors and assessors throughout this resource depending on the context.
Assessment in this unit will require you to demonstrate the skills and knowledge needed to plan, size and lay out sanitary pipe work and fixtures. Table 1 on page 3 suggests the variety of assessment methods that may be used to assess your competence in this unit. In many instances, your assessment may involve a combination of methods to ensure the validity, reliability, flexibility and fairness of the process. If you have any questions about your assessment please discuss them with your assessor who will decide with you the specific details of what you will do. An assessor may develop specific assessment strategies to meet the particular requirements of learners from diverse backgrounds.
This unit may be assessed in conjunction with assessment for other units of competence. In such a case assessment might be based on a task or tasks related to a project that more closely resembles workplace activities. Your assessor will decide if you are to be assessed in this way and will advise you.
Design and size sanitary plumbing systems
© Commonwealth of Australia 2015 7
CPCPSN4011B
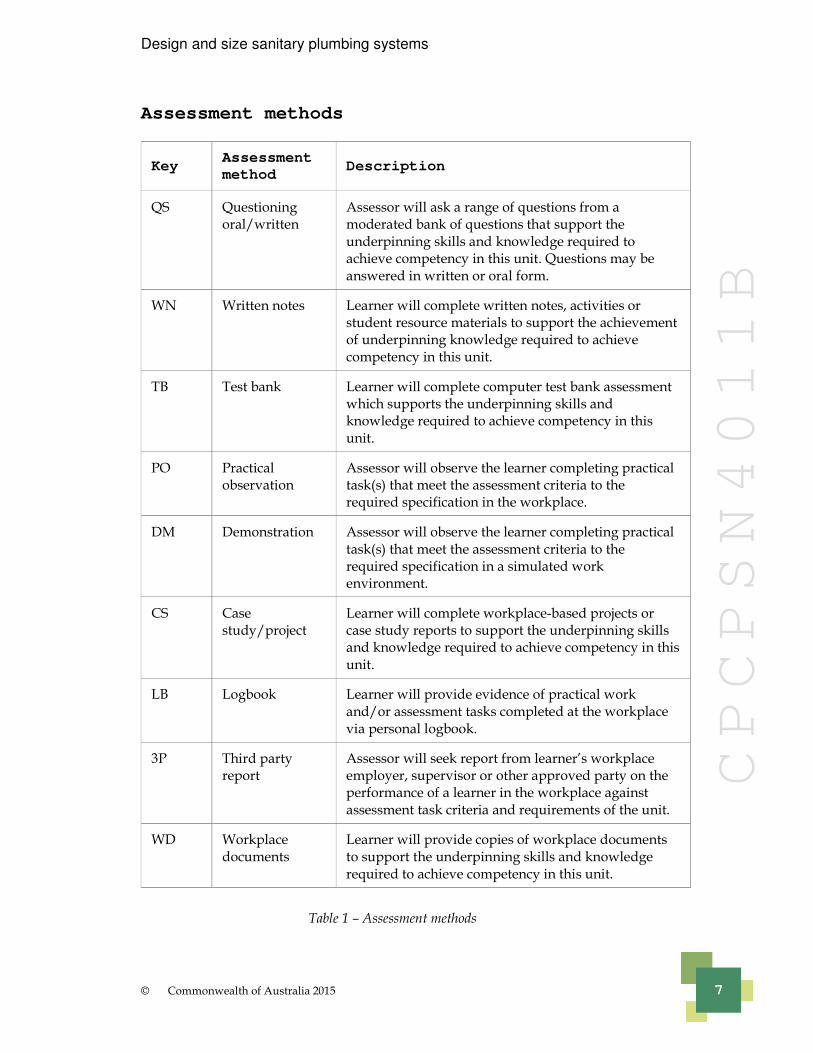
Assessment methods
Key Assessment
method Description
QS Questioning oral/written
Assessor will ask a range of questions from a moderated bank of questions that support the underpinning skills and knowledge required to achieve competency in this unit. Questions may be answered in written or oral form.
WN Written notes Learner will complete written notes, activities or student resource materials to support the achievement of underpinning knowledge required to achieve competency in this unit.
TB Test bank Learner will complete computer test bank assessment which supports the underpinning skills and knowledge required to achieve competency in this unit.
PO Practical observation
Assessor will observe the learner completing practical task(s) that meet the assessment criteria to the required specification in the workplace.
DM Demonstration Assessor will observe the learner completing practical task(s) that meet the assessment criteria to the required specification in a simulated work environment.
CS Case study/project
Learner will complete workplace-based projects or case study reports to support the underpinning skills and knowledge required to achieve competency in this unit.
LB Logbook Learner will provide evidence of practical work and/or assessment tasks completed at the workplace via personal logbook.
3P Third party report
Assessor will seek report from learner’s workplace employer, supervisor or other approved party on the performance of a learner in the workplace against assessment task criteria and requirements of the unit.
WD Workplace documents
Learner will provide copies of workplace documents to support the underpinning skills and knowledge required to achieve competency in this unit.
Table 1 – Assessment methods
Design and size sanitary plumbing systems
8 © Commonwealth of Australia 2015
CPCPSN4011B
Prerequisites units
There are no prerequisite units for this unit.
Additional resources
The following resources have been suggested that may help you undertake training and assessment in this unit. Your trainer, instructor or supervisor may also recommend specific books, videos and DVD’s.
Note
Standards, websites and codes of practice change so it is important to keep up to date. Make sure you always have the most recent edition of the standards applicable to your current job. You should also obtain relevant manufacturer information.
Texts
• Building Code of Australia
• Plumbing Code of Australia
• AS/NZS3500.2 - Sanitary Plumbing and Drainage
Websites
Video or audio resources
Design and size sanitary plumbing systems
© Commonwealth of Australia 2015 9
CPCPSN4011B
Introduction
In today’s multi-level buildings, a well-planned sanitary system is arguably the planning element that makes the most difference in how well the building ‘works’. If that system doesn’t work efficiently, then the building is at best unpleasant to live or work in, and at worst, useless.
This unit covers the skills and knowledge needed to plan, size and document the layout of sanitary pipe work and fixtures for a multi-floor building. We will discuss how to prepare the job, work out and confirm what the system will require, plan the layout and complete end of job procedures.
You will have two assessment tasks for this unit. Each will require you to plan, size and document the layout of a sanitary system for a building of at least six floors. In the first task, you will plan a fully ventilated modified sanitary system for a building with a basement. In the second, you will plan a single stack sanitary system for a commercial building.
Design and size sanitary plumbing systems
10 © Commonwealth of Australia 2015
CPCPSN4011B
1. Sanitary drainage – the basics
1.1 What is a sanitary drainage system?
A sanitary drainage system is an assembly of pipes, fittings and apparatus. Its function is to collect the discharge from the sanitary plumbing system and from fixtures directly connected to the drain, and convey it all to the sewer. To work efficiently, the system must be carefully designed to withstand the load all fixtures together impose on it. Design factors needing consideration include such things as:
• number of fixtures
• type of fixtures
• distance from the sewer point to the furthest fixture
• ventilation requirements for the drain
• depth of cover over in-ground pipes
• gradients required for sufficient flow
• allowance for expansion of pipe work
• installation of inspection openings
• support for pipe work if the drain is to be suspended.
For example, work in a multi-storey building will require sections of the drainage to be suspended. When this is the case, you must be aware that the pipe can expand and contract, and this can cause pipes and fittings to crack. To counter this, expansion joints are installed to allow the pipe to expand within itself. The drainage design must also ensure proper ventilation of the system. Regulations must be followed to ensure the sewage can flow as required.
At the planning stage, you may also need to consider the effect that the installation of utilities such as electricity, gas, water and telephone may have on the installation of the sanitary drainage system.
Design and size sanitary plumbing systems
© Commonwealth of Australia 2015 11
CPCPSN4011B
1.2 What is a sanitary plumbing system?
A sanitary plumbing system is an assembly of pipes, fittings, fixtures and appliances used to collect and convey sewage from fixtures to the sanitary drainage system. That is, the plumbing system refers mainly to the above ground parts of the sanitary system and the drainage system refers mainly to the below ground network that carries away the discharge. The system works in conjunction with the drainage system as explained above, however, design requirements differ because other issues besides the principals of drainage must be considered. For example, venting and gradients of pipe work must meet AS/NZS 3500.2, the Australian Standard that sets out the minimum requirements for installation of a sanitary plumbing system and suggests acceptable solutions to specific problems.
Other considerations include:
• fixture grouping
• manufacturer requirements for specific fixtures
• materials and product selection
• soil fixtures versus waste fixtures.
Soil and waste fixtures
Soil fixtures are used to discharge human waste products. Water closet pans, urinals, slop hoppers, autopsy tables, bedpan washers and sanitary napkin disposal units are all soil fixtures. All other fixtures are classified as waste fixtures. The two fixture types have different installation requirements and the installer must meet AS/NZS 3500.2 standards when connecting either to the sanitary drainage system.
Soil and waste fixtures both carry materials that can be termed ‘hazardous’ which can cause disease in humans. This is a WHS factor that you must consider when planning the design for sanitary projects in relation to both the end user of the system and the plumber who will install the work.
Design and size sanitary plumbing systems
12 © Commonwealth of Australia 2015
CPCPSN4011B
Materials and products
Materials and products used in the system must ensure satisfactory service for the life of the installation. In selecting these, you must consider:
• how the system will be used and the nature of the liquid to be conveyed
• the nature of the ground and the possibility of chemical attack on the pipes and fittings
• the physical and chemical characteristics of the materials and products
• the possibility of abrasion by solids in the flow
• the likely temperature range of discharge to the drainage system
• product limitations.
Every product has specific limitations as defined by AS/NZS 3500.2. For example, a copper pipe must not be used to convey the discharge from a urinal only, but is permitted where the discharge is diluted. Other limitations on the use of pipes and fittings can be found in section 2 of the Standard.
Unplasticised polyvinyl Chloride (PVC-U) is the most common material used in sanitary plumbing systems. It is lightweight, smooth and considered durable. Its high expansion rate, however, must be taken into account.
It is important that you consider the appropriate jointing methods for use with the different types of materials used in sanitary systems. This information is available from the manufacturer’s specifications and AS/NZS 3500. Discuss jointing methods for sanitary system materials with your trainer, instructor or supervisor if you need further information.
Design and size sanitary plumbing systems
© Commonwealth of Australia 2015 13
CPCPSN4011B
1.3 Types of systems
Sanitary systems may be fully vented, fully vented modified, single stack or single stack modified.
Fully vented
The fully vented system is designed for the provision of separate ventilation for every fixture trap installed (other than fixtures discharging to a floor waste gully) and the trap of every floor waste gully. This is achieved by the installation of a trap vent or an air admittance valve on each fixture. This system was widely used in multi-storey work last century.
Fully vented modified
The fully vented modified system differs by allowing the traps of any group of two or more fixtures, or floor waste gullies, discharging into the same branch to be vented in common by one or more vents. This type of system can be used when restrictions to the single stack and single stack modified system cannot be met (as you will see below).
Single stack
The single stack system is based on the principle that the air within the discharge pipes from fixtures, the stack and the stack vent allow for the permitted type and number of fixtures to be connected to the stack without the need for individual trap vents, or in the case of a range of fixtures, venting the common discharge pipes.
The regulations are very clear on the differences between connections to domestic/residential buildings and those for commercial or industrial settings. These differences are to do with the number and types of fixtures connected to the stack, and the number of floor levels in the building. Clause 8.4 of the AS/NZS 3500.2 lists the number and type of fixtures that can be connected to each system.
Design and size sanitary plumbing systems
14 © Commonwealth of Australia 2015
CPCPSN4011B
Single stack modified
The single stack modified system permits stacks to receive a higher discharge loading or to be extended to serve a greater number of floor levels by introducing a relief vent and cross vents. The cross vents are installed between the relief vent and stack. The use of the single stack modified system allows for the increase in loading and height of the stack without the need to increase the nominal size of the stack.
Suspended drain
A suspended (or aerial) drain is one that is hung by clips or a pipe support below the floor level to service fixtures above. It must meet regulations on length, nominal diameter, ventilation requirements, expansion and gradients. It is usually needed when fixtures are installed on a floor that has space underneath it, such as on a multi-storey job, where fixtures are to be drained to a stack. Provision is made in the space between the ceiling of the lower floor and the underside of the upper floor to allow for the drainage to be installed.
Design and size sanitary plumbing systems
© Commonwealth of Australia 2015 15
CPCPSN4011B
2. Planning, sizing and layout: the
task
2.1 Preliminary planning
To plan a particular drainage system, you will need to check the plans and specifications. Once you have these (usually from the builder), you will be able to determine specific criteria to develop your plan. You will need to know the number and type of fixtures for the job and the building layout. To determine what size drain is required, you will need to calculate the number of fixture unit ratings (see below), the minimum gradients required and the distance to the discharge points. Combining this information with the relevant requirements set out in the Australian standards for sanitary work will enable you to design an efficient drainage system. The definitions and installation requirements of the various pipes and fittings should be familiar to you. Discuss these with your trainer, instructor or supervisor if you need further information.
It is unlikely that at the point of planning sanitary systems you would encounter hazardous waste or the bacteria that cause disease. However, the system you are designing is specifically to carry waste and material that could be hazardous and it must be designed to ensure human health is protected. If you are the plumber who will also be installing the system on site, particularly in a building renovation, you must protect yourself and others from contact with these materials. It is also vital in work of this kind that you know and plan how to correctly handle other types of hazardous materials such as grease, material glues and cleaners.
Design and size sanitary plumbing systems
16 © Commonwealth of Australia 2015
CPCPSN4011B
2.2 Steps in planning, sizing and laying
out sanitary pipe work and fixtures
As in all installation work, planning and laying out a sanitary system requires careful planning, specific skills and knowledge, and the ability to follow specified procedures.
To plan, size and document the layout of the sanitary pipe work and fixtures required in a multi-level building, you will need to:
• prepare well
• identify what the work will require
• plan a layout for an efficient system that will meet all requirements
• restore and refurbish the work area, tools and equipment as required
• complete end of job procedures.
Design and size sanitary plumbing systems
© Commonwealth of Australia 2015 17
CPCPSN4011B
3. Preparation
As always, preparation is the foundation stone of good planning. You need to prepare before you plan. Pre-planning for the sanitary layout of a multi-level building will require you to do the following.
3.1 Determine the scope of the project
Work out the nature and scope of what is needed to plan the job and then confirm the information you have gathered. You will need to get sewer plans and builders plans to assist in design layout. You will also need to calculate the quantities of materials required by the system. Make sure your information is both accurate and complete. All plumbing work must be planned, sized and laid out to meet the requirements of AS/NZS 3500.
3.2 Consider occupational health and
safety
Assess the occupational health and safety requirements relevant to planning and carrying out the work. Decide how these requirements will be met and then ensure that they are. Hazards you encounter might relate to the use of tools and equipment, tripping, underground services, the surrounding structure and facilities, other machines, working at heights or in proximity to others or in confined spaces, worksite visitors and the public. You will need to complete a safe work method statement (referred to as a Job Safety Analysis [JSA] in some states) to identify how you will address WHS issues as part of your planning for this task.
Sanitary systems are designed to carry waste which can be hazardous to human health. As the plumber planning such a system you should address the necessary regulatory requirements to ensure the health and safety of the consumer and/or members of the public who use the system. If you are the plumber who will install the system you must plan how you will protect yourself from possible contamination while on site. If another plumber will complete the installation following your plan you should make sure you advise them of the necessary WHS precautions. In both cases you will need to include handling hazardous materials on a completed Safe Work Method Statement (or JSA) to ensure work procedures comply with WHS requirements. Refer to the unit resource CPCPCM4011A Carry out work based risk control processes for more information on completing Safe Work Method Statements.
Design and size sanitary plumbing systems
18 © Commonwealth of Australia 2015
CPCPSN4011B
3.3 Sequence the project tasks
Organise the job by breaking it down into the tasks involved and then sequencing these effectively. The size and complexity of the job may mean you will be working with others involved in planning and/or carrying out the work. You will also often need to consult a range of other people, including those likely to be affected by the work, such as architects, builders, carpenters, electricians, plasterers, suppliers, unions, WHS personnel and consumers (property owners, residents and users). Discuss timeframes with other trades affected by your work and develop a flow chart for timing the stages of the job. This will assist you sequence your work so that you don’t get in the way of others on site and they don’t delay you. Time the delivery of materials to site to ensure an efficient job. Specify the finish date of the project to coordinate end of job procedures.
3.4 Select tools and equipment
Identify all tools and equipment that will be needed, including drawing equipment and/or computer software for preparing the plan. Make sure all tools and equipment are in good working order. Remember equipment will also include appropriate personal safety items. You must also know what personal protective equipment (PPE) is required under relevant legislation, regulation and workplace practices when on site. Such equipment might include appropriate clothing, safety boots, helmets, scaffolds, harnesses and gloves. Using the right tools and equipment for each task will also help to ensure personal safety.
3.5 Prepare the location where you
will complete your planning
Your planning area may be a desk in your company office, the kitchen table or the back of your work truck depending on your personal circumstances. However, any area you use for planning will need the same basic materials. Complete the following activity with your trainer, instructor or supervisor to identify the basic requirements of a planning area.
Design and size sanitary plumbing systems
© Commonwealth of Australia 2015 19
CPCPSN4011B
Activity 1
1. In the space below, list some factors that might make an area unsuitable for the planning task.
2. List some of the factors that you would consider at this early stage of your planning if your project is the renovation of the sanitary drainage system in a heritage listed, multi storey office building in the CBD.
Design and size sanitary plumbing systems
20 © Commonwealth of Australia 2015
CPCPSN4011B
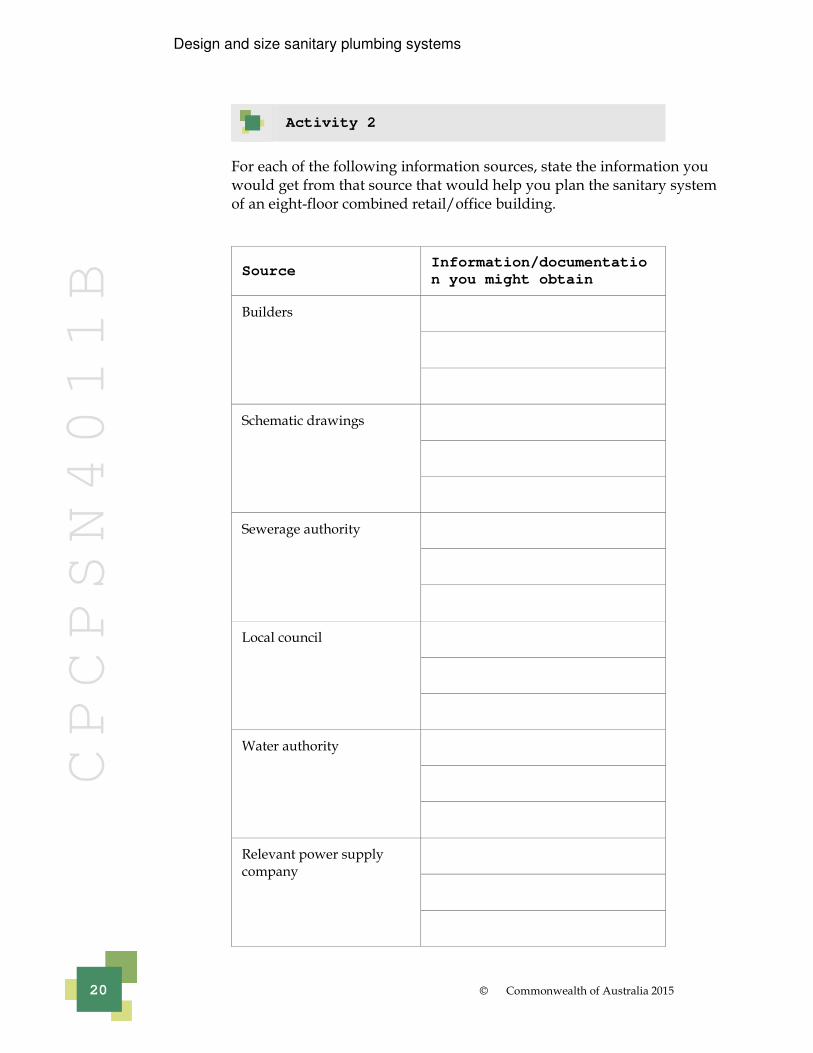
Activity 2
For each of the following information sources, state the information you would get from that source that would help you plan the sanitary system of an eight-floor combined retail/office building.
Source Information/documentatio
n you might obtain
Builders
Schematic drawings
Sewerage authority
Local council
Water authority
Relevant power supply company
Design and size sanitary plumbing systems
© Commonwealth of Australia 2015 21
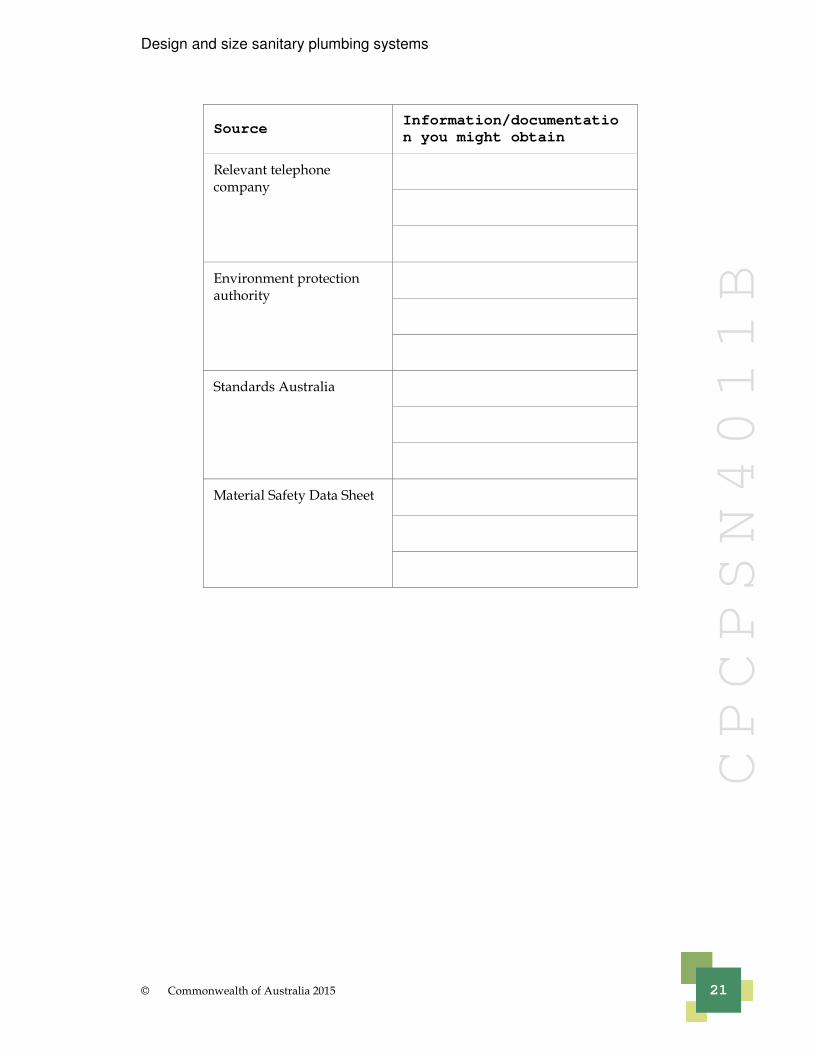
CPCPSN4011B
Source Information/documentatio
n you might obtain
Relevant telephone company
Environment protection authority
Standards Australia
Material Safety Data Sheet
Design and size sanitary plumbing systems
22 © Commonwealth of Australia 2015
CPCPSN4011B
4. Identifying system requirements
You cannot plan an efficient sanitary system without knowing what will be required of the system when it is operational.
4.1 System specifications
Before beginning planning you should ask yourself a series of questions similar to those following. If there is anything you are unsure about, discuss these with your trainer, instructor or supervisor:
• What has been specified for this project? What fixtures will be needed? How many? What type? Where? You will need to refer to design drawings, plans and elevations.
• What specific devices will the system require? For example, how many discharge pipes are needed and where will they be best located? Will the system require any special drains such as a suspended/aerial drain?
• How many floor levels does the project involve?
• Is it a commercial/industrial construction or domestic/residential?
• What is the depth of the drainage system to which the sanitary system will be connected?
• What type of soil will the system be installed in? Will there be the need for trench shoring?
• How many stacks will be needed and what type?
• What type of plumbing system is required? Is it a fully vented system or possibly a fully vented modified system?
• Are there specific materials requirements in relation to pipe locations? Are some of the drains suspended in car parks? Will all below ground drains have enough cover? (A shallower drain may need to be of cast iron. A deeper one may be PVC.) Where will vents terminate? Are other services going to be affected by your installation? If so, what action needs to be taken?
• What is the fixture unit loading?
Design and size sanitary plumbing systems
© Commonwealth of Australia 2015 23
CPCPSN4011B
Note
‘Fixture unit loading’ is a measurement of the hydraulic load a particular fixture might impose on a sanitary system. The calculation is based on the rate of discharge, time of operation and frequency of use for that fixture. (See Table 6.1 of AS/NZS 3500.2.)
4.2 What size system is needed?
In determining the size of the system required you will need to consider the following.
• What are the environmental requirements and risks? These might include the reinstatement of ground levels to match surrounding areas. Consideration must be given to any water and waste management plans that have been formulated.
• What other site activities will be going on while you work, for example work being carried out by other trades, access to the site by the public or clients?
Activity 3
Your next project is to plan the layout for a single stack sanitary system for an office building which is currently leased but undergoing renovation.
You would like to arrange a site visit to examine the site and assist with your planning. Explain how you would set up the site visit. Detail the information you hope to obtain from your visit.
Design and size sanitary plumbing systems
24 © Commonwealth of Australia 2015
CPCPSN4011B
Design and size sanitary plumbing systems
© Commonwealth of Australia 2015 25
CPCPSN4011B
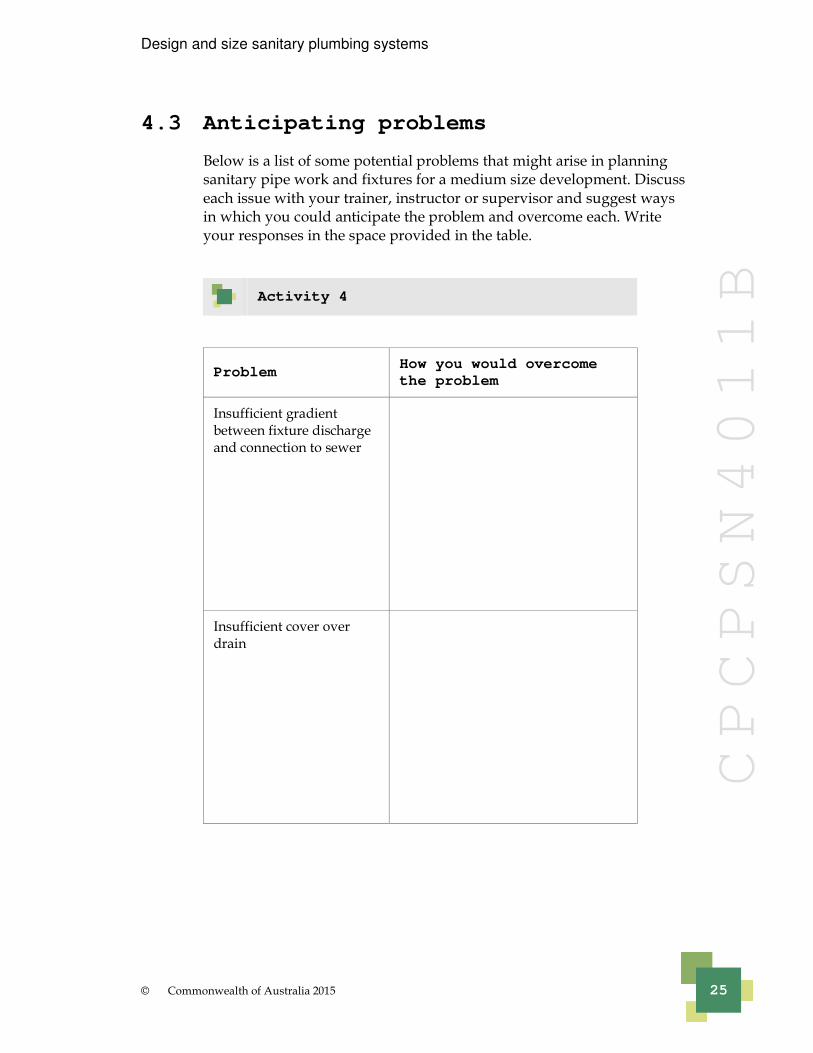
4.3 Anticipating problems
Below is a list of some potential problems that might arise in planning sanitary pipe work and fixtures for a medium size development. Discuss each issue with your trainer, instructor or supervisor and suggest ways in which you could anticipate the problem and overcome each. Write your responses in the space provided in the table.
Activity 4
Problem How you would overcome
the problem
Insufficient gradient between fixture discharge and connection to sewer
Insufficient cover over drain
Design and size sanitary plumbing systems
26 © Commonwealth of Australia 2015
CPCPSN4011B
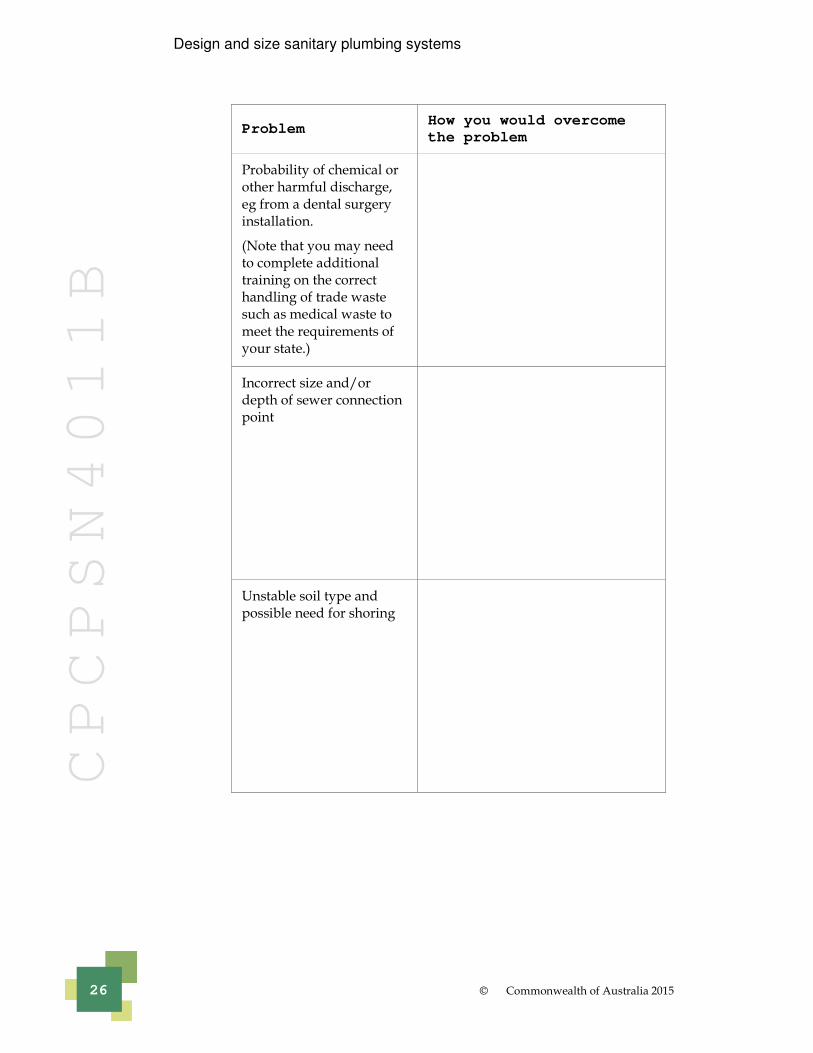
Problem How you would overcome
the problem
Probability of chemical or other harmful discharge, eg from a dental surgery installation.
(Note that you may need to complete additional training on the correct handling of trade waste such as medical waste to meet the requirements of your state.)
Incorrect size and/or depth of sewer connection point
Unstable soil type and possible need for shoring
Design and size sanitary plumbing systems
© Commonwealth of Australia 2015 27
CPCPSN4011B
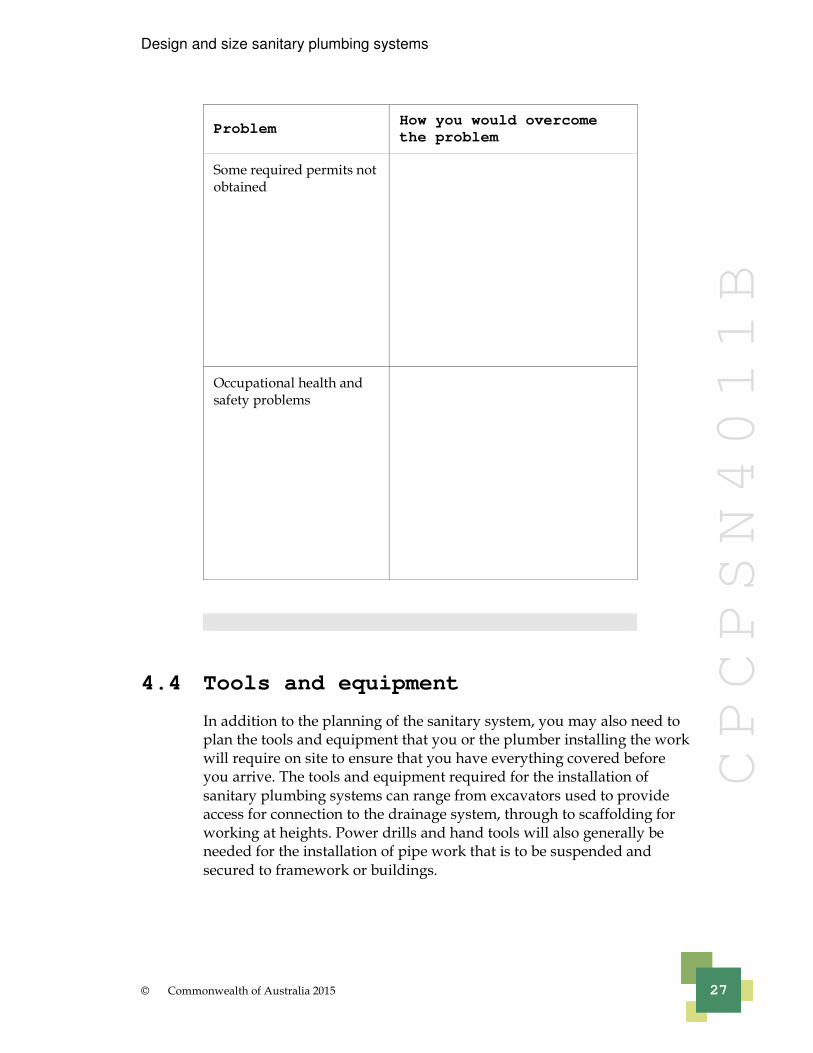
Problem How you would overcome
the problem
Some required permits not obtained
Occupational health and safety problems
4.4 Tools and equipment
In addition to the planning of the sanitary system, you may also need to plan the tools and equipment that you or the plumber installing the work will require on site to ensure that you have everything covered before you arrive. The tools and equipment required for the installation of sanitary plumbing systems can range from excavators used to provide access for connection to the drainage system, through to scaffolding for working at heights. Power drills and hand tools will also generally be needed for the installation of pipe work that is to be suspended and secured to framework or buildings.
Design and size sanitary plumbing systems
28 © Commonwealth of Australia 2015
CPCPSN4011B
4.5 Confirming system requirements
It is vital that you ensure all information, calculations, etc are correct. To confirm this, you should compare specific details of your plan against the Australian standards. It is a good idea to tailor a basic checklist to suit the particular project, for example:
• What is the fixture unit loading on the job?
• How many floor levels are there on the job?
• What is the nominal size of the stack?
• Is it a residential or commercial building?
Compiling this information can help you work out the right plumbing system for your project.
Note
Refer to AS/NZS 3500 2, tables 8.3, 8.4, 8.5 and 8.6 for details of the sizing of various system types.
Your trainer, instructor or supervisor may choose to work through a pipe sizing exercise with you at this point to demonstrate the use of the reference tables.
Design and size sanitary plumbing systems
© Commonwealth of Australia 2015 29
CPCPSN4011B
5. Sizing the system
Correctly sizing the system is critical to how well it will work. To do this task properly, you must consider all relevant information.
You will need to compile all information relevant to the specific project. Much of this will be gathered from the builder’s plans and specifications; however, you must also combine this with a thorough understanding of the requirements of the regulatory standards. For example:
• How big is the drain?
• What type of disposal system is to be used? This will depend on the type of building (industrial or domestic), the number of floors, and the number, type and position of fixtures to be installed.
• You will need to check Table 6.1 in AS/NZS 3500.2 to determine the fixture unit rating of each fixture. Once you have this information, you will need to calculate the total fixtures unit ratings.
• You will need to determine the stack size.
Example – Determining stack size
1. An industrial building of 5 floors using the single stack system with fixture unit loading totalling 75 fixture units, would need to have a stack with nominal size of 125 mm. Refer to AS/NZS 3500.2 Table 8.4 for sizing information.
2. A domestic building of 14 floors using the single stack modified system with a fixture unit loading of 360 fixture units, would need a stack with a minimum nominal size of 100 mm and a 50 mm cross vent on each level. Refer to AS/NZS 3500.2 Table 8.5 for sizing information.
Your trainer, instructor or supervisor may choose to work through a further pipe sizing exercise with you at this point to demonstrate the use of the reference tables.
Once you have gathered all the relevant information, the system size needed will largely depend on the total fixture units connected. You should use the relevant sizing tables and clauses from AS/NZS 3500.2.
Design and size sanitary plumbing systems
30 © Commonwealth of Australia 2015
CPCPSN4011B
Activity 5
Read the following scenarios. In the table on the next page, list the factors you would consider in sizing the sanitary system for each of the three projects.
For example, one consideration might be ‘determine the length of drain from the stack to the most distant fixture’.
1. A new city apartment building of ten floors
This building is to have a ground-level car park and nine floors of residential apartments, with two apartments mirror image to each other on each floor. Each apartment is to be fitted with a bathroom, ensuite, kitchen and laundry. Plumbing fixtures will be installed back to back into a central duct located between apartments. Each residential floor will have a suspended ceiling, with sufficient space in each of these ceiling spaces for the required fall for the drainage and discharge pipes.
2. An office complex being renovated
The existing office has only one toilet, one basin and one sink. The renovations are to include the installation of male and female bathrooms. The male bathroom will consist of one WC, one wall-hung urinal, two wall-mounted basins, a shower and a floor waste gully. The female bathroom is to include two WCs, two wall-mounted basins, a shower and a floor waste gully. A sink is to be installed in the kitchen area and provision made for later connection of a dishwasher on the ground floor of an existing building. Connection to the sewer is to be via an existing sewer stack that is vented to atmosphere. Below floor space is sufficient for a suspended drainage system.
3. A retail shopping complex being extended
This shopping centre is to be extended to include three more retail outlets, including a takeaway food restaurant. Each of the three will require a kitchenette. The takeaway shop will also require a grease interceptor under the main preparation sink and a basin with hands-free operation in the food preparation area.
Design and size sanitary plumbing systems
© Commonwealth of Australia 2015 31
CPCPSN4011B
Design and size sanitary plumbing systems
32 © Commonwealth of Australia 2015
CPCPSN4011B
6. Planning a layout
The essential steps in the layout stage of a project are:
1. Designing and drawing up a layout that meets the requirements of all relevant plans, specifications, standards, regulatory bodies and workplace procedures.
2. Specifying materials.
3. Documenting your planned layout.
6.1 Designing and drawing up a layout
In multi-storey work, hydraulic engineers usually draw up a design for the drainage system.
Your job as the plumber is often to use that design information to ‘take off’ material quantities for your quote and work out a timeframe for each of the tasks you will be doing.
However, if you do have the task of planning the sanitary layout on a multi-storey building, generally you will be given a set of plans. These show you a ‘typical’ layout for one floor level. Depending on the design of the building, there may be more than one ‘typical’ floor design.
The final sewerage plans generally show the below ground drains as lines, plus a series of numbers or abbreviations and an index that details what each number or abbreviation represents. In this way, the plans show how many and what fixtures are required and where they are to be on each floor. This system of notation on the drawings makes for easy to read plans that should help you to physically locate the drains on site, and to easily identify what is needed in your system design and to make your own design drawings.
In addition, as we will discuss later, one of your end of job responsibilities will be to submit ‘as laid’ plans to the relevant authority. Generally, these will include the drawings given to you at the planning stage plus any changes that have been made during installation. Accuracy in these plans is vital as they will be a key reference for future works and maintenance.
Design and size sanitary plumbing systems
© Commonwealth of Australia 2015 33
CPCPSN4011B
6.2 Specifying materials
You must determine the specific materials and how much of each is required. Consider the system size (already determined by requirements of the plans and specifications and using the sizing tables in AS/NZS 3500.2). Also consider the specifics of the job. Taking into account the location of the finished pipe work, how much material will be needed? Will the drain have enough cover to allow use of PVC or will it need to be in cast iron? If the sanitary system is to be suspended, is there the possibility it may be damaged? If so, how will you protect it?
Specific requirements are often set out in the specifications that accompany the project plan. For example, for the installation of a basin, the specifications may specifically require that all exposed waste pipes are chrome plated, and this will be a factor in your materials selection for the job. A chrome plated waste pipe may be fabricated from copper and be required to connect to a PVC stack. If so, you will need to specify and locate a source for the appropriate form of connection between the two products.
Another example may be where you are to install a suspended drain in a car park of a shopping centre. You may be required to install a copper alloy drain to prevent any damage from passing traffic. Again, you will need to consider the points of connection, the method and spacing of support for the drain and the possibility of expansion and contraction. This will also impact on your project quotation.
Example – A typical job
Here is how you might tackle the task of materials specification for a particular job.
Once you have a set of hydraulic/working drawings, you can start at ‘the point’ (legal point of discharge) and work backwards. You have already determined the diameter of the drain in your planning procedures. Now, using your drawings, establish the length of the main drain, any branches and any stacks that will be required. Then calculate the number of junctions and bends that are needed. From here, determine what other fittings may be required. Again, a checklist/spreadsheet can be an invaluable tool.
Design and size sanitary plumbing systems
34 © Commonwealth of Australia 2015
CPCPSN4011B
6.3 Documenting the layout
Everything that you plan must be properly documented and recorded. Documentation must meet the requirements of the local authority, the builder and your workplace.
The documentation related to sanitary projects that you are involved with might include the following:
• detailed drawings showing all drainage and discharge pipes, fixtures and appliances, sizes, gradients and connection points
• materials list
• your completed Safe Work Method Statement (or JSA)
• a scope of works for your part in the project. This will detail the work you are to complete and define the limits to your involvement in the project.
Scope of works
The scope of works is the document that specifies your exact responsibilities for the job. It will detail items such as the following:
• supply and installation of sanitary drainage system as per plan ‘X’
• connection from all fixtures as shown on plan ‘Y’ to the sanitary plumbing system
• connection of sanitary plumbing system to the sanitary drainage system
• exclusions, such as excavation in rock, and any works further to those specified that will be charged at a cost plus basis.
The scope of works, combined with your quotation and materials list, should be the basis of your planning documentation. You will also include the hydraulic drawings or working drawings and any specific documentation required by regulation.
Design and size sanitary plumbing systems
© Commonwealth of Australia 2015 35
CPCPSN4011B
Activity 6
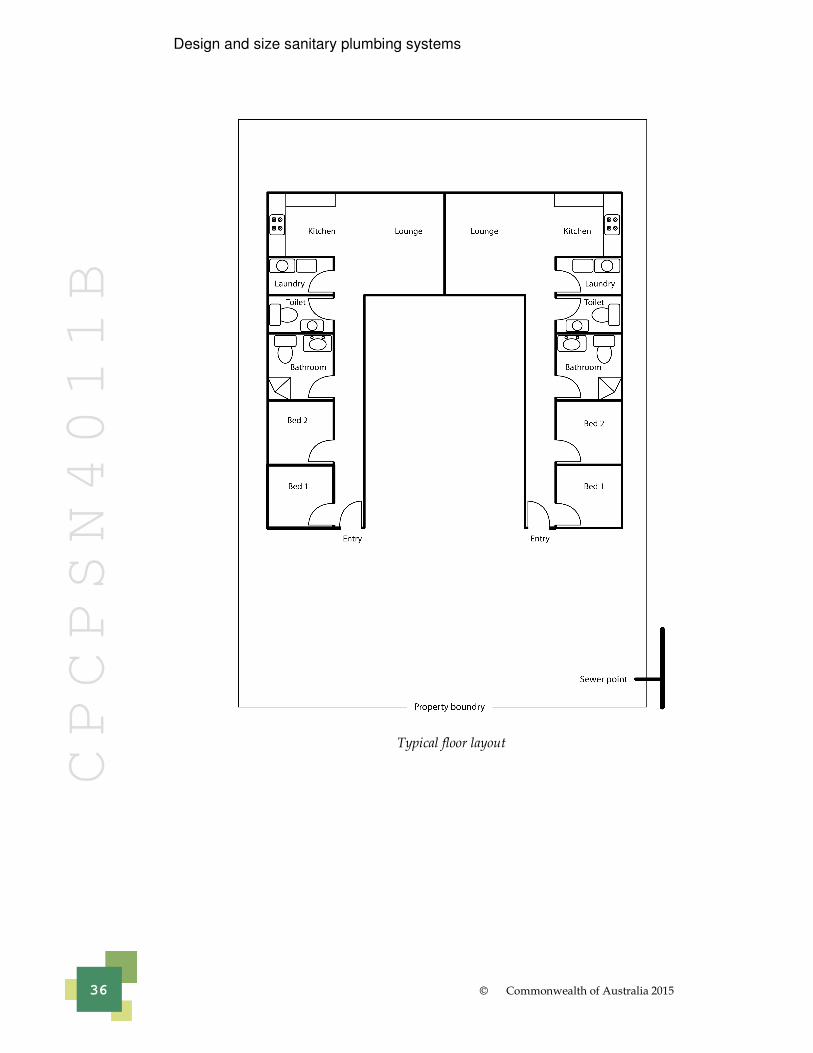
The following is a description of a project for a six-storey block of units on a flat block of land.
In this project, all floors are designed the same. All have two units, each with two bedrooms, one bathroom, an ensuite, a kitchen and a laundry. The project is to be a concrete construction.
On the next page, you will see the project’s ‘typical floor layout’ drawing. Taking into account what you know from the above description and from the typical layout drawing, consider what other information you would need to plan, size and lay out the sanitary pipe work and fixtures for this project.
Draw up basic plans for a layout that would meet project requirements. You will need to draw:
• an elevation view of the layout
• an elevation view of the stack.
Submit your plans to your trainer, instructor or supervisor for discussion.
Design and size sanitary plumbing systems
36 © Commonwealth of Australia 2015
CPCPSN4011B
Typical floor layout
Design and size sanitary plumbing systems
© Commonwealth of Australia 2015 37
CPCPSN4011B
Elevation view of the layout
Design and size sanitary plumbing systems
38 © Commonwealth of Australia 2015
CPCPSN4011B
Elevation view of the stack
Design and size sanitary plumbing systems
© Commonwealth of Australia 2015 39
CPCPSN4011B
7. End of job procedures
Project planning should always consider what must be done when works have been completed. Planning should specify procedures for each of the following:
• how the work area will be restored
• what is to be done with tools and equipment used in the works process
• what documentation must be completed (including work backup).
7.1 Restoring the work area
On completion of a job in a multi-storey project you would need to check from floor to floor to make sure each fixture was connected in a way that complied with all relevant requirements. All rubbish would need to be removed, along with all tools and equipment, and the required documentation would need to be lodged.
7.2 End of job documentation
There are a number of documents that the plumber must complete and submit when the project is completed.
‘As laid’ plans
At the end of a project, you must submit ‘as built’ drawings where relevant and an ‘as laid’ plan of the pipe work, including sizes and depths.
Generally speaking the ‘as laid’ drawings are submitted to the builder for his records and a copy is submitted to the relevant sewerage authority. This is then kept on file to facilitate maintenance and pipe location as needed. It is crucial that these drawings are accurate and up to date. The plumber should also keep a copy for his records.
Design and size sanitary plumbing systems
40 © Commonwealth of Australia 2015
CPCPSN4011B
Certificate of compliance
You are also required to submit a certificate of compliance guaranteeing the standard of workmanship on the project for a period of seven years. You should be familiar with the requirements for this certificate from your earlier training (particularly in Certificate III). The certificate of compliance is registered with the relevant authority as a record of your involvement and forms part of your insurance cover for the work you have done. A copy is given to the owner/developer/builder and you keep a copy.
Check out the website of Victoria’s Plumbing Industry Commission (or similar authority for your state or territory) to find out more on how to compile a certificate of compliance.
Lodgement of final invoice for payment
Most jobs are completed in stages and payment is also in stages. At the end of the whole job, you must take into account any variations you have been required to make. These may be extra fixtures that have been added to the plans or some other variation from the original scope of works. If these changes mean you have incurred additional costs you should charge the builder accordingly.
7.3 Tools maintenance
Tools and equipment used during the project installation would need to be maintained according to manufacturers’ requirements and stored appropriately.
Design and size sanitary plumbing systems
© Commonwealth of Australia 2015 41
CPCPSN4011B
Activity 7
Describe the end of job procedures that you must ensure are completed after the sanitary system in an eight-storey office block has been upgraded.
Design and size sanitary plumbing systems
42 © Commonwealth of Australia 2015
CPCPSN4011B
Final assessment activity
As a minimum, for the final assessment activity for this unit you will be required to:
• Plan, size and document the layout details of a fully ventilated modified sanitary system for a building with a minimum of six floors, including a basement, ensuring:
− correct identification of details of the plan
− correct selection and use of appropriate processes, tools and equipment
− completion of all work to specification
− compliance with regulations, standards and organisational quality procedures and processes.
• Plan, size and document the layout details of a single stack sanitary system for a commercial building of at least six floors, ensuring:
− correct identification of details of the plan
− correct selection and use of appropriate processes, tools and equipment
− completion of all work to specification
− compliance with regulations, standards and organisational quality procedures and processes.
Your assessor will provide you with more information regarding this assessment activity.


![Title 51 PUBLIC HEALTH SANITARY CODE Part XIV. Plumbing … · 2015-12-18 · (Plumbing) of the Sanitary Code, ... 004] A. The purpose of this ... equipment, appliances, fixtures,](https://img.pdfslide.net/doc/110x75/5b94c4f109d3f272648b5b7b/title-51-public-health-sanitary-code-part-xiv-plumbing-2015-12-18-plumbing.jpg)