Embed Size (px)
Citation preview
Die-cutting
Exam expectations
Die-cutting is a regular topic in the examination
paper. Although the question only attracts a
small numbers of marks it is an area which few
candidates score.
Die Cutting an Introduction
In industry companies need to manufacture
packaging in large quantities. In order to create
the packaging, nets or cutter guides have to be
designed accurately so that the final product
can be cut out after it had been printed.
What everyday items can you think of that
have been die cut?
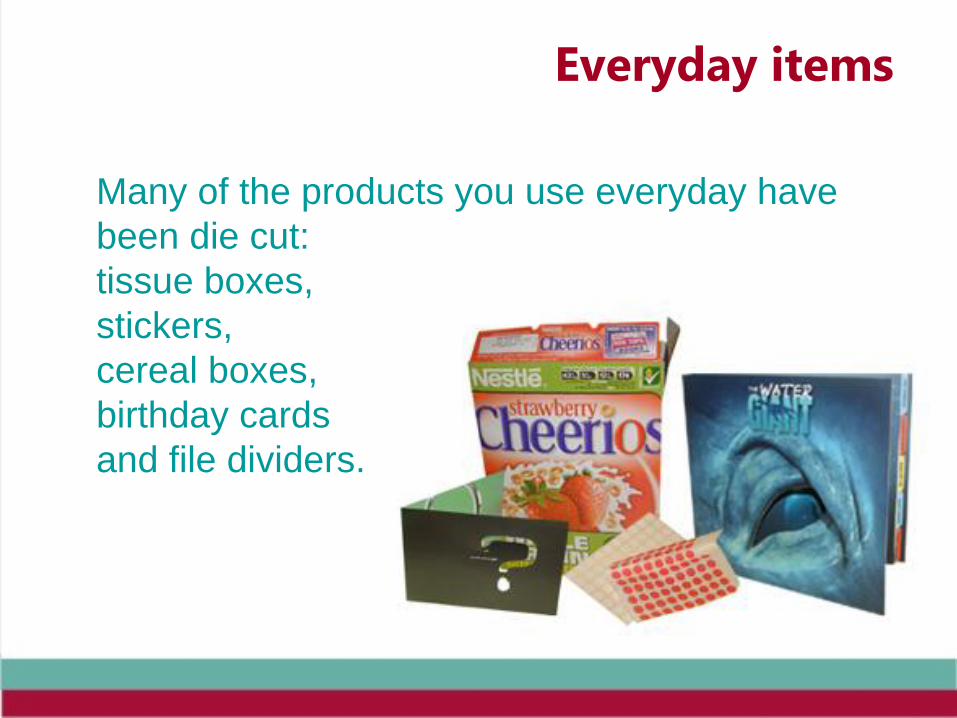
Everyday items
Many of the products you use everyday have
been die cut:
tissue boxes,
stickers,
cereal boxes,
birthday cards
and file dividers.
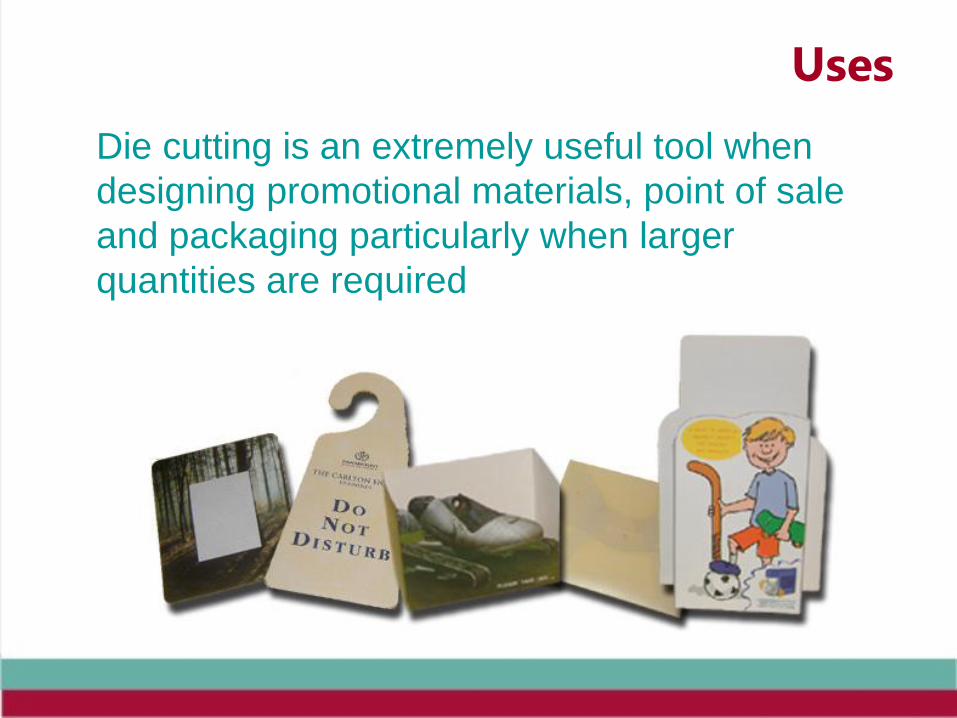
Uses
Die cutting is an extremely useful tool when
designing promotional materials, point of sale
and packaging particularly when larger
quantities are required
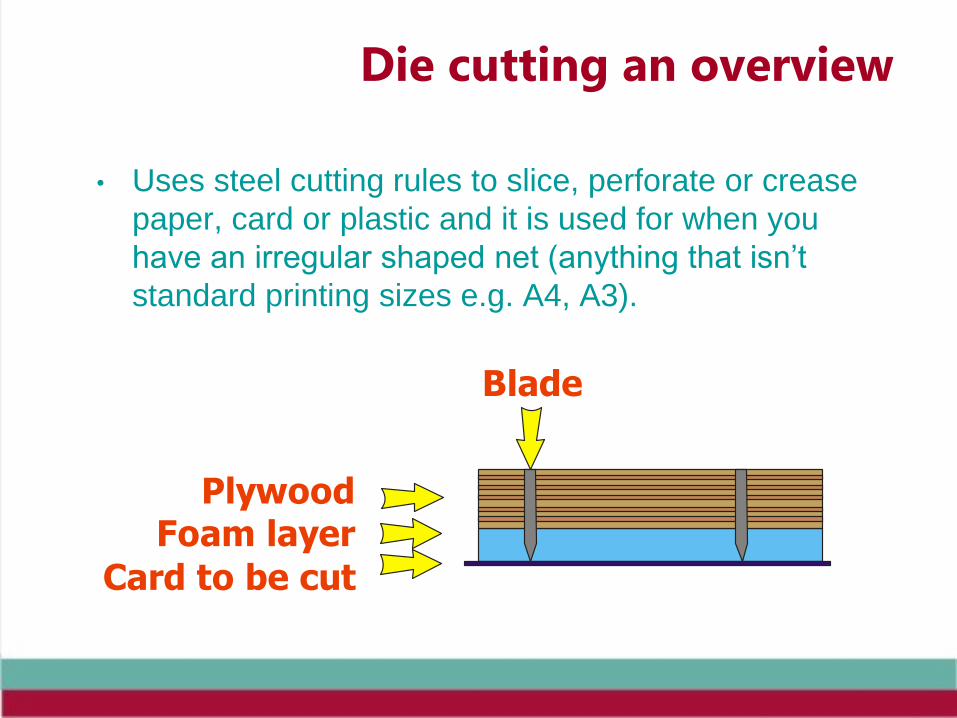
Die cutting an overview
• Uses steel cutting rules to slice, perforate or crease
paper, card or plastic and it is used for when you
have an irregular shaped net (anything that isn’t
standard printing sizes e.g. A4, A3).
PlywoodFoam layer
Card to be cut
Blade
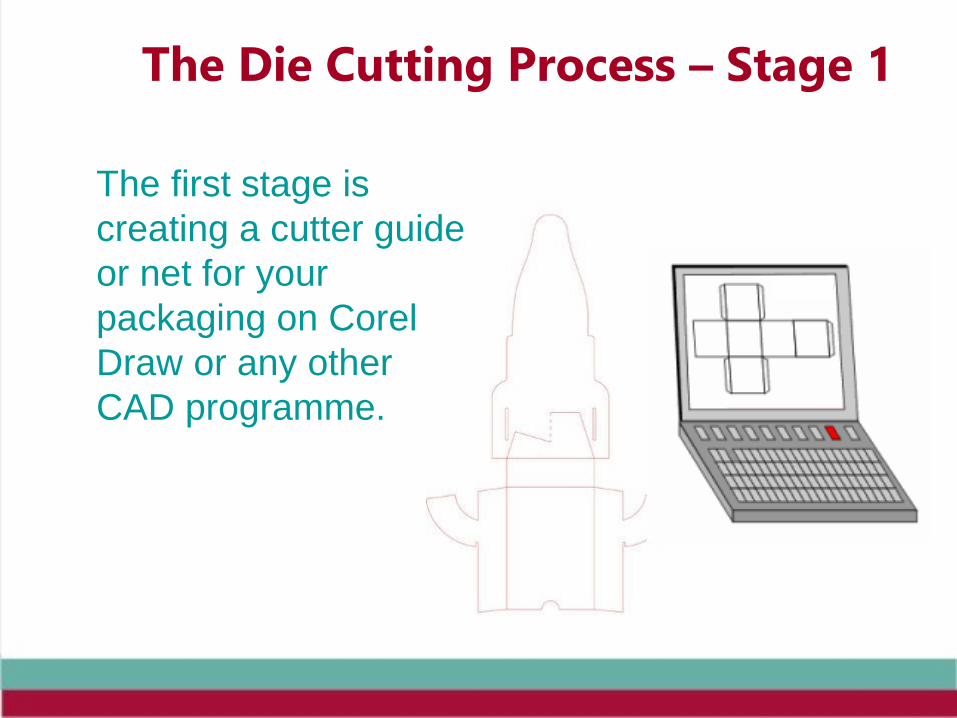
The Die Cutting Process – Stage 1
The first stage is
creating a cutter guide
or net for your
packaging on Corel
Draw or any other
CAD programme.
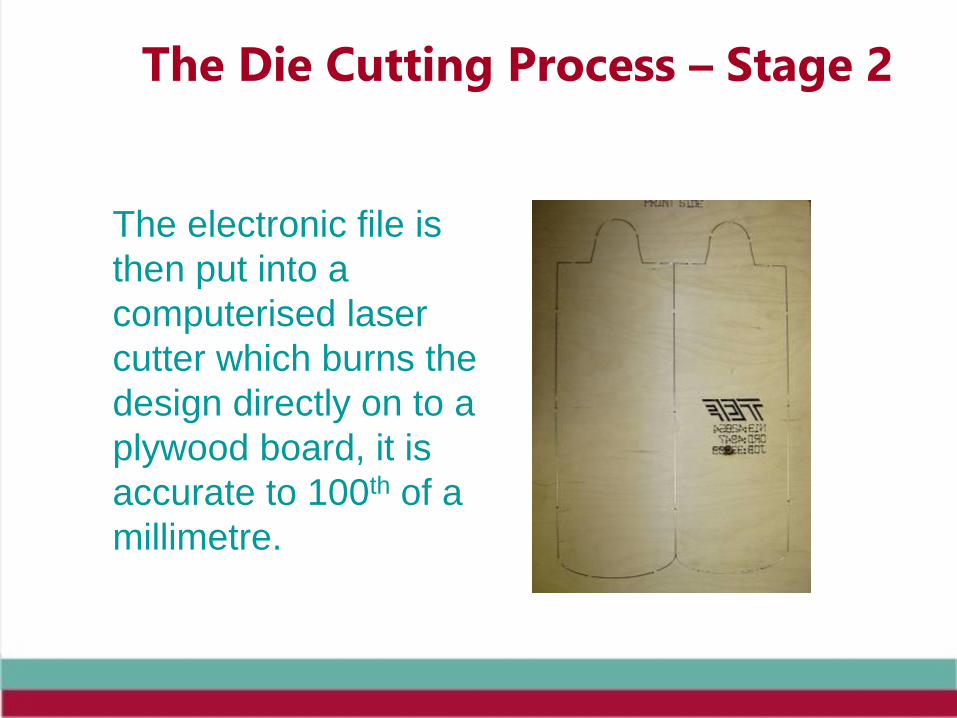
The Die Cutting Process – Stage 2
The electronic file is
then put into a
computerised laser
cutter which burns the
design directly on to a
plywood board, it is
accurate to 100th of a
millimetre.
The Die Cutting Process – Stage 3
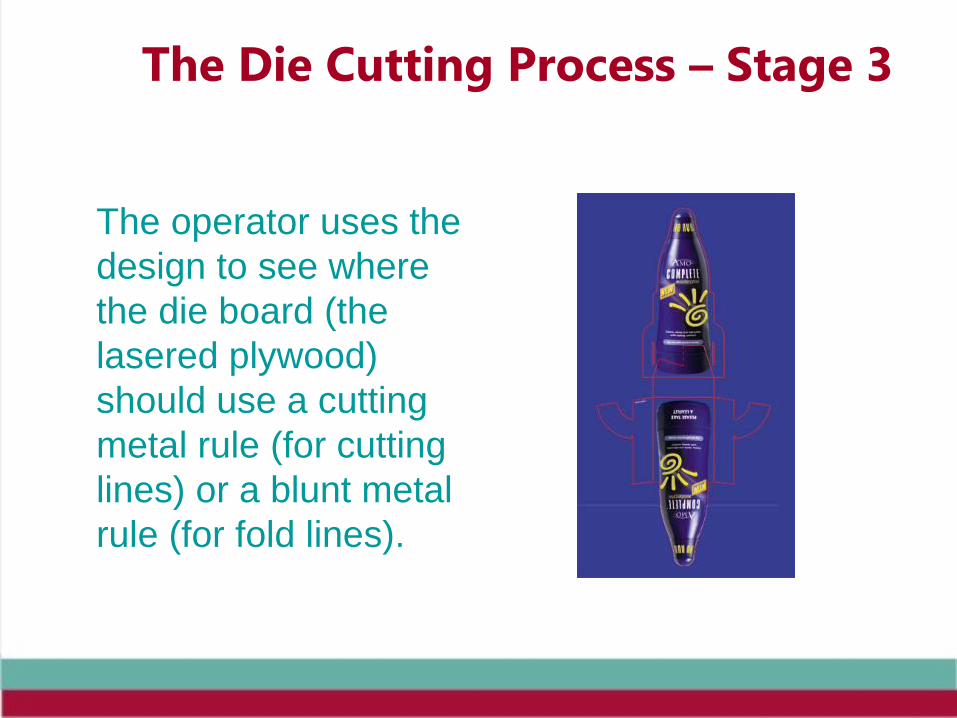
The operator uses the
design to see where
the die board (the
lasered plywood)
should use a cutting
metal rule (for cutting
lines) or a blunt metal
rule (for fold lines).
The Die Cutting Process – Stage 3
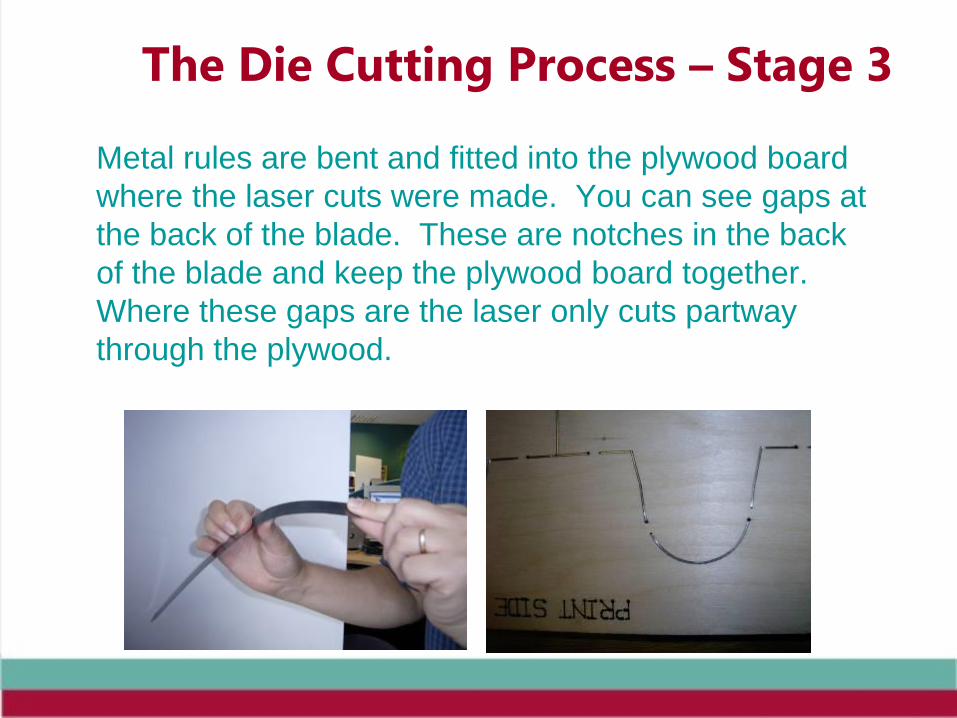
Metal rules are bent and fitted into the plywood board
where the laser cuts were made. You can see gaps at
the back of the blade. These are notches in the back
of the blade and keep the plywood board together.
Where these gaps are the laser only cuts partway
through the plywood.
The Die Cutting Process – Stage 3
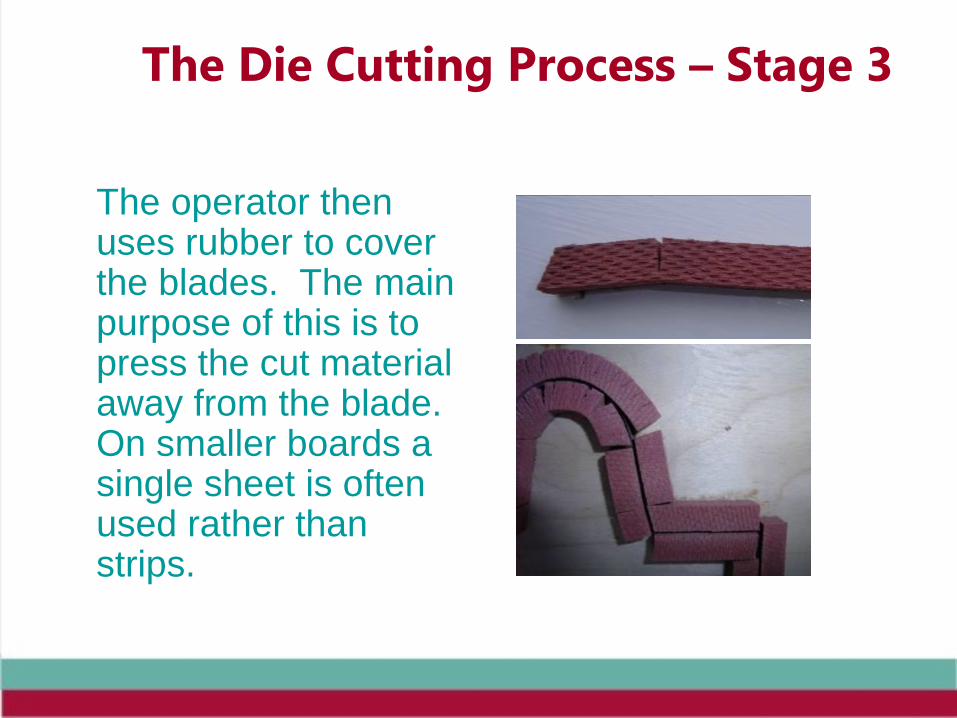
The operator then uses rubber to cover the blades. The main purpose of this is to press the cut material away from the blade. On smaller boards a single sheet is often used rather than strips.
The Die Cutting Process – Stage 3
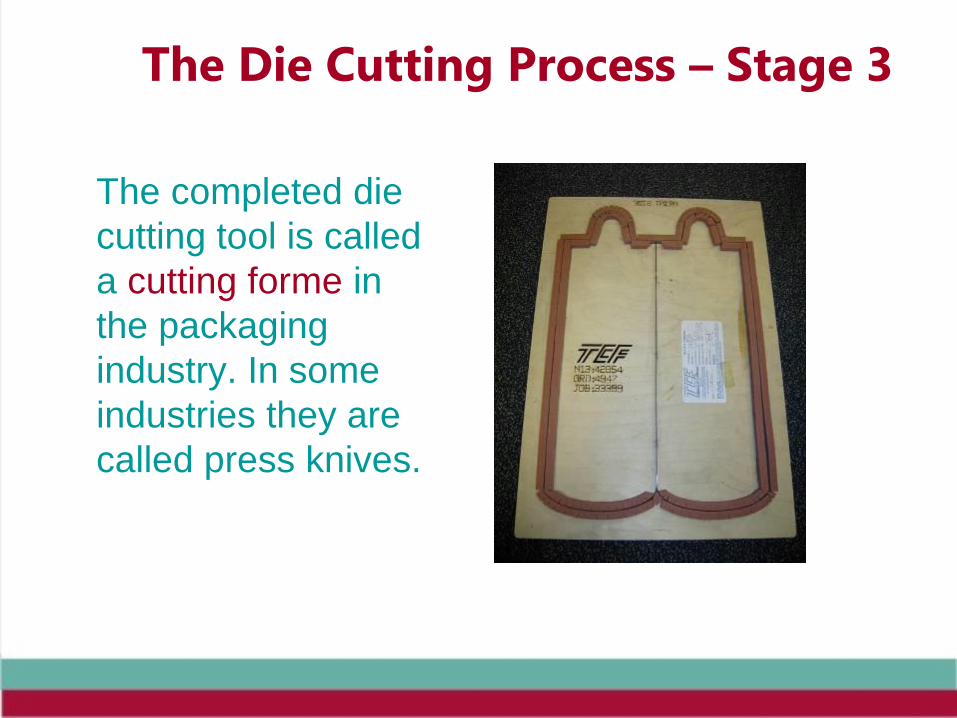
The completed die
cutting tool is called
a cutting forme in
the packaging
industry. In some
industries they are
called press knives.
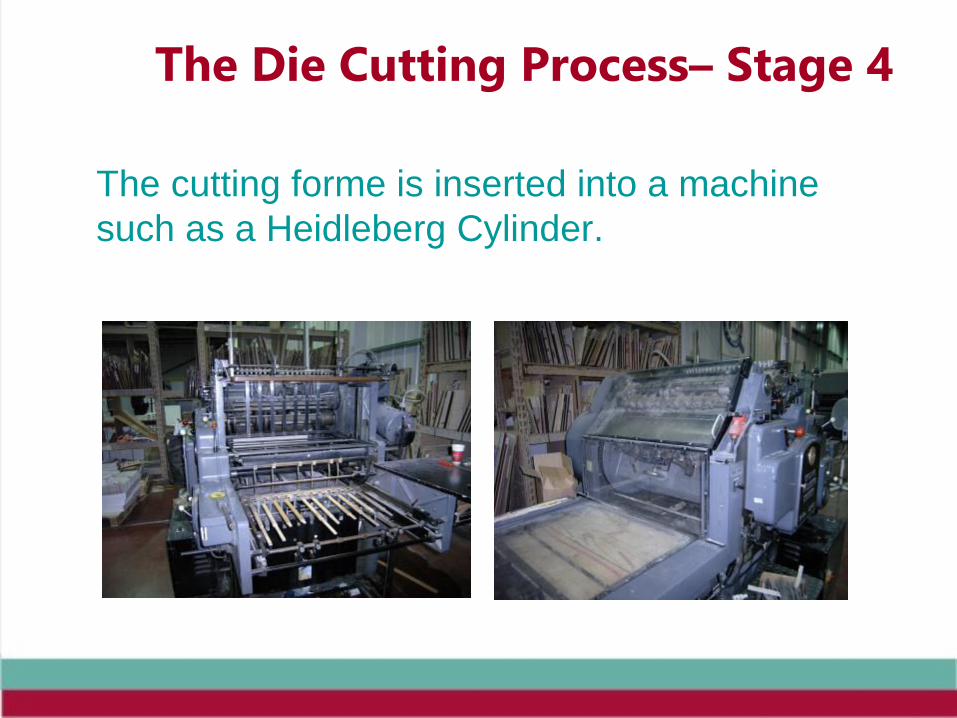
The Die Cutting Process– Stage 4
The cutting forme is inserted into a machine
such as a Heidleberg Cylinder.
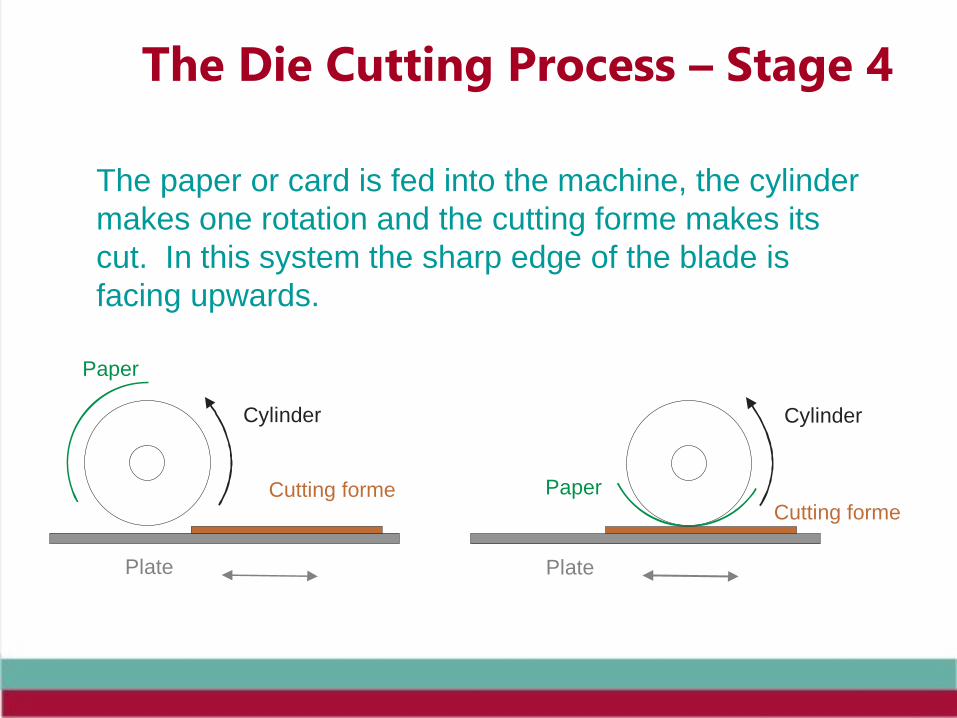
The Die Cutting Process – Stage 4
The paper or card is fed into the machine, the cylinder
makes one rotation and the cutting forme makes its
cut. In this system the sharp edge of the blade is
facing upwards.
Paper
Paper
Cylinder Cylinder
Cutting formeCutting forme
Plate Plate
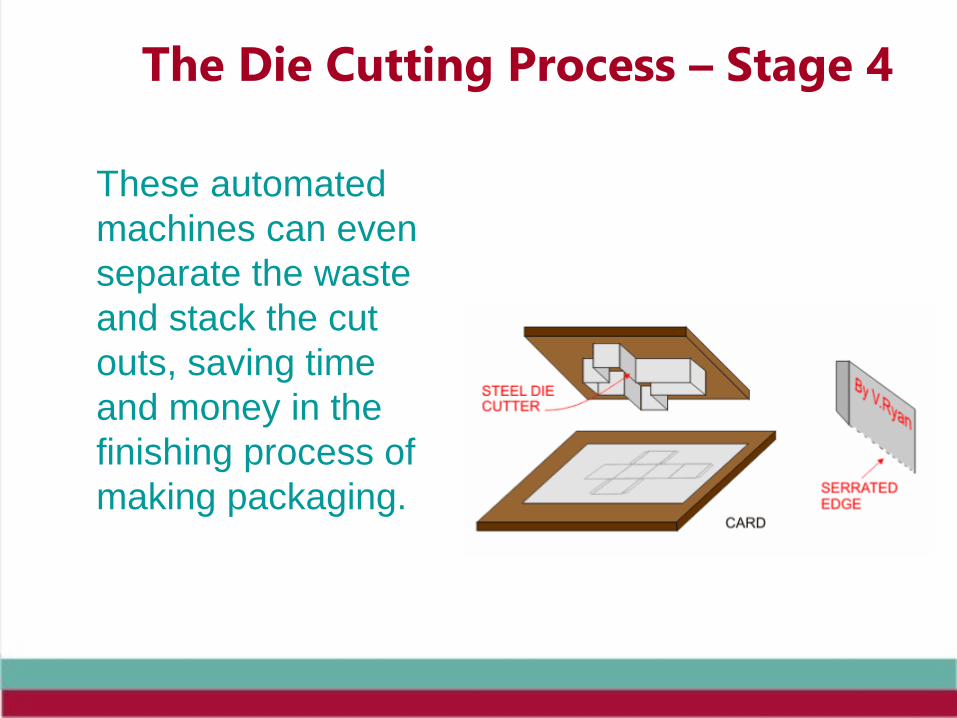
The Die Cutting Process – Stage 4
These automated
machines can even
separate the waste
and stack the cut
outs, saving time
and money in the
finishing process of
making packaging.
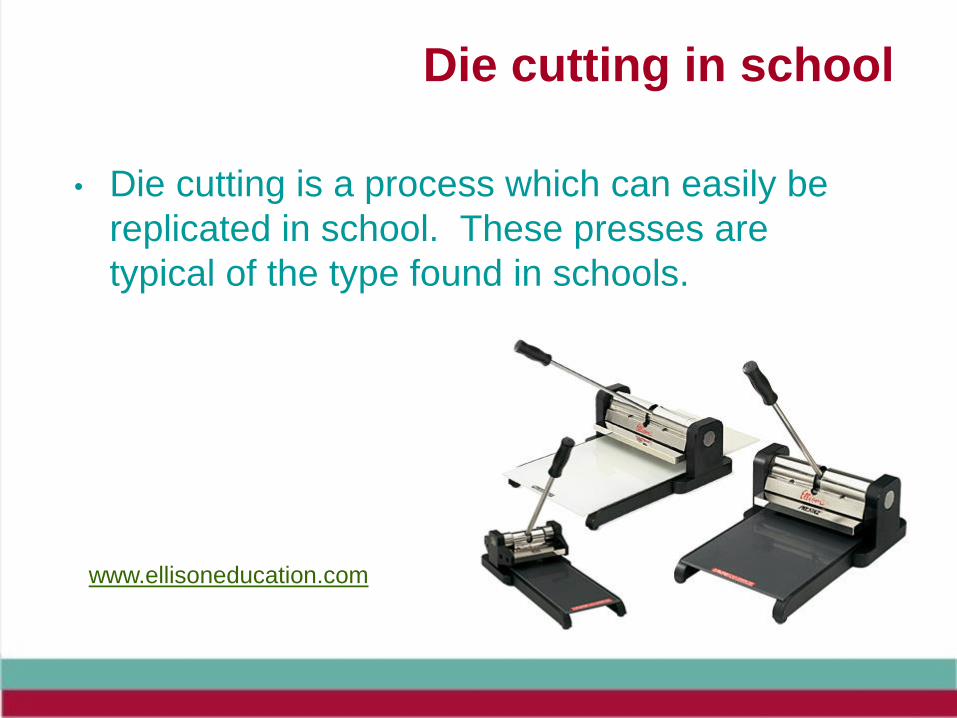
Die cutting in school
• Die cutting is a process which can easily be
replicated in school. These presses are
typical of the type found in schools.
www.ellisoneducation.com
Die cutting in school
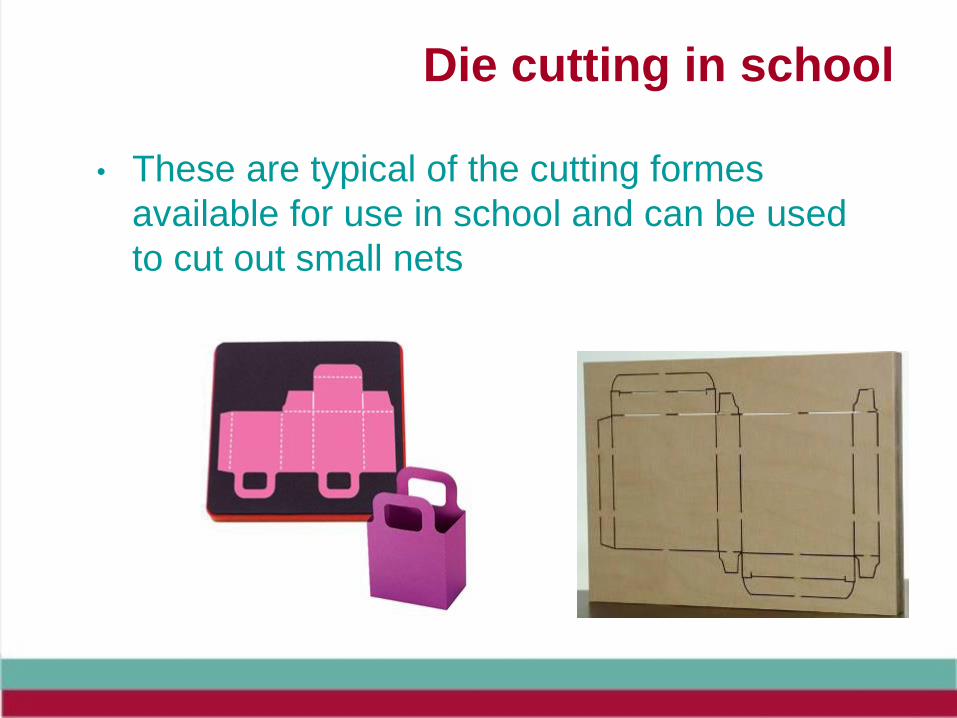
• These are typical of the cutting formes
available for use in school and can be used
to cut out small nets
Die cutting in school
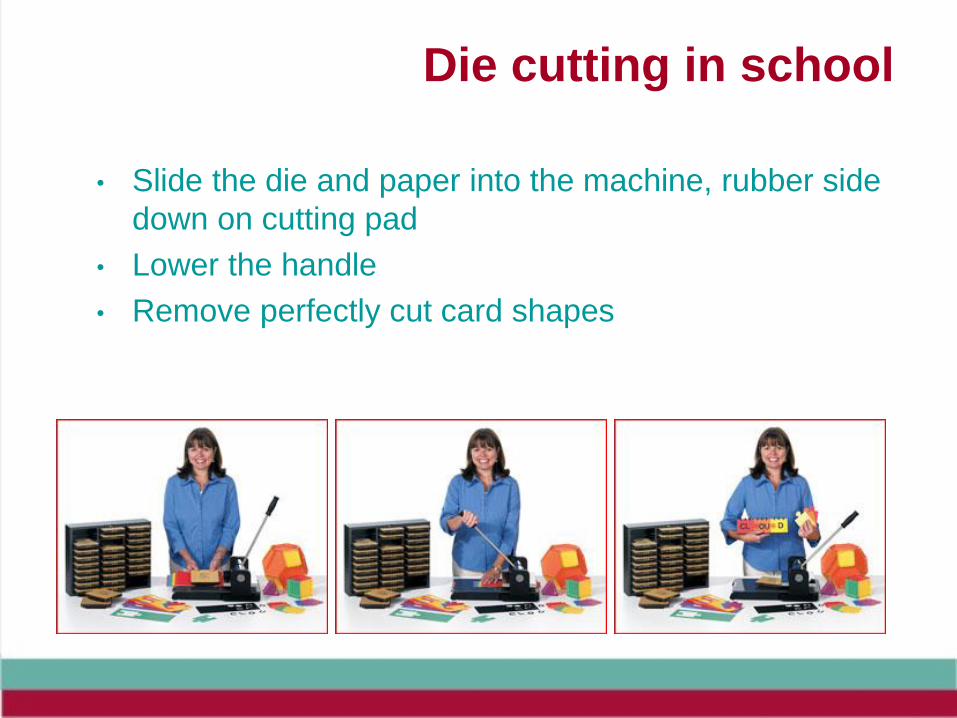
• Slide the die and paper into the machine, rubber side
down on cutting pad
• Lower the handle
• Remove perfectly cut card shapes
Making your own cutting formes
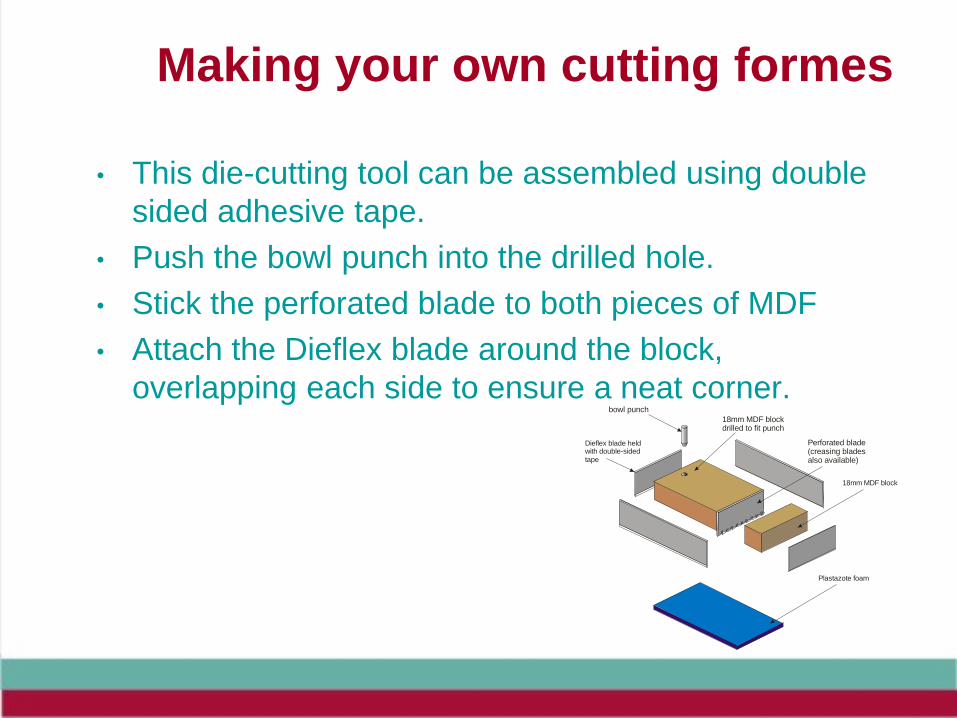
• This die-cutting tool can be assembled using double
sided adhesive tape.
• Push the bowl punch into the drilled hole.
• Stick the perforated blade to both pieces of MDF
• Attach the Dieflex blade around the block,
overlapping each side to ensure a neat corner. bowl punch
Dieflex blade held with double-sided tape
Perforated blade(creasing blades also available)
18mm MDF blockdrilled to fit punch
18mm MDF block
Plastazote foam
Making your own cutting formes
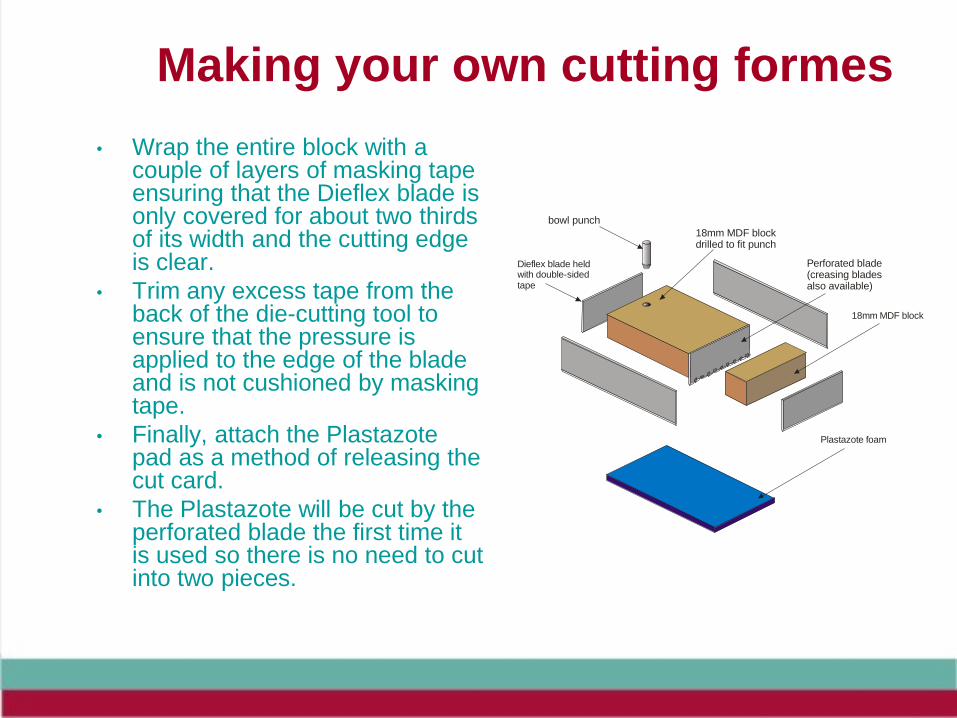
• Wrap the entire block with a couple of layers of masking tape ensuring that the Dieflex blade is only covered for about two thirds of its width and the cutting edge is clear.
• Trim any excess tape from the back of the die-cutting tool to ensure that the pressure is applied to the edge of the blade and is not cushioned by masking tape.
• Finally, attach the Plastazote pad as a method of releasing the cut card.
• The Plastazote will be cut by the perforated blade the first time it is used so there is no need to cut into two pieces.
bowl punch
Dieflex blade held with double-sided tape
Perforated blade(creasing blades also available)
18mm MDF blockdrilled to fit punch
18mm MDF block
Plastazote foam
Making your own cutting formes
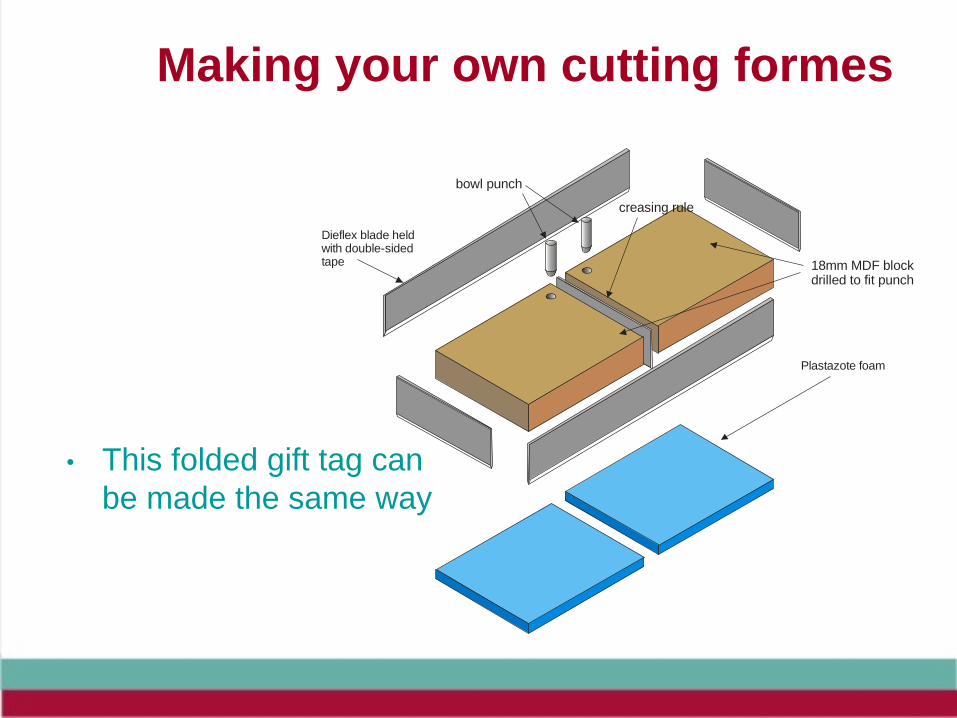
• This folded gift tag can
be made the same way
bowl punch
Dieflex blade held with double-sided tape 18mm MDF block
drilled to fit punch
Plastazote foam
creasing rule
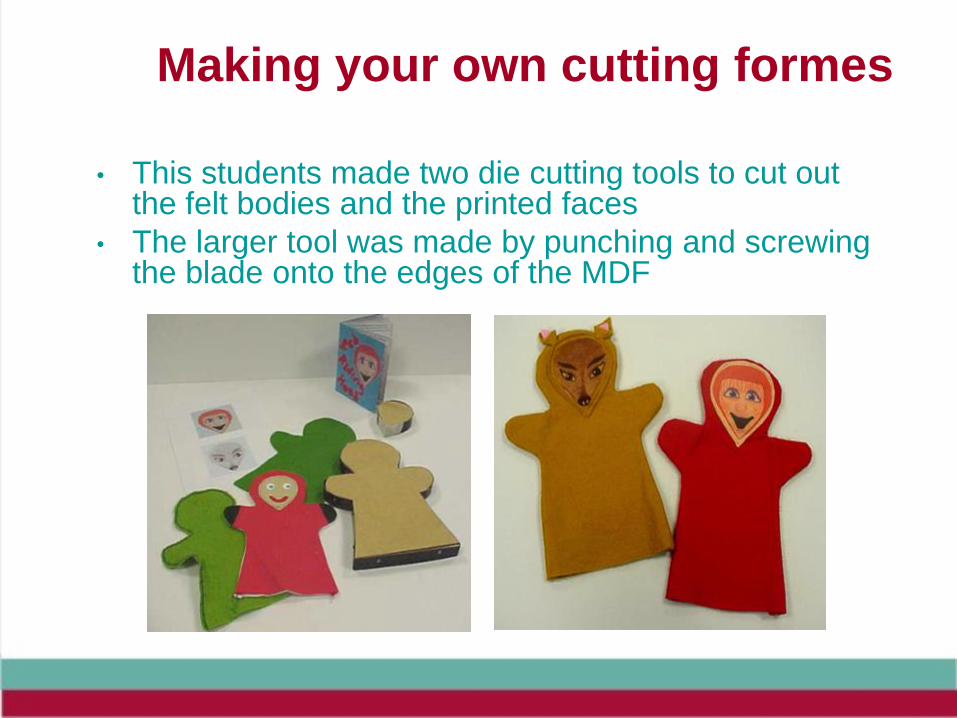
• This students made two die cutting tools to cut out the felt bodies and the printed faces
• The larger tool was made by punching and screwing the blade onto the edges of the MDF
Making your own cutting formes