Embed Size (px)
Citation preview

32
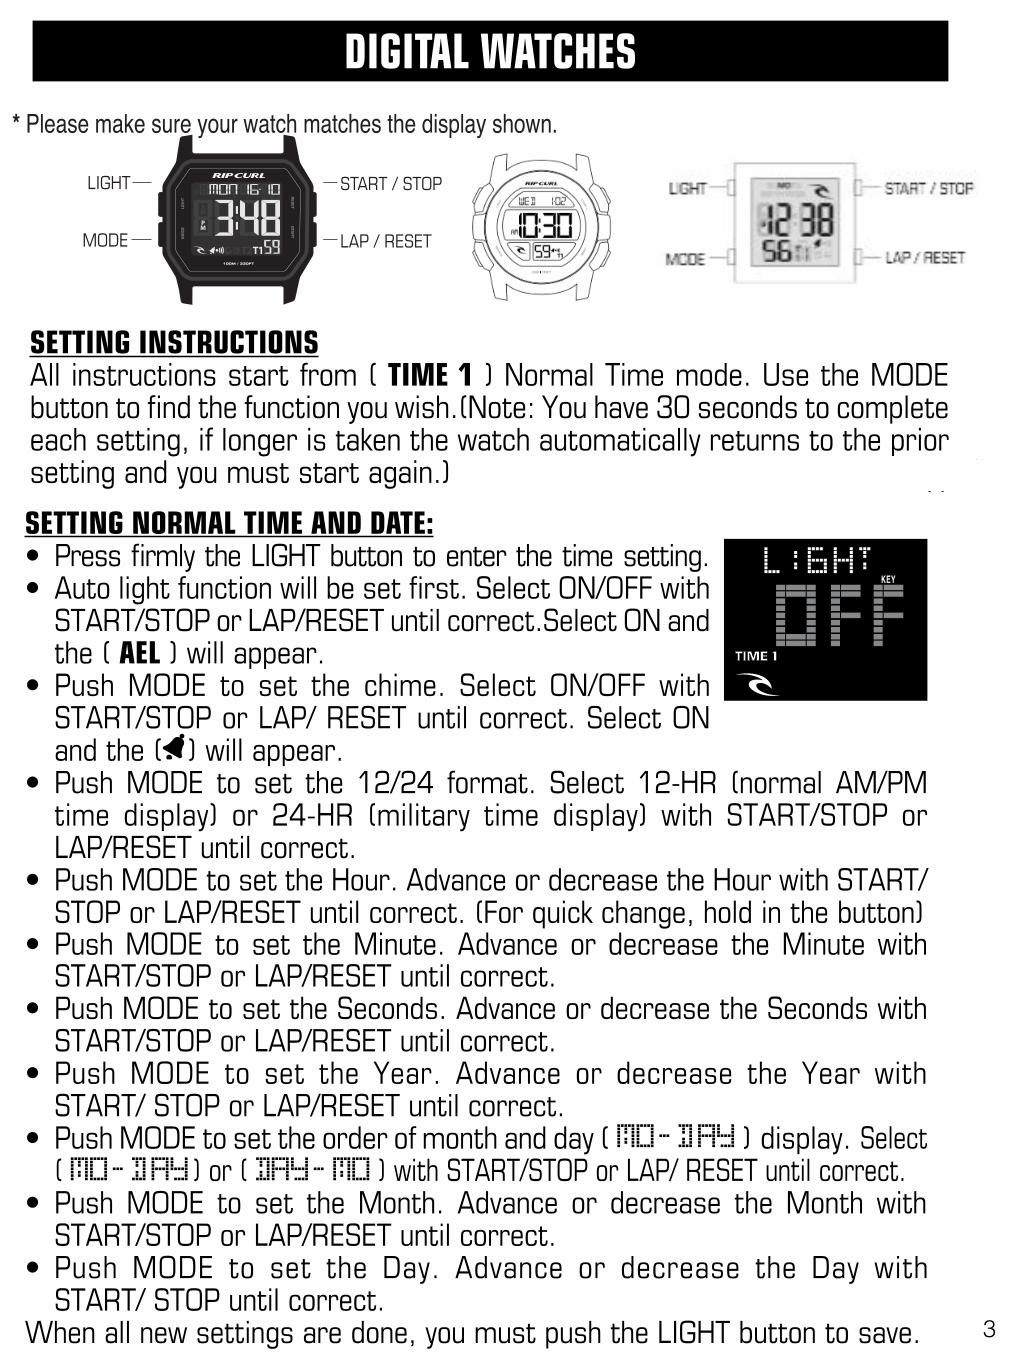
DIGITAL WATCHES* Please make sure your watch matches the display shown.
DESCRIPTION OF MODES & FUNCTIONSTIME, DATE, ALARM, STOPWATCH AND LIGHT
In Normal Time mode• Press & HOLD LAP/RESET to display Alarm
• Press & HOLD START/STOP to display Date.
Light Function• In any MODE you can simply push the LIGHT button and the whole screen
will light up and stay on for 3 seconds.
Setting Normal Time and Date• Press and HOLD the MODE button for 2 to 3 seconds and you will
then be in the daily alarm setting screen, we will cover that later in the instructions. So once you are in the alarm setting screen you must push the MODE button again to be taken to the Normal time setting screen.
• The Seconds will be flashing, push LAP/RESET to set the seconds to zero.• Push START/STOP the Minutes will be flashing, push LAP/RESET to set the
Minutes.

English P.3 Français P.8 Español P.11 German P.14 Portuguès P.17 ⽇本 P.20 Indonesia P.24
2
DIGITAL WATCHES V1
9
DIGITAL WATCHES
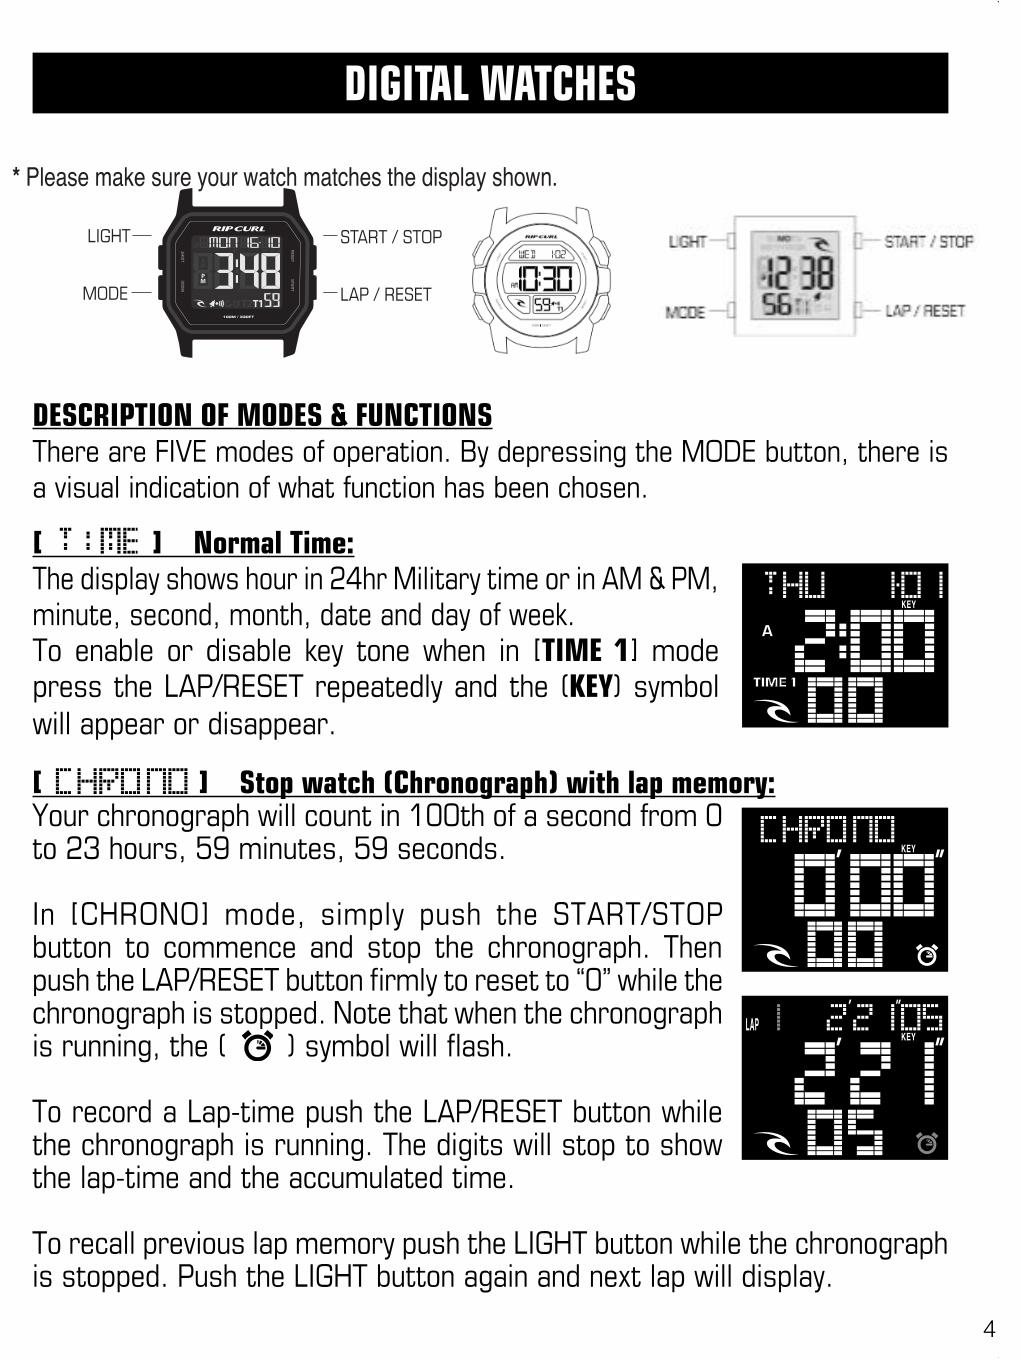
DESCRIPTION OF MODES & FUNCTIONSThere are FIVE modes of operation. By depressing the MODE button, there is a visual indication of what function has been chosen.
[ ] Normal Time: The display shows hour in 24hr Military time or in AM & PM, minute, second, month, date and day of week.To enable or disable key tone when in [TIME 1] mode press the LAP/RESET repeatedly and the (KEY) symbol will appear or disappear.
[ ] Stop watch (Chronograph) with lap memory: Your chronograph will count in 100th of a second from 0 to 23 hours, 59 minutes, 59 seconds.
In [CHRONO] mode, simply push the START/STOP button to commence and stop the chronograph. Then push the LAP/RESET button firmly to reset to “0” while the chronograph is stopped. Note that when the chronograph is running, the ( ) symbol will flash.
To record a Lap-time push the LAP/RESET button while the chronograph is running. The digits will stop to show the lap-time and the accumulated time.
To recall previous lap memory push the LIGHT button while the chronograph is stopped. Push the LIGHT button again and next lap will display.
START / STOP
LAP / RESET
LIGHT
MODE
* Please make sure your watch matches the display shown.
3
DESCRIPTION OF MODES & FUNCTIONSThere are FIVE modes of operation. By depressing the MODE button there is a visual indication ofwhat function has been chosen, just check the middle of the bottom screen.[ ] Normal Time:The display shows hour in 24hr Military time or in AM & PM, minute, second, day ofweek. To view current date, simply push the STOP/START button.To enable or disable key tone when in [ ] mode press firmly the START/STOPrepeatedly and the [KEY ] symbol will appear or disappear.[ ] Stop watch (Chronograph) with lap memory:Your chronograph will count in 100th of a second from 0 to 99 hours, 59 minutes, 59seconds.In [ ] mode, simply push the START/STOP to commence and stop the Chronograph.Then push the LAP/RESET button firmly to reset to “0” while the Chronograph is stopped. Note that
START / STOP
LAP / RESET
LIGHT
MODE
START / STOP
LAP / RESET
LIGHT
MODE
* Please make sure your watch matches the display shown.DIGITAL WATCHES
26
SETTING THE DATEPull the crown out position B. Turn the crown counterclockwise to set the date quickly.NOTE :* Do not set the date between the hours 9:00p.m. and 0:30a.m. The date may not changecorrectly the next day.MOON PHASENo setting is required as the moon phase dial is factory preset to your area. If minor adjustmentis required please follow these instructions.To set or change the Moon Phase...1.Pull the crown out position B; 2.Turn the crown clockwise until the moon symbol appears inthe windows. Keep winding until the moon symbol appears in the window. Keep winding untilthe moon lines up with the estimated current moon phase day on the markers above the window(for full moon setting, the marker 15);Notes: To maintain accurate moon tracking over long periods, small adjustments may need tobe made to your moon phase. To do this simply repeat steps 1-3 above.
11
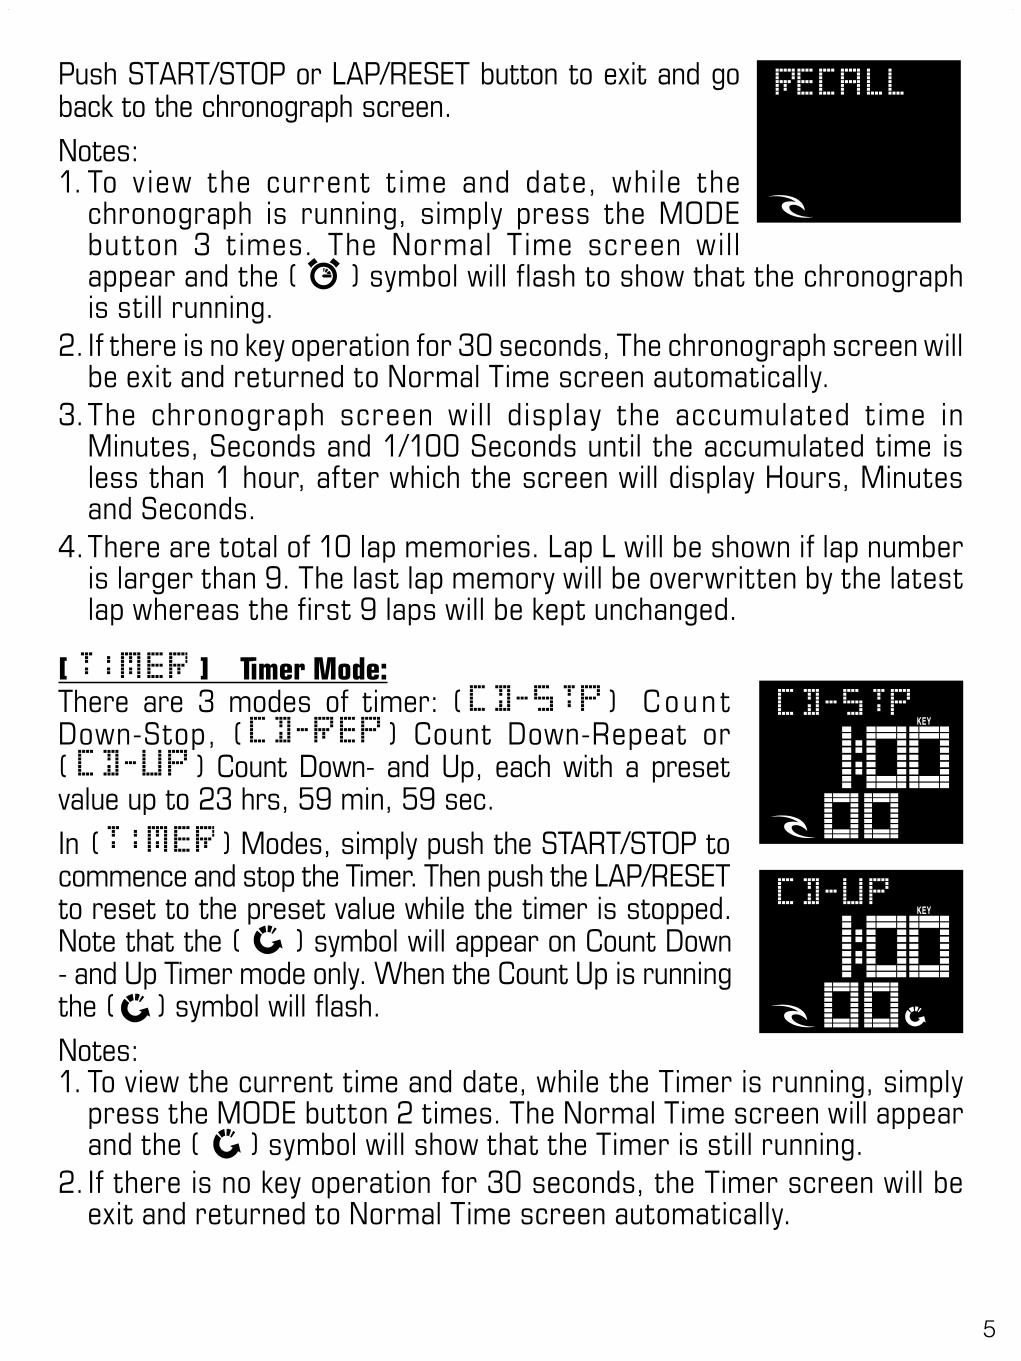
[ ] Timer Mode: There are 3 modes of timer: ( ) C o un t Down-Stop, ( ) Count Down-Repeat or ( ) Count Down- and Up, each with a preset value up to 23 hrs, 59 min, 59 sec. In ( ) Modes, simply push the START/STOP to commence and stop the Timer. Then push the LAP/RESET to reset to the preset value while the timer is stopped. Note that the ( ) symbol will appear on Count Down - and Up Timer mode only. When the Count Up is running the ( ) symbol will flash.Notes:1. To view the current time and date, while the Timer is running, simply
press the MODE button 2 times. The Normal Time screen will appear and the ( ) symbol will show that the Timer is still running.
2. If there is no key operation for 30 seconds, the Timer screen will be exit and returned to Normal Time screen automatically.
Push START/STOP or LAP/RESET button to exit and go back to the chronograph screen. Notes: 1. To view the current time and date, while the
chronograph is running, simply press the MODE button 3 times. The Normal Time screen will appear and the ( ) symbol will flash to show that the chronograph is still running.
2. If there is no key operation for 30 seconds, The chronograph screen will be exit and returned to Normal Time screen automatically.
3. The chronograph screen will display the accumulated time in Minutes, Seconds and 1/100 Seconds until the accumulated time is less than 1 hour, after which the screen will display Hours, Minutes and Seconds.
4. There are total of 10 lap memories. Lap L will be shown if lap number is larger than 9. The last lap memory will be overwritten by the latest lap whereas the first 9 laps will be kept unchanged.
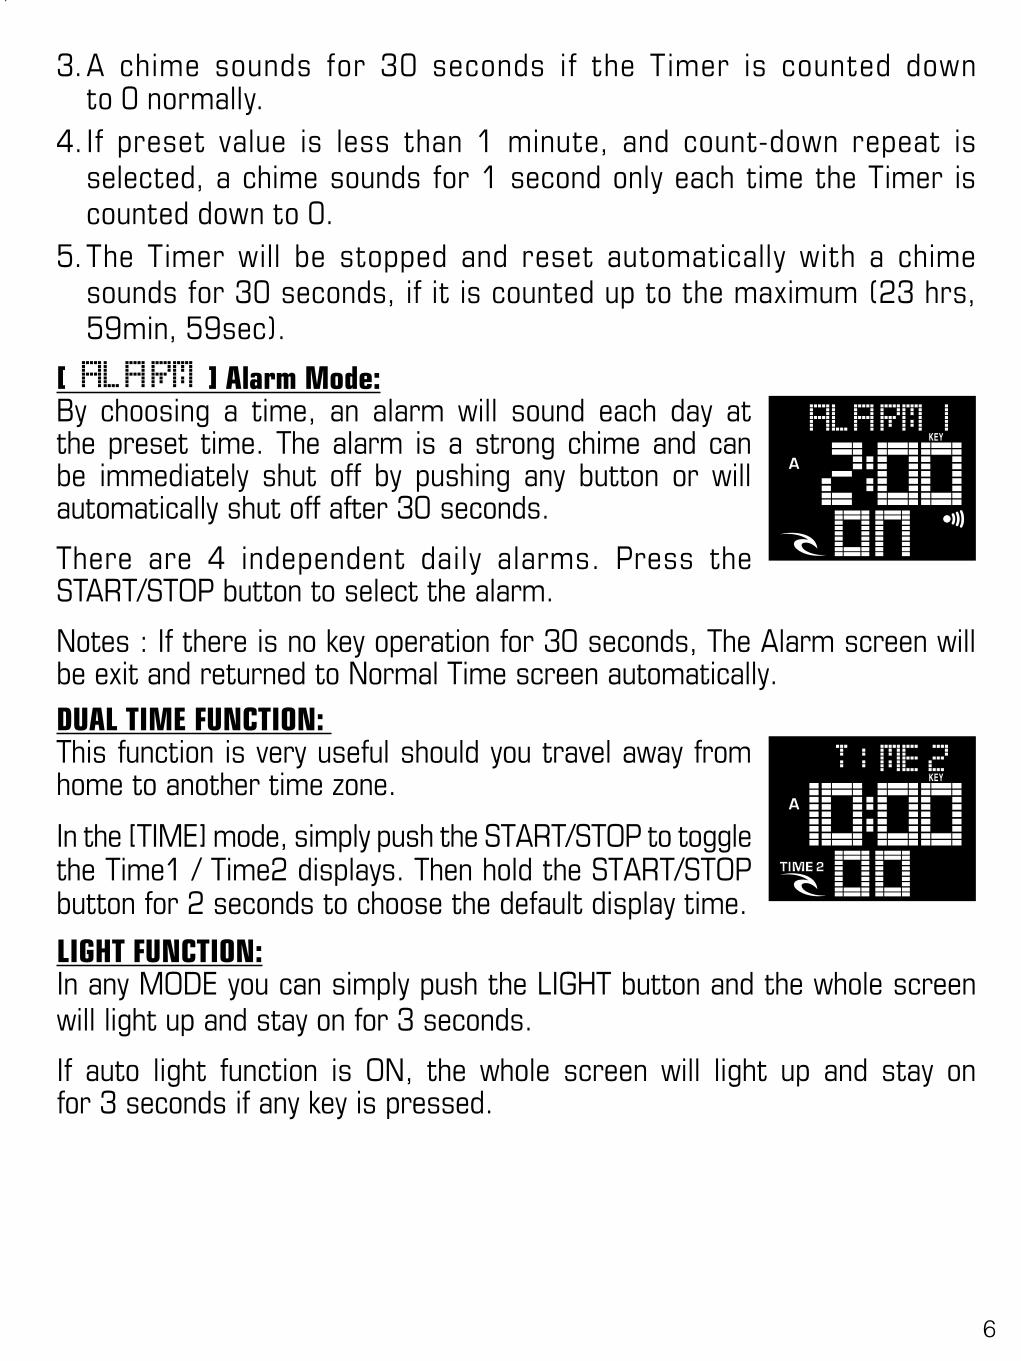
DUAL TIME FUNCTION: This function is very useful should you travel away from home to another time zone.
In the [TIME] mode, simply push the START/STOP to toggle the Time1 / Time2 displays. Then hold the START/STOP button for 2 seconds to choose the default display time.
LIGHT FUNCTION: In any MODE you can simply push the LIGHT button and the whole screen will light up and stay on for 3 seconds.
If auto light function is ON, the whole screen will light up and stay on for 3 seconds if any key is pressed.
3. A chime sounds for 30 seconds if the Timer is counted down to 0 normally.
4. If preset value is less than 1 minute, and count-down repeat is selected, a chime sounds for 1 second only each time the Timer is counted down to 0.
5. The Timer will be stopped and reset automatically with a chime sounds for 30 seconds, if it is counted up to the maximum (23 hrs, 59min, 59sec).
[ ] Alarm Mode: By choosing a time, an alarm will sound each day at the preset time. The alarm is a strong chime and can be immediately shut off by pushing any button or will automatically shut off after 30 seconds.
There are 4 independent daily alarms. Press the START/STOP button to select the alarm.
Notes : If there is no key operation for 30 seconds, The Alarm screen will be exit and returned to Normal Time screen automatically.
SETTING INSTRUCTIONSAll instructions start from ( TIME 1 ) Normal Time mode. Use the MODE button to find the function you wish.(Note: You have 30 seconds to complete each setting, if longer is taken the watch automatically returns to the prior setting and you must start again.)
12
SETTING NORMAL TIME AND DATE:• Press firmly the LIGHT button to enter the time setting.• Auto light function will be set first. Select ON/OFF with
START/STOP or LAP/RESET until correct.Select ON and the ( AEL ) will appear.
• Push MODE to set the chime. Select ON/OFF with START/STOP or LAP/ RESET until correct. Select ON and the ( ) will appear.
• Push MODE to set the 12/24 format. Select 12-HR (normal AM/PM time display) or 24-HR (military time display) with START/STOP or LAP/RESET until correct.
• Push MODE to set the Hour. Advance or decrease the Hour with START/STOP or LAP/RESET until correct. (For quick change, hold in the button)
• Push MODE to set the Minute. Advance or decrease the Minute with START/STOP or LAP/RESET until correct.
• Push MODE to set the Seconds. Advance or decrease the Seconds with START/STOP or LAP/RESET until correct.
• Push MODE to set the Year. Advance or decrease the Year with START/ STOP or LAP/RESET until correct.
• Push MODE to set the order of month and day ( ) display. Select ( ) or ( ) with START/STOP or LAP/ RESET until correct.
• Push MODE to set the Month. Advance or decrease the Month with START/STOP or LAP/RESET until correct.
• Push MODE to set the Day. Advance or decrease the Day with START/ STOP until correct.
When all new settings are done, you must push the LIGHT button to save.
[ ] SETTING TIMER:• From Normal Time mode push the MODE button
2 times.• Press firmly the LIGHT button. The Timer-Type will
flash.Select [ ] Count Down-Stop,[ ] Count Down-Repeat or [ ] Count Down - and Up with START/STOP or LAP/RESET until correct.
• Push MODE the Hour will flash. Advance or decrease the Hour with START/STOP or LAP/RESET until correct. (For quick change, hold in the button)
9
DIGITAL WATCHES
DESCRIPTION OF MODES & FUNCTIONSThere are FIVE modes of operation. By depressing the MODE button, there is a visual indication of what function has been chosen.
[ ] Normal Time: The display shows hour in 24hr Military time or in AM & PM, minute, second, month, date and day of week.To enable or disable key tone when in [TIME 1] mode press the LAP/RESET repeatedly and the (KEY) symbol will appear or disappear.
[ ] Stop watch (Chronograph) with lap memory: Your chronograph will count in 100th of a second from 0 to 23 hours, 59 minutes, 59 seconds.
In [CHRONO] mode, simply push the START/STOP button to commence and stop the chronograph. Then push the LAP/RESET button firmly to reset to “0” while the chronograph is stopped. Note that when the chronograph is running, the ( ) symbol will flash.
To record a Lap-time push the LAP/RESET button while the chronograph is running. The digits will stop to show the lap-time and the accumulated time.
To recall previous lap memory push the LIGHT button while the chronograph is stopped. Push the LIGHT button again and next lap will display.
START / STOP
LAP / RESET
LIGHT
MODE
* Please make sure your watch matches the display shown.
4
DESCRIPTION OF MODES & FUNCTIONSThere are FIVE modes of operation. By depressing the MODE button there is a visual indication ofwhat function has been chosen, just check the middle of the bottom screen.[ ] Normal Time:The display shows hour in 24hr Military time or in AM & PM, minute, second, day ofweek. To view current date, simply push the STOP/START button.To enable or disable key tone when in [ ] mode press firmly the START/STOPrepeatedly and the [KEY ] symbol will appear or disappear.[ ] Stop watch (Chronograph) with lap memory:Your chronograph will count in 100th of a second from 0 to 99 hours, 59 minutes, 59seconds.In [ ] mode, simply push the START/STOP to commence and stop the Chronograph.Then push the LAP/RESET button firmly to reset to “0” while the Chronograph is stopped. Note that
START / STOP
LAP / RESET
LIGHT
MODE
START / STOP
LAP / RESET
LIGHT
MODE
* Please make sure your watch matches the display shown.DIGITAL WATCHES
26
SETTING THE DATEPull the crown out position B. Turn the crown counterclockwise to set the date quickly.NOTE :* Do not set the date between the hours 9:00p.m. and 0:30a.m. The date may not changecorrectly the next day.MOON PHASENo setting is required as the moon phase dial is factory preset to your area. If minor adjustmentis required please follow these instructions.To set or change the Moon Phase...1.Pull the crown out position B; 2.Turn the crown clockwise until the moon symbol appears inthe windows. Keep winding until the moon symbol appears in the window. Keep winding untilthe moon lines up with the estimated current moon phase day on the markers above the window(for full moon setting, the marker 15);Notes: To maintain accurate moon tracking over long periods, small adjustments may need tobe made to your moon phase. To do this simply repeat steps 1-3 above.
10
[ ] Timer Mode: There are 3 modes of timer: ( ) C o un t Down-Stop, ( ) Count Down-Repeat or ( ) Count Down- and Up, each with a preset value up to 23 hrs, 59 min, 59 sec. In ( ) Modes, simply push the START/STOP to commence and stop the Timer. Then push the LAP/RESET to reset to the preset value while the timer is stopped. Note that the ( ) symbol will appear on Count Down - and Up Timer mode only. When the Count Up is running the ( ) symbol will flash.Notes:1. To view the current time and date, while the Timer is running, simply
press the MODE button 2 times. The Normal Time screen will appear and the ( ) symbol will show that the Timer is still running.
2. If there is no key operation for 30 seconds, the Timer screen will be exit and returned to Normal Time screen automatically.
Push START/STOP or LAP/RESET button to exit and go back to the chronograph screen. Notes: 1. To view the current time and date, while the
chronograph is running, simply press the MODE button 3 times. The Normal Time screen will appear and the ( ) symbol will flash to show that the chronograph is still running.
2. If there is no key operation for 30 seconds, The chronograph screen will be exit and returned to Normal Time screen automatically.
3. The chronograph screen will display the accumulated time in Minutes, Seconds and 1/100 Seconds until the accumulated time is less than 1 hour, after which the screen will display Hours, Minutes and Seconds.
4. There are total of 10 lap memories. Lap L will be shown if lap number is larger than 9. The last lap memory will be overwritten by the latest lap whereas the first 9 laps will be kept unchanged.
5
11
[ ] Timer Mode: There are 3 modes of timer: ( ) C o un t Down-Stop, ( ) Count Down-Repeat or ( ) Count Down- and Up, each with a preset value up to 23 hrs, 59 min, 59 sec. In ( ) Modes, simply push the START/STOP to commence and stop the Timer. Then push the LAP/RESET to reset to the preset value while the timer is stopped. Note that the ( ) symbol will appear on Count Down - and Up Timer mode only. When the Count Up is running the ( ) symbol will flash.Notes:1. To view the current time and date, while the Timer is running, simply
press the MODE button 2 times. The Normal Time screen will appear and the ( ) symbol will show that the Timer is still running.
2. If there is no key operation for 30 seconds, the Timer screen will be exit and returned to Normal Time screen automatically.
Push START/STOP or LAP/RESET button to exit and go back to the chronograph screen. Notes: 1. To view the current time and date, while the
chronograph is running, simply press the MODE button 3 times. The Normal Time screen will appear and the ( ) symbol will flash to show that the chronograph is still running.
2. If there is no key operation for 30 seconds, The chronograph screen will be exit and returned to Normal Time screen automatically.
3. The chronograph screen will display the accumulated time in Minutes, Seconds and 1/100 Seconds until the accumulated time is less than 1 hour, after which the screen will display Hours, Minutes and Seconds.
4. There are total of 10 lap memories. Lap L will be shown if lap number is larger than 9. The last lap memory will be overwritten by the latest lap whereas the first 9 laps will be kept unchanged.
DUAL TIME FUNCTION: This function is very useful should you travel away from home to another time zone.
In the [TIME] mode, simply push the START/STOP to toggle the Time1 / Time2 displays. Then hold the START/STOP button for 2 seconds to choose the default display time.
LIGHT FUNCTION: In any MODE you can simply push the LIGHT button and the whole screen will light up and stay on for 3 seconds.
If auto light function is ON, the whole screen will light up and stay on for 3 seconds if any key is pressed.
3. A chime sounds for 30 seconds if the Timer is counted down to 0 normally.
4. If preset value is less than 1 minute, and count-down repeat is selected, a chime sounds for 1 second only each time the Timer is counted down to 0.
5. The Timer will be stopped and reset automatically with a chime sounds for 30 seconds, if it is counted up to the maximum (23 hrs, 59min, 59sec).
[ ] Alarm Mode: By choosing a time, an alarm will sound each day at the preset time. The alarm is a strong chime and can be immediately shut off by pushing any button or will automatically shut off after 30 seconds.
There are 4 independent daily alarms. Press the START/STOP button to select the alarm.
Notes : If there is no key operation for 30 seconds, The Alarm screen will be exit and returned to Normal Time screen automatically.
SETTING INSTRUCTIONSAll instructions start from ( TIME 1 ) Normal Time mode. Use the MODE button to find the function you wish.(Note: You have 30 seconds to complete each setting, if longer is taken the watch automatically returns to the prior setting and you must start again.)
6

12
SETTING NORMAL TIME AND DATE:• Press firmly the LIGHT button to enter the time setting.• Auto light function will be set first. Select ON/OFF with
START/STOP or LAP/RESET until correct.Select ON and the ( AEL ) will appear.
• Push MODE to set the chime. Select ON/OFF with START/STOP or LAP/ RESET until correct. Select ON and the ( ) will appear.
• Push MODE to set the 12/24 format. Select 12-HR (normal AM/PM time display) or 24-HR (military time display) with START/STOP or LAP/RESET until correct.
• Push MODE to set the Hour. Advance or decrease the Hour with START/STOP or LAP/RESET until correct. (For quick change, hold in the button)
• Push MODE to set the Minute. Advance or decrease the Minute with START/STOP or LAP/RESET until correct.
• Push MODE to set the Seconds. Advance or decrease the Seconds with START/STOP or LAP/RESET until correct.
• Push MODE to set the Year. Advance or decrease the Year with START/ STOP or LAP/RESET until correct.
• Push MODE to set the order of month and day ( ) display. Select ( ) or ( ) with START/STOP or LAP/ RESET until correct.
• Push MODE to set the Month. Advance or decrease the Month with START/STOP or LAP/RESET until correct.
• Push MODE to set the Day. Advance or decrease the Day with START/ STOP until correct.
When all new settings are done, you must push the LIGHT button to save.
[ ] SETTING TIMER:• From Normal Time mode push the MODE button
2 times.• Press firmly the LIGHT button. The Timer-Type will
flash.Select [ ] Count Down-Stop,[ ] Count Down-Repeat or [ ] Count Down - and Up with START/STOP or LAP/RESET until correct.
• Push MODE the Hour will flash. Advance or decrease the Hour with START/STOP or LAP/RESET until correct. (For quick change, hold in the button)
7
13
SETTING NORMAL TIME AND DATE:• Press firmly the LIGHT button to enter the time setting.• Auto light function will be set first. Select ON/OFF with
START/STOP or LAP/RESET until correct.Select ON and the ( AEL ) will appear.
• Push MODE to set the chime. Select ON/OFF with START/STOP or LAP/ RESET until correct. Select ON and the ( ) will appear.
• Push MODE to set the 12/24 format. Select 12-HR (normal AM/PM time display) or 24-HR (military time display) with START/STOP or LAP/RESET until correct.
• Push MODE to set the Hour. Advance or decrease the Hour with START/STOP or LAP/RESET until correct. (For quick change, hold in the button)
• Push MODE to set the Minute. Advance or decrease the Minute with START/STOP or LAP/RESET until correct.
• Push MODE to set the Seconds. Advance or decrease the Seconds with START/STOP or LAP/RESET until correct.
• Push MODE to set the Year. Advance or decrease the Year with START/ STOP or LAP/RESET until correct.
• Push MODE to set the order of month and day ( ) display. Select ( ) or ( ) with START/STOP or LAP/ RESET until correct.
• Push MODE to set the Month. Advance or decrease the Month with START/STOP or LAP/RESET until correct.
• Push MODE to set the Day. Advance or decrease the Day with START/ STOP until correct.
When all new settings are done, you must push the LIGHT button to save.
[ ] SETTING TIMER:• From Normal Time mode push the MODE button
2 times.• Press firmly the LIGHT button. The Timer-Type will
flash.Select [ ] Count Down-Stop,[ ] Count Down-Repeat or [ ] Count Down - and Up with START/STOP or LAP/RESET until correct.
• Push MODE the Hour will flash. Advance or decrease the Hour with START/STOP or LAP/RESET until correct. (For quick change, hold in the button)
[ ] SETTING ALARM TIME:• From Normal Time mode push the MODE button
3 times. • Press the START/STOP button to select the alarm
to be set.• Press firmly the LIGHT button. The Hour will flash.
Advance or decrease the Hour with START/STOP or LAP/RESET until correct (For quick change, hold in the button)
• Push MODE the Minute will flash. Advance or decrease the Minute with START/STOP or LAP/RESET until correct.
When all new settings are done, you must push the LIGHT button to save.
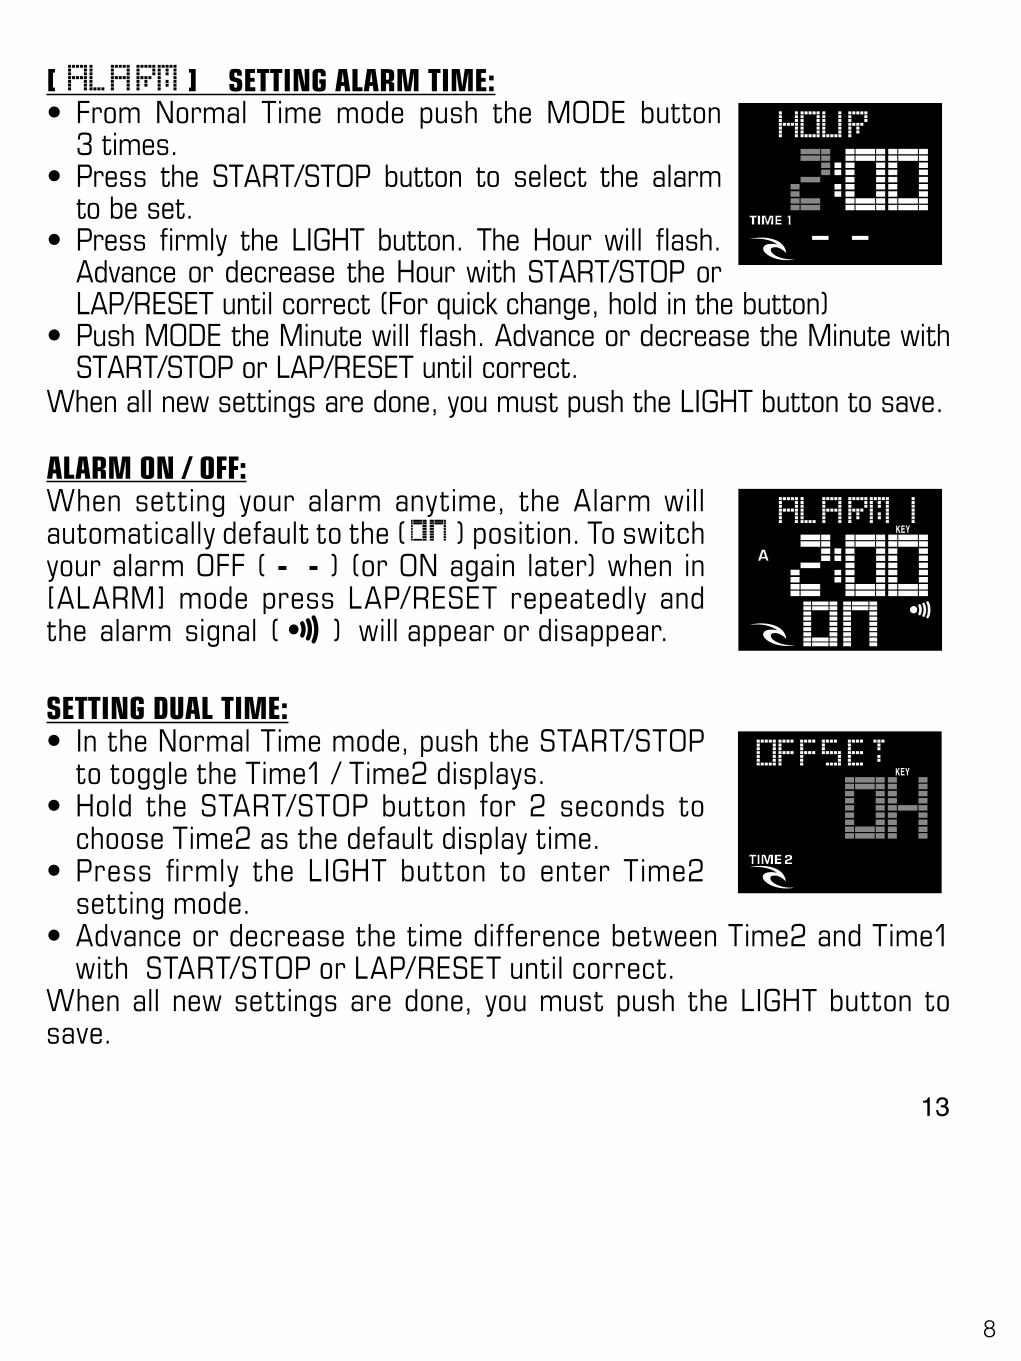
ALARM ON / OFF:When setting your alarm anytime, the Alarm will automatically default to the ( ) position. To switch your alarm OFF ( - - ) (or ON again later) when in [ALARM] mode press LAP/RESET repeatedly and the alarm signal ( ) will appear or disappear.
• Push MODE the Minute will flash. Advance or decrease the Minute with START/STOP or LAP/RESET until correct.
• Push MODE the Seconds will flash. Advance or decrease the Seconds with START/STOP or LAP/RESET until correct.
When all new settings are done, you must push the LIGHT button to save.
SETTING DUAL TIME:• In the Normal Time mode, push the START/STOP
to toggle the Time1 / Time2 displays. • Hold the START/STOP button for 2 seconds to
choose Time2 as the default display time.• Press firmly the LIGHT button to enter Time2
setting mode.• Advance or decrease the time difference between Time2 and Time1
with START/STOP or LAP/RESET until correct.When all new settings are done, you must push the LIGHT button to save.
13
SETTING NORMAL TIME AND DATE:• Press firmly the LIGHT button to enter the time setting.• Auto light function will be set first. Select ON/OFF with
START/STOP or LAP/RESET until correct.Select ON and the ( AEL ) will appear.
• Push MODE to set the chime. Select ON/OFF with START/STOP or LAP/ RESET until correct. Select ON and the ( ) will appear.
• Push MODE to set the 12/24 format. Select 12-HR (normal AM/PM time display) or 24-HR (military time display) with START/STOP or LAP/RESET until correct.
• Push MODE to set the Hour. Advance or decrease the Hour with START/STOP or LAP/RESET until correct. (For quick change, hold in the button)
• Push MODE to set the Minute. Advance or decrease the Minute with START/STOP or LAP/RESET until correct.
• Push MODE to set the Seconds. Advance or decrease the Seconds with START/STOP or LAP/RESET until correct.
• Push MODE to set the Year. Advance or decrease the Year with START/ STOP or LAP/RESET until correct.
• Push MODE to set the order of month and day ( ) display. Select ( ) or ( ) with START/STOP or LAP/ RESET until correct.
• Push MODE to set the Month. Advance or decrease the Month with START/STOP or LAP/RESET until correct.
• Push MODE to set the Day. Advance or decrease the Day with START/ STOP until correct.
When all new settings are done, you must push the LIGHT button to save.
[ ] SETTING TIMER:• From Normal Time mode push the MODE button
2 times.• Press firmly the LIGHT button. The Timer-Type will
flash.Select [ ] Count Down-Stop,[ ] Count Down-Repeat or [ ] Count Down - and Up with START/STOP or LAP/RESET until correct.
• Push MODE the Hour will flash. Advance or decrease the Hour with START/STOP or LAP/RESET until correct. (For quick change, hold in the button)
[ ] SETTING ALARM TIME:• From Normal Time mode push the MODE button
3 times. • Press the START/STOP button to select the alarm
to be set.• Press firmly the LIGHT button. The Hour will flash.
Advance or decrease the Hour with START/STOP or LAP/RESET until correct (For quick change, hold in the button)
• Push MODE the Minute will flash. Advance or decrease the Minute with START/STOP or LAP/RESET until correct.
When all new settings are done, you must push the LIGHT button to save.
ALARM ON / OFF:When setting your alarm anytime, the Alarm will automatically default to the ( ) position. To switch your alarm OFF ( - - ) (or ON again later) when in [ALARM] mode press LAP/RESET repeatedly and the alarm signal ( ) will appear or disappear.
• Push MODE the Minute will flash. Advance or decrease the Minute with START/STOP or LAP/RESET until correct.
• Push MODE the Seconds will flash. Advance or decrease the Seconds with START/STOP or LAP/RESET until correct.
When all new settings are done, you must push the LIGHT button to save.
SETTING DUAL TIME:• In the Normal Time mode, push the START/STOP
to toggle the Time1 / Time2 displays. • Hold the START/STOP button for 2 seconds to
choose Time2 as the default display time.• Press firmly the LIGHT button to enter Time2
setting mode.• Advance or decrease the time difference between Time2 and Time1
with START/STOP or LAP/RESET until correct.When all new settings are done, you must push the LIGHT button to save.
8
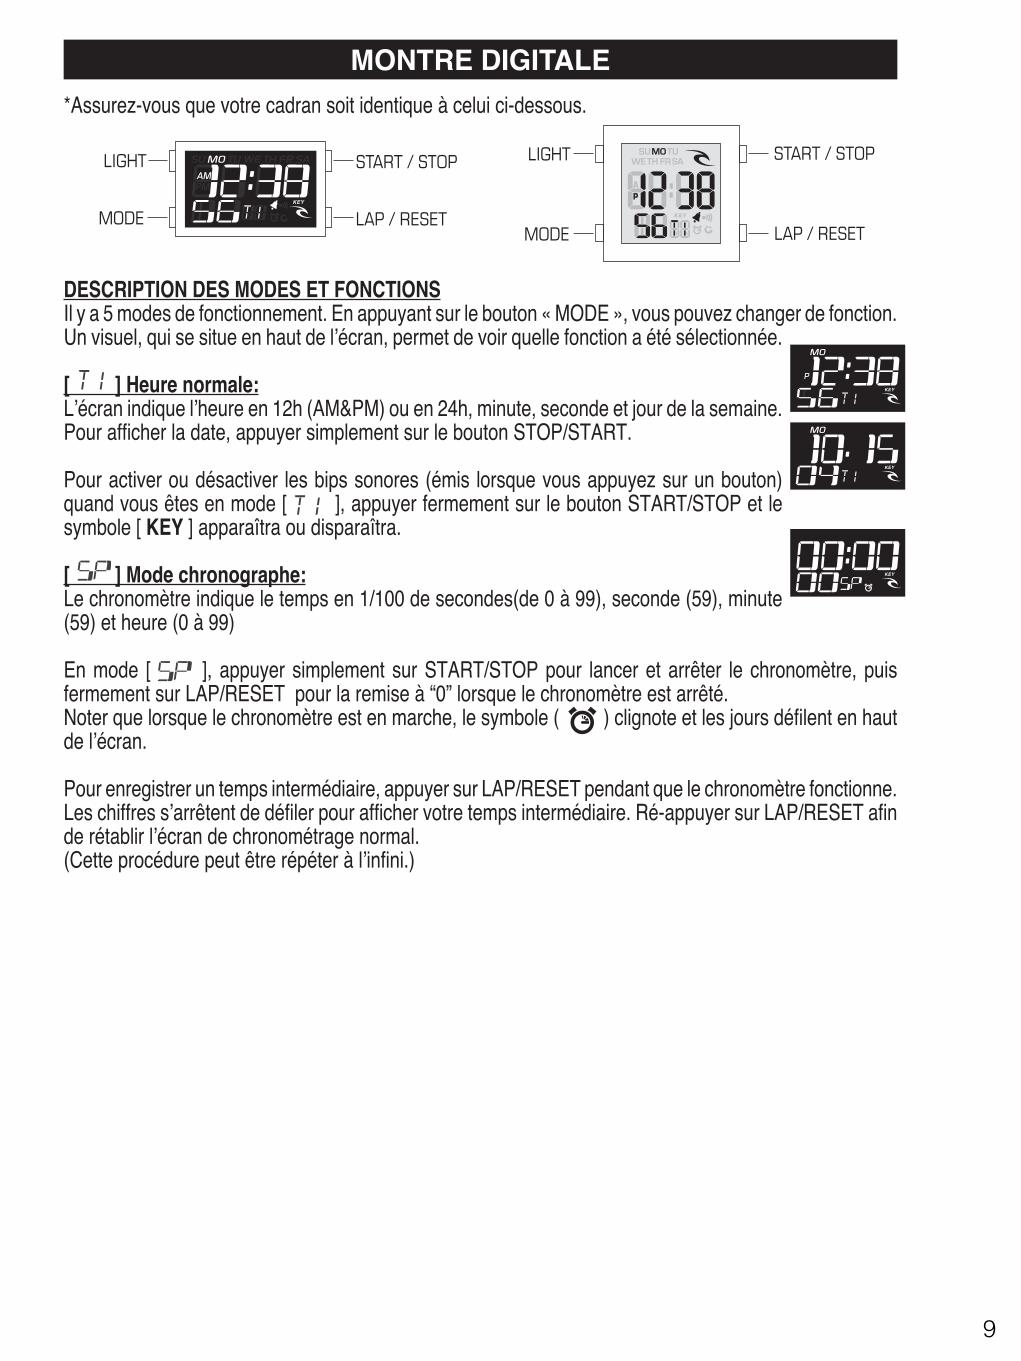
MONTRE DIGITALE*Assurez-vous que votre cadran soit identique à celui ci-dessous.DESCRIPTION DES MODES ET FONCTIONSIl y a 5 modes de fonctionnement. En appuyant sur le bouton « MODE », vous pouvez changer de fonction.Un visuel, qui se situe en haut de l’écran, permet de voir quelle fonction a été sélectionnée.[ ] Heure normale:L’écran indique l’heure en 12h (AM&PM) ou en 24h, minute, seconde et jour de la semaine.Pour afficher la date, appuyer simplement sur le bouton STOP/START.Pour activer ou désactiver les bips sonores (émis lorsque vous appuyez sur un bouton)quand vous êtes en mode [ ], appuyer fermement sur le bouton START/STOP et lesymbole [ KEY ] apparaîtra ou disparaîtra.[ ] Mode chronographe:Le chronomètre indique le temps en 1/100 de secondes(de 0 à 99), seconde (59), minute(59) et heure (0 à 99)En mode [ ], appuyer simplement sur START/STOP pour lancer et arrêter le chronomètre, puisfermement sur LAP/RESET pour la remise à “0” lorsque le chronomètre est arrêté.Noter que lorsque le chronomètre est en marche, le symbole ( ) clignote et les jours défilent en hautde l’écran.Pour enregistrer un temps intermédiaire, appuyer sur LAP/RESET pendant que le chronomètre fonctionne.Les chiffres s’arrêtent de défiler pour afficher votre temps intermédiaire. Ré-appuyer sur LAP/RESET afinde rétablir l’écran de chronométrage normal.(Cette procédure peut être répéter à l’infini.)
START / STOP
LAP / RESET
LIGHT
MODE
START / STOP
LAP / RESET
LIGHT
MODE
60
PHASES DE LA LUNEAucun réglage n’est nécessaire dans la mesure où les phases de la Lune sont préréglées en usine pourvotre région. Si de petits réglages sont nécessaires, veuillez suivre ces instructions.Pour régler ou changer les phases de la Lune...1. Tirez sur le remontoir et mettez-le en position B; 2.Tournez le remontoir dans le sens des aiguilles d’unemontre jusqu’à ce que le symbole de la Lune apparaisse sur l’écran. Continuez à tourner jusqu’à ce que lesymbole de la Lune apparaisse sur l’écran. Continuez à tourner jusqu’à ce que la lune soit à la hauteurestimée du moment de la journée au-dessus de l’écran (pour le réglage de la pleine lune voir la rubrique15);Notes: Pour garder un réglage des phases de la Lune sur de longues périodes, de petits réglages peuventêtre nécessaires pour les phases de la Lune. Pour cela,répétez simplement les étapes 1-3 ci-dessus.
9
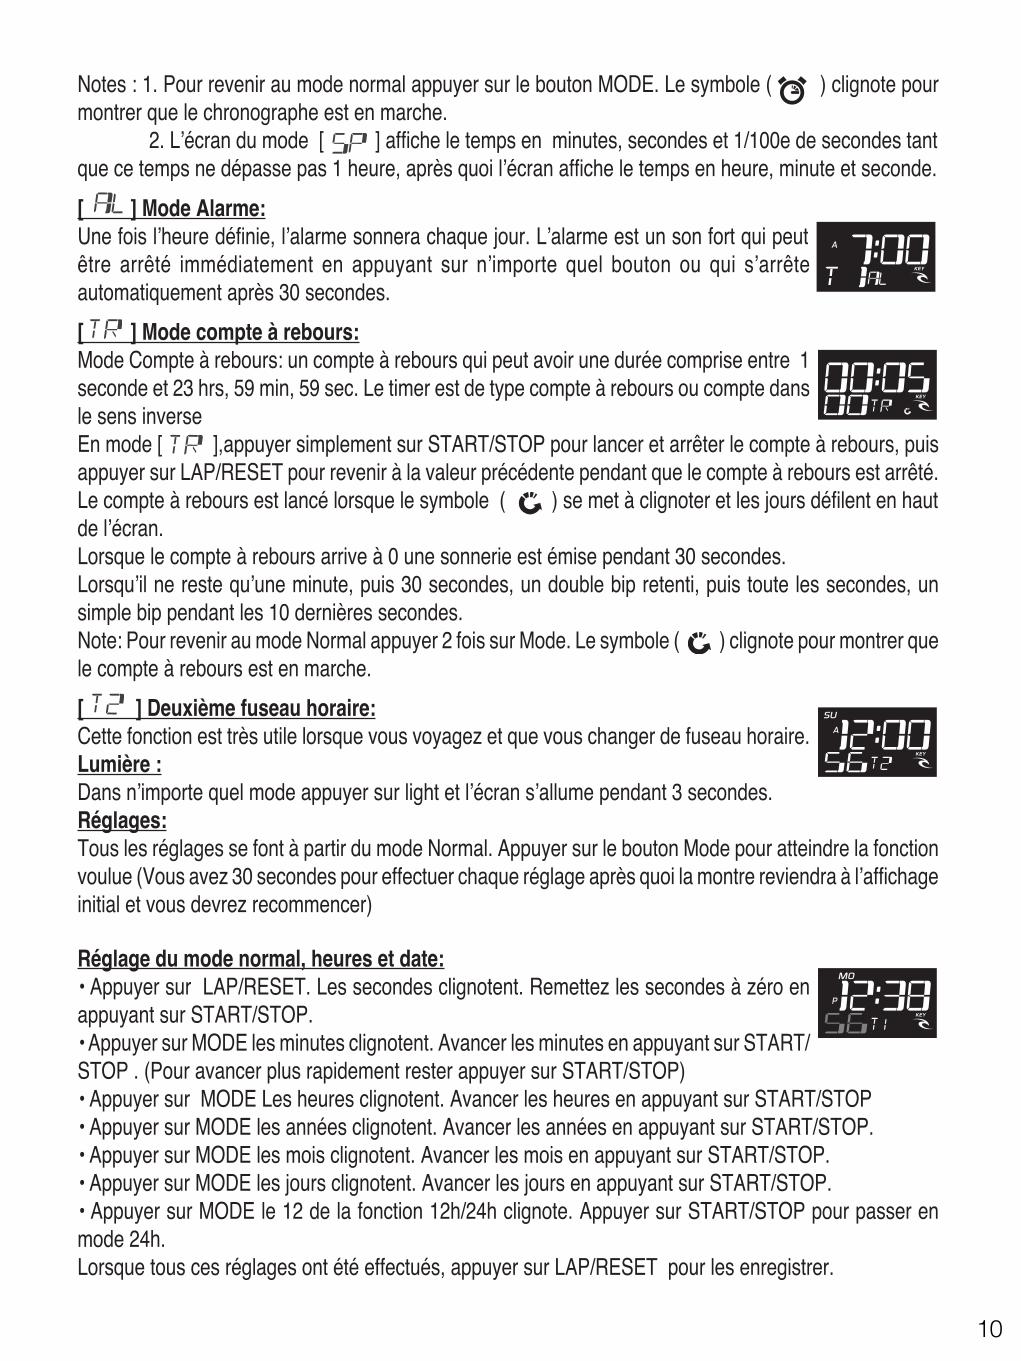
Notes : 1. Pour revenir au mode normal appuyer sur le bouton MODE. Le symbole ( ) clignote pourmontrer que le chronographe est en marche. 2. L’écran du mode [ ] affiche le temps en minutes, secondes et 1/100e de secondes tantque ce temps ne dépasse pas 1 heure, après quoi l’écran affiche le temps en heure, minute et seconde.[ ] Mode Alarme:Une fois l’heure définie, l’alarme sonnera chaque jour. L’alarme est un son fort qui peutêtre arrêté immédiatement en appuyant sur n’importe quel bouton ou qui s’arrêteautomatiquement après 30 secondes.[ ] Mode compte à rebours:Mode Compte à rebours: un compte à rebours qui peut avoir une durée comprise entre 1seconde et 23 hrs, 59 min, 59 sec. Le timer est de type compte à rebours ou compte dansle sens inverseEn mode [ ],appuyer simplement sur START/STOP pour lancer et arrêter le compte à rebours, puisappuyer sur LAP/RESET pour revenir à la valeur précédente pendant que le compte à rebours est arrêté.Le compte à rebours est lancé lorsque le symbole ( ) se met à clignoter et les jours défilent en hautde l’écran.Lorsque le compte à rebours arrive à 0 une sonnerie est émise pendant 30 secondes.Lorsqu’il ne reste qu’une minute, puis 30 secondes, un double bip retenti, puis toute les secondes, unsimple bip pendant les 10 dernières secondes.Note: Pour revenir au mode Normal appuyer 2 fois sur Mode. Le symbole ( ) clignote pour montrer quele compte à rebours est en marche.[ ] Deuxième fuseau horaire:Cette fonction est très utile lorsque vous voyagez et que vous changer de fuseau horaire.Lumière :Dans n’importe quel mode appuyer sur light et l’écran s’allume pendant 3 secondes.Réglages:Tous les réglages se font à partir du mode Normal. Appuyer sur le bouton Mode pour atteindre la fonctionvoulue (Vous avez 30 secondes pour effectuer chaque réglage après quoi la montre reviendra à l’affichageinitial et vous devrez recommencer)Réglage du mode normal, heures et date:• Appuyer sur LAP/RESET. Les secondes clignotent. Remettez les secondes à zéro enappuyant sur START/STOP.• Appuyer sur MODE les minutes clignotent. Avancer les minutes en appuyant sur START/STOP . (Pour avancer plus rapidement rester appuyer sur START/STOP)• Appuyer sur MODE Les heures clignotent. Avancer les heures en appuyant sur START/STOP• Appuyer sur MODE les années clignotent. Avancer les années en appuyant sur START/STOP.• Appuyer sur MODE les mois clignotent. Avancer les mois en appuyant sur START/STOP.• Appuyer sur MODE les jours clignotent. Avancer les jours en appuyant sur START/STOP.• Appuyer sur MODE le 12 de la fonction 12h/24h clignote. Appuyer sur START/STOP pour passer enmode 24h.Lorsque tous ces réglages ont été effectués, appuyer sur LAP/RESET pour les enregistrer.61
10
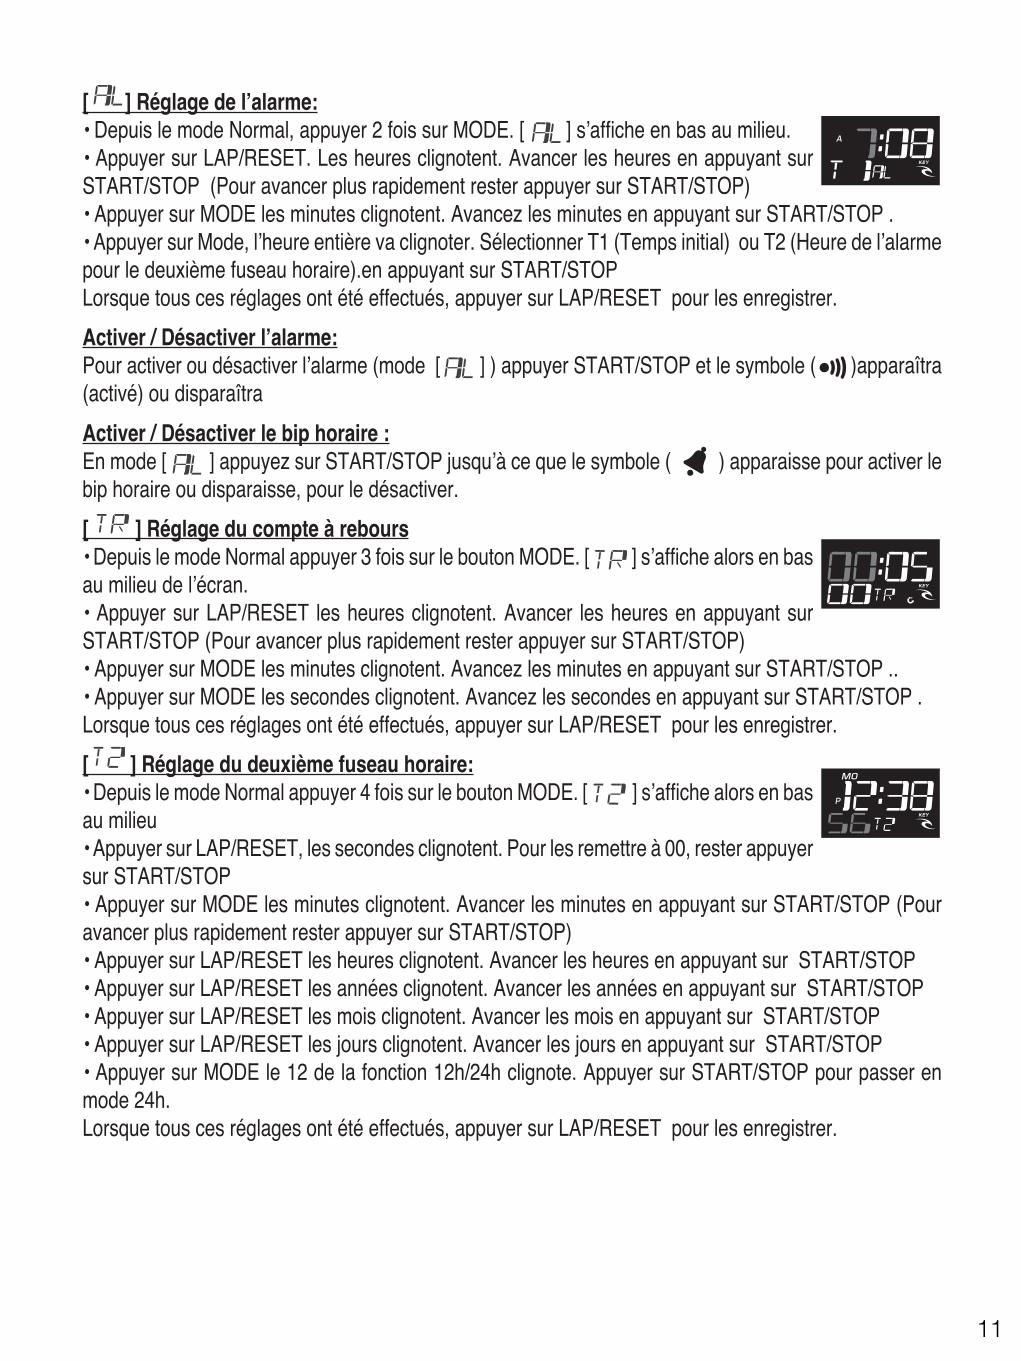
[ ] Réglage de l’alarme:• Depuis le mode Normal, appuyer 2 fois sur MODE. [ ] s’affiche en bas au milieu.• Appuyer sur LAP/RESET. Les heures clignotent. Avancer les heures en appuyant surSTART/STOP (Pour avancer plus rapidement rester appuyer sur START/STOP)• Appuyer sur MODE les minutes clignotent. Avancez les minutes en appuyant sur START/STOP .• Appuyer sur Mode, l’heure entière va clignoter. Sélectionner T1 (Temps initial) ou T2 (Heure de l’alarmepour le deuxième fuseau horaire).en appuyant sur START/STOPLorsque tous ces réglages ont été effectués, appuyer sur LAP/RESET pour les enregistrer.Activer / Désactiver l’alarme:Pour activer ou désactiver l’alarme (mode [ ] ) appuyer START/STOP et le symbole ( )apparaîtra(activé) ou disparaîtraActiver / Désactiver le bip horaire :En mode [ ] appuyez sur START/STOP jusqu’à ce que le symbole ( ) apparaisse pour activer lebip horaire ou disparaisse, pour le désactiver.[ ] Réglage du compte à rebours• Depuis le mode Normal appuyer 3 fois sur le bouton MODE. [ ] s’affiche alors en basau milieu de l’écran.• Appuyer sur LAP/RESET les heures clignotent. Avancer les heures en appuyant surSTART/STOP (Pour avancer plus rapidement rester appuyer sur START/STOP)• Appuyer sur MODE les minutes clignotent. Avancez les minutes en appuyant sur START/STOP ..• Appuyer sur MODE les secondes clignotent. Avancez les secondes en appuyant sur START/STOP .Lorsque tous ces réglages ont été effectués, appuyer sur LAP/RESET pour les enregistrer.[ ] Réglage du deuxième fuseau horaire:• Depuis le mode Normal appuyer 4 fois sur le bouton MODE. [ ] s’affiche alors en basau milieu• Appuyer sur LAP/RESET, les secondes clignotent. Pour les remettre à 00, rester appuyersur START/STOP• Appuyer sur MODE les minutes clignotent. Avancer les minutes en appuyant sur START/STOP (Pouravancer plus rapidement rester appuyer sur START/STOP)• Appuyer sur LAP/RESET les heures clignotent. Avancer les heures en appuyant sur START/STOP• Appuyer sur LAP/RESET les années clignotent. Avancer les années en appuyant sur START/STOP• Appuyer sur LAP/RESET les mois clignotent. Avancer les mois en appuyant sur START/STOP• Appuyer sur LAP/RESET les jours clignotent. Avancer les jours en appuyant sur START/STOP• Appuyer sur MODE le 12 de la fonction 12h/24h clignote. Appuyer sur START/STOP pour passer enmode 24h.Lorsque tous ces réglages ont été effectués, appuyer sur LAP/RESET pour les enregistrer.62
11
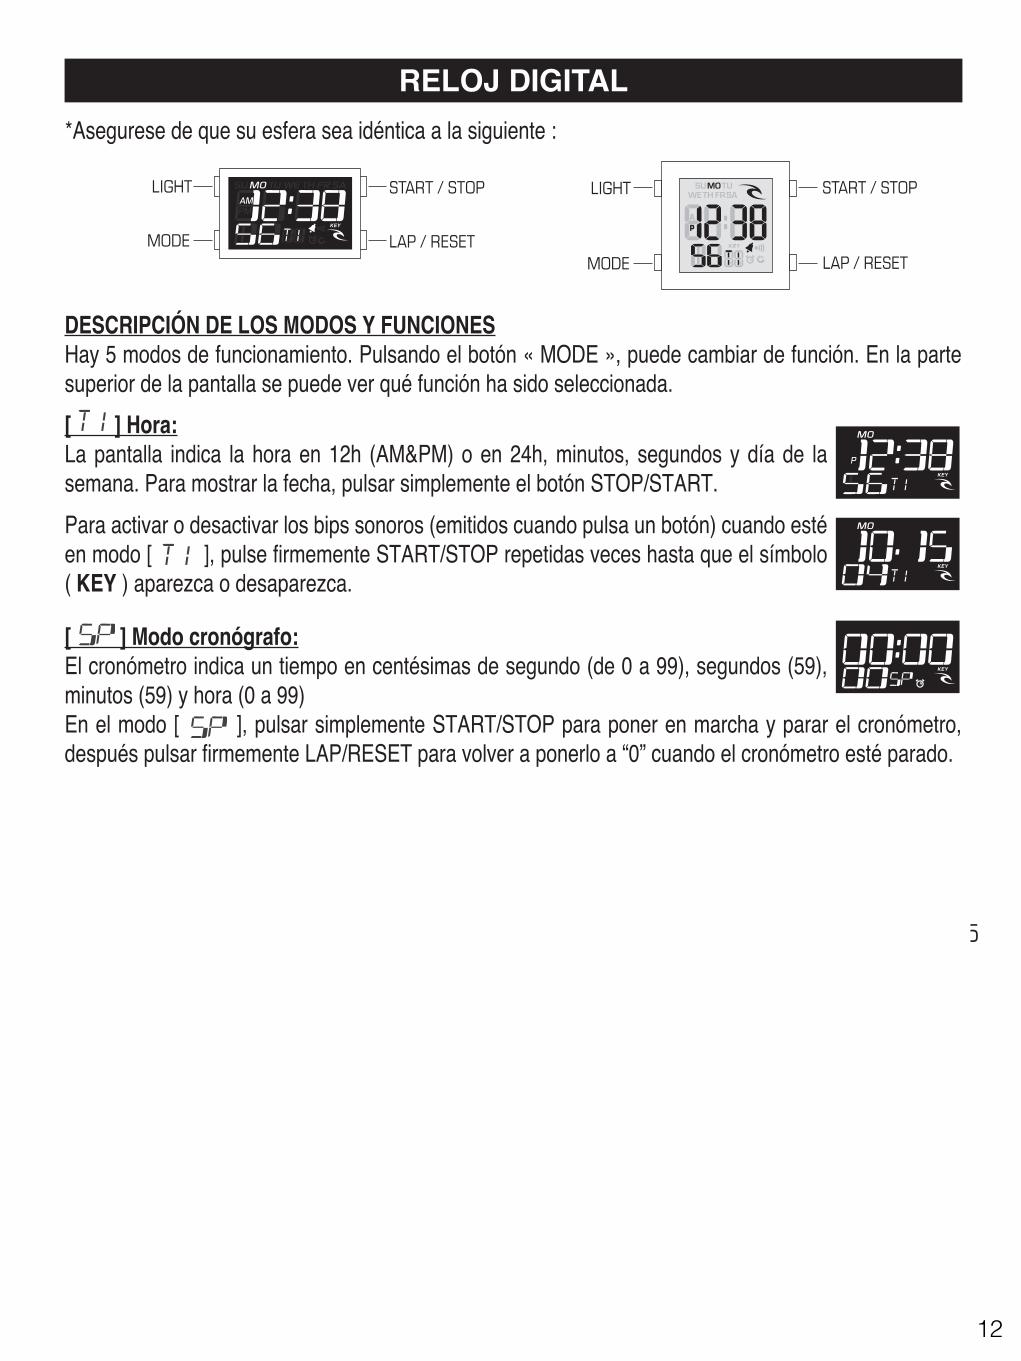
DESCRIPCIÓN DE LOS MODOS Y FUNCIONESHay 5 modos de funcionamiento. Pulsando el botón « MODE », puede cambiar de función. En la partesuperior de la pantalla se puede ver qué función ha sido seleccionada.[ ] Hora:La pantalla indica la hora en 12h (AM&PM) o en 24h, minutos, segundos y día de lasemana. Para mostrar la fecha, pulsar simplemente el botón STOP/START.Para activar o desactivar los bips sonoros (emitidos cuando pulsa un botón) cuando estéen modo [ ], pulse firmemente START/STOP repetidas veces hasta que el símbolo( KEY ) aparezca o desaparezca.[ ] Modo cronógrafo:El cronómetro indica un tiempo en centésimas de segundo (de 0 a 99), segundos (59),minutos (59) y hora (0 a 99)En el modo [ ], pulsar simplemente START/STOP para poner en marcha y parar el cronómetro,después pulsar firmemente LAP/RESET para volver a ponerlo a “0” cuando el cronómetro esté parado.
RELOJ DIGITAL*Asegurese de que su esfera sea idéntica a la siguiente :START / STOP
LAP / RESET
LIGHT
MODE
START / STOP
LAP / RESET
LIGHT
MODE
FASES LUNARNo necesita ajuste ya que el marcador de la fase lunar está preestablecido de fábrica de acuerdo con su zona. Sinecesita realizar un pequeño ajuste por favor, siga estas instrucciones.Para establecer o cambiar la Fase Lunar ...1.Tire de la corona hasta la posición B; 2.Gire la corona en sentido de las agujas del reloj hasta que aparezca elsímbolo de la luna en la esfera. Siga dando cuerda hasta que el símbolo de la luna aparezca en la esfera. Sigadando cuerda hasta que la luna esté en linea con la posición actual estimada de la fase lunar en los marcadorespor encima de la esfera (para luna llena ajuste al marcador 15);Notas: Para mantener un seguimiento preciso de la luna durante un largo tiempo, puede que necesite realizarunos posibles ajustes menores a su fase lunar. Para realizarlos, simplementerepita los pasos 1-3 de arriba.
95
12
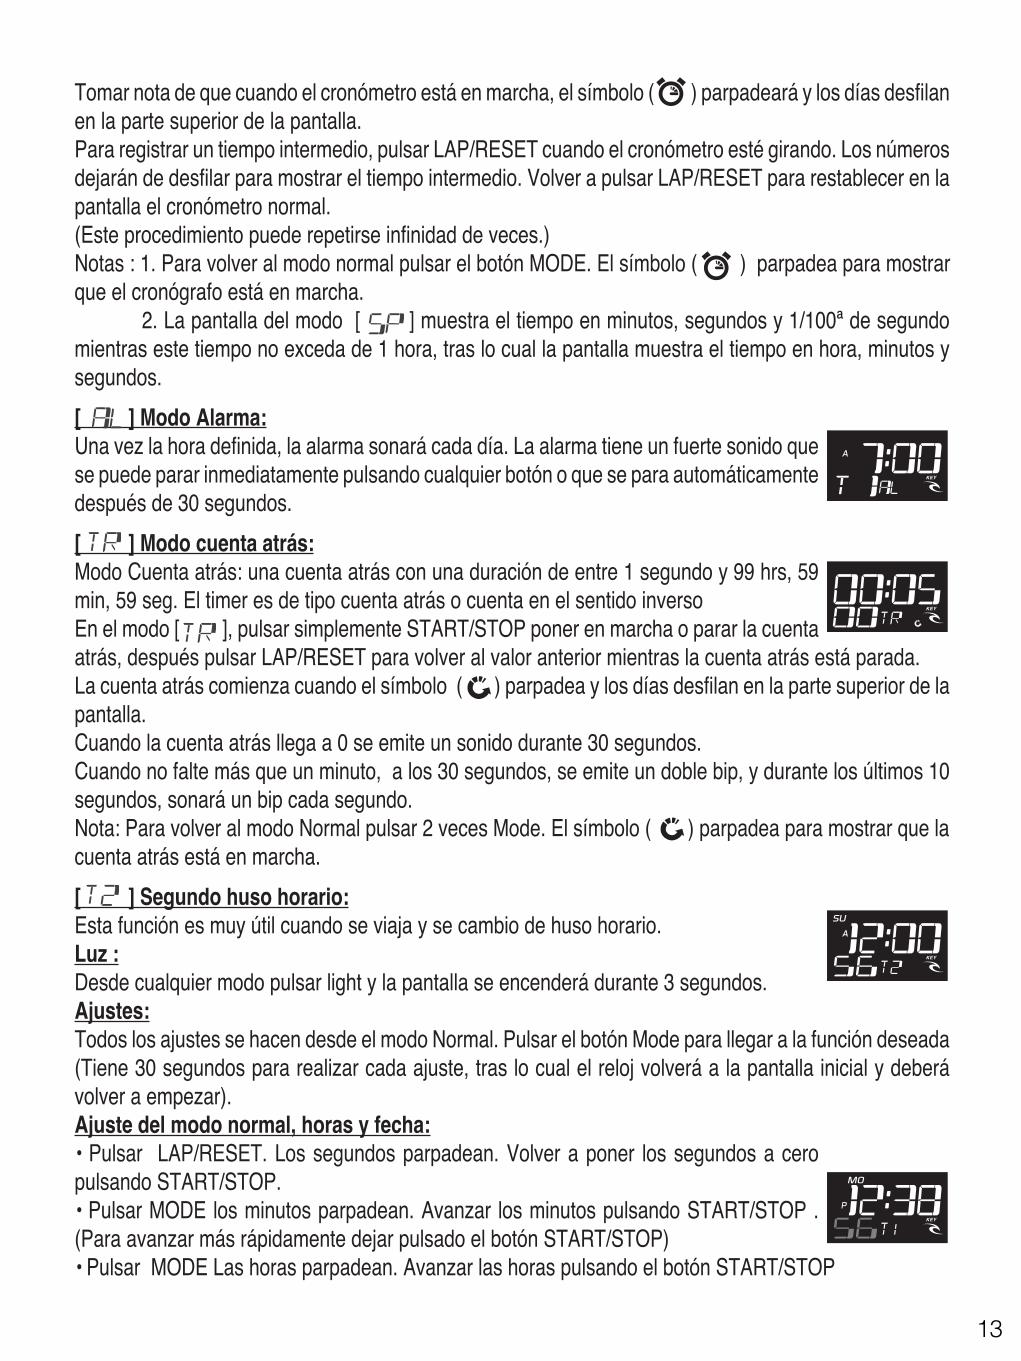
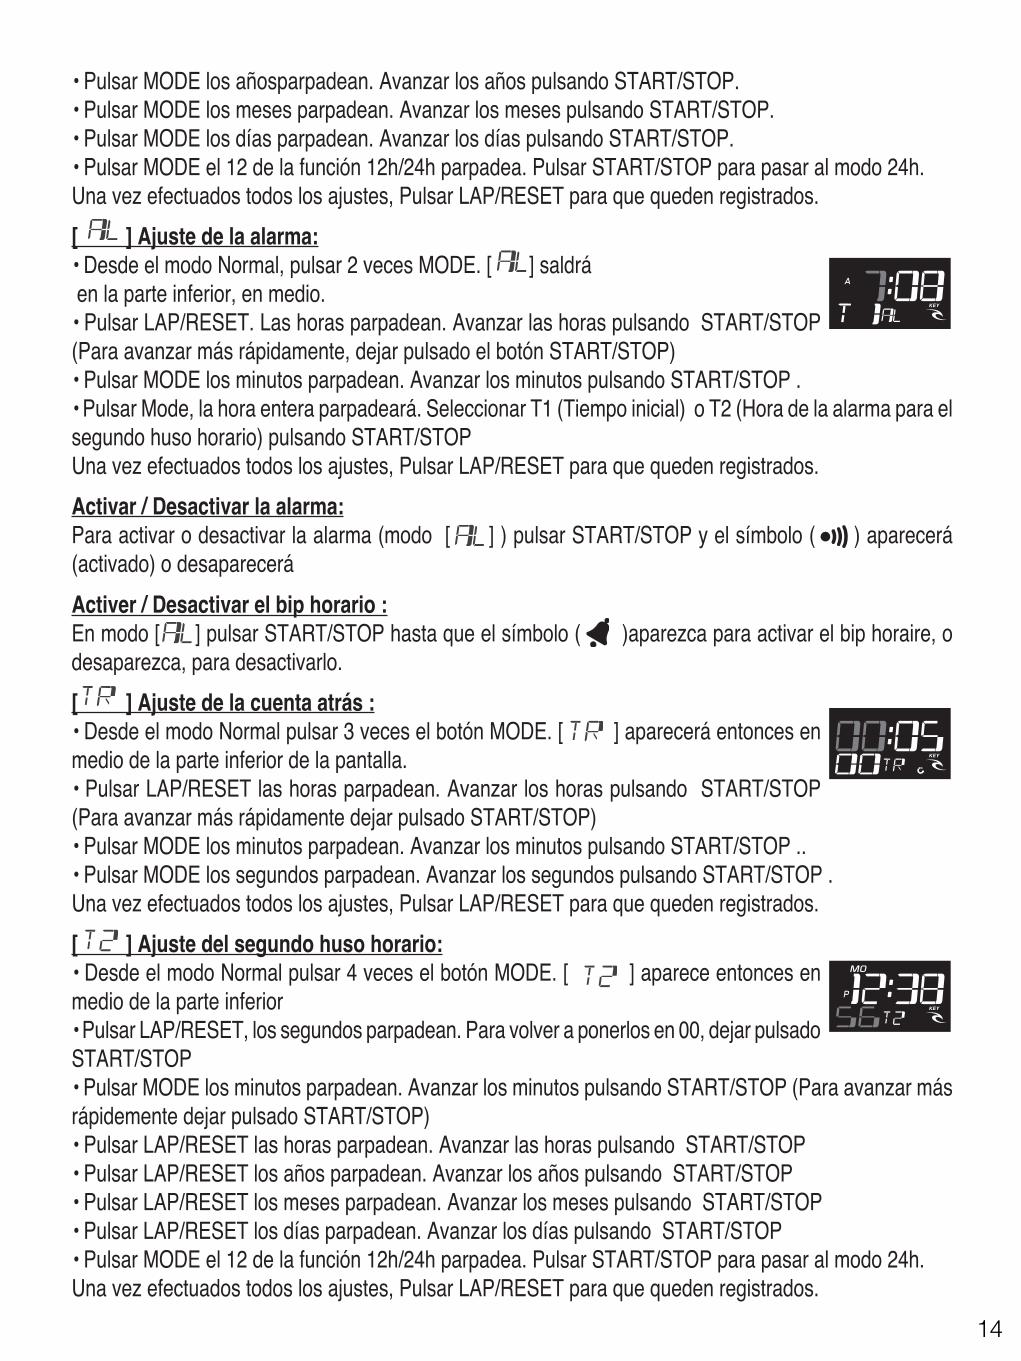
Tomar nota de que cuando el cronómetro está en marcha, el símbolo ( ) parpadeará y los días desfilanen la parte superior de la pantalla.Para registrar un tiempo intermedio, pulsar LAP/RESET cuando el cronómetro esté girando. Los númerosdejarán de desfilar para mostrar el tiempo intermedio. Volver a pulsar LAP/RESET para restablecer en lapantalla el cronómetro normal.(Este procedimiento puede repetirse infinidad de veces.)Notas : 1. Para volver al modo normal pulsar el botón MODE. El símbolo ( ) parpadea para mostrarque el cronógrafo está en marcha. 2. La pantalla del modo [ ] muestra el tiempo en minutos, segundos y 1/100ª de segundomientras este tiempo no exceda de 1 hora, tras lo cual la pantalla muestra el tiempo en hora, minutos ysegundos.[ ] Modo Alarma:Una vez la hora definida, la alarma sonará cada día. La alarma tiene un fuerte sonido quese puede parar inmediatamente pulsando cualquier botón o que se para automáticamentedespués de 30 segundos.[ ] Modo cuenta atrás:Modo Cuenta atrás: una cuenta atrás con una duración de entre 1 segundo y 99 hrs, 59min, 59 seg. El timer es de tipo cuenta atrás o cuenta en el sentido inversoEn el modo [ ], pulsar simplemente START/STOP poner en marcha o parar la cuentaatrás, después pulsar LAP/RESET para volver al valor anterior mientras la cuenta atrás está parada.La cuenta atrás comienza cuando el símbolo ( ) parpadea y los días desfilan en la parte superior de lapantalla.Cuando la cuenta atrás llega a 0 se emite un sonido durante 30 segundos.Cuando no falte más que un minuto, a los 30 segundos, se emite un doble bip, y durante los últimos 10segundos, sonará un bip cada segundo.Nota: Para volver al modo Normal pulsar 2 veces Mode. El símbolo ( ) parpadea para mostrar que lacuenta atrás está en marcha.[ ] Segundo huso horario:Esta función es muy útil cuando se viaja y se cambio de huso horario.Luz :Desde cualquier modo pulsar light y la pantalla se encenderá durante 3 segundos.Ajustes:Todos los ajustes se hacen desde el modo Normal. Pulsar el botón Mode para llegar a la función deseada(Tiene 30 segundos para realizar cada ajuste, tras lo cual el reloj volverá a la pantalla inicial y deberávolver a empezar).Ajuste del modo normal, horas y fecha:• Pulsar LAP/RESET. Los segundos parpadean. Volver a poner los segundos a ceropulsando START/STOP.• Pulsar MODE los minutos parpadean. Avanzar los minutos pulsando START/STOP .(Para avanzar más rápidamente dejar pulsado el botón START/STOP)• Pulsar MODE Las horas parpadean. Avanzar las horas pulsando el botón START/STOP96 13
• Pulsar MODE los añosparpadean. Avanzar los años pulsando START/STOP.• Pulsar MODE los meses parpadean. Avanzar los meses pulsando START/STOP.• Pulsar MODE los días parpadean. Avanzar los días pulsando START/STOP.• Pulsar MODE el 12 de la función 12h/24h parpadea. Pulsar START/STOP para pasar al modo 24h.Una vez efectuados todos los ajustes, Pulsar LAP/RESET para que queden registrados.[ ] Ajuste de la alarma:• Desde el modo Normal, pulsar 2 veces MODE. [ ] saldrá en la parte inferior, en medio.• Pulsar LAP/RESET. Las horas parpadean. Avanzar las horas pulsando START/STOP(Para avanzar más rápidamente, dejar pulsado el botón START/STOP)• Pulsar MODE los minutos parpadean. Avanzar los minutos pulsando START/STOP .• Pulsar Mode, la hora entera parpadeará. Seleccionar T1 (Tiempo inicial) o T2 (Hora de la alarma para elsegundo huso horario) pulsando START/STOPUna vez efectuados todos los ajustes, Pulsar LAP/RESET para que queden registrados.Activar / Desactivar la alarma:Para activar o desactivar la alarma (modo [ ] ) pulsar START/STOP y el símbolo ( ) aparecerá(activado) o desapareceráActiver / Desactivar el bip horario :En modo [ ] pulsar START/STOP hasta que el símbolo ( )aparezca para activar el bip horaire, odesaparezca, para desactivarlo.[ ] Ajuste de la cuenta atrás :• Desde el modo Normal pulsar 3 veces el botón MODE. [ ] aparecerá entonces enmedio de la parte inferior de la pantalla.• Pulsar LAP/RESET las horas parpadean. Avanzar los horas pulsando START/STOP(Para avanzar más rápidamente dejar pulsado START/STOP)• Pulsar MODE los minutos parpadean. Avanzar los minutos pulsando START/STOP ..• Pulsar MODE los segundos parpadean. Avanzar los segundos pulsando START/STOP .Una vez efectuados todos los ajustes, Pulsar LAP/RESET para que queden registrados.[ ] Ajuste del segundo huso horario:• Desde el modo Normal pulsar 4 veces el botón MODE. [ ] aparece entonces enmedio de la parte inferior• Pulsar LAP/RESET, los segundos parpadean. Para volver a ponerlos en 00, dejar pulsadoSTART/STOP• Pulsar MODE los minutos parpadean. Avanzar los minutos pulsando START/STOP (Para avanzar másrápidemente dejar pulsado START/STOP)• Pulsar LAP/RESET las horas parpadean. Avanzar las horas pulsando START/STOP• Pulsar LAP/RESET los años parpadean. Avanzar los años pulsando START/STOP• Pulsar LAP/RESET los meses parpadean. Avanzar los meses pulsando START/STOP• Pulsar LAP/RESET los días parpadean. Avanzar los días pulsando START/STOP• Pulsar MODE el 12 de la función 12h/24h parpadea. Pulsar START/STOP para pasar al modo 24h.Una vez efectuados todos los ajustes, Pulsar LAP/RESET para que queden registrados.97 14
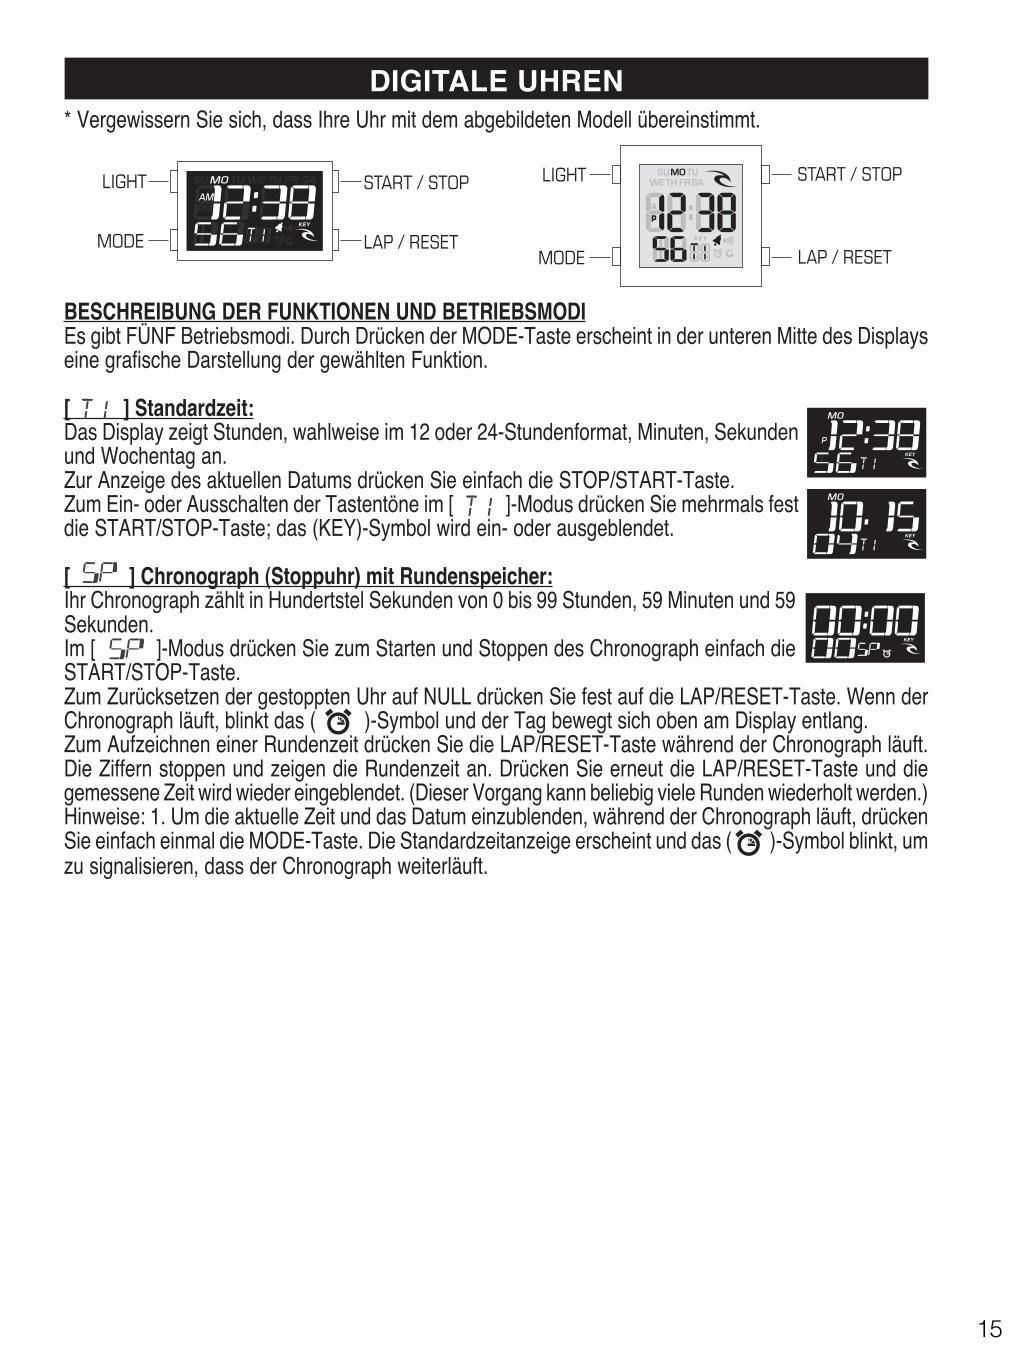
* Vergewissern Sie sich, dass Ihre Uhr mit dem abgebildeten Modell übereinstimmt.BESCHREIBUNG DER FUNKTIONEN UND BETRIEBSMODIEs gibt FÜNF Betriebsmodi. Durch Drücken der MODE-Taste erscheint in der unteren Mitte des Displayseine grafische Darstellung der gewählten Funktion.[ ] Standardzeit:Das Display zeigt Stunden, wahlweise im 12 oder 24-Stundenformat, Minuten, Sekundenund Wochentag an.Zur Anzeige des aktuellen Datums drücken Sie einfach die STOP/START-Taste.Zum Ein- oder Ausschalten der Tastentöne im [ ]-Modus drücken Sie mehrmals festdie START/STOP-Taste; das (KEY)-Symbol wird ein- oder ausgeblendet.[ ] Chronograph (Stoppuhr) mit Rundenspeicher:Ihr Chronograph zählt in Hundertstel Sekunden von 0 bis 99 Stunden, 59 Minuten und 59Sekunden.Im [ ]-Modus drücken Sie zum Starten und Stoppen des Chronograph einfach dieSTART/STOP-Taste.Zum Zurücksetzen der gestoppten Uhr auf NULL drücken Sie fest auf die LAP/RESET-Taste. Wenn derChronograph läuft, blinkt das ( )-Symbol und der Tag bewegt sich oben am Display entlang.Zum Aufzeichnen einer Rundenzeit drücken Sie die LAP/RESET-Taste während der Chronograph läuft.Die Ziffern stoppen und zeigen die Rundenzeit an. Drücken Sie erneut die LAP/RESET-Taste und diegemessene Zeit wird wieder eingeblendet. (Dieser Vorgang kann beliebig viele Runden wiederholt werden.)Hinweise: 1. Um die aktuelle Zeit und das Datum einzublenden, während der Chronograph läuft, drückenSie einfach einmal die MODE-Taste. Die Standardzeitanzeige erscheint und das ( )-Symbol blinkt, umzu signalisieren, dass der Chronograph weiterläuft.
DIGITALE UHRENSTART / STOP
LAP / RESET
LIGHT
MODE
START / STOP
LAP / RESET
LIGHT
MODE
MONDPHASEEs ist keine Einstellung notwendig, da der Mondphasenzeiger ab Fabrik für Ihre Region voreingestelltist. Falls geringfügige Anpassungen nötig sind, befolgen Sie bitte folgende Anweisungen.Einstellung oder Änderung der Mondphase...1. Ziehen Sie die Krone zu Position B heraus. 2. Drehen Sie die Krone im Uhrzeigersinn, bis dasMondsymbol im Fenster erscheint. Drehen Sie weiter, bis das Mondsymbol im Fenster erscheint. DrehenSie weiter, bis der Mond mit dem erwarteten aktuellen Mondphasentag auf dem Zeiger über demFenster übereinstimmt (für Vollmondeinstellung der Zeiger 15);Hinweis: Um eine akkurate Mondverfolgung über längere Zeitperioden aufrechtzuerhalten können kleineAnpassungen an Ihrer Mondphase nötig sein. Wiederholen Sie hierfür einfach die oben genanntenSchritte 1-3.
163
15
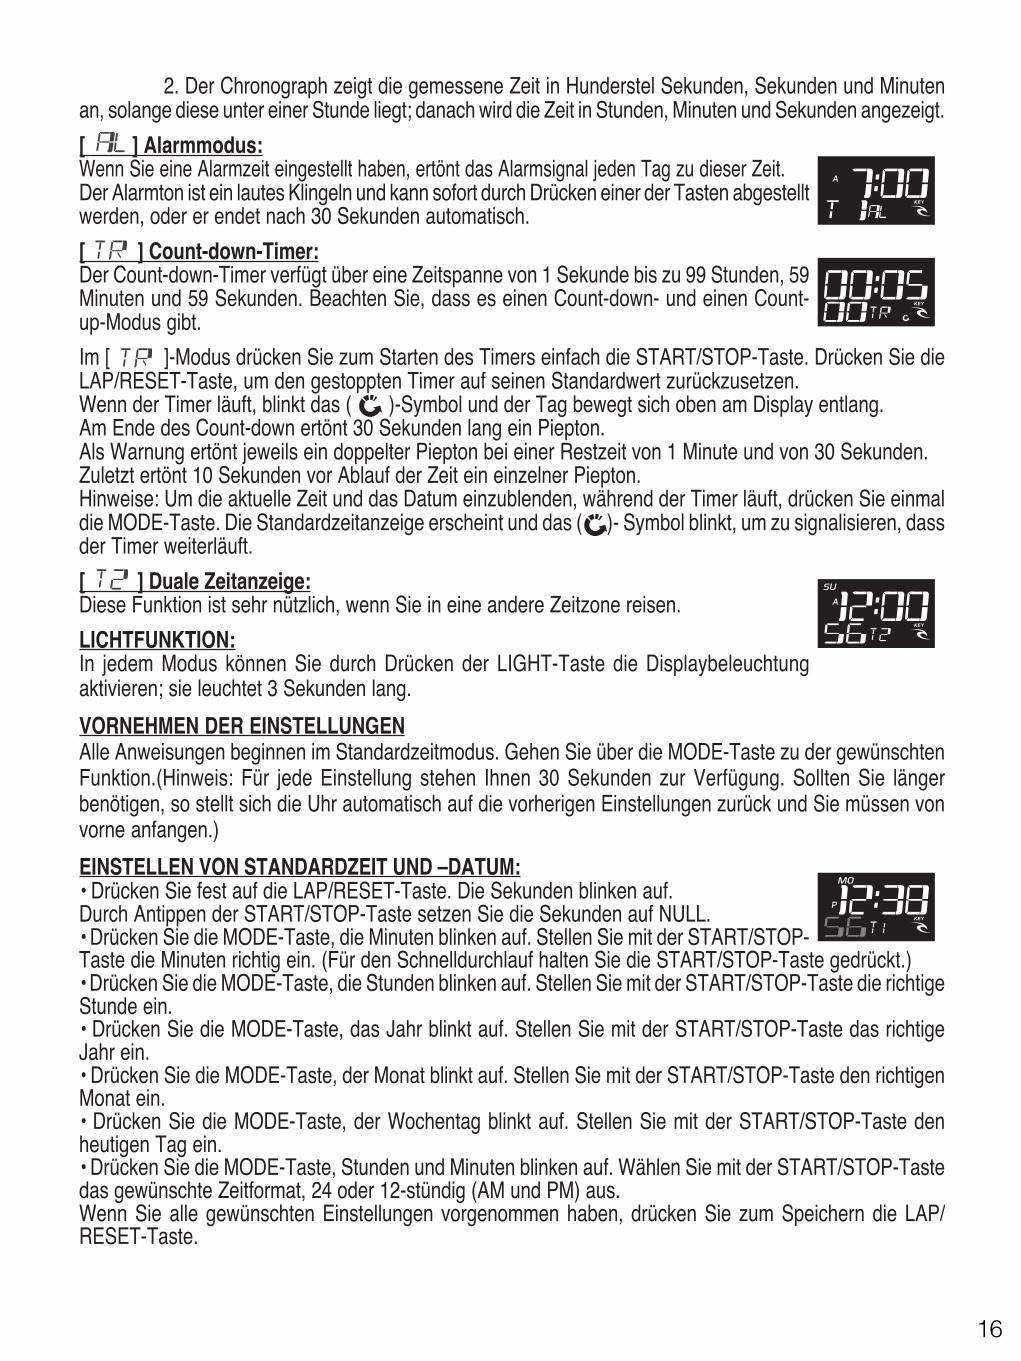
2. Der Chronograph zeigt die gemessene Zeit in Hunderstel Sekunden, Sekunden und Minutenan, solange diese unter einer Stunde liegt; danach wird die Zeit in Stunden, Minuten und Sekunden angezeigt.[ ] Alarmmodus:Wenn Sie eine Alarmzeit eingestellt haben, ertönt das Alarmsignal jeden Tag zu dieser Zeit.Der Alarmton ist ein lautes Klingeln und kann sofort durch Drücken einer der Tasten abgestelltwerden, oder er endet nach 30 Sekunden automatisch.[ ] Count-down-Timer:Der Count-down-Timer verfügt über eine Zeitspanne von 1 Sekunde bis zu 99 Stunden, 59Minuten und 59 Sekunden. Beachten Sie, dass es einen Count-down- und einen Count-up-Modus gibt.Im [ ]-Modus drücken Sie zum Starten des Timers einfach die START/STOP-Taste. Drücken Sie dieLAP/RESET-Taste, um den gestoppten Timer auf seinen Standardwert zurückzusetzen.Wenn der Timer läuft, blinkt das ( )-Symbol und der Tag bewegt sich oben am Display entlang.Am Ende des Count-down ertönt 30 Sekunden lang ein Piepton.Als Warnung ertönt jeweils ein doppelter Piepton bei einer Restzeit von 1 Minute und von 30 Sekunden.Zuletzt ertönt 10 Sekunden vor Ablauf der Zeit ein einzelner Piepton.Hinweise: Um die aktuelle Zeit und das Datum einzublenden, während der Timer läuft, drücken Sie einmaldie MODE-Taste. Die Standardzeitanzeige erscheint und das ( )- Symbol blinkt, um zu signalisieren, dassder Timer weiterläuft.[ ] Duale Zeitanzeige:Diese Funktion ist sehr nützlich, wenn Sie in eine andere Zeitzone reisen.LICHTFUNKTION:In jedem Modus können Sie durch Drücken der LIGHT-Taste die Displaybeleuchtungaktivieren; sie leuchtet 3 Sekunden lang.VORNEHMEN DER EINSTELLUNGENAlle Anweisungen beginnen im Standardzeitmodus. Gehen Sie über die MODE-Taste zu der gewünschtenFunktion.(Hinweis: Für jede Einstellung stehen Ihnen 30 Sekunden zur Verfügung. Sollten Sie längerbenötigen, so stellt sich die Uhr automatisch auf die vorherigen Einstellungen zurück und Sie müssen vonvorne anfangen.)EINSTELLEN VON STANDARDZEIT UND –DATUM:• Drücken Sie fest auf die LAP/RESET-Taste. Die Sekunden blinken auf.Durch Antippen der START/STOP-Taste setzen Sie die Sekunden auf NULL.• Drücken Sie die MODE-Taste, die Minuten blinken auf. Stellen Sie mit der START/STOP-Taste die Minuten richtig ein. (Für den Schnelldurchlauf halten Sie die START/STOP-Taste gedrückt.)• Drücken Sie die MODE-Taste, die Stunden blinken auf. Stellen Sie mit der START/STOP-Taste die richtigeStunde ein.• Drücken Sie die MODE-Taste, das Jahr blinkt auf. Stellen Sie mit der START/STOP-Taste das richtigeJahr ein.• Drücken Sie die MODE-Taste, der Monat blinkt auf. Stellen Sie mit der START/STOP-Taste den richtigenMonat ein.• Drücken Sie die MODE-Taste, der Wochentag blinkt auf. Stellen Sie mit der START/STOP-Taste denheutigen Tag ein.• Drücken Sie die MODE-Taste, Stunden und Minuten blinken auf. Wählen Sie mit der START/STOP-Tastedas gewünschte Zeitformat, 24 oder 12-stündig (AM und PM) aus.Wenn Sie alle gewünschten Einstellungen vorgenommen haben, drücken Sie zum Speichern die LAP/RESET-Taste.164
16
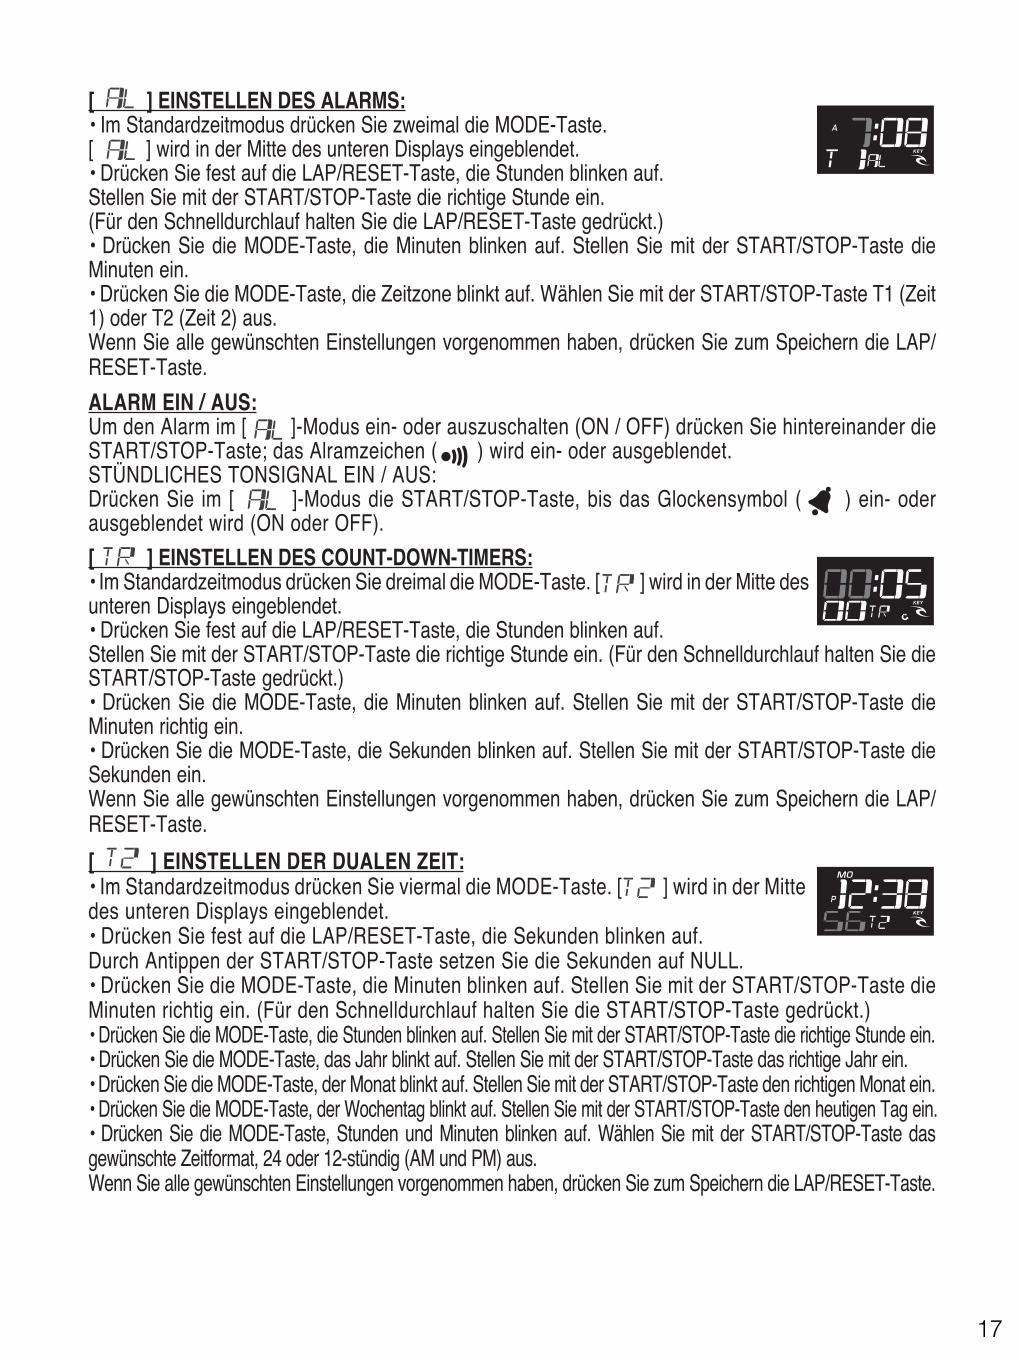
[ ] EINSTELLEN DES ALARMS:• Im Standardzeitmodus drücken Sie zweimal die MODE-Taste.[ ] wird in der Mitte des unteren Displays eingeblendet.• Drücken Sie fest auf die LAP/RESET-Taste, die Stunden blinken auf.Stellen Sie mit der START/STOP-Taste die richtige Stunde ein.(Für den Schnelldurchlauf halten Sie die LAP/RESET-Taste gedrückt.)• Drücken Sie die MODE-Taste, die Minuten blinken auf. Stellen Sie mit der START/STOP-Taste dieMinuten ein.• Drücken Sie die MODE-Taste, die Zeitzone blinkt auf. Wählen Sie mit der START/STOP-Taste T1 (Zeit1) oder T2 (Zeit 2) aus.Wenn Sie alle gewünschten Einstellungen vorgenommen haben, drücken Sie zum Speichern die LAP/RESET-Taste.ALARM EIN / AUS:Um den Alarm im [ ]-Modus ein- oder auszuschalten (ON / OFF) drücken Sie hintereinander dieSTART/STOP-Taste; das Alramzeichen ( ) wird ein- oder ausgeblendet.STÜNDLICHES TONSIGNAL EIN / AUS:Drücken Sie im [ ]-Modus die START/STOP-Taste, bis das Glockensymbol ( ) ein- oderausgeblendet wird (ON oder OFF).[ ] EINSTELLEN DES COUNT-DOWN-TIMERS:• Im Standardzeitmodus drücken Sie dreimal die MODE-Taste. [ ] wird in der Mitte desunteren Displays eingeblendet.• Drücken Sie fest auf die LAP/RESET-Taste, die Stunden blinken auf.Stellen Sie mit der START/STOP-Taste die richtige Stunde ein. (Für den Schnelldurchlauf halten Sie dieSTART/STOP-Taste gedrückt.)• Drücken Sie die MODE-Taste, die Minuten blinken auf. Stellen Sie mit der START/STOP-Taste dieMinuten richtig ein.• Drücken Sie die MODE-Taste, die Sekunden blinken auf. Stellen Sie mit der START/STOP-Taste dieSekunden ein.Wenn Sie alle gewünschten Einstellungen vorgenommen haben, drücken Sie zum Speichern die LAP/RESET-Taste.[ ] EINSTELLEN DER DUALEN ZEIT:• Im Standardzeitmodus drücken Sie viermal die MODE-Taste. [ ] wird in der Mittedes unteren Displays eingeblendet.• Drücken Sie fest auf die LAP/RESET-Taste, die Sekunden blinken auf.Durch Antippen der START/STOP-Taste setzen Sie die Sekunden auf NULL.• Drücken Sie die MODE-Taste, die Minuten blinken auf. Stellen Sie mit der START/STOP-Taste dieMinuten richtig ein. (Für den Schnelldurchlauf halten Sie die START/STOP-Taste gedrückt.)• Drücken Sie die MODE-Taste, die Stunden blinken auf. Stellen Sie mit der START/STOP-Taste die richtige Stunde ein.• Drücken Sie die MODE-Taste, das Jahr blinkt auf. Stellen Sie mit der START/STOP-Taste das richtige Jahr ein.• Drücken Sie die MODE-Taste, der Monat blinkt auf. Stellen Sie mit der START/STOP-Taste den richtigen Monat ein.• Drücken Sie die MODE-Taste, der Wochentag blinkt auf. Stellen Sie mit der START/STOP-Taste den heutigen Tag ein.• Drücken Sie die MODE-Taste, Stunden und Minuten blinken auf. Wählen Sie mit der START/STOP-Taste dasgewünschte Zeitformat, 24 oder 12-stündig (AM und PM) aus.Wenn Sie alle gewünschten Einstellungen vorgenommen haben, drücken Sie zum Speichern die LAP/RESET-Taste.165
17
DESCRIÇÃO DE MODOS E FUNÇÕESExistem 5 modos diferentes. Carregando no botão « MODO », poderá mudar de função. Um visual,que aparece acima do ecrã, indica qual é a função escolhida.
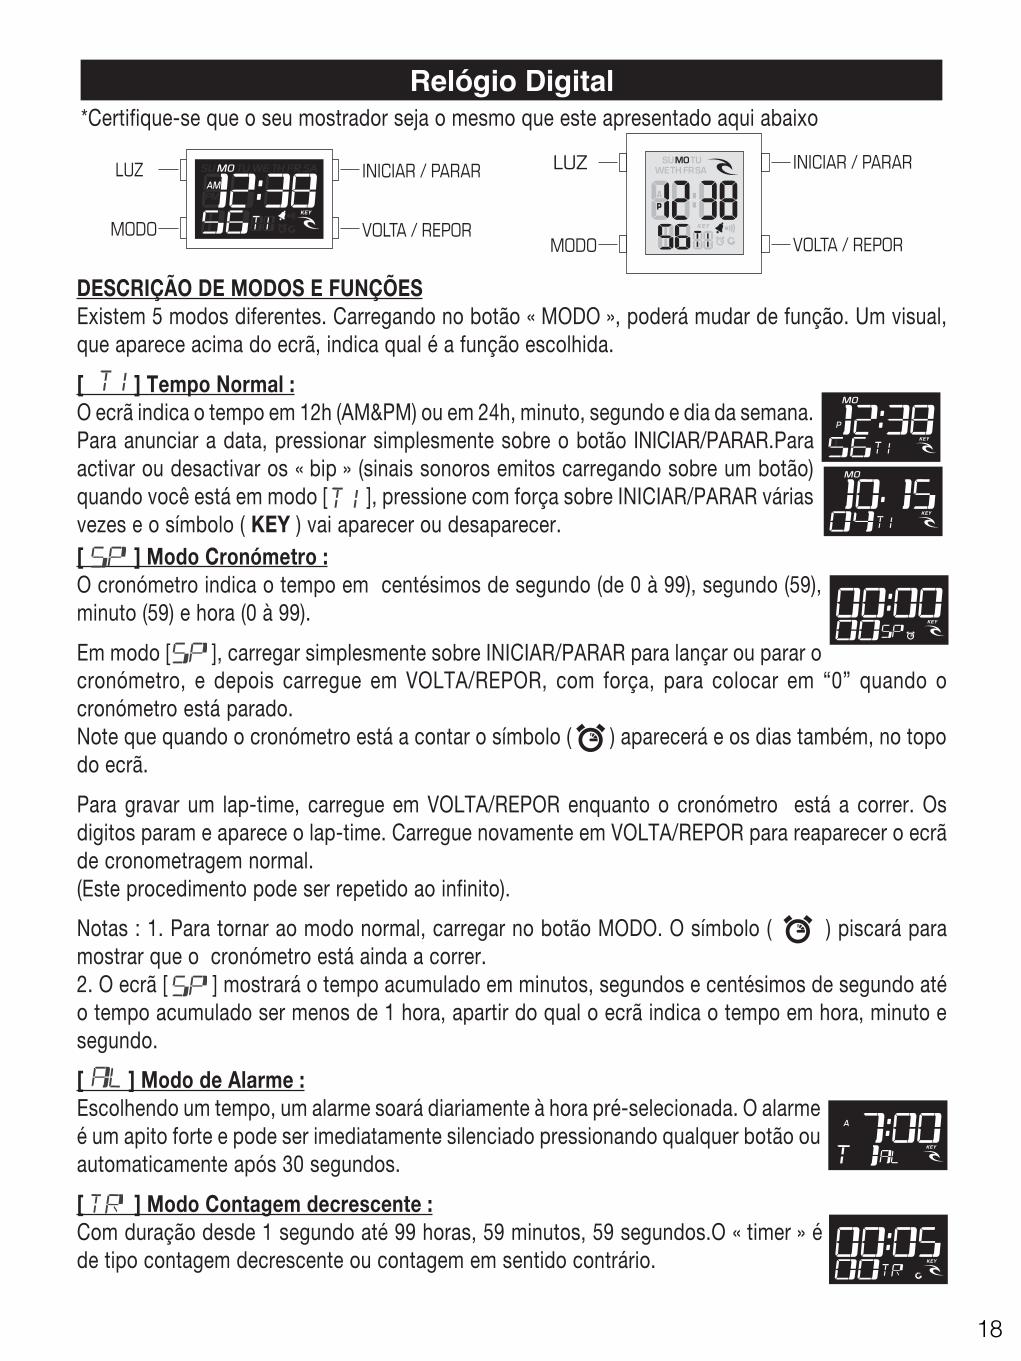
[ ] Tempo Normal :O ecrã indica o tempo em 12h (AM&PM) ou em 24h, minuto, segundo e dia da semana.Para anunciar a data, pressionar simplesmente sobre o botão INICIAR/PARAR.Paraactivar ou desactivar os « bip » (sinais sonoros emitos carregando sobre um botão)quando você está em modo [ ], pressione com força sobre INICIAR/PARAR váriasvezes e o símbolo ( KEY ) vai aparecer ou desaparecer.[ ] Modo Cronómetro :O cronómetro indica o tempo em centésimos de segundo (de 0 à 99), segundo (59),minuto (59) e hora (0 à 99).
Em modo [ ], carregar simplesmente sobre INICIAR/PARAR para lançar ou parar ocronómetro, e depois carregue em VOLTA/REPOR, com força, para colocar em “0” quando ocronómetro está parado.Note que quando o cronómetro está a contar o símbolo ( ) aparecerá e os dias também, no topodo ecrã.
Para gravar um lap-time, carregue em VOLTA/REPOR enquanto o cronómetro está a correr. Osdigitos param e aparece o lap-time. Carregue novamente em VOLTA/REPOR para reaparecer o ecrãde cronometragem normal.(Este procedimento pode ser repetido ao infinito).
Notas : 1. Para tornar ao modo normal, carregar no botão MODO. O símbolo ( ) piscará paramostrar que o cronómetro está ainda a correr.2. O ecrã [ ] mostrará o tempo acumulado em minutos, segundos e centésimos de segundo atéo tempo acumulado ser menos de 1 hora, apartir do qual o ecrã indica o tempo em hora, minuto esegundo.
[ ] Modo de Alarme :Escolhendo um tempo, um alarme soará diariamente à hora pré-selecionada. O alarmeé um apito forte e pode ser imediatamente silenciado pressionando qualquer botão ouautomaticamente após 30 segundos.
[ ] Modo Contagem decrescente :Com duração desde 1 segundo até 99 horas, 59 minutos, 59 segundos.O « timer » éde tipo contagem decrescente ou contagem em sentido contrário.
INICIAR / PARAR
VOLTA / REPOR
LUZ
MODO
INICIAR / PARAR
VOLTA / REPOR
LUZ
MODO
Relógio Digital*Certifique-se que o seu mostrador seja o mesmo que este apresentado aqui abaixo
12818
Em modo [ ], carregar simplesmente sobre INICIAR/PARAR para lançar ou parar a contagemdecrescente, depois carregar em VOLTA/REPOR para tornar a ler o valor precedente enquanto acontagem decrescente está parada.
A contagem decrescente estará a correr quando o símbolo ( ) piscará e os dias também no topodo ecrã.
Quando a contagem decrescente chega à 0, um apito soará durante 30 segundos. Quando so faltarum minuto, e depois 30 segundos, um duplo sinal sonoro soará, e depois a cada segundo, um sinalsonoro simples aos 10 últimos segundos.
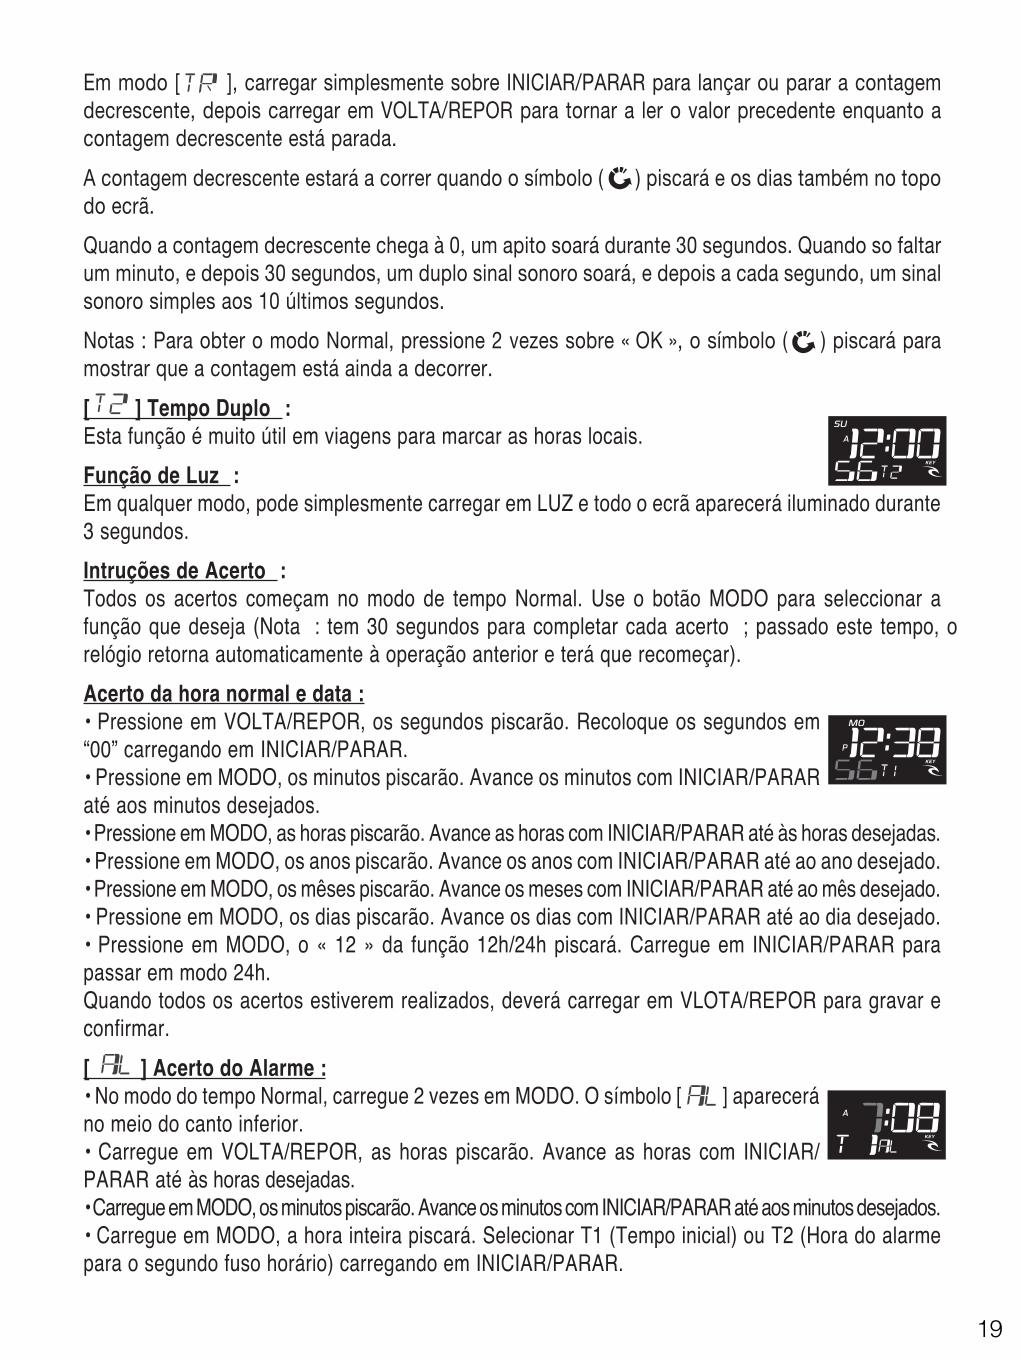
Notas : Para obter o modo Normal, pressione 2 vezes sobre « OK », o símbolo ( ) piscará paramostrar que a contagem está ainda a decorrer.[ ] Tempo Duplo :Esta função é muito útil em viagens para marcar as horas locais.Função de Luz :Em qualquer modo, pode simplesmente carregar em LUZ e todo o ecrã aparecerá iluminado durante3 segundos.Intruções de Acerto :Todos os acertos começam no modo de tempo Normal. Use o botão MODO para seleccionar afunção que deseja (Nota : tem 30 segundos para completar cada acerto ; passado este tempo, orelógio retorna automaticamente à operação anterior e terá que recomeçar).Acerto da hora normal e data :• Pressione em VOLTA/REPOR, os segundos piscarão. Recoloque os segundos em“00” carregando em INICIAR/PARAR.• Pressione em MODO, os minutos piscarão. Avance os minutos com INICIAR/PARARaté aos minutos desejados.• Pressione em MODO, as horas piscarão. Avance as horas com INICIAR/PARAR até às horas desejadas.• Pressione em MODO, os anos piscarão. Avance os anos com INICIAR/PARAR até ao ano desejado.• Pressione em MODO, os mêses piscarão. Avance os meses com INICIAR/PARAR até ao mês desejado.• Pressione em MODO, os dias piscarão. Avance os dias com INICIAR/PARAR até ao dia desejado.• Pressione em MODO, o « 12 » da função 12h/24h piscará. Carregue em INICIAR/PARAR parapassar em modo 24h.Quando todos os acertos estiverem realizados, deverá carregar em VLOTA/REPOR para gravar econfirmar.[ ] Acerto do Alarme :• No modo do tempo Normal, carregue 2 vezes em MODO. O símbolo [ ] apareceráno meio do canto inferior.• Carregue em VOLTA/REPOR, as horas piscarão. Avance as horas com INICIAR/PARAR até às horas desejadas.• Carregue em MODO, os minutos piscarão. Avance os minutos com INICIAR/PARAR até aos minutos desejados.• Carregue em MODO, a hora inteira piscará. Selecionar T1 (Tempo inicial) ou T2 (Hora do alarmepara o segundo fuso horário) carregando em INICIAR/PARAR.
12919
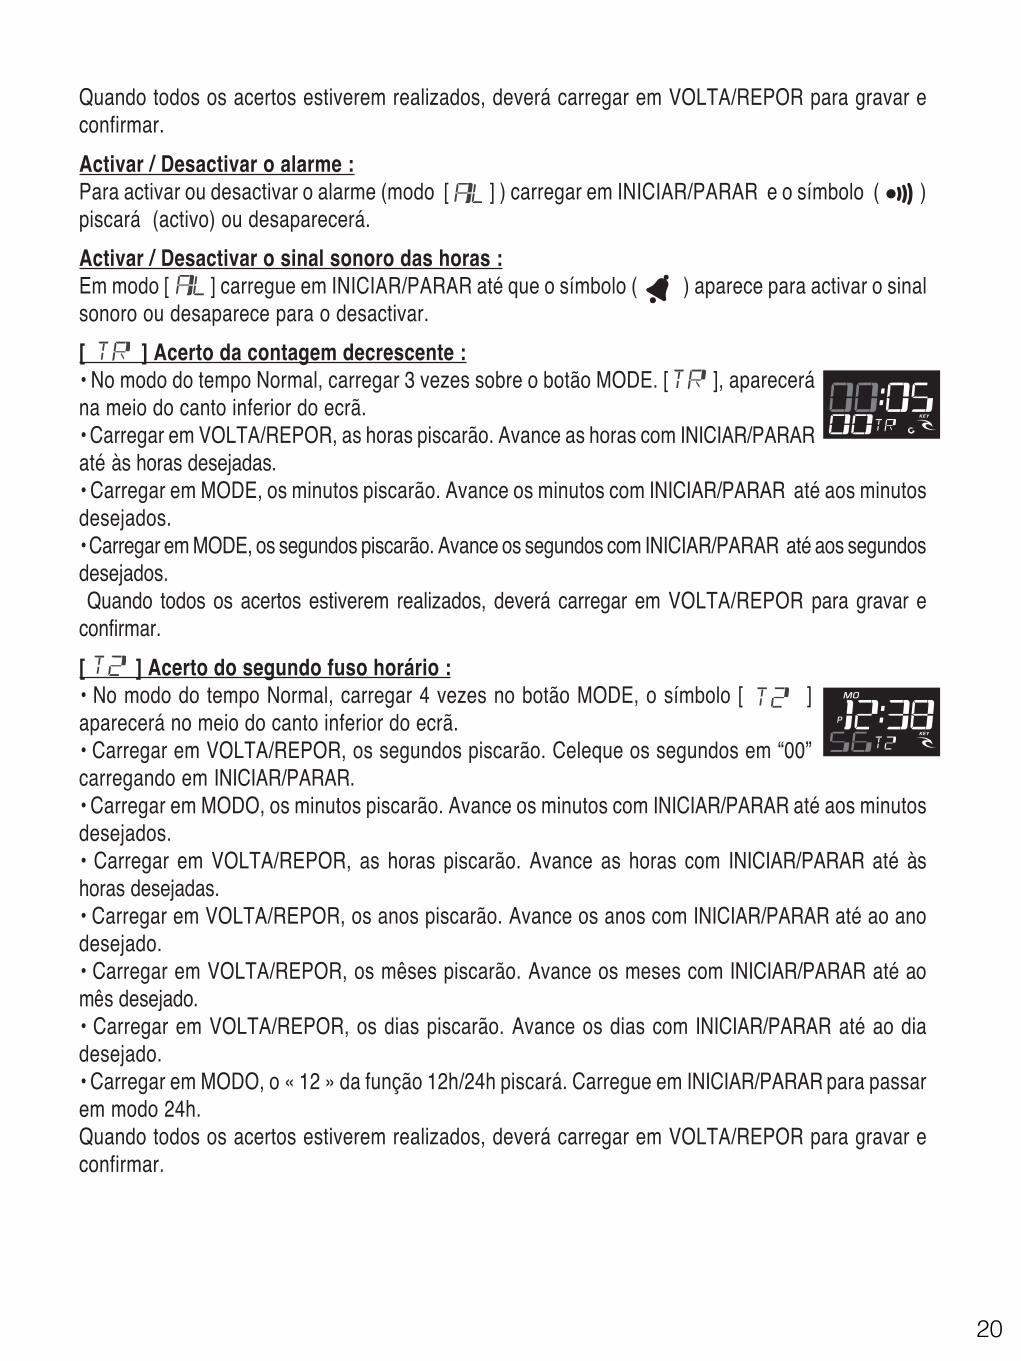
Quando todos os acertos estiverem realizados, deverá carregar em VOLTA/REPOR para gravar econfirmar.Activar / Desactivar o alarme :Para activar ou desactivar o alarme (modo [ ] ) carregar em INICIAR/PARAR e o símbolo ( )piscará (activo) ou desaparecerá.Activar / Desactivar o sinal sonoro das horas :Em modo [ ] carregue em INICIAR/PARAR até que o símbolo ( ) aparece para activar o sinalsonoro ou desaparece para o desactivar.[ ] Acerto da contagem decrescente :• No modo do tempo Normal, carregar 3 vezes sobre o botão MODE. [ ], aparecerána meio do canto inferior do ecrã.• Carregar em VOLTA/REPOR, as horas piscarão. Avance as horas com INICIAR/PARARaté às horas desejadas.• Carregar em MODE, os minutos piscarão. Avance os minutos com INICIAR/PARAR até aos minutosdesejados.• Carregar em MODE, os segundos piscarão. Avance os segundos com INICIAR/PARAR até aos segundosdesejados. Quando todos os acertos estiverem realizados, deverá carregar em VOLTA/REPOR para gravar econfirmar.[ ] Acerto do segundo fuso horário :• No modo do tempo Normal, carregar 4 vezes no botão MODE, o símbolo [ ]aparecerá no meio do canto inferior do ecrã.• Carregar em VOLTA/REPOR, os segundos piscarão. Celeque os segundos em “00”carregando em INICIAR/PARAR.• Carregar em MODO, os minutos piscarão. Avance os minutos com INICIAR/PARAR até aos minutosdesejados.• Carregar em VOLTA/REPOR, as horas piscarão. Avance as horas com INICIAR/PARAR até àshoras desejadas.• Carregar em VOLTA/REPOR, os anos piscarão. Avance os anos com INICIAR/PARAR até ao anodesejado.• Carregar em VOLTA/REPOR, os mêses piscarão. Avance os meses com INICIAR/PARAR até aomês desejado.• Carregar em VOLTA/REPOR, os dias piscarão. Avance os dias com INICIAR/PARAR até ao diadesejado.• Carregar em MODO, o « 12 » da função 12h/24h piscará. Carregue em INICIAR/PARAR para passarem modo 24h.Quando todos os acertos estiverem realizados, deverá carregar em VOLTA/REPOR para gravar econfirmar.130
20
21
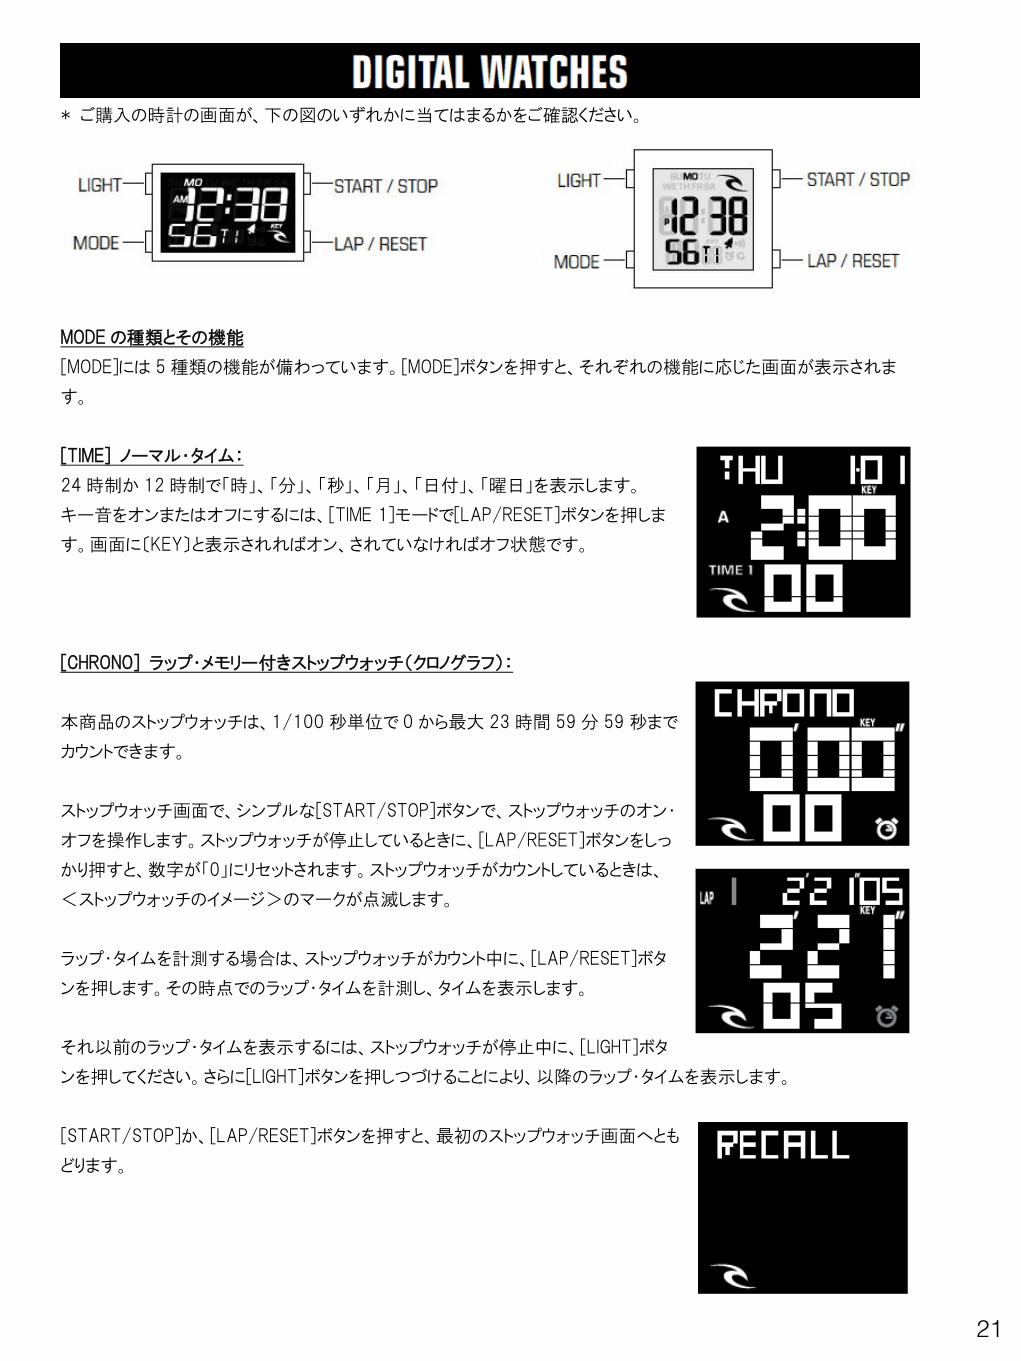
* ご購入の時計の画面が、下の図のいずれかに当てはまるかをご確認ください。
MODEの種類とその機能
[MODE]には 5種類の機能が備わっています。[MODE]ボタンを押すと、それぞれの機能に応じた画面が表示されま
す。
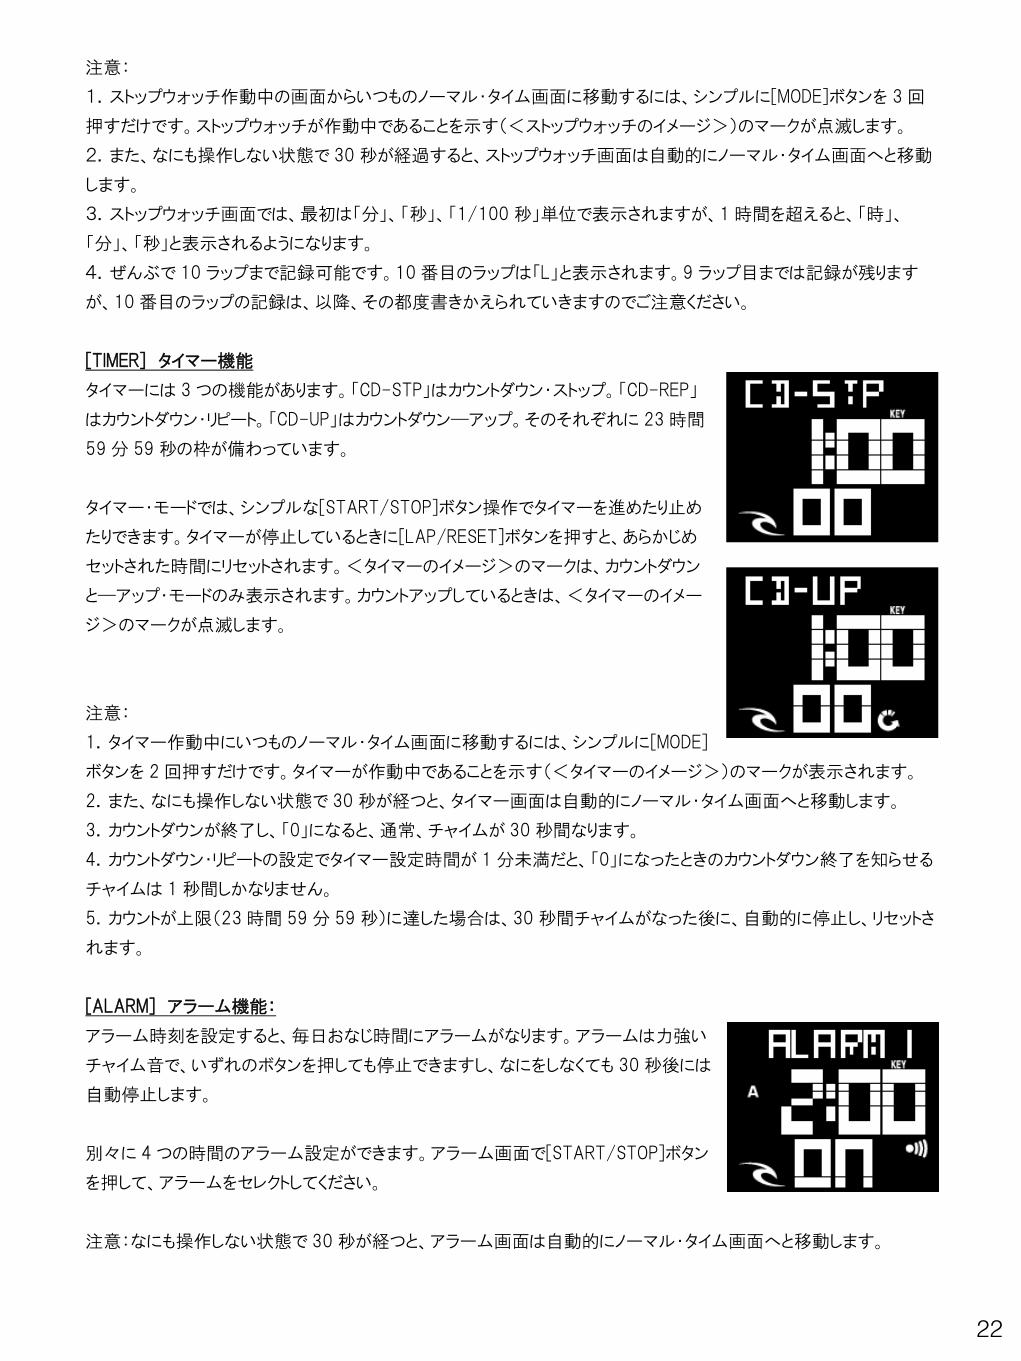
[TIME] ノーマル・タイム:
24時制か 12時制で「時」、「分」、「秒」、「月」、「日付」、「曜日」を表示します。
キー音をオンまたはオフにするには、[TIME 1]モードで[LAP/RESET]ボタンを押しま
す。画面に〔KEY〕と表示されればオン、されていなければオフ状態です。
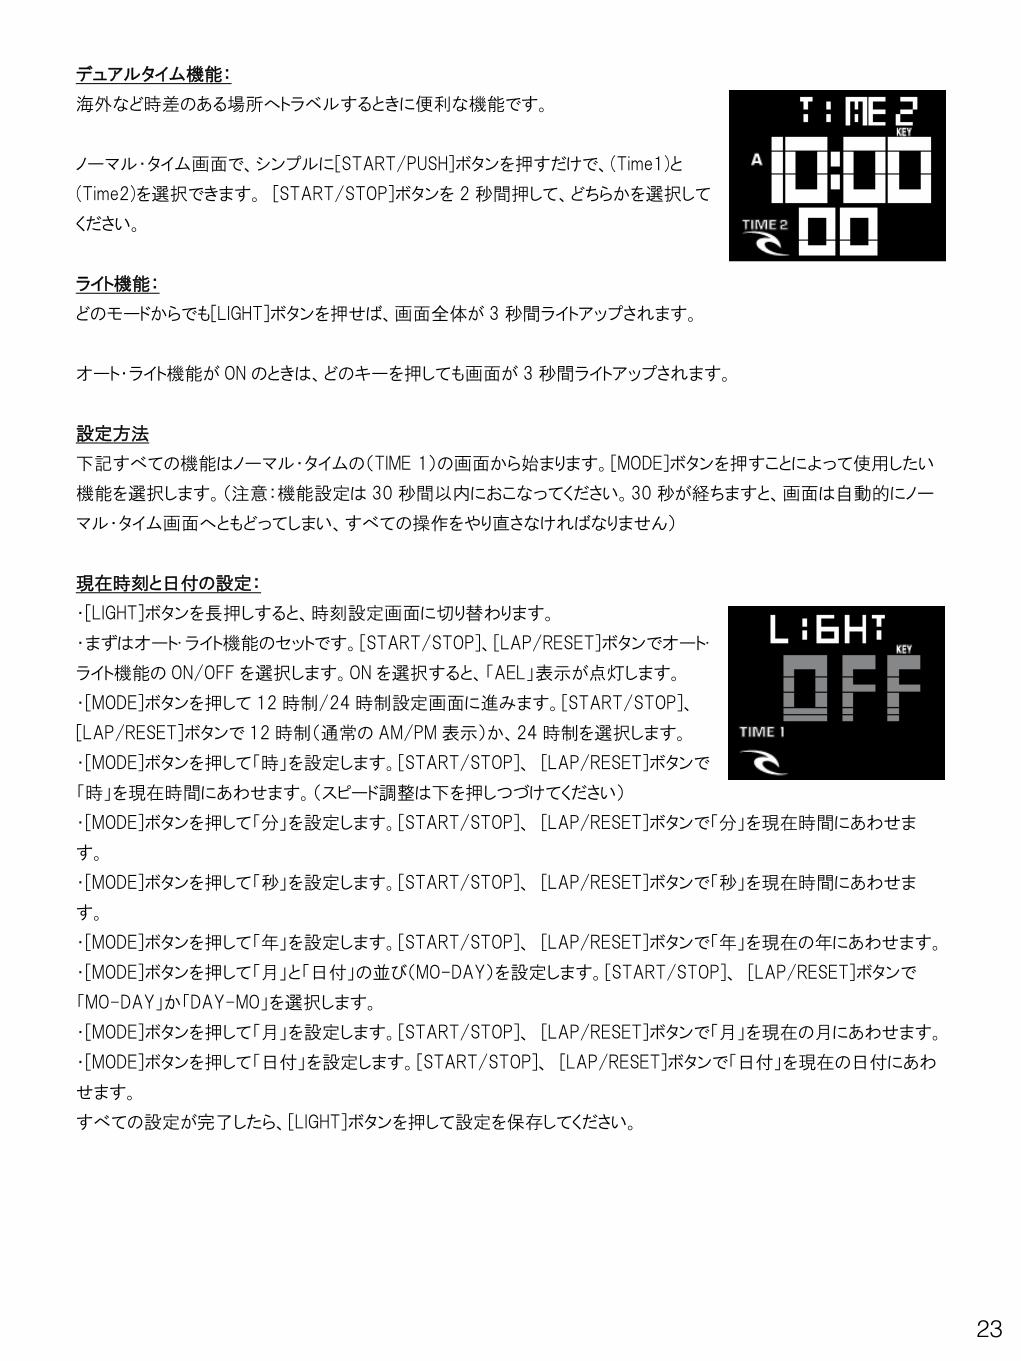
[CHRONO] ラップ・メモリー付きストップウォッチ(クロノグラフ):
本商品のストップウォッチは、1/100秒単位で 0から最大 23時間 59分 59秒まで
カウントできます。
ストップウォッチ画面で、シンプルな[START/STOP]ボタンで、ストップウォッチのオン・
オフを操作します。ストップウォッチが停止しているときに、[LAP/RESET]ボタンをしっ
かり押すと、数字が「0」にリセットされます。ストップウォッチがカウントしているときは、
<ストップウォッチのイメージ>のマークが点滅します。
ラップ・タイムを計測する場合は、ストップウォッチがカウント中に、[LAP/RESET]ボタ
ンを押します。その時点でのラップ・タイムを計測し、タイムを表示します。
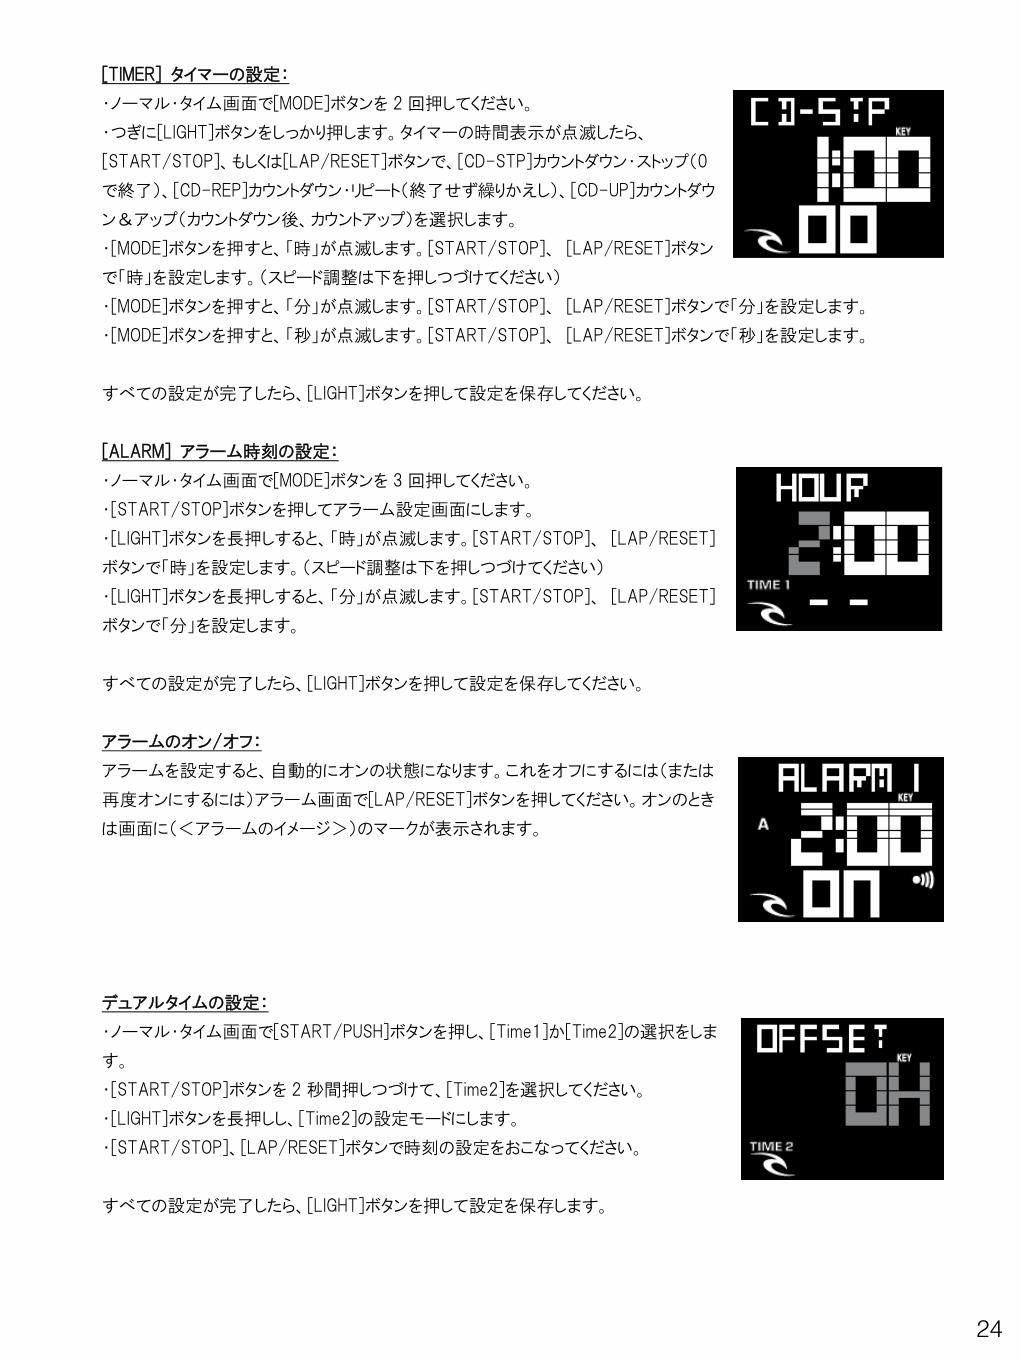
それ以前のラップ・タイムを表示するには、ストップウォッチが停止中に、[LIGHT]ボタ
ンを押してください。さらに[LIGHT]ボタンを押しつづけることにより、以降のラップ・タイムを表示します。
[START/STOP]か、[LAP/RESET]ボタンを押すと、最初のストップウォッチ画面へとも
どります。
22
注意:
1.ストップウォッチ作動中の画面からいつものノーマル・タイム画面に移動するには、シンプルに[MODE]ボタンを 3回
押すだけです。ストップウォッチが作動中であることを示す(<ストップウォッチのイメージ>)のマークが点滅します。
2.また、なにも操作しない状態で 30秒が経過すると、ストップウォッチ画面は自動的にノーマル・タイム画面へと移動
します。
3.ストップウォッチ画面では、最初は「分」、「秒」、「1/100秒」単位で表示されますが、1時間を超えると、「時」、
「分」、「秒」と表示されるようになります。
4.ぜんぶで 10 ラップまで記録可能です。10番目のラップは「L」と表示されます。9 ラップ目までは記録が残ります
が、10番目のラップの記録は、以降、その都度書きかえられていきますのでご注意ください。
[TIMER] タイマー機能
タイマーには 3つの機能があります。「CD-STP」はカウントダウン・ストップ。「CD-REP」
はカウントダウン・リピート。「CD-UP」はカウントダウン―アップ。そのそれぞれに 23時間
59分 59秒の枠が備わっています。
タイマー・モードでは、シンプルな[START/STOP]ボタン操作でタイマーを進めたり止め
たりできます。タイマーが停止しているときに[LAP/RESET]ボタンを押すと、あらかじめ
セットされた時間にリセットされます。<タイマーのイメージ>のマークは、カウントダウン
と―アップ・モードのみ表示されます。カウントアップしているときは、<タイマーのイメー
ジ>のマークが点滅します。
注意:
1.タイマー作動中にいつものノーマル・タイム画面に移動するには、シンプルに[MODE]
ボタンを 2回押すだけです。タイマーが作動中であることを示す(<タイマーのイメージ>)のマークが表示されます。
2.また、なにも操作しない状態で 30秒が経つと、タイマー画面は自動的にノーマル・タイム画面へと移動します。
3.カウントダウンが終了し、「0」になると、通常、チャイムが 30秒間なります。
4.カウントダウン・リピートの設定でタイマー設定時間が 1分未満だと、「0」になったときのカウントダウン終了を知らせる
チャイムは 1秒間しかなりません。
5.カウントが上限(23時間 59分 59秒)に達した場合は、30秒間チャイムがなった後に、自動的に停止し、リセットさ
れます。
[ALARM] アラーム機能:
アラーム時刻を設定すると、毎日おなじ時間にアラームがなります。アラームは力強い
チャイム音で、いずれのボタンを押しても停止できますし、なにをしなくても 30秒後には
自動停止します。
別々に 4つの時間のアラーム設定ができます。アラーム画面で[START/STOP]ボタン
を押して、アラームをセレクトしてください。
注意:なにも操作しない状態で 30秒が経つと、アラーム画面は自動的にノーマル・タイム画面へと移動します。
23
デュアルタイム機能:
海外など時差のある場所へトラベルするときに便利な機能です。
ノーマル・タイム画面で、シンプルに[START/PUSH]ボタンを押すだけで、(Time1)と
(Time2)を選択できます。 [START/STOP]ボタンを 2秒間押して、どちらかを選択して
ください。
ライト機能:
どのモードからでも[LIGHT]ボタンを押せば、画面全体が 3秒間ライトアップされます。
オート・ライト機能が ONのときは、どのキーを押しても画面が 3秒間ライトアップされます。
設定方法
下記すべての機能はノーマル・タイムの(TIME 1)の画面から始まります。[MODE]ボタンを押すことによって使用したい
機能を選択します。(注意:機能設定は 30秒間以内におこなってください。30秒が経ちますと、画面は自動的にノー
マル・タイム画面へともどってしまい、すべての操作をやり直さなければなりません)
現在時刻と日付の設定:
・[LIGHT]ボタンを長押しすると、時刻設定画面に切り替わります。
・まずはオート・ライト機能のセットです。[START/STOP]、[LAP/RESET]ボタンでオート・
ライト機能の ON/OFFを選択します。ONを選択すると、「AEL」表示が点灯します。
・[MODE]ボタンを押して 12時制/24時制設定画面に進みます。[START/STOP]、
[LAP/RESET]ボタンで 12時制(通常の AM/PM表示)か、24時制を選択します。
・[MODE]ボタンを押して「時」を設定します。[START/STOP]、 [LAP/RESET]ボタンで
「時」を現在時間にあわせます。(スピード調整は下を押しつづけてください)
・[MODE]ボタンを押して「分」を設定します。[START/STOP]、 [LAP/RESET]ボタンで「分」を現在時間にあわせま
す。
・[MODE]ボタンを押して「秒」を設定します。[START/STOP]、 [LAP/RESET]ボタンで「秒」を現在時間にあわせま
す。
・[MODE]ボタンを押して「年」を設定します。[START/STOP]、 [LAP/RESET]ボタンで「年」を現在の年にあわせます。
・[MODE]ボタンを押して「月」と「日付」の並び(MO-DAY)を設定します。[START/STOP]、 [LAP/RESET]ボタンで
「MO-DAY」か「DAY-MO」を選択します。
・[MODE]ボタンを押して「月」を設定します。[START/STOP]、 [LAP/RESET]ボタンで「月」を現在の月にあわせます。
・[MODE]ボタンを押して「日付」を設定します。[START/STOP]、 [LAP/RESET]ボタンで「日付」を現在の日付にあわ
せます。
すべての設定が完了したら、[LIGHT]ボタンを押して設定を保存してください。
24
[TIMER] タイマーの設定:
・ノーマル・タイム画面で[MODE]ボタンを 2回押してください。
・つぎに[LIGHT]ボタンをしっかり押します。タイマーの時間表示が点滅したら、
[START/STOP]、もしくは[LAP/RESET]ボタンで、[CD-STP]カウントダウン・ストップ(0
で終了)、[CD-REP]カウントダウン・リピート(終了せず繰りかえし)、[CD-UP]カウントダウ
ン&アップ(カウントダウン後、カウントアップ)を選択します。
・[MODE]ボタンを押すと、「時」が点滅します。[START/STOP]、 [LAP/RESET]ボタン
で「時」を設定します。(スピード調整は下を押しつづけてください)
・[MODE]ボタンを押すと、「分」が点滅します。[START/STOP]、 [LAP/RESET]ボタンで「分」を設定します。
・[MODE]ボタンを押すと、「秒」が点滅します。[START/STOP]、 [LAP/RESET]ボタンで「秒」を設定します。
すべての設定が完了したら、[LIGHT]ボタンを押して設定を保存してください。
[ALARM] アラーム時刻の設定:
・ノーマル・タイム画面で[MODE]ボタンを 3回押してください。
・[START/STOP]ボタンを押してアラーム設定画面にします。
・[LIGHT]ボタンを長押しすると、「時」が点滅します。[START/STOP]、 [LAP/RESET]
ボタンで「時」を設定します。(スピード調整は下を押しつづけてください)
・[LIGHT]ボタンを長押しすると、「分」が点滅します。[START/STOP]、 [LAP/RESET]
ボタンで「分」を設定します。
すべての設定が完了したら、[LIGHT]ボタンを押して設定を保存してください。
アラームのオン/オフ:
アラームを設定すると、自動的にオンの状態になります。これをオフにするには(または
再度オンにするには)アラーム画面で[LAP/RESET]ボタンを押してください。オンのとき
は画面に(<アラームのイメージ>)のマークが表示されます。
デュアルタイムの設定:
・ノーマル・タイム画面で[START/PUSH]ボタンを押し、[Time1]か[Time2]の選択をしま
す。
・[START/STOP]ボタンを 2秒間押しつづけて、[Time2]を選択してください。
・[LIGHT]ボタンを長押しし、[Time2]の設定モードにします。
・[START/STOP]、[LAP/RESET]ボタンで時刻の設定をおこなってください。
すべての設定が完了したら、[LIGHT]ボタンを押して設定を保存します。
25
JAM DIGITAL 1
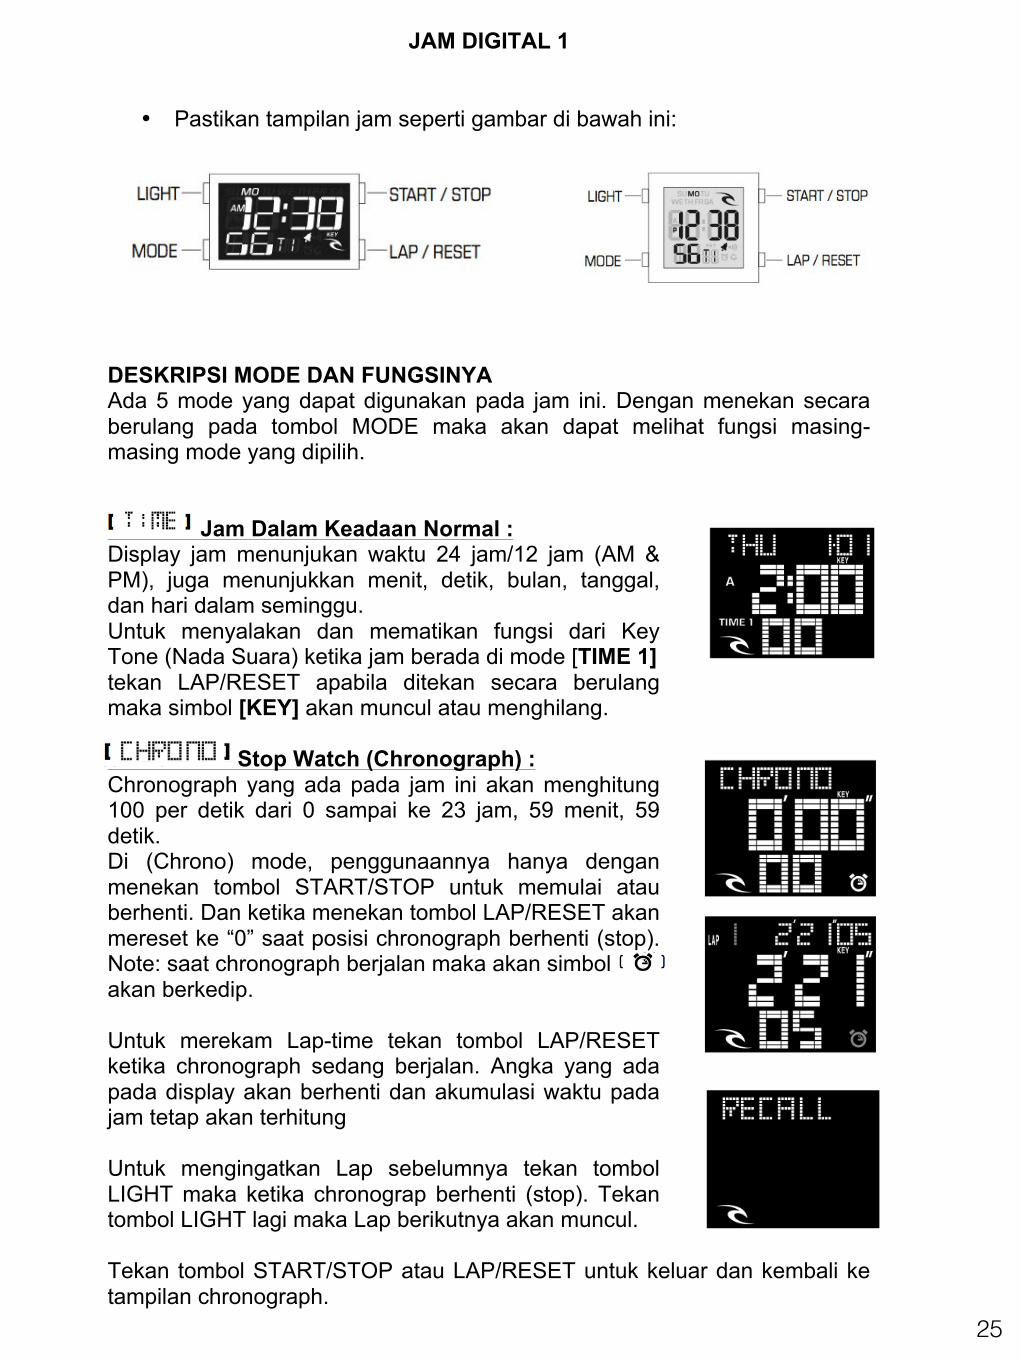
• Pastikan tampilan jam seperti gambar di bawah ini: DESKRIPSI MODE DAN FUNGSINYA Ada 5 mode yang dapat digunakan pada jam ini. Dengan menekan secara berulang pada tombol MODE maka akan dapat melihat fungsi masing-masing mode yang dipilih. Jam Dalam Keadaan Normal : Display jam menunjukan waktu 24 jam/12 jam (AM & PM), juga menunjukkan menit, detik, bulan, tanggal, dan hari dalam seminggu. Untuk menyalakan dan mematikan fungsi dari Key Tone (Nada Suara) ketika jam berada di mode [TIME 1] tekan LAP/RESET apabila ditekan secara berulang maka simbol [KEY] akan muncul atau menghilang. Stop Watch (Chronograph) : Chronograph yang ada pada jam ini akan menghitung 100 per detik dari 0 sampai ke 23 jam, 59 menit, 59 detik. Di (Chrono) mode, penggunaannya hanya dengan menekan tombol START/STOP untuk memulai atau berhenti. Dan ketika menekan tombol LAP/RESET akan mereset ke “0” saat posisi chronograph berhenti (stop). Note: saat chronograph berjalan maka akan simbol akan berkedip. Untuk merekam Lap-time tekan tombol LAP/RESET ketika chronograph sedang berjalan. Angka yang ada pada display akan berhenti dan akumulasi waktu pada jam tetap akan terhitung Untuk mengingatkan Lap sebelumnya tekan tombol LIGHT maka ketika chronograp berhenti (stop). Tekan tombol LIGHT lagi maka Lap berikutnya akan muncul. Tekan tombol START/STOP atau LAP/RESET untuk keluar dan kembali ke tampilan chronograph.
26
Notes:
1. Untuk melihat waktu dan tanggal ketika chronograph sedang berjalan, tekan lah tombol MODE sebanyak 3 kali. Display Waktu akan terlihat dan simbol akan berkedip yang menandakan bahwa chrograph masih berjalan
2. Apabila tidak ada pengoperasian tombol selama 30 detik, maka display Alarm akan secara otomatis keluar dan kembali ke display jam utama
3. Display chronograph akan menunjukkan akumulasi waktu dalam menit, detik, dan 1/100 detik dan akumulasi ini hanya dapat dihitung kurang dari 1 jam, setelah itu hanya akan terdisplay jam, menit dan detik
4. Secara keseluruhan ada 10 lap yang dapat direkam. Simbol L akan muncul apabila Lap sudah melebihi dari 9. Rekaman Lap yang ke 10 kan selalu digantikan oleh lap yang terbaru. 9 Lap awal tidak akan berubah.
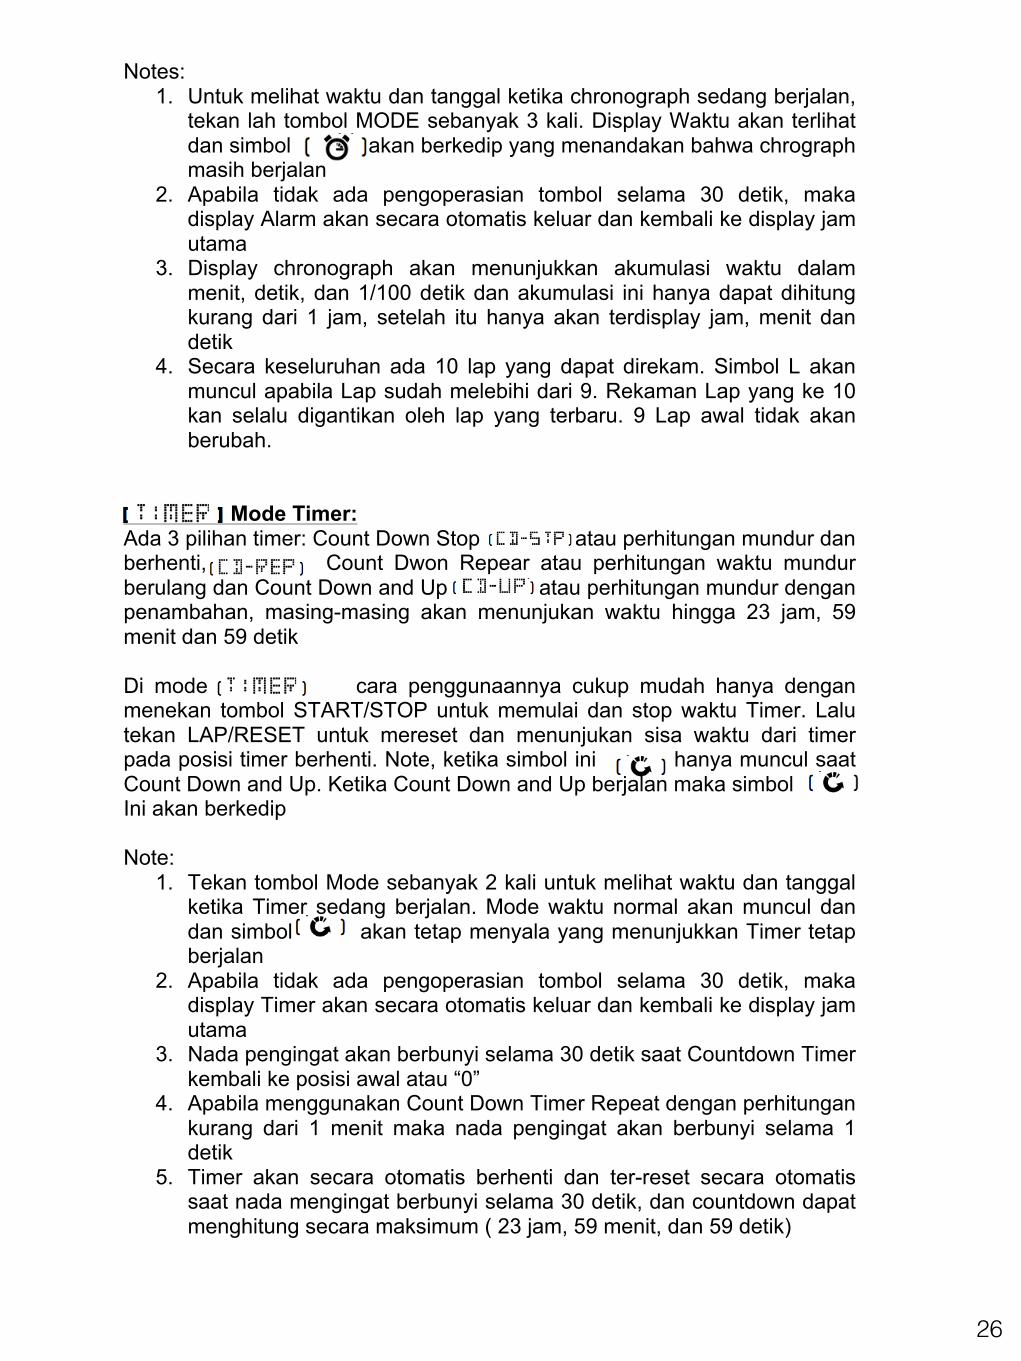
Mode Timer: Ada 3 pilihan timer: Count Down Stop atau perhitungan mundur dan berhenti, Count Dwon Repear atau perhitungan waktu mundur berulang dan Count Down and Up atau perhitungan mundur dengan penambahan, masing-masing akan menunjukan waktu hingga 23 jam, 59 menit dan 59 detik Di mode cara penggunaannya cukup mudah hanya dengan menekan tombol START/STOP untuk memulai dan stop waktu Timer. Lalu tekan LAP/RESET untuk mereset dan menunjukan sisa waktu dari timer pada posisi timer berhenti. Note, ketika simbol ini hanya muncul saat Count Down and Up. Ketika Count Down and Up berjalan maka simbol Ini akan berkedip Note:
1. Tekan tombol Mode sebanyak 2 kali untuk melihat waktu dan tanggal ketika Timer sedang berjalan. Mode waktu normal akan muncul dan dan simbol akan tetap menyala yang menunjukkan Timer tetap berjalan
2. Apabila tidak ada pengoperasian tombol selama 30 detik, maka display Timer akan secara otomatis keluar dan kembali ke display jam utama
3. Nada pengingat akan berbunyi selama 30 detik saat Countdown Timer kembali ke posisi awal atau “0”
4. Apabila menggunakan Count Down Timer Repeat dengan perhitungan kurang dari 1 menit maka nada pengingat akan berbunyi selama 1 detik
5. Timer akan secara otomatis berhenti dan ter-reset secara otomatis saat nada mengingat berbunyi selama 30 detik, dan countdown dapat menghitung secara maksimum ( 23 jam, 59 menit, dan 59 detik)
27
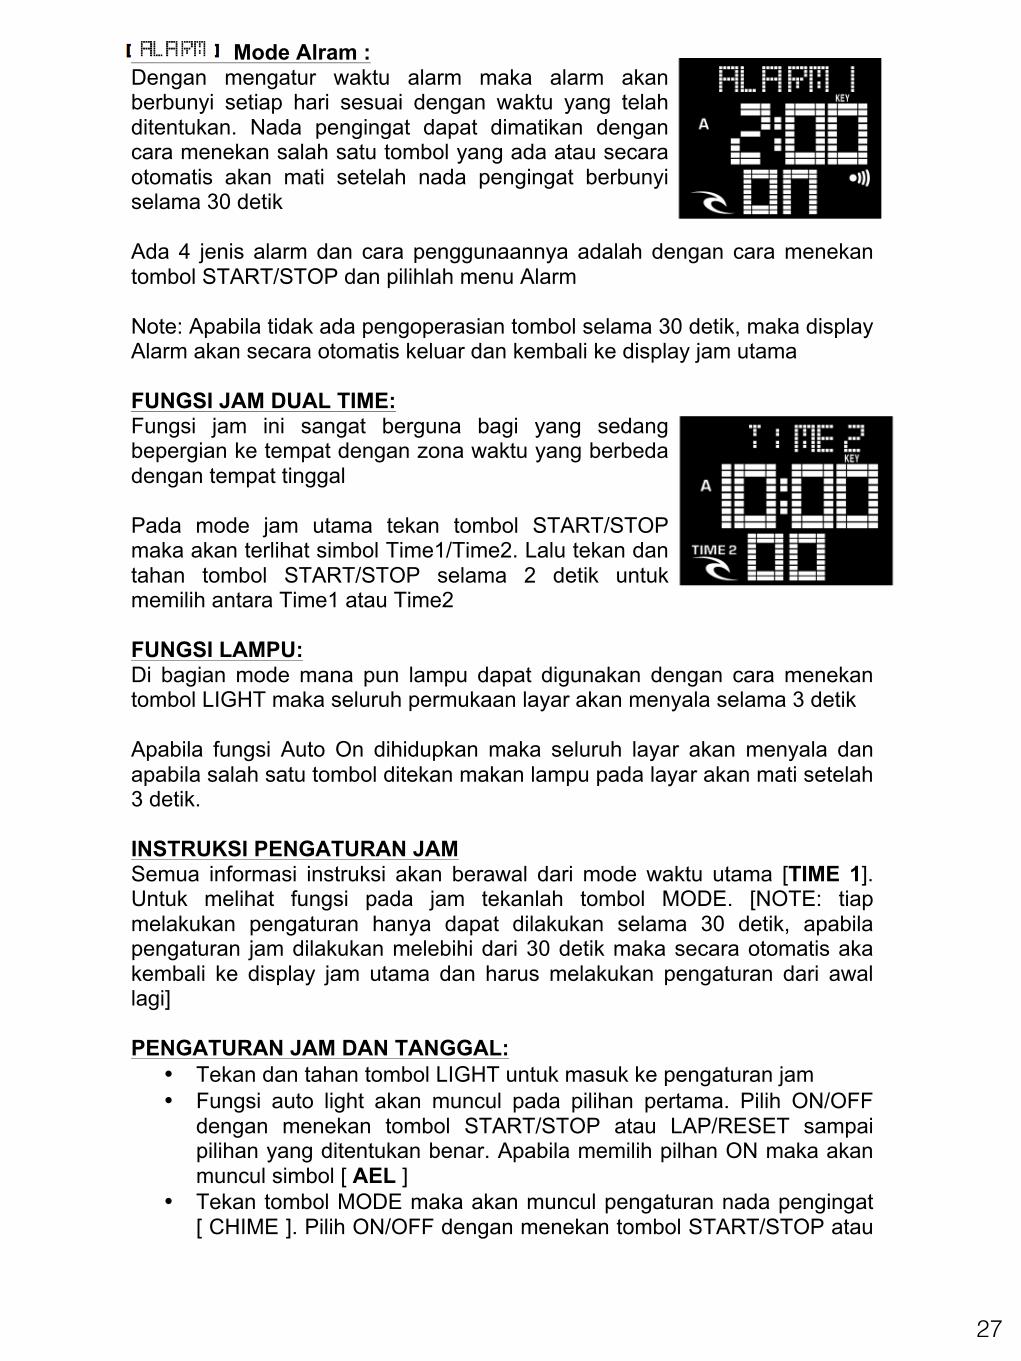
Mode Alram : Dengan mengatur waktu alarm maka alarm akan berbunyi setiap hari sesuai dengan waktu yang telah ditentukan. Nada pengingat dapat dimatikan dengan cara menekan salah satu tombol yang ada atau secara otomatis akan mati setelah nada pengingat berbunyi selama 30 detik
Ada 4 jenis alarm dan cara penggunaannya adalah dengan cara menekan tombol START/STOP dan pilihlah menu Alarm
Note: Apabila tidak ada pengoperasian tombol selama 30 detik, maka display Alarm akan secara otomatis keluar dan kembali ke display jam utama FUNGSI JAM DUAL TIME: Fungsi jam ini sangat berguna bagi yang sedang bepergian ke tempat dengan zona waktu yang berbeda dengan tempat tinggal Pada mode jam utama tekan tombol START/STOP maka akan terlihat simbol Time1/Time2. Lalu tekan dan tahan tombol START/STOP selama 2 detik untuk memilih antara Time1 atau Time2 FUNGSI LAMPU: Di bagian mode mana pun lampu dapat digunakan dengan cara menekan tombol LIGHT maka seluruh permukaan layar akan menyala selama 3 detik Apabila fungsi Auto On dihidupkan maka seluruh layar akan menyala dan apabila salah satu tombol ditekan makan lampu pada layar akan mati setelah 3 detik. INSTRUKSI PENGATURAN JAM Semua informasi instruksi akan berawal dari mode waktu utama [TIME 1]. Untuk melihat fungsi pada jam tekanlah tombol MODE. [NOTE: tiap melakukan pengaturan hanya dapat dilakukan selama 30 detik, apabila pengaturan jam dilakukan melebihi dari 30 detik maka secara otomatis aka kembali ke display jam utama dan harus melakukan pengaturan dari awal lagi] PENGATURAN JAM DAN TANGGAL:
• Tekan dan tahan tombol LIGHT untuk masuk ke pengaturan jam • Fungsi auto light akan muncul pada pilihan pertama. Pilih ON/OFF
dengan menekan tombol START/STOP atau LAP/RESET sampai pilihan yang ditentukan benar. Apabila memilih pilhan ON maka akan muncul simbol [ AEL ]
• Tekan tombol MODE maka akan muncul pengaturan nada pengingat [ CHIME ]. Pilih ON/OFF dengan menekan tombol START/STOP atau
28
LAP/RESET sampai pilihan yang ditentukan benar. Pilih On maka simbol akan muncul
• Tekan tombol MODE maka akan muncul pengaturan format jam 12/24. Pilih 12-HR (format normal AM/PM) atau 24-HR dengan cara menekan tombol START/STOP atau LAP/RESET sampai pilihan yang ditentukan benar.
• Tekan tombol MODE untuk mengatur Jam. Untuk menambahkan dan mengurangi jam cukup dengan menekan tombol START/STOP atau LAP/RESET sampai pilihan yang ditentukan benar. [Untuk melakukannya dengan cepat, tekan dan tahan tombol saat menambahkan atau mengurangi jam].
• Tekan tombol MODE untuk mengatur menit. Untuk menambahkan dan mengurangi jam cukup dengan menekan tombol START/STOP atau LAP/RESET sampai pilihan yang ditentukan benar.
• Tekan tombol MODE untuk mengatur detik. Untuk menambahkan dan mengurangi jam cukup dengan menekan tombol START/STOP atau LAP/RESET sampai pilihan yang ditentukan benar.
• Tekan tombol MODE untuk mengatur tahun. Untuk menambahkan dan mengurangi jam cukup dengan menekan tombol START/STOP atau LAP/RESET sampai pilihan yang ditentukan benar.
• Tekan tombol MODE untuk menentukan pilihan informasi bulan dan hari dan akan terdisplay simbol [ MO-DAY ]. Pilih [ MO-DAY atau [ DAY-MO ] dengan menekan tombol START/STOP atau LAP/RESET sampai pilihan yang ditentukan benar
• Tekan tombol MODE untuk mengatur bulan. Untuk menambahkan dan mengurangi jam cukup dengan menekan tombol START/STOP atau LAP/RESET sampai pilihan yang ditentukan benar.
• Tekan tombol MODE untuk mengatur hari. Untuk menambahkan dan mengurangi jam cukup dengan menekan tombol START/STOP atau LAP/RESET sampai pilihan yang ditentukan benar.
Ketika semua pengaturan sudah selesai tekan tombol LIGHT untuk menyimpan pengaturan waktu yang telah ditentukan [ TIMER ] PENGATURAN TIMER:
• Dari display utama jam, tekan tombol MODE sebanyak 2 kali
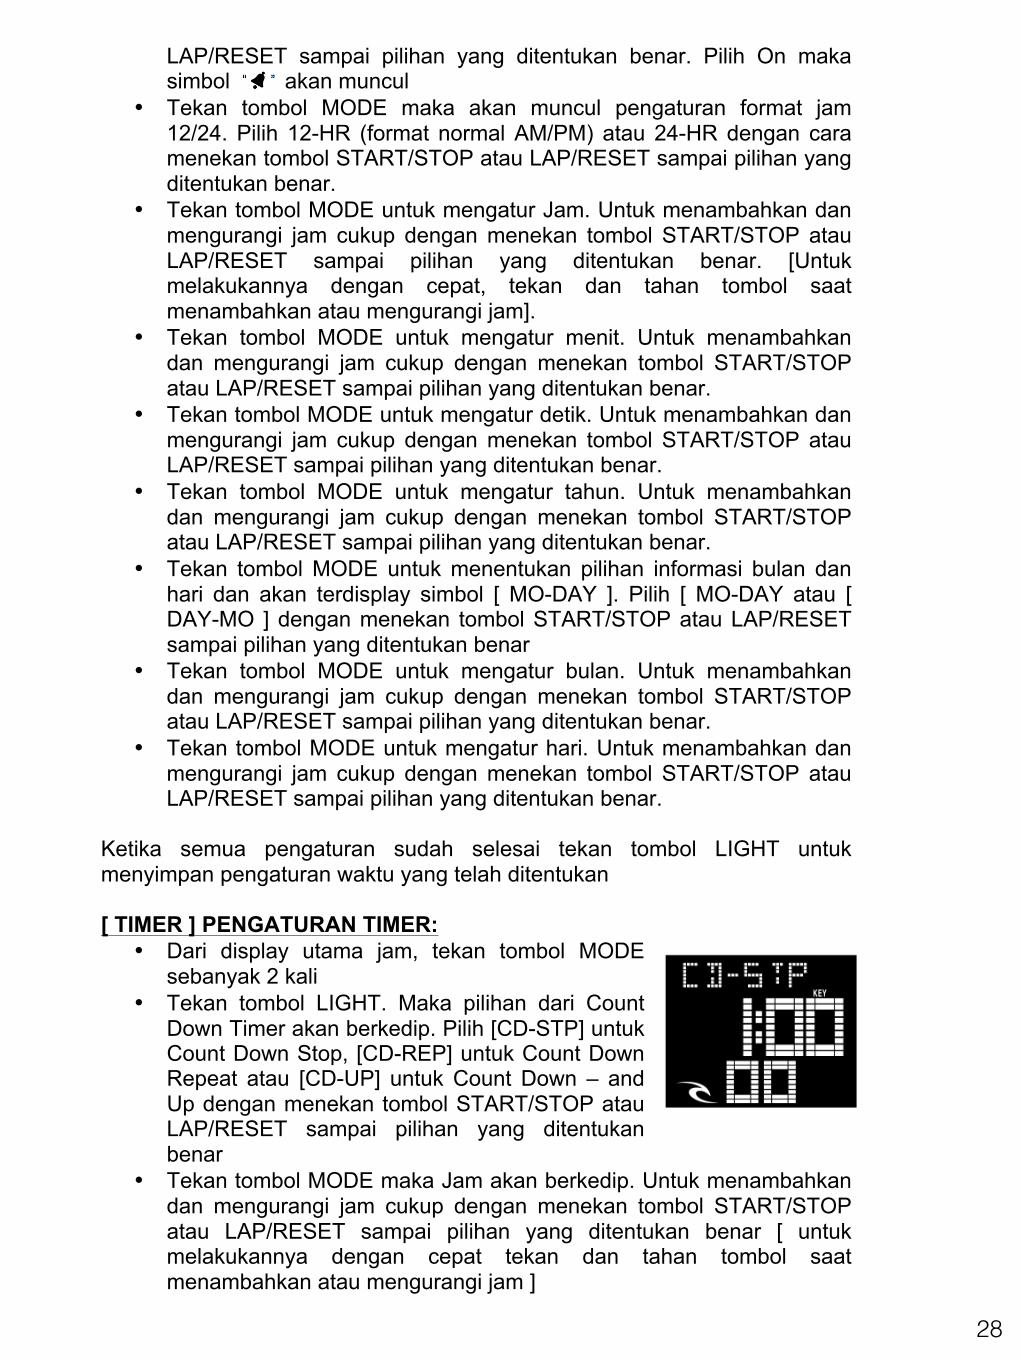
• Tekan tombol LIGHT. Maka pilihan dari Count Down Timer akan berkedip. Pilih [CD-STP] untuk Count Down Stop, [CD-REP] untuk Count Down Repeat atau [CD-UP] untuk Count Down – and Up dengan menekan tombol START/STOP atau LAP/RESET sampai pilihan yang ditentukan benar
• Tekan tombol MODE maka Jam akan berkedip. Untuk menambahkan dan mengurangi jam cukup dengan menekan tombol START/STOP atau LAP/RESET sampai pilihan yang ditentukan benar [ untuk melakukannya dengan cepat tekan dan tahan tombol saat menambahkan atau mengurangi jam ]
29
• Tekan tombol MODE untuk mengatur menit. Untuk menambahkan dan mengurangi jam cukup dengan menekan tombol START/STOP atau LAP/RESET sampai pilihan yang ditentukan benar.
• Tekan tombol MODE untuk mengatur detik. Untuk menambahkan dan mengurangi jam cukup dengan menekan tombol START/STOP atau LAP/RESET sampai pilihan yang ditentukan benar.
Ketika semua pengaturan sudah selesai tekan tombol LIGHT untuk menyimpan pengaturan waktu yang telah ditentukan [ALARM] PENGATURAN ALARM:
• Dari display utama jam tekan tombol MODE sebanyak 3 kali
• Tekan tombol START/STOP untuk memilih alarm yang akan di ataur
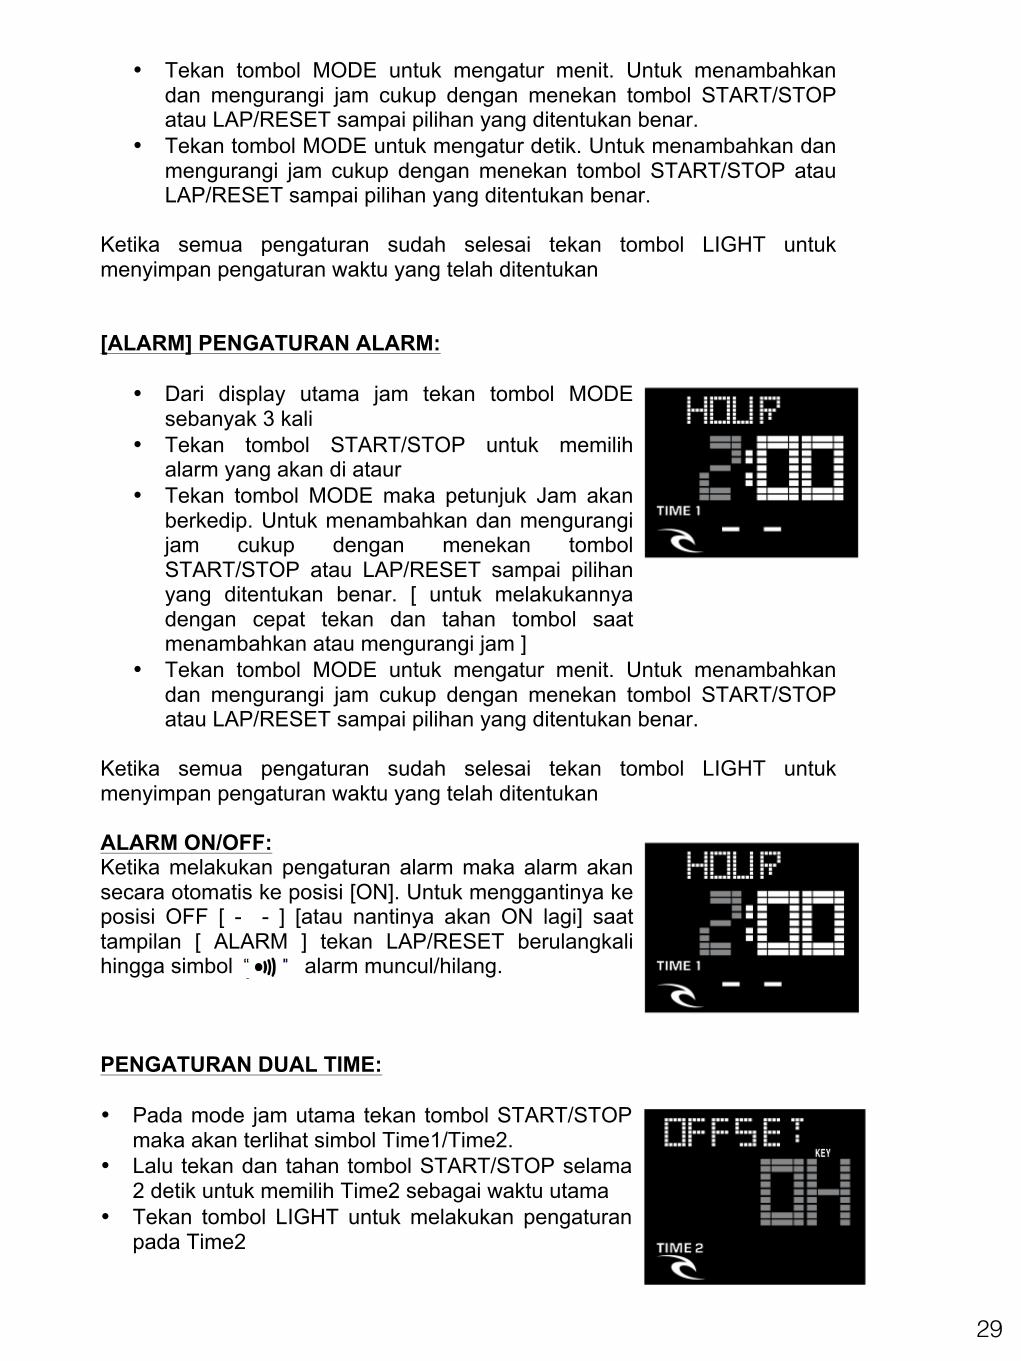
• Tekan tombol MODE maka petunjuk Jam akan berkedip. Untuk menambahkan dan mengurangi jam cukup dengan menekan tombol START/STOP atau LAP/RESET sampai pilihan yang ditentukan benar. [ untuk melakukannya dengan cepat tekan dan tahan tombol saat menambahkan atau mengurangi jam ]
• Tekan tombol MODE untuk mengatur menit. Untuk menambahkan dan mengurangi jam cukup dengan menekan tombol START/STOP atau LAP/RESET sampai pilihan yang ditentukan benar.
Ketika semua pengaturan sudah selesai tekan tombol LIGHT untuk menyimpan pengaturan waktu yang telah ditentukan ALARM ON/OFF: Ketika melakukan pengaturan alarm maka alarm akan secara otomatis ke posisi [ON]. Untuk menggantinya ke posisi OFF [ - - ] [atau nantinya akan ON lagi] saat tampilan [ ALARM ] tekan LAP/RESET berulangkali hingga simbol alarm muncul/hilang. PENGATURAN DUAL TIME: • Pada mode jam utama tekan tombol START/STOP
maka akan terlihat simbol Time1/Time2. • Lalu tekan dan tahan tombol START/STOP selama
2 detik untuk memilih Time2 sebagai waktu utama • Tekan tombol LIGHT untuk melakukan pengaturan
pada Time2
30
• Tekan tombol START/STOP atau LAP/RESET untuk menambah dan mengurangi saat melakukan pengaturan pada Time2
Ketika semua pengaturan sudah selesai tekan tombol LIGHT untuk menyimpan pengaturan waktu yang telah ditentukan.