Embed Size (px)
Citation preview


1
2
DISCLAIMER .................................................................................................................................................... 3
Why Gifting Homemade Christmas Presents Makes Sense ........................................................... 4
Make Mittens From An Old Sweater ...................................................................................................... 5
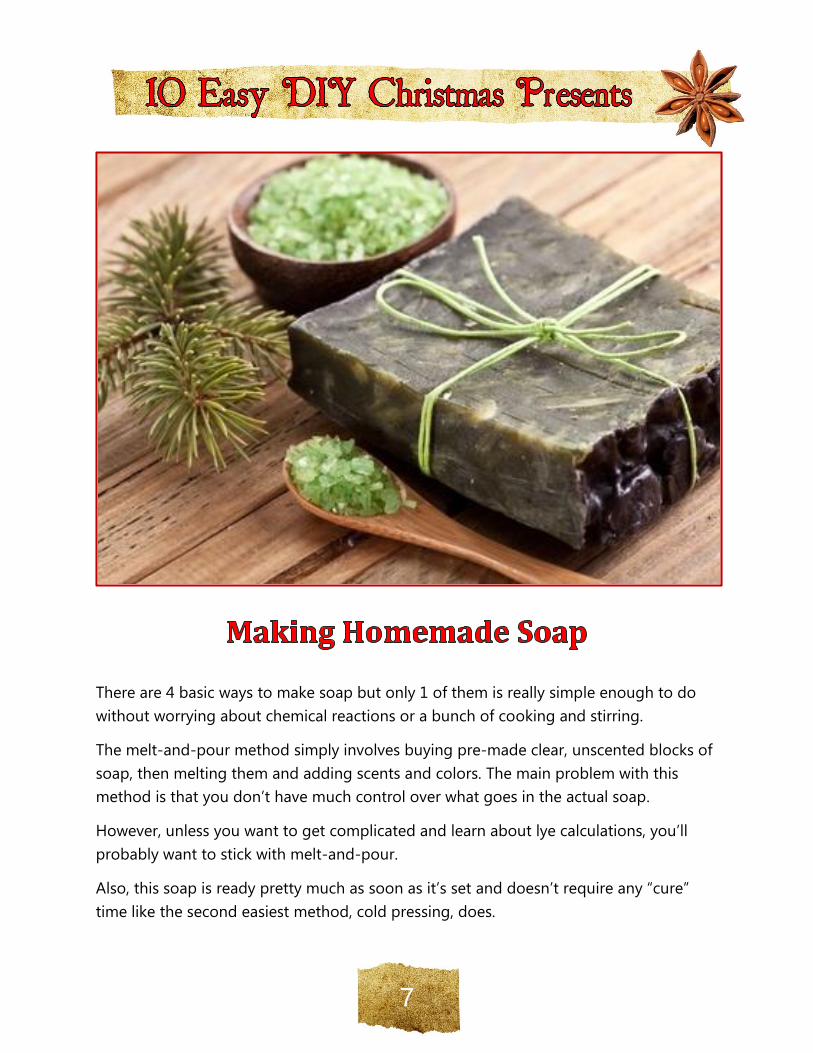
Making Homemade Soap .......................................................................................................................... 7
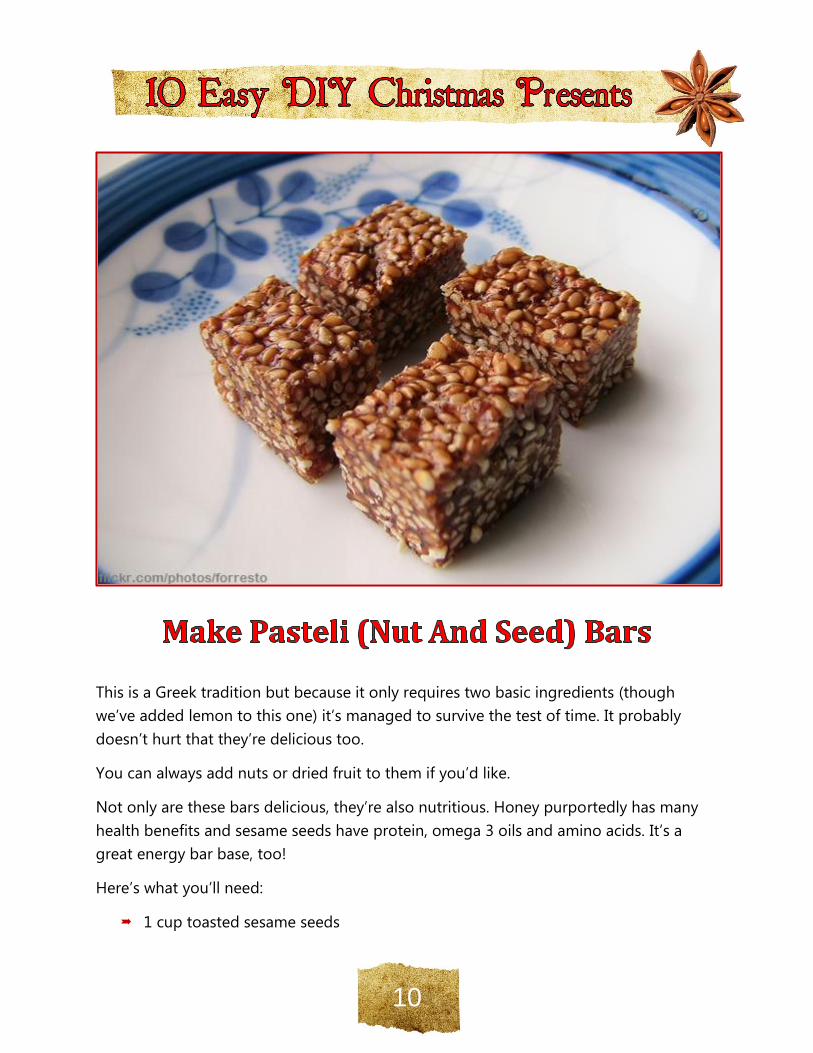
Make Pasteli (Nut And Seed) Bars ........................................................................................................ 10
Dried Soup Mixes ........................................................................................................................................ 12
Flavored Salts ................................................................................................................................................ 14
Porcini Salt ................................................................................................................................................. 14
Smoked Paprika and Ancho Chili Salt ............................................................................................. 15
Celery Salt .................................................................................................................................................. 15
Lime-Ginger Salt ...................................................................................................................................... 15
Herbs de Provence Salt ......................................................................................................................... 15
Curry Salt .................................................................................................................................................... 17
Arm Knit Blanket .......................................................................................................................................... 18
Pine Cone Fire Starters .............................................................................................................................. 21
Draft Stoppers .............................................................................................................................................. 24
Sweater Slippers .......................................................................................................................................... 27
Fingerless Gloves From Socks ................................................................................................................. 29
Final Words .................................................................................................................................................... 31
Useful Links And Sources ......................................................................................................................... 32
3
THE INFORMATION CONTAINED IN “10 EASY DIY CHRISTMAS PRESENTS” IS MEANT TO
SERVE AS A COMPREHENSIVE COLLECTION OF TIPS AND TRICKS THAT ARE ONLY
RECOMMENDATIONS BY THE AUTHORS, AND READING THIS EBOOK DOES NOT GUARANTEE
THAT ONE’S RESULTS WILL EXACTLY MIRROR OUR OWN RESULTS.
THE AUTHOR OF “10 EASY DIY CHRISTMAS PRESENTS” HAS MADE ALL REASONABLE
EFFORTS TO PROVIDE CURRENT AND ACCURATE INFORMATION FOR THE READERS OF THIS
COURSE. THE AUTHOR WILL NOT BE HELD LIABLE FOR ANY UNINTENTIONAL ERRORS OR
OMISSIONS THAT MAY BE FOUND.
THE MATERIAL IN “10 EASY DIY CHRISTMAS PRESENTS” MAY INCLUDE INFORMATION,
PRODUCTS, OR SERVICES BY THIRD PARTIES. THIRD PARTY MATERIALS COMPRISE OF THE
PRODUCTS AND OPINIONS EXPRESSED BY THEIR OWNERS. AS SUCH, THE AUTHORS OF THIS
GUIDE DO NOT ASSUME RESPONSIBILITY OR LIABILITY FOR ANY THIRD PARTY MATERIAL OR
OPINIONS.THE PUBLICATION OF SUCH THIRD PARTY MATERIALS DOES NOT CONSTITUTE THE
AUTHORS’ GUARANTEE OF ANY INFORMATION, INSTRUCTION, OPINION, PRODUCTS OR
SERVICE CONTAINED WITHIN THE THIRD PARTY MATERIAL.
WHETHER BECAUSE OF THE GENERAL EVOLUTION OF THE INTERNET, OR THE UNFORESEEN
CHANGES IN COMPANY POLICY AND EDITORIAL SUBMISSION GUIDELINES, WHAT IS STATED
AS FACT AT THE TIME OF THIS WRITING, MAY BECOME OUTDATED OR SIMPLY INAPPLICABLE
AT A LATER DATE. THIS MAY APPLY TO THE “10 EASY DIY CHRISTMAS PRESENTS” AS WELL
AS THE VARIOUS SIMILAR COMPANIES THAT WEHAVE REFERENCED IN THIS EBOOK, AND OUR
SEVERAL COMPLEMENTARY GUIDES. GREAT EFFORT HAS BEEN EXERTED TO SAFEGUARD THE
ACCURACY OF THIS WRITING. OPINIONS REGARDING SIMILAR WEBSITE PLATFORMS HAVE
BEEN FORMULATED AS A RESULT OF BOTH PERSONAL EXPERIENCE, AS WELL AS THE WELL
DOCUMENTED EXPERIENCES OF OTHERS.
NO PART OF THIS PUBLICATION SHALL BE REPRODUCED OR SOLD BY ANY ELECTRONIC,
MECHANICAL OR OTHER MEANS WITHOUT THE WRITTEN PERMISSION OF THE AUTHORS. ANY
AND ALL REQUESTS FOR SUCH PERMISSION SHOULD BE SENT BY TO
COPYRIGHT 2014 SURVIVOPEDIA™, “10 EASY DIY CHRISTMAS PRESENTS”

4
Making your own Christmas presents has several benefits. First and foremost, people
love it when you take the time to make something for them. Some people are even
touched more by the effort that you put into the gift than the actual gift itself!
Making DIY Christmas presents is often cheaper and you get to exercise your creativity
in a way that makes both you and your loved ones happy.
Just because you’ve never made gifts for Christmas before doesn’t mean that you can’t
start now. Every single project on this page is easy enough that you can do it right now
with excellent results.
As with everything though, the first couple projects that you complete may be a bit
rougher than later ones. If so, just consider them your warm-up and move on.
The fun thing about crafting is that the more you do it, the better you get!
Let’s get started!
5
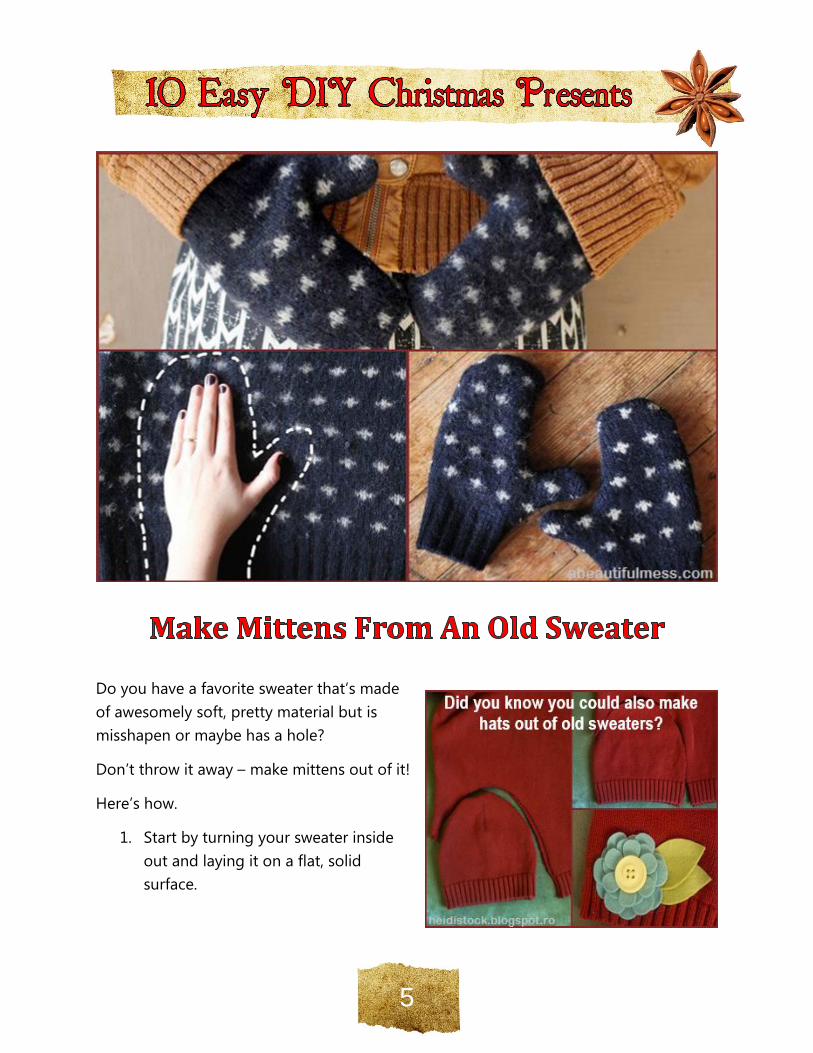
Do you have a favorite sweater that’s made
of awesomely soft, pretty material but is
misshapen or maybe has a hole?
Don’t throw it away – make mittens out of it!
Here’s how.
1. Start by turning your sweater inside
out and laying it on a flat, solid
surface.
6
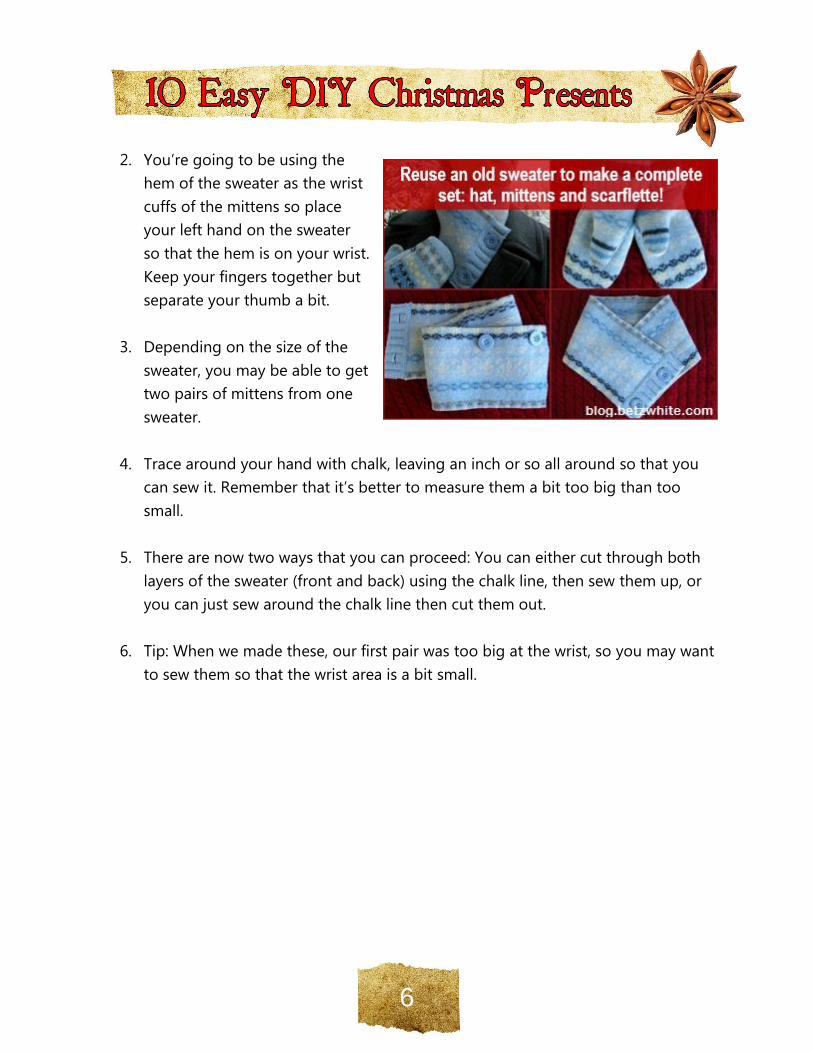
2. You’re going to be using the
hem of the sweater as the wrist
cuffs of the mittens so place
your left hand on the sweater
so that the hem is on your wrist.
Keep your fingers together but
separate your thumb a bit.
3. Depending on the size of the
sweater, you may be able to get
two pairs of mittens from one
sweater.
4. Trace around your hand with chalk, leaving an inch or so all around so that you
can sew it. Remember that it’s better to measure them a bit too big than too
small.
5. There are now two ways that you can proceed: You can either cut through both
layers of the sweater (front and back) using the chalk line, then sew them up, or
you can just sew around the chalk line then cut them out.
6. Tip: When we made these, our first pair was too big at the wrist, so you may want
to sew them so that the wrist area is a bit small.
7
There are 4 basic ways to make soap but only 1 of them is really simple enough to do
without worrying about chemical reactions or a bunch of cooking and stirring.
The melt-and-pour method simply involves buying pre-made clear, unscented blocks of
soap, then melting them and adding scents and colors. The main problem with this
method is that you don’t have much control over what goes in the actual soap.
However, unless you want to get complicated and learn about lye calculations, you’ll
probably want to stick with melt-and-pour.
Also, this soap is ready pretty much as soon as it’s set and doesn’t require any “cure”
time like the second easiest method, cold pressing, does.
8
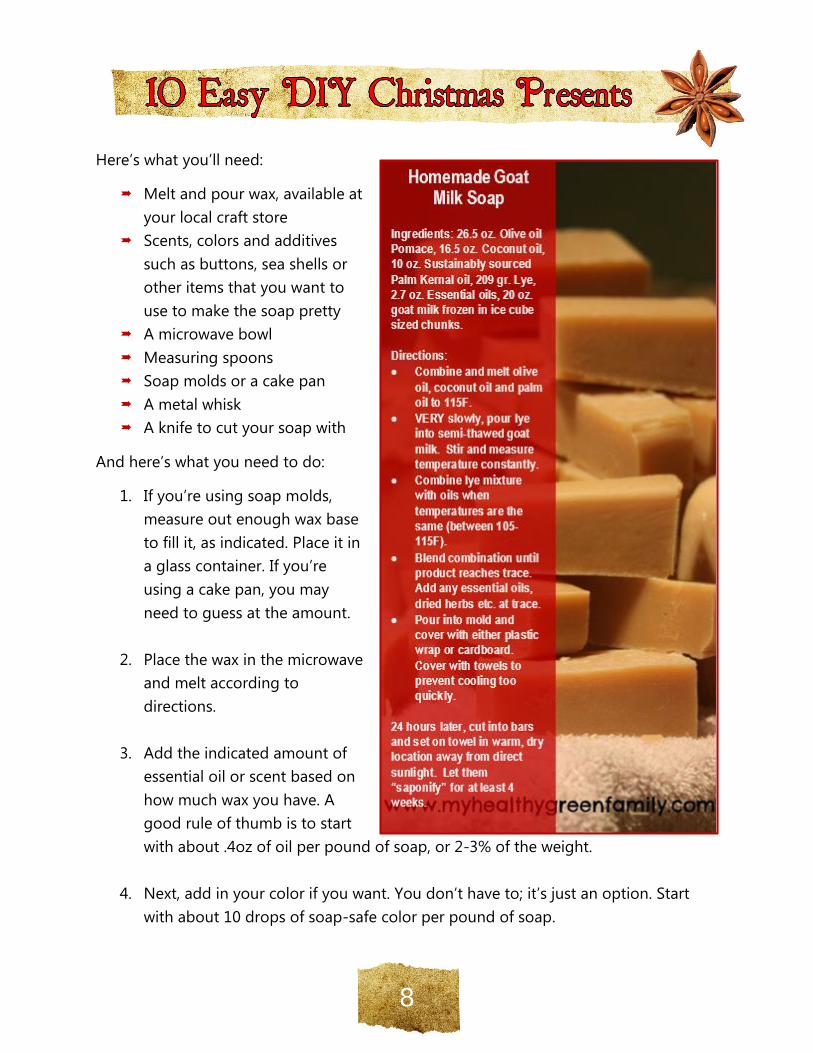
Here’s what you’ll need:
Melt and pour wax, available at
your local craft store
Scents, colors and additives
such as buttons, sea shells or
other items that you want to
use to make the soap pretty
A microwave bowl
Measuring spoons
Soap molds or a cake pan
A metal whisk
A knife to cut your soap with
And here’s what you need to do:
1. If you’re using soap molds,
measure out enough wax base
to fill it, as indicated. Place it in
a glass container. If you’re
using a cake pan, you may
need to guess at the amount.
2. Place the wax in the microwave
and melt according to
directions.
3. Add the indicated amount of
essential oil or scent based on
how much wax you have. A
good rule of thumb is to start
with about .4oz of oil per pound of soap, or 2-3% of the weight.
4. Next, add in your color if you want. You don’t have to; it’s just an option. Start
with about 10 drops of soap-safe color per pound of soap.
9
5. Whisk well to ensure that it’s blended.
6. Pour the soap into your molds or pan.
7. As soon as it’s hard you can pop them out of the molds and enjoy!
Tip: If you can’t get a bar to release from the mold, just run the bottom under a
bit of hot water for a minute or so.
Now you have soap and you can decorate it however you’d like. Tying ribbon around it
is really pretty yet simple.
10
This is a Greek tradition but because it only requires two basic ingredients (though
we’ve added lemon to this one) it’s managed to survive the test of time. It probably
doesn’t hurt that they’re delicious too.
You can always add nuts or dried fruit to them if you’d like.
Not only are these bars delicious, they’re also nutritious. Honey purportedly has many
health benefits and sesame seeds have protein, omega 3 oils and amino acids. It’s a
great energy bar base, too!
Here’s what you’ll need:
1 cup toasted sesame seeds
11
3/4 cup honey
1 t lemon juice
And all you have to do is follow the steps below:
1. If you haven’t already toasted the sesame seeds, toss them in a pan and heat on
low until they’re just starting to brown. Remove from heat and put them in a
small bowl until step 3.
2. Add honey and lemon juice and stir to blend. Bring to a simmer and stir
constantly for 5 minutes.
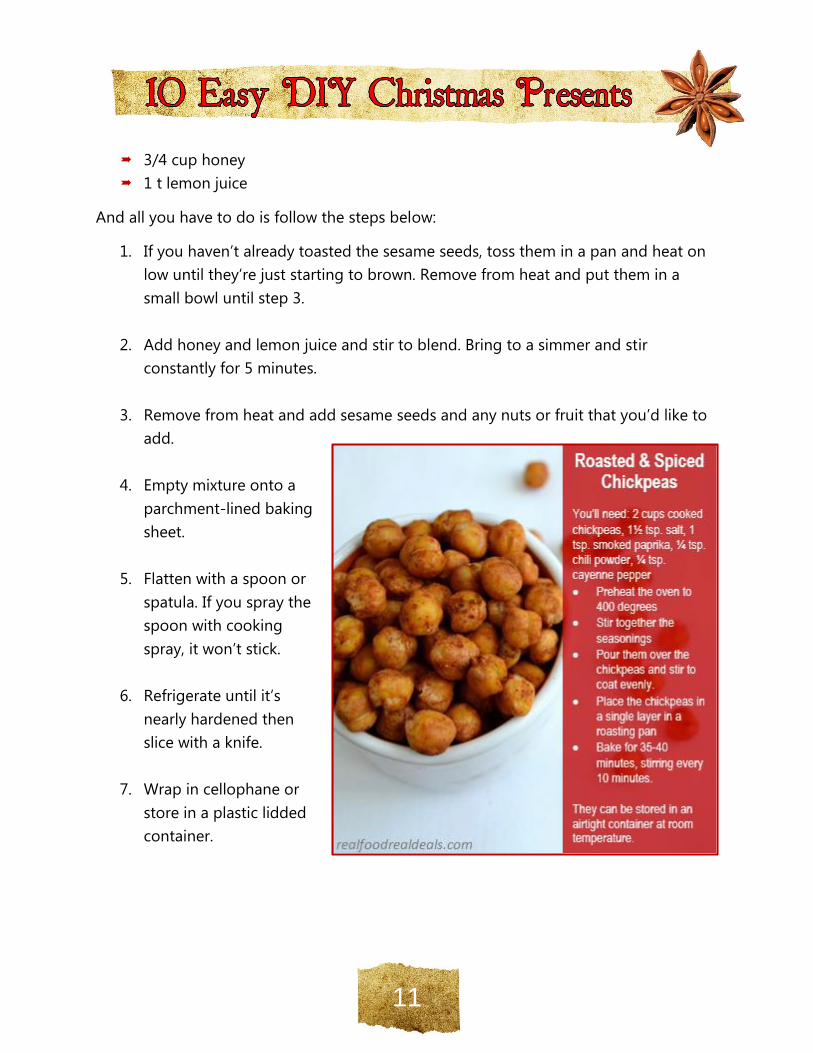
3. Remove from heat and add sesame seeds and any nuts or fruit that you’d like to
add.
4. Empty mixture onto a
parchment-lined baking
sheet.
5. Flatten with a spoon or
spatula. If you spray the
spoon with cooking
spray, it won’t stick.
6. Refrigerate until it’s
nearly hardened then
slice with a knife.
7. Wrap in cellophane or
store in a plastic lidded
container.
12
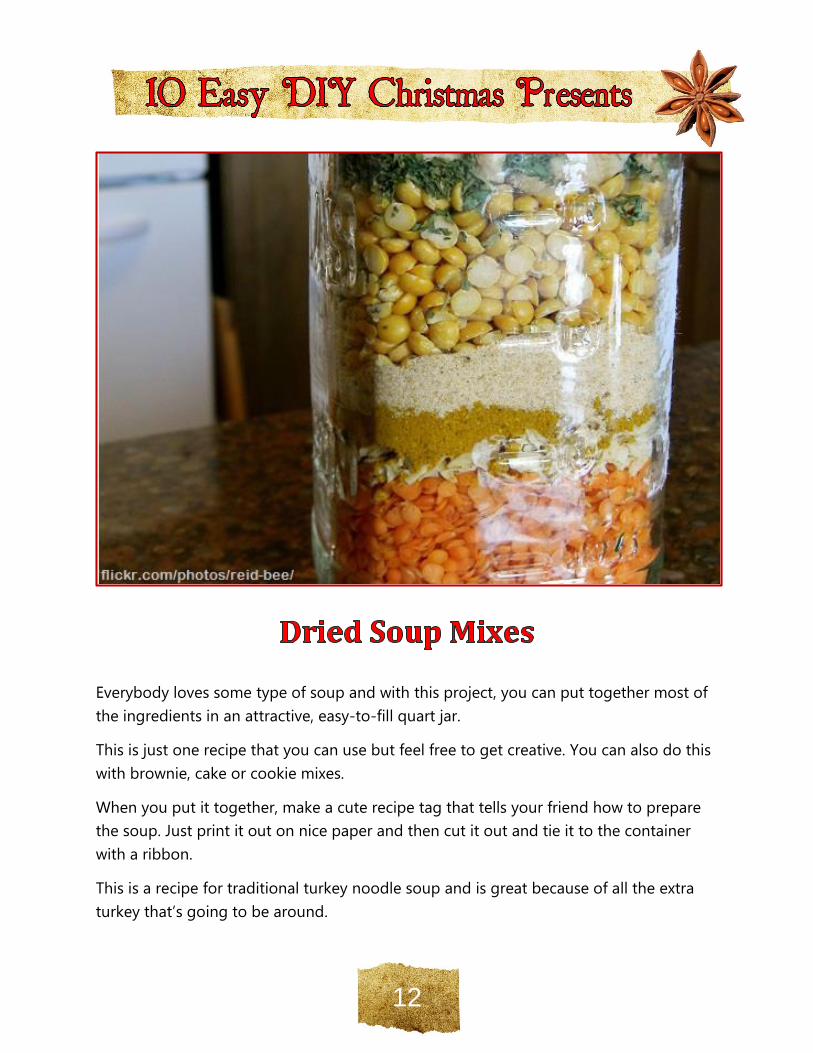
Everybody loves some type of soup and with this project, you can put together most of
the ingredients in an attractive, easy-to-fill quart jar.
This is just one recipe that you can use but feel free to get creative. You can also do this
with brownie, cake or cookie mixes.
When you put it together, make a cute recipe tag that tells your friend how to prepare
the soup. Just print it out on nice paper and then cut it out and tie it to the container
with a ribbon.
This is a recipe for traditional turkey noodle soup and is great because of all the extra
turkey that’s going to be around.
13
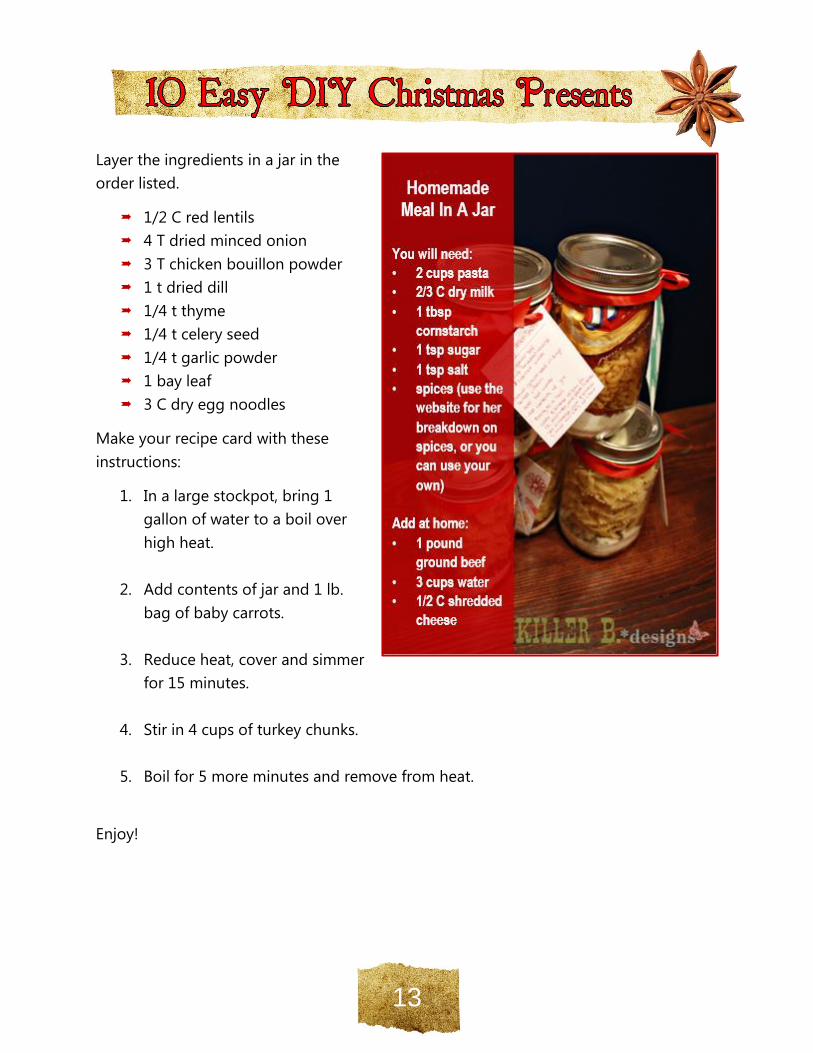
Layer the ingredients in a jar in the
order listed.
1/2 C red lentils
4 T dried minced onion
3 T chicken bouillon powder
1 t dried dill
1/4 t thyme
1/4 t celery seed
1/4 t garlic powder
1 bay leaf
3 C dry egg noodles
Make your recipe card with these
instructions:
1. In a large stockpot, bring 1
gallon of water to a boil over
high heat.
2. Add contents of jar and 1 lb.
bag of baby carrots.
3. Reduce heat, cover and simmer
for 15 minutes.
4. Stir in 4 cups of turkey chunks.
5. Boil for 5 more minutes and remove from heat.
Enjoy!
14
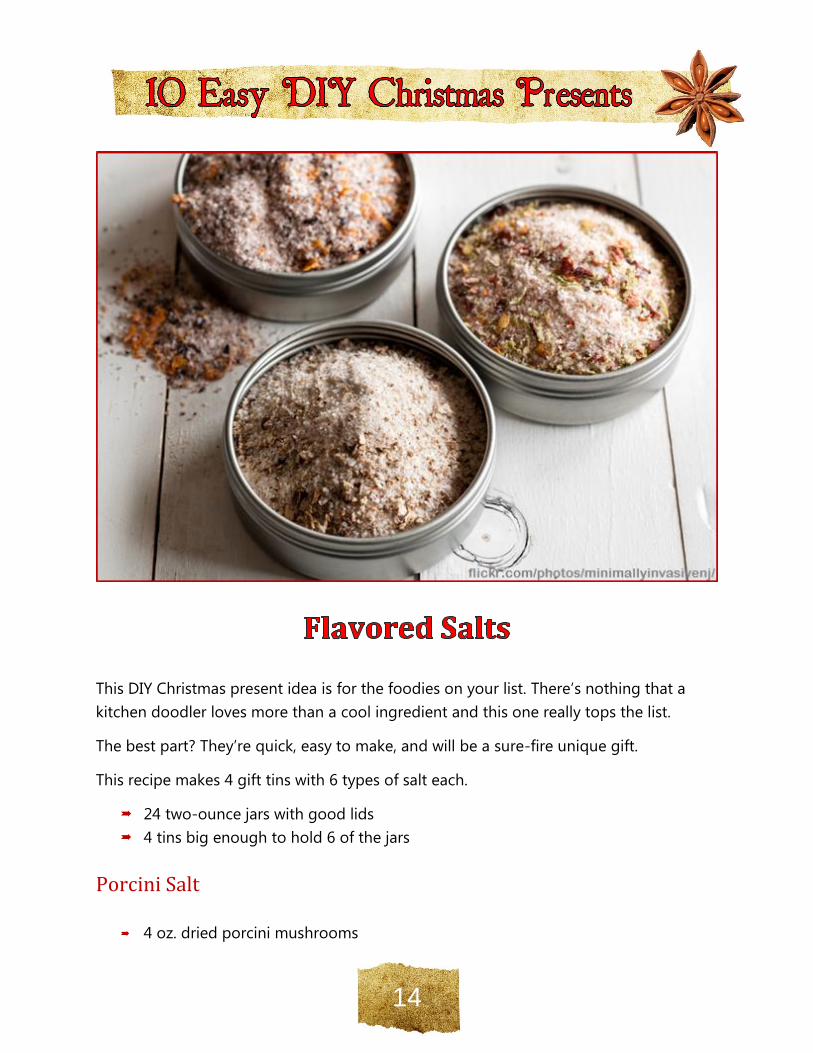
This DIY Christmas present idea is for the foodies on your list. There’s nothing that a
kitchen doodler loves more than a cool ingredient and this one really tops the list.
The best part? They’re quick, easy to make, and will be a sure-fire unique gift.
This recipe makes 4 gift tins with 6 types of salt each.
24 two-ounce jars with good lids
4 tins big enough to hold 6 of the jars
Porcini Salt
4 oz. dried porcini mushrooms
15
1 C fine sea salt
Grind porcinis in a spice grinder until finely ground. Combine in a bowl with the salt
then divide among the jars.
Smoked Paprika and Ancho Chili Salt
4 dried ancho chiles
1/4 C smoked paprika
3/4 C fine sea salt
Remove the stems and seeds from the peppers. Break into pieces and grind finely in
spice mill or food processor. Combine in a bowl with the paprika and salt, then divide
among jars.
Celery Salt
4 heads celery, leaves only
1 C fine sea salt
Grind the celery leaves in a spice mill until finely ground. Combine with salt in a bowl
and divide among the jars.
Lime-Ginger Salt
Zest of 6 limes (about 1/2 cup)
3 T ground ginger
1 C fine sea salt
Spread lime zest across a baking sheet and let it dry for several hours or overnight.
Combine with the ginger and sea salt and divide among the jars.
Herbs de Provence Salt
1/2 C herbs de Provence
6 T dried lavender
16
3/4 C fine sea salt
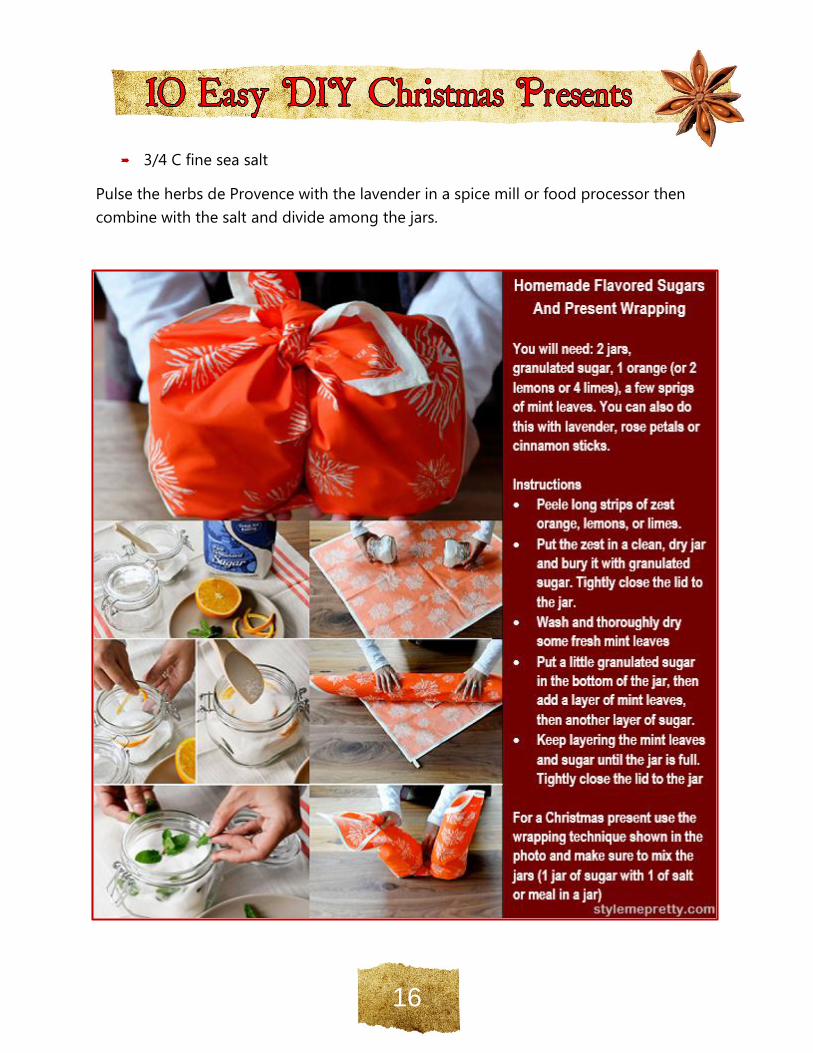
Pulse the herbs de Provence with the lavender in a spice mill or food processor then
combine with the salt and divide among the jars.

17
Curry Salt
12 medium dried bay leaves
1/4 C garam masala
1/4 C curry powder
2 t ground cumin
1/2 C fine sea salt
Break the bay leaves into small pieces and pulse in a spice mill. Combine with other
ingredients and divide among the jars.
Make sure that the jars are well-sealed.
Make a pretty label for them and pack them with confetti into the tins.
18
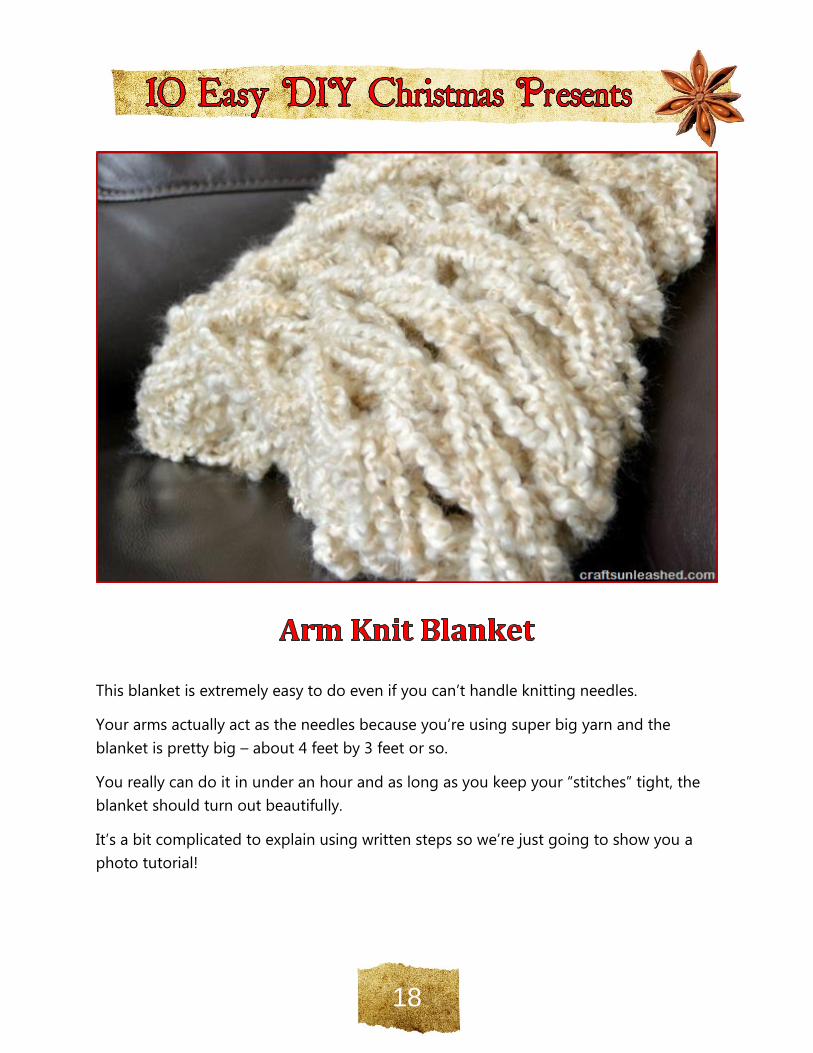
This blanket is extremely easy to do even if you can’t handle knitting needles.
Your arms actually act as the needles because you’re using super big yarn and the
blanket is pretty big – about 4 feet by 3 feet or so.
You really can do it in under an hour and as long as you keep your “stitches” tight, the
blanket should turn out beautifully.
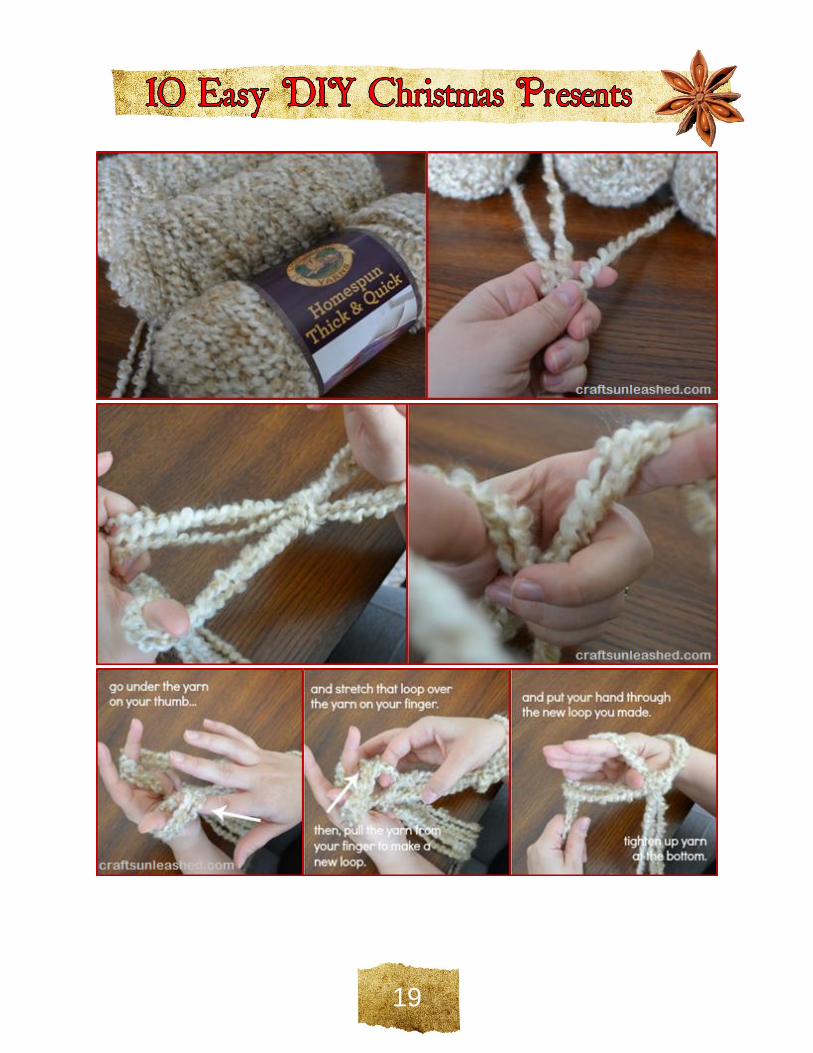
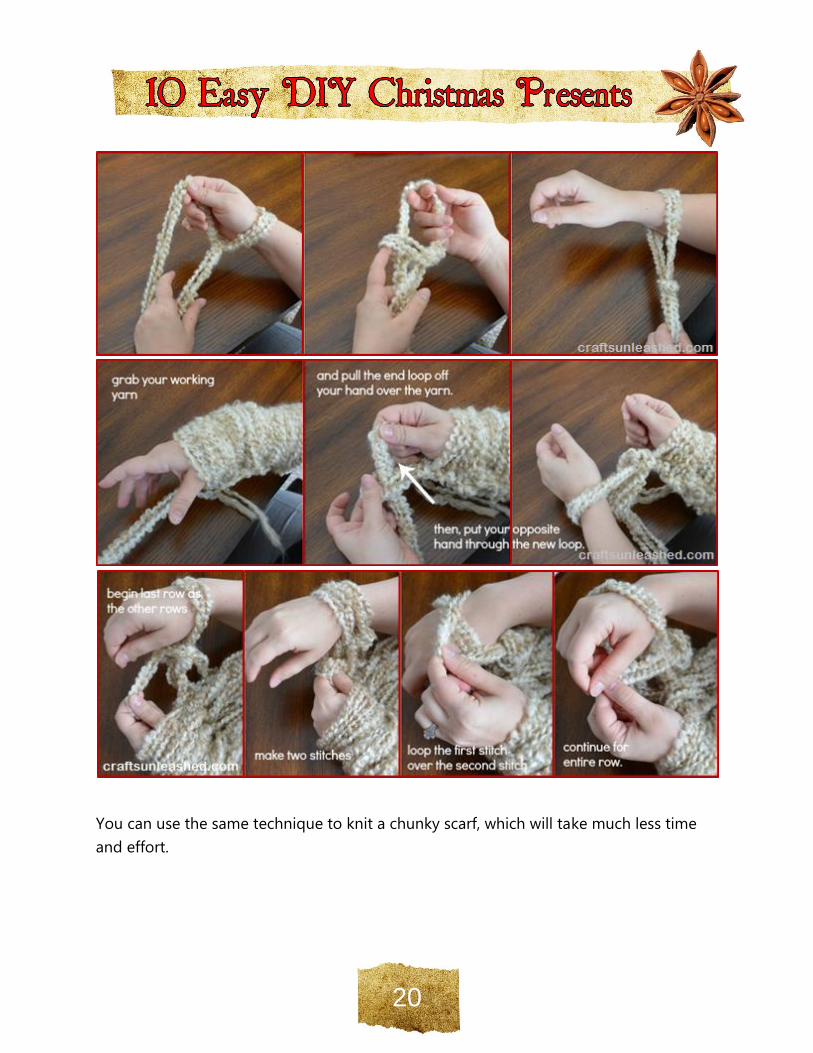
It’s a bit complicated to explain using written steps so we’re just going to show you a
photo tutorial!
19
20
You can use the same technique to knit a chunky scarf, which will take much less time
and effort.
21
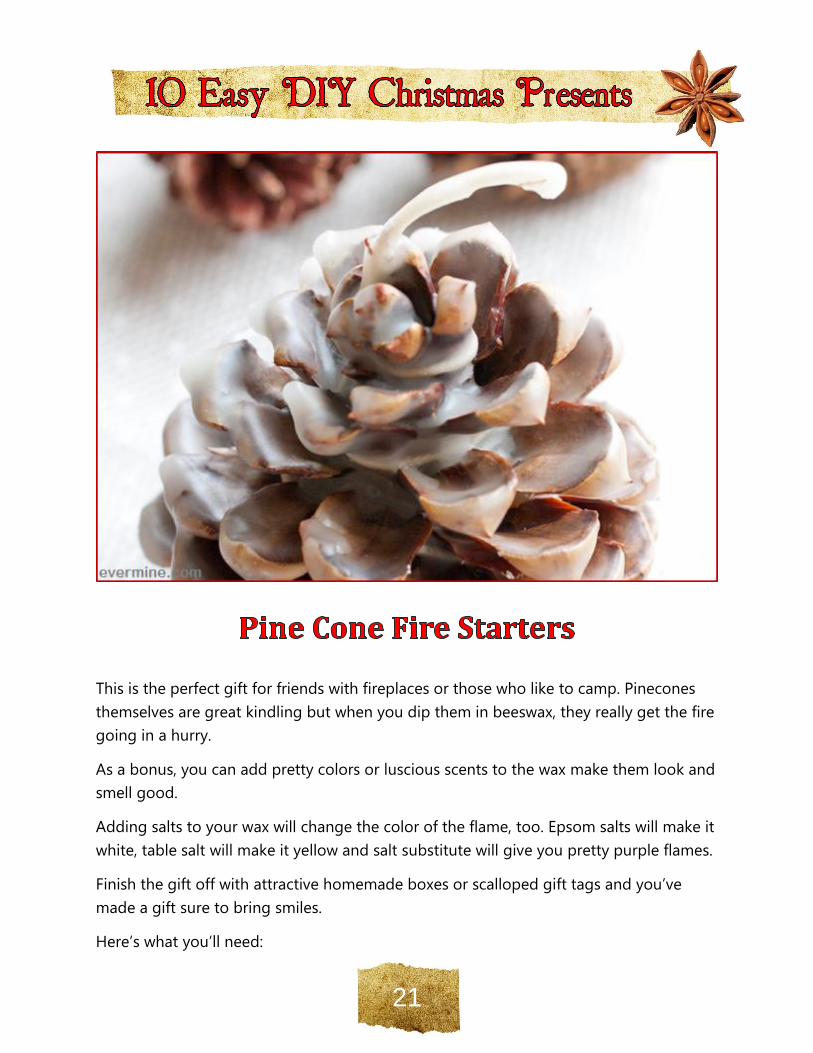
This is the perfect gift for friends with fireplaces or those who like to camp. Pinecones
themselves are great kindling but when you dip them in beeswax, they really get the fire
going in a hurry.
As a bonus, you can add pretty colors or luscious scents to the wax make them look and
smell good.
Adding salts to your wax will change the color of the flame, too. Epsom salts will make it
white, table salt will make it yellow and salt substitute will give you pretty purple flames.
Finish the gift off with attractive homemade boxes or scalloped gift tags and you’ve
made a gift sure to bring smiles.
Here’s what you’ll need:
22
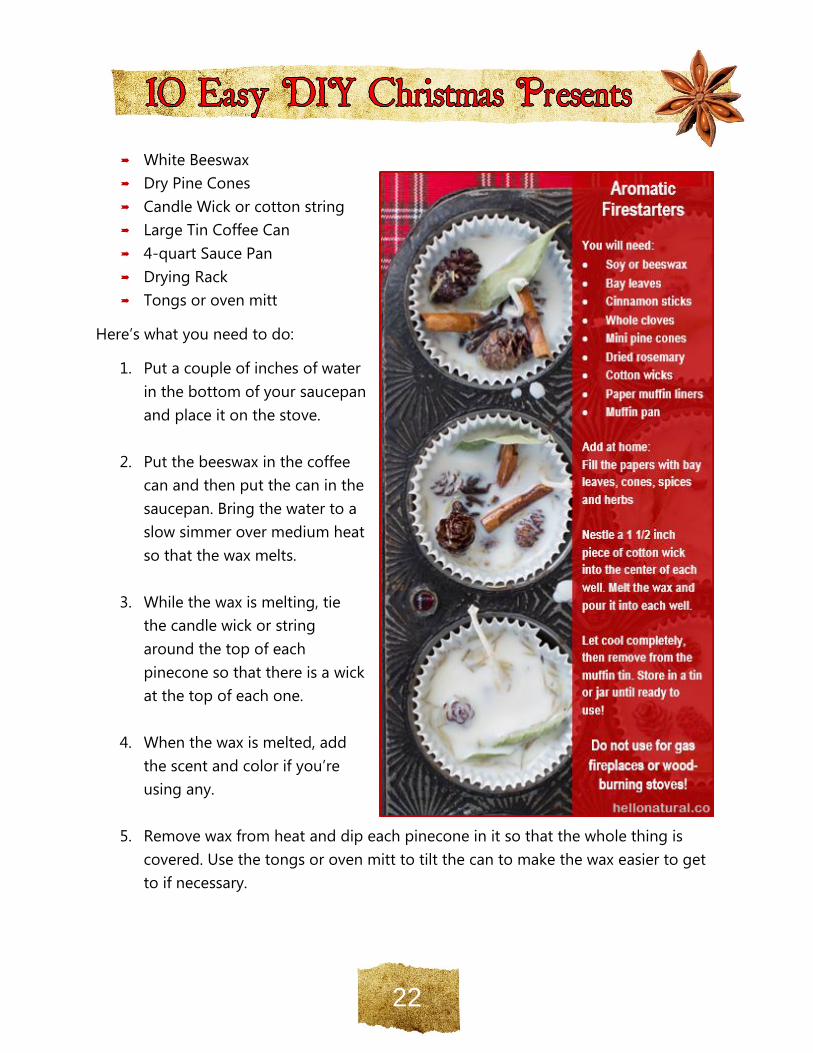
White Beeswax
Dry Pine Cones
Candle Wick or cotton string
Large Tin Coffee Can
4-quart Sauce Pan
Drying Rack
Tongs or oven mitt
Here’s what you need to do:
1. Put a couple of inches of water
in the bottom of your saucepan
and place it on the stove.
2. Put the beeswax in the coffee
can and then put the can in the
saucepan. Bring the water to a
slow simmer over medium heat
so that the wax melts.
3. While the wax is melting, tie
the candle wick or string
around the top of each
pinecone so that there is a wick
at the top of each one.
4. When the wax is melted, add
the scent and color if you’re
using any.
5. Remove wax from heat and dip each pinecone in it so that the whole thing is
covered. Use the tongs or oven mitt to tilt the can to make the wax easier to get
to if necessary.
23
6. Set each pinecone on the drying rack and dip once or twice more in order to get
a good coating of wax.
7. If you’re going to add salt, sprinkle it on when the wax is still wet.
8. Make a tag or box for each one that says what it is along with your name or
whatever else you’d like to add.
24
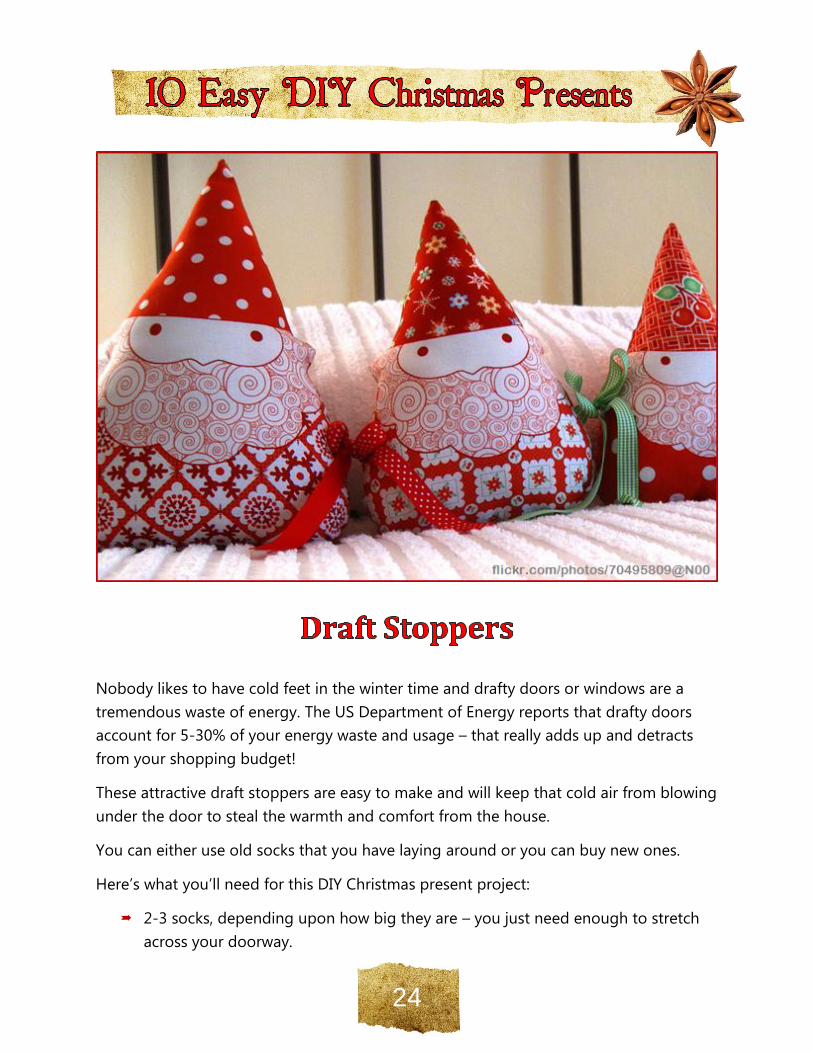
Nobody likes to have cold feet in the winter time and drafty doors or windows are a
tremendous waste of energy. The US Department of Energy reports that drafty doors
account for 5-30% of your energy waste and usage – that really adds up and detracts
from your shopping budget!
These attractive draft stoppers are easy to make and will keep that cold air from blowing
under the door to steal the warmth and comfort from the house.
You can either use old socks that you have laying around or you can buy new ones.
Here’s what you’ll need for this DIY Christmas present project:
2-3 socks, depending upon how big they are – you just need enough to stretch
across your doorway.
25
Stuffing. You can use quilt batting, polyester fill or old stuffing from pillows or old
stuffed animals that you have around the house. You could even use cut up old t-
shirts if you’d like.
Popcorn kernels or dried beans
Plastic disposable cup with the bottom cut out or a funnel
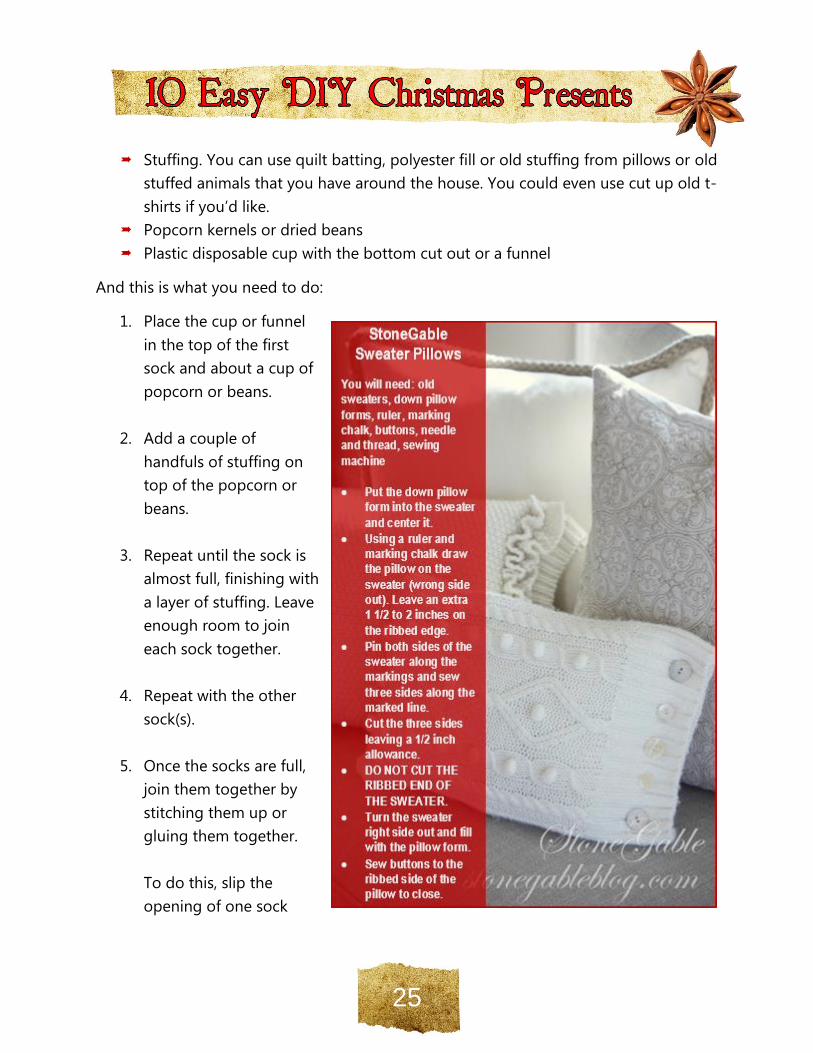
And this is what you need to do:
1. Place the cup or funnel
in the top of the first
sock and about a cup of
popcorn or beans.
2. Add a couple of
handfuls of stuffing on
top of the popcorn or
beans.
3. Repeat until the sock is
almost full, finishing with
a layer of stuffing. Leave
enough room to join
each sock together.
4. Repeat with the other
sock(s).
5. Once the socks are full,
join them together by
stitching them up or
gluing them together.
To do this, slip the
opening of one sock
26
over the toe of the other, like you’re putting a sock on your sock! I personally like
glue because I’m not a big fan of needle and thread.
6. Try it out by placing it in front of your door – you won’t feel even the tiniest draft
now.
7. Make another one, because you’re going to want to keep the first one for
yourself
Tip: If you don’t want to use socks, you can also use a piece of fabric that you buy
or that you have around. Just measure it to be a few inches longer than the door,
cut it to be about 10 inches wide. Fold it in half lengthways inside out. Sew (or
glue) each end together. Sew or glue the long seam but leave about 6 inches
open in the middle – that’s how you’ll stuff it. Turn it back right-side-out and stuff
as directed above. Sew or glue the opening and voila!
27
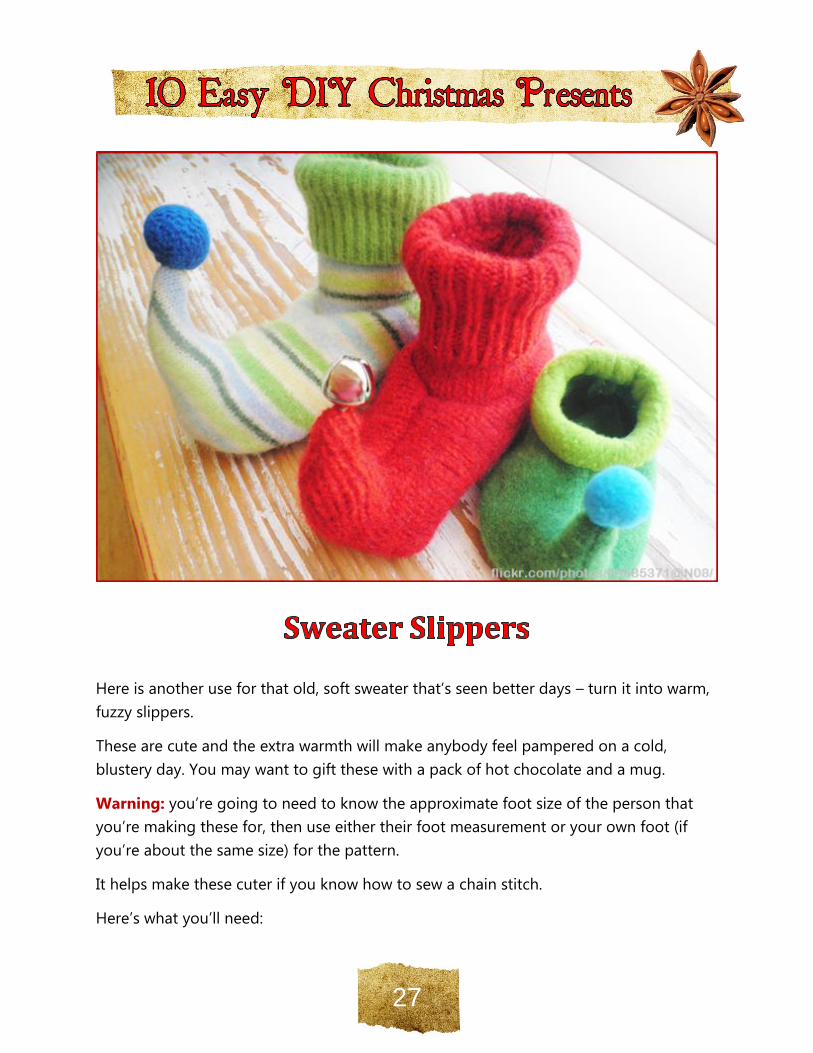
Here is another use for that old, soft sweater that’s seen better days – turn it into warm,
fuzzy slippers.
These are cute and the extra warmth will make anybody feel pampered on a cold,
blustery day. You may want to gift these with a pack of hot chocolate and a mug.
Warning: you’re going to need to know the approximate foot size of the person that
you’re making these for, then use either their foot measurement or your own foot (if
you’re about the same size) for the pattern.
It helps make these cuter if you know how to sew a chain stitch.
Here’s what you’ll need:
28
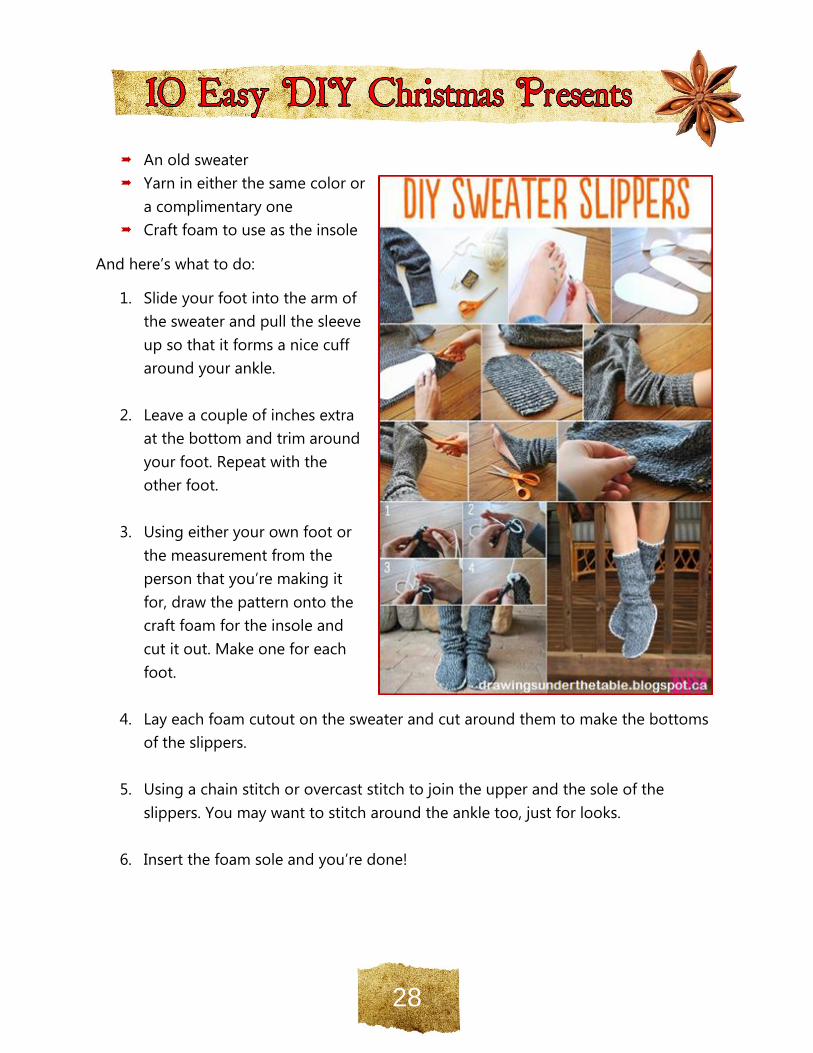
An old sweater
Yarn in either the same color or
a complimentary one
Craft foam to use as the insole
And here’s what to do:
1. Slide your foot into the arm of
the sweater and pull the sleeve
up so that it forms a nice cuff
around your ankle.
2. Leave a couple of inches extra
at the bottom and trim around
your foot. Repeat with the
other foot.
3. Using either your own foot or
the measurement from the
person that you’re making it
for, draw the pattern onto the
craft foam for the insole and
cut it out. Make one for each
foot.
4. Lay each foam cutout on the sweater and cut around them to make the bottoms
of the slippers.
5. Using a chain stitch or overcast stitch to join the upper and the sole of the
slippers. You may want to stitch around the ankle too, just for looks.
6. Insert the foam sole and you’re done!
29
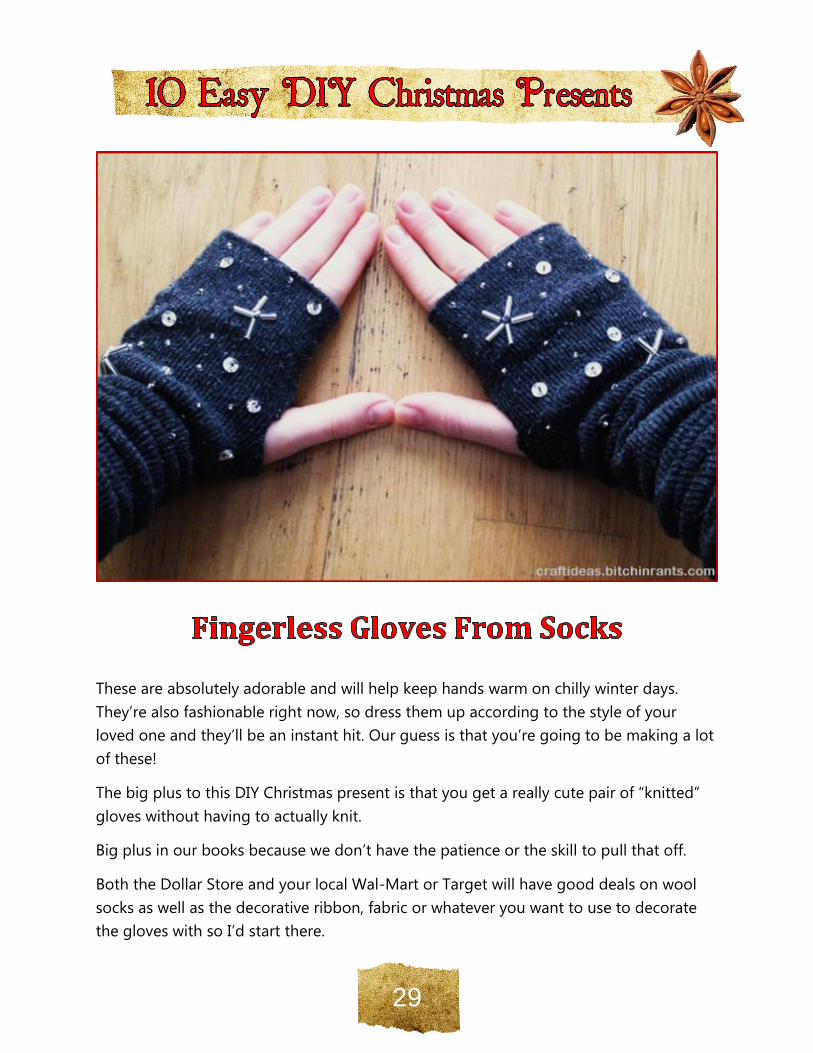
These are absolutely adorable and will help keep hands warm on chilly winter days.
They’re also fashionable right now, so dress them up according to the style of your
loved one and they’ll be an instant hit. Our guess is that you’re going to be making a lot
of these!
The big plus to this DIY Christmas present is that you get a really cute pair of “knitted”
gloves without having to actually knit.
Big plus in our books because we don’t have the patience or the skill to pull that off.
Both the Dollar Store and your local Wal-Mart or Target will have good deals on wool
socks as well as the decorative ribbon, fabric or whatever you want to use to decorate
the gloves with so I’d start there.
30
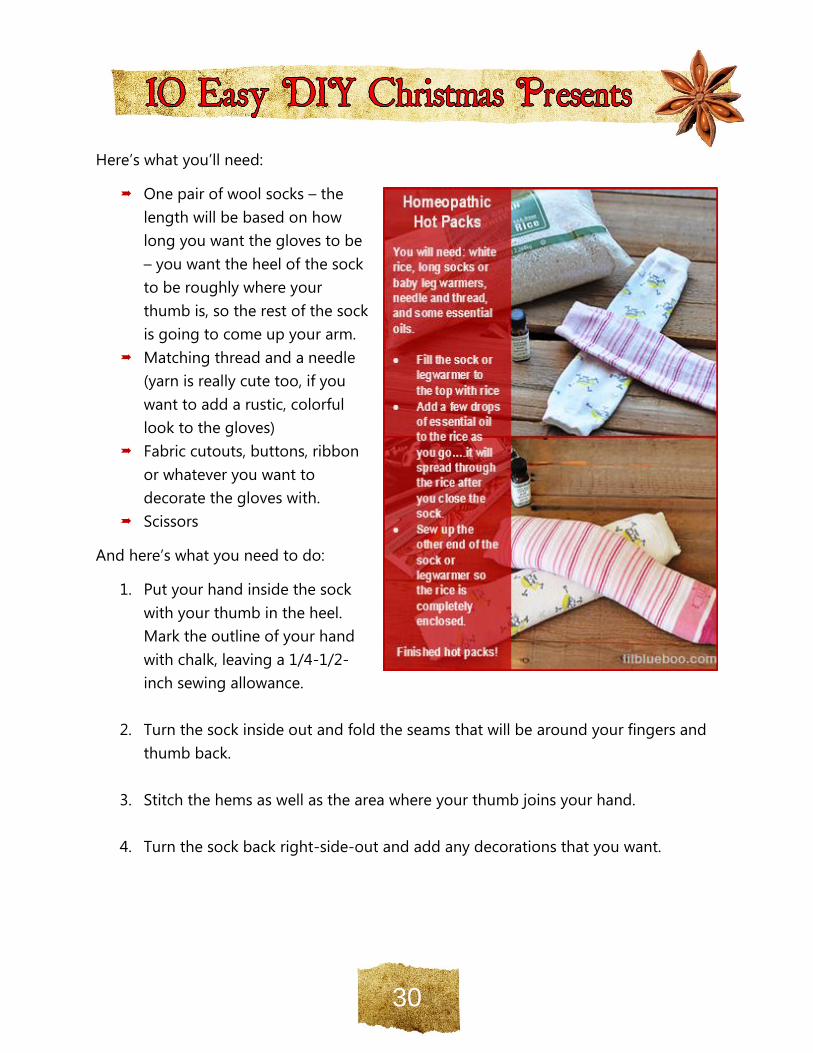
Here’s what you’ll need:
One pair of wool socks – the
length will be based on how
long you want the gloves to be
– you want the heel of the sock
to be roughly where your
thumb is, so the rest of the sock
is going to come up your arm.
Matching thread and a needle
(yarn is really cute too, if you
want to add a rustic, colorful
look to the gloves)
Fabric cutouts, buttons, ribbon
or whatever you want to
decorate the gloves with.
Scissors
And here’s what you need to do:
1. Put your hand inside the sock
with your thumb in the heel.
Mark the outline of your hand
with chalk, leaving a 1/4-1/2-
inch sewing allowance.
2. Turn the sock inside out and fold the seams that will be around your fingers and
thumb back.
3. Stitch the hems as well as the area where your thumb joins your hand.
4. Turn the sock back right-side-out and add any decorations that you want.
31
There are many crafty projects that don’t require a ton of time or an expert skill level. As
preppers, we’re pretty good at repurposing items, so use that way of thinking to your
advantage.
Figure out what your friend or family member needs or would love, then think of a way
to make it yourself!
DIY Christmas presents are economical and show that you care enough about the
person to take the time to make them something.
Plus, it gives you something to do when the weather outside is frightful! When you have
these types of crafts to do, you can gladly just say, “Let it snow” while you sip hot
chocolate and watch it from the comfort of your living room.
Happy holidays!
32
A special thank you goes to all the wonderful people who put their ideas and effort out
there for us to be inspired by and share. We hope they know how much we appreciate
their work and we’d like to give proper credit where credit is due.
http://www.abeautifulmess.com/
http://heidistock.blogspot.com/
http://betzwhite.com/blog
http://myhealthygreenfamily.com/
https://www.flickr.com/photos/forresto/
http://realfoodrealdeals.com/
https://www.flickr.com/photos/reid-bee/
http://www.killerbdesigns.com/
https://www.flickr.com/photos/minimallyinvasivenj/
http://www.stylemepretty.com/
http://www.craftsunleashed.com/
http://www.evermine.com/
http://hellonatural.co/
https://www.flickr.com/photos/70495809@N00/
http://www.stonegableblog.com/
https://www.flickr.com/photos/69685371@N08/
http://craftideas.bitchinrants.com/
http://www.lilblueboo.com/
http://drawingsunderthetable.blogspot.ca/