Embed Size (px)
Citation preview
Long press ).
Enter your PIN code usingthe keypad and press OK orL to confirm.
Enter the phone number onthe keypad and press ( todial.
Press ).
Press ( when your phonerings.
Press ) when your phonerings.
Long press ( during a call.
Long press #.
Long press 6.
Long press 5.
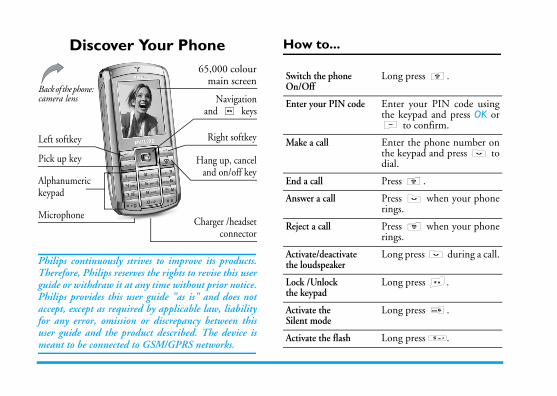
Discover Your Phone
Philips continuously strives to improve its products.Therefore, Philips reserves the rights to revise this userguide or withdraw it at any time without prior notice.Philips provides this user guide "as is" and does notaccept, except as required by applicable law, liabilityfor any error, omission or discrepancy between thisuser guide and the product described. The device ismeant to be connected to GSM/GPRS networks.
How to...
Alphanumeric keypad
Microphone
65,000 colourmain screen
Pick up key Hang up, canceland on/off key
Back of the phone: camera lens
Charger /headsetconnector
Left softkey Right softkey
Navigationand , keys
Switch the phone On/Off
Enter your PIN code
Make a call
End a call
Answer a call
Reject a call
Activate/deactivate the loudspeaker
Lock /Unlock the keypad
Activate the Silent mode
Activate the flash
1
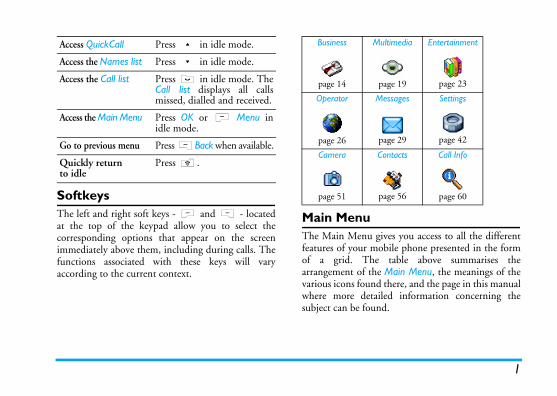
gives you access to all the differentmobile phone presented in the formhe table above summarises thehe Main Menu, the meanings of thend there, and the page in this manualtailed information concerning theund.
Multimedia Entertainment
page 19 page 23
Messages Settings
page 29 page 42
Contacts Call Info
page 56 page 60
SoftkeysThe left and right soft keys - L and R - locatedat the top of the keypad allow you to select thecorresponding options that appear on the screenimmediately above them, including during calls. Thefunctions associated with these keys will varyaccording to the current context.Main MenuThe Main Menufeatures of your of a grid. Tarrangement of tvarious icons fouwhere more desubject can be fo
Access QuickCall Press + in idle mode.
Access the Names list Press - in idle mode.
Access the Call list Press ( in idle mode. TheCall list displays all callsmissed, dialled and received.
Access the Main Menu Press OK or L Menu inidle mode.
Go to previous menu Press RBack when available.
Quickly returnto idle
Press ).
Business
page 14
Operator
page 26
Camera
page 51

Press , to access the Main Menu when in idle is manuals structured as follows:
current section. Presents aniew of your mobile phone andmation on the most commonlyfeatures.
mation on how to set up yourle phone for the first time:lation of the SIM card, battery,
mation on how to make ande calls.
mation on how to enter text the numeric keypad.
chapters treat each element ofain Menu one at a time.
Chapter 12 appear the sectionscons & Symbols, Precautions,s authentic accessories, SAR
mation (if available atcation, otherwise included as aate document), and finally theed Warranty.
2
mode, then use the central navigation key - whichdirections are represented in the present guide withthe +, -, < or >signs - to browse the iconsand lists. When navigating in a list, a scroll bar locatedon the right hand side of the screen shows yourcurrent position in the list. Within lists, press , toaccess the options related to the selected item, pressselect R Back to go back one level.
How to use thThe current manual i
Discover your phone
The overvinforused
Chapter 1: Getting started
Informobiinstaletc.
Chapter 2: Calling
Inforreceiv
Chapter 3: Text entry
Inforusing
Chapters 4 to 12
Thesethe M
Other sections
Afterfor IPhilipinforpubliseparLimit
3
..................................................... 17...................................................... 17 On / Off ................................... 18a ................................................... 19tus ................................................ 19 ................................................... 19 .................................................. 20
.................................................... 22 .................................................. 22ent ........................................... 23roscope ..................................... 23dar ............................................... 23tival ............................................. 23...................................................... 24...................................................... 24...................................................... 26...................................................... 26...................................................... 26...................................................... 29S ................................................ 29
...................................................... 29
...................................................... 29
Table of contents1. Getting Started ............................................5
Inserting the SIM card ......................................5Switching on the phone ...................................6Charging the battery ........................................7Setting Hotkeys .................................................7
2. Calling ................................................................8Make a call ..........................................................8Answer and end a call ......................................8Adjust the earpiece volume ............................8Call handsfree ....................................................8Options during a call ........................................9Quickcall .............................................................9Handling multiple calls .................................. 10
3. Text Entry ................................................... 12T9® text input ................................................ 12Basic text input ............................................... 13
4. Business ......................................................... 14Calculator ........................................................ 14Money converter ........................................... 14Organiser ......................................................... 14World clock .................................................... 15Sound recording ............................................. 16
Alarm clockInfrared .......Auto Switch
5. MultimediMemory staSound albumPicture albumDemo modeTV slideshow
6. EntertainmWestern HoLunar CalenChinese FesBrick game .Java ..............
7. Operator Services + ..WAP ...........
8. Messages .Broadcast SMDictionary ..E-Mail ..........
SMS .................................................................... 34 ............................................ 63
.............................................. 64
........................................... 68
Accessories .............. 70
y .......................................... 73
4
MMS .................................................................. 379. Settings .......................................................... 42
Time and date ................................................. 42Autonomy ........................................................ 42Security ............................................................. 42Profiles .............................................................. 44Sounds .............................................................. 45Display .............................................................. 46Network .......................................................... 47Shortcuts .......................................................... 49Language ........................................................... 50
10. Camera ....................................................... 51How to... .......................................................... 51Camera menu ................................................. 53Help ................................................................... 55
11. Contacts ..................................................... 56Settings ............................................................. 56Names list ........................................................ 56Edit and manage contacts ............................. 57
12. Call Info ...................................................... 60Counters .......................................................... 60Settings ............................................................. 61Call list .............................................................. 62
Icons & symbolsPrecautions .........
TroubleshootingPhilips AuthenticLimited warrant
5
atteryattery, press the inner clips outwards, battery by pulling it up from the
your personal settings if you remove the phone is switched on.
cardrd holder to unlock it. Remove thes protective holder and place it in theaking sure that the clipped corner ofe correct corner and that the gold
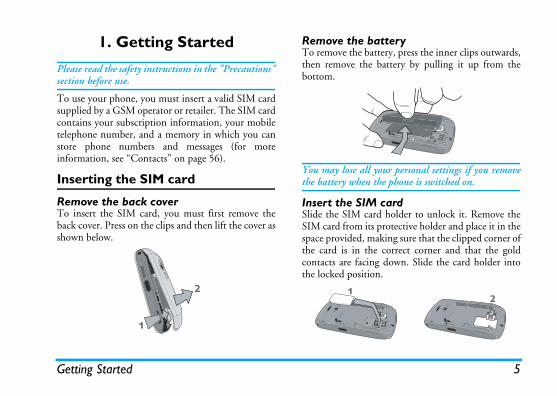
ng down. Slide the card holder intoon.
Getting Started
1. Getting Started
Please read the safety instructions in the "Precautions"section before use.
To use your phone, you must insert a valid SIM cardsupplied by a GSM operator or retailer. The SIM cardcontains your subscription information, your mobiletelephone number, and a memory in which you canstore phone numbers and messages (for moreinformation, see “Contacts” on page 56).
Inserting the SIM card
Remove the back coverTo insert the SIM card, you must first remove theback cover. Press on the clips and then lift the cover asshown below.
Remove the bTo remove the bthen remove thebottom.
You may lose allthe battery when
Insert the SIMSlide the SIM caSIM card from itspace provided, mthe card is in thcontacts are facithe locked positi
Getting Started
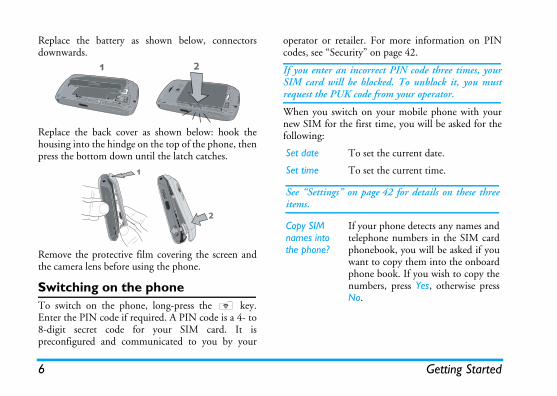
Replace the battery as shown below, connectors operator or retailer. For more information on PINon page 42.
rect PIN code three times, yourocked. To unblock it, you must from your operator.
your mobile phone with yourt time, you will be asked for the
t the current date.
t the current time.
ge 42 for details on these three
r phone detects any names andone numbers in the SIM card
ebook, you will be asked if you to copy them into the onboarde book. If you wish to copy theers, press Yes, otherwise press
6
downwards.
Replace the back cover as shown below: hook thehousing into the hindge on the top of the phone, thenpress the bottom down until the latch catches.
Remove the protective film covering the screen andthe camera lens before using the phone.
Switching on the phoneTo switch on the phone, long-press the ) key.Enter the PIN code if required. A PIN code is a 4- to8-digit secret code for your SIM card. It ispreconfigured and communicated to you by your
codes, see “Security”
If you enter an incorSIM card will be blrequest the PUK code
When you switch onnew SIM for the firsfollowing:
Set date To se
Set time To se
See “Settings” on paitems.
Copy SIM names into the phone?
If youtelephphonwantphonnumbNo.
7
bol indicates the state of charge., the charge indicators will scroll; it hours to fully recharge your mobile
l the scroll bars are steady the batteryYou can then disconnect the charger.e network and condition of use, talk
6 hours and stand-by time up to 400
rger plugged to the mobile when thearged will not damage the battery. turn off the charger is to unplug it,ccessible AC power socket. You canger to an IT supply (Belgium only).
tkeysre the numeric keys 2 to 9 (except 5,, used for the flash) to access yours simply by long-pressing on the
number of hotkey shortcuts are pre-ore information, see “Shortcuts” on
Getting Started
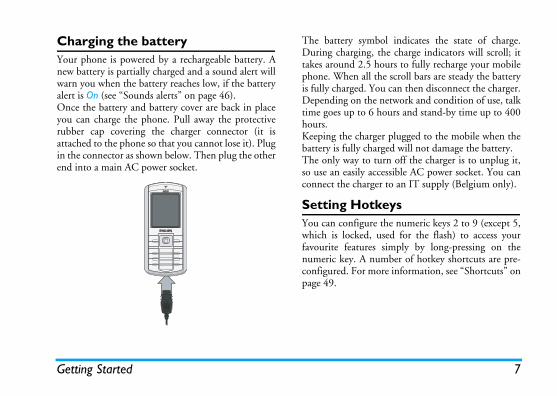
Charging the batteryYour phone is powered by a rechargeable battery. Anew battery is partially charged and a sound alert willwarn you when the battery reaches low, if the batteryalert is On (see “Sounds alerts” on page 46).Once the battery and battery cover are back in placeyou can charge the phone. Pull away the protectiverubber cap covering the charger connector (it isattached to the phone so that you cannot lose it). Plugin the connector as shown below. Then plug the otherend into a main AC power socket.
The battery symDuring chargingtakes around 2.5phone. When alis fully charged. Depending on thtime goes up to hours.Keeping the chabattery is fully chThe only way toso use an easily aconnect the char
Setting HoYou can configuwhich is lockedfavourite featurenumeric key. A configured. For mpage 49.
Calling
calling has chosen to display his or her ID. If thehe selected phonebook, then the is displayed instead of the
ess (.s ). If you have activated Call61), the call is diverted to aail. press R Silent (this only off without rejecting/accepting
.
g if in Silent mode (see page 46).
ny Key Answer, you can accept aey except ) (see page 61).
piece volumee + or - navigation key to
he volume.
t and safety, ensure you move theur ear when calling handsfree,asing the volume.
8
2. CallingMake a call
From the idle screen1. In idle mode, enter the phone number using the
keypad. To correct an error, press R <C.2. Press ( to dial.3. Press ) or R End call to hang up.For an international call, long press * to enter the"+" sign for the international prefix.
Using the phonebook1. Press - in idle mode.2. Select a contact in the list. If you are using the
onboard phonebook and the selected contactfeatures more than one number, the numberidentified as the default will automatically beselected. To select a different number,press<or > (see “Contacts” on page 56 formore information).
3. Press (: the selected number is dialled.4. Press ) or R End call to hang up.
Answer and end a callWhen receiving a call, the number of the caller may bedisplayed, depending on whether or not the person
number is stored in tcorresponding namenumber.• Answer the call: pr• Reject the call: pres
forward (see pagenumber or voice m
• Mute the ringer:switches the soundthe call).
• Hang up: press )
The phone will not rin
If you have selected Acall by pressing any k
Adjust the earDuring a call, press thincrease or decrease t
Call handsfree
For your own comforphone away from yoespecially when incre
9
ng: an edit window allows you tothe recording, which is then availableound album > Recordings, and also in records.memory capacity (see “Memory19), the number and length of
ary.
e and then Record dialogue, only thecorded.
ote down a number. You can thenonebook, call it, or send a message to
s during a calls to be able to perform the followingll is ongoing: you can access and
es list or Call list, hang up by selecting the Equaliser settings, send or readand manage events of the Organiser.
ickcall feature, press + when in idleyou to set your four most frequently. You can then quickly call one of
Calling
1. In idle mode, enter the phone number using thekeypad or select a contact in the phonebook.
2. Press , or L Options then select Callhandsfree and press,or L Select.
If you are already on the phone, long press ( toswitch to handsfree mode and back.
Options during a callDuring a call, press , or L Options to access thefollowing options.
Activate h/freeThis option allows you to use your mobile phone’shands-free option.
Mute / UnmuteAllows you to mute or unmute the microphone sothat your caller cannot hear you.
Record dialogueIn most countries, recording telephone conversations issubject to legislation. We advise you to notify the callerif you intend to record your conversation and only doso if they agree.
To record a conversation during a call, select Recorddialogue and press OK. Press OK again or L Save to
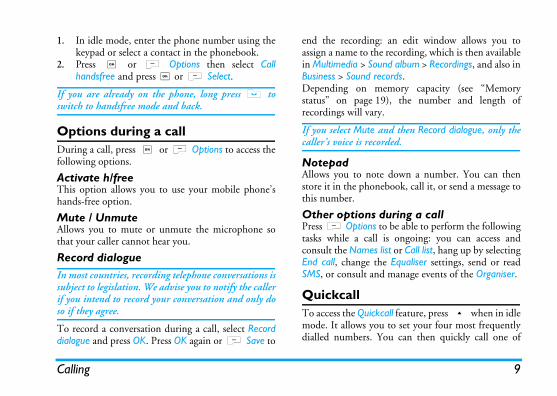
end the recordiassign a name to in Multimedia > SBusiness > SoundDepending on status” on pagerecordings will v
If you select Mutcaller’s voice is re
NotepadAllows you to nstore it in the phthis number.
Other optionPress L Optiontasks while a caconsult the NamEnd call, changeSMS, or consult
QuickcallTo access the Qumode. It allows dialled numbers
Calling
them by selecting the corresponding icon or picture iple callse two or more calls at one timence calls is dependent on your
cription.
callnd call during an active call or. While on the phone, dial acontact in the phonebook) andall is put on hold (the number isom of the screen) and the secondu can then press OK to access the are:
gle between calls (you can alsoswitch calls).ect the two calls. You are the transfer is completed.uce the caller into a conference call.
nd callecond call while being already inphone emits a beep alert and theaiting. You can then:
answer the call (the first one is on hold).
reject the call.
10
on the screen.
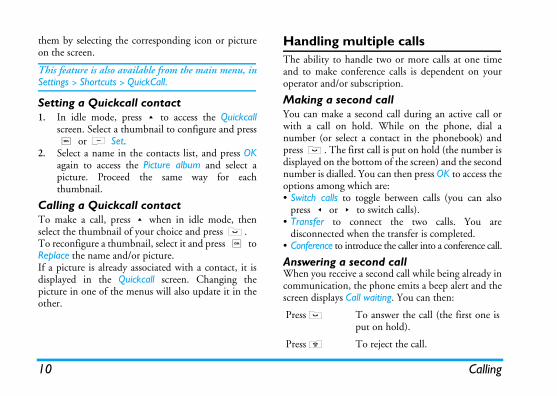
This feature is also available from the main menu, inSettings > Shortcuts > QuickCall.
Setting a Quickcall contact1. In idle mode, press+to access the Quickcall
screen. Select a thumbnail to configure and press, or L Set.
2. Select a name in the contacts list, and press OKagain to access the Picture album and select apicture. Proceed the same way for eachthumbnail.
Calling a Quickcall contactTo make a call, press+when in idle mode, thenselect the thumbnail of your choice and press (.To reconfigure a thumbnail, select it and press , toReplace the name and/or picture.If a picture is already associated with a contact, it isdisplayed in the Quickcall screen. Changing thepicture in one of the menus will also update it in theother.
Handling multThe ability to handland to make confereoperator and/or subs
Making a secondYou can make a secowith a call on holdnumber (or select a press (. The first cdisplayed on the bottnumber is dialled. Yooptions among which• Switch calls to tog
press<or>to • Transfer to conn
disconnected when• Conference to introd
Answering a secoWhen you receive a scommunication, the screen displays Call w
Press( Toput
Press) To
11
allendent.
ll is activated by making severalr from a multiple call context. Itak with up to five people at the same
call with someone, then a secondve).or Options and select Conference.
process until five members are
ve party to disconnect a member ofce, or select Private call to have a
with this member only (other put on hold). disconnect all calls at once.ming call during the conference call than five members, you can accept add this member to the Conferencebers are already connected, you canut not add it to the conference).
Calling
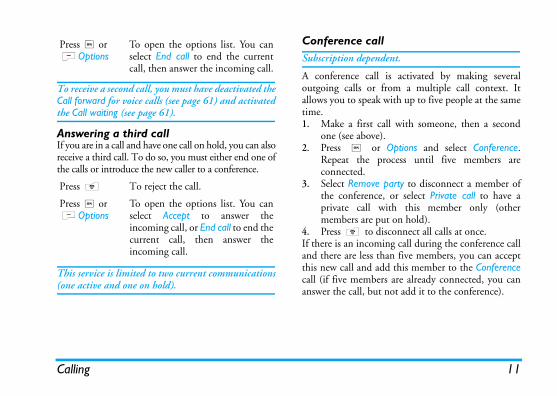
To receive a second call, you must have deactivated theCall forward for voice calls (see page 61) and activatedthe Call waiting (see page 61).
Answering a third callIf you are in a call and have one call on hold, you can alsoreceive a third call. To do so, you must either end one ofthe calls or introduce the new caller to a conference.
This service is limited to two current communications(one active and one on hold).
Conference cSubscription dep
A conference caoutgoing calls oallows you to spetime. 1. Make a first
one (see abo2. Press ,
Repeat the connected.
3. Select Remothe conferenprivate callmembers are
4. Press ) toIf there is an incoand there are lessthis new call andcall (if five memanswer the call, b
Press,orLOptions
To open the options list. You canselect End call to end the currentcall, then answer the incoming call.
Press ) To reject the call.
Press,orLOptions
To open the options list. You canselect Accept to answer theincoming call, or End call to end thecurrent call, then answer theincoming call.
Text Entry
nter the word "home":6 3. The screen displaysa list: Good.to scroll and select Home.
to confirm selection of the
nt to enter is not in the T9®
add it to the database. Presso the bottom of the list until yousented by a series of highlighted_).
ny of the three keys to insert the word followed by a space.
ress to backspace, long press tol text.
ft letter case: Standard, lower orCASE letters.
w the table of symbols andation. Then press L >> or <
to browse the 3 available tables.
ft mode from T9® to basic texto numeric.
12
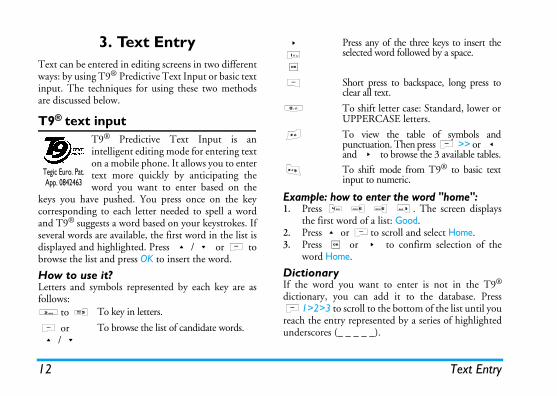
3. Text EntryText can be entered in editing screens in two differentways: by using T9® Predictive Text Input or basic textinput. The techniques for using these two methodsare discussed below.
T9® text inputT9® Predictive Text Input is anintelligent editing mode for entering texton a mobile phone. It allows you to entertext more quickly by anticipating theword you want to enter based on the
keys you have pushed. You press once on the keycorresponding to each letter needed to spell a wordand T9® suggests a word based on your keystrokes. Ifseveral words are available, the first word in the list isdisplayed and highlighted. Press +/- or L tobrowse the list and press OK to insert the word.
How to use it?Letters and symbols represented by each key are asfollows:
Example: how to e1. Press 4 6
the first word of 2. Press+or L3. Press , or >
word Home.
DictionaryIf the word you wadictionary, you can L1>2>3 to scroll treach the entry repreunderscores (_ _ _ _
2 to 9 To key in letters.
L or+/-
To browse the list of candidate words.
Tegic Euro. Pat. App. 0842463
>1,
Press aselected
R Short pclear al
0 To shiUPPER
# To viepunctuand >
* To shiinput t
13
Long press
, @ / : ; " ’ ! ¡ ? ¿ # + - * = & £ $ ¥ 1
ä å æ ç 2
è ∆ Φ 3
ì 4
5
ñ ò ö 6
β Π Θ Σ 7
ù 8
ø Ω Ξ Ψ 9
letter case: Standard, UPPERCASE letters. 0
pen symbols andion mode. Then press or < and > to
he 3 available tables.
Changes the language
used for text edition
mode: T9®, basic or.
Also shifts mode
Text Entry
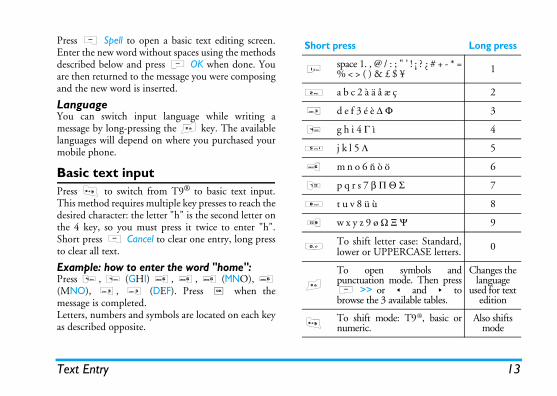
Press R Spell to open a basic text editing screen.Enter the new word without spaces using the methodsdescribed below and press L OK when done. Youare then returned to the message you were composingand the new word is inserted.
LanguageYou can switch input language while writing amessage by long-pressing the # key. The availablelanguages will depend on where you purchased yourmobile phone.
Basic text inputPress * to switch from T9® to basic text input.This method requires multiple key presses to reach thedesired character: the letter "h" is the second letter onthe 4 key, so you must press it twice to enter "h".Short press R Cancel to clear one entry, long pressto clear all text.
Example: how to enter the word "home":Press 4, 4 (GHI) 6, 6, 6 (MNO), 6(MNO), 3, 3 (DEF). Press , when themessage is completed.Letters, numbers and symbols are located on each keyas described opposite.
Short press
1 space 1. % < > ( )
2 a b c 2 à
3 d e f 3 é
4 g h i 4 Γ
5 j k l 5 Λ
6 m n o 6
7 p q r s 7
8 t u v 8 ü
9 w x y z 9
0To shiftlower or
#
To opunctuatL >>browse t
* To shiftnumeric

Business
terllows you to convert a sum from into another using the exchange choice. You can convert fromvice versa. Enter a rate in thed an amount in either the Localum is calculated automatically.
lows to create, store and manager organiser. When the organisere “Sounds alerts” on page 46), au when an event is due.
he mobile memory capacity withebook, picture album, sound,emory available in your phone,emory status.
vent<New>, then the type of eventy, Meeting, To Do). and ending date and time of theit (e.g. "Meeting with Smith").and a frequency: alerts will behosen time.
14
4. Business
This menu contains features and options designed tohelp you keep you organised and informed while onthe move.
CalculatorYour phone has a built-in calculator that youcan use to perform basic calculations.Numbers are entered with the keypad and
operators with the navigation keys as indicated in thetable below:
An icon at the top of the screen indicates whichnavigation keys to use for entering operators.Press and hold 0 to get the decimal point.Calculator accuracy is to 2 decimal places and isrounded up to the higher decimal figure.
Money converThis menu aone currencyrate of your
Local to Foreign or Exchange rate field anor Foreign fields: the s
OrganiserThis menu alevents in youalert is On (sebeep alerts yo
The organiser shares tother features (phonetc.). To check the mselect Multimedia > M
Creating a new e1. In Events, select
to create (Holida2. Enter the starting
event and name 3. Set a reminder
triggered at the c
Addition Press>or the * key.
Subtraction Press<or the * key twice.
Multiplication Press+or the * key 3 times.
Division Press-or the * key 4 times.
Equals Press , or #.
15
ating event modifies all instances of
your organiser can be displayed inview and Month view. Select a view
s OK, then use<or>to displayext day, week or month.
knu allows you to set and display both time and the time in the foreign timeour choice. Note that if you choose
cal and foreign time on your home you selected as your wallpaper willlayed there, but will be replaced withrld clock wallpaper.
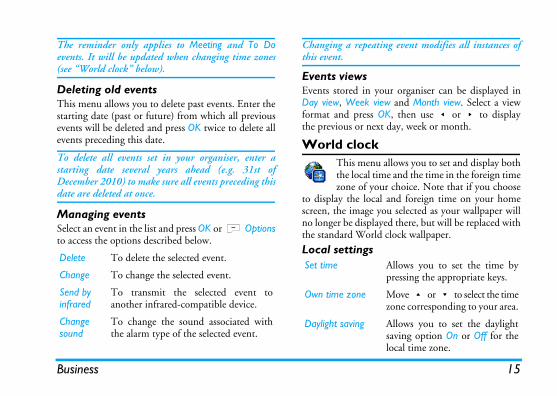
Allows you to set the time bypressing the appropriate keys.
Move+or-to select the timezone corresponding to your area.
Allows you to set the daylightsaving option On or Off for thelocal time zone.
Business
The reminder only applies to Meeting and To Doevents. It will be updated when changing time zones(see “World clock” below).
Deleting old eventsThis menu allows you to delete past events. Enter thestarting date (past or future) from which all previousevents will be deleted and press OK twice to delete allevents preceding this date.
To delete all events set in your organiser, enter astarting date several years ahead (e.g. 31st ofDecember 2010) to make sure all events preceding thisdate are deleted at once.
Managing eventsSelect an event in the list and press OK or L Optionsto access the options described below.
Changing a repethis event.
Events viewsEvents stored inDay view, Week format and presthe previous or n
World clocThis methe localzone of y
to display the loscreen, the imageno longer be dispthe standard Wo
Local settingsDelete To delete the selected event.
Change To change the selected event.
Send by infrared
To transmit the selected event toanother infrared-compatible device.
Change sound
To change the sound associated withthe alarm type of the selected event.
Set time
Own time zone
Daylight saving
Business
World clock ngllows you to make recordings ofutes in length, depending on thetus (see “Memory status” on
in the recording. The messagelong with a progress bar. Whenss L Save to stop recording.enter a name for the new soundault name proposed by pressingo the list of Sound recordings anddisplayed in the list.a sound file, it is played
loop. Press OK to access the recording, Rename or Delete it,S/MMS ringer.
gn indicates that your recordingaximum authorized length. If
ing, a red envelope icon informsg is too long to be sent via MMS.
16
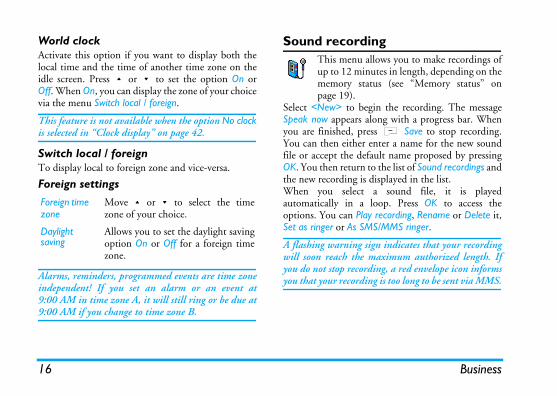
Activate this option if you want to display both thelocal time and the time of another time zone on theidle screen. Press+or-to set the option On orOff. When On, you can display the zone of your choicevia the menu Switch local / foreign.
This feature is not available when the option No clockis selected in “Clock display” on page 42.
Switch local / foreignTo display local to foreign zone and vice-versa.
Foreign settings
Alarms, reminders, programmed events are time zoneindependent! If you set an alarm or an event at9:00 AM in time zone A, it will still ring or be due at9:00 AM if you change to time zone B.
Sound recordiThis menu aup to 12 minmemory stapage 19).
Select <New> to begSpeak now appears ayou are finished, preYou can then either file or accept the defOK. You then return tthe new recording is When you select automatically in a options. You can PlaySet as ringer or As SM
A flashing warning siwill soon reach the myou do not stop recordyou that your recordin
Foreign time zone
Move+or-to select the timezone of your choice.
Daylight saving
Allows you to set the daylight savingoption On or Off for a foreign timezone.
17
to stop the ringing and the alarm
e is automatically deactivated after 9.
setting applies to all the alarms you
bile phone has an infrared port thatou to send or receive data to or frominfrared-compliant devices (e.g.phone, a computer, a PDA, etc.)
ss link.
opyright protected cannot be sent.g with a PC, make sure you haveared option.
vicesing data between two devices, theytly positioned in relation to onere that:
rts are facing each other,s than 50 cm away from each other.cts the infrared beam.
Business
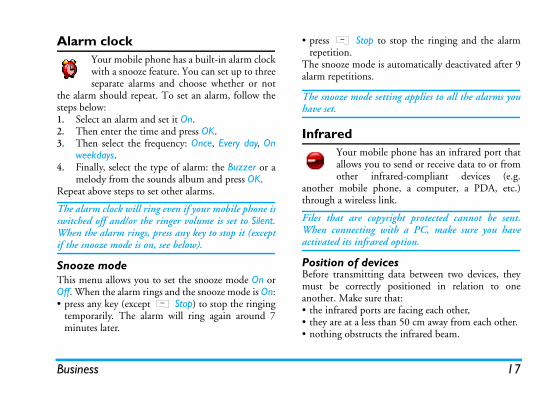
Alarm clockYour mobile phone has a built-in alarm clockwith a snooze feature. You can set up to threeseparate alarms and choose whether or not
the alarm should repeat. To set an alarm, follow thesteps below:1. Select an alarm and set it On.2. Then enter the time and press OK.3. Then select the frequency: Once, Every day, On
weekdays.4. Finally, select the type of alarm: the Buzzer or a
melody from the sounds album and press OK.Repeat above steps to set other alarms.
The alarm clock will ring even if your mobile phone isswitched off and/or the ringer volume is set to Silent.When the alarm rings, press any key to stop it (exceptif the snooze mode is on, see below).
Snooze modeThis menu allows you to set the snooze mode On orOff. When the alarm rings and the snooze mode is On:• press any key (except R Stop) to stop the ringing
temporarily. The alarm will ring again around 7minutes later.
• press R Stoprepetition.
The snooze modalarm repetitions
The snooze modehave set.
InfraredYour moallows yother
another mobile through a wirele
Files that are cWhen connectinactivated its infr
Position of deBefore transmittmust be correcanother. Make su• the infrared po• they are at a les• nothing obstru
Business
Sending data Saving the datar to inform you that you haveK to access the options described
n / Offmenus allow you to set yourh itself on or off at pre-set times. your phone’s battery life (e.g.t be disturbed at given times andch back on automatically., select the option and press OK.K. Enter the time at which you
one to switch itself on and pressed frequency from Once, Everyand press OK. A message appears.
the data, eventually rename the
ay the details of the data youived.
e the data received.
18
To send data via infrared from your mobile phone,you must first select the item to be sent: whenselecting a picture, a sound, a name or an event, a sub-menu then gives you access to the Send via infraredoption.As soon as your phone finds another infraredcompliant device to communicate with, the sendingautomatically takes place. Messages are displayed onthe screen for you to follow the process.
Sending is cancelled if your phone cannot find anotherdevice before the time out is reached, if the infraredlink is broken, or if you cancel the process.
Receiving dataWhen you select Receive your phone is ready toreceive an item via infrared and waits for the anotherinfrared device to send it. As with sending data,messages are displayed on the screen and allow you tofollow the process.
Receiving is cancelled if your phone isn’t contacted byanother device before the time out is reached, if theinfrared link is broken, if the size of the file sent is toolarge or if you cancel the process.
A message will appeareceived a file. Press Obelow.
Auto Switch OThese two separate mobile phone to switcThis lets you extendduring the night), nohave your phone switTo set Auto switch onSelect On and press Owant your mobile phOK. Select the desirday, or On weekdays to confirm activation
Save To save file.
Show To displhave rece
Discard To ignor

19
mnu allows you to manage the soundred in your mobile phone. Theare:
To launch the WAP application anddownload new sound files.
To access all your sound files in asingle list.
To access your downloaded soundfiles.
To access the list of copyrightprotected sample sounds.
Protected melodies cannot be sentnor deleted.
To access the list of soundrecordings.
Multimedia
5. Multimedia
Memory statusThis menu allows you to display thepercentage of memory available in yourphone. Various features share the memory
capacity: pictures, sounds, recorded memos and voicetags for voice commands, stored messages, phonebookand organiser entries, games, etc.Press OK to check the memory status. The displayshows you the percentage of memory free and thephone’s total memory in Kilobytes (Kb). Press OKagain to check the detailed list of memory used byeach feature.Your mobile phone is supplied with many sounds andpictures. You can only delete sounds or pictures in theOwn melodies or My images folders, e.g. to freememory space for your own sounds and pictures.If the List full message appears when saving a new itemyou must delete an item to be able to create or add anew one.
Sound albuThis mefiles stooptions
Get more...
View all
Own melodies
Protected melodies
Recordings
Multimedia
Once in a list, you can then select a sound file and e correct size and in the formatne to store and display thems” on page 55 for details.
ages are displayed as a text list. press > to view the image.u access to the menu options
nch the WAP application andload new image files. For moreation, see page 26.
cess all your image files in a list.
cess the photos taken with the’s built-in camera.
ccess the images you haveed on your phone.
cess the list of protected samples.
ted pictures cannot be sent nord.
cess the list of icons you haveloaded.
20
press OK to access the menu options listed below.
Picture albumThis menu allows you to display and modifythe images stored in your mobile phone. Theoptions are described below.
Pictures must be of thfor your mobile phocorrectly. See “Setting
Inside the folders, imSelect an image andPressing OK gives yolisted below.
Send by... To send the selected sound file viaE-mail (see page 29), via Infrared (seepage 17) or MMS (see page 37).Note that sound files fromRecordings folder cannot be sent viaMMS.
Set as ringer To set the selected sound as ringer.
As SMS/MMS
To set the selected sound as theMessages ringer. This option mustbe activated in the menu Settings >Sounds (see page 42).
Rename To Rename the selected sound file.
Delete / Delete all
To Delete the selected sound file orall files at once.
Get more... To laudowninform
View all To acsingle
My photos To acphone
My images To areceiv
Protected images
To acimage
Protecdelete
Icons To acdown
21
To Undo the last modification madeon the picture, or to Reset, i.e.cancel all changes at once. Press RBack to cancel or L OK tovalidate.
To send the selected picture viainfrared, E-mail or MMS.
To save the picture with all thechanges you have applied.
Use this option to rotate the selectedimage of -90 degrees, +90 degreesor +180 degrees.
To display the selected file.
To display its properties (size,format, resolution, etc.).
To Rename the selected image.
To Delete the selected file or all filesat once.
Pictures in the Protected imagesfolder cannot be sent nor deleted.
Multimedia
Send by... To send the selected file via E-mail(see page 29), via Infrared (seepage 17) or MMS (see page 37).Note that you cannot send picturesthat are protected by copyright.
Set as wallpaper
To set the selected picture aswallpaper.
Modify picture
Use this menu to access thefollowing options:
• Add text To add text to the selected picture.Enter your text in the editing screenand press OK. Use the navigationkeys to move the text on the screen:short press to move the text 1 pixelat a time, long press for 5 pixels.Press R Back to go back to thetext editor, or L OK to validateand go to the next option.
• Add frameor icon
To add a frame or an icon to theselected picture.
• Eraser
• Send
• Save
Rotate
View
Properties
Rename
Delete / Delete all
Multimedia
Automaticyou to display the pictureseshow. value that will be appliedture of the slideshow (10, 15 orpress OK or L Select.pears, select the pictures of yoursing < or >. Choose select or deselect all pictures at
the slideshow and R to stop it.the last selection made isnd can be played several times in quit the TV Slideshow menu.
22
Demo modeThis menu displays a short video clip.This menu option is available even if youhave not inserted a SIM card.
TV slideshowThis menu allows you to display the pictureslisted in the Picture album (automatically in aslideshow or manually one-by-one) on the
main internal screen of your phone and/or on a TVscreen via the TV Link accessory.
TV Link may not supplied with your product. In thiscase, you must purchase it separately. See “PhilipsAuthentic Accessories” on page 70 for details.
ManualThis menu allows you to display the picturesmanually. Browse the list of pictures by pressing +or -. Press > to activate the graphical full-screendisplay and send it to the TV, press < to go back tothe list. When a picture is selected, press OK or Selectto open the rotation options (90° or 180°).
This menu allows automatically in a slid1. Select the time
between each pic20 seconds) and
2. In the list that apchoice by pres(Un)Check all toonce.
3. Press OK to start In both modes, automatically saved aa row, even when you

23
ndars you the correspondence betweenhinese calendars by displaying the
ate in lunar mode from a selected
ng date & time information (e.g. depend on Gregorian dates only.
ss the date edition window. Changed by pressing the corresponding keys, convert to lunar mode.
ws you to display the lunar calendarn. Press + or - to activate ortion.
stivalrms you of the next major Chinesegiven date. Select From now or select enter the date from which you wanthinese festivals will occur. In both display the six next festivals.
Entertainment
6. Entertainment
Western Horoscope, Lunar Calendar and ChineseFestival features are available only in the Chineselanguage menu (see page 50). Your phone may or maynot have the Chinese Language menu depending onwhere the phone was purchased.
Western HoroscopeThis menu allows you to display your horoscope forany given day. To consult your horoscope, you mustfirst either enter your sign or your birth date. If youknow your sign, you can select it from the Select signmenu, otherwise select Set birth date, press OK andenter your birth date. Press OK to display thecorresponding sign.In the Horoscope menu, you can select Today or Otherday depending on the horoscope you want to consult(in the second case, enter the relevant date beforepressing OK).
Lunar CaleThis menu giveGregorian and Ccorresponding dGregorian date.
Features requiriorganiser events)
Press OK to accethe date if needethen press OK to
Lunar in idleThis option alloon the idle screedeactivate this op
Chinese FeThis menu infofestivals, from a From a date andto know what Ccases, press OK to

Entertainment
Auto launch automatic launch of Java On orapplication will be automaticallyy following installation.
the type of network used wheng a connection and to configuresponding settings.r GPRS: your mobile will only GSM or the GPRS networkail connections.irst: your mobile will first try tot to the GPRS network, then toSM network if the GPRSk isn’t available.
ption requires you to have bothings configured. See page 47 for
ou to enter the DNS address ofnal data network you want toto.
ou to select one of the datayou have defined in Settings > > Access settings (see page 47).
24
Brick gameThe goal of this game is to destroy bricks byhitting them with a ball. Destroying all bricksgive you access to the next level.
Keys used are the following:
JavaYour mobile phone features a Java run-timeenvironment, which allows you to run Javaapplications, such as games downloaded onthe network.
The first time you launch Java, a message appears toalert you that the installation and configuration ofJava will take several moments. This is a one-timeoccurrence.
SettingsOnce Java has been installed, you may then proceedwith configuration.
Allows you to set theOff. When On, a Java launched immediatelNetwork access
4 and 6 To move the racket left or right.
* and # To start the game by throwing theball left or right.
0 To pause the game up to 2 min.(after which the screen returns toidle mode and the game is lost).
Bearer To selectlaunchinthe corre• GSM o
use thefor e-m
• GPRS fconnecthe Gnetwor
Selecting the above oGSM and GPRS settdetails.
DNS address
Allows ythe exterconnect
Network account
Allows yprofiles Network
25
EntertainmentNetworkThis menu gives you access to operator-specificsettings, including DNS and proxy addresses. Whenavailable, all items of this menu are pre-configured, sothat you shouldn’t have to change them.
Java applications1. The first time you select this menu, press L
OK for initialization to start. This will takeseveral minutes.
2. Back to the JAVA window, you can either:- press , to access the content of the Default
folder, then press L Menu and Select to playthe listed games,
- or press L Menu, to access the optionsallowing you to create and manage newfolders.
3. Select Install to install on your mobile phone theJAVA games you have downloaded: you mustalways proceed with installation first, to be ableto play a game.
4. Press Exit to quit the Java application, or pressL Menu to access the list of available options.
Your mobile phone may display messages about"MIDlets". MIDlets are JAVA applications or games.
Operator
To launch a WAP session, select Operator > WAP >
e connects to the networkess settings you have defined inetwork (see page 47). In case ofe screen displays "Go to menu":tions to access the WAP options
first WAP site you access whenssion. In most cases, this menued and will connect to your
epage. To change this defaultns” on page 28.
To browse the on-line pages.
To select a highlighted item.
To return to the previous page.
To end the WAP session.
26
7. Operator
This menu contains the services and features providedby your operator. Consequently, the menus describedbelow may vary or may not be available, depending onyour subscription. Contact your network operator formore details.
The services provided may involve making a phonecall or sending a SMS for which you may be charged.
Services +This menu option is reserved for operator-specific services. Please contact your operatorfor more information about these options.
WAPThis menu allows you to access servicessupplied with your network, such as news,sports, weather, etc.
If your phone was pre-configured, it isn’t necessary foryou to change the settings described in this section.With some operators, settings can be set remotely.
Homepage.
Your mobile phonaccording to the Accthe menu Settings > Na connection error, thpress ( or L Op(see page 28).
HomepageThis is the link to thelaunching a WAP seitem is preconfiguroperator’s WAP homhomepage see “Optio
Use + or -
Press , or L Select
Press R Back
Press ) or select Options > Exit
27
the available profiles, then define thegs for each of them.
ettings described below apply to the
nseactivate the downloading of images pages.
ll speed up the global downloading browsed.
lee currently selected profile (start name for the edit screen to appear).
a of the phone’s memory where theuring a WAP session are stored.
change the homepage name andentering the new name for the editr).
s allows you to select one of the dataave defined in Settings > Access
ge 47).
Operator
BookmarksThis menu allows you to store your favourite WAPsite addresses, rename them and access them quicklyfrom the list.Press L Options while browsing, then selectBookmarks: the name and URL fields will beautomatically filled in with the information of thepage you are browsing.Select Add bookmark and start entering the new namefor the edit screen to appear. Press,, then proceedthe same way to enter the URL address.The Manage bookmarks menu allows you to Delete orEdit the selected bookmark.
Go to URLThis menu allows you to enter a WAP site address andto connect directly when selecting it (a quick way toaccess WAP addresses without saving them asbookmarks).All the addresses you enter in this menu and connectto at least once, will appear in a list. Select one of theitems and press , to reconnect to thecorresponding page, without having to re-enter itscomplete address.
SettingsIn order to access WAP sites, you must first configurea WAP connection profile.
Select profileTo select one of connection settin
All connection sselected profile.
Browser optioTo activate or dattached to WAP
Selecting Off witime of the pages
Rename profiTo rename thentering the newCacheTo empty an arepages browsed dNetwork• Homepage: to
address (start screen to appea
• Network accesprofiles you hsettings (see pa
Operator
• Bearer allows you to select the type of network used Optionss LOptions to access:
cess the default homepage.
back to the previously browsed
to the next browsed page.
load the currently browsed pageits original server.
ve the currently browsed WAPas the default homepage.
ave images embedded in the that are displayed in the Picture.
d a WAP session.
age 27 for description of thesens.
28
by the selected profile when launching a connection(see page 47).
• Proxy address and Proxy port allow you to define agateway address and port number to be used whenlaunching a WAP connection using the selectedprofile.
• Security: to display the list of installed securityCertificates (then display its details or delete it), theSession info or the Current certificate.
Push inboxThis menu allows you to read and manage messagesautomatically sent to you by the network and / or byyour operator.
In some cases, a red "@" sign will be displayed on thescreen to inform you that you have received a new pushmessage. Press , or L Read to read it or RBack to go back to idle.
Push messages include URL links for quick access tothe corresponding WAP services: a single click on thelink will connect to the WAP site for browsing ordownloading multimedia files into your handset.
If your push inbox is full, a message will advise you todelete some messages in WAP > Push Inbox.
While browsing, pres
Homepage To ac
Back To gopage.
Forward To go
Refresh To refrom
Set as homepage
To sapage
Save as... To spagesalbum
Exit To en
BookmarksGo to URLSettingsPush inbox
See poptio
29
ture allows you to enrich the T9ry used for writing messages. Select enter the word of your choice and to save it. For detailed information
with T9, please see “T9® text input”
nu allows you to access your e-mailr mobile phone. You can send and
e-mails with attachments from twoccounts. Depending on your service
ur subscription, your mobile phone pre-configured with an e-mail
h case the parameters are already set.in your mobile phone contract, youcribe to an e-mail service in order to e-mails. In this case, all parametersd to you by your provider.w describe in detail how to configureone for e-mail. To enter specials @ or %, please see “Text Entry” on
Messages
8. Messages
Broadcast SMSThis menu allows you to manage thereception of SMS broadcasts regularlytransmitted to all subscribers on the network.It gives you access to the following options:
District codeTo select the type of messages you want to bepermanently displayed on the idle screen (in this case,enter the type in both District code and Topics menus).
ReceptionTo set the reception of cell broadcast messages On or Off.
TopicsTo define the type of messages you want to receive.To configure a topic, select <New>, enter the codeprovided by the operator, and, if desired, associate aname. You can also select an existing topic in the list,which you can rename, change its code or delete.
You can enter up to 15 different topics in the list. Toobtain the codes corresponding to the different topics,contact your operator.
DictionaryThis feadictiona<New>,
simply press ,on entering text on page 12).
E-MailThis mewith youreceive
different e-mail aprovider and yomay have beenaccount, in whicIf not included will need to subssend and receiveare communicateThe sections beloyour mobile phcharacters, such apage 12.

Messages
Settings OP3 and SMTP addresses fromovider.PRS connection to access your e-to use the SMTP server of yourer to send e-mails.
lt your e-mails, you first need toction to the internet.
connection to connect to the phone dials a number providederator and the data is sent andnection, somewhat like a dial-up
port number on the POP3. This is usually port 110.
port number on the SMTP. This is usually port 25.
IP address of your Domain Server.
P authentication is usually set toontact your provider for moreation.
30
To configure an e-mail account, select one and pressOK to access the menus detailed below.Rename profileTo rename an account from its default name. If one ofthe accounts has been pre-configured, it may belocked, in which case it cannot be renamed.E-mail serverTo configure the settings needed to connect to your e-mail service.
You must obtain the Pyour e-mail service prIf you wish to use a Gmail, you may need mobile service provid
Advanced
Network accessBefore you can consuconfigure your conneGSM SettingsWhen you use a GSMinternet, your mobileby your network opreceived over this con
Password The password to access your e-mailaccount.
E-mail address
Your e-mail address.
SMTP address
The Simple Mail Transport Protocol(SMTP) address. This is the server foryour outgoing mail and is usually in aformat like smtp.yourmail.com.
POP3 address
The Post Office Protocol (POP)address. This is the server for yourincoming mail and is usually in a formatlike pop3.yourmail.com.
Login The login (or user name) to access youre-mail account.
Port POP3 The server
Port SMTP The server
DNS address
The Name
SMTP authenticat.
SMTOff. Cinform
31
ns function without them. You willthe APN (or Access Point Name).
n allows you to choose which how tonet connection.bile will only use the GSM networkections.bile will only use the GPRS networkections.r mobile will first try to connect to
etwork. If no GPRS network isit will try with the GSM network. s to work, you must first have enteredg settings.
s you to connect to your mailbox and-mail headers (sender and subjectrver. You may then choose to retrieveg e-mails. > Email: your phone automaticallythe e-mail server and downloads thel headers if any (five at a time). Previous) appears at the end (orof the list, other e-mail headers areect one of the available options and retrieve them.
Messages
internet connection from a PC. The GSM connectionparameters are described in the table below.
GPRS settingsIf using GSM is like a dial-up internet connection, aGPRS connection would be the equivalent ofbroadband. GPRS (or Global Packet Radio Service) isa protocol for sending data rapidly using a radiosignal.To configure a GPRS connection, you may need toprovide a a user name and password, although some
GPRS connectioneed to provide BearerThis menu optioestablish an inter• GSM: your mo
for e-mail conn• GPRS: your mo
for e-mail conn• GPRS first: you
the GPRS navailable, then
For these featurethe correspondin
Email inboxThis menu allowdownload the elines) from the sethe correspondin1. Select Inbox
connects to list of e-mai
2. If Next (orbeginning) pending: selpress , to
Phone number
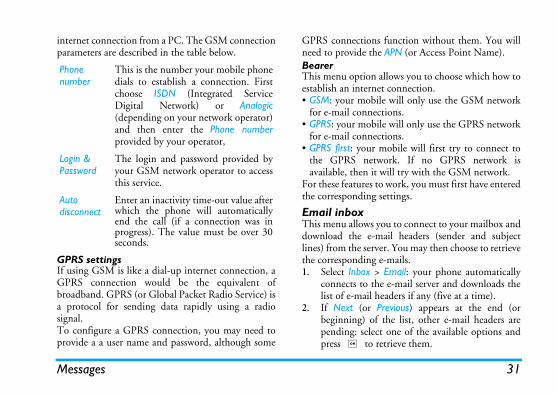
This is the number your mobile phonedials to establish a connection. Firstchoose ISDN (Integrated ServiceDigital Network) or Analogic(depending on your network operator)and then enter the Phone numberprovided by your operator,
Login & Password
The login and password provided byyour GSM network operator to accessthis service.
Auto disconnect
Enter an inactivity time-out value afterwhich the phone will automaticallyend the call (if a connection was inprogress). The value must be over 30seconds.
Messages
3. Select a header, and press ,to display the
nd save a picture before you cane album. If there isn’t enough new picture, you must deleteounds, messages, etc.) to free upew picture.ot be accepted by your mobile correct format. Images must beF format.
size is 128 x 160 pixels (thecreen). If you are transferringme computer, you can use an
m to create images of the correct
ation needed to manage this isn’t available in your phone, ors too large to be uploaded.
ail is attached to the one you to five e-mails can be attached,
ere will be no advanced options.
attached to this e-mail. Select itd press , twice to store it in
(you can rename it if you wish).
32
Details. The following status icons may appear toeach header:
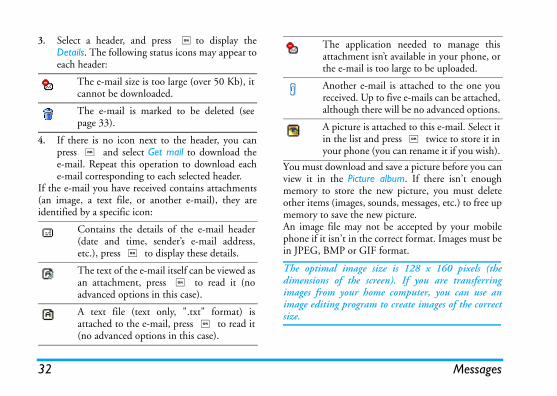
4. If there is no icon next to the header, you canpress , and select Get mail to download thee-mail. Repeat this operation to download eache-mail corresponding to each selected header.
If the e-mail you have received contains attachments(an image, a text file, or another e-mail), they areidentified by a specific icon:
You must download aview it in the Picturmemory to store theother items (images, smemory to save the nAn image file may nphone if it isn’t in thein JPEG, BMP or GI
The optimal image dimensions of the simages from your hoimage editing prograsize.
The e-mail size is too large (over 50 Kb), itcannot be downloaded.
The e-mail is marked to be deleted (seepage 33).
Contains the details of the e-mail header(date and time, sender’s e-mail address,etc.), press , to display these details.
The text of the e-mail itself can be viewed asan attachment, press , to read it (noadvanced options in this case).
A text file (text only, ".txt" format) isattached to the e-mail, press , to read it(no advanced options in this case).
The applicattachmentthe e-mail i
Another e-mreceived. Upalthough th
A picture isin the list anyour phone
33
s you to send e-mails to one or severalime, including with an attachmenticture. Once received, your messages and the attachments visualised withoftware.
reate message > New Email menuur e-mail or if you cancel the sendinglace, the e-mail content is deletedred.
elect the recipient(s) of your e-mail,ided that you have entered e-mailesses for contacts saved in youre phonebook (see “Contacts” on56).
r you have added contacts, select onehem and press ,to Change theil address, Remove it from the list.
ou select a contact from the SIMebook, an edit window will allow
to enter an e-mail address.
Messages
5. Select an e-mail header and press , to accessthe following options:
New mailThis menu allowrecipients at a tsuch as a JPEG pcan be forwardedthe appropriate s
If you exit the Cbefore sending yowhile it takes pwithout being sto
Add to names
To add the sender’s e-mail address to yourphonebook, even when you haven’t yetdownloaded his e-mail.Select <New> to create a new contact, ora name in the list to add or change thee-mail address.
You must have selected the phonephonebook in this case; this menu itemwill NOT appear if you selected the SIMphonebook.
Delete To mark the e-mail to be deleted (selectthis option again to unmark it). Whenyou exit the E-mail menu, you will beasked to confirm deletion of the selecteditem(s) from the e-mail server.
Reply To reply to the sender (whose address willbe automatically added to the list).Proceed as described in “Email inbox” onpage 31.
Forward To forward the downloaded e-mail tosomeone else. Proceed as described in“Email inbox” on page 31.
Add contacts
To sprovaddrphonpageAfteof te-ma
If yphonyou
Messages
3. Then select one of the following options:
ee different types of messages:
d another recipient(s) from thects list, or to enter a phoneer. If you want to modify or
ve a contact, select it press OK.
sign your message.
rite a new message.
it, modify and re-send the lastge sent.menu also lets you recall thege you were entering and mightlost if you pressed the ( keyccident and returned to idle.
elect a pre-configured messageas Can you ring me back on thiser?
34
You can only attach one picture (JPEG, GIF or BMP)or one sound at a time. If you accept an incoming callwhile writing an e-mail, the menu is closed and thephone goes back to idle when you hang up.
SMSThis menu allows you to send text messagesusing the Short Messaging Service (SMS) andto manage the messages you send and receive.
New SMSTo compose and send an SMS, follow the stepsdetailed below:1. Select New SMS, then Enter phone no. or From
contact list and press L Select or ,.2. Enter a phone number and press L OK or
select a name from the list and press L Select.
4. Choose from thr
Add media
Allows you to design your message. Enter the subject and text, then press, to access the next options:• Add sound or Add graphic to attach a
sound or a picture to your e-mail,• Send now to send it to the selected
recipient(s),• Modify to redesign your e-mail.
Add recipient
To adcontanumbremo
Create SMS To de
<New> To w
Last message
To edmessaThis messahave by ascreen
Template To ssuch numb
35
is displayed, press OK or L Optionsu options listed below.
To delete the selected message.
To edit, modify and resend theSMS to someone.
To reply to the sender.
To store messages in the phonememory. You can then consultthem in Messages > SMS > Archive.Moving a message to the archivedeletes it from the SMS Inbox list.
To forward the selected message.Note that attachments cannot beforwarded.
To call the sender of the messagehandsfree.
To call the sender of the message(operator-dependent).
To save the number of the sender ifit is attached to the message.
Messages
5. Enter your text and press OK to access the nextoptions:
You can send up to two attachments of two differenttypes together with your SMS. Images and animationsand pictures are exclusive: if you first select ananimation and then an image, only the image will betaken into account and vice-versa.
Copyright protected pictures and sounds cannot besent by SMS.
SMS InboxThis menu allows you to read SMS messages you havereceived. The messages are displayed in a list. At theend of the list, the <Delete All> item allows you todelete all the messages at once. Deleting old messagesis useful to free memory space in order to receive newmessages.
When a message to access the men
Save To store the current message and itsattachments in the Archive menu.
Send now To send the current message.
Add sound To attach a melody.
Add graphic To attach an image or an animation.
Input language
To change the language for typing.
Delete
Edit SMS
Reply by SMS
Move to archive
Forward to
Call handsfree
Call back
Store number
Messages
n On, allows you to add ature at the end of your message.can Edit, Change or Save theture.
elect the length of time yourges are to be stored in the SMS
e. This is useful when theient is not connected to theork (and thus cannot receive
message immediately). Thisre is subscription dependent.
n On, this option willatically save messages sent in
rchive menu.
n On, this option allows you tomit the number of your SMSge centre together with thege. The recipient can then
using your own SMS centrenot theirs. This speeds up thef transmission. This feature isription dependent.
36
SettingsThis menu allows you to configure the SMS settings.The options are:
No. extracted To extract a number included in themessage itself, if this number isincluded in double quotes (severalnumbers can be included andextracted). This menu is onlyvisible if there is a number toextract.
Store melody To save the melody that was sentwith the SMS. This menu is onlyvisible if there is a melody toextract.
Store graphic To save the graphic and/oranimation that was sent togetherwith the SMS. This menu is onlyvisible if there is an image toextract.
SMS centre To select your default SMS centre. Ifnot available on your SIM card, youmust enter your SMS centre number.
Signature WhesignaYou signa
Validity period
To smessacentrrecipnetwyour featu
Auto save SMS
Wheautomthe A
Reply path Whetransmessamessareplyand rate osubsc
37
bile phone can also send and receive(Multimedia Messaging Service)
s. With MMS you can send messagestain pictures, sounds, and text.
MS messages, your recipient mustS-enabled phone in order to be ablesage.
Ss you an MMS, an icon and a sound. If the sender of the message hasreport, a prompt will ask you to sende MMS is downloaded, it is available (see below).
MMS to download is bigger than thele in your phone, you must freeing data (picture, sounds, etc.). See on page 19.
t New MMS, you are first asked toct to whom you wish to send theselect one or more existing contacts,bile phone number or a new email
Messages
ArchiveThis menu allows you to consult all the messagesstored in the phone’s memory using the Auto saveSMS or Move to archive options. The <Delete allSMS> item allows you to delete all SMS at once.When a message is displayed, press , orLOptions to access the following options: Delete,Edit SMS, Forward to, Call back, Call handsfree.
MMSYour moMMS messagethat con
When sending Malso have an MMto view your mes
Receiving MMIf someone sendalert will informasked for a Read it or not. Once thin MMS > Inbox.
If the size of the memory availabmemory by delet“Memory status”
New MMSWhen you selecenter the contaMMS. You can enter a new moaddress.
Delivery report
When On, this option will informyou via SMS whether your own SMSwas received or not. This feature issubscription dependent.
SMS chat When On, allows you to displayreceived SMS on the idle screen. Youcan then quickly reply to a messagereceived by pressing OK, enteringyour message in the edit screen, andpressing OK again.If you receive an SMS while you arereading one, you can reply to the firstone before reading the second.Alternatively, you can press Back toexit the first message. The secondmessage then appears on your screen.
Messages
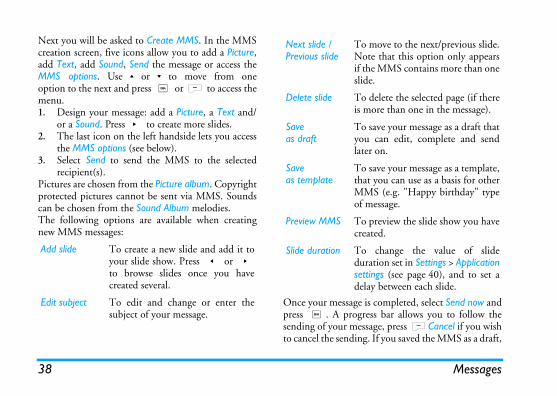
Next you will be asked to Create MMS. In the MMS
completed, select Send now andss bar allows you to follow theage, press LCancel if you wish If you saved the MMS as a draft,
move to the next/previous slide.e that this option only appearse MMS contains more than one.
delete the selected page (if thereore than one in the message).
save your message as a draft that can edit, complete and sendr on.
save your message as a template, you can use as a basis for otherS (e.g. "Happy birthday" typeessage.
preview the slide show you haveted.
change the value of slideation set in Settings > Applicationings (see page 40), and to set ay between each slide.
38
creation screen, five icons allow you to add a Picture,add Text, add Sound, Send the message or access theMMS options. Use+or-to move from oneoption to the next and press , or L to access themenu.1. Design your message: add a Picture, a Text and/
or a Sound. Press> to create more slides.2. The last icon on the left handside lets you access
the MMS options (see below).3. Select Send to send the MMS to the selected
recipient(s).Pictures are chosen from the Picture album. Copyrightprotected pictures cannot be sent via MMS. Soundscan be chosen from the Sound Album melodies.The following options are available when creatingnew MMS messages:
Once your message ispress ,. A progresending of your messto cancel the sending.
Add slide To create a new slide and add it toyour slide show. Press < or >to browse slides once you havecreated several.
Edit subject To edit and change or enter thesubject of your message.
Next slide /Previous slide
To Notif thslide
Delete slide To is m
Saveas draft
To youlate
Saveas template
To thatMMof m
Preview MMS To crea
Slide duration To dursettdela
39
otifications before you have retrieved will not be able to retrieve the MMS. automatically deleted once you haveMMS.
es saved as drafts, or automaticallyit the MMS menu before saving orMS. You can Play, Edit, Send, viewe drafts.
To move to the next or previousslide. You can also press<or>when viewing the MMS inmanual mode. Note that thisoption only appears if the MMScontains more than one slide.
To detach the picture of thecurrent slide and save it in thePicture album.
To detach the sound of the currentslide (if a sound is attached) andsave it in the Sound album.
To close the MMS and go back tothe list of options.
Messages
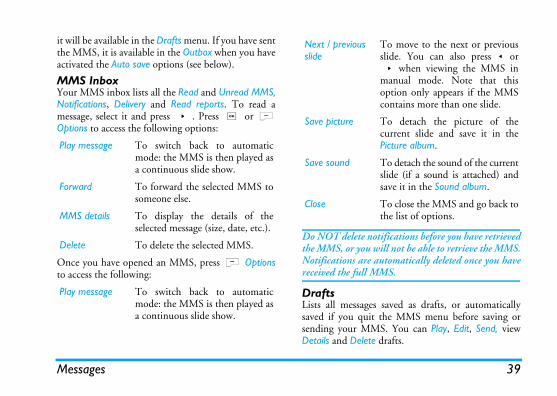
it will be available in the Drafts menu. If you have sentthe MMS, it is available in the Outbox when you haveactivated the Auto save options (see below).
MMS InboxYour MMS inbox lists all the Read and Unread MMS,Notifications, Delivery and Read reports. To read amessage, select it and press >. Press , or LOptions to access the following options:
Once you have opened an MMS, press L Optionsto access the following:
Do NOT delete nthe MMS, or youNotifications arereceived the full
DraftsLists all messagsaved if you qusending your MDetails and Delet
Play message To switch back to automaticmode: the MMS is then played asa continuous slide show.
Forward To forward the selected MMS tosomeone else.
MMS details To display the details of theselected message (size, date, etc.).
Delete To delete the selected MMS.
Play message To switch back to automaticmode: the MMS is then played asa continuous slide show.
Next / previousslide
Save picture
Save sound
Close
Messages
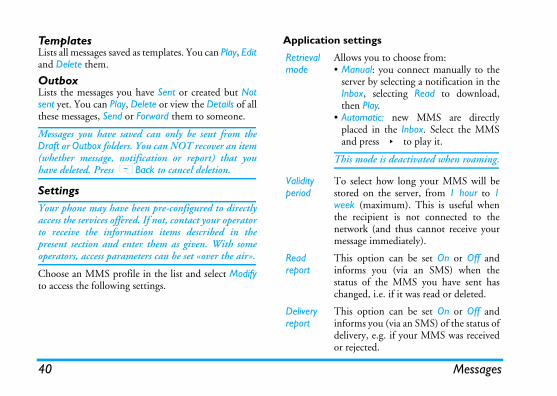
Templates Application settings
ou to choose from:l: you connect manually to they selecting a notification in theselecting Read to download,
ay.tic: new MMS are directlyin the Inbox. Select the MMSss > to play it.
e is deactivated when roaming.
t how long your MMS will be the server, from 1 hour to 1
aximum). This is useful whenient is not connected to the(and thus cannot receive your
immediately).
ion can be set On or Off andyou (via an SMS) when the the MMS you have sent has i.e. if it was read or deleted.
ion can be set On or Off andou (via an SMS) of the status of
e.g. if your MMS was receivedd.
40
Lists all messages saved as templates. You can Play, Editand Delete them.
OutboxLists the messages you have Sent or created but Notsent yet. You can Play, Delete or view the Details of allthese messages, Send or Forward them to someone.
Messages you have saved can only be sent from theDraft or Outbox folders. You can NOT recover an item(whether message, notification or report) that youhave deleted. Press RBack to cancel deletion.
SettingsYour phone may have been pre-configured to directlyaccess the services offered. If not, contact your operatorto receive the information items described in thepresent section and enter them as given. With someoperators, access parameters can be set «over the air».
Choose an MMS profile in the list and select Modifyto access the following settings.
Retrieval mode
Allows y• Manua
server bInbox, then Pl
• Automaplaced and pre
This mod
Validity period
To selecstored onweek (mthe recipnetwork message
Read report
This optinforms status ofchanged,
Delivery report
This optinforms ydelivery,or rejecte
41
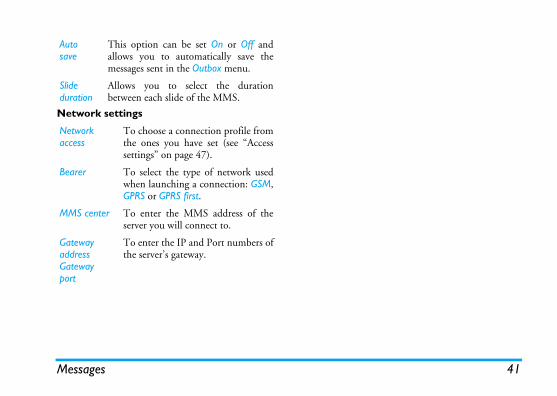
MessagesNetwork settings
Auto save
This option can be set On or Off andallows you to automatically save themessages sent in the Outbox menu.
Slide duration
Allows you to select the durationbetween each slide of the MMS.
Network access
To choose a connection profile fromthe ones you have set (see “Accesssettings” on page 47).
Bearer To select the type of network usedwhen launching a connection: GSM,GPRS or GPRS first.
MMS center To enter the MMS address of theserver you will connect to.
Gatewayaddress Gatewayport
To enter the IP and Port numbers ofthe server’s gateway.
Settings
down navigation keys. Each time zone is identifiedion relative to Greenwich Mean the main cities within that time
the daylight saving to On (inff (in winter time). If daylight set the time to 12:00, it will
to 11:00 when turning the
a direct access to the features thatergy and allows you to improveuickly changing each setting.
the functions in the Autonomyy life.
allows you access the featurese security of your mobile phoneyou store there.
42
9. Settings
This menu allows you to change the settings related toeach available option (sounds, time and date, security,etc.) and to customise your phone.
Time and dateSet timeAllows you to set the time using the keypad orwith the navigation keys.
You should select your Time zone and activateDaylight savings (if appropriate) before setting thetime.
Clock displayAllows you to select Analogue, Digital, Tiny digital orNo clock time formats when shown in idle mode.
Set dateAllows you to set the date by pressing the appropriatenumeric keys or the navigation keys.
Own time zoneAllows you to select your current time zone. Whenyou enter the menu, you are presented with a map ofthe world that which you can navigate with the up and
according to its positTime (GMT) and byzone.
Daylight savingAllows you to set summer time) or Osaving is On and youautomatically switchoption to Off.
AutonomyThis menu gives you consume the most enyour battery life by q
Deactivating most ofmenu increases batter
SecurityThis menu relating to thand the data
43
anage a specific names list calledt, and restrict calls to this list via thetion.
bscription dependent and requires aage 46).
it the use of your phone to specifice applied to Incoming calls (All callsg) and/or to Outgoing calls (All calls,lls and Intl. Exc. Home). In bothl option applies to all calls at once.
Allows you to consult, edit andmodify your Public Names list via aPIN2 code.
Allows you to restrict the calls to thePublic names list when Public only isselected.
This feature is subscriptiondependent and requires a PIN2code (see page 46). This optionmight also apply to WAP ande-mail connections over GPRS.
Settings
Change codesAllows you to change your PIN and PIN 2 codes, aswell as the call Barring code. Depending on your SIMcard, some features or options may require a PIN2secret code given to you by your operator.
If you enter a wrong PIN2 code 3 times, your SIMcard is blocked. To unblock it, request the PUK2 codefrom your operator or retailer. If you enter anincorrect PUK code 10 times in a row, the SIM cardwill be blocked and unusable. If this happens, contactyour operator or retailer.
PIN protectionThis allows you to set the PIN protection On or Off.When On, you will be asked to enter your PIN codewhen switching your phone on.
You cannot change your PIN code if this option is Off.
Keypad lockTo set your keypad Off, or to select an immediate ordelayed lock. When selecting one of the delayedoptions, and if you temporarily unlock your keypadby pressing the # key, it will be automaticallylocked again according to the delay you selected.
In all cases, the keypad is automatically unlockedwhen you receive a call.
Public namesAllows you to mPublic Names lisCall restriction op
This feature is suPIN2 code (see p
Call barringAllows you to limcalls. This can bor When roaminInternational cacases, the Cance
Public names
Callrestriction
Settings
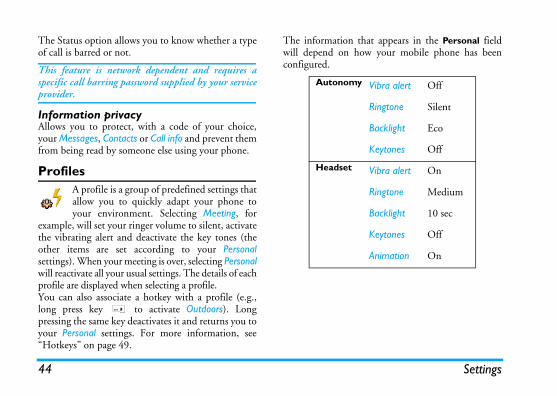
The Status option allows you to know whether a type The information that appears in the Personal field your mobile phone has been
Vibra alert Off
Ringtone Silent
Backlight Eco
Keytones Off
Vibra alert On
Ringtone Medium
Backlight 10 sec
Keytones Off
Animation On
44
of call is barred or not.
This feature is network dependent and requires aspecific call barring password supplied by your serviceprovider.
Information privacyAllows you to protect, with a code of your choice,your Messages, Contacts or Call info and prevent themfrom being read by someone else using your phone.
ProfilesA profile is a group of predefined settings thatallow you to quickly adapt your phone toyour environment. Selecting Meeting, for
example, will set your ringer volume to silent, activatethe vibrating alert and deactivate the key tones (theother items are set according to your Personalsettings). When your meeting is over, selecting Personalwill reactivate all your usual settings. The details of eachprofile are displayed when selecting a profile.You can also associate a hotkey with a profile (e.g.,long press key 3 to activate Outdoors). Longpressing the same key deactivates it and returns you toyour Personal settings. For more information, see“Hotkeys” on page 49.
will depend on howconfigured.
Autonomy
Headset
45
etion allows you to adjust the volumeringer. Press+or-to adjust theof your ringer from Silent to
g.
select a ringer tone. The list alsod sounds and melodies you saved.he list and wait to hear the selectedyed.
gert On or Off an alert for each time youessage. When On, you can select theice from the ringers list.
s you to choose from different audioy available while a call is in progress.e list and wait a few seconds to hear
unds On or Off the sounds of your mobile switch it on or off.
Settings
Sounds
Ringer volumThis opof your volume Increasin
RingtoneAllows you to includes recordeScroll through tmelody being pla
Messages rinAllows you to sereceive a new malert of your cho
EqualiserThis option allowsettings. It is onlScroll through ththe difference.
Animation soAllows you to setphone when you
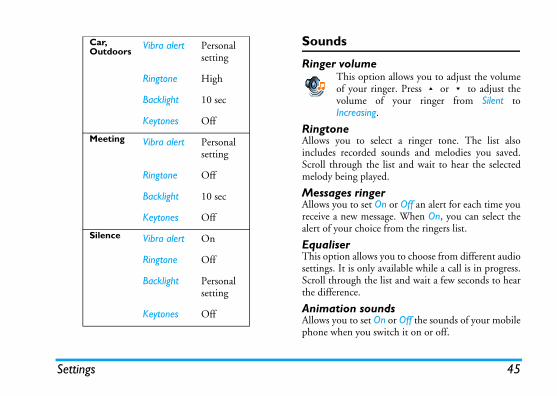
Car, Outdoors
Vibra alert Personalsetting
Ringtone High
Backlight 10 sec
Keytones Off
Meeting Vibra alert Personalsetting
Ringtone Off
Backlight 10 sec
Keytones Off
Silence Vibra alert On
Ringtone Off
Backlight Personalsetting
Keytones Off
Settings
Auto switch on & off sound Vibra alerte vibra alert On or Off when an event set in the organiser ise a message and when the alarm
ays Off when you connect thette Lighter Adapter.
n, all alerts are deactivated ande.
applies to key tones.
llows you to configure how thesplayed on screen.
or Off the camera flash on the
wallpaper of the main screen On is not displayed in idle when the On (see on page 15).
46
Allows you to set On or Off the sounds of your mobilephone when you switch it on or off.
Key tonesAllows you to switch the key tones On or Off.
Sounds alertsAllows you to set alert sounds for the following items:• Organiser: when an event programmed in your
organiser is due,• Missed call, when you missed an incoming call,• Battery alert: when the battery is running low and
requires charging,• Minute alert for a beep alert that sounds every
minute during a call to help you manage theduration of your call (the beep cannot be heard bythe caller).
Select or deselect the item(s) of your choice bypressing < or >.
This menu only allows you to set the alert sounds Onor Off, NOT the alerts themselves. E.g. setting theOrganiser alert Off will not prevent your phone fromdisplaying the Reminder screen (if you programmedone), but the corresponding sound will not be played.
Allows you to set threceiving a call, whendue, when you receivrings.The vibra alert is alwcharger or the Cigare
SilentWhen this mode is Othe vibra alert is activ
The Silent mode also
DisplayThis menu amenus are di
FlashAllows you to set Onback of the phone.
WallpaperAllows you to set the or Off. The wallpaperWorld clock option is
47
the Display period and press ,.you have set will be applied between of the slideshow.
vated when receiving incoming callswsing menus, etc. Select one of the
nsityoose from different levels of backlight
your phone operator to have fulltion about GPRS availability over its and for an appropriate subscription.eed to configure your phone with thepplied by your operator, by using the in this section. Then select the bearer) in the menus of each application toP, MMS, e-mail, etc.).
ss you to create different data profilesfor connecting to various services: forsing WAP or when sending MMS,
file will be used to connect to theetwork.
Settings
ContrastAllows you to choose from different levels of contrast.
Screen saverAllows you to set the Screen saver On or Off. When On,it will run a slide show in idle mode, by using the jpegfile(s) you have stored in your phone and selected.
Settings the Screen saver Off automatically activatesthe Economy mode, i.e., the current time displayed ona white background. This mode increases theautonomy of your phone (increases your battery life).
1. When setting the Screen saver On, select a picturein the list that appears by pressing < or >(you deselect it also by pressing these keys), thenpress - to move to the next picture.
2. Once you selected the pictures of your choice,press , to activate the screen saver.
You must select several pictures (up to 10) in order todisplay a slide show. When selecting only one pictureto be used as a screen saver, only this picture will bedisplayed.
3. Select Start delay and press + or - tochoose a value. When in idle mode, the screensaver will start according to the time limit youhave set.
4. Then selectThe timing each picture
BacklightBacklight is actior messages, broavailable values.
Backlight inteAllows you to chintensity.
NetworkContactinformanetwork
You might also nGPRS settings sumenus described(GSM or GPRSbe used (e.g. WA
Access settingThis menu allowthat can be used example, when uthe selected proGSM or GPRS n
Settings
Options described below are operator and/or
ou to define how your mobilee GPRS service.
list of the networks available innual mode is selected. Select the register with and press , to
change the GPRS settings:ogin, Password, Inactivity timehe APN menu allows you tonter the address of the externalata network you want toonnect to, a text string used tostablish the connection.
r phone automatically connectshe GPRS service (if available).
is option allows quicker accessGPRS features, but increasesrgy consumption.
r phone will connect to theRS service only when required.is option reduces energysumption, but increases thenection delay.
48
subscription dependent. Error messages duringconnections are mainly due to incorrect parameters:contact your operator before first use, in order to havethe appropriate settings, which you may receive bySMS in some cases. Some pre-configured profilesmight be locked, preventing re-programming andrenaming.Select an item in the list and press ,to access thefollowing options:
GPRS attachThis menu allows yphone connects to th
Register againProvides you with a the area when the Manetwork you want toconfirm.
Change name To rename the selected profile.
Show To display all parameters of theselected profile.
GSM Settings To change the GSM settings:• Login & Password,• Phone number needed to
establish the connection andprovided by your operator (ISDNor Analogue),
• Inactivity time, a value of over 30seconds after which the phonedisconnects automatically (if aconnection was in progress).
GPRS settings To• L• t
edce
Always on Youto tThto ene
For data calls YouGPThconcon
49
select a key from 2 to 9 andf the key was already programmed,e.list to select the function you wish toith this key and press , orIf you select Flash dial, you will bect a contact in the contacts list.key, press and hold the programmed idle mode.
ndset up a direct access to a specificng it to a voice tag.
e a voice command to most functions hotkeys.
>, then browse the list to select ad press , or LSelect. OK and speak appears, record yourMake sure you are in a quiett, choose a short and simple wordronounce it.enu gives you access to Delete, Play,tion and Change voice options. Press create another voice tag.command, press and hold , whenn say the recorded voice tag.
Settings
Preferred listAllows you to build a network list in order ofpreference. Once defined, the phone will try toregister on the network, according to yourpreferences.
ShortcutsThis feature allows you to configure shortcutsto the features and options you access mostfrequently.
HotkeysAllows you to set up direct access to a specific functionor a contact by linking it to a key. A long press on thekey in idle mode will then automatically activate thefunction or call the associated number (Flash dial).A number of Hotkeys have been preconfigured, e.g.6 for Silence, but you can reprogram them (keysfrom 2 to 9 only). The following keys are locked:
Depending on your service provider, other hotkeysmay be predefined and locked.
1. In the list, press OK. Iselect Chang
2. Browse the associate wLSelect. asked to sele
3. To use a hotkey when in
Voice commaAllows you to function by linki
You can associatsupported by the
1. Select <Newfunction an
2. When Pressvoice tag. environmenand clearly p
3. The next mChange funcR Back to
To use the voice in idle mode, the
1 Call voice mailbox.
* Dial international call.
# Lock/unlock keypad.
Settings
To reprogram a voice command: select it, press Quick Callou to set your four preferred orlled numbers. You can thenof them by selecting ther picture on the screen, thereby enter and browse the Contactsn page 9 for details.
llows you to select a language forts. Use+or -to browse thet a language by pressing , or
50
LOK and select Change function. This will bringyou to the list of available functions.
Voice dialAllows you to set a voice tag that will dial the defaultnumber for the corresponding contact simply bysaying the voice tag. To set up voice dial, proceed asfollows:1. Select <New>, then a contact in the list, then
press , or L Options.
When the phonebook in phone is selected, choose thenumber of your choice in the list that is displayed.
2. When Add voice tag? appears, follow theinstructions displayed on the screen.
To use the voice dial, press and hold , when in idlemode, then say the voice tag corresponding to thenumber you want to dial.
Up to 15 voice tags can be defined and shared betweenvoice dial and voice command. Recorded voice tags areavailable in their respective menu and can be deleted,played or changed.
This feature allows ymost frequently diaquickly call one corresponding icon oremoving the need tolist. See “Quickcall” o
LanguageThis menu aall menu texlist and selecL Select.
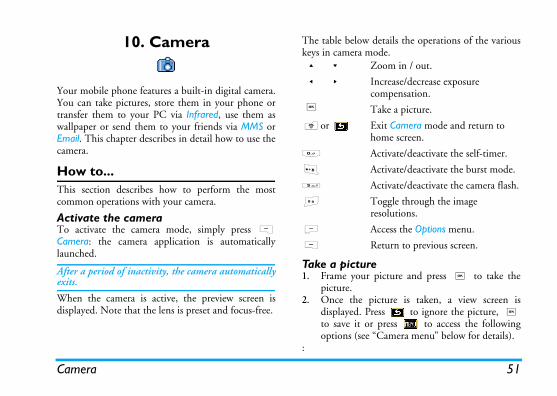
51
details the operations of the variousode.
e picture and press , to take the
picture is taken, a view screen isress to ignore the picture, ,r press to access the following “Camera menu” below for details).
Zoom in / out.
Increase/decrease exposure compensation.
Take a picture.
Exit Camera mode and return to home screen.
Activate/deactivate the self-timer.
Activate/deactivate the burst mode.
Activate/deactivate the camera flash.
Toggle through the image resolutions.
Access the Options menu.
Return to previous screen.
Camera
10. Camera
Your mobile phone features a built-in digital camera.You can take pictures, store them in your phone ortransfer them to your PC via Infrared, use them aswallpaper or send them to your friends via MMS orEmail. This chapter describes in detail how to use thecamera.
How to...This section describes how to perform the mostcommon operations with your camera.
Activate the camera To activate the camera mode, simply press RCamera: the camera application is automaticallylaunched.
After a period of inactivity, the camera automaticallyexits.
When the camera is active, the preview screen isdisplayed. Note that the lens is preset and focus-free.
The table belowkeys in camera m
Take a pictur1. Frame your
picture.2. Once the
displayed. Pto save it ooptions (see
:
+ -
< >
,
)or
0
*
5
#
L
R
Camera
2. Adjust your picture, and press OK to start the0 seconds (this value cannot be
e timer and go back to preview
three seconds before the picturein when it’s actually shot.
ou to send a picture via MMScording to it. The picture can bere album or can be a picture youhe camera.
then press Menu, or select a Picture Album, then press ,orboth cases, select Send by... >
sound? message appears, pressrecording. Then press L Saveyour recording, or R Cancel.in the list that appears and theno to the MMS creation screen.o send your message, or modify before sending it (see “New7 for more information).
52
If there is no action before the view screen time-out,the picture is automatically saved.
Pictures are named with the date of the shot, e.g."0410_154157.jpg" for a picture taken on October 4,at 15: 41:57.The number of pictures you can save varies accordingto the settings: the higher the resolution, the biggerthe file size. A message will warn you if there isn’tenough memory left. In this case, you must delete databefore storing a new picture.
Using the self-timer1. In Camera mode, press 0.
countdown of 1changed).
Press L to stop thmode.
3. A sound is playedis taken, then aga
MMS Foto talkThis feature allows yand to add a sound reselected from the Pictuhave just taken with t1. Take a picture,
picture from theLOptions. In MMS.
2. When the Add L Yes to start to stop and save
3. Select a contact Add media to gPress L Send tit as you wantMMS” on page 3
Store To save the picture in your personalphotos folder using the default numbering(you can then rename it from the folderitself ).
Send by...
To send the picture by MMS, E-mail orInfrared.
Modify picture
To save the picture and modify it (see“Picture album” on page 20).
Discard To ignore the picture and go back topreview mode.
53
tion will launch a slide show of theMy photos folder. During the slideto will be displayed briefly on the key to end the slide show and returncreen.
hootmenu option allows you to take aos with one press of the button. Notemode, the resolution must be set to
ore information, see “Settings” on
oosing this option displays theowing properties of the selectedge: Name, Size (in Kb), Resolution Format.
is option allows you to rotate ange; The options are: - 90 degrees,0 degrees, + 180 degrees. Changes automatically applied.
e this option to rename an image file.
e this option to delete some or all thes in your My photos folder.
Camera
Camera menuThis section describes in detail the Camera menuoptions.
My photosWhen you take a picture and save it, the file is storedin your My photos folder. When you open the menu,your photos are displayed as thumbnails. Use the upand down navigation keys to move through the list. To view the image full-screen, press OK. Use the upand down navigation keys to move through the list ofimages. Press L Options to access the following:
Slide showSelecting this opcontents of the show, each phoscreen. Press anyto the previous s
Continuous sActivating this "burst" of 9 photthat to use this Screensize (for mpage 55).
View To display the picture in full screen.
Send by... Use this menu to transfer an image toanother device. The options are: MMS,Email and Infrared.
Set as wallpaper
To set the selected photo as the imageto be displayed in the background ofyour screen.
Modify picture
This option launches the image editingprogram. See “Picture album” onpage 20 for details.
Properties Chfollimaand
Rotate Thima+ 9are
Rename Us
Delete / Delete all
Usfile
Camera
When the camera is finished processing the images, Framesu to take photos with decorative frames folder contains frames
your mobile phone when you
eature allows you to apply aisual effects to your images. The Embossed, Black & White,al, Edge and Edge 2.
is feature allows you to takesituations.
u to take a time-delayed pictureto the frame as well. To use then this menu, return to the view-our picture, and then press OK.
tion to adjust the exposurer mobile phone’s screen.
54
they are displayed on screen as thumbnails. You maythen press L Options to access the options describedbelow.
When you save or delete an image from the group, itis removed from the thumbnail view and stored in theMy photos folder.
Picture orientationThis feature allows you to choose how photos aredisplayed in your photo album so that they can beviewed correctly. The options are: Landscape &Portrait.
FlashThis feature allows you to set the Flash On or Off. Youcan also long press the 5 key.
This feature allows yoframes. The Standardthat were loaded onpurchased it.
Colour modeThe Colour mode fnumber of different voptions are: None,Negative, Sepia, Digit
Night modeWhen activated, thpictures in low-light
Self-TimerThis feature allows yoso that you can get inSelf-Timer, select On ifinder mode, frame y
BrightnessUse this menu opcompensation of you
Save To save the selected image.
Save all To save all the images in the group.
Send by... To send the selected image by MMS,Email, or Infrared.
Delete To delete the selected image.
Delete all To delete all the images in the group.
55
CameraSettings
HelpThis menu option provides you with on-screen helpin taking pictures with your mobile phone.
Resolution Use this menu option to choose the sizeof the photos you take. The options are:• VGA (640 x 480)• Medium (320 x 240) • Wallpaper (128 x 160)Please note that the higher theresolution, the larger the file size.
Picture quality
This menu allows you to adjust thequality of the pictures taken with yourcamera: Low, Medium, High.The lower the quality, the smaller willbe the resulting image files, therebyallowing you to store more photos onyour mobile phone.
Reset settings
To reset all camera settings to theirdefault values. A warning messageappears: Do you really want to reset allparameters? Choose Yes or No.
Contacts
Your mobile phone only manages one phonebook ate the information relative to the"Smith" is present in both
you delete it in the phone, it the SIM.
display the total number ofed in each phonebook, out of thee.
y the content of your SIM card you cancelled or aborted theour SIM phonebook when youphone, you can do it manually
twice will duplicate all the
menu that you can manage thephone numbers, and e-mail your contacts. You can alsodirectly from the home screen by
56
11. Contacts
Contacts are stored in one of the two availablephonebooks: in your SIM card (number of entriesdepending on capacity) or in your phone (up to 999names). When entering new names, they will only beadded to the phonebook you have selected.
SettingsThis menu contains the settings forconfiguring the phonebooks for your mobilephone.
Delete allTo delete all contacts at once. This option onlyapplies to the onboard phonebook, not to the SIMphonebook.
Contacts selectThis menu allows you to select the phonebook to use,either In SIM or In phone. Press+ or - to select aphonebook. Contacts added to the selectedphonebook can then be copied into the other, via theCopy to SIM or Copy to phone options.
a time and will ignorother one, e.g. if phonebooks and if remains unchanged in
StatusSelect this menu tocontacts you have savtotal number availabl
Copy to phoneThis option will copinto your phone. Ifautomatic copy of yfirst switch on your with this option.
Selecting this optionnames.
Names listIt is in this names, teleaddresses of
access the Names list pressing -.
57
srs item that appears in the contacts store your own phone number. Wenter your mobile number as well ast information.
ields can be empty, the Own numberseleted.
umber number will call the emergencyin your country. In most cases, youber even if you haven’t yet inserted ared your PIN.
ndard emergency number is 112, in.
anage contacts idle mode to access the phonebook.
the selected contact will appear in a, at the bottom of the screen. To name:
Contacts
Adding contacts to the SIM phonebook1. Select <New> in the list.2. Enter the name and the number of your choice,
then the type of number allocated to the name(Phone, Fax or Data) and press OK to store thisname in your phonebook.
A number is limited to 40 digits, depending on yourSIM card. Entering international prefix, country andarea codes allows you to dial a number from anylocation.
Adding contacts in the phone phonebook1. Select <New> in the list.2. Enter the first, then last name (up to 20 latin
characters); one of the two fields can be empty,but not both.
3. Then select the Number type. Numeric fields canhold up to 40 digits and one "+" sign andalphanumeric fields (e-mail and note) feature upto 50 latin characters. Each contact can feature amaximum of 5 numeric fields (e.g. 2 mobilenumbers, 3 work numbers, an e-mail addressand a text note).
If you wish to personalise this contact with a pictureand/or a sound, see below.
Own numberThe Own numbelist allows you toadvise that you eany other relevan
Although all its fitem cannot be d
Emergency nThe emergencyservices number can call this numSIM card or ente
In Europe the stathe UK it is 999
Edit and mPress-when inThe number of highlighted linesearch for a given
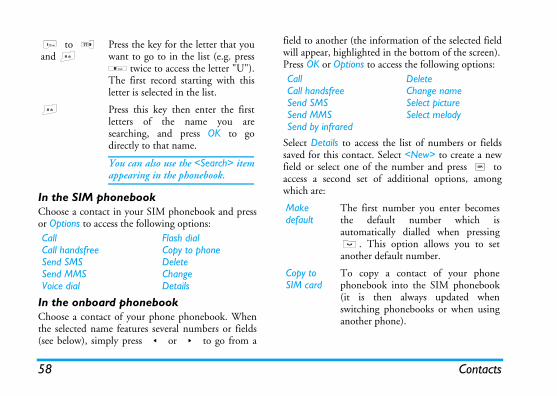
Contacts
field to another (the information of the selected fielded in the bottom of the screen).o access the following options:
ss the list of numbers or fields. Select <New> to create a new the number and press , toof additional options, among
DeleteChange nameSelect pictureSelect melody
st number you enter becomesefault number which istically dialled when pressinghis option allows you to set default number.
py a contact of your phoneook into the SIM phonebookthen always updated when
ng phonebooks or when using phone).
58
In the SIM phonebookChoose a contact in your SIM phonebook and pressor Options to access the following options:
In the onboard phonebookChoose a contact of your phone phonebook. Whenthe selected name features several numbers or fields(see below), simply press < or > to go from a
will appear, highlightPress OK or Options t
Select Details to accesaved for this contactfield or select one ofaccess a second set which are:
1 to 9and #
Press the key for the letter that youwant to go to in the list (e.g. press8 twice to access the letter "U").The first record starting with thisletter is selected in the list.
# Press this key then enter the firstletters of the name you aresearching, and press OK to godirectly to that name.
You can also use the <Search> itemappearing in the phonebook.
CallCall handsfreeSend SMSSend MMSVoice dial
Flash dialCopy to phoneDeleteChangeDetails
CallCall handsfreeSend SMSSend MMSSend by infrared
Make default
The firthe dautoma(. Tanother
Copy to SIM card
To cophoneb(it is switchianother
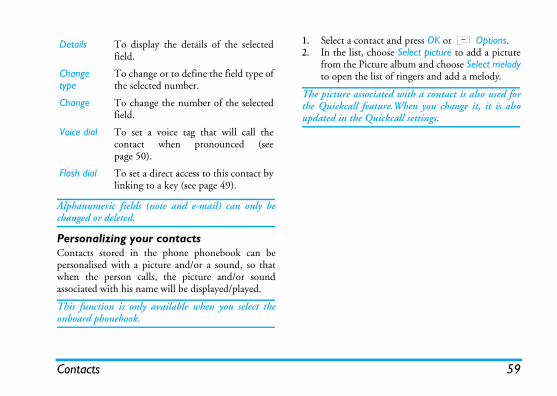
59
tact and press OK or L Options.hoose Select picture to add a pictureture album and choose Select melodylist of ringers and add a melody.
ciated with a contact is also used forature.When you change it, it is alsouickcall settings.
Contacts
Alphanumeric fields (note and e-mail) can only bechanged or deleted.
Personalizing your contactsContacts stored in the phone phonebook can bepersonalised with a picture and/or a sound, so thatwhen the person calls, the picture and/or soundassociated with his name will be displayed/played.
This function is only available when you select theonboard phonebook.
1. Select a con2. In the list, c
from the Picto open the
The picture assothe Quickcall feupdated in the Q
Details To display the details of the selectedfield.
Change type
To change or to define the field type ofthe selected number.
Change To change the number of the selectedfield.
Voice dial To set a voice tag that will call thecontact when pronounced (seepage 50).
Flash dial To set a direct access to this contact bylinking to a key (see page 49).
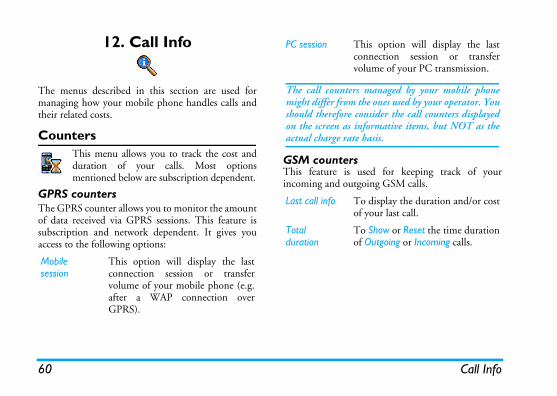
Call Info
d for keeping track of yourng GSM calls.
s option will display the lastnection session or transferme of your PC transmission.
anaged by your mobile phone ones used by your operator. Yousider the call counters displayedrmative items, but NOT as thesis.
isplay the duration and/or costour last call.
how or Reset the time durationutgoing or Incoming calls.
60
12. Call Info
The menus described in this section are used formanaging how your mobile phone handles calls andtheir related costs.
CountersThis menu allows you to track the cost andduration of your calls. Most optionsmentioned below are subscription dependent.
GPRS countersThe GPRS counter allows you to monitor the amountof data received via GPRS sessions. This feature issubscription and network dependent. It gives youaccess to the following options:
GSM countersThis feature is useincoming and outgoi
Mobilesession
This option will display the lastconnection session or transfervolume of your mobile phone (e.g.after a WAP connection overGPRS).
PC session Thiconvolu
The call counters mmight differ from theshould therefore conon the screen as infoactual charge rate ba
Last call info To dof y
Totalduration
To Sof O
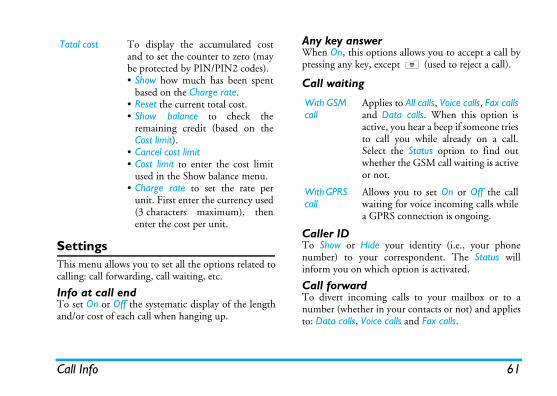
61
erptions allows you to accept a call by, except ) (used to reject a call).
de your identity (i.e., your phoneur correspondent. The Status willhich option is activated.
ing calls to your mailbox or to ar in your contacts or not) and appliesice calls and Fax calls.
pplies to All calls, Voice calls, Fax callsd Data calls. When this option istive, you hear a beep if someone tries call you while already on a call.lect the Status option to find outhether the GSM call waiting is active not.
llows you to set On or Off the callaiting for voice incoming calls whileGPRS connection is ongoing.
Call Info
SettingsThis menu allows you to set all the options related tocalling: call forwarding, call waiting, etc.
Info at call endTo set On or Off the systematic display of the lengthand/or cost of each call when hanging up.
Any key answWhen On, this opressing any key
Call waiting
Caller IDTo Show or Hinumber) to yoinform you on w
Call forwardTo divert incomnumber (whetheto: Data calls, Vo
Total cost To display the accumulated costand to set the counter to zero (maybe protected by PIN/PIN2 codes).• Show how much has been spent
based on the Charge rate.• Reset the current total cost.• Show balance to check the
remaining credit (based on theCost limit).
• Cancel cost limit • Cost limit to enter the cost limit
used in the Show balance menu.• Charge rate to set the rate per
unit. First enter the currency used(3 characters maximum), thenenter the cost per unit.
With GSM call
AanactoSewor
With GPRS call
Awa
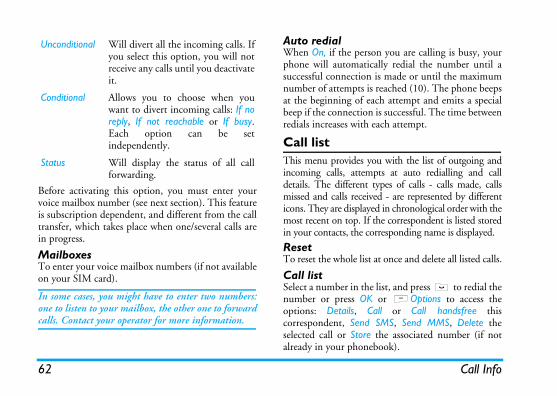
Call Info
Auto redialon you are calling is busy, yourcally redial the number until a is made or until the maximums reached (10). The phone beepsach attempt and emits a special is successful. The time between
each attempt.
ou with the list of outgoing andpts at auto redialling and calltypes of calls - calls made, calls
ved - are represented by differented in chronological order with the the correspondent is listed storedorresponding name is displayed.
at once and delete all listed calls.
e list, and press ( to redial the or LOptions to access theall or Call handsfree this
SMS, Send MMS, Delete the the associated number (if notebook).
62
Before activating this option, you must enter yourvoice mailbox number (see next section). This featureis subscription dependent, and different from the calltransfer, which takes place when one/several calls arein progress.
MailboxesTo enter your voice mailbox numbers (if not availableon your SIM card).
In some cases, you might have to enter two numbers:one to listen to your mailbox, the other one to forwardcalls. Contact your operator for more information.
When On, if the persphone will automatisuccessful connectionnumber of attempts iat the beginning of ebeep if the connectionredials increases with
Call listThis menu provides yincoming calls, attemdetails. The different missed and calls receiicons. They are displaymost recent on top. Ifin your contacts, the c
ResetTo reset the whole list
Call listSelect a number in thnumber or press OKoptions: Details, Ccorrespondent, Sendselected call or Storealready in your phon
Unconditional Will divert all the incoming calls. Ifyou select this option, you will notreceive any calls until you deactivateit.
Conditional Allows you to choose when youwant to divert incoming calls: If noreply, If not reachable or If busy.Each option can be setindependently.
Status Will display the status of all callforwarding.
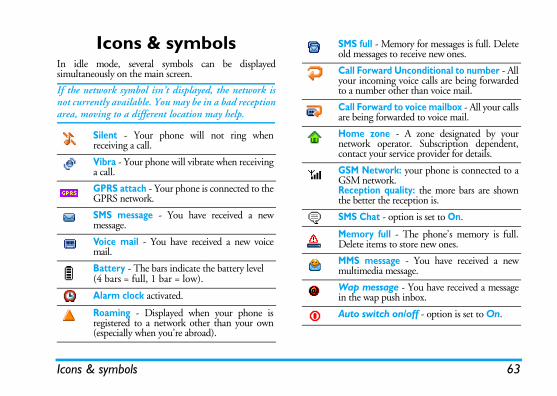
Icons & symbols 63
Icons & symbolsIn idle mode, several symbols can be displayedsimultaneously on the main screen.
If the network symbol isn’t displayed, the network isnot currently available. You may be in a bad receptionarea, moving to a different location may help.
Silent - Your phone will not ring whenreceiving a call.
Vibra - Your phone will vibrate when receivinga call.
GPRS attach - Your phone is connected to theGPRS network.
SMS message - You have received a newmessage.
Voice mail - You have received a new voicemail.
Battery - The bars indicate the battery level (4 bars = full, 1 bar = low).
Alarm clock activated.
Roaming - Displayed when your phone isregistered to a network other than your own(especially when you’re abroad).
SMS full - Memory for messages is full. Deleteold messages to receive new ones.
Call Forward Unconditional to number - Allyour incoming voice calls are being forwardedto a number other than voice mail.
Call Forward to voice mailbox - All your callsare being forwarded to voice mail.
Home zone - A zone designated by yournetwork operator. Subscription dependent,contact your service provider for details.
GSM Network: your phone is connected to aGSM network.Reception quality: the more bars are shownthe better the reception is.
SMS Chat - option is set to On.
Memory full - The phone’s memory is full.Delete items to store new ones.
MMS message - You have received a newmultimedia message.
Wap message - You have received a messagein the wap push inbox.
Auto switch on/off - option is set to On.
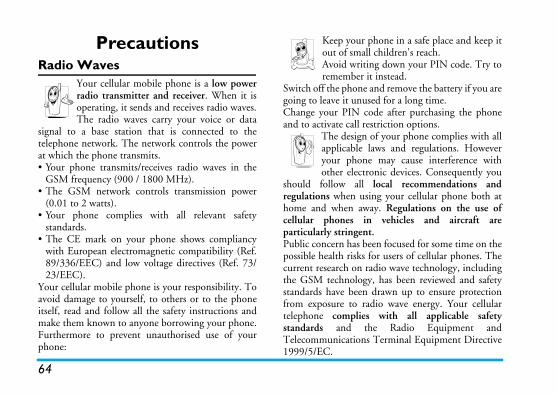
Keep your phone in a safe place and keep itchildren's reach.g down your PIN code. Try to instead. nd remove the battery if you ared for a long time.de after purchasing the phonetriction options.f your phone complies with allws and regulations. However
may cause interference withnic devices. Consequently youlocal recommendations andng your cellular phone both aty. Regulations on the use of vehicles and aircraft are.en focused for some time on theor users of cellular phones. Thedio wave technology, including, has been reviewed and safetydrawn up to ensure protectionio wave energy. Your cellularwith all applicable safety
e Radio Equipment andTerminal Equipment Directive
64
PrecautionsRadio Waves
Your cellular mobile phone is a low powerradio transmitter and receiver. When it isoperating, it sends and receives radio waves.The radio waves carry your voice or data
signal to a base station that is connected to thetelephone network. The network controls the powerat which the phone transmits.• Your phone transmits/receives radio waves in the
GSM frequency (900 / 1800 MHz).• The GSM network controls transmission power
(0.01 to 2 watts).• Your phone complies with all relevant safety
standards.• The CE mark on your phone shows compliancy
with European electromagnetic compatibility (Ref.89/336/EEC) and low voltage directives (Ref. 73/23/EEC).
Your cellular mobile phone is your responsibility. Toavoid damage to yourself, to others or to the phoneitself, read and follow all the safety instructions andmake them known to anyone borrowing your phone.Furthermore to prevent unauthorised use of yourphone:
out of small Avoid writinremember it
Switch off the phone agoing to leave it unuseChange your PIN coand to activate call res
The design oapplicable layour phoneother electro
should follow all regulations when usihome and when awacellular phones inparticularly stringentPublic concern has bepossible health risks fcurrent research on rathe GSM technologystandards have been from exposure to radtelephone complies standards and thTelecommunications 1999/5/EC.
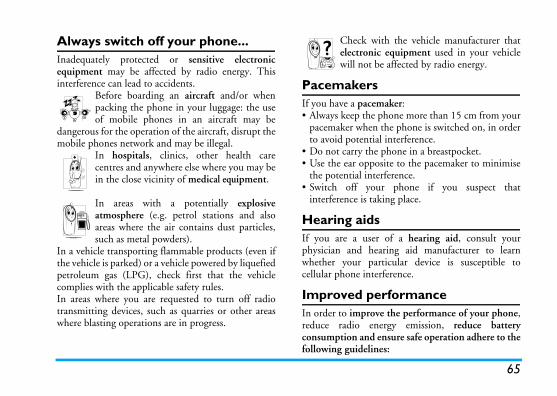
65
with the vehicle manufacturer thatic equipment used in your vehicle
t be affected by radio energy.
semaker:e phone more than 15 cm from yourn the phone is switched on, in order
tial interference.e phone in a breastpocket.
posite to the pacemaker to minimiseterference.our phone if you suspect thattaking place.
ser of a hearing aid, consult yourearing aid manufacturer to learnarticular device is susceptible toterference.
erformanceove the performance of your phone,energy emission, reduce batteryd ensure safe operation adhere to theines:
Always switch off your phone...Inadequately protected or sensitive electronicequipment may be affected by radio energy. Thisinterference can lead to accidents.
Before boarding an aircraft and/or whenpacking the phone in your luggage: the useof mobile phones in an aircraft may be
dangerous for the operation of the aircraft, disrupt themobile phones network and may be illegal.
In hospitals, clinics, other health carecentres and anywhere else where you may bein the close vicinity of medical equipment.
In areas with a potentially explosiveatmosphere (e.g. petrol stations and alsoareas where the air contains dust particles,such as metal powders).
In a vehicle transporting flammable products (even ifthe vehicle is parked) or a vehicle powered by liquefiedpetroleum gas (LPG), check first that the vehiclecomplies with the applicable safety rules.In areas where you are requested to turn off radiotransmitting devices, such as quarries or other areaswhere blasting operations are in progress.
Check electronwill no
PacemakerIf you have a pac• Always keep th
pacemaker wheto avoid poten
• Do not carry th• Use the ear op
the potential in• Switch off y
interference is
Hearing aidIf you are a usphysician and hwhether your pcellular phone in
Improved pIn order to imprreduce radio consumption anfollowing guidel
For the optimal and satisfactory operation of ationred by a rechargeable battery.er only.
pen the battery.l objects (such as keys in your
cuit the battery contacts.o excessive heat (>60° C orr caustic environments. only use Philips Authentic
as the use of any otheray damage your phone and will
arantees for your Philips phoned.arts are replaced immediately by and that they are replaced withcement parts.
hone and your care shown that speaking on thewhile driving lowers yourn, which can be dangerous.e following guidelines:tion to driving. Pull off the roadng the phone.
66
the phone you are recommended to use thephone in the normal operating position(when not using in hands-free mode or witha hands-free accessory).
• Do not expose your phone to extremetemperatures.
• Treat the phone with care. Any misuse will void theInternational Guarantee.
• Do not immerse the phone in any liquid; if yourphone is damp, switch it off, remove the batteryand let them dry for 24hrs before using them again.
• To clean the phone, wipe it with a soft cloth.• Placing and receiving calls consumes the same
amount of battery energy. However, the mobileconsumes less energy in idle screen when kept inthe same place. When in idle screen and while youare moving, your phone consumes energy totransmit updated location information to thenetwork. Setting the backlight for a shorter periodof time as well as avoiding unnecessary navigatingin the menus will also help to save the battery’senergy for longer phoning and stand-byperformances.
Battery inform• Your phone is powe• Use specified charg• Do not incinerate.• Do not deform or o• Do not allow meta
pocket) to short cir• Avoid exposure t
140° F), moisture oYou shouldAccessories,accessories mmake all gunull and voi
Make sure damaged pa qualified techniciangenuine Philips repla
Your mobile pStudies havtelephone concentratioAdhere to th
• Give your full attenand park before usi
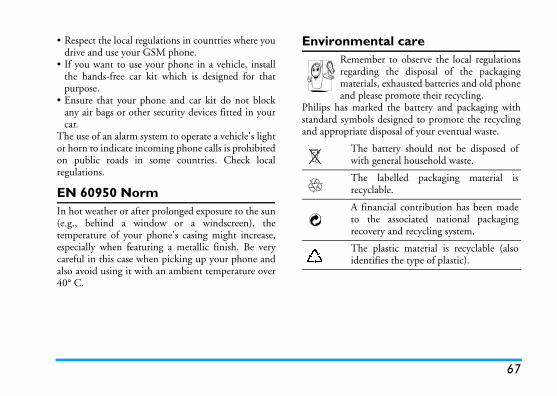
67
ntal careber to observe the local regulations
ng the disposal of the packagingls, exhausted batteries and old phonease promote their recycling.ed the battery and packaging with
s designed to promote the recyclingdisposal of your eventual waste.
battery should not be disposed of general household waste.
labelled packaging material islable.
ancial contribution has been madehe associated national packagingery and recycling system.
plastic material is recyclable (alsotifies the type of plastic).
• Respect the local regulations in countries where youdrive and use your GSM phone.
• If you want to use your phone in a vehicle, installthe hands-free car kit which is designed for thatpurpose.
• Ensure that your phone and car kit do not blockany air bags or other security devices fitted in yourcar.
The use of an alarm system to operate a vehicle's lightor horn to indicate incoming phone calls is prohibitedon public roads in some countries. Check localregulations.
EN 60950 NormIn hot weather or after prolonged exposure to the sun(e.g., behind a window or a windscreen), thetemperature of your phone's casing might increase,especially when featuring a metallic finish. Be verycareful in this case when picking up your phone andalso avoid using it with an ambient temperature over40° C.
EnvironmeRememregardimateriaand ple
Philips has markstandard symboland appropriate
The with
The recyc
A finto trecov
The iden
place if your mobile has an external antenna, orork operator for assistance/
t respond (or the display key pressesds more slowly at very low normal and does not affect thene. Take the phone to a warmern other cases please contact your
ms to over heata charger that was not intendede sure you always use the Philipsipped with your phone.
t display the phone ng callsrk and subscription dependent.’t send the caller’s number, thell 1 or Withheld instead. Contactiled information on this subject.
t messagest allow message exchanges witht check that you entered the centre, or contact your operatoron on this subject.
68
TroubleshootingThe phone does not switch onRemove/reinstall the battery. Then charge the phoneuntil the battery icon stops scrolling. Unplug fromcharger and try to switch the mobile on.
The display shows BLOCKED when you switch onSomebody tried to use your phone but didn’t knowthe PIN code nor the unblocking code (PUK).Contact your service provider.
The display shows IMSI failureThis problem is related to your subscription. Contactyour operator.
Your phone doesn’t return to the idle screenLong press the hangup key or switch off the phone,check that the SIM card and the battery are installedcorrectly and switch it on again.
The network symbol is not displayedThe network connection is lost. Either you are in aradio shadow (in a tunnel or between tall buildings) oryou are outside the network coverage area. Try fromanother place, try to reconnect to the network(especially when abroad), check that the antenna is in
contact your netwinformation.
The display doesn’responds slowly) toThe display respontemperatures. This isoperation of the phoplace and try again. Iphone supplier.
Your battery seeYou might be using for your phone. Makauthentic accessory sh
Your phone doesn’numbers of incomiThis feature is netwoIf the network doesnphone will display Cayour operator for deta
You can’t send texSome networks don’other networks. Firsnumber of your SMSfor detailed informati
69
ows INSERT YOUR SIM CARDIM card has been inserted in the right problem remains, your SIM carded. Contact your operator.
of your phone seems lower that e user guides linked to your settings (e.g., ringert duration) and the features you use.
autonomy, and whenever possible,ate features you do not use.
esn’t work well in your car many metallic parts that absorbwaves which can affect the phone’s car kit is available to provide youantenna and enables you to make andlls without handling the handset.
authorities if you are allowed to use driving.
not charging completely flat, it might take severalharge (up to 5 minutes in some cases)ng icon is displayed on the screen.
You can’t receive and/or store picturesA picture may not be accepted by your mobile phoneif it is too large, if its name is too long, or if it doesn’thave the correct file format.
You have the feeling that you miss some callsCheck your call divert options.
During battery charge, the battery icon shows no bar and the outline is flashingOnly charge the battery in an environment where thetemperature does not go below 0°C (32°F) or above50°C (113°F).In other cases please contact your phone supplier.
The display shows SIM failureCheck that the SIM card has been inserted in the rightposition. If the problem remains, your SIM card maybe damaged. Contact your operator.
When attempting to use a feature in the menu, the mobile displays NOT ALLOWEDSome features are network dependent. They are onlyavailable, therefore, if the network or yoursubscription supports them. Contact your operatorfor detailed information on this subject.
The display shCheck that the Sposition. If themight be damag
The autonomyindicated in thThe autonomy ivolume, backlighTo increase theyou must deactiv
Your phone doA car containselectromagnetic performances. Awith an external receive phone ca
Check with localthe phone whilst
Your phone isIf your battery isminutes of pre-cbefore the chargi
communication between your phone and yourvided software allows you tod melodies and to synchroniseointments.
ne as a modembile phone together with a PC ort to the internet or to send faxes,ared > Data menus. the services available via infrareding SMS, e-mails and faxes,nd sound files to your phone,isation, GPRS Wizard, etc.), youlips Mobile Phone Tools Light. This software is available ono www.club-philips.com and to access the avilable content,one Tools.
mpatible with Apple Macintoshports Windows 98 SE, ME, XP
ack 3 and up mandatory in this
dules for Lotus Notes, Lotusosoft Outlook are designed to of your Philips mobile phone
70
Philips Authentic Accessories
Some accessories, such as a battery and a charger, areincluded as standard in the package of your mobilephone. Additional accessories may also be provided orsold separately. Package contents may therefore vary.
To maximise the performance of your Philips mobilephone and not to void the warranty, always purchasePhilips Authentic Accessories that are speciallydesigned for use with your phone. Philips ConsumerElectronics cannot be held liable for any damage dueto use with non authorised accessories.
ChargerCharges your battery in any AC outlet. Small enoughto carry in a briefcase/handbag.
Carry caseProtects your phone from nicks and scratches.
Data connect kitProvides easy data connection to your Philips mobilephone. The USB cable enables high speed
computer. The prodownload pictures anyour contacts and app
Using the phoYou can use your moa PDA, e.g. to connecvia the Business > InfrTo fully benefit from(sending and receivuploading pictures aphonebook synchronmust install the Phisoftware on your PCInternet: connect tregister your mobileinlcuding Mobile Ph
The software is not cocomputers. It only supand 2000 (Service Pcase).
Specific software moOrganizer and Micrallow synchronisation
71
with these applications (refer to their respective userguides for detailed information).
TV LinkThis data cable allows you to display a slide show onyour TV. Simply connect the data end of the cable tothe headset connector, then connect the video end tothe video IN connector of your TV or VCR. See“Demo mode” on page 22 for detailed information onhow to select pictures and display them in a slideshow.
72
JAVA is a trademark of SunMicrosystems, Inc.
T9® is a trademark of TegicCommunications Inc.
In-Fusio and the gamesengine Exen are trademarksof In-Fusio France.
73
ip During The Limited Warranty
limited warranty period, Philips or itsservice representative will, at itsr repair or replace, without charge forour, a materially defective Productr refurbished parts or Product and repaired or replaced Product to thein working condition. Philips willive parts, modules or equipment.
replaced Product will be covered by warranty for the balance of theited warranty period or ninety (90)the date of repair or replacements longer. Repair or replacement of Philips’ option is your exclusive
Covered By This Limited Warranty?
warranty does not cover::
t that has been subjected to misuse,t, shipping or other physical damage,er installation, abnormal operationg, neglect, inundation, fire, water orquid intrusion; or
Limited warranty1. What Does This Limited Warranty Cover?
Philips warrants to the original retail purchaser(“Consumer” or “You”) that this Philips cellularproduct and all accessories originally provided byPhilips in the sales package (“Product”) are freefrom defects in materials, design andworkmanship under normal use in accordancewith the operating instructions and pursuant tothe following terms and conditions. This limitedwarranty extends only to the Consumer forProducts purchased and used in the originalcountry of purchase. The limited warranty isvalid only in Philips’ intended country of sales ofthe product.
2. How Long is The Limited Warranty Period?
The limited warranty period for the Productextends for ONE (1) YEAR from the date ofpurchase of the Product, documented by validproof of purchase. The limited warranty fororiginal Philips rechargeable battery extends forsix (6) months from the date of purchase.
3. What Will Philips Do if The Product is Not FreeFrom Material Defects in Materials and
WorkmanshPeriod?
During the authorized option eitheparts or labwith new oreturn suchConsumer retain defect
Repaired orthis limitedoriginal limdays from whichever iProduct, atremedy.
4. What is Not
This limited
a) Producaccidenimprophandlinother li
b) Product that has been damaged due to b) The SIM card must be removed from theore it is given to Philips. Philipsliability for damaged or loss ofd or the data contained therein.ct failure is not covered by thisanty, or this limited warranty is, void or invalid due to anyconditions stated herein, the
will be charged for the cost oflacement of the Product and all
d cost incurred in repairing ore Product.NT - you are required to return together with a valid proof ofich must identify the point of
ate of purchase, Product model serial number clearly.
: This Warranty is The Entire
OR THE EXPRESS SET FORTH ABOVE ANDED BY LAW AND WHICHXCLUDED OR MODIFIEDT, PHILIPS PROVIDES NO
ANTY WHETHER EXPRESS(WHETHER BY STATUTE,OPERATION OF LAW OR
AND SPECIALLY DISCLAIMS
74
repair, alteration, or modification by anyonenot authorized by Philips; or
c) Product that has reception or operationproblems caused by signal conditions,network reliability or cable or antennasystems; or
d) Product defects or problems caused by useswith non-Philips products or accessories; or
e) Product which warranty/quality stickers,product serial number or electronic serialnumber has been removed, altered orrendered illegible; or
f) Product purchased, used, serviced, orshipped for repair from outside the originalcountry of purchase, or used for commercialor institutional purposes (including but notlimited to Products used for rentalpurposes); or
g) Product returned without valid proof ofpurchase or which proof of purchase hasbeen altered or is illegible.
h) Normal wear and tear or Force Majeure.
5. How Do You Get Warranty Service?
a) Return the Product to an authorized servicecenter of Philips. You may contact the localPhilips office for the location of the nearestauthorized service center.
Product befassumes no the SIM car
c) If the Produlimited warrinapplicableterms and Consumer repair or repother relatereplacing th
d) IMPORTAthe Productpurchase whpurchase, dand Product
6. Other LimitationAgreement.
EXCEPT FWARRANTIESTHOSE IMPLICANNOT BE EBY AGREEMENOTHER WARROR IMPLIED UNDER THE OTHERWISE)

75
RESULTING FROM PURCHASEF THE PRODUCT, TO THE
EXTENT ALLOWED BY LAW, OR NOT PHILIPS HAS BEEN
OF THE POSSIBILTY OF SUCH. THESE LIMITATIONS SHALLNOTWITHSTANDING THEOF THE ESSENTIAL PURPOSEMITED REMEDY.
warranty represents the completee agreement between the Consumerwith respect to this cellular Productrcedes all prior agreements between oral or written, and all othertions between the parties relating tomatter of this limited warranty. Noler, agent, dealer, employee, thereof,e of Philips is authorized to makes to this limited warranty and youely on any such representation.
d warranty does not affect the statutory rights under applicables in force.
ANY WARRANTY OF SATISFACTORYQUALITY MERCHANTABILITY ORFITNESS FOR A PARTICULAR PURPOSE.PHILIPS’ TOTAL LIABILITY FORDAMAGES RELATING TO OR ARISINGOUT OF THE PURCHASE OR USE OF THEPRODUCT, REGARDLESS OF THE TYPEOR CAUSE OF SUCH DAMAGE OR THEFORM OR CHARACTERISATION OF THECLAIM ASSERTED (E.G. CONTRACT ORTOPIT), SHALL NOT EXCEED THEORIGINAL PURCHASE PRICE PAID FORTHE PRODUCT.
HOWEVER IN NO EVENT SHALL PHILIPSBE LIABLE FOR ANY PUNITIVE, SPECIAL,INCIDENTAL, INDIRECT ORCONSEQUENTIAL DAMAGES (INCLUDINGBUT NOT LIMITED TO THE LOSS OFUSE, LOSS OF TIME, INCONVENIENCE,COMMERIAL LOSS, LOST PROFITS, LOSTBUSINESS OPPORTUNITIES, COST OFSUBSTITUTION OF GOODS ORSERVICES, INVESTMENTS, DAMAGE TOGOODWILL OR REPUTATION, OR LOSSOF DATA AND CLAIMS BY THIRD
PARTIES) OR USE OFULLEST WHETHERADVISED DAMAGESAPPLY FAILURE OF ANY LI
This limitedand exclusivand Philips and it supethe parties,communicathe subject carrier, retaior employemodificationshould not r
This limiteConsumer’snational law


![Phone Features Setting Up Your Phone - lg.com · 3.ress P [TAKE] or the Camera Key to take the picture. 4. After taking the picture, select from the following options. • Press the](https://img.pdfslide.net/doc/110x75/5bf0b19509d3f2b7578be590/phone-features-setting-up-your-phone-lgcom-3ress-p-take-or-the-camera.jpg)