Embed Size (px)
Citation preview
ED 052 005
TITLEINSTITUTION
PUB DATENOTEAVAILABLE FROM
EDRS PRICEDESCRIPTORS
DOCUMENT RESUME
SE 010 158
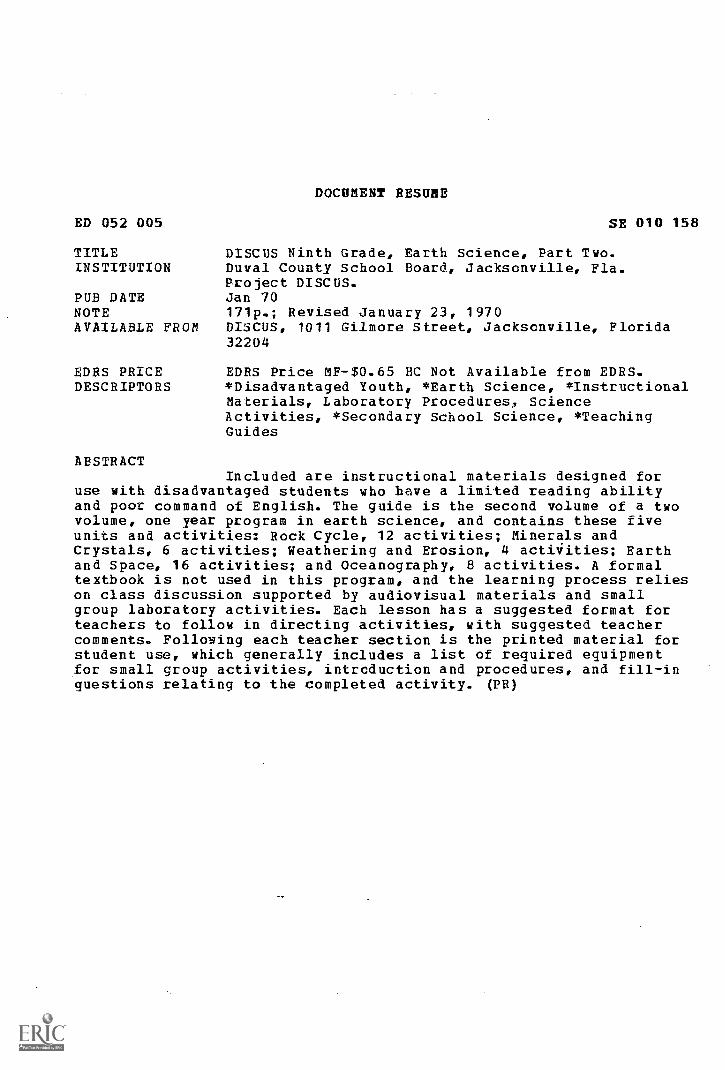
DISCUS Ninth Grade, Earth Science, Part Two.Duval County School Board, Jacksonville, Fla.Project DISCUS.Jan 70171p.; Revised January 23, 1970DISCUS, 1011 Gilmore Street, Jacksonville, Florida32204
EDRS Price MF-$0.65 BC Not Available from EDRS.*Disadvantaged Youth, *Earth Science, *InstructionalMaterials, Laboratory Procedures, ScienceActivities, *Secondary School Science, *TeachingGuides
ABSTRACTIncluded are instructional materials designed for
use with disadvantaged students who have a limited reading abilityand poor command of English. The guide is the second volume of a twovolume, one year program in earth science, and contains these fiveunits and activities: Rock Cycle, 12 activities; Minerals andCrystals, 6 activities; Weathering and Erosion, 4 activities; Earthand Space, 16 activities; and Oceanography, 8 activities. A formaltextbook is not used in this program, and the learning process relieson class discussion supported by audiovisual materials and smallgroup laboratory activities. Each lesson has a suggested format forteachers to follow in directing activities, with suggested teachercomments. Following each teacher section is the printed material forstudent use, which generally includes a list of required equipmentfor small group activities, introduction and procedures, and fill-inquestions relating to the completed activity. (PR)
U.S. DEPARTMENT OF HEALTH, EDUCATION& WELFARE
OFFICE OF EDUCATIONTHIS DOCUMENT HAS BEEN REPRODUCEDEXACTLY AS RECEIVED FROM THE PERSON ORORGANIZATION ORIGINATING IT. POINTS OFVIEW OR OPINIONS STATED DO NOT NECESSARILY REPRESENT OFFICIAL OFFICE OF EDUCATION POSITION OR POLICY
DISCUS1011 Gilmore Street
Jacksonville, Florida 32204
THE MATERIAL CONTAINED IN THIS MANUAL ISEXPERIMENTAL AND NOT IN FINISHED FORM.
"PERMISSION TO REPRODUCE THIS COPY-RIGHTED MATERIAL BY MICROFICHE ONLYHAS BEEN GRANTED BY
Disc USTO ERIC AND ORGANIZATIONS OPERATINGUNDER AGREEMENTS WITH THE U.S. OFFICEOF EDUCATION. FURTHER REPRODUCTIONOUTSIDE THE ERIC SYSTEM REQUIRES PER.MISSION OF THE COPYRIGHT OWNER."
IT HAS BEEN PREPARED FOR US BY THE DISCUSPROJECT AND ANY OTHER USE REQUIRES THEWRITTEN CONSENT OF THE PROJECT DIRECTOR.
The DISCUS project has developed a courseof study in science for the junior highgrades (7410). The material for each gradelevel has been bound into two manuals,
GRADE
GRADE 8
GRADE 9
BIOLOGICAL SCIENCE
PHYSICAL SCIENCE
EARTH SCIENCE
Your comments concerning these materialswill be appreciated. For further information, contact the project director.
Revised1.23.70
Second Semester
ITABLE OF CONTENT
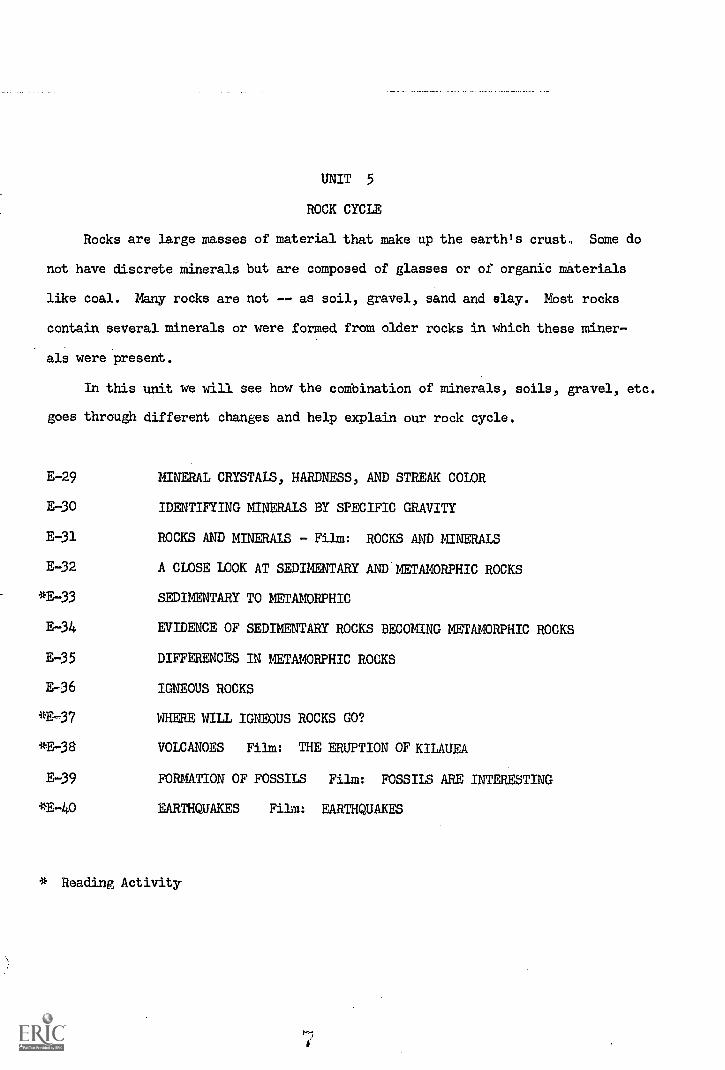
UNIT 5 ROCK CYCLE137
E -29 Mineral Crystals, Hardness, and Streak Color 142E -30 Identifying Minerals by Specific Gravity
147E -31 Rocks and Minerals 151E -32 A Close Look at Sedimentary and Metamorphic Rocks 156
*E -33 Sedimentary to Metamorphic 161E -34 Evidence of Sedimentary Rocks Becoming Metamorphic Rocks 164E -35 Differences in Metamorphic Rocks
167E -36 Igneous Rocks 172
*E -37 Where will Igneous Rocks Go 175*E -38 Volcanoes 178E -39 Formation of Fossils 180
*E -40 Earthquakes183
UNIT 6 MINERALS AND CRYSTALS186
E -41 Cleavage and Fracture187
E -42 Growing Crystals (Alum) Cubic System 193E -43 Growing Crystals (Rochelle Salt) Orthorhombic System 196E -44 Growing Crystals (Nickle Sulfate) Tetragonal System 198E-45 Crystal Models - Paper folding 200E-46 Growing a Chemical Garden 206
UNIT 7 WEATHERING AND EROSION 209
E-47 Weathering Due to Temperature Change 212E-48 Weathering by Chemical Action 214E-49 How Sand May Be Formed 216E-50 Wind Erosion 218
UNIT 8 EARTH AND SPACE 220
E-51 What is the Apparent Daily Motion of the Sun and the Moon 221and How Do We Account for it? 221
E-52 What is the Apparent Shift in the Moon's Position From Day to Day 225E-53
E-54How Can We Account for Day and Night?What are the Different Phases of the Moon and How Do We Account
227
E -55
E-56
for Them?
What Eclipses are There and How Do We Account for Them?What Makes it Warmer in Summer than Winter?
230
234238
*E-57 Be Weightless - Fall Free 241*E-58 Action and Reaction 245E-59 How Rockets Work 247
* Reading Activities
Table of Contentpage 2
E-60E-61E-62
*E-63E-64E-65E-66
UNIT
E-67E-68*E-69E-70E-71E-72E-73
E-74
9
Finding Our WaySunken TreasureItems Basic for MapsStuder. Resource (Mapping)Topographic MappingTopographic ProfilesReading Topographic Maps
OCEANOGRAPHY
Measuring the Ocean DepthWater Pressure and DepthWhy is the Ocean SaltyFresh Water Derived from the OceanTo Determine % of Salinity of Sea Water by WeightOcean Waves Changes the Land SurfaceThe Ocean FloorOrigin of Florida Shore Sands
249253256260262
264267
269
271274276278280284286291
* Reading Activities
SUGGESTED MULTIMEDIA MATERIAL TO BE USED THIS SEMESTER. FILMS MAYBE OBTAINED
THROUGH THE COUNTY LIBRARY.
FILMS:
E-31 ROCKS AND MINERALSE-38 THE ERUPTION OF KILAUEAE-39 FOSSILS ARE INTERESTINGE-40 EARTHQUAKESE-41 CRYSTALSE-50 EROSIONE-52 THIS IS THE MOON: MOON AND HOW IT AFFECTS USE-53 WHAT MAKES DAY AND NIGHTE-55 WHAT IS AN ECLIPSEE-56 SEASONSE-57 GRAVITY, WEIGHT AND WEIGHTLESSNESSE-59 HOW ROCKETS WORKE-67 THE OCEAN: A FIRST FILM
BOOKS:
Geology and Earthscience Source Book, Holt, Rinehart and Winston, Inc.1962 page 14 and 15
Earth Science Curriculum Project (ESCP), Investigating the Earth, Houghton,Mifflin Co., 1967, pages 330 - 346.
Physical Geology Prentice-Hall, 1967
Modern Earth Science, Holt, Rinehart and Winston, 1965
IT
LI
LI
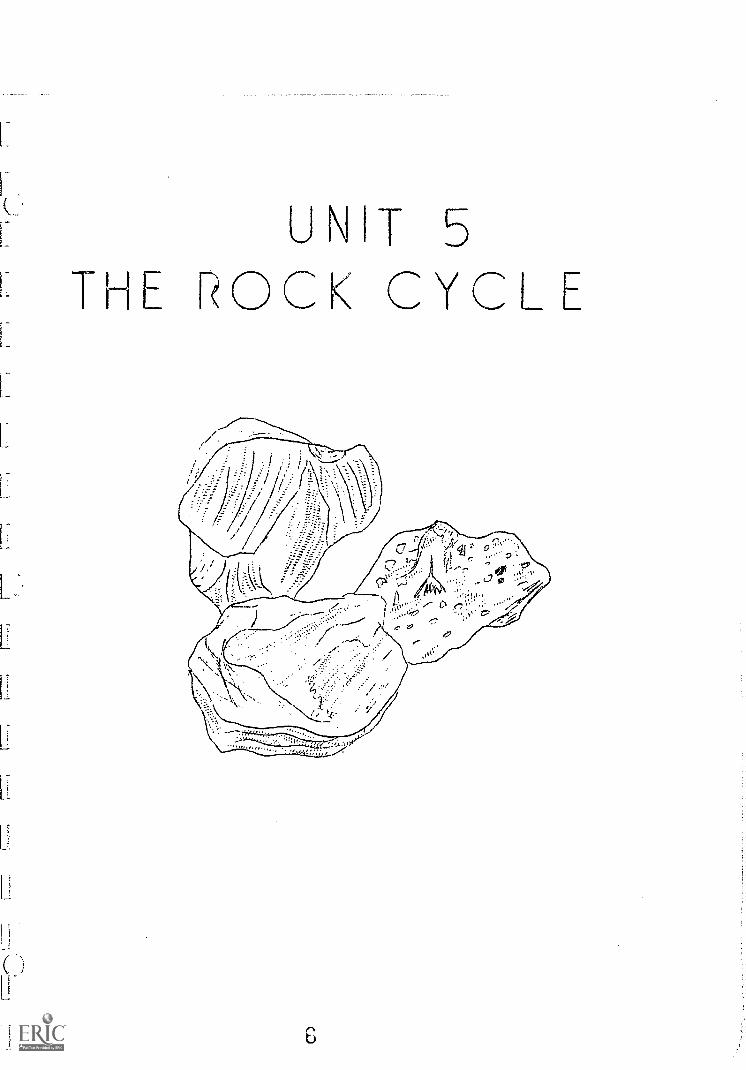
JNITTHE ROCK CYCLE
UNIT 5
ROCK CYCLE
Rocks are large masses of material that make up the earth's crust, Some do
not have discrete minerals but are composed of glasses or of organic materials
like coal. Many rocks are not -- as soil, gravel, sand and elay. Most rocks
contain several minerals or were formed from older rocks in which these miner-
als were present.
In this unit we will see how the combination of minerals, soils, gravel, etc.
goes through different changes and help explain our rock cycle.
E-29 MINERAL CRYSTALS, HARDNESS, AND STREAK COLOR
E-30 IDENTIFYING MINERALS BY SPECIFIC GRAVITY
E-31 ROCKS AND MINERALS - Film: ROCKS AND MINERALS
E-32 A CLOSE LOOK AT SEDIMENTARY AND METAMORPHIC ROCKS
*E-33 SEDIMENTARY TO METAMORPHIC
E-34 EVIDENCE OF SEDIMENTARY ROCKS BECOMING METAMORPHIC ROCKS
E-35 DIFFERENCES IN METAMORPHIC ROCKS
E-36 IGNEOUS ROCKS
*E-37 WHERE WILL IGNEOUS ROCKS GO?
*&-38 VOLCANOES Film: THE ERUPTION OF KILAUEA
E-39 FORMATION OF FOSSILS Film: FOSSILS ARE INTERESTING
*E-40 EARTHQUAKES Fila: EARTHQUAKES
* Reading Activity
-137-
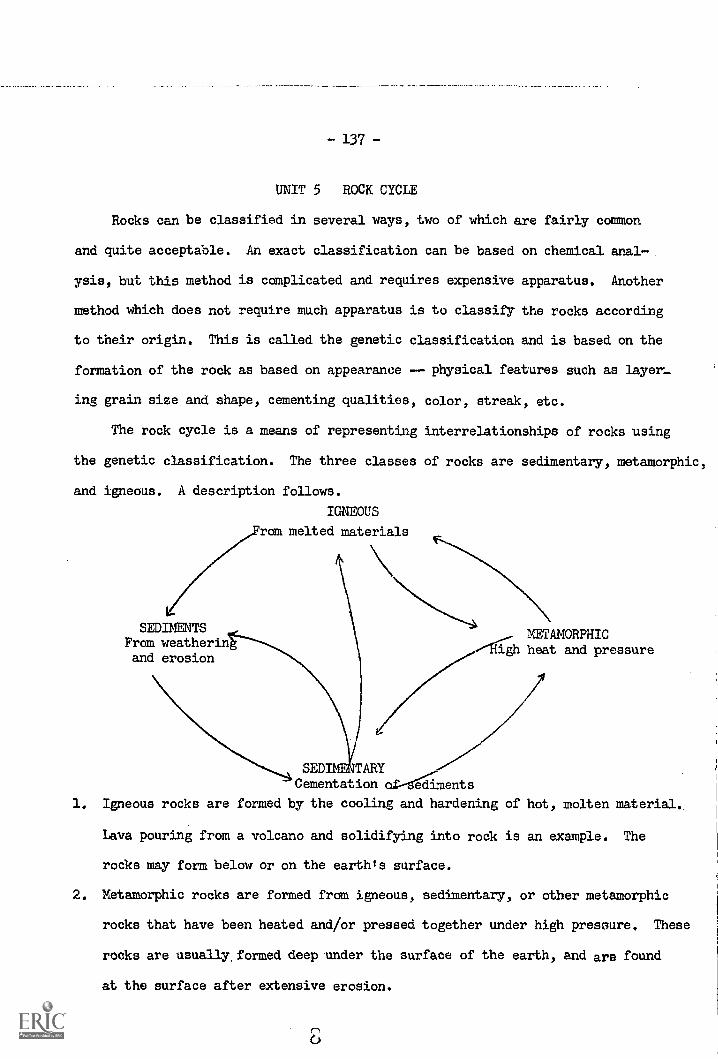
UNIT 5 ROCK CYCLE
Rocks can be classified in several ways, two of which are fairly common
and quite acceptable. An exact classification can be based on chemical anal-
ysis, but this method is complicated and requires expensive apparatus. Another
method which does not require much apparatus is to classify the rocks according
to their origin. This is called the genetic classification and is based on the
formation of the rock as based on appearance -- physical features such as layer-
ing grain size and shape, cementing qualities, color, streak, etc.
The rock cycle is a means of representing interrelationships of rocks using
the genetic classification. The three classes of rocks are sedimentary, metamorphic,
and igneous. A description follows.
IGNEOUS
ran melted materials
SEDIMENTSFrom wmatherinand erosion
METAMORPHIC''High gh heat and pressure
SED TARYCementation o.f-sfeliments
1. Igneous rocks are formed by the cooling and hardening of hot, molten material..
Lava pouring from a volcano and solidifying into rock is an example. The
rocks may form below or on the earth's surface.
2. Metamorphic rocks are formed from igneous, sedimentary, or other metamorphic
rocks that have been heated and/or pressed together under high pressure. These
rocks are usually, formed deep under the surface of the earth, and are found
at the surface after extensive erosion.
-138-
Unit:. 5Page 2
3. Sedimentary rocks, are formed by the physical and chemical breakdown of
igneous, metamorphic and other sedimentary rocks.
Weathering causes the physical and chemical breakdown when the rocks are
exposed to the hydrosphere and the atmosphere. Chemical weathering occurs
when some components of a rock combine with oxygen, carbon dioxide, water,
or with other chemicals in the air or water. In this way some of the min-
erals form new compounds and when iron rusts it combines with water and
oxygen thus making a product which occupies more space then the origi-
nal iron thus causirg the rusty surface to pull away from the original
iron. Physical weathering occurs when there is a change in temperature,
with some minerals expanding faster than others; or when water contained
in the pores of the rock freezes, expands and breaks that rock.
Sometimes plants roots grow in crevices, splitting the rock apart. Rocks
may be ground up by abrasive action as is moved over the surface of the
earth. Particles of rock are further worn as the fragments are trans-
ported by streams, ice and wind. These fragments then may accumulate
as sediments which become cemented and compacted together to form sedi-
mentary rocks.
The rock cycle provides a means of expressing the many earth pro-
cesses which are involved in rock formation. The transporting agents,
they physical influences of heat and pressure, and chemical action are
the important factors in rock formation. The chemical composition is
important in the identification of specific rocks, but in the broad
general processes of .the rock cycle the identification of specific
chemical compounds being present or not being present, is not as mean-
ingful as the physical processes. In other words, igneous rocks will
I
- 139 -
Unit 5page 3
form froia melted materials regardless of the chemical content of the melted
material; metamorphic rocks result from heat and/or pressure, and c#emical
reaction; and sedimentary rocks are the product of weathered and deposited
sediments that have accumulated and have been cemented.
A mineral is a solid element or compound with distinctive chemical and
physical properties or characteristics by which it can be readily identified.
Most minerals are recognized by their physical properties such as color, shape,
and hardness, but others are identified only by means of chemical analysis,
microscopic, or x-ray methods. Mineral identification keys are available
for making specific identifications. A typical key can be found in the Amer-
ican Geological Institute publication, GEOLOGY AND EARTH SCIENCES SOpCEBOOK,
Holt, Rinehart, and Winston, Inc. 1962, pages 14 and 15. Over 2,000 minerals
have been identified, thus trying to memorize the names of the minerals seems
impossible as well as unnecessary, since the keys make identification easy.
However, the common rocks are composed chiefly of a relatively small! number
of minerals.
To use a key, a compilation of the following properties are essentialp
1. Color of an 'untarnished surface.
2. Streak color--this may or may not be identical to the minerp. color.
3. Luster, or the "shine" or the way light if reflected such als bril-
liant like a diamond, glassy like glass, greasy, waxy, saki', or
dull.
4. Cleavage or planes of breakage when under stress.
5. Hardness
6. Weight
Unit 5page 4
- 140 -
The use of keys for identification purposes is not included in the
activities. If the students wish to study mineral identification, the
GEOLOGY AND EARTH SCIENCE SOURCEBOOK has many well written activities.
This unit will emphasize changes as they are related to the rock
cycle. Most of the technical terms will be omitted. The relationship
of the water cycle, heat, weathering, erosion and deposition to the rock
cycle is considered essential to form a model reflecting a broad general-
ized scheme needed for understanding earth processes.
- 141 -
TOPIC 1 - Minerals that have the same appearance and chemical composition
have the same hardness, the same streak, and the same color.
Different minerals have different appearances and chemical
composition and will probably exhibit different hardnesses,
different streaks, and different colors.
Minerals are identifiable by their physical appearances, properties,
and chemical compositions. The appearance of a mineral reflects the en-
vironment in which it was formed. The well formed crystals of minerals
have a regular geometric shape with smooth faces. If the minerals form
under crowded conditions, the crystal faces may not have regular geome-
tric shapes. To illustrate some physical properties of minerals, the
first nine minerals in the Mohs' Hardness Scale and Staurolite, hard-
ness 7; Cinnabar, hardness 3; and Chalcopyrite, hardness 3.5; show
hardness and streak color. The Mohst Hardness Scale and the streak on
a porcelain plate is:
1. Talc - - - White Streak 6. Orthoclase - White Streak
2. Gypsum - - White Streak 7. Quartz - - - None
3. Calcite -- White Streak 8. Topaz - - - None
4. Fluorite - White Streak 9. Corundum - - None
5. Apatite -- White Streak 10. Diamond - - None
(
- 1 /i2 -
TEACHER DIRECTION E - 29
MINERAL CRYSTALS, HARDNESS, AND STREAK COLOR
Materials for groups of three:
1. Staurolite 9. Fluorite
2. Chalcopyrite 10. Apatite
3. Cinnabar 11. Orthoclase
4. Porcelain Plate 12. Quartz
5. Penny 13, Topaz
6. Talc 14. Corundum
7. Gypsum
8. Calcite
The purpose of this activity is to demonstrate Molls' Hardness Scale,
the streak test, and the regular geometric shape of crystals.
The students are to establish the Hardness Scale. Initiate the activ-
ity by demonstrating that quartz will scratch glass, using a piece of glass,
but fluorite will not. The streak test can be demonstrated using a Porce-
lain plate and cinnabar. Explain that a fresh, clean surface of the min-
eral must be used.
A SCIENTIST NAMED MORS' DEVELOPED A HARDNESS SCALE. HE USED TEN MIN-
ERALS. YOU WILL BE GIVEN NINE OF THE TEN HE IDENTIFIED AS ONE THROUGH TEN.
Demonstrate hardness by .using.quartz and fluorite. YOU ARE TO PUT THESE
INTO THE ORDER HE USED. NEXT, YOU WILL RECEIVE THREE MINERALS. YOU ARE
TO DETERMINE THEIR HARDNESS. REMEMBER, USE A FRESH, BRIGHT SURFACE OF THE
MINERAL FOR TESTING. Discussion.
Demonstrate the streak test using cinnabar. Caution the students not
to confuse the streaks with scratches. A streak is a powder trail, a
scratch leaves a trench.
143 -
Teacher Directionpage 2
Pass out E -29
Label a demonstration set of minerals for the students to .use in identi-
fying their minerals. If the studentls minerals are not labeled, pass out
scotch tape or glue for the students to label the minerals themselves.
Upon completion, discuss the results, explain that streak tests and
hardness tests are not always conclusive in identifying minerals. They
are only clues. The crystals of staurolite, chalcopyrite, and cinnabar
may be of interest. Discuss their relationship to their environment
when forming.
14
- 144 -
STUDENT E - 29
MINERAL CRYSTALS, HARDNESS, AND STREAK COLOR
Minerals for groups of three:
1. Staurolite
2. Chalcopyrite d. Fluorite
3. Cinnabar
4. Porcelain Plate
5. Minerals of Mohst Hardness g. QuartzScale:
a. Talc
b. Gypsum
Minerals are formed in many different ways and under many different con-
ditions. They may be formed from a hot, molten liquid (igneous) such as lava
from a volcano; or they may be formed due to the heat and pressure found deep
in the earth without ever melting and flowing (metamorphic). The sizes of
the crystals may vary also. Crystals must have space and time to grow. If
there is not enough space, they will be small or irregularly shaped'.
Minerals have characteristics that remain the same, whether small
crystals or large crystals are formed. Whether they are perfectly shaped
or irregularly shaped. Two of these characteristics are hardness and streak
color. The hardness is a mineralts resistance to being scratched. A hard
mineral cannot be scratched by a softer mineral, but a hard mineral will
scratch a softer mineral. The streak of a mineral is the color of its
powder, and for many minerals it is not the same as the color of the
mineral.
Your instructor will give you nine minerals. Place the minerals in
numerical order from one to nine according to hardness. The mineral assigned
number one is to be the softest, and number nine will be the hardest.
c. Calcite
e. Orthoclase
f. Apatite
h, Topaz
i. Corundum
LI
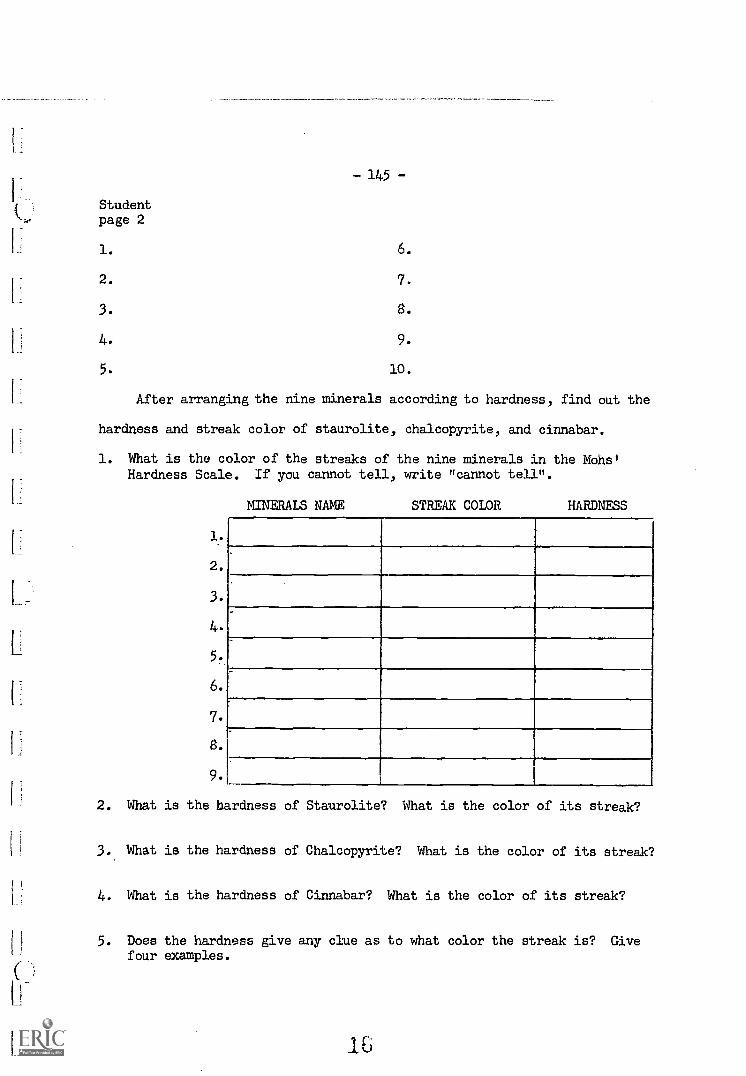
-145-
Studentpage 2
1. 6.
2. 7.
3. 8.
4. 9.
5. 10.
After arranging the nine minerals according to hardness, find out the
hardness and streak color of staurolite, chalcopyrite, and cinnabar.
1. What is the color of the streaks of the nine minerals in the Mons'Hardness Scale. If you cannot tell, write "cannot tell".
1.
2.
3.
4.
5.
6.
7.
8.
9.
2. What is the hardness of Staurolite? What is the color of its streak?
MINERALS NAME STREAK COLOR HARDNESS
3. What is the hardness of Chalcopyrite? What is the color of its streak?
4. What is the hardness of Cinnabar? What is the color of its streak?
5. Does the hardness give any clue as to what color the streak is? Givefour examples.
_16
- 146 -
Studentpage 3
6. Does the color of the mineral give you any clue as to what colorthe streak is? Give four examples.
LI
- 147 -
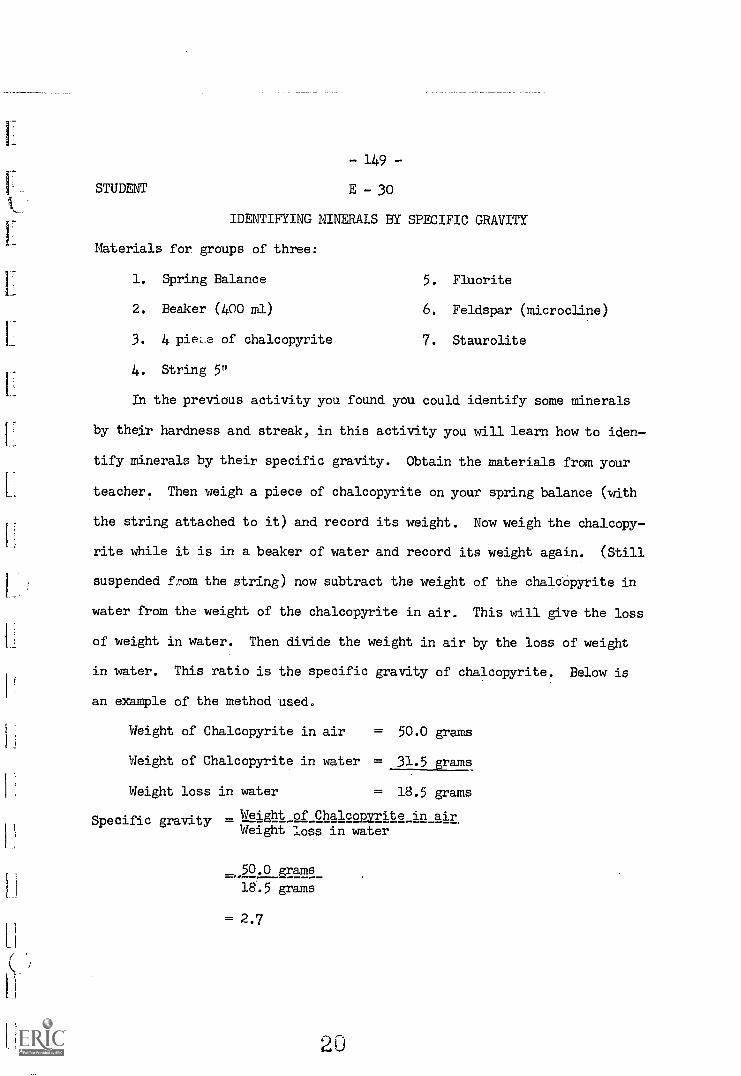
TEACHER DIRECTION E - 30
IDENTIFYING MINERALS BY SPECIFIC GRAVITY
Materials for groups of three:
1. Spring balance 5. Flourite
2. Beaker (400 ml) 6. Feldspar (microcline
3. A piece of Chalcopyrite 7. Staurolite
4. String 5"
The purpose of this activity is to show that specific gravity is
another characteristic that may aid in mineral identification. What
we would like to develop in the students is specific gravity is a ratio
of the weight of an object to the weight of an equal volume of water.
Before the students begin work ask them, HOW CAN A PIECE OF CHAL-
COPYRITE WEIGH DIFFERENT AMOUNTS AT DIFFERENT TIMES IF IT IS NOT CHANGED
IN ANY WAY? Allow them to give their ideas about this problem, but do
not give the answer.
Have the students to read the directions silently while you read
them aloud. Answer any questions the students might have concerning
the procedure. Let them begin.
After the students have weighed the chalcopyrite out of the water
and then ask them, DOES THE CHALCOPYRITE WEIGH MORE OR LESS WHEN IT IS
IN THE WATER? Less. WHY? The chalcopyrite is held up by a force
equal to the water it displaced.
Move about the students assisting if necessary. After the child-
ren understand how to find the specific gravity of chalcopyrite allow
them to determine the specific gravity of fluorite, feldspar and
staurolite.
-148-
Teacher Directionpage 2
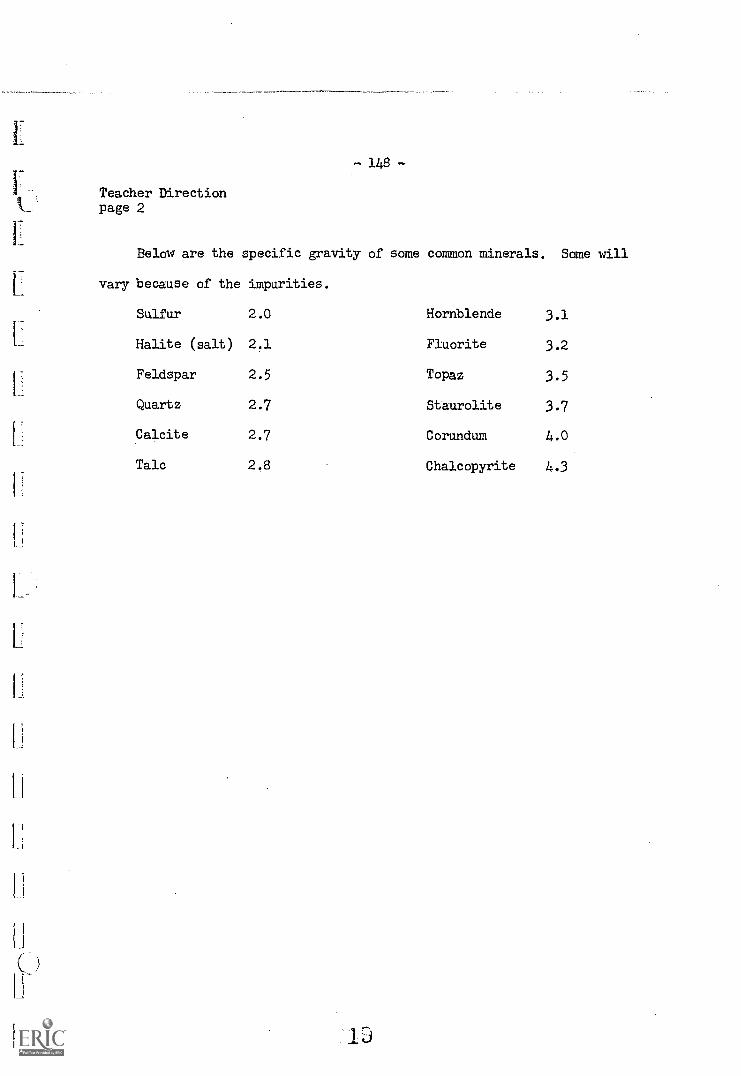
Below are the specific gravity of some common minerals.
vary because of the impurities.
Some will
Sulfur 2.0 Hornblende 3.1
Halite (salt) 2.1 Fluorite 3.2
Feldspar 2.5 Topaz 3.5
Quartz 2.7 Staurolite 3.7
Calcite 2.7 Corundum 4.0
Talc 2.8 Chalcopyrite 4.3
0
is
- 149 -
STUDENT E - 30
IDENTIFYING MINERALS BY SPECIFIC GRAVITY
Materials for groups of three:
1. Spring Balance 5. Fluorite
2. Beaker (400 ml) 6. Feldspar (microcline)
3. 4 piece of chalcopyrite 7. Staurolite
4. String 5u
LI(
In the previous activity you found you could identify some minerals
by their hardness and streak, in this activity you will learn how to iden-
tify minerals by their specific gravity. Obtain the materials from your
teacher. Then weigh a piece of chalcopyrite on your spring balance (with
the string attached to it) and record its weight. Now weigh the chalcopy-
rite while it is in a beaker of water and record its weight again. (Still
suspended from the string) now subtract the weight of the chal6opyrite in
water from the weight of the chalcopyrite in air. This will give the loss
of weight in water. Then divide the weight in air by the loss of weight
in water. This ratio is the specific gravity of chalcopyrite. Below is
an example of the method used.
Weight of Chalcopyrite in air = 50.0 grams
Weight of Chalcopyrite in water = 31.5 grams
Weight loss in water = 18.5 grams
Specific gravity = Weight of Chalcopyrite in air,Weight loss in water
__50.0 -grams
18.5 grams
= 2.7
20
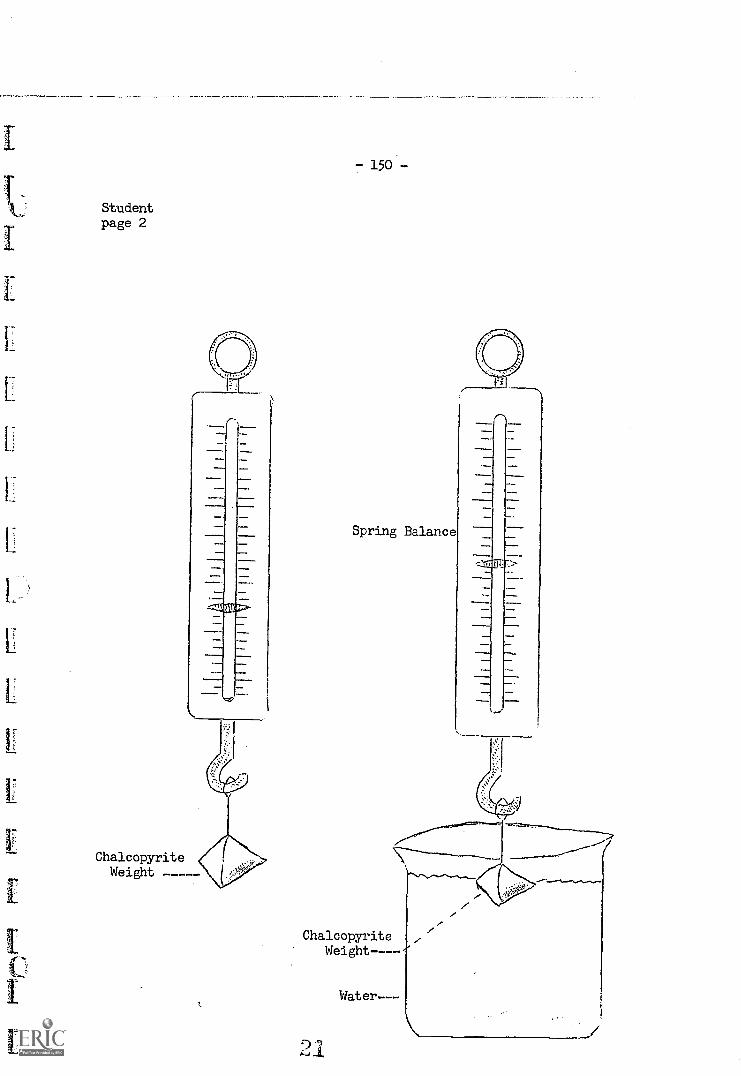
Studentpage 2
II
II
ChalcopyriteWeight
It
-150-
Spring Balance
ChalcopyriteWeight -
21
1
TOPIC 2 - A mineral is a solid element or a compound 0,,surring in natureand having a definite composition and appearance.
151
TEACHER DIRECTION E - 31
ROCKS AND MINERALS
Materials for groups of three:
1. Limestone 4. Dilute Hydrochloric apid
2. Marble 5. Hammer
3. Hand Lenses 6. Mica Schist1
Over 2,000 minerals have been identified. Minerals are natura1117-
occurring substances found in rocks. Minerals give clues of the environ-
ment in which they are formed. Three rocks are used in this activity;
limestone, which is a sedimentary rock formed in the ocean; and two
metamorphic rocks, marble and mica schist. The marble and the lime-
stone have essentially the same composition, and are chiefly composed
of the mineral calcite. In the limestone, however, the calcite is in
the form of shells and small fragments, while in the marble it has
crystallized. Thus, the marble is considered a metamorphosed lime-
stone, a limestone that has been changed by heat and pressure, so thepe
two rocks illustrate two stages in the rock cycle, namely a sedimentary
rock and a sedimentary rock that has been changed into a metamorphic
rock.
The purpose of this activity is to initiate a list of character-
istics of sedimntary rocks and metamorphic rocks.
Ask the students to group themselves into groups of three. To
each group give one piece of limestone, one piece of mica schist, and a
hammer. Ask the groups to sit in a circle and the instructor can stand
in the middle. As the students ask questions and make contributions,
ask them to show you. This will aid in communication.
2
-152-
Teacher Directionpage 2
Instruct each group to take out two sheets of paper and write sedimen-
tary on one piece and metamorphic on the other. You will have to spell the
words. The students are to make a list from the discussion. Ask the
students to write on the appropriate piece of paper labeled "metamorphic"
and "sedimentary".
TAKE OUT TWO SHEETS OF PAPER FOR EACH GROUP. Pause, giving time to
obtain the paper. If students do not have paper, give them some. ON ONE
SHEET, WRITE SEDIMENTARY. Spell the word. ON THE SECOND SHEET, WRITE
METAMORPHIC. Spell the word. LET'S TRY TO MAKE A LIST OF CHARACTERISTICS
OF EACH ROCK. DO NOT WRITE ANYTHING UNTIL WE ALL DECIDE WHAT SHOULD BE
WRITTEN. BREAK THE ROCK TO EXPOSE A FRESH SURFACE. Attempt to obtain
group discussion. Interject suggestions and the terms sedimentary and
metamorphic at every opportunity. Fossils in the limestone are examples
of past life as well as a characteristic of sedimentary rocks. The
absence of fossils in the schist is characteristic of metamorphic rocks.
Metamorphic rocks rarely contain fossils, but this fact need not be brought
up at this time. The banding of metamorphic rocks is indicative of pres-
sure. The crystallized mica is the result of heat and pressure: Meta-
morphic rocks show more compaction and cementation. When metamorphic
rocks are broken, they break across the mineral crystals. For example,
mica schist splits easily across the mica crystals; on the other hand,
sedimentary rocks break around the minerals, grains, fragments, chunks,
etc. A hand lens may be required to note these differences.
Pass out E-30
- 153 -
Teacher Directionpage 3
Upon completion of the activity assemble for a class discussion. Discuss
the findings recorded in the table, using a prepared acetate. Stress the
difference in the appearances of the three rocks.
Discuss the reason for exposing a fresh surface on the rocks. The
outer surfaces of the minerals may have weathered.
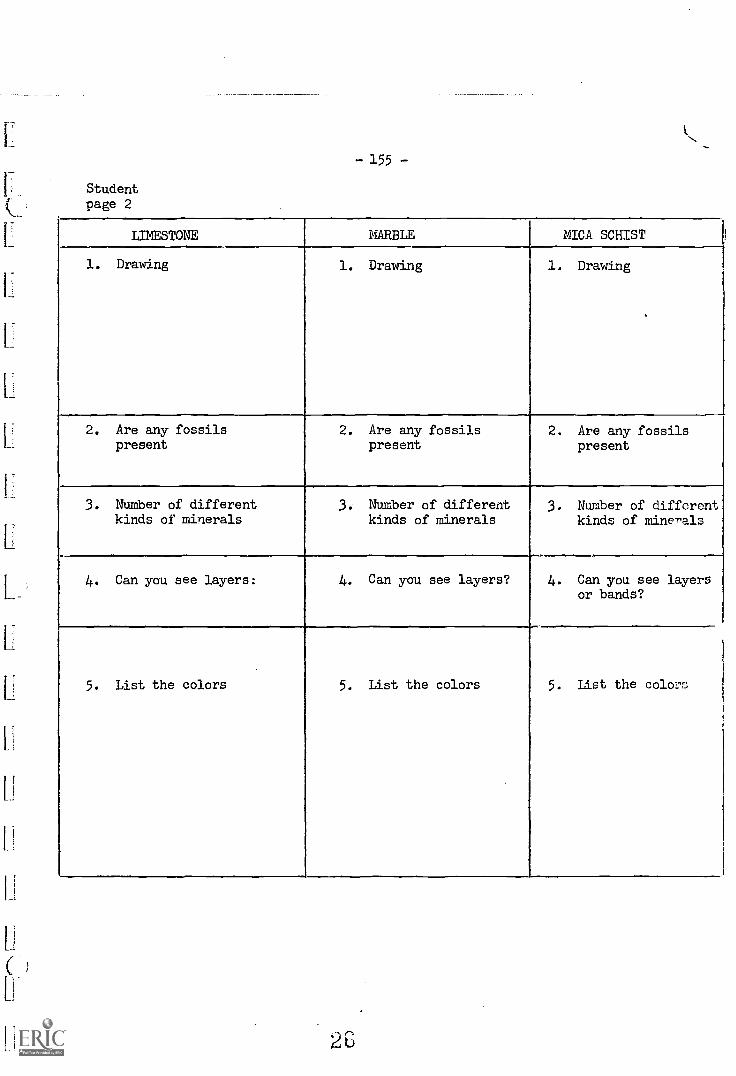
STUDENT
Materials for groups of three:
- 154 -
E - 31
ROCKS AND MINERALS
1. limestone 4. Hand lenses
2. Marble 5. Mica Schist
3. Diluted Hydrochloric acid 6. Hammer
What is a rock? What is a mineral? Well, a rock is an aggregate of minerals,
but it may be just one mineral. Let's define minerals by saying that a mineral is
a naturally occurring material having a definite appearance and a definite chemical
composition.
You see, rocks are formed in many ways. The materials on the bottom of the
ocean maybe buried and tightly packed, together thus forming a rock. This rock
might contain a number of different-looking parts--minerals.
You have a piece of limestone and a piece of marble. Lets see how they
are alike or different. They are alike in that they were once part of a bottom
of the ocean. They are different because of what happened to them after they
were formed.
Let's test limestone, schist, and marble at the same time and compare the
results. Place the limestone on a piece of paper numbered 1; the marble on
another piece of paper marked 2; and the mica schist on a piece of paper
marked 3.
First, add 1 drop of diluted hydrochloric acid to each rock. Limestone
and marble will bubble where the acid is placed, but the schist will not.
With the hammer break the rocks and use the bright, clean side for observation.
Li
C
Studentpage 2
-155-
LIMESTONE MARBLE MICA SCHIST
1. Drawing 1. Drawing 1. Drawing
2. Are any fossilspresent
2. Are any fossilspresent
2. Are any fossilspresent
3. Number of differentkinds of minerals
3. Number of differentkinds of minerals
3. Number of differentkinds of minerals
4. Can you see layers: 4. Can you see layers? . Can you see layersor bands?
5. List the colors 5. List the colors 5. List the colors
L
1
L
C
1,
TEACHER DIRECTION
- 156 -
E - 32
A CLOSE LOOK AT SEDIMENTARY AND METAMORPHIC ROCKS
Materials for groups of three:
1. Limestone 4. Hammer
2. Marble 5, Hand Lenses
3. Garnet mica schist
The students are to grind up and separate each rock into groups of minerals.
A mineral is a naturally-occurring material with a definite appearance and a de-
finite chemical composition.
The students will need help in describing their findings. Suggest key
words regarding color, feel, angles, length, width, etc., when needed.
Holding samples of the two rocks, lead the discussion. HOW MANY DIFFERENT
KINDS OF SUBSTANCES ARE IN THE LIMESTONE? Hold up the limestone for demonstra-
tion. HOW MANY KINDS OF SUBSTANCES ARE IN THE MARBLE? Hold up the marble for
demonstration. DO YOU KNOW WHAT SCIENTISTS CALL THE PARTS OF ROCKS THAT LOOK
EXACTLY ALIKE? Pause. THEY CALL THEM MINERALS. THESE MINERALS YOU SEE IN
THESE TWO ROCKS HAVE THE SAME COMPOSITION AS WELL AS LOOK ALIKE, THEREFORE,
THE LIMESTONE AND MARBLE ARE MADE OF THE SAME MINERALS. HOW MANY MINERALS ARE
IN THE SCHIST? Discussion. Stress the relationship of mineral to the total
rock.
Pass out E-32
Upon completion of the activity, reassemble for a class discussion. Start
the class discussion at least fifteen minutes before the end of the period. Ask
the students to compare their findings in E-32 with those in E -31 and then make
corrections and write a new list using a clear acetate and help compile a list
of characteristics. Ask the students to copy this list for future reference.
Li
-157-
Teacher Directionpage 2
Ask the students to explain how a metamorphic rock could become a sedi-
mentary rock. Do not use the terms erosion and weather-ng, but water, wind,
and chemical action.
Ask the students to explain how a sedimentary rock could be buried very
deep where heat and pressure caused it to change to marble, a metamorphic rock.
A good demonstration to show that they are chemically alike is to place part
of the ground-up limestone into a 500 ml solution of diluted hydrochloric acid,
and some of the ground-up marble into another 500 ml of hydrochloric acid. Do
not structure the discussion, rather, ask questions. Use the terms minerals,
sedimentary, and metamorphic freely. Compliment their use, but do not require
their use.
9 E;
Student -32 - 158 -
A CLOSE LOOK AT SEDIMENTARY AND METAMORPHIC ROCKS
Materials for groups of three:
1. Limestone 4. Hammer
2. Marble 5. Hand. lenses
3. Garnet mica schist
In activity E -31 we saw that a different looking material was on the sur-
face of each rock. All that could be se,..n was the outside. Let's see what
is inside. Can you divide the materials inside the rock into separate piles
of minerals? Minerals are the parts of a rock that look the same and have
the same chemical composition.
On one sheet of paper, write "limestone", on the second sheet write
"marble", and on the third sheet write schist.
With the help of your instructor, grind each rock up separately. Then,
separate the minerals into piles. Keep the minerals from each rock on the same
sheet of paper. Below each pile of minerals record the color, shape, how it
feels, drawings of its appearance, plus any other impoitant things you can see.
Coolare your lists to the ones made in Activity E-.31.
2
- 159 -
TOPIC 3 Metamorphic rocks formed from sedimentary rocks reflect the enviroment
and composition of the parent rock. As temperature, pressure, and
chemical composition change, the resulting metamorphic rock changes,
reflecting the changing environment.
TEACHER RESOURCE
Three conditions are necessary to form metamorphic rocks:
1. The rock must not melt; it may become soft like a plastic but it always
remains solid,
2. Heat and pressure are required. Under the influence of pressure, changes
take place which reduce the size of the rock.
3. Chemica reactions occur, resulting in the formation of new minerals or the
destruction of old minerals, or the changes in appearance and space relation
of existing minerals.
Metamorphic rocks have changed in appearance and volume in the solid state
in response to a pronounced alteration in temperature, pressure, and chemical
environment. All of these are brought about by the same forces that cause
folding, faulting, injection of molten lava (magma), and the elevation and
depression of mountains. These forces bring about changes within the rocks.
Metamorphism occurs within the earth's crust, below the zone of weathering
and cementation and outside the zone of melting.
The chemical composition and the grain size of the parent rock are the
major factors influencing the kinds of metamorphic rock that evolve. Hot
water solutions released late in the solidification of magma often invade
surrounding rocks. This introduces new chemicals into the surrounding rocks
which can cause alterations in the rocks. These solutions from the magma usu-
ally remain in areas close to igneous formations.
-160-
Teacher Resourcepage 2
The grain size of the rocks affect the rate that rocks can be changed. If new
solutions are introduced, the fine-grained rocks are more readily changed than
the larger-grained rocks because they have greater areas of grain surface
exposed to the chemically activ3 fluid.
Two different types of metamorphism occurs----Contact and regional----.
Contact metamorphism occurs in restricted zones where molten rock comes in
contact with cooler rocks. The hot gases, solutions, and heat from the molten
rock cause chemical changes in the surrounding rocks. The extent of contact
metamorphism is usually restricted---seldom measuring more than a few hundred
feet in width.
Regional metamorphism may cover thousands of square miles and be thous-
ands of feet thick. It occurs at great depth during mountain building. Rocks
representing regional metamorphism which are shown in E-33, are gneiss, schist,
slate, and marble. Staurolite and garnet are examples of minerals found in
regional metamorphosed rocks.
31
*-261 -
TEACHER DIRECTION E 33
SEDIMENTARY TO METAMORPHIC
This reading activity is to clinch that part of the rock cycle dealing
with sedimentary and metamorphic rocks. Newcterms introduced are weathering
and erosion. A short discussion of these two terms before passing out E -33
will be necessary. Other terms that need to be mentioned are higher temperature- -
hotter, increased pressure -more pressure, cycle-- a recurring process, and
rafters(support) in a mine.
Pass out E-33
Instruct the students to read the activity quietly, then read it aloud,
discussing the points of interest. Answer the,question at the end of the
activity. The answer is that metamorphic rocks, when exposed at the surface,
may Ise weathered, eroded, and transported away, or buried again.

- 162 -
STUDENT E - 33
SEDIMENTARY TO METAMORPHIC
Rocks on and under the surface of the earth are always changing. The rocks
on the surface are exposed to the hydrosphere and atmosphere. They break down
and provide materials which become sediments. The breaking down of the rocks is
called weathering. The weathered material is picked up by wind, water, or ice
and carried to a new location. The movement of the weathered rocks, with the
accompanying abrading, and pulverizing action is called erosion. The process
is an age-old cycle of crumbling by weathering, grinding as the material is
moved by erosion, and deposition of the transported materials as sediments
to form a new rock.
Changes that occur in rocks deep below the earth's surface are very dif-
ferent from the changes caused by weathering. Weathering reduces the size of
rocks and minerals whereas the processes that affect rock materials deep in
the earthts surface commonly causes minerals to grow larger or form new ones.
The changes are due to the higher temperatures and pressures on the earth's
surface, but still are not high enough to cause the rocks to melt.
How do we know these things happen: Can we see minerals growing? No.
We must look at the evidence available. Drillers of deep wells have shown
time after time that the earth gets hotter as you drill deeper. Miners in
deep mines have reported that rocks bulge out--bending large rafters (sup-
ports) due to pressure on the rocks. It is certain that pressure and tem-
perature increase as you go downward into the earth.
After millions of years of weathering and erosion of the earth's surface,
the deeply buried rocks may become exposed. We can then observe them and
form ideas regarding their formation. The questions that many ask are: Can
you show me?" "Can you demonstrate it in the laboratory?" "Can you make it?"
-163-
Studentpage 2
No, we can't show a mineral growing for thousands of years. We can grow min-
erals in the laboratory, and we sure have some good evidence. Yes, we can
make some of the crystals, in fact we can make some larger and more symmetric
than nature You will have an opportunity to make some crystals in the next unit.
If the metamorphic rocks are exposed to the hydrosphere and atmosphere,
what will happen.
34
C
164
TEACHER DIRECTION E 34
EVIDENCE OF SEDIMENTARY ROCKS BECOMING METAMORPHIC ROCKS
Materials for groups of three:
1. Clay (rock) 4. Schist
2. Shale 5. Gneiss
3. Slate
The five rocks are to be arranged according to the degree of metamorphism,
that is, to the degree of increased temperature and pressure.
The arrangement should be:
1. Clay 4: Schist
2. Shale 5. Gneiss
3. Slate
The students will then be able to see representative samples of clear
change due to an increase in temperature and pressure.
Rocks become more dense as the rock environment becomes hotter and as
squeezing becomes more intense. The minerals that make up the rock also
change as the environment changes. Garnet, a very dense, symmetrical miner
al with smooth faces can form where schist and gneiss form because the pres
sure and temperature requirements are the same for the formation of schist
and garnet.
The activity should be initiated by a short review of Activity E--33,
then read the student directions aloud. The students should be successful
with a minimum of assistance.
Pass out E-34.
Upon completion, discuss the results. The last statement in the table
regarding melting will lead into the next topic. Clinch the important prin
ciple that metamorphic rocks can never melt (become liquid). If they do melt,
they will form igneous rocks.
- 165 -
STUDENT E 34
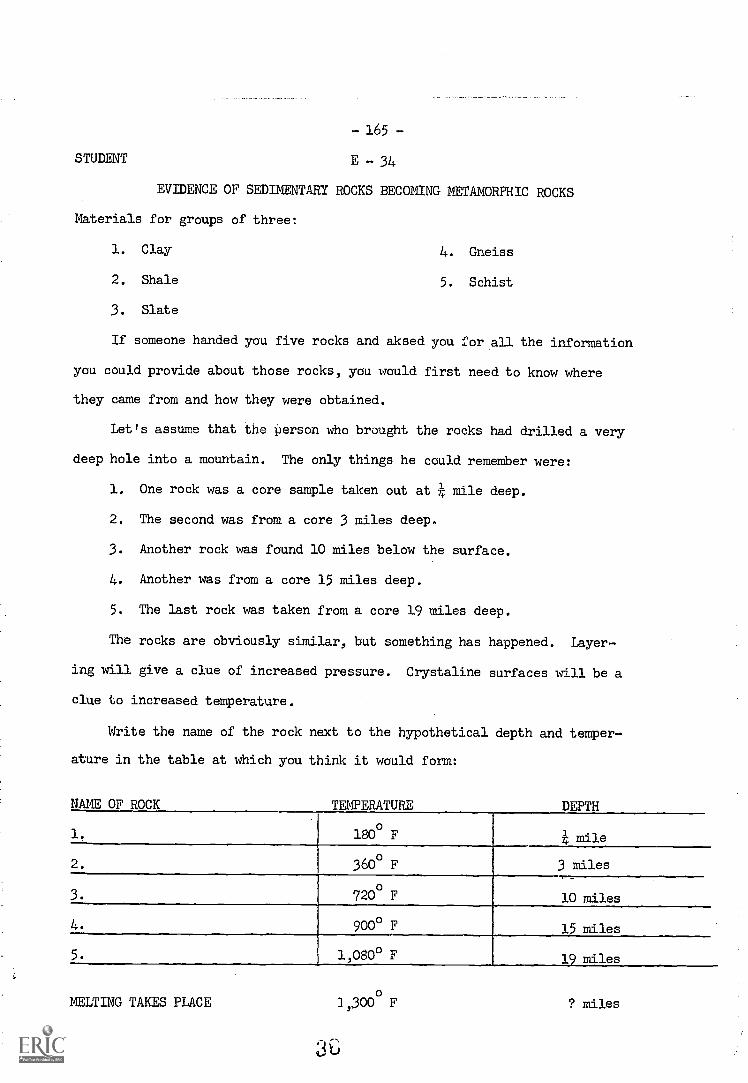
EVIDENCE OF SEDIMENTARY ROCKS BECOMING METAMORPHIC ROCKS
Materials for groups of three:
1. Clay 4. Gneiss
2. Shale 5, Schist
3. Slate
If someone handed you five rocks and aksed you for all the information
you could provide about those rocks, you would first need to know where
they came from and how they were obtained.
Let's assume that the person who brought the rocks had drilled a very
deep hole into a mountain. The only things he could remember were:
1. One rock was a core sample taken out at 4 mile deep.
2. The second was from a core 3 miles deep.
3. Another rock was found 10 miles below the surface.
4. Another was from a core 15 miles deep.
5. The last rock was taken from a core 19 miles deep.
The rocks are obviously similar, but something has happened. Layer-
ing will give a clue of increased pressure. Crystaline surfaces will be a
clue to increased temperature.
Write the name of the rock next to the hypothetical depth and temper-
ature in the table at which you think it would form:
NAME OF ROCK TEMPERATURE
0180 F
360° F
3.
4.
5.
0720 F
9000 F
1,080° F
MELTING TAKES PLACE 3,3000 F
'16
DEPTH
4 mile
3 miles
10 miles
15 miles
19 miles
? miles
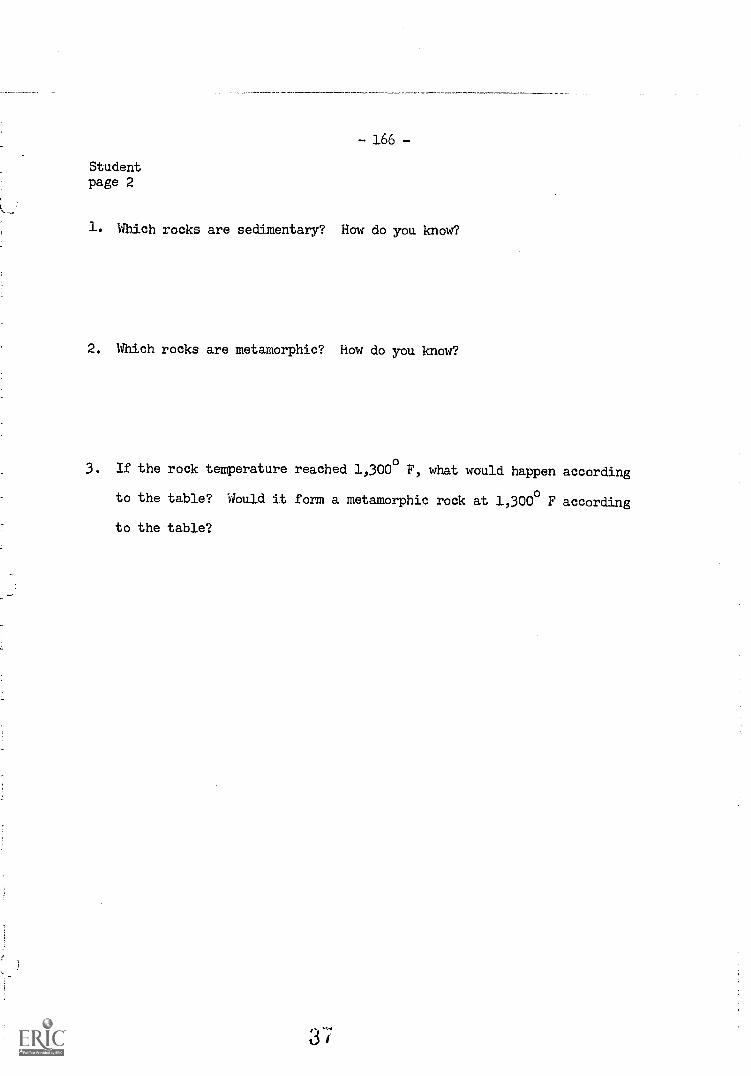
-166-
Studentpage 2
1. Which rocks are sedimentary? How do you know?
2. Which rocks are metamorphic? How do you know?
3. If the rock temperature reached 1,300° F, what would happen according
to the table? Would it form a metamorphic rock at 1,300° F according
to the table?
- 167 -
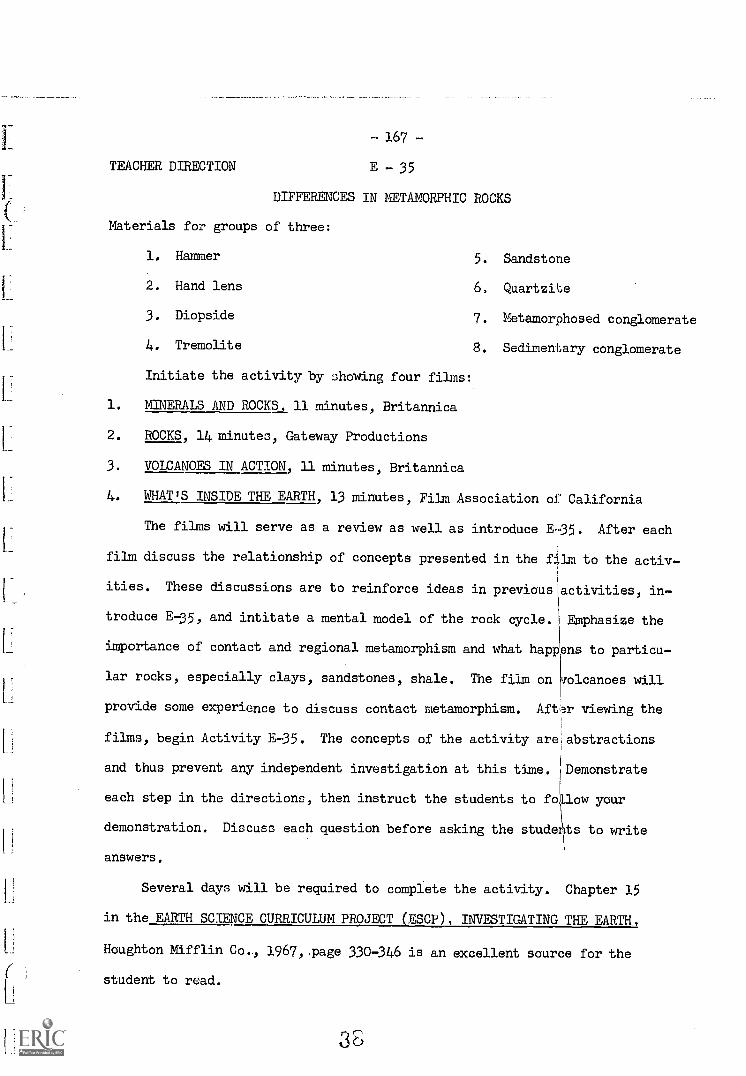
TEACHER DIRECTION E - 35
DIFFERENCES IN METAMORPHIC ROCKS
Materials for groups of three:
1. Hammer 5. Sandstone
2. Hand lens 6, Quartzite
3. Diopside 7. Metamorphosed conglomerate
4.. Tremolite 8. Sedimentary conglomerate
L_
Initiate the activity by showing four films:
1. MINERALS AND ROCKS, 11 minutes, Britannica
2. ROCKS, 14 minutes, Gateway Productions
3. VOLCANOES IN ACTION, 11 minutes, Britannica
4. WHAT'S INSIDE THE EARTH, 13 minutes, Film Association of California
The films will serve as a review as well as introduce E-35. After each
film discuss the relationship of concepts presented in the film to the activ-
ities. These discussions are to reinforce ideas in previous
troduce E-35, and intitate a mental model of the rock cycle.
activities, in-
Emphasize the
importance of contact and regional metamorphism and what happens to particu-
lar rocks, especially clays, sandstones, shale. The film on volcanoes will
provide some experience to discuss contact metamorphism. AftBr viewing the
films, begin Activity E-35. The concepts of the activity are abstractions
and thus prevent any independent investigation at this time. Demonstrate
each step in the directions, then instruct the students to foLlow your
demonstration. Discuss each question before asking the studer \ts to write
answers.
Several days will be required to complete the activity. Chapter 15
in the EARTH SCIENCE CURRICULUM PROJECT (ESCP), INVESTIGATING THE EARTH,
Houghton Mifflin Co., 1967, .page 330-346 is an excellent source for the
student to read.
do
[i
L
L_
- 168 -
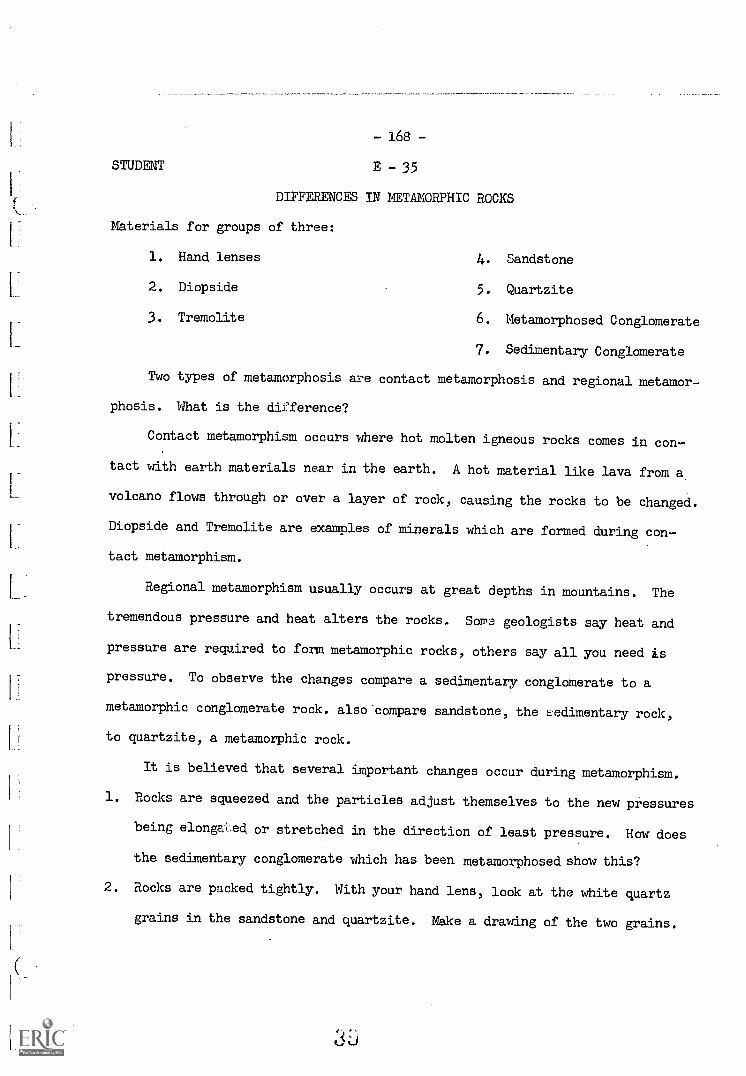
STUDENT E - 35
DIFFERENCES IN METAMORPHIC ROCKS
Materials for groups of three:
1. Hand lenses 4. Sandstone
2. Diopside 5. Quartzite
3. Tremolite 6. Metamorphosed Conglomerate
7. Sedimentary Conglomerate
Two types of metamorphosis are contact metamorphosis and regional metamor-
phosis. What is the difference?
Contact metamorphism occurs where hot molten igneous rocks comes in con-
tact with earth materials near in the earth. A hot material like lava from a
volcano flows through or over a layer of rock, causing the rocks to be changed.
Diopside and Tremolite are examples of minerals which are formed during con-
tact metamorphism.
Regional metamorphism usually occurs at great depths in mountains. The
tremendous pressure and heat alters the rocks, Soma geologists say heat and
pressure are required to form metamorphic rocks, others say all you need is
pressure. To observe the changes compare a sedimentary conglomerate to a
metamorphic conglomerate rock. also'compare sandstone, the sedimentary rock,
to quartzite, a metamorphic rock.
It is believed that several important changes occur during metamorphism.
1. Rocks are squeezed and the particles adjust themselves to the new pressures
being elongated or stretched in the direction of least pressure. How does
the sedimentary conglomerate which has been metamorphosed show this?
2. Rocks are packed tightly. With your hand lens, look at the white quartz
grains in the sandstone and quartzite. Make a drawing of the two grains.
3-J
-169-
Studentpage 2
Next, feel the surface of a sandstone - does it feel rough? This indicates
the breaking around the grains. Feel the surface of the quartzite - does it
feel smooth? This indicates a breaking across the grain.
- 170 -
Topic 4 - Igneous activity consists of movements of molten rock both inside
and outside the earth's crust. Rocks formed from the molten rock
materials are called igneous rock.
TEACHER RESOURCE
Igneous activity requires melted rock materials (liquid) called MAGMA.
It is not known at exactly what depth magma forms, but evidence indicates that
there are no extensive zones of molten rock within 18 miles of the surface of
the earth. It is probably formed at depths no greater than 40 miles. These
depths are calculated from present-day valcanoes. Any liquid will rise to a
height comparable to the pressure applied of it. The greater the pressure,
the greater the height to which it will rise. This principle may be applied
to volcanoes from 2,000 to 20,000 feet in height. It is believed that the
pressure resulting from 15 to 20 miles or rock would be required to push the
magma to the top of a 20,000-foot volcano. Over 2,000°F, is required to melt
rocks of comparable composition to volcanio magma. The increase in tempera-
ture average 150 0 F per mile below the surface for an unknown depth, so at a
depth of over 13 miles the temperature could be 2000°F.
Molten materials may supply enough heat to melt surrounding rock. As
the molten material moves within or between rocks it fractures them and pro-
vides additional avenues for magma movement.
When magma within the crust loses its mobility, it solidifies in place,
forming igneous rocks.
When the magma reaches the surface of the earth, it may blow out or pour
along cracks in the earth's surface. As the lava accumulates it may pour
from a single cone of a volcano.
As the magma cools mineral grains begin to grow, gas and vapors are given
off, and it hardens into igneous rocks.
- 171 -
Teacher Resourcepage 2
In general, the slow cooling of magma below the earth's surface produces
to coarse-grained rocks. While cooling at or near the surface causes finer-
grained rocks.
Most volcani rocks are basaltic, whereas many deep-formed rocks are
graniti and coarse-grained, called plutonic rocks.
Some granite rocks are believed to be igneous in origin, as in batho-
liths, dikes, and sills, while others, as those formed as the cores in
extensive mountain ranges are believed to be metamorphic in origin. These
latter rocks have the same composition as clays and shales, and so are
thought to be metamorphosed sediments.
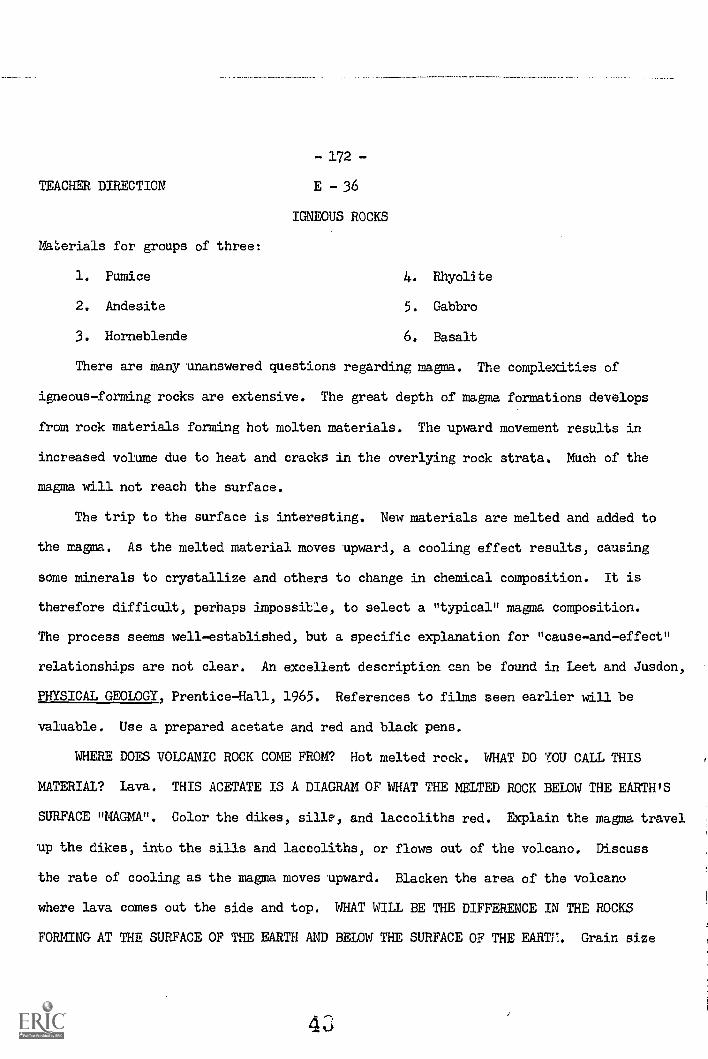
TEACHER DIRECTION
Maerials for groups of three:
- 172 -
E - 36
IGNEOUS ROCKS
1. Pumice 4. Rhyolite
2. Andesite 5. Gabbro
3. Horneblende 6. Basalt
There are many unanswered questions regarding magma. The complexities of
igneous-forming rocks are extensive. The great depth of magma formations develops
from rock materials forming hot molten materials. The upward movement results in
increased volume due to heat and cracks in the overlying rock strata. Much of the
magma will not reach the surface.
The trip to the surface is interesting. New materials are melted and added to
the magma. As the melted material moves upward, a cooling effect results, causing
some minerals to crystallize and others to change in chemical composition. It is
therefore difficult, perhaps impossible, to select a "typical" magma composition.
The process seems well-established, but a specific explanation for "cause-and-effect"
relationships are not clear. An excellent description can be found in Leet and Jusdon,
PHYSICAL GEOLOGY, Prentice-Hall, 1965. References to films seen earlier will be
valuable. Use a prepared acetate and red and black pens.
WHERE DOES VOLCANIC ROCK COME FROM? Hot melted rock. WHAT DO MU CALL THIS
MATERIAL? Lava. THIS ACETATE IS A DIAGRAM OF WHAT THE MELTED ROCK BELOW THE EARTH'S
SURFACE "MAGMA". Color the dikes, sille, and laccoliths red. Explain the magma travel
IT the dikes, into the sills and laccoliths, or flows out of the volcano. Discuss
the rate of cooling as the magma moves upward. Blacken the area of the volcano
where lava comes out the side and top. WHAT WILL BE THE DIFFERENCE IN THE ROCKS
FORMING AT THE SURFACE OF THE EARTH AND BELOW THE SURFACE OF THE EARTY,. Grain size
L
-173-Teacher Directionpage 2
will be larger below the surface. Discues. WHO KNOWS WHAT WE CALL ROCKS FORMED
FROM MELTED ROCKS? Igneous rocks. WHERE DOES THE ROCK COME FROM THAT MELTS TO FORM
MAGMA. From below the surface and from rocks next to the flowing magma. This pre-
vents us from showing exactly what original magma consists of chemically.
Use the rocks listed under materials for demonstration and read the student
activity aloud.
Pass out E-36
Upon completion of the activity, discuss the findings, using a prepared acetate
to formulate opinions about where rocks are formed.
Andesite, horneblende, and gabbro are crystallized deep below the earth's sur-
face. Basalt, rhyolite, and pumice are formed near or on the surface. This can be
determined by the mineral grain size.
Students are generally fascinated by volcanos. A library assignment to look
up and write reports on volcanos may be attempted. Volcanos of interest are:
1. Mauna Loa, Hawaii (largest known)
2. Kilauea, Hawaii
3. Katamai, Alaska
4. Asama, Japan
5. Mount Pele,?, West Indies
6. Mayon, Phillipine Islands
7. TaMbora, Sumbawo Island
8. Vesuvius, Italy
9. Krakatoa, Java
10. Paracutin, Mexico
STUDENT
Materials for groups of three:
- 174
E 36
IGNEOUS ROCKS
1. Pumice 4. Rhyolite
2. Andesite 5. Gabbro
3. Hornblende 6. Basalt
Igneous rocks are formed from hot, molten (melted) rock called magma, It is
believed that magma forms deep in the earth, then works its way toward the surface.
Sometimes the magma reaches the surface and flows along the surface, or it may erupt
to form a volcano.
Volcanos have spells. They may explode violently, throwing lava, rock fragments,
dust, and gases into the air. The volcano may remain quiet for hours or even years,
or it may have a gentle flow of lava, or it may die and never erupt again. Magma
doesn't always come to the surface, but instead may cool below the surface.
What would you expect the rocks from volcanos to look like? Probably they would
consist of minerals formed below the surface.
You have six rocks. Divide them into separate groups according to the appearance
of the rocks, and whether you think the rocks cooled above or below the earthls
surface.
List the characteristics of each group.
ABOVE THE SURFACE BELOW THE SURFACE
43

TEACHER DIRECTION
- 175 -
E - 37
WHERE WILL IGNEOUS ROCKS GO?
This reading activity reinforces the rock-cycle. Ask the students to read
the activity, then read it aloud, discussing the important parts, using the pre-
pared acetate. The terms weathering and erosion should be reviewed. Water,
wind, and ice are the major eroding agents.
4E1
L.
- 176 -
STUDENT E - 37
WHERE WILL IGNEOUS ROCKS GO?
It seems that rocks are always in the process of going somewhere! How about
igneous rocks? Do they change by weathering and erosion? Yes! All rocks undergo
weathering and erosion when exposed to the hydrosphere and atmosphere. The chemicals
in the water and in the air react with igneous rocks the same as they do with sed-
imentary and metamorphic rocks.
But, how do we know? If we were to drill a well in south Arkansas, we would
find small flakes of volcanic lava, but we would have a hard time finding a volcano..
If we looked further north we would find a mountain of igneous rocks. Now, anyone
in south Arkansas can tell you that one of the major rivers flowing through Arkansas
runs right through the igneous rocks farther upstream, then across south Arkansas
and into Louisiana. If you would talk to my grandfather, he would tell you how the
rivers used to rise during the winter and flood many square miles of woods. If my
grandfather was a geologist, he would tell you the flood waters were from the igne-
ous rocks in north Arkansas as well as locally.
In 1783, a Japanese volcano named Asana and another named Lahi in Iceland had
tremendous volcanic eruptions. Scientists during the year also reported "dry" fog
in northern Africa and Scandinavia. At one place, the density of the fog was so
great the sun was not visible until it had reached a position 17 degrees above the
horizon. The winters of 1783-1784 were among the coldest on record. Benjamin
Franklin was the first to publish the reason--volcanic, or igneous materials in
the air above the earth. Other volcanic activities have been recorded demonstrating
the wide effects of volcanic activity. Mayon in the Philippine Islands threw so
much dust in the air that for three days there was an absolute darkness for a distance
of about 300 miles. This dust accumulated as sediment which could be formed into
sedimentary rock. These in turn could be burned.
4 I
- 177 -
Studentpage 2
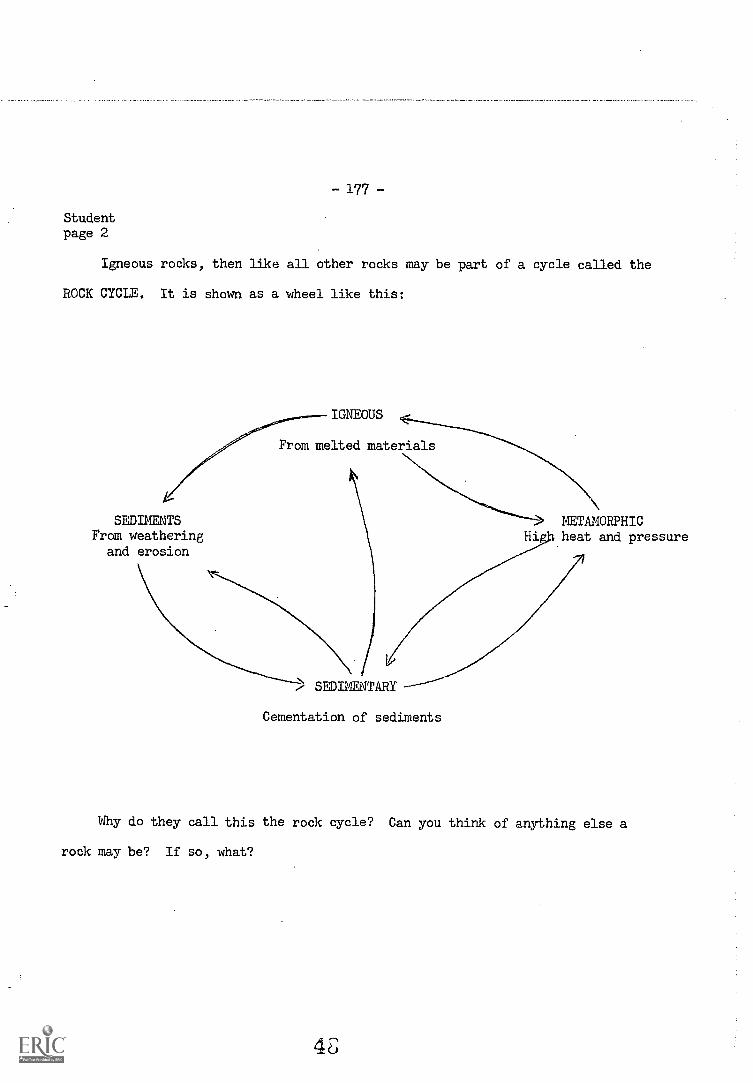
Igneous rocks, then like all other rocks may be part of a cycle called the
ROCK CYCLE. It is shown as a wheel like this:
SEDIMENTSFrom weathering
and erosion
IGNEOUS
From melted materials
> METAMORPHICHi:. heat and pressure
SEDIMENTARY
Cementation of sediments
Why do they call this the rock cycle? Can you think of anything else a
rock may be? If so, what?
4E;
TEACHER DIRECTION
178
E 38
VOLCANOES
Materials for teacher demonstration
1. Modeling clay 2. Ammonium dichromate
This is a reading activity on volcanoes to give the students some insight on
the make up and causes of volcanoes.
Have the students to read over the activity. Afterward read over the activity
with the students discussing the definition of terms and the different types of
volcanoes. Explain mythology to them. When you have finished the discussion per
form the demonstration to get their interest. Make an indentation in the top of
a cone shaped mound of modeling clay large enough to hold three (3) tablespoons of
ammonium dichromate. Light the chemical with a match or light a piece of magnesium
ribbon extending from the chemical. Use a dark room to get a better effect.
(Caution the student should stand a few feet away from the demonstration).
Explain to the students that this is showing how volcanic cinder exude from
a volcano, tell them they will observe the flow of lava and other characteristics of
one volcano in the film.
Show film: THE ERUPTION OF KILAUEA. After the film entertain questions and
comments. You may want to refer back to transparency E-36.
4 5'
- 179 -
E - 38
VOLCANOES
STUDENT
The rd volcano comes from the word Vulcan. According to mythology, vulcan
was the Roman god of fire. It is also told that he was the blacksmith for the
other gods. The terrific explosions were thought to be blasts from his furnaces.
We now have other explanations.
A volcano is an opening in the earth's crust that acts as "safety values". Hot
material escapes through them when there is great pressure under the ground. The
opening is called a crater. Molten rock and gases that have been trapped in the
earth comes up through the crater.
Is all the material below a certain level in the earth in a molten state? No.
This molten state may be caused by a chemical action on the solid materials or it
may be caused by some radioactivity. The molten material in the earth is called
magma. When the magma pours from the earth it is called lava. This lava cools
and in many instances builds up the land.
What causes these materials to come out of the earth? The cause may be the
weight of the land pressing down on the molten materials. It may also be caused
from a crack or fault (slipping) in the surrounding rock formations.
Some volcanoes are of the explosive type - erupting with terrific violence,
blowing great quantities of lava and shattered rock high into the air. Some ex-
amples of these are Mount Katmai in Alaska, Paracutin in Mexico and Mount Hood in
Oregon. There are also the quiet type that permits lava to ooze out slowly over the
top or flowing out fissures on the sides of the cones. Some examples are Mauna
Loa in Hawaii, Mount Rainier in Washington and Mount Etna in Sicily.
Volcanoes are frightening, yet magnificent to read and study about.
J0
180
TEACHER DIRECTION E 39
FORMATION OF FOSSILS
Materials for groups of three:
1. Plaster of paris 4. Vaseline
2. Leaf 5. Mayonnaise jar cap
3. Shell. sea
The students will be involved in a reading exercise on fossils to receaNe
some background and afterwards do an activity on making spine fossils.
To help in their comprehension of fossils show the film FOSSILS ARE IN
TERESTING, from the county library.
Bring out the fact that geologist use fossil remains to determine the age
of the earth and the types of plants and animals that existed during a certain
period.
Assist the students if necessary in making their fossil molds and emphasize
the fact that they should have enough vaseline on their materials to prevent
the plaster from sticking.
181
STUDENT E 39
FORMATION OF FOSSILS
Materials for groups of three:
1. Plaster of paris 3. Shell, sea 5. Mayonnaise jar cap
2. Leaf 4. Vaseline
Uncountable billions of plants and animals have lived and died during the
hundreds of millions of years that life has inhabited the earth. Relatively few
of the organisms have left any record of their existence. The remains and traces
left by these relatively few organisms are called fossils. The study of fossils
is the science called paleontology. (PAY LEON TOLO GEE) Fossils are
formed by the remains of plants or animals being buried in mud, sand, volcanic
ash, frozen ground or other material. The surrounding material has 'usually harden
ed into rock at a later time. The great majority of plants and animals that lived
in the sea are most often found in limestone rocks. Those of land plants and
animals are found most often in shale or sandstone rock.
To see how this could have been done we will do it artificially. Mix some
plaster of paris in a beaker enough to fill up your jar cap ( for better results
add the water to your plaster of paris when mixing it). Pour your mixture in
the vaseline lined jar cap. Place your shell, which is covered with vaseline to
keep it from sticking, to the plaster and let it remain until the plaster hardens.
When you remove the shell you should have an imprint of the shell. This imprint
is a fossil mold. Follow the same procedure 'using your leaf.
From our activity we found that fossils are the remains of and
. We also found in one of our previous activities that most fossils
are found in rocks.
52
(-182-
TEACHER RESOURCE
Earthquake - The shaking or trembling of the earth that is volcanic or tec-
tonic in orgin.
Faulting is the principal cause of earthquakes, and nearly all the destruc-
tive earthquakes of history originated through faulting. But earthquakes do re-
sult from other causes. Of these, the most importat is volcanic eruption. A
violent explosion of any kind, whether it be of gas, TNT, or a nuclear bomb, will
rock the vicinity and shake the earth for varying distances. Violent explosions
occur naturally in the eruptions of many volcanoes, and in some cases these
have resulted in destructive earthquakes. In general however, such earthquakes
are far less extensive and less damaging than those caused by faulting. Minor
earthquakes of very limited extent may be caused by landslides and cave-ins of
various kinds.
From the physiographic point of view, faulting is a constructional process.
But to man, the earthquakes that follow faulting are among the most destructive
of all natural occurrences.
The seismograph (syze - muh - graf) is an instrument used to detect and re-
cord earthquaketshocks. It is sensitive enough to detect vibrations of the
bedrock that are much too slight to be felt by man.
53
- 1E33 -
TEACHER DIRECTION E - 40
EARTHQUAKES
In this activity we will try to enhance the students knowledge of the cause,
detection and destruction of earthquakes with a reading activity and a film. Allow
them to read over the activity once or twice to themselves then you read it aloud
asking questions and receiving comments. Afterwards show them the film EARTHQUAKES,
obtainable from your county film library to reinforce some possible misunderstand-
ings.
Tell the students to observe the film to see what a seismograph looks like and
how it works.
LI
- 184 -
STUDENT E - 40
EARTHQUAKES
On August 31, 1886, the ground beneath the city of Charleston, South Carolina,
shook slightly several times. Each tremor was a little more violent than the one
before. The people in the city heard a distant rumble that seemed to approach the
city. It sounded as though a hugh railway train were rushing through a tunnel under
the town. The rumble increased to a roar. The ground seemed to rise and fall in
waves. The violence lasted only a little more than a minute, but it was repeated
eight minutes later.
During the shaking of the earth, people were unable to keep on their feet.
Chimneys and walls were knocked down, Every single building in town was damaged.
Many persons were killed by falling buildings. Narrow cracks called fissures (fish-
erz), were opened in the earth, and railway tracks twisted. The shocks were felt
as far away as Canada.
The sudden violent movement of a part of the earth's crust is called an earth-
quake. What causes earthquakes? One cause is the sudden slipping of the rock on
two sides of a fault. (a crack in the earth's crust caused by pressure that dis-
places rock masses.) Most movements along faults are very slow and cannot be
noticed. The edges of the two sides of a fault are not perfectly straight and
smooth. The edges are jaggard. Jaggard edges of a fault may fit together as do
the teeth of two saw blades placed cutting edge to cutting edge. Ordinary pres-
sure in the earth's crust cannot move fault blocks that fit together so snugly.
The pressure builds up tremendously until it is great enough to overcome the tight fit
of the fault blocks. The result is a sudden springing of the earth's crust into a
new position along the lines of the fault. This sudden springing movement causes
earthquakes.
- 185 -
Studentpage 2
TRY IT AND SEE!
Clench both fists. Place together the edges of the second-joint knuckles of
each fist. The knuckle on one fist should fit into a notch between two fingers of
the other fist. Press the fists tightly together. At the same time, push side-
wise harder and harder until the knuckles suddenly slip over one another, In this
way the sides of a fault suddenly slip past one another when enough pressure builds
up in the earth's crust.
Earthquakes sometimes take place beneath the ocean. Great sea waves maybe caused
by the movement of the earth. These waves may rise as much as 60 feet above the
usual sea level. These hugh waves caused by earthquakes are sometimes called tidal
waves or a tsunami (soo-NAH-me).
To find out when an earthquake will happen an instrument called a seismograph
(syze-mah-graf) is used.
Scientist cannot tell us as much about the mighty storms underground as they can
about the storm in the air. But every day they are learning more about the wonder
of our earth.
- 186 -
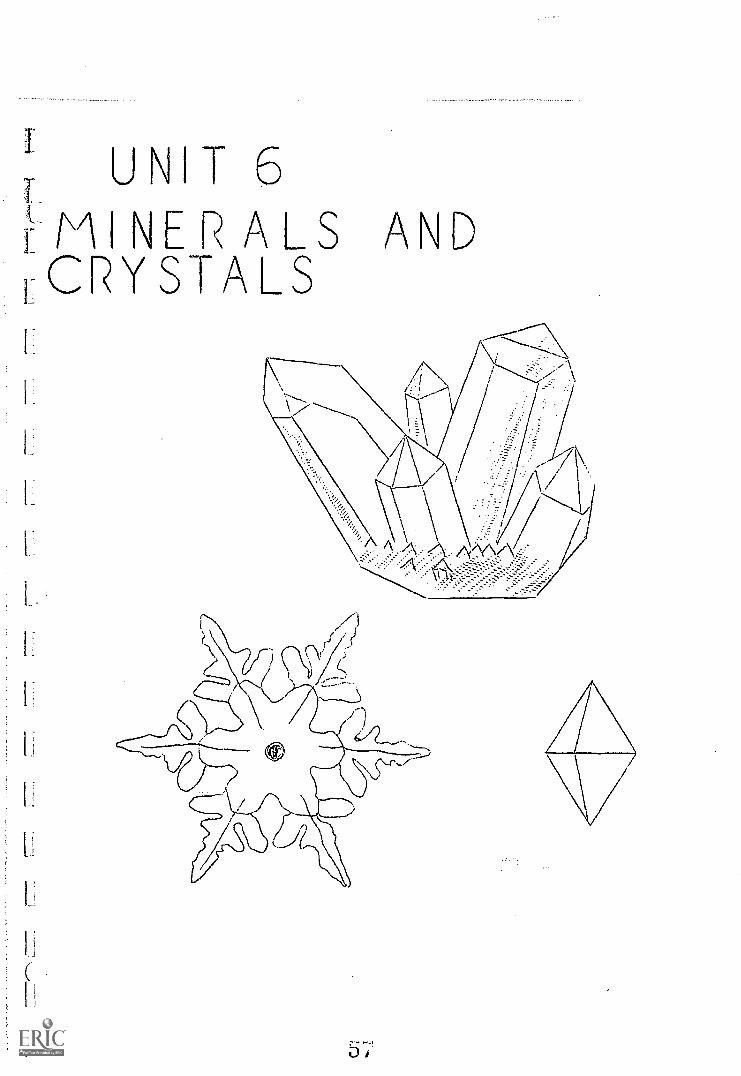
UNIT 6
MINERALS AND CRYSTALS
Another way to classify minerals is to observe the crystal structure of that
mineral. This unit is designed to show the difference between a morphous (contain-
ing crystals) substance and an amorphous (containing no crystals) substance. Also
to familiarize the students with the growing of crystals and the basic system.
E-41 CLEAVAGE AND FRACTURE Film: CRYSTALS
E-42 GROWING CRYSTALS (ALUM) CUBIC SYSTEM
E-43 GROWING CRYSTALS (ROCHELLE SALT) ORTHORHOMBIC SYSTEM
E-44 GROWING CRYSTALS (NICKLE SULFATE) TETRAGONAL SYSTEM
E-45 CRYSTAL MODEL - PAPER FOLDING CUBIC, ORTHORHOMBIC, TETRAGONAL
E-46 GROWING A CHINICAL GARDEN
LI
- 187 -
TEACHER DIRECTION E - 44
CLEAVAGE AND FRACTURE
Identifying minerals by the way they break
Minerals for groups of three:
1. Knife 7. Calcite crystals
2. Razor blade (single edge) 8. Quartz (uneven fracture)
3. Cloth 9. Talc or graphite
4. Hammer 10. Asbestos (serpentine)
5. Mica 11. Chert or flint
6. Halite crystals
This activity is designed to show the students the difference between a sub-
stance cleaving and fracturing. When we mention the word crystal one should ex-
pect to see it break along the faces showing a clean cut at an angle. If a sub-
stance does not break or split leaving smooth surfaces it is not a crystal there-
fore it is said to fracture.
Allow the students to work through the activity assisting them if necessary.
Bring out the fact that this is one of the ways to identify minerals. After the
students have completed the activity and answered all of the questions show the
film CRYSTALS as a culminating activity.
As an additional activity you may have the students to identify some "unknown"
minerals. You could use the minerals used in previous activities. Consult the
identification key of MODERN EARTH SCIENCE, Holt, Rinehart and Winston
Iz
Li
- 188 -
STUDENT E 44
CLEAVAGE AND FRACTURE
Identifying minerals by the way they break
Materials for groups of three
1. Knife 7. Calcite crystals
2. Razor blade (single edge) 8. Quartz (uneven fracture)
3. Cloth 9. Talc or graphite
4. Hammer 10. Asbestos
5. Mica 11. Chert or flint
6. Halite crystals
Some minerals break in interesting ways when you strike them. The way a
mineral breaks can be used to identify them. When a mineral breaks or splits
easily leaving smooth surfaces, this is called CLEAVAGE.
1. Use a knife to split a piece of MICA. Does it cleave easily?
See how thin a sheet you can split.
2. Place a razor blade parallel to the edge of a piece of HALITE. Hit
the top of the blade gently with a hammer. What happens?
3. Wrap a piece of CALCITE with a cloth. Hit it with the hammer. What does
the pieces look like?
Draw a few of them.
When a mineral does not break or split leaving smooth surfaces, this is called
FRACTURE. There are many different kinds of fractures described in such terms as
UNEVEN, FLAKY, SHELL-LIKE OR CONCHOIDAL AND FIBROUS.
1. Look at a piece of QUARTZ. What kind of fracture does it have?
2. Chip off a small piece of TALC OR GRAPHITE. Does it appear to have a flaky
fracture?
U 60
- 189 -
Studentpage 2
1: 3. Break and pull apart a piece of ASBESTOS. Describe its fracture.
4. Examine pieces of FLINT or CHERT. What kind of fracture does this mineral
have? Notice the sharp edges. How did the Indians
use this mineral?
After you have answered all of your questions and cleaned your area ask your
teacher to show you the film on crystals.
LI
IJ
(
- 190 -
TEACHER RESOURCE CRYSTALS AND CRYSTAL GROWING
Crystals are solids with a natural geometric form. They may be cubes,
rectangles, or complex geometric figures. A crystal reflects the internal
structure of the mineral or substance, since the crystal form is the structural
form of molecules that make up the mineral. Crystal shape can be an important
means of identifying minerals.
Certain factors regulate the growth of crystals: the temperature of the
liquid that contains the dissolved material; the rate of evaporation of the
solution; the presence of foreign particles in the solution; the degree of
supersaturation of the solution; and the tendency of the particular substance
to crystalize or form crystals.
A crystal does not suddenly spring into being; it grows into being. A
growing crystal does not grow from within as man does; but it has to grow from
outside - from the material presented to its surface. They grow until some-
thing gets in their way or until they get in one another's way.
Cyrstals grow under many different conditions - some of them quite surprising.
Snow flakes grow directly from moist air. Some crystals grow from hot melted
metal. But the most familiar method of growing crystals is from a solution
in a liquid - in other words from a second substance which stays liquid or
evaporated while the solid separates out.
Almost all salts can be crystallized from the most abundant liquid, water. In
our experiments we will be using water as the liquid as we crystallize various
salts.
One 16MM film available from the audio-visual department of the Duval County
School Board will be of interest and helpful to the students as they begin
their study of crystals.
-191-
Teacher Resourcepage 2
The film is: CRYSTALS
Ask the students to bring in small jars - baby food jars or half pint jars.
Large jars are unsuitable for making crystals.
These jars will be needed for E-45, E-46, and E-47. Each student will
need 3 jars. Have the students to thoroughly clean all jars before the day
of the experiment.
63
- 192 -
STUDEIT RESOURCE
CRYSTALS AND CRYSTAL GROWING
Usually in an earth science class we will discuss crystals in the mineral
section, but because they play an important role in identifying minerals we are
going to discuss crystals as a separate unit.
There are a few facts we would like to mention which may help you to under-
stand the activities better.
Crystals are solids with a natural geometric form. They may be cubes, rec-
tangles or complex geometric figures. A crystal reflects the internal structure
of minerals or other substances.
There are certain factors that regulate the growth of crystals. The tempera-
ture of the liquid that contains the dissolved material; How fast the solution
evaporates; The presence of foreign particles (dust, chemicals, etc); The degree
of supersaturation; and the trend of the particular substance to crystallize or
form crystals.
We mentioned the word supersaturated, this means a solution holds more of a
substance than it can dissolve.
A crystal does not suddenly spring into being; it grows into being, a growing
crystal does not grow from within as man does; but it has to grow from outside -
from the material its surface comes in contact with.
There are many methods used in growing crystals, some take a long time to
grow such as the crystals in some igneous rocks, but in our activities we are
going to use water as our liquid and grow crystals from various salts. Some will
cause rapid growth and others will take longer.
If you would like to learn more about crystals go to your library and read
some books on crystals, they can be interesting.
,t1
193
TEACHER DIRECTION E 42
GROWING CRYSTALS (ALUM CUBIC SYSTEM)
Materials for groups of three:
1. Alum (4 teaspoons) 5. 3 pencils or small pieces of stick
2. Beaker (400 ml) 6. Asbestos gauze
3. Three small jars (cleaned) 7. Alcohol or bunsen burner
4. String 8. Tripod or ring stand
9. Stirring rod
This experiment in crystal growing will take several weeks (two to three) to
complete. Interest in the experiment should be generated each day to see how the
crystal growing is progressing. When the student has completed this experiment he
may take the crystal he has grown home with him.
IN THIS LESSON WE ARE GOING TO MAKE ANOTHER SUPERSATURATED SOLUTION. THIS TIME
WE WILL MAKE A SUPERSATURATED ALUM SOLUTION. IF WE WORK VERY CAREFULLY, WE CAN MAKE
SOME PRETTY CRYSTALS GROW IN THE LITTLE JARS. WHO DO YOU THINK CAN GROW THE BIGGEST
AND PRETTIEST CRYSTALS IN THE CLASS999999 (Discuss how crystals grow. Refer to
material in Teacher Resource at beginning of unit.)
HERE IS WHAT WE WILL DO. LET'S BOIL ONE CUP OF WATER IN THE BEAKER. (Pause)
NOW THAT YOU HAVE BOILED THE WATER, DIVIDE IT EQUALLY INTO THE THREE SMALL JARS
EACH OF YOU HAVE. WRITE YOUR NAME ON THE LABEL AND PLACE IT ON YOUR JARS.
ADD TWO TEASPOONS OF ALUM TO THE HOT WATER IN THE JAR. STIR IT UNTIL ALL OF
THE ALUM IS MIXED IN THE WATER. ADD A LITTLE MORE ALUM TO THE WATER AND BE SURE
THAT ALI OF IT MIXES. (Pause) KEEP ADDING A VERY SMALL AMOUNT OF ALUM UNTIL YOU
FIND THAT NO MORE ALUM WILL DISSOLVE IN THE WATER. NOW YOU HAVE PUT IN ENOUGH ALUM
TO MAKE THE SOLUTION SUPERSATURATED.
LET THE SOLUTION COOL VERY SLOWLY.
6tJ
194Teacher Directionpage 2
WHILE THE SOLUTION IS BEGINNING TO COOL, TIE A SEED OF ALUM TO A STRING USING
A SLIP KNOT (show acetate on overhead projector). TIE THE OTHER END OF THE STRING
AROUND THE MIDDLE OF THE PENCIL (or stick), (Teacher: Be sure the string is long
enough to go down into the solution but short enough so that it will hang straight
down in the jar). BE SURE THAT THE SEED DOES NOT EXTEND ABOVE THE SURFACE OF THE
SOLUTION. THE STRING ACTS AS A WICK: AS WATER EVAPORATES FROM THE WICK ADDITIONAL
SEEDS FORM ON IT.
(Teacher: Check each jar to be sure the seed has been properly placed in the solu
tion and that the string is hanging straight down in the jars).
SINCE TEMPERATURE CHANGES AFFECT THE DEGREE OF SUPERSATURATION, WE WILL WANT TO
KEEP THE JARS WHERE THEY WILL NOT BE DISTURBED AND WHERE THE TEMPERATURE VARIES THE
LEAST. (Instruct students where to place their jars. This should be somewhere that
they can view the jars each day and yet be where the temperature remains fairly
constant.)
BARBER SHOPS KEEP ON HAND A SMALL PENCIL MADE OF ALUM. IT IS CALLED A STYPTIC
PENCIL AND IS USED TO STOP BLEEDING FROM SMALL CUTS. IF THE BARBER ACIDENTLY MAKES
A SMALL CUT ON A CUSTOMER'S FACE WHILE SHAVING HIM...77 APPLIES THE END OF THE PEN
CIL TO THE WOUND, THE NEXT TIME YOU ARE AT THE BARBER SHOP ASK THE BARBER TO SHOW
YOU HIS ALUM PENCIL. HOW DOES THE ALUM PENCIL HELP THE BARBER STOP THE BLEEDING.
ALUM IS A WHITE CRYSTAL SUBSTANCE WHICH SHRINKS OR DRAWS TOGETHER THE TISSUES OF
SKIN. SHRINKING THE SKIN AROUND A CUT STOPS BLEEDING.
b 6
- 195 -
STUDENT E - 42
GROWING CRYSTALS (ALUM)
Materials for groups of three:
CUBIC SYSTEM
1. Alum 5. Pencils cr small sticks (3)
2, Beaker (400 ml) 6. Alcohol burner
3. Small jars (3) 7. Asbestos gauw.
4. String S. Tripod
9. Stirring rod
Be sure that your coffee can and jars are clean. Put your name on a label
and stick it to your jar. Boil one cup of water in the coffee can. Divide the
water equally into the three jars. Add two teaspoons of alum to the hot water in
each jar. Stir it until all of the alum is mixed in the water. Add a little more
alum to the water and be sure that it all mixes. Keep adding very small amounts
of alum to the water until no moie alum will go into the solution.
Let the solution cool very slowly.
While the solution is cooling, tie the seed of alum with a piece of string
by making a slip knot as shown in the transparency on the screen.
After you have fastened the seed to the string, tie the string around the
middle of the pencil. Be sure the string is long enough so that the seed will
reach into the solution but still hang straight down into the jar. As shown
on the transparency.
Place the jars where they will not be disturbed and where the temperature
will vary little. In a few days the crystal should start to grow.
TEACHER DIRECTION
- 196 -
E - 43
GROWING CRYSTALS (ROCHELLE SALT)ORTHORHOMBIC SYSTEM
Materials for groups of three:
1. Rochelle Salt 6. Asbestos gauze
2. Beaker (400 ml) 7. Alcohol or Bunsim burner
3. Three small jars 8. Ring stand
4. String 9. Stirring rod
5. 3 pencils or small piece of stick
L.
1
In this activity have the students to follow the directions e;ven for the
alum crystals.
Next to alum, Rochelle salt is best suited for an initial attempt at cry-
stal growing. In growing Rochelle salt, the seed solution often supersaturates
without depositing any seeds. Should no seed appear within two day;, add a
very few Rochelle salt particles from the supply bar-. Once started, the seeds
will probably grow very quickly, and therefore the students should inspect them
twice a day.
The fact that the solubility of Rochelle salt varies greatly wii;11 temper-
ature, the students must be careful to observe and control the temperatures
at which they work; it is easy to lose the planted seed by dissolving; it off
the thread before the solution becomes supersaturated.
Some of the chemicals may not have crystals large enough to be tiled as
seeds, therefore the students or maybe you can prepare some seed crysitals
using this method: POUR AN OUNCE OF YOUR SATURATED SOLUTION INTO A TALL
GLASS AND SETTING IT IN AN UNDISTURBED PLACE. AS THE SOLUTION EVAPOTES,
A FEW-CRYSTALS WILL USUALLY BEGIN TO GROW ON THE BOTTOM OF THE GLASS.i IF IT
BECOMES SUPERSATURATED WITHOUT DEPOSITING CRYSTALS, ADD A VERY SMALL )1MOUNT
OF CRYSTALLINE POWDER FROM THE SUPPLY BOTTLE, OR OF THE POWDER LEFT Ai'TER
EVAPORATING A DROP OF SOLUTION. LOOK AT THE GLASS AND ITS CONTENTS 07CE
OR TWICE A DAY: HARVEST THE SEEDS WHEN THEY HAVE GROWN LARGE ENOUGH FOR
CONVENIENT HANDLING.68

STUDENT DIRECTION
- 197 -
E - 43 .
GROWING CRYSTALS (ROCHELLE SALT)ORTHOROMBIC SYSTEM
Materials fro groups of three:
1. Rochelle Salt 6. Asbestos gauze
2. Beaker (400 ml) 7. Alcohol or bunsen burner
3. Three small jars 8. Ring stand
4. String 9. Stirring rod
5. 3 pencils or small sticks
You will follow the same procedure with the rochelle salt as you did with
the alum, except you may have to use more rochelle salt to get a supersaturated
solution.
Draw a picture of your crystal after a couple of days.
63
TEACHER DIRECTION
- 198 -
E - 44
GROWING CRYSTALS (NICKLE SULFATE)TETRAGONAL SYSTEM
Materials for groups of three
1. Nickle sulfate 6. Asbestos gauze
2. Beaker (400 ml) 7. Alcohol or bunsen burner
3. Three small jars 8. Ring stand
4. String 9. Stirring rod
5. 3 pencils or small sticks
Again the students will follow the same procedure as before. In making
the seed for this crystal you may have to use more of the chemical to reach
its saturation point.
STUDENT DIRECTION
- 199 -
E - 44
GROWING CRYSTALS (NICKLE SULFATE)TETRAGONAL SYSTEM
Materials for groups of three:
1. Nickle sulfate C. AEbestos ,gauze
2. Beaker (400 ml) 7. Alcohol or bunsen burner
3. Three small jars 8. Ring stand
4. String 9. Stirring rod
5. 3 pencils or small sticks
Follow the same procedure as before and draw a picture of the crystals
after a few days.
1_
71.
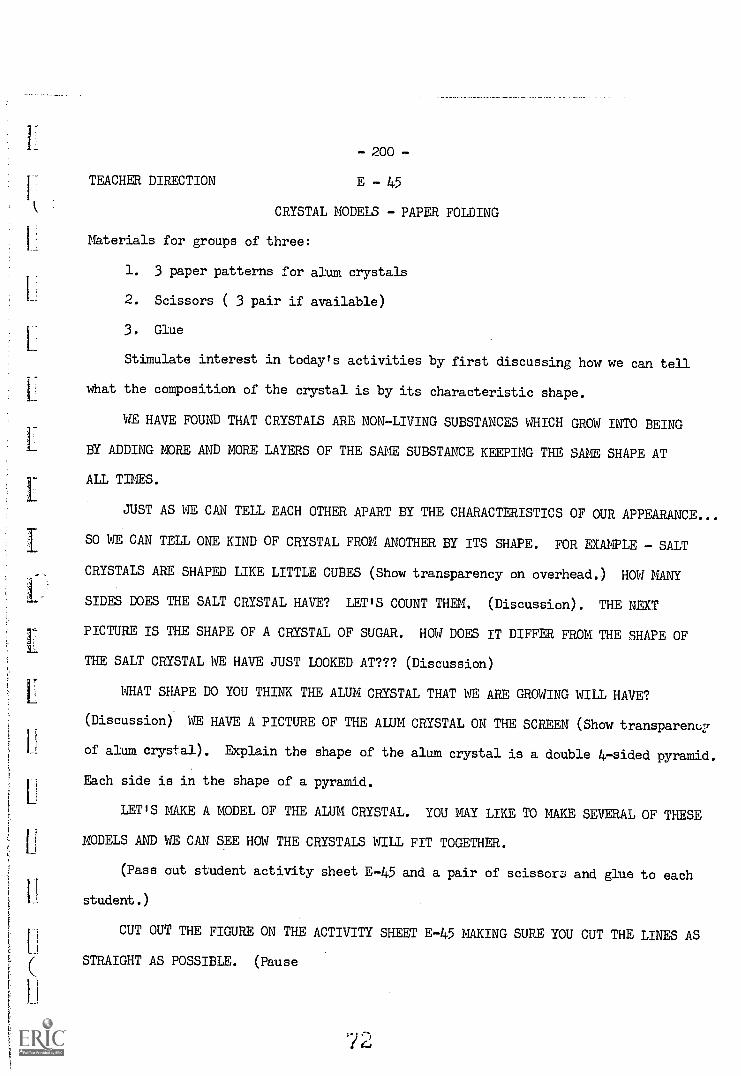
L
- 200 -
TEACHER DIRECTION E - 45
CRYSTAL MODELS - PAPER FOLDING
Materials for groups of three:
1. 3 paper patterns for alum crystals
2. Scissors ( 3 pair if available)
3. Glue
Stimulate interest in today's activities by first discussing how we can tell
what the composition of the crystal is by its characteristic shape.
WE HAVE FOUND THAT CRYSTALS ARE NON-LIVING SUBSTANCES WHICH GROW INTO BEING
BY ADDING MORE AND MORE LAYERS OF THE SAME SUBSTANCE KEEPING THE SAME SHAPE AT
ALL TIMES.
JUST AS WE CAN TELL EACH OTHER APART BY THE CHARACTERISTICS OF OUR APPEARANCE...
SO WE CAN TELL ONE KIND OF CRYSTAL FROM ANOTHER BY ITS SHAPE. FOR EXAMPLE - SALT
CRYSTALS ARE SHAPED LIKE LITTLE CUBES (Show transparency on overhead.) HOW MANY
SIDES DOES THE SALT CRYSTAL HAVE? LET'S COUNT THEM. (Discussion). THE NEXT
PICTURE IS THE SHAPE OF A CRYSTAL OF SUGAR. HOW DOES IT DIFFER FROM THE SHAPE OF
THE SALT CRYSTAL WE HAVE JUST LOOKED AT??? (Discussion)
WHAT SHAPE DO YOU THINK THE ALUM CRYSTAL THAT WE ARE GROWING WILL HAVE?
(Discussion) WE HAVE A PICTURE OF THE ALUM CRYSTAL ON THE SCREEN (Show transparenty
of alum crystal). Explain the shape of the alum crystal is a double 4-sided pyramid.
Each side is in the shape of a pyramid.
LET'S MAKE A MODEL OF THE ALUM CRYSTAL. YOU MAY LIKE TO MAKE SEVERAL OF THESE
MODELS AND WE CAN SEE HOW THE CRYSTALS WILL FIT TOGETHER.
(Pass out student activity sheet E-45 and a pair of scissor: and glue to each
student.)
CUT OUT THE FIGURE ON THE ACTIVITY SHEET E-45 MAKING SURE YOU CUT THE LINES AS
STRAIGHT AS POSSIBLE. (Pause
72

L
Ir
U
-201-
Teacher Directionpage 2
FOLD THE SIDES OF THE TRIANGLES ALONG THE LINES MARKED FOLD. (Teacher could
make a larger scale model to illustrate how to fold and glue model into correct
positions).
NOW TUCK UNDER THE LITTLE TABS TO SEE IF YOUR MODEL IS GOING TO FIT SMOOTHLY.
(Pause) WE ARE READY NOW TO PUT A SMALL AMOUNT OF GLUE ON EACH OF THE FIVE TABS
AND STICK THEM INTO PLACE. HOLD ONTO THE MODEL MAKING SURE THAT THE TABS STAY
WELL GLUED. CAN YOU SEE THE DOUBLE PYRAMID SHAPE?
THIS IS THE SHAPE OF THE ALUM CRYSTAL WE ARE MAKING IN THE SOLUTIONS WE PRE-
PARED EARLIER. AS OUR CRYSTALS BEGIN TO FORM IN A FEW DAYS WE CAN COMPARE THEIR
SHAPE WITH THOSE OF OUR MODELS.
Follow the same procedure as the alUm model and let the Students make paper
models of the four basic crystal systems they used.
YOU MIGHT MENTION ALL OF THE CRYSTALS FORMED BELONG TO ONE OF THE SIX
"CRYSTAL SYSTEMS".
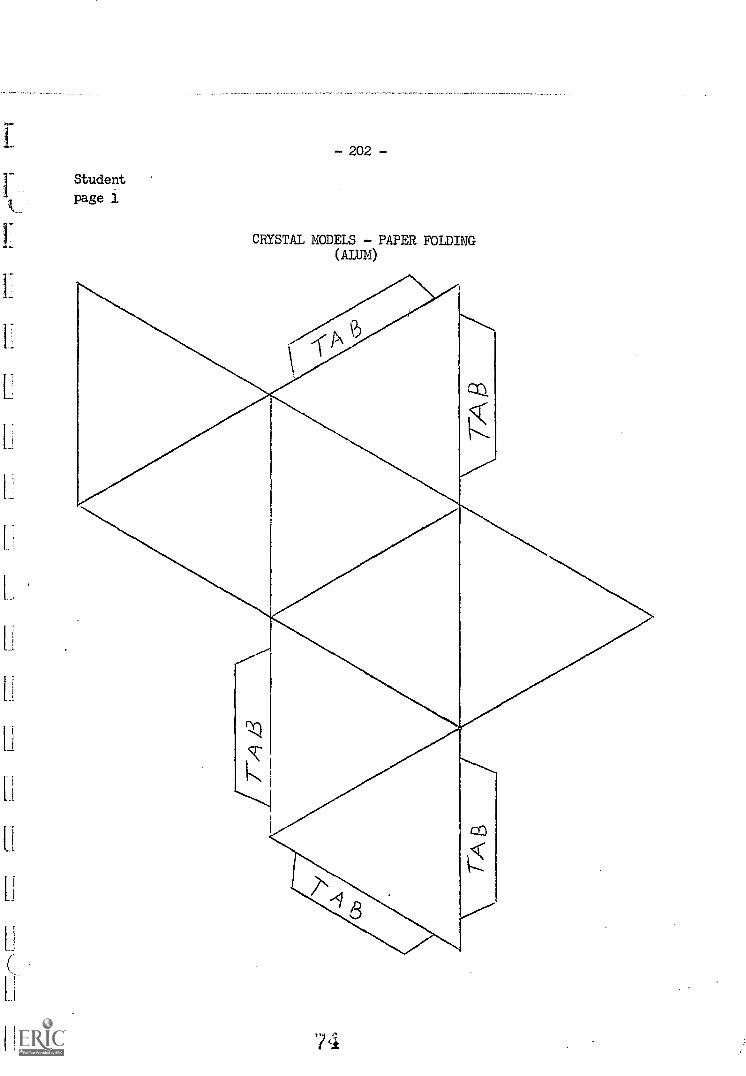
Yi
U
Studentpage 1
- 202 -
CRYSTAL MODELS - PAPER FOLDING(AIM)
7
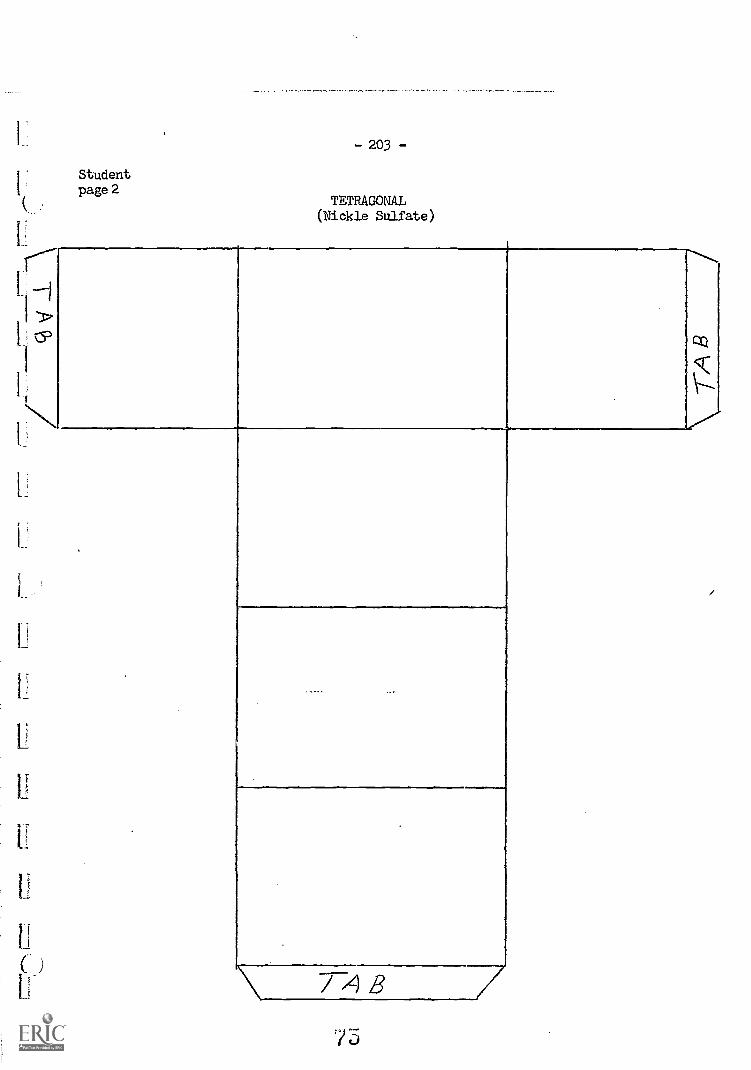
1 I
11
II
U
U
I
Studentpage 2
-203-
TETRAGONAL(Nickle Sulfate)
1.1 '73
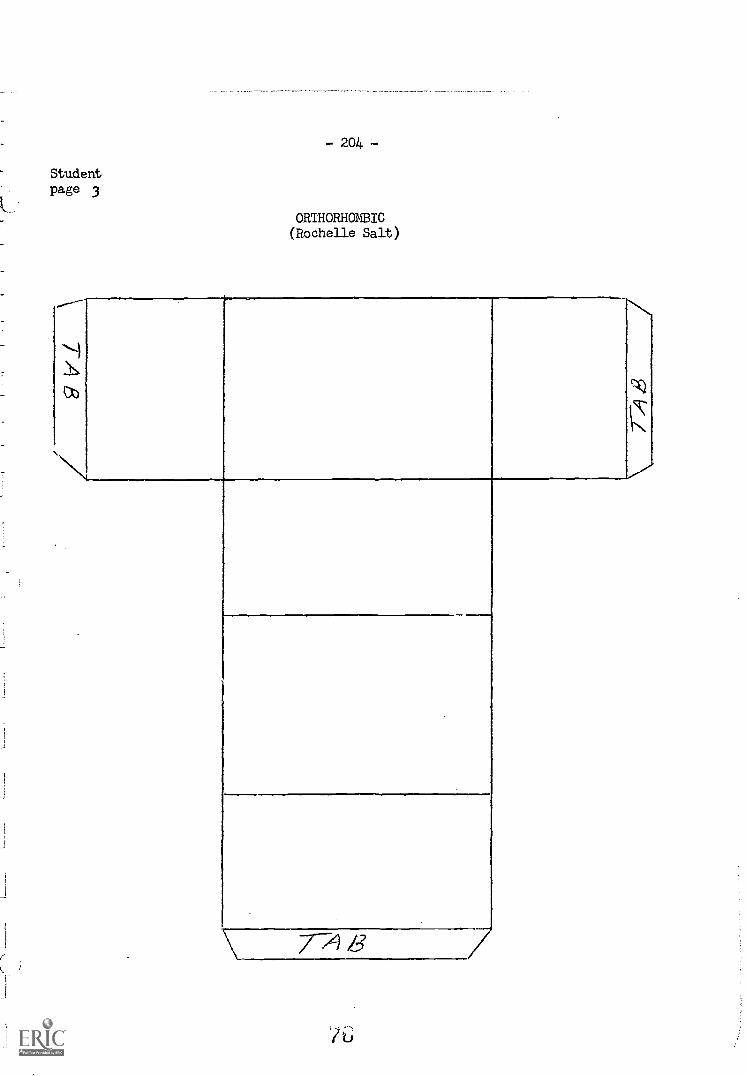
Studentpage 3
- 204
ORTHORHOMBIC(Rochelle Salt)
771)
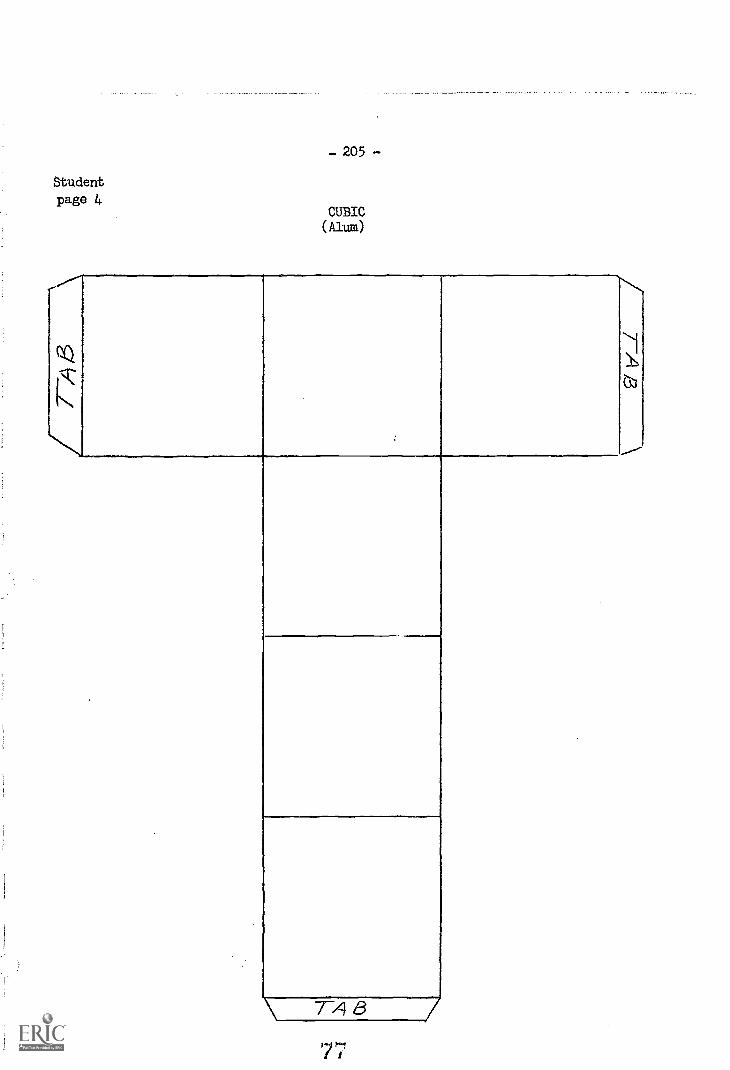
Studentpage 4
- 205 -
CUBIC(Alum)
748
- 206 -
TEACHER DIRECTION E - 46
GROWING A CHEMICAL GARDEN
Materials for groups of three:
1. 3 jars (about 2 pint to pint size) 6. Copper chloride
2. Beaker 7. Potassium Nitrate
3. Sand S. Labels
4. Sodium silicate 9. Measuring cup
5. Iron chloride 10. Copper sulfate
Give the students a chance to try out their "chemical" green thumb with this
activity of growing a chemical garden. THIS MIGHT BE TERMED "GETTING A HEAD-START
ON SPRING."
IN THIS ACTIVITY WE ARE GOING TO SEE THE WAY SILICATES FORM FROM SEED CRYSTALS
AND THESE CRYSTAL$ WILL BLOOM INTO A BEAUTIFUL CHEMICAL FLOWER GARDEN. PUT 1/8 to
1/4 INCH OF SAND IN THE BOTTOM OF YOUR JAR. PLACE A LABEL WITH YOUR NAME ON THE JAR.
(Pause)
MAKE A SOLUTION OF 1/4 CUP SODIUM SILICATE TO A CUP OF WATER. STIR IT WELL.
(Pause).
SPRINKLE A SMALL QUANTITY OF IRON ANL COPPER CHLORIDES, POTASSIUM NITRATE, AND
COPPER SULFATE. THE PARTICLES YOU SPRINKLE IN THE JARS SHOULD BE NO LARGER THAN THE
HEAD OF A PIN. USE THEM SPARINGLY... SO THAT YOU WILL HAVE A BEAUTIFUL GARDEN.
(Pause). NOW LET'S LEAVE THE JARS ON THE TABLES FOR A LITTLE WHILE AND KEEP OUR
EYES ON THEM. BEFORE TOO LONG COLORFUL FLOWERS WILL START TO GROW. HOW DO YOU
THINK THEY WILL GROW?
207
Teacher Directionpage 2
THE CRYSTALS WILL RUPTURE BECAUSE OF INTERNAL PRESSURE AND WILL BUILD UP LAYER
UPON LAThq. WE HAVE ALREADY LEARNED THAT CRYSTALS GROW FROM ONE LATER BUILDING
UPON ANOTHER LAYER. IN A FEW DAYS WE WILL FIND THAT THE CRYSTALS OF SILICATE WILL
HAVE GROWN INTO A BEAUTIFULLY COLORED GARDEN.
WE CAN PRESERVE THIS GARDEN AFTER THE CRYSTALS HAVE STOPPED GROWING BY SIPHONING
OFF THE WATER GLASS SOLUTION AND REPLACING IT WITH CLEAR WATER. THEN WE MAY TAKE
oua CHEMICAL GARDENS HOME...THEY WILL KEEP FOR A VERY LONG LONG TIME.
11
I
I
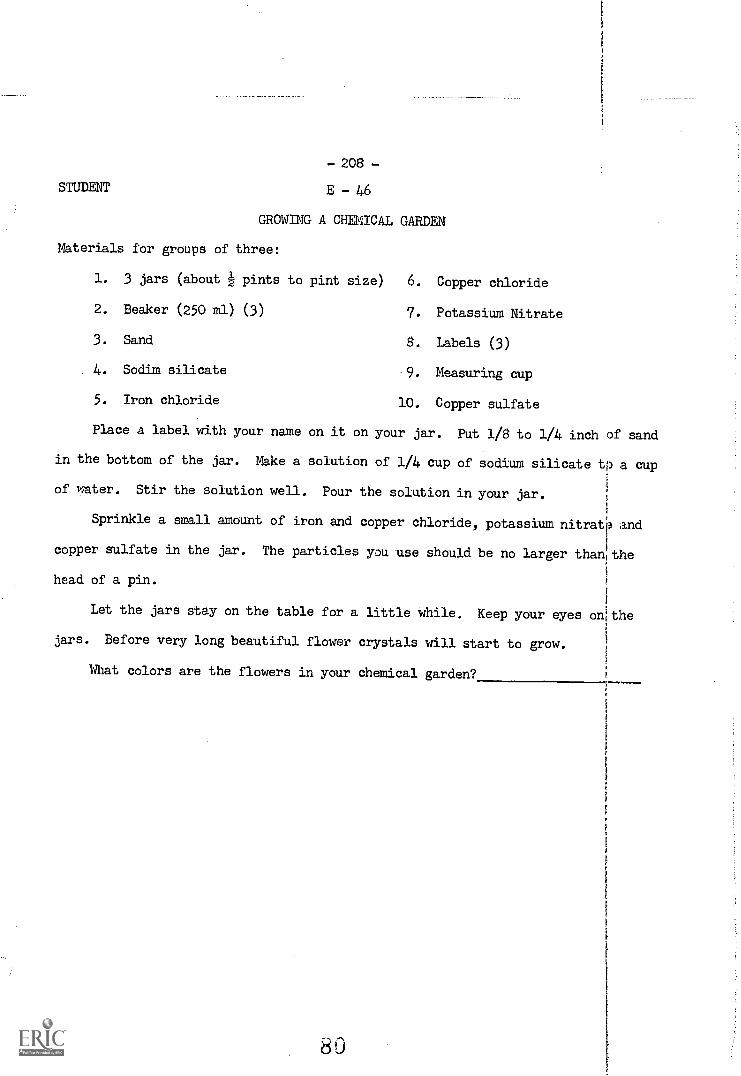
- 208 -
STUDENT E - 46
GROWING A CHEMICAL GARDEN
Materials for groups of three:
1. 3 jars (about z pints to pint size) 6. Copper chloride
2. Beaker (250 ml) (3) 7. Potassium Nitrate
3. Sand 8. Labels (3)
4. Sodim silicate 9. Measuring cup
5. Iron chloride 10. Copper sulfate
Place a label with your name on it on your jar. Put 1/8 to 1/4 inch of sand
in the bottom of the jar. Make a solution of 1/4 cup of sodium silicate tp a cup
of water. Stir the solution well. Pour the solution in your jar.
Sprinkle a small amount of iron and copper chloride, potassium nitratirl and
copper sulfate in the jar. The particles you 'use should be no larger thanIthe
head of a pin.
Let the jars stay on the table for a little while. Keep your eyes on:the
jars. Before very long beautiful flower crystals will start to grow.
That colors are the flowers in your chemical garden?
80
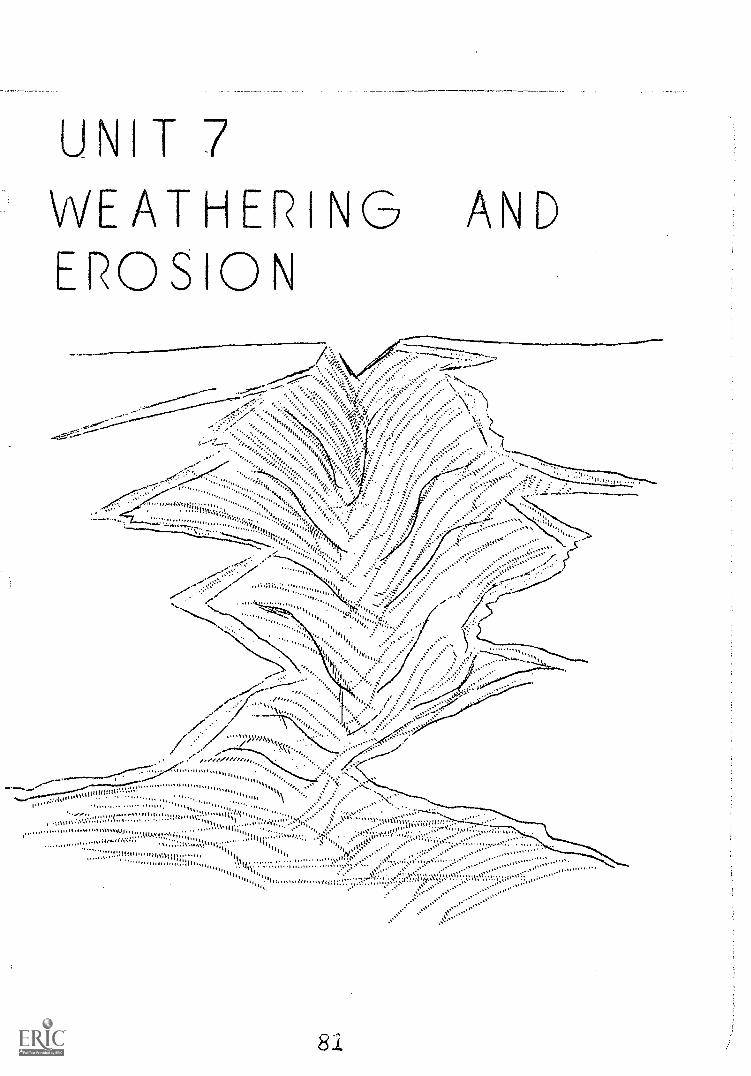
U\IT 7WEATHERI\G ANDEROSION
..... ....
*."i
....
.
.... ...
81
1'
I
tl
( )t
209
UNIT 7
WEATHERING & EROSION
This unit is designed to give the students some insight on weathering and
erosion, it causes and effects.
E -1,.7 WEATHERING DUE TO TEMPERATURE CHANGE
E 48 ACID AND LIMESTONE
E HOW SAND IS FORMED
E-50 WIND EROSION Film: EROSION
82
-210-
TEACHER RESOURCE
Weathering is a general term applied to processes operating at or near the
earth's surface that causes rocks to rupture into small fragments, dissolve,
decompose and form new minerals, and by a combination of such events form soil.
One should understand, however, that weathering disrupts and alters rocks but
that the removal of such altered debris is erosion and not weathering.
Although all weathering processes proceed simultaneously toward the devel-
opment of their end products, the rate of progression varies as rock and climatic
condition dictate. Weathering is subdivided into physical, chemical, and biolog-
ical processes. Physical processes rupture the existing rocks causing small fis-
sures to appear, and generally fragment rocks. Dominant is the splitting action
due to ice forming in fractures. Expansion and contraction of rock surfaces.
Caused by repeated heating and cooling are also significant in weakening and
rupturing rock. Chemical weathering is more varied than physical weathering
and also is more important in the development of soil. Chemical weathering are
in four major types, carbonation, oxidation, hydration and leaching. Biological
processes include the physical effects of splitting of rocks by roots growing in
fissures, grinding and nbraf:Ing of rock fragment by burrowing and digging organ-
isms, and grinding and dissolving of particles by organisms such as earth worms
which eat soil for its contained organic matter. After rock is reduced to small
particles by weathering, it may be removed to other locations by erosion. The
means by which erosion is accomplished depends to a large extent upon the climate
of the locality. In dry climates, the wind is most effective in picking up the
rock grains and moving them, often for great distances. The windborne rock grains
also have an abrasive action on unweathered rock. Thus wind is an agent of
weathering and erosion.
L.
LI
- 211 -
Teacher Resourcepage 2
In most climates, the most important agent of erosion is moving water. The
work of waves and currents is effective along shores of oceans and lakes.
Water is also a.powerful agent of erosion in the form of glacial ice. Mov-
ing ice transports large rock fragments which act as sharp cutting tools to scour
the solid bedrock as the glacier moves.
Another agent of erosion works in a much less obvious way than those already
mentioned. This is gravity, which is a constant factor on the earth. It is sur-
prisingly effective in eroding the weathered rock.
- 212 -
TEACHER DIRECTION E 47
WEATHERING DUE TO TEMPERATURE CHANGE
Materials for groups of three:
1. Tongs 3. Alcohol or bunsen burner
2. Beaker 4. Staurolite in Schist
In your discussion of the rock cycle you may have mentioned to the students
how rocks are weathered and form sand. To show this in actuality the students
can observe how sudden changes of temperature may cause rocks to split into
smaller pieces by using staurolite in schist (small pieces from a previous activ-
ity in the rock cycle) some water and a bunsen or alcohol burner. In doing this
activity the students will see small particles falling away from the staurolite
after they have heated it and put into some water.
After the students have done the activity you may go over the questions to
insure comprehension and you might ask them if they know of any other temperature
change that will cause rocks to split. If there are no responses have some of the
students to take a test tube and a stopper or cork home and tell them to fill it to
the brim and put the stopper on it and set it in the freezer overnight. Tell them
to mark the test tube where the stopper has gone in and put the test tube in a
paper bag. When the students return discuss their findings.
8u
[
LI
U
Ii
213
STUDENT E 47
WEATHERING DUE TO TEEPERATURE CHANGE
Materials for groups of three:
1. Tongs 3. Alcohol or bunsen burner
2. Beaker 4. Staurolite in Schist
In talking about the rocks in the rock cycle the word weathering was men
tioned this means the natural breaking or splitting of rocks and minerals. What
do you suppose causes this to happen to rocks and minerals? There are several
things that might cause this but we are going to discuss one of them in this
activity.
Obtain the materials needed for your group. One student will fill the
beaker threefourths (3/4) full of water, another will light the burner, the
last person will take the tongs and hold a piece of staurolite in the flame for
ten (10) minutes then put it into the water. Observe what happens.
What happened to the staurolite when it was put into the water?
What caused this to happen? What
could we call the particles that fell from the staurolit?
86
t;
I
t: I
- 214 -
TEACHER DIRECTION E - 48
WEATHERING BY CHEMICAL ACTION
Materials for groups of three:
1. Dilute Hydrochloric Acid 3. Beaker (200 ml)
2. Limestone, Small pieces
In the previous activity we discussed the effects of mechanical weathering on
rocks. This activity will be concerned with the chemical aspects of weathering.
In chemical weathering, reactions take place between minerals in the rock and
carbon dioxide, oxygen and water. These reactions alter the composition of
the rock minerals. We are going to base our activity on the carbon dioxide
and water reaction. We will use HCI as our carbonic acid to show the effect
better, we could have used CO2 from our breath and limewater but the conditions
would have to be just right.
After the students have finished the activity go over the questions and
answer the questions the students might have.
87
U
Ii
- 215 -
STUDENT E -48
WEATHERING BY CHEMICAL ACTION
Materials for groups of three:
1. Acid 3. Beaker (200 ml)
2. Limestone, small pieces
In nature rainwater as it falls to the earth absorbs a certain amount of carbon
dioxide from the air. As it enters the soil additional carbon dioxide is absorbed
from plants and animals. Water is combining with the carbon dioxide and forms a
weak acid called carbonic acid. This is the same acid which is contained in a
coke or 7 up or other soft drinks. As the water containing this acid comes in
contact with limestone a reaction occurs causing the limestone (calcium carbonate)
to dissolve and release carbon dioxide gas. The end result is a complete weather-
ing of the limestone. Later the water containing this dissolved limestone will
evaporate leaving behind the limestone in the form of calcite (a mineral) or in
the form of stalactites and stalagmites as seen in many natural caves in the U.S.
To see how this takes place put a few pieces of limestone in a beaker and
pour some acid over them. What do you notice taking place?
Does the clear liquid turn milky? Why?
What could you call the particles at the bottom of the beaker?
What can you say is contained in ground water which causes limestone to dissolve
over a period of time
88
- 216 -
TEACHER DIRECTION E -49
HOW SAND MAYBE FORKED
Materials for groups of three:
1. Jar, pint 2. Limestone chips 3. Pea gravel
What we would like to have brought out in this activity is the fact that
weathering and erosion work together but there is a difference between them.
Also we would like to point out that sand maybe formed and also the rounding
of pebbles flowing along in a river bed.
In your discussions you may ask the students to name some of the erosion
agents. Pass out the activity and let the students have at it.
83
217
STUDENT DIRECTION E 49
HOW SAND MAYBE FORMED
Materials for groups of three:
1. Jar pint (with top) 3. Pea gravel
2. Limestone chips 4. Beaker (250 ml)
Erosion of rocks is a phenomenon that occurs naturally whenever conditions
favoring their formations are found. The most common occurrance of "pebbles"
is to be found in areas with rapidly flowing streams or rivers. A tumbling
action takes place. The stones rub against each other on the stream bed. By
this abrasive effect the corners are broken or worn down on the irregular rocks
and a rounded rock or pebble results.
Winds causes some rounding of pebbles by moving the pebbles from one place
to another and cause the pebbles to hit against larger rocks which tends to wear
away a part of the pebbles.
Let's see if we can illustrate these ideas in our class.
Put 100 ml of pea gravel and 100 ml of limestone chips in your jar; Add
200 ml of water. Shake vigorously for 10 minutes. Examine to see if the lime
stone chips have been changes at all. Repeat the process until you are con
vinced of the grinding abrasive action that occurs when rock tumble over each
other in a stream bed. Take the limestones and pea gravel out of the jar being
careful not to pour out any of the water. Did the limestone chips become rounded?
Are there any rock materials left in the jar?
What would you call this material?
Set up your materials as before but do not use any water. Shake the jar for
10 minutes. Did the limestone chips become rounded? Are there any
rock materials left in the jar? What would you call this materials?
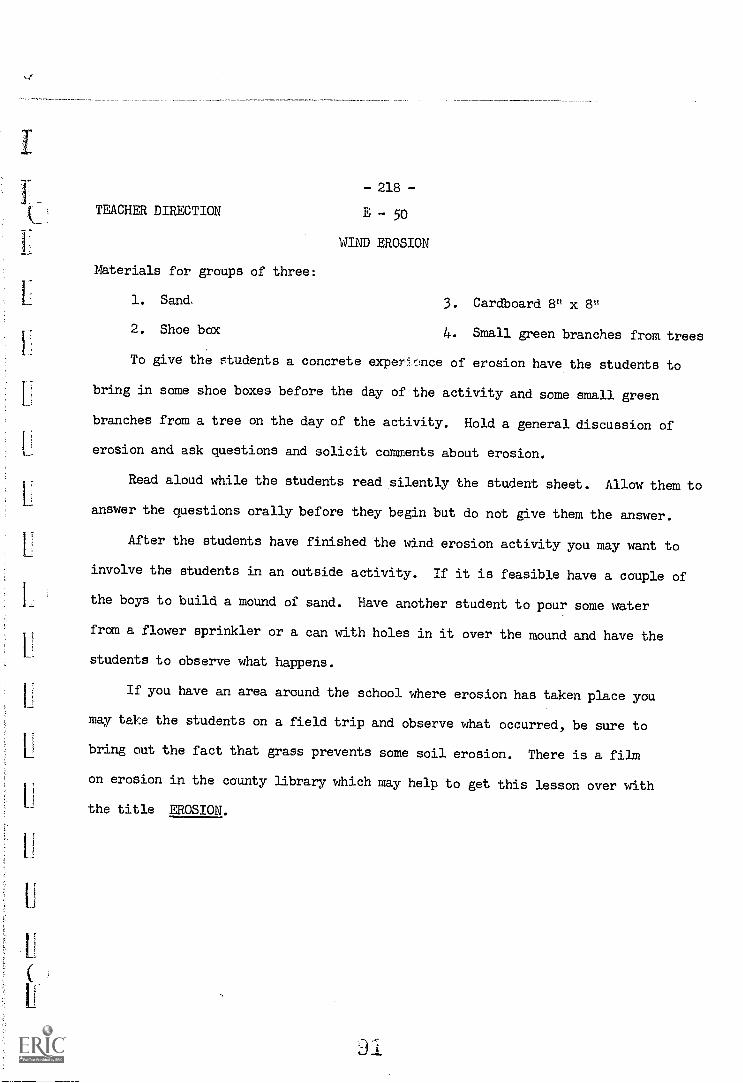
TEACHER DIRECTION
Materials for groups of three:
1. Sand.
2. Shoe box
- 218 -
E - 50
WIND EROSION
3. Cardboard 8" x 8"
4. Small green branches from trees
To give the students a concrete expernce of erosion have the students to
bring in some shoe boxes before the day of the activity and some small green
branches from a tree on the day of the activity. Hold a general discussion of
erosion and ask questions and solicit comments about erosion.
Read aloud while the students read silently the student sheet. Allow them to
answer the questions orally before they begin but do not give them the answer.
After the students have finished the wind erosion activity you may want to
involve the students in an outside activity. If it is feasible have a couple of
the boys to build a mound of sand. Have another student to pour some water
from a flower sprinkler or a can with holes in it over the mound and have the
students to observe what happens.
If you have an area around the school where erosion has taken place you
may take the students on a field trip and observe what occurred, be sure to
bring out the fact that grass prevents some soil erosion. There is a film
on erosion in the county library which may help to get this lesson over with
the title EROSION.
U
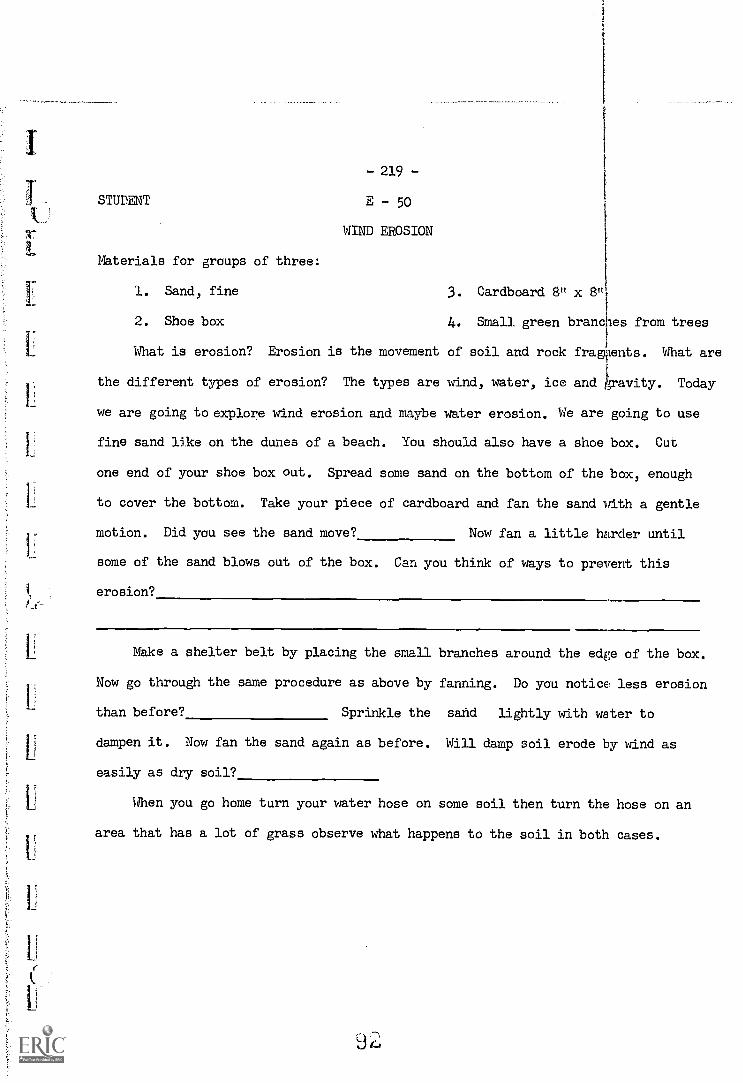
si
UDENT
U
- 219 -
E- 50
WIND EROSION
Materials for groups of three:
1. Sand, fine 3. Cardboard 8" x 8"
2. Shoe box 4. Small green brancles from trees
What is erosion? Erosion is the movement of soil and rock fragments. What are
the different types of erosion? The types are wind, water, ice and gravity. Today
we are going to explore wind erosion and maybe water erosion. We are going to use
fine sand like on the dunes of a beach. You should also have a shoe box. Cut
one end of your shoe box out. Spread some sand on the bottom of the box, enough
to cover the bottom. Take your piece of cardboard and fan the sand with a gentle
motion. Did you see the sand move? Now fan a little harder until
some of the sand blows out of the box. Can you think of ways to prevent this
erosion?
Make a shelter belt by placing the small branches around the edge of the box.
Now go through the same procedure as above by fanning. Do you notice less erosion
than before? Sprinkle the sand lightly with water to
dampen it. Now fan the sand again as before. Will damp soil erode by wind as
easily as dry soil?
When you go home turn your water hose on some soil then turn the hose on an
area that has a lot of grass observe what happens to the soil in both cases.
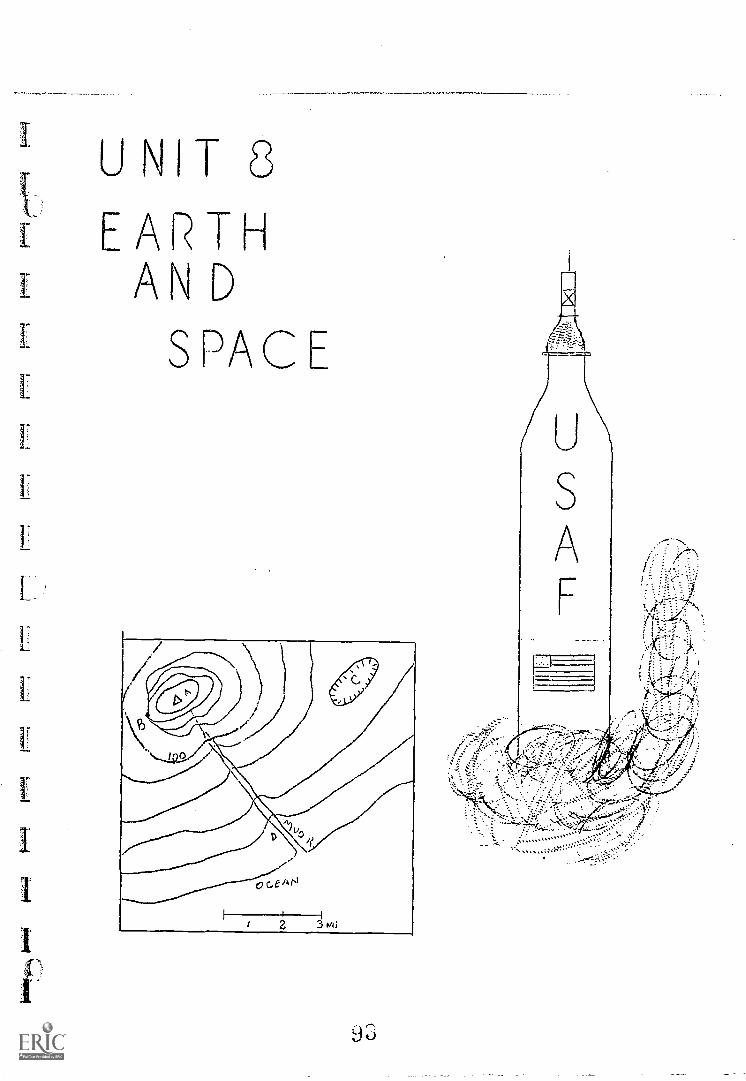
,1-47fp,0,07°' Irmri Stsnmts--,1 :;;;;;,1 in-Art ih,i14.!.0 LgaiM
I I
C
- 220 -
UNIT 8
EARTH AND SPACE
This unit is to introduce the students to some of the phenomena of our heavenly
bodies and to answer some of the questions which might have been in the minds of the
students concerning these phenomena, but didn't take time to investigate them.
We are going to center most of our activities around the earth, since we are
able to observe most of the changes it experiences.
Most of these activities are designed for the students to do with a minimum
amount of help.
E-51 WHAT IS THE APPARENT DAILY MOTION OF THE SUN AND THE MOON AND HOWDO WE ACCOUNT FOR IT?
E-52 WHAT IS THE APPARENT SHIFT IN THE MOON'S POSITION FROM DAY TO DAYFilm: THIS IS THE MOON: MOON AND HOW IT AFFECTS US
E-53 HOW CAN WE ACCOUNT FOR DAY AND NIGHTFilm: WHAT MAKES DAY AND NIGHT
E-54 WHAT ARE THE DIFFERENT PHASES OF THE MOON AND HOW DO WE ACCOUNT FORTHEM?
E-55 WHAT ECLIPSES ARE THERE AND HOW DO WE ACCOUNT FOR THEM?Film: WHAT IS AN ECLIPSE
E-56 WHAT MAKES IT WARMER IN SUMMER THAN WINTER? Film: SEASONS
*E -5'7 BE WEIGHTLESS - FALL FREE Film: GRAVITY, WEIGHT AND WEIGHTLESSNESS
*E-58 ACTION AND REACTION
E-59 HOW ROCKETS WORK Film: HOW ROCKETS WORK
E-60 FINDING OUR WAY
E -61 SUNKEN TREASURE
E-62 ITEMS BASIC FOR MAPS
*E-63 STUDENT RESOURCE
E-64 TOPOGRAPHIC MAPPING
E-65 TOPOGRAPHIC PROFILE
E-66 READING TOPOGRAPHIC MAPS
*READING ACTIVITIES
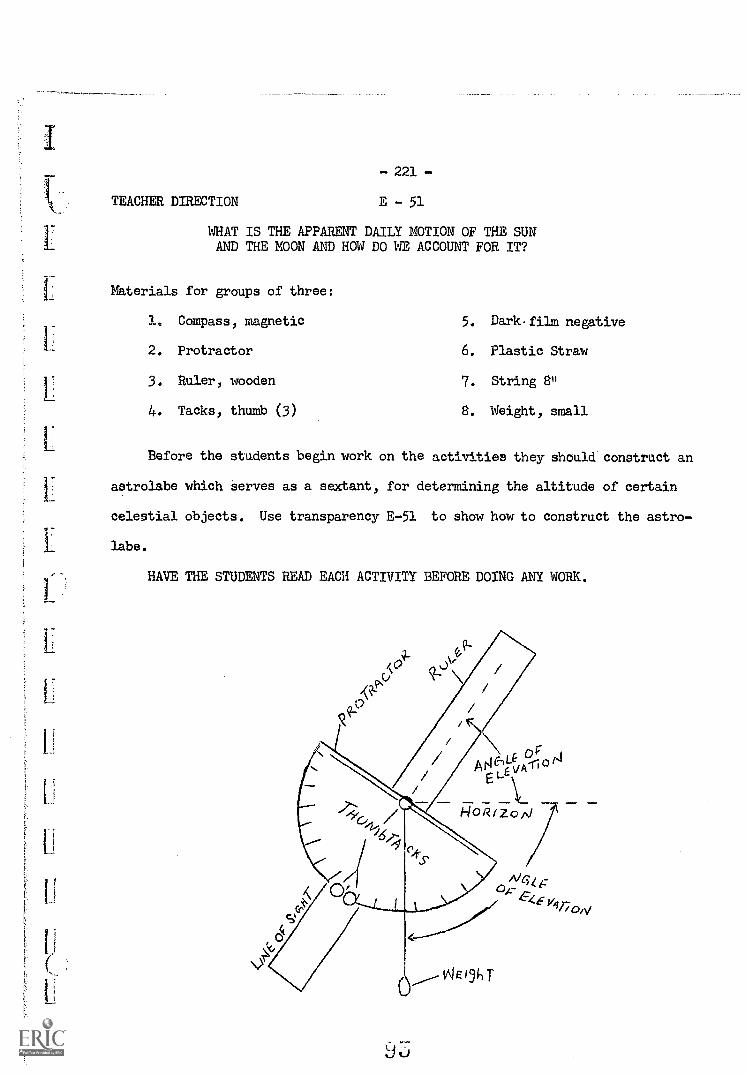
I- 221 -
TEACHER DIRECTION E - 51
WHAT IS THE APPARENT DAILY MOTION OF THE SUNAND THE MOON AND HOW DO 1E ACCOUNT FOR IT?
Materials for groups of three:
1. Compass, magnetic 5. Dark- film negative
2. Protractor 6. Plastic Straw
3. Ruler, wooden 7. String 8"
4. Tacks, thumb (3) 8. Weight, small
Before the students begin work on the activities they should construct an
astrolabe which serves as a sextant, for determining the altitude of certain
celestial objects. Use transparency E-51 to show how to construct the astro-
labe.
HAVE THE STUDENTS READ EACH ACTIVITY BEFORE DOING ANY WORK.
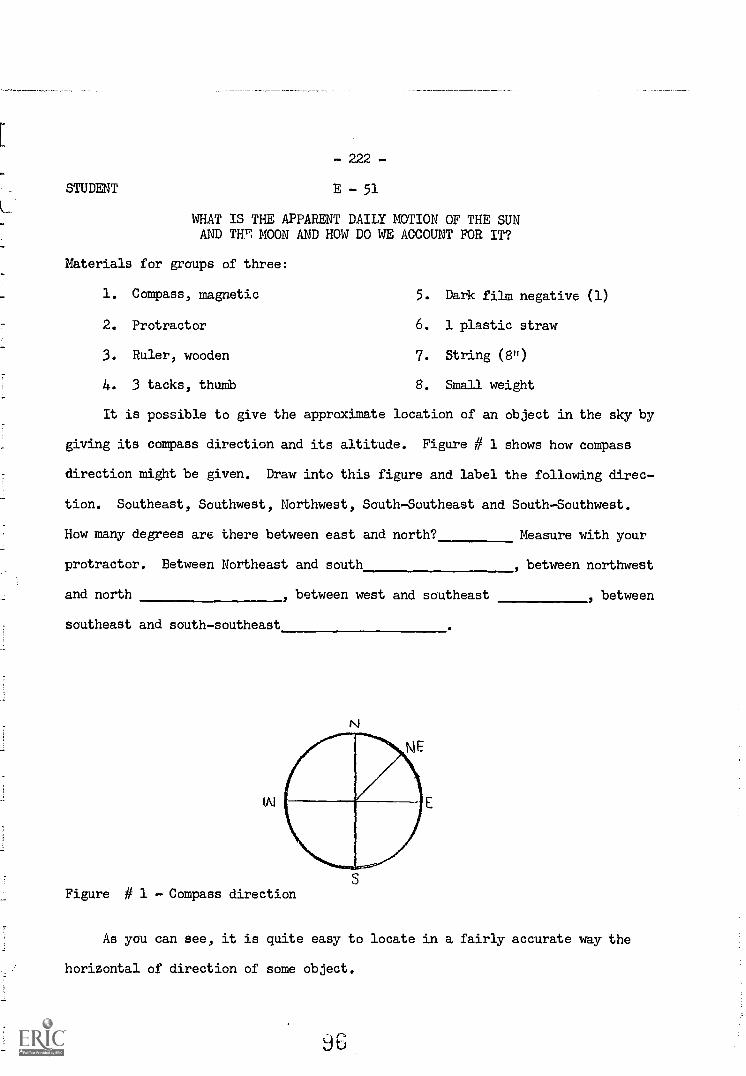
STUDENT
- 222 -
E - 51
WHAT IS THE APPARENT DAILY MOTION OF THE SUNAND TH7, MOON AND HOW DO WE ACCOUNT FOR IT?
Materials for groups of three:
1. Compass, magnetic 5. Dark film negative (1)
2. Protractor 6. 1 plastic straw
3. Ruler, wooden 7. String (8")
4. 3 tacks, thumb 8. Small weight
It is possible to give the approximate location of an object in the sky by
giving its compass direction and its altitude. Figure # 1 shows how compass
direction might be given. Draw into this figure and label the following direc-
tion. Southeast, Southwest, Northwest, South-Southeast and South-Southwest.
How many degrees are there between east and north? Measure with your
protractor. Between Northeast and south , between northwest
and north between west and southeast between
southeast and south-southeast
IA!
Figure # 1 - Compass direction
As you can see, it is quite easy to locate in a fairly accurate way the
horizontal of direction of some object.
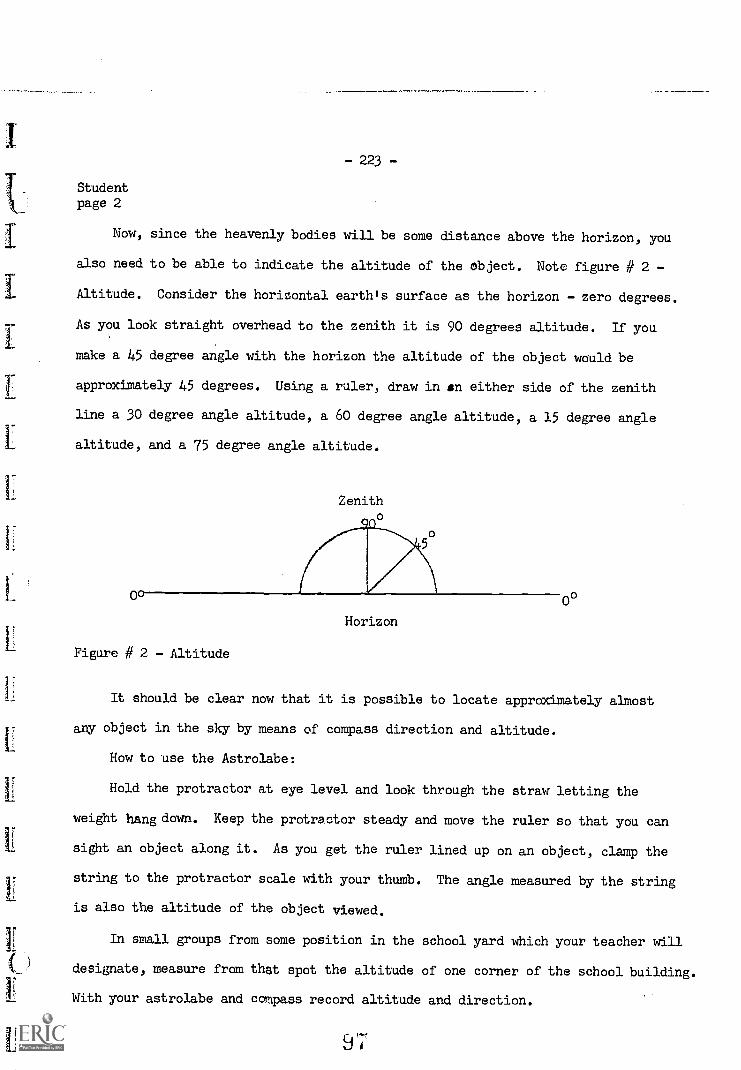
-223-
Studentpage 2
Now, since the heavenly bodies will be some distance above the horizon, you
also need to be able to indicate the altitude of the object. Note figure # 2 -
Altitude. Consider the horizontal earthts surface as the horizon - zero degrees.
As you look straight overhead to the zenith it is 90 degrees altitude. If you
make a 45 degree angle with the horizon the altitude of the object would be
approximately 45 degrees. Using a ruler, draw in n either side of the zenith
line a 30 degree angle altitude, a 60 degree angle altitude, a 15 degree angle
altitude, and a 75 degree angle altitude.
00
Horizon
Figure # 2 - Altitude
0°
It should be clear now that it is possible to locate approximately almost
any object in the sky by means of compass direction and altitude.
How to use the Astrolabe:
Hold the protractor at eye level and look through the straw letting the
weight hang down. Keep the protractor steady and move the ruler so that you can
sight an object along it. As you get the ruler lined up on an object, clamp the
string to the protractor scale with your thumb. The angle measured by the string
is also the altitude of the object viewed.
In small groups from some position in the school yard which your teacher will
designate, measure from that spot the altitude of one corner of the school building.
With your astrolabe and compass record altitude and direction.
97
I-
1'
i
i
tF
224Studentpage 3
Do the same with some street light. Record altitude and direction. While looking
through a dark film negative at the sun record its altitude, direction, and also
the time of day. If the moon is visible in the sky, record its altitude and dir
ection and time of day. In what direction does the sun rise?
What is its altitude and direction at noon? In what direction
does the sun set? Does the sun rise in one direction, move
across the sky, and set in the opposite direction? If so, it moves
from direction to direction. In what direction
does the moon move across the sky?
Question:
l. How can you account for this apparent motion of the moon and the sun across
the sky?
re)
I]
L
-225-
TEACHER DIRECTION E - 52
What is the apparent shift in the moon's position from day to day?
The students will be able to do this activity quite easily, but you should
encourage them to make accurate observations at the same time. You may consult an
almanac or a calendar to find out when to start their observations, you should start
when the moon is in one of its major phases.
The students will need to work on activity E-52 over a period of 10 days.
Allow the students to carry their compasses and astrolabes home each night,
letting a different person in each group gather the data from his observations
so that each person will have at least two opportunities. Each student should
record the data gathered by their group members. Check the student's observa-
tions each day before going on with the other activities.
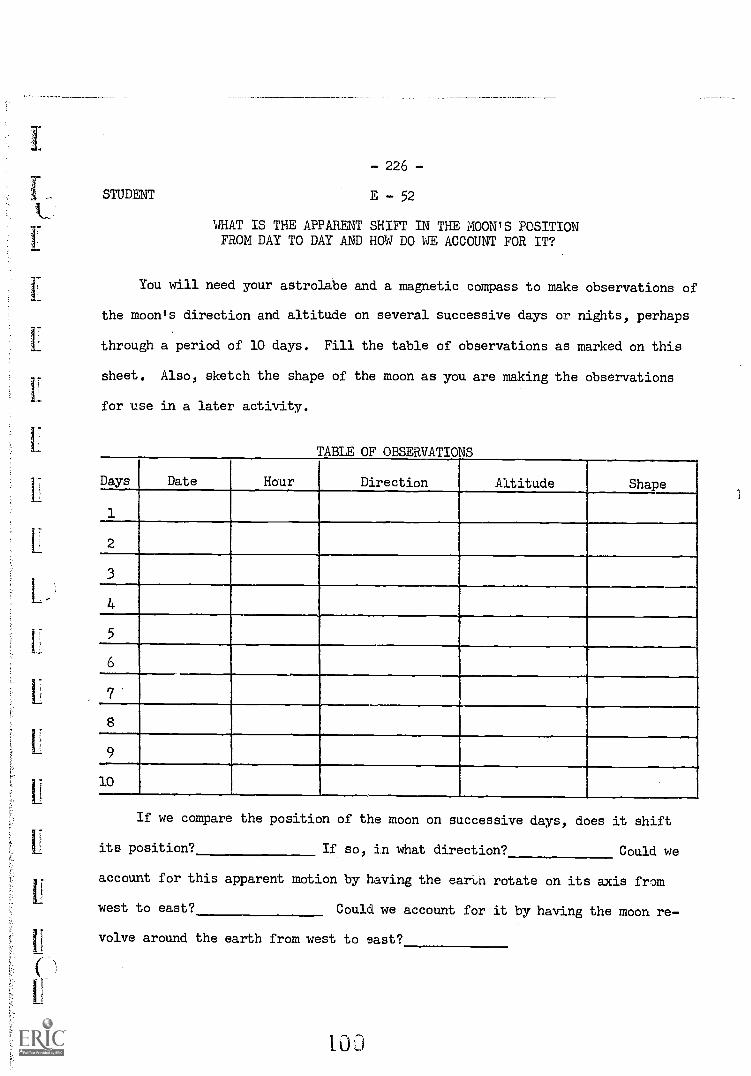
226
STUDENT E 52
WHAT IS THE APPARENT SHIFT IN THE MOON'S POSITIONFROM DAY TO DAY AND HOW DO WE ACCOUNT FOR IT?
You will need your astrolabe and a magnetic compass to make observations of
the moonts direction and altitude on several successive days or nights, perhaps
through a period of 10 days. Fill the table of observations as marked on this
sheet. Also, sketch the shape of the moon as you are making the observations
for use in a later activity.
TABLE OF OBSERVATIONS
Days Date Hour Direction Altitude Shape
1
2
3
4
5
6
1
7.
8
9
10
If we compare the position of the moon on successive days, does it shift
its position? If so, in what direction? Could we
account for this apparent motion by having the earth rotate on its axis from
west to east? Could we account for it by having the moon re
volve around the earth from west to east?
- 227 -
STUDENT E - 53
HOW CAN WE ACCOUNT FOR DAY AND NIGHT?
Materials for groups of three:
1. 1 large styrofoam ball or rubber ball (5 inches)
2. 1 flashlight
You have seen that the sun apparently rises in the east, moves across the
sky during the day and sets in the west at eventing time. It is light during
the time when the sun is moving across the sky and it becomes dark after the
sun has settled below the horizon. Man used to think that day and night were
caused by the sun going around the earth.
Scientists today believe that day and night are caused by the earth ro-
tating on its axis. Can you account for day an night in this way?
In groups of three see if you can represent how day and night might be
caused by the sun going around the earth. Have one student hold the ball which
represents the earth while another student walks around the "earth" with a
lighted flashlight focused on the ball. Have the third student watch the ball
carefully and see if the part lighted by the flashlight moves around the earth
from east to west. If we had no way of knowing if the earth rotated on its
axis, could we account for day and night by having the sun go daily around the
earth from east to west.
To see if we account for day and night by having the earth spin on its
axis, have one student spin the ball representing the earth in a counter-
clockwise direction while another student focuses the flashlight on the ball.
Does the lighted portion of the "earth" move from east to west? Can we account
for day and night by assuming that the earth spins on its axis from west to east?
101
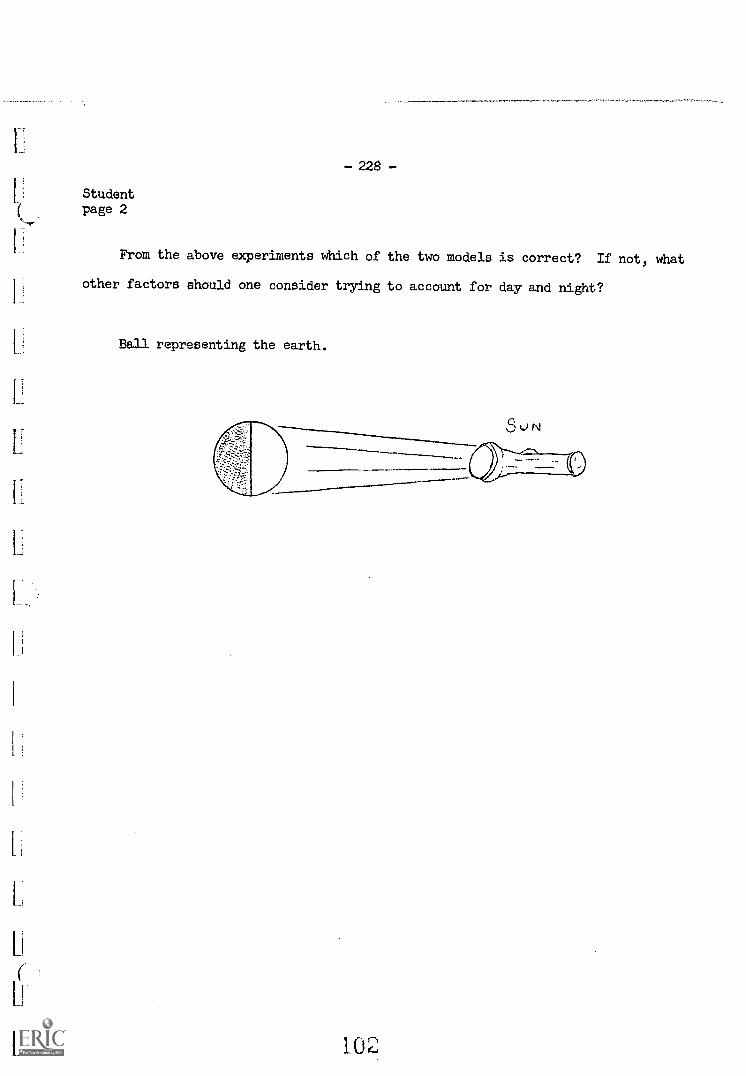
228Studentpage 2
From the above experiments which of the two models is correct? If not, what
other factors should one consider trying to account for day and night?
Ball representing the earth.
102
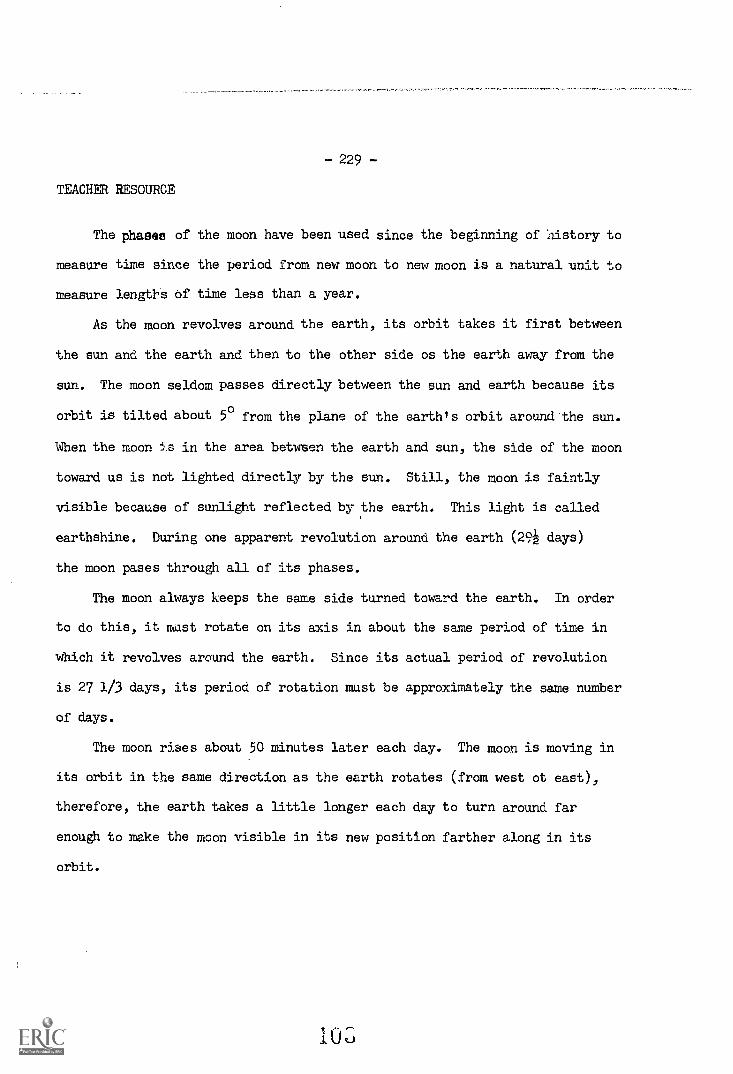
-229-
TEACHER RESOURCE
The phases of the moon have been used since the beginning of history to
measure time since the period from new moon to new moon is a natural unit to
measure lengths of time less than a year.
As the moon revolves around the earth, its orbit takes it first between
the sun and the earth and then to the other side os the earth away from the
sun. The moon seldom passes directly between the sun and earth because its
orbit is tilted about 5° from the plane of the earth's orbit around'the sun.
When the moon ..5.s in the area between the earth and sun, the side of the moon
toward us is not lighted directly by the sun. Still, the moon is faintly
visible because of sunlight reflected by the earth. This light is called
earthshine. During one apparent revolution around the earth (29i days)
the moon pases through all of its phases.
The moon always keeps the same side turned toward the earth. In order
to do this, it mast rotate on its axis in about the same period of time in
which it revolves around the earth. Since its actual period of revolution
is 27 1/3 days, its period of rotation must be approximately the same number
of days.
The moon rises about 50 minutes later each day. The moon is moving in
its orbit in the same direction as the earth rotates (from west of east),
therefore, the earth takes a little longer each day to turn around far
enough to make the moon visible in its new position farther along in its
orbit.
10

1
is
STUDENT
- 230 -
E - 54
WHAT ARE THE DIFFERENT PHASES OF THE MOONAND HOW DO WE ACCOUNT FOR THEM?
Materials for groups of three:
1. 1 styrofoam or rubber ball (about 5 inches)
2. 1 piece of wire (about 10 inches long) for a support
3. 1 flashlight
The above materials can be used to represent a model of the sun- moon-
earth system. Stick a wire into the ball to hold it easily. Let the ball
represent the moon and the flashlight represent the sun. The person holding
the ball will represent the earth. While one person keeps the flashlight
focused on the moon, have the (earth) student holding the ball turn around
in a counter-clockwise direction while holding the (moon) at arm's length.
Start with the (moon) directly in front of the (sun). The person represent-
ing the earth should see the various phases on the (moon) as he moves around
in a counter-clockwise direction. Identify the position of the "moon" when
it appears as a new crescent or a new moon. As a first quarter moon. As a
new gibbous moon. As a full moon. As an old gibbous moon. As a last quarter
moon. As an old crescent.
3
7 5
2C 01
8
006
4
Using the above diagram, observe and record your observations of the moon's
position # 3 -
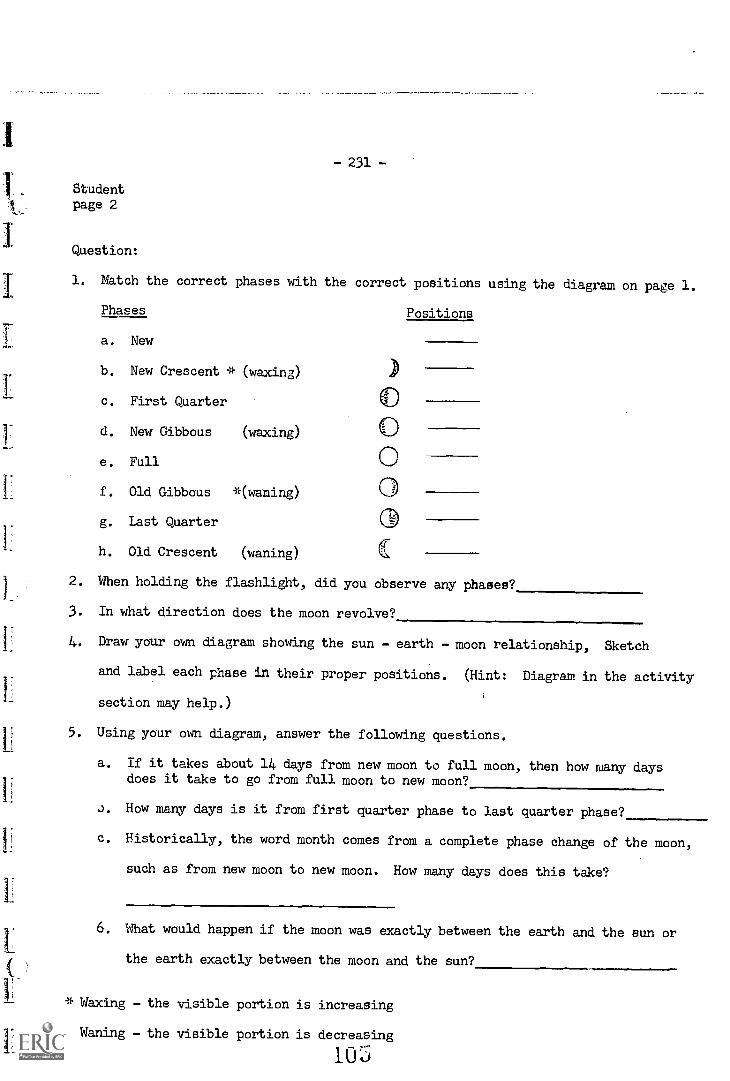
I
ti
- 231 -Studentpage 2
Question:
1. Match the correct phases with the correct positions using the diagram on page 1.
Phases
a. New
b. New Crescent * (waxing)
c. First Quarter
d. New Gibbous (waxing)
e. Full
f. Old Gibbous *(waning)
g. Last Quarter
h. Old Crescent (waning)
00
Positions
2. When holding the flashlight, did you observe any phases?
3. In what direction does the moon revolve?
4. Draw your own diagram showing the sun - earth - moon relationship, Sketch
and label each phase in their proper positions. (Hint: Diagram in the activity
section may help.)
5. Using your own diagram, answer the following questions.
a. If it takes about 14 days from new moon to full moon, then how many daysdoes it take to go from full moon to new moon?
J. How many days is it from first quarter phase to last quarter phase?
c. Historically, the word month comes from a complete phase change of the moon,
such as from new moon to new moon. How many days does this take?
6. What would happen if the moon was exactly between the earth and the sun or
the earth exactly between the moon and the sun?
* Waxing - the visible portion is increasing
Waning - the visible portion is decreasing
103
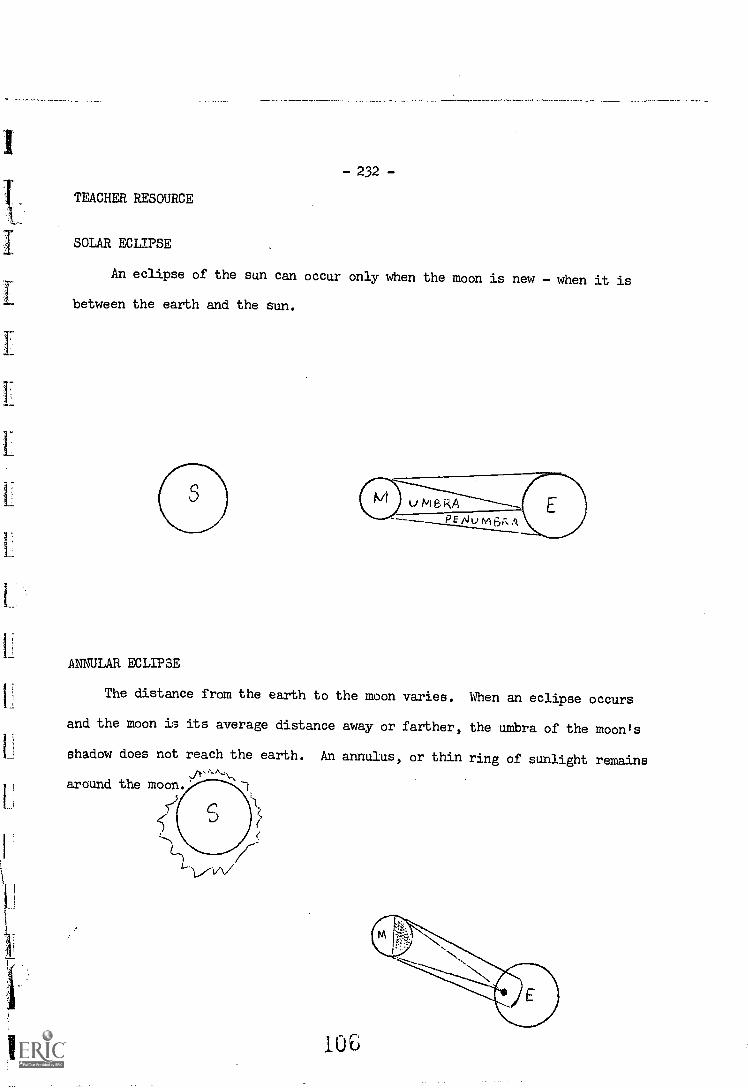
- 232 -
TEACHER RESOURCE
SOLAR ECLIPSE
An eclipse of the sun can occur only when the moon is new - when it is
between the earth and the sun.
ti NIB RA
ANNULAR ECLIPSE
The distance from the earth to the moon varies. When an eclipse occurs
and the moon is its average distance away or farther, the umbra of the moon's
shadow does not reach the earth. An annulus, or thin ring of sunlight remains
around the moon.
vii
106
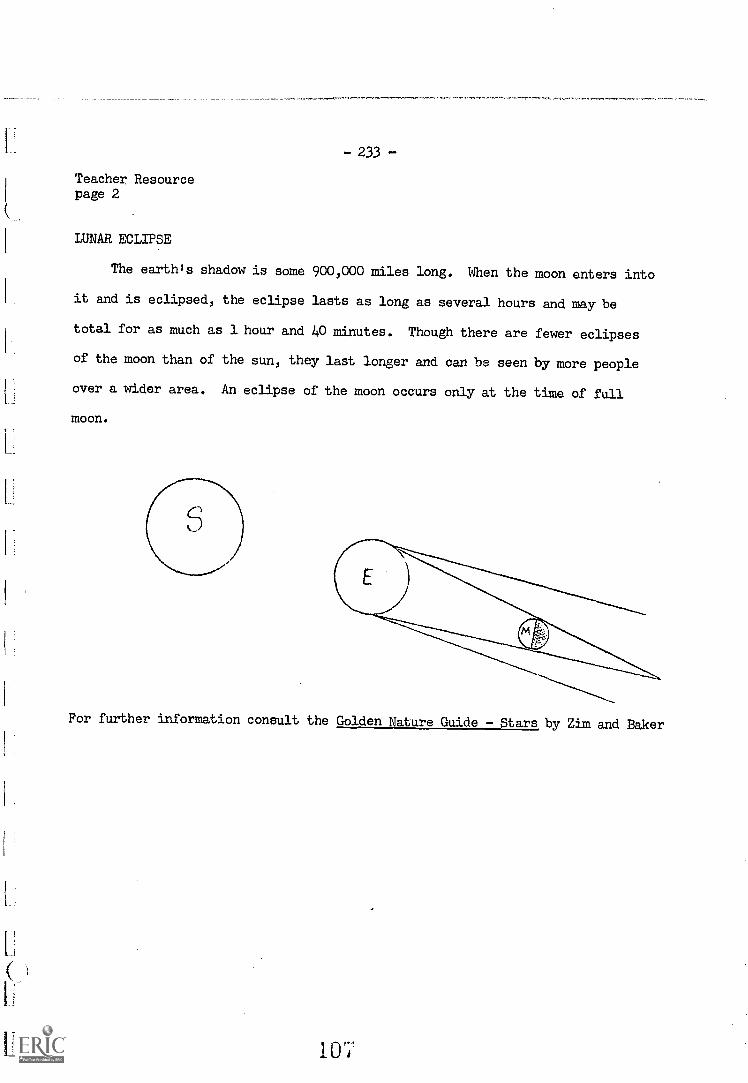
233
Teacher Resourcepage 2
LUNAR ECLIPSE
The earth's shadow is some 900,000 miles long. When the moon enters into
it and is eclipsed, the eclipse lasts as long as several hours and may be
total for as much as 1 hour and 40 minutes. Though there are fewer eclipses
of the moon than of the sun, they last longer and can be seen by more people
over a wider area. An eclipse of the moon occurs only at the time of full
moon.
For further information consult the Golden Nature Guide - Stars by Zim and Baker
107
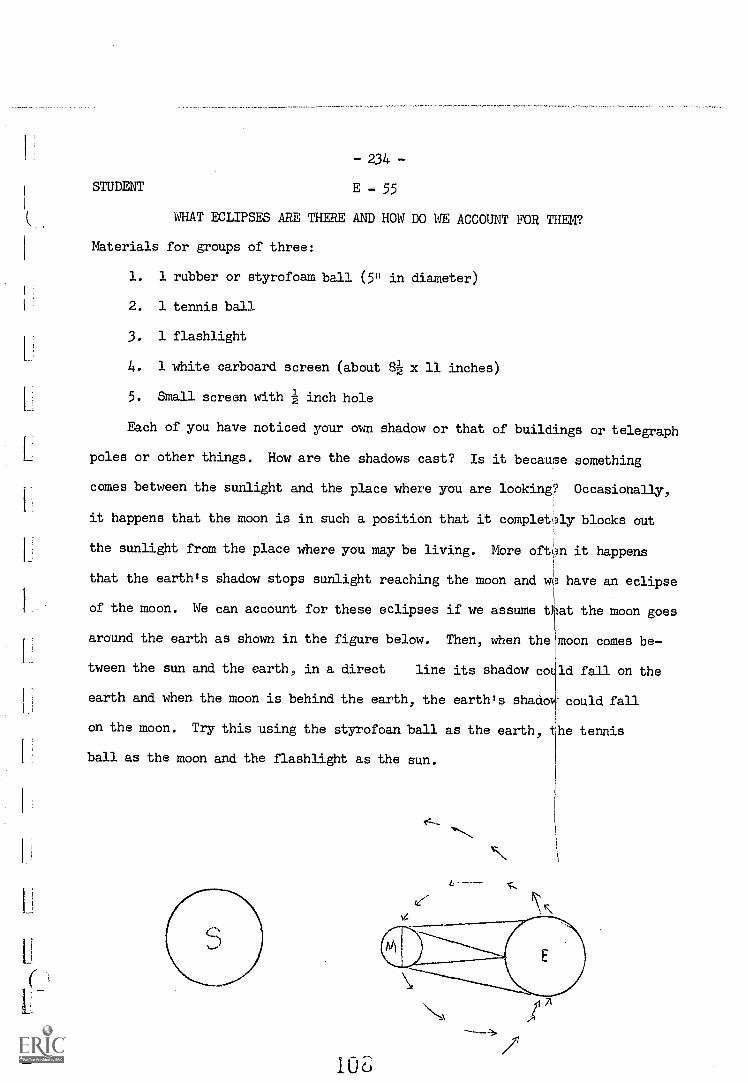
L
- 234 -
STUDENT E - 55
WHAT ECLIPSES ARE THERE AND HOW DO WE ACCOUNT FOR THEM?
Materials for groups of three:
1. 1 rubber or styrofoam ball (5" in diameter)
2. 1 tennis ball
3. 1 flashlight
4. 1 white carboard screen (about 81 x 11 inches)
5. Small screen with i inch hole
Each of you have noticed your own shadow or that of buildings or telegraph
poles or other things. How are the shadows cast? Is it because something
comes between the sunlight and the place where you are looking? Occasionally,
it happens that the moon is in such a position that it completcay blocks out
the sunlight from the place where you may be living. More oftn it happens
that the earthSs shadow stops sunlight reaching the moon and 14,,i3 have an eclipse
of the moon. We can account for these eclipses if we assume that the moon goes
around the earth as shown in the figure below. Then, when the moon comes be-
tween the sun and the earth, in a direct line its shadow could fall on the
earth and when the moon is behind the earth, the earth's shadow could fall
on the moon. Try this using the styrofoan ball as the earth, t
ball as the moon and the flashlight as the sun.
he tennis
- - -
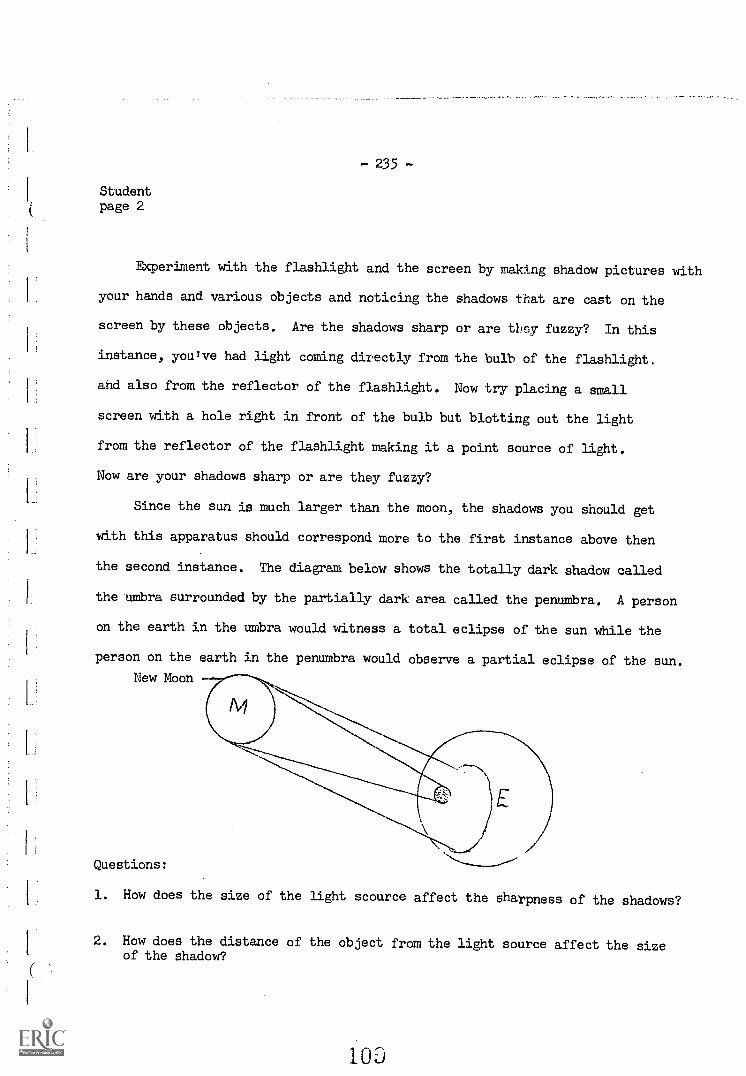
235
Studentpage 2
Experiment with the flashlight and the screen by making shadow pictures with
your hands and various objects and noticing the shadows that are cast on the
screen by these objects. Are the shadows sharp or are they fuzzy? In this
instance, youlve had light coming directly from the bulb of the flashlight.
and also from the reflector of the flashlight. Now try placing a small
screen with a hole right in front of the bulb but blotting out the light
from the reflector of the flashlight making it a point source of light.
Now are your shadows sharp or are they fuzzy?
Since the sun is much larger than the moon, the shadows you should get
with this apparatus should correspond more to the first instance above then
the second instance. The diagram below shows the totally dark shadow called
the umbra surrounded by the partially dark area called the penumbra. A person
on the earth in the umbra would witness a total eclipse of the sun while the
person on the earth in the penumbra would observe a partial eclipse of the sun.
New Moon
C
Questions:
1. How does the size of the light scource affect the sharpness of the shadows?
2. How does the distance of the object from the light source affect the sizeof the shadow?
103
236
Studentpage 3
3. How does the distance between the "earth" or "moon" affect the size of theshadow cast?
4. Will an eclipse of the sun occur at the time of the new moon or the full moon?
5. Will an eclipse of the moon occur at the time of the new moon or the full moon?
6. Draw diagrams showing an eclipse of the moon and sun and label the parts:
I237
STUDENT RESOURCE
The imaginary line through the center of the earth from the northpole to
the southpole is called the earthis axis. The curved path of the earth around
the sun is called the earth's orbit. As the earth travels around in its orbit,
its axis is always tilted 23.5 degrees. In June the north half of the earth
is tilted toward the sun, and the south half is tilted away from the sun. In
June, this tilt of the earth's axis causes the svniS rays to fall more directly,
or vertically, on the northern hemisphere, and less vertically or slanted on the
southern hemisphere. As a result, the June days are both longer and warmer in
the northern hemisphere than in the southern hemisphere. In June, then, the
northern hemisphere is having summer while the southern hemisphere is having
winter.
In December, the earth is on the opposite side of its orbit. The north
half is tilted away from the sun, and the south half is tilted toward the sun.
This makes December days colder and shorter in the northern hemisphere.
L
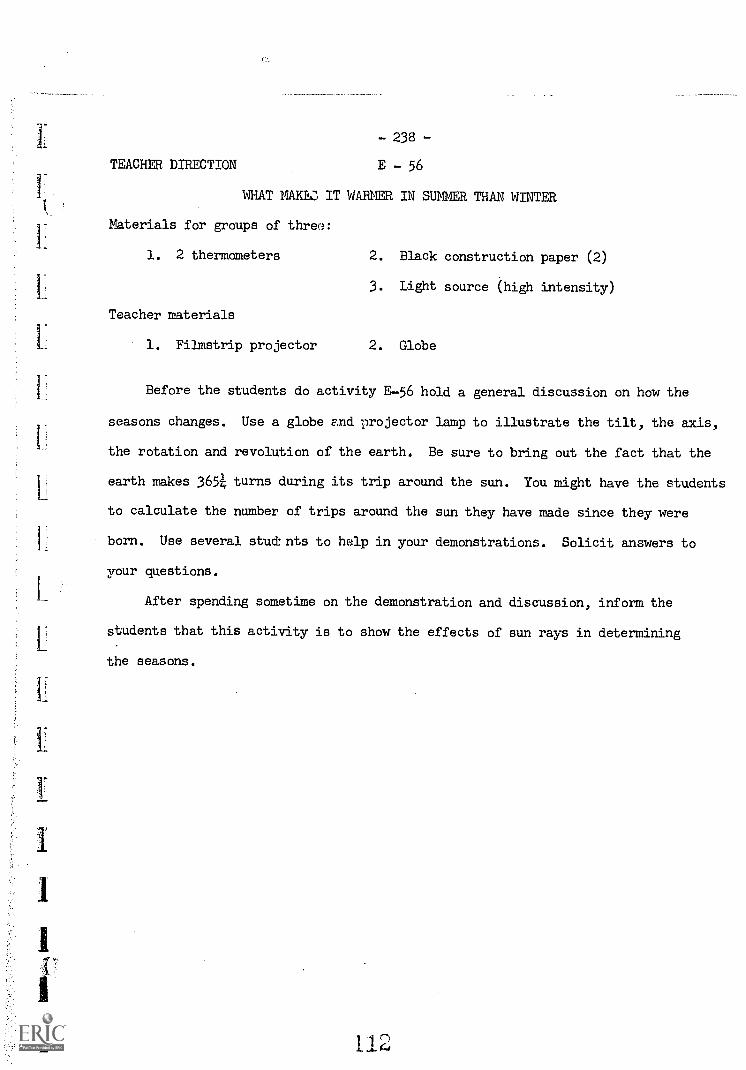
- 238 -
TEACHER DIRECTION E - 56
WHAT MARK' IT WARMER IN SUMMER THAN WINTER
Materials for groups of three:
1. 2 thermometers 2. Black construction paper (2)
3. Light source (high intensity)
Teacher materials
1_ 1. Filmstrip projector 2. Globe
1_ Before the students do activity E-56 hold a general discussion on how the
seasons changes. Use a globe and projector lamp to illustrate the tilt, the axis,
the rotation and revolution of the earth. Be sure to bring out the fact that the
earth makes 3654; turns during its trip around the sun. You might have the students
to calculate the number of trips around the sun they have made since they were
born. Use several stud: nts to help in your demonstrations. Solicit answers to
your questions.
After spending sometime on the demonstration and discussion, inform the
students that this activity is to show the effects of sun rays in determining
the seasons.
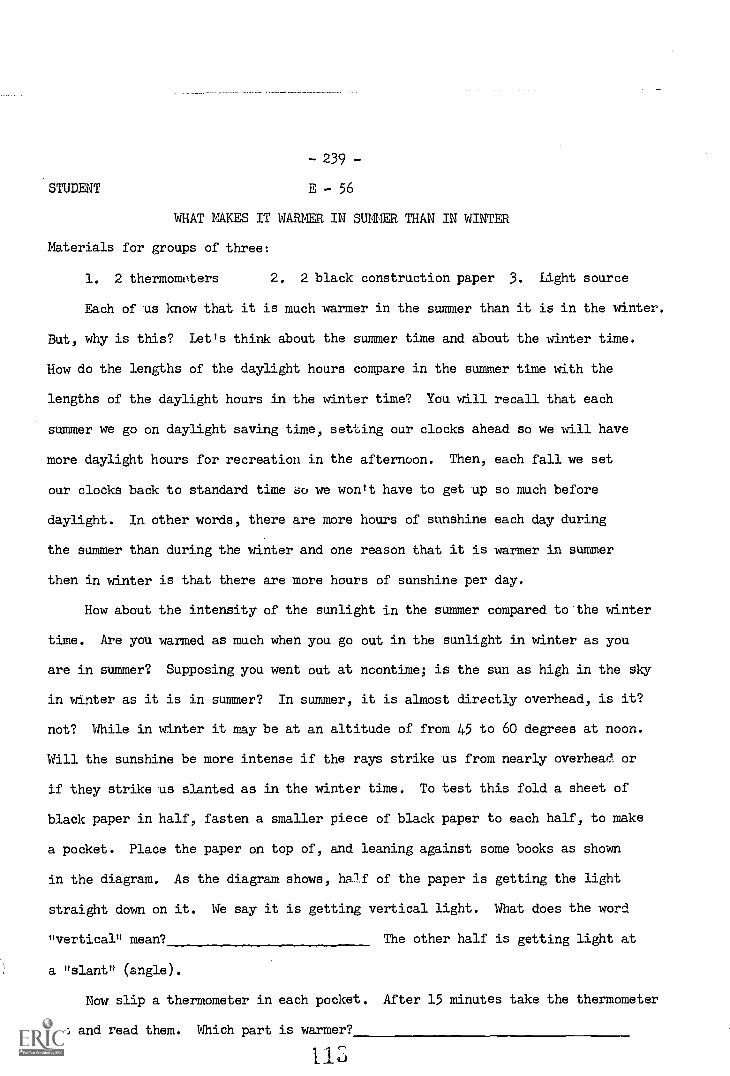
- 239 -
STUDENT E - 56
WHAT MAKES IT WARMER IN SUMMER THAN IN WINTER
Materials for groups of three:
1. 2 thermometers 2. 2 black construction paper 3. Light source
Each of us know that it is much warmer in the summer than it is in the winter.
But, why is this? Let's think about the summer time and about the winter time.
How do the lengths of the daylight hours compare in the summer time with the
lengths of the daylight hours in the winter time? You will recall that each
summer we go on daylight saving time, setting our clocks ahead so we will have
more daylight hours for recreation in the afternoon. Then, each fall we set
our clocks back to standard time so we won't have to get up so much before
daylight. In other words, there are more hours of sunshine each day during
the summer than during the winter and one reason that it is warmer in summer
then in winter is that there are more hours of sunshine per day.
How about the intensity of the sunlight in the summer compared to the winter
time. Are you warmed as much when you go out in the sunlight in winter as you
are in summer? Supposing you went out at noontime; is the sun as high in the sky
in winter as it is in summer? In summer, it is almost directly overhead, is it?
not? While in winter it may be at an altitude of from 45 to 60 degrees at noon.
Will the sunshine be more intense if the rays strike us from nearly overhead or
if they strike us slanted as in the winter time. To test this fold a sheet of
black paper in half, fasten a smaller piece of black paper to each half, to make
a pocket. Place the paper on top of, and leaning against some books as shown
in the diagram. As the diagram shows, half of the paper is getting the light
straight down on it. We say it is getting vertical light. What does the word
uvertical" mean? The other half is getting light at
a "slant" (angle).
Now slip a thermometer in each pocket. After 15 minutes take the thermometer
out and read them. Which part is warmer?
11_3
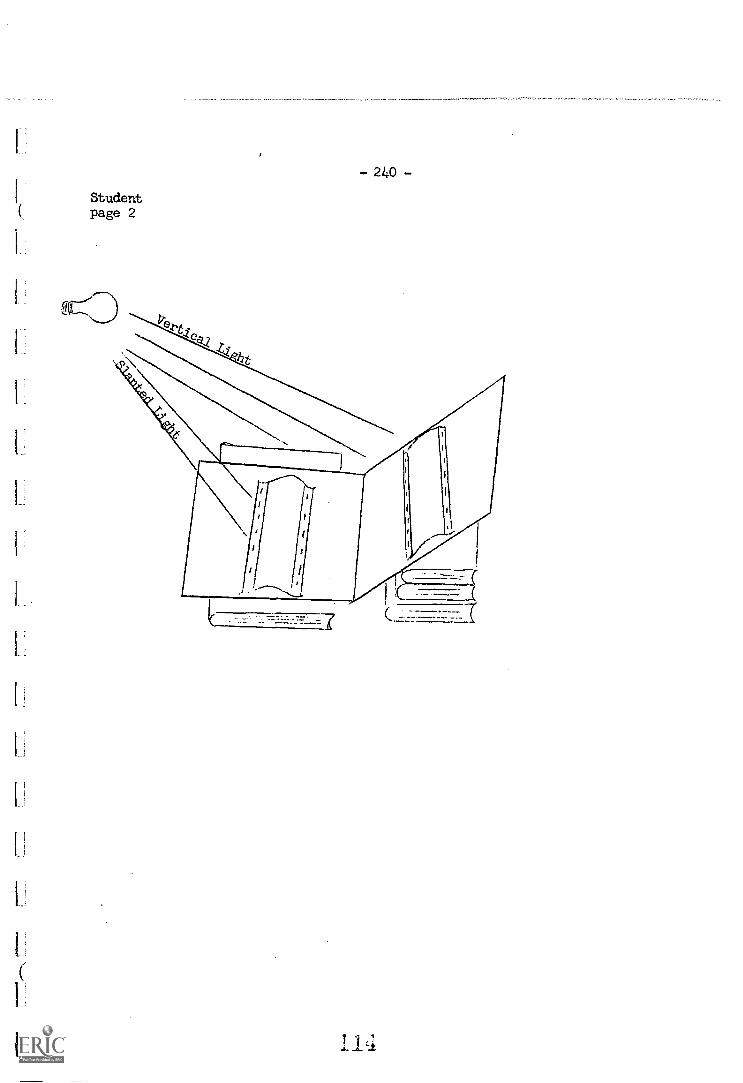
- 240 -Studentpage 2
TEACHER DIRECTION
- 241 -
E - 57
BE WEIGHTLESSFALL FREE
This is a reading activity to help increase the students reading compre-
hension. Have the students read the activity before doing the exercise.
After they have finished hold a general discussion of the activity.
The film Gravity, Weight and Weightlessness, maybe shown for more
effective comprehension.
115
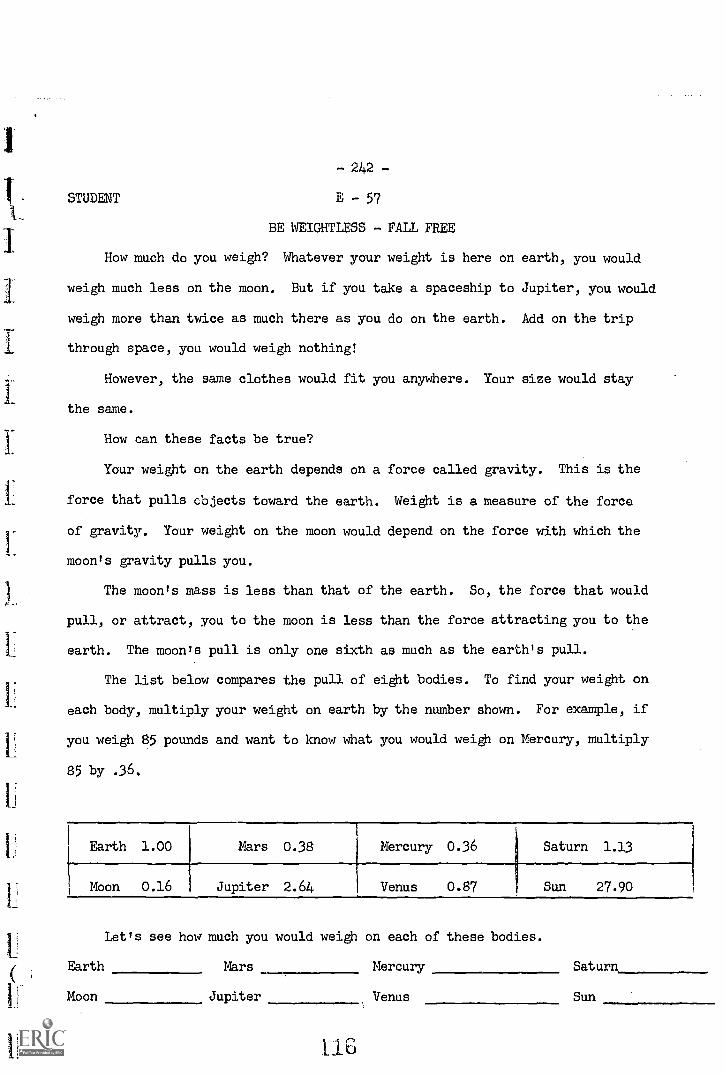
1 1
L
1
I
I
242
STUDENT E 57
BE WEIGHTLESS FALL FREE
How much do you weigh? Whatever your weight is here on earth, you would
weigh much less on the moon. But if you take a spaceship to Jupiter, you would
weigh more than twice as much there as you do on the earth. Add on the trip
through space, you would weigh nothing!
However, the same clothes would fit you anywhere. Your size would stay
the same.
How can these facts be true?
Your weight on the earth depends on a force called gravity. This is the
force that pulls objects toward the earth. Weight is a measure of the force
of gravity. Your weight on the moon would depend on the force with which the
moon's gravity pulls you.
The moon's mass is less than that of the earth. So, the force that would
pull, or attract, you to the moon is less than the force attracting you to the
earth. The moon's pull is only one sixth as much as the earth's pull.
The list below compares the pull of eight bodies. To find your weight on
each body, multiply your weight on earth by the number shown. For example, if
you weigh 85 pounds and want to know what you would weigh on Mercury, multiply
85 by .36.
Earth 1.00 Mars 0.38 Mercury 0.36 Saturn 1.13
Moon 0.16 Jupiter 2.64 Venus 0.87 Sun 27.90
Earth
Let's see how much you would weigh on each of these bodies.
Mars Mercury Saturn
Moon Jupiter Venus Sun
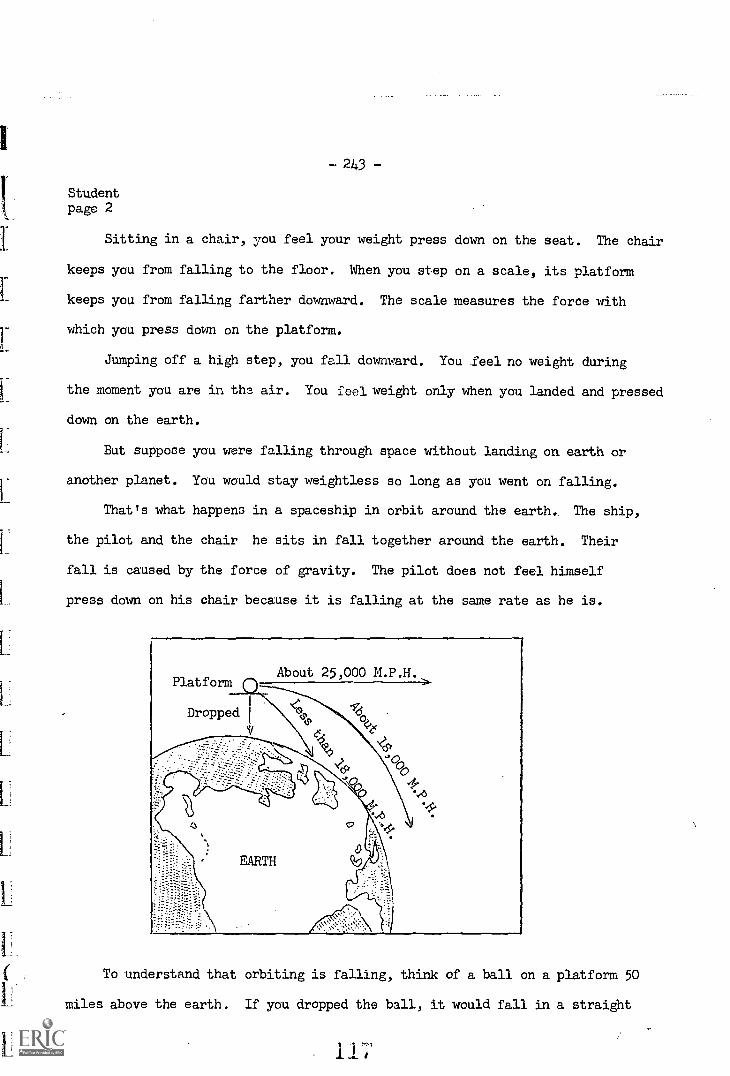
L.
C
-243-
Studentpage 2
Sitting in a chair, you feel your weight press down on the seat. The chair
keeps you from falling to the floor. When you step on a scale, its platform
keeps you from falling farther downward. The scale measures the force with
which you press down on the platform.
Jumping off a high step, you fall downward. You feel no weight during
the moment you are in the air. You feel weight only when you landed and pressed
down on the earth.
But suppose you were falling through space without landing on earth or
another planet. You would stay weightless so long as you went on falling.
That's what happens in a spaceship in orbit around the earth.. The ship,
the pilot and the chair he sits in fall together around the earth. Their
fall is caused by the force of gravity. The pilot does not feel himself
press down on his chair because it is falling at the same rate as he is.
About 25,000 M.P.H.>
To understand that orbiting is falling, think of a ball on a platform 50
miles above the earth. If you dropped the ball, it would fall in a straight
- 244 -
Studentpage 3
toward the center of the earth. If you threw the ball eastward at a speed
of 100 feet a second, it would travel to the earth in a curved path.
If you could throw it fast enough - nearly five miles in a second - its
curved path would exactly match the curve of the earth's surface. It would
still be falling and weightless, but its fall would not bring it nearer the
earth. The ball would be in orbit.
A spaceship goes into orbit around the earth when its rockets get it
moving about 18,000 miles an hour. At that speed, the ship falls in a curve
matching the curve of the earth.
In the ship, the pilot does not have the sense of "down" and "up" that
we have because we are held to the earth by gravity. He is weightless.
Astronauts must learn to get used to this strange feeling and to do their
work in spite of it.
245
TEACHER DIRECTION E 58
ACTION AND REACTION
Materials for groups of three:
1. Roller Skates 2. Basketball
This reading activity is designed to help the students understand the
principle behind rocket engines. The students may or may not have heard of
Newton's Laws of Motion, it is almost imperative to mention something about
one of them.
Have one or two of your students bring a pair of roller skates and a
basketball. After having the students read over the activity once or twice
read the activity aloud while they read it silently to insure comprehension.
When you finish the reading have one student put on the roller skates and
toss the ball to another person. Discuss what happened and bring out the
fact that this principle is used in rocket engines.
113
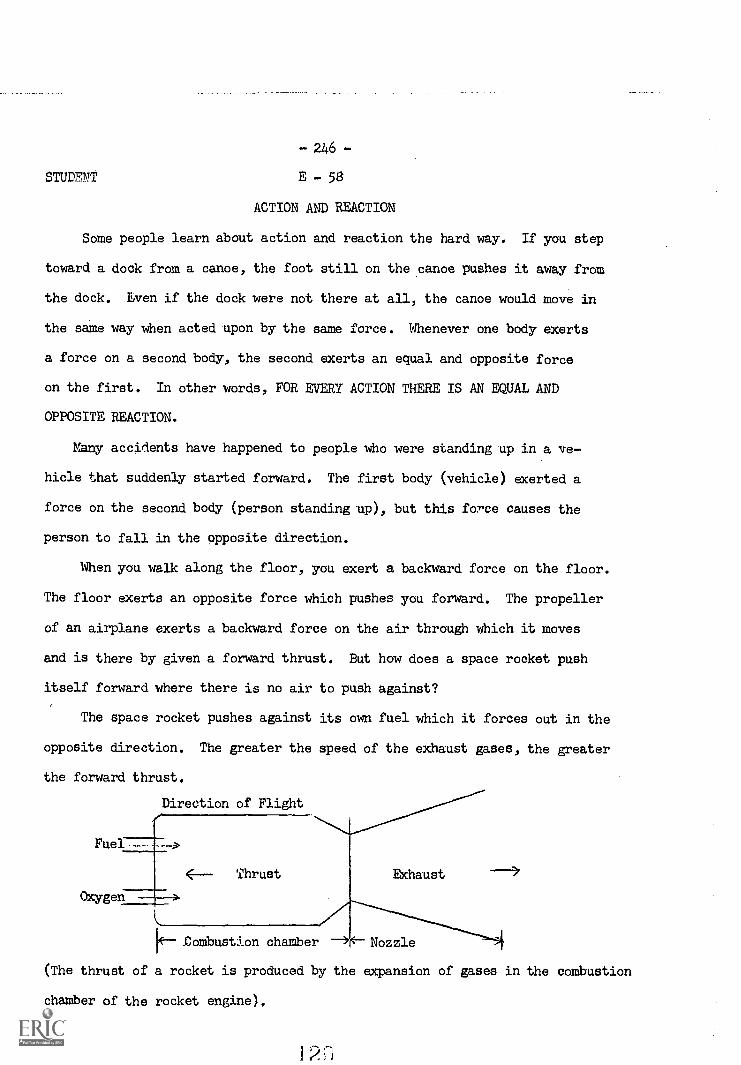
- 246 -
STUDErT E 58
ACTION AND REACTION
Some people learn about action and reaction the hard way. If you step
toward a dock from a canoe, the foot still on the canoe pushes it away from
the dock. Even if the dock were not there at all, the canoe would move in
the same way when acted upon by the same force. Whenever one body exerts
a force on a second body, the second exerts an equal and opposite force
on the first. In other words, FOR EVERY ACTION THERE IS AN EQUAL AND
OPPOSITE REACTION.
Many accidents have happened to people who were standing up in a ve-
hicle that suddenly started forward. The first body (vehicle) exerted a
force on the second body (person standing op), but this force causes the
person to fall in the opposite direction.
When you walk along the floor, you exert a backward force on the floor.
The floor exerts an opposite force which pushes you forward. The propeller
of an airplane exerts a backward force on the air through which it moves
and is there by given a forward thrust. But how does a space rocket push
itself forward where there is no air to push against?
The space rocket pushes against its on fuel which it forces out in the
opposite direction. The greater the speed of the exhaust gases, the greater
the forward thrust.
Direction of Flight
Fuel.--- -->
E7--- Thrust
Oxygen
Combustion chamber
Exhaust
t- Nozzle
(The thrust of a rocket is produced by the expansion of gases in the combustion
chamber of the rocket engine).
12
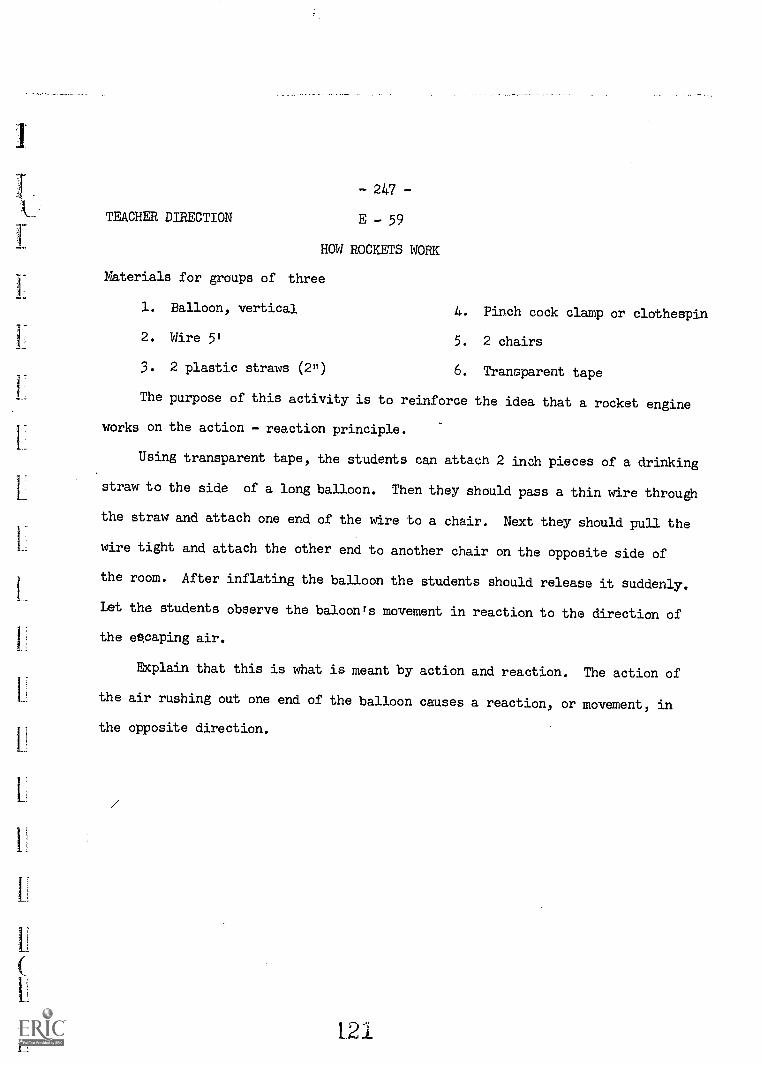
E!
- 247 -
TEACHER DIRECTION E - 59
HOW ROCKETS WORK
Materials for groups of three
1. Balloon, vertical 4. Pinch cock clamp or clothespin
2. Wire 5' 5. 2 chairs
3. 2 plastic straws (2") 6. Transparent tape
The purpose of this activity is to reinforce the idea that a rocket engine
works on the action - reaction principle.
Using transparent tape, the students can attach 2 inch pieces of a drinking
straw to the side of a long balloon. Then they should pass a thin wire through
the straw and attach one end of the wire to a chair. Next they should pull the
wire tight and attach the other end to another chair on the opposite side of
the room. After inflating the balloon the students should release it suddenly.
Let the students observe the baloon's movement in reaction to the direction of
the escaping air.
Explain that this is what is meant by action and reaction. The action of
the air rushing out one end of the balloon causes a reaction, or movement, in
the opposite direction.
1.21
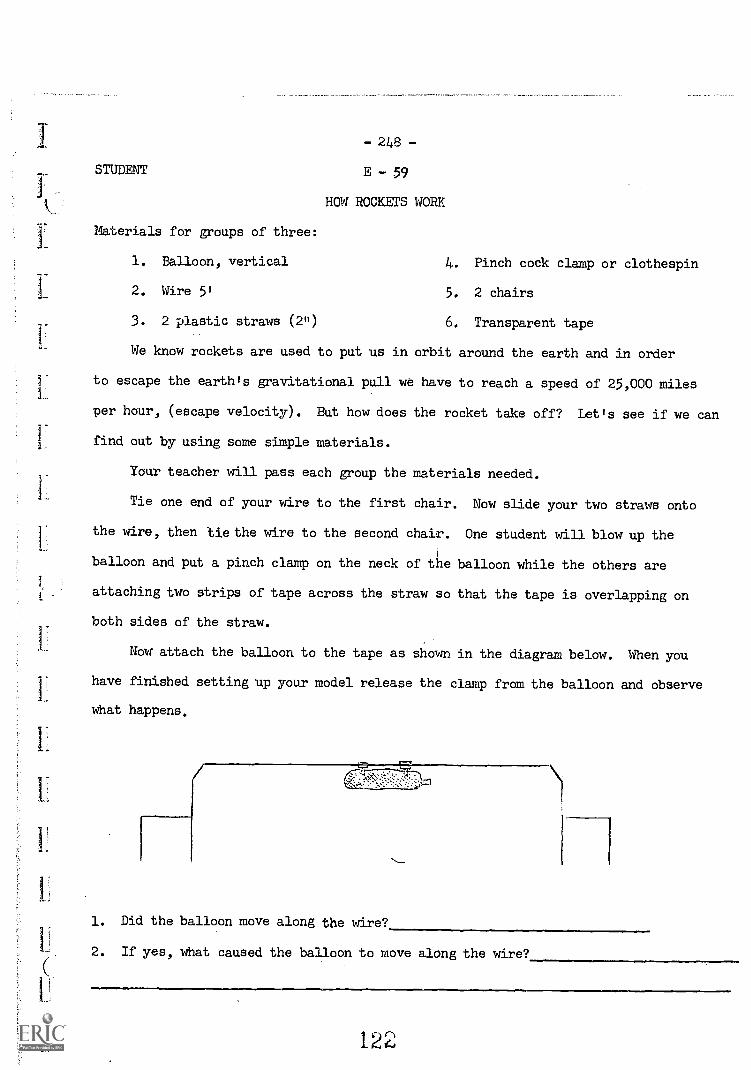
STUDENT
Materials for groups of three:
- 248 -
E - 59
HOW ROCKETS WORK
1. Balloon, vertical 4. Pinch cock clamp or clothespin
2. Wire 51 5. 2 chairs
3. 2 plastic straws (2") 6. Transparent tape
We know rockets are used to put us in orbit around the earth and in order
to escape the earth's gravitational pull we have to reach a speed of 25,000 miles
per hour, (escape velocity). But how does the rocket take off? Let's see if we can
find out by using some simple materials.
Your teacher will pass each group the materials needed.
Tie one end of your wire to the first chair. Now slide your two straws onto
the wire, then -tie the wire to the second chair. One student will blow up the
balloon and put a pinch clamp on the neck of the balloon while the others are
attaching two strips of tape across the straw so that the tape is overlapping on
both sides of the straw.
Now attach the balloon to the tape as shown in the diagram below. When you
have finished setting up your model release the clamp from the balloon and observe
what happens.
1. Did the balloon move along the wire?
2. If yes, what caused the balloon to move along the wire?
1'22
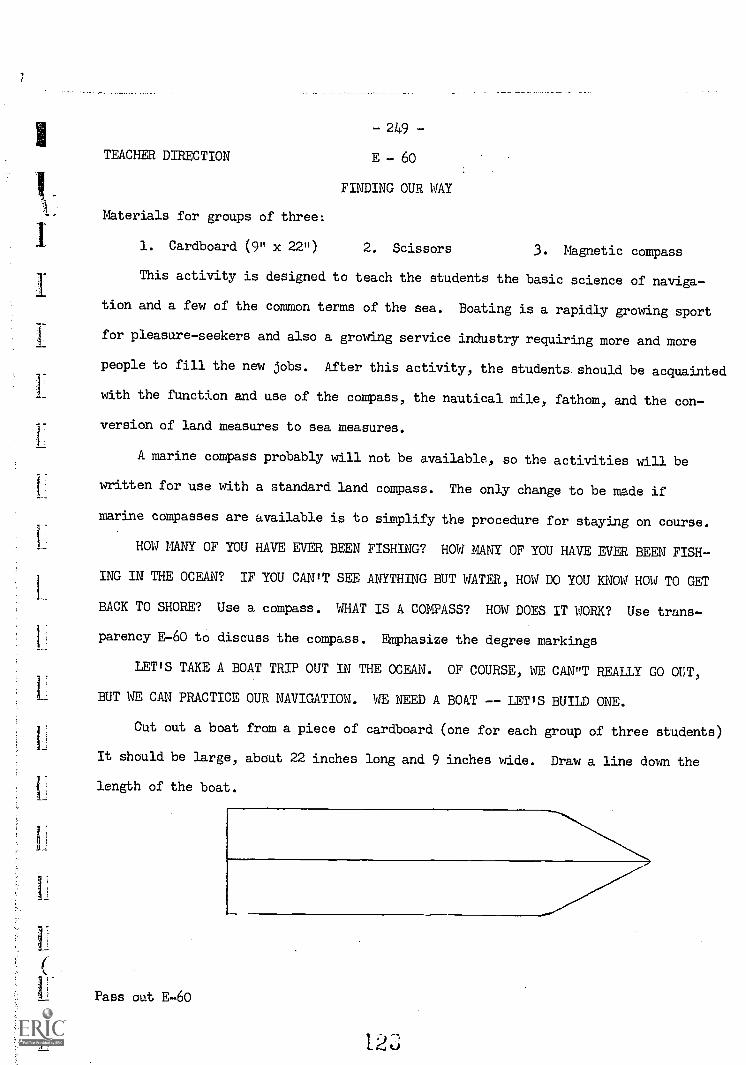
7
TEACHER DIRECTION
Materials for groups of three:
1. Cardboard (9" x 22")
- 249 -
E - 60
FINDING OUR WAY
2, Scissors 3. Magnetic compass
This activity is designed to teach the students the basic science of naviga-
tion and a few of the common terms of the sea. Boating is a rapidly growing sport
for pleasure-seekers and also a growing service industry requiring more and more
people to fill the new jobs. After this activity, the students should be acquainted
with the function and use of the compass, the nautical mile, fathom, and the con-
version of land measures to sea measures.
A marine compass probably will not be available, so the activities will be
written for use with a standard land compass. The only change to be made if
marine compasses are available is to simplify the procedure for staying on course.
HOW MANY OF YOU HAVE EVER BEEN FISHING? HOW MANY OF YOU HAVE EVER BEEN FISH-
ING IN THE OCEAN? IF YOU CAN'T SEE ANYTHING BUT WATER, HOW DO YOU KNOW HOW TO GET
BACK TO SHORE? Use a compass. WHAT IS A COMPASS? HOW DOES IT WORK? Use trans-
parency 1-60 to discuss the compass. Emphasize the degree markings
LET'S TAKE A BOAT TRIP OUT IN THE OCEAN. OF COURSE, WE CAN"T REALLY GO OUT,
BUT NE CAN PRACTICE OUR NAVIGATION. WE NEED A BOAT -- LET'S BUILD ONE.
Out out a boat from a piece of cardboard (one for each group of three students)
It should be large, about 22 inches long and 9 inches wide. Draw a line down the
length of the boat.
Pass out E -60
123
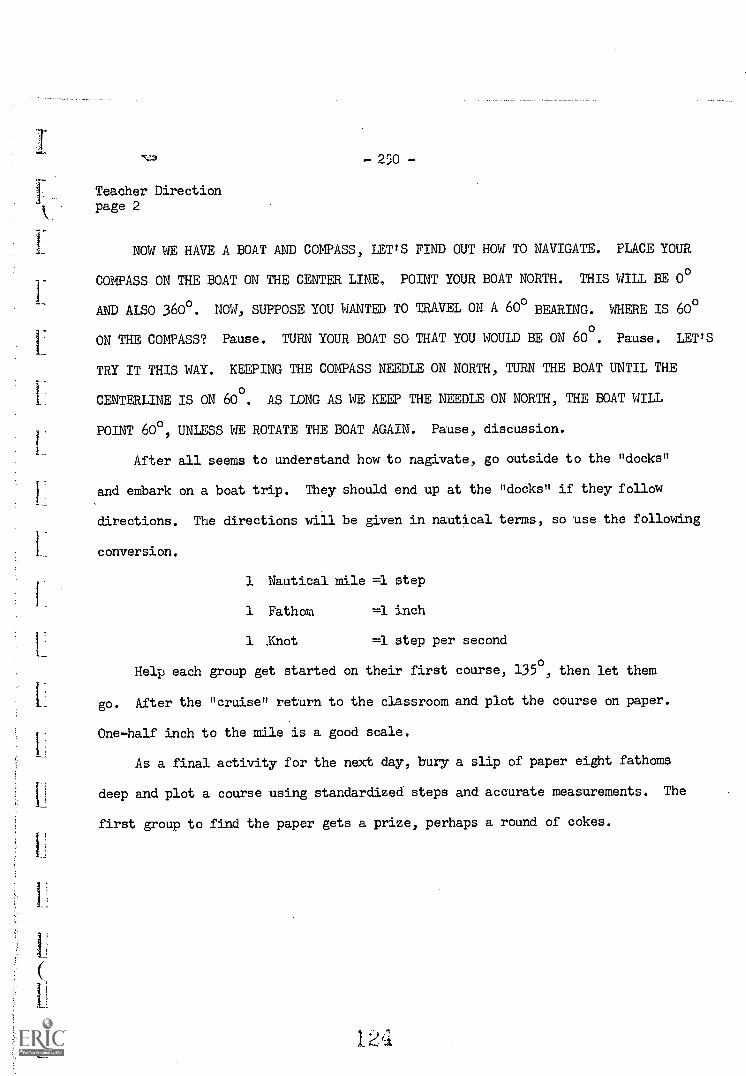
Li
- 250 -
Teacher Directionpage 2
NOW WE HAVE A BOAT AND COMPASS, LET'S FIND OUT HOW TO NAVIGATE. PLACE YOUR
COMPASS ON THE BOAT ON THE CENTER LINE. POINT YOUR BOAT NORTH. THIS WILL BE 0°
AND ALSO 360°. NOW, SUPPOSE YOU WANTED TO TRAVEL ON A 60° BEARING. WHERE IS 60°
ON THE COMPASS? Pause. TURN YOUR BOAT SO THAT YOU WOULD BE ON 600. Pause. LET'S
TRY IT THIS WAY. KEEPING THE COMPASS NEEDLE ON NORTH, TURN THE BOAT UNTIL THE
CENTERLINE IS ON 600. AS LONG AS WE KEEP THE NEEDLE ON NORTH, THE BOAT WILL
POINT 600, UNLESS WE ROTATE THE BOAT AGAIN. Pause, discussion.
After all seems to understand how to nagivate, go outside to the "docks"
and embark on a boat trip. They should end up at the "docks" if they follow
directions. The directions will be given in nautical terms, so use the following
conversion.
1 Nautical mile =1 step
1 Fathom =1 inch
1 .Knot =1 step per second
Help each group get started on their first course, 135°, then let them
go. After the "cruise" return to the classroom and plot the course on paper.
One-half inch to the mile is a good scale.
As a final activity for the next day, bury a slip of paper eight fathoms
deep and plot a course using standardized steps and accurate measurements. The
first group to find the paper gets a prize, perhaps a round of cokes.
12,1
STUDENT
- 251 -
E - 60
FINDING OUR WAYS
Materials for groups of three:
1. Cardboard (9" x 22") 2. Scissors 3. Magnetic Compass
You have heard the word "navigation" many times. It really doesn't
mean much to you beyond finding your way. The big question is HOW? In a
car, you read signs and use a road map to direct you down the right road.
But if you don't have a road map or a road or signs, what do you do? We pull
a Daniel Boone and use a magnetic compass.
You all know what a compass is, just a magnet in a case. The magnet
is pointed and the painted point always points to the north magnetic pole
which here in Florida is close to the north pole. If we know which way north
is, then we know all the other directions, also.
Take your compass and look at the bottom of the case. Turn the case
until the needle points North. Notice the other letters; turn the compass
case and notice that the needle doesn't turn, it always points North.
You will be charting your course in degrees. The degrees scale is
located around the upper edge of the compass case. Now, let's take a cruise.
Take a piece of cardboard and cut it out in the shape of a boat. Make
it about 9" wide and 22" long.
Draw a line down the center of the boat to use as a reference line. Place
your compass on the center of the boat and point it to the North. The N should
be under the painted tip. Now, hold the compass still and rotate the boat until
it points toward 135 (SE). The line on the boat should pass through 135° and
125
- 252 -
Studentpage 2
315°. As long as you hold the needle on 0° (N), the boat will point towards
the 135o
course.1 nautical mile = 1 step
The course:
135° for 24 nautical miles (steps)
then 180° for 10 nautical miles
then 315° for 24 nautical miles
then 360° for 10 nautical miles
You should end up the same place you started. If not, try it again with
another navigator. When you have finished, go back to your room and draw a
chart of your cruise. Use a scale of in equals 1 mile.
126
STUDENT
- 253 -
E - 61
SUNKEN TREASURE
See if you can find the sunken treasure. Use your boat and compass to
the exact spot and dig up the
Proceed on a course of 90° from the dock for 20 nautical miles. Ask
your instructor for the exact length of the nautical mile (her step length).
Turn to a course of 120° and sail 30 nautical miles, Turn to a course of 270°
0and proceed 30 miles. Now take a course of 300 and sail 20 miles. Then come
about to 325° and proceed 10 miles. Send a diver down (dig) for about 5 fathoms
(inches) and find the treasure. If you miss, start over.
197
TEACHER RESOURCE
-254-
MAPS AND MAP READING
Maps are used to find out many kinds of information about the earthls
surface. To understand any map, we must first know its relation to the com-
pass directions. The standard method of showing compass directions on a map
is to make the top of the map north. Because of the magnetic declination, com-
pass direction does not usually agree with true north as shown by the meridians.
In order to change compas3 direction at a certain location into true direction
for the same location, you will have to look up the declination. On'small maps,
the declination for a particular area can be given on the map. It maybe printed
below the map or indicated as a symbol on the map itself,
Once a person has determined directions the map user is generally inter-
ested in distances. All maps must have some basis for comparison between actual
distances. All maps. must have some basis for comparison between actual distance
on the earth and the same distance measured on the map. This relationship is
the scale of the map. The scales maybe graphic j. t fractional,Mile
(1/10,000) or verbal (one inch equals one mile).
Most maps will have a legend showing symbols which represents certain
features on the map.
There are many types of maps geologic maps, topographic maps, road maps,
weather and climate maps, etc. In this unit we will work with some of these
maps.
it
maux,`,
-255-
Topic - 1 A map is defined as the representation of all or part of the earth's
surface on a plane.
This pdrt of our unit is designed'io increase the ability of the students
to understand the general features Of maps and their interpretation.
125
- 256 -
TEACHER DIRECTION E - 62
ITEMS BASIC FOR MAPS
Materials for groups of three:
1. Map of the city
2. U. S. Map
3. ruler
4. Marker, transparency
In this activity we will try to orient the students to the basic items used
in interpreting maps. Have the students bring to class some road maps obtained
from a service station. Hold a general discussion of maps. Asking questions and
soliciting answers from the students.
HOW MANY TYPES OF MAPS CAN YOU THINK OF AND WHAT INFORMATION DO THEY GIVE?
Discussion. Write the types of maps and information on an acetate. WHAT IS THE
FIRST ITEM YOU LOOK FOR ON A NAP? (Compass direction) Discussion. WHAT ARE THOSE
LINES DRAWN FROM TOP TO BOTTOM AND SIDE TO SIDE CATIRD? Longitudinal or meridians
and Latitudinal or parallels. Discussion. Include in the discussion which lines
uses certain directions. SOME MAPS HAVE SOMETHING CATTRD A LEGEND, WHAT DO YOU
SUPPOSE A LEGEND IS AND WHAT DOES IT CONTAIN? An area on a map that gives infor-
mation concerning the features on the map. Discussion. Discuss the types of
scales used on maps.
Letts see if we can interpret a road map and a U.S. map. Have the students
to find the compass direction,* next have them indicate what type of scale is being
used.. (graphic, fractional or verbal) To help orient the students in finding their
way from one point to another and the mileage. Designate a starting point and an
ending point on the city map. Let the students draw lines indicating the path taken
and the approximate number of miles to the scale.* See how many took the shortest
route, Give a small prize for the shortest distance taken.
Talk about the symbols used on the map, after which you will give the students
130
I-
257Teacher Directionpage 2
a different starting and ending point for them to plot on a U.S. map. But have
write in all of the details they encountered, i.e. roads under construc
tion, highway directions traveled, mileage, etc.
* If the maps the students have give only north, east, south and west be sure
they include NW SW NE & SE
*3 Inform the students to mark off the required distance on the straight edge of
a sheet of paper p:rid compare with the graphic scale. Zig zag paths should be
be marked off on the paper edge as a series or succession of straight paths
131
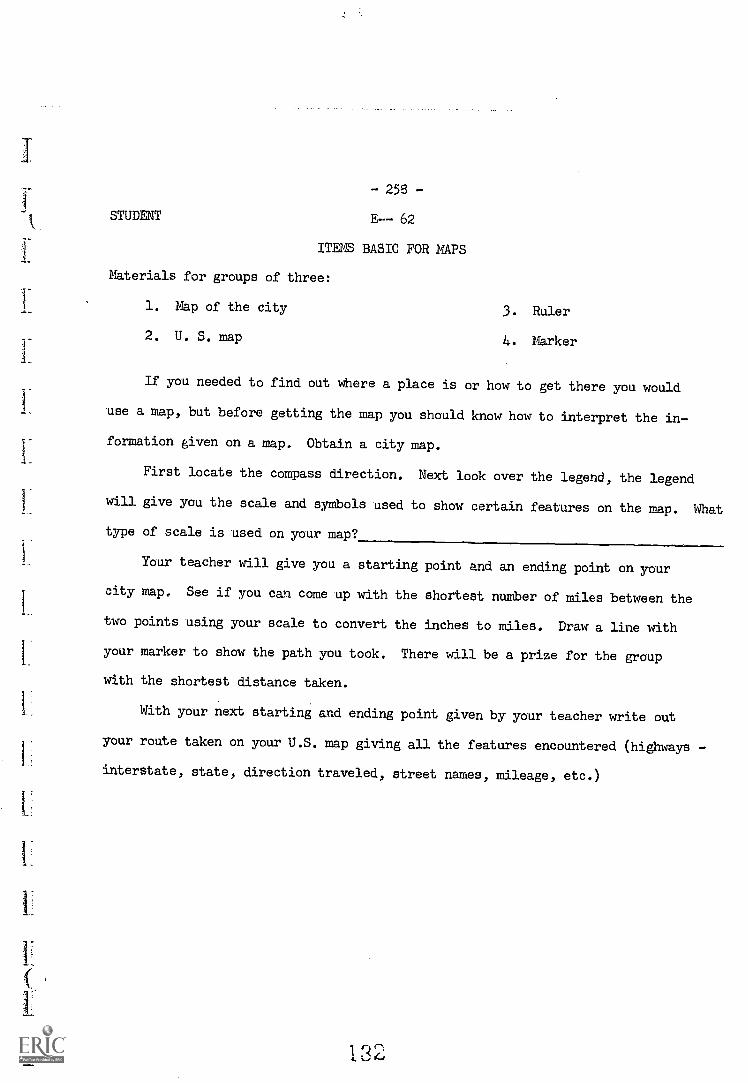
- 258 -
STUDENT E-- 62
ITEMS BASIC FOR MAPS
Materials for groups of three:
1. Map of the city
2. U. S. map
3. Ruler
4. Marker
If you needed to find out where a place is or how to get there you would
use a map, but before getting the map you should know how to interpret the in-
formation given on a map. Obtain a city map.
First locate the compass direction. Next look over the legend, the legend
will give you the scale and symbols used to show certain features on the map. What
type of scale is used on your map?
Your teacher will give you a starting point and an ending point on your
city map. See if you can come up with the shortest number of miles between the
two points using your scale to convert the inches to miles. Draw a line with
your marker to show the path you took. There will be a prize for the group
with the shortest distance taken.
With your next starting and ending point given by your teacher write out
your route taken on your U.S. map giving all the features encountered (highways -
interstate, state, direction traveled, street names, mileage, etc.)
U
-259-
TEACHER RESOURCE
To the earth scientists, the most important features on a map are the land-
forms that shape the earth's surface. All the details that make up the sur-
face features of the land are called its topography. A map made especially to
show these details is known as a topographic map. Natural features such as
hills, valleys, lakes, plains and streams are the most important details shown
on these maps. Artificial features such as buildings, bridges, railroads and
roads may also be shown.
The making of these maps are slow and difficult. Survey crews will
establish points of known position and elevation height abo",:e sea level.
These points are used, with high altitude photographs, to make the final map.
All features shown on maps must be indicated by the use of symbols to
represent the actual object. Most topographic maps make use of several colors
to show various features.
The featilres of the earth's surface that are most difficult to show on
a map is its relief - the difference in elevation. To show variation in
elevation of the surface some maps employ hachures to show mountains and
hills. These are short straight lines. Draw in the direction that water
would take in flowing down the slopes. The most commonly used method to
show variations in elevation is by means of contour lines - lines joining
points of equal elevation. The differences in elevation between neighboring
lines is called the contour interval.
133
- 260 -
STUDENT RESOURCE E - 63
Topographic or contour map - A map which shows the shape and form of the land surface
Elevation - Height above sea level
Contour lines - Lines joining points of equal elevation.
Contour interval - The difference in elevation between neighboring lines.
Hachures (Hash - Yooz) - Lines indicating a slope.
River Valley - Contours bend up stream in crossing a valley.
The contour interval can be determined by dividing the elevation difference
between two marked contour lines by the number of intervals between them. Also
it may be written in the legend.
Flat or gently sloping land - Widely spaced contour lines.
Hill tops - closed circles or ovals.
Depressions have the same elevation as the closest lower contour line.
The maximum elevation of a hill, if not given, is one (1) less than the
next elevation if the contour line was drawn in.
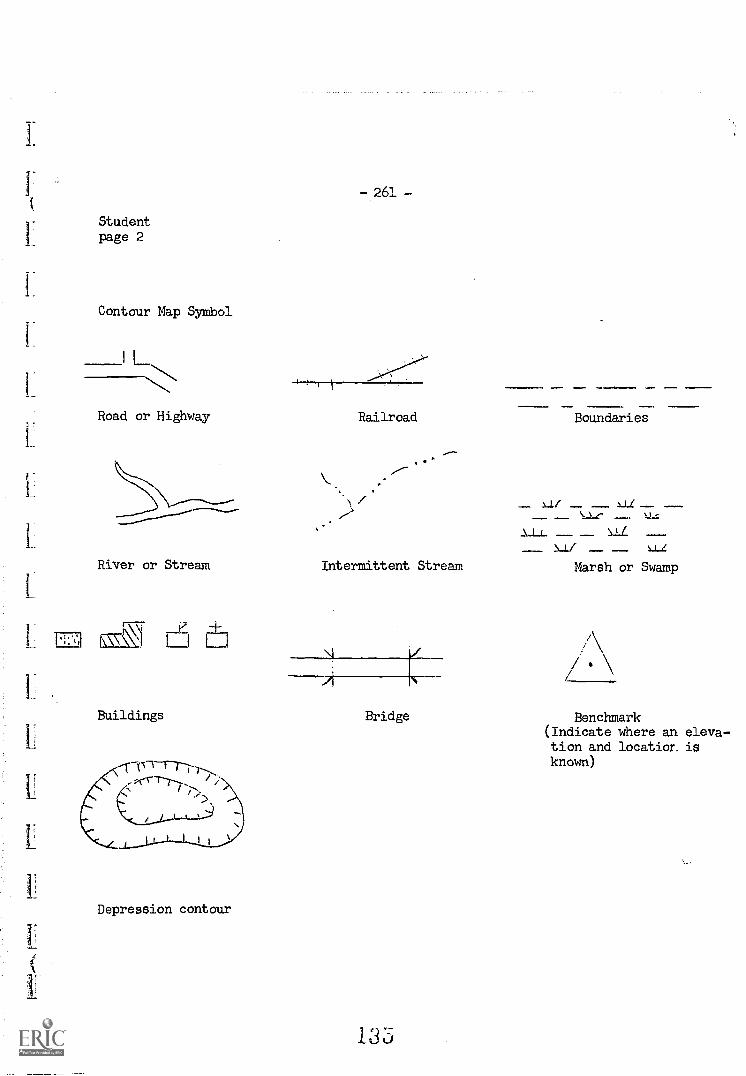
U
Studentpage 2
Contour Map Symbol
I I_
Road or Highway
-261-
Railroad Boundaries
, . ^
River or Stream Intermittent Stream
Buildings
Depression contour
Bridge
13 5
1.11 sJL\-Le
Marsh or Swamp
Benchmark(Indicate where an eleva-tion and location, isknown)
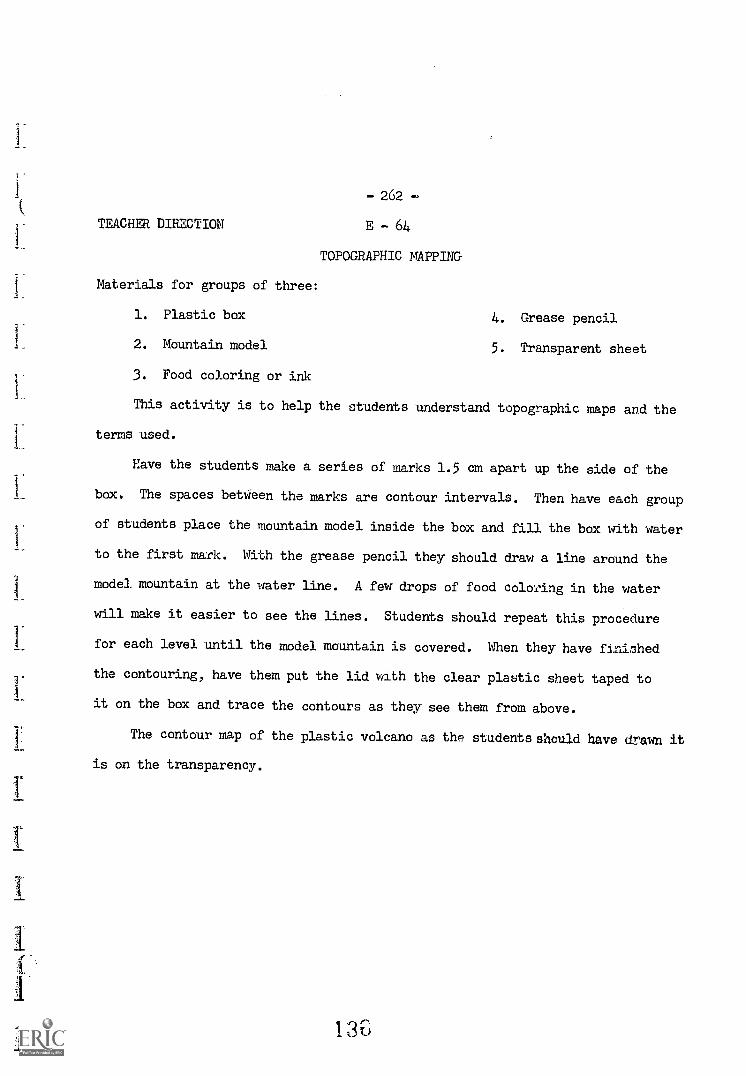
A_
I
TEACHER DIRECTION
- 262
E - 64
TOPOGRAPHIC NAPPING
Materials for groups of three:
1. Plastic box 4. Grease pencil
2. Mountain model 5. Transparent sheet
3. Food coloring or ink
This activity is to help the students understand topographic maps and the
terms used.
Have the students make a series of marks 1.5 cm apart up the side of the
box. The spaces betWeen the marks are contour intervals. Then have each group
of students place the mountain model inside the box and fill the box with water
to the first mark. With the grease pencil they should draw a line around the
model mountain at the water line. A few drops of food coloring in the water
will make it easier to see the lines. Students should repeat this procedure
for each level until the model mountain is covered. When they have finished
the contouring, have them put the lid with the clear plastic sheet taped to
it on the box and trace the contours as they see them from above.
The contour map of the plastic volcano as the students should have drawn it
is on the transparency.
136'
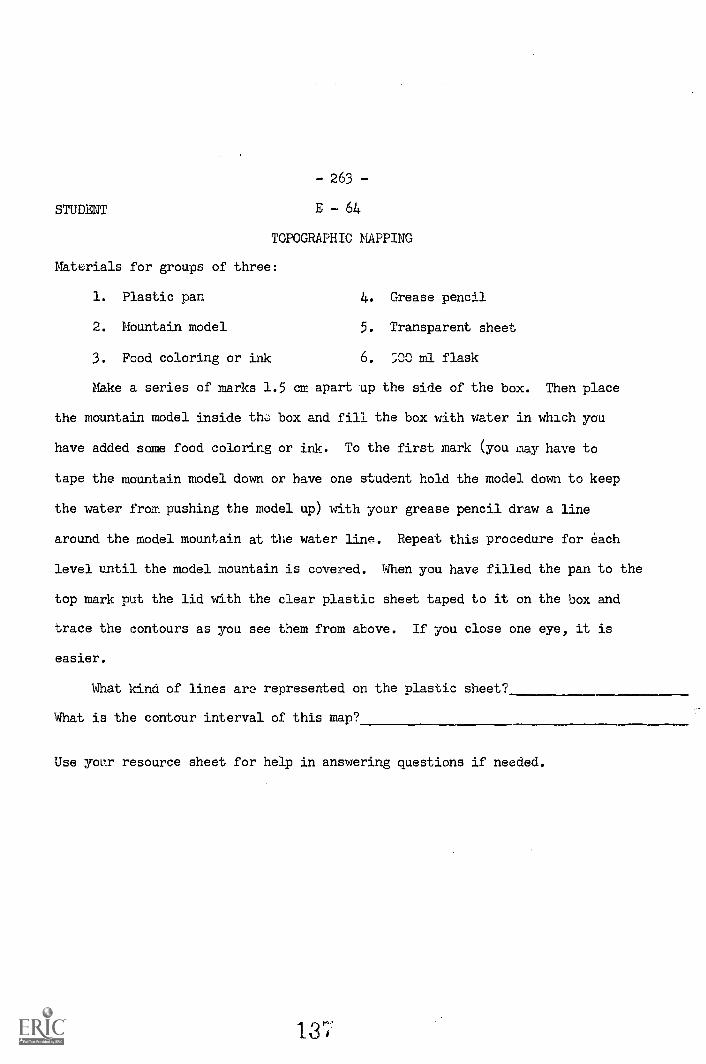
263
STUDENT E 64
TOPOGRAPHIC NAPPING
Materials for groups of three:
1. Plastic pan 4. Grease pencil
2. Mountain model 5. Transparent sheet
3. Food coloring or ink 6. ;00 ml flask
Make a series of marks 1.5 cm apart up the side of the box. Then place
the mountain model inside the box and fill the box with water in which you
have added some food coloring or ink. To the first mark (you may have to
tape the mountain model down or have one student hold the model down to keep
the water from pushing the model up) with your grease pencil draw a line
around the model mountain at the water line. Repeat this procedure for each
level 'until the model mountain is covered. When you have filled the pan to the
top mark put the lid with the clear plastic sheet taped to it on the box and
trace the contours as you see them from above. If you close one eye, it is
easier.
What kind of lines are represented on the plastic sheet?
What is the contour interval of this map?
Use your resource sheet for help in answering questions if needed.
1R
I
1r
- 264 -
TEACHER DIRECTION E - 65
TOPOGRAPHIC PROFILE
Materials for groups of three:
1. Sheet of paper 2. Ruler
Since the students have a fair knowledge of topographic maps, as seen
from an aerial view we would like for them to be able to see what the to-
pography of certain areas would look like from a cross sectional oriside
view. To do this the students will have to involve himself in simple graph
making.
Have the student to follow the steps given on their activity sheet ex-
plaining how to construct the profiles. This will require the teachers to
give some assistance to each of the groups. Before the students be n
place the topographic map transparency on the overhead projector and; explain
what is to be done.
You may make up some simple maps for the students to practice their
profiles.
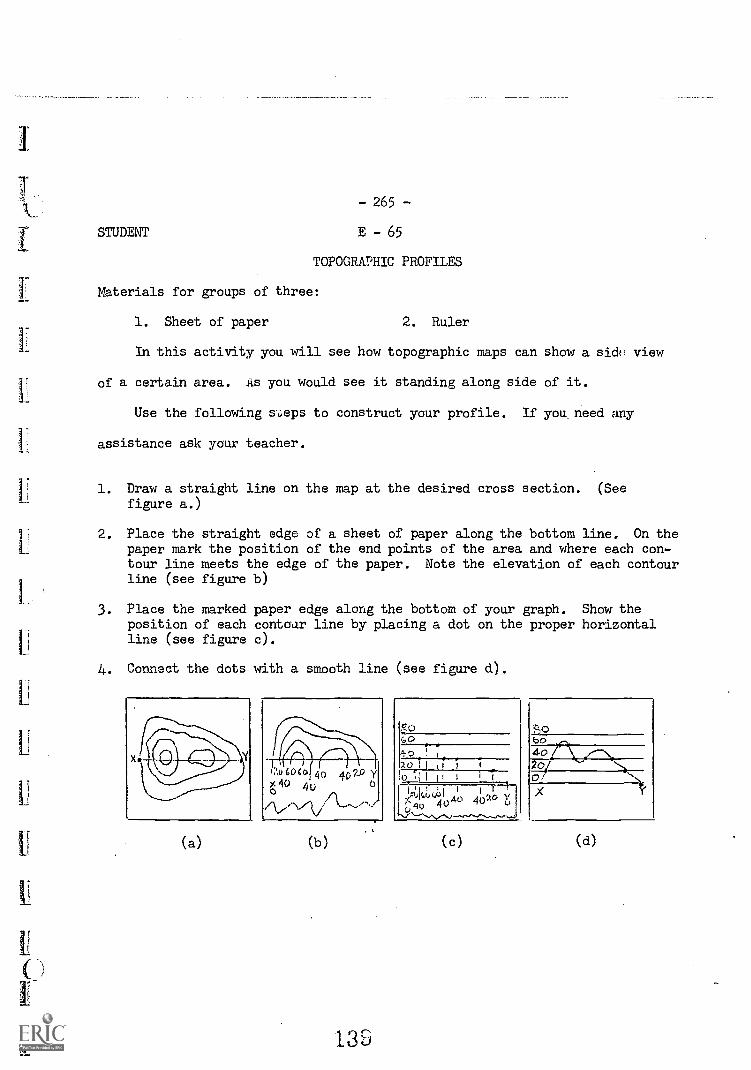
- 265 -
STUDENT E - 65
TOPOGRAPHIC PROFILES
Materials for groups of three:
1. Sheet of paper 2. Ruler
In this activity you will see how topographic maps can show a side view
of a certain area. As you would see it standing along side of it.
Use the following steps to construct your profile. If you, need any
assistance ask your teacher.
1. Draw a straight line on the map at the desired cross section. (See
figure a.)
2. Place the straight edge of a sheet of paper along the bottom line. On thepaper mark the position of the end points of the area and where each con-tour line meets the edge of the paper. Note the elevation of each contourline (see figure b)
3. Place the marked paper edge along the bottom of your graph. Show theposition of each contour line by placing a dot on the proper horizontalline (see figure c).
4. Connect the dots with a smooth line (see figure d).
(a)
13J
Cc)
Go---
T4- 0 1
2 0,T I i j I0.ii 11 I I I
LI r 4-',1 I I 1 1C,''' ,(;') q 0 40 .4 0° i:,.........,,,,,,...........-.......,,,,
(c) (d)

-266-
Studentpage 2
Let's see if you can do a profile for this map. To answer the question
you may need to refer to your student resource sheet E.- 63
What is the contour interval?
120
P.
100
80
60
40
20
0
140
I
I
I
TEACHER DIRECTION
- 267 -
E - 66
READING TOPOGRAPHIC MAPS
This activity is a culminating activity to allow the students to use
some of their knowledge of topographic mapping to answer some questions
about a particular map. Spend some time soliciting answers for questions
you might ask your students in preparing for this activity.
Special procedures are sometimes required to determine direction,
elevation and distance.
1. DIRECTION The map may be oriented by following meridians (north-south) orthe map arrow that points to true north. When there are no in-dications, the top of the map is assumed to be north.
2. ELEVATION Use the given contour interval. When the interval is not given,it can be determined by dividing the elevation difference betweentwo marked contour lines by the number of intervals between them.Ocean shorelines have sea-level elevations of 0 feet.
3. DISTANCE Mark off the required distance on the straight edge of a sheetof paper and compare with the graphic scale. Zigzag edge as aseries or saccession of straight paths. When the scale is givenin miles pe/ inch, distance can be read directly with a ruler.
These are the answers to the questions to be asked of the students.
a. 20 feet There are five intervals between sea level (0 feet) and the 100foot contour line.
b. 199 feet Since the last contour line is at an elevation of 180 feet, theactual height of the hill top is at least 180 feet but not quite200 feet.
c. East
d. About 5 miles
e. 64 square miles The map represents an area 8 miles by 8 miles.
f. A depression
141

I
U
STUDENT
Materials for each student
- 265 -
E - 66
READING CONTOUR MAPS
1. A sheet of paper 2. A ruler
Let's see how much we know about contour (topographic) maps. The
following questions refer to the map below:
a. What is the contour interval?
b. What is the maximum possible elevation of hill A?
c. In what direction does Mud River flow?
d. What is the length of Mud River?
e. What is the area of this map.
f. What does the symbol at (c) represent?
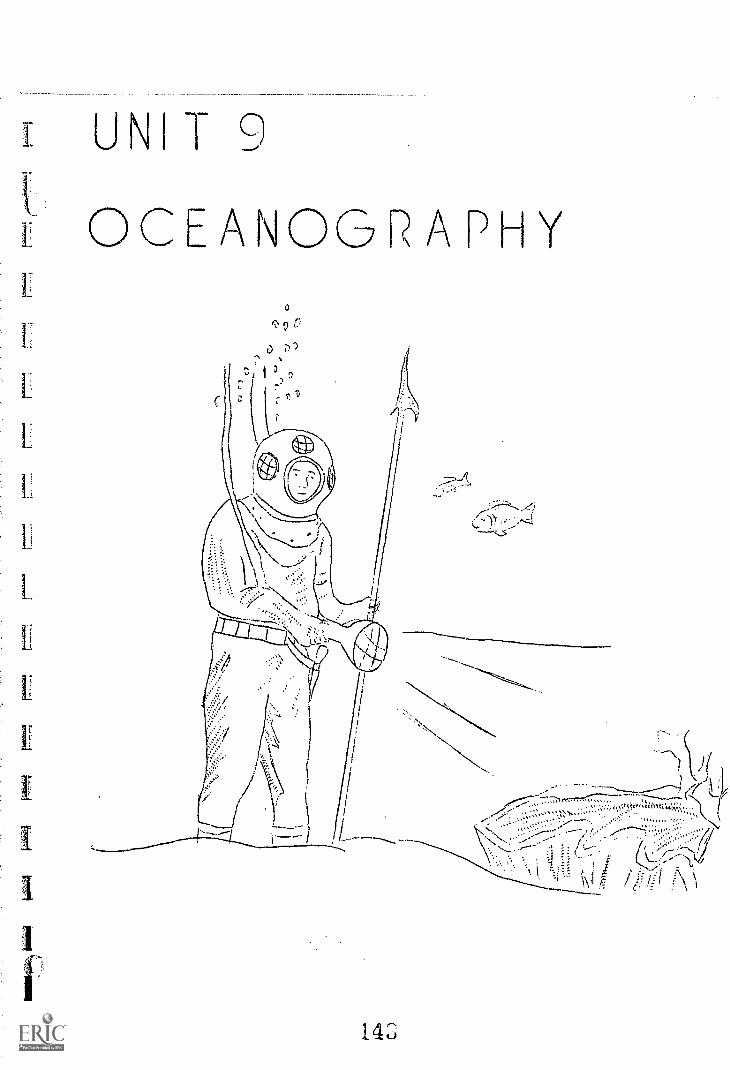
T
OCEANOGR A SHY
I
0
fi) 9
1
a
1A'

- 269 -
UNIT 9
OCEANOGRAPHY
Oceanography is a fast growing and needed science. To learn some of the
simple investigations that are going on we are attempting to relate some of the
investigations in this series of activities on a small scale.
E-67 MEASURING THE OCEAN DEPTH Film: THE OCEAN: A FIRST FILM
E-68 WATER PRESSURE AND DEPTH
*E-69 WHY IS THE OCEAN SALTY
E -70 FRESH WATER DERIVED FROM OCEAN WATER
E -71 DETERMINING % OF SALINITY OF SEAWATER BY WEIGHT
E -72 OCEAN WAVES CHANGES THE SHORELINE
E -73 THE OCEAN FLOOR
E-7!4 ORIGIN OF FLORIDA SHORESANDS
* Reading Activity
14(1
I
I!
TEACHER RESOURCE
11
- 270 -
UNIT - 9
OCEANOGRAPHY
Oceanography - The branch of science which deals with the study of the ocean.
About 75 per cent of the earths surface is covered with water. Because
of this vast amount of water scientists are becoming more and more involved in
studying its composition from all aspects. (Geological, physical, biological and
Chemical) to find the answers to their questions oceanographers have developed
many special methods, techniques, and instruments for their work. Much oceano-
graphic research and collection of data takes place aboard specially equipped
ships. Ships can be used to gather considerable information about the ocean,
but some can only be collected far beneath the surface. To do this scientists
have invented bathyspheres or bathyscaphes to go to depths of 35,000 feet. One
of the most well known bathyscaphes is the triest. At relatively shallow depths
scientists utilizes self- contained underwater breathing apparatus (scuba).
The scientists are finding more about the oceans than ever before and are
also using much of their finds for commercial purposes such as seaweed for the
processing of ice cream, jellies, jams, toothpaste, cosmetics, and ink. The
chemical products found in the oceans are sodium chloride, the metal magnesium
and bromine to name a few.
L45
I
II
U
U
)
TEACHER DIRECTION
271
E 67
MEASURING THE OCEAN DEPTH
This reading activity is to orient the student to the methods used in
determining the topography of the ocean. While reading over the activity
with the students throw out lead questions concerning the activity, such as
WHAT KIND OF SURFACE WOULD BE REVEALED IF THE OCEANS WERE DRAINED OFF? WHY
WEREN'T THE ROPE AND CABLE VERY GOOD METHODS? WHY ARE WE TO TAKE HALF THE
NUMBER OF SECONDS FOR THE WAVES TO BE RECEIVED?
When the students understand that the ocean floor is much like the land
surfaces go on to the next activity.
146
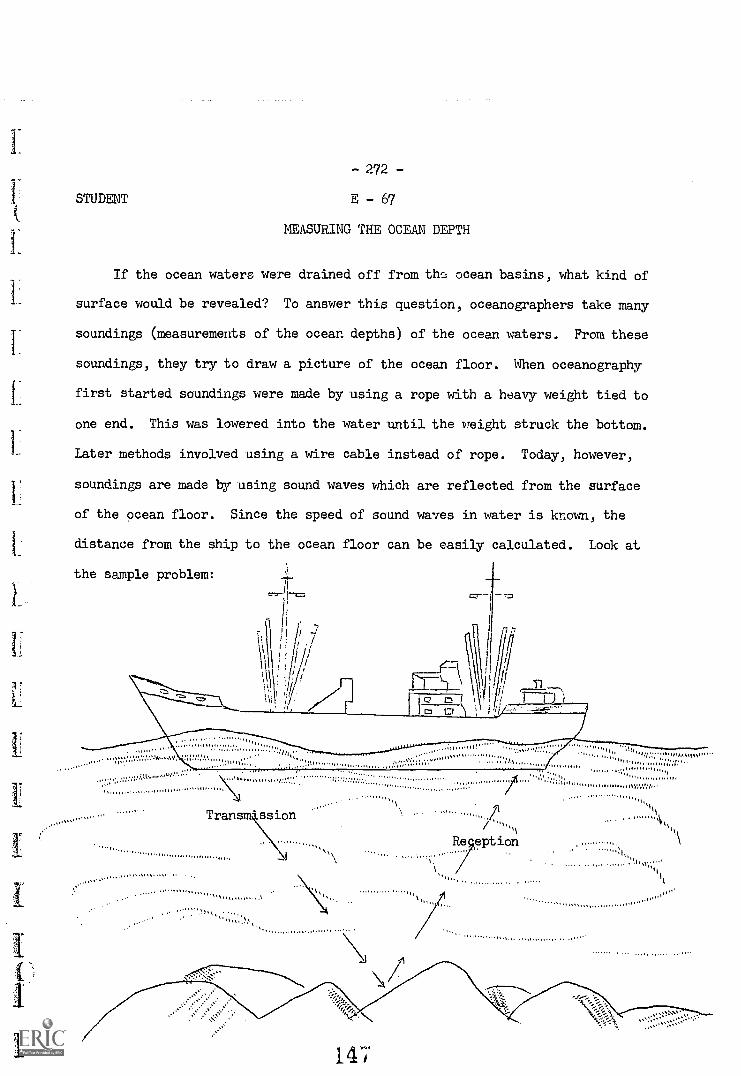
I
I
I
STUDENT
- 272 -
E - 67
MEASURING THE OCEAN DEPTH
If the ocean waters were drained off from the ocean basins, what kind of
surface would be revealed? To answer this question, oceanographers take many
soundings (measurements of the ocean depths) of the ocean waters. From these
soundings, they try to draw a picture of the ocean floor. When oceanography
first started soundings were made by using a rope with a heavy weight tied to
one end. This was lowered into the water until the weight struck the bottom.
Later methods involved using a wire cable instead of rope. Today, however,
soundings are made by using sound waves which are reflected from the surface
of the ocean floor. Since the speed of sound waves in water is known, the
distance from the ship to the ocean floor can be easily calculated. Look at
the sample problem:
M.
... .. .
............ .... ........... .. ........
... ..... .. ..................
..........
.....
1, ....
........
.11, .... Transmission
...... .......
........
.
............. " .............
..........
..........
.........
.........
Al2 .....
Reeption
. . ..
................
..............
. 0°...... .......................................
...
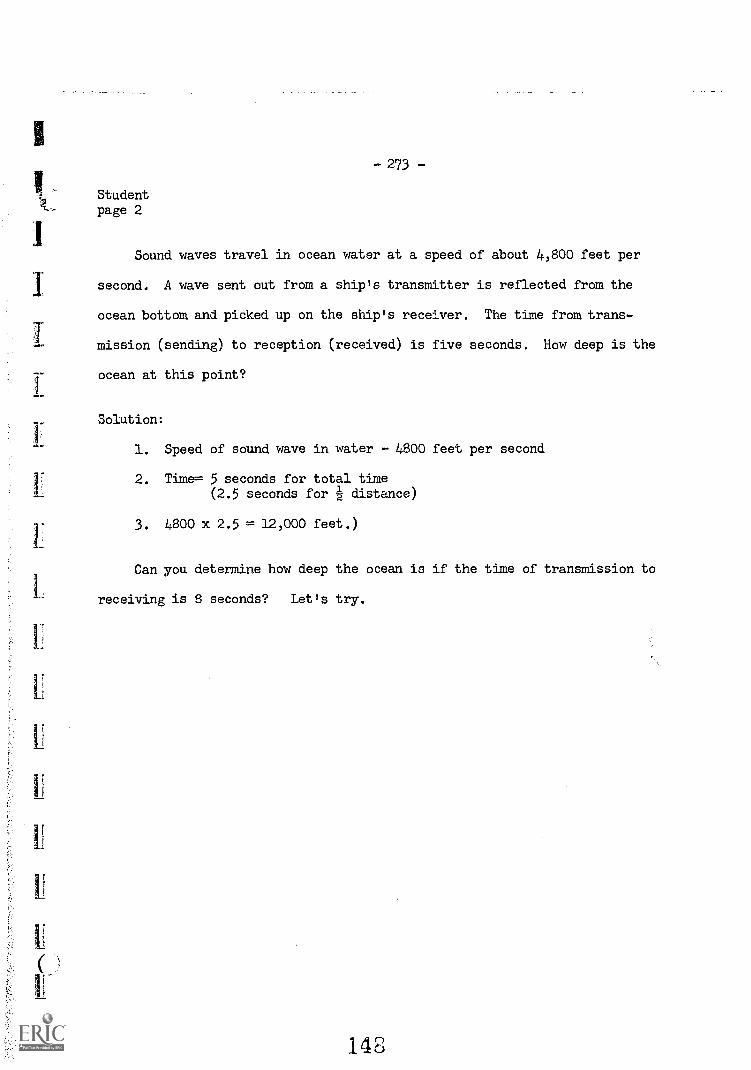
-273-
Studentpage 2
Sound waves travel in ocean water at a speed of about 4,800 feet per
second. A wave sent out from a ship's transmitter is reflected from the
ocean bottom and picked up on the ship's receiver. The time from trans-
mission (sending) to reception (received) is five seconds. How deep is the
ocean at this point?
Solution:
1. Speed of sound wave in water - 4800 feet per second
2. Time= 5 seconds for total time(2.5 seconds for A distance)
3. 4800 x 2.5 = 12,000 feet.)
Can you determine how deep the ocean is if the time of transmission to
receiving is 8 seconds? Let's try.
lob

I
r
- 274 -
TEACHER DIRECTION E 68
WATER PRESSURE AND DEPTH
Materials for groups of three:
1. Thistle tube 4. Beaker (400 ml)
2. Balloon 5. Rubber band
3. Grease pencil 6. Food color or dye
In this activity the students should observe that the water pressure in-
creases as we go deeper into the water. Ask them if they have ever had their ears
to become stopped up or pop when they ride up or down a steep hill? Dis-
cussion. WHAT CAUSED THIS? Solicit answers but do not give the answer. Show
them transparency E -68 and let them get started.
145
- 275 -
STUDENT E 68
WATER PRESSURE AND DEPTH
Materials for groups of three:
1. Thistle tube 4. Beaker (400 ml)
2. Balloon 5. Rubber band
3. Grease pencil 6. Food coloring or dye
Under normal conditions of life man is adapted to live at an atmospheric
pressure of..14.7 icounds per square inch (psi) at sea level. We are not aware
of this force because the pressure inside the body is the same as the pressure
outside it. The only time a person may become aware of this pressure is when
it changes rapidly, such as when we go up in the air or down in the ocean.
The occasional Ipoppine of the ear drums reminds us that we live in a sea of t
air at specific pressure.
Legs prove that depth in water increases the pressure on objects. Obtlin
the materials needed for your group.
Cover the wide end of a thistle tube with a piece of rubber from a balloon.
Partially fill the thistle tube with water and dye, mark the level of the water in
the tube, then lower the covered end into a container of water. What do you observe
happening to the liquid in the narrow portion of the tube as it is lowered deeper
into the water?
What does this show about the realtionship between water pressure and depth?
I
I
E.
11
TEACHER DIRECTION
276
E 69
WHY IS THE OCEAN SALTY
In this activity the students should get an understanding of how the ocean
water became salty.
Have the students to read the activity over a couple of times to insure
their comprehension, then you read it aloud while the students read silently.
When you reach a question pause and solicit answers to see if the students
have the correct understanding. When you feel the students have a fair un
derstanding of how the oceans became salty go to the next activity.
151
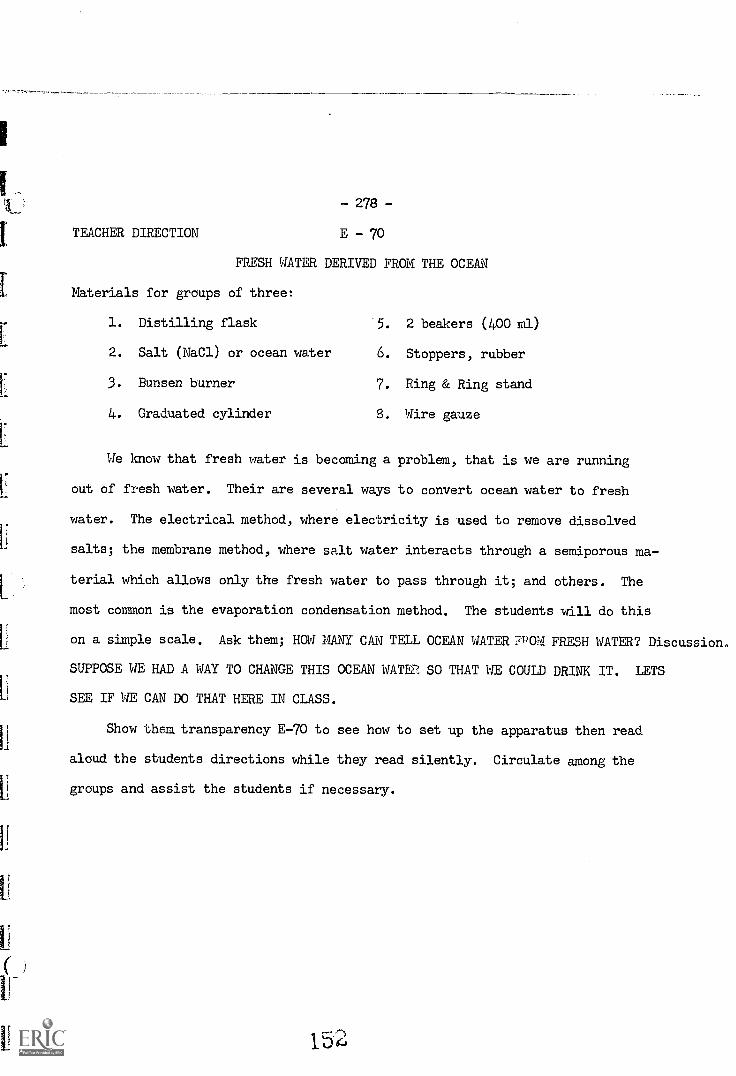
I
sL
- 278 -
TEACHER DIRECTION E - 70
FRESH WATER DERIVED FROM THE OCEAN
Materials for groups of three:
1. Distilling flask 5. 2 beakers (400 ml)
2. Salt (NaC1) or ocean water 6. Stoppers, rubber
3. Bunsen burner 7. Ring & Ring stand
4. Graduated cylinder S. Wire gauze
We know that fresh water is becoming a problem, that is we are running
out of fresh water. Their are several ways to convert ocean water to fresh
water. The electrical method, where electricity is used to remove dissolved
salts; the membrane method, where salt water interacts through a semiporous ma-
terial which allows only the fresh water to pass through it; and others. The
most common is the evaporation condensation method. The students will do this
on a simple scale. Ask them; HOW MANY CAN TELL OCEAN WATER 7PO1 FRESH WATER? Discussion.
SUPPOSE WE HAD A WAY TO CHANGE THIS OCEAN WATER SO THAT WE COULD DRINK IT. LETS
SEE IF WE CAN DO THAT HERE IN CLASS.
Show them transparency E-70 to see how to set up the apparatus then read
aloud the students directions while they read silently. Circulate among the
groups and assist the students if necessary.
152
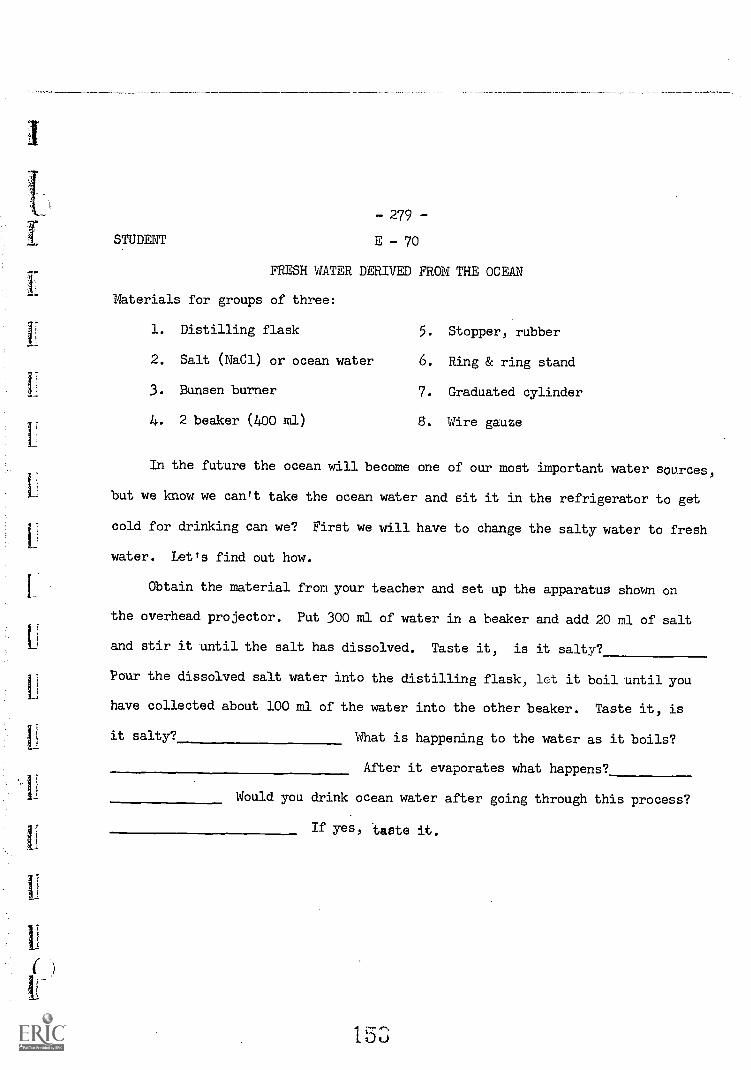
- 279 -
STUDENT E - 70
FRESH WATER DERIVED FROM THE OCEAN
Materials for groups of three:
1. Distilling flask 5. Stopper, rubber
2. Salt (NaC1) or ocean water 6. Ring & ring stand
3. Bunsen burner 7. Graduated cylinder
4. 2 beaker (400 ml) 8. Wire gauze
Li
Ii
Ii
I
In the future the ocean will become one of our most important water sources,
but we know we can't take the ocean water and sit it in the refrigerator to get
cold for drinking can we? First we will have to change the salty water to fresh
water. Let's find out how.
Obtain the material from your teacher and set up the apparatus shown on
the overhead projector. Put 300 ml of water in a beaker and add 20 ml of salt
and stir it until the salt has dissolved. Taste it, is it salty?
Pour the dissolved salt water into the distilling flask, let it boil until you
have collected about 100 ml of the water into the other beaker. Taste it, is
it salty? What is happening to the water as it boils?
After it evaporates what happens?
Would you drink ocean water after going through this process?
If yes, taste it.
1..53
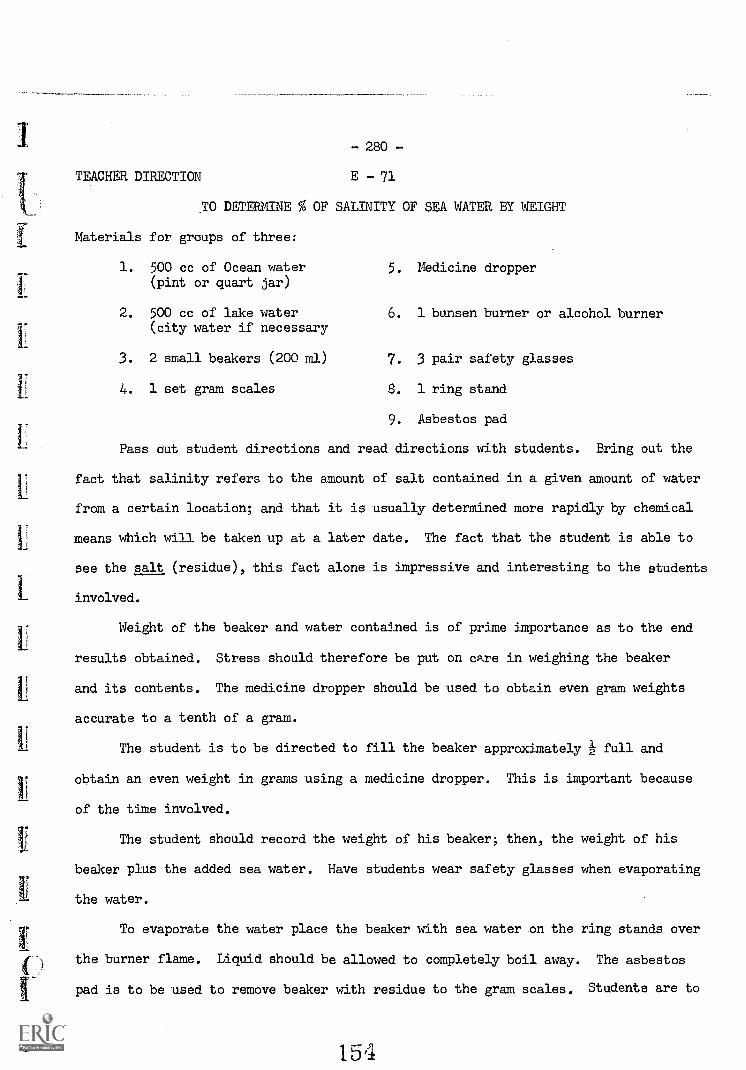
I
I-
I
- 280 -
TEACHER DIRECTION E - 71
TO DETERMINE % OF SALINITY OF SEA WATER BY WEIGHT
Materials for groups of three:
1. 500 cc of Ocean water 5. Medicine dropper(pint or quart jar)
2. 500 cc of lake water 6. 1 bunsen burner or alcohol burner(city water if necessary
3. 2 small beakers (200 ml) 7. 3 pair safety glasses
4. 1 set gram scales B. 1 ring stand
9. Asbestos pad
Pass out student directions and read directions with students. Bring out the
fact that salinity refers to the amount of salt contained in a given amount of water
from a certain location; and that it is usually determined more rapidly by chemical
means which will be taken up at a later date. The fact that the student is able to
see the salt (residue), this fact alone is impressive and interesting to the students
involved.
Weight of the beaker and water contained is of prime importance as to the end
results obtained. Stress should therefore be put on care in weighing the beaker
and its contents. The medicine dropper should be used to obtain even gram weights
accurate to a tenth of a gram.
The student is to be directed to fill the beaker approximately z full and
obtain an even weight in grams using a medicine dropper. This is important because
of the time involved.
The student should record the weight of his beaker; then, the weight of his
beaker plus the added sea water. Have students wear safety glasses when evaporating
the water.
To evaporate the water place the beaker with sea water on the ring stands over
the burner flame. Liquid should be allowed to completely boil away. The asbestos
pad is to be used to remove beaker with residue to the gram scales. Students are to
154
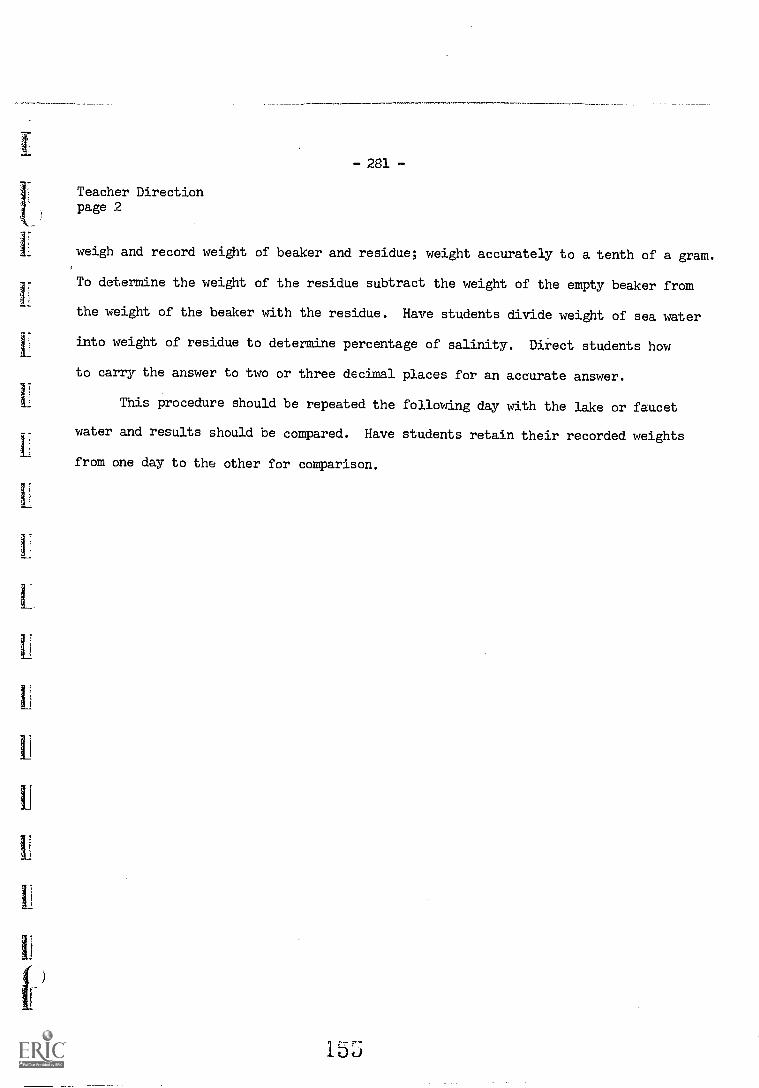
El
U
-281-
Teacher Directionpage 2
weigh and record weight of beaker and residue; weight accurately to a tenth of a gram.
To determine the weight of the residue subtract the weight of the empty beaker from
the weight of the beaker with the residue. Have students divide weight of sea water
into weight of residue to determine percentage of salinity. Direct students how
to carry the answer to two or three decimal places for an accurate answer.
This procedure should be repeated the following day with the lake or faucet
water and results should be compared. Have students retain their recorded weights
from one day to the other for comparison.
155
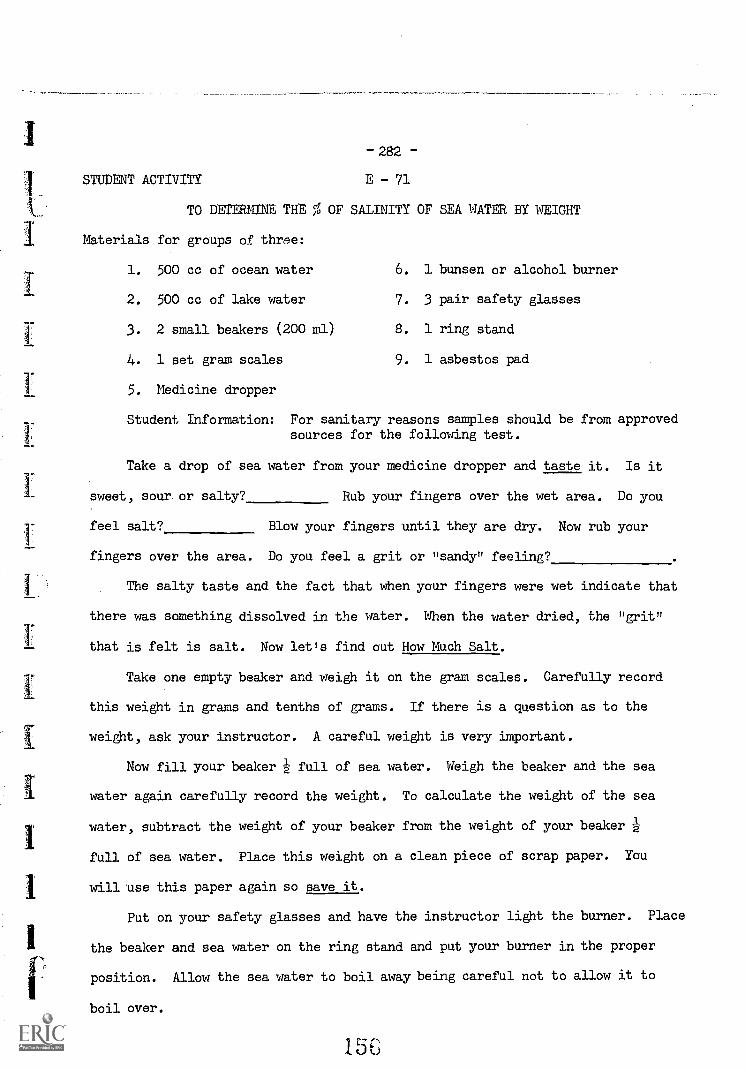
ISTUDENT ACTIVITY
-282-
E - 71
TO DETERMINE THE % OF SALINITY OF SEA WATER BY WEIGHT
Materials for groups of three:
1. 500 cc of ocean water 6. 1 bunsen or alcohol burner
2. 500 cc of lake water 7. 3 pair safety glasses
3. 2 small beakers (200 ml) 8. 1 ring stand
4. 1 set gram scales 9. 1 asbestos pad
5. Medicine dropper
Student Information: For sanitary reasons samples should be from approvedsources for the following test.
Take a drop of sea water from your medicine dropper and taste it. Is it
sweet, sour or salty? Rub your fingers over the wet area. Do you
feel salt? Blow your fingers until they are dry. Now rub your
fingers over the area. Do you feel a grit or "sandy" feeling?
The salty taste and the fact that when your fingers were wet indicate that
there was something dissolved in the water. When the water dried, the "grit"
that is felt is salt. Now let's find out How Much Salt.
Take one empty beaker and weigh it on the gram scales. Carefully record
this weight in grams and tenths of grams. If there is a question as to the
weight, ask your instructor. A careful weight is very important.
Now fill your beaker A full of sea water. Weigh the beaker and the sea
water again carefully record the weight. To calculate the weight of the sea
water, subtract the weight of your beaker from the weight of your beaker A
full of sea water. Place this weight on a clean piece of scrap paper. You
will use this paper again so save it.
Put on your safety glasses and have the instructor light the burner. Place
the beaker and sea water on the ring stand and put your burner in the proper
position. Allow the sea water to boil away being careful not to allow it to
boil over.
15c0
I 283Studentpage 2
When only a white powder remains, move your beaker and the white powder
to the gram scale. Weigh this and look back to your records for the weight of
the empty beaker. Subtract the weight of the empty beaker from the weight of the
beaker and white powder. Record this weight which is the weight of the white
powder. This figure is the weight of the salt in your beaker of sea water.
Now take the weight of the sea water on the scrap paper and divide it into
the weight of your salt. You answer will be the percentage of salinity. This
salinity is the amount of salt in a known amount of sea water from one place
in the ocean. This salinity changes from place to place.
2nd day. Repeat the above activity using the lake water and compare your
salinity percentages.
157
- 284 -
TEACHER DIRECTION E - 72
OCEAN WAVES CHANGES THE LAND SURFACE
Materials for groups of three:
1. Gas collecting bottle 3. Balance scale
2. 5 - 10 rock chips (Limestone) 4. Paper towel
Try to get the students to visualize an area on a beach where there are
large boulders and the ocean waves are pounding on the boulders. WHAT DO YOU
SUPPOSE IS HAPPENING TO THE BOULDERS AS THE WAVES SPLASH AGAINST THEM? Dis-
cussion, Try to get them to remember the terms weathering and erosion. With
this in mind the students can see a change is taking place on the boulders.
LETIS SEE IF WE CAN MAKE A CHANGE IN THE LAND SURFACE BY OCEAN WAVES. Pass
out the materials and read the student page aloud while the students read
silently.
A portion of the period may be devoted to learning how to read the balance.
15E;
285
STUDENT E 72
OCEAN WAVES CHANGES LAND SURFACES
Materials for groups of three:
1. Gas collecting bottle 3. Balance scale
2. 5 - 10 rock chips (thin) 4. Paper towel
We read in a previous activity that the land surfaces can be changed by
weathering and erosion. In this activity letls find out what effect does the
ocean waves have on land surfaces.
Weigh a bottle and record its weight. Now add 5 - 10 chips (thin rock
chips) to the bottle and weigh the bottle with the chips. Record the weight.
Then add some water to the bottle so that it is about half full. Place your
hand over the mouth of the bottle and shake vigorously for ten minutes. Poor
the water out of the bottle carefully, but do not lose any chips. Now wash
the chips with clean water and again pour the water out carefully. Dry the
chips off with a paper towel. Place a paper towel in the bottle to remove all
the water. Why?
Now weigh the bottle and chips again. Check your results with others
in the class. bhat conclusions can you draw from this activity?
Record all of your data in the charts.
Before youshook it up
After youshook it up
Weight of 1
BottleWeight of
Bottle and ChipsWeight of
Chips
Weight ofBottle
Weight ofBottle and Chips
Weight ofChips
1
159
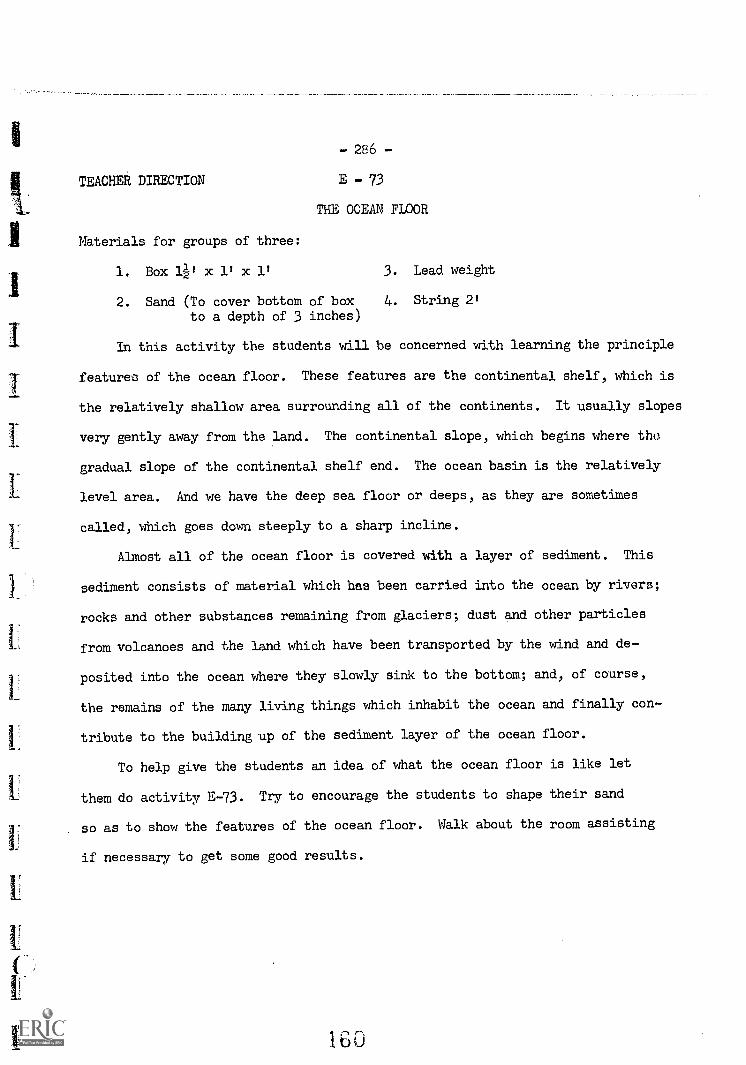
I
I
I
I
1
i
E
I
TEACHER DIRECTION
- 286 -
E - 73
THE OCEAN FLOOR
Materials for groups of three:
1. Box lif x 1' x 1' 3. Lead. weight
2. Sand (To cover bottom of box 4. String 2'
to a depth of 3 inches)
In this activity the students will be concerned with learning the principle
features of the ocean floor. These features are the continental shelf, which is
the relatively shallow area surrounding all of the continents. It usually slopes
very gently away from the land. The continental slope, which begins where thu
gradual slope of the continental shelf end. The ocean basin is the relatively
level area. And we have the deep sea floor or deeps, as they are sometimes
called, which goes down steeply to a sharp incline.
Almost all of the ocean floor is covered with a layer of sediment. This
sediment consists of material which has been carried into the ocean by rivers;
rocks and other substances remaining from glaciers; dust and other particles
from volcanoes and the land which have been transported by the wind and de-
posited into the ocean where they slowly sink to the bottom; and, of course,
the remains of the many living things which inhabit the ocean and finally con-
tribute to the building up of the sediment layer of the ocean floor.
To help give the students an idea of what the ocean floor is like let
them do activity E -73. Try to encourage the students to shape their sand
so as to show the features of the ocean floor. Walk about the room assisting
if necessary to get some good results.
160
STUDENT
-287 -
E - 73
THE OCEAN FLOOR
Materials for groups of three:
1. Box lilx l'x 3. Lead weight
2. Sand (to cover bottom of box 4. String 2'to a depth of 3 inches)
The bottom of the ocean is usually divided into four different areas:
1) THE CONTINENTAL SHELF - have you ever gone to the beach and noticed as you
moved further into the water the land sloped gently, this is the continental
shelf which may extend for many miles. 2) THE CONTINENTAL SLOPE - it slopes
from the edge of the shelf gradually into the 3) DEEPS OR TROUGHS which goes
down very sharply. 4) THE OCEAN BASIN is the overall depressed portions of
the earth containing waters of the oceans. The areas have a thin cover of
sediments brought to the ocean from various sources.
Not only does the ocean occupy a large area of the surface of the earth,
but the ocean also is, on the average quite deep. The average depth has been
estimated at about 2i miles. In some places, the ocean is as deep as 7 miles.
Would you like to make a model of the ocean floor? This is one way you can
make a model showing the nature of the ocean floor.
Place sand in the bottom of a box to a depth of about 3 inches. Then work the
sand into low and high patterns. Tie a weight to a string which is about 24 inches
long. Mark the string at 1 inch intervals, beginning at the bottom of the weight.
Cut holes in the cover of the box one inch apart and number them. Drop your
weight at intervals of 2 inches. Be sure the string doesn't have any slack in it.
Record the depth at each station. When all the measurements are recorded, connect
the points on your graph.
Are you able to recognize the different areas of the ocean floor from your
profile? Name the areas you see
161

ii
Studentpage 2
16
15
14
13
12
11
10
9
8
7
6
5
43
2
1
0
- .288 -
1 2 3 4 5 6 7 8 9 10 11 12 13 14. 15 16 17 18 19 20 21 22 23
STATIONS
1 6 2
24
I-289-
TEACHER RESOURCE To determine the type of material on our beaches, read anddiscuss the following paragraph.
All of the beaches of Florida are not made of sand. When we look at the
white beaches of Panama. City and Daytona Beach, of Jacksonville and Pensacola
we then and there think of all of the beaches of Florida as being made of
white, coarse beach sand. Not true, there are many more Florida beaches
made of shell and ground coral than are made of ground quartz and sandstone.
We say quartz and sandstone; yet, these rocks from which they come are not
found in Florida. If this is so, then where did they come from? The white
sands of Floridats beaches really came from the high mountains of Georgia,
South Carolina, North Carolina or Mexico.
How did they get here? The major rivers of the southeast and of Mexico
washed the worn rocks and minerals down from the mountains to the sea. Once
in the sea, the currents flowing north and south along our shores wash the
beach material in a never ending cycle. The cold Labrador current from the
North Atlantic picks up mountain borne materials flowing from the Cooper and
Edisto Rivers of South Carolina and the Savannah, Altawaha and Ogeechee of
Georgia and moves this materials down along the Florida coast until Cape
Canaveral diverts it out into the Gulf Stream.
The rivers flowing from high in the mountains of Yucatan and Mexico deposit
their mountain materials into the Gulf and they are carried by the Yucatan current
on the beaches of Northwest Florida. When this yucatan current slows and swirls
near Panama City, this material either sinks into the Gulf or is deposited on
the beaches.
While these currents make these beaches white with the mountain minerals,
an entirely different process is taking place on the remaining beaches of Florida.
c; 3
I
- 290 -
Teacher Resourcepage 2
Panot fish feed on the coral reefs of the Keys and pass off a powdery waste of
fine organic coral. The mollusks die and their shells are ground up by wave
action. Waves pound on the exposed limerock of ancient sea bottoms. Through
this action a finely ground mass of organic material is moved into the Gulf
Stream passing through the Florida Keys. This "sand" made of dead sea animals
is moved up the East and West coasts of Florida and cast upon the beaches until
Cape Canaveral on the East and a weakening Gulf Stream current on the West stops
the shell deposit. Thus, our beaches are really very different in the Northern
and Southern parts of our State.
We have several tests to determine if our beaches are really made of
"sand" or "shell".
Most beach materials are ground to such a fine state that it is difficult
to really tell their origin by just looking at them.
164
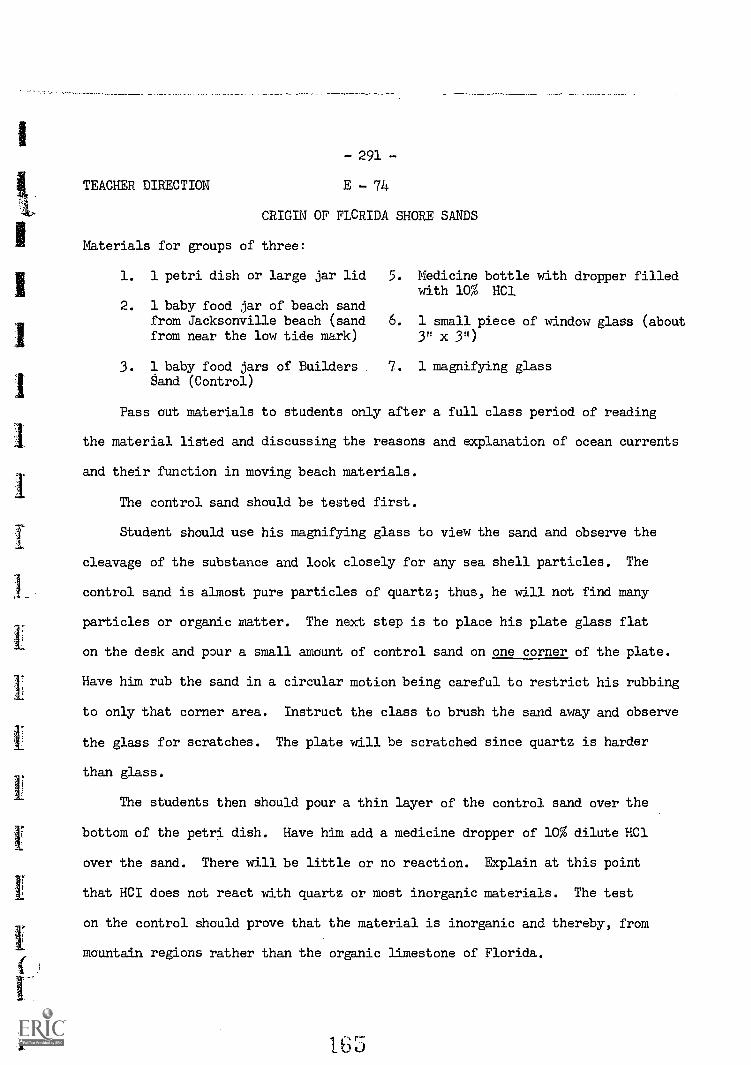
I
f3f
- 291 -
TEACHER DIRECTION E - 74
CRIGIN OF FLCRIDA SHORE SANDS
Materials for groups of three:
1. 1 petri dish or large jar lid 5. Medicine bottle with dropper filledwith 10% HC1
2. 1 baby food jar of beach sandfrom Jacksonville beach (sand 6. 1 small piece of window glass (aboutfrom near the low tide mark) 3" x 3")
3. 1 baby food jars of Builders . 7. 1 magnifying glassSand (Control)
Pass out materials to students only after a full class period of reading
the material listed and discussing the reasons and explanation of ocean currents
and their function in moving beach materials.
The control sand should be tested first.
Student should use his magnifying glass to view the sand and observe the
cleavage of the substance and look closely for any sea shell particles. The
control sand is almost pure particles of quartz; thus, he will not find many
particles or organic matter. The next step is to place his plate glass flat
on the desk and pour a small amount of control sand on one corner of the plate.
Have him rub the sand in a circular motion being careful to restrict his rubbing
to only that corner area. Instruct the class to brush the sand away and observe
the glass for scratches. The plate will be scratched since quartz is harder
than glass.
The students then should pour a thin layer of the control sand over the
bottom of the petri dish. Have him add a medicine dropper of 10% dilute HC1
over the sand. There will be little or no reaction. Explain at this point
that HCI does not react with quartz or most inorganic materials. The test
on the control should prove that the material is inorganic and thereby, from
mountain regions rather than the organic limestone of Florida.
16
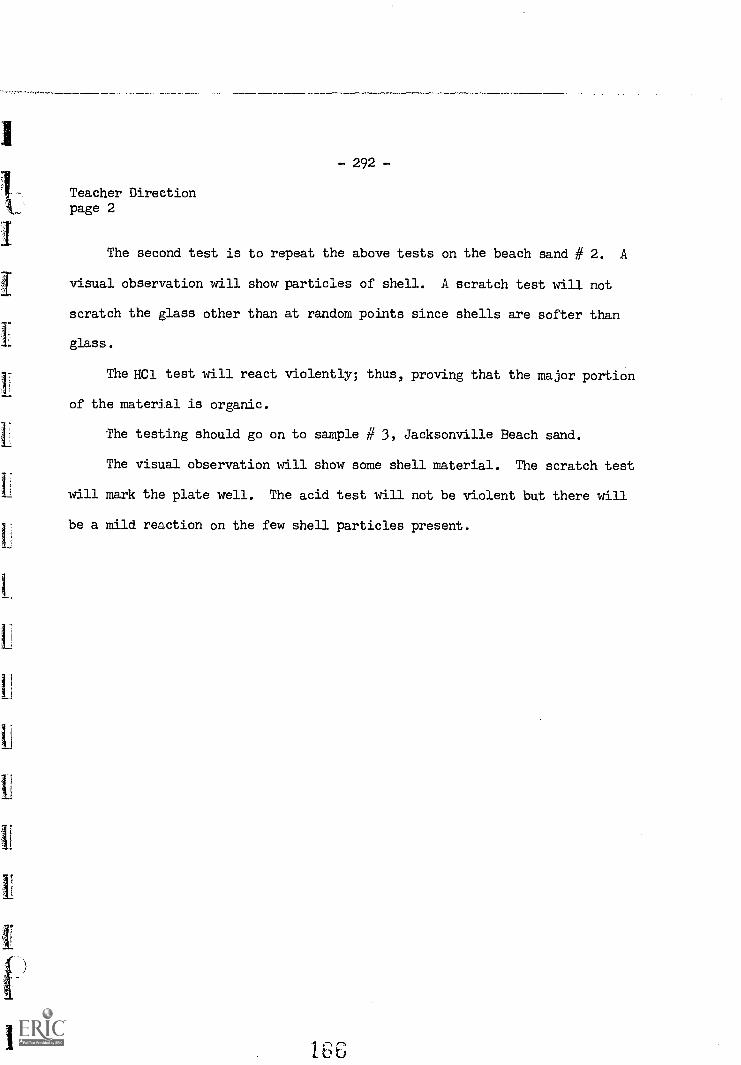
1
U
11
!
I
-292-
Teacher Directionpage 2
The second test is to repeat the above tests on the beach sand # 2. A
visual observation will show particles of shell. A scratch test will not
scratch the glass other than at random points since shells are softer than
glass.
The HCl test will react violently; thus, proving that the major portion
of the material is organic.
The testing should go on to sample # 3, Jacksonville Beach sand.
The visual observation will show some shell material. The scratch test
will mark the plate well. The acid test will not be violent but there will
be a mild reaction on the few shell particles present.
166
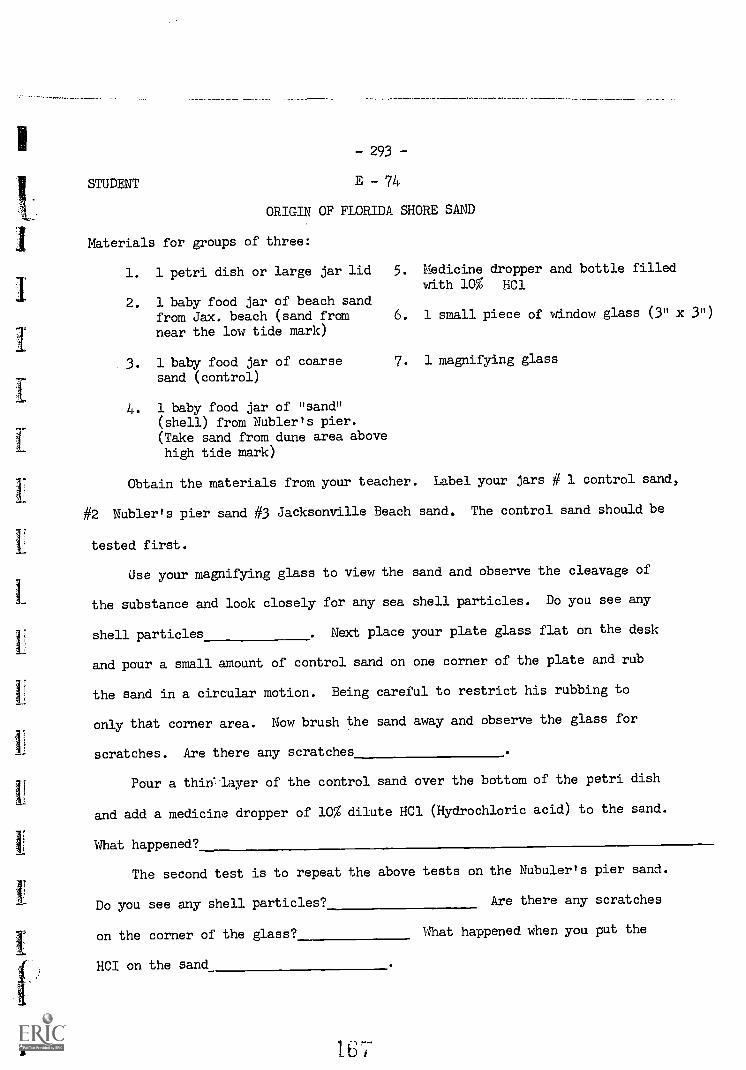
- 293 -
STUDENT E - 74
ORIGIN OF FLORIDA SHORE SAND
Materials for groups of three:
1. 1 petri dish or large jar lid 5. Medicine dropper and bottle filledwith 10% HC1
2. 1 baby food jar of beach sandfrom Jax. beach (sand fromnear the low tide mark)
6. 1 small piece of window glass (3" x 3")
3. 1 baby food jar of coarsesand (control)
7. 1 magnifying glass
4. 1 baby food jar of "sand"(shell) from Nubler's pier.(Take sand from dune area abovehigh tide mark)
Obtain the materials from your teacher. Label your jars # 1 control sand,
#2 Nubler's pier sand #3 Jacksonville Beach sand. The control sand should be
tested first.
Use your magnifying glass to view the sand and observe the cleavage of
the substance and look closely for any sea shell particles. Do you see any
shell particles .Next place your plate glass flat on the desk
and pour a small amount of control sand on one corner of the plate and rub
the sand in a circular motion. Being careful to restrict his rubbing to
only that corner area. Now brush the sand away and observe the glass for
scratches. Are there any scratches
Pour a thin layer of the control sand over the bottom of the petri dish
and add a medicine dropper of 10% dilute HC1 (Hydrochloric acid) to the sand.
What happened?
The second test is to repeat the above tests on the Nubuler's pier sand.
Do you see any shell particles? Are there any scratches
on the corner of the glass? What happened when you put the
HCI on the sand
167
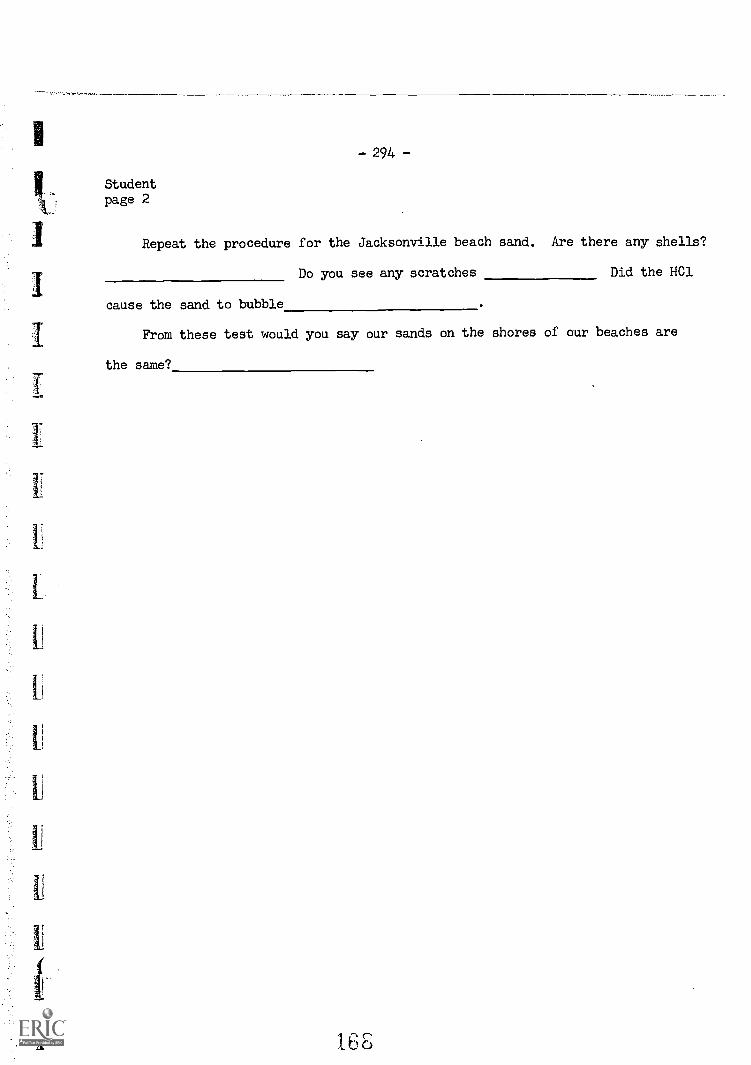
U
-294-
Studentpage 2
Repeat the procedure for the Jacksonville beach sand. Are there any shells?
Do you see any scratches Did the HCl
cause the sand to bubble
From these test would you say our sands on the shores of our beaches are
the same?
1 6 6
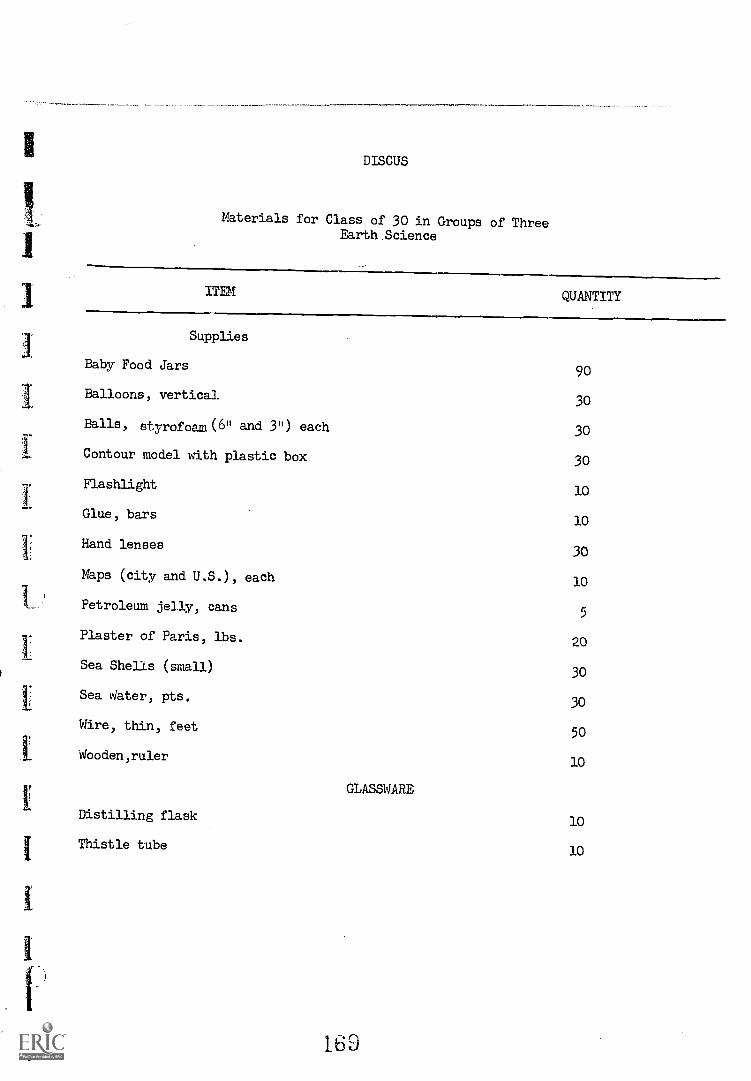
11
DISCUS
Materials for Class of 30 in Groups of ThreeEarth Science
ITEM QUANTITY
Supplies
Baby Food Jars 90
Balloons, vertical 30
Balls, styrofomn(6" and 3") each 30
Contour model with plastic box 30
Flashlight 10
Glue, bars10
Hand lenses30
Maps (city and U.S.), each 10
Petroleum jelly, cans5
Plaster of Paris, lbs. 20
Sea Shells (small) 30
Sea dater, pts.30
Wire, thin, feet50
Wooden,ruler 10
GLASSWARE
Distilling flask 10
Thistle tube10
169
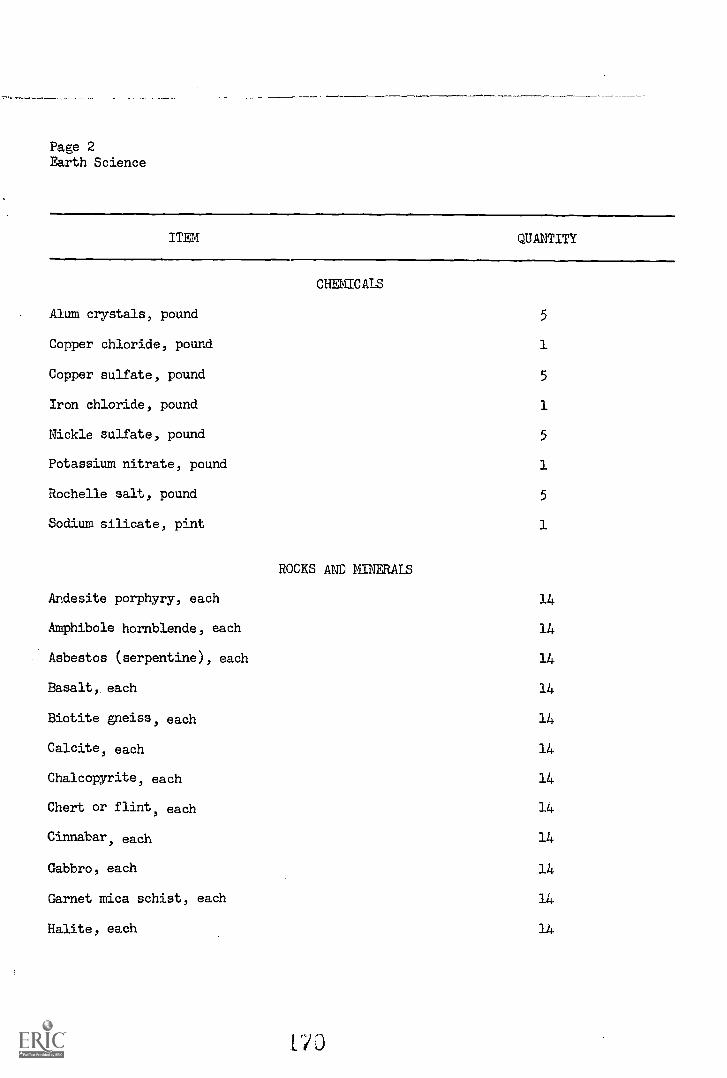
Page 2Earth Science
ITEM QUANTITY
CHEMICALS
Alum crystals, pound 5
Copper chloride, pound 1
Copper sulfate, pound 5
Iron chloride, pound 1
Nickle sulfate, pound 5
Potassium nitrate, pound 1
Rochelle salt, pound 5
Sodium silicate, pint 1
ROCKS AND MINERALS
Andesite porphyry, each 14
Amphibole hornblende, each 14
Asbestos (serpentine), each 14
Basalt, each 14
Biotite gneiss, each 14
Calcite, each 14
Chalcopyrite, each 14
Chert or flint, each 14
Cinnabar, each 14
Gabbro, each 14
Garnet mica schist, each 14
Halite, each 14
1.70
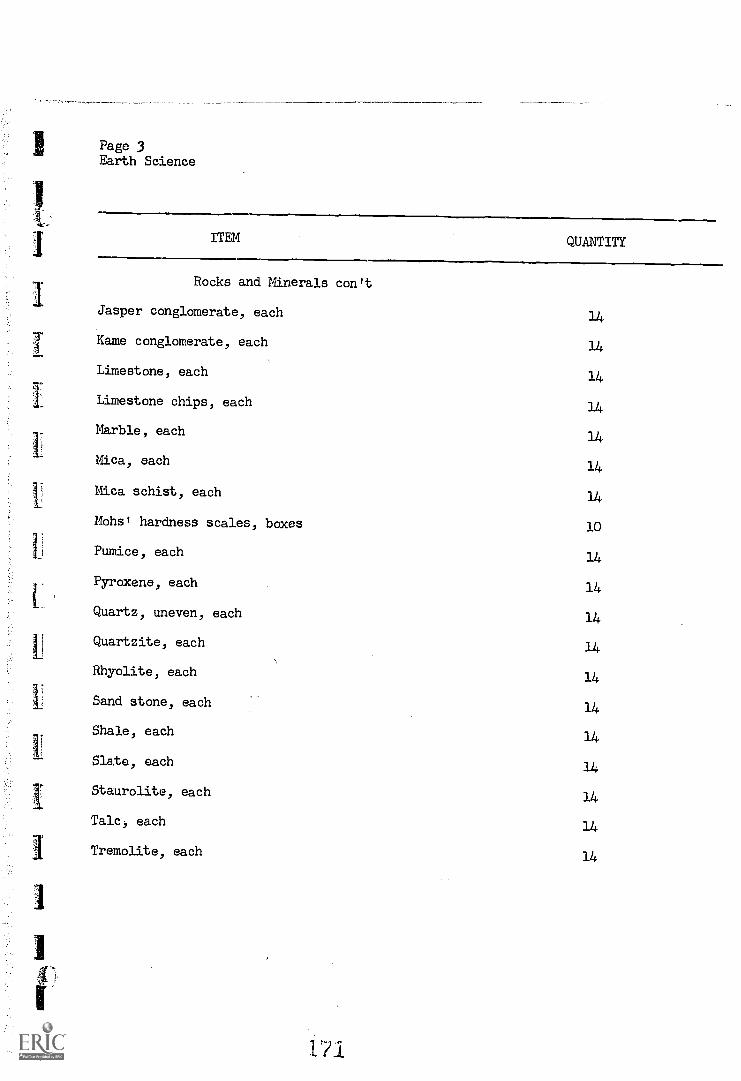
Page 3Earth Science
I
A'.
ii
Rocks and Minerals cont
Jasper conglomerate, each 14
Kame conglomerate, each 14
Limestone, each 14
Limestone chips, each 14
Marble, each14
Mica, each 14
Mica schist, each 14
Mohs hardness scales, boxes 10
Pumice, each 14
Pyroxene, each 14
Quartz, uneven, each 14
Quartzite, each 14
Rhyolite, each 14
Sand stone, each 14
Shale, each 14
Slate, each14
Staurolite, each 14
Talc, each 14
Tremolite, each 14
1 71