Embed Size (px)
Citation preview

Operating instruction GB
Mode d’emploi F
Instruccions de manejo E
Gebruiksaanwijzing NL
Bedienungsanleitung D
DPR-39
DAB+ / FM-RDS Hand-held Receiver
DAB+ / FM-RDS Récepteur portable
DAB+ / FM-RDS Receptor de mano
DAB+ / FM-RDS Draagbare ontvanger
DAB+ / UKW-RDS Handempfänger
3A81X51000000


1
Important Safety Instructions
1. Read these instructions.
2. Keep these instructions.
3. Heed all warnings.
4. Follow all instructions.
5. Do not use this apparatus near water.
6. Clean only with dry cloth.
7. Do not block any ventilation openings.
Install in accordance with the manufacturer’
s instructions.
8. Do not install near any heat sources such
as radiators, heat registers, stoves, or
other apparatus (including amplifiers) that
produce heat.

2
9. Do not defeat the safety purpose of
GB
the polarized or grounding-type plug. A
polarized plug has two blades with one
wider than the other. A grounding type
plug has two blades and a third grounding
prong. The wide blade or the third
prong are provided for your safety. If the
provided plug does not fit into your outlet.
consult an electrician for replacement of
the obsolete outlet.
10. Protect the power cord from being walked
on or pinched particularly at plugs,
convenience receptacles, and the point
where they exit from the apparatus.
11. Only use attachments/ accessories
specified by the manufacturer.

3
12. Use only with the cart, stand, tripod,
bracket, or table specif ied by the
manufacturer, or sold with the apparatus.
When a cart is used, use caution when
moving the cart/apparatus combination to
avoid injury from tip-over.
13. Unplug this apparatus during lightning
storms or when unused for long periods
of time.
14. Refer all servicing to qualified service
personnel. Servicing is required when
the apparatus has been damaged in
anyway, such as power-supply cord or
plug is damaged. liquid has been spilled
or objects have fallen into the apparatus,
the apparatus has been exposed to rain
or moisture, does not operate normally, or
has been dropped.

4
15. To Reduce the Risk of Fire or Electric
Shock, Do not Expose This Appliance To
Rain or Moisture. GB
16. T h e S h o c k H a z a r d M a r k i n g a n d
Associated Graphical Symbol is provided
on the bottom panel of unit.
17. Apparatus shall not be exposed to
dripping or splashing and no objects filled
with liquids, shall not be placed on the
apparatus.

5

6
Controls
1 Headphone socket
GB
2 Preset buttons (1-5)
3 Power button
4 LCD display
5 Volume control
6 Tuning/Menu jog wheel
7 Lock switch (Note: If this is activated the
radio will not operate)
8 USB socket for software upgrade
9 Battery compartment
10 Strap holder

7
Battery Installation
Battery cover is located on the back of the
unit. Slide the cover downwards to gain
access to the battery compartment. Insert
two AA (UM-3/R6/LR6) batteries into the
compartment. Make sure that the battery is
positioned in accordance with the indicated
diagram. Replace cover.
Note:
You can always monitor the battery power
from LCD display battery icon. When battery
power becomes very low and unable to
operate the radio, low battery indicator will
appears on the LCD display. The radio will
shut off.
Headphones
The 3.5 mm stereo headphone socket located
on the top of your radio is provided for use
with stereo headphones or an earpiece.

8
Important:
Excessive volume levels from earphones GB
and headphones may cause damage to your
hearing.
Setting the clock
The clock will automatically update each time
you turn on the radio and tune to a DAB radio
station or to an FM station which is
broadcasting the time via RDS. Time display
will flash 0:00 for a few seconds then display
the clock time when it receives DAB or FM –
RDS clock time signal.
Initial operation –DAB
This step is only necessary for initial setup –
1. Make sure a headphones/an earpiece is
plugged in.
2. Press the Power button on the top of your
radio.

9
3. The display will show “Welcome to Digital
Radio” and start to scan the entire DAB+
channel range and stop at the first found
station. If the radio has been used before,
the last used station will be selected. Press
in the tuning/menu jog wheel to play the
station.
4. Turn the jog wheel either up or down to
display station list and find desired station.
Press in the jog wheel to select the station.
The radio will tune to the station and
display the station name.
5. Adjust the volume control for comfortable
listening.
Service Information – DAB
The Service Information display – Technical
information on the current status of the
station being broadcast.

10
While listening to DAB+, continually press in
the jog wheel to cycle through information on: GB
a. Program type (PTY)
b. Multiplex Name
c. Time
d. Date
e. Channel and Frequency
f . Bit Rate and Codec
g. Signal Strength
Menu Functions-DAB
Press in and hold the jog wheel for 2 seconds
to enter the menu list. The display will first
show DAB and <Find Services>. Turn the jog
wheel up or down and choose from the
following options: ‘Find Services’, ‘Back’, ‘FM
mode’, ‘Settings’ and ‘Prune’.
A) Find Services
Press in the tuning/menu jog wheel and turn
up or down to select.

11
● Full scan
press in the jog wheel to scan the whole
DAB network in your area. Radio will tune
to first station found after the scanning is
completed.
● Back
press in the jog wheel to go back to the
previous menu display.
● Manual tune
press in and turn the jog wheel to scroll the
whole station list. Press in the jog wheel to
select desired station.
B) Back
Press in the jog wheel to go back to current
listening status.
C) FM mode
Press in the jog wheel to select FM band.
D) Settings
Press in the jog wheel to select from following
settings options:

12
● Auto select
Press in and turn the jog wheel to select GB
YES or NO. Default setting is NO. Press
YES and the radio will auto select and tune
to the station shown on the display within a
few seconds.
● Back
Press in the jog wheel to go back to the
setting menu.
● Software upgrade
From time to time, new software features
for your radio may be developed. Your
radio has therefore been designed to allow
its internal software to be updated using
your USB upgrade port.
You should not attempt to update your
radio unless it is recommended to you by
Sangean Customer Services. Updating the
software may remove all network settings
and radio station presets from your radio.
Software updates for your radio may be
available in the future.
13
As software updates become available
software and information on how to update
your radio can be found at:
http://sg.sangean.com.tw/first/first.asp
http://www.sangean.eu/first/first.asp
www.sangean.com.au.
For more information, please contact our
Head Office by sending an email to: info@
sangean.com
● SW version
Press in the jog wheel to view software
version installed in the radio. Press in the
jog wheel again to go back to setting
menu.
● Factory reset
Press in and turn the jog wheel to select
YES or NO. Select YES to erase all saved
settings, station lists and favorites. All
settings will revert to factory default.
● Set contrast
Turn and press in the jog wheel to select
required LCD display contrast. Display
contrast will change accordingly.

14
● Set backlight
Press in the jog wheel to select Backlight GB
Auto.
Select YES and display backlight will auto
shut off 12 seconds after last operation.
Select NO and the display backlight will
remain on.
● DRC
Dynamic Range Control (DRC) feature can
make quieter sounds easier to hear,
especially when your radio is used in a
noisy environment. This function only
works within the DAB band.
Press in DRC and turn the jog wheel to
cycle through; DRC off, DRC Low and
DRC High. Press in to select your preferred
option:
DRC off – DRC is switched off, broadcast
DRC will be ignored.
DRC low – DRC level is set to 1/2 that sent
by broadcaster.
DRC high – DRC is set as sent by
broadcaster

15
● Language
Your radio functions can be configured to a
different language.
Press in and turn the log wheel to select
your desired language. The current
language setting is marked with an
asterisk.
● Sleep
Use the Sleep menu to set auto shut off
timer. Press in and turn the jog wheel to
cycle through:
Sleep off ( auto shut off disabled),
90-60-45-30-15 Auto shut off timer.
Radio will turn off after selected sleep time
has elapsed.
E) Prune
If you move to a different part of the country,
some of the stations which were listed may no
longer be available. Also, from time to time,
some DAB services may stop broadcasting,
or may change location or frequency.

16
Stations which cannot be found, or which
have not been received for a very long time GB
are shown in the station list with a question
mark.
The Prune stations function will delete the
marked DAB stations from your station list.
Press in the jog wheel to enter prune station
function.
Turn the jog wheel to select YES to cause
the stations list to be pruned, eliminating
unavailable stations If you do not wish to
prune stations, select NO and the display will
revert to the previous menu.
Operating your radio – FM
1. Turn on the radio by pressing Power
button. Press in jog wheel for 2 seconds
to enter Menu. Turn jog wheel and scroll
to FM Mode and press in to select the FM
band.

17
Search tuning - FM
1. Turn the jog wheel either down or down
until display shows “scanning”.
2. The radio will search in an upwards or
downwards direction until it finds a station
of sufficient signal strength.
Menu-FM
Press in the jog wheel for 2 seconds to enter
FM Menu. Turn the jog wheel either down or
up-down to find ‘FM Scan Zone’, ‘Back’, ‘DAB
mode’ and ‘Settings’.
A) FM Scan Zone
When using the FM mode your radio can be
set to either scan local stations or to scan all
stations including distant radio stations.
Press in and turn the jog wheel to enter FM
scan zone setting.
Select ‘Local’: only the stations with the
strongest signals are found during scanning
Select ‘Distant’: all available stations are
found during scanning

18
B) Back
press in jog wheel to return to FM listening.
C) DAB Mode
press in jog wheel to switch to DAB mode.
D) Settings
press in jog wheel to select from the following
settings:
● Audio setting
Turn the jog wheel to select Stereo allowed
or Forced mono.
Select ‘Stereo allowed’: the radio will
receive FM stereo broadcasts.
Select ‘Forced mono’: to improve reception
of a weak FM signal.
● Back
Press in the jog wheel to go back to the
setting menu.
● Software upgrade
From time to time, new software features
for your radio may be developed. Your
radio has therefore been designed to allow
its internal software to be updated using
your USB upgrade port.
GB

19
You should not attempt to update your
radio unless it is recommended to you by
Sangean Customer Services. Updating the
software may remove all network settings
and radio station presets from your radio.
Software updates for your radio may be
available in the future.
As software updates become available
software and information on how to update
your radio can be found at:
http://sg.sangean.com.tw/first/first.asp
http://www.sangean.eu/first/first.asp
www.sangean.com.au.
For more information, please contact our
Head Office by sending an email to: info@
sangean.com
● SW version
Press in the jog wheel to view software
version installed in the radio. Press in the
jog wheel again to go back to setting
menu.
20
● Factory reset
Press in and turn the jog wheel to select GB
YES or NO. Select YES to erase all saved
settings, station lists and favorites. All
settings will revert to factory default.
● Set contrast
Turn and press in the jog wheel to select
required LCD display contrast. Display
contrast will change accordingly.
● Set backlight
Press in the jog wheel to select Backlight
Auto.
Select YES and display backlight will auto
shut off 12 seconds after last operation.
Select NO and the display backlight will
remain on.
● Language
Your radio functions can be configured to a
different language.
Press in and turn the log wheel to select
your desired language. The current
language setting is marked with an
asterisk.

21
● Sleep
Use the Sleep menu to set auto shut off
timer. Press in and turn the jog wheel to
cycle through: Sleep off (auto shut off
disabled), 90-60-45-30-15 Auto shut off
timer. Radio will turn off after selected
sleep time has elapsed.
Presetting stations- FM & DAB
There are 5 memory presets each for DAB
and FM radio. They are used in the same
way for each operating mode.
1. Tune to the required radio station as
previously described.
2. To store the station as a preset, press
and hold the required Preset button (1 –
5) until the display shows 'Preset stored'.
The station will be stored under the chosen
preset button. Repeat this procedure as
needed for the remaining presets.

22
3. Stations which are already stored in the
presets may be over written by following GB
the above procedure.
Note:
The radio station presets are retained in
memory when the radio is switched off.
Recalling a preset- FM & DAB
1. Select the required operating mode as
previously described.
2. Momentarily press the required Preset
button. Your radio will then tune to the
station stored in the selected preset
memory. The chosen preset number is also
shown in the radio display, e.g. 'P2'.
Key lock function
The key lock function is used to prevent
unintentional operation of the radio.

23
1. Key lock switch is located on the back
of the radio. When the key lock switch is
set to LOCK, the power button, volume
control, preset buttons and jog wheel will
be disabled. If any buttons are pressed
when the key lock function is set to lock,
display will show “Button Locked” for a few
second.
2. To switch off the key lock function switch
the key lock button to opposite position.
The key lock function will be disabled.
Specification
Power Requirement:
Batteries: 2 x LR6 (AA size) Alkaline
Battery Life:
Approx 12 hours of listening with headphones
for 4 hours a day at normal volume.

24
Frequency Coverage:
FM 87.50 – 108 MHz GB
DAB+ Band III 5A – 13 F
Circuit Features
Headphones: 32 ohm, in-ear style
The company reserves the right to amend the specification
without notice
If at any time in the future you should need to dispose of
this product please note that: Waste electrical products
should not be disposed of with household waste. Please
recycle where facilities exist.Check with yourLocalAuthority
or retailer for recycling advice. (Waste Electrical and
Electronic Equipment Directive)

25
1. Lisez ces instructions.
2. Conservez ces instructions.
3. Tenez compte de toutes les mises en
garde.
4. Suivez toutes les instructions.
5. N’utilisez pas cet appareil à proximité de l’eau.
6. Ne nettoyez qu’à l’aide d’un linge sec.
7. N’obstruez aucune voie de ventilation.
Installez conformément aux instructions du
fabricant.
8. N’installez pas à proximité de sources
de chaleur telles que radiateurs, registre
de chaleur, poêle ou autres appareils (y
compris les amplificateurs) qui produisent
de la chaleur.
Instructions importantes sur la sécurité

26
9. Ne sous-estimez pas l’objectif de sécurité F
des prise polarisées ou de type terre.
Une prise polarisée a deux fiches dont l’
une est plus large que l’autre. Une prise
de type terre à deux fiches plus une fiche
supplémentaire de raccord à la terre. La
fiche large ou le raccord à la terre sont
conçues pour votre sécurité. Si la prise
fournie ne s’adapte pas à votre
installation, consultez un électricien pour
le remplacement de votre installation
obsolète.
10. Protégez le cordon d’alimentation contre
les piétinements ou les pincements,
p a r t i c u l i è r e m e n t a u n i v e a u d e s
branchements, prises de courant, et du
point d’où il sort de l’appareil.
11. N’utilisez que les extensions/accessoires
spécifiés par le fabricant.

27
12. N’utilisez qu’avec un chariot, support,
trépied, crochet ou table spécifié par
le fabricant, ou vendu avec l’appareil.
Lorsque vous utilisez un chariot, soyez
attent i f l orsque vous déplacez l a
combinaison chariot/appareil pour éviter
les blessures dues au renversement.
13. Débranchez cet appareil lors des orages
ou lorsqu’il est inutilisé pendant une
longue période.
14. Confiez toute réparation à du personnel
de maintenance qualifié. La réparation
est nécessaire lorsque l’appareil a été
endommagé de quelque sorte, par
exemple si le cordon d’alimentation ou la
prise sont endommagés, si du liquide a été
répandu ou si des objets sont tombés dans
l’appareil, si ce dernier a été exposé aux
moisissures ou à la pluie, s’il ne fonctionne
pas normalement, ou qu’il a chuté.

28
15. Pour réduire le risque d'incendie ou
de choc électrique, n'exposez pas cet
appareil à la pluie ou l'humidité. F
16. Le symbole de risque d’étouffement et
les symboles graphiques associés sont
présents sur la face inférieure de l’unité.
17. L’appareil ne doit pas être exposé aux
égouttements ou aux éclaboussures et
aucun objet rempli de liquide ne doit être
placé dessus.

29

35
Commandes
1 Prise écouteurs F
2 Touches présélection (1-5) 3 Touche d’alimentation
4 Écran LCD
5 Contrôle du volume
6 Roue de défilement Fréquence/Menu
7 Interrupteur de verrouillage (Note: Si
activé, la radio ne fonctionnera pas)
8 Fente USB pour la mise à jour de logiciel
9 Compartiment des piles
10 Œillet pour la courroie

30
Installation de la batterie
Le compartiment de piles est situé à l’arrière
de l'unité. Faites coulisser le couvercle vers le
bas pour accéder au compartiment de piles.
Insérez deux piles AA (UM-3 / R6 / LR6) dans
le compartiment. Assurez-vous que les piles
sont positionnées conformément au schéma
d'indication. Replacez le couvercle.
Remarque:
Vous pouvez toujours surveiller le niveau des
piles sur l'icône de batterie de l'écran LCD.
Lorsque le niveau de batterie devient très bas
et incapable de faire fonctionner la radio, un
indicateur de batterie faible s'affiche sur
l'écran LCD. La radio s'éteindra.
Casque
La prise écouteurs stéréo située sur le dessus
de votre radio vous permet d’utiliser des
écouteurs stéréo ou une oreillette. Connecter
des écouteurs coupera automatiquement le
son du haut-parleur intégré.

32
Important:
Des volumes sonores excessifs des F
écouteurs et casques peuvent engendrer des
troubles de l’audition.
Régler l’horloge
L’horloge se mettra à jour automatiquement
à chaque fois que vous allumerez la radio et
la réglerez sur une station radio DAB+ ou sur
une station de radio qui diffuse l’heure via
RDS. L’affichage de l’heure clignotera 00:00
pendant quelques secondes puis l’heure s’
affichera lorsque l’horloge recevra un signal d’
heure DAB ou FM-RDS.
Première utilisation - DAB
Cette étape n'est nécessaire que pour le
réglage initial--
1. Assurez-vous qu'un casque/des écouteurs
sont branchés.

33
3. L’écran affichera “Welcome to Digital
Radio” et commencera à scanner toute l’
étendue des canaux DAB et s’arrêtera à la
première station trouvée. Si la radio a été
utilisée avant, la dernière station utilisée
sera sélectionnée à la place. Appuyez sur
la roue de défilement fréquence/menu pour
diffuser la station.
4. Tournez la roue de défilement vers le bas
ou vers le haut pour afficher la liste des
stations et trouver celle de votre choix.
Appuyez sur la roue de défilement pour
sélectionner la station. La radio diffusera la
station et affichera le nom de la station.
5. Réglez le volume pour une écoute
confortable.
Information de service -- DAB
L’ i nformat ion de service aff i che des
informations techniques sur le statut actuel
de la station en cours de diffusion.

34
Lorsque vous écoutez du DAB+, maintenez
la roue de défilement appuyée pour circuler
entre les informations: F
a. Type de programme (PTY)
b. Nom du multiplexe
c. Heure
d. Date
e. Canal et fréquence
f . Débit binaire et codec
g. Force du signal
Fonctions du menu - DAB
Maintenez la roue de défilement appuyée
pendant 2 secondes pour entrer dans la liste
de menu. L'écran affichera d'abord DAB et
<Find Services>. Tournez la roue de défilement
vers le haut ou vers le bas et choisissez entre
les options suivantes: 'Trouver des services',
'retour', 'mode FM', 'Paramètres' et 'Prune'.
A) Trouver des services
Appuyez sur la roue de défilement menu/
fréquence et tournez vers le haut ou le bas
pour choisir.

35
● Scan total
Appuyez sur la roue de défilement pour
scanner l’ensemble du réseau DAB+ dans
votre secteur. La radio réglera la première
station trouvée une fois la recherche
terminée
● Arrière
Appuyez sur la roue de défilement pour
revenir à l'affichage du menu précédent.
● Réglage manuel
Appuyez et tournez la roue de défilement
pour faire défiler la liste des stations dans
son intégralité. Appuyez sur la roue de
défilement pour sélectionner la station de
votre choix.
B) Retour
Appuyez sur la roue de défilement pour
revenir au statut de lecture en cours.
C) Mode FM
Appuyez sur la roue de défilement pour
sélectionner la bande FM.

36
D) Paramètres
Appuyez sur la roue de défilement pour choisir entre les différentes options de réglage: F
● Sélection automatique Appuyez et tournez la roue de défilement pour choisir OUI ou NON. Le paramètre par défaut est NON. Appuyez sur OUI et la radio choisira et se réglera sur la station affichée sur l'écran en quelques secondes.
● Arrière Appuyez sur la roue de défilement pour revenir au menu de paramètre.
● Mise à jour de logiciel D e t e m p s e n t e m p s , d e n o u v e l l e s fonctionnalités pour votre radio peuvent être développées. Votre radio a cependant été conçue pour permettre son logiciel interne de se mettre à jour grâce à votre port de connexion USB. Vous ne devez pas essayer de mettre votre radio à jour à moins que cela ne vous soit recommandé par le service clients de Sangean. La mise à jour du logiciel peut peut-être effacer tous les paramètres réseau et les stations présélectionnées réglées sur votre radio.

37
Des mises à jour de logiciel pour votre
radio seront peut-être disponibles à l’
avenir.
Au fur et à mesure que des mises à jour de
logiciel apparaissent, des informations sur
la manière de mettre à jour le logiciel de
votre radio sont disponibles sur :
http://sg.sangean.com.tw/first/first.asp
http://www.sangean.eu/first/first.asp
www.sangean.com.au.
Pour plus d’informations, veuillez contacter
notre siège social en envoyant un email à:
● Version du logiciel
Appuyez sur la roue de défilement pour
voir la version du logiciel installé sur votre
radio. Appuyez sur la roue de défilement
pour revenir au menu de paramètre.
● Réinitialisation de la configuration d’usine
Appuyez et tournez la roue de défilement
pour choisir OUI ou NON. Choisissez OUI
pour effacer tous les paramètres, listes de
stations et stations favorites sauvegardés.
Tous les paramètres reviendront à la
configuration par défaut.

38
● Régler le contraste
Tournez et appuyez sur la roue de défilement F
pour sélectionner le contraste de l’écran LCD
que vous souhaitez. Le contraste de l’écran
changera en conséquence.
● Régler le rétro éclairage
Appuyez sur la roue de défilement pour
sélectionner le rétro éclairage automatique.
Choisissez OUI et le rétro éclairage de
l'écran s'éteindra automatiquement 12
secondes après la dernière opération.
Choisissez NON et le rétro éclairage
restera allumé.
● DRC
La fonction Dynamic Range Control (DRC)
permet d’obtenir des sons plus propre
et agréables à écouter, spécialement
quand vous utilisez votre radio dans un
environnement bruyant. Cette fonction ne
fonctionne qu’avec la bande DAB.
Appuyez sur DRC et tournez la roue de
défilement pour cicruler entre; DRC éteint,
DRC bas et DRC haut. Appuyez pour
choisir l’option que vous souhaitez:

39
DRC Off - le DRC est désactivé, la
diffusion en DRC sera ignorée.
DRC bas – le niveau de DRC est réglé à ½
du niveau émis par le diffuseur.
DRC haut – le DRC est réglé tel qu’émis
par le diffuseur.
● Language
Votre radio peut être configurée sur
différentes langues.
Appuyez et tournez la roue de défilement
pour choisir la langue de votre choix. Le
paramètre de langue actuel sera indiqué
avec un astérisque.
● Mise en veille programmée
U t i l i s é l e m e n u d e m i s e e n v e i l l e
programmée pour régler le minuteur
d'extinction automatique. Appuyez et tournez
la roue de défilement pour circuler entre:
Mise en vei l le programmée éteinte
(extinction automatique désactivée),
mi n u te u r d ' e x t i n c t i o n a u to ma t i q u e
90-60-45-30-15.
Votre radio s’éteindra automatiquement
après que le délai sélectionné soit écoulé.

45
E) Rafraichir la liste
Si vous déménagez dans une zone différente F
du pays, certaines stations qui étaient
répertoriées ne seront plus disponibles.
Aussi, de temps en temps, certains services
DAB peuvent arrêter de diffuser, ou peuvent
changer d’emplacement ou de fréquence.
Les stations qui ne peuvent être trouvées,
ou qui n’ont pas été reçues pendant une très
longue période sont indiquées dans la liste
de stations avec un point d’interrogation.
La fonction d’élimination des stations effacera
les stations DAB marquées de votre liste de
stations. Appuyez sur la roue de défilement
pour sélectionner la station.
Tournez la roue de défilement pour rafraichir
la liste de stations, et éliminer les stations
non disponibles. Si vous ne souhaitez pas
rafraichir la liste des stations, touchez Non, l’
écran reviendra alors au menu précédent.

40
Utiliser votre radio -- FM
1. Allumez la radio en appuyant sur la touche Alimentation. Appuyez sur la roue de défilement pendant 2 secondes pour entrer dans le menu. Tournez la roue de défilement et faites défiler versle mode FM et appuyez pour choisir la bande FM.
Réglage par recherche - FM
1. Tournez la roue de défilement soit vers le haut soit vers le bas jusqu'à ce que l'écran affiche « scanning ».
2. La radio recherchera dans une direction ascendante ou descendante jusqu'à ce qu’ elle trouve une station dont le signal est suffisamment puissant.
Menu-FM
Appuyez sur la roue de défilement pendant 2 secondes pour entrer dans le menu FM. Tournez la roue de défilement vers le haut ou vers le bas pour trouver ‘zone de recherche FM’, ‘Back’, ‘Mode DAB’ et ‘Paramètres’.

42
A) Zone de recherche FM
Lorsque vous utilisez le mode FM, votre radio F
peut être réglée soit sur scanner des stations
locales soit sur scanner toutes les stations,
y compris les stations de radio éloignées.
Appuyez et tournez la roue de défilement pour
saisir le paramètre de zone de recherche FM.
Choisissez 'Local': seules les stations avec
les signaux les plus forts sont détectées
pendant la recherche
Choisissez 'Distante': toutes les stations sont
détectées pendant la recherche
B) Retour
Appuyez sur la roue de défilement pour
retourner à l'écoute de radio FM.
C) Mode DAB
Appuyez sur la roue de défilement pour
passer en mode DAB.
D) Paramètres
Appuyez sur la roue de défilement pour
sélectionner entre les différents paramètres:

43
● Paramètres audio
Tournez la roue de défilement pour choisir
stéréo autorisé ou mono forcé.
Choisissez 'Stéréo autorisé': la radio
recevra les programmes de stéréo FM.
Choisissez 'Mono forcé': améliore la
réception d'un signal FM faible.
● Arrière
Appuyez sur la roue de défilement pour
revenir au menu de paramètre.
● Mise à jour de logiciel
Tournez la roue de défilement pour choisir
stéréo autorisé ou mono forcé.
Choisissez 'Stéréo autorisé': la radio
recevra les programmes de stéréo FM.
Choisissez 'Mono forcé': améliore la
réception d'un signal FM faible.
Appuyez sur la roue de défilement pour
revenir au menu de paramètre.
De temps en temps, de nouvelles fonctionnalités
pour votre radio peuvent être développées.
Votre radio a cependant été conçue pour
permettre son logiciel interne de se mettre à
jour grâce à votre port de connexion USB.

44
Vous ne devez pas essayer de mettre votre
radio à jour à moins que cela ne vous F
soit recommandé par le service clients
de Sangean. La mise à jour du logiciel
peut peut-être effacer tous les paramètres
réseau et les stations présélectionnées
réglées sur votre radio.
Des mises à jour de logiciel pour votre radio
seront peut-être disponibles à l’avenir.
Au fur et à mesure que des mises à jour de
logiciel apparaissent, des informations sur
la manière de mettre à jour le logiciel de
votre radio sont disponibles sur:
http://sg.sangean.com.tw/first/first.asp
http://www.sangean.eu/first/first.asp
www.sangean.com.au.
Pour plus d’informations, veuillez contacter
notre siège social en envoyant un email à:
● Version du logiciel
Appuyez sur la roue de défilement pour
voir la version du logiciel installé sur votre
radio. Appuyez sur la roue de défilement
pour revenir au menu de paramètre.

45
● Réinitialisation de la configuration d’usine
Appuyez et tournez la roue de défilement
pour choisir OUI ou NON. Choisissez OUI
pour effacer tous les paramètres, listes de
stations et stations favorites sauvegardés.
Tous les paramètres reviendront à la
configuration par défaut.
● Régler le contraste
Tournez et appuyez sur la roue de
défilement pour sélectionner le contraste
de l’ écran LCD que vous souhaitez. Le
contraste de l’écran changera en
conséquence.
● Régler le rétro éclairage
Appuyez sur la roue de défilement pour
sélectionner le rétro éclairage automatique.
Choisissez OUI et le rétro éclairage de
l'écran s'éteindra automatiquement 12
secondes après la dernière opération.
Choisissez NON et le rétro éclairage
restera allumé.

46
● Langue
Votre radio peut être configurée sur F
différentes langues.
Appuyez et tournez la roue de défilement
pour choisir la langue de votre choix. Le
paramètre de langue actuel sera indiqué
avec un astérisque.
● Mise en veille programmée
U t i l i s é l e m e n u d e m i s e e n v e i l l e
programmée pour régler le minuteur
d'extinction automatique. Appuyez et tournez
la roue de défilement pour circuler entre:
Mise en veille programmée éteinte (extinction
automatique désact ivée), minuteur
d'extinction automatique 90-60-45-30-15.
Votre radio s’éteindra automatiquement
après que le délai sélectionné soit écoulé.
Présélection de station-FM&DAB
Il y’a 5 espaces de présélection chacun pour
les radios DAB et les radios FM Ils sont
utilisés de la même manière pour chaque
mode de fonctionnement.

47
1. Réglez la station de radio souhaitée
comme décrit précédemment.
2. Pour enregistrer une station, tenez la
touche Preset requise (1-5) appuyée
jusqu'à ce que l'écran affiche 'Preset
Stored' La station sera enregistrée à l’
aide de la touche de présélection utilisée.
Répétez cette procédure autant de fois
pour les présélections restantes.
3. Les stations qui sont déjà enregistrées
en présélection peuvent être écrasées en
suivant la procédure ci-dessus.
Remarque:
Les stations de radio en présélection sont
conservées dans la mémoire lorsque la radio
est éteinte.

48
1. Choisissez le mode de fonctionnement qui F
vous convient comme décrit précédemment.
2. Appuyez un moment sur la touche de présélection de votre choix. Votre radio réglera alors la station sauvegardée dans la mémoire de présélection. Le numéro de présélection sélectionné est également affiché sur l'écran de la radio, ex: 'P2'.
Fonction verrouillage des touches
La fonction de verrouillage des touches sert à empêcher les opérations non-intentionnelles sur la radio.
1. L'interrupteur de verrouillage des touches est situé à l’arrière de la radio. Lorsque l’ interrupteur de verrouillage des touches est réglé sur LOCK, la touche d’alimentation, le contrôle du volume et la roue de défilement sont désactivés. Si une touche est appuyée lorsque la fonction de verrouillage est réglée sur verrouillée, l'écran affichera 'Button
Locked' pendant quelques secondes. 48
Rappeler une station présélectionnée – DAB et FM

49
2. Pour désactiver la fonction de verrouillage
des touches, passez le bouton de
verrouillage sur la position opposée. La
fonction de verrouillage des touches sera
désactivée.
Spécification
Mode d’alimentation:
Batteries: 2 x LR6 (taille AA) Alcaline
Durée de vie de la batterie:
Environ 12 heures d’ écoute avec des
écouteurs pendant 4 heures par jour à un
volume normal.
Couverture de fréquence:
FM 87.50 – 108 MHz
DAB+ Band III 5A – 13 F
Caractéristiques du circuit
Casque: 32 ohms, écouteur interne

50
F
L’entreprise se réserve le droit de modifier les spécifications
sans notification.
Si à l'avenir vous devez vous débarrasser de ce produit,
veuillez noter que: Les produits électriques ne peuvent
pas être jetés avec le reste des déchets ménagers. Si
possible, amenez l'appareil à un centre de recyclage.
Vérifiez auprès de votre municipalité ou de votre
détaillant pour en savoir plus sur le recyclage. (Directive
relative aux déchets d’équipements électriques et
électroniques).

51
1. Lea estas instrucciones.
2. Conserve estas instrucciones.
3. Observe todas las advertencias.
4. Siga todas las instrucciones.
5. No use este aparato cerca del agua.
6. Límpielo solo con un paño seco.
7. No bloquee ninguna de las aberturas de
ventilación. Instale según las instrucciones
del fabricante.
8. No instale cerca de fuentes de calor, como
radiadores, estufas, fuegos de cocina u
otros aparatos (incluyendo amplificadores)
que produzcan calor.
Importantes instrucciones de seguridad

52
9. No eluda el propósito de seguridad del
enchufe polarizado o del tipo de toma de E
tierra. Un enchufe polarizado tiene dos
hojas, siendo una más ancha que la otra.
Un enchufe del tipo de toma de tierra
tiene dos hojas y una clavija de toma de
tierra. La hoja ancha o la tercera clavija
se le proporcionan por su seguridad. Si
el enchufe no se ajustara a su toma de
corriente, consulte a un electricista para
que se encargue de la sustitución de la
toma obsoleta.
10. Evite pisar o pel l izcar el cable de
alimentación, especialmente en la parte
del enchufe, ladrones y el lugar en que
este sale del aparato.
11. U t i l i c e ú n i c a m e n t e a c c e s o r i o s
especificados por el fabricante.

53
12. Coloque el aparato sobre un carrito,
soporte, pie de apoyo o mesa que haya
sido especificado por el fabricante o
vendido con el televisor. Cuando use el
televisor en combinación con un carrito,
tenga cuidado al desplazarlos juntos,
para evitar las lesiones que podría
producir un vuelco de ambos.
13. Desenchufe este aparato durante las
tormentas o cuando no vaya a usarlo por
un periodo prolongado.
14. Para su reparación, acuda a personal
cualificado. Será necesario reparar el
equipo cuando este haya resultado dañado
en cualquier modo, como en el cable de
alimentación o el enchufe, cuando se haya
derramado líquido o haya caído algún
objeto en la unidad, si el aparato ha sido
expuesto a la lluvia o la humedad, cuando
no funcione con normalidad o en caso de
que se haya caído y recibido un impacto.

54
15. Para reducir el riesgo de incendio o
descarga eléctrica, no exponga este
aparato a la lluvia o la humedad.
E
16. La marca de peligro de descarga eléctrica
y los símbolos gráficos asociados están
presentes en la parte posterior de la
unidad.
17. El aparato no debe ser expuesto a goteos
ni salpicaduras y no deberán colocarse
objetos que contengan líquidos sobre
este.

55

56
Controles
1 Toma para auriculares
2 Botones de presintonías (1-5) E
3 Botón de encendido
4 Display LCD
5 Control de volumen
6 Dial de Sintonización / Menú
7 Interruptor Lock (Nota: si está activado, la
radio no funcionará)
8 Toma USB para la actualización del software
9 Compartimento para pilas
10 Pasador de la correa

57
Instalación de las pilas
La tapa del compartimento para pilas está
situada en la parte posterior de la unidad.
Deslícela hacia abajo para lograr tener acceso
al compartimento. Introduzca dos pilas AA
(UM-3/R6/LR6) en su interior. Asegúrese de
que las pilas han sido instaladas siguiendo el
diagrama indicado. Vuelva a colocar la tapa.
Nota:
Podrá hacer un seguimiento del nivel de
batería en el icono de la batería del display
LCD. Cuando el nivel de batería esté muy
bajo y no sea posible seguir usando la radio,
el indicador se mostrará en el display
LCD. Entonces, la radio se apagará.
Auriculares
La toma para auriculares de 3,5 mm situada en
la parte superior de su radio se le proporciona
para usarla con auriculares estéreo. Tras la
conexión de los auriculares, el altavoz interno
quedará desactivado automáticamente.

58
Importante:
Un volumen excesivo procedente de los
auriculares podía dañar sus oídos. E
Ajuste de la hora
El reloj se actualizará automáticamente cada
vez que encienda su radio y sintonice una
emisora DAB o FM que esté retransmitiendo
la hora mediante RDS. La visualización de
la hora parpadeará en 0:00 durante unos
segundos y después mostrará la hora, una
vez reciba señal de hora RDS de DAB o FM.
Uso inicial – DAB
Este paso es necesario solo para la
configuración inicial –
1. Asegúrese de haber conectado unos
auriculares.
2. Pulse el botón de Encendido de la parte
superior de su radio.

59
3. El display mostrará “Welcome to Digital
Radio” y comenzará la búsqueda por
toda la cobertura de canales DAB+,
deteniéndose en la primera emisora
encontrada. Si la radio se ha usado con
anterioridad, se seleccionará la última
emisora reproducida. Pulse el Dial de
Sintonización/Menú para reproducir la
emisora.
4. Gire el Dial hacia arriba o hacia abajo para
mostrar la lista de emisoras y encontrar la
que desee. Pulse el Dial para seleccionar
la emisora. La radio sintonizará la emisora
y mostrará su nombre.
5. Ajuste el volumen a su gusto.
Información de servicio – DAB
La visualización de información de servicio –
Información técnica sobre el estado actual de
la emisora que se está retransmitiendo.

61
Cuando esté escuchando DAB+, mantenga
pulsado el Dial para pasar por la información
del modo siguiente: E
a. Tipo de programa (PTY)
b. Nombre Multiplex
c. Hora
d. Fecha
e. Canal y frecuencia
f . Velocidad de transferencia de bits y códec
g. Intensidad de la señal
Funciones del menú-DAB
Mantenga pulsado Dial durante dos segundos
para entrar en la lista del menú. El display
mostrará primero DAB y <Find Services>. Gire
el Dial hacia arriba y hacia abajo y elija de entre
la siguientes opciones: ‘Find Services’ (Encontrar
servicios), ‘Back’ (Atrás), ‘FM mode’(Modo FM),
‘Settings’ (Ajustes) y ‘Prune’ (Eliminar).
A) Encontrar servicios
Pulse el Dial de Sintonización / Menú y gírelo
hacia arriba o hacia abajo para seleccionar.

60
● Búsqueda completa
Pulse el Dial para buscar por toda la red
DAB de su área. La radio sintonizará la
primera emisora encontrada, una vez la
búsqueda se haya completado.
● Atrás
Pulse el Dial para volver a la visualización
del menú anterior.
● Sintonización manual
Mantenga pulsado el Dial para pasar por
la lista de emisoras. Pulse el Dial para
seleccionar la emisora que desee.
B) Atrás
Pulse el Dial para retomar el estado de
escucha en el que se encontraba.
C) Modo FM
Pulse el Dial para seleccionar la banda FM.
D) Ajustes
Pulse el Dial para seleccionar de entre la
siguientes opciones de ajuste:

62
● Selección automática
Mantenga pulsado y gire el Dial para
s e l e c c i o n a r Y E S o N O . E l a j u s t e E
predeterminado es NO. Pulse YES y la
radio seleccionará automáticamente y
sintonizará la emisora mostrada en el
display en unos pocos segundos.
● Atrás
Pulse el Dial para regresar al menú de
ajustes.
● Actualización del software
De vez en cuando, podrían desarrollarse
nuevas funciones para su radio. Por lo
tanto, su radio ha sido diseñada para
permitir que su software interno sea
actualizado usando su puerto USB de
actualización.
No intente actualizar su radio, a menos
que le sea recomendado por el Servicio de
Atención al Cliente de Sangean. La
actualización del software podría eliminar
todos los ajustes de la red y emisoras de
radio presintonizadas.

63
Las actualizaciones del software de su radio
podrían estar disponibles en un futuro.
A medida que haya alguna actualización de
software disponible, la información sobre este y
sobre cómo actualizarlo podrán encontrarse en:
http://sg.sangean.com.tw/first/first.asp
http://www.sangean.eu/first/first.asp
www.sangean.com.au.
Para más información, por favor, póngase
en contacto con nuestra Oficina Central,
enviando un email a: [email protected]
● Versión de software
Pulse el Dial para consultar la versión de
software instalada en su radio. Pulse de nuevo
el Dial para regresar al menú de ajustes.
● Restablecimiento de los ajustes de fábrica
Pulse y gire el Dial para seleccionar YES
o NO. Seleccione YES para eliminar todos
los ajustes guardados, listas de emisoras y
favoritas. Todos los ajustes recuperarán su
configuración inicial de fábrica.
● Ajuste de contraste
Gire y pulse el Dial para seleccionar el
contraste del display LCD que desee. El
contraste del display variará según gire el dial.

64
● Ajuste de la retroiluminación
P u l s e e l D i a l p a r a s e l e c c i o n a r l a
retroiluminación automática (Backlight Auto).
Seleccione YES y la retroiluminación del E
display se apagará pasados 12 segundos
después de la última operación.
Seleccione NO y la retroiluminación del
display permanecerá encendida.
● DRC
Control del Rango Dinámico ( DRC)
función que puede hacer que los sonidos
más bajos sean más fáciles de oír,
especialmente cuando esté usando su
radio en entornos ruidosos. Esta función
solo funcionará con la banda DAB.
Pulse DRC y gire el Dial para pasar por;
DRC off (DRC apagado), DRC Low (DRC
bajo) y DRC High (DRC alto). Púlselo para
seleccionar la opción que prefiera:
D R C o f f – D R C e s t á a p a g a d o , l a
retransmisión DRC será ignorada.
DRC low – El nivel DRC será la mitad del
enviado por la estación de retransmisión.
DRC high – DRC viene tal y como lo
establece la estación de retransmisión.

65
● Idioma
Las funciones de su radio podrán ser
configuradas con diferentes idiomas.
Pulse y gire el Dial para seleccionar el
idioma que desee. El ajuste de idioma
actual será indicado con un asterisco.
● Apagado automático (Sleep)
Utilice el menú de apagado automático (Sleep)
para ajustar el temporizador de apagado
automático. Pulse y gire el Dial para pasar por:
S l e e p o f f ( a p a g a d o a u t o m á t i c o
desactivado), temporizador de apagado
automático 90-60-45-30-15.
La radio se apagará una vez haya
transcurrido el tiempo para el apagado
automático preestablecido.
E) Eliminación de emisoras no activas
Si se desplaza dentro de su país, algunas
de las emisoras que podía escuchar antes
podrían no estar disponibles ahora. Además,
de vez en cuando hay algunos servicios DAB
que dejan de retransmitir, o podrían cambiar
de ubicación o de frecuencia.

66
A q u e l l a s e m i s o r a s q u e n o p u e d a n
encontrarse o que no se reciban desde hace
mucho tiempo se mostrarán en la lista de E
emisoras con un símbolo de interrogación.
La función de eliminación de emisoras no
activas eliminará las emisoras DAB
marcadas de su lista de emisoras. Pulse el
Dial para entrar en la función de eliminación
de emisoras no activas.
Gire el Dial para seleccionar YES y hacer que
la lista de emisoras quede reducida, eliminando
las emisoras que no estén disponibles Si no
desea eliminar emisoras, seleccione NO y el
display regresará al menú anterior.
Uso de su – FM
1. Encienda la radio pulsando el botón de
Encendido. Pulse el Dial durante 2 segundos
para entrar en el Menú. Gire el Dial y
desplácese hasta el modo FM, después
púlselo para seleccionar la banda FM.

67
Sintonización de emisoras - FM
1. Gire el Dial hacia arriba o hacia abajo
hasta que el display muestre “scanning”.
2. La radio buscará en dirección ascendente o descendente hasta que encuentre una emisora con la señal lo bastante potente.
Menú-FM
Pulse el Dial durante 2 segundos para entrar
en el menú FM. Gire el dial hacia abajo o
hacia arriba-abajo para encontrar ‘FM Scan
Zone’ (Zona de búsqueda FM), ‘Back’ (Atrás),
‘DAB mode’ (Modo DAB) y ‘Settings’ (Ajustes).
A) Zona de búsqueda FM
Cuando use el modo FM, podrá realizar la
búsqueda de emisoras locales o todas las
emisoras, incluyendo, las distantes, en su
radio.
Pulse y gire el Dial para entrar en el ajuste de
la zona de búsqueda FM.

68
Si selecciona ‘Local’: solo se encontrarán
las emisoras con las señales más potentes E
durante la búsqueda.
Si selecciona ‘Distant’: se buscarán todas las
emisoras disponibles.
B) Atrás
Pulse el Dial para volver a la escucha de FM.
C) Modo DAB
Pulse el Dial para pasar al modo DAB.
D) Ajustes
Pulse el Dial para seleccionar de entre los
siguientes ajustes:
● Ajustes de audio
Gire el Dial para seleccionar estéreo o
mono forzado.
Si selecciona ‘Stereo allowed’: la radio
recibirá los programas de FM estéreo.
Seleccione ‘Forced mono’: to para mejorar
la recepción de una señal débil de FM.

69
● Atrás
Pulse el Dial para regresar al menú de
ajustes.
● Actualización de software
De vez en cuando, podrían desarrollarse
nuevas funciones para su radio. Por lo tanto,
su radio ha sido diseñada para permitir que
su software interno sea actualizado usando
su puerto USB de actualización.
No intente actualizar su radio, a menos
que le sea recomendado por el Servicio de
Atención al Cliente de Sangean. La
actualización del software podría eliminar
todos los ajustes de la red y emisoras de
radio presintonizadas.
Las actualizaciones del software de su radio
podrían estar disponibles en un futuro.
A medida que haya alguna actualización
de software disponible, la información
sobre este y sobre cómo actualizarlo
podrán encontrarse en:
http://sg.sangean.com.tw/first/first.asp
http://www.sangean.eu/first/first.asp
www.sangean.com.au.

71
Para más información, por favor, póngase
en contacto con nuestra Oficina Central,
enviando un email a: [email protected] E
● Versión de software
Pulse el Dial para consultar la versión de
software instalada en su radio. Pulse de nuevo
el Dial para regresar al menú de ajustes.
● Restablecimiento de los ajustes de fábrica
Pulse y gire el Dial para seleccionar YES
o NO. Seleccione YES para eliminar todos
los ajustes guardados, listas de emisoras y
favoritas. Todos los ajustes recuperarán su
configuración inicial de fábrica.
● Ajuste de contraste
Gire y pulse el Dial para seleccionar el
contraste del display LCD que desee. El
contraste del display variará según gire el dial.
● Ajuste de la retroiluminación
Pulse el Dial para seleccionar la retroiluminación
automática (Backlight Auto). Seleccione YES
y la retroiluminación del display se apagará
pasados 12 segundos después de la última
operación. Seleccione NO y la retroiluminación
del display permanecerá encendida.

70
● Idioma
Las funciones de su radio podrán ser
configuradas con diferentes idiomas. Pulse
y gire el Dial para seleccionar el idioma
que desee. El ajuste de idioma actual será
indicado con un asterisco.
● Apagado automático (Sleep)
Utilice el menú de apagado automático
(Sleep) para ajustar el temporizador de
apagado automático. Pulse y gire el Dial
para pasar por: Sleep off (apagado
automático desactivado), temporizador de
apagado automático 90-60-45-30-15.
La radio se apagará una vez haya
transcurrido el tiempo para el apagado
automático preestablecido.
● Ajuste de contraste
Gire y pulse el Dial para seleccionar el
contraste del display LCD que desee. El
contraste del display variará según gire el dial.

73
● Ajuste de la retroiluminación
P u l s e e l D i a l p a r a s e l e c c i o n a r l a
retroiluminación automática (Backlight E
Auto). Seleccione YES y la retroiluminación
del display se apagará pasados 12
segundos después de la última operación.
Seleccione NO y la retroiluminación del
display permanecerá encendida.
● Idioma
Las funciones de su radio podrán ser
configuradas con diferentes idiomas. Pulse
y gire el Dial para seleccionar el idioma
que desee. El ajuste de idioma actual será
indicado con un asterisco.
● Apagado automático (Sleep)
Utilice el menú de apagado automático
(Sleep) para ajustar el temporizador de
apagado automático. Pulse y gire el Dial
para pasar por: Sleep off (apagado
automático desactivado), temporizador de
apagado automático 90-60-45-30-15. La
radio se apagará una vez haya
transcurrido el tiempo para el apagado
automático preestablecido.

72
Hay cinco memorias de presintonías disponibles
para DAB y cinco más para FM. Se usarán de
la misma manera para cada modo de uso.
1. Sintonice la emisora de radio que desee
del modo descrito anteriormente.
2. Para guardar la emisora como presintonía,
mantenga pulsado el botón de Presintonía
que desee (1 – 5) hasta que el display
muestre ' Preset stored'. La emisora
se habrá guardado en el número de
presintonía elegido. Repita este mismo
procedimiento para el resto de presintonías
3. Las emisoras que ya estén guardadas en
las presintonías podrán ser sobrescritas
siguiendo el procedimiento apenas descrito.
Nota:
Las presintonías de emisoras de radio se
conservarán en la memoria cuando la radio
esté apagada.
Presintonización de emisoras- FM y DAB

73
1. Seleccione el modo de uso que desee del
E
modo descrito anteriormente.
2. Pulse el botón de Presintonía que desee. Su radio sintonizará entonces la emisora guardada en la memoria de presintonía seleccionada. El número de presintonía elegido se mostrará también en el display de la radio, por ejemplo, 'P2'.
Función de bloqueo de botones
La función de bloqueo de botones se emplea para evitar un uso no intencionado de la radio.
1. El interruptor de bloqueo de botones se
encuentra en la parte posterior de la radio. Cuando se seleccione la posición LOCK de este interruptor, el botón de encendido, el control de volumen, los botones de presintonías y el dial se desactivarán. Si se pulsa algún botón cuando esté seleccionada la posición LOCK del interruptor de bloqueo de botones, en el display se mostrará el mensaje “Button Locked” (Botones
bloqueados) durante unos segundos. 74
Selección de una emisora presintonizada - FM y DAB

75
2. Para desactivar la función de bloqueo de
botones, cambie de posición el interruptor
de bloqueo. Entonces, los botones
recuperarán su funcionalidad.
Especificaciones
Requisitos de alimentación:
Pilas: 2 x LR6 (tamaño AA) alcalinas
Duración de la pila:
Aproximadamente 12 horas de escucha con
los auriculares
durante 4 horas al día a un volumen normal.
Cobertura de frecuencias:
FM 87.50 – 108 MHz
DAB+ Banda III 5A – 13 F
Características del circuito
Auriculares: 32 ohmios, estilo de introducción
en la oreja

76
E
La empresa se reserva el derecho de realizar las
modificaciones de las especificaciones que considere
pertinentes sin notificarlo previamente.
Si en un futuro deseara deshacerse de este aparato,
recuerde que los productos eléctricos no deben tirarse
junto a los desechos domésticos. Deposítelo en centros
de reciclaje adecuados. Póngase en contacto con las
autoridades locales o con el vendedor del producto
para obtener más información al respecto. (Directiva
sobre Residuos de Aparatos Eléctricos y Electrónicos).

77
Belangrijke veiligheidsinstructies
1. Lees deze instructies.
2. Bewaar deze instructies.
3. Neem alle waarschuwingen in acht.
4. Volg alle instructies.
5. Gebruik het apparaat niet in de buurt van
water.
6. Alleen schoonmaken met een droge doek.
7. Blokkeer de ventilatieopeningen niet.
Installeer in overeenstemming met de
instructies van de fabrikant.
8. N i e t i n s t a l l e r e n i n d e b u u r t v a n
warmtebronnen, zoals radiatoren, kachels
of andere apparaten (inclusief versterkers)
die warmte produceren.

78
9. Omzeil de veiligheidsdoeleinden van
de gepolariseerde stekker niet. Een
gepolariseerde stekker heeft twee NL
pinnen, één is breder dan de ander. Een
geaarde stekker heeft twee pinnen en
een derde aardepin. De brede pin of
derde pin is voor uw veiligheid. Als de
geleverde stekker niet in uw stopcontact
past moet u een elektricien raadplegen
voor vervanging van het verouderde
stopcontact.
10. Bescherm het netsnoer tegen stappen of
pletten bij de stekker, het stopcontact en
het punt waar ze het apparaat verlaten.
11. Gebruik alleen accessoires/hulpstukken
die door de fabrikant zijn gespecificeerd.

79
12. Alleen gebruiken met het wagentje,
standaard, driepoot, haak of tafel die
gespecificeerd is door de fabrikant of
verkocht met het apparaat. Beweeg,
als er een wagentje wordt gebruikt, het
wagentje voorzichtig om verwonding door
omvallen te voorkomen.
13. Haal de stekker van het apparaat uit
het stopcontact tijdens onweer of als
het apparaat voor lange tijd niet wordt
gebruikt.
14. L a a t a l l e o n d e r h o u d o v e r a a n
gekwalificeerd onderhoudspersoneel. Er
is onderhoud nodig wanneer het apparaat
is beschadigd, bijvoorbeeld wanneer het
netsnoer is beschadigd, er vloeistof is
gemorst op of voorwerpen zijn gevallen in
het apparaat zijn gevallen, het apparaat
is blootgesteld aan regen of vocht, niet
normaal werkt of is gevallen.

85
15. Stel het apparaat niet bloot aan regen
of vocht om het risico van brand of
elektrische schok te voorkomen.
16. De schokgevaar- markering en de
NL
bijbehorende afbeelding staan op de
achterkant van het apparaat.
17. H e t a p p a r a a t m a g n i e t w o r d e n
blootgesteld aan druppend of spattend
water en er mogen geen voorwerpen
gevuld met vloeistof op het apparaat
worden geplaatst.

80

82
Bedieningselementen
1 Hoofdtelefoonaansluiting
2 Knoppen voorkeurszenders (1-5)
3 Power NL
4 LCD-display
5 Volumeregeling
6 Afstem/Menu-draaiwiel
7 Vergrendelschakelaar (Opmerking: Als
deze geactiveerd is, dan kan de radio niet
worden bediend)
8 USB-poort voor bijwerken software
9 Batterijvak
10 Houder voor draagriem

83
Installatie batterij
Het batterijdeksel zit op de achterkant van het apparaat. Schuif het deksel omlaag om het batterijvak te openen. Plaats twee AA (UM-3/ R6/ LR6) batterijen in het batterijvak. Zorg ervoor dat de batterijen juist worden geplaatst in overeenstemming met het diagram. Plaats het deksel terug.
Opmerking: U kunt met het batterij-icoontje op het LCD- display altijd in de gaten houden hoeveel batterijstroom de batterijen nog hebben. Wanneer de batterijen bijna leeg zijn en de radio niet meer werkt, dan zal de indicator verschijnen op het LCD-display om aan te geven dat de batterijen bijna leeg zijn. De radio schakelt uit.
Hoofdtelefoon
De 3,5 mm stereo-hoofdtelefoonuitgang zit op de bovenkant van uw radio en u kunt een stereo- hoofdtelefoon of – oortelefoon aansluiten op deze aansluiting. De ingebouwde luidspreker zal automatisch uitschakelen wanneer u de stekker van een hoofdtelefoon in de aansluiting steekt.

84
Belangrijk:
Overmatige geluidsdruk van oortelefoons en
hoofdtelefoons kan leiden tot gehoorverlies. NL
De klok instellen
De klok zal elke keer wanneer u uw radio
inschakelt en afstemt op een DAB-zender of
een FM-zender die de tijd uitzendt met behulp
van RDS automatisch worden ingesteld.
De tijdsweergave 0:00 knippert voor een
paar seconden en daarna zal de tijd worden
weergegeven als deze wordt ontvangen via
DAB of FM – RDS.
Eerste gebruik –DAB
Deze stap is alleen nodig bij het eerste gebruik–
1. Zorg ervoor dat er een hoofdtelefoon/
oortelefoon is verbonden met de radio.
2. Druk op Power op de bovenkant van uw radio.

85
3. Het display toont de melding “Welcome
to Digital Radio” en start met het scannen
van het gehele DAB+ kanaalbereik. De
radio stopt met scannen wanneer de
eerste zender wordt gevonden. Als de
radio al eerder is gebruikt, dat zal de laatst
gebruikte zender worden geselecteerd.
Druk op het afstem/menu-draaiwiel om de
zender af te spelen.
4. Draai het draaiwiel omhoog of omlaag om
de zenderlijst te tonen en een gewenste
zender te selecteren. Druk op het draaiwiel
om op de zender af te stemmen. De
radio toont de zendernaam wanneer er is
afgestemd op de zender.
5. Stel het volume naar wens in met behulp
van de volumeregeling.

86
Dienstinformatie – DAB
De weergave van dienstinformatie –
Technische informatie over de huidige status
van de zender die wordt ontvangen.
Druk tijdens het luisteren DAB+ herhaaldelijk
op het draaiwiel om door de informatie te
bladeren:
a. Programmatype (PTY)
b. Multiplexnaam
c. Tijd
d. Datum
e. Kanaal en frequentie
f . Bitrate en codec
g. Signaalsterkte
Menufuncties-DAB
Houd het draaiwiel 2 seconden ingedrukt om
de menulijst te openen. Het display zal eerst
DAB en <Find Services> tonen. Draai het
draaiwiel omhoog of omlaag en kies een van
de volgende opties: ‘Find Services’, ‘Back’,
‘FM mode’, ‘Settings’ en ‘Prune’.
NL

87
A) Diensten zoeken (Find Services)
Druk op het afstem/menu-draaiwiel en draai
omhoog og omlaag om te selecteren.
● Volledige scan (Full scan)
Druk op het draaiwiel om te scannen op
het gehele DAB-netwerk in uw gebied. De
radio zal afstemmen op de eerst gevonden
zender nadat het scannen is voltooid.
● Terug (Back)
Druk op het draaiwiel om terug te gaan
naar de voorgaande menuweergave.
● Handmatig afstemmen (Manual tune)
Druk op het draaiwiel om door de hele
zenderlijst te bladeren. Druk op het
draaiwiel om de gewenste zender te
selecteren.
B) Terug (Back)
Druk op het draaiwiel om terug te gaan naar
de huidige luisterstatus.
C) FM-modus (FM mode)
Druk op het draaiwiel om de FM-band te
selecteren.

88
D) Instellingen (Settings)
Druk op het draaiwiel om een van de
volgende opties te selecteren:
● Auto select NL
Druk op en draai aan het draaiwiel om YES
of NO te selecteren. De standaardinstelling
is NO. Druk op YES en de radio zal
automatisch selecteren en afstemmen op
de zender die binnen een paar seconden
op het display wordt getoond.
● Terug (Back)
Druk op het draaiwiel om terug te gaan
naar het instellingenmenu.
● Software upgrade
E r k u n n e n v a n t i j d t o t t i j d n i e u w e
softwarefuncties voor uw radio worden
ontwikkeld. Uw radio heeft daarom de
mogelijk om de interne software up te
daten met behulp van de USB-poort.
U moet niet proberen uw radio up te daten,
tenzij het wordt aangeraden door de
klantenservice van Sangean. Het updaten
van de software kan alle
netwerkinstellingen en voorkeurszenders
verwijderen van uw radio

89
Er zullen wellicht in de toekomst software-
updates voor uw radio beschikbaar zijn.
Als er software-updates beschikbaar
komen, dan kan de software en informatie
over het updaten van de radio worden
gevonden op:
http://sg.sangean.com.tw/first/first.asp
http://www.sangean.eu/first/first.asp
www.sangean.com.au.
Voor meer informatie, neem contact op met
ons hoofdkantoor door een email te sturen
naar: [email protected]
● SW-versie (SW version)
Druk op het draaiwiel om de softwareversie
van de software op uw radio te bekijken.
Druk nogmaals op het draaiwiel om terug
te gaan naar het instellingenmenu.
● Fabrieksreset (Factory reset)
Druk op en draai aan het draaiwiel om YES
of NO te selecteren. Selecteer YES om alle
opgeslagen instellingen, zenderlijsten en
favorieten te wissen. Alle instellingen worden
hersteld naar de fabrieksinstellingen.

91
● Instellen contrast (Set contrast)
Draai en druk op het draaiwiel om het
gewenste contrast van het LCD-display te
selecteren. Het contrast van het display NL
verandert dienovereenkomstig.
● Instellen achtergrondverlichting (Set backlight)
Druk op het draaiwiel om Backlight Auto te
selecteren.
Selecteer YES: de achtergrondverlichting
van het display zal 12 seconden na de
laatste toetsdruk automatisch uitschakelen.
Selecteer NO: de achtergrondverlichting
van het display blijft ingeschakeld.
● DRC
Dynamic Range Control (DRC) kan zachte
geluiden makkelijker hoorbaar maken,
vooral wanneer uw radio wordt gebruikt in
een lawaaiige omgeving. Deze functie
werkt alleen op de DAB-band.
Druk op DRC en draai aan het draaiwiel
om te bladeren door; DRC off, DRC Low
en DRC High. Druk om de gewenste optie
te selecteren:

90
D R C o f f – D R C i s u i t g e s c h a k e l d ,
uitgezonden DRC zal worden genegeerd.
DRC low – DRC-niveau wordt ingesteld op
1/2 van datgene wat de zender verzendt..
DRC high – DRC wordt ingesteld zoals
verzonden door de zender
● Taal (Language)
De functies van uw radio kunnen in
meerdere talen worden weergegeven.
Druk op en draai aan het draaiwiel om de
gewenste taal te selecteren. De huidige
taal wordt aangegeven met een asterisk.
● Slaap (Sleep)
Gebruik het slaapmenu om de automatische
uitschakeltimer in te stellen. Druk op en
draai aan het draaiwiel om de bladeren door:
Sleep off ( automatisch uitschakelen
i s u i t g e s c h a k e l d ) , 9 0 - 6 0 - 4 5 - 3 0 - 1 5
automatische uitschakeltimer.
D e r a d i o s c h a k e l t u i t n a d a t d e
geselecteerde slaaptijd is verstreken.

92
E) Niet-beschikbare zenders verwijderen
(Prune)
Als u bent verhuisd naar een ander deel
van het land, dan is het mogelijk dat NL
bepaalde zenders in de zenderlijst niet meer
beschikbaar zijn. Ook kunnen bepaalde DAB-
diensten van tijd tot tijd stoppen met uitzenden,
of veranderen van locatie of frequentie.
Zenders die niet gevonden kunnen worden of
die erg lang niet zijn ontvangen worden in de
zenderlijst gemarkeerd met een vraagteken.
De verwijderfunctie zal de gemarkeerde DAB-
zenders uit uw zenderlijst verwijderen.
Druk op het draaiwiel om de functie voor het
verwijderen van niet-beschikbare zenders te
openen.
Draai aan het draaiwiel om YES te selecteren
en niet-beschikbare zenders te verwijderen.
Als u de niet-beschikbare zenders niet wilt
verwijderen, selecteer dan NO en de radio
zal terugkeren naar het voorgaande menu.

93
Uw radio bedienen – FM
1. Schakel de radio in door op Power te
drukken. Houd het draaiwiel 2 seconden
ingedrukt om het Menu te openen. Draai
aan het draaiwiel, ga naar de FM Mode
en druk op de knop om de FM-band te
selecteren.
Zoeken en afstemmen - FM
1. Draai het draaiwiel omlaag of omhoog tot
het display “scanning” toont.
2. De radio zoekt naar zenders met een
hogere of lagere frequentie tot er een
zender met voldoende signaalsterkte wordt
gevonden.
Menu-FM
Houd het draaiwiel voor 2 seconden ingedrukt
om het FM Menu te openen. Draai het draaiwiel
omlaag of omhoog om ‘FM Scan Zone’, ‘Back’,
‘DAB mode’ of ‘Settings’ te selecteren.

94
A) FM-scanzone (FM Scan Zone)
Uw radio kan in de FM-modus worden
ingesteld om alleen naar lokale zenders te
scannen of om naar alle zenders, inclusief NL
verre zenders, te scannen.
Druk op en draai aan het draaiwiel om de
instellingen voor de FM-zone te openen.
Selecteer ‘Local’: alleen zenders met de
sterkste signalen worden gevonden tijdens
het scannen.
Selecteer ‘Distant’: alle beschikbare zenders
worden gevonden tijdens het scannen
B) Terug (Back)
Druk op het draaiwiel om terug te keren naar
het FM-luisteren.
C) DAB-modus (DAB Mode)
Druk op het draaiwiel om naar de DAB-
modus te schakelen.
D) Instellingen (Settings)
Druk op het draaiwiel om een van de
volgende instellingen te selecteren:

95
● Audio-instelling (Audio setting)
Draai aan het draaiwiel om Stereo allowed
of Forced mono te selecteren.
Selecteer ‘ Stereo allowed’: de radio
ontvangt FM-stereo uitzendingen.
Selecteer ‘Forced mono’: om de ontvangst
van een zwak FM-signaal te verbeteren.
● Terug (Back)
Druk op het draaiwiel om terug te gaan
naar het instellingenmenu.
● Software upgrade
E r k u n n e n v a n t i j d t o t t i j d n i e u w e
softwarefuncties voor uw radio worden
ontwikkeld. Uw radio heeft daarom de
mogelijk om de interne software up te
daten met behulp van de USB-poort.
U moet niet proberen uw radio up te daten,
tenzij het wordt aangeraden door de
klantenservice van Sangean. Het updaten
van de software kan alle
netwerkinstellingen en voorkeurszenders
verwijderen van uw radio
Er zullen wellicht in de toekomst software-
updates voor uw radio beschikbaar zijn.

96
Als er software-updates beschikbaar
komen, dan kan de software en informatie
over het updaten van de radio worden
gevonden op: NL
http://sg.sangean.com.tw/first/first.asp
http://www.sangean.eu/first/first.asp
www.sangean.com.au.
Voor meer informatie, neem contact op met
ons hoofdkantoor door een email te sturen
naar: [email protected]
● SW-versie (SW version)
Druk op het draaiwiel om de softwareversie
van de software op uw radio te bekijken.
Druk nogmaals op het draaiwiel om terug
te gaan naar het instellingenmenu.
● Fabrieksreset (Factory reset)
Druk op en draai aan het draaiwiel om
YES of NO te selecteren. Selecteer YES
om alle opgeslagen instellingen,
zenderlijsten en favorieten te wissen. Alle
instellingen worden hersteld naar de
fabrieksinstellingen.

97
● Instellen contrast (Set contrast)
Draai en druk op het draaiwiel om het
gewenste contrast van het LCD-display te
selecteren. Het contrast van het display
verandert dienovereenkomstig.
● Instellen achtergrondverlichting (Set backlight)
Druk op het draaiwiel om Backlight Auto te
selecteren.
Selecteer YES, de achtergrondverlichting
van het display zal 12 seconden na
d e l a a t s t e b e d i e n i n g a u t o m a t i s c h
uitschakelen.
Selecteer NO, de achtergrondverlichting
van het display blijft ingeschakeld.
● Taal (Language)
De functies van uw radio kunnen in
meerdere talen worden weergegeven.
Druk op en draai aan het draaiwiel om de
gewenste taal te selecteren. De huidige
taal wordt aangegeven met een asterisk.
● Slaap (Sleep)
Gebruik het slaapmenu om de automatische
uitschakeltimer in te stellen. Druk op en
draai aan het draaiwiel om de bladeren door:

98
Sleep off ( automatisch uitschakelen
i s u i t g e s c h a k e l d ) , 9 0 - 6 0 - 4 5 - 3 0 - 1 5
automatische uitschakeltimer. De radio
schakelt uit nadat de geselecteerde NL
slaaptijd is verstreken.
Voorkeurszenders - FM & DAB
Er zijn in de DAB- en FM-modus elk 5
voorkeurszenders beschikbaar. Ze worden op
dezelfde manier gebruikt.
1. Stem zoals eerder beschreven af op de
gewenste zender.
2. Sla de zender op als voorkeurszender,
houd de knop van de voorkeurszender (1
– 5) ingedrukt tot het display de melding
'Preset stored' toont. De zender wordt
opgeslagen onder het gekozen nummer.
Herhaal deze procedure indien gewenst
voor de resterende voorkeurszenders.

99
3. Zenders die al zijn opgeslagen in het
geheugen kunnen worden overschreven
door de bovenstaande procedure te
volgen.
Opmerking:
De voorkeurszenders blijven opgeslagen
i n h e t g e h e u g e n a l s d e r a d i o w o r d t
uitgeschakeld.
1. Selecteer zoals eerder beschreven de
gewenste modus.
2. D r u k k o r t o p d e k n o p v a n d e
voorkeurszender. Uw radio stemt af op de
voorkeurszender die is opgeslagen in het
geheugen. Het nummer van de gekozen
voorkeurszender wordt ook getoond op het
display, bijv. 'P2'.
Een voorkeurszender oproepen- FM & DAB
103
Toetsvergrendelfunctie
De toetsvergrendelfunctie wordt gebruikt om
het per ongeluk bedienen van de radio te
voorkomen.
1. De toetsvergrendelschakelaar zit op de
achterkant van de radio. Als de toetsvergr
endelschakelaar in de stand LOCK staat,
dan zullen de power-knop, volumeregeling,
knoppen van voorkeurszenders en het
draaiwiel worden uitgeschakeld. Als er
knoppen worden ingedrukt terwijl de
toetsvergrendelfunctie is ingesteld op
vergrendelen, dan zal het display een paar
seconden de melding “Button Locked”
tonen.
NL
2. Als u de toetsvergrendelfunctie wilt
u i t s c h a k e l e n , z e t d e s c h a k e l a a r
dan in de tegenovergestelde stand.
D e t o e t s v e r g r e n d e l f u n c t i e w o r d t
uitgeschakeld.

100
Specificaties
Voeding:
Batterijen: 2 x LR6 (maat AA) Alkaline
Levensduur batterij:
Ongeveer 12 uur luisteren met hoofdtelefoon
voor 4 uur per dag op een normaal volume.
Frequentiebereik:
FM 87,50 – 108 MHz
DAB+ Band III 5A – 13 F
Circuitfuncties
Hoofdtelefoon: 32 ohm, in-oor stijl
Het bedrijf behoudt zich het recht voor om de specificaties te
wijzigen zonder voorafgaande kennisgeving
Indien u zich op enig moment in de toekomst wenst
te ontdoen van dit product, houd er dan rekening mee
dat: afgedankte elektrische producten dienen niet
verwijderd te worden met huishoudelijk afval. Recycle
waar mogelijk. Neem contact op met uw gemeente of
winkelier voor recycling advies. (Afgedankte Elektrische
en Elektronische Apparaten, AEEA)

102
Important Safety Instructions
1. Read these instructions.
2. Keep these instructions. D
3. Heed all warnings.
4. Follow all instructions.
5. Do not use this apparatus near water.
6. Clean only with dry cloth.
7. Do not block any ventilation openings.
Install in accordance with the manufacturer’
s instructions.
8. Do not install near any heat sources such
as radiators, heat registers, stoves, or
other apparatus (including amplifiers) that
produce heat.

103
9. Do not defeat the safety purpose of
the polarized or grounding-type plug. A
polarized plug has two blades with one
wider than the other. A grounding type
plug has two blades and a third grounding
prong. The wide blade or the third
prong are provided for your safety. If the
provided plug does not fit into your outlet.
consult an electrician for replacement of
the obsolete outlet.
10. Protect the power cord from being walked
on or pinched particularly at plugs,
convenience receptacles, and the point
where they exit from the apparatus.
11. Only use attachments/ accessories
specified by the manufacturer.
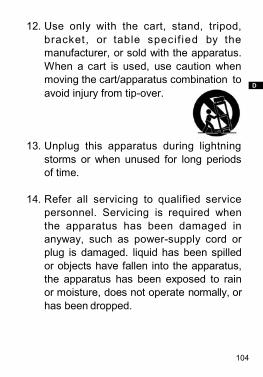
104
12. Use only with the cart, stand, tripod,
bracket, or table specif ied by the
manufacturer, or sold with the apparatus.
When a cart is used, use caution when
moving the cart/apparatus combination to D
avoid injury from tip-over.
13. Unplug this apparatus during lightning
storms or when unused for long periods
of time.
14. Refer all servicing to qualified service
personnel. Servicing is required when
the apparatus has been damaged in
anyway, such as power-supply cord or
plug is damaged. liquid has been spilled
or objects have fallen into the apparatus,
the apparatus has been exposed to rain
or moisture, does not operate normally, or
has been dropped.

105
15. To Reduce the Risk of Fire or Electric
Shock, Do not Expose This Appliance To
Rain or Moisture.
16. T h e S h o c k H a z a r d M a r k i n g a n d
Associated Graphical Symbol is provided
on the bottom panel of unit.
17. Apparatus shall not be exposed to
dripping or splashing and no objects filled
with liquids, shall not be placed on the
apparatus.

106
D

107
Controls
1 Kopfhörerausgang
2 Speichertasten (1 - 5)
3 Ein/Aus-Schalter
4 LCD-Anzeige
5 Lautstärkeregelung
6 Frequenzauswahl / Menürad
7 Tastensperre (Hinweis: Wenn dieser
Schalter eingeschaltet ist, kann das Radio
nicht eingeschaltet werden)
8 USB-Anschluss für Software-Upgrades
9 Batteriefach
10 Trageriemenöse

108
Einlegen der Batterien
Das Batteriefach befindet sich auf der
Rückseite des Geräts. Schieben Sie die
Abdeckung nach unten, um den Zugang zum D
Batteriefach zu erhalten. Legen Sie zwei
Batterien der Größe AA (UM-3 / R6 / LR6) in
das Fach ein. Vergewissern Sie sich, dass
die Batterien entsprechend der vorliegenden
Zeichnung eingelegt werden. Schließen Sie
das Batteriefach wieder.
Hinweis:
Sie können den Batteriestand jederzeit über
das Batteriesymbol auf demLCD-Bildschirm
verfolgen. Wenn die Batterieleistung sehr
niedrig ist und nicht mehr ausreicht das Radio
zu betreiben, erscheint das Batteriestandssy
mbol auf dem LCD-Bildschirm. Das Radio
schaltet sich dann von selbst aus.

109
Kopfhörer
Der 3,5mm-Stereo-Kopfhöreranschluss
befindet sich auf der Oberseite des Geräts
und steht für die Verwendung mit Stereo-
Kopfhörern oder Headsets zur Verfügung.
Wenn Sie Kopfhörer am Gerät anschließen,
w i r d d e r e i n g e b a u t e L a u t s p r e c h e r
automatisch ausgeschaltet.
Wichtig:
Eine zu hohe Lautstärke kann bei der
Benutzung von Ohrhörern und Kopfhörern zu
Gehörschäden führen.
Einstellen der Uhrzeit
Die Uhrzeit wird automatisch jedes Mal, wenn
Sie das Radio einschalten und einen DAB-
Sender oder einen UKW-Sender mit RDS
wählen, aktualisiert. In der Uhrzeitanzeige
blinkt 00:00 für ein paar Sekunden auf und
zeigt dann die aktualisierte Uhrzeit an, wenn
das RDS-Uhrzeitsignal über DAB oder UKW-
RDS empfangen werden kann.

110
Inbetriebnahme - DAB
Dieser Vorgang ist nur bei der ersten Inbetriebnahme des Geräts notwendig –
1. Vergewissern Sie sich, dass Ihre Kopfhörer D
/Ohrhörer angeschlossen sind.
2. Betätigen Sie den EIN/AUS-Schalterauf der Oberseite des Radios.
3. In der Anzeige erscheint die Meldung "Welcome to Digital Radio" und das Radio fängt dann an das gesamte DAB-Frequenzband zu durchsuchen. Sobald der erste Sender gefunden wird, stoppt der Suchvorgang. Wenn Sie das Radio in der Vergangenheit bereits benutzt haben, geht das Gerät auf den zuletzt benutzten Sender. Drücken Sie auf das Menürad, um den Sender wiederzugeben.
4. Drehen Sie am Menürad, um die Senderliste anzuzeigen und den gewünschten Sender auszuwählen. Betätigen Sie das Menürad zur Auswahl des Senders. Das Radio geht zur Frequenz des entsprechenden Senders und zeigt den Sendernamen an.

111
5. Stel len Sie d i e Lautstärke auf e i n
angenehmes Maß.
Informationsanzeige - DAB
I n f o r m a t i o n s a n z e i g e - t e c h n i s c h e
Informationen über den aktuellen Status der
vom Sender übertragenen Dienste.
Beim Hören eines DAB-Senders können Sie
kontinuierlich das Menürad betätigen, um die
folgenden Informationen anzuzeigen:
a. Programmtyp (PTY)
b. Multiplexname
c. Uhrzeit
d. Datum
e. Kanal und Frequenz
f . Bitrate und Codec
g. Signalstärke

112
Menüfunktionen - DAB
Halten Sie das Menürad für 2 Sekunden
gedrückt, um die Menüliste aufzurufen. Das
Display zeigt zunächst "DAB" und dann <Find D
Services>. Drehen Sie am Menürad und wählen
Sie eine der folgenden Optionen: "Dienst finden",
"Zurück", "UKW-Modus", "Einstellungen" und
"Nicht-aktive Sender entfernen".
A) Dienst finden
Betätigen Sie das Menürad und drehen es für.
● Vollständige Suche
Betätigen Sie das Menürad, um das gesamte
DAB-Netz Ihrer Region zu durchsuchen. Das
Radio springt zum ersten gefundenen Sender,
nachdem der Suchvorgang abgeschlossen ist.
● Zurück
Betätigen Sie das Menürad, um zurück zur
vorigen Menüanzeige zu gelangen.
● Manuelle Einstellung
Betätigen und drehen Sie das Menürad,
um durch die gesamte Senderliste zu
gehen. Betätigen Sie das Menürad zur
Auswahl des gewünschten Senders.

113
B) Zurück
Betätigen Sie das Menürad, um zurück zur
Wiedergabeanzeige zu gelangen.
C) UKW-Modus
Betätigen Sie das Menürad zur Auswahl des
UKW-Bands.
D) Einstellungen
Betätigen Sie das Menürad, um eine der
folgenden Einstellungsoptionen zu wählen:
● Automatische Auswahl
Betätigen und drehen Sie am Menürad zur
Auswahl von JA oder NEIN. Betätigen Sie
JA und das Radio wählt automatisch den
in der Anzeige angezeigten Sender und
startet dessen Wiedergabe innerhalb von
ein paar Sekunden.
● Zurück
Betätigen Sie das Menürad, um zurück
zum Einstellungsmenü zu gelangen.

114
● Software-Upgrade
Unter bestimmten Umständen stehen neue
Softwarefunktionen für Ihr Radio zur
Verfügung. Ihr Radio wurde daher
so konzipiert, dass die interne Software D
über Ihrem USB-Upgrade-Port aktualisiert
werden kann.
Sie sollten allerdings nicht versuchen das
Radio zu aktualisieren, es sei denn es wird
vom Sangean-Kundendienst empfohlen.
Durch eine Software- Aktualisierung
werden alle Netzwerkeinstellungen und
Senderspeicher gelöscht.
Software-Upgrades für Ihr Radio stehen
möglicherweise in der Zukunft zur
Verfügung.
Wenn Software-Upgrades verfügbar sind,
finden Sie die Upgrades und Informationen
zum Upgrade unter:
http://sg.sangean.com.tw/first/first.asp
http://www.sangean.eu/first/first.asp
www.sangean.com.au
Für weitere Informationen wenden Sie sich
bitte an unseren Kundenservice, indem Sie
eine Email an [email protected] senden.

115
● SW-Version
Betätigen Sie das Menürad, um die
Software-Version, die auf dem Radio
installiert ist, anzuzeigen. Betätigen
S i e d a s M e n ü r a d , u m z u r ü c k z u m
Einstellungsmenü zu gelangen.
● Reset
Betätigen und drehen Sie das Menürad zur
Auswahl von JA oder NEIN. Wählen Sie
JA, um alle gespeicherten Einstellungen,
Senderlisten und Favoriten zu löschen.
Alle Einstellungen werden dann auf die
ursprünglichen Werkseinstellungen
zurückgesetzt.
● Kontrast einstellen
Drehen und betätigen in das Menürad, um
den gewünschten LCD- Kontrast
einzustellen. Der Kontrast der Anzeige
ändert sich entsprechend.

116
● Hintergrundbeleuchtung einstellen
B e t ä t i g e n S i e d a s M e n ü r a d , u m
d i e a u t o m a t i s c h e E i n s t e l l u n g d e r
Hintergrundbeleuchtung zu aktivieren.
Wählen Sie JA und die Hintergrundbeleuchtung
des Bildschirms wird automatisch 12
Sekunden nach der letzten Tastenbetätigung
ausgeschaltet.
W ä h l e n S i e N E I N , d a m i t d i e
Hintergrundbeleuchtung eingeschaltet bleibt.
● DRC
D R C ( D y n a m i k b e r e i c h s t e u e r u n g )
ermöglicht es leise Geräusche leichter
hörbar zu machen, inbesondere wenn das
Radio in einer lärmigen Umgebung benutzt
wird. Diese Option funktioniert nur mit dem
DAB-Wellenbereich.
Wählen Sie die DRC-Option und benutzen
Sie das Menürad zur Auswahl von: DRC
aus, DRC niedrig oder DRC hoch.Betätigen
Sie zur Auswahl der gewünschten Option:
DRC off – DRC i s t ausgeschaltet.
Gesendete DRC-Signale werden nicht
berücksichtigt.
D
117
DRC low – Der DRC-Pegel wird auf die
Hälfte der Senderangaben gestellt.
DRC high – Der DRC-Wert wird auf den
vom Sender vorgegebenen Wert gestellt.
● Sprache
Das Radio kann auf andere Sprachen
eingestellt werden werden.
Betätigen und drehen Sie das Menürad,
um die gewünschte Sprache auszuwählen.
Die aktuelle Spracheinstellung ist mit
einem Sternchen gekennzeichnet.
● Einschlaf-Timer
Use the Sleep menu to set auto shut off
timer. Press in and turn the jog wheel to
cycle through:
Sleep off ( auto shut off disabled),
90-60-45-30-15 Auto shut off timer.
Radio will turn off after selected sleep time
has elapsed.

118
E) Entfernen nicht-aktiver Sender
Wenn Sie in einen anderen Teil Ihres Landes
ziehen, kann es passieren, dass einige der
Sender in der Senderliste nicht mehr
verfügbar sind. Unter Umständen können
DAB-Sender auch geschlossen werden oder
Standort bzw. Frequenz ändern.
Sender, die nicht gefunden oder die nicht für
lange Zeit nicht empfangen werden können,
werden in der Senderliste mit einem
Fragezeichen dargestellt.
Mit dieser Funktion können Sie auf diese
Weise markierte DAB- Sender aus der
Senderliste löschen.
Betätigen Sie das Menürad die Funktion zum
Entfernen nicht-aktiver Sender aufzurufen.
Drehen Sie am Menürad, um JA zu wählen,
damit alle Sender, die nicht mehr verfügbar
sind, entfernt werden.
Wenn Sie nicht möchten, dass diese Sender
entfernt werden, wählen Sie NEIN und die
Anzeige kehrt zum vorigen Menü zurück.
D

119
Benutzung des Radios – UKW
1. Betätigen Sie den Ein/Aus--Schalter zum
Einschalten des Radios. Betätigen Sie das
Menürad für 2 Sekunden, um das Menü
aufzurufen. Drehen Sie am Menürad und
wählen Sie den UKW-Modus zur Auswahl
des UKW-Wellenbereichs.
Automatische Sendersuche-UKW
1. Drehen Sie das Menürad, bis "Scan" in der
Anzeige erscheint.
2. Das Radio beginnt dann in die entsprechende
Richtung zu suchen, bis ein Sender mit
ausreichender Signalstärke gefunden wird.
Menü - UKW
Betätigen Sie das Menürad für 2 Sekunden,
um in das UKW-Menü zu gelangen. Drehen
Sie das Menürad zur Auswahl von "UKW-
Suchbereich", "Zurück", "DAB-Modus" und
"Einstellungen".

120
A) UKW-Suchbereich
Sie können den UKW-Modus des Radios
entweder so einstellen, dass bei einer
Sendersuche lokale Sender gefunden
werden oder alle Sendern gefunden werden,
einschließlich entfernterer Sender. Betätigen
und drehen Sie das Menürad, um in die
UKW-Suchbereichseinstellung zu gelangen.
"Local": nur die Sender mit den stärksten
Signalen werden während des Suchvorgangs
berücksichtigt. "Distant": Alle verfügbaren
Sender werden bei der Suche gefunden.
B) Zurück
Betätigen Sie das Menürad, um zur UKW-
Wiedergabe zurückzukehren.
C) DAB-Modus
Betätigen Sie das Menürad, um in den DAB-
Modus zu wechseln.
D) Einstellungen
Betätigen Sie das Menürad, um eine der
folgenden Einstellungsoptionen zu wählen:
D

121
● Audio-Einstellungen
Drehen Sie das Menürad zur Auswahl von
"Stereo möglich" oder "Mono erzwungen".
"Stereo erlaubt": das Radio kann UKW-
Stereo-Sendungen empfangen.
"Mono erzwungen": um den Empfang
schwacher UKW-Signal zu verbessern, wird
der Empfang auf einen Audiokanal begrenzt.
● Zurück
Betätigen Sie das Menürad, um zurück
zum Einstellungsmenü zu gelangen.
● Software-Upgrade
Unter bestimmten Umständen stehen
neue Softwarefunktionen für Ihr Radio
zur Verfügung. Ihr Radio wurde daher
so konzipiert, dass die interne Software
über Ihrem USB-Upgrade-Port aktualisiert
werden kann.
Sie sollten allerdings nicht versuchen das
Radio zu aktualisieren, es sei denn es wird
vom Sangean-Kundendienst empfohlen.
Durch eine Software- Aktualisierung
werden alle Netzwerkeinstellungen und
Senderspeicher gelöscht.

122
Software-Upgrades für Ihr Radio stehen
möglicherweise in der Zukunft zur Verfügung.
Wenn Software-Upgrades verfügbar sind,
finden Sie die Upgrades und Informationen D
zum Upgrade unter:
http://sg.sangean.com.tw/first/first.asp
http://www.sangean.eu/first/first.asp
www.sangean.com.au
Für weitere Informationen wenden Sie sich
bitte an unseren Kundenservice, indem Sie
eine Email an [email protected] senden.
● SW-Version
Betätigen Sie das Menürad, um die Software-
Version, die auf dem Radio installiert ist,
anzuzeigen. Betätigen Sie das Menürad, um
zurück zum Einstellungsmenü zu gelangen.
● Reset
Betätigen und drehen Sie das Menürad zur
Auswahl von JA oder NEIN. Wählen Sie
JA, um alle gespeicherten Einstellungen,
Senderlisten und Favoriten zu löschen.
Alle Einstellungen werden dann auf die
ursprünglichen Werkseinstellungen
zurückgesetzt.
123
● Kontrast einstellen
Drehen und betätigen in das Menürad, um
den gewünschten LCD- Kontrast
einzustellen. Der Kontrast der Anzeige
ändert sich entsprechend.
● Hintergrundbeleuchtung einstellen
B e t ä t i g e n S i e d a s M e n ü r a d , u m
d i e a u t o m a t i s c h e E i n s t e l l u n g d e r
Hintergrundbeleuchtung zu aktivieren.
W ä h l e n S i e J A u n d d i e
Hintergrundbeleuchtung des Bildschirms
wird automatisch 12 Sekunden nach der
letzten Tastenbetätigung ausgeschaltet.
W ä h l e n S i e N E I N , d a m i t d i e
Hintergrundbeleuchtung eingeschaltet bleibt.
● Sprache
Das Radio kann auf andere Sprachen
eingestellt werden werden.
Betätigen und drehen Sie das Menürad,
um die gewünschte Sprache auszuwählen.
Die aktuelle Spracheinstellung ist mit
einem Sternchen gekennzeichnet.

124
● Einschlaf-Timer
Verwenden Sie das Einschlaf-Menü zum
Einstellen der automatischen Abschaltung.
Betätigen und drehen Sie das Menürad,
um eine der folgenden Einstellungen zu
wählen: Einschlaf-Timer aus (automatische
Abschaltung ist deaktiviert), 90 - 60 - 45
- 30 - 15 automatischer Abschaltung. Ihr
Radio schaltet automatisch ab, nachdem die
voreingestellte Abschaltzeit abgelaufen ist.
Sender speichern-DAB und UKW
Es stehen jeweils 5 Speicherplätze für jedes
Frequenzband (DAB / UKW) zur Verfügung.
Die Speicher werden auf die gleiche Weise
für beide Frequenzbänder verwendet.
1. Wählen Sie einen Sender auf die bereits
beschriebene Weise.
D

125
2. Zum Speichern eines Senders auf
einem Speicherplatz, halten Sie die
entsprechende Sendertaste ( 1 - 5 )
gedrückt, bis in der Anzeige "Preset
stored" erscheint. Der Sender wird
dann unter der gewählten Sendertaste
gespeichert. Wiederholen Sie diesen
Vorgang bei Bedarf für die verbleibenden
Speicherplätze.
3. Wenn Sie eine Sendertaste erneut
konf igurieren, können damit vorher
gespeicherte Sender überschrieben werden.
Hinweis:
Die Senderspeicher bleiben auch dann im
Speicher erhalten, wenn das Radio
ausgeschaltet wird.
1. W ä h l e n S i e d e n g e w ü n s c h t e n
Betriebsmodus wie zuvor beschrieben.
Abrufen gespeicherter Sender – DAB und UKW

126
2. Betätigen Sie die gewünschte Sendertaste.
Das Radio stel lt s ich dann auf die
Frequenz des gespeicherten Senders. Die
gewählte Speichernummer erscheint dann D
in der Anzeige des Radios, z. B. "P2 ".
Tastensperre
Die Tastensperre wird verwendet, um
unbeabsichtigte Tastenbetätigung zu verhindern.
1. Die Tastensperre befindet sich auf der
Rückseite des Radios. Wenn der Schalter auf
LOCK gesetzt ist, bleiben die Ein/Aus-Taste,
Lautstärkeregelung, Speichertasten und das
Menürad wirkungslos. Falls irgendeine Taste
betätigt wird, während die Tastensperre aktiviert
ist, erscheint die Meldung "Tasten gesperrt" für
ein paar Sekunden in der Anzeige.
2. Zum Deaktivieren der Tastensperre
schieben Sie den Schalter einfach zurück
in die OFF-Position. Die Tastensperre wird
damit deaktiviert.

127
Technische Daten
Stromversorgungsanforderungen
Batterien: 2 x LR6 (AA) alkalisch
Batterielebensdauer:
Ca. 12 Stunden bei 4 Stunden Benutzung über
Kopfhörer am Tag bei normaler Lautstärke.
Frequenzbereich:
UKW 87,50 bis 108 MHz
DAB+ Band III 5A - 13F
Schaltkreismerkmale
Kopfhörer: 32 Ohm, Innenohr
Veränderungen der Spezifikationen ohne vorherige
Ankündigung vorbehalten.
Sollten sind irgendwann das Gerät nicht mehr benutzen,
achten Sie bei der Entsorgung bitte auf folgendes:
Elektrische Altgeräte dürfen nicht zusammen mit dem
Hausmüll entsorgt werden. Bitte geben Sie das Gerät zur
Wiederverwertung ab, wenn entsprechende Einrichtungen
existieren. Wenden Sie sich bitte an Ihre lokalen Behörden
oder Ihren Händler für mehr Informationen zur Entsorgung
dieses Geräts. (WEEE-Richtlinie - Waste Electrical and
Electronic Equipment Directive)