Embed Size (px)
Citation preview

Introduction to Arduino
Mobile Computing, aa. 2016/2017May 12, 2017
Daniele Ronzani - Ph.D student in Computer [email protected]

What are Microcontrollers
● Very small and simple computers
● Cheap and useful
● Present in every smart system
● Atmel is one of the family of microcontrollers
2

What is the DIY paradigm
3
● Create something without professional knowledge
● Many fields
○ Programming○ Education○ Critical theory○ Business○ Electronics○ ...

4
The Arduino project
Arduino is an open-source electronics prototyping platform based on flexible, easy-to-use hardware and software. It's intended for artists, designers, hobbyists, and anyone interested in creating interactive objects or environments.
Arduino.cc
● An Italian prototyping tool project
● Ready-made electronic products at low costs
● Open Source
● Boards with different performances
● Shields that extend the functions○ Wi-Fi, GPSR, Ethernet, microSD reader, ...
Arduino UNO
Shields and sensors

Some History of Arduino
● Arduino was born in 2005 in Ivrea, Italy
● IDEA: less expensive device for controlling interactive electronic projects○ Rapid prototyping
● Name "Arduino" in honor of Bar di Re Arduino
● Start to produce boards in a small factory
● Arduino was built around the Wiring project of Hernando Barragan.○ Hernando's thesis project at the Interaction Design
Institute Ivrea.
○ Remove the deep knowledge barriers
5
Massimo Banzi

The First Protoype
6

Arduino Today
●●
○
7
80% from Europe and USA
Arduino community is mushrooming across the globe
More than 200 distributors

Some Competitors - 1
8
● Lego Mindstorm○ Intelligent brick computer○ Programmed in Brick Logo○ Strong community○ Too much expensive (cost: ~ $349)
● i-cubeX ○ Objects respond to human actions and
environmental parameters○ Human Interface Devices○ Easy but expensive
● Phidgets○ Easy-to-assemble sensors and controllers○ Not open source (proprietary)○ Requires less hardware and software knowledge○ ~ 3.5 x the cost of Arduino board

Some Competitors - 2
● Make Controller Kit○ More powerful CPU than Arduino○ Has quite a lot of "bang for the buck"
● Raspberry○ It is closer to a computer○ Includes CPU, USB ports, Ethernet, HDMI, ...○ Includes an own OS (Linux)
● Teensy ○ Same Arduino firmware○ Compatible with Arduino○ Very small size
● UDOO○ Merges Arduino and Raspberry○ Powerful prototyping platform○ Linux or Android OSs
9
Hardware Environment Community
○
10
The three key concepts of Arduino Project
Can sense the environment by sensors, and affects it by controlling lights, motors, and other actuators.
Allows to write code in the Arduino programming language and using the Arduino development environment.
It is made up of everyone from and to hobbyists, students, designers and engineers all across the world.
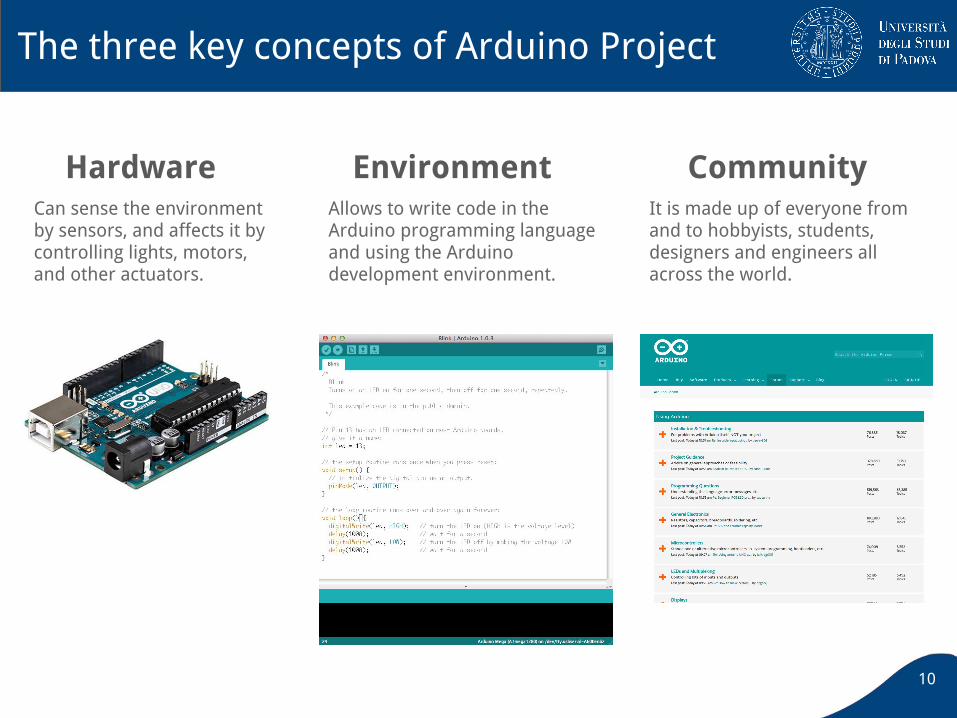
Why should we use Arduino?
● Simple, academic purposes
● Open source○ Hardware & Software: permits to manufacture the boards and
software distribution by anyone■ Arduino compatibile: Canaduino, Freeduino, Linduino, SainSmart, ...
○ GNU Lesser General Public License (LGPL)
● Opportunistic prototyping
● Community○ Wiki○ Forum○ Tutorials
● Could be used as an IoT starting point○ Physical computing objects
11

12
● 2006: New Generation (NG)○ ATmega168○ First Mini Arduino
● 2007: Portable and communication○ i-Bluetooth○ Sew-through contacts pads
● 2009: Nano and LilyPad○ New Arduino Mega with
ATmega1280
● 2010: Rapid development○ Official Arduino Uno
● 2012: Miniaturization and CPU power enhance
■ LilyPad Simple/Snap and Micro■ Arduino Due (32 bit)

Evolution of Arduino
13
● 2013: 700.000 official boards were sold● 2016: 17 versions of the Arduino board have been
commercially produced.

Some Current Arduino Boards
UNO● Current official reference of Arduino Boards● Most used and documented board
Mega● Designed for more complex projects● 54 digital I/O pins, 16 analog inputs● ATmega2560
LilyPad● Designed for e-textiles and wearables projects● Can be sewn to fabric and to power supplies
Nano● Compact board similar to the UNO
14

Arduino as Physical Computing Platform
15
Physical Computing involves the design of interactive objects that can communicate with humans using sensors and actuators controlled by a behaviour implemented as software running inside a microcontroller.

Smart Objects in the Internet Of Things
● Arduino provides the tools○ Remote processing of data○ Connection of physical objects to the Internet
● IoT Manifest○ Open SW & HW:
■ Possibility to share works■ More innovation
○ Sustainable■ Devices should be easily upgraded
○ Fair■ You should have control of your devices■ Security
16
IoT is a new emerging technology where the things are connected altogether and interact

Arduino Cloud
● A new platform to make building IoT● Creation of tools that allow connection and control of device on/by
the Internet● MQTT broker makes connection between each object
17

Home Control and Automation
18

Arduino Usage Examples
19
Beat Bearing

Arduino Usage Examples
20
Twitter Lamp

TeleBall (Breakout game)
21
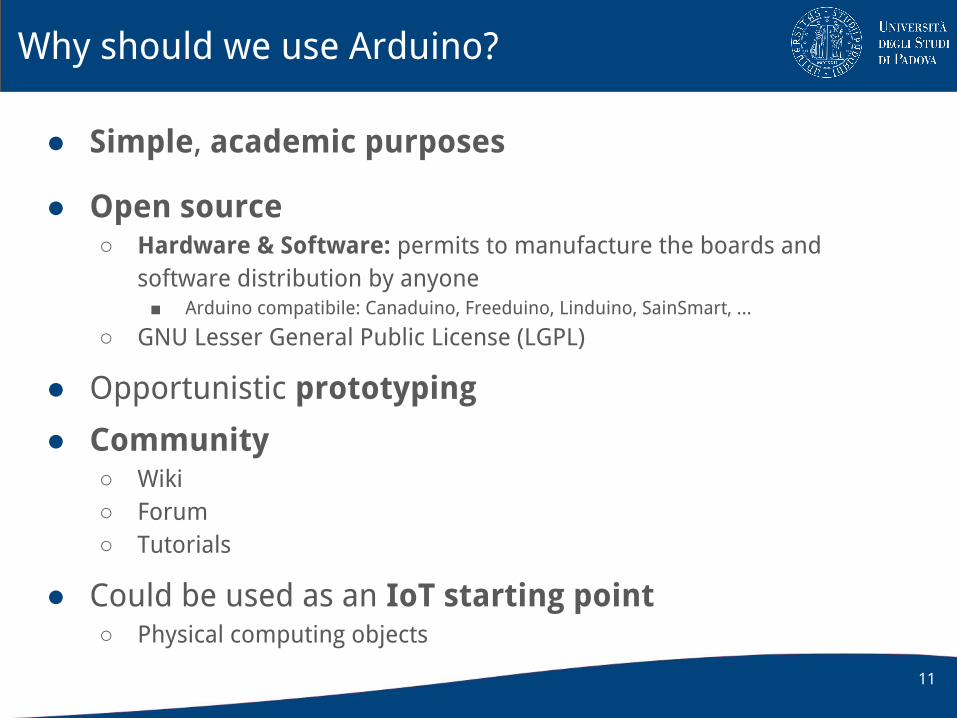
Other Examples
22

Arduino Architecture and Components
23

24
General Architecture
Main components
● AVR Microcontroller● Analog and digital I/O pins● Flash memory
○ Integrated in the microcontroller
● USB port for serial communication
ATmega328
USB
DC power jack

25
Components: mandatory
USB connector
Wires Prototyping board (breadboard)
Resistors and leds

Components: I/O devices
26

Components: communication devices
Wired and Wireless comm. devices
27
Bluetooth
Zig-Bee
Ethernet
WiFi
Infrared
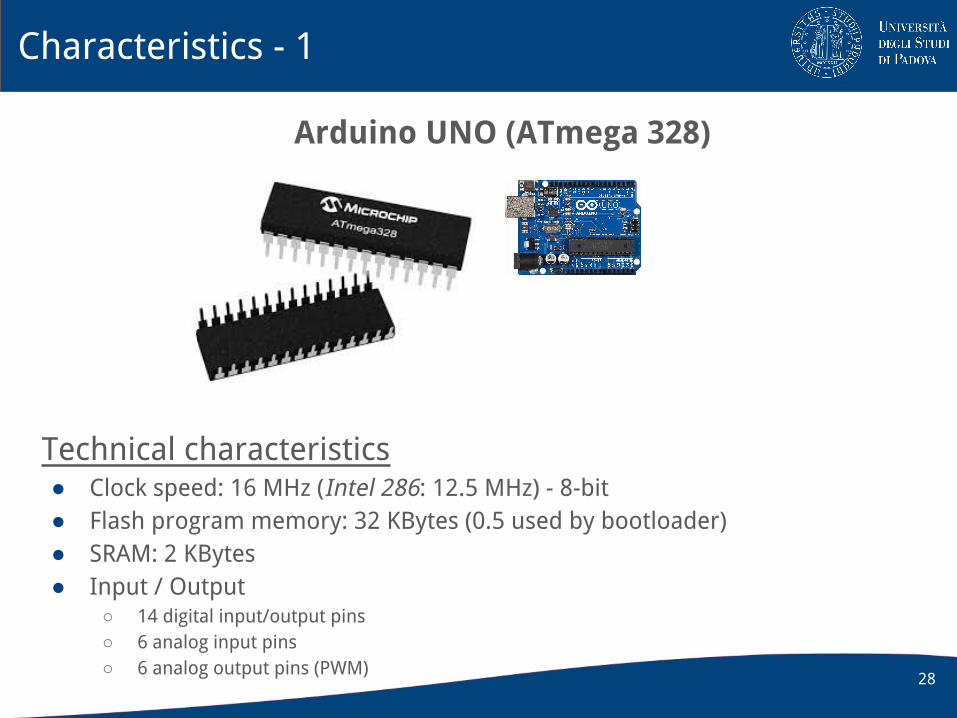
Characteristics - 1
Arduino UNO (ATmega 328)
Technical characteristics● Clock speed: 16 MHz (Intel 286: 12.5 MHz) - 8-bit● Flash program memory: 32 KBytes (0.5 used by bootloader)● SRAM: 2 KBytes● Input / Output
○ 14 digital input/output pins○ 6 analog input pins○ 6 analog output pins (PWM)
28

Characteristics - 2
Layout of Arduino UNO
1. Analog Reference pin2. Digital Ground3. Digital pins 2-134. Digital pins 0-1/Seral In/Out5. Reset Button6. In-circuit Serial Programmer7. Analog In pins 0-58. Power and Ground pins9. External Power Supply In
10. USB port
29
1 2 3 4
5 6
78
9
10

Digital and Analog pins
● Digital pins have only two values on/off (0/1)○ Arduino UNO has 14 digital I/O pins○ To connect devices that read/produce digital values (switch, leds, ...)
● Analog pins use many states using quantization○ Arduino UNO has 6 input analog pins○ To read analog sensors (temperature, pressure, ... )○ An A/D converter of 10 bit returns integers from 0 to 1023
30

Digital and Analog pins
● Analog output pins use PWM technique○ Arduino UNO has 6 digital pins used as PWM (~)○ The signal is affected on the input pulse duration
31

Programming in Arduino
32
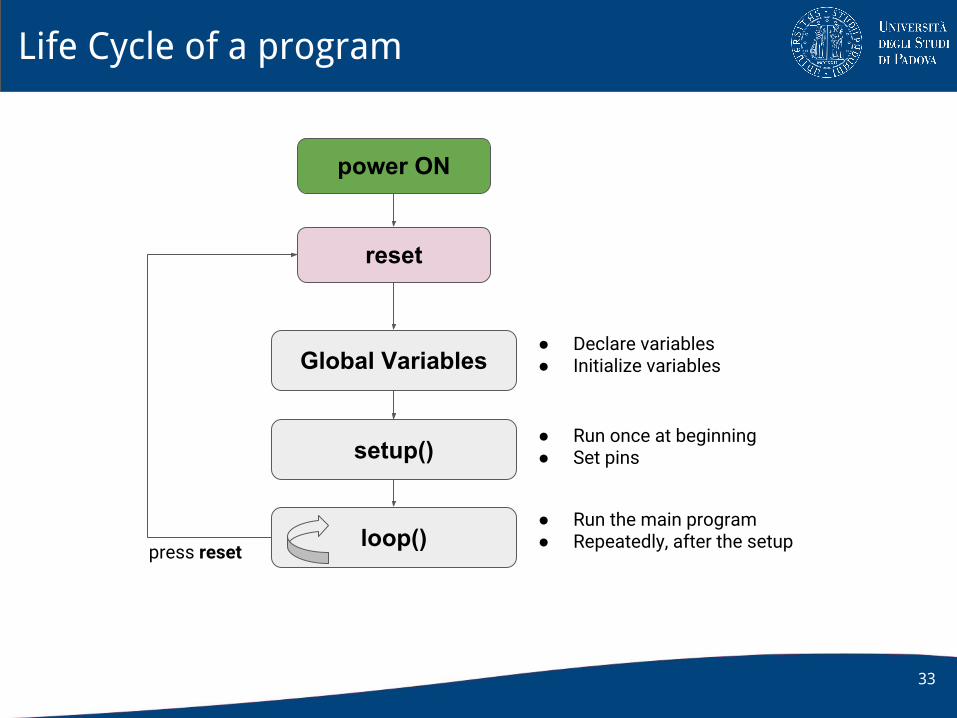
Life Cycle of a program
33
power ON
setup()
loop()
reset
press reset
● Run once at beginning● Set pins
● Run the main program● Repeatedly, after the setup
Global Variables● Declare variables● Initialize variables

Arduino IDE software
● Source code of IDE and library are distributed under the free GNU GPLv2 license
34
● Friendly Multi Platform application written in Java
● Allows you to write programs and upload them to your Arduino board
● Derived by "Processing" IDE○ Initially developed in 2003 to simplifies
electronic projects
● Very simple for novice programmers○ Simple programming language○ Bootloader

Arduino IDE software
● Text editor containing syntax highlighting and automatic indentation
● Toolbar● Text Console● Compiler● Serial monitor to debug
○ Allows you to read the data that Arduino communicates through the COM serial port
35
Sketch filled with the two basic Arduino functions: the setup() and loop().

Online IDE - Web Editor
36

Wiring-based Language
● Open Source computer programming language
● Derived by C/C++ language○ With some slight simplifications and modifications
○ Includes classical libraries and functions■ Data types (Integer, float, long, character, ...)■ Operators (Mathematical, logical, comparison, ...)■ Control statements (If, switch/case, while, for, ...)
● Offer to the programmer simple access to I/O devices
● Wiring programs are called sketch
37

Some functions
38
setup()
loop()
● pinMode(pin, Input|Output) set pin ledPin as an input or output
● Serial.begin(9600) talk to the computer at 9600 baud rate
○ Some values: 300, 600, 1200, 2400, 4800, 9600, 14400, 19200, 28800, 38400, 57600, or 115200
● Serial.print(" ... ") write text on Serial Monitor
● digitalWrite(pin, HIGH|LOW) set a digital pin high/low
● digitalRead(pin) read a digital pin's state
● analogRead(pin) read an a analog pin
● analogWrite(pin, intValue) write an "analog" PWM value
● delay(milliseconds) wait an amount of time

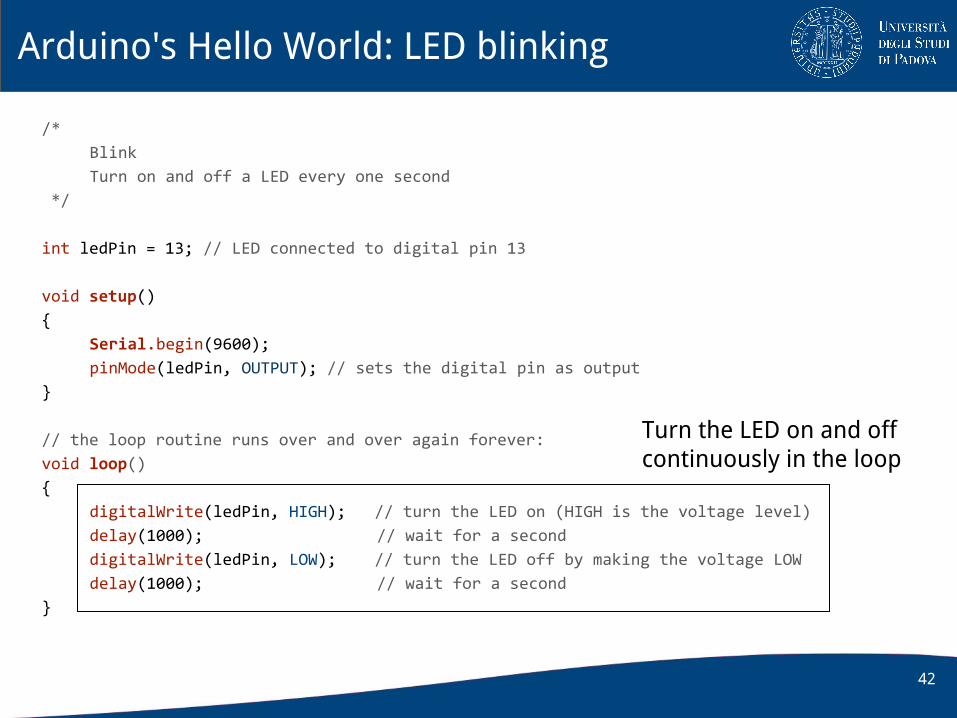
Arduino's Hello World: LED blinking
/*
Blink
Turn on and off a LED every one second
*/
int ledPin = 13; // LED connected to digital pin 13
void setup()
{
Serial.begin(9600);
pinMode(ledPin, OUTPUT); // sets the digital pin as output
}
// the loop routine runs over and over again forever:
void loop()
{
digitalWrite(ledPin, HIGH); // turn the LED on (HIGH is the voltage level)
delay(1000); // wait for a second
digitalWrite(ledPin, LOW); // turn the LED off by making the voltage LOW
delay(1000); // wait for a second
}
39

Arduino's Hello World: LED blinking
/*
Blink
Turn on and off a LED every one second
*/
int ledPin = 13; // LED connected to digital pin 13
void setup()
{
Serial.begin(9600);
pinMode(ledPin, OUTPUT); // sets the digital pin as output
}
// the loop routine runs over and over again forever:
void loop()
{
digitalWrite(ledPin, HIGH); // turn the LED on (HIGH is the voltage level)
delay(1000); // wait for a second
digitalWrite(ledPin, LOW); // turn the LED off by making the voltage LOW
delay(1000); // wait for a second
}
40
Initialise the variable with the pin number

Arduino's Hello World: LED blinking
/*
Blink
Turn on and off a LED every one second
*/
int ledPin = 13; // LED connected to digital pin 13
void setup()
{
Serial.begin(9600);
pinMode(ledPin, OUTPUT); // sets the digital pin as output
}
// the loop routine runs over and over again forever:
void loop()
{
digitalWrite(ledPin, HIGH); // turn the LED on (HIGH is the voltage level)
delay(1000); // wait for a second
digitalWrite(ledPin, LOW); // turn the LED off by making the voltage LOW
delay(1000); // wait for a second
}
41
Setup the serial connections and LED
Arduino's Hello World: LED blinking
/*
Blink
Turn on and off a LED every one second
*/
int ledPin = 13; // LED connected to digital pin 13
void setup()
{
Serial.begin(9600);
pinMode(ledPin, OUTPUT); // sets the digital pin as output
}
// the loop routine runs over and over again forever:
void loop()
{
digitalWrite(ledPin, HIGH); // turn the LED on (HIGH is the voltage level)
delay(1000); // wait for a second
digitalWrite(ledPin, LOW); // turn the LED off by making the voltage LOW
delay(1000); // wait for a second
}
42
Turn the LED on and off continuously in the loop

LED and Servo control via Android Application
43