Embed Size (px)
Citation preview
WARNING: TO OWNERS OF PROJECTION TELEVISIONS
Still pictures or images may cause permanent picture-tube damage or mark the phosphorof the CRT. Avoid repeated or extended use of video games on large-screen projectiontelevisions.
EPILEPSY WARNING
Please Read Before Using This Game Or Allowing Your Children To Use It.
Some people are susceptible to epileptic seizures or loss of consciousness whenexposed to certain flashing lights or light patterns in everyday life. Such people may have a seizure while watching television images or playing certainvideo games. This may happen even if the person has no medical history of epilepsy orhas never had any epileptic seizures.If you or anyone in your family has ever had symptoms related to epilepsy (seizures orloss of consciousness) when exposed to flashing lights, consult your doctor prior toplaying.We advise that parents should monitor the use of video games by their children. If you oryour child experience any of the following symptoms: dizziness, blurred vision, eye ormuscle twitches, loss of consciousness, disorientation, any involuntary movement orconvulsion, while playing a video game, IMMEDIATELY discontinue use and consult yourdoctor.
PRECAUTIONS TO TAKE DURING USE
• Do not stand too close to the screen. Sit a good distance away from the screen,as far away as the length of the cable allows.
• Preferably play the game on a small screen.
• Avoid playing if you are tired or have not had much sleep.
• Make sure that the room in which you are playing is well lit.
• Rest for at least 10 to 15 minutes per hour while playing a video game.
1
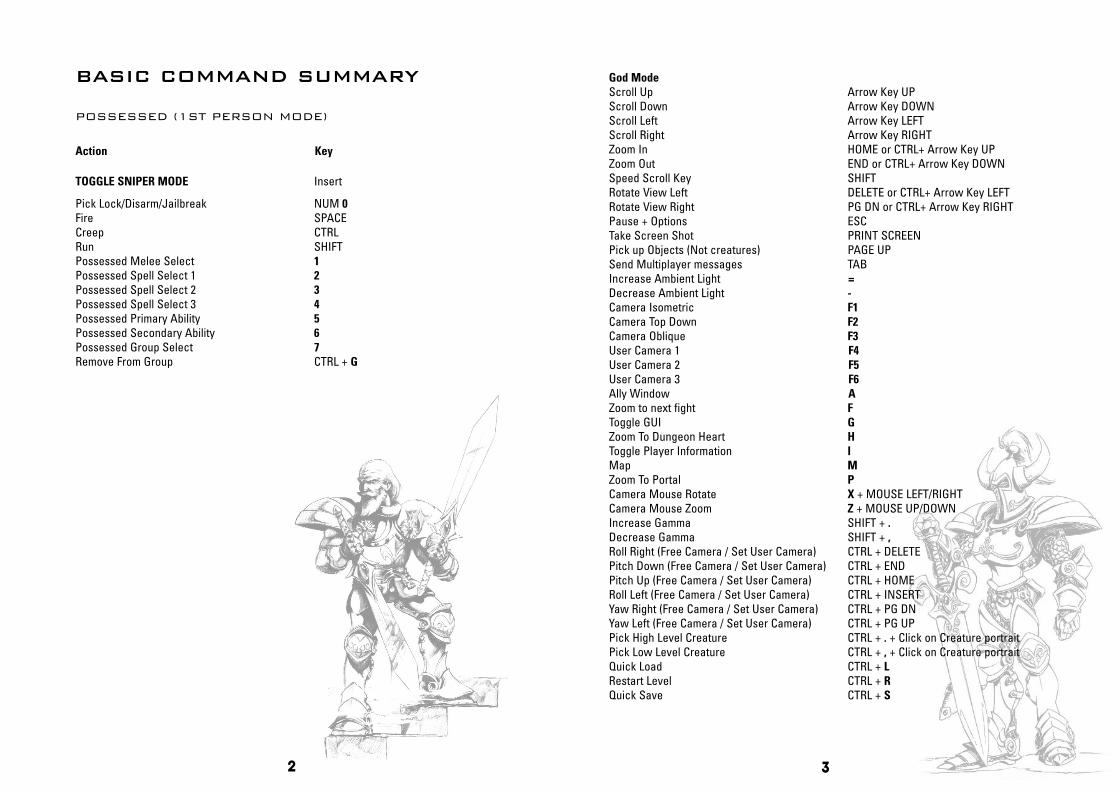
God ModeScroll Up Arrow Key UPScroll Down Arrow Key DOWNScroll Left Arrow Key LEFTScroll Right Arrow Key RIGHTZoom In HOME or CTRL+ Arrow Key UPZoom Out END or CTRL+ Arrow Key DOWNSpeed Scroll Key SHIFTRotate View Left DELETE or CTRL+ Arrow Key LEFTRotate View Right PG DN or CTRL+ Arrow Key RIGHTPause + Options ESCTake Screen Shot PRINT SCREENPick up Objects (Not creatures) PAGE UPSend Multiplayer messages TABIncrease Ambient Light =Decrease Ambient Light -Camera Isometric F1Camera Top Down F2Camera Oblique F3User Camera 1 F4User Camera 2 F5User Camera 3 F6Ally Window AZoom to next fight FToggle GUI GZoom To Dungeon Heart HToggle Player Information IMap MZoom To Portal PCamera Mouse Rotate X + MOUSE LEFT/RIGHTCamera Mouse Zoom Z + MOUSE UP/DOWNIncrease Gamma SHIFT + .Decrease Gamma SHIFT + ,Roll Right (Free Camera / Set User Camera) CTRL + DELETEPitch Down (Free Camera / Set User Camera) CTRL + ENDPitch Up (Free Camera / Set User Camera) CTRL + HOMERoll Left (Free Camera / Set User Camera) CTRL + INSERTYaw Right (Free Camera / Set User Camera) CTRL + PG DNYaw Left (Free Camera / Set User Camera) CTRL + PG UPPick High Level Creature CTRL + . + Click on Creature portraitPick Low Level Creature CTRL + , + Click on Creature portraitQuick Load CTRL + LRestart Level CTRL + RQuick Save CTRL + S
BASIC COMMAND SUMMARY
POSSESSED (1ST PERSON MODE)
Action Key
TOGGLE SNIPER MODE Insert
Pick Lock/Disarm/Jailbreak NUM 0Fire SPACECreep CTRLRun SHIFTPossessed Melee Select 1Possessed Spell Select 1 2Possessed Spell Select 2 3Possessed Spell Select 3 4Possessed Primary Ability 5Possessed Secondary Ability 6Possessed Group Select 7Remove From Group CTRL + G
2 3
6.1.7.2 To move the Dungeon
View to a specific place ................28
6.1.7.3 Query Toggle ..................28
6.1.7.4 Sell Toggle ......................28
6.1.7.5 Options ............................28
6.1.7.6 Zoom In/Out ....................28
6.1.8 The Map Screen . . . . . . . . .29
6.1.8.1 Opening the Map Screen ..29
6.1.8.2 Closing the Map Screen ..29
6.1.9 Horny Talisman ......................29
7.0 Terrain Types ..................307.1 Unmined Earth ............................30
7.2 Water ..........................................30
7.3 Lava ............................................30
7.4 Reinforced Wall ........................30
7.5 Impenetrable Rock ......................31
7.6 Gold ..........................................31
7.6.1 Where it comes from ..............31
7.6.1.1 Mining ..............................31
7.6.1.2 Selling ............................31
7.6.1.3 Stealing ..........................31
7.6.1.4 Hero Bounty ....................31
7.6.2 Where it goes ........................32
7.6.2.1 Buying stuff ....................32
7.6.2.2 Payday ..............................32
7.6.2.3 Treats ..............................32
7.6.2.4 Casino ..............................32
7.7 Gems ..........................................32
7.8 Mana Vaults ................................33
7.9 Hero Gate ..................................33
7.10 Dirt Path ..................................33
7.11 Claimed Path ............................33
8.0 Rooms ..............................348.0.1 Attractive Rooms ................34
8.0.2 Room-Specific Jobs ..............34
8.0.3 Selling Rooms ....................34
8.0.4 Minimum Recommended Size ..35
8.1 Room Types ................................35
8.1.1 Dungeon Heart ......................35
8.1.2 Treasury ................................36
8.1.3 Lair . . . . . . . . . . . . . . . . . .36
8.1.3.1 To re-locate a creature ..36
8.1.3.2 Rest and Recuperation ....37
8.1.4 Hatchery ..............................37
8.1.4.1 Feeding Incarcerated
Creatures ....................................37
8.1.5 Training Room ........................37
8.1.5.1 Watch Creature Flowers ..38
8.1.6 Combat Pit ............................38
8.1.6.1 Why Use a Combat Pit? ....38
8.1.6.2 Mano-a-Mano ....................38
8.1.6.3 Group Battles ................38
8.1.7 Temple ..................................39
8.1.7.1 Sacrifices for the Gods ..39
8.1.8 Workshop ..............................39
8.1.8.1 To Place a Door or Trap ..40
8.1.9 Casino ..................................40
8.1.9.1 Mob Handed Keepers
take note ......................................40
8.1.10 Graveyard . . . . . . . . . . . .41
8.1.11 Portal ................................41
8.1.12 Torture Chamber ................42
8.1.12.1 Extend the Agony ..........42
8.1.13 Prison ................................42
8.1.13.1 Prolong the life
of your prisoners ........................42
8.1.13.2 Jailbreak! ......................42
8.1.14 Library ................................43
8.1.15 Guard Room ........................43
8.1.17 Stone Bridge ......................44
9.0 Creatures ........................449.1 Creature Types ............................44
9.1.1 Imp ........................................44
9.1.1.1 Imp Experience ....................44
9.1.2 Goblin ..................................45
9.1.3 Warlock ................................45
9.1.4 Firefly ..................................46
9.1.5 Troll ....................................46
9.1.6 Dark Elf ................................47
9.1.7 Skeleton ..............................47
9.1.8 Mistress ................................48
9.1.9 Salamander ..........................48
9.1.10 Rogue ..................................49
9.1.11 Bile Demon ..........................49
9.1.12 Vampire ................................50
9.1.14 Dark Angel ..........................51
10.0 Mana and Keeper Spells 5210.1 Mana ........................................52
10.1.1 How Mana is Generated ......52
10.1.1.1 Claimed Territory ..........52
10.1.1.2 Temple Prayer ................52
10.1.1.3 Mana Vaults ..................52
10.1.1.4 Increase Mana Special ..53
10.1.2 How Mana is Used ..............53
10.1.2.1 Sustaining Imps ..............53
10.1.2.2 Sustaining Horny ..........53
10.1.2.3 Casting Spells ..............53
10.1.2.4 Traps ............................53
10.2 Keeper Spells ..........................54
10.2.1 To cast a Keeper Spell ........54
CONTENTS 11.0 INTRODUCTION................8
2.0 INSTALLING THE GAME ..9
3.0 KEEPING A DUNGEON – A SHORT OVERVIEW ..............9
3.1 The Dungeon View ..........................9
3.2 The Dungeon Heart ....................10
3.3 Mana ..........................................10
3.4 Gold ..........................................11
3.5 Imps ............................................11
3.6 Dig for Victory ............................12
3.7 The Hand of Evil™ ......................12
3.7.1 Normal ..................................12
3.7.1.1 Picking up and
dropping objects ..........................12
3.7.1.2 Slapping Creatures ..........12
3.7.2 Hand of Digging ....................13
3.7.2.1 To tag an area
for digging ..................................13
3.7.2.2 To undo a
highlighted area ..........................13
3.7.3 Selected Hand ......................13
3.7.3.1 To action your selection ..13
3.7.3.2 To cancel your selection 13
4.0 Mini Tutorial . . . . . . . . .144.1 Digging ................................14
4.1.1 To dig a tile of
Unmined Rock ..............................14
4.1.2 Claiming newly mined areas 15
4.1.3 Reinforcing Walls ..............15
4.1.4 Mining Gold ........................15
4.2 Building rooms. ........................16
4.2.1 Lairs ..................................16
4.2.2 Hatcheries ..........................16
4.2.3 Portals ..............................16
4.3 Creatures ..............................16
4.4 Fight ........................................17
5.0 Care for Your Creatures! 175.1 Micro Management ......................17
5.1.1Slapping Creatures ................17
5.1.2 Dropping Creatures ..............17
5.1.2.1 Dazed and Confused ........17
5.1.2.2 On the Job ......................17
5.2 Creature Moods ..........................18
5.2.1 Happy ....................................18
5.2.2 Unhappy ................................18
5.2.3 Angry ....................................18
5.3 Factors Affecting Creature Mood 18
5.3.1 Creature Dislikes ....................18
5.3.1.1 No Lair ............................18
5.3.1.2 No Food ..........................19
5.3.1.3 No Pay ............................19
5.3.1.4 Out of Work ....................19
5.3.1.5 Held in the Hand ............19
5.3.1.6 Slapping ..........................19
5.3.1.7
Lairing with a Hated Creature ......19
5.3.1.8 Imprisoning or Torture ....19
5.3.2 Creature Comforts ................20
5.3.2.1 Using the Casino ..............20
5.3.2.2 Using the Temple ..............20
5.3.2.3 Treats ..............................20
6.0 Game Controls ................206.1 Control Panel ............................20
6.1.1 Panel Bar ..............................21
6.1.1.2 Creature Icon ..................21
6.1.1.3 Rooms Icon ......................21
6.1.1.4 Spells Icon ......................21
6.1.1.5 Workshop Icon ................21
6.1.1.6 Hide/Reveal Panel Toggle 21
6.1.1.7 Objective Tab ..................21
6.1.1.8 Message Tabs ..................21
6.1.1.9 Message Windows ............22
6.1.1.10 Battle Tab ......................22
6.1.2 Creatures Panel ....................22
6.1.2.1 To select Creatures
from the Creature Panel ..............22
6.1.2.2 To drop creatures ............23
6.1.2.3 Total No. Of
Each Creature Type ......................23
6.1.2.4 Jobs ................................23
6.1.2.5 Fighting ............................24
6.1.2.6 Moods ............................24
6.1.3 Imps Panel ............................24
6.1.4 Rooms Panel ..........................25
6.1.5 Spells Panel ......................26
6.1.5.1 Spell-specific
Information ..................................26
6.1.6 Workshop Panel ....................26
6.1.6.1 To Construct and
Install a Door or Trap ................27
6.1.6.2 The Blueprint ..................27
6.1.6.3 To Cancel An Order ........27
6.1.6.4 Work In Progress ............27
6.1.7 Dynamic Panel Map ................27
6.1.7.1 Colour Codes within the
Dynamic Panel Map/Map Screen ....28
4 5
16.0 Options ..........................7416.1 Front-End Options ....................74
16.1.1 Single Player Game ................74
16.1.1.1 New Campaign ................74
16.1.1.2 Continue Campaign ........74
16.1.1.3 Skirmish ........................75
16.1.2 Multiplayer Game ................75
16.1.3 My Pet Dungeon ..................75
16.1.4 Options ..............................76
16.1.4.1 Graphics Options ..........76
16.1.4.2 Sound Options ..............76
16.1.4.3 Control Options ............76
16.1.5 Extras ................................76
16.1.5 Quit ....................................77
16.2 In-Game Options ........................77
16.2.1 level Objective ....................77
16.2.2 Game Options ......................77
16.2.2.1 Graphic Options ............77
16.2.2.2 Sound Options ..............77
16.2.2.3 Control Options ............78
16.2.2.4 Define User Cameras ....78
16.2.3 Load ................................78
16.2.4 Save ......................................78
16.2.5 End Game ............................78
16.2.6 Restart Level ......................78
17.0 Other Modes Of Play ....79
18.0 My Pet Dungeon ............7918.1 My Pet Dungeon Control Panel 79
18.1.1 Trigger Single
Hero Invasion ................................79
18.1.2 Trigger Continual
Hero Invasion ................................79
18.1.3 Hero Enemy Toolbox ............79
18.1.3.1 Hero Level selector ....80
18.2 My Pet Dungeon Realms ............80
19.0 Multiplayer ....................8019.1 Creating a Game ........................80
19.1.1 IPX ......................................80
19.1.2 Winsock TCP/IP ....................80
19.1.2.1 Ping Time ........................81
19.2 Starting a Game ........................81
19.2.1 Game Settings ....................81
19.2.2 Change Map ........................81
19.2.3 FOG OF WAR tm
(Found in Game Settings) ..................82
19.2.4 Start ..................................82
20.0 Skirmish ........................8320.1 Game Settings ..........................83
20.1.1 Creatures ............................83
20.1.2 Rooms, Spells,
Traps and Doors ............................83
20.1.2.1 No ................................83
20.1.2.2 Start ............................83
20.1.2.3 Research ......................83
20.1.2.4 Dungeon Heart
Destroyed ....................................83
20.1.2.5 Game Duration ..............83
20.1.2.7 Max creatures ..............84
20.1.2.8 Gold Density ................84
20.1.2.9 Mana Regeneration ........84
20.1.2.10 Game Speed ................84
Credits ..................................85Notice ..............................87
10.2.2 Create Imp ..........................55
10.2.3 Thunderbolt ........................55
10.2.4 Possession ..........................55
10.2.5 Heal ....................................55
10.2.6 Sight of Evil ........................55
10.2.7 Call to Arms ......................55
10.2.8 Tremor ................................55
10.2.9 Turncoat ............................56
10.2.10 Summon Horny ..................56
10.2.11 Create Gold ......................56
10.2.12 Inferno ............................56
10.2.13 Chicken ............................56
11.0 Traps and Doors ..........5711.1 Traps ........................................57
11.1.1 Trap Charging ....................57
11.1.3 Mana Cost ..........................57
11.2 Trap Types ................................58
11.2.1 Sentry ................................58
11.2.2 Fear ....................................58
11.2.3 Alarm ..................................58
11.2.4 Gas ....................................58
11.2.5 Guard Post ........................58
11.2.6 Spike ..................................59
11.2.8 Boulder ..............................59
11.2.10 Lightning ..........................60
11.2.11 Fireburst ..........................60
11.3 Doors ......................................60
11.3.1 Locking and
Unlocking Doors ............................60
11.3.1.1 To lock/unlock a door ..61
11.4 Door Types ..............................61
11.4.1 Wooden ..............................61
11.4.2 Braced ................................61
11.4.3 Steel ..................................61
11.4.4 Magic ..................................61
11.4.5 Secret ................................62
11.4.6 Barricade ............................62
12.0 Creature Spells ............6212.1 Spells ......................................62
12.1.1 Fireball ..............................62
12.1.2 Firebomb ..............................62
12.1.3 Freeze ................................62
12.1.4 Lightning ............................63
12.1.5 Gas Cloud ..........................63
12.1.6 Gas Missile ..........................63
12.1.7 Guided Bolt ........................63
12.1.8 Slow ..................................63
12.1.9 Grenade ..............................63
12.1.10 Drain ................................63
12.1.11 Hail Storm ........................64
12.1.12 Arrow ................................64
12.1.13 Whirlwind ..........................64
12.1.14 Haste Creature ................64
12.1.15 Heal Creature ..................64
12.1.16 Armour ..............................64
12.1.17 Invisible ............................64
12.1.18 Knives ..............................65
12.1.19 Raise Dead ........................65
12.1.20 Skeleton Army ..................65
12.1.21 Haste Self ........................65
12.1.22 Disruption ........................65
12.1.23 Spit ..................................65
12.1.24 Teleport ............................65
13.0 Combat ..........................6613.1 Fight! ........................................66
13.2 Enemy Health ............................66
13.3 Fear and Threat ........................66
13.3.1 Fear ....................................67
13.3.2 Threat ................................67
13.4 Tactical Battle ..........................67
13.5 Fighter Types ............................67
13.5.1 Blocker ..............................67
13.5.3 Flanker ..............................68
13.5.4 Support ..............................68
14.0 Advanced Strategiesand Tactics ............................68
14.1 General ..................................68
14.2 Rooms ....................................68
14.3 Traps ......................................69
14.4 Combat ..................................69
14.5 Spells ....................................70
15.0 Possession ....................7015.1.1 Why Possess A Creature? ....71
15.2 First Person Controls ..............71
15.2.1 Exiting A Possessed
Creature ........................................71
15.3 Controlling Other
Creatures in 1st Person ................71
15.3.1 Forming a group ..................72
15.4 Special Creature Abilities ........72
15.4.1 Bile Demon ........................72
15.4.2 Dark Elf ..............................72
15.4.3 Vampire ................................72
15.4.4 Fairy ....................................73
15.4.5 Rogue ..................................73
15.4.6 Giant ..................................73
15.4.7 Elven Archer ......................73
15.4.8 Thief ....................................73
15.4.9 Monk ..................................73
6 7
11..00 22..00 -- 33..00
2.0 INSTALLING THE GAME
See the enclosed Reference Card.
3.0 KEEPING A DUNGEON –
A SHORT OVERVIEW
Important Note: In this manual where the term Click is used, it means click the LeftMouse Button. Any Right Mouse Button clicks are denoted Right-click.
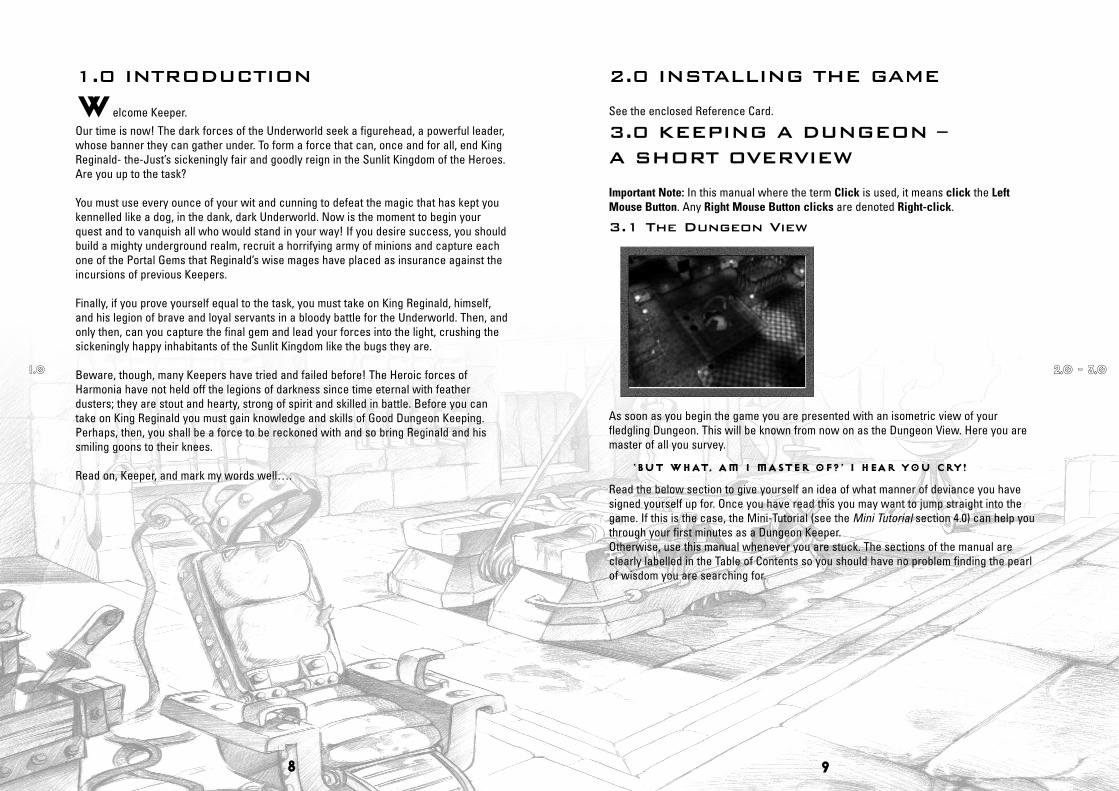
3.1 The Dungeon View
As soon as you begin the game you are presented with an isometric view of yourfledgling Dungeon. This will be known from now on as the Dungeon View. Here you aremaster of all you survey.
‘BUT WHAT, AM I MASTER OF?’ I HEAR YOU CRY!
Read the below section to give yourself an idea of what manner of deviance you havesigned yourself up for. Once you have read this you may want to jump straight into thegame. If this is the case, the Mini-Tutorial (see the Mini Tutorial section 4.0) can help youthrough your first minutes as a Dungeon Keeper.Otherwise, use this manual whenever you are stuck. The sections of the manual areclearly labelled in the Table of Contents so you should have no problem finding the pearlof wisdom you are searching for.
1.0 INTRODUCTION
Welcome Keeper. Our time is now! The dark forces of the Underworld seek a figurehead, a powerful leader,whose banner they can gather under. To form a force that can, once and for all, end KingReginald- the-Just’s sickeningly fair and goodly reign in the Sunlit Kingdom of the Heroes.Are you up to the task?
You must use every ounce of your wit and cunning to defeat the magic that has kept youkennelled like a dog, in the dank, dark Underworld. Now is the moment to begin yourquest and to vanquish all who would stand in your way! If you desire success, you shouldbuild a mighty underground realm, recruit a horrifying army of minions and capture eachone of the Portal Gems that Reginald’s wise mages have placed as insurance against theincursions of previous Keepers.
Finally, if you prove yourself equal to the task, you must take on King Reginald, himself,and his legion of brave and loyal servants in a bloody battle for the Underworld. Then, andonly then, can you capture the final gem and lead your forces into the light, crushing thesickeningly happy inhabitants of the Sunlit Kingdom like the bugs they are.
Beware, though, many Keepers have tried and failed before! The Heroic forces ofHarmonia have not held off the legions of darkness since time eternal with featherdusters; they are stout and hearty, strong of spirit and skilled in battle. Before you cantake on King Reginald you must gain knowledge and skills of Good Dungeon Keeping.Perhaps, then, you shall be a force to be reckoned with and so bring Reginald and hissmiling goons to their knees.
Read on, Keeper, and mark my words well….
8 9
3.4 Gold
The wheels of life may not stop turning inbeautiful Harmonia for lack of gold, but in thedepths of the Underworld, Gold talks andother creature deposits walk, so to speak.Without Gold all your plans are for nothing.Gold is a physical, tangible resource, the hardcurrency that pays for life’s materialconcerns.
The bricks and mortar of dungeon building do not spring from thin air, my inexperiencedapprentice! The wages of your evil minions are not paid with excavated soil, though somekeeper’s have tried! Without prompt payment your hellish recruits will soon up sticks and quit your pit ofdespair. Paid on time, they’ll stay focussed and content. Without gold, the construction ofrooms, traps and doors is impossible. So, ensuring that you have adequate amounts of thestuff should be a primary concern as you start on your path to domination of theUnderworld and elsewhere!
Gold must be mined from the sparkling deposits that lie throughout the Underworld. Tomine it you must enlist the help of some small, cute, magical creatures – Imps!
3.5 Imps
Imps are wonderful, magical creatures, brought into being solely to do their evilmaster’s bidding. They are the builders, tunnellers and wealth gatherers ofyour domain. They are so stiflingly obedient; you may find yourselfslapping ten shades of Imp dung out of them, just for fun! But don’t getcarried away as they are essential for the smooth running of yourDungeon.
A firm hand and clever management of your Imps willreap you dividends as you expand into the dank earthsurrounding your Dungeon Heart.
3.2 The Dungeon Heart
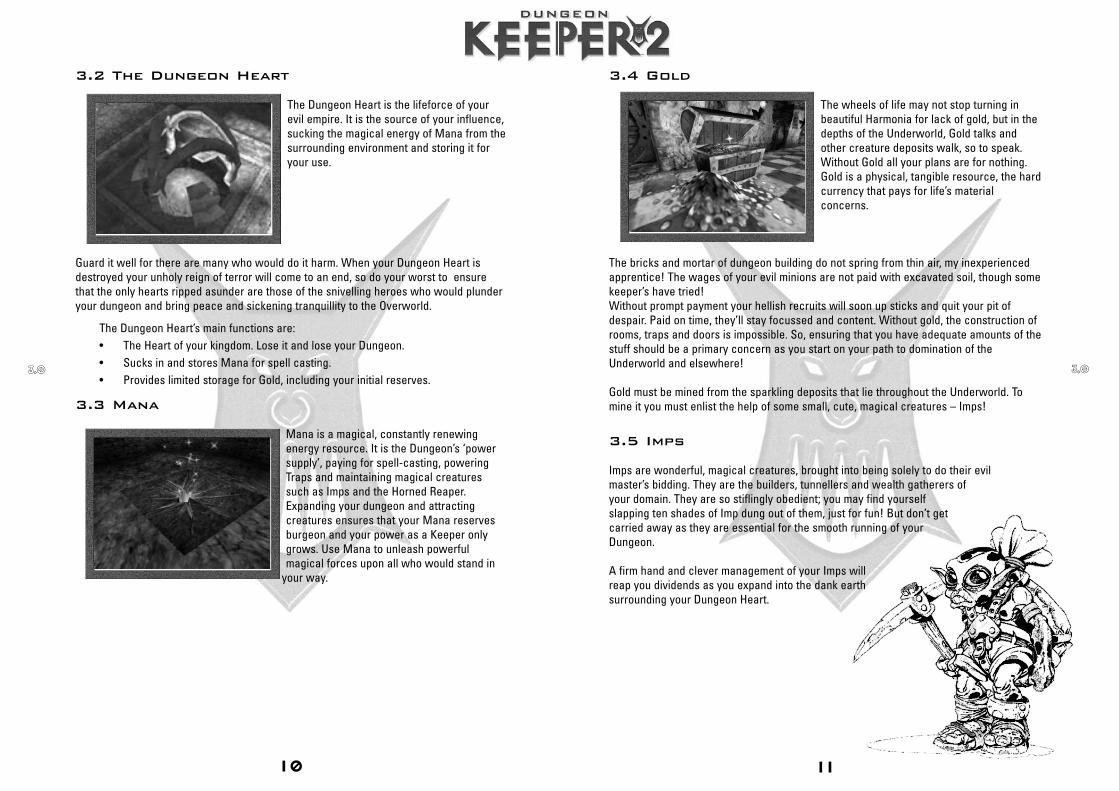
The Dungeon Heart is the lifeforce of yourevil empire. It is the source of your influence,sucking the magical energy of Mana from thesurrounding environment and storing it foryour use.
Guard it well for there are many who would do it harm. When your Dungeon Heart isdestroyed your unholy reign of terror will come to an end, so do your worst to ensurethat the only hearts ripped asunder are those of the snivelling heroes who would plunderyour dungeon and bring peace and sickening tranquillity to the Overworld.
The Dungeon Heart’s main functions are:• The Heart of your kingdom. Lose it and lose your Dungeon.• Sucks in and stores Mana for spell casting.• Provides limited storage for Gold, including your initial reserves.
3.3 Mana
Mana is a magical, constantly renewingenergy resource. It is the Dungeon’s ‘powersupply’, paying for spell-casting, poweringTraps and maintaining magical creaturessuch as Imps and the Horned Reaper.Expanding your dungeon and attractingcreatures ensures that your Mana reservesburgeon and your power as a Keeper onlygrows. Use Mana to unleash powerfulmagical forces upon all who would stand in
your way.
10
33..00 33..00
11
3.7.2 HAND OF DIGGING
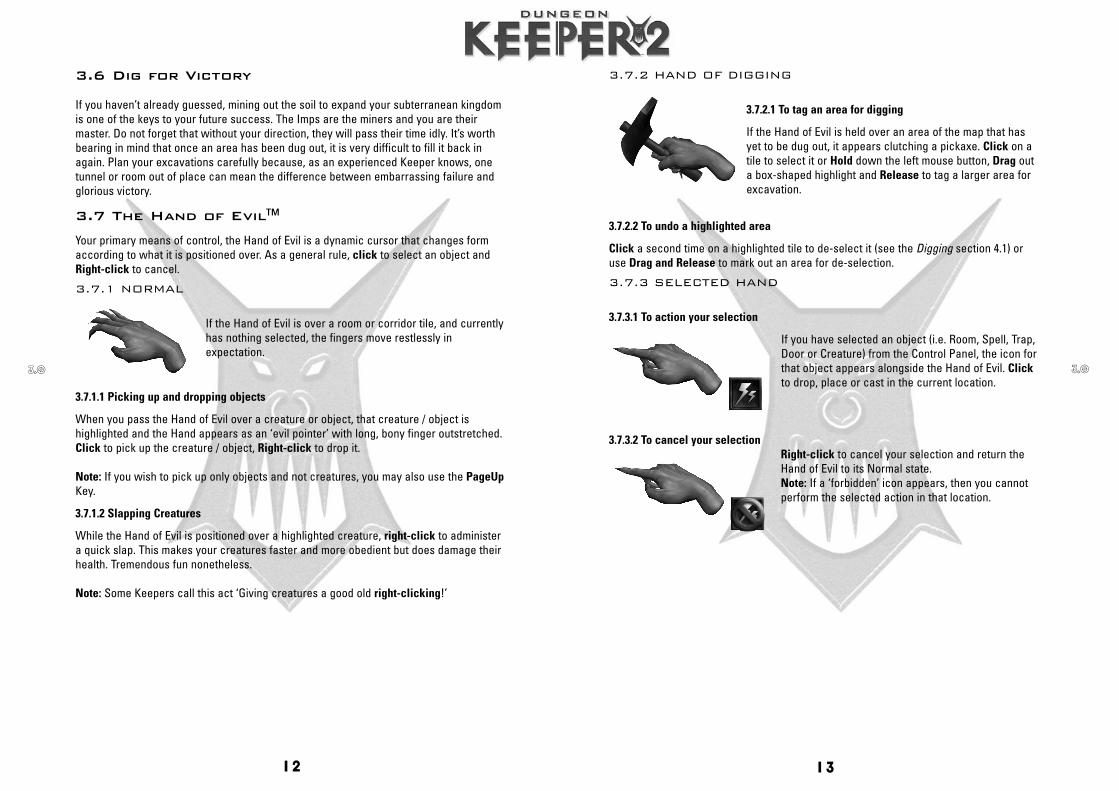
3.7.2.1 To tag an area for digging
If the Hand of Evil is held over an area of the map that hasyet to be dug out, it appears clutching a pickaxe. Click on atile to select it or Hold down the left mouse button, Drag outa box-shaped highlight and Release to tag a larger area forexcavation.
3.7.2.2 To undo a highlighted area
Click a second time on a highlighted tile to de-select it (see the Digging section 4.1) oruse Drag and Release to mark out an area for de-selection.
3.7.3 SELECTED HAND
3.7.3.1 To action your selection
If you have selected an object (i.e. Room, Spell, Trap,Door or Creature) from the Control Panel, the icon forthat object appears alongside the Hand of Evil. Clickto drop, place or cast in the current location.
3.7.3.2 To cancel your selectionRight-click to cancel your selection and return theHand of Evil to its Normal state.Note: If a ‘forbidden’ icon appears, then you cannotperform the selected action in that location.
3.6 Dig for Victory
If you haven’t already guessed, mining out the soil to expand your subterranean kingdomis one of the keys to your future success. The Imps are the miners and you are theirmaster. Do not forget that without your direction, they will pass their time idly. It’s worthbearing in mind that once an area has been dug out, it is very difficult to fill it back inagain. Plan your excavations carefully because, as an experienced Keeper knows, onetunnel or room out of place can mean the difference between embarrassing failure andglorious victory.
3.7 The Hand of Evil™Your primary means of control, the Hand of Evil is a dynamic cursor that changes formaccording to what it is positioned over. As a general rule, click to select an object andRight-click to cancel.
3.7.1 NORMAL
If the Hand of Evil is over a room or corridor tile, and currentlyhas nothing selected, the fingers move restlessly inexpectation.
3.7.1.1 Picking up and dropping objects
When you pass the Hand of Evil over a creature or object, that creature / object ishighlighted and the Hand appears as an ‘evil pointer’ with long, bony finger outstretched.Click to pick up the creature / object, Right-click to drop it.
Note: If you wish to pick up only objects and not creatures, you may also use the PageUpKey.
3.7.1.2 Slapping Creatures
While the Hand of Evil is positioned over a highlighted creature, right-click to administera quick slap. This makes your creatures faster and more obedient but does damage theirhealth. Tremendous fun nonetheless.
Note: Some Keepers call this act ‘Giving creatures a good old right-clicking!’
12 13
33..00 33..00
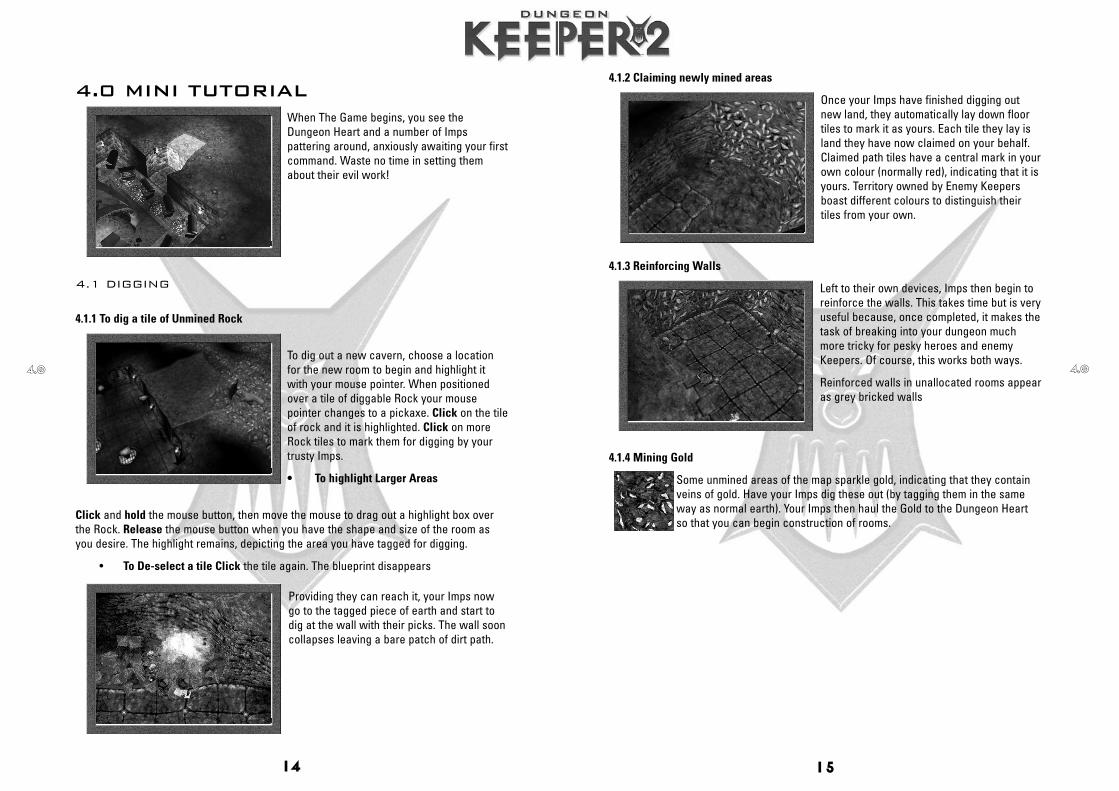
4.1.2 Claiming newly mined areas
Once your Imps have finished digging outnew land, they automatically lay down floortiles to mark it as yours. Each tile they lay island they have now claimed on your behalf.Claimed path tiles have a central mark in yourown colour (normally red), indicating that it isyours. Territory owned by Enemy Keepersboast different colours to distinguish theirtiles from your own.
4.1.3 Reinforcing Walls
Left to their own devices, Imps then begin toreinforce the walls. This takes time but is veryuseful because, once completed, it makes thetask of breaking into your dungeon muchmore tricky for pesky heroes and enemyKeepers. Of course, this works both ways.
Reinforced walls in unallocated rooms appearas grey bricked walls
4.1.4 Mining Gold
Some unmined areas of the map sparkle gold, indicating that they containveins of gold. Have your Imps dig these out (by tagging them in the sameway as normal earth). Your Imps then haul the Gold to the Dungeon Heartso that you can begin construction of rooms.
4.0 MINI TUTORIAL
When The Game begins, you see theDungeon Heart and a number of Impspattering around, anxiously awaiting your firstcommand. Waste no time in setting themabout their evil work!
4.1 DIGGING
4.1.1 To dig a tile of Unmined Rock
To dig out a new cavern, choose a locationfor the new room to begin and highlight itwith your mouse pointer. When positionedover a tile of diggable Rock your mousepointer changes to a pickaxe. Click on the tileof rock and it is highlighted. Click on moreRock tiles to mark them for digging by yourtrusty Imps.
• To highlight Larger Areas
Click and hold the mouse button, then move the mouse to drag out a highlight box overthe Rock. Release the mouse button when you have the shape and size of the room asyou desire. The highlight remains, depicting the area you have tagged for digging.
• To De-select a tile Click the tile again. The blueprint disappears
Providing they can reach it, your Imps nowgo to the tagged piece of earth and start todig at the wall with their picks. The wall sooncollapses leaving a bare patch of dirt path.
14 15
44..00 44..00
4.4 FIGHT
If any of your creatures detect an enemy presence within your dungeon, they generallyattack. Should you detect an enemy presence on your turf before any of your creaturesdo, you may wish to pick up some creatures (see the Hand of Evil section 3.7) and dropthem nearby to confront the invaders (But not too close! See Dazed and ConfusedSection, below).For more information on fighting, see the Combat section 14.4.
5.0 CARE FOR YOUR CREATURES!
5.1 Micro Management
5.1.1SLAPPING CREATURES
Right-click with the Hand of Evil to administer a quick slap to one of your creatures. Thisincreases creatures’ work rate and efficiency but, on the down side, also makes themunhappy (see the Creature Moods section 5.2).
5.1.2 DROPPING CREATURES
5.1.2.1 Dazed and Confused
Whenever you drop a creature anywhere in your dungeon (see the Hand of Evil section3.7), it lies stunned on the floor with stars circling its head. During the time it takes torecover, the creature is extremely vulnerable to attack and will take considerable extradamage. Bear this in mind if you’re thinking of dropping creatures directly into the middleof a melee.
Note: Some Creatures recover more quickly from being dropped than others (SeeAdvanced Strategies and Tactics Section 14.0 for more information)
5.1.2.2 On the Job
Drop idle minions into rooms such as Libraries and Workshops, to keep your creaturesoccupied and up the pace of work in progress. When doing so, however, be aware ofwhat work your creatures do and do not enjoy carrying out (see the Creatures section9.0). Fail to do so and you risk upsetting your minions.
4.2 BUILDING ROOMS.
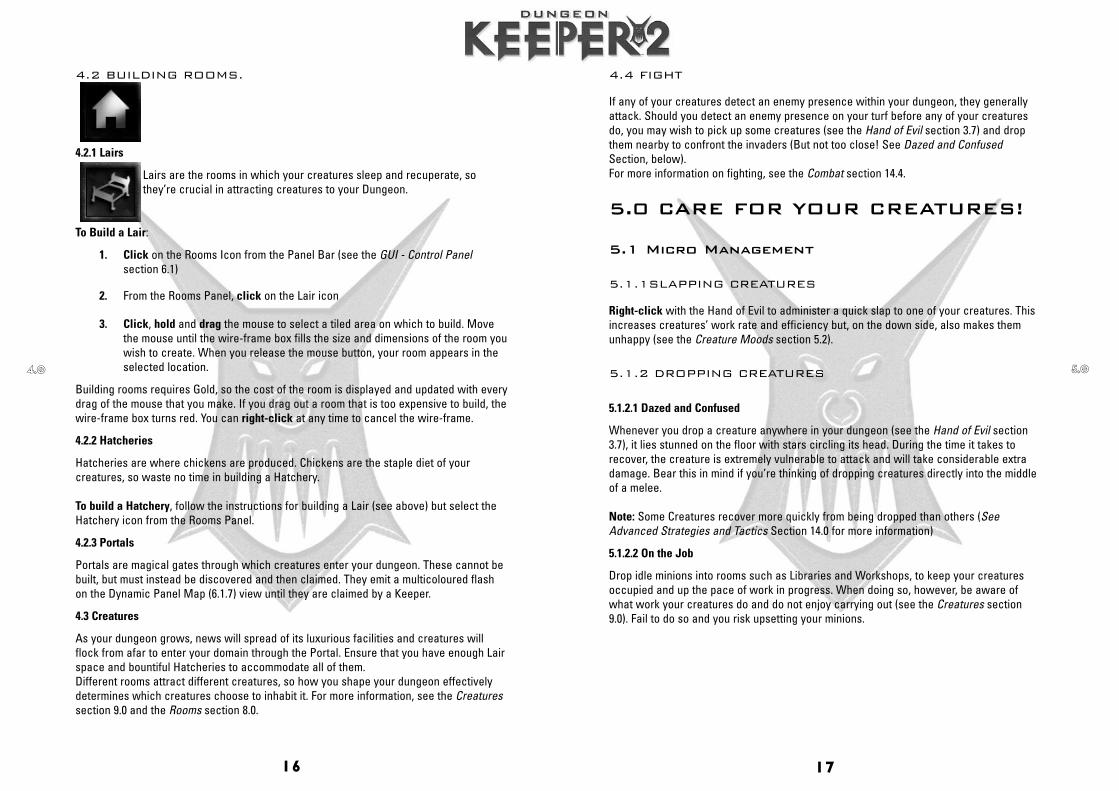
4.2.1 Lairs
Lairs are the rooms in which your creatures sleep and recuperate, sothey’re crucial in attracting creatures to your Dungeon.
To Build a Lair:
1. Click on the Rooms Icon from the Panel Bar (see the GUI - Control Panelsection 6.1)
2. From the Rooms Panel, click on the Lair icon
3. Click, hold and drag the mouse to select a tiled area on which to build. Movethe mouse until the wire-frame box fills the size and dimensions of the room youwish to create. When you release the mouse button, your room appears in theselected location.
Building rooms requires Gold, so the cost of the room is displayed and updated with everydrag of the mouse that you make. If you drag out a room that is too expensive to build, thewire-frame box turns red. You can right-click at any time to cancel the wire-frame.
4.2.2 Hatcheries
Hatcheries are where chickens are produced. Chickens are the staple diet of yourcreatures, so waste no time in building a Hatchery.
To build a Hatchery, follow the instructions for building a Lair (see above) but select theHatchery icon from the Rooms Panel.
4.2.3 Portals
Portals are magical gates through which creatures enter your dungeon. These cannot bebuilt, but must instead be discovered and then claimed. They emit a multicoloured flashon the Dynamic Panel Map (6.1.7) view until they are claimed by a Keeper.
4.3 Creatures
As your dungeon grows, news will spread of its luxurious facilities and creatures willflock from afar to enter your domain through the Portal. Ensure that you have enough Lairspace and bountiful Hatcheries to accommodate all of them.Different rooms attract different creatures, so how you shape your dungeon effectivelydetermines which creatures choose to inhabit it. For more information, see the Creaturessection 9.0 and the Rooms section 8.0.
16 17
44..00 55..00
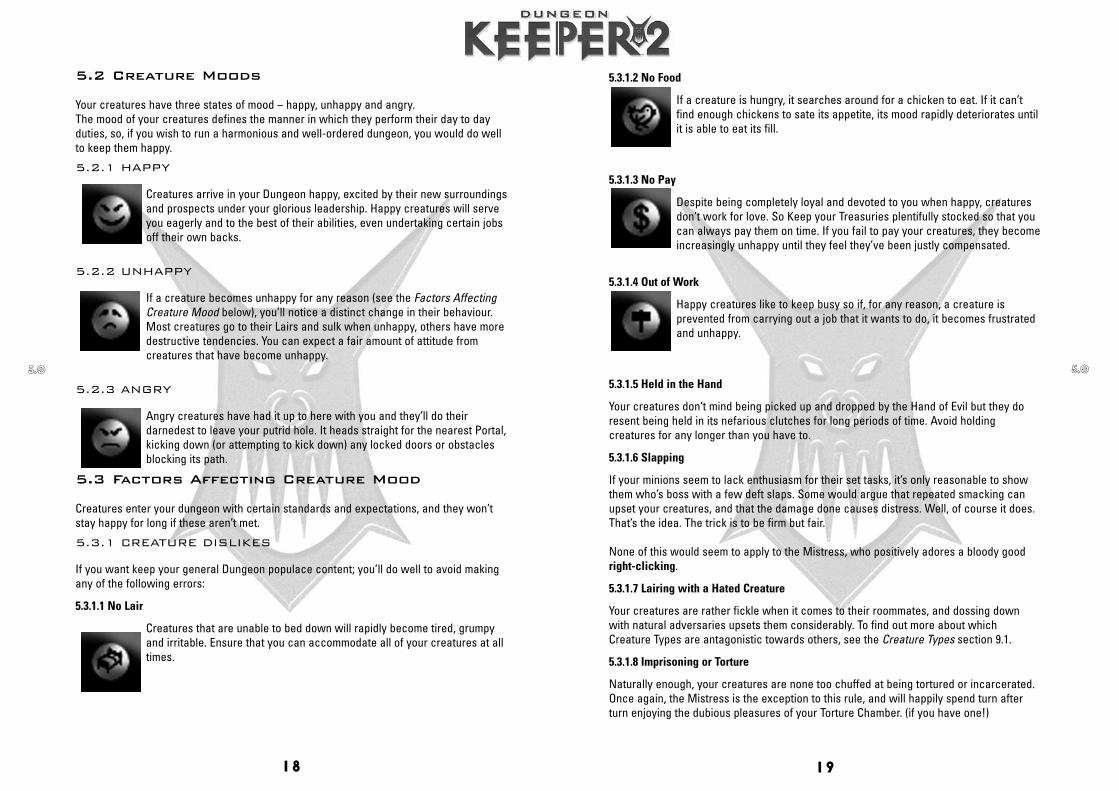
5.3.1.2 No Food
If a creature is hungry, it searches around for a chicken to eat. If it can’tfind enough chickens to sate its appetite, its mood rapidly deteriorates untilit is able to eat its fill.
5.3.1.3 No Pay
Despite being completely loyal and devoted to you when happy, creaturesdon’t work for love. So Keep your Treasuries plentifully stocked so that youcan always pay them on time. If you fail to pay your creatures, they becomeincreasingly unhappy until they feel they’ve been justly compensated.
5.3.1.4 Out of Work
Happy creatures like to keep busy so if, for any reason, a creature isprevented from carrying out a job that it wants to do, it becomes frustratedand unhappy.
5.3.1.5 Held in the Hand
Your creatures don’t mind being picked up and dropped by the Hand of Evil but they doresent being held in its nefarious clutches for long periods of time. Avoid holdingcreatures for any longer than you have to.
5.3.1.6 Slapping
If your minions seem to lack enthusiasm for their set tasks, it’s only reasonable to showthem who’s boss with a few deft slaps. Some would argue that repeated smacking canupset your creatures, and that the damage done causes distress. Well, of course it does.That’s the idea. The trick is to be firm but fair.
None of this would seem to apply to the Mistress, who positively adores a bloody goodright-clicking.
5.3.1.7 Lairing with a Hated Creature
Your creatures are rather fickle when it comes to their roommates, and dossing downwith natural adversaries upsets them considerably. To find out more about whichCreature Types are antagonistic towards others, see the Creature Types section 9.1.
5.3.1.8 Imprisoning or Torture
Naturally enough, your creatures are none too chuffed at being tortured or incarcerated.Once again, the Mistress is the exception to this rule, and will happily spend turn afterturn enjoying the dubious pleasures of your Torture Chamber. (if you have one!)
5.2 Creature Moods
Your creatures have three states of mood – happy, unhappy and angry. The mood of your creatures defines the manner in which they perform their day to dayduties, so, if you wish to run a harmonious and well-ordered dungeon, you would do wellto keep them happy.
5.2.1 HAPPY
Creatures arrive in your Dungeon happy, excited by their new surroundingsand prospects under your glorious leadership. Happy creatures will serveyou eagerly and to the best of their abilities, even undertaking certain jobsoff their own backs.
5.2.2 UNHAPPY
If a creature becomes unhappy for any reason (see the Factors AffectingCreature Mood below), you’ll notice a distinct change in their behaviour.Most creatures go to their Lairs and sulk when unhappy, others have moredestructive tendencies. You can expect a fair amount of attitude fromcreatures that have become unhappy.
5.2.3 ANGRY
Angry creatures have had it up to here with you and they’ll do theirdarnedest to leave your putrid hole. It heads straight for the nearest Portal,kicking down (or attempting to kick down) any locked doors or obstaclesblocking its path.
5.3 Factors Affecting Creature Mood
Creatures enter your dungeon with certain standards and expectations, and they won’tstay happy for long if these aren’t met.
5.3.1 CREATURE DISLIKES
If you want keep your general Dungeon populace content; you’ll do well to avoid makingany of the following errors:
5.3.1.1 No Lair
Creatures that are unable to bed down will rapidly become tired, grumpyand irritable. Ensure that you can accommodate all of your creatures at alltimes.
18 19
55..00 55..00
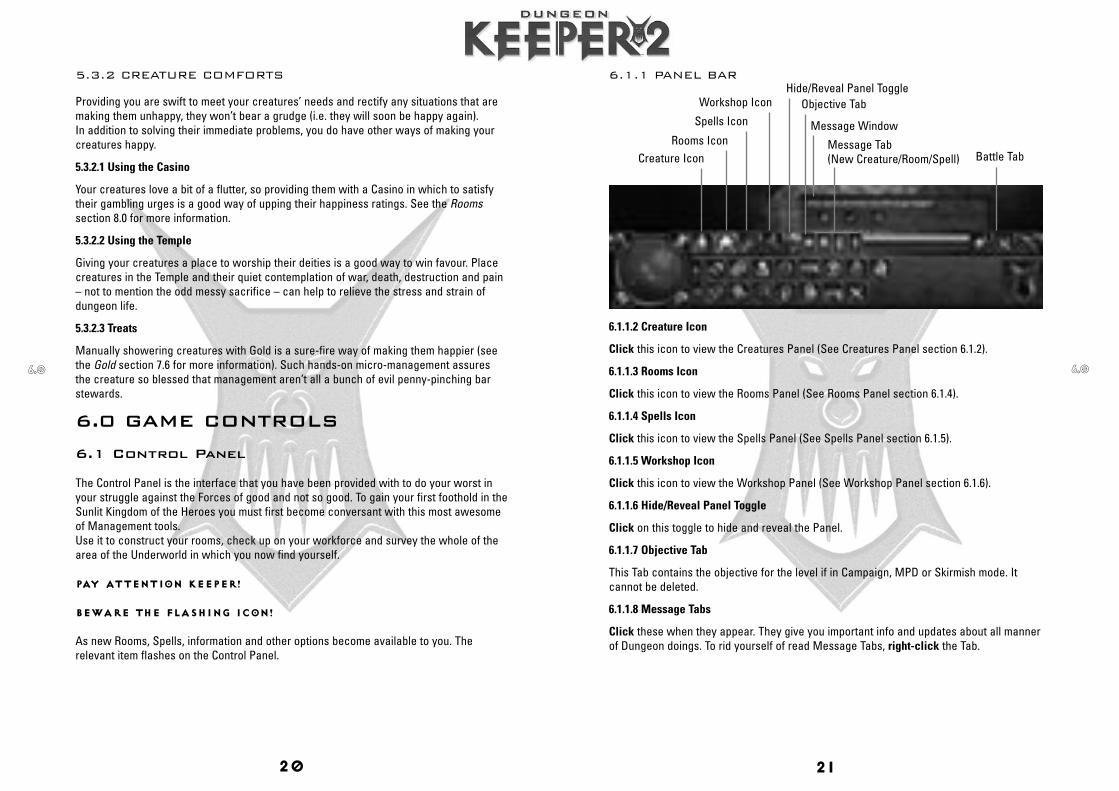
6.1.1 PANEL BAR
6.1.1.2 Creature Icon
Click this icon to view the Creatures Panel (See Creatures Panel section 6.1.2).
6.1.1.3 Rooms Icon
Click this icon to view the Rooms Panel (See Rooms Panel section 6.1.4).
6.1.1.4 Spells Icon
Click this icon to view the Spells Panel (See Spells Panel section 6.1.5).
6.1.1.5 Workshop Icon
Click this icon to view the Workshop Panel (See Workshop Panel section 6.1.6).
6.1.1.6 Hide/Reveal Panel Toggle
Click on this toggle to hide and reveal the Panel.
6.1.1.7 Objective Tab
This Tab contains the objective for the level if in Campaign, MPD or Skirmish mode. Itcannot be deleted.
6.1.1.8 Message Tabs
Click these when they appear. They give you important info and updates about all mannerof Dungeon doings. To rid yourself of read Message Tabs, right-click the Tab.
5.3.2 CREATURE COMFORTS
Providing you are swift to meet your creatures’ needs and rectify any situations that aremaking them unhappy, they won’t bear a grudge (i.e. they will soon be happy again).In addition to solving their immediate problems, you do have other ways of making yourcreatures happy.
5.3.2.1 Using the Casino
Your creatures love a bit of a flutter, so providing them with a Casino in which to satisfytheir gambling urges is a good way of upping their happiness ratings. See the Roomssection 8.0 for more information.
5.3.2.2 Using the Temple
Giving your creatures a place to worship their deities is a good way to win favour. Placecreatures in the Temple and their quiet contemplation of war, death, destruction and pain– not to mention the odd messy sacrifice – can help to relieve the stress and strain ofdungeon life.
5.3.2.3 Treats
Manually showering creatures with Gold is a sure-fire way of making them happier (seethe Gold section 7.6 for more information). Such hands-on micro-management assuresthe creature so blessed that management aren’t all a bunch of evil penny-pinching barstewards.
6.0 GAME CONTROLS
6.1 Control Panel
The Control Panel is the interface that you have been provided with to do your worst inyour struggle against the Forces of good and not so good. To gain your first foothold in theSunlit Kingdom of the Heroes you must first become conversant with this most awesomeof Management tools.Use it to construct your rooms, check up on your workforce and survey the whole of thearea of the Underworld in which you now find yourself.
PAY ATTENTION KEEPER!
BEWARE THE FLASHING ICON!
As new Rooms, Spells, information and other options become available to you. Therelevant item flashes on the Control Panel.
20 21
66..00 66..00
Creature Icon
Spells Icon
Workshop Icon
Battle TabRooms Icon
Hide/Reveal Panel Toggle
Message Tab (New Creature/Room/Spell)
Message Window
Objective Tab
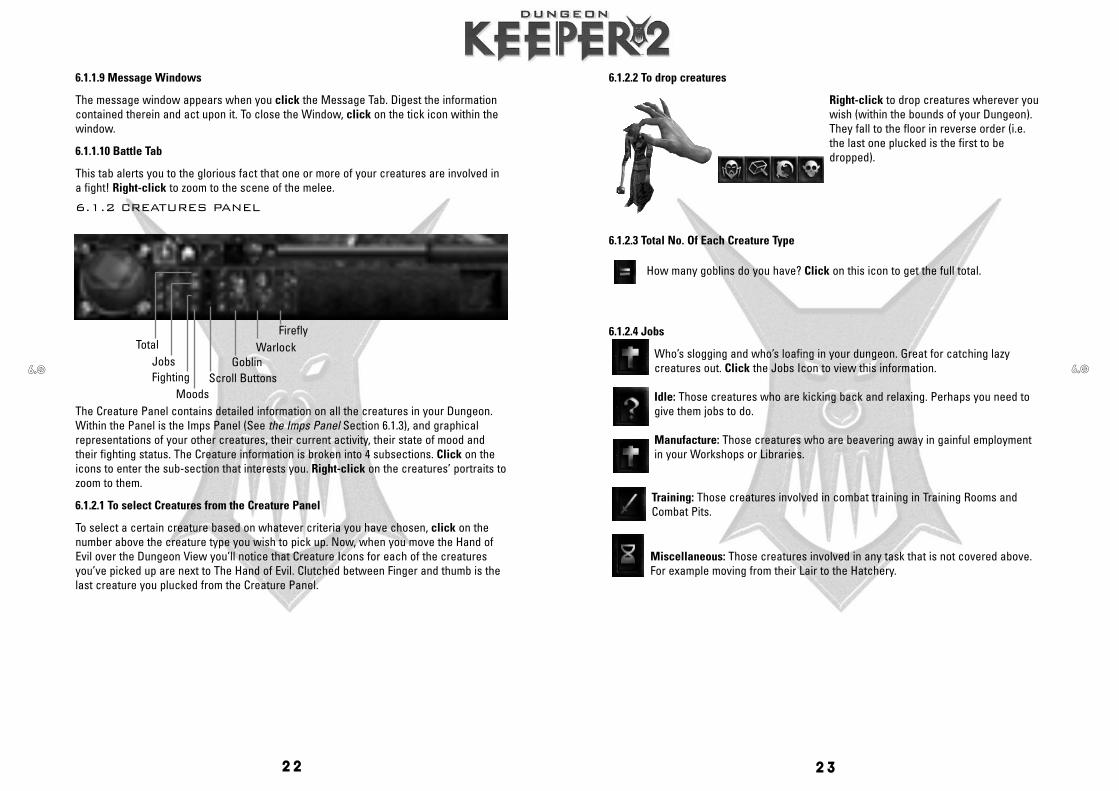
6.1.2.2 To drop creatures
Right-click to drop creatures wherever youwish (within the bounds of your Dungeon).They fall to the floor in reverse order (i.e.the last one plucked is the first to bedropped).
6.1.2.3 Total No. Of Each Creature Type
How many goblins do you have? Click on this icon to get the full total.
6.1.2.4 Jobs
Who’s slogging and who’s loafing in your dungeon. Great for catching lazycreatures out. Click the Jobs Icon to view this information.
Idle: Those creatures who are kicking back and relaxing. Perhaps you need togive them jobs to do.
Manufacture: Those creatures who are beavering away in gainful employmentin your Workshops or Libraries.
Training: Those creatures involved in combat training in Training Rooms andCombat Pits.
Miscellaneous: Those creatures involved in any task that is not covered above.For example moving from their Lair to the Hatchery.
6.1.1.9 Message Windows
The message window appears when you click the Message Tab. Digest the informationcontained therein and act upon it. To close the Window, click on the tick icon within thewindow.
6.1.1.10 Battle Tab
This tab alerts you to the glorious fact that one or more of your creatures are involved ina fight! Right-click to zoom to the scene of the melee.
6.1.2 CREATURES PANEL
The Creature Panel contains detailed information on all the creatures in your Dungeon.Within the Panel is the Imps Panel (See the Imps Panel Section 6.1.3), and graphicalrepresentations of your other creatures, their current activity, their state of mood andtheir fighting status. The Creature information is broken into 4 subsections. Click on theicons to enter the sub-section that interests you. Right-click on the creatures’ portraits tozoom to them.
6.1.2.1 To select Creatures from the Creature Panel
To select a certain creature based on whatever criteria you have chosen, click on thenumber above the creature type you wish to pick up. Now, when you move the Hand ofEvil over the Dungeon View you’ll notice that Creature Icons for each of the creaturesyou’ve picked up are next to The Hand of Evil. Clutched between Finger and thumb is thelast creature you plucked from the Creature Panel.
22 23
66..00 66..00
Total
Fighting Scroll ButtonsGoblin
WarlockFirefly
Jobs
Moods
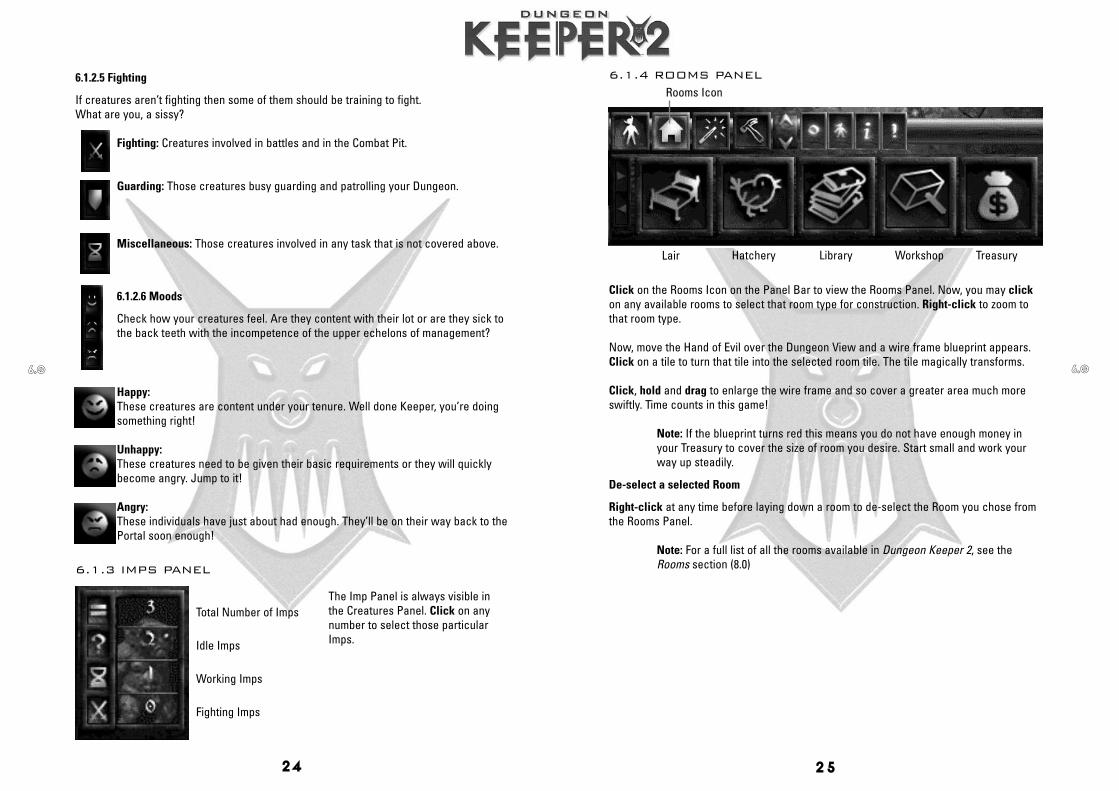
6.1.4 ROOMS PANEL
Click on the Rooms Icon on the Panel Bar to view the Rooms Panel. Now, you may clickon any available rooms to select that room type for construction. Right-click to zoom tothat room type.
Now, move the Hand of Evil over the Dungeon View and a wire frame blueprint appears.Click on a tile to turn that tile into the selected room tile. The tile magically transforms.
Click, hold and drag to enlarge the wire frame and so cover a greater area much moreswiftly. Time counts in this game!
Note: If the blueprint turns red this means you do not have enough money in your Treasury to cover the size of room you desire. Start small and work your way up steadily.
De-select a selected Room
Right-click at any time before laying down a room to de-select the Room you chose fromthe Rooms Panel.
Note: For a full list of all the rooms available in Dungeon Keeper 2, see the Rooms section (8.0)
6.1.2.5 Fighting
If creatures aren’t fighting then some of them should be training to fight.What are you, a sissy?
Fighting: Creatures involved in battles and in the Combat Pit.
Guarding: Those creatures busy guarding and patrolling your Dungeon.
Miscellaneous: Those creatures involved in any task that is not covered above.
6.1.2.6 Moods
Check how your creatures feel. Are they content with their lot or are they sick tothe back teeth with the incompetence of the upper echelons of management?
Happy:These creatures are content under your tenure. Well done Keeper, you’re doingsomething right!
Unhappy:These creatures need to be given their basic requirements or they will quicklybecome angry. Jump to it!
Angry:These individuals have just about had enough. They’ll be on their way back to thePortal soon enough!
6.1.3 IMPS PANEL
The Imp Panel is always visible inthe Creatures Panel. Click on anynumber to select those particularImps.
24 25
66..00 66..00
Total Number of Imps
Idle Imps
Working Imps
Fighting Imps
Rooms Icon
HatcheryLair Library Workshop Treasury
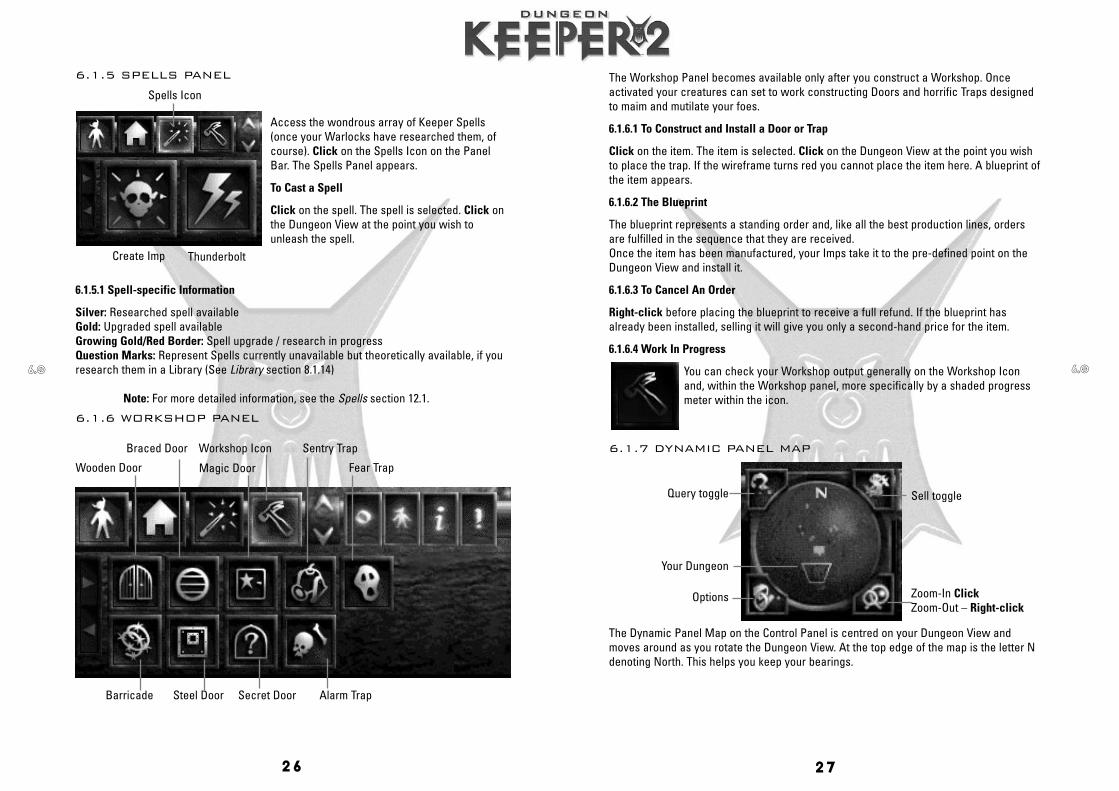
The Workshop Panel becomes available only after you construct a Workshop. Onceactivated your creatures can set to work constructing Doors and horrific Traps designedto maim and mutilate your foes.
6.1.6.1 To Construct and Install a Door or Trap
Click on the item. The item is selected. Click on the Dungeon View at the point you wishto place the trap. If the wireframe turns red you cannot place the item here. A blueprint ofthe item appears.
6.1.6.2 The Blueprint
The blueprint represents a standing order and, like all the best production lines, ordersare fulfilled in the sequence that they are received. Once the item has been manufactured, your Imps take it to the pre-defined point on theDungeon View and install it.
6.1.6.3 To Cancel An Order
Right-click before placing the blueprint to receive a full refund. If the blueprint hasalready been installed, selling it will give you only a second-hand price for the item.
6.1.6.4 Work In Progress
You can check your Workshop output generally on the Workshop Iconand, within the Workshop panel, more specifically by a shaded progressmeter within the icon.
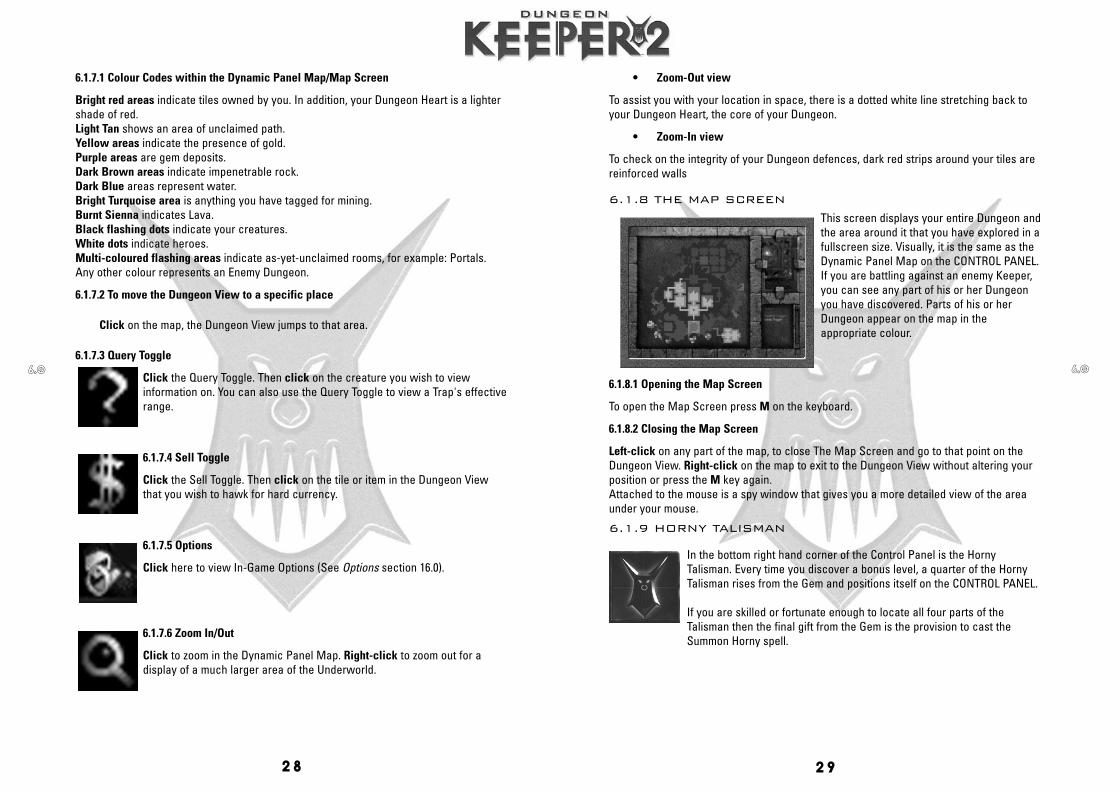
6.1.7 DYNAMIC PANEL MAP
The Dynamic Panel Map on the Control Panel is centred on your Dungeon View andmoves around as you rotate the Dungeon View. At the top edge of the map is the letter Ndenoting North. This helps you keep your bearings.
6.1.5 SPELLS PANEL
Access the wondrous array of Keeper Spells(once your Warlocks have researched them, ofcourse). Click on the Spells Icon on the PanelBar. The Spells Panel appears.
To Cast a Spell
Click on the spell. The spell is selected. Click onthe Dungeon View at the point you wish tounleash the spell.
6.1.5.1 Spell-specific Information
Silver: Researched spell availableGold: Upgraded spell availableGrowing Gold/Red Border: Spell upgrade / research in progressQuestion Marks: Represent Spells currently unavailable but theoretically available, if youresearch them in a Library (See Library section 8.1.14)
Note: For more detailed information, see the Spells section 12.1.
6.1.6 WORKSHOP PANEL
26 27
66..00 66..00
Your Dungeon
Options
Query toggle Sell toggle
Zoom-In ClickZoom-Out – Right-click
Spells Icon
Create Imp Thunderbolt
Workshop Icon
Wooden Door
Braced Door
Steel Door
Magic Door
Secret DoorBarricade
Sentry Trap
Fear Trap
Alarm Trap
• Zoom-Out view
To assist you with your location in space, there is a dotted white line stretching back toyour Dungeon Heart, the core of your Dungeon.
• Zoom-In view
To check on the integrity of your Dungeon defences, dark red strips around your tiles arereinforced walls
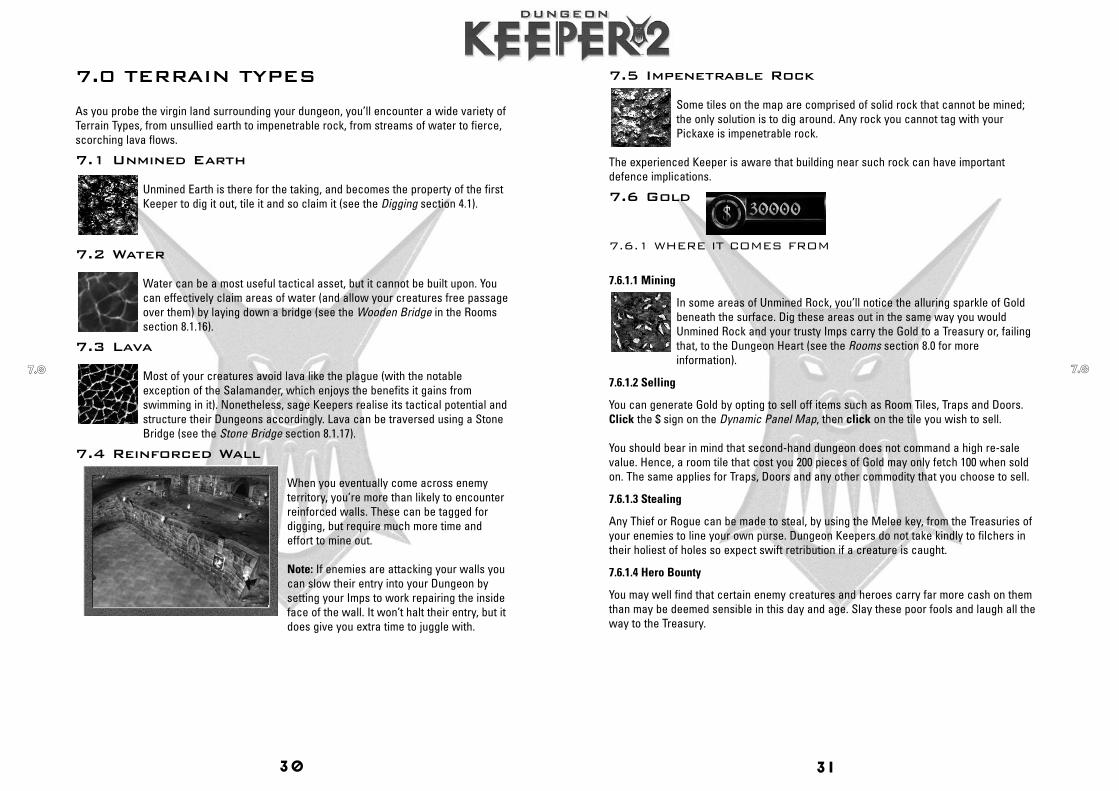
6.1.8 THE MAP SCREEN
This screen displays your entire Dungeon andthe area around it that you have explored in afullscreen size. Visually, it is the same as theDynamic Panel Map on the CONTROL PANEL.If you are battling against an enemy Keeper,you can see any part of his or her Dungeonyou have discovered. Parts of his or herDungeon appear on the map in theappropriate colour.
6.1.8.1 Opening the Map Screen
To open the Map Screen press M on the keyboard.
6.1.8.2 Closing the Map Screen
Left-click on any part of the map, to close The Map Screen and go to that point on theDungeon View. Right-click on the map to exit to the Dungeon View without altering yourposition or press the M key again.Attached to the mouse is a spy window that gives you a more detailed view of the areaunder your mouse.
6.1.9 HORNY TALISMAN
In the bottom right hand corner of the Control Panel is the HornyTalisman. Every time you discover a bonus level, a quarter of the HornyTalisman rises from the Gem and positions itself on the CONTROL PANEL.
If you are skilled or fortunate enough to locate all four parts of theTalisman then the final gift from the Gem is the provision to cast theSummon Horny spell.
6.1.7.1 Colour Codes within the Dynamic Panel Map/Map Screen
Bright red areas indicate tiles owned by you. In addition, your Dungeon Heart is a lightershade of red.Light Tan shows an area of unclaimed path.Yellow areas indicate the presence of gold. Purple areas are gem deposits.Dark Brown areas indicate impenetrable rock.Dark Blue areas represent water.Bright Turquoise area is anything you have tagged for mining.Burnt Sienna indicates Lava.Black flashing dots indicate your creatures.White dots indicate heroes.Multi-coloured flashing areas indicate as-yet-unclaimed rooms, for example: Portals.Any other colour represents an Enemy Dungeon.
6.1.7.2 To move the Dungeon View to a specific place
Click on the map, the Dungeon View jumps to that area.
6.1.7.3 Query Toggle
Click the Query Toggle. Then click on the creature you wish to viewinformation on. You can also use the Query Toggle to view a Trap's effectiverange.
6.1.7.4 Sell Toggle
Click the Sell Toggle. Then click on the tile or item in the Dungeon Viewthat you wish to hawk for hard currency.
6.1.7.5 Options
Click here to view In-Game Options (See Options section 16.0).
6.1.7.6 Zoom In/Out
Click to zoom in the Dynamic Panel Map. Right-click to zoom out for adisplay of a much larger area of the Underworld.
28 29
66..00 66..00
7.5 Impenetrable Rock
Some tiles on the map are comprised of solid rock that cannot be mined;the only solution is to dig around. Any rock you cannot tag with yourPickaxe is impenetrable rock.
The experienced Keeper is aware that building near such rock can have importantdefence implications.
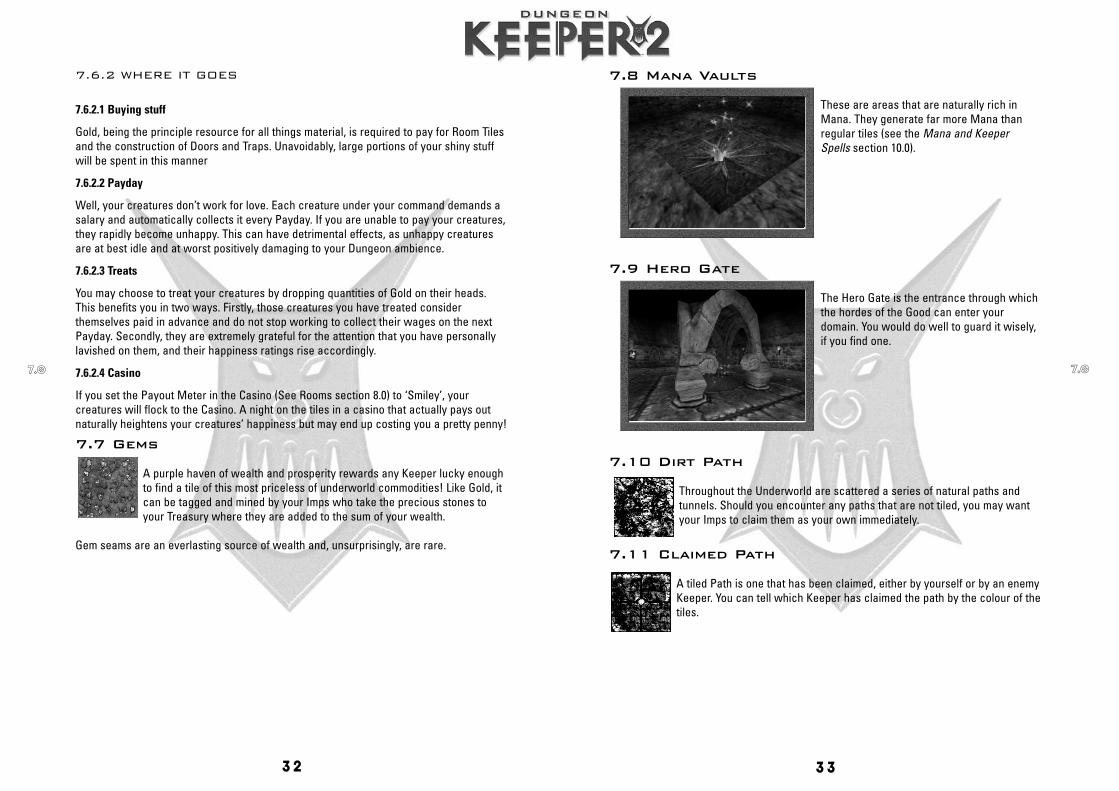
7.6 Gold
7.6.1 WHERE IT COMES FROM
7.6.1.1 Mining
In some areas of Unmined Rock, you’ll notice the alluring sparkle of Goldbeneath the surface. Dig these areas out in the same way you wouldUnmined Rock and your trusty Imps carry the Gold to a Treasury or, failingthat, to the Dungeon Heart (see the Rooms section 8.0 for moreinformation).
7.6.1.2 Selling
You can generate Gold by opting to sell off items such as Room Tiles, Traps and Doors.Click the $ sign on the Dynamic Panel Map, then click on the tile you wish to sell.
You should bear in mind that second-hand dungeon does not command a high re-salevalue. Hence, a room tile that cost you 200 pieces of Gold may only fetch 100 when soldon. The same applies for Traps, Doors and any other commodity that you choose to sell.
7.6.1.3 Stealing
Any Thief or Rogue can be made to steal, by using the Melee key, from the Treasuries ofyour enemies to line your own purse. Dungeon Keepers do not take kindly to filchers intheir holiest of holes so expect swift retribution if a creature is caught.
7.6.1.4 Hero Bounty
You may well find that certain enemy creatures and heroes carry far more cash on themthan may be deemed sensible in this day and age. Slay these poor fools and laugh all theway to the Treasury.
7.0 TERRAIN TYPES
As you probe the virgin land surrounding your dungeon, you’ll encounter a wide variety ofTerrain Types, from unsullied earth to impenetrable rock, from streams of water to fierce,scorching lava flows.
7.1 Unmined Earth
Unmined Earth is there for the taking, and becomes the property of the firstKeeper to dig it out, tile it and so claim it (see the Digging section 4.1).
7.2 Water
Water can be a most useful tactical asset, but it cannot be built upon. Youcan effectively claim areas of water (and allow your creatures free passageover them) by laying down a bridge (see the Wooden Bridge in the Roomssection 8.1.16).
7.3 Lava
Most of your creatures avoid lava like the plague (with the notableexception of the Salamander, which enjoys the benefits it gains fromswimming in it). Nonetheless, sage Keepers realise its tactical potential andstructure their Dungeons accordingly. Lava can be traversed using a StoneBridge (see the Stone Bridge section 8.1.17).
7.4 Reinforced Wall
When you eventually come across enemyterritory, you’re more than likely to encounterreinforced walls. These can be tagged fordigging, but require much more time andeffort to mine out.
Note: If enemies are attacking your walls youcan slow their entry into your Dungeon bysetting your Imps to work repairing the insideface of the wall. It won’t halt their entry, but itdoes give you extra time to juggle with.
30 31
77..00 77..00
7.8 Mana Vaults
These are areas that are naturally rich inMana. They generate far more Mana thanregular tiles (see the Mana and KeeperSpells section 10.0).
7.9 Hero Gate
The Hero Gate is the entrance through whichthe hordes of the Good can enter yourdomain. You would do well to guard it wisely,if you find one.
7.10 Dirt Path
Throughout the Underworld are scattered a series of natural paths andtunnels. Should you encounter any paths that are not tiled, you may wantyour Imps to claim them as your own immediately.
7.11 Claimed Path
A tiled Path is one that has been claimed, either by yourself or by an enemyKeeper. You can tell which Keeper has claimed the path by the colour of thetiles.
7.6.2 WHERE IT GOES
7.6.2.1 Buying stuff
Gold, being the principle resource for all things material, is required to pay for Room Tilesand the construction of Doors and Traps. Unavoidably, large portions of your shiny stuffwill be spent in this manner
7.6.2.2 Payday
Well, your creatures don’t work for love. Each creature under your command demands asalary and automatically collects it every Payday. If you are unable to pay your creatures,they rapidly become unhappy. This can have detrimental effects, as unhappy creaturesare at best idle and at worst positively damaging to your Dungeon ambience.
7.6.2.3 Treats
You may choose to treat your creatures by dropping quantities of Gold on their heads.This benefits you in two ways. Firstly, those creatures you have treated considerthemselves paid in advance and do not stop working to collect their wages on the nextPayday. Secondly, they are extremely grateful for the attention that you have personallylavished on them, and their happiness ratings rise accordingly.
7.6.2.4 Casino
If you set the Payout Meter in the Casino (See Rooms section 8.0) to ‘Smiley’, yourcreatures will flock to the Casino. A night on the tiles in a casino that actually pays outnaturally heightens your creatures’ happiness but may end up costing you a pretty penny!
7.7 Gems
A purple haven of wealth and prosperity rewards any Keeper lucky enoughto find a tile of this most priceless of underworld commodities! Like Gold, itcan be tagged and mined by your Imps who take the precious stones toyour Treasury where they are added to the sum of your wealth.
Gem seams are an everlasting source of wealth and, unsurprisingly, are rare.
32 33
77..00 77..00
88..00
8.0.4 Minimum Recommended Size
The below room descriptions all detail a minimum recommended room size, you cancreate smaller rooms but only experienced Keepers will be effective in their attempts. Atthis size the room is most likely to function effectively, containing many of the featuresthat make a room efficacious for its role in your Dungeon.
8.1 Room Types
8.1.1 DUNGEON HEART
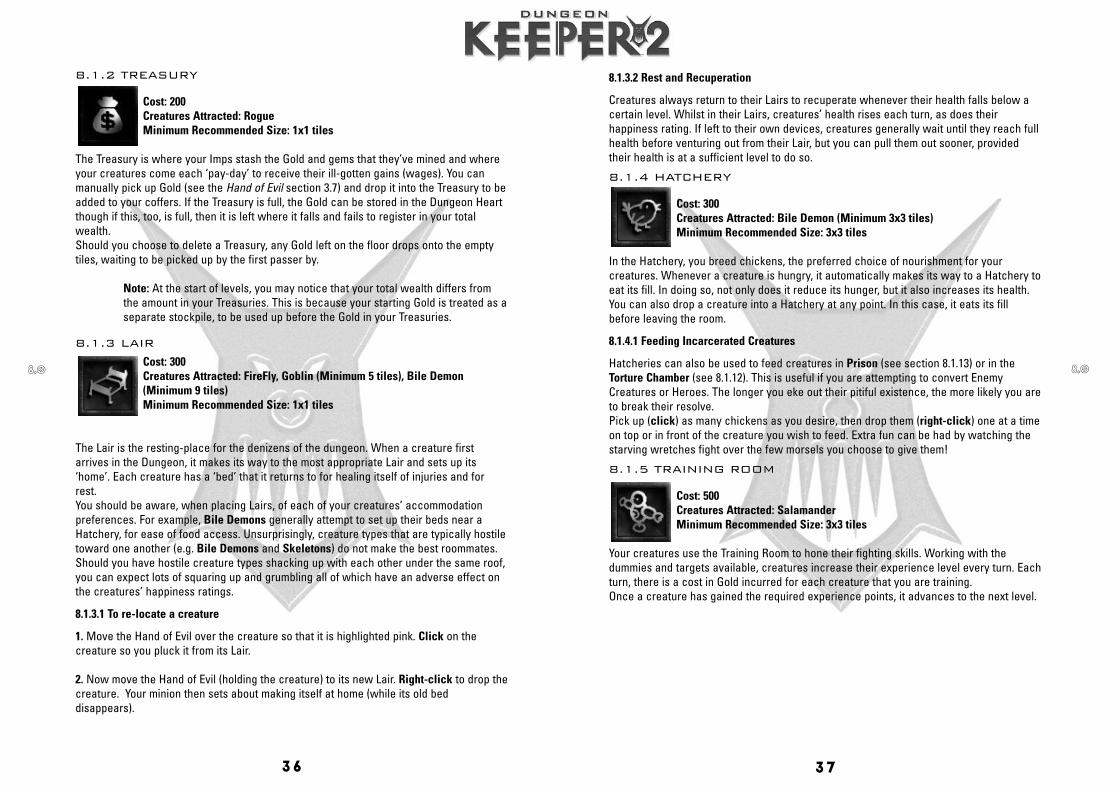
Cost: N/ACreatures Attracted: N/AMinimum Recommended Size: 5x5 tilesThe Dungeon Heart is the very nerve centreof your entire operation and, should you benegligent enough to allow it to be destroyed,the game is lost (with the exception ofMultiplayer games see Multiplayer section19.0). All of your Mana is stored in theDungeon Heart and some of your Gold can bestored in its outer ring.
Friendly creatures always do everything in their power to prevent the Dungeon Heartfrom being destroyed. Whilst in the vicinity of the Dungeon Heart, friendly creatures feelless fear in combat.
Note: Creatures may only be dropped freely into the outer causeway of the Dungeon Heart and not into the centre. The only exceptions are Imps, which you may drop into the centre of the Heart and ‘redeem’ for half of their Mana cost
Should you destroy an enemy’s Dungeon Heart, you automatically receive all of thatKeeper’s stored Mana (with the exception of Multiplayer games – see Multiplayer Section19.0 for more information).
8.0 ROOMS
You start the game with a ‘blank canvas’ of dank earth and rock upon whichto paint your blueprint for deviousness and destruction. Clearly, the types ofrooms you elect to build completely shape the character of your dungeon.Most rooms have specific functions that are crucial to the growth,maintenance and general well being of your dungeon and its inhabitants.
8.0.1 Attractive Rooms
Different rooms attract certain types of creatures, so the manner in which you build yourdungeon is a crucial factor in determining the types of creature that are to make up yourarmy.
8.0.2 Room-Specific Jobs
When a creature is dropped into a room, it attempts to do the job specific to that room.Creatures quickly leave the room if they hate the job that the room requires of them (seethe Creatures section 9.0). Additionally, if a creature is dropped in a room and there areenemy creatures nearby, it deals with the enemy threat as a priority over working in theroom. After it has finished fighting, the lazy individual returns to its idle state rather thanstart working in the room. Note: Well-timed slaps and Micro Management (See the Micro Management section 5.1)are always in order in the well-run dungeon.
8.0.3 Selling Rooms
You may elect to sell rooms at any time, in return for which you receive aGold deposit in your Treasury. Note that the amount of Gold you receive ismuch less than the initial outlay you make on a room tile, so avoid using thistechnique to raise funds unless you have no alternative.
34 35
88..00
8.1.3.2 Rest and Recuperation
Creatures always return to their Lairs to recuperate whenever their health falls below acertain level. Whilst in their Lairs, creatures’ health rises each turn, as does theirhappiness rating. If left to their own devices, creatures generally wait until they reach fullhealth before venturing out from their Lair, but you can pull them out sooner, providedtheir health is at a sufficient level to do so.
8.1.4 HATCHERY
Cost: 300Creatures Attracted: Bile Demon (Minimum 3x3 tiles)Minimum Recommended Size: 3x3 tiles
In the Hatchery, you breed chickens, the preferred choice of nourishment for yourcreatures. Whenever a creature is hungry, it automatically makes its way to a Hatchery toeat its fill. In doing so, not only does it reduce its hunger, but it also increases its health. You can also drop a creature into a Hatchery at any point. In this case, it eats its fillbefore leaving the room.
8.1.4.1 Feeding Incarcerated Creatures
Hatcheries can also be used to feed creatures in Prison (see section 8.1.13) or in theTorture Chamber (see 8.1.12). This is useful if you are attempting to convert EnemyCreatures or Heroes. The longer you eke out their pitiful existence, the more likely you areto break their resolve.Pick up (click) as many chickens as you desire, then drop them (right-click) one at a timeon top or in front of the creature you wish to feed. Extra fun can be had by watching thestarving wretches fight over the few morsels you choose to give them!
8.1.5 TRAINING ROOM
Cost: 500Creatures Attracted: SalamanderMinimum Recommended Size: 3x3 tiles
Your creatures use the Training Room to hone their fighting skills. Working with thedummies and targets available, creatures increase their experience level every turn. Eachturn, there is a cost in Gold incurred for each creature that you are training. Once a creature has gained the required experience points, it advances to the next level.
8.1.2 TREASURY
Cost: 200Creatures Attracted: RogueMinimum Recommended Size: 1x1 tiles
The Treasury is where your Imps stash the Gold and gems that they’ve mined and whereyour creatures come each ‘pay-day’ to receive their ill-gotten gains (wages). You canmanually pick up Gold (see the Hand of Evil section 3.7) and drop it into the Treasury to beadded to your coffers. If the Treasury is full, the Gold can be stored in the Dungeon Heartthough if this, too, is full, then it is left where it falls and fails to register in your totalwealth.Should you choose to delete a Treasury, any Gold left on the floor drops onto the emptytiles, waiting to be picked up by the first passer by.
Note: At the start of levels, you may notice that your total wealth differs from the amount in your Treasuries. This is because your starting Gold is treated as aseparate stockpile, to be used up before the Gold in your Treasuries.
8.1.3 LAIR
Cost: 300Creatures Attracted: FireFly, Goblin (Minimum 5 tiles), Bile Demon(Minimum 9 tiles)Minimum Recommended Size: 1x1 tiles
The Lair is the resting-place for the denizens of the dungeon. When a creature firstarrives in the Dungeon, it makes its way to the most appropriate Lair and sets up its‘home’. Each creature has a ‘bed’ that it returns to for healing itself of injuries and forrest.You should be aware, when placing Lairs, of each of your creatures’ accommodationpreferences. For example, Bile Demons generally attempt to set up their beds near aHatchery, for ease of food access. Unsurprisingly, creature types that are typically hostiletoward one another (e.g. Bile Demons and Skeletons) do not make the best roommates.Should you have hostile creature types shacking up with each other under the same roof,you can expect lots of squaring up and grumbling all of which have an adverse effect onthe creatures’ happiness ratings.
8.1.3.1 To re-locate a creature
1. Move the Hand of Evil over the creature so that it is highlighted pink. Click on thecreature so you pluck it from its Lair.
2. Now move the Hand of Evil (holding the creature) to its new Lair. Right-click to drop thecreature. Your minion then sets about making itself at home (while its old beddisappears).
36 37
88..00 88..00
Note: Imps drag your battered and unconscious creatures to their Lair to ensure they arefighting fit in no time.
• If you drop a mix of friendly and enemy creatures into the Combat Pit, then afight ensues between the two different factions. Similarly, in the case of a groupconsisting entirely of enemies, they react as if all of the other creatures areenemies. Most enjoyable!
As well as gaining experience points, creatures that are victorious in the Combat Pit alsogain happiness, safe in the knowledge that they are evil mothers in the combat stakes!
8.1.7 TEMPLE
Cost: 3000Creatures Attracted: Dark Angel (Minimum 5x5 tiles)Minimum Recommended Size: 5x5 tiles
The Temple is a sacred room in which your creatures have the chance to get deep andspiritual praying to the Dark Old Gods. As well as gaining pleasure from their heathenpiety, creatures also generate Mana for the duration they are at worship.
8.1.7.1 Sacrifices for the Gods
An effective Temple also contains a Sacrificial Pool, into which you may throw creaturesand other objects as sacrifices to the Gods. In return, you may receive a gift from theGods.Beware, though! The Gods do not appreciate a scrawny, ill-thought-out sacrifice and maymete out punishment on the offending Keeper as they see fit!
8.1.8 WORKSHOP
Cost: 600Creatures Attracted: Trolls, Bile Demon (Minimum 3x3 tiles)Minimum Recommended Size: 5x5 tiles
The Workshop is the room in which all your manufacturing work is undertaken (e.g. allDoors, Traps and Guard Posts). Any creatures that you place in the Workshopimmediately busy themselves making essential furnishings for your dungeon, unless theycan’t abide the sight of hot anvils or you have not got a Door or Trap to be made.
8.1.5.1 Watch Creature Flowers
To ensure you don’t waste precious resources in the Training of creatureskeep an eye on their Experience progress using the inner section of theCreature Health Flower.
Note: The highest level a creature can attain in the Training Room is level 4. Once on level 4, it can only improve itself through experience in actual combat such as that provided by the addition of a Combat Pit.
8.1.6 COMBAT PIT
Cost: 750Creatures Attracted: Black KnightMinimum Recommended Size: 5x5 tiles
The Combat Pit provides creatures with an opportunity to prove their worth in head-to-head gladiatorial combat. You may throw enemy or friendly creatures into the Combat Pit,where they engage in a no-holds-barred contest, gaining experience as they would inactual combat situations. Using the Combat Pit is an excellent way of increasing yourcreatures’ experience levels for free
8.1.6.1 Why Use a Combat Pit?
Unlike the Training Room, the Combat Pit allows creatures to reach experience levels 5, 6,7 and 8 by bloodying their knuckles (or claws!).
Note: To go beyond level 8, your creatures must experience and survive authentic combat situations attacking other Dungeons or defending your Dungeon from assailants.
8.1.6.2 Mano-a-Mano
• If a friendly creature and an enemy creature are dropped into the Combat Pit,then a fight to the death ensues. Marvellous! Your Imps will then drag the bodyto your Prison or Graveyard.
• If both creatures are friendly, then they attempt to knock one another out. Ofcourse, there is always a chance that one friendly creature may accidentallykill the other, but that is not its express intention. Honest!
8.1.6.3 Group Battles
• Should you choose to drop a group of friendly creatures into the Combat Pit, thecreatures react as if all of the other creatures are enemies. They pick a fightwith the creature closest to them at the start, and continue fighting them untilthey’ve won or lost. Creatures continue to fight until they are the last onestanding.
38 39
88..00 88..00
Unsurprisingly, jackpot-winning creatures are not best pleased at having their Goldthieved by you, and this is reflected in their happiness rating. If other creatures arewitness to your skinflint actions you may provoke a mutiny!
8.1.10 GRAVEYARD
Cost: 2000Creatures Attracted: VampireMinimum Recommended Size: 3x3 tiles
The corpses of your creatures killed in battle are bought to the Graveyard, where theysoon attract the attention of a Vampire. Each creature left to decompose grants theVampire life-force, the amount being dependent on how powerful the creature was duringits life (see the Creatures section 9.0). Once the life-force generated is sufficient, aVampire rises from the grave.
Note: Dead bodies dragged to the graveyard cannot be resurrected by a Special or raised by the creature spell Raise Dead.
8.1.11 PORTAL
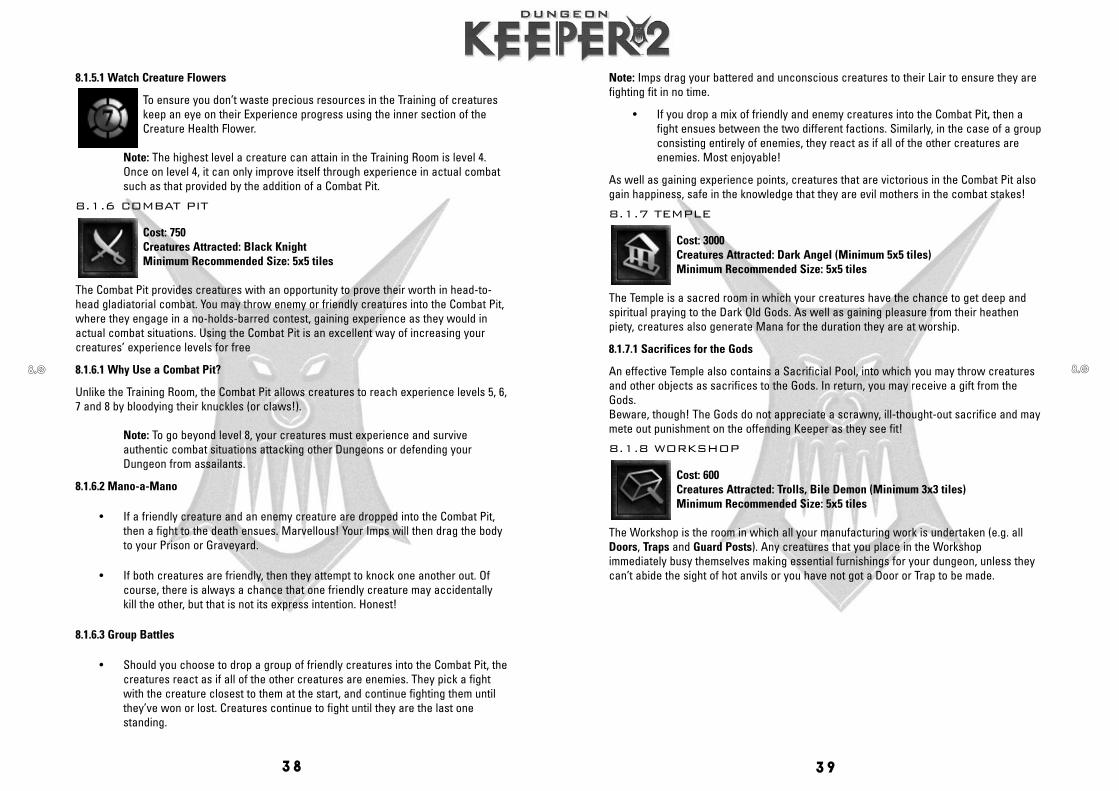
Cost: N/ACreatures Attracted: Dependant upon yourDungeonMinimum Recommended Size: 3x3 tiles
The Portal is a magical gateway to yourunderground kingdom. From the Portal,creatures are drawn to do your bidding andbecome pliant minions under your command.
The types of creatures that are available to enter the dungeon through the Portal dependon the type and size of rooms that you’ve created. Many creatures won’t enter just anyold dungeon and they often have minimum expectations as to what sort of dungeon they’llmove into. Whenever these expectations are met, a creature may emerge through thePortal.
Note: In Multiplayer levels, the pool of creatures is finite so make sure you waste no time in both claiming a portal and providing rooms that creatures require. If a room is lost (by being sold or captured), any creatures dependent on that room type are automatically removed from the pool.
8.1.11.1 Sacking CreaturesYou may “sack” creatures by dropping them back into the Portal at anytime. This canoften be the only way to rid yourself of a very destructive creature. Dismissed creaturesleave the dungeon immediately and, providing you are below your maximum creaturelevel, they are replaced by a new creature.
8.1.8.1 To Place a Door or Trap
1. Click on the Workshop Icon on the Panel Bar
2. Click on the Door, Trap or Guard Post you desire
3. Now move the Wireframe box to the location you wish to place it.
4. Click on the tile. The Blueprint of the chosen item appears and your coffers arelightened accordingly.
5. Your workshop worthies now construct the item before an Imp drags thefinished product into position.
Note: Items are built in the order in which they are placed.
The creatures in the Workshop each undertake only a finite amount of work per turn untilthe work is complete; the more workers present, the speedier their output will be.
8.1.9 CASINO
Cost per Tile: 750Creatures Attracted: RogueMinimum Recommended Size: 3x3 tiles
After a hard day’s work slaughtering and carrying out your nefarious bidding, there’snothing your creatures enjoy more than a flutter and a mug of ale at the Casino. AsKeeper, you decide the level of payouts at the Casino. If you set the payout levels high(Smiley) then your creatures’ happiness ratings rise. If you set them low ($), you stand tomake more money, but at a cost to your creatures’ happiness ratings.
• To Set the Payout Lever - Zoom in on the Casino using the Home key. Click onthe $ sign if you want to rip off your creatures and on the Smiley face if youwant to pamper your creatures’ pathetic little egos.
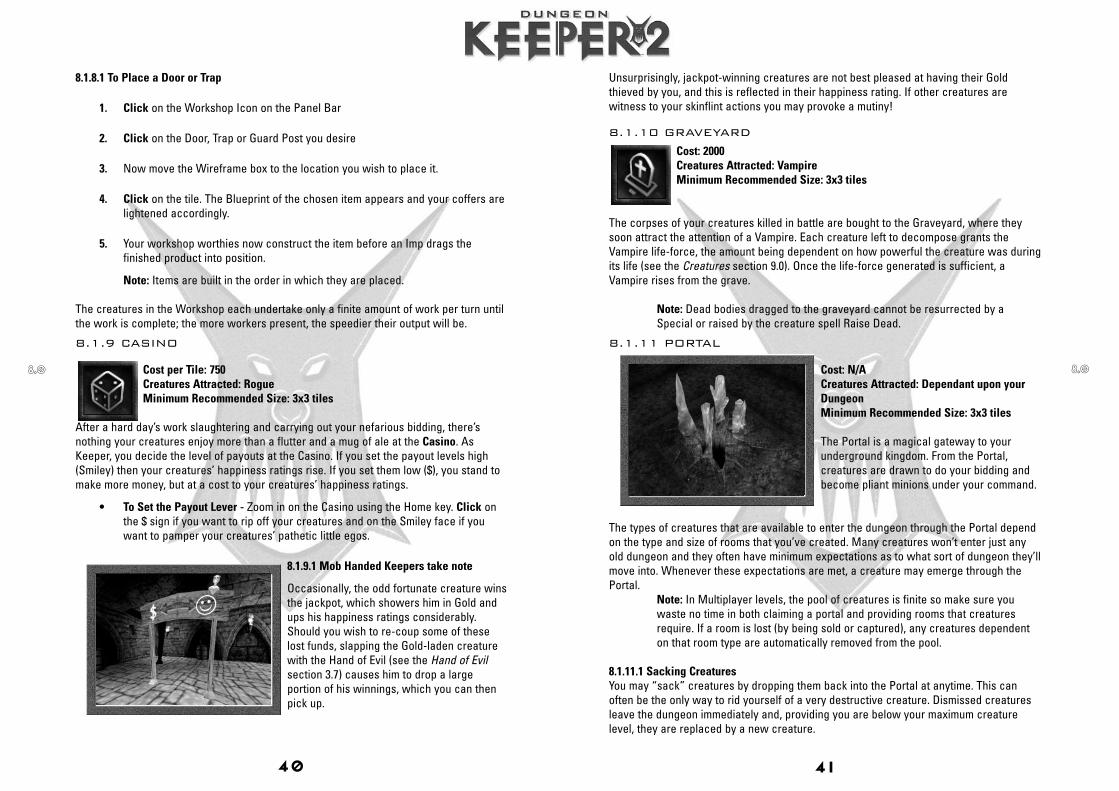
8.1.9.1 Mob Handed Keepers take note
Occasionally, the odd fortunate creature winsthe jackpot, which showers him in Gold andups his happiness ratings considerably.Should you wish to re-coup some of theselost funds, slapping the Gold-laden creaturewith the Hand of Evil (see the Hand of Evilsection 3.7) causes him to drop a largeportion of his winnings, which you can thenpick up.
40 41
88..00 88..00
8.1.14 LIBRARY
Cost: 600Creatures Attracted: WarlockMinimum Recommended Size: 3x3 tiles
The Library is the academic research hothouse of your dungeon, the primary resource forstudy of the arcane arts. The research of Spells is conducted within its book-lined walls.Warlocks actively seek out Dungeons with Libraries though other creatures may helpwith the research, depending on their love of books. Creatures placed in the Librarycontribute to research as long as they stay in the room. Once the required research hasbeen completed the Spell is attained. Once researched, the spell does not have to beresearched again though you should allow researchers time to upgrade Spells (See theSpell Panel section 6.1.5).
Once a spell has been researched, the icon materialises on the Spells panel of theControl Panel and becomes available to use.
Note: If an enemy captures a Library, any Spells that have been researched there becomeunavailable until the Library is re-captured or a new one is built and the Spells areresearched again.
8.1.15 GUARD ROOM
Cost: 600Creatures Attracted: Dark ElfMinimum Recommended Size: 1x1 tiles
The Guard Room is an ideal resource for defending the outer reaches of your dungeon.
Creatures placed in the Guard Room are duty-bound to remain there, and seldom leavetheir posts (unless, of course, they are hungry or in need of paying). As well as managingthe Guard Room, they also make patrols around the dungeon to check on any Guard Postsin the vicinity.
8.1.16 WOODEN BRIDGE
Cost per Tile: 200Creatures Attracted: N/AMinimum Recommended Size: 1x1 tiles
Wooden Bridges allow your creatures ease of passage over Water or Lava and are theonly way (other than a stone bridge) that you can take over unconnected shores of theUnderworld. Obviously, due to their flammable nature, Wooden Bridges have a verylimited life span if placed over Lava.
8.1.12 TORTURE CHAMBER
Cost: 1500Creatures Attracted: Mistress Minimum Recommended Size: 3x3 tiles
In the Torture Chamber, you can relish showing insubordinate creatures and heroes theerror of their ways. Enemy creatures placed in the Torture Chamber are likely to convertor, failing that, release a valuable piece of information and die. The amount of time ittakes to convert an enemy creature depends on the Creature Type
8.1.12.1 Extend the Agony
You can prolong the agony of your captives and keep them alive by either casting theHeal spell (see the Heal spell 10.2.5) or feeding them chickens. This increases yourchance of converting enemy creatures and heroes as well as heightening yours and theMistress’ own voyeuristic enjoyment!
8.1.13 PRISON
Cost: 750Creatures Attracted: SkeletonsMinimum Recommended Size: 5x5 tiles
Imps carry unconscious enemy creatures to the nearest Prison, where they are held atyour discretion. You can also imprison friendly creatures, should the urge take you. Whilstin Prison, creatures gradually lose health as they wither away to nothing. Any creaturesthat perish in Prison will rise as Skeletons under your control. There is a bar on the Prisondoor which, when closed, will prevent any more prisoners from being taken to that Prison.
8.1.13.1 Prolong the life of your prisoners
Cast the Heal spell (see the Heal spell 10.2.5) or feed them chickens.
8.1.13.2 Jailbreak!
Should one of your Prisons become full, Imps search for the nearest Prison with availablespaces and take their captives there instead. If no spaces are available in any of yourPrisons, your Imps do not collect any more creatures. You can drop friendly or enemycreatures being tortured into your Prisons manually using the Hand of Evil but, be warned,causing overcrowding in your prisons may lead to Jailbreak.
Jailbreak happens if you overstuff the prison manually with dropped creatures, if you sellpart of an actively used prison or if an enemy releases his comrades.
If you are careless enough to lose a Prison to the enemy, all enemy creatures areautomatically freed, while friendly creatures are kept in the Prison under enemy control.
42 43
88..00 88..00
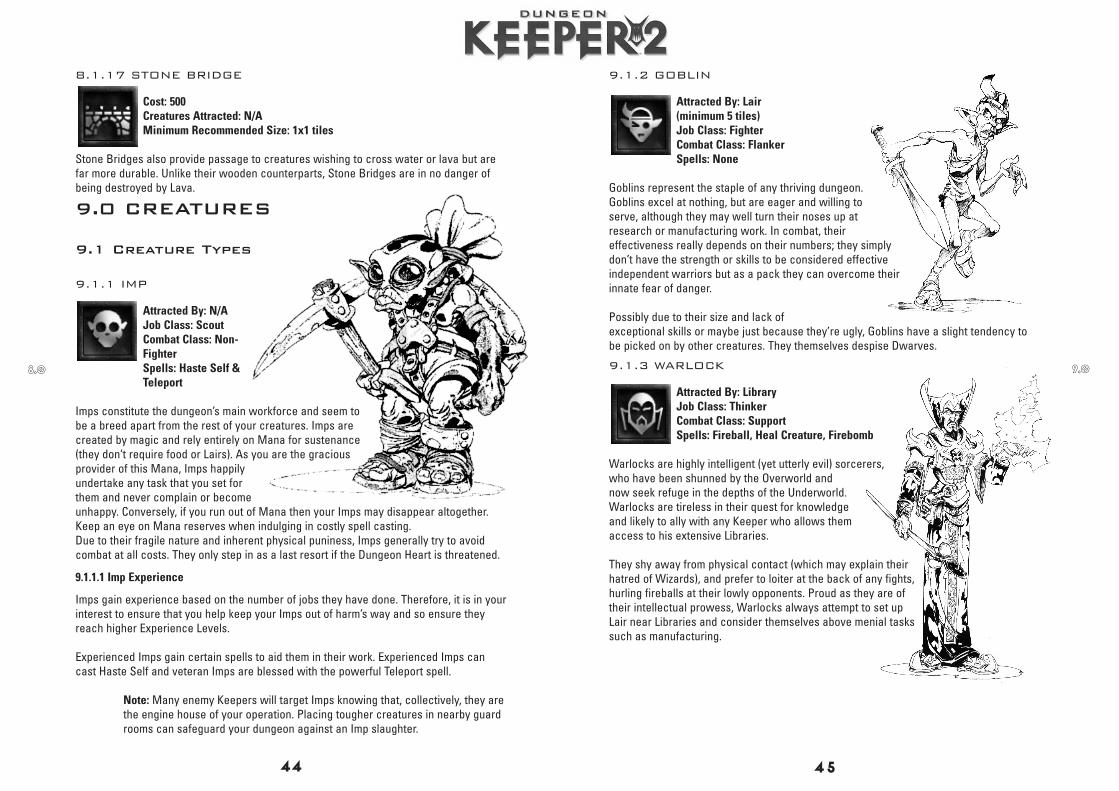
9.1.2 GOBLIN
Attracted By: Lair(minimum 5 tiles)Job Class: FighterCombat Class: FlankerSpells: None
Goblins represent the staple of any thriving dungeon.Goblins excel at nothing, but are eager and willing toserve, although they may well turn their noses up atresearch or manufacturing work. In combat, theireffectiveness really depends on their numbers; they simplydon’t have the strength or skills to be considered effectiveindependent warriors but as a pack they can overcome theirinnate fear of danger.
Possibly due to their size and lack ofexceptional skills or maybe just because they’re ugly, Goblins have a slight tendency tobe picked on by other creatures. They themselves despise Dwarves.
9.1.3 WARLOCK
Attracted By: Library Job Class: ThinkerCombat Class: SupportSpells: Fireball, Heal Creature, Firebomb
Warlocks are highly intelligent (yet utterly evil) sorcerers,who have been shunned by the Overworld andnow seek refuge in the depths of the Underworld.Warlocks are tireless in their quest for knowledgeand likely to ally with any Keeper who allows themaccess to his extensive Libraries.
They shy away from physical contact (which may explain theirhatred of Wizards), and prefer to loiter at the back of any fights,hurling fireballs at their lowly opponents. Proud as they are oftheir intellectual prowess, Warlocks always attempt to set upLair near Libraries and consider themselves above menial taskssuch as manufacturing.
8.1.17 STONE BRIDGE
Cost: 500Creatures Attracted: N/AMinimum Recommended Size: 1x1 tiles
Stone Bridges also provide passage to creatures wishing to cross water or lava but arefar more durable. Unlike their wooden counterparts, Stone Bridges are in no danger ofbeing destroyed by Lava.
9.0 CREATURES
9.1 Creature Types
9.1.1 IMP
Attracted By: N/AJob Class: ScoutCombat Class: Non-FighterSpells: Haste Self &Teleport
Imps constitute the dungeon’s main workforce and seem tobe a breed apart from the rest of your creatures. Imps arecreated by magic and rely entirely on Mana for sustenance(they don’t require food or Lairs). As you are the graciousprovider of this Mana, Imps happilyundertake any task that you set forthem and never complain or becomeunhappy. Conversely, if you run out of Mana then your Imps may disappear altogether.Keep an eye on Mana reserves when indulging in costly spell casting.Due to their fragile nature and inherent physical puniness, Imps generally try to avoidcombat at all costs. They only step in as a last resort if the Dungeon Heart is threatened.
9.1.1.1 Imp Experience
Imps gain experience based on the number of jobs they have done. Therefore, it is in yourinterest to ensure that you help keep your Imps out of harm’s way and so ensure theyreach higher Experience Levels.
Experienced Imps gain certain spells to aid them in their work. Experienced Imps cancast Haste Self and veteran Imps are blessed with the powerful Teleport spell.
Note: Many enemy Keepers will target Imps knowing that, collectively, they are the engine house of your operation. Placing tougher creatures in nearby guard rooms can safeguard your dungeon against an Imp slaughter.
44 45
88..00 99..00
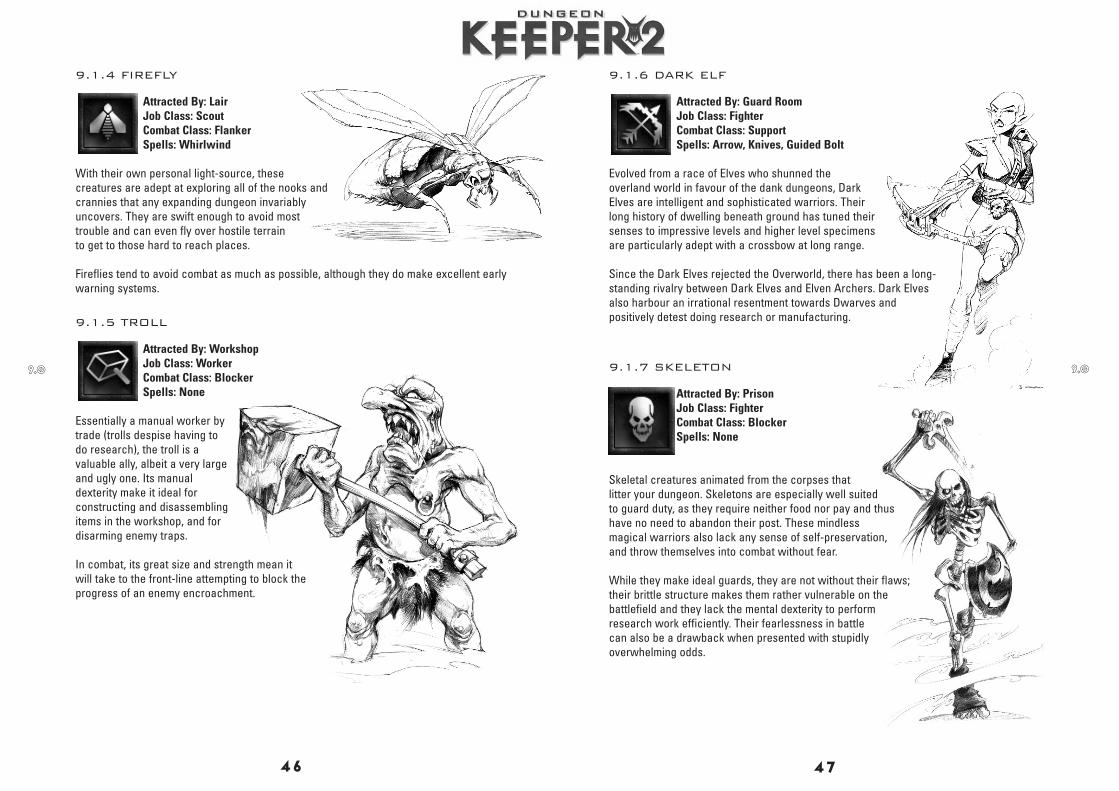
9.1.6 DARK ELF
Attracted By: Guard Room Job Class: FighterCombat Class: SupportSpells: Arrow, Knives, Guided Bolt
Evolved from a race of Elves who shunned theoverland world in favour of the dank dungeons, DarkElves are intelligent and sophisticated warriors. Theirlong history of dwelling beneath ground has tuned theirsenses to impressive levels and higher level specimensare particularly adept with a crossbow at long range.
Since the Dark Elves rejected the Overworld, there has been a long-standing rivalry between Dark Elves and Elven Archers. Dark Elvesalso harbour an irrational resentment towards Dwarves andpositively detest doing research or manufacturing.
9.1.7 SKELETON
Attracted By: Prison Job Class: FighterCombat Class: BlockerSpells: None
Skeletal creatures animated from the corpses thatlitter your dungeon. Skeletons are especially well suitedto guard duty, as they require neither food nor pay and thushave no need to abandon their post. These mindlessmagical warriors also lack any sense of self-preservation,and throw themselves into combat without fear.
While they make ideal guards, they are not without their flaws;their brittle structure makes them rather vulnerable on thebattlefield and they lack the mental dexterity to performresearch work efficiently. Their fearlessness in battlecan also be a drawback when presented with stupidlyoverwhelming odds.
9.1.4 FIREFLY
Attracted By: LairJob Class: ScoutCombat Class: FlankerSpells: Whirlwind
With their own personal light-source, thesecreatures are adept at exploring all of the nooks andcrannies that any expanding dungeon invariablyuncovers. They are swift enough to avoid mosttrouble and can even fly over hostile terrainto get to those hard to reach places.
Fireflies tend to avoid combat as much as possible, although they do make excellent earlywarning systems.
9.1.5 TROLL
Attracted By: Workshop Job Class: WorkerCombat Class: BlockerSpells: None
Essentially a manual worker bytrade (trolls despise having todo research), the troll is avaluable ally, albeit a very largeand ugly one. Its manualdexterity make it ideal forconstructing and disassemblingitems in the workshop, and fordisarming enemy traps.
In combat, its great size and strength mean itwill take to the front-line attempting to block theprogress of an enemy encroachment.
46 47
99..00 99..00
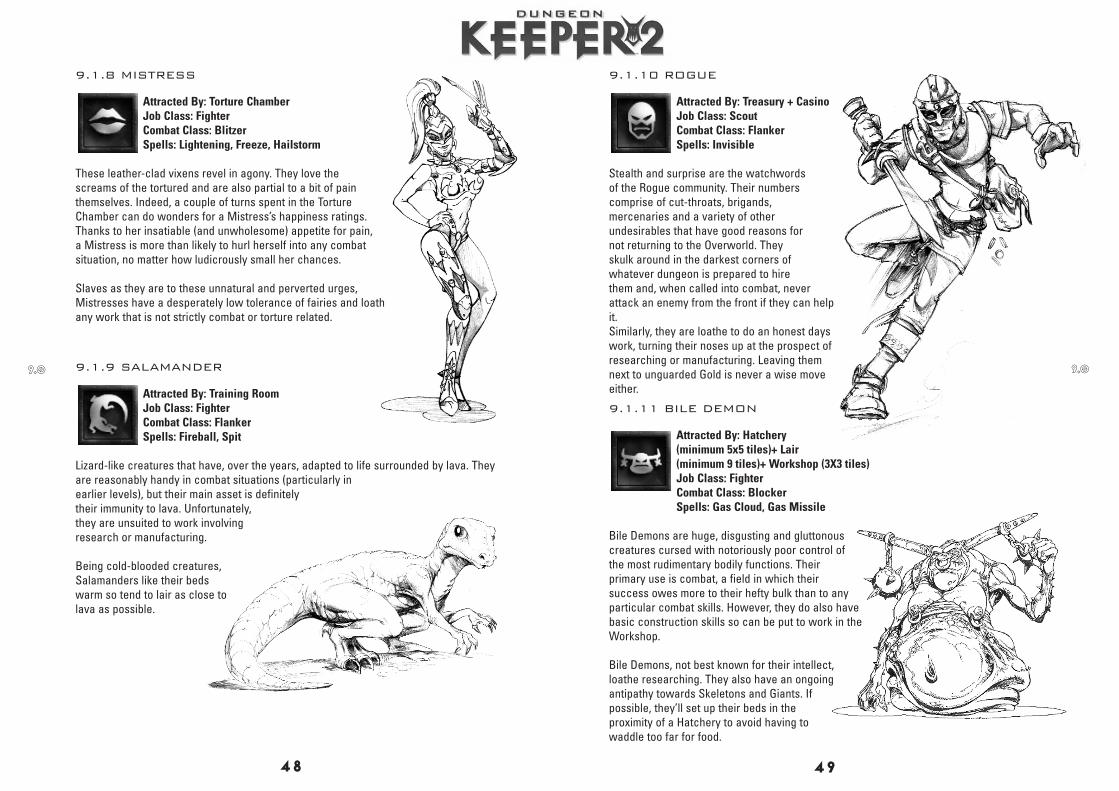
9.1.10 ROGUE
Attracted By: Treasury + CasinoJob Class: ScoutCombat Class: FlankerSpells: Invisible
Stealth and surprise are the watchwordsof the Rogue community. Their numberscomprise of cut-throats, brigands,mercenaries and a variety of otherundesirables that have good reasons fornot returning to the Overworld. Theyskulk around in the darkest corners ofwhatever dungeon is prepared to hirethem and, when called into combat, neverattack an enemy from the front if they can helpit.Similarly, they are loathe to do an honest dayswork, turning their noses up at the prospect ofresearching or manufacturing. Leaving themnext to unguarded Gold is never a wise moveeither.
9.1.11 BILE DEMON
Attracted By: Hatchery(minimum 5x5 tiles)+ Lair(minimum 9 tiles)+ Workshop (3X3 tiles)Job Class: FighterCombat Class: BlockerSpells: Gas Cloud, Gas Missile
Bile Demons are huge, disgusting and gluttonouscreatures cursed with notoriously poor control ofthe most rudimentary bodily functions. Theirprimary use is combat, a field in which theirsuccess owes more to their hefty bulk than to anyparticular combat skills. However, they do also havebasic construction skills so can be put to work in theWorkshop.
Bile Demons, not best known for their intellect,loathe researching. They also have an ongoingantipathy towards Skeletons and Giants. Ifpossible, they’ll set up their beds in theproximity of a Hatchery to avoid having towaddle too far for food.
9.1.8 MISTRESS
Attracted By: Torture Chamber Job Class: FighterCombat Class: BlitzerSpells: Lightening, Freeze, Hailstorm
These leather-clad vixens revel in agony. They love thescreams of the tortured and are also partial to a bit of painthemselves. Indeed, a couple of turns spent in the TortureChamber can do wonders for a Mistress’s happiness ratings.Thanks to her insatiable (and unwholesome) appetite for pain,a Mistress is more than likely to hurl herself into any combatsituation, no matter how ludicrously small her chances.
Slaves as they are to these unnatural and perverted urges,Mistresses have a desperately low tolerance of fairies and loathany work that is not strictly combat or torture related.
9.1.9 SALAMANDER
Attracted By: Training RoomJob Class: FighterCombat Class: FlankerSpells: Fireball, Spit
Lizard-like creatures that have, over the years, adapted to life surrounded by lava. Theyare reasonably handy in combat situations (particularly inearlier levels), but their main asset is definitelytheir immunity to lava. Unfortunately,they are unsuited to work involvingresearch or manufacturing.
Being cold-blooded creatures,Salamanders like their bedswarm so tend to lair as close tolava as possible.
48 49
99..00 99..00

99..00
9.1.14 DARK ANGEL
Attracted By: Temple (Minimum 5x5 tiles)Job Class: FighterCombat Class: BlitzerSpells: Disruption, Hailstorm, Skeleton Army,
Once-divine creatures now fallen from grace, Dark Angels make for fearsome allies onthe battlefield. They have exceptional strength, as well as the ability to summon skeletalhordes at will.
Unsurprisingly (given their history), Dark Angels have a deep-rooted hatred of Monks, andthey also extend these ill feelings to Fairies. However, in deference to their spiritualbackground, they do like to establish their Lairs as close to Temples as possible.
51
9.1.12 VAMPIRE
Attracted By: GraveyardJob Class: ThinkerCombat Class: BlitzerSpells: Slow, Drain, Raise Dead
Lords of the Undead, Vampires are created from thedecaying souls of slain creatures and humans.Amongst their skills in combat, Vampires have theability to hypnotise enemy creatures into temporarilyswitching sides.
Although not completely immortal, Vampires canonly be eternally ‘laid to rest’ by Monks (hencetheir unbridled hatred of the shaven-pated holyones). Each time a Vampire is slain, it loses anexperience Level before re-incarnating in theGraveyard. If you are not in control of aGraveyard when a Vampire is slain, or if theVampire is Level 1, then it is lost for good.
9.1.13 BLACK KNIGHT
Attracted By: Combat PitJob Class: FighterCombat Class: BlockerSpells: None
Having spurned the righteous callings of decency and chivalry,Black Knights are now solely dedicated to the cause of pureevil, making them sworn enemies of Knights and Kingsalike. Warriors through and through, Black Knights detestany from of work that doesn’t involve the repeated andbloody use of their trusty sword. Their sturdy plate armourallows them to survive prolonged and sustainedpunishment in combat and their great strength andbravery means they gleefully join the front ranks in anypotential bloodbath.
99..00
50
10.1.1.4 Increase Mana Special
A special bonus that gives your Manareserves a welcome boost.
10.1.2 HOW MANA IS USED
Essentially, Mana is a source of energy, which powers your magical Creatures, Spells andTraps. Many of these assets require Mana for maintenance, regardless of their currentactivities, so you should expect a fairly constant drain on your reserves.
10.1.2.1 Sustaining Imps
An absolutely fundamental part of your workforce (see the Imps section 3.5), Imps requirea constant supply of Mana to function. The Dungeon Heart always provides enough Manato sustain your four Imps, but any additional ones that you create (See Keeper Spells10.2) feed from your Mana reserves.
10.1.2.2 Sustaining Horny
A veritable powerhouse of mystical energy, Horny is a massive drain on your Manaresources. Summoning him requires vast amounts of Mana initially, and there’s also ahefty charge for keeping him in your dungeon. You have been warned.
10.1.2.3 Casting Spells
Every time you cast a Spell (see the Spells Panel section 6.1.5), a one off payment isimmediately drawn from your Current Mana. Spells that remain open indefinitely (i.e.Summon Horny and Possession) will remain open at no charge for a fixed amount of timeafter the initial payment, and then incur a Mana charge every turn.
10.1.2.4 Traps
Mana is used to power up and activate all of your Traps. Not only do Traps use Mana foreach individual firing; some of them also require maintenance every turn, which incurs anadditional cost. Ouch.
10.1.2.5 Dying in PossessionPossessing one of your servile lackeys costs Mana (see the Possession section 15.0).‘Dying’ whilst in possession of another Creature’s body isn’t nice. Expect to be taxedseverely should you let it happen.
10.0 MANA AND KEEPER SPELLS
10.1 Mana
Mana is the life force of your dungeon, the source of power for all of your Spells, Trapsand magical creatures. Maintaining your Mana levels is crucial to your success and youshould, at all times, keep a close eye on your Mana stockpile.
Note: The amount of Mana you can store is restricted by the limited capacity of your Dungeon Heart.
10.1.1 HOW MANA IS GENERATED
There are four basic ways in which you can generate Mana.
10.1.1.1 Claimed Territory
As every Dungeon Keeper worth his salt knows, the key to success and dominance isterritory. Each tile you claim generates Mana for you, so the more land you bag, the moreMana you’ll receive.
Note: Room tiles generate the same amount of Mana as claimed but undeveloped tiles.
10.1.1.2 Temple Prayer
Every time a creature gets spiritual and prays in one of your Temples, it generates Mana.The amount generated depends on the creature’s Job Class (Thinkers generate the most,Fighters the least). Converted enemy creatures produce twice as much Mana as friendlycreatures when they pray in the Temple.
10.1.1.3 Mana Vaults
As you explore the terrain surrounding you dungeons, you may come across large, bluereservoirs. These are Mana Vaults, natural reserves rich in the spiritual resource. Thesetiles may not be built upon, but they do provide a constant supply of Mana to the firstKeeper to claim them.
53
1100..00 1100..00
52
10.2 Keeper Spells
As Keeper, you have a ferocious collection of awesome spells potentially atyour disposal. Many of these spells will not become available until laterlevels but ensuring you have a good-sized Library gives you the bestchance of gaining any spells on a particular level.
If used wisely, Keeper spells will benefit you no end and have devastating effects onthose who seek to defile your Dungeon Heart.
Note: The majority of Keeper Spells may only be cast on your own land but, as you progress, you’ll discover spells that may be cast anywhere
10.2.1 TO CAST A KEEPER SPELL
1. Click on the Spells Icon on the Panel Bar of the Control Panel. Then click onthe spell of your choice.
2. Now move the Hand of Evil to the point on the Dungeon View where you wish to cast the spell. Note that the spell icon appears alongside the Hand of Evil.
3. Click and the spell is cast.
If you try to cast the spell over a forbidden area, or if you don’t have sufficient Mana, theSpell Icon changes:
Move the Hand of Evil so that the iconchanges back to its active state. Now youmay cast your selected spell.
10.2.2 CREATE IMP
Imps are your magically created workforce, your thoughts made flesh. Theyare your eyes, ears and hands in the world, changing the environment tomeet your grand designs. They are also very cute in a strange sort of way.The Create Imp spell enables you to expand your workforce, provided youhave the territory (and thus the Mana) to maintain it.
10.2.3 THUNDERBOLT
One of your simpler offensive spells, Thunderbolt hurls down a bolt ofelectrical energy on an enemy creature that has had the gall to enter yourdomain.
10.2.4 POSSESSION
Use the Possession spell to take up residence in the body of one of yourCreatures. For more information, refer to the Possession section 15.0.
10.2.5 HEAL
Use this spell to grant new health and vitality to battered troops. Cast thison a particular creature to replenish their Health. Healing ailing creaturescan change the odds dramatically in small skirmishes.
10.2.6 SIGHT OF EVIL
This cunning incantation allows you to view areas of terrain that are stillclouded by the Fog of War.
10.2.7 CALL TO ARMS
Cast this spell to have your Creatures drop everything and assemble underyour War Banner for the mother of all battles.
10.2.8 TREMOR
Tremor causes whole areas of land to shake uncontrollably. If used wisely,it can go a long way in weakening your enemies’ defences, but be warnedthat this spell has a detrimental effect on all creatures, striking fearthroughout the ranks of those so affected.
54 55
1100..00 1100..00
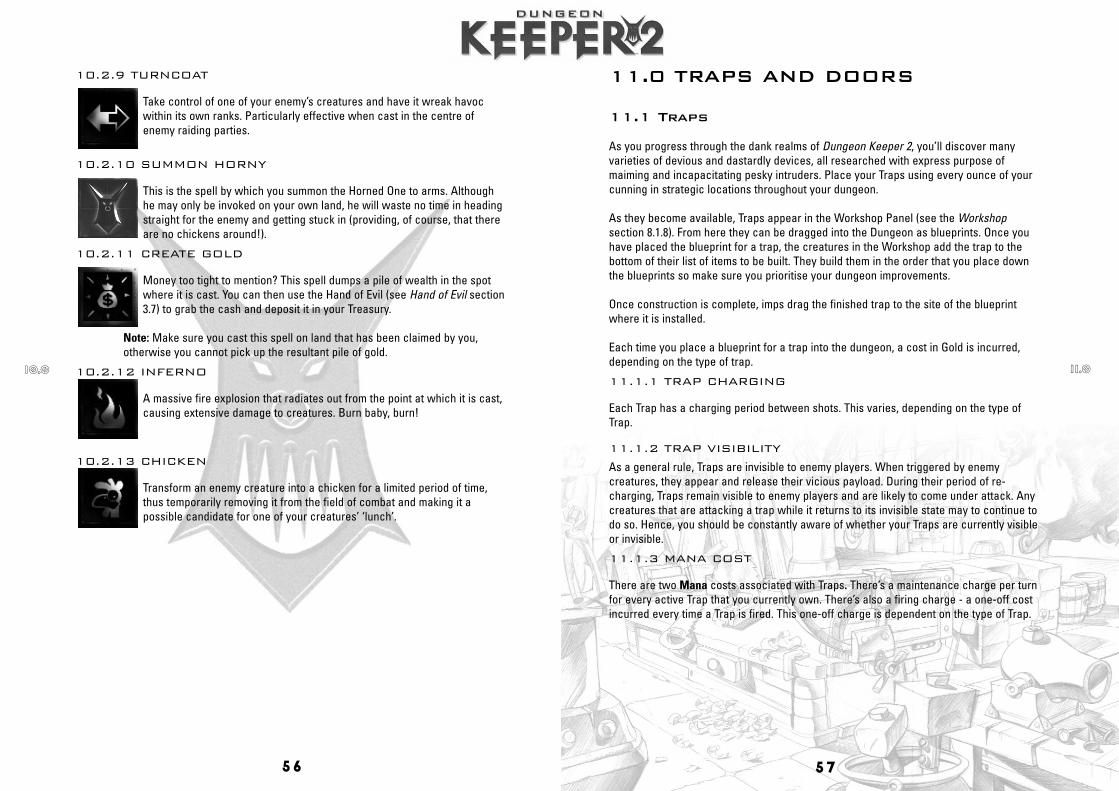
11.0 TRAPS AND DOORS
11.1 Traps
As you progress through the dank realms of Dungeon Keeper 2, you’ll discover manyvarieties of devious and dastardly devices, all researched with express purpose ofmaiming and incapacitating pesky intruders. Place your Traps using every ounce of yourcunning in strategic locations throughout your dungeon.
As they become available, Traps appear in the Workshop Panel (see the Workshopsection 8.1.8). From here they can be dragged into the Dungeon as blueprints. Once youhave placed the blueprint for a trap, the creatures in the Workshop add the trap to thebottom of their list of items to be built. They build them in the order that you place downthe blueprints so make sure you prioritise your dungeon improvements.
Once construction is complete, imps drag the finished trap to the site of the blueprintwhere it is installed.
Each time you place a blueprint for a trap into the dungeon, a cost in Gold is incurred,depending on the type of trap.
11.1.1 TRAP CHARGING
Each Trap has a charging period between shots. This varies, depending on the type ofTrap.
11.1.2 TRAP VISIBILITY
As a general rule, Traps are invisible to enemy players. When triggered by enemycreatures, they appear and release their vicious payload. During their period of re-charging, Traps remain visible to enemy players and are likely to come under attack. Anycreatures that are attacking a trap while it returns to its invisible state may to continue todo so. Hence, you should be constantly aware of whether your Traps are currently visibleor invisible.
11.1.3 MANA COST
There are two Mana costs associated with Traps. There’s a maintenance charge per turnfor every active Trap that you currently own. There’s also a firing charge - a one-off costincurred every time a Trap is fired. This one-off charge is dependent on the type of Trap.
10.2.9 TURNCOAT
Take control of one of your enemy’s creatures and have it wreak havocwithin its own ranks. Particularly effective when cast in the centre ofenemy raiding parties.
10.2.10 SUMMON HORNY
This is the spell by which you summon the Horned One to arms. Althoughhe may only be invoked on your own land, he will waste no time in headingstraight for the enemy and getting stuck in (providing, of course, that thereare no chickens around!).
10.2.11 CREATE GOLD
Money too tight to mention? This spell dumps a pile of wealth in the spotwhere it is cast. You can then use the Hand of Evil (see Hand of Evil section3.7) to grab the cash and deposit it in your Treasury.
Note: Make sure you cast this spell on land that has been claimed by you, otherwise you cannot pick up the resultant pile of gold.
10.2.12 INFERNO
A massive fire explosion that radiates out from the point at which it is cast,causing extensive damage to creatures. Burn baby, burn!
10.2.13 CHICKEN
Transform an enemy creature into a chicken for a limited period of time,thus temporarily removing it from the field of combat and making it apossible candidate for one of your creatures’ ‘lunch’.
56 57
1100..00 1111..00
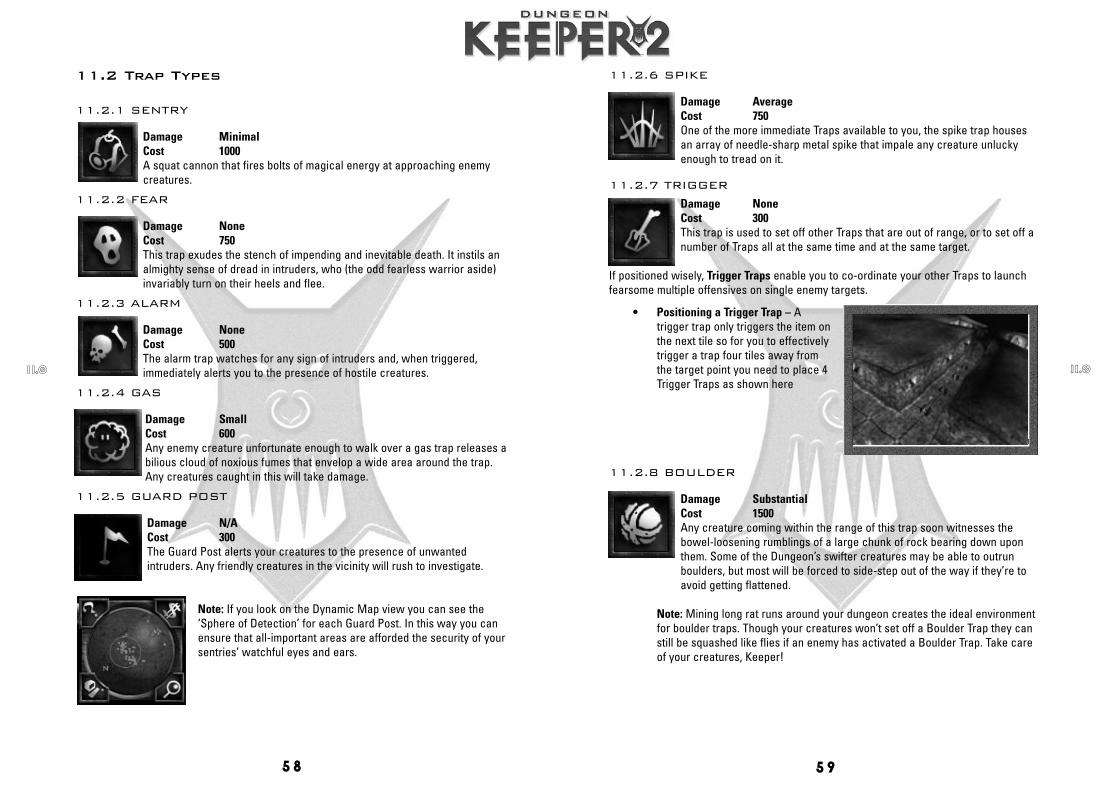
11.2.6 SPIKE
Damage AverageCost 750One of the more immediate Traps available to you, the spike trap housesan array of needle-sharp metal spike that impale any creature unluckyenough to tread on it.
11.2.7 TRIGGER
Damage NoneCost 300This trap is used to set off other Traps that are out of range, or to set off anumber of Traps all at the same time and at the same target.
If positioned wisely, Trigger Traps enable you to co-ordinate your other Traps to launchfearsome multiple offensives on single enemy targets.
• Positioning a Trigger Trap – Atrigger trap only triggers the item onthe next tile so for you to effectivelytrigger a trap four tiles away fromthe target point you need to place 4Trigger Traps as shown here
11.2.8 BOULDER
Damage SubstantialCost 1500Any creature coming within the range of this trap soon witnesses thebowel-loosening rumblings of a large chunk of rock bearing down uponthem. Some of the Dungeon’s swifter creatures may be able to outrunboulders, but most will be forced to side-step out of the way if they’re toavoid getting flattened.
Note: Mining long rat runs around your dungeon creates the ideal environment for boulder traps. Though your creatures won’t set off a Boulder Trap they can still be squashed like flies if an enemy has activated a Boulder Trap. Take care of your creatures, Keeper!
11.2 Trap Types
11.2.1 SENTRY
Damage MinimalCost 1000A squat cannon that fires bolts of magical energy at approaching enemycreatures.
11.2.2 FEAR
Damage NoneCost 750This trap exudes the stench of impending and inevitable death. It instils analmighty sense of dread in intruders, who (the odd fearless warrior aside)invariably turn on their heels and flee.
11.2.3 ALARM
Damage NoneCost 500The alarm trap watches for any sign of intruders and, when triggered,immediately alerts you to the presence of hostile creatures.
11.2.4 GAS
Damage SmallCost 600Any enemy creature unfortunate enough to walk over a gas trap releases abilious cloud of noxious fumes that envelop a wide area around the trap.Any creatures caught in this will take damage.
11.2.5 GUARD POST
Damage N/ACost 300The Guard Post alerts your creatures to the presence of unwantedintruders. Any friendly creatures in the vicinity will rush to investigate.
Note: If you look on the Dynamic Map view you can see the‘Sphere of Detection’ for each Guard Post. In this way you canensure that all-important areas are afforded the security of yoursentries’ watchful eyes and ears.
58 59
1111..00 1111..00
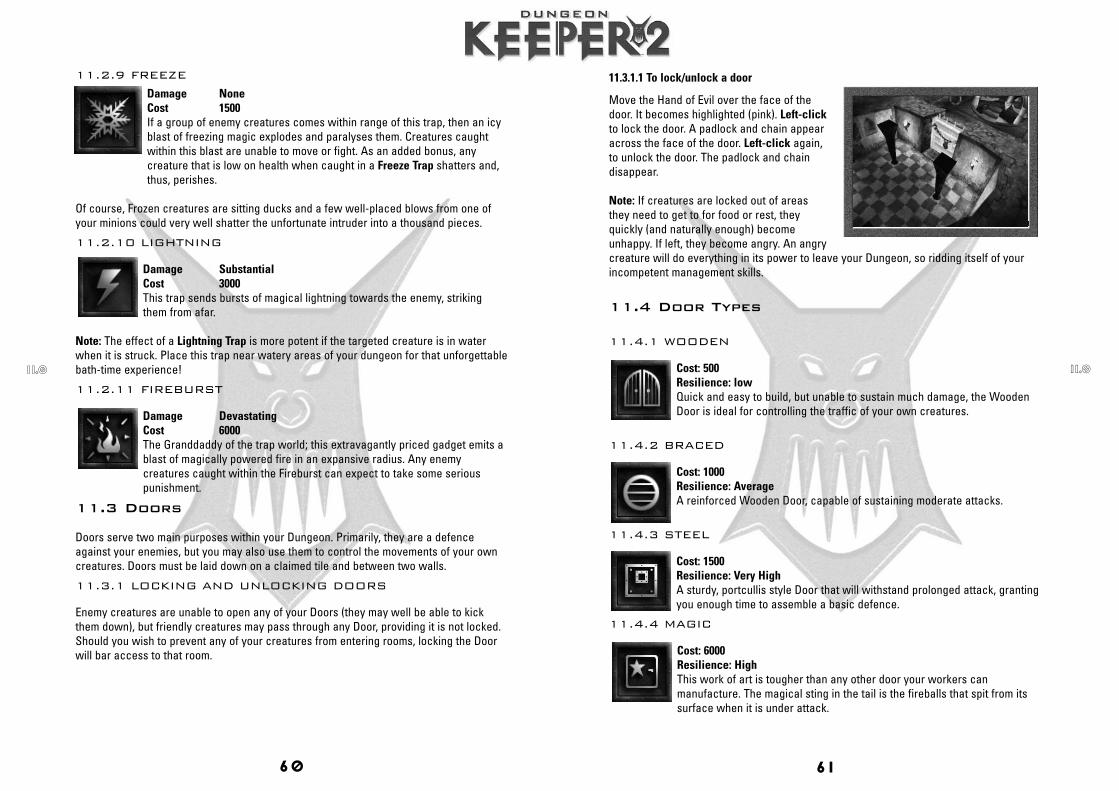
11.3.1.1 To lock/unlock a door
Move the Hand of Evil over the face of thedoor. It becomes highlighted (pink). Left-clickto lock the door. A padlock and chain appearacross the face of the door. Left-click again,to unlock the door. The padlock and chaindisappear.
Note: If creatures are locked out of areasthey need to get to for food or rest, theyquickly (and naturally enough) becomeunhappy. If left, they become angry. An angrycreature will do everything in its power to leave your Dungeon, so ridding itself of yourincompetent management skills.
11.4 Door Types
11.4.1 WOODEN
Cost: 500Resilience: lowQuick and easy to build, but unable to sustain much damage, the WoodenDoor is ideal for controlling the traffic of your own creatures.
11.4.2 BRACED
Cost: 1000Resilience: AverageA reinforced Wooden Door, capable of sustaining moderate attacks.
11.4.3 STEEL
Cost: 1500Resilience: Very HighA sturdy, portcullis style Door that will withstand prolonged attack, grantingyou enough time to assemble a basic defence.
11.4.4 MAGIC
Cost: 6000Resilience: HighThis work of art is tougher than any other door your workers canmanufacture. The magical sting in the tail is the fireballs that spit from itssurface when it is under attack.
11.2.9 FREEZE
Damage NoneCost 1500If a group of enemy creatures comes within range of this trap, then an icyblast of freezing magic explodes and paralyses them. Creatures caughtwithin this blast are unable to move or fight. As an added bonus, anycreature that is low on health when caught in a Freeze Trap shatters and,thus, perishes.
Of course, Frozen creatures are sitting ducks and a few well-placed blows from one ofyour minions could very well shatter the unfortunate intruder into a thousand pieces.
11.2.10 LIGHTNING
Damage SubstantialCost 3000This trap sends bursts of magical lightning towards the enemy, strikingthem from afar.
Note: The effect of a Lightning Trap is more potent if the targeted creature is in waterwhen it is struck. Place this trap near watery areas of your dungeon for that unforgettablebath-time experience!
11.2.11 FIREBURST
Damage DevastatingCost 6000The Granddaddy of the trap world; this extravagantly priced gadget emits ablast of magically powered fire in an expansive radius. Any enemycreatures caught within the Fireburst can expect to take some seriouspunishment.
11.3 Doors
Doors serve two main purposes within your Dungeon. Primarily, they are a defenceagainst your enemies, but you may also use them to control the movements of your owncreatures. Doors must be laid down on a claimed tile and between two walls.
11.3.1 LOCKING AND UNLOCKING DOORS
Enemy creatures are unable to open any of your Doors (they may well be able to kickthem down), but friendly creatures may pass through any Door, providing it is not locked.Should you wish to prevent any of your creatures from entering rooms, locking the Doorwill bar access to that room.
60 61
1111..00 1111..00
12.1.4 LIGHTNING
Harness Nature’s own electrical energy and unleash a ferocious bolt oflightening with which to fry your opponents.
12.1.5 GAS CLOUD
A toxic and potent combination of unholy vapours that causes damage toany enemy foolish enough to breathe it in. The nauseous cloud slowlyexpands as it dissipates.
12.1.6 GAS MISSILE
A long range missile that explodes on impact and immediately emits a rip-snorting Fart.
12.1.7 GUIDED BOLT
A magical arrow capable of locking onto, and tracking, its target. Althoughthe Guided Bolt is flawlessly accurate, it may fail to reach its target ifhindered by a wall or other obstacle.
12.1.8 SLOW
A cunning, web-like spell that reduces the target creature’s speed, givinghim or her a distinct disadvantage in combat. If the creature is currentlyunder the Haste Creature spell, Slow nullifies its effects and returns thecreature to ‘normal speed’.
12.1.9 GRENADE
A small, handheld explosive device thrown in the direction of the target. Itexplodes on impact with any damageable object except a wall, and affectscreatures in its blast area. If it fails to impact with a recognised target, itexplodes at the extent of its range.
12.1.10 DRAIN
Vampirism for the masses! This spell saps the enemy’s lifeforce andstrengthens your own. Drain removes a percentage of the target’s healthand heals the caster by a proportionally similar amount.
11.4.5 SECRET
Cost: 3000Resilience: HighThis is mysteriously cloaked from the sight of enemy whilst being clearlyvisible to you and your creatures. Ideal for rooms you do not want the
enemy to find.
11.4.6 BARRICADE
Cost: 400Resilience: AverageThis hefty blockade prevents any land-based creatures (including yourown) from passing, and may be placed anywhere in the dungeon. Flyingcreatures and projectile attacks can pass over the Barricade.
12.0 CREATURE SPELLS
Many of your creatures have magical spells at their disposal; their repertoire will burgeonas their experience increases.
12.1 Spells
12.1.1 FIREBALL
A ball of flame that inflicts fire damage on anything it hits. For use onsingle targets only.
12.1.2 FIREBOMB
A fireball that explodes on impact, damaging anything in the local vicinity.
12.1.3 FREEZE
Turns the targeted creature to ice. The unfortunate peon is then held insuspended animation until it thaws. While it causes no damage in itself, theFreeze spell does leave the target pitifully defenceless and open to attack.It can make a fair fight decidedly unfair!
62 63
1122..00 1122..00
12.1.18 KNIVES
Sends a shower of razor-sharp knives hurtling towards your target
12.1.19 RAISE DEAD
Temporarily transforms any humanoid corpses in the casting area intoSkeletons. Once raised, these act as regular Skeletons, fighting forwhichever side has raised them. Of course, they fall back into a lifeless pileof bones as soon as their task is complete or their time limit runs out.
12.1.20 SKELETON ARMY
Similar to the Raise the Dead spell but doesn’t require dead bodies. Whenthe spell is cast, a skeleton army of up to three skeletons rises from theground to fight for the caster.
12.1.21 HASTE SELF
Available only to experienced Imps, Haste Self increases the overall speedof the caster.
Note: Your Imps cast this automatically. An Imp so blessed has blue-greenstreaks behind him.
12.1.22 DISRUPTION
A fearsome projectile of bubbling, flesh-disrupting energy. The Dark Angelis the creature most likely to gain this Spell.
12.1.23 SPIT
A short range projectile attack of burning saliva. It causes all but the mostfearless of creatures to wince in disgust, then pain, as the noxioussubstance eats through their epidermis.
12.1.24 TELEPORT
Any Imp with this spell can teleport its way out of danger or to a job site.Most useful.
12.1.11 HAIL STORM
Rain down icy terror on your target with a Hail Storm so powerful that it canrip smaller targets to shreds.
12.1.12 ARROW
A standard ranged attack that keeps on truckin’ until it hits an obstacle or,better still, a living creature!
12.1.13 WHIRLWIND
Sends forth a spiraling wind of destruction. Which picks up any creaturesin its path.
12.1.14 HASTE CREATURE
Increases the overall speed of a friendly creature
12.1.15 HEAL CREATURE
Cures wounds and restores the health of a friendly creature. Used bySupport creatures to ensure that ailing front line troops remain fighting fit.
12.1.16 ARMOUR
Bolsters the defence characteristics of a friendly creature, enabling him towithstand greater amounts of damage than normal.
12.1.17 INVISIBLE
Renders the caster of the spell invisible. Therefore allowing the caster toslip,undetected,past enemy troops free to commit all manner of dastardlydeeds.
64 65
1122..00 1122..00
13.3.1 FEAR
Creatures become fearful when they realise that their chances against an enemy areslim. This may be because a creature is aware that it is no match for the opposition (i.e. itis outnumbered or unable to compete with the enemy’s strength / skills) or because it islow on health and needs a break. Either way, a creature afflicted by fear does all in itspower to escape the threat.
Note: If a creature is running away for a good reason (e.g. its health levels are critical),slapping it back into combat is very likely to bring its life to a premature and rather pitifulconclusion.
13.3.2 THREAT
It’s not just enemy creatures that present a threat to your minions. Your creatures maybecome fearful of enemy traps, spells and even rooms. If the threat presented is ofsufficient magnitude, then your creature will do everything in its power to escape. Groupsof creatures represent a greater threat than individuals and large creatures are morethreatening than smaller creatures.
13.4 Tactical Battle
Should your creatures encounter an enemy threat, they may well choose to engage incombat but, without your glorious leadership and direction, your creatures are vulnerableto mass slaughter and, ultimately, defeat.Taking into account the Combat Class of your creatures (see Fighter Types below), youshould position them in such a way as to maximise their effectiveness against the enemy.Co-ordinate your Blockers, Blitzers, Flankers and Support troops to wreak devastationand havoc in the enemy ranks.
13.5 Fighter Types
Each of your creatures is assigned a Combat Class (see the Creatures section 9.0). Thisdetermines how each creature is best used in battle.
13.5.1 BLOCKER
Blockers are ideal for defending vital areas of your dungeon. In combat situations, theydon’t storm in on the offensive, but rather hold their position in an attempt to preventenemy troops from gaining ground.
13.5.2 BLITZER
Blitzers are ideally suited to offensive strikes. When confronted with enemy troops,Blitzers storm towards the front line in an attempt to break through and reach the enemysupport creatures. Once the enemy support has been disabled, they turn their attentionsback to the other creatures.
13.0 COMBAT
As your dungeon expands and gains infamy and notoriety, the more likely it becomes thatHeroes and enemy Keepers are making designs on your admirably hideous domain.Sooner or later, violence inevitably erupts as your dungeon comes under attack from theforces of Good and/or rival Keepers.
13.1 Fight!
As soon as a fight breaks out, an icon appears on the Panel Bar. Right-clickon the icon or press the F key to head straight for the action.
• To select any of your creatures, click on or beside their number in the PanelBar.
• To zoom to any of your creatures, right-click on or beside their number in thePanel Bar.
13.2 Enemy Health
Enemy creatures display Creature Flowers, very much like your those of your ownminions. These are coloured coded, and are easily differentiated from those of your owntroops. Use the enemy Creature Flowers to gauge the health of your adversaries.
13.3 Fear and Threat
Whether or not your creatures choose to enter into combat dependslargely on their assessment of the situation. If a creature is pessimisticabout its chances of survival in a fight, it attempts to retreat. Similarly, if acreature is low on health, it attempts to return to its Lair to recuperate.
66 67
1133..00 1133..00
Use Impenetrable Rock as walls for rooms whenever you can, as they don’t needreinforcing and cannot be tunneled through.
Wherever possible, make good use of Prisons and Torture Chambers. They are anexcellent way to increase your vile army at the enemies’ expense.
Establish ‘killing zones’ so that combat doesn’t always take place in your vital rooms.These areas should allow access to your dungeon but be heavily defended by Traps andGuard Rooms.
14.3 TRAPS
Use Traps for defence wherever possible. They are better (and more expendable) thancreatures as a form of dungeon defence.
Use Fear Traps to delay attacks on your Dungeon.
Don’t just use Sentry Traps on their own. Place a line of other Traps or Barricades in frontof them to prevent the enemy from just waltzing straight up to them.
Multiple Trigger Traps used in liaison with Boulder Traps work wonders in turning theHordes of Good into a nasty mess on your Dungeon floor.
Boulders aren’t just defensive. They can be used to batter down Magic Doors withoutgetting your creatures shot. Just slap the Boulder towards the door and let physics do therest.
14.4 COMBAT
Use a good mix of Blockers and Support creatures when attacking. This sort of advancedtactic reaps dividends.
Use Possess Creature spell to draw enemy creatures into an ambush.
Don’t use obvious attack routes when you are ready to attack the enemy.
If you have to drop creatures in front of approaching heroes drop Goblins and Mistressesat the front, as the speed at which they recover from being stunned will allow them toprotect your slower to get up creatures.
If the battle is taking place on your terrain then once it has been joined, drop a couple ofBlitzers behind the enemy. This will allow them easy access to the enemy Supportcreatures.
Do not assume that you will automatically win a battle just because you have moreminions. Watch battles closely and be prepared to use your spells to aid them.
13.5.3 FLANKER
Flankers attempt to position themselves behind the enemy targets, where they can thenlet rip and inflict the maximum damage possible.
13.5.4 SUPPORT
Support creatures are generally unsuited to physical, hand-to-hand combat, but theirranged attacks are ideally suited to providing cover and support to the Blitzers andFlankers.
14.0 ADVANCED STRATEGIES
AND TACTICS
DO NOT READ THIS SECTION IF YOU WANT TO EXPERIENCE THEJOY OF DISCOVERY THAT COMES WITH KEEPER EXPERTISE. IF YOU’VE JUST TAKEN A HAMMERING IN A MULTIPLAYERGAME AND NEED SOME TOP TIPS FROM THE BRAINS ATBULLFROG™, READ ON!
This section is designed to help you on your way to becoming a world-beating Keeper.Follow these tips to improve your Dungeon management skills and instil fear and dread inthe hearts of all those who may be foolish enough to cross you…
14.1 GENERAL
Use Sight of Evil to reveal areas before digging out blindly and opening up your dungeonto marauding invaders.
At the beginning of each realm, start building as many rooms as possible and fortify yourdungeon with traps. Don’t forget to keep a watchful eye on your Gold levels though.
Keep expanding your dungeon. Don’t wall yourself in, as there are plenty of things to find.Don’t expand so fast that you leave yourself exposed, however.
You can never have too much gold. Gold means more rooms, traps and above all happywell paid minions. Gold also often acts as a hint where to travel in the level.
Keep an eye on your Mana levels, as it’s all too easy to waste it all on frenzied spellusage. Remember: no Mana means no traps will work and no spells can be cast. Plusyour Imps might start to vanish.
14.2 ROOMS
Not all rooms have to be large and sprawling. A well-placed line of room tiles along areinforced wall will allow the creatures to work and take up less space.
68 69
1144..00 1144..00
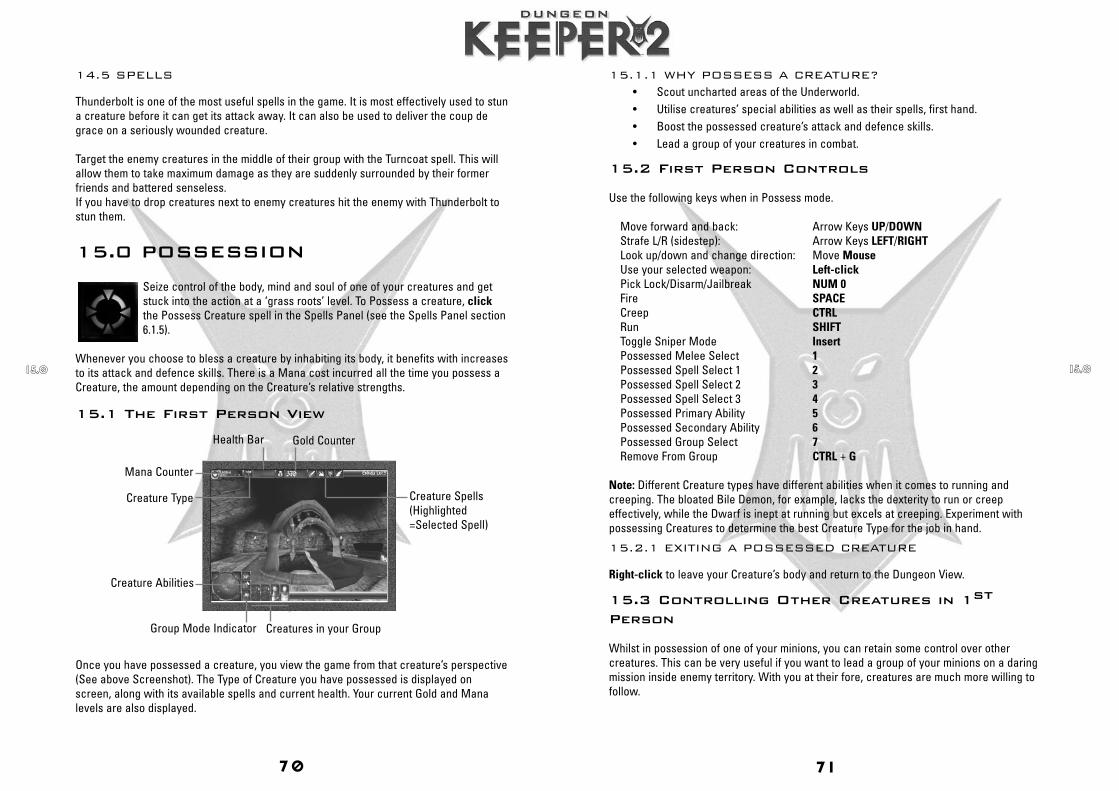
15.1.1 WHY POSSESS A CREATURE?
• Scout uncharted areas of the Underworld.• Utilise creatures’ special abilities as well as their spells, first hand.• Boost the possessed creature’s attack and defence skills.• Lead a group of your creatures in combat.
15.2 First Person Controls
Use the following keys when in Possess mode.
Move forward and back: Arrow Keys UP/DOWNStrafe L/R (sidestep): Arrow Keys LEFT/RIGHT Look up/down and change direction: Move MouseUse your selected weapon: Left-clickPick Lock/Disarm/Jailbreak NUM 0Fire SPACECreep CTRLRun SHIFTToggle Sniper Mode InsertPossessed Melee Select 1Possessed Spell Select 1 2Possessed Spell Select 2 3Possessed Spell Select 3 4Possessed Primary Ability 5Possessed Secondary Ability 6Possessed Group Select 7Remove From Group CTRL + G
Note: Different Creature types have different abilities when it comes to running andcreeping. The bloated Bile Demon, for example, lacks the dexterity to run or creepeffectively, while the Dwarf is inept at running but excels at creeping. Experiment withpossessing Creatures to determine the best Creature Type for the job in hand.
15.2.1 EXITING A POSSESSED CREATURE
Right-click to leave your Creature’s body and return to the Dungeon View.
15.3 Controlling Other Creatures in 1st
Person
Whilst in possession of one of your minions, you can retain some control over othercreatures. This can be very useful if you want to lead a group of your minions on a daringmission inside enemy territory. With you at their fore, creatures are much more willing tofollow.
14.5 SPELLS
Thunderbolt is one of the most useful spells in the game. It is most effectively used to stuna creature before it can get its attack away. It can also be used to deliver the coup degrace on a seriously wounded creature.
Target the enemy creatures in the middle of their group with the Turncoat spell. This willallow them to take maximum damage as they are suddenly surrounded by their formerfriends and battered senseless.If you have to drop creatures next to enemy creatures hit the enemy with Thunderbolt tostun them.
15.0 POSSESSION
Seize control of the body, mind and soul of one of your creatures and getstuck into the action at a ‘grass roots’ level. To Possess a creature, clickthe Possess Creature spell in the Spells Panel (see the Spells Panel section6.1.5).
Whenever you choose to bless a creature by inhabiting its body, it benefits with increasesto its attack and defence skills. There is a Mana cost incurred all the time you possess aCreature, the amount depending on the Creature’s relative strengths.
15.1 The First Person View
Once you have possessed a creature, you view the game from that creature’s perspective(See above Screenshot). The Type of Creature you have possessed is displayed onscreen, along with its available spells and current health. Your current Gold and Manalevels are also displayed.
70 71
1155..00 1155..00
Mana Counter
Gold CounterHealth Bar
Creature Type Creature Spells(Highlighted=Selected Spell)
Creatures in your GroupGroup Mode Indicator
Creature Abilities
15.4.4 FAIRY
Primary Ability: Pray (see Monk below).
15.4.5 ROGUE
Primary Ability: Cloaking. Sneak into enemy dungeons, appearing to enemy keepers asone of their Rogues. In order to do this; the rogue must be standing on a tile of theenemy’s land that he wishes to imitate. Hit 5 and he will cloak.
Note: Guards can sniff Cloaked Rogues out and if your Rogue steals Gold from anotherKeeper’s treasury he will be quickly discovered.
15.4.6 GIANT
Primary Ability: Dwarf Chucking (See Bile Demon 15.4.1).
15.4.7 ELVEN ARCHER
Primary Ability: Sniper mode (See Dark Elf 15.4.2).
15.4.8 THIEF
Primary Ability: Cloaking (See Rogue above).
15.4.9 MONK
Primary Ability: Pray. Praying replenishes a Monk’s health as well as healing any friendlycreature within the Monk’s range of perception. To exit prayer mode, press 5 again.
Note: The Monk is vulnerable to attack when praying (much like a stunned creature).
15.3.1 FORMING A GROUP
Press the Possessed Group Select button (7).Now, use the Mouse look feature to highlight the creature you want to join your group.Click when the creature is highlighted. The creature is now compelled to join your partyand will attack anything that you attack.
• You can check how many creatures you have with you on the Info bar withinthe 1st Person screen.
Press CTRL + G to release any creatures that are following you
Note: Unhappy or angry creatures may choose to ignore your commands. Due to hismagical nature, Horny cannot be possessed.
15.4 Special Creature Abilities
These are only available if you possess a creature, and can definitely give you the upperhand in many situations. You may also use any creature spells the possessed individualhas gained.Primary ability:5Secondary Ability (If applicable): 6
15.4.1 BILE DEMON
Primary Ability: Dwarf Chucking. This fat bloater can indulge in a spot of Imp and Dwarfthrowing. Clearly, a projectile of this size can do goodly amounts of damage to any targethit but the unfortunate, unwilling projectile may perish in the process.
15.4.2 DARK ELF
Primary Ability: Sniper mode. The Dark Elf’s eyesight is so keen that even in the depths ofa dark dungeon he can zoom in on his targets. This enables him to take extra potent potshots at unfortunate enemies.
Toggle Sniper Mode: Insert
15.4.3 VAMPIRE
Primary Ability: Change into Bat. In bat mode the Vampire appears as such to enemyKeepers, and can fly around in the same way as a Firefly does. Very useful for stealthyscouting missions.
Secondary Ability: Hypnotise enemy creature. Kings, Imps, and Horned Reapers are notaffected due to their strong or plain psychotic nature.
72 73
1155..00 1155..00
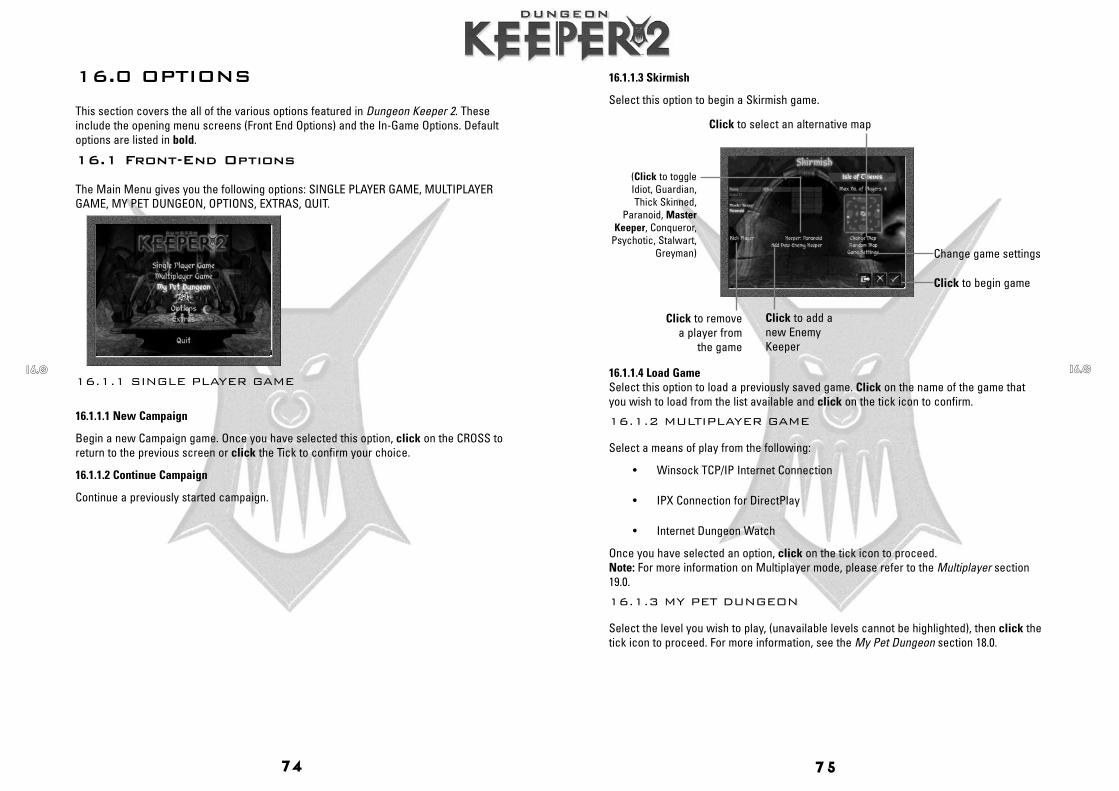
16.1.1.3 Skirmish
Select this option to begin a Skirmish game.
16.1.1.4 Load GameSelect this option to load a previously saved game. Click on the name of the game thatyou wish to load from the list available and click on the tick icon to confirm.
16.1.2 MULTIPLAYER GAME
Select a means of play from the following:
• Winsock TCP/IP Internet Connection
• IPX Connection for DirectPlay
• Internet Dungeon Watch
Once you have selected an option, click on the tick icon to proceed. Note: For more information on Multiplayer mode, please refer to the Multiplayer section19.0.
16.1.3 MY PET DUNGEON
Select the level you wish to play, (unavailable levels cannot be highlighted), then click thetick icon to proceed. For more information, see the My Pet Dungeon section 18.0.
16.0 OPTIONS
This section covers the all of the various options featured in Dungeon Keeper 2. Theseinclude the opening menu screens (Front End Options) and the In-Game Options. Defaultoptions are listed in bold.
16.1 Front-End Options
The Main Menu gives you the following options: SINGLE PLAYER GAME, MULTIPLAYERGAME, MY PET DUNGEON, OPTIONS, EXTRAS, QUIT.
16.1.1 SINGLE PLAYER GAME
16.1.1.1 New Campaign
Begin a new Campaign game. Once you have selected this option, click on the CROSS toreturn to the previous screen or click the Tick to confirm your choice.
16.1.1.2 Continue Campaign
Continue a previously started campaign.
74 75
1166..00 1166..00
Click to begin game
Click to select an alternative map
Click to removea player from
the game
(Click to toggleIdiot, Guardian,Thick Skinned,
Paranoid, MasterKeeper, Conqueror,
Psychotic, Stalwart,Greyman)
Click to add anew EnemyKeeper
Change game settings
16.1.5 QUIT
Select this option to exit Dungeon Keeper 2 and return to Windows.
16.2 In-Game Options
To access the In-Game options either:
• Press ESC
• Click on the Options Icon on the Dynamic Panel Map (see Dynamic Panel Map6.1.7)
16.2.1 LEVEL OBJECTIVE
Select this option to view the mission briefing for this level.
16.2.2 GAME OPTIONS
Select Game Options to access options for Graphics, Sound, Control and Cameras.
16.2.2.1 Graphic Options• Water Translucency (toggle ON/OFF)• Environment Mapping (toggle ON/OFF)• Graphic Options (toggle LOW/MEDIUM/HIGH)• Shadow Detail Level (adjust using slider)
16.2.2.2 Sound Options
These options are identical to those found in the Front End Options (see the Front EndOptions section 16.1)
16.1.4 OPTIONS
Select this option to alter your configuration for Graphics, Sound or Control.
16.1.4.1 Graphics Options• Water Translucency (toggle ON/OFF)• Environment Mapping (toggle ON/OFF)• Hardware Acceleration (toggle ON/OFF)• D3D Device (toggle)• Resolution (toggle 400x300, 512x384, 640x480, 800x600)• Gamma (adjust using slider) - only avaliable with some graphic cards• Shadow Detail Level (adjust using slider)• Graphics Options (toggle LOW/MEDIUM/HIGH)
16.1.4.2 Sound Options• Master Volume (adjust using slider)• Voice Volume (adjust using slider)• Music Volume (adjust using slider)• SFX Volume (adjust using slider)• Sound Quality (toggle LOW/MEDIUM/HIGH)• Speaker Configuration (toggle STEREO/HEADPHONES)• QSound (toggle ON/OFF)
16.1.4.3 Control Options
To define your key commands:
1. Select an action (use the slider to scroll down the list).
2. At the prompt, press the button on your keyboard that you wish to assign to thataction.
• Mouse Sensitivity (adjust using slider)• Invert Mouse (1st Person) (toggle ON/OFF)• Game Speed (adjust using slider)• Scroll Speed (adjust using slider)
16.1.5 EXTRAS
• Today’s Top Keepers• View Movies• DK3 Trailer• Credits
76 77
1166..00 1166..00
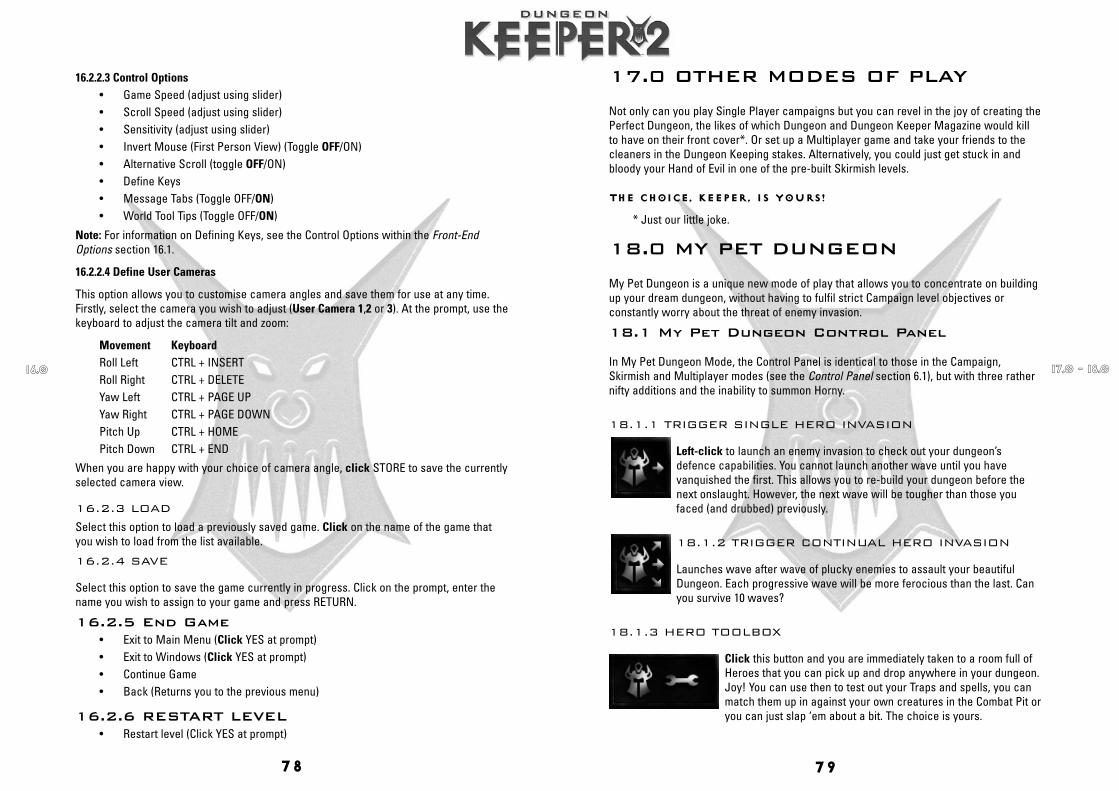
17.0 OTHER MODES OF PLAY
Not only can you play Single Player campaigns but you can revel in the joy of creating thePerfect Dungeon, the likes of which Dungeon and Dungeon Keeper Magazine would killto have on their front cover*. Or set up a Multiplayer game and take your friends to thecleaners in the Dungeon Keeping stakes. Alternatively, you could just get stuck in andbloody your Hand of Evil in one of the pre-built Skirmish levels.
THE CHOICE, KEEPER, IS YOURS!
* Just our little joke.
18.0 MY PET DUNGEON
My Pet Dungeon is a unique new mode of play that allows you to concentrate on buildingup your dream dungeon, without having to fulfil strict Campaign level objectives orconstantly worry about the threat of enemy invasion.
18.1 My Pet Dungeon Control Panel
In My Pet Dungeon Mode, the Control Panel is identical to those in the Campaign,Skirmish and Multiplayer modes (see the Control Panel section 6.1), but with three rathernifty additions and the inability to summon Horny.
18.1.1 TRIGGER SINGLE HERO INVASION
Left-click to launch an enemy invasion to check out your dungeon’sdefence capabilities. You cannot launch another wave until you havevanquished the first. This allows you to re-build your dungeon before thenext onslaught. However, the next wave will be tougher than those youfaced (and drubbed) previously.
18.1.2 TRIGGER CONTINUAL HERO INVASION
Launches wave after wave of plucky enemies to assault your beautifulDungeon. Each progressive wave will be more ferocious than the last. Canyou survive 10 waves?
18.1.3 HERO TOOLBOX
Click this button and you are immediately taken to a room full ofHeroes that you can pick up and drop anywhere in your dungeon.Joy! You can use then to test out your Traps and spells, you canmatch them up in against your own creatures in the Combat Pit oryou can just slap ‘em about a bit. The choice is yours.
16.2.2.3 Control Options• Game Speed (adjust using slider)• Scroll Speed (adjust using slider)• Sensitivity (adjust using slider)• Invert Mouse (First Person View) (Toggle OFF/ON)• Alternative Scroll (toggle OFF/ON)• Define Keys• Message Tabs (Toggle OFF/ON)• World Tool Tips (Toggle OFF/ON)
Note: For information on Defining Keys, see the Control Options within the Front-EndOptions section 16.1.
16.2.2.4 Define User Cameras
This option allows you to customise camera angles and save them for use at any time.Firstly, select the camera you wish to adjust (User Camera 1,2 or 3). At the prompt, use thekeyboard to adjust the camera tilt and zoom:
Movement KeyboardRoll Left CTRL + INSERTRoll Right CTRL + DELETEYaw Left CTRL + PAGE UPYaw Right CTRL + PAGE DOWNPitch Up CTRL + HOMEPitch Down CTRL + END
When you are happy with your choice of camera angle, click STORE to save the currentlyselected camera view.
16.2.3 LOAD
Select this option to load a previously saved game. Click on the name of the game thatyou wish to load from the list available.
16.2.4 SAVE
Select this option to save the game currently in progress. Click on the prompt, enter thename you wish to assign to your game and press RETURN.
16.2.5 End Game• Exit to Main Menu (Click YES at prompt)• Exit to Windows (Click YES at prompt)• Continue Game• Back (Returns you to the previous menu)
16.2.6 RESTART LEVEL• Restart level (Click YES at prompt)
78 79
1166..00 1177..00 -- 1188..00
• To create a new game, first choose the Multiplayer game name by clicking onthe name under Game Name and entering the name of your session. If youwish to change the TCP/IP Port, click on the number under Port and enter anew port value. When you’re ready to create a Multiplayer game click onCreate.
• To join a game already created, click on the name and click on JOIN.
19.1.2.1 Ping Time
Ping time shows the time taken to send data between the client and the server. Werecommend a ping time of less than 300ms although we have made efforts to ensure thatgames remain playable even at higher ping times.
19.2 Starting a Game
If you have joined a game, you will see a different screen to the host. The joiner will onlybe able to chat with the other players, while the host will be able to alter a number ofdifferent options to change the game.
At the top of the screen is a list of all the players. To Ally with another player click on theSymbol under Allies, of the player you wish to Ally with. Half of his Symbol will thenchange to your colour. If he then wishes to Ally with you he must then click on yourSymbol and the other half changes to his colour. The last column shows which playersare ready to start. Before each game can start, each player must click on the bottomright tick and toggle this option to yes.
Below is the Chat Box. When a player sends a message, it appears in this box. To sendyour own, click on the box underneath and type your message. When you press RETURN,the message is sent.
To the left is the name of the level currently selected.The host has a number of different options;
19.2.1 GAME SETTINGS
• Click to enter the Game Settings menu and click on the tick to return.
The Game Settings List allows you to decide which spells and buildings will be included inthe game. Each level has its own recommended Game Settings list. Click on the arrowbuttons to scroll through the list and use the slider bars or click under Available totoggle."
19.2.2 CHANGE MAP
• Click to enter the Map Select menu and click the tick icon to return.
This menu lists all the levels available to you, depending on how many players are in yourgame. Click on a name to select it.
18.1.3.1 Hero Level selector
You can choose the experience levels of the heroes you pluck from the Hero Toolboxusing the Hero Level Selector, which can be found in the Hero Toolbox. Click on the HeroLevel Selector to go up 1 level and right-click to go down 1 level.
18.2 My Pet Dungeon Realms
There are a number of realms in the My Pet Dungeon Mode, but when you complete arealm you are not obliged to proceed to the next. Should you wish to remain indefinitely inRealm 1 to continue the development of your dungeon, you may do so.
When you have met the criteria for any realm, a prompt appears asking you if you want toproceed to the next. Select YES to check out the next realm. Select NO to remain on thecurrent level.
19.0 MULTIPLAYER
Multiplayer is available via LAN and Internet.
19.1 Creating a Game
When you first choose a service, your default name is Player. To change this, left-click onthe name and type in a new one. Press RETURN to store the name.Click on the CROSS to return to the Choose Service menu.
19.1.1 IPX
In IPX, Dungeon Keeper 2 automatically searches for created games and lists them on thescreen for you.
• To host a new game, first change the name of your game. Click on the nameunder Game Name, change it and press RETURN. Now click on CREATE.
• To join a game already created, click on the name and then click on JOIN.
19.1.2 WINSOCK TCP/IP
On the Winsock service, you are provided with an Address Book. You can use thisaddress book to store the Names, IP Addresses/ Domain Names and Ports of yourfavourite opponents.
The game automatically searches these addresses for any games that have been createdand then displays them in the Games Available Box.
80 81
1188..00--1199..00 1199..00
20.0 SKIRMISH
Skirmish is an alternative mode of play to the Campaign or My Pet Dungeon modes, inwhich you can opt to take on computer controlled enemy Keepers.Skirmish mode is ideally suited to testing out your combat skills. Game on…Note: For information on setting up a Skirmish game, please refer to the Front End Optionssection 16.1.
20.1 Game Settings
The Game Settings screen contains a number of options that you can adjust for SkirmishMode games. At the top of the screen are five tabs that you can click on to bring uprelevant information on Creatures, Rooms, Spells, Traps or Doors.
20.1.1 CREATURES
Adjust the slider bars to set the maximum number of each creature type for your game. 0 - 32
20.1.2 ROOMS, SPELLS, TRAPS AND DOORS
For Rooms, Spells, Traps and Doors, you can toggle the availability of each item:
20.1.2.1 No
This item is not available
20.1.2.2 Start
This item is available from the start of the game
20.1.2.3 Research
This item becomes available only after it has been researched
In addition to the Creature, Rooms, Spells, Traps and Doors specific information, theGame Settings screen gives you the following options:
20.1.2.4 Dungeon Heart Destroyed
This option enables you to select the reward for destroying an Enemy Keeper’s DungeonHeart. Toggle between Gain Mana, Gain Mana and Specials or Gain Mana, Rooms andLand.
20.1.2.5 Game Duration
Click on the Zero and enter a number representing Game Time in minutes.
20.1.2.6 Fog of War ™Toggle the Fog of War ON/OFF.
19.2.3 FOG OF WAR TM (Found in Game Settings)
This toggles the Fog of War ON or OFF. This option hides all the land under a thick fog,except those areas that your followers have explored. This can add a more strategicelement to your games.
19.2.4 START
Click on the tick icon to begin the game.
82 83
1199..00 2200..00
CREDITS
BULLFROG
Executive Producer: Colin RobinsonProducer: Nick GoldsworthyAssistant Producers: Pete Blow, Graham HarbourSenior Project Scheduler: Jon LawrenceLead Programmer: Alex PetersEngine Programmer: Martin BellEffects Programmer: Andy CakebreadProgrammers: Paul Carpenter, Michael A. Carr, Alex Dowdeswell, David Foskett, Colin Moore, Mark Stacey, Matt Whitton, Thomas Anderson, Carsten SorensonLibs & Tools: Mark Huntley, Andy McDonald, Alistair MilneNavigation: Ian Shaw, Robin Green, Jarl OstensenSoftware Render & Audio Programming: Martin GriffithsProgressive Meshing: Mark FeldmanAudio Programming: Austin EllisLevel Design Manager: David AmorLead Level Design: Shintaro KanaoyaLevel Designers: Julian Glover, Shelagh Lewins, Nick RicksLead Game Design: Sean CooperGame Design: Zy Nicholson, Alex Trowers, Andy TrowersArt Director: John MilesLead Animator: Jason SmithAnimator: Adam CoglanArtist (Character Models, Models & Textures) 2D Front End: Darren PattendenArtist (Models & Textures) 3D Front End: Peter AmachreeArtist (Special Effects), Animator: Kevin DuffyArtist (Graphic User Interface, Electronic Press Kit): Mike ManGraphic Artist: Graham BellArt Support: Darren TuckeyVideo Artists: Jason Lord, Jamie BradshawWriters: Zy Nicholson, Jon Weinbren, Gordon DavidsonManual Writers: James Lenoël, Oli LadenburgDevelopment Co-ordinator: Tracey CharltonAudio Producer: Nick LaviersSound Effects: Matt Thurling, Adele Kellett, Elaine WilliamsComposer: Mark KnightRecording Engineer: Bill LustyMusicians: Andy Hamill (Acoustic Bass), Dan Farrant (Percussion)Voice of the Mentor: Richard RidingsVoices of Enemy Keepers: Kate Harbour, Gavin Robertson, Nigel CarringtonVoice of Horny: Nicholas CalderbankCreature Sounds: Lewis MacLeod, Big Al, Peter Amachree, Dene Carter, Ada Posta, Andy Nyman, James Taylor, Ben Stevens
20.1.2.7 Max creatures
Adjust the slider bar to select the maximum amount of creatures that a player may haveat any one time.
20.1.2.8 Gold Density
Adjusts amount of Gold in block ranging between three settings: Low (50%) Medium(100%) High (400%)
20.1.2.9 Mana Regeneration
Adjusts rate of regeneration from LOW to HIGH. This works exactly the same as Golddensity
20.1.2.10 Game Speed
This affects the speed of everything in the game. The game turn ranges from 25% to 400%of its default rate.
84 85
2200..00
NOTICE
ELECTRONIC ARTS RESERVES THE RIGHT TO MAKE IMPROVEMENTS IN THIS PRODUCT DESCRIBED IN THISMANUAL AT ANY TIME AND WITHOUT NOTICE. THIS MANUAL, AND THE SOFTWARE DESCRIBED IN THISMANUAL, IS UNDER COPYRIGHT. ALL RIGHTS ARE RESERVED. NO PART OF THIS MANUAL OR THE DESCRIBEDSOFTWARE MAY BE COPIED, REPRODUCED, TRANSLATED OR REDUCED TO ANY ELECTRONIC MEDIUM ORMACHINE-READABLE FORM WITHOUT THE PRIOR WRITTEN CONSENT OF ELECTRONIC ARTS LIMITED, PO BOX835, SLOUGH, BERKS, SL3 8XU, ENGLAND. ELECTRONIC ARTS MAKES NO WARRANTIES, CONDITIONS ORREPRESENTATIONS EXPRESS OR IMPLIED, WITH RESPECT TO THIS MANUAL, ITS QUALITY, MERCHANTABILITYOR FITNESS FOR ANY PARTICULAR PURPOSE. THIS MANUAL IS PROVIDED “AS IS”. ELECTRONIC ARTS MAKESCERTAIN LIMITED WARRANTIES WITH RESPECT TO THE SOFTWARE AND THE MEDIA FOR THE SOFTWARE. IN NOEVENT SHALL ELECTRONIC ARTS BE LIABLE FOR ANY SPECIAL, INDIRECT OR CONSEQUENTIAL DAMAGES.THESE TERMS AND CONDITIONS DO NOT AFFECT OR PREJUDICE THE STATUTORY RIGHTS OF A PURCHASER INANY CASE WHERE A PURCHASER IS A CONSUMER ACQUIRING GOODS OTHERWISE THAN IN THE COURSE OF ABUSINESS.
LIMITED WARRANTY
Electronic Arts warrants to the original purchaser of this computer software product that the recording media onwhich the software programs are recorded will be free from defects in materials and workmanship for 12 monthsfrom the date of purchase. During such period defective media will be replaced if the original product is returned toElectronic Arts at the address at the rear of this document, together with a dated proof of purchase, a statementdescribing the defects, the faulty media and your return address.This warranty is in addition to, and does not affect your statutory rights in any way.This warranty does not apply to the software program themselves, which are provided “as is”, nor does it apply tomedia which has been subject to misuse, damage or excessive wear.
Returns After Warranty.
Electronic Arts will replace user-damaged media, current stocks allowing, if the original media is returned with aEurocheque or postal order for £7.50 per CD, payable to Electronic Arts Ltd.Please remember to include full details of the defect, your name, address and, where possible, a daytime telephonenumber where we can contact you.
Electronic Arts Customer Warranty, P.O. Box 835, Slough, SL3 8XU, UK.
Software © 1999 Electronic Arts. Electronic Arts, Bullfrog, the Bullfrog logo, The Hand of Evil, and Dungeon Keeperare trademarks or registered trademarks of Electronic Arts in the United States and/or other countries. All rightsreserved. Bullfrog Productions Ltd is an Electronic Arts™ company. Dark Angel is a registered trademark of GamesWorkshop Ltd. Used with permission. DirectX, Direct 3D, DirectSound, DirectDraw, Windows and Microsoft areeither trademarks or registered trademarks of Microsoft Corporation in the United States and/or other countries.QSound and the Q Logo are registered trademarks of QSound Labs, Inc.”Environmental Audio” is a trademark andthe Environmental Audio Logo is a registered trademark of Creative Technologies Ltd.All other trademarks are theproperty of their respective owners. All rights reserved.
Lead Tester: Steven LawrieAssistant Lead Tester (Single Player): Darren TuckeyAssistant Lead Tester (Multiplayer): Lawrence DoyleConfig Manager: Matt PriceTesters: Dan McDonald, Phil Mansell, Tristan Paramor, Andy Miller, Nathan Smethurst,Jez Harris, Robert Stevens, Ross Manton, Stuart Pratt, Braydon Burgess, Greg Williams,James Pickett, Ed Law, Martin Hall, John Brunton, Joe Borthwick, Additional Testing: Olly Byrne, Darren King, Rob Charlish, Jeff Brutus, Matt Price, Stephen Harrison, Dominic Waddel, Idwal Wynne-Jones, Anthony Street, AnthonyPimentelPublic Relations: Patrick Buechner, Marc Trennheuser, Melanie Bongartz, BerndReinartz, Anne Vaganay, Stéphanie MichelMarketing: Karine Dognin, Pauline Vivet, Chris Plummer, Jonathon Harris
ELECTRONIC ARTS EUROPE
Product Manager: Owen O’BrienLocalisation Project Manager: Carol AggettDTP Manager: Anita K. LeggDocumentation: James Lenoël, Oli LadenburgPack Design: Caroline PagePack and Documentation Layout: John Montague, Nicola LinehanTranslation Co-ordination: Clare ParkesLocalisation Co-ordination - Export and Web: Petrina WallaceMaterials Co-ordination: Lynne MossStudio Ops: Steve Fitton and Dan HolmanQuality Assurance: Simon Romans
SPECIAL THANKS
Johan Danforth, Richard Wilson, Stan Ragan, Brian Bonislawsky.
86 87

NOTES
88


![Comunidad Inti Wara Yassi Reports/CIWY Annual Report... · Magali [•] Keeper Eugenia [•] Keeper Oso Antonio Keeper Monica Negrete Keeper Parque Jacj Cuisi Miriam Ríos Director](https://img.pdfslide.net/doc/110x75/5e1a843df3295425390e6116/comunidad-inti-wara-reportsciwy-annual-report-magali-a-keeper-eugenia.jpg)