Embed Size (px)
Citation preview
7/23/2019 e10878.pdf
http://slidepdf.com/reader/full/e10878pdf 1/12
1
Oracle® Database
Quick Installation Guide
11g Release 2 (11.2) for Microsoft Windows x64 (64-Bit)
E10878-01
March 2010
This guide describes how to quickly install the Oracle Database product on Windowsx64 systems. It includes information about the following:
1. Review Information About this Guide
2. Log On to the System with Administrator Privileges
3. Check the Hardware Requirements
4. Check the Software Requirements
5. Web Browser Support
6. Install the Oracle Database Software
7. Installing Oracle Database Examples
8. What to Do Next?
9. Additional Information
10. Documentation Accessibility
1 Review Information About this Guide
This guide describes how to install Oracle Database using the default installationoptions into a new Oracle home.
Tasks Described in this Guide
The procedures in this guide describe how to:
■ Configure your system to support Oracle Database.
■ Install the Oracle Database software on a local file system.
■ Configure a general-purpose Oracle database that uses the local file system fordatabase file storage.
Results of a Successful Installation
After you successfully install Oracle Database:
■ The database that you created and the default Oracle Net listener process run onthe system.
■ Oracle Enterprise Manager Database Control is running and can be accessed usinga Web browser.
7/23/2019 e10878.pdf
http://slidepdf.com/reader/full/e10878pdf 2/12
2
Tasks Not Described in this Guide
This guide covers the Typical Installation scenario and does not describe how tocomplete the following tasks:
■ Installing the software on a system that has an existing Oracle softwareinstallation.
■ Installing Oracle Clusterware and Oracle Real Application Clusters.
■ Cloning an Oracle home.
■ Enabling Enterprise Manager e-mail notifications or automated backups.
■ Using alternative storage options such as Automatic Storage Management.
■ Installing and configuring Oracle grid infrastructure.
Where to Get Additional Installation Information
For more detailed information about installing Oracle Database components,including information about the tasks not described in this guide, see one of thefollowing guides:
■ If you are installing the software on a single system, see Oracle Database Installation
Guide for Microsoft Windows.■ If you want to install Oracle grid infrastructure for a standalone server, then see
the "Oracle Grid Infrastructure" chapter in Oracle Database Installation Guide for Microsoft Windows.
■ If you are installing Oracle Real Application Clusters, see Oracle Grid Infrastructure Installation Guide and Oracle Real Application Clusters InstallationGuide. These guides describe how to install Oracle grid infrastructure and OracleReal Application Clusters. Oracle grid infrastructure is a prerequisite for OracleReal Application Clusters installations.
All these guides are available on the product media. To access these guides, use a Web browser to open the welcome.htm l file located in the top-level directory of the
installation media.For information about installing Oracle Database examples, see Oracle DatabaseExamples Installation Guide.
2 Log On to the System with Administrator PrivilegesLog on as a member of the Administrators group to the computer on which you wantto install Oracle components. If you are installing on a Primary Domain Controller(PDC) or a Backup Domain Controller (BDC), log on as a member of the DomainAdministrators group.
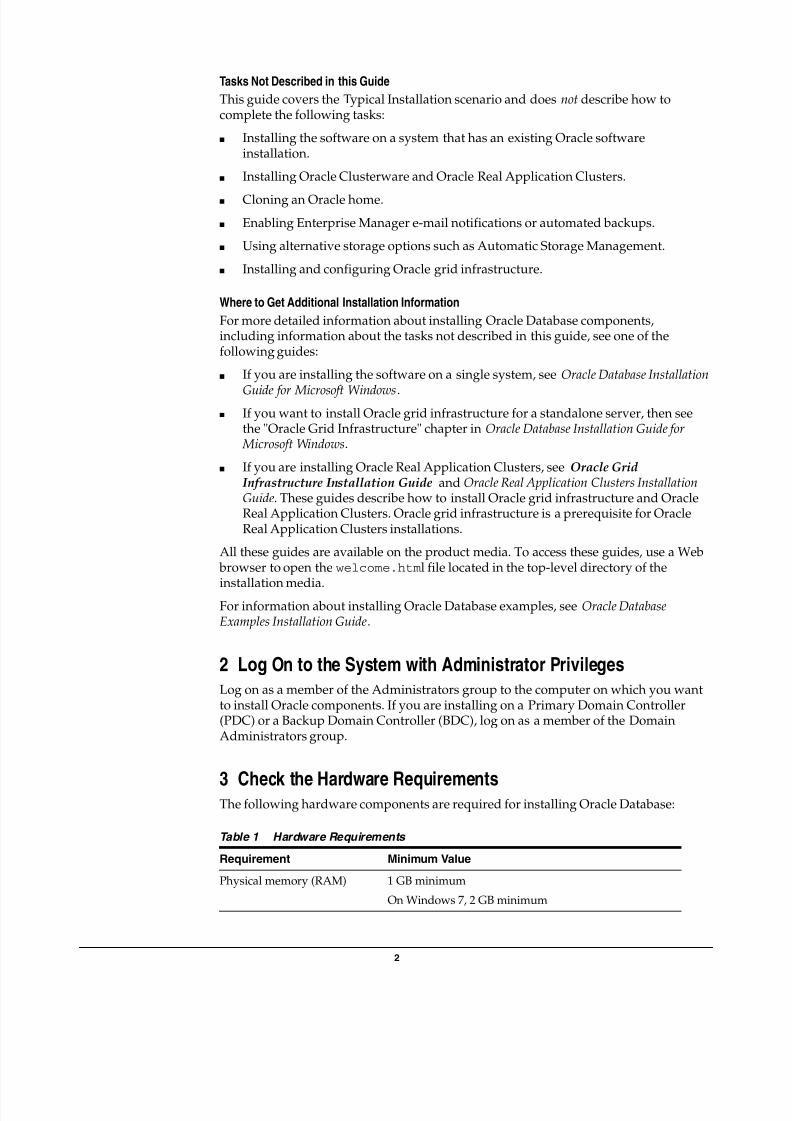
3 Check the Hardware RequirementsThe following hardware components are required for installing Oracle Database:
Table 1 Hardware Requirements
Requirement Minimum Value
Physical memory (RAM) 1 GB minimum
On Windows 7, 2 GB minimum
7/23/2019 e10878.pdf
http://slidepdf.com/reader/full/e10878pdf 3/12
3
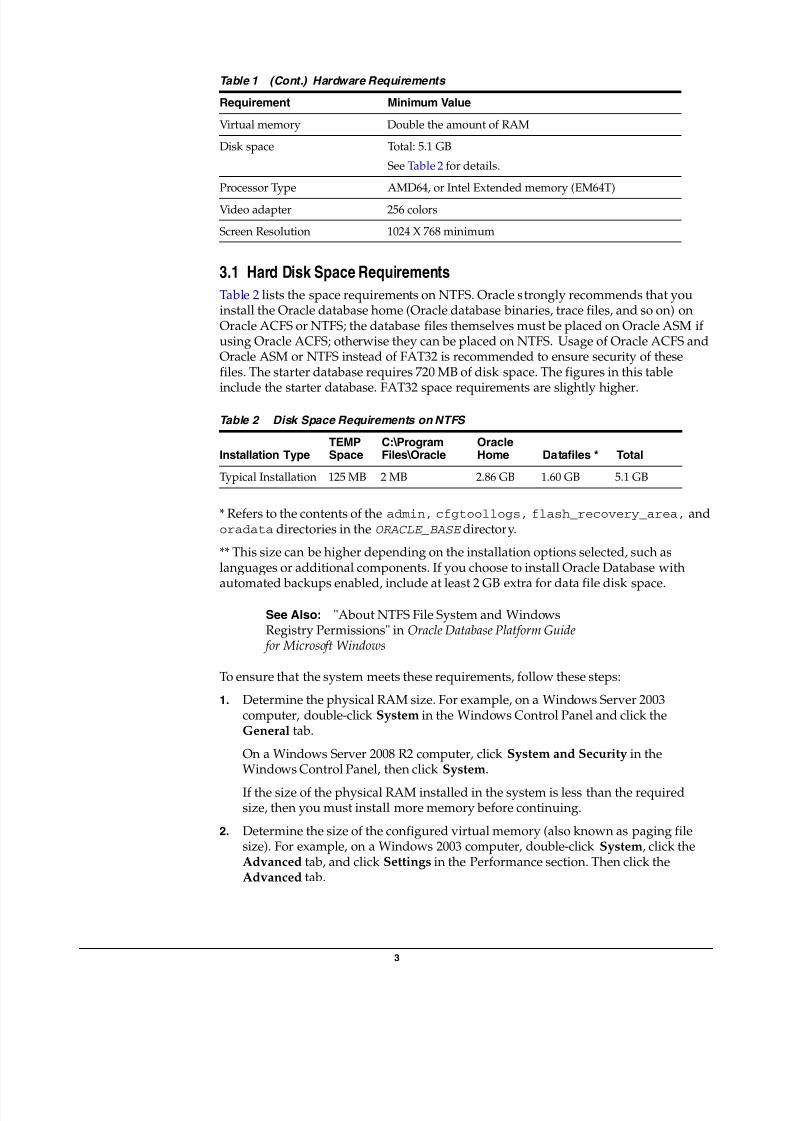
3.1 Hard Disk Space Requirements
Table 2 lists the space requirements on NTFS. Oracle strongly recommends that youinstall the Oracle database home (Oracle database binaries, trace files, and so on) onOracle ACFS or NTFS; the database files themselves must be placed on Oracle ASM ifusing Oracle ACFS; otherwise they can be placed on NTFS. Usage of Oracle ACFS andOracle ASM or NTFS instead of FAT32 is recommended to ensure security of thesefiles. The starter database requires 720 MB of disk space. The figures in this table
include the starter database. FAT32 space requirements are slightly higher.
* Refers to the contents of the admin, cfgtoollogs, flash_recovery_area, andoradata directories in the ORACLE_BASE directory.
** This size can be higher depending on the installation options selected, such aslanguages or additional components. If you choose to install Oracle Database with
automated backups enabled, include at least 2 GB extra for data file disk space.
To ensure that the system meets these requirements, follow these steps:
1. Determine the physical RAM size. For example, on a Windows Server 2003computer, double-click System in the Windows Control Panel and click theGeneral tab.
On a Windows Server 2008 R2 computer, click System and Security in theWindows Control Panel, then click System.
If the size of the physical RAM installed in the system is less than the requiredsize, then you must install more memory before continuing.
2. Determine the size of the configured virtual memory (also known as paging filesize). For example, on a Windows 2003 computer, double-click System, click theAdvanced tab, and click Settings in the Performance section. Then click theAdvanced tab.
Virtual memory Double the amount of RAM
Disk space Total: 5.1 GB
See Table 2 for details.
Processor Type AMD64, or Intel Extended memory (EM64T)
Video adapter 256 colors
Screen Resolution 1024 X 768 minimum
Table 2 Disk Space Requirements on NTFS
Installation TypeTEMPSpace
C:\ProgramFiles\Oracle
OracleHome Datafiles * Total
Typical Installation 125 MB 2 MB 2.86 GB 1.60 GB 5.1 GB
See Also: "About NTFS File System and WindowsRegistry Permissions" in Oracle Database Platform Guide
for Microsoft Windows
Table 1 (Cont.) Hardware Requirements
Requirement Minimum Value
7/23/2019 e10878.pdf
http://slidepdf.com/reader/full/e10878pdf 4/12
4
On a Windows Server 2008 R2 computer, click System and Security, then clickSystem, click Advanced System Settings, click the Advanced tab on SystemProperties page, and then click Settings in the Performance section. Then selectthe Advanced tab on Performance Options page.
The virtual memory is listed in the Virtual Memory section.
If necessary, see your operating system documentation for information about how
to configure additional virtual memory.3. Determine the amount of free disk space on the system. For example, on a
Windows 2003 computer, double-click My Computer, right-click the drive wherethe Oracle software is to be installed, and select Properties.
On a Windows Server 2008 R2 computer, right-click My Computer and clickOpen.
4. Determine the amount of disk space available in the temp directory. This isequivalent to the total amount of free disk space, minus what is needed for theOracle software to be installed.
If there is less than 125 MB of disk space available in the temp directory, then firstdelete all unnecessary files. If the temp disk space is still less than 125 MB, then set
the TEMP or TMP environment variable to point to a different hard drive.For example, to change the environment variables on a Windows Server 2003computer, double-click System, click the Advanced tab, and click EnvironmentVariables.
On a Windows Server 2008 R2 computer, click System and Security, then clickSystem, click Advanced System Settings, click the Advanced tab on SystemProperties page, and then click Environment Variables.
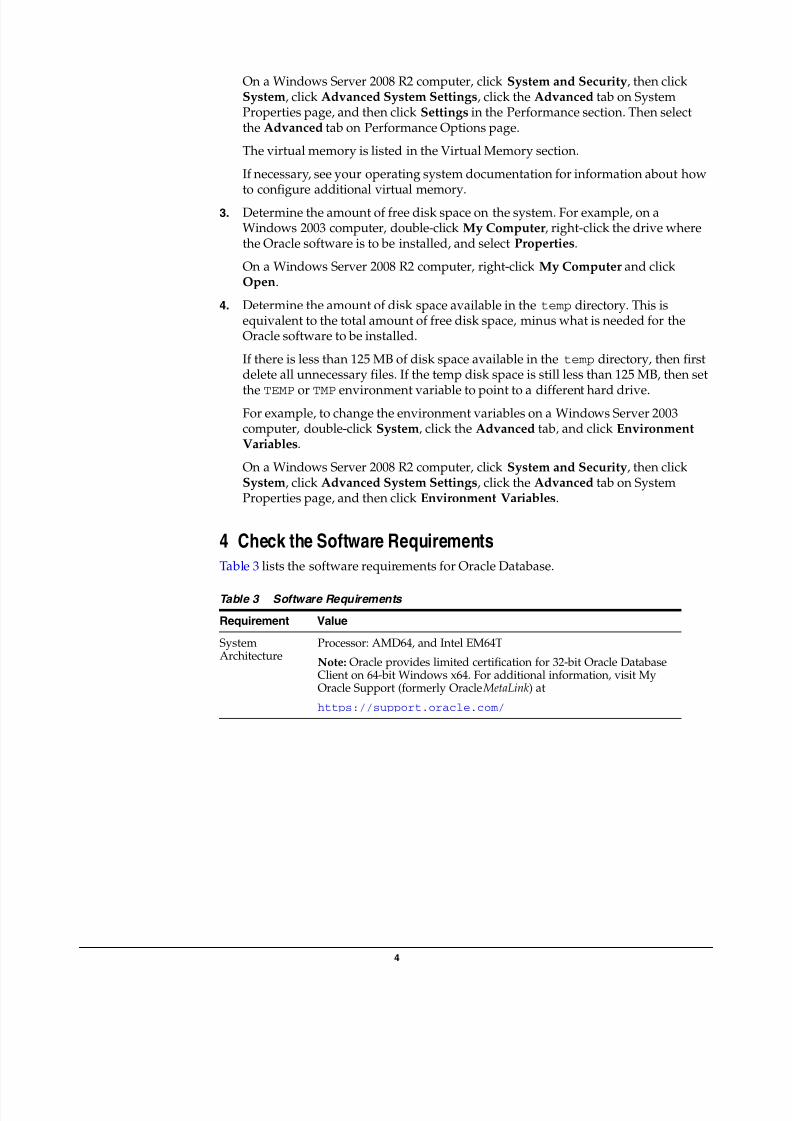
4 Check the Software RequirementsTable 3 lists the software requirements for Oracle Database.
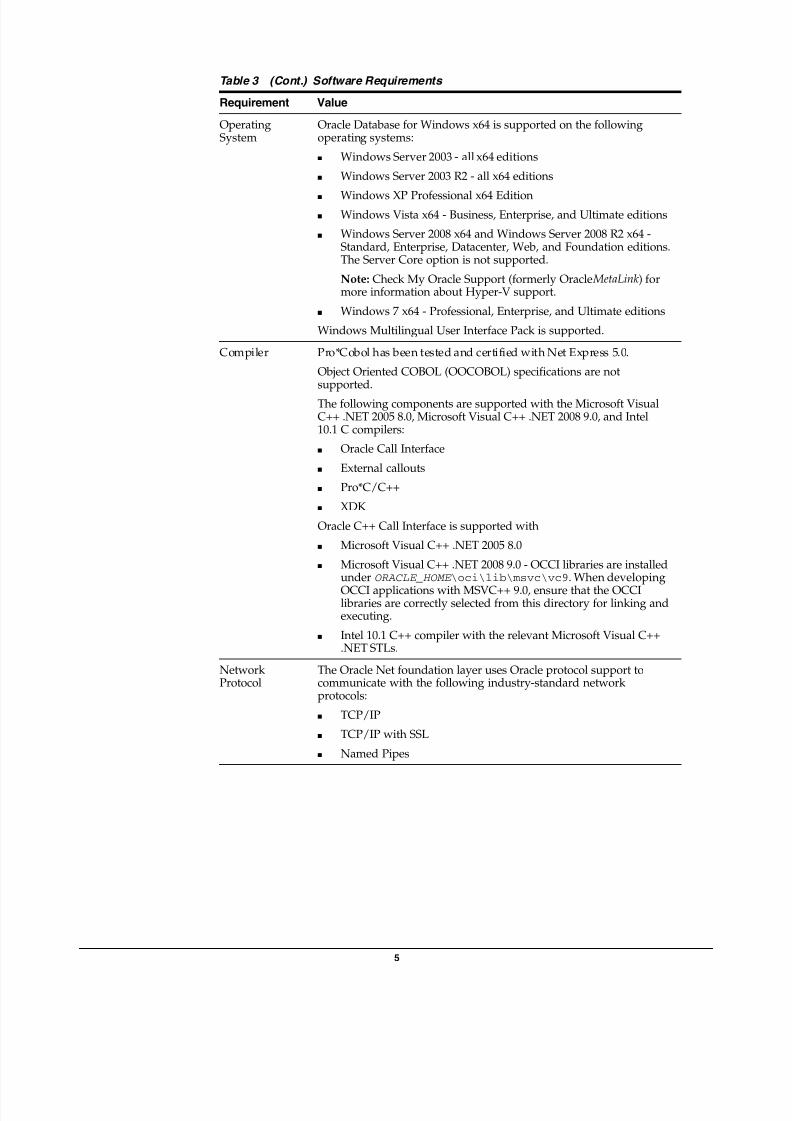
Table 3 Software Requirements
Requirement Value
SystemArchitecture
Processor: AMD64, and Intel EM64T
Note: Oracle provides limited certification for 32-bit Oracle DatabaseClient on 64-bit Windows x64. For additional information, visit MyOracle Support (formerly Oracle MetaLink ) at
https://support.oracle.com/
7/23/2019 e10878.pdf
http://slidepdf.com/reader/full/e10878pdf 5/12
5
OperatingSystem
Oracle Database for Windows x64 is supported on the followingoperating systems:
■ Windows Server 2003 - all x64 editions
■ Windows Server 2003 R2 - all x64 editions
■ Windows XP Professional x64 Edition■ Windows Vista x64 - Business, Enterprise, and Ultimate editions
■ Windows Server 2008 x64 and Windows Server 2008 R2 x64 -Standard, Enterprise, Datacenter, Web, and Foundation editions.The Server Core option is not supported.
Note: Check My Oracle Support (formerly Oracle MetaLink ) formore information about Hyper-V support.
■ Windows 7 x64 - Professional, Enterprise, and Ultimate editions
Windows Multilingual User Interface Pack is supported.
Compiler Pro*Cobol has been tested and certified with Net Express 5.0.
Object Oriented COBOL (OOCOBOL) specifications are notsupported.
The following components are supported with the Microsoft VisualC++ .NET 2005 8.0, Microsoft Visual C++ .NET 2008 9.0, and Intel10.1 C compilers:
■ Oracle Call Interface
■ External callouts
■ Pro*C/C++
■ XDK
Oracle C++ Call Interface is supported with
■ Microsoft Visual C++ .NET 2005 8.0
■ Microsoft Visual C++ .NET 2008 9.0 - OCCI libraries are installedunder ORACLE_HOME \oci\lib\msvc\vc9. When developing
OCCI applications with MSVC++ 9.0, ensure that the OCCIlibraries are correctly selected from this directory for linking andexecuting.
■ Intel 10.1 C++ compiler with the relevant Microsoft Visual C++.NET STLs.
NetworkProtocol
The Oracle Net foundation layer uses Oracle protocol support tocommunicate with the following industry-standard networkprotocols:
■ TCP/IP
■ TCP/IP with SSL
■ Named Pipes
Table 3 (Cont.) Software Requirements
Requirement Value
7/23/2019 e10878.pdf
http://slidepdf.com/reader/full/e10878pdf 6/12
6
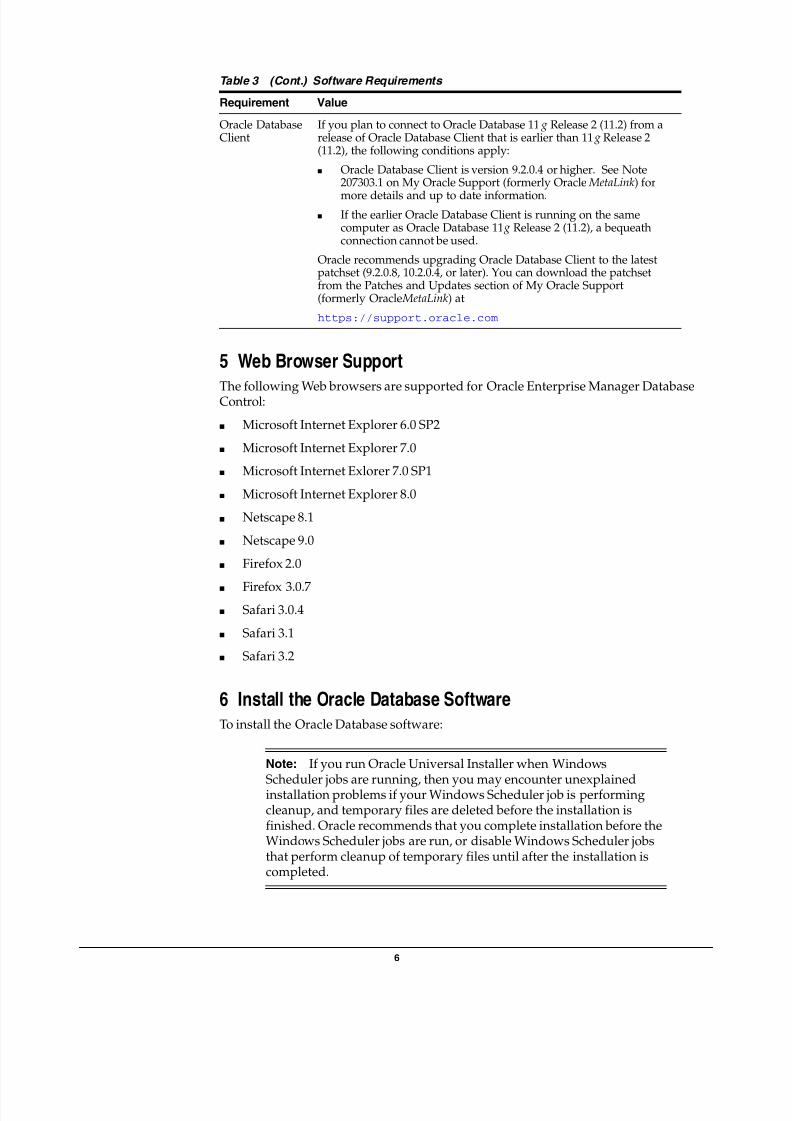
5 Web Browser Support
The following Web browsers are supported for Oracle Enterprise Manager DatabaseControl:
■ Microsoft Internet Explorer 6.0 SP2
■ Microsoft Internet Explorer 7.0
■ Microsoft Internet Exlorer 7.0 SP1
■ Microsoft Internet Explorer 8.0
■ Netscape 8.1
■ Netscape 9.0
■ Firefox 2.0
■ Firefox 3.0.7■ Safari 3.0.4
■ Safari 3.1
■ Safari 3.2
6 Install the Oracle Database SoftwareTo install the Oracle Database software:
Oracle DatabaseClient
If you plan to connect to Oracle Database 11 g Release 2 (11.2) from arelease of Oracle Database Client that is earlier than 11 g Release 2(11.2), the following conditions apply:
■ Oracle Database Client is version 9.2.0.4 or higher. See Note207303.1 on My Oracle Support (formerly Oracle MetaLink ) for
more details and up to date information.■ If the earlier Oracle Database Client is running on the same
computer as Oracle Database 11 g Release 2 (11.2), a bequeathconnection cannot be used.
Oracle recommends upgrading Oracle Database Client to the latestpatchset (9.2.0.8, 10.2.0.4, or later). You can download the patchsetfrom the Patches and Updates section of My Oracle Support(formerly Oracle MetaLink ) at
https://support.oracle.com
Note: If you run Oracle Universal Installer when Windows
Scheduler jobs are running, then you may encounter unexplainedinstallation problems if your Windows Scheduler job is performingcleanup, and temporary files are deleted before the installation isfinished. Oracle recommends that you complete installation before theWindows Scheduler jobs are run, or disable Windows Scheduler jobsthat perform cleanup of temporary files until after the installation iscompleted.
Table 3 (Cont.) Software Requirements
Requirement Value
7/23/2019 e10878.pdf
http://slidepdf.com/reader/full/e10878pdf 7/12
7
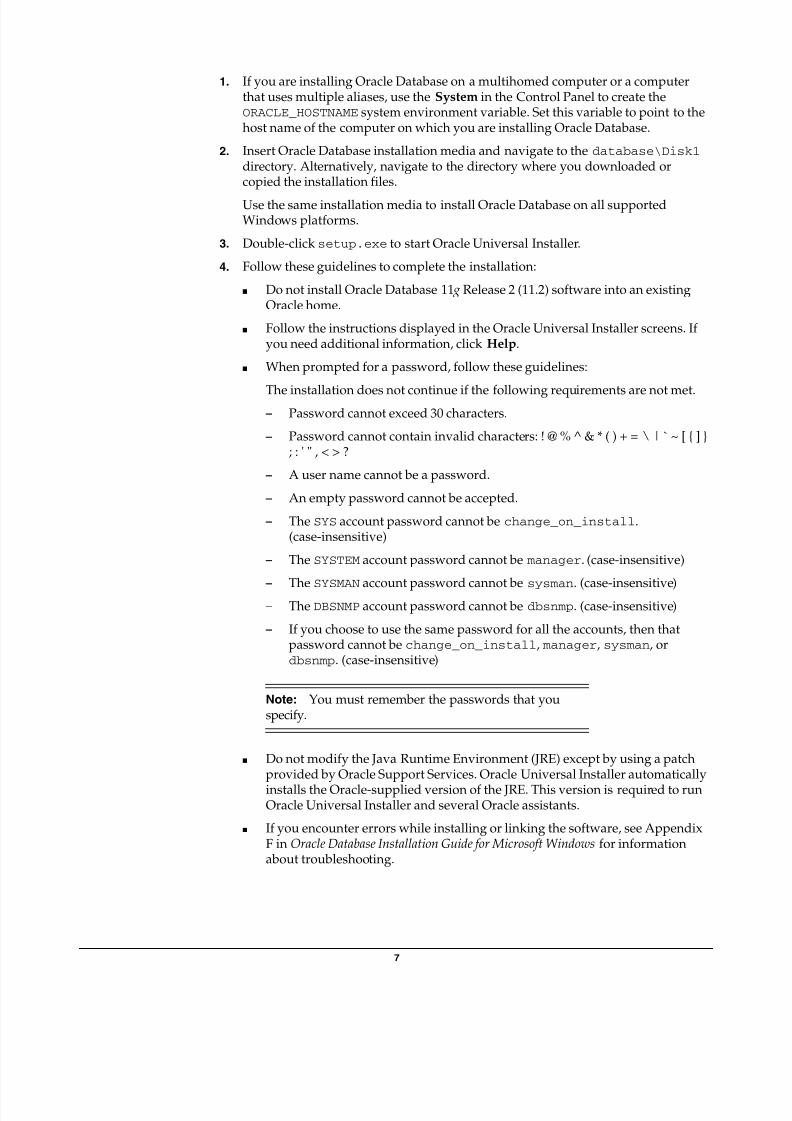
1. If you are installing Oracle Database on a multihomed computer or a computerthat uses multiple aliases, use the System in the Control Panel to create theORACLE_HOSTNAME system environment variable. Set this variable to point to thehost name of the computer on which you are installing Oracle Database.
2. Insert Oracle Database installation media and navigate to the database\Disk1 directory. Alternatively, navigate to the directory where you downloaded orcopied the installation files.
Use the same installation media to install Oracle Database on all supportedWindows platforms.
3. Double-clicksetup.exe to start Oracle Universal Installer.
4. Follow these guidelines to complete the installation:
■ Do not install Oracle Database 11 g Release 2 (11.2) software into an existingOracle home.
■ Follow the instructions displayed in the Oracle Universal Installer screens. Ifyou need additional information, click Help.
■ When prompted for a password, follow these guidelines:
The installation does not continue if the following requirements are not met.– Password cannot exceed 30 characters.
– Password cannot contain invalid characters: ! @ % ^ & * ( ) + = \ | ` ~ [ { ] }; : ' " , < > ?
– A user name cannot be a password.
– An empty password cannot be accepted.
– The SYS account password cannot be change_on_install.(case-insensitive)
– The SYSTEM account password cannot be manager. (case-insensitive)
– TheSYSMAN
account password cannot besysman
. (case-insensitive)– The DBSNMP account password cannot be dbsnmp. (case-insensitive)
– If you choose to use the same password for all the accounts, then thatpassword cannot be change_on_install, manager, sysman, ordbsnmp. (case-insensitive)
■ Do not modify the Java Runtime Environment (JRE) except by using a patchprovided by Oracle Support Services. Oracle Universal Installer automatically
installs the Oracle-supplied version of the JRE. This version is required to runOracle Universal Installer and several Oracle assistants.
■ If you encounter errors while installing or linking the software, see AppendixF in Oracle Database Installation Guide for Microsoft Windows for informationabout troubleshooting.
Note: You must remember the passwords that youspecify.
7/23/2019 e10878.pdf
http://slidepdf.com/reader/full/e10878pdf 8/12
8
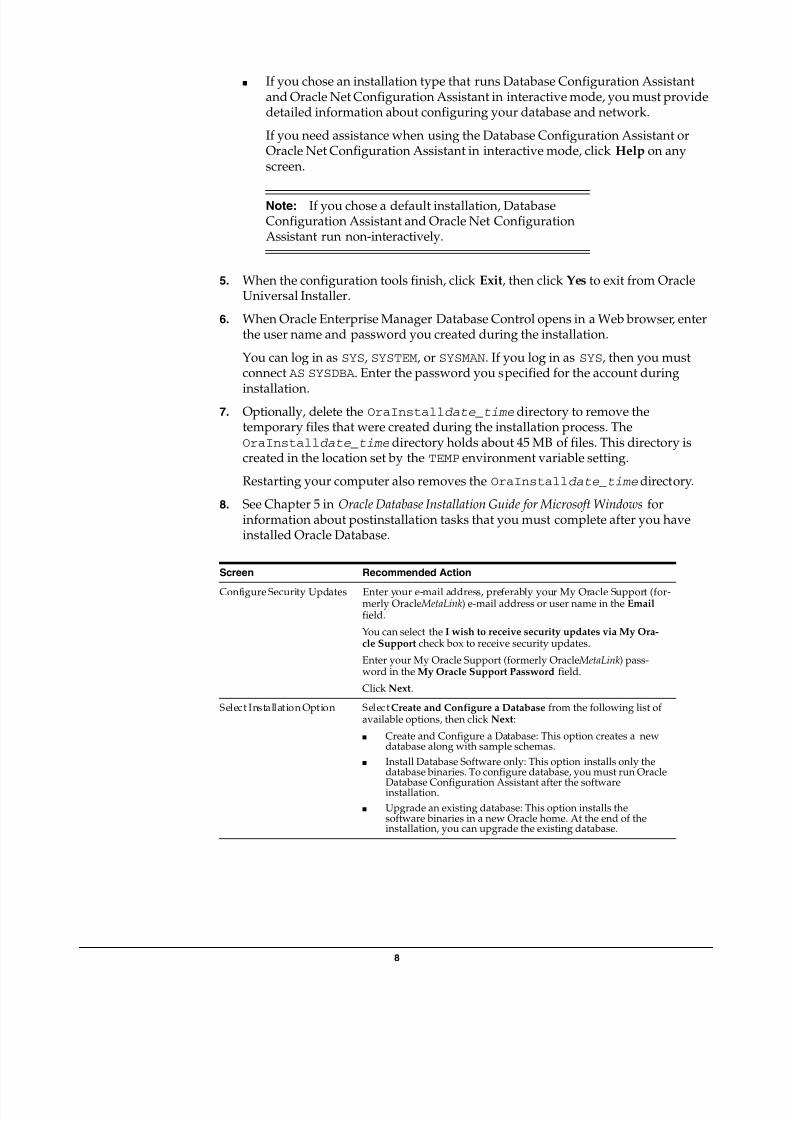
■ If you chose an installation type that runs Database Configuration Assistantand Oracle Net Configuration Assistant in interactive mode, you must providedetailed information about configuring your database and network.
If you need assistance when using the Database Configuration Assistant orOracle Net Configuration Assistant in interactive mode, click Help on anyscreen.
5. When the configuration tools finish, click Exit, then click Yes to exit from OracleUniversal Installer.
6. When Oracle Enterprise Manager Database Control opens in a Web browser, enterthe user name and password you created during the installation.
You can log in as SYS, SYSTEM, or SYSMAN. If you log in as SYS, then you mustconnect AS SYSDBA. Enter the password you specified for the account during
installation.7. Optionally, delete the OraInstalldate_time directory to remove the
temporary files that were created during the installation process. TheOraInstalldate_time directory holds about 45 MB of files. This directory iscreated in the location set by the TEMP environment variable setting.
Restarting your computer also removes the OraInstalldate_time directory.
8. See Chapter 5 in Oracle Database Installation Guide for Microsoft Windows forinformation about postinstallation tasks that you must complete after you haveinstalled Oracle Database.
Note: If you chose a default installation, DatabaseConfiguration Assistant and Oracle Net ConfigurationAssistant run non-interactively.
Screen Recommended Action
Configure Security Updates Enter your e-mail address, preferably your My Oracle Support (for-merly Oracle MetaLink ) e-mail address or user name in the Email field.
You can select the I wish to receive security updates via My Ora-cle Support check box to receive security updates.
Enter your My Oracle Support (formerly Oracle MetaLink ) pass-word in the My Oracle Support Password field.
Click Next.
Select Installation Option Select Create and Configure a Database from the following list ofavailable options, then click Next:
■ Create and Configure a Database: This option creates a newdatabase along with sample schemas.
■ Install Database Software only: This option installs only thedatabase binaries. To configure database, you must run Oracle
Database Configuration Assistant after the softwareinstallation.
■ Upgrade an existing database: This option installs thesoftware binaries in a new Oracle home. At the end of theinstallation, you can upgrade the existing database.
7/23/2019 e10878.pdf
http://slidepdf.com/reader/full/e10878pdf 9/12
9
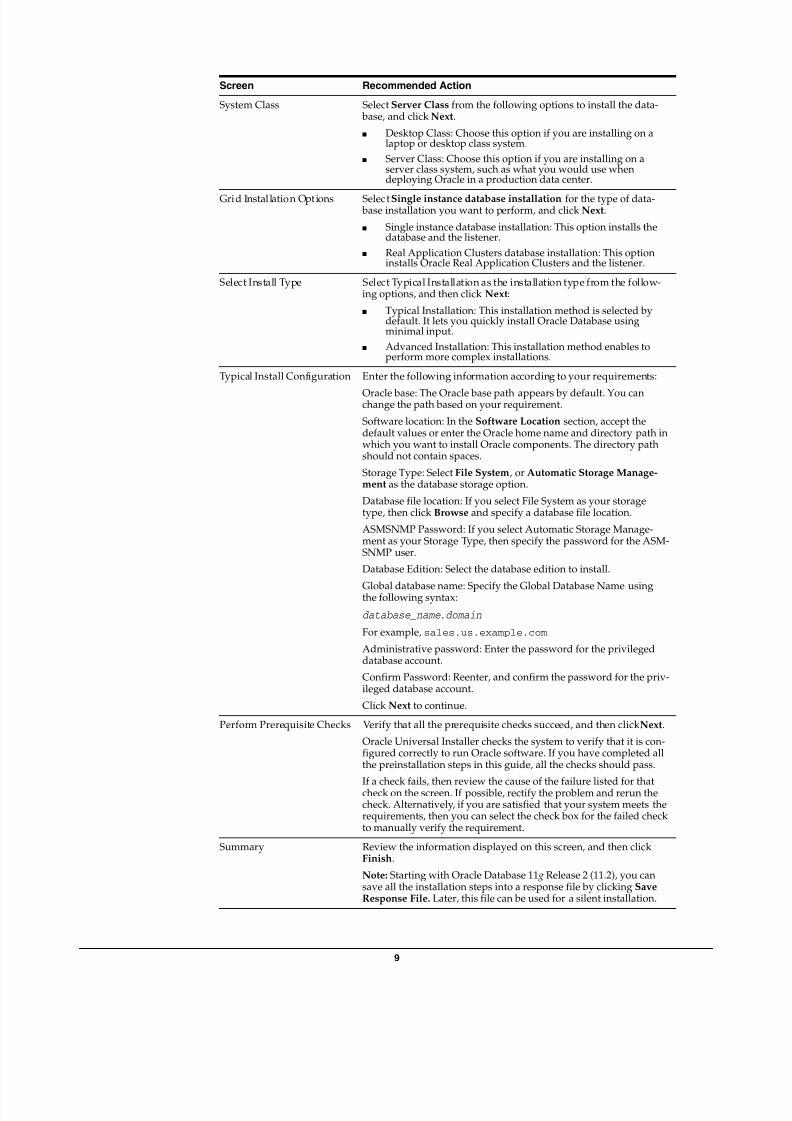
System Class Select Server Class from the following options to install the data- base, and click Next.
■ Desktop Class: Choose this option if you are installing on alaptop or desktop class system.
■ Server Class: Choose this option if you are installing on aserver class system, such as what you would use whendeploying Oracle in a production data center.
Grid Installation Options Select Single instance database installation for the type of data- base installation you want to perform, and click Next.
■ Single instance database installation: This option installs thedatabase and the listener.
■ Real Application Clusters database installation: This optioninstalls Oracle Real Application Clusters and the listener.
Select Install Type Select Typical Installation as the installation type from the follow-ing options, and then click Next:
■ Typical Installation: This installation method is selected bydefault. It lets you quickly install Oracle Database usingminimal input.
■ Advanced Installation: This installation method enables toperform more complex installations.
Typical Install Configuration Enter the following information according to your requirements:
Oracle base: The Oracle base path appears by default. You canchange the path based on your requirement.
Software location: In the Software Location section, accept thedefault values or enter the Oracle home name and directory path inwhich you want to install Oracle components. The directory pathshould not contain spaces.
Storage Type: Select File System, or Automatic Storage Manage-ment as the database storage option.
Database file location: If you select File System as your storagetype, then click Browse and specify a database file location.
ASMSNMP Password: If you select Automatic Storage Manage-ment as your Storage Type, then specify the password for the ASM-SNMP user.
Database Edition: Select the database edition to install.
Global database name: Specify the Global Database Name usingthe following syntax:
database_name .domain
For example, sales.us.example.com
Administrative password: Enter the password for the privilegeddatabase account.
Confirm Password: Reenter, and confirm the password for the priv-ileged database account.
Click Next to continue.
Perform Prerequisite Checks Verify that all the prerequisite checks succeed, and then click Next.
Oracle Universal Installer checks the system to verify that it is con-figured correctly to run Oracle software. If you have completed allthe preinstallation steps in this guide, all the checks should pass.
If a check fails, then review the cause of the failure listed for thatcheck on the screen. If possible, rectify the problem and rerun thecheck. Alternatively, if you are satisfied that your system meets therequirements, then you can select the check box for the failed checkto manually verify the requirement.
Summary Review the information displayed on this screen, and then clickFinish.
Note: Starting with Oracle Database 11 g Release 2 (11.2), you cansave all the installation steps into a response file by clicking SaveResponse File. Later, this file can be used for a silent installation.
Screen Recommended Action
7/23/2019 e10878.pdf
http://slidepdf.com/reader/full/e10878pdf 10/12
10
7 Installing Oracle Database ExamplesIf you plan to use the following products or features, then download and install theproducts from the Oracle Database Examples media:
■ Oracle JDBC Development Drivers
■ Oracle Database Examples
■ Oracle Context Companion
■ Various Oracle product demonstrations
For information about installing software and various Oracle product demonstrationsfrom the Oracle Database Examples media, see Oracle Database Examples InstallationGuide.
8 What to Do Next?To become familiar with this release of Oracle Database, Oracle suggests that youcomplete the following tasks:
■ Log in to Oracle Enterprise Manager Database Control using a Web browser.
Oracle Enterprise Manager Database Control is a Web-based application that youcan use to manage a single Oracle database. The default URL for Database Controlis:
http://host.domain: port/em/
Log in with the user name SYSMAN. Use the password that you specified for thisuser during the Oracle Database installation.
■ See Chapter 5 of Oracle Database Installation Guide for Microsoft Windows forinformation about required and optional postinstallation tasks, depending on thecomponents to use.
■ Review Chapter 6 of Oracle Database Installation Guide for Microsoft Windows forinformation about how to get started using Oracle Database.
■ Read Oracle Database 2 Day DBA guide, to learn more about using OracleEnterprise Manager Database Control to administer a database.
This guide, designed for new Oracle DBAs, describes how to use Oracle EnterpriseManager Database Control to manage all aspects of an Oracle databaseinstallation. It also provides information about how to enable e-mail notificationsand automated backups, which you might not have configured during theinstallation.
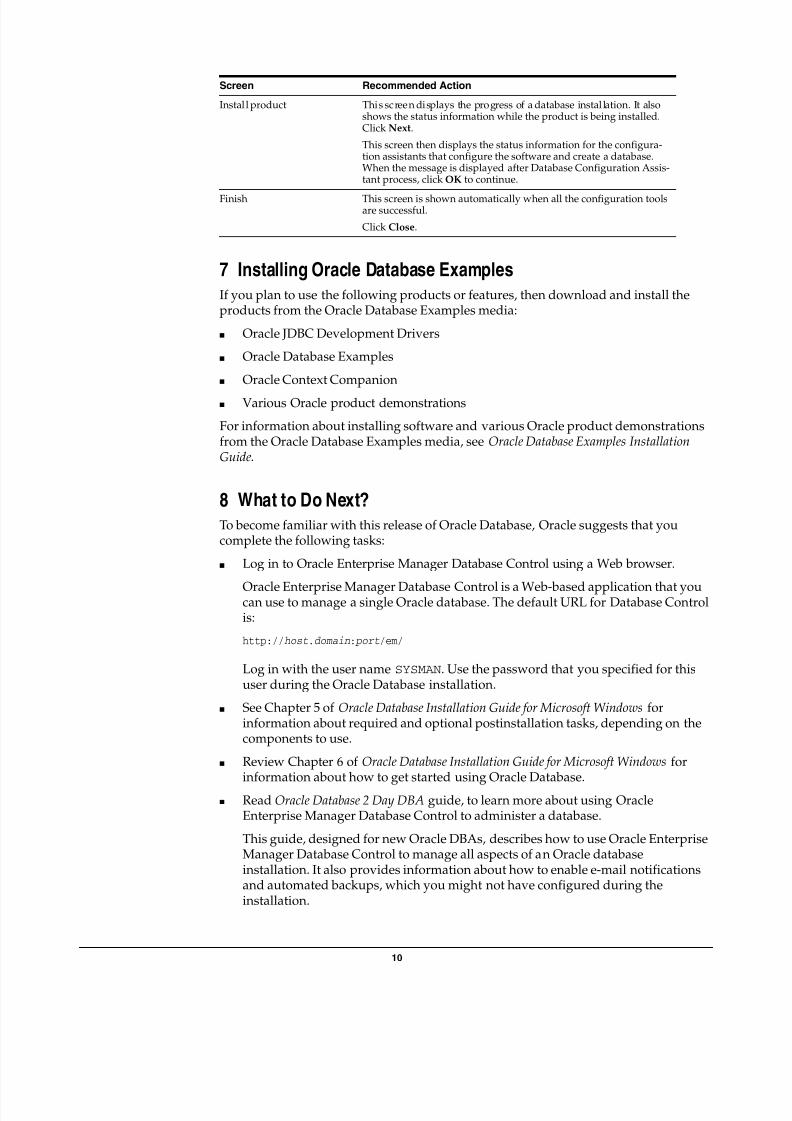
Install product This screen displays the progress of a database installation. It alsoshows the status information while the product is being installed.Click Next.
This screen then displays the status information for the configura-tion assistants that configure the software and create a database.When the message is displayed after Database Configuration Assis-tant process, click OK to continue.
Finish This screen is shown automatically when all the configuration toolsare successful.
Click Close.
Screen Recommended Action
7/23/2019 e10878.pdf
http://slidepdf.com/reader/full/e10878pdf 11/12
11
9 Additional InformationThis section contains information about the following:
■ Product Licenses
■ Purchasing Licenses, Version Updates, and Documentation
■ Contacting Oracle Support Services
■ Locating Product Documentation
Product Licenses
You are welcome to install and evaluate the products included in this media pack for30 days under the terms of the Trial License Agreement. However, you must purchasea program license to continue using any product after the 30 day evaluation period.See the following section for information about purchasing program licenses.
Purchasing Licenses, Version Updates, and Documentation
You can purchase program licenses and updated versions of Oracle products from the
Oracle Store Web site:
http://shop.oracle.com/
Contacting Oracle Support Services
If you have purchased Oracle Product Support, you can call Oracle Support Servicesfor assistance 24 hours a day, seven days a week. For information about purchasingOracle Product Support or contacting Oracle Support Services, go to the OracleSupport Services Web site:
http://www.oracle.com/support/
Locating Product Documentation
Documentation for Oracle products is available in both HTML and Adobe portabledocument format (PDF) formats from several locations:
■ On disks in the media pack:
- Platform-specific documentation is available on the installation media. Toaccess the documentation, see the welcome.htm file located in the top-leveldirectory of the installation media.
- Generic product documentation is available on the Oracle DocumentationLibrary.
■ From the Oracle Technology Network Web site:
http://www.oracle.com/technology/documentation/
To view PDF documents, download the free Adobe Acrobat Reader from the AdobeWeb site, if necessary:
http://www.adobe.com/
See Also: Oracle Database Licensing Information
7/23/2019 e10878.pdf
http://slidepdf.com/reader/full/e10878pdf 12/12
12
10 Documentation AccessibilityOur goal is to make Oracle products, services, and supporting documentationaccessible to all users, including users that are disabled. To that end, ourdocumentation includes features that make information available to users of assistivetechnology. This documentation is available in HTML format, and contains markup tofacilitate access by the disabled community. Accessibility standards will continue toevolve over time, and Oracle is actively engaged with other market-leadingtechnology vendors to address technical obstacles so that our documentation can beaccessible to all of our customers. For more information, visit the Oracle AccessibilityProgram Web site at http://www.oracle.com/accessibility/ .
Accessibility of Code Examples in Documentation
Screen readers may not always correctly read the code examples in this document. Theconventions for writing code require that closing braces should appear on anotherwise empty line; however, some screen readers may not always read a line of textthat consists solely of a bracket or brace.
Accessibility of Links to External Web Sites in Documentation
This documentation may contain links to Web sites of other companies or
organizations that Oracle does not own or control. Oracle neither evaluates nor makesany representations regarding the accessibility of these Web sites.
Access to Oracle Support
Oracle customers have access to electronic support through My Oracle Support. Forinformation, visit http://www.oracle.com/support/contact.html or visithttp://www.oracle.com/accessibility/support.html if you are hearingimpaired.
Oracle Database Quick Installation Guide, 11g Release 2 (11.2) for Microsoft Windows x64 (64-Bit)E10878-01
Copyright © 2006, 2010, Oracle and/or its affiliates. All rights reserved.
This software and related documentation are provided under a license agreement containing restrictions on use and disclosure and are protectedby intellectual property laws. Except as expressly permitted in your license agreement or allowed by law, you may not use, copy, reproduce, translate,broadcast, modify, license, transmit, distribute, exhibit, perform, publish, or display any part, in any form, or by any means. Reverse engineering,disassembly, or decompilation of this software, unless required by law for interoperability, is prohibited.
The information contained herein is subject to change without notice and is not warranted to be error-free. If you find any errors, please report themto us in writing.
If this software or related documentation is delivered to the U.S. Government or anyone licensing it on behalf of the U.S. Government, the followingnotice is applicable:
U.S. GOVERNMENT RIGHTS Programs, software, databases, and related documentation and technical data delivered to U.S. Governmentcustomers are "commercial computer software" or "commercial technical data" pursuant to the applicable Federal Acquisition Regulation andagency-specific supplemental regulations. As such, the use, duplication, disclosure, modification, and adaptation shall be subject to the restrictionsand license terms set forth in the applicable Government contract, and, to the extent applicable by the terms of the Government contract, theadditional rights set forth in FAR 52.227-19, Commercial Computer Software License (December 2007). Oracle USA, Inc. , 500 Oracle Parkway,Redwood City, CA 94065.
This software is developed for general use in a variety of information management applications. It is not developed or intended for use in anyinherently dangerous applications, including applications which may create a risk of personal injury. If you use this software in dangerous applications,then you shall be responsible to take all appropriate fail-safe, backup, redundancy, and other measures to ensure the safe use of this software.Oracle Corporation and its affiliates disclaim any liability for any damages caused by use of this software in dangerous applications.
Oracle is a registered trademark of Oracle Corporation and/or its affiliates. Other names may be trademarks of their respective owners.
This software and documentation may provide access to or information on content, products, and services from third parties. Oracle Corporationand its affiliates are not responsible for and expressly disclaim all warranties of any kind with respect to third-party content, products, and services.Oracle Corporation and its affiliates will not be responsible for any loss, costs, or damages incurred due to your access to or use of third-partycontent, products, or services.