Embed Size (px)
Citation preview

How to Use iTunes U ( A tutorial for Instructors) 1. Go to your course site, and click “Control Panel”.
2. Click “Manage Tools” under “Course Options” panel.
3. Click “Building Block Tool Availability”.
Educational Technology York College / CUNY
1
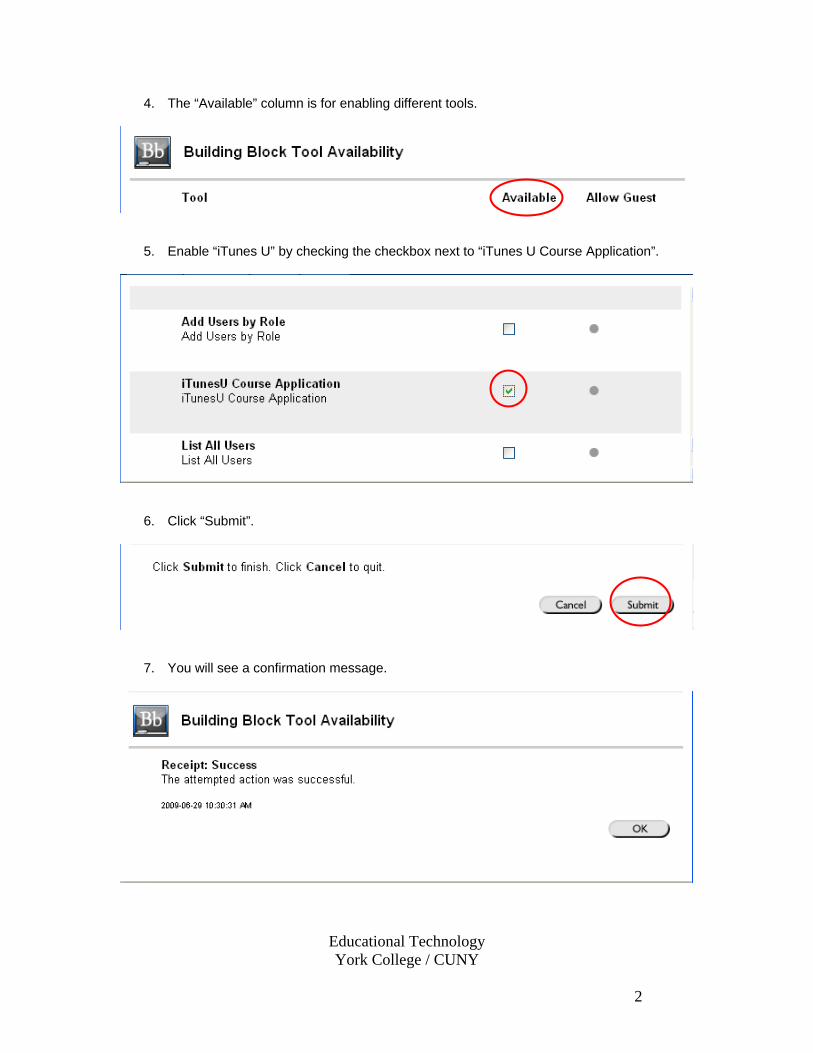
4. The “Available” column is for enabling different tools.
5. Enable “iTunes U” by checking the checkbox next to “iTunes U Course Application”.
6. Click “Submit”.
7. You will see a confirmation message.
Educational Technology York College / CUNY
2

8. Go to “Manage Tools” again. Click “Content Type Availability”.
9. Check the checkbox next to the “iTunes U Link” to enable iTunes U content, and then click “Submit”.
10. You will see a confirmation message.
Educational Technology York College / CUNY
3

11. Go back to the “Control Panel”. Click “iTunes U” link on “Course Tools” panel.
12. Click Enable to enable the iTunes U.
13. Go back to the “Control Panel”, and add a link to iTunes U course site under any of the Content Areas. For example, click “Course Documents”.
Educational Technology York College / CUNY
4

14. Select “iTunes U Link” from the dropdown box, and click “Go”.
Educational Technology York College / CUNY
5
15. Fill in the information and set up options for your “iTunes U” link, and click “Submit”.
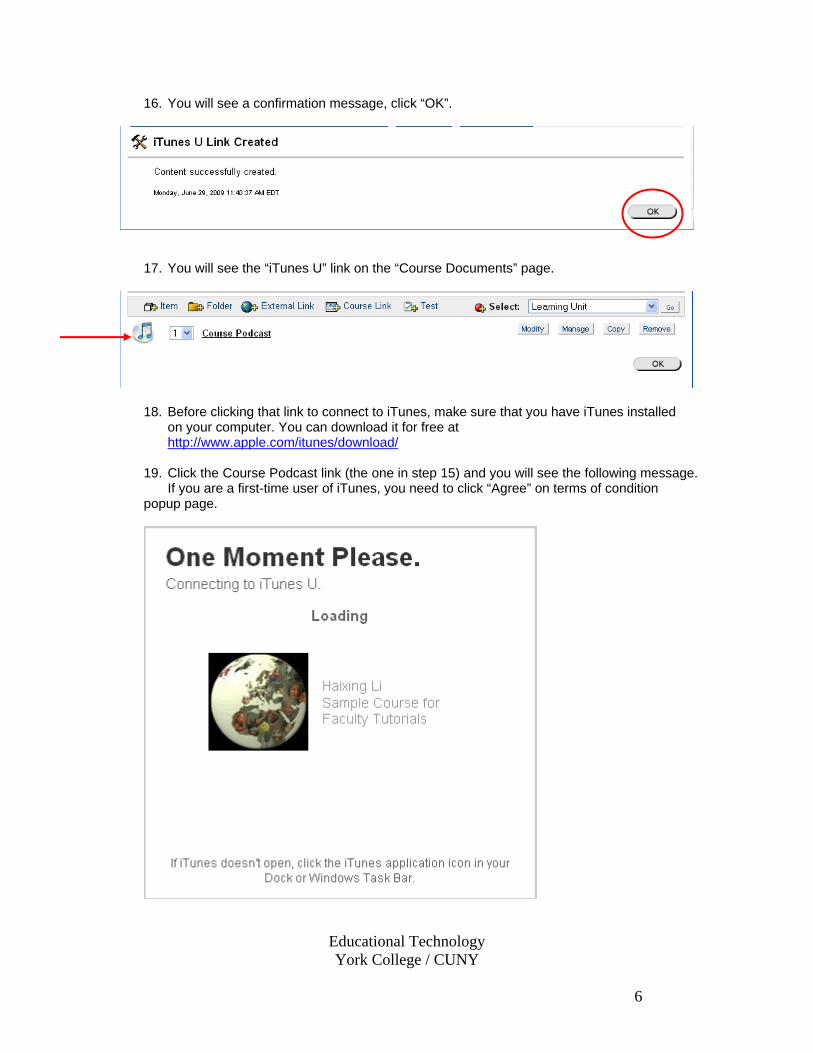
16. You will see a confirmation message, click “OK”.
17. You will see the “iTunes U” link on the “Course Documents” page.
18. Before clicking that link to connect to iTunes, make sure that you have iTunes installed on your computer. You can download it for free at http://www.apple.com/itunes/download/
19. Click the Course Podcast link (the one in step 15) and you will see the following message. If you are a first-time user of iTunes, you need to click “Agree” on terms of condition
popup page.
Educational Technology York College / CUNY
6

20. iTunes application will open and displays your course home page. You will notice that the course name is the same as that on the Blackboard course site.
21. “Group 1” and “Group 2” are the default tabs under which you can upload audio files or video files. Your students have only download access to the files from these two tabs.
Educational Technology York College / CUNY
7
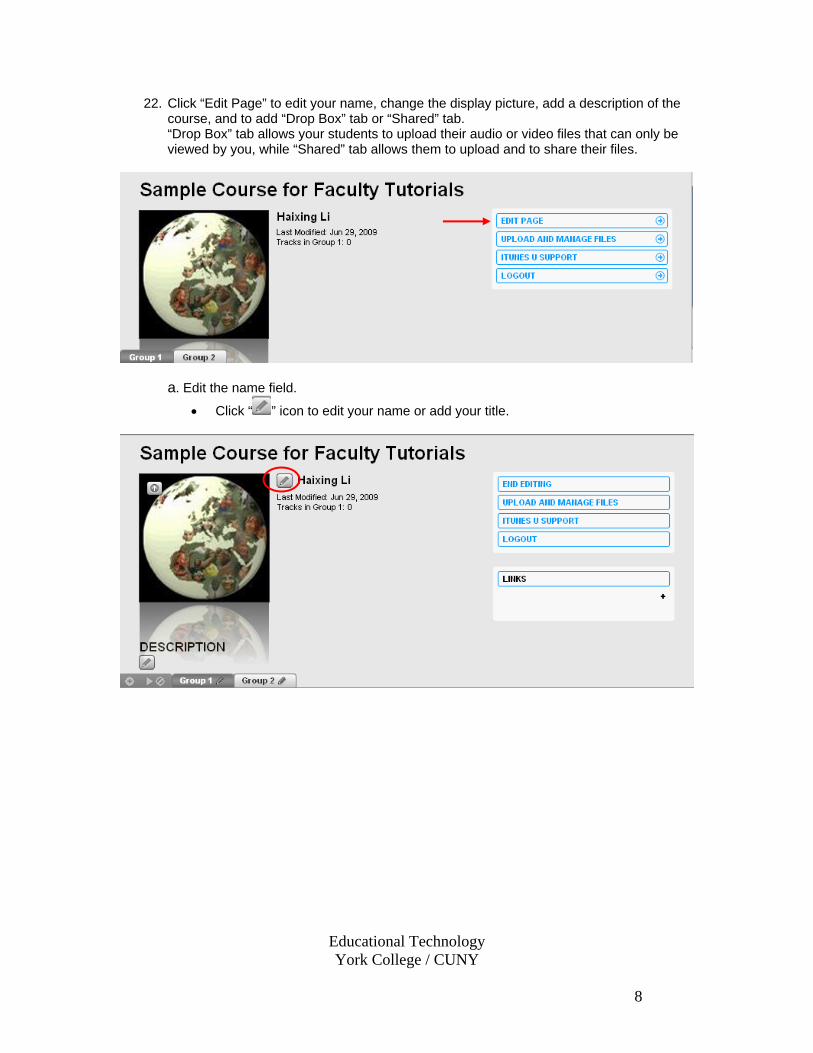
22. Click “Edit Page” to edit your name, change the display picture, add a description of the course, and to add “Drop Box” tab or “Shared” tab. “Drop Box” tab allows your students to upload their audio or video files that can only be viewed by you, while “Shared” tab allows them to upload and to share their files.
a. Edit the name field.
• Click “ ” icon to edit your name or add your title.
Educational Technology York College / CUNY
8

• Type in your title, etc, and click “ ” icon to save the new name.
Educational Technology York College / CUNY
9
• The new name will be displayed on the home page.
Type in the new name
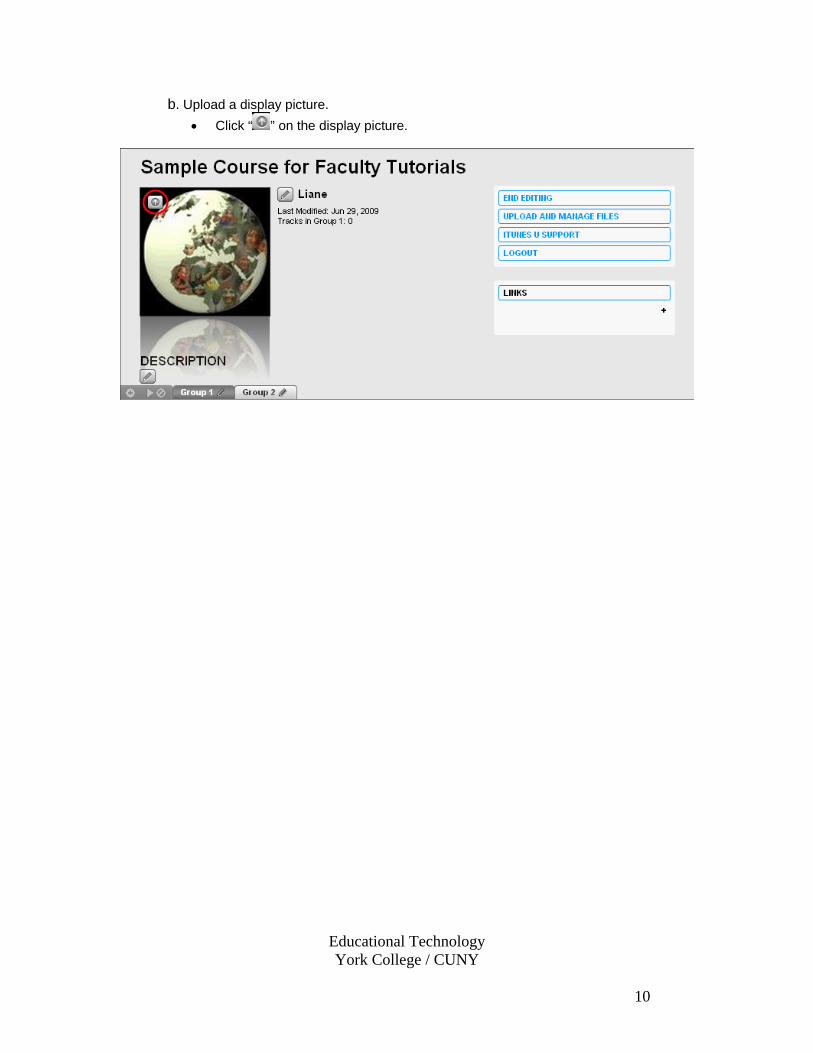
b. Upload a display picture. • Click “ ” on the display picture.
Educational Technology York College / CUNY
10
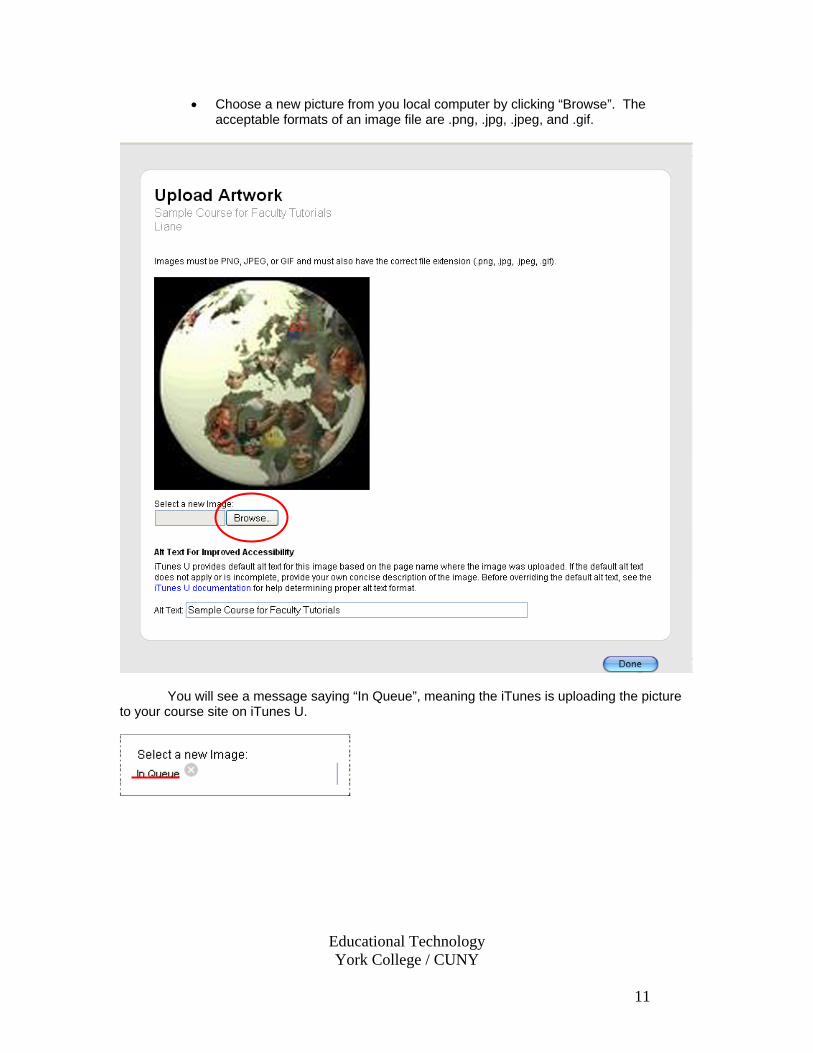
• Choose a new picture from you local computer by clicking “Browse”. The acceptable formats of an image file are .png, .jpg, .jpeg, and .gif.
You will see a message saying “In Queue”, meaning the iTunes is uploading the picture to your course site on iTunes U.
Educational Technology York College / CUNY
11
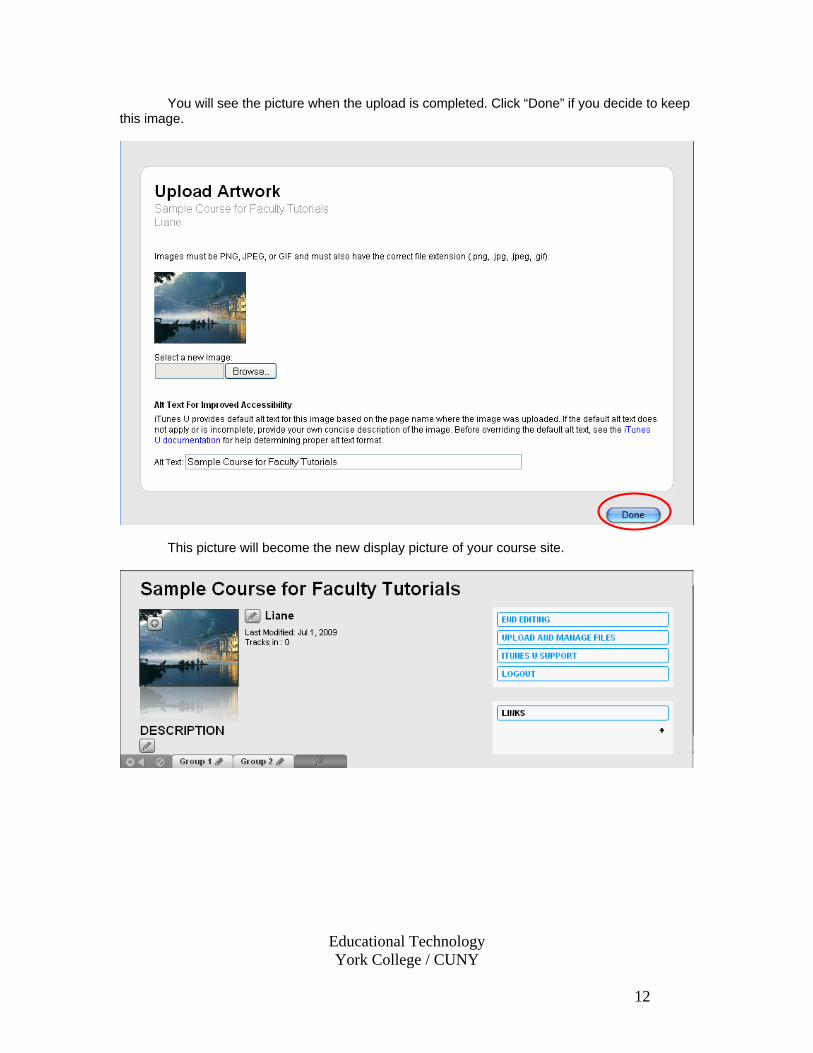
You will see the picture when the upload is completed. Click “Done” if you decide to keep this image.
This picture will become the new display picture of your course site.
Educational Technology York College / CUNY
12
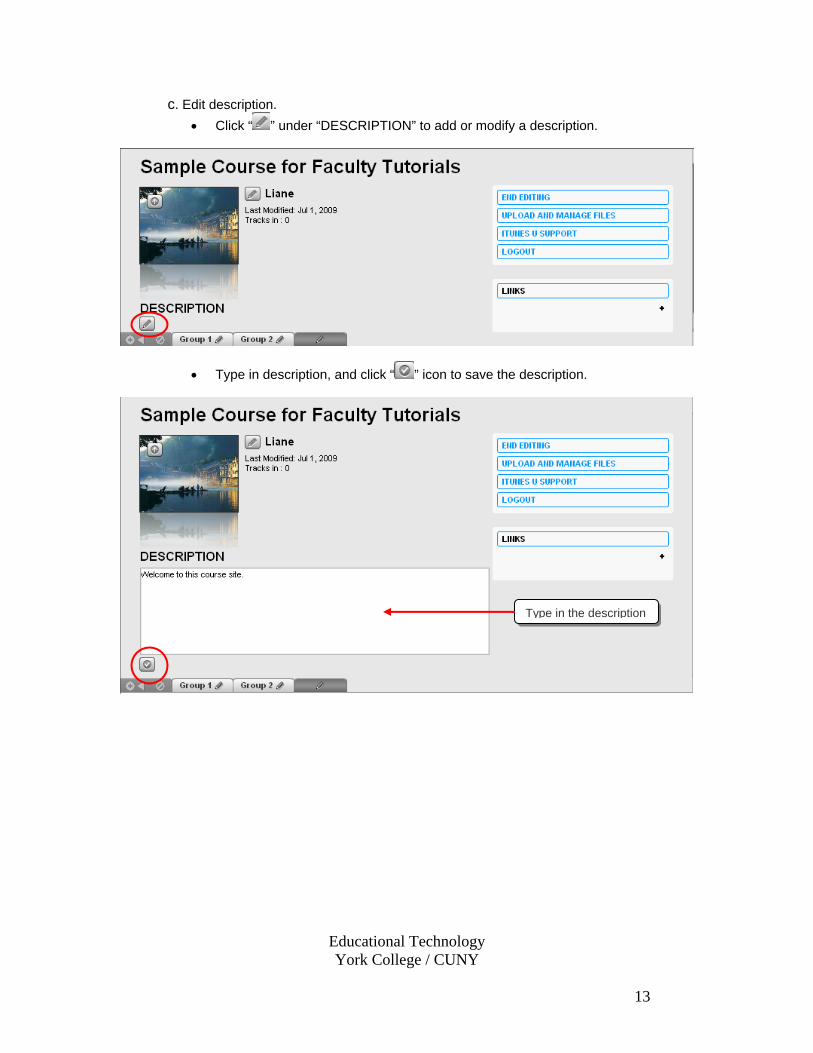
c. Edit description. • Click “ ” under “DESCRIPTION” to add or modify a description.
Educational Technology York College / CUNY
13
• Type in description, and click “ ” icon to save the description.
Type in the description
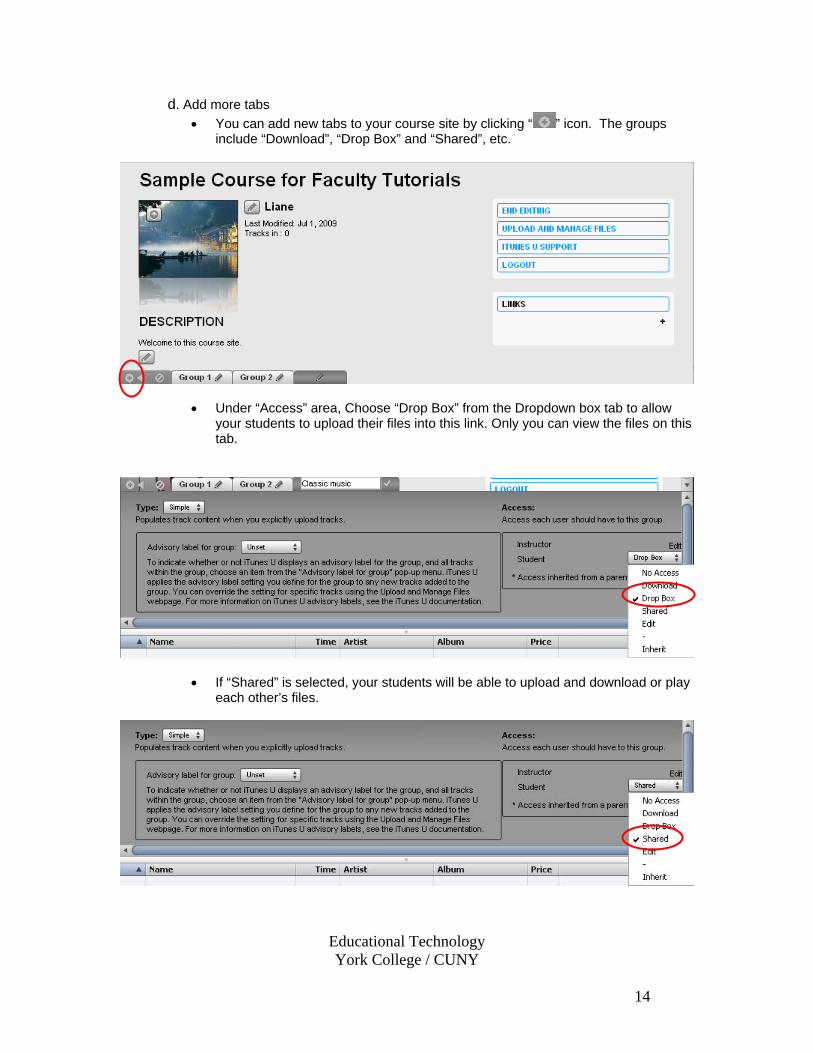
d. Add more tabs • You can add new tabs to your course site by clicking “ ” icon. The groups
include “Download”, “Drop Box” and “Shared”, etc.
• Under “Access” area, Choose “Drop Box” from the Dropdown box tab to allow your students to upload their files into this link. Only you can view the files on this tab.
• If “Shared” is selected, your students will be able to upload and download or play each other’s files.
Educational Technology York College / CUNY
14
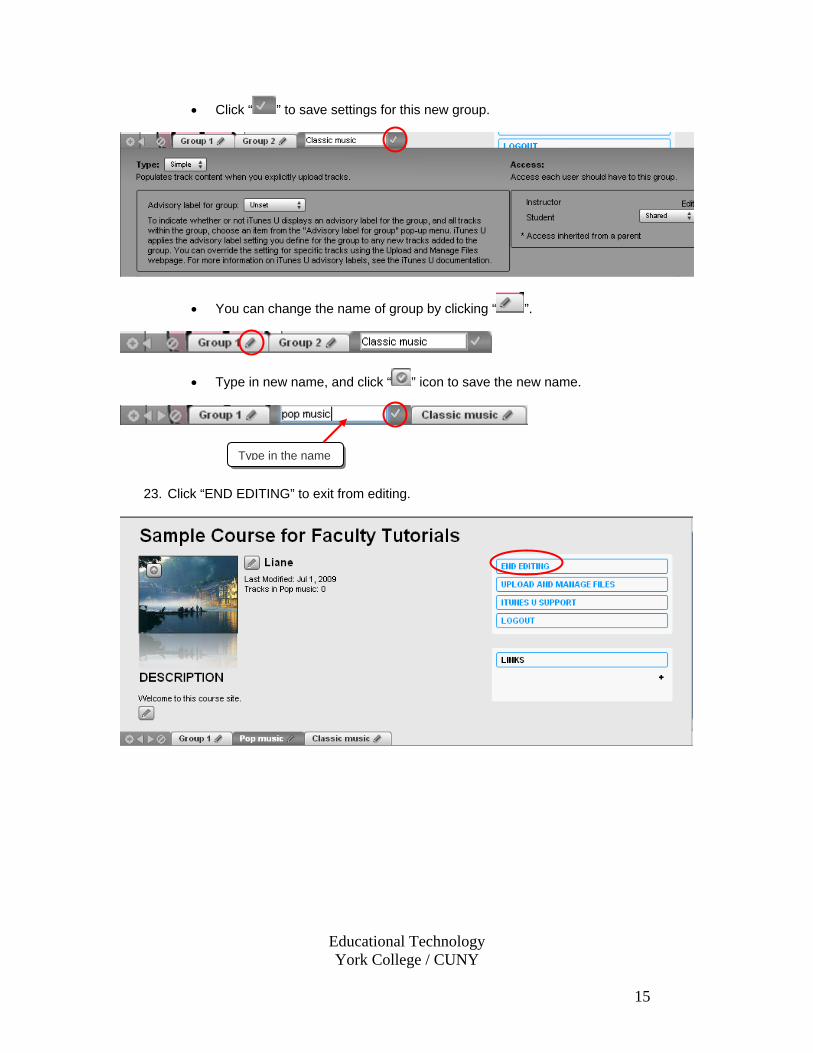
• Click “ ” to save settings for this new group.
Educational Technology York College / CUNY
15
• You can change the name of group by clicking “ ”.
• Type in new name, and click “ ” icon to save the new name.
23. Click “END EDITING” to exit from editing.
Type in the name

24. Click “UPLOAD AND MANAGE FILES” to upload audio or video files to your “iTunes U” course site.
25. Click “Add New File”.
Educational Technology York College / CUNY
16
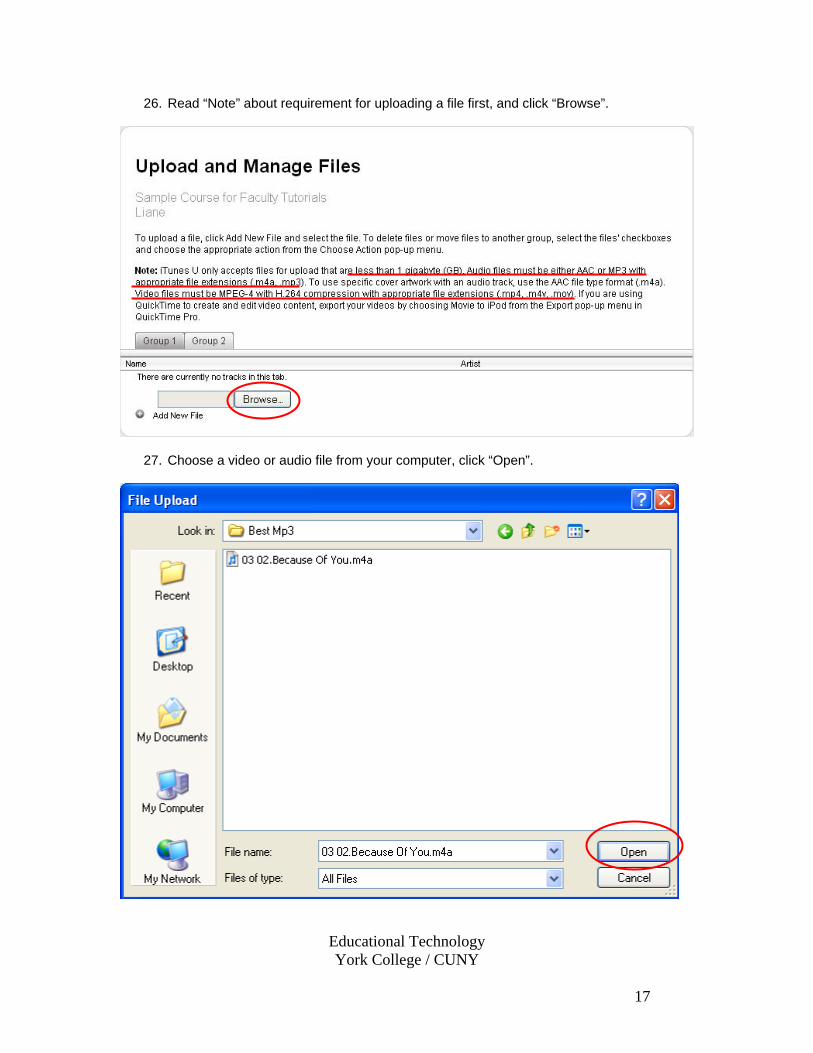
26. Read “Note” about requirement for uploading a file first, and click “Browse”.
27. Choose a video or audio file from your computer, click “Open”.
Educational Technology York College / CUNY
17
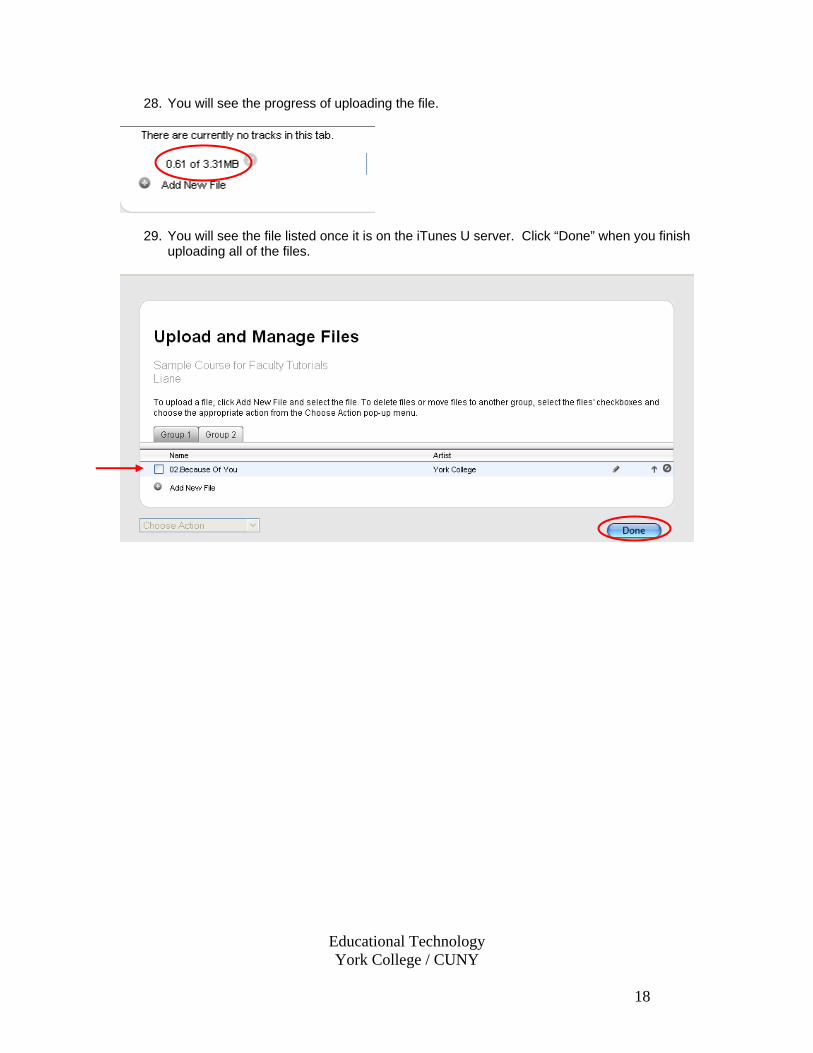
28. You will see the progress of uploading the file.
29. You will see the file listed once it is on the iTunes U server. Click “Done” when you finish uploading all of the files.
Educational Technology York College / CUNY
18

30. The audio or video file will be listed on your iTunes U course home page of the selected tab.
31. If you want to modify the metadata of your audio or video file, click “UPLOAD AND MANAGE FILES”.
Educational Technology York College / CUNY
19
32. Click “ ” icon to edit the information about the file.
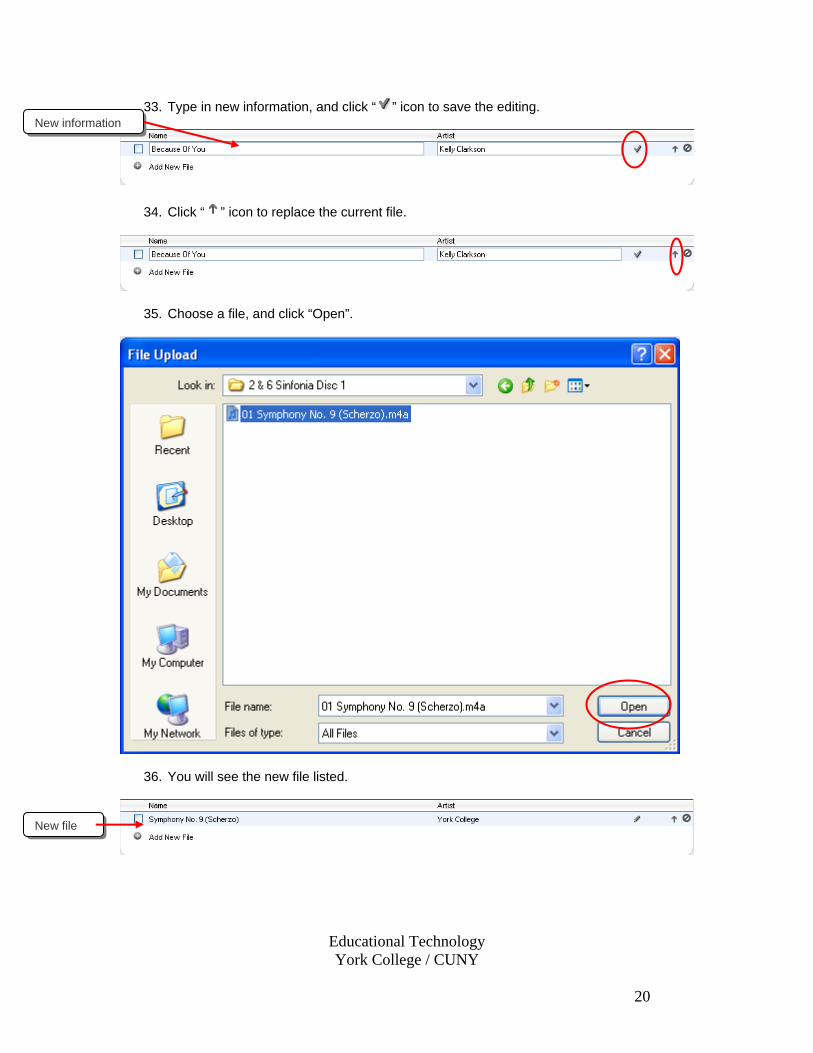
33. Type in new information, and click “ ” icon to save the editing.
34. Click “ ” icon to replace the current file.
35. Choose a file, and click “Open”.
36. You will see the new file listed.
New information
New file
Educational Technology York College / CUNY
20
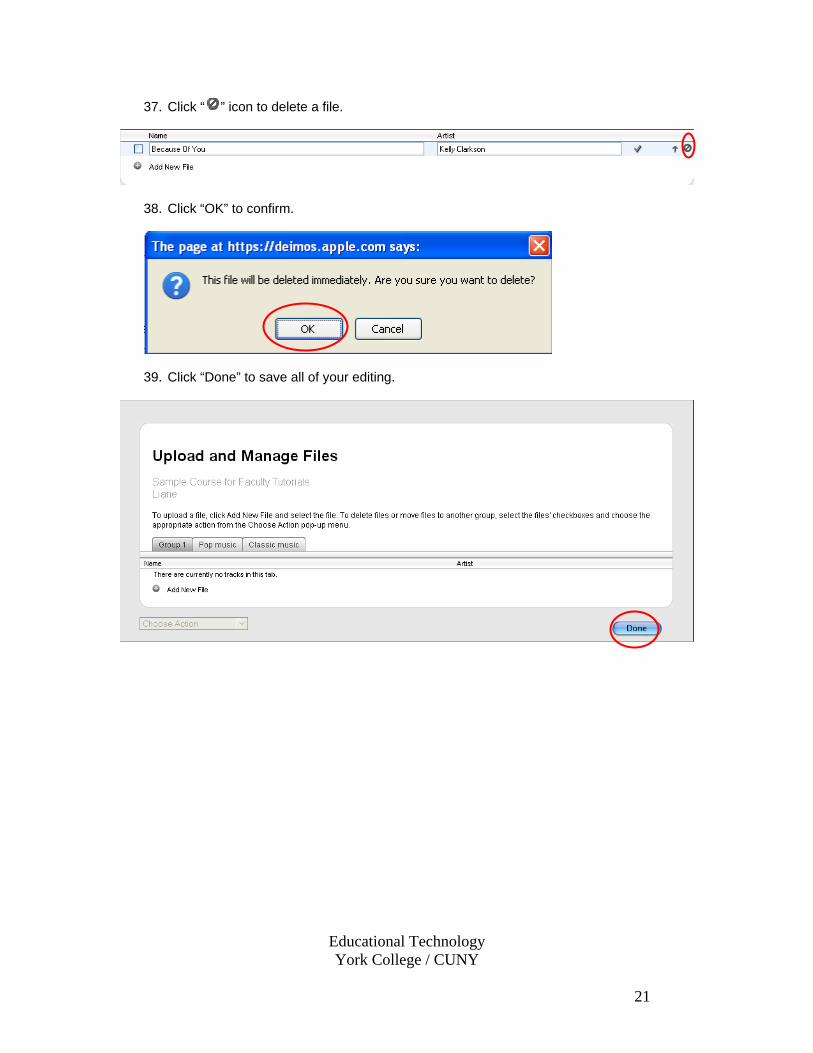
37. Click “ ” icon to delete a file.
38. Click “OK” to confirm.
39. Click “Done” to save all of your editing.
Educational Technology York College / CUNY
21