Embed Size (px)
Citation preview
设计模式精解-GoF 23 种设计模式解析附 C++实现源码 http://www.mscenter.edu.cn/blog/k_eckel
设计模式精解-GoF 23 种设计模式解析附 C++实现源码
目 录
0 引言 ..............................................................................................................................................2
0.1 设计模式解析(总序).....................................................................................................2 0.2 设计模式解析后记.............................................................................................................2 0.3 与作者联系........................................................................................................................5
1 创建型模式...................................................................................................................................5 1.1 Factory模式 ........................................................................................................................5 1.2 AbstactFactory模式 ..........................................................................................................11 1.3 Singleton模式 ...................................................................................................................16 1.4 Builder模式.......................................................................................................................18 1.5 Prototype模式 ...................................................................................................................23
2 结构型模式.................................................................................................................................26 2.1 Bridge模式........................................................................................................................26 2.2 Adapter模式 ......................................................................................................................31 2.3 Decorator模式...................................................................................................................35 2.4 Composite模式 .................................................................................................................40 2.5 Flyweight模式 ..................................................................................................................44 2.6 Facade模式 .......................................................................................................................49 2.7 Proxy模式 .........................................................................................................................52
3 行为模式.....................................................................................................................................55 3.1 Template模式 ....................................................................................................................55 3.2 Strategy模式 .....................................................................................................................59 3.3 State模式...........................................................................................................................63 3.4 Observer模式 ....................................................................................................................68 3.5 Memento模式 ...................................................................................................................73 3.6 Mediator模式 ....................................................................................................................76 3.7 Command模式 ..................................................................................................................81 3.8 Visitor模式........................................................................................................................87 3.9 Chain of Responsibility模式.............................................................................................92 3.10 Iterator模式 .....................................................................................................................96 3.11 Interpreter模式 ..............................................................................................................100
4 说明 ..........................................................................................................................................105
第 1 页 共 105 页 k_eckel
设计模式精解-GoF 23 种设计模式解析附 C++实现源码 http://www.mscenter.edu.cn/blog/k_eckel
0 引言
0.1 设计模式解析(总序)
“Next to My Life, Software Is My Passion”——Robert C.Martin.
懂了设计模式,你就懂了面向对象分析和设计(OOA/D)的精要。反之好像也可能成
立。道可道,非常道。道不远人,设计模式亦然如此。
一直想把自己的学习经验以及在项目中的应用经历拿出来和大家共享,却总是下不了这
个决心:GoF 的 23 种模式研读、总结也总需要些时日,然而时间对于我来说总是不可预计
的。
之所以下了这个决心,有两个原因:一是 Robert 的箴言,二是因为我是一个感恩的人,
就像常说的:长怀感恩之心,人生便无遗憾。想想当时读 GoF 的那本圣经时候的苦闷、实
现 23 个模式时候的探索、悟道后的欣悦,我觉得还是有这个意义。
0.2 设计模式解析后记
写完了Interpreter模式之后,我习惯性的看看下一天的安排,却陡然发现GoF的 23个
设计模式的解析已经在我不经意间写完了。就像在一年前看GoF的《设计模式》一书,和半
年前用C++模拟、实现 23 种经典的设计模式一般,透过这个写解析的过程,我又看到了另外
一个境界。一直认为学习的过程很多时候可以这样划分:自己学会一门知识(技术)、表达
出来、教会别人、记录下来,虽然这个排序未必对每个人都合适(因为可能不同人有着不同
的特点能力)。学一门知识,经过努力、加以时日,总是可以达到的,把自己学的用自己的
话表达出来就必须要将学到的知识加以消化、理解,而教会一个不懂这门知识的人则比表达
出来要难,因为别人可能并不是适应你的表述方式,记录下来则需要经过沉淀、积累、思考,
后厚积薄发,方可小成。
设计模式之于面向对象系统的设计和开发的作用就有如数据结构之于面向过程开发的
作用一般,其重要性和必要性自然不需要我赘述。然而学习设计模式的过程却是痛苦的,从
阅读设计模式的圣经——GoF 的《设计模式:可复用面向对象软件的基础》时的枯燥、苦闷、
茫无头绪,到有一天突然有一种顿悟;自己去实现 GoF 的 23 中模式时候的知其然不知其所
以然,并且有一天在自己设计的系统种由于设计的原因让自己苦不堪言,突然悟到了设计模
第 2 页 共 105 页 k_eckel
设计模式精解-GoF 23 种设计模式解析附 C++实现源码 http://www.mscenter.edu.cn/blog/k_eckel
式种的某一个正好可以很好的解决问题,到自己设计的 elegant 的系统时候的喜悦与思考;
一直到 后向别人去讲解设计模式,别人向你咨询设计模式,和别人讨论设计模式。就如
GoF 在其前言中说到:一旦你理解了设计并且有了一种“Aha!”(而不是“Huh?”)的应
用经验和体验后,你将用一种非同寻常的方式思考面向对象设计。这个过程我认为是漫长的,
painful,但是是非常必要的。经过了的才是自己的,Scott Mayer 在其巨著《Effective C++》
就曾经说过:C++老手和 C++新手的区别就是前者手背上有很多伤疤。是的在软件开发和设
计的过程中,失败、错误是 好的老师,当然在系统开发中,失败和错误则是噩梦的开端和
结束,因为你很难有改正错误的机会。因此,尽量让自己多几道疤痕是对的。
面向对象系统的分析和设计实际上追求的就是两点,一是高内聚(Cohesion),而是低
耦合(Coupling)。这也是我们软件设计所准求的,因此无论是 OO 中的封装、继承、多态,
还是我们的设计模式的原则和实例都是在为了这两个目标努力着、贡献着。
道不远人,设计模式也是这般,正如我在《设计模式探索(总序)》中提到的。设计模
式并不是空的理论,并不是脱离实际的教条。就如我们在进行软件开发的过程会很自然用到
很多的算法和结构来解决实际的问题,那些其实也就是数据结构中的重要概念和内容。在面
向对象系统的设计和开发中,我们已经积累了很多的原则,比如面向对象中的封装、继承和
多态、面向接口编程、优先使用组合而不是继承、将抽象和实现分离的思想等等,在设计模
式中你总是能看到他们的影子,特别是组合(委托)和继承的差异带来系统在耦合性上的差
别,更是在设计模式多次涉及到。而一些设计模式的思想在我们做系统的设计和开发中则是
经常要用到的,比如说Template、Strategy模式的思想,Singleton模式的思想,Factory
模式的思想等等,还有很多的模式已经在我们的开发平台中扎根了,比如说Observer(其实
例为Model-Control-View模式)是MFC和Struts中的基本框架,Iterator模式则在C++的STL
中有实现等。或许有的人会说,我们不需要设计模式,我们的系统很小,设计模式会束缚我
们的实现。我想说的是,设计模式体现的是一种思想,而思想则是指导行为的一切,理解和
掌握了设计模式,并不是说记住了 23 种(或更多)设计场景和解决策略(实际上这也是很
重要的一笔财富),实际接受的是一种思想的熏陶和洗礼,等这种思想融入到了你的思想中
后,你就会不自觉地使用这种思想去进行你的设计和开发,这一切才是 重要的。
之于学习设计模式的过程我想应该是一个迭代的过程,我向来学东西的时候不追求一遍
就掌握、理解透彻(很多情况也是不可能的),我喜欢用一种迭代的思想来指导我的学习过
程。看书看不懂、思想没有理解,可以反复去读、去思考,我认为这样一个过程是适合向我
们不是有一个很统一的时间去学习一种技术和知识(可能那样有时候反而有些枯燥和郁闷)。
第 3 页 共 105 页 k_eckel
设计模式精解-GoF 23 种设计模式解析附 C++实现源码 http://www.mscenter.edu.cn/blog/k_eckel
GoF 在《设计模式》一书中也提到,如果不是一个有经验的面向对象设计人员,建议从 简
单 常用的设计模式入门,比如 AbstractFactory 模式、Adapater 模式、Composite 模式、
Decorator 模式、Factory 模式、Observer 模式、Strategy 模式、Template 模式等。我的
感触是确实是这样,至少 GoF 列出的模式我都在开发和设计有用到,如果需要我这里再加上
几个我觉得在开发中会很有用的模式:Singleton 模式、Façade 模式和 Bridge 模式。
写设计模式解析的目的其实是想把 GoF 的《设计模式》进行简化,变得容易理解和接受。
GoF 的《设计模式》是圣经,但是同时因为《设计模式》一书是 4 位博士的作品,并且主要
是基于 Erich 的博士论文,博士的特色我觉得 大的就是抽象,将一个具体的问题抽象到一
般,形成理论。因此 GoF 的这本圣经在很多地方用语都比较精简和抽象,读过的可能都有一
种确实是博士写出来的东西的感觉。抽象的好处是能够提供指导性的意见和建议,其瑕疵就
是不容易为新手所理解和掌握。我的本意是想为抽象描述和具体的实现提供一个桥接(尽管
GoF 在书中给出了很多的代码和实例,但是我觉得有两个不足:一是不完整,结果是不好直
接看到演示,因此我给出的代码都是完整的、可编译运行的;二是给出的都是一些比较大的
系统中一部分简单实现,我想 GoF 的原意可能是想说明这些模式确实很管用,但是却同时带
来一个更大的不好的地方就是不容易为新手理解和掌握),然而这个过程是痛苦的,也可能
是不成功的(可能会是这样)。这里面就有一个取舍的问题,一方面我想尽量去简化 GoF
的描述,然而思考后的东西却在很多的时候和 GoF 的描述很相似,并且觉得将这些内容再抽
象一下,书中的很多表达则是 为经典的。当然这里面也有些许的例外,Bruce Eckel 在其
大作《Thinking in Patterns》一书中提到:Bridge 模式是 GoF 在描述其 23 中设计模式中
描述得 为糟糕得模式,于我心有戚戚焉!具体的内容请参看我写的《设计模式解析——
Bridge 模式》一文。另外一方面,我又要尽量去避免走到了 GoF 一起,因为那样就失去了
我写这个解析的本意了。这两个方面的权衡是很痛苦,并且结果可能也还是没有达到我的本
意要求。
4 月份是我 不忙的时候,也是我非常忙的时候。论文的查阅、思考、撰写,几个项目
的前期准备(文档、Demo等),俱乐部的诸多事宜,挑战杯的准备,学习(课业、专业等各
个方面)等等,更加重要的是Visual CMCS(Visual C_minus Compiler System)的设
计和开发(Visual CMCS是笔者设计和开发的C_minus语言(C的子集)的编译系统,系统操
作界面类似VC,并且准备代码分发和共享,详细信息请参考Visual CMCS的网站和Blog中的
相关信息的发布), Visual CMCS1.0(Beta)终于在 4 月底发布了,也在别人的帮助下构建
了Visual CMCS的网站(http://cs.whu.edu.cn/cmcs )。之所以提及这个,一方面是在Visual CMCS
第 4 页 共 105 页 k_eckel
设计模式精解-GoF 23 种设计模式解析附 C++实现源码 http://www.mscenter.edu.cn/blog/k_eckel
的设计和开发体验了很多的设计模式,比如Factoty模式、Singleton模式、Strategy模式、
State模式等等(我有一篇Blog中有关于这个的不完全的描述);另外一方面是这个设计模
式解析实际上在这些工作的间隙中完成的,我一般会要求自己每天写一个模式,但是特殊的
时候可能没有写或者一天写了不止一个。写这些文章,本身没有任何功利的杂念,只是一个
原生态的冲动,反而很轻松的完成了。有心栽花未必发,无心之事可成功,世间的事情可能
在很多的时候恰恰就是那样了。
后想用自己在阅读、学习、理解、实现、应用、思考设计模式后的一个感悟结束这个
后记:只有真正理解了设计模式,才知道什么叫面向对象分析和设计。
k_eckel 写毕于 2005-05-04(五四青年节) 1:01
0.3 与作者联系
Author K_Eckel
State Candidate for Master’s Degree School of Computer Wuhan University
E_mail [email protected]
1 创建型模式
1.1 Factory 模式
问题
在面向对象系统设计中经常可以遇到以下的两类问题:
1)为了提高内聚(Cohesion)和松耦合(Coupling),我们经常会抽象出一些类的公共
接口以形成抽象基类或者接口。这样我们可以通过声明一个指向基类的指针来指向实际的子
类实现,达到了多态的目的。这里很容易出现的一个问题 n 多的子类继承自抽象基类,我们
不得不在每次要用到子类的地方就编写诸如 new ×××;的代码。这里带来两个问题 1)客
户程序员必须知道实际子类的名称(当系统复杂后,命名将是一个很不好处理的问题,为了
处理可能的名字冲突,有的命名可能并不是具有很好的可读性和可记忆性,就姑且不论不同
程序员千奇百怪的个人偏好了。),2)程序的扩展性和维护变得越来越困难。
第 5 页 共 105 页 k_eckel
设计模式精解-GoF 23 种设计模式解析附 C++实现源码 http://www.mscenter.edu.cn/blog/k_eckel
2)还有一种情况就是在父类中并不知道具体要实例化哪一个具体的子类。这里的意思
为:假设我们在类 A 中要使用到类 B,B 是一个抽象父类,在 A 中并不知道具体要实例化
那一个 B 的子类,但是在类 A 的子类 D 中是可以知道的。在 A 中我们没有办法直接使用类
似于 new ×××的语句,因为根本就不知道×××是什么。
以上两个问题也就引出了 Factory 模式的两个 重要的功能:
1)定义创建对象的接口,封装了对象的创建;
2)使得具体化类的工作延迟到了子类中。
模式选择
我们通常使用 Factory 模式来解决上面给出的两个问题。在第一个问题中,我们经常就
是声明一个创建对象的接口,并封装了对象的创建过程。Factory 这里类似于一个真正意义
上的工厂(生产对象)。在第二个问题中,我们需要提供一个对象创建对象的接口,并在子
类中提供其具体实现(因为只有在子类中可以决定到底实例化哪一个类)。
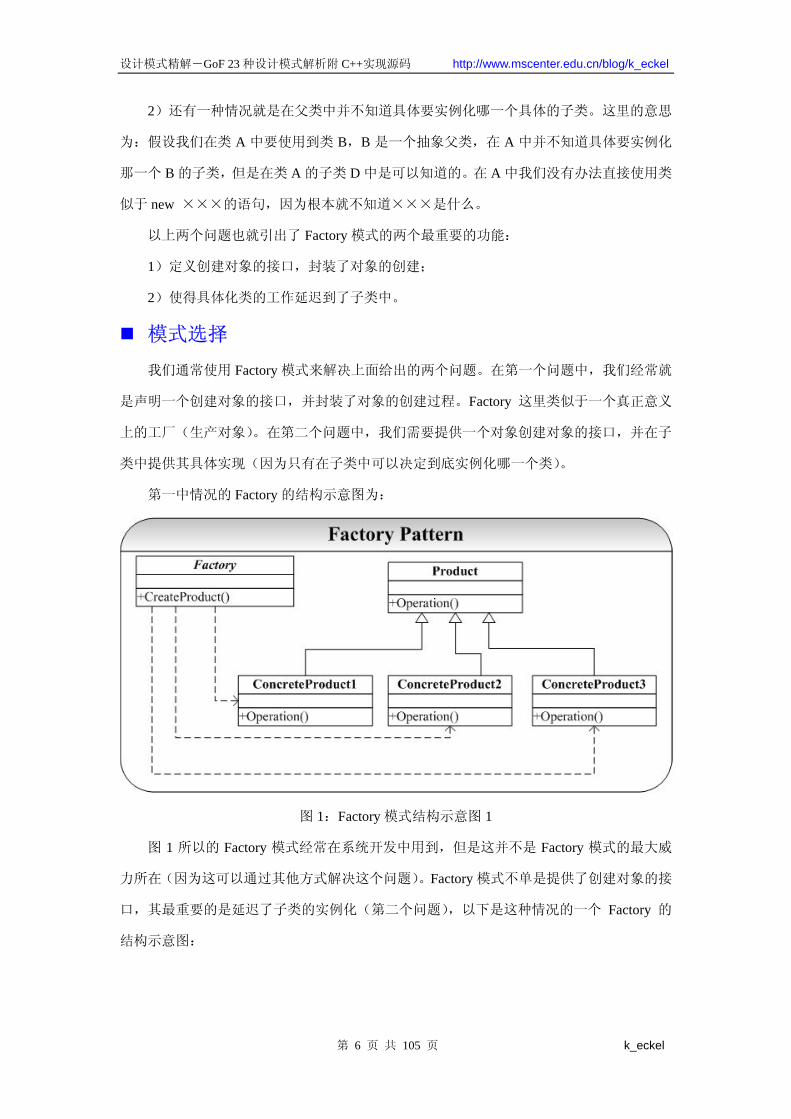
第一中情况的 Factory 的结构示意图为:
图 1:Factory 模式结构示意图 1
图 1 所以的 Factory 模式经常在系统开发中用到,但是这并不是 Factory 模式的 大威
力所在(因为这可以通过其他方式解决这个问题)。Factory 模式不单是提供了创建对象的接
口,其 重要的是延迟了子类的实例化(第二个问题),以下是这种情况的一个 Factory 的
结构示意图:
第 6 页 共 105 页 k_eckel
设计模式精解-GoF 23 种设计模式解析附 C++实现源码 http://www.mscenter.edu.cn/blog/k_eckel
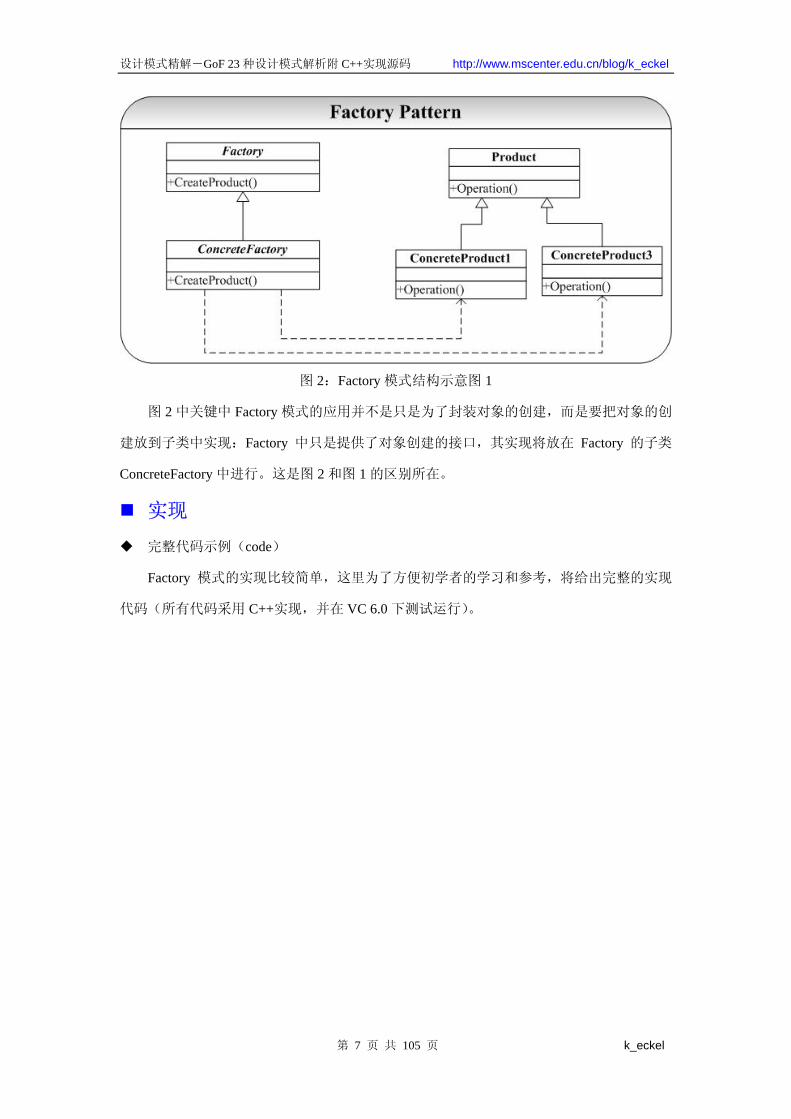
图 2:Factory 模式结构示意图 1
图 2 中关键中 Factory 模式的应用并不是只是为了封装对象的创建,而是要把对象的创
建放到子类中实现:Factory 中只是提供了对象创建的接口,其实现将放在 Factory 的子类
ConcreteFactory 中进行。这是图 2 和图 1 的区别所在。
实现
完整代码示例(code)
Factory 模式的实现比较简单,这里为了方便初学者的学习和参考,将给出完整的实现
代码(所有代码采用 C++实现,并在 VC 6.0 下测试运行)。
第 7 页 共 105 页 k_eckel

设计模式精解-GoF 23 种设计模式解析附 C++实现源码 http://www.mscenter.edu.cn/blog/k_eckel
代码片断 2:Product.cpp
//Product.cpp
#include "Product.h"
#include <iostream>
using namespace std;
Product::Product()
{
}
Product::~Product()
{
}
ConcreteProduct::ConcreteProduct()
{
cout<<"ConcreteProduct...."<<endl;
}
ConcreteProduct::~ConcreteProduct()
{
}
代码片断 1:Product.h
//Product.h
#ifndef _PRODUCT_H_
#define _PRODUCT_H_
class Product
{
public:
virtual ~Product() = 0;
protected:
Product();
private:
};
class ConcreteProduct:public Product
{
public:
~ConcreteProduct();
ConcreteProduct();
protected:
private:
};
#endif //~_PRODUCT_H_
第 8 页 共 105 页 k_eckel
设计模式精解-GoF 23 种设计模式解析附 C++实现源码 http://www.mscenter.edu.cn/blog/k_eckel
class ConcreteFactory:public Factory
{
public:
~ConcreteFactory();
ConcreteFactory();
Product* CreateProduct();
protected:
private:
};
#endif //~_FACTORY_H_
代码片断 3:Factory.h
//Factory.h
#ifndef _FACTORY_H_
#define _FACTORY_H_
class Product;
class Factory
{
public:
virtual ~Factory() = 0;
virtual Product* CreateProduct() = 0;
protected:
Factory();
private:
};
}
ConcreteFactory::ConcreteFactory()
{
cout<<"ConcreteFactory....."<<endl;
}
ConcreteFactory::~ConcreteFactory()
{
}
Product* ConcreteFactory::CreateProduct()
{
return new ConcreteProduct();
}
代码片断 4: Factory.cpp
//Factory.cpp
#include "Factory.h"
#include "Product.h"
#include <iostream>
using namespace std;
Factory::Factory()
{
}
Factory::~Factory()
{
第 9 页 共 105 页 k_eckel
设计模式精解-GoF 23 种设计模式解析附 C++实现源码 http://www.mscenter.edu.cn/blog/k_eckel
#include <iostream>
using namespace std;
int main(int argc,char* argv[])
{
Factory* fac = new ConcreteFactory();
Product* p = fac->CreateProduct();
return 0;
}
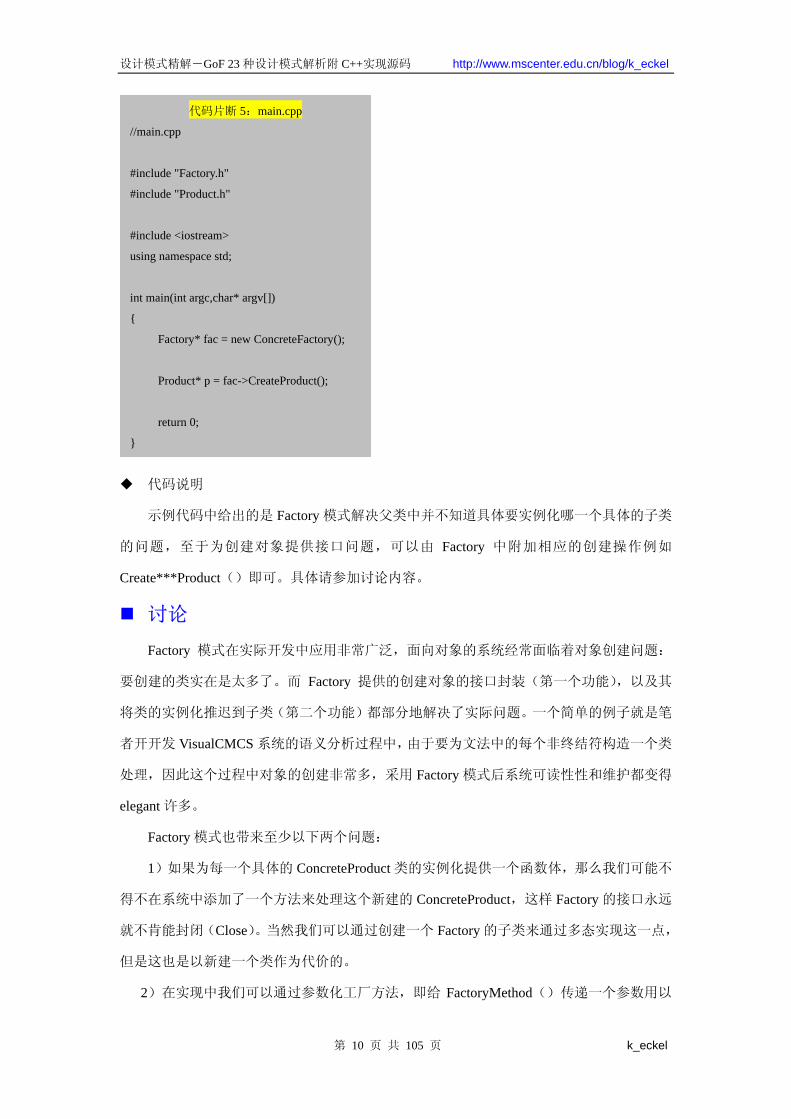
代码片断 5:main.cpp
//main.cpp
#include "Factory.h"
#include "Product.h"
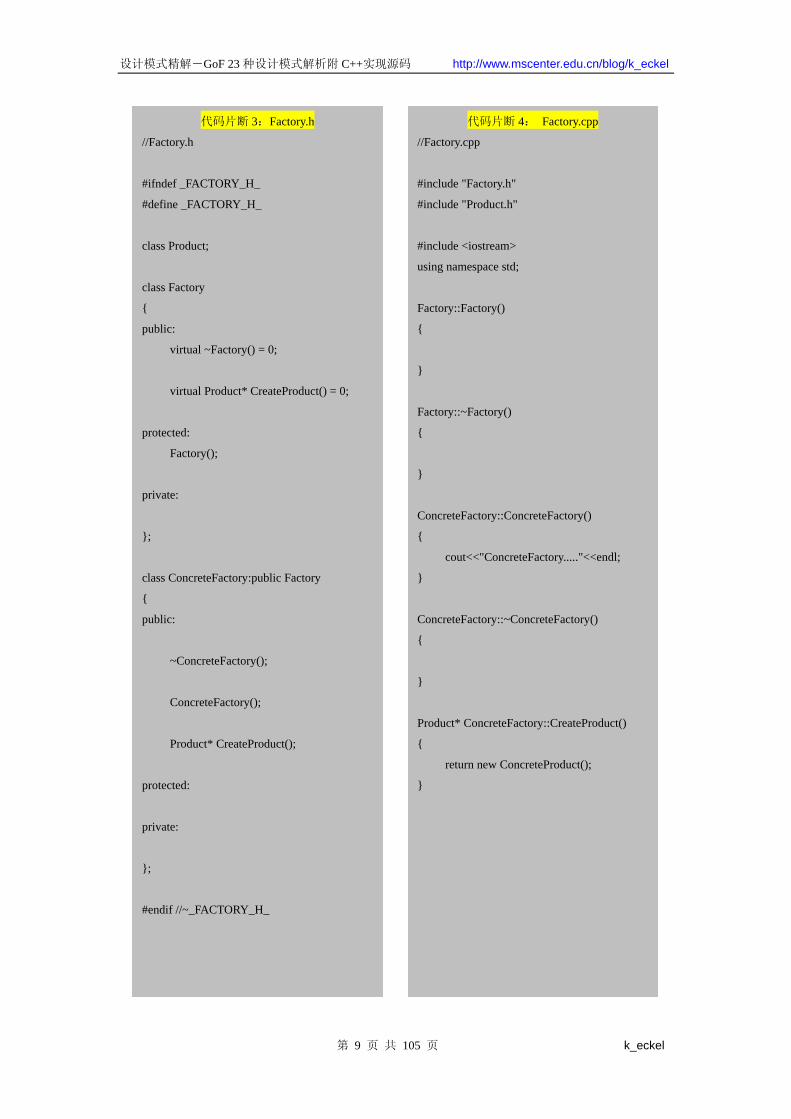
代码说明
示例代码中给出的是 Factory 模式解决父类中并不知道具体要实例化哪一个具体的子类
的问题,至于为创建对象提供接口问题,可以由 Factory 中附加相应的创建操作例如
Create***Product()即可。具体请参加讨论内容。
讨论
Factory 模式在实际开发中应用非常广泛,面向对象的系统经常面临着对象创建问题:
要创建的类实在是太多了。而 Factory 提供的创建对象的接口封装(第一个功能),以及其
将类的实例化推迟到子类(第二个功能)都部分地解决了实际问题。一个简单的例子就是笔
者开开发 VisualCMCS 系统的语义分析过程中,由于要为文法中的每个非终结符构造一个类
处理,因此这个过程中对象的创建非常多,采用 Factory 模式后系统可读性性和维护都变得
elegant 许多。
Factory 模式也带来至少以下两个问题:
1)如果为每一个具体的 ConcreteProduct 类的实例化提供一个函数体,那么我们可能不
得不在系统中添加了一个方法来处理这个新建的 ConcreteProduct,这样 Factory 的接口永远
就不肯能封闭(Close)。当然我们可以通过创建一个 Factory 的子类来通过多态实现这一点,
但是这也是以新建一个类作为代价的。
2)在实现中我们可以通过参数化工厂方法,即给 FactoryMethod()传递一个参数用以
第 10 页 共 105 页 k_eckel
设计模式精解-GoF 23 种设计模式解析附 C++实现源码 http://www.mscenter.edu.cn/blog/k_eckel
决定是创建具体哪一个具体的 Product(实际上笔者在 VisualCMCS 中也正是这样做的)。当
然也可以通过模板化避免 1)中的子类创建子类,其方法就是将具体 Product 类作为模板参
数,实现起来也很简单。
可以看出,Factory 模式对于对象的创建给予开发人员提供了很好的实现策略,但是
Factory 模式仅仅局限于一类类(就是说 Product 是一类,有一个共同的基类),如果我们要
为不同类的类提供一个对象创建的接口,那就要用 AbstractFactory 了。
1.2 AbstactFactory 模式
问题
假设我们要开发一款游戏,当然为了吸引更多的人玩,游戏难度不能太大(让大家都没
有信心了,估计游戏也就没有前途了),但是也不能太简单(没有挑战性也不符合玩家的心
理)。于是我们就可以采用这样一种处理策略:为游戏设立等级,初级、中级、高级甚至有
BT 级。假设也是过关的游戏,每个关卡都有一些怪物(monster)守着,玩家要把这些怪物
干掉才可以过关。作为开发者,我们就不得不创建怪物的类,然后初级怪物、中级怪物等都
继承自怪物类(当然不同种类的则需要另创建类,但是模式相同)。在每个关卡,我们都要
创建怪物的实例,例如初级就创建初级怪物(有很多种类)、中级创建中级怪物等。可以想
象在这个系统中,将会有成千上万的怪物实例要创建,问题是还要保证创建的时候不会出错:
初级不能创建 BT 级的怪物(玩家就郁闷了,玩家一郁闷,游戏也就挂挂了),反之也不可
以。
AbstractFactory 模式就是用来解决这类问题的:要创建一组相关或者相互依赖的对象。
模式选择
AbstractFactory 模式典型的结构图为:
第 11 页 共 105 页 k_eckel
设计模式精解-GoF 23 种设计模式解析附 C++实现源码 http://www.mscenter.edu.cn/blog/k_eckel
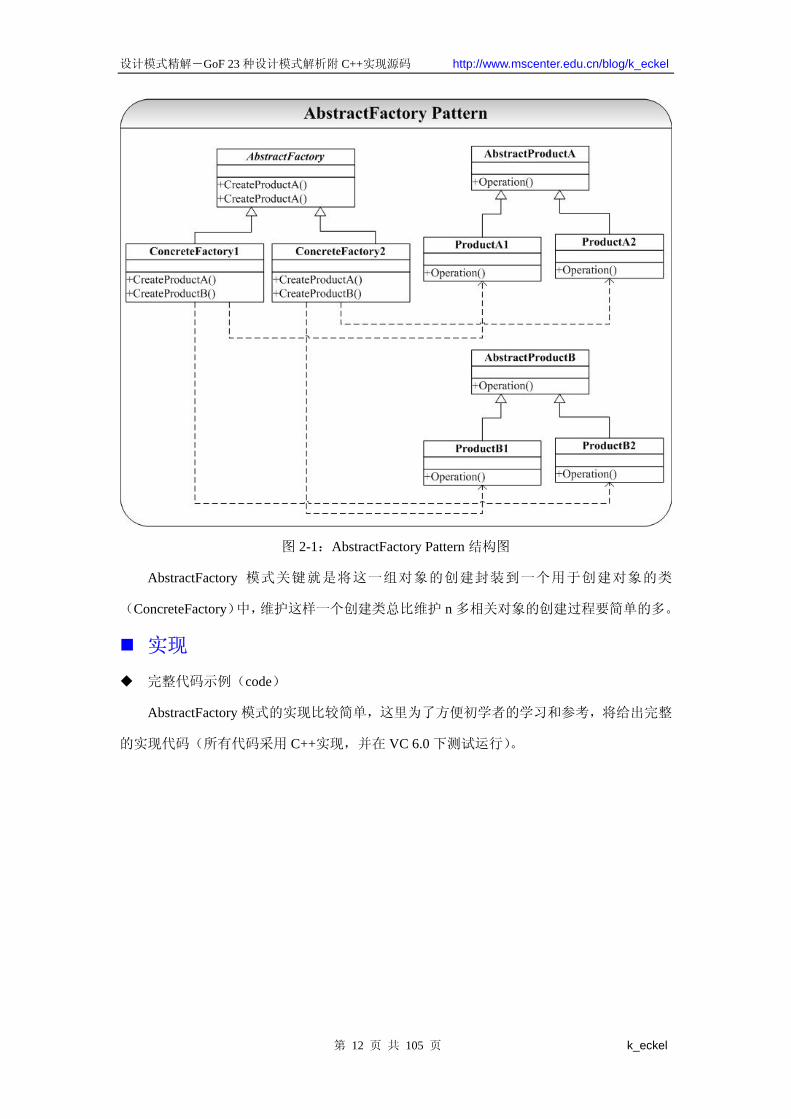
图 2-1:AbstractFactory Pattern 结构图
AbstractFactory 模式关键就是将这一组对象的创建封装到一个用于创建对象的类
(ConcreteFactory)中,维护这样一个创建类总比维护 n 多相关对象的创建过程要简单的多。
实现
完整代码示例(code)
AbstractFactory 模式的实现比较简单,这里为了方便初学者的学习和参考,将给出完整
的实现代码(所有代码采用 C++实现,并在 VC 6.0 下测试运行)。
第 12 页 共 105 页 k_eckel
设计模式精解-GoF 23 种设计模式解析附 C++实现源码 http://www.mscenter.edu.cn/blog/k_eckel
第 13 页 共 105 页 k_eckel
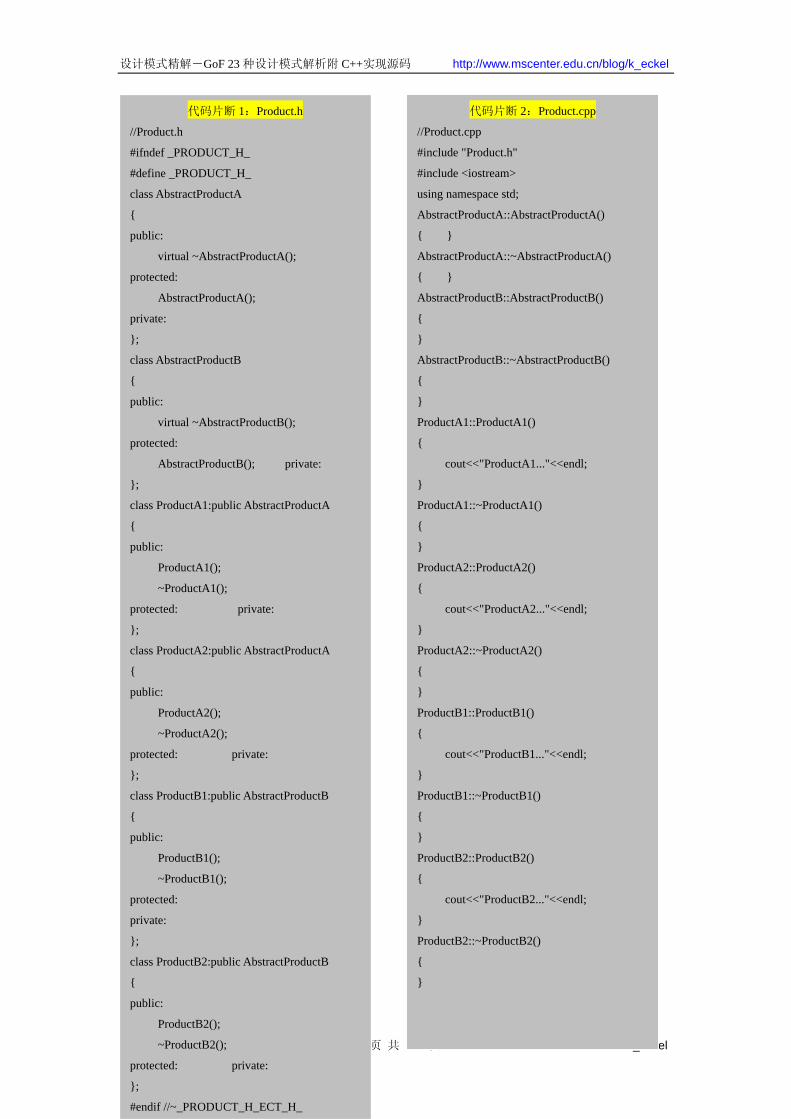
代码片断 1:Product.h
//Product.h
#ifndef _PRODUCT_H_
#define _PRODUCT_H_
class AbstractProductA
{
public:
virtual ~AbstractProductA();
protected:
AbstractProductA();
private:
};
class AbstractProductB
{
public:
virtual ~AbstractProductB();
protected:
AbstractProductB(); private:
};
class ProductA1:public AbstractProductA
{
public:
ProductA1();
~ProductA1();
protected: private:
};
class ProductA2:public AbstractProductA
{
public:
ProductA2();
~ProductA2();
protected: private:
};
class ProductB1:public AbstractProductB
{
public:
ProductB1();
~ProductB1();
protected:
private:
};
class ProductB2:public AbstractProductB
{
public:
ProductB2();
~ProductB2();
protected: private:
};
#endif //~_PRODUCT_H_ECT_H_
代码片断 2:Product.cpp
//Product.cpp
#include "Product.h"
#include <iostream>
using namespace std;
AbstractProductA::AbstractProductA()
{ }
AbstractProductA::~AbstractProductA()
{ }
AbstractProductB::AbstractProductB()
{
}
AbstractProductB::~AbstractProductB()
{
}
ProductA1::ProductA1()
{
cout<<"ProductA1..."<<endl;
}
ProductA1::~ProductA1()
{
}
ProductA2::ProductA2()
{
cout<<"ProductA2..."<<endl;
}
ProductA2::~ProductA2()
{
}
ProductB1::ProductB1()
{
cout<<"ProductB1..."<<endl;
}
ProductB1::~ProductB1()
{
}
ProductB2::ProductB2()
{
cout<<"ProductB2..."<<endl;
}
ProductB2::~ProductB2()
{
}
设计模式精解-GoF 23 种设计模式解析附 C++实现源码 http://www.mscenter.edu.cn/blog/k_eckel
第 14 页 共 105 页 k_eckel
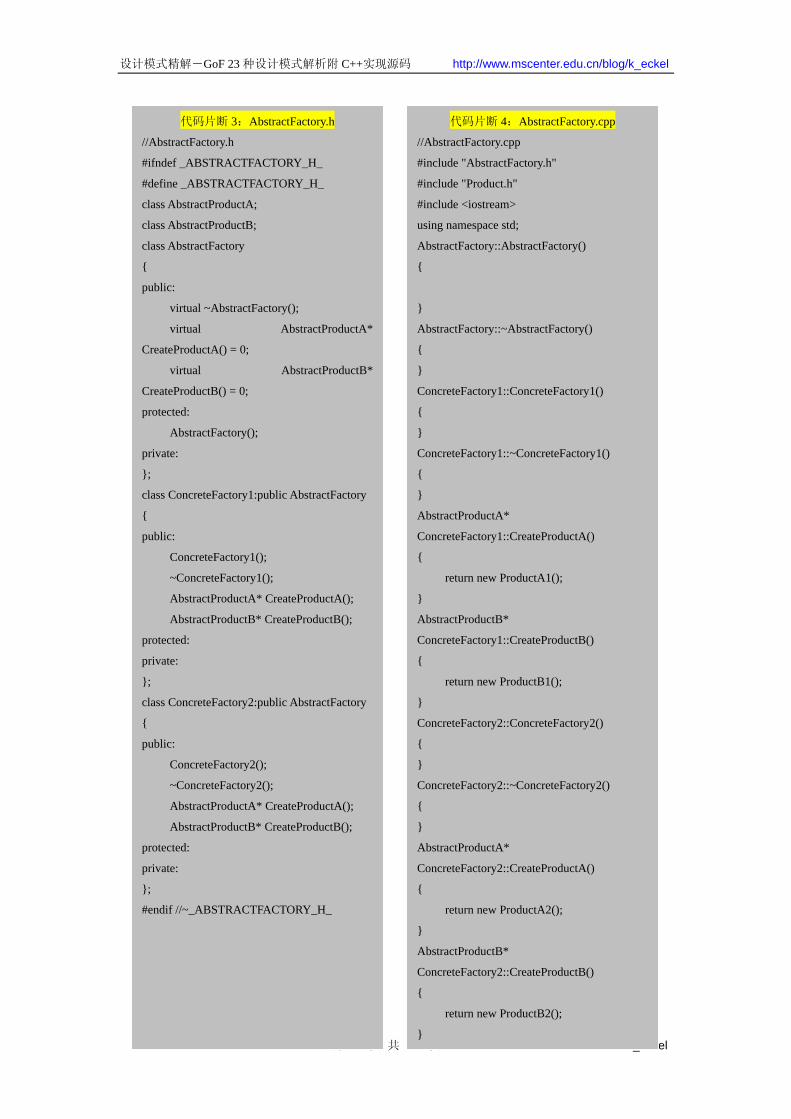
代码片断 3:AbstractFactory.h
//AbstractFactory.h
#ifndef _ABSTRACTFACTORY_H_
#define _ABSTRACTFACTORY_H_
class AbstractProductA;
class AbstractProductB;
class AbstractFactory
{
public:
virtual ~AbstractFactory();
virtual AbstractProductA*
CreateProductA() = 0;
virtual AbstractProductB*
CreateProductB() = 0;
protected:
AbstractFactory();
private:
};
class ConcreteFactory1:public AbstractFactory
{
public:
ConcreteFactory1();
~ConcreteFactory1();
AbstractProductA* CreateProductA();
AbstractProductB* CreateProductB();
protected:
private:
};
class ConcreteFactory2:public AbstractFactory
{
public:
ConcreteFactory2();
~ConcreteFactory2();
AbstractProductA* CreateProductA();
AbstractProductB* CreateProductB();
protected:
private:
};
#endif //~_ABSTRACTFACTORY_H_
代码片断 4:AbstractFactory.cpp
//AbstractFactory.cpp
#include "AbstractFactory.h"
#include "Product.h"
#include <iostream>
using namespace std;
AbstractFactory::AbstractFactory()
{
}
AbstractFactory::~AbstractFactory()
{
}
ConcreteFactory1::ConcreteFactory1()
{
}
ConcreteFactory1::~ConcreteFactory1()
{
}
AbstractProductA*
ConcreteFactory1::CreateProductA()
{
return new ProductA1();
}
AbstractProductB*
ConcreteFactory1::CreateProductB()
{
return new ProductB1();
}
ConcreteFactory2::ConcreteFactory2()
{
}
ConcreteFactory2::~ConcreteFactory2()
{
}
AbstractProductA*
ConcreteFactory2::CreateProductA()
{
return new ProductA2();
}
AbstractProductB*
ConcreteFactory2::CreateProductB()
{
return new ProductB2();
}
设计模式精解-GoF 23 种设计模式解析附 C++实现源码 http://www.mscenter.edu.cn/blog/k_eckel
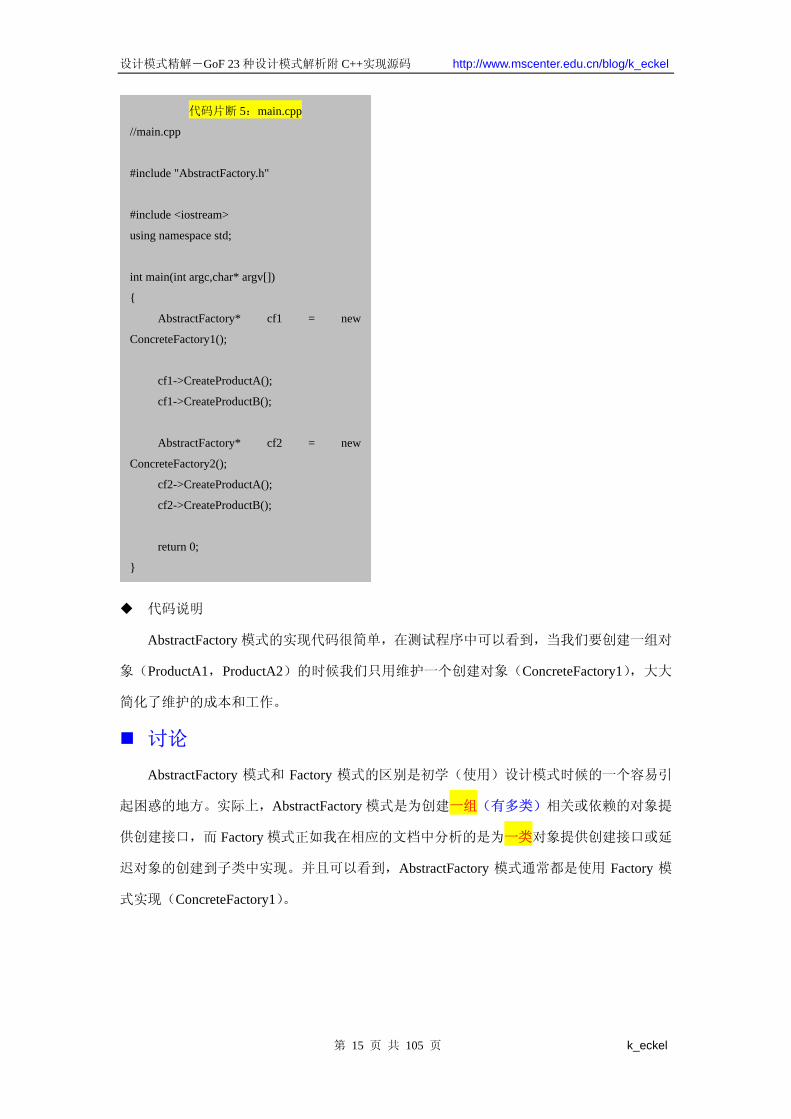
代码片断 5:main.cpp
//main.cpp
#include "AbstractFactory.h"
#include <iostream>
using namespace std;
int main(int argc,char* argv[])
{
AbstractFactory* cf1 = new
ConcreteFactory1();
cf1->CreateProductA();
cf1->CreateProductB();
AbstractFactory* cf2 = new
ConcreteFactory2();
cf2->CreateProductA();
cf2->CreateProductB();
return 0;
}
代码说明
AbstractFactory 模式的实现代码很简单,在测试程序中可以看到,当我们要创建一组对
象(ProductA1,ProductA2)的时候我们只用维护一个创建对象(ConcreteFactory1),大大
简化了维护的成本和工作。
讨论
AbstractFactory 模式和 Factory 模式的区别是初学(使用)设计模式时候的一个容易引
起困惑的地方。实际上,AbstractFactory 模式是为创建一组(有多类)相关或依赖的对象提
供创建接口,而 Factory 模式正如我在相应的文档中分析的是为一类对象提供创建接口或延
迟对象的创建到子类中实现。并且可以看到,AbstractFactory 模式通常都是使用 Factory 模
式实现(ConcreteFactory1)。
第 15 页 共 105 页 k_eckel
设计模式精解-GoF 23 种设计模式解析附 C++实现源码 http://www.mscenter.edu.cn/blog/k_eckel
1.3 Singleton 模式
问题
个人认为 Singleton 模式是设计模式中 为简单、 为常见、 容易实现,也是 应该
熟悉和掌握的模式。且不说公司企业在招聘的时候为了考察员工对设计的了解和把握,考的
多的就是 Singleton 模式。
Singleton 模式解决问题十分常见,我们怎样去创建一个唯一的变量(对象)?在基于
对象的设计中我们可以通过创建一个全局变量(对象)来实现,在面向对象和面向过程结合
的设计范式(如 C++中)中,我们也还是可以通过一个全局变量实现这一点。但是当我们遇
到了纯粹的面向对象范式中,这一点可能就只能是通过 Singleton 模式来实现了,可能这也
正是很多公司在招聘 Java 开发人员时候经常考察 Singleton 模式的缘故吧。
Singleton 模式在开发中非常有用,具体使用在讨论给出。
模式选择
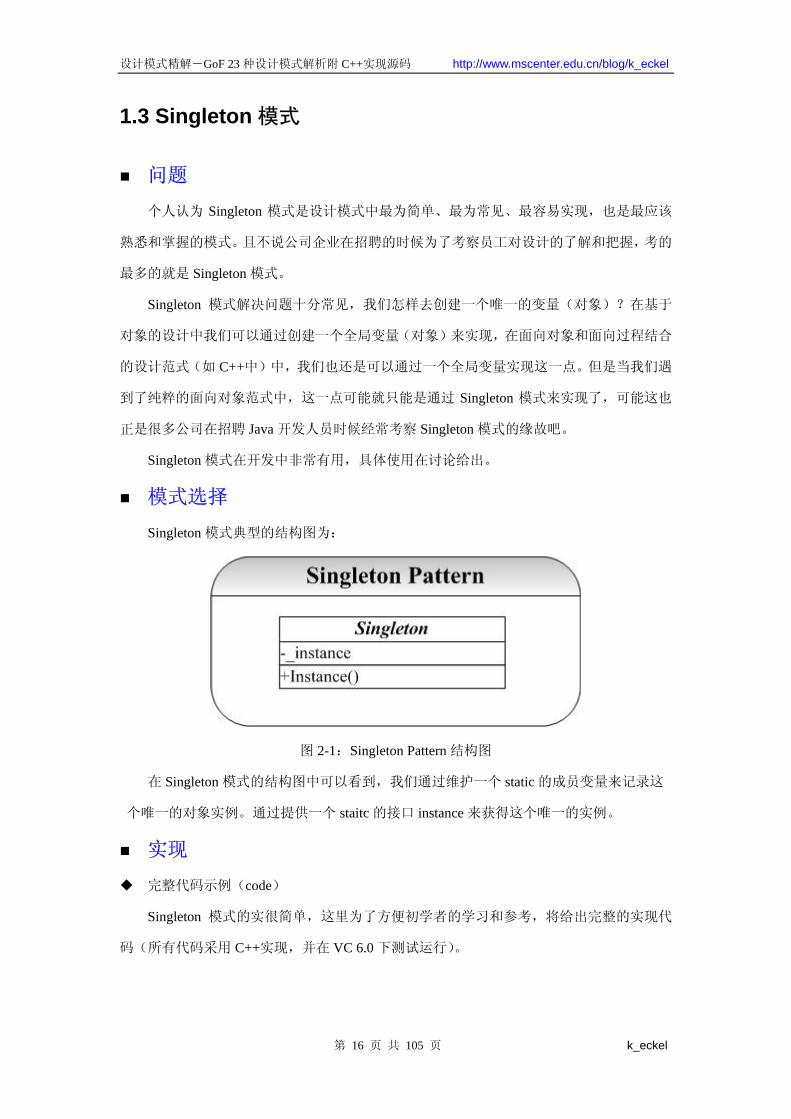
Singleton 模式典型的结构图为:
图 2-1:Singleton Pattern 结构图
在 Singleton 模式的结构图中可以看到,我们通过维护一个 static 的成员变量来记录这
个唯一的对象实例。通过提供一个 staitc 的接口 instance 来获得这个唯一的实例。
实现
完整代码示例(code)
Singleton 模式的实很简单,这里为了方便初学者的学习和参考,将给出完整的实现代
码(所有代码采用 C++实现,并在 VC 6.0 下测试运行)。
第 16 页 共 105 页 k_eckel
设计模式精解-GoF 23 种设计模式解析附 C++实现源码 http://www.mscenter.edu.cn/blog/k_eckel
代码片断 1:Singleton.h
//Singleton.h
#ifndef _SINGLETON_H_
#define _SINGLETON_H_
#include <iostream>
using namespace std;
class Singleton
{
public:
static Singleton* Instance();
protected:
Singleton();
private:
static Singleton* _instance;
};
#endif //~_SINGLETON_H_
代码片断 2:Singleton.cpp
//Singleton.cpp
#include "Singleton.h"
#include <iostream>
using namespace std;
Singleton* Singleton::_instance = 0;
Singleton::Singleton()
{
cout<<"Singleton...."<<endl;
}
Singleton* Singleton::Instance()
{
if (_instance == 0)
{
_instance = new Singleton();
}
return _instance;
}
代码片断 3:main.cpp
//main.cpp
#include "Singleton.h"
#include <iostream>
using namespace std;
int main(int argc,char* argv[])
{
Singleton* sgn = Singleton::Instance();
return 0;
}
第 17 页 共 105 页 k_eckel
设计模式精解-GoF 23 种设计模式解析附 C++实现源码 http://www.mscenter.edu.cn/blog/k_eckel
代码说明
Singleton 模式的实现无须补充解释,需要说明的是,Singleton 不可以被实例化,因此
我们将其构造函数声明为 protected 或者直接声明为 private。
讨论
Singleton 模式在开发中经常用到,且不说我们开发过程中一些变量必须是唯一的,比
如说打印机的实例等等。
Singleton 模式经常和 Factory(AbstractFactory)模式在一起使用,因为系统中工厂对象
一般来说只要一个,笔者在开发 Visual CMCS 的时候,语义分析过程(以及其他过程)中
都用到工厂模式来创建对象(对象实在是太多了),这里的工厂对象实现就是同时是一个
Singleton 模式的实例,因为系统我们就只要一个工厂来创建对象就可以了。
1.4 Builder 模式
问题
生活中有着很多的Builder的例子,个人觉得大学生活就是一个Builder模式的 好体验:
要完成大学教育,一般将大学教育过程分成 4 个学期进行,因此没有学习可以看作是构建完
整大学教育的一个部分构建过程,每个人经过这 4 年的(4 个阶段)构建过程得到的 后的
结果不一样,因为可能在四个阶段的构建中引入了很多的参数(每个人的机会和际遇不完全
相同)。
Builder 模式要解决的也正是这样的问题:当我们要创建的对象很复杂的时候(通常是
由很多其他的对象组合而成),我们要要复杂对象的创建过程和这个对象的表示(展示)分
离开来,这样做的好处就是通过一步步的进行复杂对象的构建,由于在每一步的构造过程中
可以引入参数,使得经过相同的步骤创建 后得到的对象的展示不一样。
模式选择
Builder 模式的典型结构图为:
第 18 页 共 105 页 k_eckel

设计模式精解-GoF 23 种设计模式解析附 C++实现源码 http://www.mscenter.edu.cn/blog/k_eckel
图 2-1:Builder Pattern 结构图
Builder 模式的关键是其中的 Director 对象并不直接返回对象,而是通过一步步
(BuildPartA,BuildPartB,BuildPartC)来一步步进行对象的创建。当然这里 Director 可以
提供一个默认的返回对象的接口(即返回通用的复杂对象的创建,即不指定或者特定唯一指
定 BuildPart 中的参数)。
实现
完整代码示例(code)
Builder 模式的实现很简单,这里为了方便初学者的学习和参考,将给出完整的实现代
码(所有代码采用 C++实现,并在 VC 6.0 下测试运行)。
第 19 页 共 105 页 k_eckel
设计模式精解-GoF 23 种设计模式解析附 C++实现源码 http://www.mscenter.edu.cn/blog/k_eckel
代码片断 1:Product.h
//Product.h
#ifndef _PRODUCT_H_
#define _PRODUCT_H_
class Product
{
public:
Product();
~Product();
void ProducePart();
protected:
private:
};
class ProductPart
{
public:
ProductPart();
~ProductPart();
ProductPart* BuildPart();
protected:
private:
};
#endif //~_PRODUCT_H_
代码片断 2:Product.cpp
//Component.cpp
#include "Component.h"
Component::Component()
{
}
Component::~Component()
{
}
void Component::Add(const Component&
com)
{
}
Component* Component::GetChild(int index)
{
return 0;
}
void Component::Remove(const Component&
com)
{
}
第 20 页 共 105 页 k_eckel
设计模式精解-GoF 23 种设计模式解析附 C++实现源码 http://www.mscenter.edu.cn/blog/k_eckel
代码片断 3:Builder.h
//Builder.h
#ifndef _BUILDER_H_
#define _BUILDER_H_
#include <string>
using namespace std;
class Product;
class Builder
{
public:
virtual ~Builder();
virtual void BuildPartA(const string&
buildPara) = 0;
virtual void BuildPartB(const string&
buildPara) = 0;
virtual void BuildPartC(const string&
buildPara) = 0;
virtual Product* GetProduct() = 0;
protected:
Builder();
private:
};
class ConcreteBuilder:public Builder
{
public:
ConcreteBuilder();
~ConcreteBuilder();
void BuildPartA(const string&
buildPara);
void BuildPartB(const string& buildPara);
void BuildPartC(const string& buildPara);
Product* GetProduct();
protected:
private:
};
#endif //~_BUILDER_H_
代码片断 4:Builder.cpp
//Builder.cpp
#include "Builder.h"
#include "Product.h"
#include <iostream>
using namespace std;
Builder::Builder()
{
}
Builder::~Builder()
{
}
ConcreteBuilder::ConcreteBuilder()
{
}
ConcreteBuilder::~ConcreteBuilder()
{
}
void ConcreteBuilder::BuildPartA(const
string& buildPara)
{
cout<<"Step1:Build
PartA..."<<buildPara<<endl;
}
void ConcreteBuilder::BuildPartB(const
string& buildPara)
{
cout<<"Step1:Build
PartB..."<<buildPara<<endl;
}
void ConcreteBuilder::BuildPartC(const
string& buildPara)
{
cout<<"Step1:Build
PartC..."<<buildPara<<endl;
}
Product* ConcreteBuilder::GetProduct()
{
BuildPartA("pre-defined");
BuildPartB("pre-defined");
BuildPartC("pre-defined");
return new Product();
}
第 21 页 共 105 页 k_eckel
设计模式精解-GoF 23 种设计模式解析附 C++实现源码 http://www.mscenter.edu.cn/blog/k_eckel
代码片断 5:Director.h
//Director.h
#ifndef _DIRECTOR_H_
#define _DIRECTOR_H_
class Builder;
class Director
{
public:
Director(Builder* bld);
~Director();
void Construct();
protected:
private:
Builder* _bld;
};
#endif //~_DIRECTOR_H_
代码片断 6:Director.cpp
//Director.cpp
#include "director.h"
#include "Builder.h"
Director::Director(Builder* bld)
{
_bld = bld;
}
Director::~Director()
{
}
void Director::Construct()
{
_bld->BuildPartA("user-defined");
_bld->BuildPartB("user-defined");
_bld->BuildPartC("user-defined");
}
代码片断 7:main.cpp
//main.cpp
#include "Builder.h"
#include "Product.h"
#include "Director.h"
#include <iostream>
using namespace std;
int main(int argc,char* argv[])
{
Director* d = new Director(new
ConcreteBuilder());
d->Construct();
return 0;
}
第 22 页 共 105 页 k_eckel

设计模式精解-GoF 23 种设计模式解析附 C++实现源码 http://www.mscenter.edu.cn/blog/k_eckel
代码说明
Builder 模式的示例代码中,BuildPart 的参数是通过客户程序员传入的,这里为了简单
说明问题,使用“user-defined”代替,实际的可能是在 Construct 方法中传入这 3 个参数,
这样就可以得到不同的细微差别的复杂对象了。
讨论
GoF 在《设计模式》一书中给出的关于 Builder 模式的意图是非常容易理解、间接的:
将一个复杂对象的构建与它的表示分离,使得同样的构建过程可以创建不同的表示(在示例
代码中可以通过传入不同的参数实现这一点)。
Builder 模式和 AbstractFactory 模式在功能上很相似,因为都是用来创建大的复杂的对
象,它们的区别是:Builder 模式强调的是一步步创建对象,并通过相同的创建过程可以获
得不同的结果对象,一般来说 Builder 模式中对象不是直接返回的。而在 AbstractFactory 模
式中对象是直接返回的,AbstractFactory 模式强调的是为创建多个相互依赖的对象提供一个
同一的接口。
1.5 Prototype 模式
问题
关于这个模式,突然想到了小时候看的《西游记》,齐天大圣孙悟空再发飙的时候可以
通过自己头上的 3 根毛立马复制出来成千上万的孙悟空,对付小妖怪很管用(数量 重要)。
Prototype 模式也正是提供了自我复制的功能,就是说新对象的创建可以通过已有对象进行
创建。在 C++中拷贝构造函数(Copy Constructor)曾经是很对程序员的噩梦,浅层拷贝和
深层拷贝的魔魇也是很多程序员在面试时候的快餐和系统崩溃时候的根源之一。
模式选择
Prototype 模式典型的结构图为:
第 23 页 共 105 页 k_eckel
设计模式精解-GoF 23 种设计模式解析附 C++实现源码 http://www.mscenter.edu.cn/blog/k_eckel
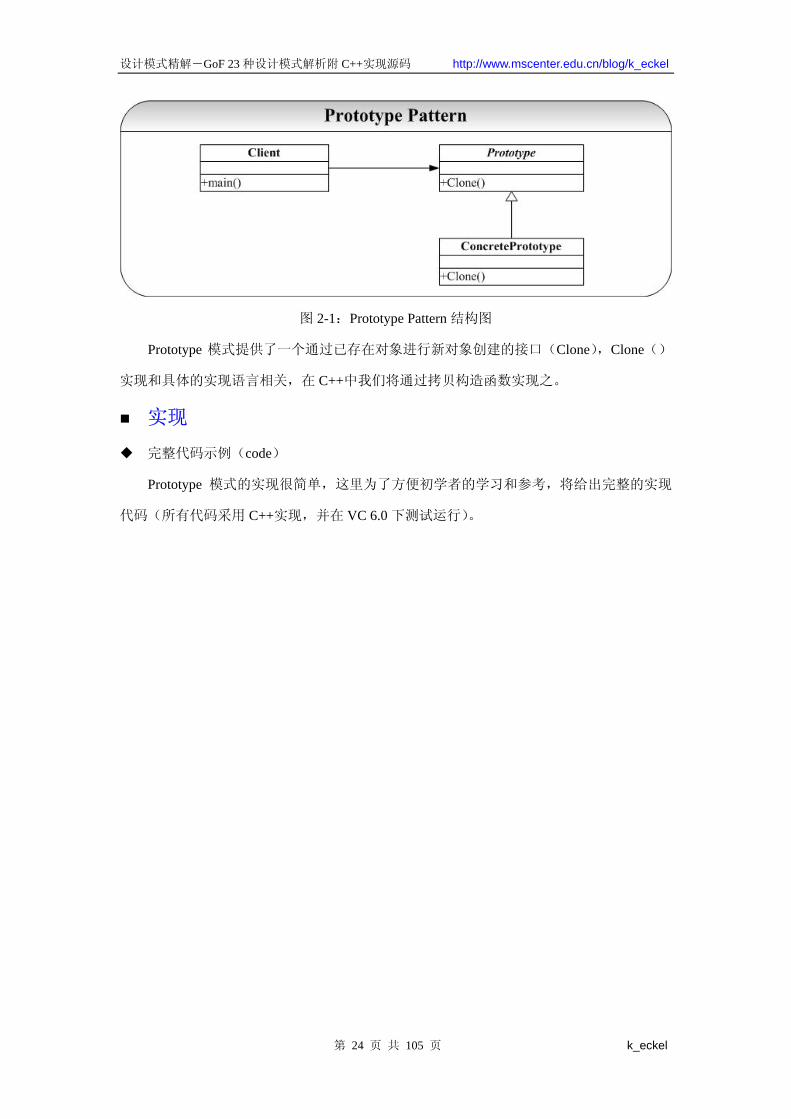
图 2-1:Prototype Pattern 结构图
Prototype 模式提供了一个通过已存在对象进行新对象创建的接口(Clone),Clone()
实现和具体的实现语言相关,在 C++中我们将通过拷贝构造函数实现之。
实现
完整代码示例(code)
Prototype 模式的实现很简单,这里为了方便初学者的学习和参考,将给出完整的实现
代码(所有代码采用 C++实现,并在 VC 6.0 下测试运行)。
第 24 页 共 105 页 k_eckel
设计模式精解-GoF 23 种设计模式解析附 C++实现源码 http://www.mscenter.edu.cn/blog/k_eckel
代码片断 1:Prototype.h
//Prototype.h
#ifndef _PROTOTYPE_H_
#define _PROTOTYPE_H_
class Prototype
{
public:
virtual ~Prototype();
virtual Prototype* Clone() const = 0;
protected:
Prototype();
private:
};
class ConcretePrototype:public Prototype
{
public:
ConcretePrototype();
ConcretePrototype(const
ConcretePrototype& cp);
~ConcretePrototype();
Prototype* Clone() const;
protected:
private:
};
#endif //~_PROTOTYPE_H_
代码片断 2:Prototype.cpp
//Prototype.cpp
#include "Prototype.h"
#include <iostream>
using namespace std;
Prototype::Prototype()
{
}
Prototype::~Prototype()
{
}
Prototype* Prototype::Clone() const
{
return 0;
}
ConcretePrototype::ConcretePrototype()
{
}
ConcretePrototype::~ConcretePrototype()
{
}
ConcretePrototype::ConcretePrototype(const
ConcretePrototype& cp)
{
cout<<"ConcretePrototype
copy ..."<<endl;
}
Prototype* ConcretePrototype::Clone() const
{
return new ConcretePrototype(*this);
}
第 25 页 共 105 页 k_eckel
设计模式精解-GoF 23 种设计模式解析附 C++实现源码 http://www.mscenter.edu.cn/blog/k_eckel
代码片断 3:main.cpp
//main.cpp
#include "Prototype.h"
#include <iostream>
using namespace std;
int main(int argc,char* argv[])
{
Prototype* p = new ConcretePrototype();
Prototype* p1 = p->Clone();
return 0;
}
代码说明
Prototype 模式的结构和实现都很简单,其关键就是(C++中)拷贝构造函数的实现方
式,这也是 C++实现技术层面上的事情。由于在示例代码中不涉及到深层拷贝(主要指有指
针、复合对象的情况),因此我们通过编译器提供的默认的拷贝构造函数(按位拷贝)的方
式进行实现。说明的是这一切只是为了实现简单起见,也因为本文档的重点不在拷贝构造函
数的实现技术,而在 Prototype 模式本身的思想。
讨论
Prototype 模式通过复制原型(Prototype)而获得新对象创建的功能,这里 Prototype 本
身就是“对象工厂”(因为能够生产对象),实际上 Prototype 模式和 Builder 模式、
AbstractFactory 模式都是通过一个类(对象实例)来专门负责对象的创建工作(工厂对象),
它们之间的区别是:Builder 模式重在复杂对象的一步步创建(并不直接返回对象),
AbstractFactory 模式重在产生多个相互依赖类的对象,而 Prototype 模式重在从自身复制自
己创建新类。
2 结构型模式
2.1 Bridge 模式
问题
第 26 页 共 105 页 k_eckel
设计模式精解-GoF 23 种设计模式解析附 C++实现源码 http://www.mscenter.edu.cn/blog/k_eckel
总结面向对象实际上就两句话:一是松耦合(Coupling),二是高内聚(Cohesion)。面
向对象系统追求的目标就是尽可能地提高系统模块内部的内聚(Cohesion)、尽可能降低模
块间的耦合(Coupling)。然而这也是面向对象设计过程中 为难把握的部分,大家肯定在
OO 系统的开发过程中遇到这样的问题:
1)客户给了你一个需求,于是使用一个类来实现(A);
2)客户需求变化,有两个算法实现功能,于是改变设计,我们通过一个抽象的基类,
再定义两个具体类实现两个不同的算法(A1 和 A2);
3)客户又告诉我们说对于不同的操作系统,于是再抽象一个层次,作为一个抽象基类
A0,在分别为每个操作系统派生具体类(A00 和 A01,其中 A00 表示原来的类 A)实现不
同操作系统上的客户需求,这样我们就有了一共 4 个类。
4)可能用户的需求又有变化,比如说又有了一种新的算法……..
5)我们陷入了一个需求变化的郁闷当中,也因此带来了类的迅速膨胀。
Bridge 模式则正是解决了这类问题。
模式选择
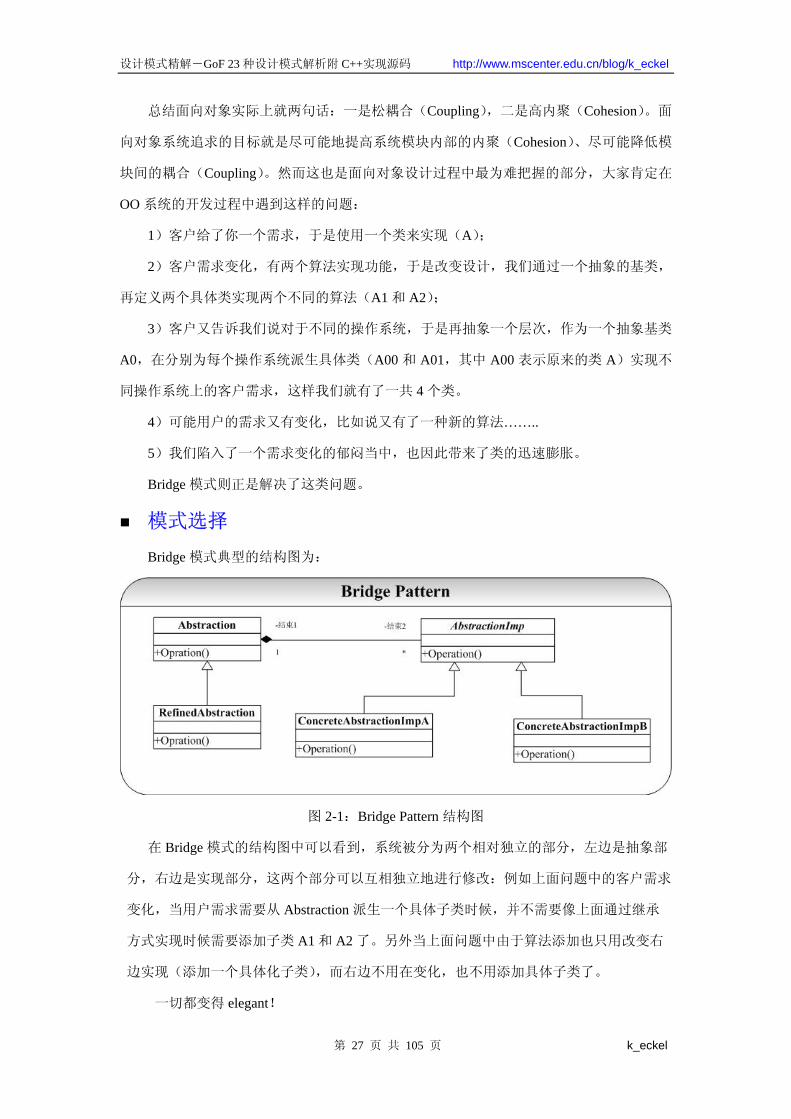
Bridge 模式典型的结构图为:
图 2-1:Bridge Pattern 结构图
在 Bridge 模式的结构图中可以看到,系统被分为两个相对独立的部分,左边是抽象部
分,右边是实现部分,这两个部分可以互相独立地进行修改:例如上面问题中的客户需求
变化,当用户需求需要从 Abstraction 派生一个具体子类时候,并不需要像上面通过继承
方式实现时候需要添加子类 A1 和 A2 了。另外当上面问题中由于算法添加也只用改变右
边实现(添加一个具体化子类),而右边不用在变化,也不用添加具体子类了。
一切都变得 elegant!
第 27 页 共 105 页 k_eckel
设计模式精解-GoF 23 种设计模式解析附 C++实现源码 http://www.mscenter.edu.cn/blog/k_eckel
实现
完整代码示例(code)
Bridge 模式的实现起来并不是特别困难,这里为了方便初学者的学习和参考,将给出完
整的实现代码(所有代码采用 C++实现,并在 VC 6.0 下测试运行)。
代码片断 1:Abstraction.h
//Abstraction.h
#ifndef _ABSTRACTION_H_
#define _ABSTRACTION_H_
class AbstractionImp;
class Abstraction
{
public:
virtual ~Abstraction();
virtual void Operation() = 0;
protected:
Abstraction();
private:
};
class RefinedAbstraction:public Abstraction
{
public:
RefinedAbstraction(AbstractionImp*
imp);
~RefinedAbstraction();
void Operation();
protected:
private:
AbstractionImp* _imp;
};
#endif //~_ABSTRACTION_H_
代码片断 2:Abstraction.cpp
//Abstraction.cpp
#include "Abstraction.h"
#include "AbstractionImp.h"
#include <iostream>
using namespace std;
Abstraction::Abstraction()
{
}
Abstraction::~Abstraction()
{
}
RefinedAbstraction::RefinedAbstraction(Abstra
ctionImp* imp)
{
_imp = imp;
}
RefinedAbstraction::~RefinedAbstraction()
{
}
void RefinedAbstraction::Operation()
{
_imp->Operation();
}
第 28 页 共 105 页 k_eckel
设计模式精解-GoF 23 种设计模式解析附 C++实现源码 http://www.mscenter.edu.cn/blog/k_eckel
代码片断 3:AbstractionImp.h
//AbstractionImp.h
#ifndef _ABSTRACTIONIMP_H_
#define _ABSTRACTIONIMP_H_
class AbstractionImp
{
public:
virtual ~AbstractionImp();
virtual void Operation() = 0;
protected:
AbstractionImp();
private:
};
class ConcreteAbstractionImpA:public
AbstractionImp
{
public:
ConcreteAbstractionImpA();
~ConcreteAbstractionImpA();
virtual void Operation();
protected:
private:
};
class ConcreteAbstractionImpB:public
AbstractionImp
{
public:
ConcreteAbstractionImpB();
~ConcreteAbstractionImpB();
virtual void Operation();
protected:
private:
};
#endif //~_ABSTRACTIONIMP_H_
代码片断 4:AbstractionImp.cpp
//AbstractionImp.cpp
#include "AbstractionImp.h"
#include <iostream>
using namespace std;
AbstractionImp::AbstractionImp()
{
}
AbstractionImp::~AbstractionImp()
{
}
void AbstractionImp::Operation()
{
cout<<"AbstractionImp....imp..."<<endl;
}
ConcreteAbstractionImpA::ConcreteAbstractio
nImpA()
{
}
ConcreteAbstractionImpA::~ConcreteAbstracti
onImpA()
{
}
void ConcreteAbstractionImpA::Operation()
{
cout<<"ConcreteAbstractionImpA...."<<e
ndl;
}
ConcreteAbstractionImpB::ConcreteAbstractio
nImpB()
{
}
ConcreteAbstractionImpB::~ConcreteAbstracti
onImpB()
{
}
void ConcreteAbstractionImpB::Operation()
{
cout<<"ConcreteAbstractionImpB...."<<e
ndl;
}
第 29 页 共 105 页 k_eckel

设计模式精解-GoF 23 种设计模式解析附 C++实现源码 http://www.mscenter.edu.cn/blog/k_eckel
代码片断 5:main.cpp
//main.cpp
#include "Abstraction.h"
#include "AbstractionImp.h"
#include <iostream>
using namespace std;
int main(int argc,char* argv[])
{
AbstractionImp* imp = new
ConcreteAbstractionImpA();
Abstraction* abs = new
RefinedAbstraction(imp);
abs->Operation();
return 0;
}
代码说明
Bridge 模式将抽象和实现分别独立实现,在代码中就是 Abstraction 类和 AbstractionImp
类。
讨论
Bridge 是设计模式中比较复杂和难理解的模式之一,也是 OO 开发与设计中经常会用到
的模式之一。使用组合(委托)的方式将抽象和实现彻底地解耦,这样的好处是抽象和实现
可以分别独立地变化,系统的耦合性也得到了很好的降低。
GoF 在说明 Bridge 模式时,在意图中指出 Bridge 模式“将抽象部分与它的实现部分分
离,使得它们可以独立地变化”。这句话很简单,但是也很复杂,连 Bruce Eckel 在他的大作
《Thinking in Patterns》中说“Bridge 模式是 GoF 所讲述得 不好(Poorly-described)的模
式”,个人觉得也正是如此。原因就在于 GoF 的那句话中的“实现”该怎么去理解:“实现”
特别是和“抽象”放在一起的时候我们“默认”的理解是“实现”就是“抽象”的具体子类
的实现,但是这里 GoF 所谓的“实现”的含义不是指抽象基类的具体子类对抽象基类中虚
函数(接口)的实现,是和继承结合在一起的。而这里的“实现”的含义指的是怎么去实现
第 30 页 共 105 页 k_eckel
设计模式精解-GoF 23 种设计模式解析附 C++实现源码 http://www.mscenter.edu.cn/blog/k_eckel
用户的需求,并且指的是通过组合(委托)的方式实现的,因此这里的实现不是指的继承基
类、实现基类接口,而是指的是通过对象组合实现用户的需求。理解了这一点也就理解了
Bridge 模式,理解了 Bridge 模式,你的设计就会更加 Elegant 了。
实际上上面使用 Bridge 模式和使用带来问题方式的解决方案的根本区别在于是通过继
承还是通过组合的方式去实现一个功能需求。因此面向对象分析和设计中有一个原则就是:
Favor Composition Over Inheritance。其原因也正在这里。
2.2 Adapter 模式
问题
Adapter 模式解决的问题在生活中经常会遇到:比如我们有一个 Team 为外界提供 S 类
服务,但是我们 Team 里面没有能够完成此项人物的 member,然后我们得知有 A 可以完成
这项服务(他把这项人物重新取了个名字叫 S’,并且他不对外公布他的具体实现)。为了保
证我们对外的服务类别的一致性(提供 S 服务),我们有以下两种方式解决这个问题:
1)把 B 君直接招安到我们 Team 为我们工作,提供 S 服务的时候让 B 君去办就是了;
2)B 君可能在别的地方有工作,并且不准备接受我们的招安,于是我们 Team 可以想
这样一种方式解决问题:我们安排 C 君去完成这项任务,并做好工作(Money:))让 A 君
工作的时候可以向 B 君请教,因此 C 君就是一个复合体(提供 S 服务,但是是 B 君的继承
弟子)。
实际上在软件系统设计和开发中,这种问题也会经常遇到:我们为了完成某项工作购买
了一个第三方的库来加快开发。这就带来了一个问题:我们在应用程序中已经设计好了接口,
与这个第三方提供的接口不一致,为了使得这些接口不兼容的类(不能在一起工作)可以在
一起工作了,Adapter 模式提供了将一个类(第三方库)的接口转化为客户(购买使用者)
希望的接口。
在上面生活中问题的解决方式也就正好对应了 Adapter 模式的两种类别:类模式和对象
模式。
模式选择
Adapter 模式典型的结构图为:
第 31 页 共 105 页 k_eckel
设计模式精解-GoF 23 种设计模式解析附 C++实现源码 http://www.mscenter.edu.cn/blog/k_eckel
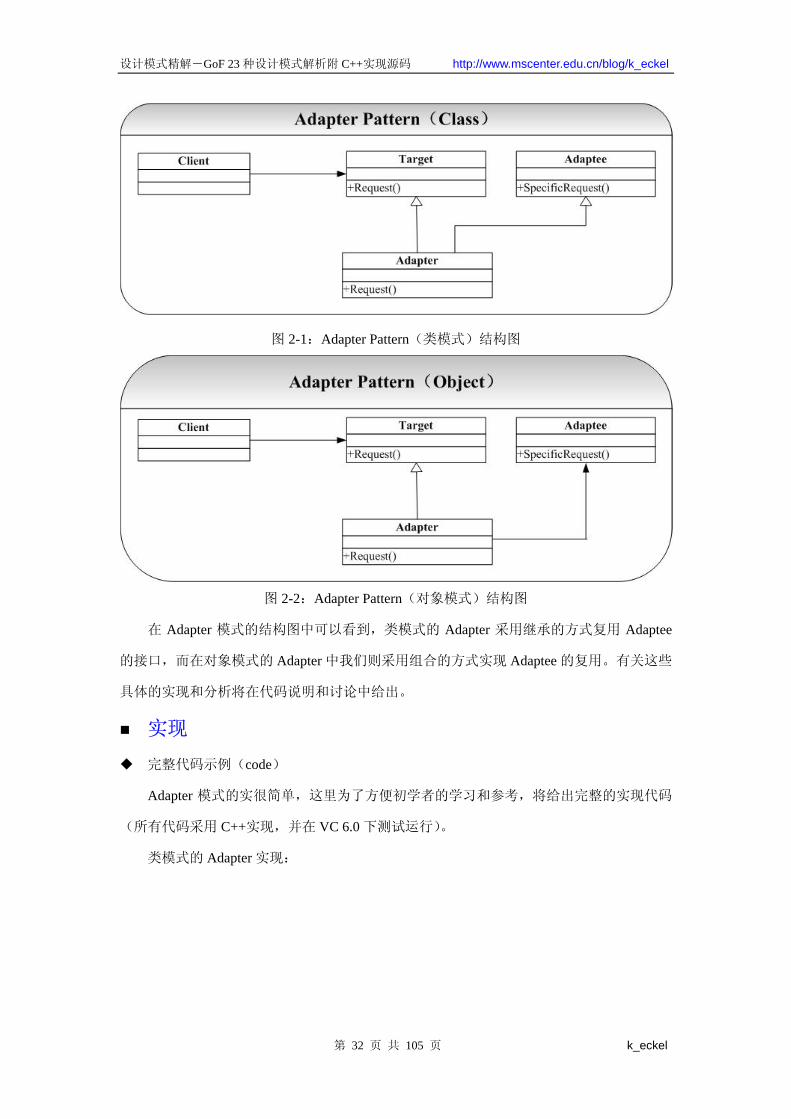
图 2-1:Adapter Pattern(类模式)结构图
图 2-2:Adapter Pattern(对象模式)结构图
在 Adapter 模式的结构图中可以看到,类模式的 Adapter 采用继承的方式复用 Adaptee
的接口,而在对象模式的 Adapter 中我们则采用组合的方式实现 Adaptee 的复用。有关这些
具体的实现和分析将在代码说明和讨论中给出。
实现
完整代码示例(code)
Adapter 模式的实很简单,这里为了方便初学者的学习和参考,将给出完整的实现代码
(所有代码采用 C++实现,并在 VC 6.0 下测试运行)。
类模式的 Adapter 实现:
第 32 页 共 105 页 k_eckel
设计模式精解-GoF 23 种设计模式解析附 C++实现源码 http://www.mscenter.edu.cn/blog/k_eckel
代码片断 1:Adapter.h
//Adapter.h
#ifndef _ADAPTER_H_
#define _ADAPTER_H_
class Target
{
public:
Target();
virtual ~Target();
virtual void Request();
protected:
private:
};
class Adaptee
{
public:
Adaptee();
~Adaptee();
void SpecificRequest();
protected:
private:
};
class Adapter:public Target,private Adaptee
{
public:
Adapter();
~Adapter();
void Request();
protected:
private:
};
#endif //~_ADAPTER_H_
代码片断 2:Adapter.cpp
//Adapter.cpp
#include "Adapter.h"
#include <iostream>
Target::Target()
{
}
Target::~Target()
{
}
void Target::Request()
{
std::cout<<"Target::Request"<<std::endl;
}
Adaptee::Adaptee()
{
}
Adaptee::~Adaptee()
{
}
void Adaptee::SpecificRequest()
{
std::cout<<"Adaptee::SpecificRequest"<<
std::endl;
}
Adapter::Adapter()
{
}
Adapter::~Adapter()
{
}
void Adapter::Request()
{
this->SpecificRequest();
}
第 33 页 共 105 页 k_eckel
设计模式精解-GoF 23 种设计模式解析附 C++实现源码 http://www.mscenter.edu.cn/blog/k_eckel
代码片断 1:Adapter.h
//Adapter.h
#ifndef _ADAPTER_H_
#define _ADAPTER_H_
class Target
{
public:
Target();
virtual ~Target();
virtual void Request();
protected:
private:
};
class Adaptee
{
public:
Adaptee();
~Adaptee();
void SpecificRequest();
protected:
private:
};
class Adapter:public Target
{
public:
Adapter(Adaptee* ade);
~Adapter();
void Request();
protected:
private:
Adaptee* _ade;
};
#endif //~_ADAPTER_H_
代码片断 2:Adapter.cpp
//Adapter.cpp
#include "Adapter.h"
#include <iostream>
Target::Target()
{
}
Target::~Target()
{
}
void Target::Request()
{
std::cout<<"Target::Request"<<std::endl;
}
Adaptee::Adaptee()
{
}
Adaptee::~Adaptee()
{
}
void Adaptee::SpecificRequest()
{
std::cout<<"Adaptee::SpecificRequest"<<
std::endl;
}
Adapter::Adapter(Adaptee* ade)
{
this->_ade = ade;
}
Adapter::~Adapter()
{
}
void Adapter::Request()
{
_ade->SpecificRequest();
}
第 34 页 共 105 页 k_eckel
设计模式精解-GoF 23 种设计模式解析附 C++实现源码 http://www.mscenter.edu.cn/blog/k_eckel
代码片断 3:main.cpp
//main.cpp
#include "Adapter.h"
#include <iostream>
using namespace std;
int main(int argc,char* argv[])
{
Adaptee* ade = new Adaptee;
Target* adt = new Adapter(ade);
adt->Request();
return 0;
}
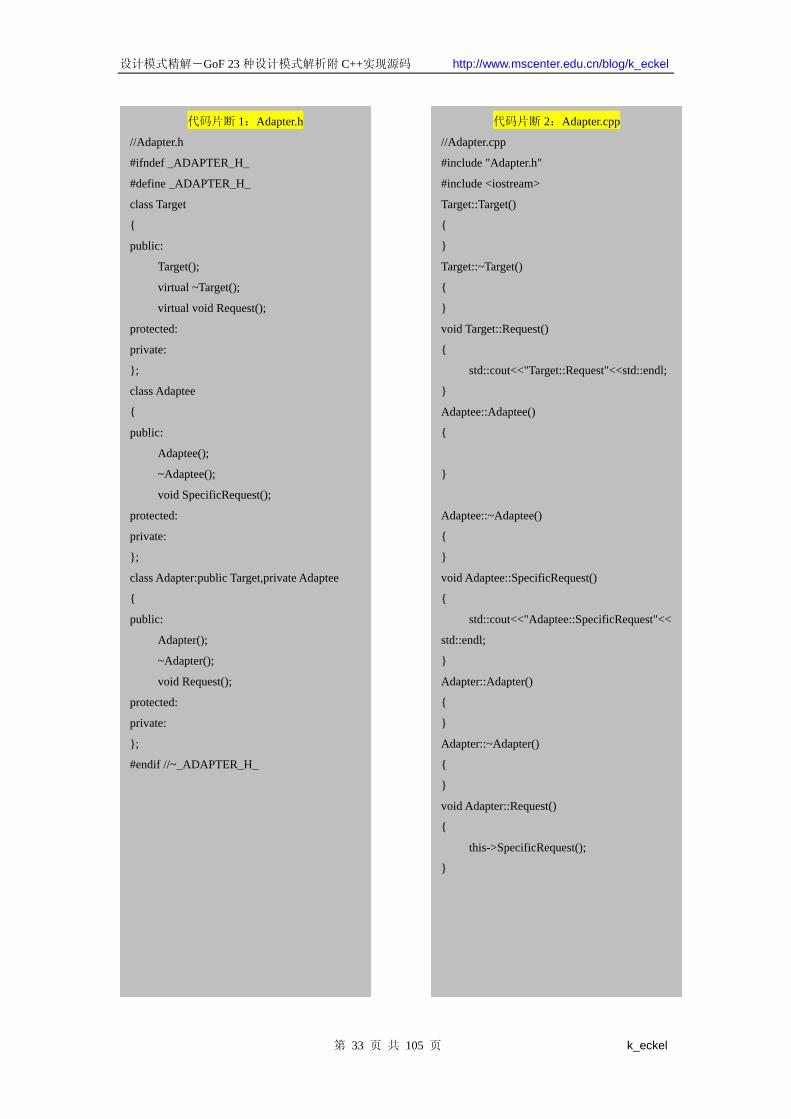
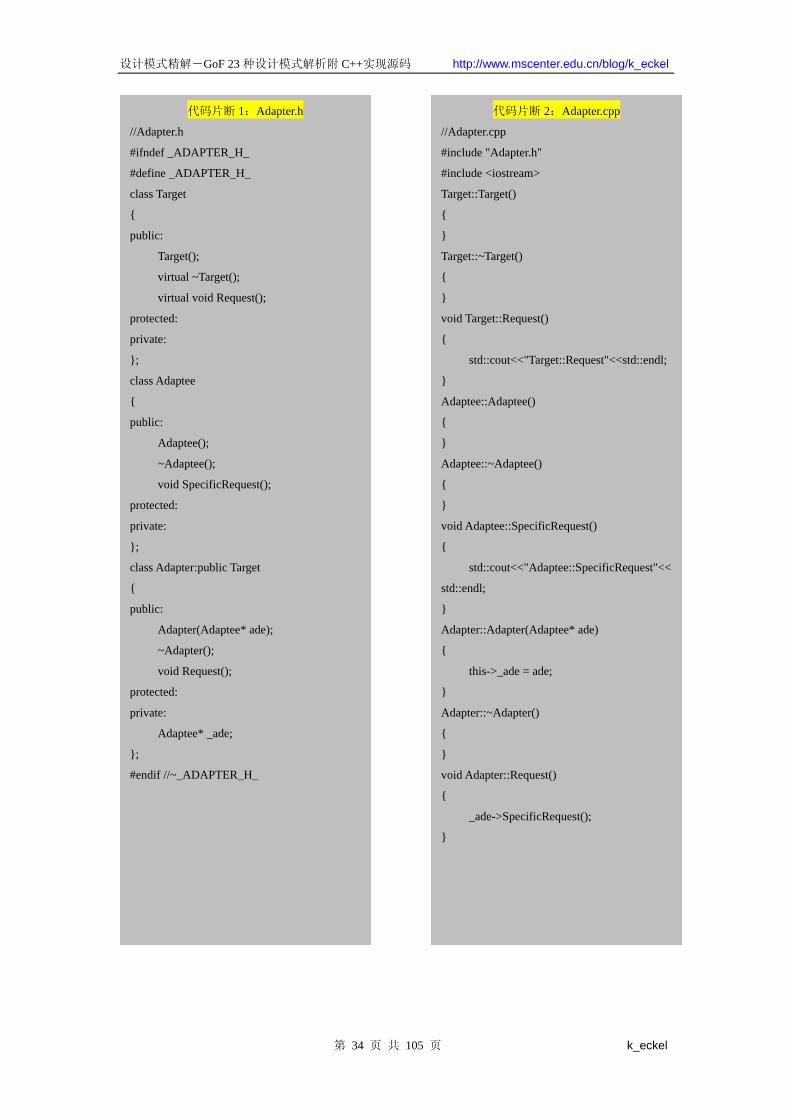
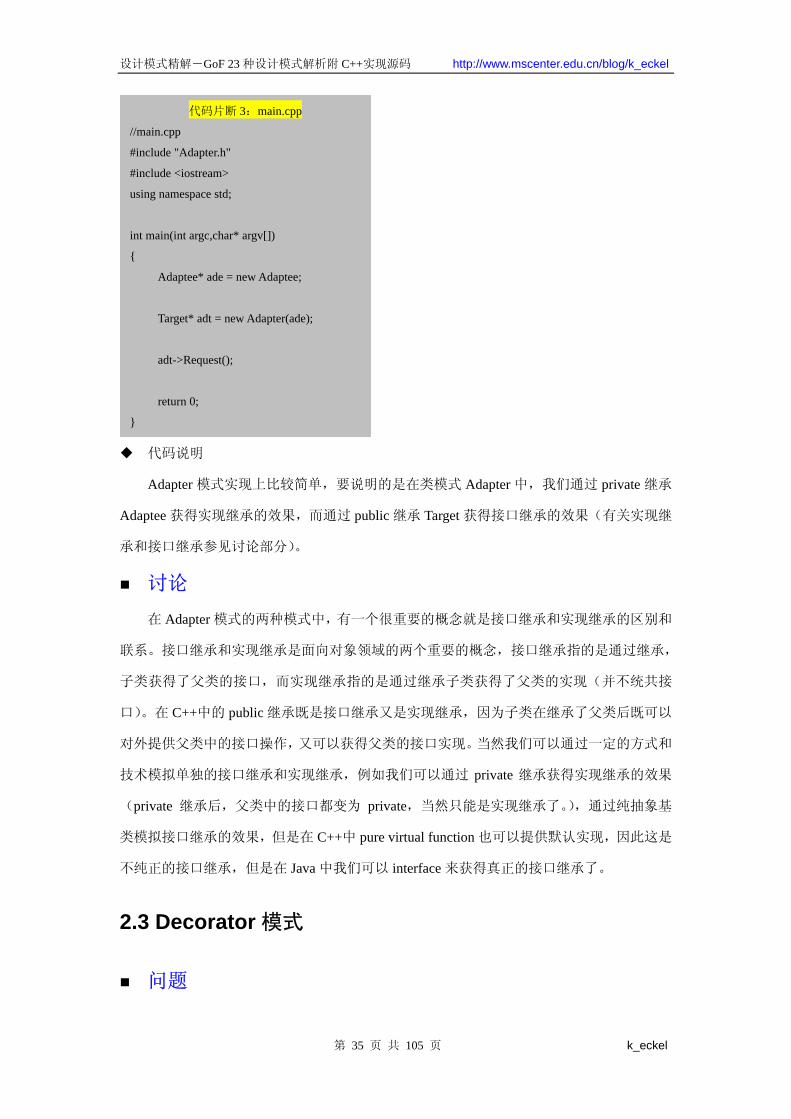
代码说明
Adapter 模式实现上比较简单,要说明的是在类模式 Adapter 中,我们通过 private 继承
Adaptee 获得实现继承的效果,而通过 public 继承 Target 获得接口继承的效果(有关实现继
承和接口继承参见讨论部分)。
讨论
在 Adapter 模式的两种模式中,有一个很重要的概念就是接口继承和实现继承的区别和
联系。接口继承和实现继承是面向对象领域的两个重要的概念,接口继承指的是通过继承,
子类获得了父类的接口,而实现继承指的是通过继承子类获得了父类的实现(并不统共接
口)。在 C++中的 public 继承既是接口继承又是实现继承,因为子类在继承了父类后既可以
对外提供父类中的接口操作,又可以获得父类的接口实现。当然我们可以通过一定的方式和
技术模拟单独的接口继承和实现继承,例如我们可以通过 private 继承获得实现继承的效果
(private 继承后,父类中的接口都变为 private,当然只能是实现继承了。),通过纯抽象基
类模拟接口继承的效果,但是在 C++中 pure virtual function 也可以提供默认实现,因此这是
不纯正的接口继承,但是在 Java 中我们可以 interface 来获得真正的接口继承了。
2.3 Decorator 模式
问题
第 35 页 共 105 页 k_eckel
设计模式精解-GoF 23 种设计模式解析附 C++实现源码 http://www.mscenter.edu.cn/blog/k_eckel
在 OO 设计和开发过程,可能会经常遇到以下的情况:我们需要为一个已经定义好的类
添加新的职责(操作),通常的情况我们会给定义一个新类继承自定义好的类,这样会带来
一个问题(将在本模式的讨论中给出)。通过继承的方式解决这样的情况还带来了系统的复
杂性,因为继承的深度会变得很深。
而 Decorator 提供了一种给类增加职责的方法,不是通过继承实现的,而是通过组合。
有关这些内容在讨论中进一步阐述。
模式选择
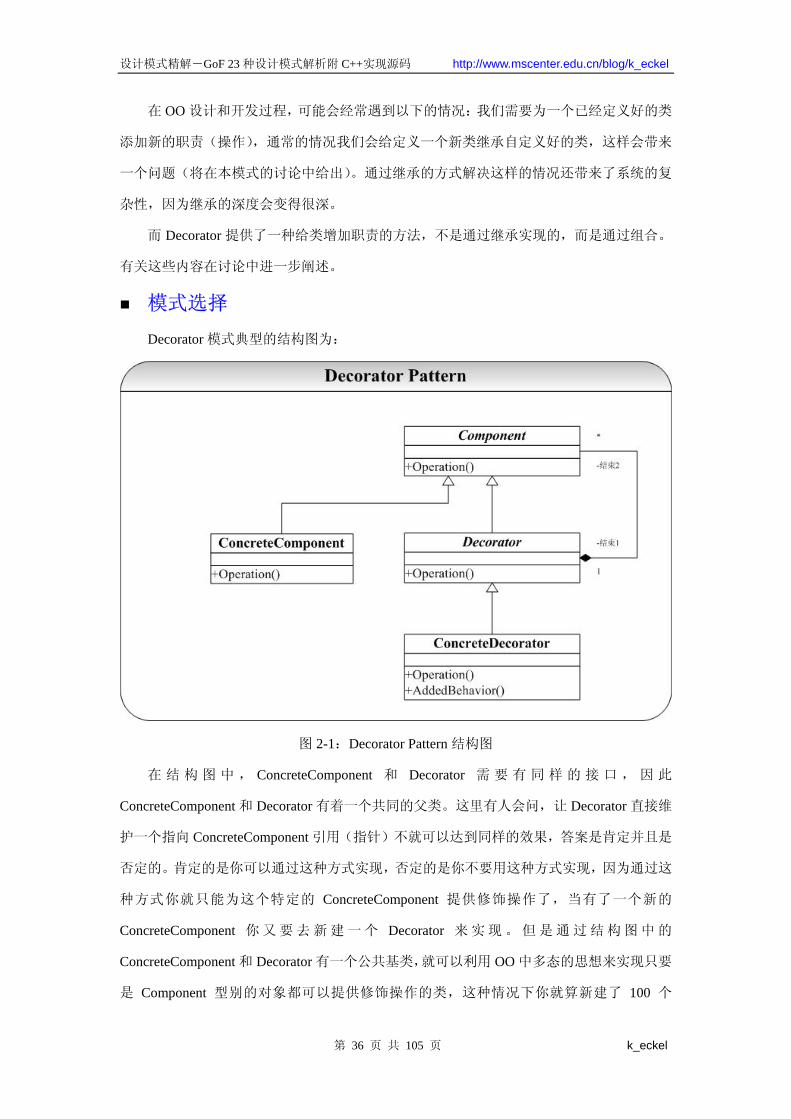
Decorator 模式典型的结构图为:
图 2-1:Decorator Pattern 结构图
在 结 构 图 中 , ConcreteComponent 和 Decorator 需 要 有 同 样 的 接 口 , 因 此
ConcreteComponent 和 Decorator 有着一个共同的父类。这里有人会问,让 Decorator 直接维
护一个指向 ConcreteComponent 引用(指针)不就可以达到同样的效果,答案是肯定并且是
否定的。肯定的是你可以通过这种方式实现,否定的是你不要用这种方式实现,因为通过这
种方式你就只能为这个特定的 ConcreteComponent 提供修饰操作了,当有了一个新的
ConcreteComponent 你又要去新建一个 Decorator 来实现。但是通过结构图中的
ConcreteComponent 和 Decorator 有一个公共基类,就可以利用 OO 中多态的思想来实现只要
是 Component 型别的对象都可以提供修饰操作的类,这种情况下你就算新建了 100 个
第 36 页 共 105 页 k_eckel
设计模式精解-GoF 23 种设计模式解析附 C++实现源码 http://www.mscenter.edu.cn/blog/k_eckel
Component 型别的类 ConcreteComponent,也都可以由 Decorator 一个类搞定。这也正是
Decorator 模式的关键和威力所在了。
当然如果你只用给 Component 型别类添加一种修饰,则 Decorator 这个基类就不是很必
要了。
实现
完整代码示例(code)
Decorator 模式的实现起来并不是特别困难,这里为了方便初学者的学习和参考,将给
出完整的实现代码(所有代码采用 C++实现,并在 VC 6.0 下测试运行)。
第 37 页 共 105 页 k_eckel
设计模式精解-GoF 23 种设计模式解析附 C++实现源码 http://www.mscenter.edu.cn/blog/k_eckel
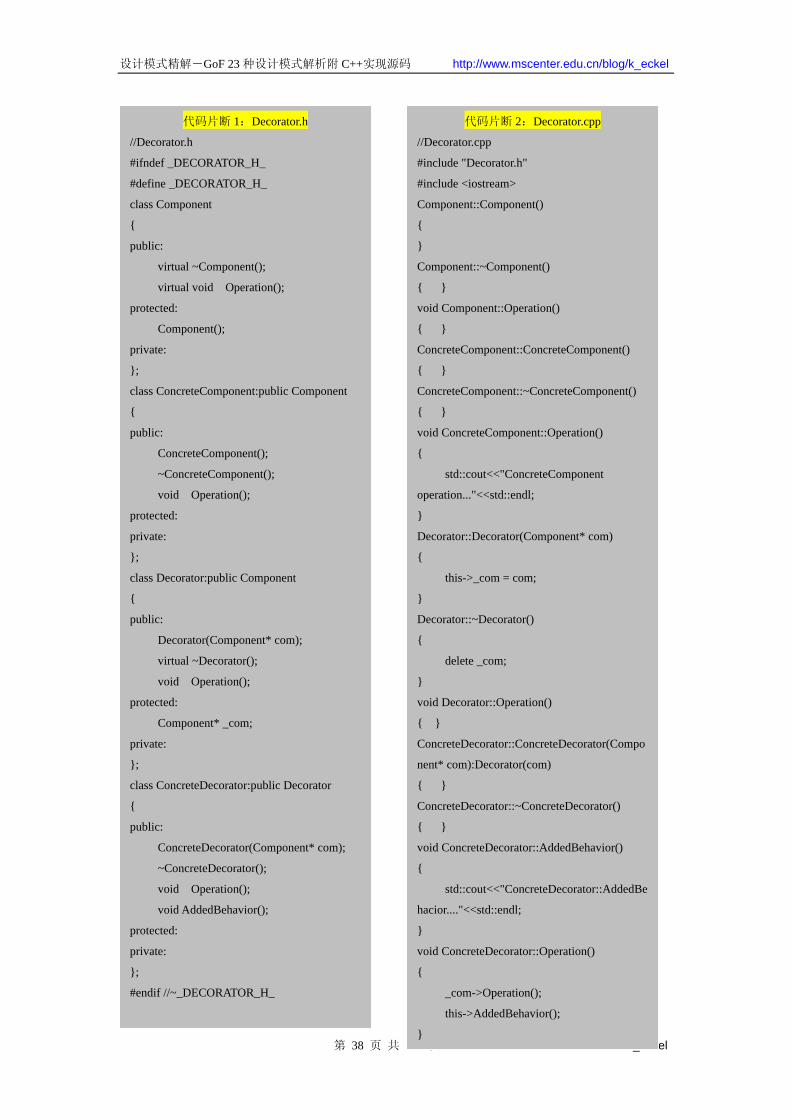
代码片断 1:Decorator.h
//Decorator.h
#ifndef _DECORATOR_H_
#define _DECORATOR_H_
class Component
{
public:
virtual ~Component();
virtual void Operation();
protected:
Component();
private:
};
class ConcreteComponent:public Component
{
public:
ConcreteComponent();
~ConcreteComponent();
void Operation();
protected:
private:
};
class Decorator:public Component
{
public:
Decorator(Component* com);
virtual ~Decorator();
void Operation();
protected:
Component* _com;
private:
};
class ConcreteDecorator:public Decorator
{
public:
ConcreteDecorator(Component* com);
~ConcreteDecorator();
void Operation();
void AddedBehavior();
protected:
private:
};
#endif //~_DECORATOR_H_
第 38 页 共 105 页 k_eckel
代码片断 2:Decorator.cpp
//Decorator.cpp
#include "Decorator.h"
#include <iostream>
Component::Component()
{
}
Component::~Component()
{ }
void Component::Operation()
{ }
ConcreteComponent::ConcreteComponent()
{ }
ConcreteComponent::~ConcreteComponent()
{ }
void ConcreteComponent::Operation()
{
std::cout<<"ConcreteComponent
operation..."<<std::endl;
}
Decorator::Decorator(Component* com)
{
this->_com = com;
}
Decorator::~Decorator()
{
delete _com;
}
void Decorator::Operation()
{ }
ConcreteDecorator::ConcreteDecorator(Compo
nent* com):Decorator(com)
{ }
ConcreteDecorator::~ConcreteDecorator()
{ }
void ConcreteDecorator::AddedBehavior()
{
std::cout<<"ConcreteDecorator::AddedBe
hacior...."<<std::endl;
}
void ConcreteDecorator::Operation()
{
_com->Operation();
this->AddedBehavior();
}
设计模式精解-GoF 23 种设计模式解析附 C++实现源码 http://www.mscenter.edu.cn/blog/k_eckel
Decorator* dec = new
ConcreteDecorator(com);
dec->Operation();
delete dec;
return 0;
}
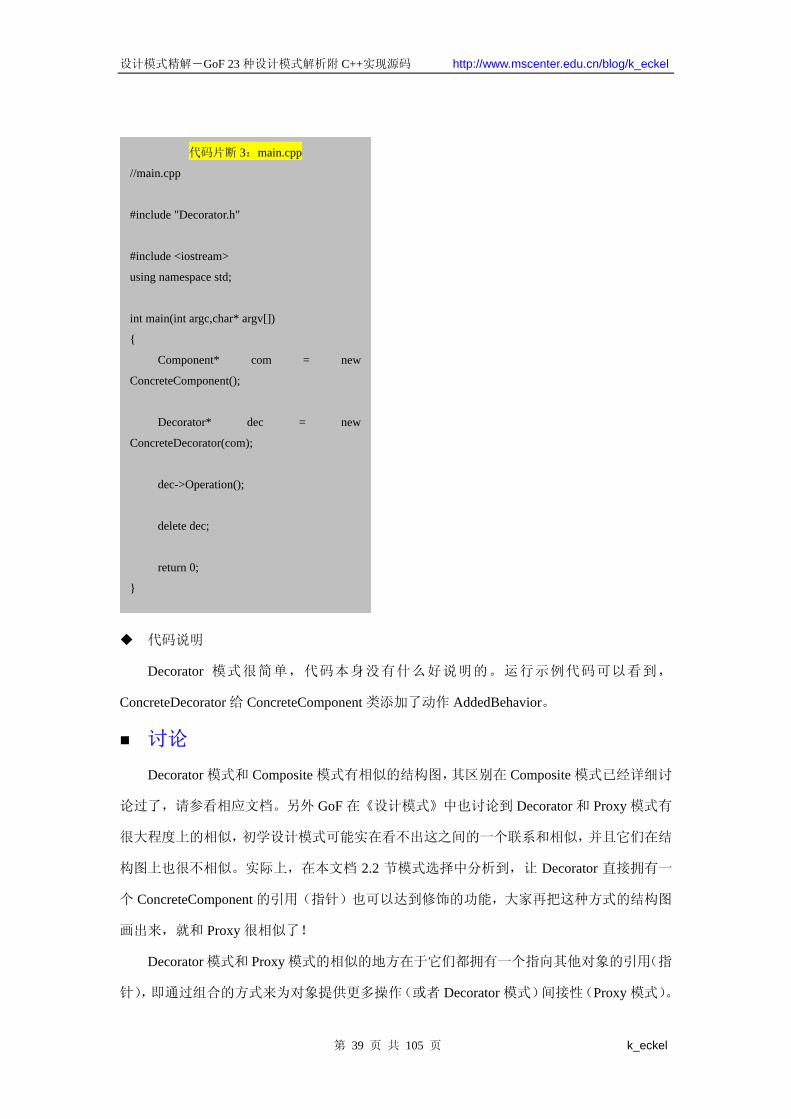
代码片断 3:main.cpp
//main.cpp
#include "Decorator.h"
#include <iostream>
using namespace std;
int main(int argc,char* argv[])
{
Component* com = new
ConcreteComponent();
代码说明
Decorator 模式很简单,代码本身没有什么好说明的。运行示例代码可以看到,
ConcreteDecorator 给 ConcreteComponent 类添加了动作 AddedBehavior。
讨论
Decorator 模式和 Composite 模式有相似的结构图,其区别在 Composite 模式已经详细讨
论过了,请参看相应文档。另外 GoF 在《设计模式》中也讨论到 Decorator 和 Proxy 模式有
很大程度上的相似,初学设计模式可能实在看不出这之间的一个联系和相似,并且它们在结
构图上也很不相似。实际上,在本文档 2.2 节模式选择中分析到,让 Decorator 直接拥有一
个 ConcreteComponent 的引用(指针)也可以达到修饰的功能,大家再把这种方式的结构图
画出来,就和 Proxy 很相似了!
Decorator 模式和 Proxy 模式的相似的地方在于它们都拥有一个指向其他对象的引用(指
针),即通过组合的方式来为对象提供更多操作(或者 Decorator 模式)间接性(Proxy 模式)。
第 39 页 共 105 页 k_eckel
设计模式精解-GoF 23 种设计模式解析附 C++实现源码 http://www.mscenter.edu.cn/blog/k_eckel
但是他们的区别是,Proxy 模式会提供使用其作为代理的对象一样接口,使用代理类将其操
作都委托给 Proxy 直接进行。这里可以简单理解为组合和委托之间的微妙的区别了。
Decorator 模式除了采用组合的方式取得了比采用继承方式更好的效果,Decorator 模式
还给设计带来一种“即用即付”的方式来添加职责。在 OO 设计和分析经常有这样一种情况:
为了多态,通过父类指针指向其具体子类,但是这就带来另外一个问题,当具体子类要添加
新的职责,就必须向其父类添加一个这个职责的抽象接口,否则是通过父类指针是调用不到
这个方法了。这样处于高层的父类就承载了太多的特征(方法),并且继承自这个父类的所
有子类都不可避免继承了父类的这些接口,但是可能这并不是这个具体子类所需要的。而在
Decorator 模式提供了一种较好的解决方法,当需要添加一个操作的时候就可以通过
Decorator 模式来解决,你可以一步步添加新的职责。
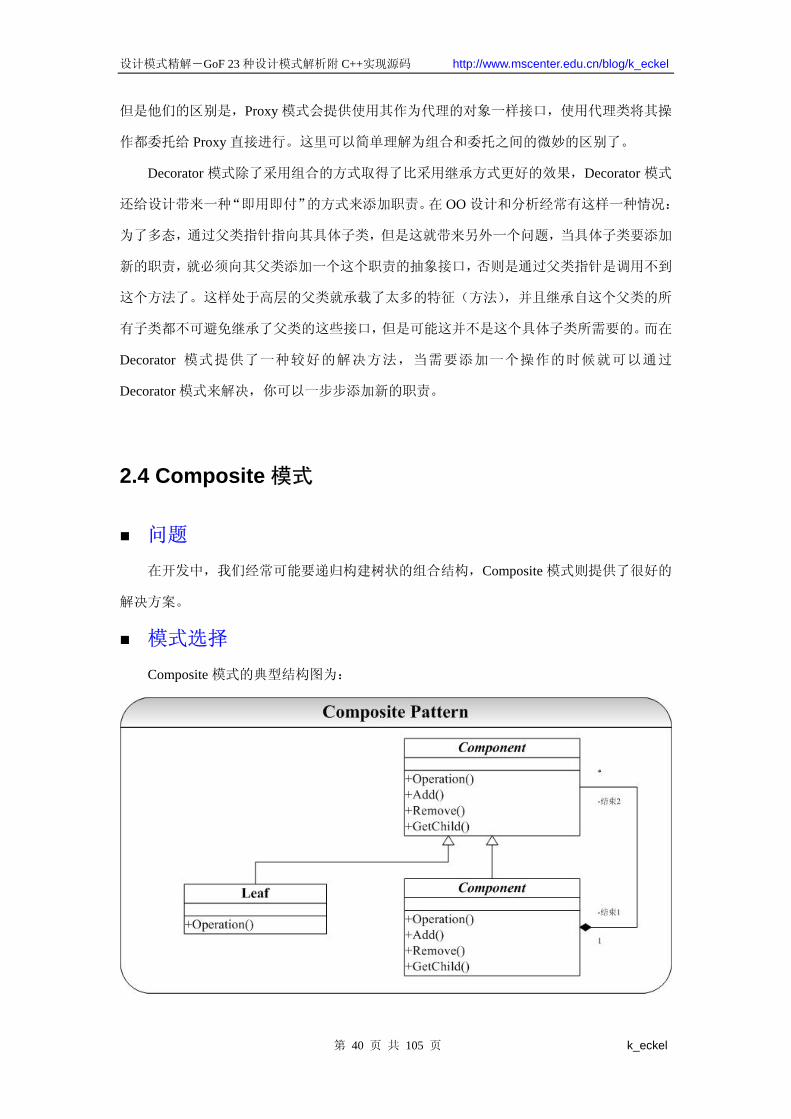
2.4 Composite 模式
问题
在开发中,我们经常可能要递归构建树状的组合结构,Composite 模式则提供了很好的
解决方案。
模式选择
Composite 模式的典型结构图为:
第 40 页 共 105 页 k_eckel
设计模式精解-GoF 23 种设计模式解析附 C++实现源码 http://www.mscenter.edu.cn/blog/k_eckel
图 2-1:Composite Pattern 结构图
实现
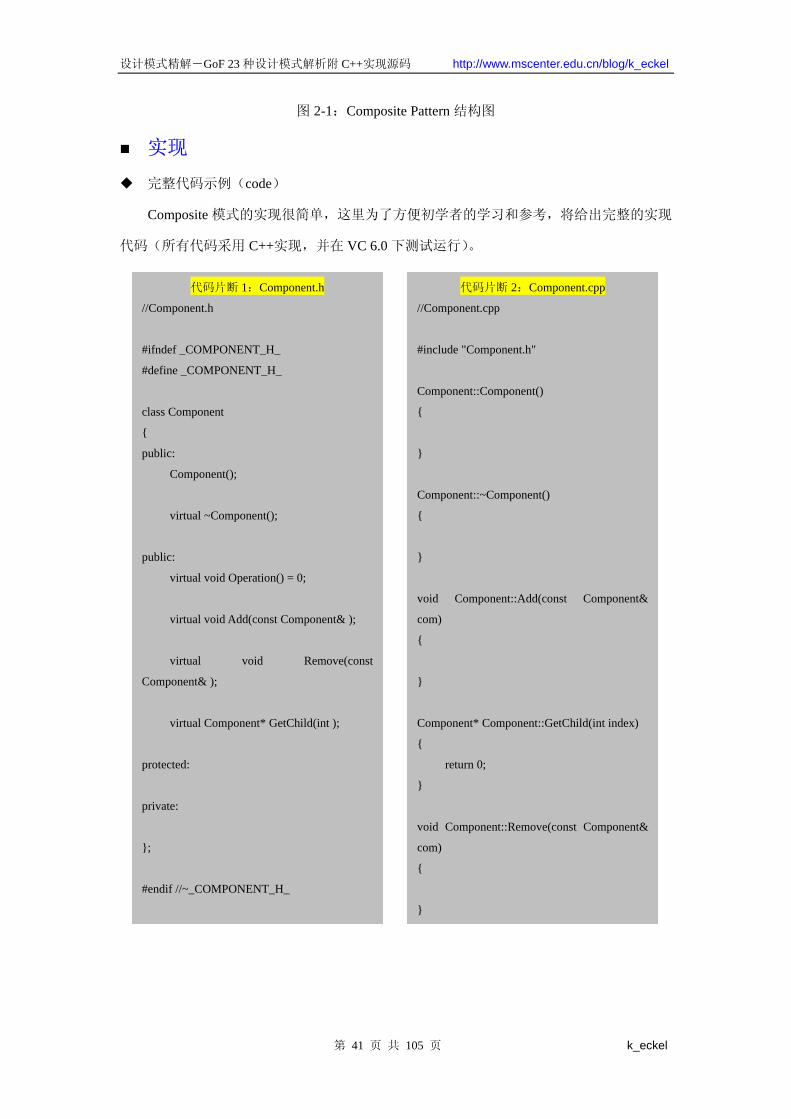
完整代码示例(code)
Composite 模式的实现很简单,这里为了方便初学者的学习和参考,将给出完整的实现
代码(所有代码采用 C++实现,并在 VC 6.0 下测试运行)。
代码片断 1:Component.h
//Component.h
#ifndef _COMPONENT_H_
#define _COMPONENT_H_
class Component
{
public:
Component();
virtual ~Component();
public:
virtual void Operation() = 0;
virtual void Add(const Component& );
virtual void Remove(const
Component& );
virtual Component* GetChild(int );
protected:
private:
};
#endif //~_COMPONENT_H_
{
}
Component::~Component()
{
}
void Component::Add(const Component&
com)
{
}
Component* Component::GetChild(int index)
{
return 0;
}
void Component::Remove(const Component&
com)
{
}
代码片断 2:Component.cpp
//Component.cpp
#include "Component.h"
Component::Component()
第 41 页 共 105 页 k_eckel
设计模式精解-GoF 23 种设计模式解析附 C++实现源码 http://www.mscenter.edu.cn/blog/k_eckel
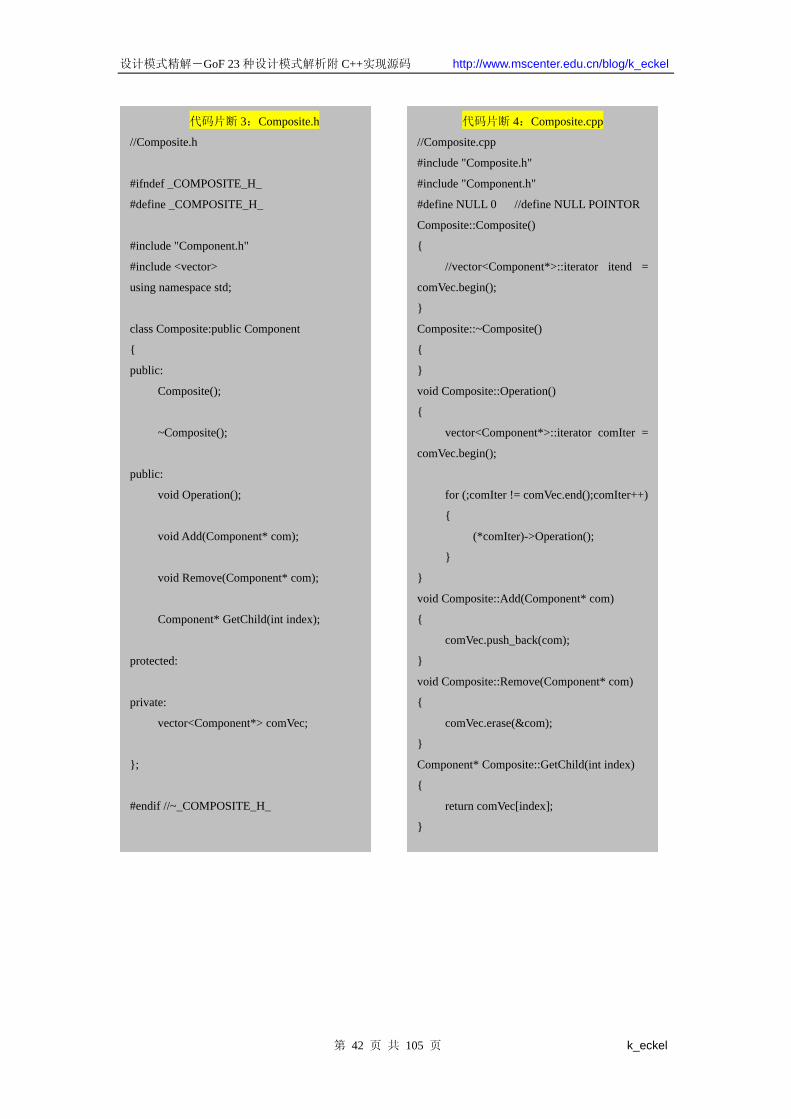
代码片断 3:Composite.h
//Composite.h
#ifndef _COMPOSITE_H_
#define _COMPOSITE_H_
#include "Component.h"
#include <vector>
using namespace std;
class Composite:public Component
{
public:
Composite();
~Composite();
public:
void Operation();
void Add(Component* com);
void Remove(Component* com);
Component* GetChild(int index);
protected:
private:
vector<Component*> comVec;
};
#endif //~_COMPOSITE_H_
代码片断 4:Composite.cpp
//Composite.cpp
#include "Composite.h"
#include "Component.h"
#define NULL 0 //define NULL POINTOR
Composite::Composite()
{
//vector<Component*>::iterator itend =
comVec.begin();
}
Composite::~Composite()
{
}
void Composite::Operation()
{
vector<Component*>::iterator comIter =
comVec.begin();
for (;comIter != comVec.end();comIter++)
{
(*comIter)->Operation();
}
}
void Composite::Add(Component* com)
{
comVec.push_back(com);
}
void Composite::Remove(Component* com)
{
comVec.erase(&com);
}
Component* Composite::GetChild(int index)
{
return comVec[index];
}
第 42 页 共 105 页 k_eckel
设计模式精解-GoF 23 种设计模式解析附 C++实现源码 http://www.mscenter.edu.cn/blog/k_eckel
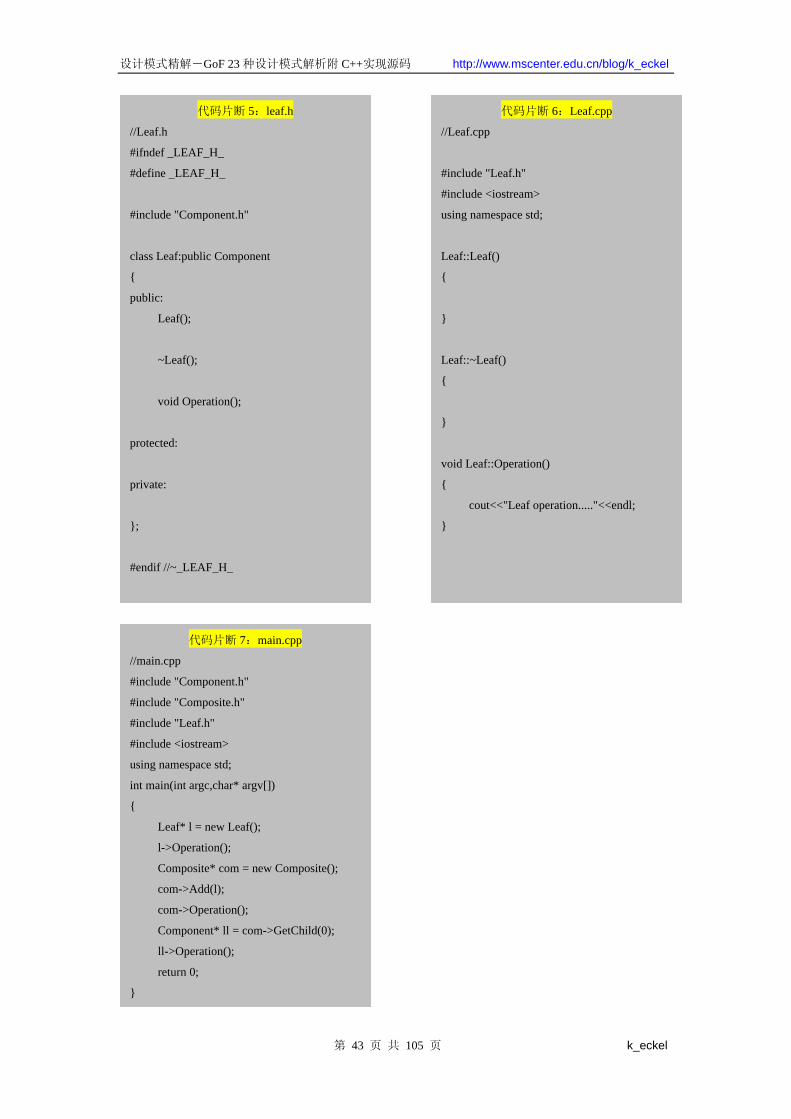
代码片断 5:leaf.h
//Leaf.h
#ifndef _LEAF_H_
#define _LEAF_H_
#include "Component.h"
class Leaf:public Component
{
public:
Leaf();
~Leaf();
void Operation();
protected:
private:
};
#endif //~_LEAF_H_
代码片断 6:Leaf.cpp
//Leaf.cpp
#include "Leaf.h"
#include <iostream>
using namespace std;
Leaf::Leaf()
{
}
Leaf::~Leaf()
{
}
void Leaf::Operation()
{
cout<<"Leaf operation....."<<endl;
}
代码片断 7:main.cpp
//main.cpp
#include "Component.h"
#include "Composite.h"
#include "Leaf.h"
#include <iostream>
using namespace std;
int main(int argc,char* argv[])
{
Leaf* l = new Leaf();
l->Operation();
Composite* com = new Composite();
com->Add(l);
com->Operation();
Component* ll = com->GetChild(0);
ll->Operation();
return 0;
}
第 43 页 共 105 页 k_eckel
设计模式精解-GoF 23 种设计模式解析附 C++实现源码 http://www.mscenter.edu.cn/blog/k_eckel
代码说明
Composite 模式在实现中有一个问题就是要提供对于子节点(Leaf)的管理策略,这里
使用的是 STL 中的 vector,可以提供其他的实现方式,如数组、链表、Hash 表等。
讨论
Composite 模式通过和 Decorator 模式有着类似的结构图,但是 Composite 模式旨在构造
类,而 Decorator 模式重在不生成子类即可给对象添加职责。Decorator 模式重在修饰,而
Composite 模式重在表示。
2.5 Flyweight 模式
问题
在面向对象系统的设计何实现中,创建对象是 为常见的操作。这里面就有一个问题:
如果一个应用程序使用了太多的对象,就会造成很大的存储开销。特别是对于大量轻量级(细
粒度)的对象,比如在文档编辑器的设计过程中,我们如果为没有字母创建一个对象的话,
系统可能会因为大量的对象而造成存储开销的浪费。例如一个字母“a”在文档中出现了
100000 次,而实际上我们可以让这一万个字母“a”共享一个对象,当然因为在不同的位置
可能字母“a”有不同的显示效果(例如字体和大小等设置不同),在这种情况我们可以为将
对象的状态分为“外部状态”和“内部状态”,将可以被共享(不会变化)的状态作为内部
状态存储在对象中,而外部对象(例如上面提到的字体、大小等)我们可以在适当的时候将
外部对象 为参数传递给对象(例如在显示的时候,将字体、大小等信息传递给对象)。
模式选择
上面解决问题的方式被称作 Flyweight 模式解决上面的问题,其典型的结构图为:
第 44 页 共 105 页 k_eckel
设计模式精解-GoF 23 种设计模式解析附 C++实现源码 http://www.mscenter.edu.cn/blog/k_eckel
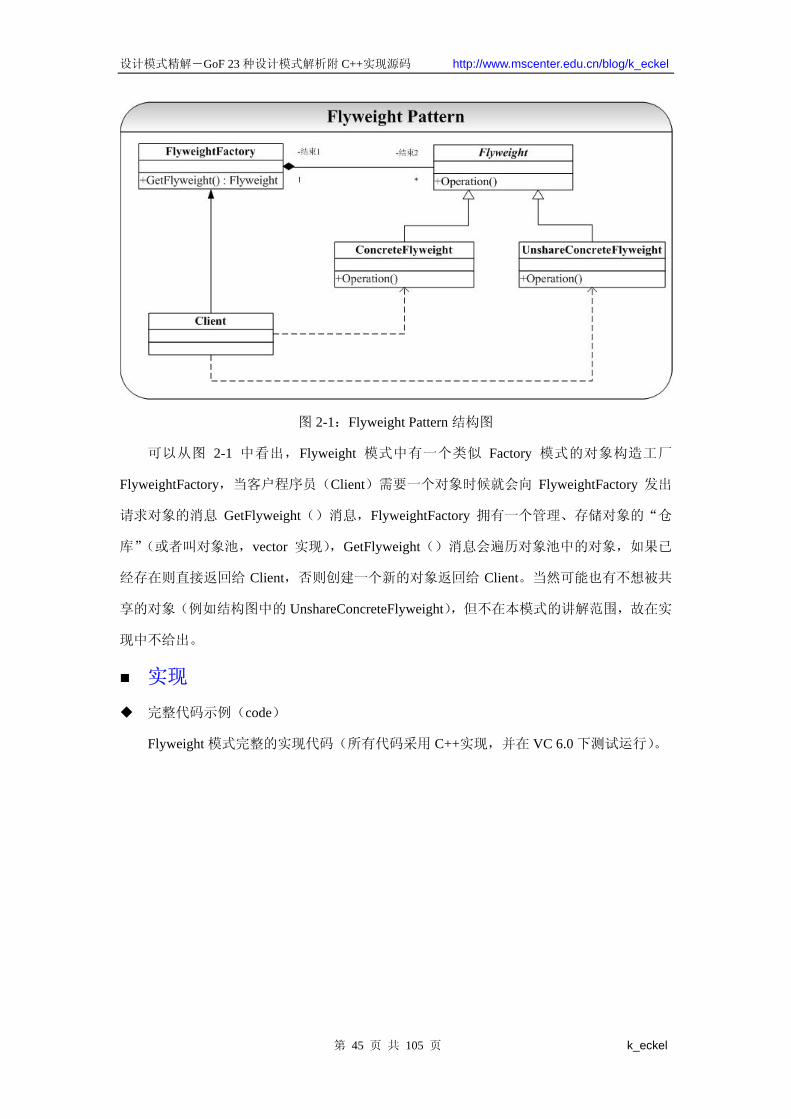
图 2-1:Flyweight Pattern 结构图
可以从图 2-1 中看出,Flyweight 模式中有一个类似 Factory 模式的对象构造工厂
FlyweightFactory,当客户程序员(Client)需要一个对象时候就会向 FlyweightFactory 发出
请求对象的消息 GetFlyweight()消息,FlyweightFactory 拥有一个管理、存储对象的“仓
库”(或者叫对象池,vector 实现),GetFlyweight()消息会遍历对象池中的对象,如果已
经存在则直接返回给 Client,否则创建一个新的对象返回给 Client。当然可能也有不想被共
享的对象(例如结构图中的 UnshareConcreteFlyweight),但不在本模式的讲解范围,故在实
现中不给出。
实现
完整代码示例(code)
Flyweight 模式完整的实现代码(所有代码采用 C++实现,并在 VC 6.0 下测试运行)。
第 45 页 共 105 页 k_eckel
设计模式精解-GoF 23 种设计模式解析附 C++实现源码 http://www.mscenter.edu.cn/blog/k_eckel
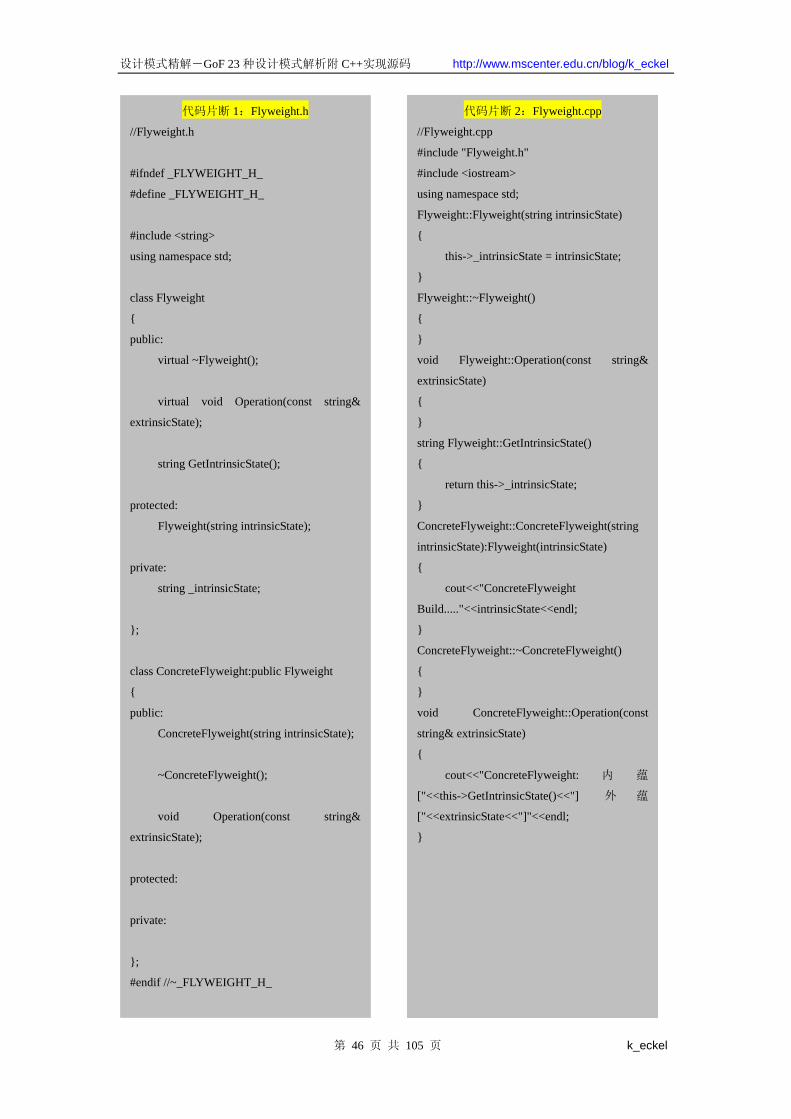
代码片断 1:Flyweight.h
//Flyweight.h
#ifndef _FLYWEIGHT_H_
#define _FLYWEIGHT_H_
#include <string>
using namespace std;
class Flyweight
{
public:
virtual ~Flyweight();
virtual void Operation(const string&
extrinsicState);
string GetIntrinsicState();
protected:
Flyweight(string intrinsicState);
private:
string _intrinsicState;
};
class ConcreteFlyweight:public Flyweight
{
public:
ConcreteFlyweight(string intrinsicState);
~ConcreteFlyweight();
void Operation(const string&
extrinsicState);
protected:
private:
};
#endif //~_FLYWEIGHT_H_
代码片断 2:Flyweight.cpp
//Flyweight.cpp
#include "Flyweight.h"
#include <iostream>
using namespace std;
Flyweight::Flyweight(string intrinsicState)
{
this->_intrinsicState = intrinsicState;
}
Flyweight::~Flyweight()
{
}
void Flyweight::Operation(const string&
extrinsicState)
{
}
string Flyweight::GetIntrinsicState()
{
return this->_intrinsicState;
}
ConcreteFlyweight::ConcreteFlyweight(string
intrinsicState):Flyweight(intrinsicState)
{
cout<<"ConcreteFlyweight
Build....."<<intrinsicState<<endl;
}
ConcreteFlyweight::~ConcreteFlyweight()
{
}
void ConcreteFlyweight::Operation(const
string& extrinsicState)
{
cout<<"ConcreteFlyweight: 内 蕴
["<<this->GetIntrinsicState()<<"] 外 蕴
["<<extrinsicState<<"]"<<endl;
}
第 46 页 共 105 页 k_eckel
设计模式精解-GoF 23 种设计模式解析附 C++实现源码 http://www.mscenter.edu.cn/blog/k_eckel
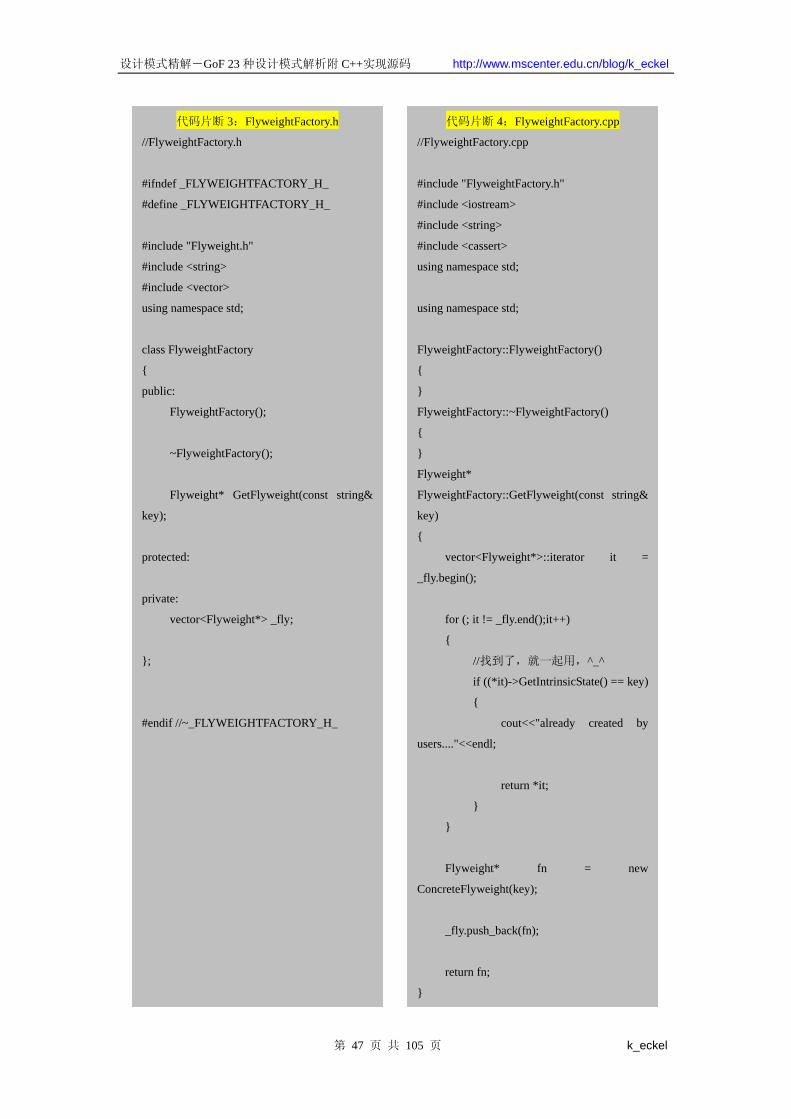
代码片断 3:FlyweightFactory.h
//FlyweightFactory.h
#ifndef _FLYWEIGHTFACTORY_H_
#define _FLYWEIGHTFACTORY_H_
#include "Flyweight.h"
#include <string>
#include <vector>
using namespace std;
class FlyweightFactory
{
public:
FlyweightFactory();
~FlyweightFactory();
Flyweight* GetFlyweight(const string&
key);
protected:
private:
vector<Flyweight*> _fly;
};
#endif //~_FLYWEIGHTFACTORY_H_
代码片断 4:FlyweightFactory.cpp
//FlyweightFactory.cpp
#include "FlyweightFactory.h"
#include <iostream>
#include <string>
#include <cassert>
using namespace std;
using namespace std;
FlyweightFactory::FlyweightFactory()
{
}
FlyweightFactory::~FlyweightFactory()
{
}
Flyweight*
FlyweightFactory::GetFlyweight(const string&
key)
{
vector<Flyweight*>::iterator it =
_fly.begin();
for (; it != _fly.end();it++)
{
//找到了,就一起用,^_^
if ((*it)->GetIntrinsicState() == key)
{
cout<<"already created by
users...."<<endl;
return *it;
}
}
Flyweight* fn = new
ConcreteFlyweight(key);
_fly.push_back(fn);
return fn;
}
第 47 页 共 105 页 k_eckel
设计模式精解-GoF 23 种设计模式解析附 C++实现源码 http://www.mscenter.edu.cn/blog/k_eckel
代码片断 5:main.cpp
//main.cpp
#include "Flyweight.h"
#include "FlyweightFactory.h"
#include <iostream>
using namespace std;
int main(int argc,char* argv[])
{
FlyweightFactory* fc = new
FlyweightFactory();
Flyweight* fw1 =
fc->GetFlyweight("hello");
Flyweight* fw2 =
fc->GetFlyweight("world!");
Flyweight* fw3 =
fc->GetFlyweight("hello");
return 0;
}
代码说明
Flyweight 模式在实现过程中主要是要为共享对象提供一个存放的“仓库”(对象池),
这里是通过 C++ STL 中 Vector 容器,当然就牵涉到 STL 编程的一些问题(Iterator 使用等)。
另外应该注意的就是对对象“仓库”(对象池)的管理策略(查找、插入等),这里是通过直
接的顺序遍历实现的,当然我们可以使用其他更加有效的索引策略,例如 Hash 表的管理策
略,当时这些细节已经不是 Flyweight 模式本身要处理的了。
讨论
我们在 State 模式和 Strategy 模式中会产生很多的对象,因此我们可以通过 Flyweight
模式来解决这个问题。
第 48 页 共 105 页 k_eckel
设计模式精解-GoF 23 种设计模式解析附 C++实现源码 http://www.mscenter.edu.cn/blog/k_eckel
2.6 Facade 模式
问题
举一个生活中的小例子,大凡开过学或者毕过业的都会体会到这样一种郁闷:你要去 n
个地方办理 n 个手续(现在大学合并后就更加麻烦,因为可能那 n 个地方都隔的比较远)。
但是实际上我们需要的就是一个 后一道手续的证明而已,对于前面的手续是怎么办的、到
什么地方去办理我们都不感兴趣。
实际上在软件系统开发中也经常回会遇到这样的情况,可能你实现了一些接口(模块),
而这些接口(模块)都分布在几个类中(比如 A 和 B、C、D):A 中实现了一些接口,B 中
实现一些接口(或者 A 代表一个独立模块,B、C、D 代表另一些独立模块)。然后你的客户
程序员(使用你设计的开发人员)只有很少的要知道你的不同接口到底是在那个类中实现的,
绝大多数只是想简单的组合你的 A-D 的类的接口,他并不想知道这些接口在哪里实现的。
这里的客户程序员就是上面生活中想办理手续的郁闷的人!在现实生活中我们可能可以
很快想到找一个人代理所有的事情就可以解决你的问题(你只要维护和他的简单的一个接口
而已了!),在软件系统设计开发中我们可以通过一个叫做 Façade 的模式来解决上面的问题。
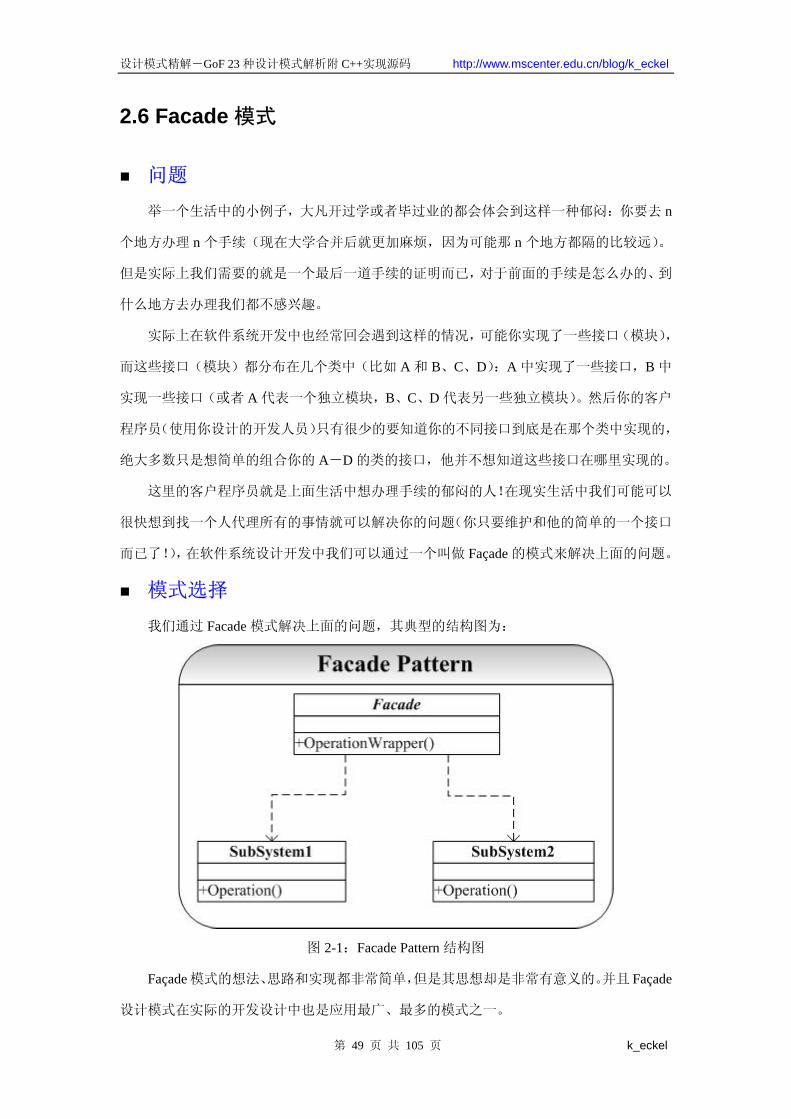
模式选择
我们通过 Facade 模式解决上面的问题,其典型的结构图为:
图 2-1:Facade Pattern 结构图
Façade 模式的想法、思路和实现都非常简单,但是其思想却是非常有意义的。并且 Façade
设计模式在实际的开发设计中也是应用 广、 多的模式之一。
第 49 页 共 105 页 k_eckel
设计模式精解-GoF 23 种设计模式解析附 C++实现源码 http://www.mscenter.edu.cn/blog/k_eckel
一个简单的例子就是,我在开发 Visual CMCS 项目【注释 1】时候,在 Visual CMCS 中
我们将允许用户独立访问我们的编译子系统(词法、语法、语义、代码生成模块),这些都
是通过特定的类实现的,我们通过使用 Façade 模式给用户提供一个高层的接口,供用户在
不想了解编译器实现的情况下去使用或重用我们的设计和实现。我们将提供一个 Compile
类作为 Façade 对象。
【注释 1】:Visual CMCS 是笔者主要设计和完成的一个 C_minus 语言(C 语言的一个子集)
的编译系统,该系统可以生成源 C-minus 程序的汇编代码(并且可以获得编译中间阶段的
各个输出,如:词法、语法、语义中间代码等。),并可执行。Visual CMCS 将作为一个对
教学、学习、研究开源的项目,它更加重要的特性是提供了一个框架(framework),感兴
趣的开发人员可以实现、测试自己感兴趣的模块,而无需实现整个的编译系统。Visual
CMCS 采用 VC++ 6.0 的界面风格,更多内容请参见 Visual CMCS 网站。
实现
完整代码示例(code)
Facade 模式的实现很简单,这里为了方便初学者的学习和参考,将给出完整的实现代
码(所有代码采用 C++实现,并在 VC 6.0 下测试运行)。
第 50 页 共 105 页 k_eckel
设计模式精解-GoF 23 种设计模式解析附 C++实现源码 http://www.mscenter.edu.cn/blog/k_eckel
代码片断 1:Façade.h
//Facade.h
#ifndef _FACADE_H_
#define _FACADE_H_
class Subsystem1
{
public:
Subsystem1();
~Subsystem1();
void Operation();
protected:
private:
};
class Subsystem2
{
public:
Subsystem2();
~Subsystem2();
void Operation();
protected:
private:
};
class Facade
{
public:
Facade();
~Facade();
void OperationWrapper();
protected:
private:
Subsystem1* _subs1;
Subsystem2* _subs2;
};
#endif //~_FACADE_H_
代码片断 2:Façade.cpp
//Facade.cpp
#include "Facade.h"
#include <iostream>
using namespace std;
Subsystem1::Subsystem1()
{
}
Subsystem1::~Subsystem1()
{
}
void Subsystem1::Operation()
{
cout<<"Subsystem1 operation.."<<endl;
}
Subsystem2::Subsystem2()
{
}
Subsystem2::~Subsystem2()
{
}
void Subsystem2::Operation()
{
cout<<"Subsystem2 operation.."<<endl;
}
Facade::Facade()
{
this->_subs1 = new Subsystem1();
this->_subs2 = new Subsystem2();
}
Facade::~Facade()
{
delete _subs1;
delete _subs2;
}
void Facade::OperationWrapper()
{
this->_subs1->Operation();
this->_subs2->Operation();
}
第 51 页 共 105 页 k_eckel
设计模式精解-GoF 23 种设计模式解析附 C++实现源码 http://www.mscenter.edu.cn/blog/k_eckel
代码片断 3:main.cpp
//main.cpp
#include "Facade.h"
#include <iostream>
using namespace std;
int main(int argc,char* argv[])
{
Facade* f = new Facade();
f->OperationWrapper();
return 0;
}
代码说明
Façade 模式的实现很简单,多余的解释完全是没有必要。
讨论
Façade 模式在高层提供了一个统一的接口,解耦了系统。设计模式中还有另一种模式
Mediator 也和 Façade 有类似的地方。但是 Mediator 主要目的是对象间的访问的解耦(通讯
时候的协议),具体请参见 Mediator 文档。
2.7 Proxy 模式
问题
至少在以下集中情况下可以用 Proxy 模式解决问题:
1)创建开销大的对象时候,比如显示一幅大的图片,我们将这个创建的过程交给代理
去完成,GoF 称之为虚代理(Virtual Proxy);
2)为网络上的对象创建一个局部的本地代理,比如要操作一个网络上的一个对象(网
络性能不好的时候,问题尤其突出),我们将这个操纵的过程交给一个代理去完成,GoF 称
之为远程代理(Remote Proxy);
3)对对象进行控制访问的时候,比如在 Jive 论坛中不同权限的用户(如管理员、普通
用户等)将获得不同层次的操作权限,我们将这个工作交给一个代理去完成,GoF 称之为保
护代理(Protection Proxy)。
4)智能指针(Smart Pointer),关于这个方面的内容,建议参看 Andrew Koenig 的《C++
第 52 页 共 105 页 k_eckel
设计模式精解-GoF 23 种设计模式解析附 C++实现源码 http://www.mscenter.edu.cn/blog/k_eckel
沉思录》中的第 5 章。
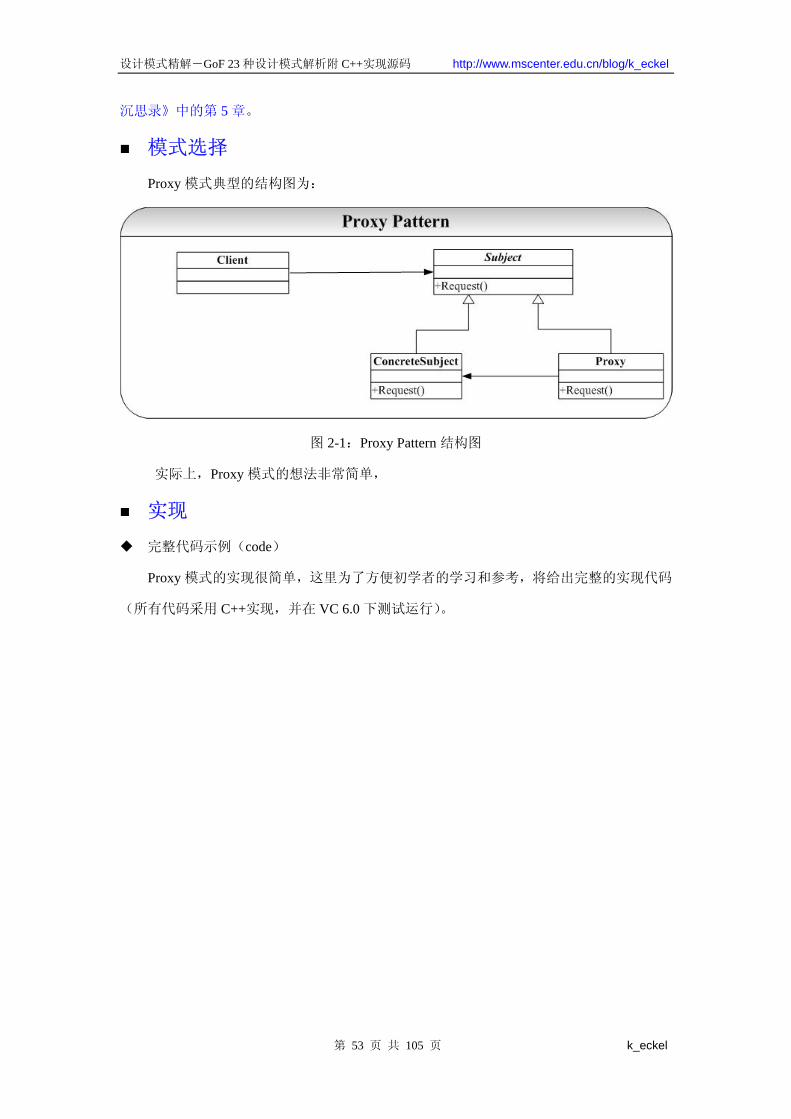
模式选择
Proxy 模式典型的结构图为:
图 2-1:Proxy Pattern 结构图
实际上,Proxy 模式的想法非常简单,
实现
完整代码示例(code)
Proxy 模式的实现很简单,这里为了方便初学者的学习和参考,将给出完整的实现代码
(所有代码采用 C++实现,并在 VC 6.0 下测试运行)。
第 53 页 共 105 页 k_eckel
设计模式精解-GoF 23 种设计模式解析附 C++实现源码 http://www.mscenter.edu.cn/blog/k_eckel
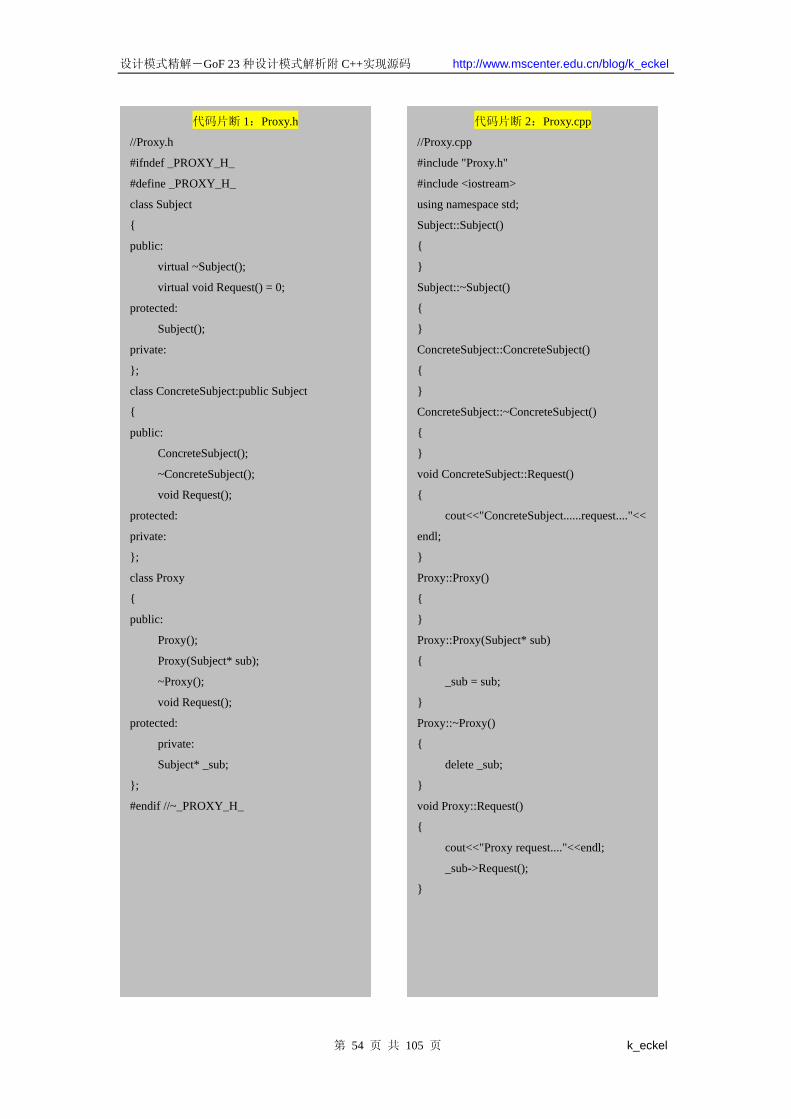
代码片断 1:Proxy.h
//Proxy.h
#ifndef _PROXY_H_
#define _PROXY_H_
class Subject
{
public:
virtual ~Subject();
virtual void Request() = 0;
protected:
Subject();
private:
};
class ConcreteSubject:public Subject
{
public:
ConcreteSubject();
~ConcreteSubject();
void Request();
protected:
private:
};
class Proxy
{
public:
Proxy();
Proxy(Subject* sub);
~Proxy();
void Request();
protected:
private:
Subject* _sub;
};
#endif //~_PROXY_H_
代码片断 2:Proxy.cpp
//Proxy.cpp
#include "Proxy.h"
#include <iostream>
using namespace std;
Subject::Subject()
{
}
Subject::~Subject()
{
}
ConcreteSubject::ConcreteSubject()
{
}
ConcreteSubject::~ConcreteSubject()
{
}
void ConcreteSubject::Request()
{
cout<<"ConcreteSubject......request...."<<
endl;
}
Proxy::Proxy()
{
}
Proxy::Proxy(Subject* sub)
{
_sub = sub;
}
Proxy::~Proxy()
{
delete _sub;
}
void Proxy::Request()
{
cout<<"Proxy request...."<<endl;
_sub->Request();
}
第 54 页 共 105 页 k_eckel
设计模式精解-GoF 23 种设计模式解析附 C++实现源码 http://www.mscenter.edu.cn/blog/k_eckel
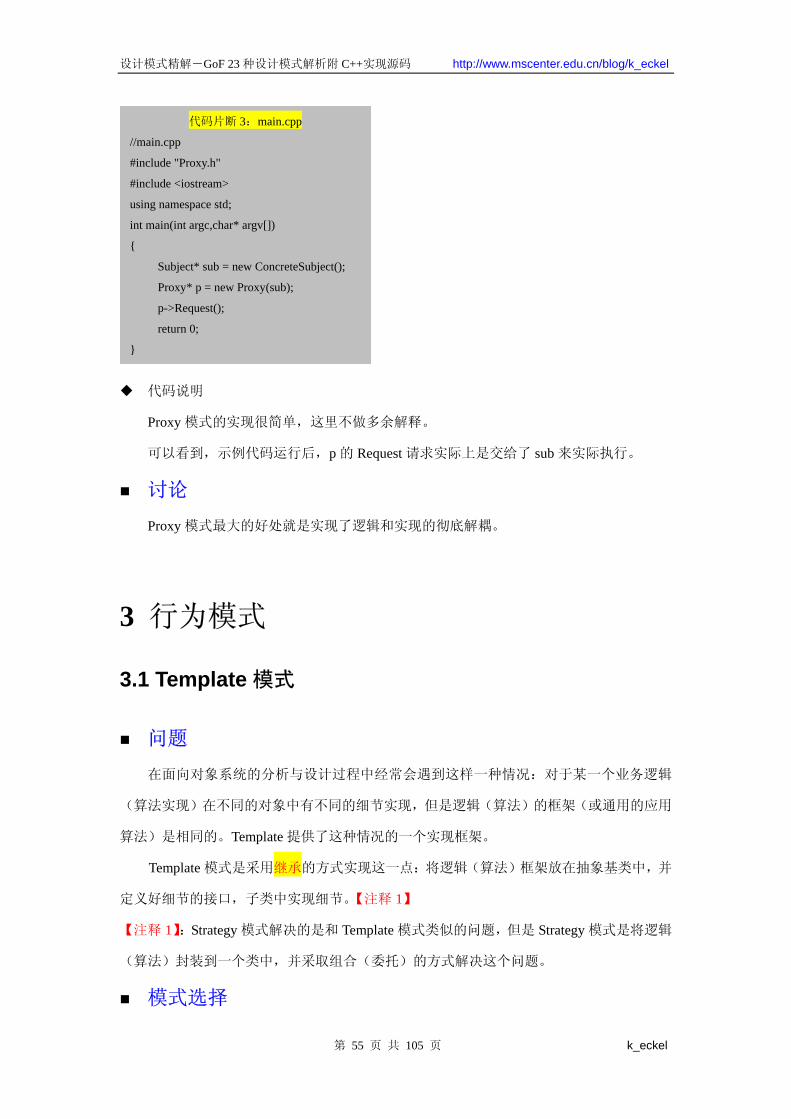
代码片断 3:main.cpp
//main.cpp
#include "Proxy.h"
#include <iostream>
using namespace std;
int main(int argc,char* argv[])
{
Subject* sub = new ConcreteSubject();
Proxy* p = new Proxy(sub);
p->Request();
return 0;
}
代码说明
Proxy 模式的实现很简单,这里不做多余解释。
可以看到,示例代码运行后,p 的 Request 请求实际上是交给了 sub 来实际执行。
讨论
Proxy 模式 大的好处就是实现了逻辑和实现的彻底解耦。
3 行为模式
3.1 Template 模式
问题
在面向对象系统的分析与设计过程中经常会遇到这样一种情况:对于某一个业务逻辑
(算法实现)在不同的对象中有不同的细节实现,但是逻辑(算法)的框架(或通用的应用
算法)是相同的。Template 提供了这种情况的一个实现框架。
Template 模式是采用继承的方式实现这一点:将逻辑(算法)框架放在抽象基类中,并
定义好细节的接口,子类中实现细节。【注释 1】
【注释 1】:Strategy 模式解决的是和 Template 模式类似的问题,但是 Strategy 模式是将逻辑
(算法)封装到一个类中,并采取组合(委托)的方式解决这个问题。
模式选择
第 55 页 共 105 页 k_eckel

设计模式精解-GoF 23 种设计模式解析附 C++实现源码 http://www.mscenter.edu.cn/blog/k_eckel
解决 2.1 中问题可以采取两种模式来解决,一是 Template 模式,二是 Strategy 模式。本
文当给出的是 Template 模式。一个通用的 Template 模式的结构图为:
图 2-1:Template 模式结构图
Template 模式实际上就是利用面向对象中多态的概念实现算法实现细节和高层接口的
松耦合。可以看到 Template 模式采取的是继承方式实现这一点的,由于继承是一种强约束
性的条件,因此也给 Template 模式带来一些许多不方便的地方(有关这一点将在讨论中展
开)。
实现
完整代码示例(code)
Template 模式的实现很简单,这里为了方便初学者的学习和参考,将给出完整的实现代
码(所有代码采用 C++实现,并在 VC 6.0 下测试运行)。
第 56 页 共 105 页 k_eckel
设计模式精解-GoF 23 种设计模式解析附 C++实现源码 http://www.mscenter.edu.cn/blog/k_eckel
第 57 页 共 105 页 k_eckel
代码片断 2:Template.cpp
#include "Template.h"
#include <iostream>
using namespace std;
AbstractClass::AbstractClass()
{
}
AbstractClass::~AbstractClass()
{
}
void AbstractClass::TemplateMethod()
{
this->PrimitiveOperation1();
this->PrimitiveOperation2();
}
代码片断 1:Template.h
//Template.h
#ifndef _TEMPLATE_H_
#define _TEMPLATE_H_
class AbstractClass
{
public:
virtual ~AbstractClass();
void TemplateMethod();
protected:
virtual void PrimitiveOperation1() = 0;
virtual void PrimitiveOperation2() = 0;
ConcreteClass1::ConcreteClass1()
{
}
ConcreteClass1::~ConcreteClass1()
{
}
void ConcreteClass1::PrimitiveOperation1()
{
cout<<"ConcreteClass1...PrimitiveOperat
ion1"<<endl;
}
void ConcreteClass1::PrimitiveOperation2()
{
cout<<"ConcreteClass1...PrimitiveOperat
ion2"<<endl;
}
ConcreteClass2::ConcreteClass2()
{
}
ConcreteClass2::~ConcreteClass2()
{
}
void ConcreteClass2::PrimitiveOperation1()
{
cout<<"ConcreteClass2...PrimitiveOperat
ion1"<<endl;
}
void ConcreteClass2::PrimitiveOperation2()
{
cout<<"ConcreteClass2...PrimitiveOperat
ion2"<<endl;
}
class ConcreteClass1:public AbstractClass
{
public:
ConcreteClass1();
~ConcreteClass1();
protected:
void PrimitiveOperation1();
void PrimitiveOperation2();
private:
};
class ConcreteClass2:public AbstractClass
{
public:
ConcreteClass2();
~ConcreteClass2();
protected:
void PrimitiveOperation1();
void PrimitiveOperation2();
private:
};
#endif //~ TEMPLATE H
AbstractClass();
private:
};
设计模式精解-GoF 23 种设计模式解析附 C++实现源码 http://www.mscenter.edu.cn/blog/k_eckel
代码片断 3:main.cpp//测试程序
#include "Template.h"
#include <iostream>
using namespace std;
int main(int argc,char* argv[])
{
AbstractClass* p1 = new ConcreteClass1();
AbstractClass* p2 = new ConcreteClass2();
p1->TemplateMethod();
p2->TemplateMethod();
return 0;
}
代码说明
由于 Template 模式的实现代码很简单,因此解释是多余的。其关键是将通用算法(逻
辑)封装起来,而将算法细节让子类实现(多态)。
唯一注意的是我们将原语操作(细节算法)定义未保护(Protected)成员,只供模板方
法调用(子类可以)。
讨论
Template 模式是很简单模式,但是也应用很广的模式。如上面的分析和实现中阐明的
Template 是采用继承的方式实现算法的异构,其关键点就是将通用算法封装在抽象基类中,
并将不同的算法细节放到子类中实现。
Template 模式获得一种反向控制结构效果,这也是面向对象系统的分析和设计中一个原
则 DIP(依赖倒置:Dependency Inversion Principles)。其含义就是父类调用子类的操作(高
层模块调用低层模块的操作),低层模块实现高层模块声明的接口。这样控制权在父类(高
层模块),低层模块反而要依赖高层模块。
继承的强制性约束关系也让 Template 模式有不足的地方,我们可以看到对于
ConcreteClass 类中的实现的原语方法 Primitive1(),是不能被别的类复用。假设我们要创建
一个 AbstractClass 的变体 AnotherAbstractClass,并且两者只是通用算法不一样,其原语操
作想复用 AbstractClass 的子类的实现。但是这是不可能实现的,因为 ConcreteClass 继承自
AbstractClass,也就继承了 AbstractClass 的通用算法,AnotherAbstractClass 是复用不了
ConcreteClass 的实现,因为后者不是继承自前者。
Template 模式暴露的问题也正是继承所固有的问题,Strategy 模式则通过组合(委托)
第 58 页 共 105 页 k_eckel
设计模式精解-GoF 23 种设计模式解析附 C++实现源码 http://www.mscenter.edu.cn/blog/k_eckel
来达到和 Template 模式类似的效果,其代价就是空间和时间上的代价,关于 Strategy 模式的
详细讨论请参考 Strategy 模式解析。
3.2 Strategy 模式
问题
Strategy 模式和 Template 模式要解决的问题是相同(类似)的,都是为了给业务逻辑(算
法)具体实现和抽象接口之间的解耦。Strategy 模式将逻辑(算法)封装到一个类(Context)
里面,通过组合的方式将具体算法的实现在组合对象中实现,再通过委托的方式将抽象接口
的实现委托给组合对象实现。State 模式也有类似的功能,他们之间的区别将在讨论中给出。
模式选择
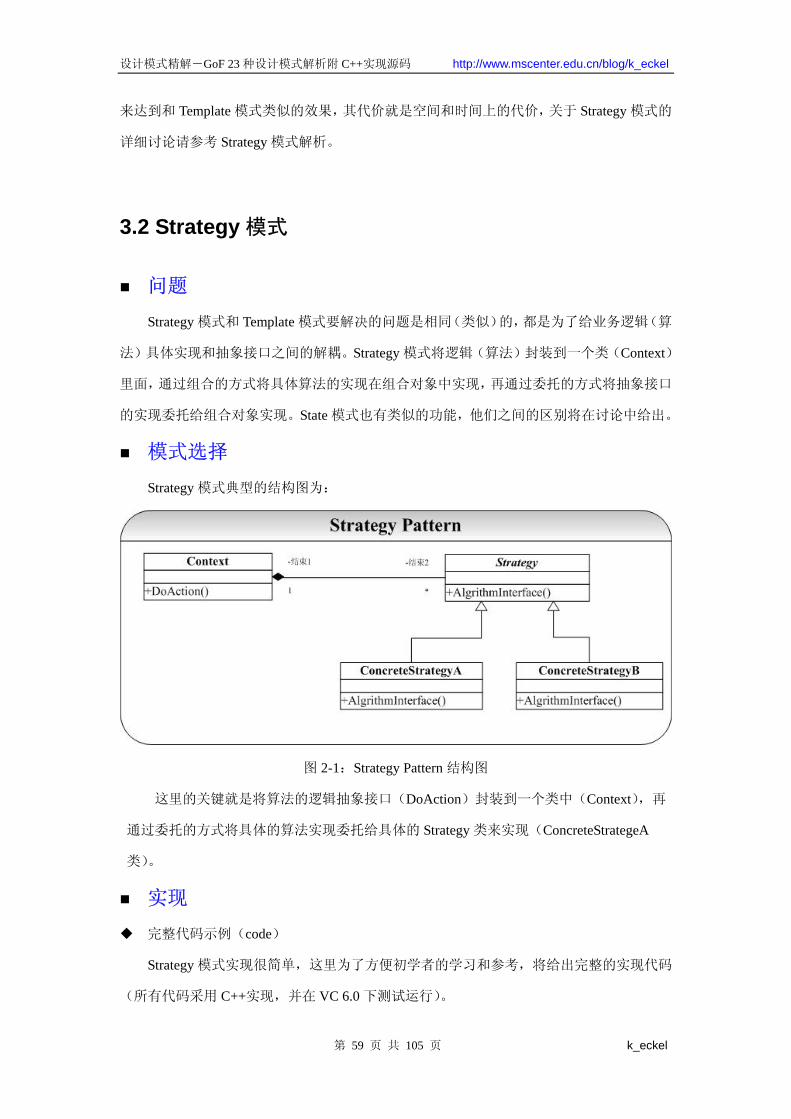
Strategy 模式典型的结构图为:
图 2-1:Strategy Pattern 结构图
这里的关键就是将算法的逻辑抽象接口(DoAction)封装到一个类中(Context),再
通过委托的方式将具体的算法实现委托给具体的 Strategy 类来实现(ConcreteStrategeA
类)。
实现
完整代码示例(code)
Strategy 模式实现很简单,这里为了方便初学者的学习和参考,将给出完整的实现代码
(所有代码采用 C++实现,并在 VC 6.0 下测试运行)。
第 59 页 共 105 页 k_eckel
设计模式精解-GoF 23 种设计模式解析附 C++实现源码 http://www.mscenter.edu.cn/blog/k_eckel
代码片断 1:strategy.h
//strategy.h
#ifndef _STRATEGY_H_
#define _STRATEGY_H_
class Strategy
{
public:
Strategy();
virtual ~Strategy();
virtual void AlgrithmInterface() = 0;
protected:
private:
};
class ConcreteStrategyA:public Strategy
{
public:
ConcreteStrategyA();
virtual ~ConcreteStrategyA();
void AlgrithmInterface();
protected:
private:
};
class ConcreteStrategyB:public Strategy
{
public:
ConcreteStrategyB();
virtual ~ConcreteStrategyB();
void AlgrithmInterface();
protected:
private:
};
#endif //~_STRATEGY_H_
代码片断 2:strategy.cpp
//Strategy.cpp
#include "Strategy.h"
#include <iostream>
using namespace std;
Strategy::Strategy()
{
}
Strategy::~Strategy()
{
cout<<"~Strategy....."<<endl;
}
void Strategy::AlgrithmInterface()
{
}
ConcreteStrategyA::ConcreteStrategyA()
{
}
ConcreteStrategyA::~ConcreteStrategyA()
{
cout<<"~ConcreteStrategyA....."<<endl;
}
void ConcreteStrategyA::AlgrithmInterface()
{
cout<<"test
ConcreteStrategyA....."<<endl;
}
ConcreteStrategyB::ConcreteStrategyB()
{
}
ConcreteStrategyB::~ConcreteStrategyB()
{
cout<<"~ConcreteStrategyB....."<<endl;
}
void ConcreteStrategyB::AlgrithmInterface()
{
cout<<"test
ConcreteStrategyB....."<<endl;
}
第 60 页 共 105 页 k_eckel
设计模式精解-GoF 23 种设计模式解析附 C++实现源码 http://www.mscenter.edu.cn/blog/k_eckel
代码片断 3:Context.h
//Context.h
#ifndef _CONTEXT_H_
#define _CONTEXT_H_
class Strategy;
/**
*这个类是 Strategy 模式的关键,也是 Strategy
模式和 Template 模式的根本区别所在。
*Strategy 通过“组合”(委托)方式实现算法
(实现)的异构,而 Template 模式则采取的
是继承的方式
*这两个模式的区别也是继承和组合两种实
现接口重用的方式的区别
*/
class Context
{
public:
Context(Strategy* stg);
~Context();
void DoAction();
protected:
private:
Strategy* _stg;
};
#endif //~_CONTEXT_H_
代码片断 4:Context.cpp
//Context.cpp
#include "Context.h"
#include "Strategy.h"
#include <iostream>
using namespace std;
Context::Context(Strategy* stg)
{
_stg = stg;
}
Context::~Context()
{
if (!_stg)
delete _stg;
}
void Context::DoAction()
{
_stg->AlgrithmInterface();
}
第 61 页 共 105 页 k_eckel

设计模式精解-GoF 23 种设计模式解析附 C++实现源码 http://www.mscenter.edu.cn/blog/k_eckel
代码片断 5:main.cpp
//main.cpp
#include "Context.h"
#include "Strategy.h"
#include <iostream>
using namespace std;
int main(int argc,char* argv[])
{
Strategy* ps;
ps = new ConcreteStrategyA();
Context* pc = new Context(ps);
pc->DoAction();
if (NULL != pc)
delete pc;
return 0;
}
代码说明
Strategy 模式的代码很直观,关键是将算法的逻辑封装到一个类中。
讨论
可以看到 Strategy 模式和 Template 模式解决了类似的问题,也正如在 Template 模式中
分析的,Strategy 模式和 Template 模式实际是实现一个抽象接口的两种方式:继承和组合之
间的区别。要实现一个抽象接口,继承是一种方式:我们将抽象接口声明在基类中,将具体
的实现放在具体子类中。组合(委托)是另外一种方式:我们将接口的实现放在被组合对象
中,将抽象接口放在组合类中。这两种方式各有优缺点,先列出来:
1) 继承:
优点
1)易于修改和扩展那些被复用的实现。
缺点
1)破坏了封装性,继承中父类的实现细节暴露给子类了;
2)“白盒”复用,原因在 1)中;
3)当父类的实现更改时,其所有子类将不得不随之改变
4)从父类继承而来的实现在运行期间不能改变(编译期间就已经确定了)。
第 62 页 共 105 页 k_eckel
设计模式精解-GoF 23 种设计模式解析附 C++实现源码 http://www.mscenter.edu.cn/blog/k_eckel
2) 组合
优点
1)“黑盒”复用,因为被包含对象的内部细节对外是不可见的;
2)封装性好,原因为 1);
3)实现和抽象的依赖性很小(组合对象和被组合对象之间的依赖性小);
4)可以在运行期间动态定义实现(通过一个指向相同类型的指针,典型的是抽象
基类的指针)。
缺点
1)系统中对象过多。
从上面对比中我们可以看出,组合相比继承可以取得更好的效果,因此在面向对象
的设计中的有一条很重要的原则就是:优先使用(对象)组合,而非(类)继承(Favor
Composition Over Inheritance)。
实际上,继承是一种强制性很强的方式,因此也使得基类和具体子类之间的耦合
性很强。例如在 Template 模式中在 ConcreteClass1 中定义的原语操作别的类是不能够直
接复用(除非你继承自 AbstractClass,具体分析请参看 Template 模式文档)。而组合(委
托)的方式则有很小的耦合性,实现(具体实现)和接口(抽象接口)之间的依赖性很
小,例如在本实现中,ConcreteStrategyA 的具体实现操作很容易被别的类复用,例如我
们要定义另一个 Context 类 AnotherContext,只要组合一个指向 Strategy 的指针就可以
很容易地复用 ConcreteStrategyA 的实现了。
我们在 Bridge 模式的问题和 Bridge 模式的分析中,正是说明了继承和组合之间的
区别。请参看相应模式解析。
另外 Strategy 模式很 State 模式也有相似之处,但是 State 模式注重的对象在不同的
状态下不同的操作。两者之间的区别就是 State 模式中具体实现类中有一个指向 Context
的引用,而 Strategy 模式则没有。具体分析请参看相应的 State 模式分析中。
3.3 State 模式
问题
每个人、事物在不同的状态下会有不同表现(动作),而一个状态又会在不同的表现下
第 63 页 共 105 页 k_eckel
设计模式精解-GoF 23 种设计模式解析附 C++实现源码 http://www.mscenter.edu.cn/blog/k_eckel
转移到下一个不同的状态(State)。 简单的一个生活中的例子就是:地铁入口处,如果你
放入正确的地铁票,门就会打开让你通过。在出口处也是验票,如果正确你就可以 ok,否
则就不让你通过(如果你动作野蛮,或许会有报警(Alarm),:))。
有限状态自动机(FSM)也是一个典型的状态不同,对输入有不同的响应(状态转移)。
通常我们在实现这类系统会使用到很多的 Switch/Case 语句,Case 某种状态,发生什么动作,
Case 另外一种状态,则发生另外一种状态。但是这种实现方式至少有以下两个问题:
1)当状态数目不是很多的时候,Switch/Case 可能可以搞定。但是当状态数目很多的时
候(实际系统中也正是如此),维护一大组的 Switch/Case 语句将是一件异常困难并且容易出
错的事情。
2)状态逻辑和动作实现没有分离。在很多的系统实现中,动作的实现代码直接写在状
态的逻辑当中。这带来的后果就是系统的扩展性和维护得不到保证。
模式选择
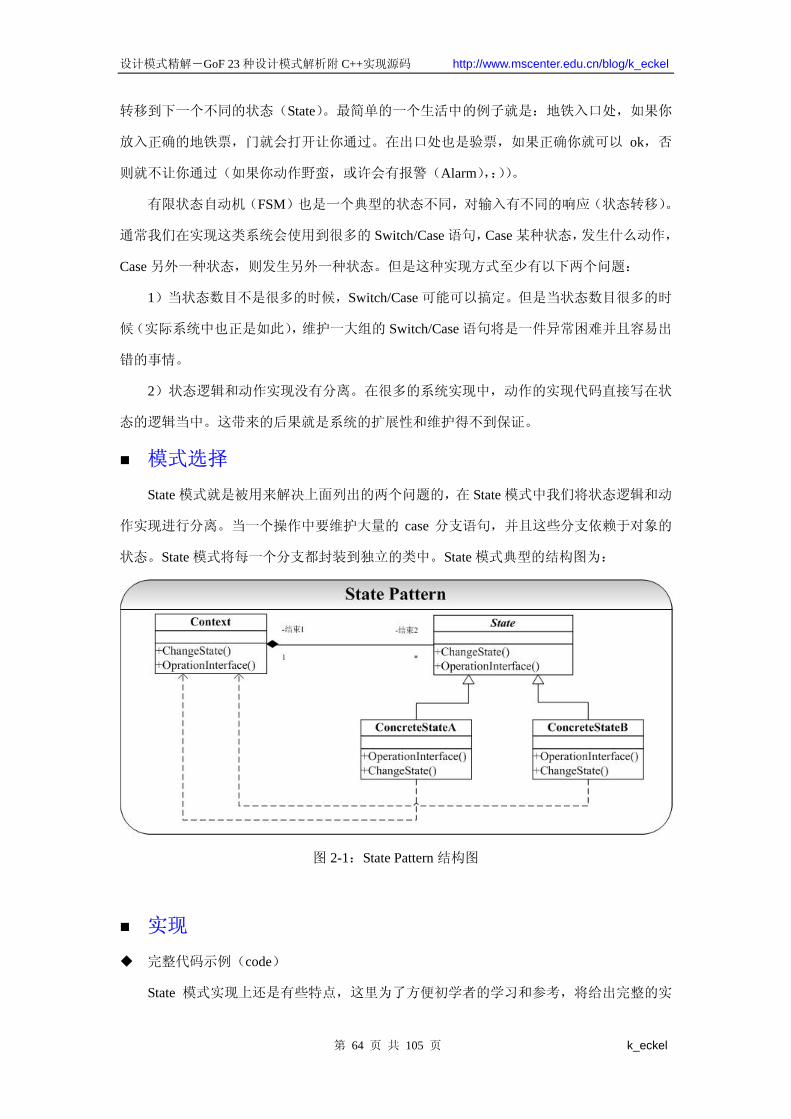
State 模式就是被用来解决上面列出的两个问题的,在 State 模式中我们将状态逻辑和动
作实现进行分离。当一个操作中要维护大量的 case 分支语句,并且这些分支依赖于对象的
状态。State 模式将每一个分支都封装到独立的类中。State 模式典型的结构图为:
图 2-1:State Pattern 结构图
实现
完整代码示例(code)
State 模式实现上还是有些特点,这里为了方便初学者的学习和参考,将给出完整的实
第 64 页 共 105 页 k_eckel

设计模式精解-GoF 23 种设计模式解析附 C++实现源码 http://www.mscenter.edu.cn/blog/k_eckel
现代码(所有代码采用 C++实现,并在 VC 6.0 下测试运行)。
代码片断 1:State.h
//state.h
#ifndef _STATE_H_
#define _STATE_H_
class Context; //前置声明
class State
{
public:
State();
virtual ~State();
virtual void
OperationInterface(Context* ) = 0;
virtual void
OperationChangeState(Context*) = 0;
protected:
bool ChangeState(Context* con,State*
st);
private:
//bool ChangeState(Context* con,State*
st);
};
class ConcreteStateA:public State
{
public:
ConcreteStateA();
virtual ~ConcreteStateA();
virtual void
OperationInterface(Context* );
virtual void
OperationChangeState(Context*);
protected:
private:
};
代码片断 2:State.cpp
//State.cpp
#include "State.h"
#include "Context.h"
#include <iostream>
using namespace std;
State::State()
{
}
State::~State()
{
}
void State::OperationInterface(Context* con)
{
cout<<"State::.."<<endl;
}
bool State::ChangeState(Context* con,State* st)
{
con->ChangeState(st);
return true;
}
void State::OperationChangeState(Context*
con)
{
}
ConcreteStateA::ConcreteStateA()
{
}
ConcreteStateA::~ConcreteStateA()
{
}
void
ConcreteStateA::OperationInterface(Context*
con)
{
cout<<"ConcreteStateA::OperationInterfa
ce......"<<endl;
}
第 65 页 共 105 页 k_eckel
设计模式精解-GoF 23 种设计模式解析附 C++实现源码 http://www.mscenter.edu.cn/blog/k_eckel
代码片断 1:State.h
class ConcreteStateB:public State
{
public:
ConcreteStateB();
virtual ~ConcreteStateB();
virtual void
OperationInterface(Context* );
virtual void
OperationChangeState(Context*);
protected:
private:
};
#endif //~_STATE_H_
代码片断 2:State.cpp
void
ConcreteStateA::OperationChangeState(Contex
t* con)
{
OperationInterface(con);
this->ChangeState(con,new
ConcreteStateB());
}
ConcreteStateB::ConcreteStateB()
{
}
ConcreteStateB::~ConcreteStateB()
{
}
void
ConcreteStateB::OperationInterface(Context*
con)
{
cout<<"ConcreteStateB::OperationInterfa
ce......"<<endl;
}
void
ConcreteStateB::OperationChangeState(Contex
t* con)
{
OperationInterface(con);
this->ChangeState(con,new
ConcreteStateA());
}
代码片断 3:Context.h
//context.h
#ifndef _CONTEXT_H_
#define _CONTEXT_H_
class State;
class Context
{
public:
Context();
Context(State* state);
~Context();
void OprationInterface();
void OperationChangState();
protected:
private:
friend class State; //表明在 State 类中可
以访问 Context 类的 private 字段
bool ChangeState(State* state);
private:
State* _state;
};
#endif //~_CONTEXT_H_
第 66 页 共 105 页 k_eckel
设计模式精解-GoF 23 种设计模式解析附 C++实现源码 http://www.mscenter.edu.cn/blog/k_eckel
代码片断 4:Context.cpp
//context.cpp
#include "Context.h"
#include "State.h"
Context::Context()
{
}
Context::Context(State* state)
{
this->_state = state;
}
Context::~Context()
{
delete _state;
}
void Context::OprationInterface()
{
_state->OperationInterface(this);
}
bool Context::ChangeState(State* state)
{
this->_state = state;
return true;
}
void Context::OperationChangState()
{
_state->OperationChangeState(this);
}
代码片断 5:main.cpp
//main.cpp
#include "Context.h"
#include "State.h"
#include <iostream>
using namespace std;
int main(int argc,char* argv[])
{
State* st = new ConcreteStateA();
Context* con = new Context(st);
con->OprationInterface();
con-> OprationInterface ();
con->OprationInterface();
if (con != NULL)
delete con;
if (st != NULL)
st = NULL;
return 0;
}
代码说明
State 模式在实现中,有两个关键点:
1)将 State 声明为 Context 的友元类(friend class),其作用是让 State 模式访问 Context
的 protected 接口 ChangeSate()。
2)State 及其子类中的操作都将 Context*传入作为参数,其主要目的是 State 类可以通
过这个指针调用 Context 中的方法(在本示例代码中没有体现)。这也是 State 模式和 Strategy
模式的 大区别所在。
运行了示例代码后可以获得以下的结果:连续 3 次调用了 Context 的 OprationInterface()
因为每次调用后状态都会改变(A-B-A),因此该动作随着 Context 的状态的转变而获得了不同的结果。
第 67 页 共 105 页 k_eckel
设计模式精解-GoF 23 种设计模式解析附 C++实现源码 http://www.mscenter.edu.cn/blog/k_eckel
讨论
State 模式的应用也非常广泛,从 高层逻辑用户接口 GUI 到 底层的通讯协议(例如
GoF 在《设计模式》中就利用 State 模式模拟实现一个 TCP 连接的类。)都有其用武之地。
State 模式和 Strategy 模式又很大程度上的相似:它们都有一个 Context 类,都是通过委
托(组合)给一个具有多个派生类的多态基类实现 Context 的算法逻辑。两者 大的差别就
是 State 模式中派生类持有指向 Context 对象的引用,并通过这个引用调用 Context 中的方法,
但在 Strategy 模式中就没有这种情况。因此可以说一个 State 实例同样是 Strategy 模式的一
个实例,反之却不成立。实际上 State 模式和 Strategy 模式的区别还在于它们所关注的点不
尽相同:State 模式主要是要适应对象对于状态改变时的不同处理策略的实现,而 Strategy
则主要是具体算法和实现接口的解耦(coupling),Strategy 模式中并没有状态的概念(虽然
很多时候有可以被看作是状态的概念),并且更加不关心状态的改变了。
State 模式很好地实现了对象的状态逻辑和动作实现的分离,状态逻辑分布在 State 的派
生类中实现,而动作实现则可以放在 Context 类中实现(这也是为什么 State 派生类需要拥
有一个指向 Context 的指针)。这使得两者的变化相互独立,改变 State 的状态逻辑可以很容
易复用 Context 的动作,也可以在不影响 State 派生类的前提下创建 Context 的子类来更改或
替换动作实现。
State 模式问题主要是逻辑分散化,状态逻辑分布到了很多的 State 的子类中,很难看到
整个的状态逻辑图,这也带来了代码的维护问题。
3.4 Observer 模式
问题
Observer 模式应该可以说是应用 多、影响 广的模式之一,因为 Observer 的一个实
例 Model/View/Control(MVC)结构在系统开发架构设计中有着很重要的地位和意义,MVC
实现了业务逻辑和表示层的解耦。个人也认为 Observer 模式是软件开发过程中必须要掌握
和使用的模式之一。在 MFC 中,Doc/View(文档视图结构)提供了实现 MVC 的框架结构
(有一个从设计模式(Observer 模式)的角度分析分析 Doc/View 的文章正在进一步的撰写
当中,遗憾的是时间:))。在 Java 阵容中,Struts 则提供和 MFC 中 Doc/View 结构类似的实
第 68 页 共 105 页 k_eckel
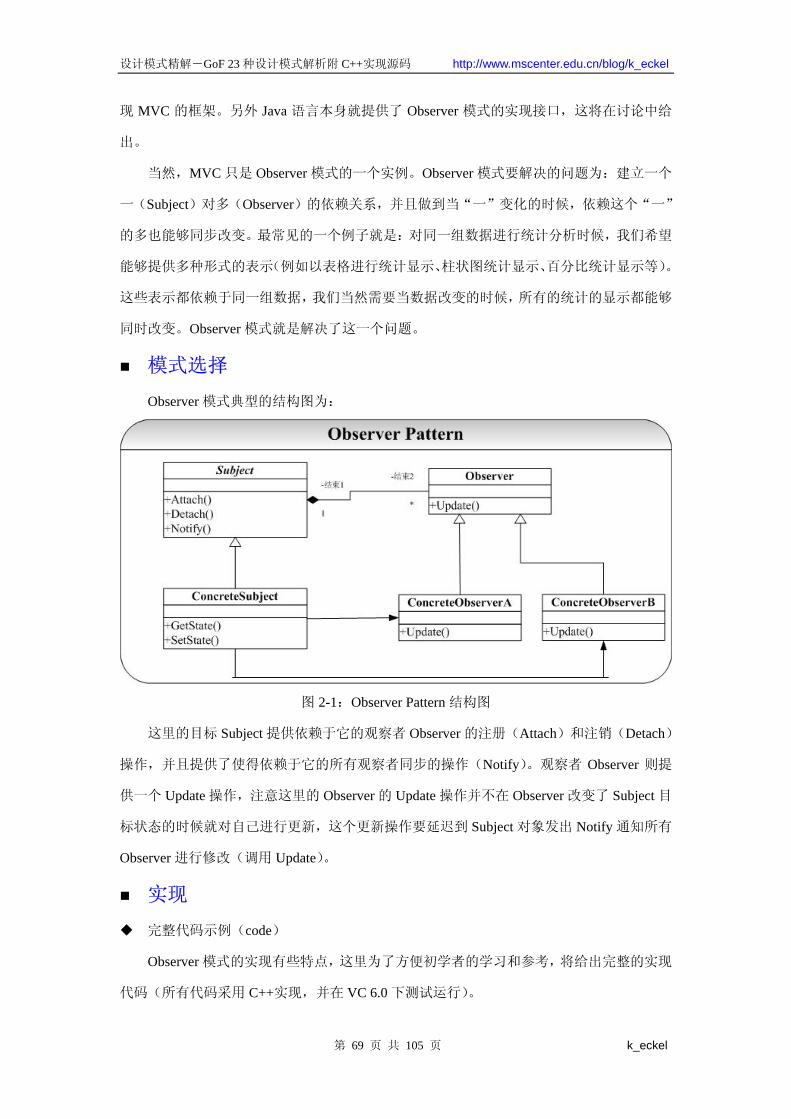
设计模式精解-GoF 23 种设计模式解析附 C++实现源码 http://www.mscenter.edu.cn/blog/k_eckel
现 MVC 的框架。另外 Java 语言本身就提供了 Observer 模式的实现接口,这将在讨论中给
出。
当然,MVC 只是 Observer 模式的一个实例。Observer 模式要解决的问题为:建立一个
一(Subject)对多(Observer)的依赖关系,并且做到当“一”变化的时候,依赖这个“一”
的多也能够同步改变。 常见的一个例子就是:对同一组数据进行统计分析时候,我们希望
能够提供多种形式的表示(例如以表格进行统计显示、柱状图统计显示、百分比统计显示等)。
这些表示都依赖于同一组数据,我们当然需要当数据改变的时候,所有的统计的显示都能够
同时改变。Observer 模式就是解决了这一个问题。
模式选择
Observer 模式典型的结构图为:
图 2-1:Observer Pattern 结构图
这里的目标 Subject 提供依赖于它的观察者 Observer 的注册(Attach)和注销(Detach)
操作,并且提供了使得依赖于它的所有观察者同步的操作(Notify)。观察者 Observer 则提
供一个 Update 操作,注意这里的 Observer 的 Update 操作并不在 Observer 改变了 Subject 目
标状态的时候就对自己进行更新,这个更新操作要延迟到 Subject 对象发出 Notify 通知所有
Observer 进行修改(调用 Update)。
实现
完整代码示例(code)
Observer 模式的实现有些特点,这里为了方便初学者的学习和参考,将给出完整的实现
代码(所有代码采用 C++实现,并在 VC 6.0 下测试运行)。
第 69 页 共 105 页 k_eckel
设计模式精解-GoF 23 种设计模式解析附 C++实现源码 http://www.mscenter.edu.cn/blog/k_eckel
代码片断 1:Subject.h
//Subject.h
#ifndef _SUBJECT_H_
#define _SUBJECT_H_
#include <list>
#include <string>
using namespace std;
typedef string State;
class Observer;
class Subject
{
public:
virtual ~Subject();
virtual void Attach(Observer* obv);
virtual void Detach(Observer* obv);
virtual void Notify();
virtual void SetState(const State& st) = 0;
virtual State GetState() = 0;
protected:
Subject();
private:
list<Observer* >* _obvs;
};
class ConcreteSubject:public Subject
{
public:
ConcreteSubject();
~ConcreteSubject();
State GetState();
void SetState(const State& st);
protected:
private:
State _st;
};
#endif //~_SUBJECT_H_
代码片断 2:Subject.cpp
#include "Subject.h"
#include "Observer.h"
#include <iostream>
#include <list>
using namespace std;
typedef string state;
Subject::Subject()
{ //在模板的使用之前一定要 new,创建
_obvs = new list<Observer*>;
}
Subject::~Subject()
{ }
void Subject::Attach(Observer* obv)
{
_obvs->push_front(obv);
}
void Subject::Detach(Observer* obv)
{
if (obv != NULL)
_obvs->remove(obv);
}
void Subject::Notify()
{
list<Observer*>::iterator it;
it = _obvs->begin();
for (;it != _obvs->end();it++)
{ //关于模板和 iterator 的用法
(*it)->Update(this);
}
}
ConcreteSubject::ConcreteSubject()
{
_st = '\0';
}
ConcreteSubject::~ConcreteSubject()
{ }
State ConcreteSubject::GetState()
{
return _st;
}
void ConcreteSubject::SetState(const State& st)
{ _st = st;
}
第 70 页 共 105 页 k_eckel
设计模式精解-GoF 23 种设计模式解析附 C++实现源码 http://www.mscenter.edu.cn/blog/k_eckel
第 71 页 共 105 页 k_eckel
virtual ~Observer();
virtual void Update(Subject* sub) = 0;
virtual void PrintInfo() = 0;
protected:
Observer();
State _st;
private:
};
class ConcreteObserverA:public Observer
{
public:
virtual Subject* GetSubject();
ConcreteObserverA(Subject* sub);
virtual ~ConcreteObserverA();
//传入 Subject 作为参数,这样可以让一个
View 属于多个的 Subject。
void Update(Subject* sub);
void PrintInfo();
protected:
private:
Subject* _sub;
};
class ConcreteObserverB:public Observer
{
public:
virtual Subject* GetSubject();
ConcreteObserverB(Subject* sub);
virtual ~ConcreteObserverB();
//传入 Subject 作为参数,这样可以让一个
View 属于多个的 Subject。
void Update(Subject* sub);
void PrintInfo();
protected:
private:
Subject* _sub;
};
#endif //~_OBSERVER_H_
代码片断 3:Observer.h
//Observer.h
#ifndef _OBSERVER_H_
#define _OBSERVER_H_
#include "Subject.h"
#include <string>
using namespace std;
typedef string State;
class Observer
{
public:
代码片断 4:Observer.cpp
//Observer.cpp
#include "Observer.h"
#include "Subject.h"
#include <iostream>
#include <string>
using namespace std;
Observer::Observer()
{
_st = '\0';
}
Observer::~Observer()
{
}
ConcreteObserverA::ConcreteObserverA(Subje
ct* sub)
{
_sub = sub;
_sub->Attach(this);
}
ConcreteObserverA::~ConcreteObserverA()
{
_sub->Detach(this);
if (_sub != 0)
delete _sub;
}
Subject* ConcreteObserverA::GetSubject()
{
return _sub;
}
void ConcreteObserverA::PrintInfo()
{
cout<<"ConcreteObserverA observer....
"<<_sub->GetState()<<endl;
}
void ConcreteObserverA::Update(Subject* sub)
{
_st = sub->GetState();
PrintInfo();
}
ConcreteObserverB::ConcreteObserverB(Subje
ct* sub)
{
_sub = sub;
_sub->Attach(this);
}
设计模式精解-GoF 23 种设计模式解析附 C++实现源码 http://www.mscenter.edu.cn/blog/k_eckel
代码片断 5:main.cpp
//main.cpp
#include "Subject.h"
#include "Observer.h"
#include <iostream>
using namespace std;
int main(int argc,char* argv[])
{
ConcreteSubject* sub = new
ConcreteSubject();
Observer* o1 = new
ConcreteObserverA(sub);
Observer* o2 = new
ConcreteObserverB(sub);
sub->SetState("old");
sub->Notify();
sub->SetState("new"); // 也 可 以 由
Observer 调用
sub->Notify();
return 0;
}
代码片断 4:Observer.cpp
ConcreteObserverB::~ConcreteObserverB()
{
_sub->Detach(this);
if (_sub != 0)
{
delete _sub;
}
Subject* ConcreteObserverB::GetSubject()
{
return _sub;
}
void ConcreteObserverB::PrintInfo()
{
cout<<"ConcreteObserverB observer....
"<<_sub->GetState()<<endl;
}
void ConcreteObserverB::Update(Subject* sub)
{
_st = sub->GetState();
PrintInfo();
}
代码说明
在 Observer 模式的实现中,Subject 维护一个 list 作为存储其所有观察者的容器。每当
调用Notify操作就遍历 list中的Observer对象,并广播通知改变状态(调用Observer的Update
操作)。目标的状态 state 可以由 Subject 自己改变(示例),也可以由 Observer 的某个操作引
起 state 的改变(可调用 Subject 的 SetState 操作)。Notify 操作可以由 Subject 目标主动广播
(示例),也可以由 Observer 观察者来调用(因为 Observer 维护一个指向 Subject 的指针)。
运行示例程序,可以看到当 Subject 处于状态“old”时候,依赖于它的两个观察者都显
示“old”,当目标状态改变为“new”的时候,依赖于它的两个观察者也都改变为“new”。
讨论
Observer 是影响极为深远的模式之一,也是在大型系统开发过程中要用到的模式之一。
除了 MFC、Struts 提供了 MVC 的实现框架,在 Java 语言中还提供了专门的接口实现 Observer
模式:通过专门的类 Observable 及 Observer 接口来实现 MVC 编程模式,其 UML 图可以表
第 72 页 共 105 页 k_eckel
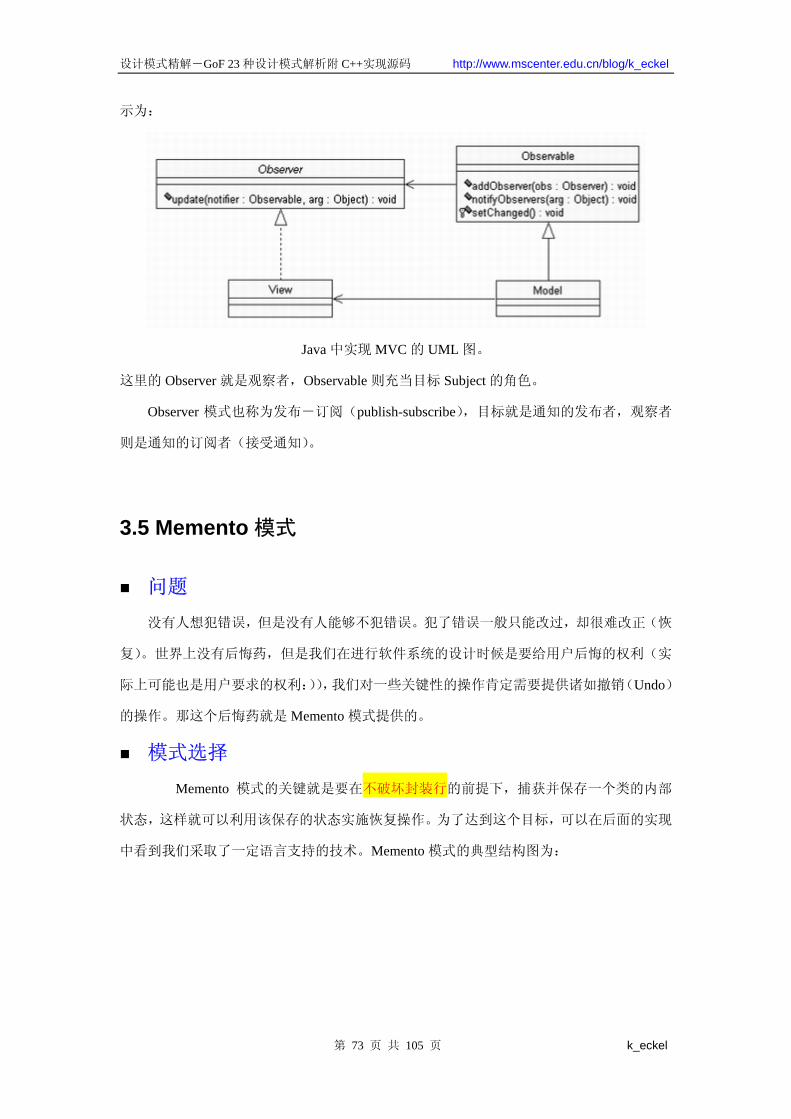
设计模式精解-GoF 23 种设计模式解析附 C++实现源码 http://www.mscenter.edu.cn/blog/k_eckel
示为:
Java 中实现 MVC 的 UML 图。
这里的 Observer 就是观察者,Observable 则充当目标 Subject 的角色。
Observer 模式也称为发布-订阅(publish-subscribe),目标就是通知的发布者,观察者
则是通知的订阅者(接受通知)。
3.5 Memento 模式
问题
没有人想犯错误,但是没有人能够不犯错误。犯了错误一般只能改过,却很难改正(恢
复)。世界上没有后悔药,但是我们在进行软件系统的设计时候是要给用户后悔的权利(实
际上可能也是用户要求的权利:)),我们对一些关键性的操作肯定需要提供诸如撤销(Undo)
的操作。那这个后悔药就是 Memento 模式提供的。
模式选择
Memento 模式的关键就是要在不破坏封装行的前提下,捕获并保存一个类的内部
状态,这样就可以利用该保存的状态实施恢复操作。为了达到这个目标,可以在后面的实现
中看到我们采取了一定语言支持的技术。Memento 模式的典型结构图为:
第 73 页 共 105 页 k_eckel
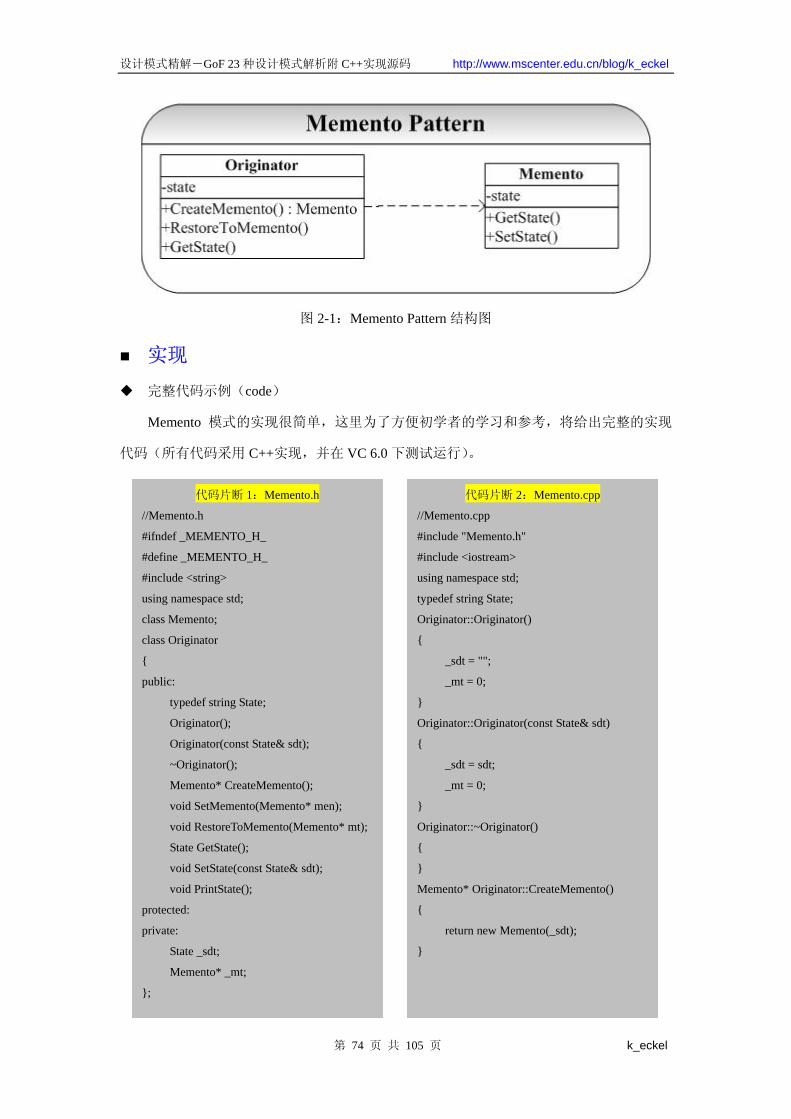
设计模式精解-GoF 23 种设计模式解析附 C++实现源码 http://www.mscenter.edu.cn/blog/k_eckel
图 2-1:Memento Pattern 结构图
实现
完整代码示例(code)
Memento 模式的实现很简单,这里为了方便初学者的学习和参考,将给出完整的实现
代码(所有代码采用 C++实现,并在 VC 6.0 下测试运行)。
代码片断 1:Memento.h
//Memento.h
#ifndef _MEMENTO_H_
#define _MEMENTO_H_
#include <string>
using namespace std;
class Memento;
class Originator
{
public:
typedef string State;
Originator();
Originator(const State& sdt);
~Originator();
Memento* CreateMemento();
void SetMemento(Memento* men);
void RestoreToMemento(Memento* mt);
State GetState();
void SetState(const State& sdt);
void PrintState();
protected:
private:
State _sdt;
Memento* _mt;
};
代码片断 2:Memento.cpp
//Memento.cpp
#include "Memento.h"
#include <iostream>
using namespace std;
typedef string State;
Originator::Originator()
{
_sdt = "";
_mt = 0;
}
Originator::Originator(const State& sdt)
{
_sdt = sdt;
_mt = 0;
}
Originator::~Originator()
{
}
Memento* Originator::CreateMemento()
{
return new Memento(_sdt);
}
第 74 页 共 105 页 k_eckel
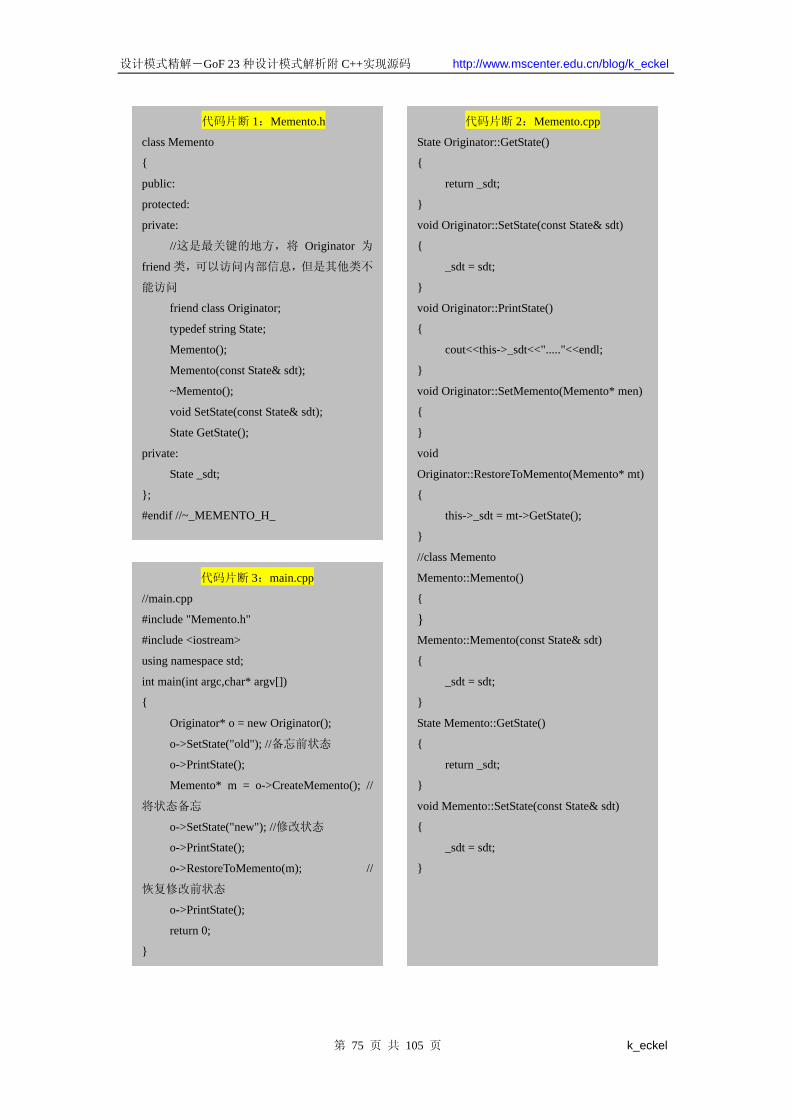
设计模式精解-GoF 23 种设计模式解析附 C++实现源码 http://www.mscenter.edu.cn/blog/k_eckel
代码片断 1:Memento.h
class Memento
{
public:
protected:
private:
//这是 关键的地方,将 Originator 为
friend 类,可以访问内部信息,但是其他类不
能访问
friend class Originator;
typedef string State;
Memento();
Memento(const State& sdt);
~Memento();
void SetState(const State& sdt);
State GetState();
private:
State _sdt;
};
#endif //~_MEMENTO_H_
代码片断 2:Memento.cpp
State Originator::GetState()
{
return _sdt;
}
void Originator::SetState(const State& sdt)
{
_sdt = sdt;
}
void Originator::PrintState()
{
cout<<this->_sdt<<"....."<<endl;
}
void Originator::SetMemento(Memento* men)
{
}
void
Originator::RestoreToMemento(Memento* mt)
{
this->_sdt = mt->GetState();
}
//class Memento
Memento::Memento()
{
} Memento::Memento(const State& sdt)
{
_sdt = sdt;
}
State Memento::GetState()
{
return _sdt;
}
void Memento::SetState(const State& sdt)
{
_sdt = sdt;
}
代码片断 3:main.cpp
//main.cpp
#include "Memento.h"
#include <iostream>
using namespace std;
int main(int argc,char* argv[])
{
Originator* o = new Originator();
o->SetState("old"); //备忘前状态
o->PrintState();
Memento* m = o->CreateMemento(); //
将状态备忘
o->SetState("new"); //修改状态
o->PrintState();
o->RestoreToMemento(m); //
恢复修改前状态
o->PrintState();
return 0;
}
第 75 页 共 105 页 k_eckel
设计模式精解-GoF 23 种设计模式解析附 C++实现源码 http://www.mscenter.edu.cn/blog/k_eckel
代码说明
Memento 模式的关键就是 friend class Originator;我们可以看到,Memento 的接口都声明
为 private,而将 Originator 声明为 Memento 的友元类。我们将 Originator 的状态保存在
Memento 类中,而将 Memento 接口 private 起来,也就达到了封装的功效。
在 Originator 类中我们提供了方法让用户后悔:RestoreToMemento(Memento* mt);我们可以
通过这个接口让用户后悔。在测试程序中,我们演示了这一点:Originator 的状态由 old 变为 new
后又回到了 old。
讨论
在 Command 模式中,Memento 模式经常被用来维护可以撤销(Undo)操作的状态。这
一点将在 Command 模式具体说明。
3.6 Mediator 模式
问题
在面向对象系统的设计和开发过程中,对象之间的交互和通信是 为常见的情况,因为
对象间的交互本身就是一种通信。在系统比较小的时候,可能对象间的通信不是很多、对象
也比较少,我们可以直接硬编码到各个对象的方法中。但是当系统规模变大,对象的量变引
起系统复杂度的急剧增加,对象间的通信也变得越来越复杂,这时候我们就要提供一个专门
处理对象间交互和通信的类,这个中介者就是 Mediator 模式。Mediator 模式提供将对象间
的交互和通讯封装在一个类中,各个对象间的通信不必显势去声明和引用,大大降低了系统
的复杂性能(了解一个对象总比深入熟悉 n 个对象要好)。另外 Mediator 模式还带来了系统
对象间的松耦合,这些将在讨论中详细给出。
模式选择
Mediator 模式典型的结构图为:
第 76 页 共 105 页 k_eckel
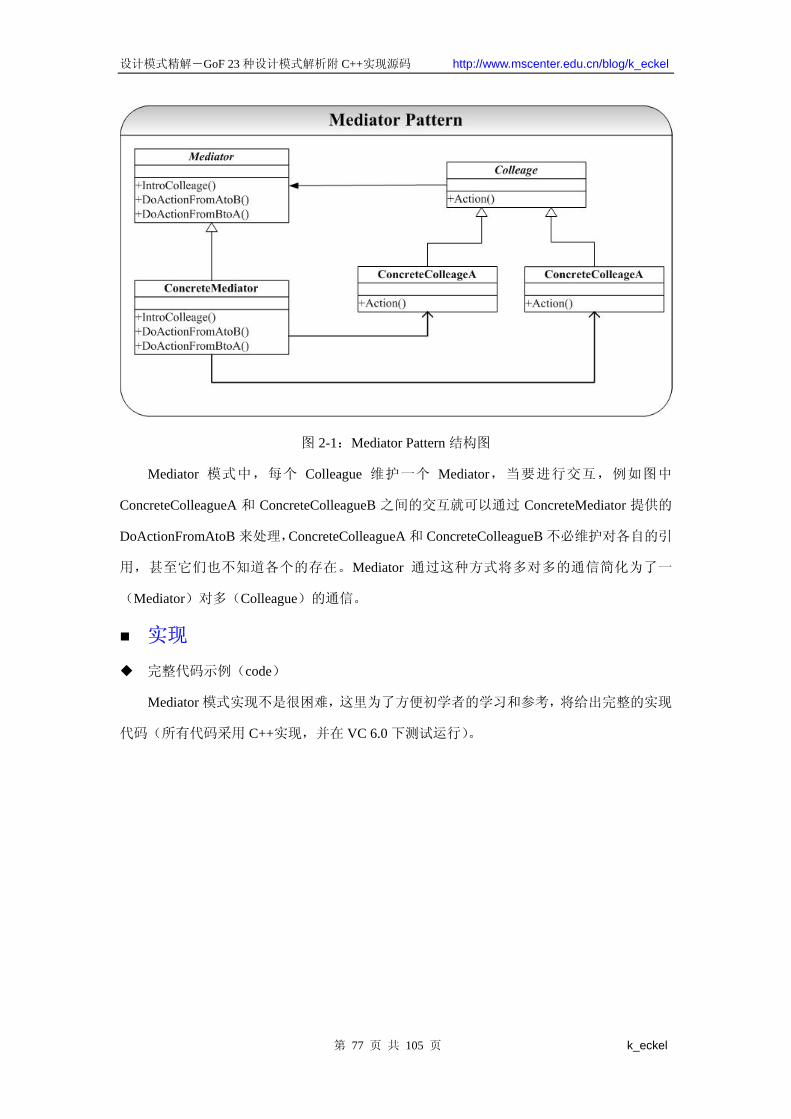
设计模式精解-GoF 23 种设计模式解析附 C++实现源码 http://www.mscenter.edu.cn/blog/k_eckel
图 2-1:Mediator Pattern 结构图
Mediator 模式中,每个 Colleague 维护一个 Mediator,当要进行交互,例如图中
ConcreteColleagueA 和 ConcreteColleagueB 之间的交互就可以通过 ConcreteMediator 提供的
DoActionFromAtoB 来处理,ConcreteColleagueA 和 ConcreteColleagueB 不必维护对各自的引
用,甚至它们也不知道各个的存在。Mediator 通过这种方式将多对多的通信简化为了一
(Mediator)对多(Colleague)的通信。
实现
完整代码示例(code)
Mediator 模式实现不是很困难,这里为了方便初学者的学习和参考,将给出完整的实现
代码(所有代码采用 C++实现,并在 VC 6.0 下测试运行)。
第 77 页 共 105 页 k_eckel
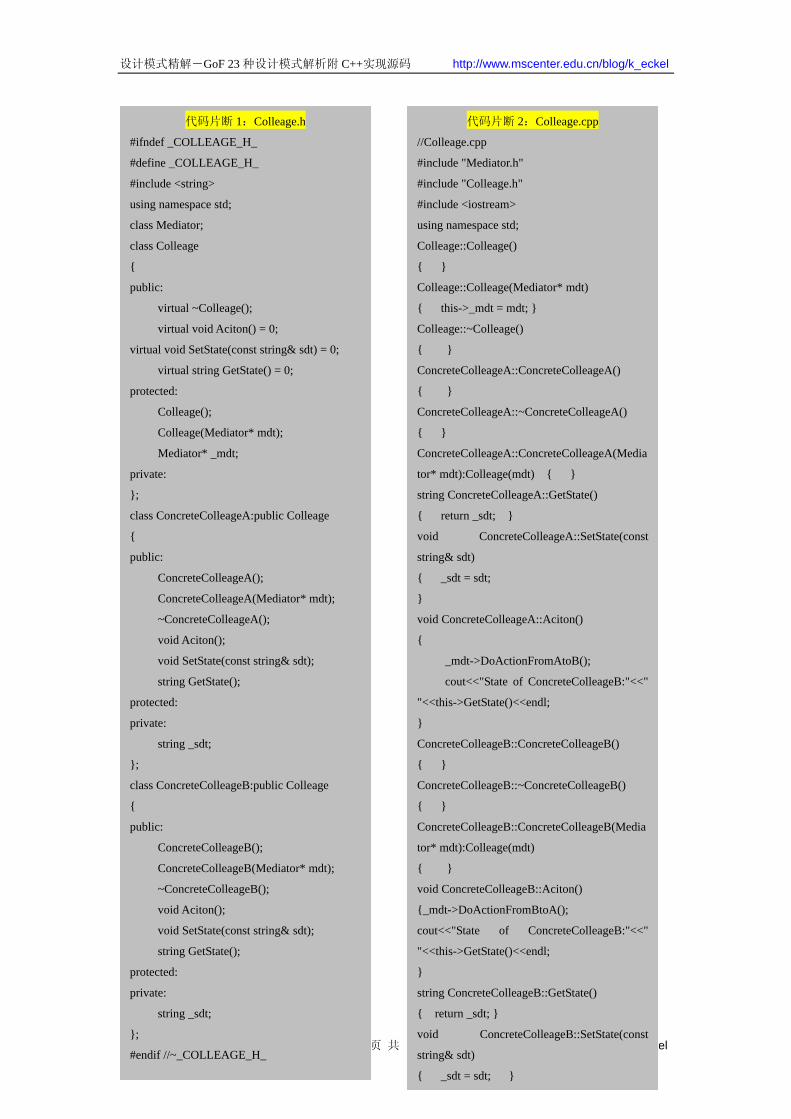
设计模式精解-GoF 23 种设计模式解析附 C++实现源码 http://www.mscenter.edu.cn/blog/k_eckel
第 78 页 共 105 页 k_eckel
代码片断 1:Colleage.h
#ifndef _COLLEAGE_H_
#define _COLLEAGE_H_
#include <string>
using namespace std;
class Mediator;
class Colleage
{
public:
virtual ~Colleage();
virtual void Aciton() = 0;
virtual void SetState(const string& sdt) = 0;
virtual string GetState() = 0;
protected:
Colleage();
Colleage(Mediator* mdt);
Mediator* _mdt;
private:
};
class ConcreteColleageA:public Colleage
{
public:
ConcreteColleageA();
ConcreteColleageA(Mediator* mdt);
~ConcreteColleageA();
void Aciton();
void SetState(const string& sdt);
string GetState();
protected:
private:
string _sdt;
};
class ConcreteColleageB:public Colleage
{
public:
ConcreteColleageB();
ConcreteColleageB(Mediator* mdt);
~ConcreteColleageB();
void Aciton();
void SetState(const string& sdt);
string GetState();
protected:
private:
string _sdt;
};
#endif //~_COLLEAGE_H_
代码片断 2:Colleage.cpp
//Colleage.cpp
#include "Mediator.h"
#include "Colleage.h"
#include <iostream>
using namespace std;
Colleage::Colleage()
{ }
Colleage::Colleage(Mediator* mdt)
{ this->_mdt = mdt; }
Colleage::~Colleage()
{ }
ConcreteColleageA::ConcreteColleageA()
{ }
ConcreteColleageA::~ConcreteColleageA()
{ }
ConcreteColleageA::ConcreteColleageA(Media
tor* mdt):Colleage(mdt) { }
string ConcreteColleageA::GetState()
{ return _sdt; }
void ConcreteColleageA::SetState(const
string& sdt)
{ _sdt = sdt;
}
void ConcreteColleageA::Aciton()
{
_mdt->DoActionFromAtoB();
cout<<"State of ConcreteColleageB:"<<"
"<<this->GetState()<<endl;
}
ConcreteColleageB::ConcreteColleageB()
{ }
ConcreteColleageB::~ConcreteColleageB()
{ }
ConcreteColleageB::ConcreteColleageB(Media
tor* mdt):Colleage(mdt)
{ }
void ConcreteColleageB::Aciton()
{_mdt->DoActionFromBtoA();
cout<<"State of ConcreteColleageB:"<<"
"<<this->GetState()<<endl;
}
string ConcreteColleageB::GetState()
{ return _sdt; }
void ConcreteColleageB::SetState(const
string& sdt)
{ _sdt = sdt; }

设计模式精解-GoF 23 种设计模式解析附 C++实现源码 http://www.mscenter.edu.cn/blog/k_eckel
代码片断 3:Mediator.h
//Mediator.h
#ifndef _MEDIATOR_H_
#define _MEDIATOR_H_
class Colleage;
class Mediator
{
public:
virtual ~Mediator();
virtual void DoActionFromAtoB() = 0;
virtual void DoActionFromBtoA() = 0;
protected:
Mediator();
private:
};
class ConcreteMediator:public Mediator
{
public:
ConcreteMediator();
ConcreteMediator(Colleage*
clgA,Colleage* clgB);
~ConcreteMediator();
void SetConcreteColleageA(Colleage*
clgA);
void SetConcreteColleageB(Colleage*
clgB);
Colleage* GetConcreteColleageA();
Colleage* GetConcreteColleageB();
void IntroColleage(Colleage*
clgA,Colleage* clgB);
void DoActionFromAtoB();
void DoActionFromBtoA();
protected:
private:
Colleage* _clgA;
Colleage* _clgB;
};
#endif //~_MEDIATOR_H
代码片断 4:Mediator.cpp
//Mediator.cpp
#include "Mediator.h"
#include "Colleage.h"
Mediator::Mediator()
{ }
Mediator::~Mediator()
{ }
ConcreteMediator::ConcreteMediator()
{ }
ConcreteMediator::~ConcreteMediator()
{ }
ConcreteMediator::ConcreteMediator(Colleage
* clgA,Colleage* clgB)
{ this->_clgA = clgA;
this->_clgB = clgB;
}
void ConcreteMediator::DoActionFromAtoB()
{ _clgB->SetState(_clgA->GetState()); }
void
ConcreteMediator::SetConcreteColleageA(Coll
eage* clgA)
{ this->_clgA = clgA; }
void
ConcreteMediator::SetConcreteColleageB(Coll
eage* clgB)
{ this->_clgB = clgB; }
Colleage*
ConcreteMediator::GetConcreteColleageA()
{ return _clgA; }
Colleage*
ConcreteMediator::GetConcreteColleageB()
{ return _clgB; }
void
ConcreteMediator::IntroColleage(Colleage*
clgA,Colleage* clgB)
{ this->_clgA = clgA;
this->_clgB = clgB;
}
void ConcreteMediator::DoActionFromBtoA()
{
_clgA->SetState(_clgB->GetState());
}
第 79 页 共 105 页 k_eckel
设计模式精解-GoF 23 种设计模式解析附 C++实现源码 http://www.mscenter.edu.cn/blog/k_eckel
代码片断 5:main.cpp
//main.cpp
#include "Mediator.h"
#include "Colleage.h"
#include <iostream>
using namespace std;
int main(int argc,char* argv[])
{
ConcreteMediator* m = new
ConcreteMediator();
ConcreteColleageA* c1 = new
ConcreteColleageA(m);
ConcreteColleageB* c2 = new
ConcreteColleageB(m);
m->IntroColleage(c1,c2);
c1->SetState("old");
c2->SetState("old");
c1->Aciton();
c2->Aciton();
cout<<endl;
c1->SetState("new");
c1->Aciton();
c2->Aciton();
cout<<endl;
c2->SetState("old");
c2->Aciton();
c1->Aciton();
return 0;
}
代码说明
Mediator 模式的实现关键就是将对象 Colleague 之间的通信封装到一个类种单独处理,
为了模拟 Mediator 模式的功能,这里给每个 Colleague 对象一个 string 型别以记录其状态,
并通过状态改变来演示对象之间的交互和通信。这里主要就 Mediator 的示例运行结果给出
分析:
1)将 ConcreteColleageA 对象设置状态“old”,ConcreteColleageB 也设置状态“old”;
2)ConcreteColleageA 对象改变状态,并在 Action 中和 ConcreteColleageB 对象进行通信,并改变
第 80 页 共 105 页 k_eckel
设计模式精解-GoF 23 种设计模式解析附 C++实现源码 http://www.mscenter.edu.cn/blog/k_eckel
ConcreteColleageB 对象的状态为“new”;
3)ConcreteColleageB 对象改变状态,并在 Action 中和 ConcreteColleageA 对象进行通信,并改变
ConcreteColleageA 对象的状态为“new”;
注意到,两个 Colleague 对象并不知道它交互的对象,并且也不是显示地处理交互过程,这一切都是
通过 Mediator 对象完成的,示例程序运行的结果也正是证明了这一点。
讨论
Mediator 模式是一种很有用并且很常用的模式,它通过将对象间的通信封装到一个类
中,将多对多的通信转化为一对多的通信,降低了系统的复杂性。Mediator 还获得系统解耦
的特性,通过 Mediator,各个 Colleague 就不必维护各自通信的对象和通信协议,降低了系
统的耦合性,Mediator 和各个 Colleague 就可以相互独立地修改了。
Mediator 模式还有一个很显著额特点就是将控制集中,集中的优点就是便于管理,也正
式符合了 OO 设计中的每个类的职责要单一和集中的原则。
3.7 Command 模式
问题
Command 模式通过将请求封装到一个对象(Command)中,并将请求的接受者存放到
具体的 ConcreteCommand 类中(Receiver)中,从而实现调用操作的对象和操作的具体实现
者之间的解耦。
模式选择
Command 模式的典型结构图为:
第 81 页 共 105 页 k_eckel

设计模式精解-GoF 23 种设计模式解析附 C++实现源码 http://www.mscenter.edu.cn/blog/k_eckel
图 2-1:Command Pattern 结构图
Command 模式结构图中,将请求的接收者(处理者)放到 Command 的具体子类
ConcreteCommand 中,当请求到来时(Invoker 发出 Invoke 消息激活 Command 对象),
ConcreteCommand 将处理请求交给 Receiver 对象进行处理。
实现
完整代码示例(code)
Command 模式的实现很简单,这里为了方便初学者的学习和参考,将给出完整的实现
代码(所有代码采用 C++实现,并在 VC 6.0 下测试运行)。
代码片断 1:Reciever.h
//Reciever.h
#ifndef _RECIEVER_H_
#define _RECIEVER_H_
class Reciever
{
public:
Reciever();
~Reciever();
void Action();
protected:
private:
};
#endif //~_RECIEVER_H_
第 82 页 共 105 页 k_eckel
代码片断 2:Reciever.cpp
//Reciever.cpp
#include "Reciever.h"
#include <iostream>
Reciever::Reciever()
{
}
Reciever::~Reciever()
{
}
void Reciever::Action()
{
std::cout<<"Reciever
action......."<<std::endl;
}
设计模式精解-GoF 23 种设计模式解析附 C++实现源码 http://www.mscenter.edu.cn/blog/k_eckel
代码片断 3:Command.h
//Command.h
#ifndef _COMMAND_H_
#define _COMMAND_H_
class Reciever;
class Command
{
public:
virtual ~Command();
virtual void Excute() = 0;
protected:
Command();
private:
};
class ConcreteCommand:public Command
{
public:
ConcreteCommand(Reciever* rev);
~ConcreteCommand();
void Excute();
protected:
private:
Reciever* _rev;
};
#endif //~_COMMAND_H_
代码片断 4:Command.cpp
//Composite.cpp
#include "Composite.h"
#include "Component.h"
#define NULL 0 //define NULL POINTOR
Composite::Composite()
{
//vector<Component*>::iterator itend =
comVec.begin();
}
Composite::~Composite()
{
}
void Composite::Operation()
{
vector<Component*>::iterator comIter =
comVec.begin();
for (;comIter != comVec.end();comIter++)
{
(*comIter)->Operation();
}
}
void Composite::Add(Component* com)
{
comVec.push_back(com);
}
void Composite::Remove(Component* com)
{
comVec.erase(&com);
}
Component* Composite::GetChild(int index)
{
return comVec[index];
}
第 83 页 共 105 页 k_eckel
设计模式精解-GoF 23 种设计模式解析附 C++实现源码 http://www.mscenter.edu.cn/blog/k_eckel
代码片断 5:Invoker.h
//Invoker.h
#ifndef _INVOKER_H_
#define _INVOKER_H_
class Command;
class Invoker
{
public:
Invoker(Command* cmd);
~Invoker();
void Invoke();
protected:
private:
Command* _cmd;
};
#endif //~_INVOKER_H_
代码片断 6:Invoker.cpp
//Leaf.cpp
#include "Leaf.h"
#include <iostream>
using namespace std;
Leaf::Leaf()
{
}
Leaf::~Leaf()
{
}
void Leaf::Operation()
{
cout<<"Leaf operation....."<<endl;
}
代码片断 7:main.cpp
//main.cpp
#include "Command.h"
#include "Invoker.h"
#include "Reciever.h"
#include <iostream>
using namespace std;
int main(int argc,char* argv[])
{
Reciever* rev = new Reciever();
Command* cmd = new
ConcreteCommand(rev);
Invoker* inv = new Invoker(cmd);
inv->Invoke();
return 0;
}
第 84 页 共 105 页 k_eckel
设计模式精解-GoF 23 种设计模式解析附 C++实现源码 http://www.mscenter.edu.cn/blog/k_eckel
代码说明
Command 模式在实现的实现和思想都很简单,其关键就是将一个请求封装到一个类中
(Command),再提供处理对象(Receiver), 后 Command 命令由 Invoker 激活。另外,我
们可以将请求接收者的处理抽象出来作为参数传给 Command 对象,实际也就是回调的机制
(Callback)来实现这一点,也就是说将处理操作方法地址(在对象内部)通过参数传递给
Command 对象,Command 对象在适当的时候(Invoke 激活的时候)再调用该函数。这里就
要用到 C++中的类成员函数指针的概念,为了方便学习,这里给出一个简单的实现源代码供
参考:
代码片断 1:Reciever.h
//Reciever.h
#ifndef _RECIEVER_H_
#define _RECIEVER_H_
class Reciever
{
public:
Reciever();
~Reciever();
void Action();
protected:
private:
};
#endif //~_RECIEVER_H_
代码片断 2:Reciever.cpp
//Reciever.cpp
#include "Reciever.h"
#include <iostream>
Reciever::Reciever()
{
}
Reciever::~Reciever()
{
}
void Reciever::Action()
{
std::cout<<"Reciever
action......."<<std::endl;
}
第 85 页 共 105 页 k_eckel
设计模式精解-GoF 23 种设计模式解析附 C++实现源码 http://www.mscenter.edu.cn/blog/k_eckel
代码片断 3:Command.h
template <class Reciever>
class SimpleCommand:public Command
{
public:
typedef void (Reciever::* Action)();
SimpleCommand(Reciever* rev,Action act)
{
_rev = rev;
_act = act;
}
virtual void Excute()
{
(_rev->* _act)();
}
~SimpleCommand()
{
delete _rev;
}
protected:
private:
Reciever* _rev;
Action _act;
};
#endif //~_COMMAND_H_
代码片断 4:main.cpp
//main.cpp
#include "Command.h"
#include "Reciever.h"
#include <iostream>
using namespace std;
int main(int arc,char* argv[])
{
Reciever* rev = new Reciever();
Command* cmd = new
SimpleCommand<Reciever>(rev,&Reciever::A
ction);
cmd->Excute();
return 0;
}
注意到上面通过模板的方式来参数化请求的接收者,当然是为了简单演示。在复杂的情
况下我们会提供一个抽象 Command 对象,然后创建 Command 的子类以支持更复杂的处理。
讨论
Command 模式的思想非常简单,但是 Command 模式也十分常见,并且威力不小。实
际上,Command 模式关键就是提供一个抽象的 Command 类,并将执行操作封装到 Command
类接口中,Command 类中一般就是只是一些接口的集合,并不包含任何的数据属性(当然
在示例代码中,我们的 Command 类有一个处理操作的 Receiver 类的引用,但是其作用也仅
仅就是为了实现这个 Command 的 Excute 接口)。这种方式在是纯正的面向对象设计者 为
鄙视的设计方式,就像 OO 设计新手做系统设计的时候,仅仅将 Class 作为一个关键字,将
C 种的全局函数找一个类封装起来就以为是完成了面向对象的设计。
但是世界上的事情不是绝对的,上面提到的方式在 OO 设计种绝大部分的时候可能是一
第 86 页 共 105 页 k_eckel
设计模式精解-GoF 23 种设计模式解析附 C++实现源码 http://www.mscenter.edu.cn/blog/k_eckel
个不成熟的体现,但是在 Command 模式中却是起到了很好的效果。主要体现在:
1) Command 模式将调用操作的对象和知道如何实现该操作的对象解耦。在上面
Command 的结构图中,Invoker 对象根本就不知道具体的是那个对象在处理 Excute
操作(当然要知道是 Command 类别的对象,也仅此而已)。
2) 在 Command 要增加新的处理操作对象很容易,我们可以通过创建新的继承自
Command 的子类来实现这一点。
3) Command 模式可以和 Memento 模式结合起来,支持取消的操作。
3.8 Visitor 模式
问题
在面向对象系统的开发和设计过程,经常会遇到一种情况就是需求变更(Requirement
Changing),经常我们做好的一个设计、实现了一个系统原型,咱们的客户又会有了新的需
求。我们又因此不得不去修改已有的设计, 常见就是解决方案就是给已经设计、实现好的
类添加新的方法去实现客户新的需求,这样就陷入了设计变更的梦魇:不停地打补丁,其带
来的后果就是设计根本就不可能封闭、编译永远都是整个系统代码。
Visitor 模式则提供了一种解决方案:将更新(变更)封装到一个类中(访问操作),并
由待更改类提供一个接收接口,则可达到效果。
模式选择
我们通过 Visitor 模式解决上面的问题,其典型的结构图为:
第 87 页 共 105 页 k_eckel
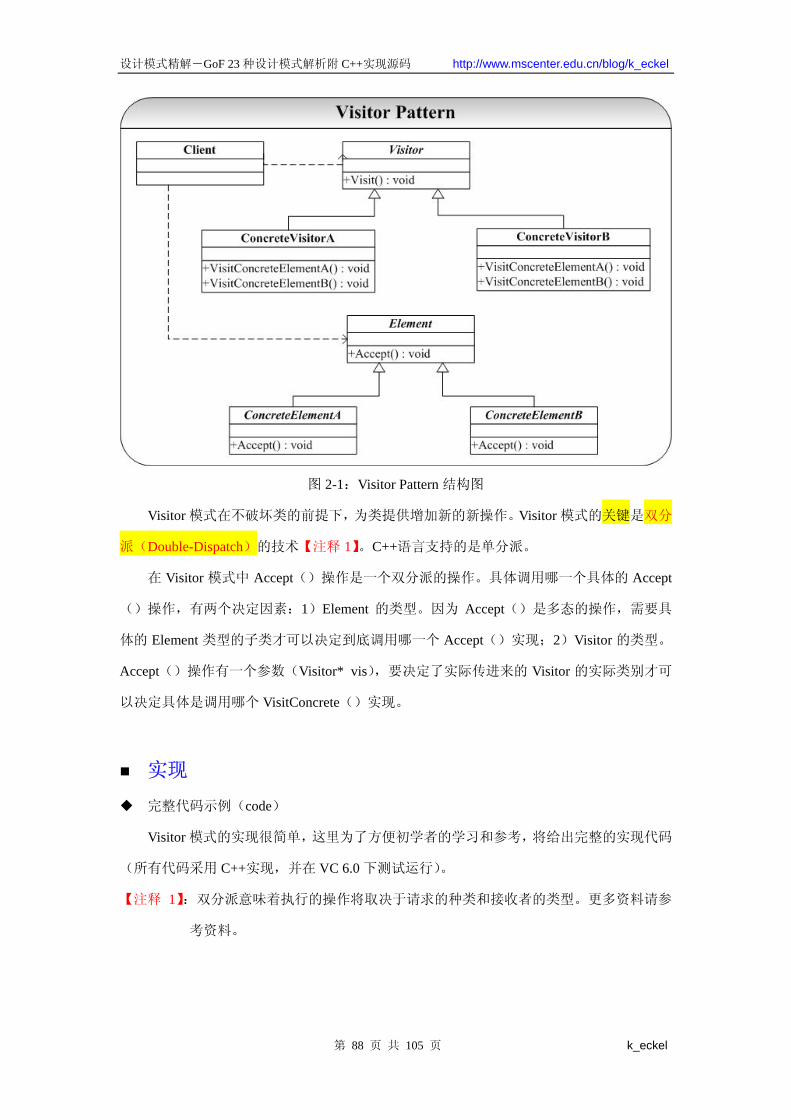
设计模式精解-GoF 23 种设计模式解析附 C++实现源码 http://www.mscenter.edu.cn/blog/k_eckel
图 2-1:Visitor Pattern 结构图
Visitor 模式在不破坏类的前提下,为类提供增加新的新操作。Visitor 模式的关键是双分
派(Double-Dispatch)的技术【注释 1】。C++语言支持的是单分派。
在 Visitor 模式中 Accept()操作是一个双分派的操作。具体调用哪一个具体的 Accept
()操作,有两个决定因素:1)Element 的类型。因为 Accept()是多态的操作,需要具
体的 Element 类型的子类才可以决定到底调用哪一个 Accept()实现;2)Visitor 的类型。
Accept()操作有一个参数(Visitor* vis),要决定了实际传进来的 Visitor 的实际类别才可
以决定具体是调用哪个 VisitConcrete()实现。
实现
完整代码示例(code)
Visitor 模式的实现很简单,这里为了方便初学者的学习和参考,将给出完整的实现代码
(所有代码采用 C++实现,并在 VC 6.0 下测试运行)。
【注释 1】:双分派意味着执行的操作将取决于请求的种类和接收者的类型。更多资料请参
考资料。
第 88 页 共 105 页 k_eckel
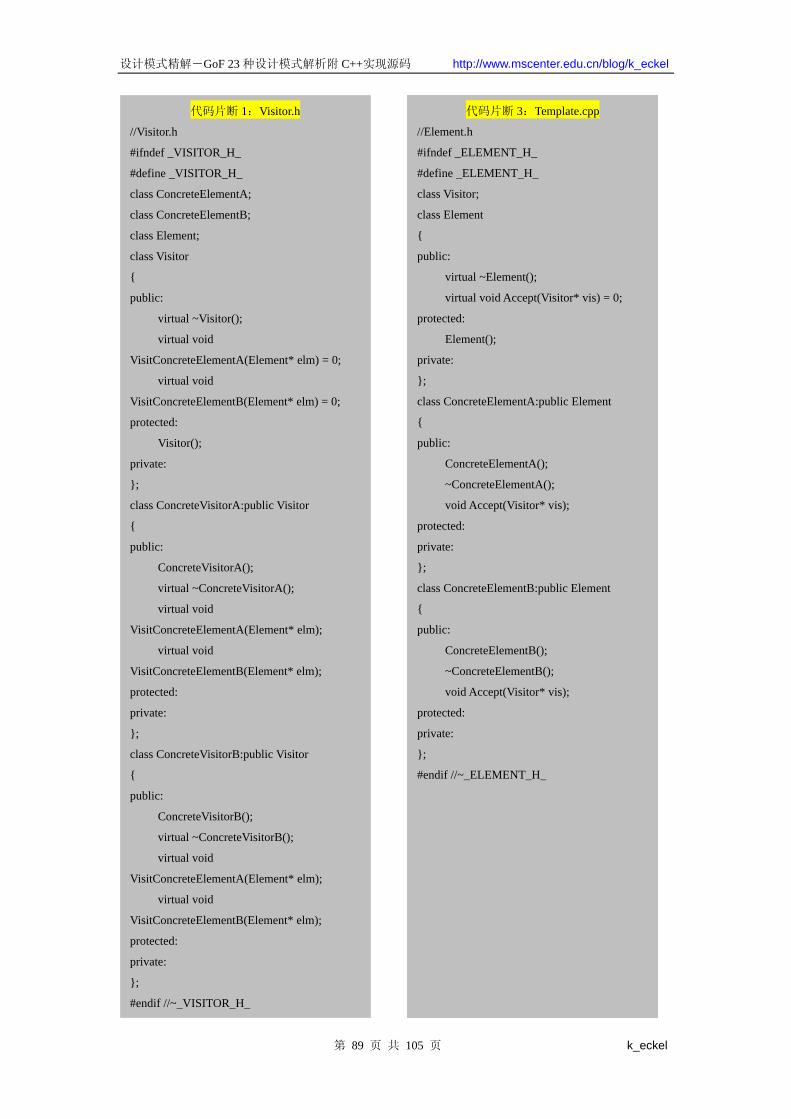
设计模式精解-GoF 23 种设计模式解析附 C++实现源码 http://www.mscenter.edu.cn/blog/k_eckel
代码片断 1:Visitor.h
//Visitor.h
#ifndef _VISITOR_H_
#define _VISITOR_H_
class ConcreteElementA;
class ConcreteElementB;
class Element;
class Visitor
{
public:
virtual ~Visitor();
virtual void
VisitConcreteElementA(Element* elm) = 0;
virtual void
VisitConcreteElementB(Element* elm) = 0;
protected:
Visitor();
private:
};
class ConcreteVisitorA:public Visitor
{
public:
ConcreteVisitorA();
virtual ~ConcreteVisitorA();
virtual void
VisitConcreteElementA(Element* elm);
virtual void
VisitConcreteElementB(Element* elm);
protected:
private:
};
class ConcreteVisitorB:public Visitor
{
public:
ConcreteVisitorB();
virtual ~ConcreteVisitorB();
virtual void
VisitConcreteElementA(Element* elm);
virtual void
VisitConcreteElementB(Element* elm);
protected:
private:
};
#endif //~_VISITOR_H_
代码片断 3:Template.cpp
//Element.h
#ifndef _ELEMENT_H_
#define _ELEMENT_H_
class Visitor;
class Element
{
public:
virtual ~Element();
virtual void Accept(Visitor* vis) = 0;
protected:
Element();
private:
};
class ConcreteElementA:public Element
{
public:
ConcreteElementA();
~ConcreteElementA();
void Accept(Visitor* vis);
protected:
private:
};
class ConcreteElementB:public Element
{
public:
ConcreteElementB();
~ConcreteElementB();
void Accept(Visitor* vis);
protected:
private:
};
#endif //~_ELEMENT_H_
第 89 页 共 105 页 k_eckel
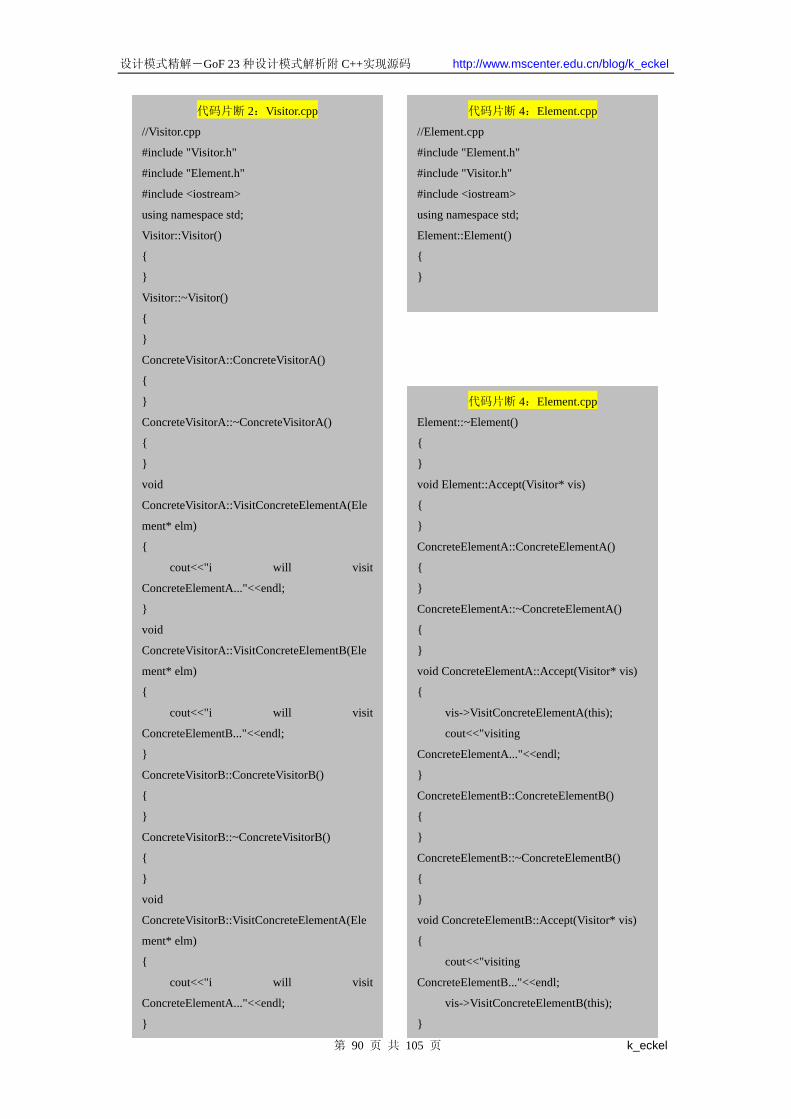
设计模式精解-GoF 23 种设计模式解析附 C++实现源码 http://www.mscenter.edu.cn/blog/k_eckel
第 90 页 共 105 页 k_eckel
代码片断 2:Visitor.cpp
//Visitor.cpp
#include "Visitor.h"
#include "Element.h"
#include <iostream>
using namespace std;
Visitor::Visitor()
{
}
Visitor::~Visitor()
{
}
ConcreteVisitorA::ConcreteVisitorA()
{
}
ConcreteVisitorA::~ConcreteVisitorA()
{
}
void
ConcreteVisitorA::VisitConcreteElementA(Ele
ment* elm)
{
cout<<"i will visit
ConcreteElementA..."<<endl;
}
void
ConcreteVisitorA::VisitConcreteElementB(Ele
ment* elm)
{
cout<<"i will visit
ConcreteElementB..."<<endl;
}
ConcreteVisitorB::ConcreteVisitorB()
{
}
ConcreteVisitorB::~ConcreteVisitorB()
{
}
void
ConcreteVisitorB::VisitConcreteElementA(Ele
ment* elm)
{
cout<<"i will visit
ConcreteElementA..."<<endl;
}
代码片断 4:Element.cpp
//Element.cpp
#include "Element.h"
#include "Visitor.h"
#include <iostream>
using namespace std;
Element::Element()
{
}
代码片断 4:Element.cpp
Element::~Element()
{
}
void Element::Accept(Visitor* vis)
{
}
ConcreteElementA::ConcreteElementA()
{
}
ConcreteElementA::~ConcreteElementA()
{
}
void ConcreteElementA::Accept(Visitor* vis)
{
vis->VisitConcreteElementA(this);
cout<<"visiting
ConcreteElementA..."<<endl;
}
ConcreteElementB::ConcreteElementB()
{
}
ConcreteElementB::~ConcreteElementB()
{
}
void ConcreteElementB::Accept(Visitor* vis)
{
cout<<"visiting
ConcreteElementB..."<<endl;
vis->VisitConcreteElementB(this);
}
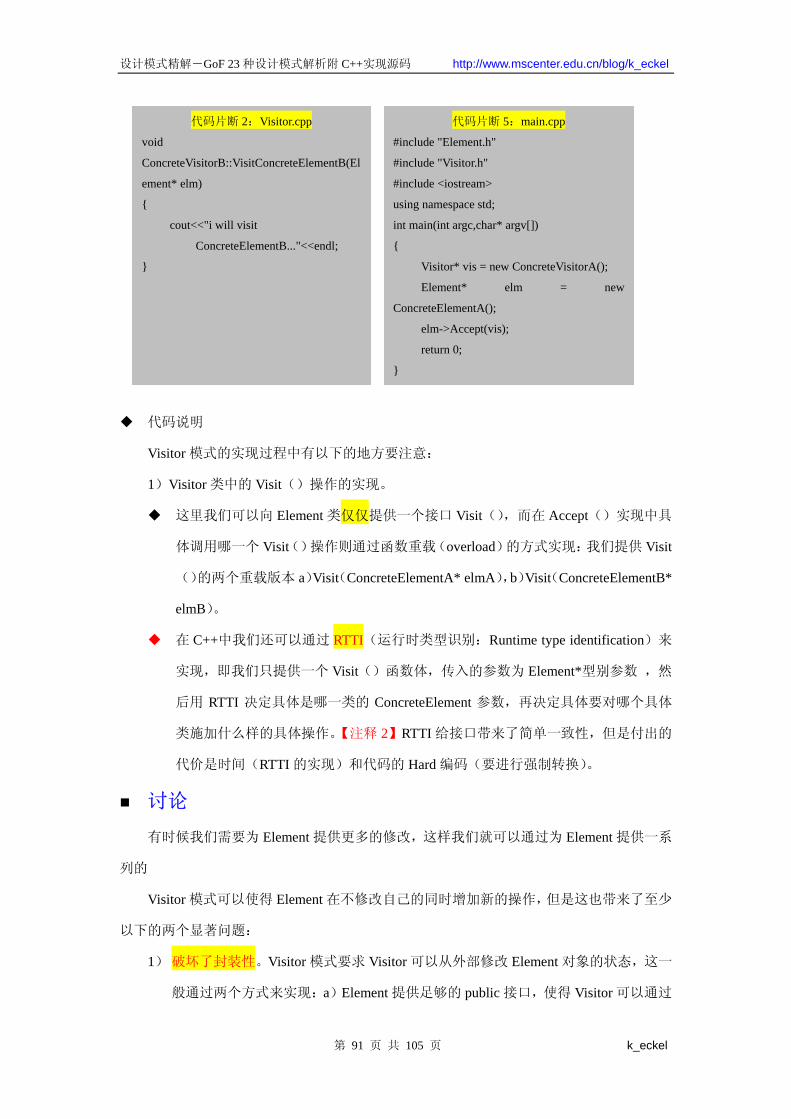
设计模式精解-GoF 23 种设计模式解析附 C++实现源码 http://www.mscenter.edu.cn/blog/k_eckel
代码片断 2:Visitor.cpp
void
ConcreteVisitorB::VisitConcreteElementB(El
ement* elm)
{
cout<<"i will visit
ConcreteElementB..."<<endl;
}
代码片断 5:main.cpp
#include "Element.h"
#include "Visitor.h"
#include <iostream>
using namespace std;
int main(int argc,char* argv[])
{
Visitor* vis = new ConcreteVisitorA();
Element* elm = new
ConcreteElementA();
elm->Accept(vis);
return 0;
}
代码说明
Visitor 模式的实现过程中有以下的地方要注意:
1)Visitor 类中的 Visit()操作的实现。
这里我们可以向 Element 类仅仅提供一个接口 Visit(),而在 Accept()实现中具
体调用哪一个 Visit()操作则通过函数重载(overload)的方式实现:我们提供 Visit
()的两个重载版本 a)Visit(ConcreteElementA* elmA),b)Visit(ConcreteElementB*
elmB)。
在 C++中我们还可以通过 RTTI(运行时类型识别:Runtime type identification)来
实现,即我们只提供一个 Visit()函数体,传入的参数为 Element*型别参数 ,然
后用 RTTI 决定具体是哪一类的 ConcreteElement 参数,再决定具体要对哪个具体
类施加什么样的具体操作。【注释 2】RTTI 给接口带来了简单一致性,但是付出的
代价是时间(RTTI 的实现)和代码的 Hard 编码(要进行强制转换)。
讨论
有时候我们需要为 Element 提供更多的修改,这样我们就可以通过为 Element 提供一系
列的
Visitor 模式可以使得 Element 在不修改自己的同时增加新的操作,但是这也带来了至少
以下的两个显著问题:
1) 破坏了封装性。Visitor 模式要求 Visitor 可以从外部修改 Element 对象的状态,这一
般通过两个方式来实现:a)Element 提供足够的 public 接口,使得 Visitor 可以通过
第 91 页 共 105 页 k_eckel
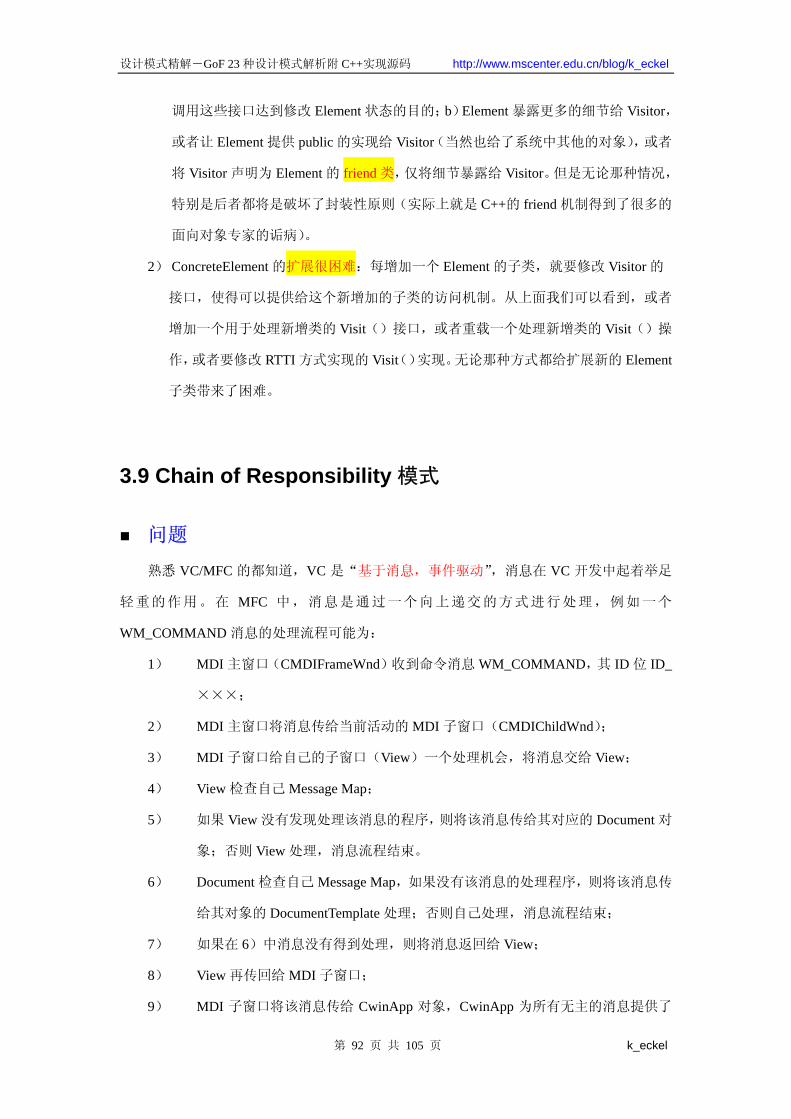
设计模式精解-GoF 23 种设计模式解析附 C++实现源码 http://www.mscenter.edu.cn/blog/k_eckel
调用这些接口达到修改 Element 状态的目的;b)Element 暴露更多的细节给 Visitor,
或者让 Element 提供 public 的实现给 Visitor(当然也给了系统中其他的对象),或者
将 Visitor 声明为 Element 的 friend 类,仅将细节暴露给 Visitor。但是无论那种情况,
特别是后者都将是破坏了封装性原则(实际上就是 C++的 friend 机制得到了很多的
面向对象专家的诟病)。
2) ConcreteElement 的扩展很困难:每增加一个 Element 的子类,就要修改 Visitor 的
接口,使得可以提供给这个新增加的子类的访问机制。从上面我们可以看到,或者
增加一个用于处理新增类的 Visit()接口,或者重载一个处理新增类的 Visit()操
作,或者要修改 RTTI 方式实现的 Visit()实现。无论那种方式都给扩展新的 Element
子类带来了困难。
3.9 Chain of Responsibility 模式
问题
熟悉 VC/MFC 的都知道,VC 是“基于消息,事件驱动”,消息在 VC 开发中起着举足
轻重的作用。在 MFC 中,消息是通过一个向上递交的方式进行处理,例如一个
WM_COMMAND 消息的处理流程可能为:
1) MDI 主窗口(CMDIFrameWnd)收到命令消息 WM_COMMAND,其 ID 位 ID_
×××;
2) MDI 主窗口将消息传给当前活动的 MDI 子窗口(CMDIChildWnd);
3) MDI 子窗口给自己的子窗口(View)一个处理机会,将消息交给 View;
4) View 检查自己 Message Map;
5) 如果 View 没有发现处理该消息的程序,则将该消息传给其对应的 Document 对
象;否则 View 处理,消息流程结束。
6) Document 检查自己 Message Map,如果没有该消息的处理程序,则将该消息传
给其对象的 DocumentTemplate 处理;否则自己处理,消息流程结束;
7) 如果在 6)中消息没有得到处理,则将消息返回给 View;
8) View 再传回给 MDI 子窗口;
9) MDI 子窗口将该消息传给 CwinApp 对象,CwinApp 为所有无主的消息提供了
第 92 页 共 105 页 k_eckel
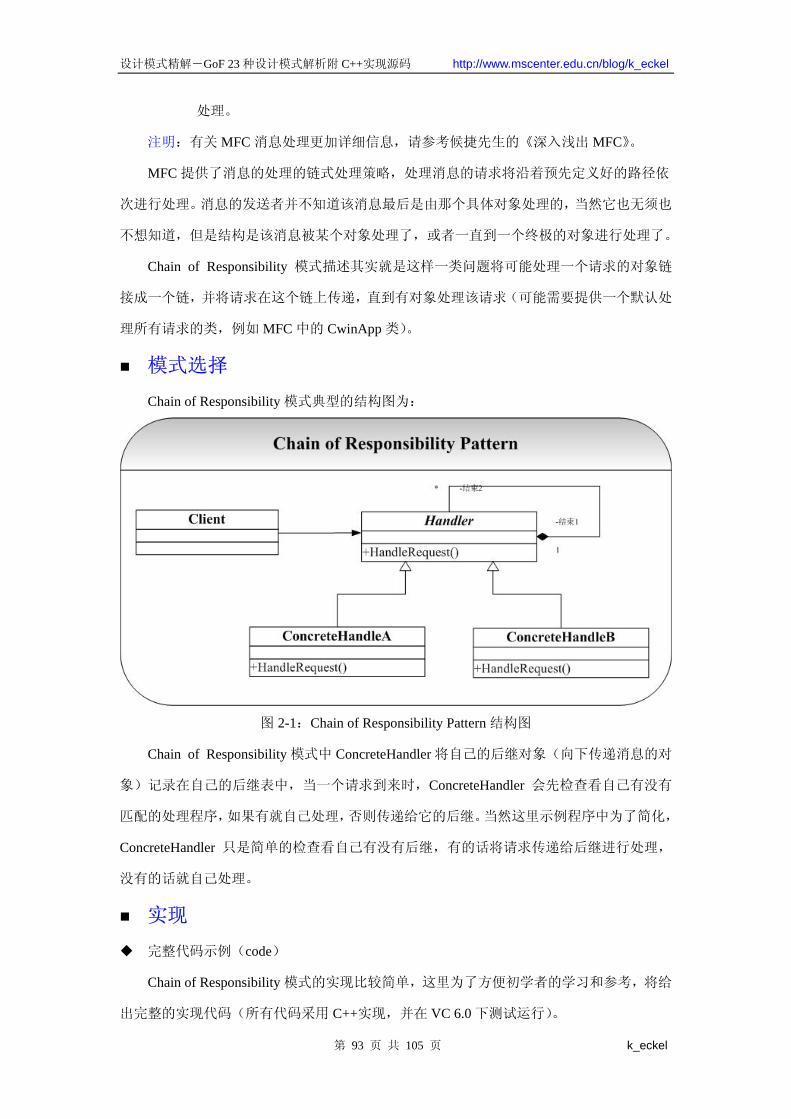
设计模式精解-GoF 23 种设计模式解析附 C++实现源码 http://www.mscenter.edu.cn/blog/k_eckel
处理。
注明:有关 MFC 消息处理更加详细信息,请参考候捷先生的《深入浅出 MFC》。
MFC 提供了消息的处理的链式处理策略,处理消息的请求将沿着预先定义好的路径依
次进行处理。消息的发送者并不知道该消息 后是由那个具体对象处理的,当然它也无须也
不想知道,但是结构是该消息被某个对象处理了,或者一直到一个终极的对象进行处理了。
Chain of Responsibility 模式描述其实就是这样一类问题将可能处理一个请求的对象链
接成一个链,并将请求在这个链上传递,直到有对象处理该请求(可能需要提供一个默认处
理所有请求的类,例如 MFC 中的 CwinApp 类)。
模式选择
Chain of Responsibility 模式典型的结构图为:
图 2-1:Chain of Responsibility Pattern 结构图
Chain of Responsibility 模式中 ConcreteHandler 将自己的后继对象(向下传递消息的对
象)记录在自己的后继表中,当一个请求到来时,ConcreteHandler 会先检查看自己有没有
匹配的处理程序,如果有就自己处理,否则传递给它的后继。当然这里示例程序中为了简化,
ConcreteHandler 只是简单的检查看自己有没有后继,有的话将请求传递给后继进行处理,
没有的话就自己处理。
实现
完整代码示例(code)
Chain of Responsibility 模式的实现比较简单,这里为了方便初学者的学习和参考,将给
出完整的实现代码(所有代码采用 C++实现,并在 VC 6.0 下测试运行)。
第 93 页 共 105 页 k_eckel
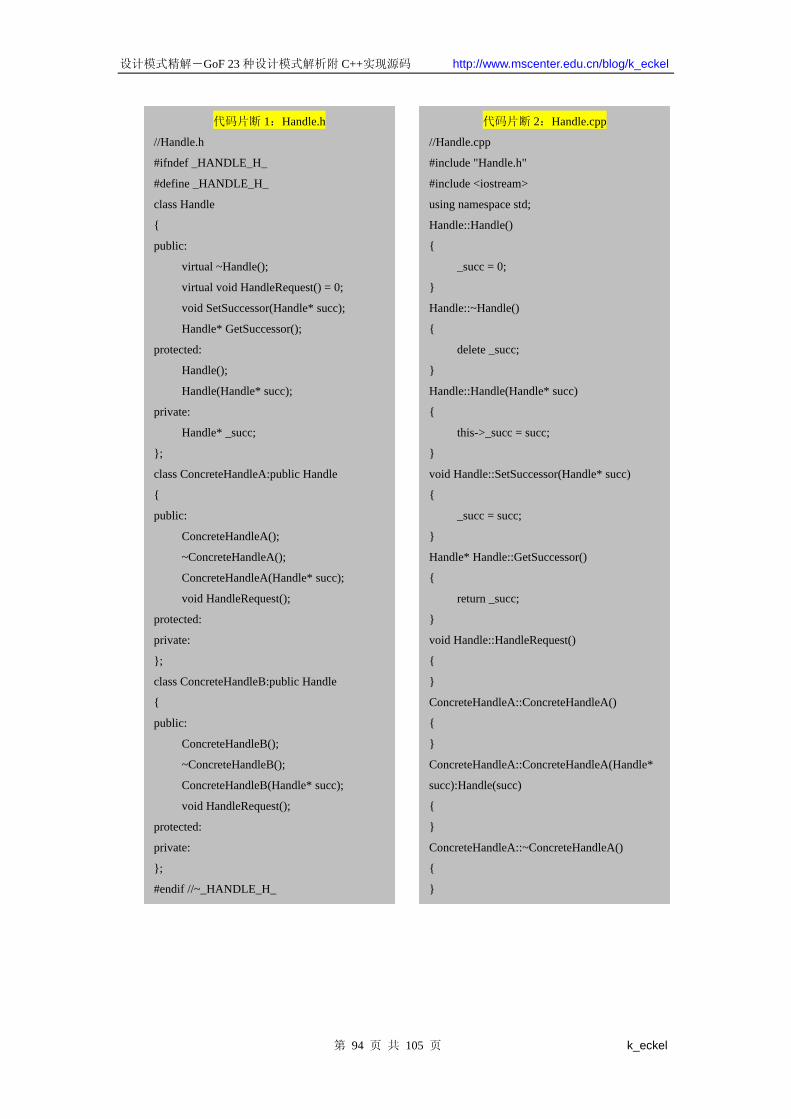
设计模式精解-GoF 23 种设计模式解析附 C++实现源码 http://www.mscenter.edu.cn/blog/k_eckel
代码片断 1:Handle.h
//Handle.h
#ifndef _HANDLE_H_
#define _HANDLE_H_
class Handle
{
public:
virtual ~Handle();
virtual void HandleRequest() = 0;
void SetSuccessor(Handle* succ);
Handle* GetSuccessor();
protected:
Handle();
Handle(Handle* succ);
private:
Handle* _succ;
};
class ConcreteHandleA:public Handle
{
public:
ConcreteHandleA();
~ConcreteHandleA();
ConcreteHandleA(Handle* succ);
void HandleRequest();
protected:
private:
};
class ConcreteHandleB:public Handle
{
public:
ConcreteHandleB();
~ConcreteHandleB();
ConcreteHandleB(Handle* succ);
void HandleRequest();
protected:
private:
};
#endif //~_HANDLE_H_
代码片断 2:Handle.cpp
//Handle.cpp
#include "Handle.h"
#include <iostream>
using namespace std;
Handle::Handle()
{
_succ = 0;
}
Handle::~Handle()
{
delete _succ;
}
Handle::Handle(Handle* succ)
{
this->_succ = succ;
}
void Handle::SetSuccessor(Handle* succ)
{
_succ = succ;
}
Handle* Handle::GetSuccessor()
{
return _succ;
}
void Handle::HandleRequest()
{
}
ConcreteHandleA::ConcreteHandleA()
{
}
ConcreteHandleA::ConcreteHandleA(Handle*
succ):Handle(succ)
{
}
ConcreteHandleA::~ConcreteHandleA()
{
}
第 94 页 共 105 页 k_eckel

设计模式精解-GoF 23 种设计模式解析附 C++实现源码 http://www.mscenter.edu.cn/blog/k_eckel
代码片断 3:main.cpp
//main.cpp
#include "Handle.h"
#include <iostream>
using namespace std;
int main(int argc,char* argv[])
{
Handle* h1 = new ConcreteHandleA();
Handle* h2 = new ConcreteHandleB();
h1->SetSuccessor(h2);
h1->HandleRequest();
return 0;
}
代码片断 2:Handle.cpp
void ConcreteHandleA::HandleRequest()
{
if (this->GetSuccessor() != 0)
{
cout<<"ConcreteHandleA 我把处
理权给后继节点....."<<endl;
this->GetSuccessor()->HandleRequest();
}
else
{
cout<<"ConcreteHandleA 没有后
继了,我必须自己处理...."<<endl;
}
}
ConcreteHandleB::ConcreteHandleB()
{
}
ConcreteHandleB::ConcreteHandleB(Handle*
succ):Handle(succ)
{
}
ConcreteHandleB::~ConcreteHandleB()
{
}
void ConcreteHandleB::HandleRequest()
{
if (this->GetSuccessor() != 0)
{
cout<<"ConcreteHandleB 我把处
理权给后继节点....."<<endl;
this->GetSuccessor()->HandleRequest();
}
else
{
cout<<"ConcreteHandleB 没有后
继了,我必须自己处理...."<<endl;
}
}
第 95 页 共 105 页 k_eckel
设计模式精解-GoF 23 种设计模式解析附 C++实现源码 http://www.mscenter.edu.cn/blog/k_eckel
代码说明
Chain of Responsibility 模式的示例代码实现很简单,这里就其测试结果给出说明:
ConcreteHandleA 的对象和 h1 拥有一个后继 ConcreteHandleB 的对象 h2,当一个请求到来时
候,h1 检查看自己有后继,于是 h1 直接将请求传递给其后继 h2 进行处理,h2 因为没有后
继,当请求到来时候,就只有自己提供响应了。于是程序的输出为:
1) ConcreteHandleA 我把处理权给后继节点.....;
2) ConcreteHandleB 没有后继了,我必须自己处理....。
讨论
Chain of Responsibility 模式的 大的一个有点就是给系统降低了耦合性,请求的发送者
完全不必知道该请求会被哪个应答对象处理,极大地降低了系统的耦合性。
3.10 Iterator 模式
问题
Iterator 模式应该是 为熟悉的模式了, 简单的证明就是我在实现 Composite 模式、
Flyweight 模式、Observer 模式中就直接用到了 STL 提供的 Iterator 来遍历 Vector 或者 List
数据结构。
Iterator 模式也正是用来解决对一个聚合对象的遍历问题,将对聚合的遍历封装到一个
类中进行,这样就避免了暴露这个聚合对象的内部表示的可能。
模式选择
Iterator 模式典型的结构图为:
第 96 页 共 105 页 k_eckel
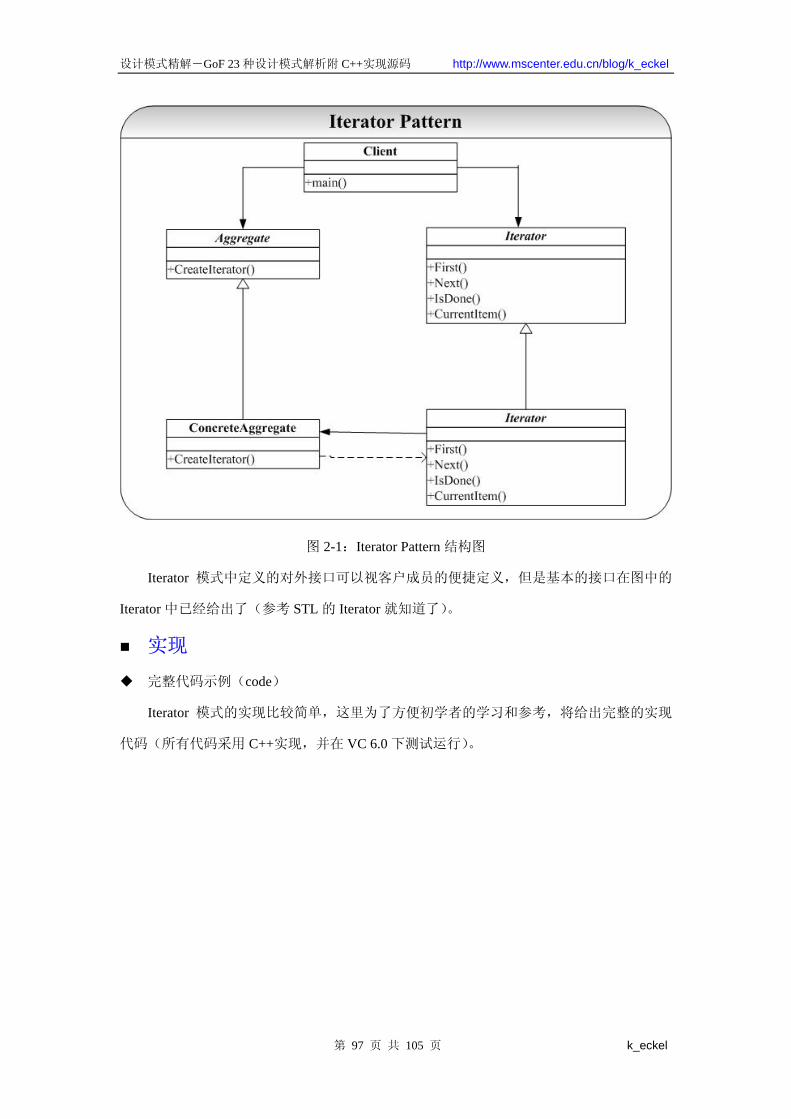
设计模式精解-GoF 23 种设计模式解析附 C++实现源码 http://www.mscenter.edu.cn/blog/k_eckel
图 2-1:Iterator Pattern 结构图
Iterator 模式中定义的对外接口可以视客户成员的便捷定义,但是基本的接口在图中的
Iterator 中已经给出了(参考 STL 的 Iterator 就知道了)。
实现
完整代码示例(code)
Iterator 模式的实现比较简单,这里为了方便初学者的学习和参考,将给出完整的实现
代码(所有代码采用 C++实现,并在 VC 6.0 下测试运行)。
第 97 页 共 105 页 k_eckel
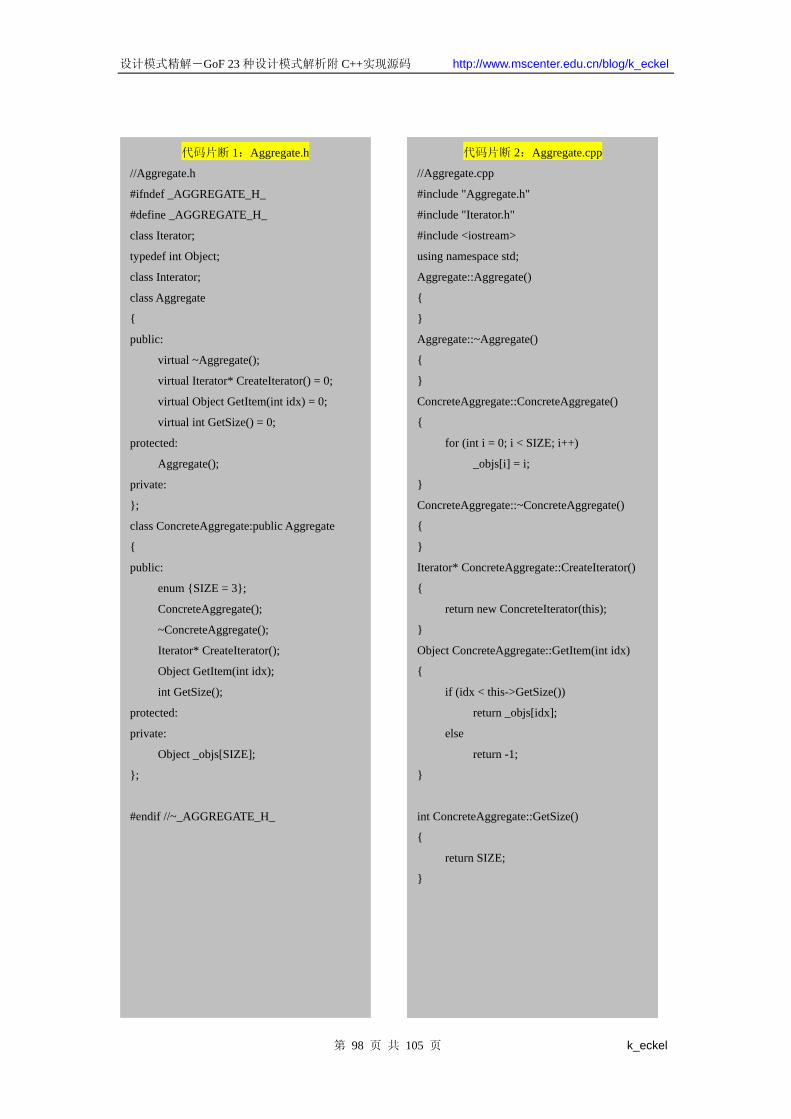
设计模式精解-GoF 23 种设计模式解析附 C++实现源码 http://www.mscenter.edu.cn/blog/k_eckel
代码片断 1:Aggregate.h
//Aggregate.h
#ifndef _AGGREGATE_H_
#define _AGGREGATE_H_
class Iterator;
typedef int Object;
class Interator;
class Aggregate
{
public:
virtual ~Aggregate();
virtual Iterator* CreateIterator() = 0;
virtual Object GetItem(int idx) = 0;
virtual int GetSize() = 0;
protected:
Aggregate();
private:
};
class ConcreteAggregate:public Aggregate
{
public:
enum {SIZE = 3};
ConcreteAggregate();
~ConcreteAggregate();
Iterator* CreateIterator();
Object GetItem(int idx);
int GetSize();
protected:
private:
Object _objs[SIZE];
};
#endif //~_AGGREGATE_H_
代码片断 2:Aggregate.cpp
//Aggregate.cpp
#include "Aggregate.h"
#include "Iterator.h"
#include <iostream>
using namespace std;
Aggregate::Aggregate()
{
}
Aggregate::~Aggregate()
{
}
ConcreteAggregate::ConcreteAggregate()
{
for (int i = 0; i < SIZE; i++)
_objs[i] = i;
}
ConcreteAggregate::~ConcreteAggregate()
{
}
Iterator* ConcreteAggregate::CreateIterator()
{
return new ConcreteIterator(this);
}
Object ConcreteAggregate::GetItem(int idx)
{
if (idx < this->GetSize())
return _objs[idx];
else
return -1;
}
int ConcreteAggregate::GetSize()
{
return SIZE;
}
第 98 页 共 105 页 k_eckel
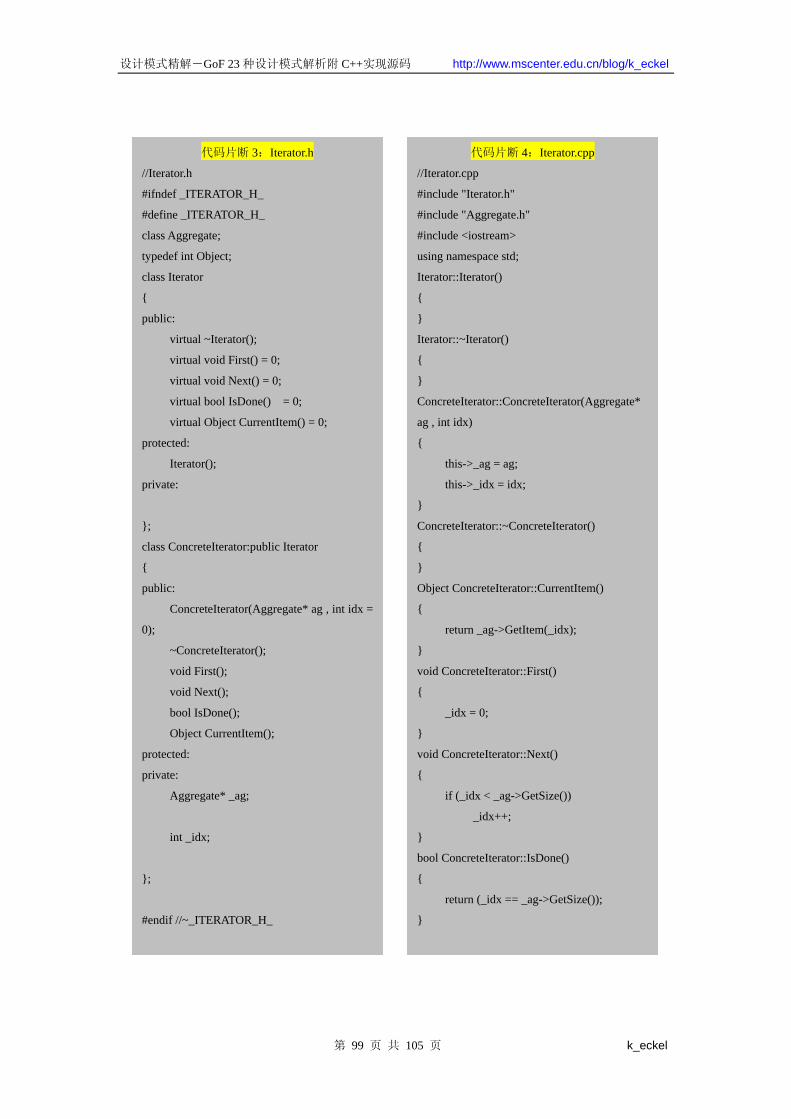
设计模式精解-GoF 23 种设计模式解析附 C++实现源码 http://www.mscenter.edu.cn/blog/k_eckel
代码片断 3:Iterator.h
//Iterator.h
#ifndef _ITERATOR_H_
#define _ITERATOR_H_
class Aggregate;
typedef int Object;
class Iterator
{
public:
virtual ~Iterator();
virtual void First() = 0;
virtual void Next() = 0;
virtual bool IsDone() = 0;
virtual Object CurrentItem() = 0;
protected:
Iterator();
private:
};
class ConcreteIterator:public Iterator
{
public:
ConcreteIterator(Aggregate* ag , int idx =
0);
~ConcreteIterator();
void First();
void Next();
bool IsDone();
Object CurrentItem();
protected:
private:
Aggregate* _ag;
int _idx;
};
#endif //~_ITERATOR_H_
代码片断 4:Iterator.cpp
//Iterator.cpp
#include "Iterator.h"
#include "Aggregate.h"
#include <iostream>
using namespace std;
Iterator::Iterator()
{
}
Iterator::~Iterator()
{
}
ConcreteIterator::ConcreteIterator(Aggregate*
ag , int idx)
{
this->_ag = ag;
this->_idx = idx;
}
ConcreteIterator::~ConcreteIterator()
{
}
Object ConcreteIterator::CurrentItem()
{
return _ag->GetItem(_idx);
}
void ConcreteIterator::First()
{
_idx = 0;
}
void ConcreteIterator::Next()
{
if (_idx < _ag->GetSize())
_idx++;
}
bool ConcreteIterator::IsDone()
{
return (_idx == _ag->GetSize());
}
第 99 页 共 105 页 k_eckel
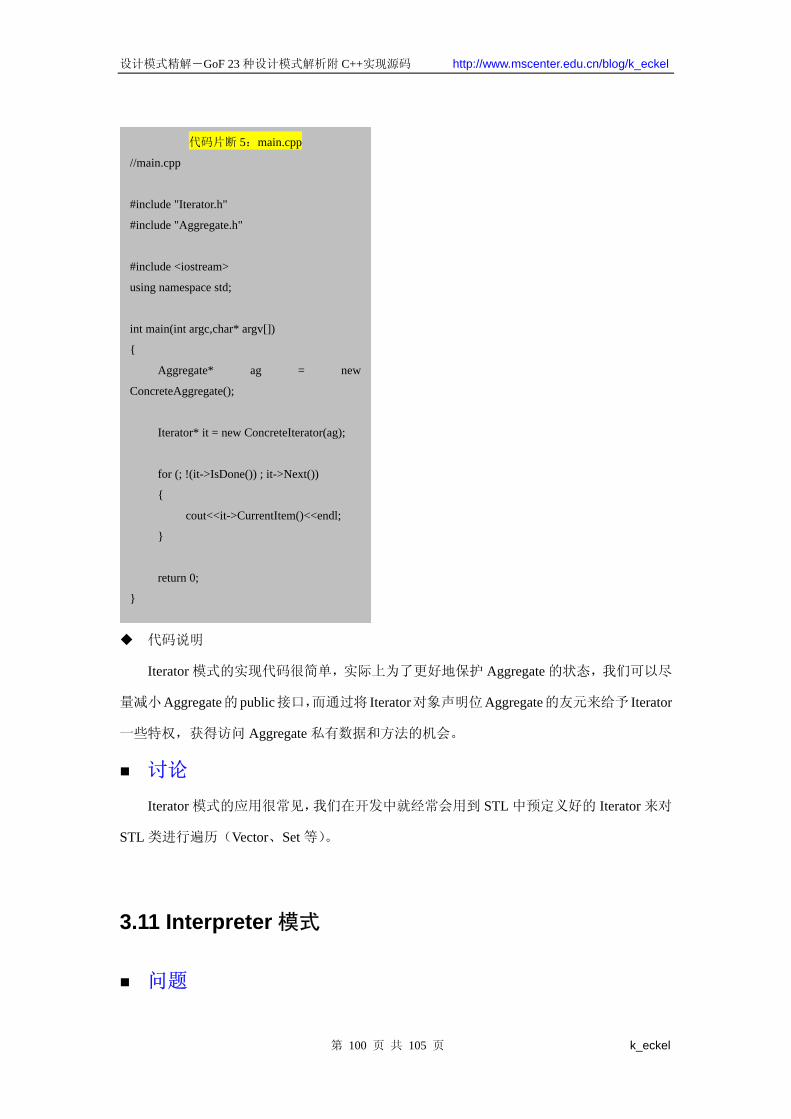
设计模式精解-GoF 23 种设计模式解析附 C++实现源码 http://www.mscenter.edu.cn/blog/k_eckel
代码片断 5:main.cpp
//main.cpp
#include "Iterator.h"
#include "Aggregate.h"
#include <iostream>
using namespace std;
int main(int argc,char* argv[])
{
Aggregate* ag = new
ConcreteAggregate();
Iterator* it = new ConcreteIterator(ag);
for (; !(it->IsDone()) ; it->Next())
{
cout<<it->CurrentItem()<<endl;
}
return 0;
}
代码说明
Iterator 模式的实现代码很简单,实际上为了更好地保护 Aggregate 的状态,我们可以尽
量减小Aggregate的public接口,而通过将 Iterator对象声明位Aggregate的友元来给予 Iterator
一些特权,获得访问 Aggregate 私有数据和方法的机会。
讨论
Iterator 模式的应用很常见,我们在开发中就经常会用到 STL 中预定义好的 Iterator 来对
STL 类进行遍历(Vector、Set 等)。
3.11 Interpreter 模式
问题
第 100 页 共 105 页 k_eckel
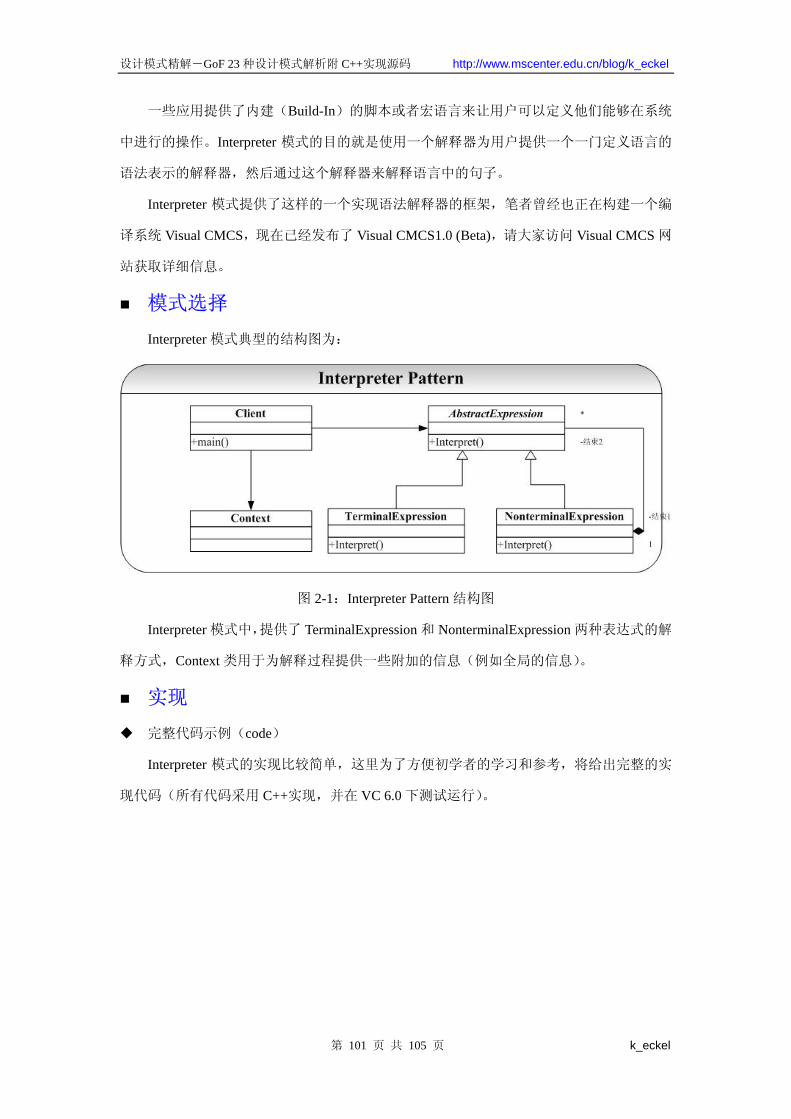
设计模式精解-GoF 23 种设计模式解析附 C++实现源码 http://www.mscenter.edu.cn/blog/k_eckel
一些应用提供了内建(Build-In)的脚本或者宏语言来让用户可以定义他们能够在系统
中进行的操作。Interpreter 模式的目的就是使用一个解释器为用户提供一个一门定义语言的
语法表示的解释器,然后通过这个解释器来解释语言中的句子。
Interpreter 模式提供了这样的一个实现语法解释器的框架,笔者曾经也正在构建一个编
译系统 Visual CMCS,现在已经发布了 Visual CMCS1.0 (Beta),请大家访问 Visual CMCS 网
站获取详细信息。
模式选择
Interpreter 模式典型的结构图为:
图 2-1:Interpreter Pattern 结构图
Interpreter 模式中,提供了 TerminalExpression 和 NonterminalExpression 两种表达式的解
释方式,Context 类用于为解释过程提供一些附加的信息(例如全局的信息)。
实现
完整代码示例(code)
Interpreter 模式的实现比较简单,这里为了方便初学者的学习和参考,将给出完整的实
现代码(所有代码采用 C++实现,并在 VC 6.0 下测试运行)。
第 101 页 共 105 页 k_eckel
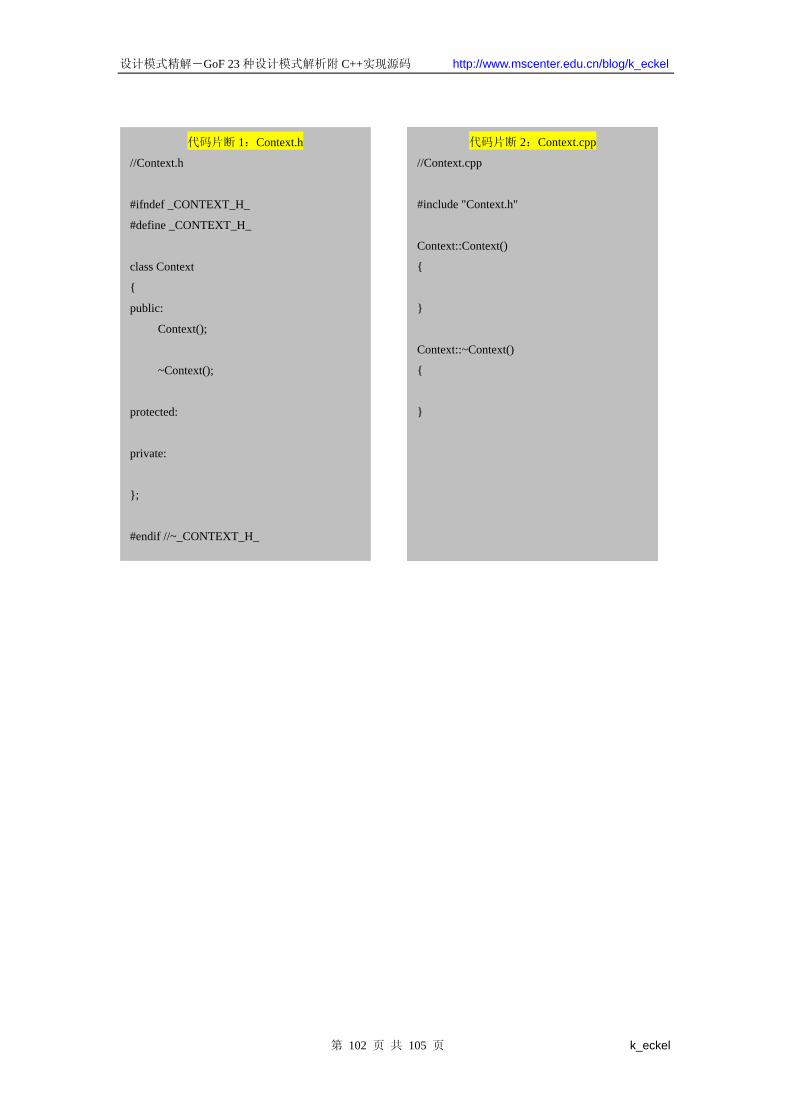
设计模式精解-GoF 23 种设计模式解析附 C++实现源码 http://www.mscenter.edu.cn/blog/k_eckel
代码片断 1:Context.h
//Context.h
#ifndef _CONTEXT_H_
#define _CONTEXT_H_
class Context
{
public:
Context();
~Context();
protected:
private:
};
#endif //~_CONTEXT_H_
代码片断 2:Context.cpp
//Context.cpp
#include "Context.h"
Context::Context()
{
}
Context::~Context()
{
}
第 102 页 共 105 页 k_eckel
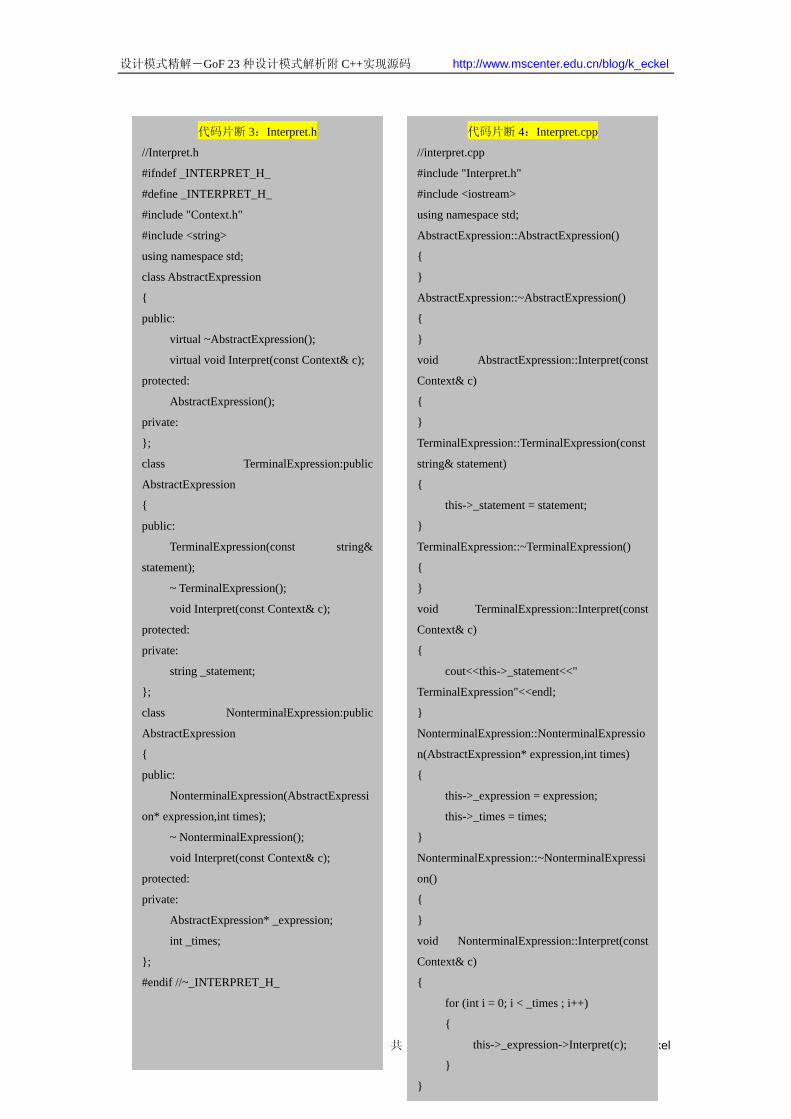
设计模式精解-GoF 23 种设计模式解析附 C++实现源码 http://www.mscenter.edu.cn/blog/k_eckel
第 103 页 共 105 页 k_eckel
代码片断 3:Interpret.h
//Interpret.h
#ifndef _INTERPRET_H_
#define _INTERPRET_H_
#include "Context.h"
#include <string>
using namespace std;
class AbstractExpression
{
public:
virtual ~AbstractExpression();
virtual void Interpret(const Context& c);
protected:
AbstractExpression();
private:
};
class TerminalExpression:public
AbstractExpression
{
public:
TerminalExpression(const string&
statement);
~ TerminalExpression();
void Interpret(const Context& c);
protected:
private:
string _statement;
};
class NonterminalExpression:public
AbstractExpression
{
public:
NonterminalExpression(AbstractExpressi
on* expression,int times);
~ NonterminalExpression();
void Interpret(const Context& c);
protected:
private:
AbstractExpression* _expression;
int _times;
};
#endif //~_INTERPRET_H_
代码片断 4:Interpret.cpp
//interpret.cpp
#include "Interpret.h"
#include <iostream>
using namespace std;
AbstractExpression::AbstractExpression()
{
}
AbstractExpression::~AbstractExpression()
{
}
void AbstractExpression::Interpret(const
Context& c)
{
}
TerminalExpression::TerminalExpression(const
string& statement)
{
this->_statement = statement;
}
TerminalExpression::~TerminalExpression()
{
}
void TerminalExpression::Interpret(const
Context& c)
{
cout<<this->_statement<<"
TerminalExpression"<<endl;
}
NonterminalExpression::NonterminalExpressio
n(AbstractExpression* expression,int times)
{
this->_expression = expression;
this->_times = times;
}
NonterminalExpression::~NonterminalExpressi
on()
{
}
void NonterminalExpression::Interpret(const
Context& c)
{
for (int i = 0; i < _times ; i++)
{
this->_expression->Interpret(c);
}
}
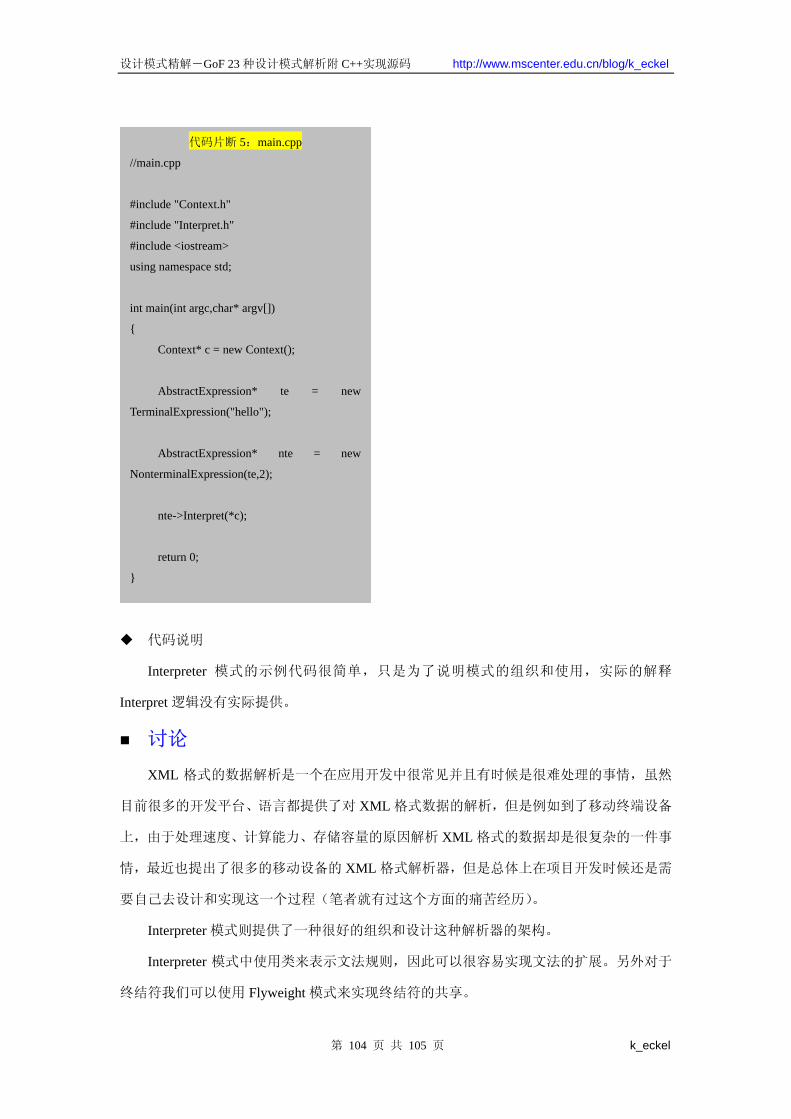
设计模式精解-GoF 23 种设计模式解析附 C++实现源码 http://www.mscenter.edu.cn/blog/k_eckel
代码片断 5:main.cpp
//main.cpp
#include "Context.h"
#include "Interpret.h"
#include <iostream>
using namespace std;
int main(int argc,char* argv[])
{
Context* c = new Context();
AbstractExpression* te = new
TerminalExpression("hello");
AbstractExpression* nte = new
NonterminalExpression(te,2);
nte->Interpret(*c);
return 0;
}
代码说明
Interpreter 模式的示例代码很简单,只是为了说明模式的组织和使用,实际的解释
Interpret 逻辑没有实际提供。
讨论
XML 格式的数据解析是一个在应用开发中很常见并且有时候是很难处理的事情,虽然
目前很多的开发平台、语言都提供了对 XML 格式数据的解析,但是例如到了移动终端设备
上,由于处理速度、计算能力、存储容量的原因解析 XML 格式的数据却是很复杂的一件事
情, 近也提出了很多的移动设备的 XML 格式解析器,但是总体上在项目开发时候还是需
要自己去设计和实现这一个过程(笔者就有过这个方面的痛苦经历)。
Interpreter 模式则提供了一种很好的组织和设计这种解析器的架构。
Interpreter 模式中使用类来表示文法规则,因此可以很容易实现文法的扩展。另外对于
终结符我们可以使用 Flyweight 模式来实现终结符的共享。
第 104 页 共 105 页 k_eckel

设计模式精解-GoF 23 种设计模式解析附 C++实现源码 http://www.mscenter.edu.cn/blog/k_eckel
4 说明
Project Design Pattern Explanation with C++ Implementation(By K_Eckel) Authorization Free Distributed but Ownership Reserved
Date 2005-04-05(Cherry blossom is Beautiful)——2005-05-04 Test Bed MS Visual C++ 6.0
第 105 页 共 105 页 k_eckel