Embed Size (px)
Citation preview
Electrical safety
liability or responsibility for any fires or electrical shock caused by improper handling or installation.
Transportation security eavy stress, violent vibration or water splash should be avoided during transportation, storage and
installation.
Installation
top of the NVR
Qualified engineers needed
Environment
The NVR should be installed in a cool, dry place away from direct sunlight and inflammable or explosive
substances, etc.
Accessories
he package.
Lithium battery
or personal injury.
1 Declaration Please prevail in kind. The manual is for reference only.
This manual may contain inaccurate data or printing error.
The products described in this manual may be updated at any time.
Screenshots of the manual is not in a machine and only for display.
If in doubt, obtaining a copy of the latest procedure or the additional document, please contact with the
company's after-sales department.
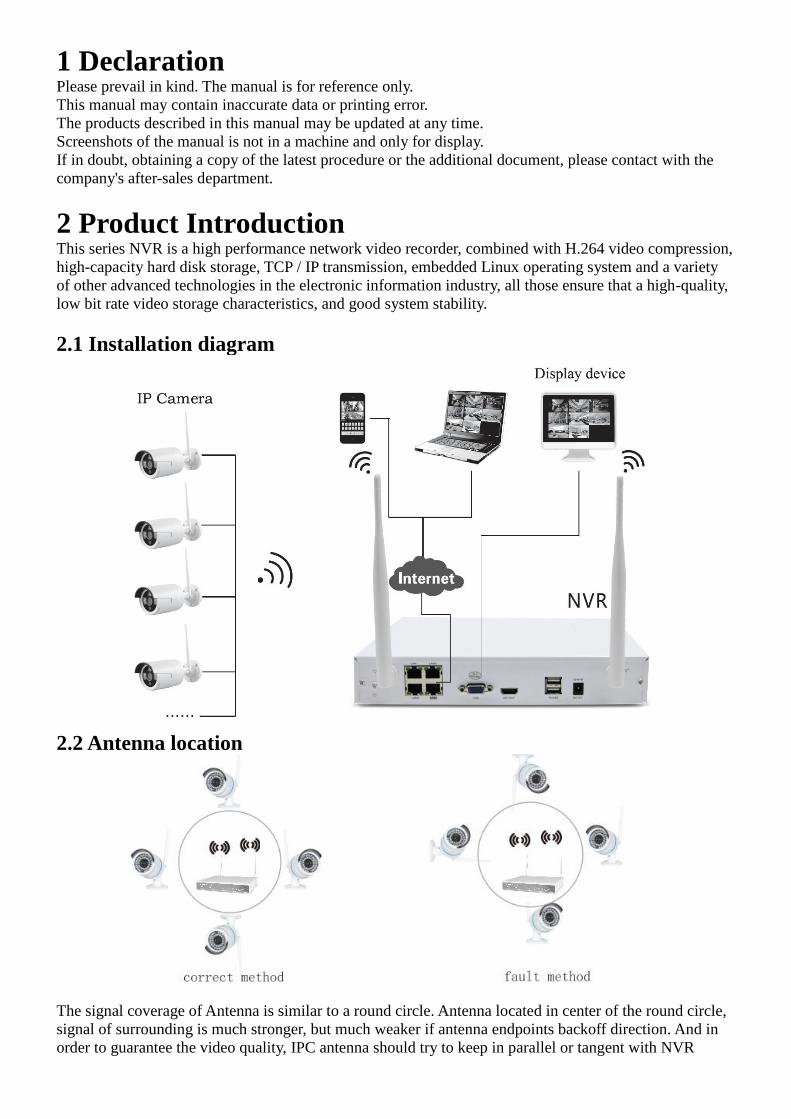
2 Product Introduction This series NVR is a high performance network video recorder, combined with H.264 video compression,
high-capacity hard disk storage, TCP / IP transmission, embedded Linux operating system and a variety
of other advanced technologies in the electronic information industry, all those ensure that a high-quality,
low bit rate video storage characteristics, and good system stability.
2.1 Installation diagram
2.2 Antenna location
The signal coverage of Antenna is similar to a round circle. Antenna located in center of the round circle,
signal of surrounding is much stronger, but much weaker if antenna endpoints backoff direction. And in
order to guarantee the video quality, IPC antenna should try to keep in parallel or tangent with NVR
antenna.
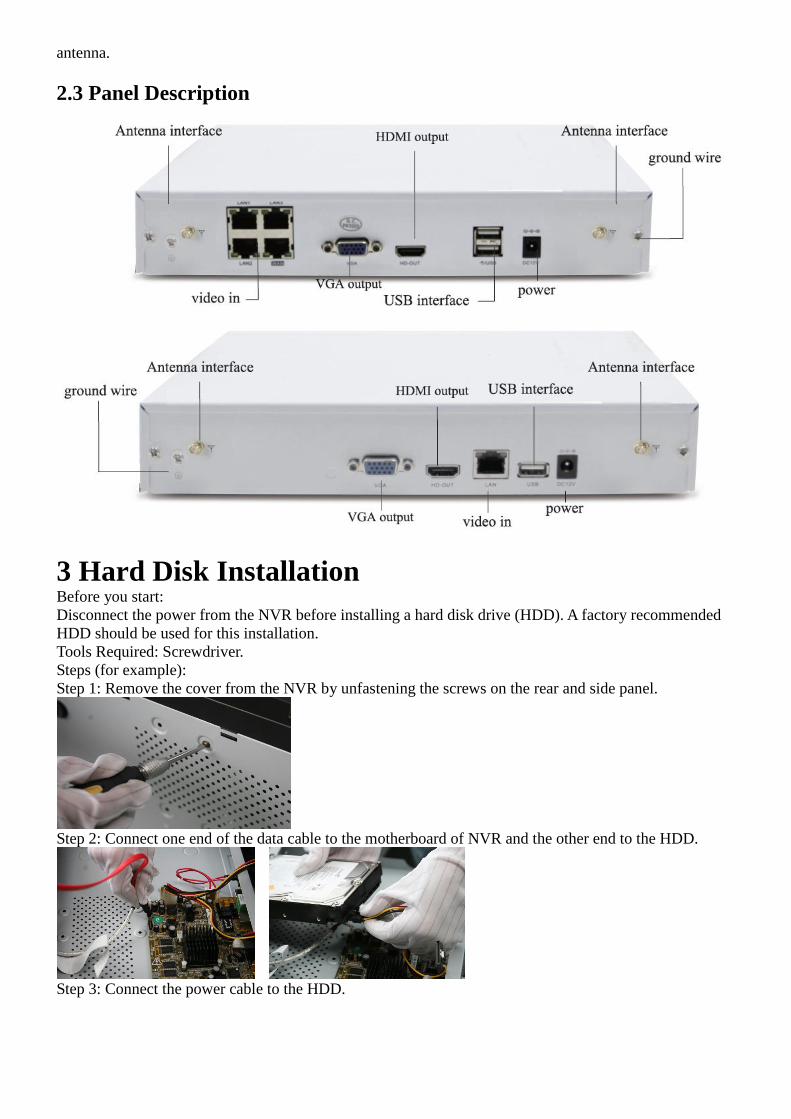
2.3 Panel Description
3 Hard Disk Installation Before you start:
Disconnect the power from the NVR before installing a hard disk drive (HDD). A factory recommended
HDD should be used for this installation.
Tools Required: Screwdriver.
Steps (for example):
Step 1: Remove the cover from the NVR by unfastening the screws on the rear and side panel.
Step 2: Connect one end of the data cable to the motherboard of NVR and the other end to the HDD.
Step 3: Connect the power cable to the HDD.
Step 4: Place the HDD on the bottom of the device and then fasten the screws on the bottom to fix the
HDD.
The form is for reference. Available time of HDD is based on access channels and actual streams.
Test passed the full range of Western Digital, Seagate Sata HDD, recommend the use of AV-GP series
Sata HDD.
Note: Please use the recommended HDD that is compatible with the NVR.
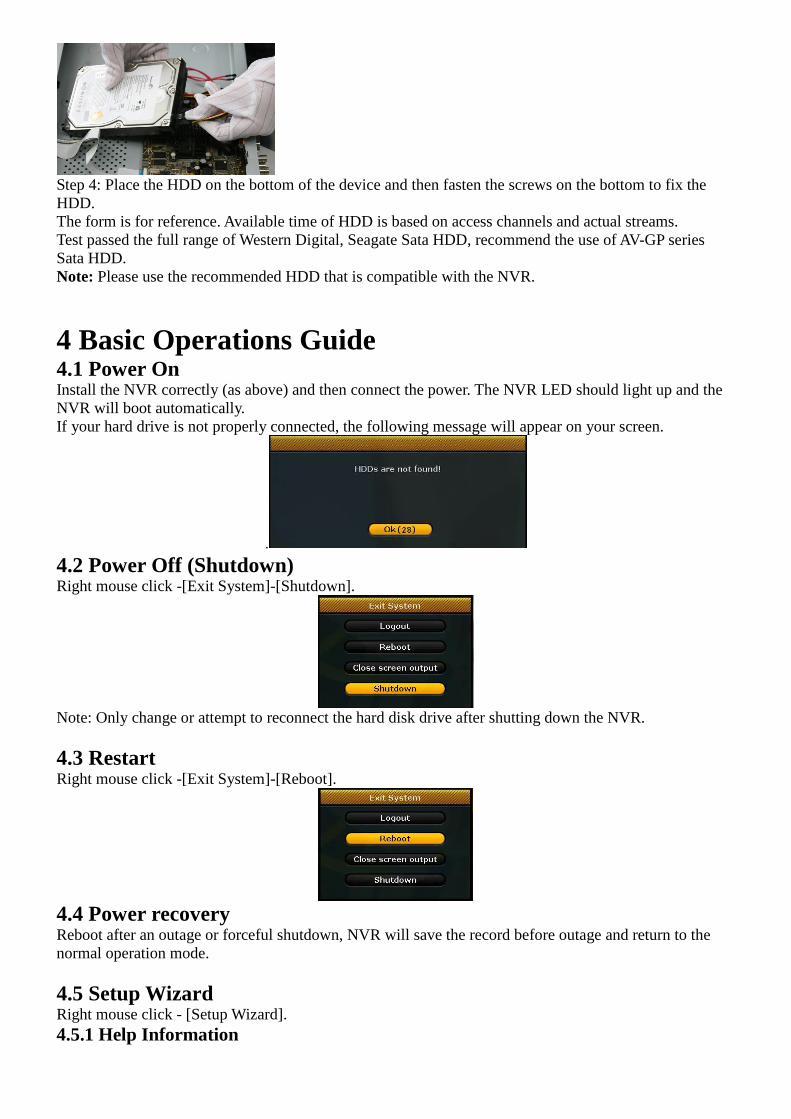
4 Basic Operations Guide 4.1 Power On Install the NVR correctly (as above) and then connect the power. The NVR LED should light up and the
NVR will boot automatically.
If your hard drive is not properly connected, the following message will appear on your screen.
.
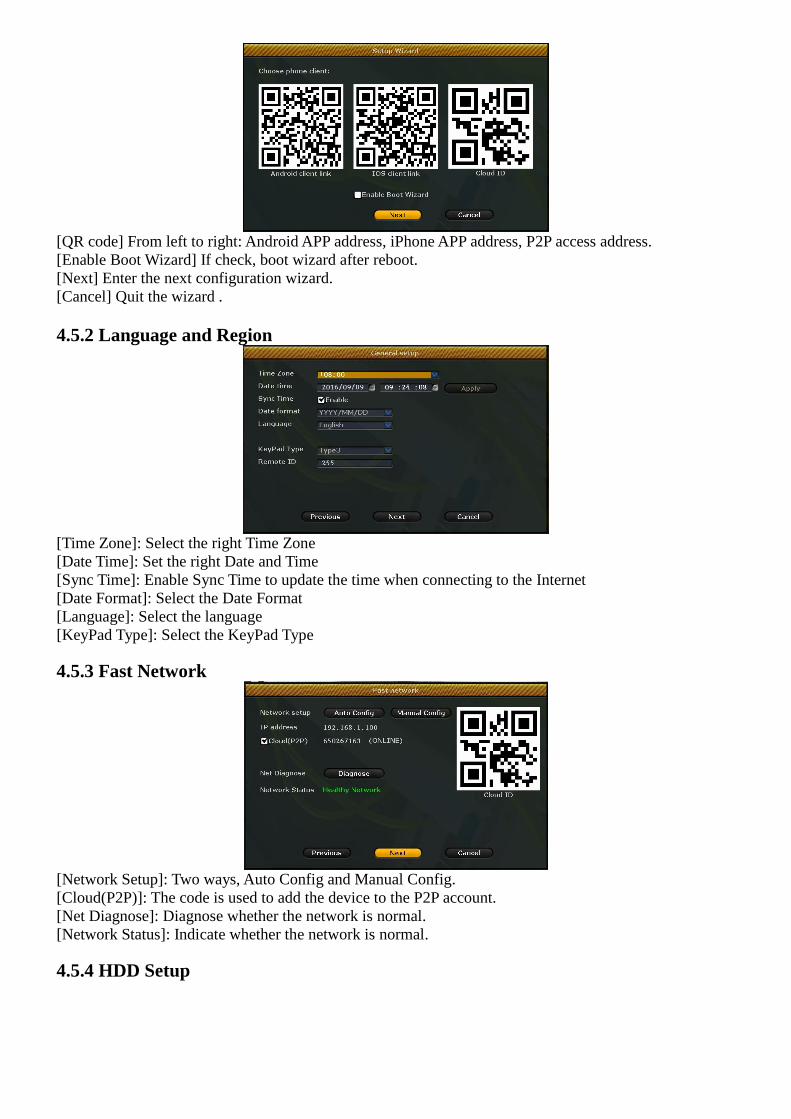
4.2 Power Off (Shutdown) Right mouse click -[Exit System]-[Shutdown].
Note: Only change or attempt to reconnect the hard disk drive after shutting down the NVR.
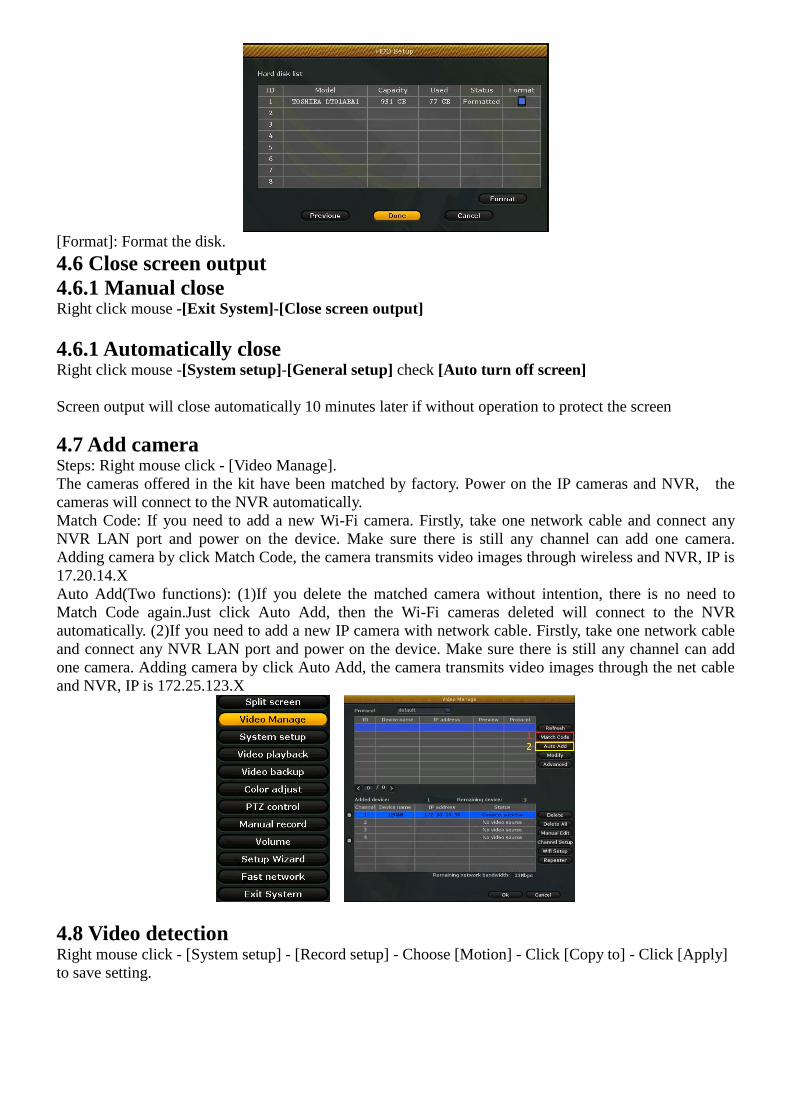
4.3 Restart Right mouse click -[Exit System]-[Reboot].
4.4 Power recovery Reboot after an outage or forceful shutdown, NVR will save the record before outage and return to the
normal operation mode.
4.5 Setup Wizard Right mouse click - [Setup Wizard].
4.5.1 Help Information
[QR code] From left to right: Android APP address, iPhone APP address, P2P access address.
[Enable Boot Wizard] If check, boot wizard after reboot.
[Next] Enter the next configuration wizard.
[Cancel] Quit the wizard .
4.5.2 Language and Region
[Time Zone]: Select the right Time Zone
[Date Time]: Set the right Date and Time
[Sync Time]: Enable Sync Time to update the time when connecting to the Internet
[Date Format]: Select the Date Format
[Language]: Select the language
[KeyPad Type]: Select the KeyPad Type
4.5.3 Fast Network
[Network Setup]: Two ways, Auto Config and Manual Config.
[Cloud(P2P)]: The code is used to add the device to the P2P account.
[Net Diagnose]: Diagnose whether the network is normal.
[Network Status]: Indicate whether the network is normal.
4.5.4 HDD Setup
[Format]: Format the disk.
4.6 Close screen output
4.6.1 Manual close Right click mouse -[Exit System]-[Close screen output]
4.6.1 Automatically close Right click mouse -[System setup]-[General setup] check [Auto turn off screen]
Screen output will close automatically 10 minutes later if without operation to protect the screen
4.7 Add camera Steps: Right mouse click - [Video Manage].
The cameras offered in the kit have been matched by factory. Power on the IP cameras and NVR, the
cameras will connect to the NVR automatically.
Match Code: If you need to add a new Wi-Fi camera. Firstly, take one network cable and connect any
NVR LAN port and power on the device. Make sure there is still any channel can add one camera.
Adding camera by click Match Code, the camera transmits video images through wireless and NVR, IP is
17.20.14.X
Auto Add(Two functions): (1)If you delete the matched camera without intention, there is no need to
Match Code again.Just click Auto Add, then the Wi-Fi cameras deleted will connect to the NVR
automatically. (2)If you need to add a new IP camera with network cable. Firstly, take one network cable
and connect any NVR LAN port and power on the device. Make sure there is still any channel can add
one camera. Adding camera by click Auto Add, the camera transmits video images through the net cable
and NVR, IP is 172.25.123.X
4.8 Video detection Right mouse click - [System setup] - [Record setup] - Choose [Motion] - Click [Copy to] - Click [Apply]
to save setting.
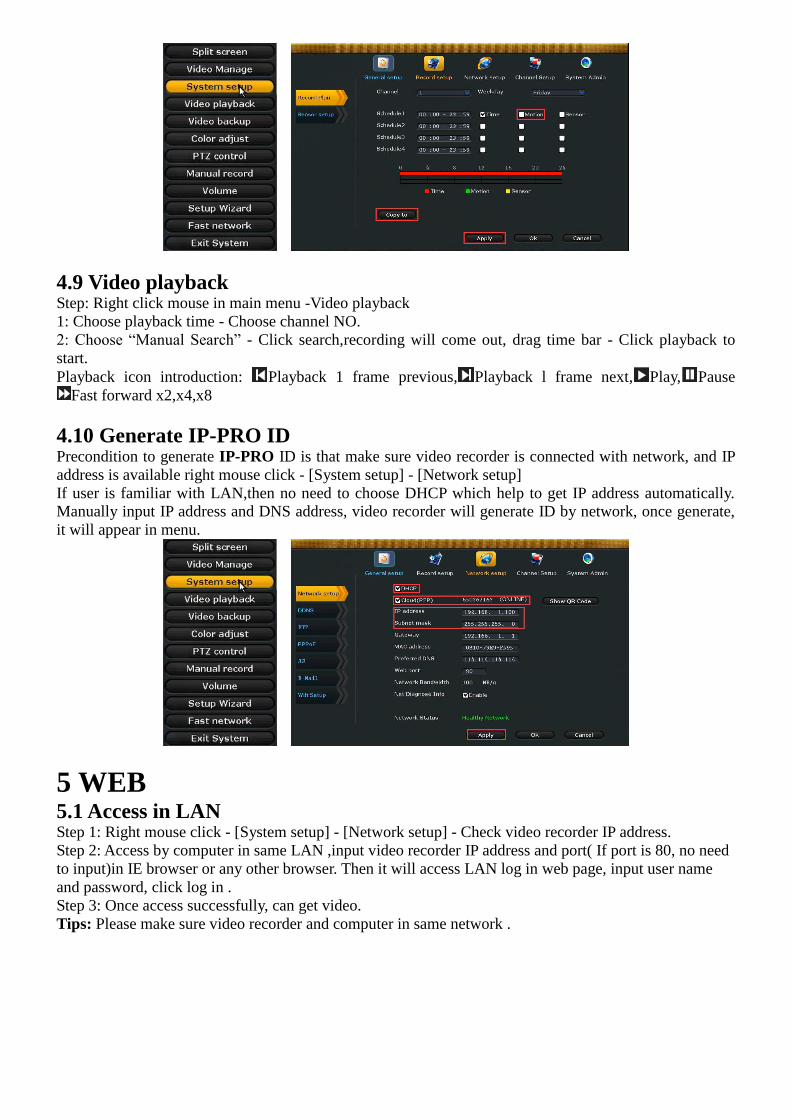
4.9 Video playback Step: Right click mouse in main menu -Video playback
1: Choose playback time - Choose channel NO.
2: Choose “Manual Search” - Click search,recording will come out, drag time bar - Click playback to
start.
Playback icon introduction: Playback 1 frame previous, Playback l frame next, Play, Pause
Fast forward x2,x4,x8
4.10 Generate IP-PRO ID Precondition to generate IP-PRO ID is that make sure video recorder is connected with network, and IP
address is available right mouse click - [System setup] - [Network setup]
If user is familiar with LAN,then no need to choose DHCP which help to get IP address automatically.
Manually input IP address and DNS address, video recorder will generate ID by network, once generate,
it will appear in menu.
5 WEB 5.1 Access in LAN Step 1: Right mouse click - [System setup] - [Network setup] - Check video recorder IP address.
Step 2: Access by computer in same LAN ,input video recorder IP address and port( If port is 80, no need
to input)in IE browser or any other browser. Then it will access LAN log in web page, input user name
and password, click log in .
Step 3: Once access successfully, can get video.
Tips: Please make sure video recorder and computer in same network .
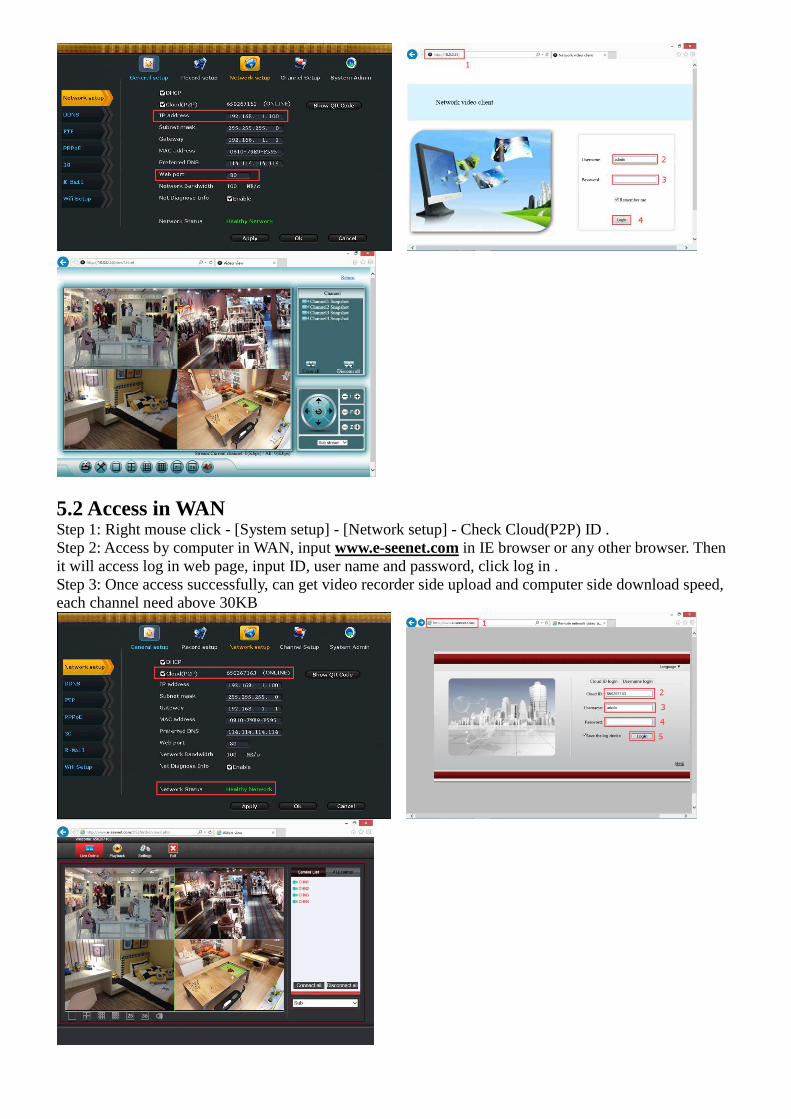
5.2 Access in WAN Step 1: Right mouse click - [System setup] - [Network setup] - Check Cloud(P2P) ID .
Step 2: Access by computer in WAN, input www.e-seenet.com in IE browser or any other browser. Then
it will access log in web page, input ID, user name and password, click log in .
Step 3: Once access successfully, can get video recorder side upload and computer side download speed,
each channel need above 30KB
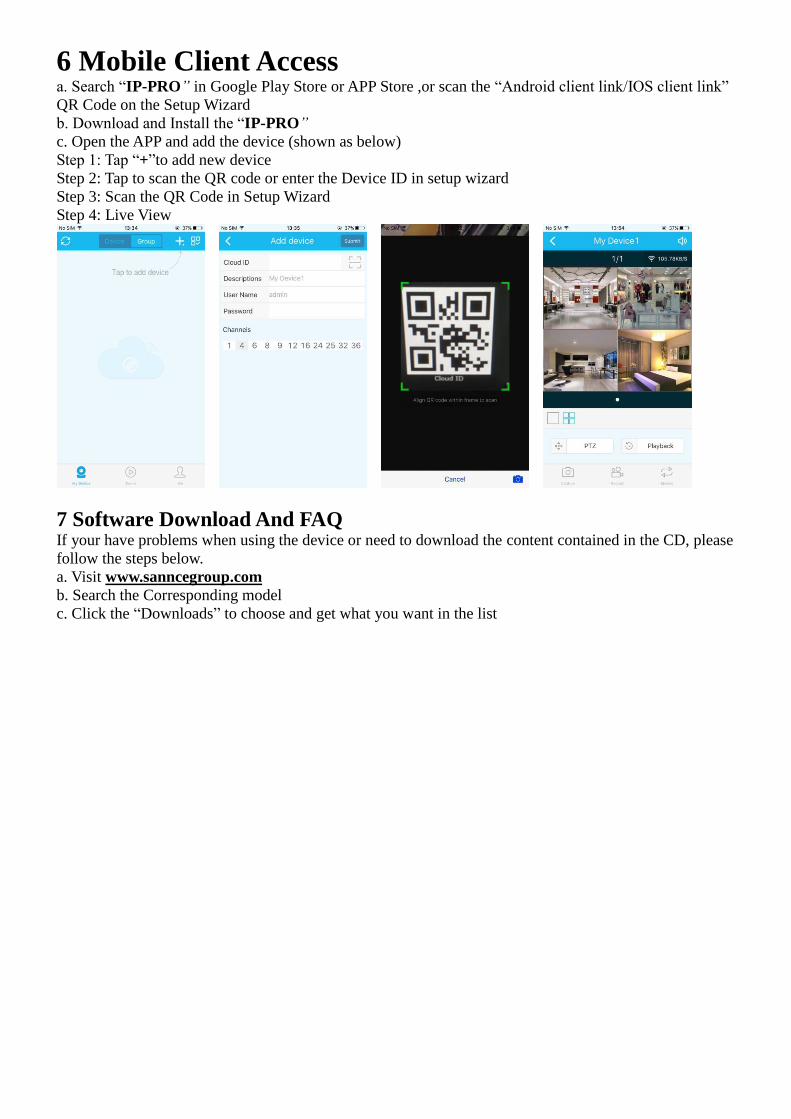
6 Mobile Client Access a. Search “IP-PRO” in Google Play Store or APP Store ,or scan the “Android client link/IOS client link”
QR Code on the Setup Wizard
b. Download and Install the “IP-PRO”
c. Open the APP and add the device (shown as below)
Step 1: Tap “+”to add new device
Step 2: Tap to scan the QR code or enter the Device ID in setup wizard
Step 3: Scan the QR Code in Setup Wizard
Step 4: Live View
7 Software Download And FAQ If your have problems when using the device or need to download the content contained in the CD, please
follow the steps below.
a. Visit www.sanncegroup.com
b. Search the Corresponding model
c. Click the “Downloads” to choose and get what you want in the list