Embed Size (px)
Citation preview

Page 1 of 91
ELECTRONIC PERSONNEL
ACTION FORMS (EPAFs)
HOW TO GUIDE
Effective October 15, 2018
Updated May 22, 2020

Page 2 of 91
APPROVAL CATEGORIES
New Employee – No previous job records / assignments:
Hourly with No End Date
Hourly with End Date
Salaried with End Date
Salaried with No End Date
Work Study with No End Date
Work Study with End Date
Additional Job Record – Employee is being assigned to this job for the first time and already has a job in Banner:
Hourly with No End Date
Hourly with End Date
Salaried with End Date
Salaried with No End Date
Work Study with No End Date
Work Study with End Date
Change a Job Record – A change is needed to a current job record:
Hourly
Salaried
Work Study
Reactivate a Job Record – Employee previously occupied this job:
Hourly with No End Date
Hourly with End Date
Salaried with End Date
Salaried with No End Date
Work Study with No End Date
Work Study with End Date
Update Labor Distribution Record
Terminate a Job Record
Terminate a Job Record and Employee
Exception to Normal Pay – Payments to an employee for something other than his/her normal payroll; payment to
an employee if EPAF was submitted late and employee should have been paid on a previous payroll and was not;
or adjustments to a payroll payment to an employee for a prior month:
Create New ENP Job
Reactivate an Existing ENP Job
Transfer – Employee is transferring from one position on campus to another position on campus:
Transfer to Hourly Job with No End Date
Transfer to Hourly Job with End Date
Transfer to a Salaried Job with No End Date
Transfer to a Salaried Job with End Date
Transfer to Work Study Job with No End Date
Key:
- Dropdown box
options
- Listed items for
which a New Value
can be entered
- Tip

Page 3 of 91
Transfer to Work Study Job with End Date
Appendix:
A – Job Change Reason Codes List
B – ENP Job Change Reason Codes and Earnings Codes Chart
C – ENP Date Chart
D – Suffix – Type of Payment Chart
E – Employee Class Codes
F – Employee Class Codes with Leave Accrual Defaults and Acceptable Overrides

Page 4 of 91
NEW EMPLOYEE – HOURLY EMPLOYEE WITH NO END DATE
1. Log in and select Employee > Employee Self Service > Electronic Personnel Action Forms > New EPAF.
2. Enter the employee’s Banner ID or use the magnifying glass to search by the employee’s name.
Use % as the wildcard for searches.
3. Enter the Query Date (the date the action on the EPAF is to become effective).
4. Select Approval Category New Hourly Employee no end date, NHH1NP.
5. Click on the All Jobs button. Review current assignments under the Employee Job Assignments section.
If Employee Job Assignments are listed after clicking on the All Jobs button, STOP. You may have
selected the wrong approval category.
6. If you have determined you are using the correct approval category, click on Go.
7. Enter the Position number and Suffix for the new job.
The Suffix is a combination of two alpha and/or numeric characters. In most cases, the suffix used will
be 00. See Appendix D for Suffixes used to identify specific types of payments.
8. Select the radio button for the new job, and click on Go.
9. In the Create/Change PEAEMPL Record section, review the data in the Current Value column. Do not enter
information in the New Value column unless there is no Current Value for a field or if the Current Value in a
field is believed to be inaccurate.
Employee Class Code
See the list of OPSU Employee Class Codes in Appendix E.
Current Hire Date
The Current Hire Date is the date the employee is to begin working. This should be the same
date as the Section 2 Certification date (employee’s first date of employment) from page 2 of Form
I-9 and the hire date in E-Verify. If an employee begins working prior to the Current Hire Date / I-9
date / E-Verify date, this will result in federal compliance issues.
Home Organization
Benefit Category
10. Review the Job Begin Date (defaulted to Query Date) and change if appropriate.
The Job Begin Date is the date the assignment begins (the first day the employee can start any time
entry).
For new employees, this date should be the same as the Jobs Effective Date.
11. Review the Jobs Effective Date (defaulted to Query Date) and change if appropriate.
The Jobs Effective Date is the date this action will affect payroll.
For a New Job record, the Jobs Effective Date MUST be the same as the Job Begin Date.
12. Review the Personnel Date (defaulted to Query Date) and change if appropriate.
This date does not affect pay and serves as an information field for historical, audit, or reporting
purposes.
For all new hires, the Personnel Date should be the same date as the Section 2 Certification date
(employee’s first date of employment) from page 2 of Form I-9 and the hire date in E-Verify.
13. Review the Contract Type (defaulted to Primary) and use the dropdown box to change if appropriate.
Primary – The employee’s primary job.
Secondary – Used to add an additional position for an employee.
Overload – Used for a position in addition to a regular assignment (e.g., non-faculty employee who
teaches a class, a faculty member on a 9 month contract who has a summer assignment, housing or car
allowance, etc.).
Each employee can have only one Primary job.
14. Review the Job Change Reason (defaulted to 1NEW, New Hire) and use the dropdown box to change if
appropriate.
See the Job Change Reason Codes List in Appendix A for additional information.

Page 5 of 91
15. Enter the New Value for:
Regular Rate – Employee’s Pay Rate per Hour.
FTE – Full-Time Equivalent. ( Must be 1.0 or less)
Hours Per Day – Number of hours employee will work per day.
Hours Per Pay – Number of hours employee will work per pay period.
Timesheet Organization – Department timesheet organization number.
16. If the employee is to accrue leave using a different rule code than the default for
the employee class group, use the dropdown box to select the appropriate Job
Leave Category code.
See Appendix F for a list of Employee Classes with defaults and acceptable overrides.
17. If the Contract Type from step 13 is Secondary or Overload AND the employee should accrue leave on this
Secondary or Overload job, use the dropdown box for Accrue Leave and select Yes.
The Accrue Leave field is used to allow a Secondary or Overload job to accrue paid time off. In most
instances, this field will not be entered (remain as Not Selected) or will be entered with Yes. In the rare
instances where this job previously had an Accrue Leave value of Yes and should be changed to No, a
comment explaining the change to No is required.
If the Contract Type for this job is Primary, do NOT select Yes or No from the dropdown box. The New
Value should remain as Not Selected. For Primary jobs, this is automatically completed by Banner and
should not be overridden.
18. Time Entry Method – defaults to ‘W’ Web Time Entry. You must enter ‘P’ for Monthly Non-Exempt employees
paid on the PM payroll (must still be ‘W’ if paid on PH payroll.
19. Enter the New Value for:
Title
20. Review the Effective Date (defaulted to Query Date) for the funding information
and change if appropriate.
The Effective Date is the date this action will affect payroll.
21. Review the funding information (defaulted based on the position number) in the New section and change if
appropriate.
Chart (COA) MUST be P for OPSU.
Funding total must equal 100%.
The Labor Distribution Percentage on each line must be between .01 and 100. When changing a line to
0%, that line must be removed. After entering 0 in the percent field, hit the Enter key or the Save button. A
remove box will appear for each line. Click on the remove box in the line to be removed, then hit the Enter
key or Save button to remove the line.
22. Review the Routing Queue and use the magnifying glass to change or add User Name(s) if appropriate.
23. In the Comment box, enter comments with sufficient detail for the approvers to understand the change to the
job record.
24. Click on the Save button, and check the top of the EPAF to make sure the action was saved successfully.
25. Review and then click on the Submit button.
The routing process does not begin until you click on the Save button and then the Submit button.
Hours/ Hours/
FTE Day Pay
1.0 7.50 162.50
.75 5.63 121.88
.50 3.75 81.25
.25 1.88 40.63
Hours per day and
hours per pay should be
based on the FTE.

Page 6 of 91
NEW EMPLOYEE – HOURLY EMPLOYEE WITH END DATE
1. Log in and select Employee > Employee Self Service > Electronic Personnel Action Forms > New EPAF.
2. Enter the employee’s Banner ID or use the magnifying glass to search by the employee’s name.
Use % as the wildcard for searches.
3. Enter the Query Date (the date the action on the EPAF is to become effective).
4. Select Approval Category New Hourly Employee With END DATE, NHH1EP.
5. Click on the All Jobs button. Review current assignments under the Employee Job Assignments section.
If Employee Job Assignments are listed after clicking on the All Jobs button, STOP. You may have
selected the wrong approval category.
6. If you have determined you are using the correct approval category, click on Go.
7. Enter the Position number and Suffix for the new job.
The Suffix is a combination of two alpha and/or numeric characters. In most cases, the suffix used will
be 00. See Appendix D for Suffixes used to identify specific types of payments.
8. Select the radio button for the new job, and click on Go.
9. In the Create/Change PEAEMPL Record section, review the data in the Current Value column. Do not enter
information in the New Value column unless there is no Current Value for a field or if the Current Value in a
field is believed to be inaccurate.
Employee Class Code
See the list of OPSU Employee Class Codes in Appendix E.
Current Hire Date
The Current Hire Date is the date the employee is to begin working. This should be the same
date as the Section 2 Certification date (employee’s first date of employment) from page 2 of Form
I-9 and the hire date in E-Verify. If an employee begins working prior to the Current Hire Date / I-9
date / E-Verify date, this will result in federal compliance issues.
Home Organization
Benefit Category
10. Review the Job Begin Date (defaulted to Query Date) and change if appropriate.
The Job Begin Date is the date the assignment begins (the first day the employee can start any time
entry).
For new employees, this date should be the same as the Jobs Effective Date.
11. Review the Jobs Effective Date (defaulted to Query Date) and change if appropriate.
The Jobs Effective Date is the date this action will affect payroll.
For a New Job record, the Jobs Effective Date MUST be the same as the Job Begin Date.
12. Review the Personnel Date (defaulted to Query Date) and change if appropriate.
This date does not affect pay and serves as an information field for historical, audit, or reporting
purposes.
For all new hires, the Personnel Date should be the same date as the Section 2 Certification date
(employee’s first date of employment) from page 2 of Form I-9 and the hire date in E-Verify.
13. Review the Contract Type (defaulted to Primary) and use the dropdown box to change if appropriate.
Primary – The employee’s primary job.
Secondary – Used to add an additional position for an employee.
Overload – Used for a position in addition to a regular assignment (e.g., non-faculty employee who
teaches a class, a faculty member on a 9 month contract who has a summer assignment, housing or car
allowance, etc.).
Each employee can have only one Primary job.
14. Review the Job Change Reason (defaulted to 1NEW, New Hire) and use the dropdown box to change if
appropriate.
See the Job Change Reason Codes List in Appendix A for additional information.

Page 7 of 91
15. Enter the New Value for:
Regular Rate – Employee’s Pay Rate per Hour.
FTE – Full-Time Equivalent. ( Must be 1.0 or less)
Hours Per Day – Number of hours employee will work per day.
Hours Per Pay – Number of hours employee will work per pay period.
Timesheet Organization – Department timesheet organization number.
16. If the employee is to accrue leave using a different rule code than the default for
the employee class group, use the dropdown box to select the appropriate Job
Leave Category code.
See Appendix F for a list of Employee Classes with defaults and acceptable overrides.
17. If the Contract Type from step 13 is Secondary or Overload AND the employee should accrue leave on this
Secondary or Overload job, use the dropdown box for Accrue Leave and select Yes.
The Accrue Leave field is used to allow a Secondary or Overload job to accrue paid time off. In most
instances, this field will not be entered (remain as Not Selected) or will be entered with Yes. In the rare
instances where this job previously had an Accrue Leave value of Yes and should be changed to No, a
comment explaining the change to No is required.
If the Contract Type for this job is Primary, do NOT select Yes or No from the dropdown box. The New
Value should remain as Not Selected. For Primary jobs, this is automatically completed by Banner and
should not be overridden.
18. Time Entry Method – defaults to ‘W’ Web Time Entry. You must enter ‘P’ for Monthly Non-Exempt employees
paid on the PM payroll (must still be ‘W’ if paid on PH payroll.)
19. Enter the New Value for:
Title
20. Review the Effective Date (defaulted to Query Date) for the funding information
and change if appropriate.
The Effective Date is the date this action will affect payroll.
21. Review the funding information (defaulted based on the position number) in the New section and change if
appropriate.
Chart (COA) MUST be P for OPSU.
Funding total must equal 100%.
The Labor Distribution Percentage on each line must be between .01 and 100. When changing a line to
0%, that line must be removed. After entering 0 in the percent field, hit the Enter key or the Save button. A
remove box will appear for each line. Click on the remove box in the line to be removed, then hit the Enter
key or Save button to remove the line.
22. In the Terminate / End Pay Job Record Only section, enter the Jobs Effective Date.
The Jobs Effective Date is the date this action will affect payroll.
23. Enter the Personnel Date.
This date does not affect pay and serves as an information field for historical, audit, or reporting
purposes.
24. Review the Job Change Reason (defaulted to 2END, End of Appointment) and use the dropdown box to
change if appropriate.
See the Job Change Reason Codes List in Appendix A for additional information.
25. Review the Routing Queue and use the magnifying glass to change or add User Name(s) if appropriate.
26. In the Comment box, enter comments with sufficient detail for the approvers to understand the change to the
job record.
27. Click on the Save button, and check the top of the EPAF to make sure the action was saved successfully.
28. Review and then click on the Submit button.
The routing process does not begin until you click on the Save button and then the Submit button.
Hours/ Hours/
FTE Day Pay
1.0 7.50 162.50
.75 5.63 121.88
.50 3.75 81.25
.25 1.88 40.63
Hours per day and
hours per pay should be
based on the FTE.

Page 8 of 91
NEW EMPLOYEE – SALARIED EMPLOYEE WITH END DATE
1. Log in and select Employee > Employee Self Service > Electronic Personnel Action Forms > New EPAF.
2. Enter the employee’s Banner ID or use the magnifying glass to search by the employee’s name.
Use % as the wildcard for searches.
3. Enter the Query Date (the date the action on the EPAF is to become effective).
4. Select Approval Category New Salaried Employee with END DATE, NHS1EP.
5. Click on the All Jobs button. Review current assignments under the Employee Job Assignments section.
If Employee Job Assignments are listed after clicking on the All Jobs button, STOP. You may have
selected the wrong approval category.
6. If you have determined you are using the correct approval category, click on Go.
7. Enter the Position number and Suffix for the new job.
The Suffix is a combination of two alpha and/or numeric characters. In most cases, the suffix used will
be 00. See Appendix D for Suffixes used to identify specific types of payments.
8. Select the radio button for the new job, and click on Go.
9. In the Create/Change PEAEMPL Record section, review the data in the Current Value column. Do not enter
information in the New Value column unless there is no Current Value for a field or if the Current Value in a
field is believed to be inaccurate.
Employee Class Code
See the list of OPSU Employee Class Codes in Appendix E.
Current Hire Date (defaulted to Query Date)
The Current Hire Date is the date the employee is to begin working. This should be the same
date as the Section 2 Certification date (employee’s first date of employment) from page 2 of Form
I-9 and the hire date in E-Verify. If an employee begins working prior to the Current Hire Date / I-9
date / E-Verify date, this will result in federal compliance issues.
Home Organization
Benefit Category
10. Review the Job Begin Date (defaulted to Query Date) and change if appropriate.
The Job Begin Date is the date the assignment begins.
For new employees, this date should be the same as the Jobs Effective Date.
11. Review the Jobs Effective Date (defaulted to Query Date) and change if appropriate.
The Jobs Effective Date is the date this action will affect payroll.
For a New Job record, the Jobs Effective Date MUST be the same as the Job Begin Date.
12. Review the Personnel Date (defaulted to Query Date) and change if appropriate.
This date does not affect pay and serves as an information field for historical, audit, or reporting
purposes.
For all new hires, the Personnel Date should be the same date as the Section 2 Certification date
(employee’s first date of employment) from page 2 of Form I-9 and the hire date in E-Verify.
13. Review the Contract Type (defaulted to Primary) and use the dropdown box to change if appropriate.
Primary – The employee’s primary job.
Secondary – Used to add an additional position for an employee.
Overload – Used for a position in addition to a regular assignment (e.g., non-faculty employee who
teaches a class, a faculty member on a 9 month contract who has a summer assignment, housing or car
allowance, etc.).
Each employee can have only one Primary job.
14. Review the Job Change Reason (defaulted to 1NEW, New Hire) and use the dropdown box to change if
appropriate.
See the Job Change Reason Codes List in Appendix A for additional information.
15. Enter the new value as appropriate for:

Page 9 of 91
Annual Salary / Contract Amount – Employee’s actual annual salary.
Factor (defaulted to 12) – Used to calculate the amount per month to be paid.
Annual Salary (or Contract Amount) / Factor = Monthly Payment
As a general rule, the Factor will be the number of months in the contract / assignment for
faculty members, 1 for graduate assistants, and 12 for staff members.
Pays (defaulted to 12) – Pays = Factor (Exception: Faculty member with a salary deferral agreement.)
For all new hires, Factor = Pays. Payroll Services will update the Pays field if a faculty member
completes a deferral agreement.
Unless the appointment is for less than 12 months, Factor = 12 and
Pays = 12 regardless of when the employee is hired during the year.
FTE (defaulted to 1.0) – Full-Time Equivalent. ( Must be 1.0 or less)
Hours Per Day – Number of hours employee will work per day.
Hours Per Pay – Number of hours employee will work per pay period.
If the FTE for this employee is not 1.0, the Hours per Day and Hours
per Pay (based on the FTE) MUST be entered.
Timesheet Organization – Department timesheet organization number.
16. If the employee is to accrue leave using a different rule code than the default for the employee class group,
use the dropdown box to select the appropriate Job Leave Category code.
See Appendix F for a list of Employee Classes with defaults and acceptable overrides.
17. If the Contract Type from step 13 is Secondary or Overload AND the employee should accrue leave on this
Secondary or Overload job, use the dropdown box for Accrue Leave and select Yes.
The Accrue Leave field is used to allow a Secondary or Overload job to accrue paid time off. In most
instances, this field will not be entered (remain as Not Selected) or will be entered with Yes. In the rare
instances where this job previously had an Accrue Leave value of Yes and should be changed to No, a
comment explaining the change to No is required.
If the Contract Type for this job is Primary, do NOT select Yes or No from the dropdown box. The New
Value should remain as Not Selected. For Primary jobs, this is automatically completed by Banner and
should not be overridden.
18. Enter the New Value for:
Title
19. Review the Effective Date (defaulted to Query Date) for the funding information and change if appropriate.
The Effective Date is the date this action will affect payroll.
20. Review the funding information (defaulted based on the position number) in the New section and change if
appropriate.
Chart (COA) MUST be P for OPSU.
Funding total must equal 100%.
The Labor Distribution Percentage on each line must be between .01 and 100. When changing a line to
0%, that line must be removed. After entering 0 in the percent field, hit the Enter key or the Save button. A
remove box will appear for each line. Click on the remove box in the line to be removed, then hit the Enter
key or Save button to remove the line.
21. In the Terminate / End Pay Job Record Only section, enter the Jobs Effective Date.
The Jobs Effective Date is the date this action will affect payroll. Use the termination date – the last day
the employee is scheduled to work in this position.
22. Enter the Personnel Date.
This date does not affect pay and serves as an information field for historical, audit, or reporting
purposes.
23. Review the Job Change Reason (defaulted to 2END, End of Appointment) and use the dropdown box to
change if appropriate.
See the Job Change Reason Codes List in Appendix A for additional information.
24. Review the Job Status (defaulted to Terminated) and use the dropdown box to change if appropriate.
Remove – Do not select Remove as the Job Status field must be populated.
Hours/ Hours/
FTE Day Pay
1.0 7.50 162.50
.75 5.63 121.88
.50 3.75 81.25
.25 1.88 40.63
Hours per day and
hours per pay should be
based on the FTE.

Page 10 of 91
Active – Do not select Active for this section of this approval category as this section is used to terminate
or end pay for this job record.
Leave without Pay, with Benefits
Leave without Pay, without Benefits
Leave with Pay, with Benefits
Leave with Partial Pay, with Benefits – Used for 60% LTD.
Terminated
25. Review the Routing Queue and use the magnifying glass to change or add User Name(s) if appropriate.
26. In the Comment box, enter comments with sufficient detail for the approvers to understand the changes to
the job record.
27. Click on the Save button, and check the top of the EPAF to make sure the action was saved successfully.
28. Review and then click on the Submit button.
The routing process does not begin until you click on the Save button and then the Submit button.

Page 11 of 91
NEW EMPLOYEE – SALARIED EMPLOYEE WITH NO END DATE
1. Log in and select Employee > Employee Self Service > Electronic Personnel Action Forms > New EPAF.
2. Enter the employee’s Banner ID or use the magnifying glass to search by the employee’s name.
Use % as the wildcard for searches.
3. Enter the Query Date (the date the action on the EPAF is to become effective).
4. Select Approval Category New Salaried Employee no End Date, NHS1NP.
5. Click on the All Jobs button. Review current assignments under the Employee Job Assignments section.
If Employee Job Assignments are listed after clicking on the All Jobs button, STOP. You may have
selected the wrong approval category.
6. If you have determined you are using the correct approval category, click on Go.
7. Enter the Position number and Suffix for the new job.
The Suffix is a combination of two alpha and/or numeric characters. In most cases, the suffix used will
be 00. See Appendix D for Suffixes used to identify specific types of payments.
8. Select the radio button for the new job, and click on Go.
9. In the Create/Change PEAEMPL Record section, review the data in the Current Value column. Do not enter
information in the New Value column unless there is no Current Value for a field or if the Current Value in a
field is believed to be inaccurate.
Employee Class Code
See the list of OPSU Employee Class Codes in Appendix E.
Current Hire Date (defaulted to Query Date)
The Current Hire Date is the date the employee is to begin working. This should be the same
date as the Section 2 Certification date (employee’s first date of employment) from page 2 of Form
I-9 and the hire date in E-Verify. If an employee begins working prior to the Current Hire Date / I-9
date / E-Verify date, this will result in federal compliance issues.
Home Organization
Benefit Category
10. Review the Job Begin Date (defaulted to Query Date) and change if appropriate.
The Job Begin Date is the date the assignment begins.
For new employees, this date should be the same as the Jobs Effective Date.
11. Review the Jobs Effective Date (defaulted to Query Date) and change if appropriate.
The Jobs Effective Date is the date this action will affect payroll.
For a New Job record, the Jobs Effective Date MUST be the same as the Job Begin Date.
12. Review the Personnel Date (defaulted to Query Date) and change if appropriate.
This date does not affect pay and serves as an information field for historical, audit, or reporting
purposes.
For all new hires, the Personnel Date should be the same date as the Section 2 Certification date
(employee’s first date of employment) from page 2 of Form I-9 and the hire date in E-Verify.
13. Review the Contract Type (defaulted to Primary) and use the dropdown box to change if appropriate.
Primary – The employee’s primary job.
Secondary – Used to add an additional position for an employee.
Overload – Used for a position in addition to a regular assignment (e.g., non-faculty employee who
teaches a class, a faculty member on a 9 month contract who has a summer assignment, housing or car
allowance, etc.).
Each employee can have only one Primary job.
14. Review the Job Change Reason (defaulted to 1NEW, New Hire) and use the dropdown box to change if
appropriate.
See the Job Change Reason Codes List in Appendix A for additional information.
15. Enter the new value as appropriate for:

Page 12 of 91
Annual Salary / Contract Amount – Employee’s actual annual salary.
Factor (defaulted to 12) – Used to calculate the amount per month to be paid.
Annual Salary (or Contract Amount) / Factor = Monthly Payment
As a general rule, the Factor will be the number of months in the contract / assignment for
faculty members, 1 for graduate assistants, and 12 for staff members.
Pays (defaulted to 12) – Pays = Factor (Exception: Faculty member with a salary deferral agreement.)
For all new hires, Factor = Pays. Payroll Services will update the Pays field if a faculty member
completes a deferral agreement.
Unless the appointment is for less than 12 months, Factor = 12 and
Pays = 12 regardless of when the employee is hired during the year.
FTE (defaulted to 1.0) – Full-Time Equivalent. ( Must be 1.0 or less)
Hours Per Day – Number of hours employee will work per day.
Hours Per Pay – Number of hours employee will work per pay period.
If the FTE for this employee is not 1.0, the Hours per Day and Hours
per Pay (based on the FTE) MUST be entered.
Timesheet Organization – Department timesheet organization number.
16. If the employee is to accrue leave using a different rule code than the default for the employee class group,
use the dropdown box to select the appropriate Job Leave Category code.
See Appendix F for a list of Employee Classes with defaults and acceptable overrides.
17. If the Contract Type from step 13 is Secondary or Overload AND the employee should accrue leave on this
Secondary or Overload job, use the dropdown box for Accrue Leave and select Yes.
The Accrue Leave field is used to allow a Secondary or Overload job to accrue paid time off. In most
instances, this field will not be entered (remain as Not Selected) or will be entered with Yes. In the rare
instances where this job previously had an Accrue Leave value of Yes and should be changed to No, a
comment explaining the change to No is required.
If the Contract Type for this job is Primary, do NOT select Yes or No from the dropdown box. The New
Value should remain as Not Selected. For Primary jobs, this is automatically completed by Banner and
should not be overridden.
18. Enter the New Value for:
Title
19. Review the Effective Date (defaulted to Query Date) for the funding information and change if appropriate.
The Effective Date is the date this action will affect payroll.
20. Review the funding information (defaulted based on the position number) in the New section and change if
appropriate.
Chart (COA) MUST be P for OPSU.
Funding total must equal 100%.
The Labor Distribution Percentage on each line must be between .01 and 100. When changing a line to
0%, that line must be removed. After entering 0 in the percent field, hit the Enter key or the Save button. A
remove box will appear for each line. Click on the remove box in the line to be removed, then hit the Enter
key or Save button to remove the line.
21. Review the Routing Queue and use the magnifying glass to change or add User Name(s) if appropriate.
22. In the Comment box, enter comments with sufficient detail for the approvers to understand the change to the
job record.
23. Click on the Save button, and check the top of the EPAF to make sure the action was saved successfully.
24. Review and then click on the Submit button.
The routing process does not begin until you click on the Save button and then the Submit button.
Hours/ Hours/
FTE Day Pay
1.0 7.50 162.50
.75 5.63 121.88
.50 3.75 81.25
.25 1.88 40.63
Hours per day and
hours per pay should be
based on the FTE.

Page 13 of 91
NEW EMPLOYEE – WORK STUDY WITH NO END DATE
1. Log in and select Employee > Employee Self Service > Electronic Personnel Action Forms > New EPAF.
2. Enter the employee’s Banner ID or use the magnifying glass to search by the employee’s name.
Use % as the wildcard for searches.
3. Enter the Query Date (the date the action on the EPAF is to become effective).
4. Select Approval Category New Work Study Employee with no end date, NHW1NP.
5. Click on the All Jobs button. Review current assignments under the Employee Job Assignments section.
If Employee Job Assignments are listed after clicking on the All Jobs button, STOP. You may have
selected the wrong approval category.
6. If you have determined you are using the correct approval category, click on Go.
7. Enter the Position number and Suffix for the new job.
The Suffix is a combination of two alpha and/or numeric characters. In most cases, the suffix used will
be 00. See Appendix D for Suffixes used to identify specific types of payments.
8. Select the radio button for the new job, and click on Go.
9. In the Create/Change PEAEMPL Record section, review the data in the Current Value column. Do not enter
information in the New Value column unless there is no Current Value for a field or if the Current Value in a
field is believed to be inaccurate.
Employee Class Code
See the list of OPSU Employee Class Codes in Appendix E.
Current Hire Date
The Current Hire Date is the date the employee is to begin working. This should be the same
date as the Section 2 Certification date (employee’s first date of employment) from page 2 of Form
I-9 and the hire date in E-Verify. If an employee begins working prior to the Current Hire Date / I-9
date / E-Verify date, this will result in federal compliance issues.
Home Organization
Benefit Category
10. Review the Job Begin Date (defaulted to Query Date) and change if appropriate.
The Job Begin Date is the date the assignment begins (the first day the employee can start any time
entry).
For new employees, this date should be the same as the Jobs Effective Date.
11. Review the Jobs Effective Date (defaulted to Query Date) and change if appropriate.
The Jobs Effective Date is the date this action will affect payroll.
For a New Job record, the Jobs Effective Date MUST be the same as the Job Begin Date.
12. Review the Personnel Date (defaulted to Query Date) and change if appropriate.
This date does not affect pay and serves as an information field for historical, audit, or reporting
purposes.
For all new hires, the Personnel Date should be the same date as the Section 2 Certification date
(employee’s first date of employment) from page 2 of Form I-9 and the hire date in E-Verify.
13. Review the Contract Type (defaulted to Primary) and use the dropdown box to change if appropriate.
Primary – The employee’s primary job.
Secondary – Used to add an additional position for an employee.
Overload – Used for a position in addition to a regular assignment (e.g., non-faculty employee who
teaches a class, a faculty member on a 9 month contract who has a summer assignment, housing or car
allowance, etc.).
Each employee can have only one Primary job.
14. Review the Job Change Reason (defaulted to 1NEW, New Hire) and use the dropdown box to change if
appropriate.
See the Job Change Reason Codes List in Appendix A for additional information.

Page 14 of 91
15. Enter the New Value for:
Regular Rate – Employee’s Pay Rate per Hour.
FTE – Full-Time Equivalent. ( Must be 1.0 or less)
Hours Per Day – Number of hours employee will work per day.
Hours Per Pay – Number of hours employee will work per pay period.
Timesheet Organization – Department timesheet organization number.
Title
16. Review the Effective Date (defaulted to Query Date) for the funding information
and change if appropriate.
The Effective Date is the date this action will affect payroll.
17. Review the funding information (defaulted based on the position number) in the New section and change if
appropriate.
Chart (COA) MUST be P for OPSU.
Funding total must equal 100%.
The Labor Distribution Percentage on each line must be between .01 and 100. When changing a line to
0%, that line must be removed. After entering 0 in the percent field, hit the Enter key or the Save button. A
remove box will appear for each line. Click on the remove box in the line to be removed, then hit the Enter
key or Save button to remove the line.
18. Review the Routing Queue and use the magnifying glass to change or add User Name(s) if appropriate.
19. In the Comment box, enter comments with sufficient detail for the approvers to understand the change to the
job record.
20. Click on the Save button, and check the top of the EPAF to make sure the action was saved successfully.
21. Review and then click on the Submit button.
The routing process does not begin until you click on the Save button and then the Submit button.
Hours/ Hours/
FTE Day Pay
1.0 7.50 162.50
.75 5.63 121.88
.50 3.75 81.25
.25 1.88 40.63
Hours per day and
hours per pay should be
based on the FTE.

Page 15 of 91
NEW EMPLOYEE – WORK STUDY WITH END DATE
1. Log in and select Employee > Employee Self Service > Electronic Personnel Action Forms > New EPAF.
2. Enter the employee’s Banner ID or use the magnifying glass to search by the employee’s name.
Use % as the wildcard for searches.
3. Enter the Query Date (the date the action on the EPAF is to become effective).
4. Select Approval Category New Work Study Employee with end date, NHW1NP.
5. Click on the All Jobs button. Review current assignments under the Employee Job Assignments section.
If Employee Job Assignments are listed after clicking on the All Jobs button, STOP. You may have
selected the wrong approval category.
6. If you have determined you are using the correct approval category, click on Go.
7. Enter the Position number and Suffix for the new job.
The Suffix is a combination of two alpha and/or numeric characters. In most cases, the suffix used will
be 00. See Appendix D for Suffixes used to identify specific types of payments.
8. Select the radio button for the new job, and click on Go.
9. In the Create/Change PEAEMPL Record section, review the data in the Current Value column. Do not enter
information in the New Value column unless there is no Current Value for a field or if the Current Value in a
field is believed to be inaccurate.
Employee Class Code
See the list of OPSU Employee Class Codes in Appendix E.
Current Hire Date
The Current Hire Date is the date the employee is to begin working. This should be the same
date as the Section 2 Certification date (employee’s first date of employment) from page 2 of Form
I-9 and the hire date in E-Verify. If an employee begins working prior to the Current Hire Date / I-9
date / E-Verify date, this will result in federal compliance issues.
Home Organization
Benefit Category
10. Review the Job Begin Date (defaulted to Query Date) and change if appropriate.
The Job Begin Date is the date the assignment begins (the first day the employee can start any time
entry).
For new employees, this date should be the same as the Jobs Effective Date.
11. Review the Jobs Effective Date (defaulted to Query Date) and change if appropriate.
The Jobs Effective Date is the date this action will affect payroll.
For a New Job record, the Jobs Effective Date MUST be the same as the Job Begin Date.
12. Review the Personnel Date (defaulted to Query Date) and change if appropriate.
This date does not affect pay and serves as an information field for historical, audit, or reporting
purposes.
For all new hires, the Personnel Date should be the same date as the Section 2 Certification date
(employee’s first date of employment) from page 2 of Form I-9 and the hire date in E-Verify.
13. Review the Contract Type (defaulted to Primary) and use the dropdown box to change if appropriate.
Primary – The employee’s primary job.
Secondary – Used to add an additional position for an employee.
Overload – Used for a position in addition to a regular assignment (e.g., non-faculty employee who
teaches a class, a faculty member on a 9 month contract who has a summer assignment, housing or car
allowance, etc.).
Each employee can have only one Primary job.
14. Review the Job Change Reason (defaulted to 1NEW, New Hire) and use the dropdown box to change if
appropriate.
See the Job Change Reason Codes List in Appendix A for additional information.

Page 16 of 91
15. Enter the New Value for:
Regular Rate – Employee’s Pay Rate per Hour.
FTE – Full-Time Equivalent. ( Must be 1.0 or less)
Hours Per Day – Number of hours employee will work per day.
Hours Per Pay – Number of hours employee will work per pay period.
Timesheet Organization – Department timesheet organization number.
Title
16. Review the Effective Date (defaulted to Query Date) for the funding information
and change if appropriate.
The Effective Date is the date this action will affect payroll.
17. Review the funding information (defaulted based on the position number) in the New section and change if
appropriate.
Chart (COA) MUST be P for OPSU.
Funding total must equal 100%.
The Labor Distribution Percentage on each line must be between .01 and 100. When changing a line to
0%, that line must be removed. After entering 0 in the percent field, hit the Enter key or the Save button. A
remove box will appear for each line. Click on the remove box in the line to be removed, then hit the Enter
key or Save button to remove the line.
18. In the Terminate / End Pay Job Record Only section, enter the Jobs Effective Date.
The Jobs Effective Date is the date this action will affect payroll.
19. Enter the Personnel Date.
This date does not affect pay and serves as an information field for historical, audit, or reporting
purposes.
20. Review the Job Change Reason (defaulted to 2END, End of Appointment) and use the dropdown box to
change if appropriate.
See the Job Change Reason Codes List in Appendix A for additional information.
21. Review the Routing Queue and use the magnifying glass to change or add User Name(s) if appropriate.
22. In the Comment box, enter comments with sufficient detail for the approvers to understand the change to the
job record.
23. Click on the Save button, and check the top of the EPAF to make sure the action was saved successfully.
24. Review and then click on the Submit button.
The routing process does not begin until you click on the Save button and then the Submit button.
Hours/ Hours/
FTE Day Pay
1.0 7.50 162.50
.75 5.63 121.88
.50 3.75 81.25
.25 1.88 40.63
Hours per day and
hours per pay should be
based on the FTE.

Page 17 of 91
ADD A JOB RECORD – HOURLY EMPLOYEE WITH NO END DATE
1. Log in and select Employee > Employee Self Service > Electronic Personnel Action Forms > New EPAF.
2. Enter the employee’s Banner ID or use the magnifying glass to search by the employee’s name.
Use % as the wildcard for searches.
3. Enter the Query Date (the date the action on the EPAF is to become effective) in MM/DD/YYYY format.
4. Select Approval Category Additional Hourly Job no end date, AJH1NP.
5. Review current assignments under the Employee Job Assignments section.
Click on the All Jobs button below the Employee Job Assignments for a list of all jobs for the employee.
If the employee was previously in this position, STOP. Are you reactivating a primary job and there have
been subsequent primary jobs since the original primary job was ended? If the answer is YES, continue with
the Add a Job Record approval category; however, you must use a new suffix value for the position number.
If the answer is NO, use the Reactivate a Job approval category rather than the Add a Job Record approval
category.
Review the Last Paid Date for each job assignments, and make a note of the most recent Last Paid Date
for the employee.
6. If you have determined you are using the correct approval category, click on Go.
7. Enter the Position number and Suffix for the new job.
The Suffix is a combination of 2 alpha and/or numeric characters. In most cases, the suffix used will be
00. See Appendix D for Suffixes used to identify specific types of payments.
If the employee has multiple current jobs in the same position (usually due to multiple rates of pay),
start with a Suffix of 00, then use 01, 02, etc.
If you are reactivating a primary job and there have been subsequent primary jobs since the original
primary job was ended (see Step 5 above), use a one up on the Suffix originally used for the primary job you
are reactivating (e.g., if the original Suffix used for the position was 00, use 01).
8. Select the radio button for the new job, and click on Go.
9. Review the Job Begin Date (defaulted to Query Date) and change if appropriate.
The Job Begin Date is the date the assignment begins.
This date should be the same as the Jobs Effective Date.
10. Review the Jobs Effective Date (defaulted to Query Date) and change if appropriate.
The Jobs Effective Date is the date this action will affect payroll, and this date must be after the Last Paid
Date for the employee.
The Last Paid Date for the employee is listed in the top section of the EPAF screen (under Query Date and
to the right of Transaction Status); however, this date appears only when updating an existing job. If the
Last Paid Date information is not listed in this section, use the date you noted from the Employee Job
Assignments section in step 5.
For a New Job record, the Jobs Effective Date MUST be the same as the Job Begin Date.
11. Review the Personnel Date (defaulted to Query Date) and change if appropriate.
This date does not affect pay and serves as an information field for historical, audit, or reporting
purposes.
12. Review the Contract Type (defaulted to Secondary) and use the dropdown box to change if appropriate.
Primary – The employee’s primary job.
Secondary – Used to add an additional position for an employee.
Overload – Used for a position in addition to a regular assignment (e.g., non-faculty employee who
teaches a class, a faculty member on a 9 month contract who has a summer assignment, housing or car
allowance, etc.).
Each employee can have only one Primary job.
13. Review the Job Change Reason (defaulted to 1CURR, Concurrent Appointment) and use the dropdown box to
change if appropriate.

Page 18 of 91
See the Job Change Reason Codes List in Appendix A for additional
information.
14. Enter the new value as appropriate for:
Regular Rate – Employee’s Pay Rate per Hour.
FTE – Full-Time Equivalent. ( Must be 1.0 or less)
Hours Per Day – Number of hours employee will work per day.
Hours Per Pay – Number of hours employee will work per pay period.
Timesheet Organization – Department timesheet organization number.
15. If the employee is to accrue leave using a different rule code than the default for
the employee class group, use the dropdown box to select the appropriate Job
Leave Category code.
See Appendix F for a list of Employee Classes with defaults and acceptable overrides.
16. If the Contract Type from step 12 is Secondary or Overload AND the employee should accrue leave on this
Secondary or Overload job, use the dropdown box for Accrue Leave and select Yes.
The Accrue Leave field is used to allow a Secondary or Overload job to accrue paid time off. In most
instances, this field will not be entered (remain as Not Selected) or will be entered with Yes. In the rare
instances where this job previously had an Accrue Leave value of Yes and should be changed to No, a
comment explaining the change to No is required.
If the Contract Type for this job is Primary, do NOT select Yes or No from the dropdown box. The New
Value should remain as Not Selected. For Primary jobs, this is automatically completed by Banner and
should not be overridden.
17. Time Entry Method - Defaults to ‘W’ Web Time Entry. You must enter ‘P’ for Monthly Non-Exempt employees
paid on the PM payroll (must still be ‘W’ if paid on PH payroll).
18. Enter the New Value for:
Title
19. Review the Effective Date (defaulted to Query Date) for the funding information and change if appropriate.
The Effective Date is the date this action will affect payroll.
20. Review the funding information (defaulted based on the position number) in the New section and change if
appropriate.
Chart (COA) MUST be P for OPSU.
Funding total must equal 100.
The Labor Distribution Percentage on each line must be between .01 and 100. When changing a line to
0%, that line must be removed. After entering 0 in the percent field, hit the Enter key or the Save button. A
remove box will appear for each line. Click on the remove box in the line to be removed, then hit the Enter
key or the Save button to remove the line.
21. Review the Routing Queue and use the magnifying glass to change or add User Name(s) if appropriate.
22. In the Comment box, enter comments with sufficient detail for the approvers to understand the change to the
job record.
23. Click on the Save button, and check the top of the EPAF to make sure the action was saved successfully.
24. Review and then click on the Submit button.
The routing process does not begin until you click on the Save button and then the Submit button.
Hours/ Hours/
FTE Day Pay
1.0 7.50 162.50
.75 5.63 121.88
.50 3.75 81.25
.25 1.88 40.63
Hours per day and
hours per pay should be
based on the FTE.

Page 19 of 91
ADD A JOB RECORD – HOURLY EMPLOYEE WITH END DATE
1. Log in and select Employee > Employee Self Service > Electronic Personnel Action Forms > New EPAF.
2. Enter the employee’s Banner ID or use the magnifying glass to search by the employee’s name.
Use % as the wildcard for searches.
3. Enter the Query Date (the date the action on the EPAF is to become effective) in MM/DD/YYYY format.
4. Select Approval Category Additional Hourly Job with END DATE, AJH1EP.
5. Review current assignments under the Employee Job Assignments section.
Click on the All Jobs button below the Employee Job Assignments for a list of all jobs for the employee.
If the employee was previously in this position, STOP. Are you reactivating a primary job and there have
been subsequent primary jobs since the original primary job was ended? If the answer is YES, continue with
the Add a Job Record approval category; however, you must use a new suffix value for the position number.
If the answer is NO, use the Reactivate a Job approval category rather than the Add a Job Record approval
category.
Review the Last Paid Date for each job assignments, and make a note of the most recent Last Paid Date
for the employee.
6. If you have determined you are using the correct approval category, click on Go.
7. Enter the Position number and Suffix for the new job.
The Suffix is a combination of 2 alpha and/or numeric characters. In most cases, the suffix used will be
00. See Appendix D for Suffixes used to identify specific types of payments.
If the employee has multiple current jobs in the same position (usually due to multiple rates of pay),
start with a Suffix of 00, then use 01, 02, etc.
If you are reactivating a primary job and there have been subsequent primary jobs since the original
primary job was ended (see Step 5 above), use a one up on the Suffix originally used for the primary job you
are reactivating (e.g., if the original Suffix used for the position was 00, use 01).
8. Select the radio button for the new job, and click on Go.
9. Review the Job Begin Date (defaulted to Query Date) and change if appropriate.
The Job Begin Date is the date the assignment begins.
This date should be the same as the Jobs Effective Date.
10. Review the Jobs Effective Date (defaulted to Query Date) and change if appropriate.
The Jobs Effective Date is the date this action will affect payroll, and this date must be after the Last Paid
Date for the employee.
The Last Paid Date for the employee is listed in the top section of the EPAF screen (under Query Date and
to the right of Transaction Status); however, this date appears only when updating an existing job. If the
Last Paid Date information is not listed in this section, use the date you noted from the Employee Job
Assignments section in step 5.
For a New Job record, the Jobs Effective Date MUST be the same as the Job Begin Date.
11. Review the Personnel Date (defaulted to Query Date) and change if appropriate.
This date does not affect pay and serves as an information field for historical, audit, or reporting
purposes.
12. Review the Contract Type (defaulted to Secondary) and use the dropdown box to change if appropriate.
Primary – The employee’s primary job.
Secondary – Used to add an additional position for an employee.
Overload – Used for a position in addition to a regular assignment (e.g., non-faculty employee who
teaches a class, a faculty member on a 9 month contract who has a summer assignment, housing or car
allowance, etc.).
Each employee can have only one Primary job.
13. Review the Job Change Reason (defaulted to 1CURR, Concurrent Appointment) and use the dropdown box to
change if appropriate.

Page 20 of 91
See the Job Change Reason Codes List in Appendix A for additional information.
14. Enter the new value as appropriate for:
Regular Rate – Employee’s Pay Rate per Hour.
FTE – Full-Time Equivalent. ( Must be 1.0 or less)
Hours Per Day – Number of hours employee will work per day.
Hours Per Pay – Number of hours employee will work per pay period.
Timesheet Organization – Department timesheet organization number.
15. If the employee is to accrue leave using a different rule code than the default for
the employee class group, use the dropdown box to select the appropriate Job
Leave Category code.
See Appendix F for a list of Employee Classes with defaults and acceptable overrides.
16. If the Contract Type from step 12 is Secondary or Overload AND the employee should accrue leave on this
Secondary or Overload job, use the dropdown box for Accrue Leave and select Yes.
The Accrue Leave field is used to allow a Secondary or Overload job to accrue paid time off. In most
instances, this field will not be entered (remain as Not Selected) or will be entered with Yes. In the rare
instances where this job previously had an Accrue Leave value of Yes and should be changed to No, a
comment explaining the change to No is required.
If the Contract Type for this job is Primary, do NOT select Yes or No from the dropdown box. The New
Value should remain as Not Selected. For Primary jobs, this is automatically completed by Banner and
should not be overridden.
17. Defaults to ‘W’ Web Time Entry. You must enter ‘P for Monthly Non-Exempt employees paid on the PM
payroll (must still be ‘W’ if paid on PH payroll.
18. Enter the New Value for
Title
19. Review the Effective Date (defaulted to Query Date) for the funding information and change if appropriate.
The Effective Date is the date this action will affect payroll.
20. Review the funding information (defaulted based on the position number) in the New section and change if
appropriate.
Chart (COA) MUST be P for OPSU.
Funding total must equal 100.
The Labor Distribution Percentage on each line must be between .01 and 100. When changing a line to
0%, that line must be removed. After entering 0 in the percent field, hit the Enter key or the Save button. A
remove box will appear for each line. Click on the remove box in the line to be removed, then hit the Enter
key or the Save button to remove the line.
21. In the Terminate / End Pay Job Record Only section, enter the Jobs Effective Date.
The Jobs Effective Date is the date this action will affect payroll.
22. Enter the Personnel Date.
This date does not affect pay and serves as an information field for historical, audit, or reporting
purposes.
23. Review the Job Change Reason (defaulted to 2END, End of Appointment) and use the dropdown box to
change if appropriate.
See the Job Change Reason Codes List in Appendix A for additional information.
24. Review the Routing Queue and use the magnifying glass to change or add User Name(s) if appropriate.
25. In the Comment box, enter comments with sufficient detail for the approvers to understand the change to the
job record.
26. Click on the Save button, and check the top of the EPAF to make sure the action was saved successfully.
27. Review and then click on the Submit button.
The routing process does not begin until you click on the Save button and then the Submit button.
Hours/ Hours/
FTE Day Pay
1.0 7.50 162.50
.75 5.63 121.88
.50 3.75 81.25
.25 1.88 40.63
Hours per day and
hours per pay should be
based on the FTE.

Page 21 of 91
ADD A JOB RECORD – SALARIED EMPLOYEE WITH END DATE
1. Log in and select Employee > Employee Self Service > Electronic Personnel Action Forms > New EPAF.
2. Enter the employee’s Banner ID or use the magnifying glass to search by the employee’s name.
Use % as the wildcard for searches.
3. Enter the Query Date (the date the action on the EPAF is to become effective) in MM/DD/YYYY format.
4. Select Approval Category Additional Salaried Job with END DATE, AJS1EP.
5. Review current assignments under the Employee Job Assignments section.
Click on the All Jobs button below the Employee Job Assignments for a list of all jobs for the employee.
If the employee was previously in this position, STOP. Are you reactivating a primary job and there have
been subsequent primary jobs since the original primary job was ended? If the answer is YES, continue with
the Add a Job Record approval category; however, you must use a new suffix value for the position number.
If the answer is NO, use the Reactivate a Job approval category rather than the Add a Job Record approval
category.
Review the Last Paid Date for each job assignments, and make a note of the most recent Last Paid Date
for the employee.
6. If you have determined you are using the correct approval category, click on Go.
7. Enter the Position number and Suffix for the new job.
The Suffix is a combination of 2 alpha and/or numeric characters. In most cases, the suffix used will be
00. See Appendix D for Suffixes used to identify specific types of payments.
If the employee has multiple current jobs in the same position (usually due to multiple rates of pay),
start with a Suffix of 00, then use 01, 02, etc.
If you are reactivating a primary job and there have been subsequent primary jobs since the original
primary job was ended (see Step 5 above), use a one up on the Suffix originally used for the primary job you
are reactivating (e.g., if the original Suffix used for the position was 00, use 01).
8. Select the radio button for the new job, and click on Go.
9. Review the Job Begin Date (defaulted to Query Date) and change if appropriate.
The Job Begin Date is the date the assignment begins. This date should be the same as the Jobs Effective
Date.
10. Review the Jobs Effective Date (defaulted to Query Date) and change if appropriate.
The Jobs Effective Date is the date this action will affect payroll, and this date must be after the Last Paid
Date.
The Last Paid Date for the employee is listed in the top section of the EPAF screen (under Query Date and
to the right of Transaction Status); however, this date appears only when updating an existing job. If the
Last Paid Date information is not listed in this section, use the date you noted from the Employee Job
Assignments section in step 5.
For a New Job record, the Jobs Effective Date MUST be the same as the Job Begin Date.
11. Review the Personnel Date (defaulted to Query Date) and change if appropriate.
This date does not affect pay and serves as an information field for historical, audit, or reporting
purposes.
12. Review the Contract Type (defaulted to Overload) and use the dropdown box to change if appropriate.
Primary – The employee’s primary job.
Secondary – Used to add an additional position for an employee.
Overload – Used for a position in addition to a regular assignment (e.g., non-faculty employee who
teaches a class, a faculty member on a 9 month contract who has a summer assignment, housing or car
allowance, etc.).
Each employee can have only one Primary job.
13. Review the Job Status (defaulted to Active) and use the dropdown box to change if appropriate.
Remove – Do not select Remove as the Job Status field must be populated.

Page 22 of 91
Active
Leave without Pay, with Benefits
Leave without Pay, without Benefits
Leave with Pay, with Benefits
Leave with Partial Pay, with Benefits – Used for 60% LTD.
Terminated – Do not select Terminated in the Additional Salaried Job section.
14. Select the Job Change Reason (defaulted to 1CURR, Concurrent Appointment) from the dropdown box.
See the Job Change Reason Codes List in Appendix A for additional information.
15. Enter the new value as appropriate for:
Annual Salary / Contract Amount – Employee’s actual annual salary.
Factor – Used to calculate the amount per month to be paid.
Annual Salary (or Contract Amount) / Factor = Monthly Payment
As a general rule, the Factor will be the number of months in the contract / assignment for
faculty members, 1 for graduate assistants, and 12 for staff members.
Pays – Pays = Factor (Exception: Faculty member with a salary deferral agreement.)
Payroll Services will update the Pays field if a faculty member
completes a deferral agreement.
Unless the appointment is for less than 12 months, Factor = 12 and
Pays = 12 regardless of when the employee is hired during the year.
FTE – Full-Time Equivalent. ( Must be 1.0 or less)
Hours Per Day – Number of hours employee will work per day.
Hours Per Pay – Number of hours employee will work per pay period.
If the FTE for this employee is not 1.0, the Hours per Day and Hours
per Pay (based on the FTE) MUST be entered.
Timesheet Organization – Department timesheet organization number.
16. If the employee is to accrue leave using a different rule code than the default for
the employee class group, use the dropdown box to select the appropriate Job
Leave Category code.
See Appendix F for a list of Employee Classes with defaults and acceptable overrides.
17. If the Contract Type from step 12 is Secondary or Overload AND the employee should accrue leave on this
Secondary or Overload job, use the dropdown box for Accrue Leave and select Yes.
The Accrue Leave field is used to allow a Secondary or Overload job to accrue paid time off. In most
instances, this field will not be entered (remain as Not Selected) or will be entered with Yes. In the rare
instances where this job previously had an Accrue Leave value of Yes and should be changed to No, a
comment explaining the change to No is required.
If the Contract Type for this job is Primary, do NOT select Yes or No from the dropdown box. The New
Value should remain as Not Selected. For Primary jobs, this is automatically completed by Banner and
should not be overridden.
18. Leave Report Method (defaults to P – Payroll entry -- so that no leave report will be produced for the extra
job.) Change to W if you wish a leave report to be presented in Employee Self-Service for this job
19. Enter the New Value for:
Title
20. Review the Effective Date (defaulted to Query Date) for the funding information and change if appropriate.
The Effective Date is the date this action will affect payroll.
21. Review the funding information (defaulted based on the position number) in the New section and change if
appropriate.
Chart (COA) MUST be P for OPSU.
Funding total must equal 100%.
The Labor Distribution Percentage on each line must be between .01 and 100. When changing a line to
0%, that line must be removed. After entering 0 in the percent field, hit the Enter key or the Save button. A
Hours/ Hours/
FTE Day Pay
1.0 7.50 162.50
.75 5.63 121.88
.50 3.75 81.25
.25 1.88 40.63
Hours per day and
hours per pay should be
based on the FTE.

Page 23 of 91
remove box will appear for each line. Click on the remove box in the line to be removed, then hit the Enter
key or the Save button to remove the line.
22. In the Terminate / End Pay Job Record Only section, enter the Jobs Effective Date.
The Jobs Effective Date is the date this action will affect payroll. Use the termination date – the last day
the employee is scheduled to work in this position.
23. Enter the Personnel Date.
This date does not affect pay and serves as an information field for historical, audit, or reporting
purposes.
24. Review the Job Change Reason (defaulted to 2END, End of Appointment) and use the dropdown box to
change if appropriate.
See the Job Change Reason Codes List in Appendix A for additional information.
25. Review the Routing Queue and use the magnifying glass to change or add User Name(s) if appropriate.
26. In the Comment box, enter comments with sufficient detail for the approvers to understand the change to the
job record.
27. Click on the Save button, and check the top of the EPAF to make sure the action was saved successfully.
28. Review and then click on the Submit button.
The routing process does not begin until you click on the Save button and then the Submit button.

Page 24 of 91
ADD A JOB RECORD – SALARIED EMPLOYEE WITH NO END DATE
1. Log in and select Employee > Employee Self Service > Electronic Personnel Action Forms > New EPAF.
2. Enter the employee’s Banner ID or use the magnifying glass to search by the employee’s name.
Use % as the wildcard for searches.
3. Enter the Query Date (the date the action on the EPAF is to become effective).
4. Select Approval Category Additional Salaried Job no end date, AJS1NP.
5. Review current assignments under the Employee Job Assignments section.
Click on the All Jobs button below the Employee Job Assignments for a list of all jobs for the employee.
If the employee was previously in this position, STOP. Are you reactivating a primary job and there have
been subsequent primary jobs since the original primary job was ended? If the answer is YES, continue with
the Add a Job Record approval category; however, you must use a new suffix value for the position number.
If the answer is NO, use the Reactivate a Job approval category rather than the Add a Job Record approval
category.
Review the Last Paid Date for all job assignments, and make a note of the most recent Last Paid Date for
the employee.
6. If you have determined you are using the correct approval category, click on Go.
7. Enter the Position number and Suffix for the new job.
The Suffix is a combination of 2 alpha and/or numeric characters. In most cases, the suffix used will be
00. See Appendix D for Suffixes used to identify specific types of payments.
If the employee has multiple current jobs in the same position (usually due to multiple rates of pay),
start with a Suffix of 00, then use 01, 02, etc.
If you are reactivating a primary job and there have been subsequent primary jobs since the original
primary job was ended (see Step 5 above), use a one up on the Suffix originally used for the primary job you
are reactivating (e.g., if the original Suffix used for the position was 00, use 01).
8. Select the radio button for the new job, and click on Go.
9. Review the Job Begin Date (defaulted to Query Date) and change if appropriate.
The Job Begin Date is the date the assignment begins. This date should be the same as the Jobs Effective
Date.
10. Review the Jobs Effective Date (defaulted to Query Date) and change if appropriate.
The Jobs Effective Date is the date this action will affect payroll, and this date must be after the Last Paid
Date.
The Last Paid Date for the employee is listed in the top section of the EPAF screen (under Query Date and
to the right of Transaction Status); however, this date appears only when updating an existing job. If the
Last Paid Date information is not listed in this section, use the date you noted from the Employee Job
Assignments section in step 5.
For a New Job record, the Jobs Effective Date MUST be the same as the Job Begin Date.
11. Review the Personnel Date (defaulted to Query Date) and change if appropriate.
This date does not affect pay and serves as an information field for historical, audit, or reporting
purposes.
12. Use the dropdown box to select the Contract Type (defaulted to Overload).
Primary – The employee’s primary job.
Secondary – Used to add an additional position for an employee.
Overload – Used for a position in addition to a regular assignment (e.g., non-faculty employee who
teaches a class, a faculty member on a 9 month contract who has a summer assignment, housing or car
allowance, etc.).
Each employee can have only one Primary job.
13. Select the Job Status (defaulted to Active) and use the dropdown box to change if appropriate.
Remove – Do not select Remove as the Job Status field must be populated.

Page 25 of 91
Active
Leave without Pay, with Benefits
Leave without Pay, without Benefits
Leave with Pay, with Benefits
Leave with Partial Pay, with Benefits – Used for 60% LTD.
Terminated – Do not select Terminated for this approval category. Use a termination approval category.
14. Select the Job Change Reason (defaulted to 1CURR, Current Appointment) from the dropdown box.
See the Job Change Reason Codes List in Appendix A for additional information.
15. Enter the new value as appropriate for:
Annual Salary / Contract Amount – Employee’s actual annual salary.
Factor – Used to calculate the amount per month to be paid.
Annual Salary (or Contract Amount) / Factor = Monthly Payment
As a general rule, the Factor will be the number of months in the contract / assignment for
faculty members, 1 for graduate assistants, and 12 for staff members.
Pays – Pays = Factor (Exception: Faculty member with a salary deferral agreement.)
Payroll Services will update the Pays field if a faculty member completes a deferral agreement.
Unless the appointment is for less than 12 months, Factor = 12
and Pays = 12 regardless of when the employee is hired during the
year.
FTE – Full-Time Equivalent. ( Must be 1.0 or less)
Hours Per Day – Number of hours employee will work per day.
Hours Per Pay – Number of hours employee will work per pay period.
If the FTE for this employee is not 1.0, the Hours per Day and Hours
per Pay (based on the FTE) MUST be entered.
Timesheet Organization – Department timesheet organization number.
16. If the employee is to accrue leave using a different rule code than the default for the employee class group,
use the dropdown box to select the appropriate Job Leave Category code.
See Appendix F for a list of Employee Classes with defaults and acceptable overrides.
17. If the Contract Type from step 12 is Secondary or Overload AND the employee should accrue leave on this
Secondary or Overload job, use the dropdown box for Accrue Leave and select Yes.
The Accrue Leave field is used to allow a Secondary or Overload job to accrue paid time off. In most
instances, this field will not be entered (remain as Not Selected) or will be entered with Yes. In the rare
instances where this job previously had an Accrue Leave value of Yes and should be changed to No, a
comment explaining the change to No is required.
If the Contract Type for this job is Primary, do NOT select Yes or No from the dropdown box. The New
Value should remain as Not Selected. For Primary jobs, this is automatically completed by Banner and
should not be overridden.
18. Leave Report Method (defaults to P – Payroll entry -- so that no leave report will be produced for the extra
job.) Change to W if you wish a leave report to be presented in Employee Self-Service for this job.
19. Enter the New Value for:
Title
20. Review the Effective Date (defaulted to Query Date) for the funding information and change if appropriate.
The Effective Date is the date this action will affect payroll.
21. Review the funding information (defaulted based on the position number) in the New section and change if
appropriate.
Chart (COA) MUST be P for OPSU.
Funding total must equal 100%.
The Labor Distribution Percentage on each line must be between .01 and 100. When changing a line to
0%, that line must be removed. After entering 0 in the percent field, hit the Enter key or the Save button. A
remove box will appear for each line. Click on the remove box in the line to be removed, then hit the Enter
key or the Save button to remove the line.
Hours/ Hours/
FTE Day Pay
1.0 7.50 162.50
.75 5.63 121.88
.50 3.75 81.25
.25 1.88 40.63
Hours per day and
hours per pay should be
based on the FTE.

Page 26 of 91
22. Review the Routing Queue and use the magnifying glass to change or add User Name(s) if appropriate.
23. In the Comment box, enter comments with sufficient detail for the approvers to understand the change to the
job record.
24. Click on the Save button, and check the top of the EPAF to make sure the action was saved successfully.
25. Review and then click on the Submit button.
The routing process does not begin until you click on the Save button and then the Submit button.

Page 27 of 91
ADD A JOB RECORD – WORK STUDY WITH NO END DATE
1. Log in and select Employee > Employee Self Service > Electronic Personnel Action Forms > New EPAF.
2. Enter the employee’s Banner ID or use the magnifying glass to search by the employee’s name.
Use % as the wildcard for searches.
3. Enter the Query Date (the date the action on the EPAF is to become effective).
4. Select Approval Category Additional Work Study Job with no end date, AJW1NP.
5. Review current assignments under the Employee Job Assignments section.
Click on the All Jobs button below the Employee Job Assignments for a list of all jobs for the employee.
If the employee was previously in this position, STOP. Are you reactivating a primary job and there have
been subsequent primary jobs since the original primary job was ended? If the answer is YES, continue with
the Add a Job Record approval category; however, you must use a new suffix value for the position number.
If the answer is NO, use the Reactivate a Job approval category rather than the Add a Job Record approval
category.
Review the Last Paid Date for all job assignments, and make a note of the most recent Last Paid Date for
the employee.
6. If you have determined you are using the correct approval category, click on Go.
7. Enter the Position number and Suffix for the new job.
The Suffix is a combination of 2 alpha and/or numeric characters. In most cases, the suffix used will be
00. See Appendix D for Suffixes used to identify specific types of payments.
If the employee has multiple current jobs in the same position (usually due to multiple rates of pay),
start with a Suffix of 00, then use 01, 02, etc.
If you are reactivating a primary job and there have been subsequent primary jobs since the original
primary job was ended (see Step 5 above), use a one up on the Suffix originally used for the primary job you
are reactivating (e.g., if the original Suffix used for the position was 00, use 01).
8. Select the radio button for the new job, and click on Go.
9. Review the Job Begin Date (defaulted to Query Date) and change if appropriate.
The Job Begin Date is the date the assignment begins.
This date should be the same as the Jobs Effective Date.
10. Review the Jobs Effective Date (defaulted to Query Date) and change if appropriate.
The Jobs Effective Date is the date this action will affect payroll, and this date must be after the Last Paid
Date for the employee.
The Last Paid Date for the employee is listed in the top section of the EPAF screen (under Query Date and
to the right of Transaction Status); however, this date appears only when updating an existing job. If the
Last Paid Date information is not listed in this section, use the date you noted from the Employee Job
Assignments section in step 5.
For a New Job record, the Jobs Effective Date MUST be the same as the Job Begin Date.
11. Review the Personnel Date (defaulted to Query Date) and change if appropriate.
This date does not affect pay and serves as an information field for historical, audit, or reporting
purposes.
12. Review the Contract Type (defaulted to Secondary) and use the dropdown box to change if appropriate.
Primary – The employee’s primary job.
Secondary – Used to add an additional position for an employee.
Overload – Used for a position in addition to a regular assignment (e.g., non-faculty employee who
teaches a class, a faculty member on a 9 month contract who has a summer assignment, housing or car
allowance, etc.).
Each employee can have only one Primary job.
13. Select the Job Change Reason (defaulted to 1CURR, Concurrent Appointment) from the dropdown box.

Page 28 of 91
See the Job Change Reason Codes List in Appendix A for additional
information.
14. Enter the new value as appropriate for:
Regular Rate – Employee’s Pay Rate per Hour.
FTE – Full-Time Equivalent. ( Must be 1.0 or less)
Hours Per Day – Number of hours employee will work per day.
Hours Per Pay – Number of hours employee will work per pay period.
Timesheet Organization – Department timesheet organization number.
Title
15. Review the Effective Date (defaulted to Query Date) for the funding information and change if appropriate.
The Effective Date is the date this action will affect payroll.
16. Review the funding information (defaulted based on the position number) in the New section and change if
appropriate.
Chart (COA) MUST be P for OPSU.
Funding total must equal 100%.
The Labor Distribution Percentage on each line must be between .01 and 100. When changing a line to
0%, that line must be removed. After entering 0 in the percent field, hit the Enter key or the Save button. A
remove box will appear for each line. Click on the remove box in the line to be removed, then hit the Enter
key or the Save button to remove the line.
17. Review the Routing Queue and use the magnifying glass to change or add User Name(s) if appropriate.
18. In the Comment box, enter comments with sufficient detail for the approvers to understand the change to the
job record.
19. Click on the Save button, and check the top of the EPAF to make sure the action was saved successfully.
20. Review and then click on the Submit button.
The routing process does not begin until you click on the Save button and then the Submit button.
Hours/ Hours/
FTE Day Pay
1.0 7.50 162.50
.75 5.63 121.88
.50 3.75 81.25
.25 1.88 40.63
Hours per day and
hours per pay should be
based on the FTE.

Page 29 of 91
ADD A JOB RECORD – WORK STUDY WITH END DATE
1. Log in and select Employee > Employee Self Service > Electronic Personnel Action Forms > New EPAF.
2. Enter the employee’s Banner ID or use the magnifying glass to search by the employee’s name.
Use % as the wildcard for searches.
3. Enter the Query Date (the date the action on the EPAF is to become effective).
4. Select Approval Category Additional Work Study Job with end date, AJW1NP.
5. Review current assignments under the Employee Job Assignments section.
Click on the All Jobs button below the Employee Job Assignments for a list of all jobs for the employee.
If the employee was previously in this position, STOP. Are you reactivating a primary job and there have
been subsequent primary jobs since the original primary job was ended? If the answer is YES, continue with
the Add a Job Record approval category; however, you must use a new suffix value for the position number.
If the answer is NO, use the Reactivate a Job approval category rather than the Add a Job Record approval
category.
Review the Last Paid Date for all job assignments, and make a note of the most recent Last Paid Date for
the employee.
6. If you have determined you are using the correct approval category, click on Go.
7. Enter the Position number and Suffix for the new job.
The Suffix is a combination of 2 alpha and/or numeric characters. In most cases, the suffix used will be
00. See Appendix D for Suffixes used to identify specific types of payments.
If the employee has multiple current jobs in the same position (usually due to multiple rates of pay),
start with a Suffix of 00, then use 01, 02, etc.
If you are reactivating a primary job and there have been subsequent primary jobs since the original
primary job was ended (see Step 5 above), use a one up on the Suffix originally used for the primary job you
are reactivating (e.g., if the original Suffix used for the position was 00, use 01).
8. Select the radio button for the new job, and click on Go.
9. Review the Job Begin Date (defaulted to Query Date) and change if appropriate.
The Job Begin Date is the date the assignment begins.
This date should be the same as the Jobs Effective Date.
10. Review the Jobs Effective Date (defaulted to Query Date) and change if appropriate.
The Jobs Effective Date is the date this action will affect payroll, and this date must be after the Last Paid
Date for the employee.
The Last Paid Date for the employee is listed in the top section of the EPAF screen (under Query Date and
to the right of Transaction Status); however, this date appears only when updating an existing job. If the
Last Paid Date information is not listed in this section, use the date you noted from the Employee Job
Assignments section in step 5.
For a New Job record, the Jobs Effective Date MUST be the same as the Job Begin Date.
11. Review the Personnel Date (defaulted to Query Date) and change if appropriate.
This date does not affect pay and serves as an information field for historical, audit, or reporting
purposes.
12. Review the Contract Type (defaulted to Secondary) and use the dropdown box to change if appropriate.
Primary – The employee’s primary job.
Secondary – Used to add an additional position for an employee.
Overload – Used for a position in addition to a regular assignment (e.g., non-faculty employee who
teaches a class, a faculty member on a 9 month contract who has a summer assignment, housing or car
allowance, etc.).
Each employee can have only one Primary job.
13. Select the Job Change Reason (defaulted to 1CURR, Concurrent Appointment) from the dropdown box.

Page 30 of 91
See the Job Change Reason Codes List in Appendix A for additional
information.
14. Enter the new value as appropriate for:
Regular Rate – Employee’s Pay Rate per Hour.
FTE – Full-Time Equivalent. ( Must be 1.0 or less)
Hours Per Day – Number of hours employee will work per day.
Hours Per Pay – Number of hours employee will work per pay period.
Timesheet Organization – Department timesheet organization number.
Title
15. Review the Effective Date (defaulted to Query Date) for the funding information and change if appropriate.
The Effective Date is the date this action will affect payroll.
16. Review the funding information (defaulted based on the position number) in the New section and change if
appropriate.
Chart (COA) MUST be P for OPSU.
Funding total must equal 100%.
The Labor Distribution Percentage on each line must be between .01 and 100. When changing a line to
0%, that line must be removed. After entering 0 in the percent field, hit the Enter key or the Save button. A
remove box will appear for each line. Click on the remove box in the line to be removed, then hit the Enter
key or the Save button to remove the line.
17. In the Terminate / End Pay Job Record Only section, enter the Jobs Effective Date.
The Jobs Effective Date is the date this action will affect payroll.
18. Enter the Personnel Date.
This date does not affect pay and serves as an information field for historical, audit, or reporting
purposes.
19. Review the Job Change Reason (defaulted to 2END, End of Appointment) and use the dropdown box to
change if appropriate.
See the Job Change Reason Codes List in Appendix A for additional information.
20. Review the Routing Queue and use the magnifying glass to change or add User Name(s) if appropriate.
21. In the Comment box, enter comments with sufficient detail for the approvers to understand the change to the
job record.
22. Click on the Save button, and check the top of the EPAF to make sure the action was saved successfully.
23. Review and then click on the Submit button.
The routing process does not begin until you click on the Save button and then the Submit button.
Hours/ Hours/
FTE Day Pay
1.0 7.50 162.50
.75 5.63 121.88
.50 3.75 81.25
.25 1.88 40.63
Hours per day and
hours per pay should be
based on the FTE.

Page 31 of 91
CHANGE A JOB RECORD – HOURLY EMPLOYEE
1. Log in and select Employee > Employee Self Service > Electronic Personnel Action Forms > New EPAF.
2. Enter the employee’s Banner ID or use the magnifying glass to search by the employee’s name.
Use % as the wildcard for searches.
3. Enter the Query Date (the date the action on the EPAF is to become effective) in MM/DD/YYYY format.
4. Select Approval Category Change Existing Hourly Job, CJH1NP.
5. Review current assignments under the Employee Job Assignments section.
Click on the All Jobs button below the Employee Job Assignments for a list of all jobs for the employee.
Review the Last Paid Date for all job assignments, and make a note of the most recent Last Paid Date for
the employee.
6. Click on Go.
7. Select the radio button for the position to be changed, and click on Go.
8. Review the Jobs Effective Date (defaulted to Query Date) and change if appropriate.
The Jobs Effective Date is the date this action will affect payroll, and this date must be after the Last Paid
Date.
The Last Paid Date for the employee is listed in the top section of the EPAF screen (under Query Date and
to the right of Transaction Status). If the Last Paid Date information is not listed in this section, use the date
you noted from the Employee Job Assignments section in step 5.
9. Review the Personnel Date (defaulted to Query Date) and change if appropriate.
This date does not affect pay and serves as an information field for historical, audit, or reporting
purposes.
10. Review the Contract Type current value and use the dropdown box to change if appropriate.
Primary – The employee’s primary job.
Secondary – Used to add an additional position for an employee.
Overload – Used for a position in addition to a regular assignment (e.g., non-faculty employee who
teaches a class, a faculty member on a 9 month contract who has a summer assignment, housing or car
allowance, etc.).
Each employee can have only one Primary job.
11. Review Job Status current value and use the dropdown box to change if appropriate.
Remove – Do not select Remove as the Job Status field must be populated.
Active
Leave without Pay, with Benefits
Leave without Pay, without Benefits
Leave with Pay, with Benefits
Leave with Partial Pay, with Benefits
Terminated – Do not select Terminated for this approval category. Use a termination approval category.
12. Select the Job Change Reason from the dropdown box.
See the Job Change Reason Codes List in Appendix A for additional
information.
13. Review the current values and enter the new value for any changes to:
a. Regular Rate – Employee’s Pay Rate per Hour.
b. FTE – Full-Time Equivalent. ( Must be 1.0 or less)
c. Hours Per Day – Number of hours employee will work per day.
d. Hours Per Pay – Number of hours employee will work per pay period.
If a change is made to FTE, Hours Per Day and Hours Per Pay must
be updated.
e. Timesheet Organization – Department timesheet organization number.
Hours/ Hours/
FTE Day Pay
1.0 7.50 162.50
.75 5.63 121.88
.50 3.75 81.25
.25 1.88 40.63
Hours per day and
hours per pay should be
based on the FTE.

Page 32 of 91
14. If the employee is to accrue leave using a different rule code than the default for the employee class group,
use the dropdown box to select the appropriate Job Leave Category code.
See Appendix F for a list of Employee Classes with defaults and acceptable overrides.
15. If the Contract Type from step 10 is Secondary or Overload AND the employee should accrue leave on this
Secondary or Overload job, use the dropdown box for Accrue Leave and select Yes.
The Accrue Leave field is used to allow a Secondary or Overload job to accrue paid time off. In most
instances, this field will not be entered (remain as Not Selected) or will be entered with Yes. In the rare
instances where this job previously had an Accrue Leave value of Yes and should be changed to No, a
comment explaining the change to No is required.
If the Contract Type for this job is Primary, do NOT select Yes or No from the dropdown box. The New
Value should remain as Not Selected. For Primary jobs, this is automatically completed by Banner and
should not be overridden.
16. Enter the New Value for:
Title
17. Review the Effective Date (defaulted to Query Date) for the New funding information and change if
appropriate.
The Effective Date is the date this action will affect payroll.
18. Review current funding and update funding in the New section (defaulted to the current value) if appropriate.
Chart (COA) MUST be P for OPSU.
Funding total must equal 100%.
The Labor Distribution Percentage on each line must be between .01 and 100. When changing a line to
0%, that line must be removed. After entering 0 in the percent field, hit the Enter key or the Save button. A
remove box will appear for each line. Click on the remove box in the line to be removed, then hit the Enter
key or the Save button to remove the line.
19. Review the Routing Queue and use the magnifying glass to change or add User Name(s) if appropriate.
20. In the Comment box, enter comments with sufficient detail for the approvers to understand the change to the
job record.
21. Click on the Save button, and check the top of the EPAF to make sure the action was saved successfully.
22. Review and then click on the Submit button.
The routing process does not begin until you click on the Save button and then the Submit button.

Page 33 of 91
CHANGE A JOB RECORD – SALARIED EMPLOYEE
1. Log in and select Employee > Employee Self Service > Electronic Personnel Action Forms > New EPAF.
2. Enter the employee’s Banner ID or use the magnifying glass to search by the employee’s name.
Use % as the wildcard for searches.
3. Enter the Query Date (the date the action on the EPAF is to become effective) in MM/DD/YYYY format.
4. Select Approval Category Change Existing Salaried Job, CJS1NP.
5. Review current assignments under the Employee Job Assignments section.
Click on the All Jobs button below the Employee Job Assignments for a list of all jobs for the employee.
Review the Last Paid Date for all job assignments, and make a note of the most recent Last Paid Date for
the employee.
6. Click on Go.
7. Select the radio button for the position to be changed, and click on Go.
8. Review the Jobs Effective Date (defaulted to Query Date) and change if appropriate.
The Jobs Effective Date is the date this action will affect payroll, and this date must be after the Last Paid
Date.
The Last Paid Date for the employee is listed in the top section of the EPAF screen (under Query Date and
to the right of Transaction Status). If the Last Paid Date information is not listed in this section, use the date
you noted from the Employee Job Assignments section in step 5.
9. Review the Personnel Date (defaulted to Query Date) and change if appropriate.
This date does not affect pay and serves as an information field for historical, audit, or reporting
purposes.
10. Review the Contract Type current value and use the dropdown box to change if appropriate.
Primary – The employee’s primary job.
Secondary – Used to add an additional position for an employee.
Overload – Used for a position in addition to a regular assignment (e.g., non-faculty employee who
teaches a class, a faculty member on a 9 month contract who has a summer assignment, housing or car
allowance, etc.).
Each employee can have only one Primary job.
11. Review Job Status current value and use the dropdown box to change if appropriate.
Remove – Do not select Remove as the Job Status field must be populated.
Active
Leave without Pay, with Benefits
Leave without Pay, without Benefits
Leave with Pay, with Benefits
Leave with Partial Pay, with Benefits – Used for 60% LTD.
Terminated – Do not select Terminated for this approval category. Use a termination approval category.
12. Select the Job Change Reason from the dropdown box.
See the Job Change Reason Codes List in Appendix A for additional information.
13. Review the current values and enter the new value for any changes to:
Annual Salary / Contract Amount – Employee’s actual annual salary.
Factor – Used to calculate the amount per month to be paid.
Annual Salary (or Contract Amount) / Factor = Monthly Payment
As a general rule, the Factor will be the number of months in the contract / assignment for
faculty members, 1 for graduate assistants, and 12 for staff members.
Pays – Pays = Factor (Exception: Faculty member with a salary deferral agreement.)
Payroll Services will update the Pays field if a faculty member completes a deferral agreement.
Unless the appointment is for less than 12 months, Factor = 12 and Pays = 12 regardless of
when the employee is hired during the year.

Page 34 of 91
FTE – Full-Time Equivalent. ( Must be 1.0 or less)
Hours Per Day – Number of hours employee will work per day.
Hours Per Pay – Number of hours employee will work per pay period.
If a change is made to FTE, Hours Per Day and Hours Per Pay
must be updated.
Timesheet Organization – Department timesheet organization
number.
14. If the employee is to accrue leave using a different rule code than the default
for the employee class group, use the dropdown box to select the appropriate
Job Leave Category code.
See Appendix F for a list of Employee Classes with defaults and acceptable overrides.
15. If the Contract Type from step 10 is Secondary or Overload AND the employee should accrue leave on this
Secondary or Overload job, use the dropdown box for Accrue Leave and select Yes.
The Accrue Leave field is used to allow a Secondary or Overload job to accrue paid time off. In most
instances, this field will not be entered (remain as Not Selected) or will be entered with Yes. In the rare
instances where this job previously had an Accrue Leave value of Yes and should be changed to No, a
comment explaining the change to No is required.
If the Contract Type for this job is Primary, do NOT select Yes or No from the dropdown box. The New
Value should remain as Not Selected. For Primary jobs, this is automatically completed by Banner and
should not be overridden.
16. Leave Report Method. Enter a value ONLY if the leave report method is changing. Enter ‘W’ if you wish a
leave report to be presented in Employee Self-Service for this job. Enter ‘P’ if you wish no leave report to be
presented in Employee Self-Service for this job.
17. Enter the New Value for:
Title
18. Review the Effective Date (defaulted to Query Date) for the New funding information and change if
appropriate.
The Effective Date is the date this action will affect payroll.
19. Review current funding and update funding in the New section (defaulted to the current value) if appropriate.
Chart (COA) MUST be P for OPSU.
Funding total must equal 100%.
The Labor Distribution Percentage on each line must be between .01 and 100. When changing a line to
0%, that line must be removed. After entering 0 in the percent field, hit the Enter key or the Save button. A
remove box will appear for each line. Click on the remove box in the line to be removed, then hit the Enter
key or the Save button to remove the line.
20. Review the Routing Queue and use the magnifying glass to change or add User Name(s) if appropriate.
21. In the Comment box, enter comments with sufficient detail for the approvers to understand the change to the
job record.
22. Click on the Save button, and check the top of the EPAF to make sure the action was saved successfully.
23. Review and then click on the Submit button.
The routing process does not begin until you click on the Save button and then the Submit button.
Hours/ Hours/
FTE Day Pay
1.0 7.50 162.50
.75 5.63 121.88
.50 3.75 81.25
.25 1.88 40.63
Hours per day and
hours per pay should be
based on the FTE.

Page 35 of 91
CHANGE A JOB RECORD – WORK STUDY
1. Log in and select Employee > Employee Self Service > Electronic Personnel Action Forms > New EPAF.
2. Enter the employee’s Banner ID or use the magnifying glass to search by the employee’s name.
Use % as the wildcard for searches.
3. Enter the Query Date (the date the action on the EPAF is to become effective) in MM/DD/YYYY format.
4. Select Approval Category Change Existing Work Study Job, CJW1NP.
5. Review current assignments under the Employee Job Assignments section.
Click on the All Jobs button below the Employee Job Assignments for a list of all jobs for the employee.
Review the Last Paid Date for all job assignments, and make a note of the most recent Last Paid Date for
the employee.
6. Click on Go.
7. Select the radio button for the position to be changed, and click on Go.
8. Review the Jobs Effective Date (defaulted to Query Date) and change if appropriate.
The Jobs Effective Date is the date this action will affect payroll, and this date must be after the Last Paid
Date.
The Last Paid Date for the employee is listed in the top section of the EPAF screen (under Query Date and
to the right of Transaction Status). If the Last Paid Date information is not listed in this section, use the date
you noted from the Employee Job Assignments section in step 5.
9. Review the Personnel Date (defaulted to Query Date) and change if appropriate.
This date does not affect pay and serves as an information field for historical, audit, or reporting
purposes.
10. Review the Contract Type current value and use the dropdown box to change if appropriate.
Primary – The employee’s primary job.
Secondary – Used to add an additional position for an employee.
Overload – Used for a position in addition to a regular assignment (e.g., non-faculty employee who
teaches a class, a faculty member on a 9 month contract who has a summer assignment, housing or car
allowance, etc.).
11. Review Job Status current value and use the dropdown box to change if appropriate.
Remove – Do not select Remove as the Job Status field must be populated.
Active
Leave without Pay, with Benefits
Leave without Pay, without Benefits
Leave with Pay, with Benefits
Leave with Partial Pay, with Benefits
Terminated – Do not select Terminated for this approval category. Use a termination approval category.
Each employee can have only one Primary job.
12. Select the Job Change Reason from the dropdown box.
See the Job Change Reason Codes List in Appendix A for additional information.
13. Review the current values and enter the new value for any changes to:
Regular Rate – Employee’s Pay Rate per Hour.
FTE – Full-Time Equivalent. ( Must be 1.0 or less)
Hours Per Day – Number of hours employee will work per day.
Hours Per Pay – Number of hours employee will work per pay period.
If a change is made to FTE, Hours Per Day and Hours Per Pay must
be updated.
Timesheet Organization – Department timesheet organization number.
Title
Hours/ Hours/
FTE Day Pay
1.0 7.50 162.50
.75 5.63 121.88
.50 3.75 81.25
.25 1.88 40.63
Hours per day and
hours per pay should be
based on the FTE.

Page 36 of 91
14. Review the Effective Date (defaulted to Query Date) for the New funding information and change if
appropriate.
The Effective Date is the date this action will affect payroll.
15. Review current funding and update funding in the New section (defaulted to the current value) if appropriate.
Chart (COA) MUST be P for OPSU.
Funding total must equal 100%.
The Labor Distribution Percentage on each line must be between .01 and 100. When changing a line to
0%, that line must be removed. After entering 0 in the percent field, hit the Enter key or the Save button. A
remove box will appear for each line. Click on the remove box in the line to be removed, then hit the Enter
key or the Save button to remove the line.
16. Review the Routing Queue and use the magnifying glass to change or add User Name(s) if appropriate.
17. In the Comment box, enter comments with sufficient detail for the approvers to understand the change to the
job record.
18. Click on the Save button, and check the top of the EPAF to make sure the action was saved successfully.
19. Review and then click on the Submit button.
The routing process does not begin until you click on the Save button and then the Submit button.

Page 37 of 91
REACTIVATE A JOB RECORD – HOURLY EMPLOYEE WITH NO END DATE
1. Log in and select Employee > Employee Self Service > Electronic Personnel Action Forms > New EPAF.
2. Enter the employee’s Banner ID or use the magnifying glass to search by the employee’s name.
Use % as the wildcard for searches.
3. Enter the Query Date in MM/DD/YYYY format.
When reactivating a previous job, you may query using an earlier date when that previous job was
active. This will allow you to select the previous job. Remember to change the Jobs Effective Date,
Personnel Date, and Funding Effective Date as appropriate as the query date will have auto-populated those
fields.
4. Select Approval Category Reactivate Existing Hourly Job no end date, RJH1NP.
5. Review current assignments under the Employee Job Assignments section.
Click on the All Jobs button below the Employee Job Assignments for a list of all jobs for the employee.
If you are reactivating a primary job and there have been subsequent primary jobs since the original
primary job was ended, STOP. Use an Add a New Job approval category and use a new suffix value for the
position number.
Review the Last Paid Date for all job assignments, and make a note of the most recent Last Paid Date for
the employee.
6. If you have determined you are using the correct approval category, click on Go.
7. Select the radio button for the position to be changed, and click on Go.
8. Review the Jobs Effective Date (defaulted to Query Date) and change if appropriate.
The Jobs Effective Date is the date this action will affect payroll, and this date must be after the Last Paid
Date for the employee.
The Last Paid Date for the employee is listed in the top section of the EPAF screen (under Query Date and
to the right of Transaction Status); however, this date appears only when updating an existing job. If the
Last Paid Date information is not listed in this section, use the date you noted from the Employee Job
Assignments section in step 5.
9. Review the Personnel Date (defaulted to Query Date) and change if appropriate.
This date does not affect pay and serves as an information field for historical, audit, or reporting
purposes.
10. Review the Contract Type current value and use the dropdown box to change if appropriate.
Primary – The employee’s primary job.
Secondary – Used to add an additional position for an employee.
Overload – Used for a position in addition to a regular assignment (e.g., non-faculty employee who
teaches a class, a faculty member on a 9 month contract who has a summer assignment, housing or car
allowance, etc.).
Each employee can have only one Primary job.
11. Select the Job Change Reason from the dropdown box.
See the Job Change Reason Codes List in Appendix A for additional
information.
12. Review the current values and enter the new value for any changes to:
Regular Rate – Employee’s Pay Rate per Hour.
FTE – Full-Time Equivalent. ( Must be 1.0 or less)
Hours Per Day – Number of hours employee will work per day.
Hours Per Pay – Number of hours employee will work per pay period.
If a change is made to FTE, Hours Per Day and Hours Per Pay must
be updated.
Timesheet Organization – Department timesheet organization number.
Hours/ Hours/
FTE Day Pay
1.0 7.50 162.50
.75 5.63 121.88
.50 3.75 81.25
.25 1.88 40.63
Hours per day and
hours per pay should be
based on the FTE.

Page 38 of 91
13. If the employee is to accrue leave using a different rule code than the default for the employee class group,
use the dropdown box to select the appropriate Job Leave Category code.
See Appendix F for a list of Employee Classes with defaults and acceptable overrides.
14. If the Contract Type from step 10 is Secondary or Overload AND the employee should accrue leave on this
Secondary or Overload job, use the dropdown box for Accrue Leave and select Yes.
The Accrue Leave field is used to allow a Secondary or Overload job to accrue paid time off. In most
instances, this field will not be entered (remain as Not Selected) or will be entered with Yes. In the rare
instances where this job previously had an Accrue Leave value of Yes and should be changed to No, a
comment explaining the change to No is required.
If the Contract Type for this job is Primary, do NOT select Yes or No from the dropdown box. The New
Value should remain as Not Selected. For Primary jobs, this is automatically completed by Banner and
should not be overridden.
15. Enter the New Value for:
Title
16. Review the Effective Date (defaulted to Query Date) for the New funding information and change if
appropriate.
The Effective Date is the date this action will affect payroll.
17. Review current funding and update funding in the New section (defaulted to the current value) if appropriate.
Chart (COA) MUST be P for OPSU.
Funding total must equal 100%.
The Labor Distribution Percentage on each line must be between .01 and 100. When changing a line to
0%, that line must be removed. After entering 0 in the percent field, hit the Enter key or the Save button. A
remove box will appear for each line. Click on the remove box in the line to be removed, then hit the Enter
key or the Save button to remove the line.
18. Review the Routing Queue and use the magnifying glass to change or add User Name(s) if appropriate.
19. In the Comment box, enter comments with sufficient detail for the approvers to understand the change to the
job record.
20. Click on the Save button, and check the top of the EPAF to make sure the action was saved successfully.
21. Review and then click on the Submit button.
The routing process does not begin until you click on the Save button and then the Submit button.

Page 39 of 91
REACTIVATE A JOB RECORD – HOURLY EMPLOYEE WITH END DATE
1. Log in and select Employee > Employee Self Service > Electronic Personnel Action Forms > New EPAF.
2. Enter the employee’s Banner ID or use the magnifying glass to search by the employee’s name.
Use % as the wildcard for searches.
3. Enter the Query Date in MM/DD/YYYY format.
When reactivating a previous job, you may query using an earlier date when that previous job was
active. This will allow you to select the previous job. Remember to change the Jobs Effective Date,
Personnel Date, and Funding Effective Date as appropriate as the query date will have auto-populated those
fields.
4. Select Approval Category Reactivate Existing Hourly Job with END DATE, RJH1EP.
5. Review current assignments under the Employee Job Assignments section.
Click on the All Jobs button below the Employee Job Assignments for a list of all jobs for the employee.
If you are reactivating a primary job and there have been subsequent primary jobs since the original
primary job was ended, STOP. Use an Add a New Job approval category and use a new suffix value for the
position number.
Review the Last Paid Date for all job assignments, and make a note of the most recent Last Paid Date for
the employee.
6. If you have determined you are using the correct approval category, click on Go.
7. Select the radio button for the position to be changed, and click on Go.
8. Review the Jobs Effective Date (defaulted to Query Date) and change if appropriate.
The Jobs Effective Date is the date this action will affect payroll, and this date must be after the Last Paid
Date for the employee.
The Last Paid Date for the employee is listed in the top section of the EPAF screen (under Query Date and
to the right of Transaction Status); however, this date appears only when updating an existing job. If the
Last Paid Date information is not listed in this section, use the date you noted from the Employee Job
Assignments section in step 5.
9. Review the Personnel Date (defaulted to Query Date) and change if appropriate.
This date does not affect pay and serves as an information field for historical, audit, or reporting
purposes.
10. Review the Contract Type current value and use the dropdown box to change if appropriate.
Primary – The employee’s primary job.
Secondary – Used to add an additional position for an employee.
Overload – Used for a position in addition to a regular assignment (e.g., non-faculty employee who
teaches a class, a faculty member on a 9 month contract who has a summer assignment, housing or car
allowance, etc.).
Each employee can have only one Primary job.
11. Review Job Status (defaulted to Active) and use the dropdown box to change if appropriate.
Remove – Do not select Remove as the Job Status field must be populated.
Active
Leave without Pay, with Benefits
Leave without Pay, without Benefits
Leave with Pay, with Benefits
Leave with Partial Pay, with Benefits – Used for 60% LTD.
Terminated – Do not select Terminated in this section.
12. Select the Job Change Reason from the dropdown box.
See the Job Change Reason Codes List in Appendix A for additional
information.
13. Review the current values and enter the new value for any changes to:

Page 40 of 91
Regular Rate – Employee’s Pay Rate per Hour.
FTE – Full-Time Equivalent. ( Must be 1.0 or less)
Hours Per Day – Number of hours employee will work per day.
Hours Per Pay – Number of hours employee will work per pay period.
If a change is made to FTE, Hours Per Day and Hours Per Pay must
be updated.
Timesheet Organization – Department timesheet organization number.
14. If the employee is to accrue leave using a different rule code than the default for the employee class group,
use the dropdown box to select the appropriate Job Leave Category code.
See Appendix F for a list of Employee Classes with defaults and acceptable overrides.
15. If the Contract Type from step 10 is Secondary or Overload AND the employee should accrue leave on this
Secondary or Overload job, use the dropdown box for Accrue Leave and select Yes.
The Accrue Leave field is used to allow a Secondary or Overload job to accrue paid time off. In most
instances, this field will not be entered (remain as Not Selected) or will be entered with Yes. In the rare
instances where this job previously had an Accrue Leave value of Yes and should be changed to No, a
comment explaining the change to No is required.
If the Contract Type for this job is Primary, do NOT select Yes or No from the dropdown box. The New
Value should remain as Not Selected. For Primary jobs, this is automatically completed by Banner and
should not be overridden.
16. Enter the New Value for:
Title
17. Review the Effective Date (defaulted to Query Date) for the New funding information and change if
appropriate.
The Effective Date is the date this action will affect payroll.
18. Review current funding and update funding in the New section (defaulted to the current value) if appropriate.
Chart (COA) MUST be P for OPSU.
Funding total must equal 100%.
The Labor Distribution Percentage on each line must be between .01 and 100. When changing a line to
0%, that line must be removed. After entering 0 in the percent field, hit the Enter key or the Save button. A
remove box will appear for each line. Click on the remove box in the line to be removed, then hit the Enter
key or the Save button to remove the line.
19. In the Terminate / End Pay Job Record Only section, enter the Jobs Effective Date.
The Jobs Effective Date is the date this action will affect payroll.
20. Enter the Personnel Date.
This date does not affect pay and serves as an information field for historical, audit, or reporting
purposes.
21. Review the Job Change Reason (defaulted to 2END, End of Appointment) and use the dropdown box to
change if appropriate.
See the Job Change Reason Codes List in Appendix A for additional information.
22. Review Job Status (defaulted to Terminated) and use the dropdown box to change if appropriate.
Remove – Do not select Remove as the Job Status field must be populated.
Active – Do not select Active in this section.
Leave without Pay, with Benefits
Leave without Pay, without Benefits
Leave with Pay, with Benefits
Leave with Partial Pay, with Benefits – Used for 60% LTD.
Terminated
23. Review the Routing Queue and use the magnifying glass to change or add User Name(s) if appropriate.
24. In the Comment box, enter comments with sufficient detail for the approvers to understand the change to the
job record.
25. Click on the Save button, and check the top of the EPAF to make sure the action was saved successfully.
Hours/ Hours/
FTE Day Pay
1.0 7.50 162.50
.75 5.63 121.88
.50 3.75 81.25
.25 1.88 40.63
Hours per day and
hours per pay should be
based on the FTE.

Page 41 of 91
26. Review and then click on the Submit button.
The routing process does not begin until you click on the Save button and then the Submit button.

Page 42 of 91
REACTIVATE A JOB RECORD – SALARIED EMPLOYEE WITH END DATE
1. Log in and select Employee > Employee Self Service > Electronic Personnel Action Forms > New EPAF.
2. Enter the employee’s Banner ID or use the magnifying glass to search by the employee’s name.
Use % as the wildcard for searches.
3. Enter the Query Date in MM/DD/YYYY format.
When reactivating a previous job, you may query using an earlier date when that previous job was
active. This will allow you to select the previous job. Remember to change the Jobs Effective Date,
Personnel Date, and Funding Effective Date as appropriate as the query date will have auto-populated those
fields.
4. Select Approval Category Reactivate Existing Salaried Job with END DATE, RJS1EP.
5. Review current assignments under the Employee Job Assignments section.
Click on the All Jobs button below the Employee Job Assignments for a list of all jobs for the employee.
If you are reactivating a primary job and there have been subsequent primary jobs since the original
primary job was ended, STOP. Use an Add a New Job approval category and use a new suffix value for the
position number.
Review the Last Paid Date for all job assignments, and make a note of the most recent Last Paid Date for
the employee.
6. If you have determined you are using the correct approval category, click on Go.
7. Select the radio button for the position to be changed, and click on Go.
8. Review the Jobs Effective Date (defaulted to Query Date) and change if appropriate.
The Jobs Effective Date is the date this action will affect payroll, and this date must be after the Last Paid
Date.
The Last Paid Date for the employee is listed in the top section of the EPAF screen (under Query Date and
to the right of Transaction Status); however, this date appears only when updating an existing job. If the
Last Paid Date information is not listed in this section, use the date you noted from the Employee Job
Assignments section in step 5.
9. Review the Personnel Date (defaulted to Query Date) and change if appropriate.
This date does not affect pay and serves as an information field for historical, audit, or reporting
purposes.
10. Review the Contract Type current value and use the dropdown box to change if appropriate.
Primary – The employee’s primary job.
Secondary – Used to add an additional position for an employee.
Overload – Used for a position in addition to a regular assignment (e.g., non-faculty employee who
teaches a class, a faculty member on a 9 month contract who has a summer assignment, housing or car
allowance, etc.)
Each employee can have only one Primary job.
11. Review Job Status (defaulted to Active) and use the dropdown box to change if appropriate.
Remove – Do not select Remove as the Job Status field must be populated.
Active
Leave without Pay, with Benefits
Leave without Pay, without Benefits
Leave with Pay, with Benefits
Leave with Partial Pay, with Benefits – Used for 60% LTD.
Terminated – Do not select Terminated in this section.
12. Select the Job Change Reason from the dropdown box.
See the Job Change Reason Codes List in Appendix A for additional information.
13. Review the current values and enter the new value for any changes to:
Annual Salary / Contract Amount – Employee’s actual annual salary.

Page 43 of 91
Factor – Used to calculate the amount per month to be paid.
Annual Salary (or Contract Amount) / Factor = Monthly Payment
As a general rule, the Factor will be the number of months in the contract / assignment for
faculty members, 1 for graduate assistants, and 12 for staff members.
Pays – Pays = Factor (Exception: Faculty member with a salary deferral agreement.)
Payroll Services will update the Pays field if a faculty member
completes a deferral agreement.
Unless the appointment is for less than 12 months, Factor = 12 and
Pays = 12 regardless of when the employee is hired during the year.
FTE – Full-Time Equivalent. ( Must be 1.0 or less)
Hours Per Day – Number of hours employee will work per day.
Hours Per Pay – Number of hours employee will work per pay period.
If a change is made to FTE, Hours Per Day and Hours Per Pay must
be updated.
Timesheet Organization – Department timesheet organization number.
14. If the employee is to accrue leave using a different rule code than the default for the employee class group,
use the dropdown box to select the appropriate Job Leave Category code.
See Appendix F for a list of Employee Classes with defaults and acceptable overrides.
15. If the Contract Type from step 10 is Secondary or Overload AND the employee should accrue leave on this
Secondary or Overload job, use the dropdown box for Accrue Leave and select Yes.
The Accrue Leave field is used to allow a Secondary or Overload job to accrue paid time off. In most
instances, this field will not be entered (remain as Not Selected) or will be entered with Yes. In the rare
instances where this job previously had an Accrue Leave value of Yes and should be changed to No, a
comment explaining the change to No is required.
If the Contract Type for this job is Primary, do NOT select Yes or No from the dropdown box. The New
Value should remain as Not Selected. For Primary jobs, this is automatically completed by Banner and
should not be overridden.
16. Enter the New Value for:
Title
17. Review the Effective Date (defaulted to Query Date) for the New funding information and change if
appropriate.
The Effective Date is the date this action will affect payroll.
18. Review current funding and update funding in the New section (defaulted to the current value) if appropriate.
Chart (COA) MUST be P for OPSU.
Funding total must equal 100%.
The Labor Distribution Percentage on each line must be between .01 and 100. When changing a line to
0%, that line must be removed. After entering 0 in the percent field, hit the Enter key or the Save button. A
remove box will appear for each line. Click on the remove box in the line to be removed, then hit the Enter
key or the Save button to remove the line.
19. In the Terminate Job Record Only section, enter the Jobs Effective Date.
The Jobs Effective Date is the date this action will affect payroll. Use the termination date – the last day
the employee is scheduled to work in this position.
20. Enter the Personnel Date.
This date does not affect pay and serves as an information field for historical, audit, or reporting
purposes.
21. Review the Job Change Reason (defaulted to 2END, End of Appointment) and use the dropdown box to
change if appropriate.
See the Job Change Reason Codes List in Appendix A for additional information.
22. Review Job Status (defaulted to Terminated) and use the dropdown box to change if appropriate.
Remove – Do not select Remove as the Job Status field must be populated.
Active – Do not select Active in this section.
Hours/ Hours/
FTE Day Pay
1.0 7.50 162.50
.75 5.63 121.88
.50 3.75 81.25
.25 1.88 40.63
Hours per day and
hours per pay should be
based on the FTE.

Page 44 of 91
Leave without Pay, with Benefits
Leave without Pay, without Benefits
Leave with Pay, with Benefits
Leave with Partial Pay, with Benefits – Used for 60% LTD.
Terminated
23. Review the Routing Queue and use the magnifying glass to change or add User Name(s) if appropriate.
24. In the Comment box, enter comments with sufficient detail for the approvers to understand the change to the
job record.
25. Click on the Save button, and check the top of the EPAF to make sure the action was saved successfully.
26. Review and then click on the Submit button.
The routing process does not begin until you click on the Save button and then the Submit button.

Page 45 of 91
REACTIVATE A JOB RECORD – SALARIED EMPLOYEE WITH NO END DATE
1. Log in and select Employee > Employee Self Service > Electronic Personnel Action Forms > New EPAF.
2. Enter the employee’s Banner ID or use the magnifying glass to search by the employee’s name.
Use the % as the wildcard for searches.
3. Enter the Query Date in MM/DD/YYYY format.
When reactivating a previous job, you may query using an earlier date when that previous job was
active. This will allow you to select the previous job. Remember to change the Jobs Effective Date,
Personnel Date, and Funding Effective Date as appropriate as the query date will have auto-populated those
fields.
4. Select Approval Category Reactivate Existing Salaried Job no end date, RJS1NP.
5. Review current assignments under the Employee Job Assignments section.
Click on the All Jobs button below the Employee Job Assignments for a list of all jobs for the employee.
If you are reactivating a primary job and there have been subsequent primary jobs since the original
primary job was ended, STOP. Use an Add a New Job approval category and use a new suffix value for the
position number.
Review the Last Paid Date for all job assignments, and make a note of the most recent Last Paid Date for
the employee.
6. If you have determined you are using the correct approval category, click on Go.
7. Select the radio button for the position to be changed, and click on Go.
8. Review the Jobs Effective Date (defaulted to Query Date) and change if appropriate.
The Jobs Effective Date is the date this action will affect payroll, and this date must be after the Last Paid
Date.
The Last Paid Date for the employee is listed in the top section of the EPAF screen (under Query Date and
to the right of Transaction Status); however, this date appears only when updating an existing job. If the
Last Paid Date information is not listed in this section, use the date you noted from the Employee Job
Assignments section in step 5.
9. Review the Personnel Date (defaulted to Query Date) and change if appropriate.
This date does not affect pay and serves as an information field for historical, audit, or reporting
purposes.
10. Review the Contract Type current value and use the dropdown box to change if appropriate.
Primary – The employee’s primary job.
Secondary – Used to add an additional position for an employee.
Overload – Used for a position in addition to a regular assignment (e.g., non-faculty employee who
teaches a class, a faculty member on a 9 month contract who has a summer assignment, housing or car
allowance, etc.)
Each employee can have only one Primary job.
11. Review Job Status (defaulted to Active) and use the dropdown box to change if appropriate.
Remove – Do not select Remove as the Job Status field must be populated.
Active
Leave without Pay, with Benefits
Leave without Pay, without Benefits
Leave with Pay, with Benefits
Leave with Partial Pay, with Benefits – Used for 60% LTD.
Terminated – Do not select Terminated for this approval category. Use a termination approval category.
12. Select the Job Change Reason from the dropdown box.
See the Job Change Reason Codes List in Appendix A for additional information.
13. Review the current values and enter the new value for any changes to:
Annual Salary / Contract Amount – Employee’s actual annual salary.

Page 46 of 91
Factor – Used to calculate the amount per month to be paid.
Annual Salary (or Contract Amount) / Factor = Monthly Payment
As a general rule, the Factor will be the number of months in the contract / assignment for
faculty members, 1 for graduate assistants, and 12 for staff members.
Pays – Pays = Factor (Exception: Faculty member with a salary deferral agreement.)
Payroll Services will update the Pays field if a faculty member
completes a deferral agreement.
Unless the appointment is for less than 12 months, Factor = 12 and
Pays = 12 regardless of when the employee is hired during the year.
FTE – Full-Time Equivalent. ( Must be 1.0 or less)
Hours Per Day – Number of hours employee will work per day.
Hours Per Pay – Number of hours employee will work per pay period.
If a change is made to FTE, Hours Per Day and Hours Per Pay must
be updated.
Timesheet Organization – Department timesheet organization number.
14. If the employee is to accrue leave using a different rule code than the default for the employee class group,
use the dropdown box to select the appropriate Job Leave Category code.
See Appendix F for a list of Employee Classes with defaults and acceptable overrides.
15. If the Contract Type from step 10 is Secondary or Overload AND the employee should accrue leave on this
Secondary or Overload job, use the dropdown box for Accrue Leave and select Yes.
The Accrue Leave field is used to allow a Secondary or Overload job to accrue paid time off. In most
instances, this field will not be entered (remain as Not Selected) or will be entered with Yes. In the rare
instances where this job previously had an Accrue Leave value of Yes and should be changed to No, a
comment explaining the change to No is required.
If the Contract Type for this job is Primary, do NOT select Yes or No from the dropdown box. The New
Value should remain as Not Selected. For Primary jobs, this is automatically completed by Banner and
should not be overridden.
16. Enter the New Value for:
Title
17. Review the Effective Date (defaulted to Query Date) for the New funding information and change if
appropriate.
The Effective Date is the date this action will affect payroll.
18. Review current funding and update funding in the New section (defaulted to the current value) if appropriate.
Chart (COA) MUST be P for OPSU.
Funding total must equal 100%.
The Labor Distribution Percentage on each line must be between .01 and 100. When changing a line to
0%, that line must be removed. After entering 0 in the percent field, hit the Enter key or the Save button. A
remove box will appear for each line. Click on the remove box in the line to be removed, then hit the Enter
key or the Save button to remove the line.
19. Review the Routing Queue and use the magnifying glass to change or add User Name(s) if appropriate.
20. In the Comment box, enter comments with sufficient detail for the approvers to understand the change to the
job record.
21. Click on the Save button, and check the top of the EPAF to make sure the action was saved successfully.
22. Review and then click on the Submit button.
The routing process does not begin until you click on the Save button and then the Submit button.
Hours/ Hours/
FTE Day Pay
1.0 7.50 162.50
.75 5.63 121.88
.50 3.75 81.25
.25 1.88 40.63
Hours per day and
hours per pay should be
based on the FTE.

Page 47 of 91
REACTIVATE A JOB RECORD – WORK STUDY WITH NO END DATE
1. Log in and select Employee > Employee Self Service > Electronic Personnel Action Forms > New EPAF.
2. Enter the employee’s Banner ID or use the magnifying glass to search by the employee’s name.
Use % as the wildcard for searches.
3. Enter the Query Date in MM/DD/YYYY format.
When reactivating a previous job, you may query using an earlier date when that previous job was
active. This will allow you to select the previous job. Remember to change the Jobs Effective Date,
Personnel Date, and Funding Effective Date as appropriate as the query date will have auto-populated those
fields.
4. Select Approval Category Reactivate Existing Work Study Job with no end date, RJW1NP.
5. Review current assignments under the Employee Job Assignments section.
Click on the All Jobs button below the Employee Job Assignments for a list of all jobs for the employee.
If you are reactivating a primary job and there have been subsequent primary jobs since the original
primary job was ended, STOP. Use an Add a New Job approval category and use a new suffix value for the
position number.
Review the Last Paid Date for all job assignments, and make a note of the most recent Last Paid Date for
the employee.
6. If you have determined you are using the correct approval category, click on Go.
7. Select the radio button for the position to be changed, and click on Go.
8. Review the Jobs Effective Date (defaulted to Query Date) and change if appropriate.
The Jobs Effective Date is the date this action will affect payroll, and this date must be after the Last Paid
Date for the employee.
The Last Paid Date for the employee is listed in the top section of the EPAF screen (under Query Date and
to the right of Transaction Status); however, this date appears only when updating an existing job. If the
Last Paid Date information is not listed in this section, use the date you noted from the Employee Job
Assignments section in step 5.
9. Review the Personnel Date (defaulted to Query Date) and change if appropriate.
This date does not affect pay and serves as an information field for historical, audit, or reporting
purposes.
10. Review the Contract Type current value and use the dropdown box to change if appropriate.
Primary – The employee’s primary job.
Secondary – Used to add an additional position for an employee.
Overload – Used for a position in addition to a regular assignment (e.g., non-faculty employee who
teaches a class, a faculty member on a 9 month contract who has a summer assignment, housing or car
allowance, etc.).
Each employee can have only one Primary job.
11. Select the Job Change Reason from the dropdown box.
See the Job Change Reason Codes List in Appendix A for additional information.
12. Review the current values and enter the new value for any changes to:
Regular Rate – Employee’s Pay Rate per Hour.
FTE – Full-Time Equivalent. ( Must be 1.0 or less)
Hours Per Day – Number of hours employee will work per day.
Hours Per Pay – Number of hours employee will work per pay period.
If a change is made to FTE, Hours Per Day and Hours Per Pay must
be updated.
Timesheet Organization – Department timesheet organization number.
Title
Hours/ Hours/
FTE Day Pay
1.0 7.50 162.50
.75 5.63 121.88
.50 3.75 81.25
.25 1.88 40.63
Hours per day and
hours per pay should be
based on the FTE.

Page 48 of 91
13. Review the Effective Date (defaulted to Query Date) for the New funding information and change if
appropriate.
The Effective Date is the date this action will affect payroll.
14. Review current funding and update funding in the New section (defaulted to the current value) if appropriate.
Chart (COA) MUST be P for OPSU.
Funding total must equal 100%.
The Labor Distribution Percentage on each line must be between .01 and 100. When changing a line to
0%, that line must be removed. After entering 0 in the percent field, hit the Enter key or the Save button. A
remove box will appear for each line. Click on the remove box in the line to be removed, then hit the Enter
key or the Save button to remove the line.
15. Review the Routing Queue and use the magnifying glass to change or add User Name(s) if appropriate.
16. In the Comment box, enter comments with sufficient detail for the approvers to understand the change to the
job record.
17. Click on the Save button, and check the top of the EPAF to make sure the action was saved successfully.
18. Review and then click on the Submit button.
The routing process does not begin until you click on the Save button and then the Submit button.

Page 49 of 91
REACTIVATE A JOB RECORD – WORK STUDY WITH END DATE
1. Log in and select Employee > Employee Self Service > Electronic Personnel Action Forms > New EPAF.
2. Enter the employee’s Banner ID or use the magnifying glass to search by the employee’s name.
Use % as the wildcard for searches.
3. Enter the Query Date in MM/DD/YYYY format.
When reactivating a previous job, you may query using an earlier date when that previous job was
active. This will allow you to select the previous job. Remember to change the Jobs Effective Date,
Personnel Date, and Funding Effective Date as appropriate as the query date will have auto-populated those
fields.
4. Select Approval Category Reactivate Existing Work Study Job with end date, RJW1NP.
5. Review current assignments under the Employee Job Assignments section.
Click on the All Jobs button below the Employee Job Assignments for a list of all jobs for the employee.
If you are reactivating a primary job and there have been subsequent primary jobs since the original
primary job was ended, STOP. Use an Add a New Job approval category and use a new suffix value for the
position number.
Review the Last Paid Date for all job assignments, and make a note of the most recent Last Paid Date for
the employee.
6. If you have determined you are using the correct approval category, click on Go.
7. Select the radio button for the position to be changed, and click on Go.
8. Review the Jobs Effective Date (defaulted to Query Date) and change if appropriate.
The Jobs Effective Date is the date this action will affect payroll, and this date must be after the Last Paid
Date for the employee.
The Last Paid Date for the employee is listed in the top section of the EPAF screen (under Query Date and
to the right of Transaction Status); however, this date appears only when updating an existing job. If the
Last Paid Date information is not listed in this section, use the date you noted from the Employee Job
Assignments section in step 5.
9. Review the Personnel Date (defaulted to Query Date) and change if appropriate.
This date does not affect pay and serves as an information field for historical, audit, or reporting
purposes.
10. Review the Contract Type current value and use the dropdown box to change if appropriate.
Primary – The employee’s primary job.
Secondary – Used to add an additional position for an employee.
Overload – Used for a position in addition to a regular assignment (e.g., non-faculty employee who
teaches a class, a faculty member on a 9 month contract who has a summer assignment, housing or car
allowance, etc.).
Each employee can have only one Primary job.
11. Select the Job Change Reason from the dropdown box.
See the Job Change Reason Codes List in Appendix A for additional information.
12. Review the current values and enter the new value for any changes to:
Regular Rate – Employee’s Pay Rate per Hour.
FTE – Full-Time Equivalent. ( Must be 1.0 or less)
Hours Per Day – Number of hours employee will work per day.
Hours Per Pay – Number of hours employee will work per pay period.
If a change is made to FTE, Hours Per Day and Hours Per Pay must
be updated.
Timesheet Organization – Department timesheet organization number.
Title
Hours/ Hours/
FTE Day Pay
1.0 7.50 162.50
.75 5.63 121.88
.50 3.75 81.25
.25 1.88 40.63
Hours per day and
hours per pay should be
based on the FTE.

Page 50 of 91
13. Review the Effective Date (defaulted to Query Date) for the New funding information and change if
appropriate.
The Effective Date is the date this action will affect payroll.
14. Review current funding and update funding in the New section (defaulted to the current value) if appropriate.
Chart (COA) MUST be P for OPSU.
Funding total must equal 100%.
The Labor Distribution Percentage on each line must be between .01 and 100. When changing a line to
0%, that line must be removed. After entering 0 in the percent field, hit the Enter key or the Save button. A
remove box will appear for each line. Click on the remove box in the line to be removed, then hit the Enter
key or the Save button to remove the line.
15. In the Terminate / End Pay Job Record Only section, enter the Jobs Effective Date.
The Jobs Effective Date is the date this action will affect payroll.
16. Enter the Personnel Date.
This date does not affect pay and serves as an information field for historical, audit, or reporting
purposes.
17. Review the Job Change Reason (defaulted to 2END, End of Appointment) and use the dropdown box to
change if appropriate.
See the Job Change Reason Codes List in Appendix A for additional information.
18. Review the Routing Queue and use the magnifying glass to change or add User Name(s) if appropriate.
19. In the Comment box, enter comments with sufficient detail for the approvers to understand the change to the
job record.
20. Click on the Save button, and check the top of the EPAF to make sure the action was saved successfully.
21. Review and then click on the Submit button.
The routing process does not begin until you click on the Save button and then the Submit button.

Page 51 of 91
UPDATE LABOR DISTRIBUTION RECORD
1. Log in and select Employee > Employee Self Service > Electronic Personnel Action Forms > New EPAF.
2. Enter the employee’s Banner ID or use the magnifying glass to search by the employee’s name.
Use % as the wildcard for searches.
3. Enter the Query Date (the date the action on the EPAF is to become effective).
4. Select Approval Category Labor Distribution Update for Existing Job, LAB1P.
5. Review current assignments under the Employee Job Assignments section.
Click on the All Jobs button below the Employee Job Assignments for a list of all jobs for the employee.
6. Click on Go.
7. Select the radio button for the position to be changed, and click on Go.
8. Review the Effective Date (defaulted to Query Date) for the New funding information and change if
appropriate.
The Effective Date is the date this action will affect payroll, and this date must be after the Last Paid
Date. (The Last Paid Date is listed in the Update Labor Distribution Information heading for this section.)
9. Review current funding and update funding in the New section (defaulted to the current value).
Chart (COA) MUST be P for OPSU.
Funding total must equal 100%.
The Labor Distribution Percentage on each line must be between .01 and 100. When changing a line to
0%, that line must be removed. After entering 0 in the percent field, hit the Enter key or the Save button. A
remove box will appear for each line. Click on the remove box in the line to be removed, then hit the Enter
key or the Save button to remove the line.
10. Review the Routing Queue and use the magnifying glass to change or add User Name(s) if appropriate.
11. In the Comment box, enter comments with sufficient detail for the approvers to understand the change to the
job record.
12. Click on the Save button, and check the top of the EPAF to make sure the action was saved successfully.
13. Review and then click on the Submit button.
The routing process does not begin until you click on the Save button and then the Submit button.

Page 52 of 91
TERMINATE A JOB RECORD
1. Log in and select Employee > Employee Self Service > Electronic Personnel Action Forms > New EPAF.
2. Enter the employee’s Banner ID or use the magnifying glass to search by the employee’s name.
Use % as the wildcard for searches.
3. Enter the Query Date (the date the action on the EPAF is to become effective).
4. Select Approval Category Terminate – Job Record Only, TRM1JP.
When preparing an EPAF for an employee who is retiring, select this approval category – do NOT select
Terminate a Job Record and Employee.
5. Review current assignments under the Employee Job Assignments section.
Click on the All Jobs button below the Employee Job Assignments for a list of all jobs for the employee.
6. Click on Go.
7. Select the radio button for the position to be changed, and click on Go.
8. Review the Jobs Effective Date (defaulted to Query Date) and change if appropriate.
The Jobs Effective Date is the date this action will affect payroll. This should be the actual last day of
work and can be the Last Paid Date or later. (The Last Paid Date is listed in the top section of the EPAF
screen – under Query Date and to the right of Transaction Status.)
If the employee’s last day of work is prior to the Last Paid Date, use the Last Paid Date as the Jobs
Effective Date, and enter the actual last day of work as the Personnel Date.
9. Review the Personnel Date (defaulted to Query Date) and change if appropriate.
This date does not affect pay and serves as an information field for historical, audit, or reporting
purposes.
10. Select the Job Change Reason from the dropdown box.
See the Job Change Reason Codes List in Appendix A for additional information.
11. Review the Routing Queue and use the magnifying glass to change or add User Name(s) if appropriate.
12. In the Comment box, enter comments with sufficient detail for the approvers to understand the change to the
job record.
13. Click on the Save button, and check the top of the EPAF to make sure the action was saved successfully.
14. Review and then click on the Submit button.
The routing process does not begin until you click on the Save button and then the Submit button.

Page 53 of 91
TERMINATE A JOB RECORD AND EMPLOYEE
1. Log in and select Employee > Employee Self Service > Electronic Personnel Action Forms > New EPAF.
2. Enter the employee’s Banner ID or use the magnifying glass to search by the employee’s name.
Use % as the wildcard for searches.
3. Enter the Query Date (the date the action on the EPAF is to become effective).
4. Select Approval Category Terminate – Job Record and Employee, TRM1EP.
Do NOT select this approval category for an employee who is retiring – use Terminate Job Record Only,
TRM1JP.
5. Review current assignments under the Employee Job Assignments section.
Click on the All Jobs button below the Employee Job Assignments for a list of all jobs for the employee.
If an employee has at least one other active assignment in addition to his/her Primary job, STOP. Use
the Terminate a Job Record approval category to terminate all job records other than the Primary job
record. Then use the Terminate a Job Record and Employee approval category to terminate the Primary job
record and the employee.
6. Click on Go.
7. Select the radio button for the position to be changed, and click on Go.
8. In the Terminate/End Pay Job Record Only, review the Jobs Effective Date (defaulted to Query Date) and
change if appropriate.
The Jobs Effective Date is the date this action will affect payroll. This should be the actual last day of
work and can be the Last Paid Date or later. (The Last Paid Date is listed in the top section of the EPAF
screen – under Query Date and to the right of Transaction Status.)
If the employee’s last day of work is prior to the last Paid Date, use the Last Paid Date as the Jobs
Effective Date, and enter the actual last day of work as the Personnel Date.
9. Review the Personnel Date (defaulted to Query Date) and change if appropriate.
This date does not affect pay and serves as an information field for historical, audit, or reporting
purposes.
10. Select the Job Change Reason from the dropdown box.
See the Job Change Reason Codes List in Appendix A for additional information.
11. In the Terminate Employee section, select the Term Reason Code from the dropdown box.
12. Enter the Termination Date.
The Termination Date is normally the last work date.
The Termination Date cannot be earlier than the Jobs Effective Date entered in the Terminate/End Pay
Job Record section. If the last day of the pay period or the Last Paid Date is used for the Jobs Effective Date,
enter that same date for the Termination Date.
13. Review the Last Work Date (defaulted to Query Date) and change if appropriate.
The Last Work Date is the last day the employee is expected to work and will normally be the same as
the Termination Date.
14. Review the Employee Status (defaulted to T, Terminated) and change if appropriate.
If the Termination Date is a future date, change the Employee Status to Active. When the payroll is
processed for the period that includes the Termination Date, the employee status will automatically be set
to Terminated.
15. Review the Routing Queue and use the magnifying glass to change or add User Name(s) if appropriate.
16. In the Comment box, enter comments with sufficient detail for the approvers to understand the change to the
job record.
17. Click on the Save button, and check the top of the EPAF to make sure the action was saved successfully.
18. Review and then click on the Submit button.
The routing process does not begin until you click on the Save button and then the Submit button.

Page 54 of 91
EXCEPTION TO NORMAL PAY – CREATE A NEW ENP JOB
1. Log in and select Employee > Employee Self Service > Electronic Personnel Action Forms > New EPAF.
2. Enter the employee’s Banner ID or use the magnifying glass to search by the employee’s name.
Use % as the wildcard for searches.
3. Enter the Query Date (the date the action on the EPAF is to become effective).
Review the Monthly Payroll Processing Schedule, determine which pay period the ENP will be paid
(regular monthly or supplemental), and enter the first day of the month of the payroll on which the ENP will
be paid. (For example, if the ENP will be paid on the August regular monthly payroll or August
supplemental payroll, you MUST enter 08/01/YYYY.)
The regular monthly payroll will pay on the last day of the month and the supplemental payroll will pay
on the 12th of the following month, unless the 12th is a non-working day. (For example, the August monthly
payroll will pay on 08/31/YYYY, and the August supplemental payroll will pay on 09/12/YYYY. For both the
August monthly payroll and August supplemental payroll, you MUST enter 08/01/YYYY.)
See Appendix C for more information on dates to be used for this approval category.
If the ENP is being used to process an overpayment (or a negative amount), do NOT use an ENP EPAF.
Contact Dana Collins for the ENP form to be completed and attach the appropriate documentation.
4. Select Exception to Normal Pay Create New Job, ENPN1P.
This approval category can only be used for a salaried exempt employee.
If the ENP is related to retroactive pay for a non-exempt employee, do NOT use an ENP EPAF. Contact
Dana Collins for the ENP form to be completed and attach the appropriate documentation so time, leave,
and any overtime/comp time adjustments are properly addressed.
5. Review current assignments under the Employee Job Assignments section.
Click on the All Jobs button below the Employee Job Assignments for a list of all jobs for the employee.
6. Click on Go.
7. Enter the Position and Suffix for the ENP.
Use the Position the ENP applies to and enter a new Suffix beginning with the letter “Z” followed by a
number. (Start with Z0 and go up to Z9 if needed.)
If the ENP applies to a Position for which the job record has previously been terminated and that
Position has not been canceled, do NOT reactivate the job record. The ENP EPAF can be processed using
that position number and the new Suffix beginning with the letter “Z” followed by a number.
8. Select the radio button for the New Job, and click on Go.
9. Review the Job Begin Date (defaulted to Query Date).
The Job Begin Date MUST be the first day of the month of the payroll on which the ENP will be
processed.

Page 55 of 91
This date should be the same as the Jobs Effective Date.
10. Review the Jobs Effective Date (defaulted to Query Date).
The Jobs Effective Date MUST be the first day of the month of the payroll on which the ENP will be
processed.
The Jobs Effective Date MUST be the same as the Job Begin Date.
11. Review the Personnel Date (defaulted to Query Date).
This date does not affect pay and serves as an information field for historical, audit, or reporting
purposes.
12. Select the Job Change Reason from the dropdown box.
Job Change Reason codes to be used for this approval category begin with ENP.
Select one of the Job Change Reason Codes from the list below. (This chart is also found in Appendix B.)
Job Change Reason Earnings Code Use / Additional Information & Notes
Code Description Code Description
ENPSP Special Projects 130 Extra Time Pay Extra work; grading papers; special short-term projects
ENPRP Retroactive Pay A10 Regular Monthly Adj EPAF was late and employee was not paid; adjustment to a payment received in a prior month
ENPIN Incentive Pay 081 Approved Incentive Plans
Certificate Programs (e.g., Ambassador Program, Leadership Program)
ENPAW Awards 080 Awards Award for Excellence; Outstanding Staff Award; published paper
ENPMV Moving Allowance 515 Moving Allowance Salary additive for moving expenses for new faculty/staff
13. Review the Payroll ID (defaulted to PM, OPSU Monthly) and use the dropdown box to change if appropriate.
Select “PM, OPSU Monthly” for the regular monthly payroll or “PX, OPSU Supplemental” for the
supplemental payroll. (Only select PM or PX – do NOT select any of the other Payroll IDs listed.)
14. Enter the Timesheet Organization for which the payment is associated with.
15. Complete the Exception to Normal Pay Payment Information section:
Effective Date (defaulted to Query Date) – The date this action will affect payroll.
The Effective Date MUST be the first day of the month of the payroll on which the ENP will be
processed. This date MUST be the same date as the Job Begin Date and Jobs Effective Date above.
Earnings Code – Select the appropriate Earnings Code from the dropdown box.
Only certain Earnings Codes can be used for this approval category. Others will result in an
error message.
See the ENP Job Change Reason Codes and Earnings Codes Chart in Step 12 above and select the
Earnings Code that corresponds with the Job Change Reason selected.
Hours or Units Per Pay
Enter the number “1”.
Deemed Hours – Leave this field blank.
Special Rate – The total amount the employee is to be paid.
Shift – Defaulted to 1. Do not change this field.
End Date
The End Date MUST be the first day of the following month. (For example, if the ENP will be
paid on the August regular monthly payroll or August supplemental payroll, you MUST enter
09/01/YYYY.)
16. Review the Effective Date (defaulted to Query Date) for the funding information.
The Effective Date is the date this action will affect payroll.
17. Review the funding information (defaulted based on the position number) in the New section and change if
appropriate.
Chart (COA) MUST be P for OPSU.
Funding total must equal 100%.

Page 56 of 91
The Labor Distribution Percentage on each line must be between .01 and 100. When changing a line to
0%, that line must be removed. After entering 0 in the percent field, hit the Enter key or the Save button. A
remove box will appear for each line. Click on the remove box in the line to be removed, then hit the Enter
key or the Save button to remove the line.
18. In the Terminate / End Pay Job Record Only section, enter the Jobs Effective Date.
The Jobs Effective Date is the date this action will affect payroll. This date MUST be the last day of the
month of the payroll on which the ENP will be processed. (For example, if the Job Begin Date is
08/01/YYYY, this date MUST be 08/31/YYYY.)
19. Enter the Personnel Date.
This date does not affect pay and serves as an information field for historical, audit, or reporting
purposes. Use the same date as the Jobs Effective Date.
20. Review the Routing Queue and use the magnifying glass to change or add User Name(s) if appropriate.
21. In the Comment box, enter comments with sufficient detail for the approvers to understand the ENP being
processed.
22. Click on the Save button, and check the top of the EPAF to make sure the action was saved successfully.
23. Review and then click on the Submit button.
The routing process does not begin until you click on the Save button and then the Submit button.

Page 57 of 91
EXCEPTION TO NORMAL PAY – REACTIVATE AN EXISTING ENP JOB
1. Log in and select Employee > Employee Self Service > Electronic Personnel Action Forms > New EPAF.
2. Enter the employee’s Banner ID or use the magnifying glass to search by the employee’s name.
Use % as the wildcard for searches.
3. Enter the Query Date (the date the action on the EPAF is to become effective).
Review the Monthly Payroll Processing Schedule, determine which pay period the ENP will be paid
(regular monthly or supplemental), and enter the first day of the month of the payroll on which the ENP will
be paid. (For example, if the ENP will be paid on the August regular monthly payroll or August
supplemental payroll, you MUST enter 08/01/YYYY.)
The regular monthly payroll will pay on the last day of the month and the supplemental payroll will pay
on the 12th of the following month, unless the 12th is a non-working day. (For example, the August monthly
payroll will pay on 08/31/YYYY, and the August supplemental payroll will pay on 09/12/YYYY. For both the
August monthly payroll and August supplemental payroll, you MUST enter 08/01/YYYY.)
See Appendix C for more information on dates to be used for this approval category.
If the ENP is being used to process an overpayment (or a negative amount), do NOT use an ENP EPAF.
Contact Dana Collins for the ENP form to be completed and attach the appropriate documentation.
4. Select Exception to Normal Pay Reactivate Existing ENP Job, ENPR1P.
This approval category can only be used for a salaried exempt employee.
If the ENP is related to retroactive pay for a non-exempt employee, do NOT use an ENP EPAF. Contact
Dana Collins for the ENP form to be completed and attach the appropriate documentation so time, leave,
and any overtime/comp time adjustments are properly addressed.
5. Review current assignments under the Employee Job Assignments section.
Click on the All Jobs button below the Employee Job Assignments for a list of all jobs for the employee.
If the employee does not have an assignment with the Position for which the ENP applies with a Suffix
beginning with the letter “Z” followed by a number, STOP. You may have selected the wrong approval
category.
6. If you have determined you are using the correct approval category, click on Go.
7. Select the radio button for the existing ENP job to be reactivated, and click on Go.
An ENP that can be reactivated will have a Suffix that begins with the letter “Z” followed by a number.
8. Review the Jobs Effective Date (defaulted to Query Date).
The Jobs Effective Date MUST be the first day of the month of the payroll on which the ENP will be
processed.
9. Review the Personnel Date (defaulted to Query Date).

Page 58 of 91
This date does not affect pay and serves as an information field for historical, audit, or reporting
purposes.
10. Select the Job Change Reason from the dropdown box.
Job Change Reason codes to be used for this approval category begin with ENP.
Select one of the Job Change Reason Codes from the list below. (This chart is also found in Appendix B.)
Job Change Reason Earnings Code Use / Additional Information & Notes
Code Description Code Description
ENPSP Special Projects 130 Extra Time Pay Extra work; grading papers; special short-term projects
ENPRP Retroactive Pay A10 Regular Monthly Adj EPAF was late and employee was not paid; adjustment to a payment received in a prior month
ENPIN Incentive Pay 081 Approved Incentive Plans
Certificate Programs (e.g., Ambassador Program, Leadership Program)
ENPAW Awards 080 Awards Award for Excellence; Outstanding Staff Award; published paper
ENPMV Moving Allowance 515 Moving Allowance Salary additive for moving expenses for new faculty/staff
11. Review the Payroll ID (defaulted to PM, OPSU Monthly) and use the dropdown box to change if appropriate.
Select “PM, OPSU Monthly” for the regular monthly payroll or “PX, OPSU Supplemental” for the
supplemental payroll. (Only select PM or PX – do NOT select any of the other Payroll IDs listed.)
12. Enter the Timesheet Organization for which the payment is associated with.
13. Complete the Exception to Normal Pay Payment Information section:
Effective Date (defaulted to Query Date) – The date this action will affect payroll.
The Effective Date MUST be the first day of the month of the payroll on which the ENP will be
processed. This date MUST be the same date as the Jobs Effective Date above.
Earnings Code – Select the appropriate Earnings Code from the dropdown box.
Only certain Earnings Codes can be used for this approval category. Others will result in an
error message.
See the ENP Job Change Reason Codes and Earnings Codes Chart in Step 10 above and select the
Earnings Code that corresponds with the Job Change Reason selected.
The Earnings Code is defaulted to a Regular Monthly Earnings Code; however, this will not result
in regular pay as the job is defaulted to a zero rate. Only the additional Earnings Codes will result
in payment.
Hours or Units Per Pay (defaulted to 162.50 if FTE = 1.0)
Enter the number “1”.
Deemed Hours – Leave this field blank.
Special Rate – The total amount the employee is to be paid.
Shift – Defaulted to 1. Do not change this field.
End Date
The End Date MUST be the first day of the following month. (For example, if the ENP will be
paid on the August regular monthly payroll or August supplemental payroll, you MUST enter
09/01/YYYY.)
14. Review the Effective Date (defaulted to Query Date) for the funding information.
The Effective Date is the date this action will affect payroll.
15. Review the funding information (defaulted based on the position number) in the New section and change if
appropriate.
Chart (COA) MUST be P for OPSU.
Funding total must equal 100%.
The Labor Distribution Percentage on each line must be between .01 and 100. When changing a line to
0%, that line must be removed. After entering 0 in the percent field, hit the Enter key or the Save button. A
remove box will appear for each line. Click on the remove box in the line to be removed, then hit the Enter
key or the Save button to remove the line.

Page 59 of 91
16. In the Terminate / End Pay Job Record Only section, enter the Jobs Effective Date.
The Jobs Effective Date is the date this action will affect payroll. This date MUST be the last day of the
month of the payroll on which the ENP will be processed. (For example, if the Job Begin Date is
08/01/YYYY, this date MUST be 08/31/YYYY.)
17. Enter the Personnel Date.
This date does not affect pay and serves as an information field for historical, audit, or reporting
purposes. Use the same date as the Jobs Effective Date.
18. Review the Routing Queue and use the magnifying glass to change or add User Name(s) if appropriate.
19. In the Comment box, enter comments with sufficient detail for the approvers to understand the ENP being
processed.
20. Click on the Save button, and check the top of the EPAF to make sure the action was saved successfully.
21. Review and then click on the Submit button.
The routing process does not begin until you click on the Save button and then the Submit button.

Page 60 of 91
TRANSFER – EMPLOYEE TRANSFERRING TO AN HOURLY JOB WITH NO END DATE
1. Log in and select Employee > Employee Self Service > Electronic Personnel Action Forms > New EPAF.
2. Enter the employee’s Banner ID or use the magnifying glass to search by the employee’s name.
Use % as the wildcard for searches.
3. Enter the Query Date (the date the action on the EPAF is to become effective).
Enter the date the employee is to begin the NEW job (the job the employee is transferring to).
4. Select Approval Category Transfer to Hourly Job no end date, TRH1NP.
5. Click on the All Jobs button. Review current assignments under the Employee Job Assignments section.
Click on the All Jobs button below the Employee Job Assignments for a list of all jobs for the employee.
Only one position can be ended with a Transfer approval category. If the employee has multiple jobs
that need to be ended, use the approval category Terminate – Job Record Only, TRM1JP to end all jobs, with
the exception of one (1) job. Then, use the Transfer approval category for the final job.
Two (2) consecutive terminate dates are NOT allowed on a job record. If the employee is transferring
from a position with an End Date (a Jobs Effective Date has been entered to Terminate/End Pay for the Job
Record), contact Payroll Services to request that End Date be removed. After that date is removed, the
Transfer EPAF can be processed.
6. Click on Go.
7. Select the radio button for the position the employee is transferring from.
Note the heading for the box that contains the job information is labeled Terminate/End Pay Job Record
Only. This indicates the job selected is the one that is being terminated.
8. Click on Next Approval Type.
Do NOT select Go at this time. Selecting Go will result in the employee being transferred to the same job
the employee is transferring from.
9. Enter the Position number and Suffix for the job the employee is transferring to.
Note the heading for the box that contains the job information is labeled Transfer to Hourly Job. This
indicates the job selected is the one the employee is transferring to.
For the suffix, follow the same rules you would for a new hire or to add a new job (e.g., begin with the
suffix 00.)
10. Click on Go.
Do NOT select Next Approval Type a second time.
11. Note the sections on the EPAF form.
The data in the Terminate/End Pay Job Record Only section is for the job the employee is transferring
from.
The data in the other sections (Transfer Employment Data, Transfer to Hourly Job, and Update Labor
Distribution Information) is for the job the employee is transferring to.
12. In the Terminate/End Pay Job Record Only section, enter the Jobs Effective Date.
The Jobs Effective Date is the last day the employee will be working in the job the employee is
transferring from. This will normally be the day before the employee transfers to the new job; however,
this date can be any date prior to the effective date of the new job (the job the employee is transferring to)
and greater than or equal to the Last Paid Date of the prior job.
If the dates overlap on the job the employee is transferring from and the job the employee is
transferring to, STOP. The overlap of dates will result in a problem if the Contract Type for job the
employee is transferring from is Primary and the job the employee is transferring to is Primary. If both are
Primary, use the appropriate Change Job EPAF (Hourly, Salaried, or Work Study) to change the Contract
Type from Primary to Secondary for the job the employee is transferring from. After the Change Job EPAF
has been applied (not just submitted or approved), the Transfer EPAF can be used to complete the needed
transfer.
13. Enter the Personnel Date for the position the employee is transferring from.

Page 61 of 91
This date does not affect pay and serves as an information field for historical, audit, or reporting
purposes.
14. Select the Job Change Reason from the dropdown box.
See the Job Change Reason Codes List in Appendix A for additional information.
In many cases, the Job Change Reason Code for the job the employee is transferring from should match
the Job Change Reason Code for the job the employee is transferring to (e.g., for a lateral transfer, the Job
Change Reason Code for both will be CTRAN).
15. In the Transfer Employment Data section, review the data in the Current Value column. Do not enter
information in the New Value column unless there is no Current Value for a field or if the Current Value in a
field is believed to be inaccurate based on the job the employee is transferring to.
Employee Status (defaulted to Active)
Employee Class Code
See the list of OPSU Employee Class Codes in Appendix E.
Home Organization
Distribution Organization
The Distribution Organization code should be the same as the Home Organization.
Benefit Category (defaulted to JE, All Deds/Bens – Used for trans)
If the employee is transferring to a job with the same Benefit Category as the job the employee
is transferring from (e.g., transferring from a 1.0 FTE hourly job to another 1.0 FTE hourly job),
select the same category from the dropdown box as the category listed in the Current Value
column. Otherwise, leave the New Value as JE, All Ded/Bens – Used for trans.
If the Benefit Category is changing, the Benefit Category in the New Value column MUST be JE,
All Deds/Bens – Used for trans. Current benefit deductions must be ended before the new
deductions can be created. JE is a temporary transitional rule that will allow the Transfer EPAF to
process and allow HR Benefits to review and make the appropriate changes.
If there is an increase or decrease to the employee’s FTE between the job the employee is
transferring from and the job the employee is transferring to, leave the Benefit Category as JE, All
Deds/Bens – Used for trans.
16. In the Transfer to Hourly Job section, review the Job Begin Date (defaulted to Query Date) and change if
appropriate.
The Job Begin Date is the date the assignment begins (the first day the employee can start any time
entry) for the job the employee is transferring to.
This date should be the same as the Jobs Effective Date.
There is one exception where the Job Begin Date will not be the same as the Jobs Effective Date. If the
employee was previously in this position, is the employee transferring back to an existing position and the
position suffix value used is the same as what was used for the prior job for this employee? If yes, the Job
Begin Date must be the same as the original Job Begin Date (as the field cannot be changed on an existing
job).
17. Review the Jobs Effective Date (defaulted to Query Date) and change if appropriate.
The Jobs Effective Date is the date this action will affect payroll.
The Jobs Effective Date MUST be the same as the Job Begin Date. The only exception is when an
employee was previously in this position and is transferring back to the position using the same position
suffix value. See Step 16.
18. Review the Personnel Date (defaulted to Query Date) and change if appropriate.
This date does not affect pay and serves as an information field for historical, audit, or reporting
purposes.
19. Review the Contract Type (defaulted to Primary) and use the dropdown box to change if appropriate.
Primary – The employee’s primary job.
Secondary – Used to add an additional position for an employee.
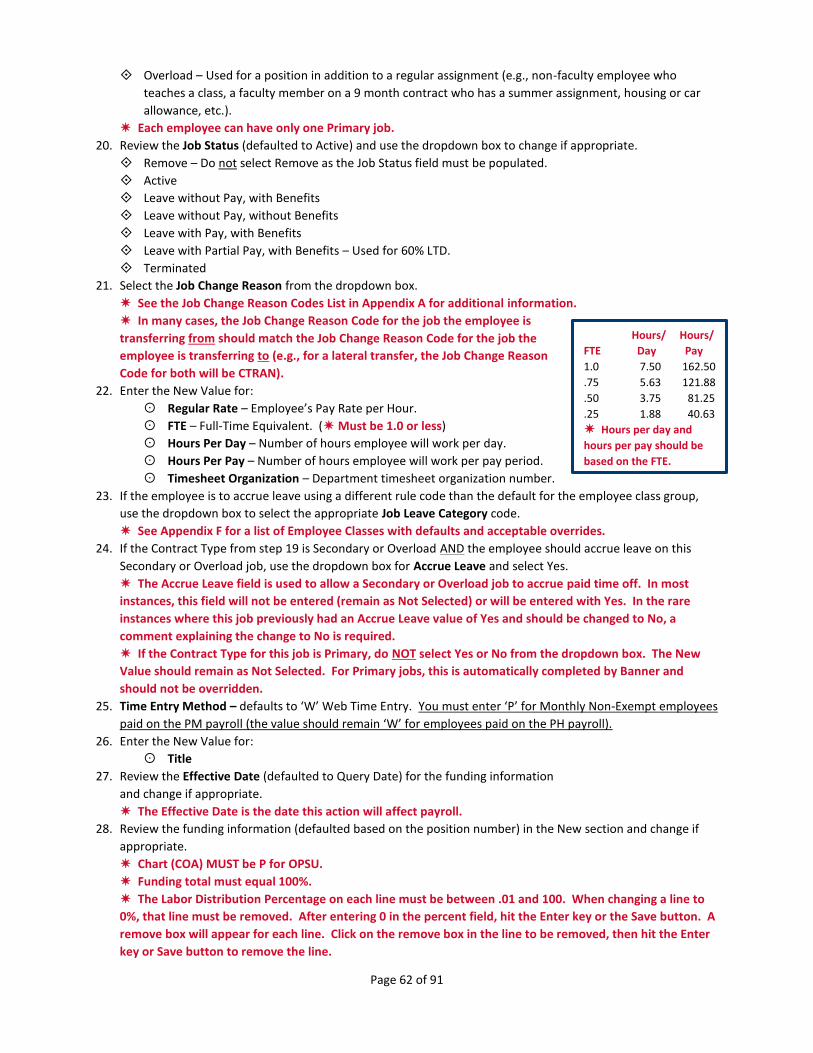
Page 62 of 91
Overload – Used for a position in addition to a regular assignment (e.g., non-faculty employee who
teaches a class, a faculty member on a 9 month contract who has a summer assignment, housing or car
allowance, etc.).
Each employee can have only one Primary job.
20. Review the Job Status (defaulted to Active) and use the dropdown box to change if appropriate.
Remove – Do not select Remove as the Job Status field must be populated.
Active
Leave without Pay, with Benefits
Leave without Pay, without Benefits
Leave with Pay, with Benefits
Leave with Partial Pay, with Benefits – Used for 60% LTD.
Terminated
21. Select the Job Change Reason from the dropdown box.
See the Job Change Reason Codes List in Appendix A for additional information.
In many cases, the Job Change Reason Code for the job the employee is
transferring from should match the Job Change Reason Code for the job the
employee is transferring to (e.g., for a lateral transfer, the Job Change Reason
Code for both will be CTRAN).
22. Enter the New Value for:
Regular Rate – Employee’s Pay Rate per Hour.
FTE – Full-Time Equivalent. ( Must be 1.0 or less)
Hours Per Day – Number of hours employee will work per day.
Hours Per Pay – Number of hours employee will work per pay period.
Timesheet Organization – Department timesheet organization number.
23. If the employee is to accrue leave using a different rule code than the default for the employee class group,
use the dropdown box to select the appropriate Job Leave Category code.
See Appendix F for a list of Employee Classes with defaults and acceptable overrides.
24. If the Contract Type from step 19 is Secondary or Overload AND the employee should accrue leave on this
Secondary or Overload job, use the dropdown box for Accrue Leave and select Yes.
The Accrue Leave field is used to allow a Secondary or Overload job to accrue paid time off. In most
instances, this field will not be entered (remain as Not Selected) or will be entered with Yes. In the rare
instances where this job previously had an Accrue Leave value of Yes and should be changed to No, a
comment explaining the change to No is required.
If the Contract Type for this job is Primary, do NOT select Yes or No from the dropdown box. The New
Value should remain as Not Selected. For Primary jobs, this is automatically completed by Banner and
should not be overridden.
25. Time Entry Method – defaults to ‘W’ Web Time Entry. You must enter ‘P’ for Monthly Non-Exempt employees
paid on the PM payroll (the value should remain ‘W’ for employees paid on the PH payroll).
26. Enter the New Value for:
Title
27. Review the Effective Date (defaulted to Query Date) for the funding information
and change if appropriate.
The Effective Date is the date this action will affect payroll.
28. Review the funding information (defaulted based on the position number) in the New section and change if
appropriate.
Chart (COA) MUST be P for OPSU.
Funding total must equal 100%.
The Labor Distribution Percentage on each line must be between .01 and 100. When changing a line to
0%, that line must be removed. After entering 0 in the percent field, hit the Enter key or the Save button. A
remove box will appear for each line. Click on the remove box in the line to be removed, then hit the Enter
key or Save button to remove the line.
Hours/ Hours/
FTE Day Pay
1.0 7.50 162.50
.75 5.63 121.88
.50 3.75 81.25
.25 1.88 40.63
Hours per day and
hours per pay should be
based on the FTE.

Page 63 of 91
29. Review the Routing Queue and use the magnifying glass to change or add User Name(s) if appropriate.
30. In the Comment box, enter comments with sufficient detail for the approvers to understand the change to the
job record.
31. Click on the Save button, and check the top of the EPAF to make sure the action was saved successfully.
32. Review and then click on the Submit button.
The routing process does not begin until you click on the Save button and then the Submit button.

Page 64 of 91
TRANSFER – EMPLOYEE TRANSFERRING TO AN HOURLY JOB WITH END DATE
1. Log in and select Employee > Employee Self Service > Electronic Personnel Action Forms > New EPAF.
2. Enter the employee’s Banner ID or use the magnifying glass to search by the employee’s name.
Use % as the wildcard for searches.
3. Enter the Query Date (the date the action on the EPAF is to become effective).
Enter the date the employee is to begin the NEW job (the job the employee is transferring to).
4. Select Approval Category Transfer to Hourly Job with END DATE, TRH1EP.
5. Click on the All Jobs button. Review current assignments under the Employee Job Assignments section.
Click on the All Jobs button below the Employee Job Assignments for a list of all jobs for the employee.
Only one position can be ended with a Transfer approval category. If the employee has multiple jobs
that need to be ended, use the approval category Terminate – Job Record Only, TRM1JP to end all jobs, with
the exception of one (1) job. Then, use the Transfer approval category for the final job.
Two (2) consecutive terminate dates are NOT allowed on a job record. If the employee is transferring
from a position with an End Date (a Jobs Effective Date has been entered to Terminate/End Pay for the Job
Record), contact Payroll Services to request that End Date be removed. After that date is removed, the
Transfer EPAF can be processed.
6. Click on Go.
7. Select the radio button for the position the employee is transferring from.
Note the heading for the box that contains the job information is labeled Terminate/End Pay Job Record
Only. This indicates the job selected is the one that is being terminated.
8. Click on Next Approval Type.
Do NOT select Go at this time. Selecting Go will result in the employee being transferred to the same job
the employee is transferring from.
9. Enter the Position number and Suffix for the job the employee is transferring to.
Note the heading for the box that contains the job information is labeled Transfer to Hourly Job. This
indicates the job selected is the one the employee is transferring to.
For the suffix, follow the same rules you would for a new hire or to add a new job (e.g., begin with the
suffix 00.)
10. Click on Go.
Do NOT select Next Approval Type a second time.
11. Note the sections on the EPAF form.
The data in the Terminate/End Pay Transferred Job Record Only section is for the job the employee is
transferring from.
The data in the other sections (Transfer Employment Data, Transfer to Hourly Job, Update Labor
Distribution Information, and Terminate/End Pay Job Record Only) is for the job the employee is
transferring to.
12. In the Terminate/End Pay Transferred Job Record Only section, enter the Jobs Effective Date.
The Jobs Effective Date is the last day the employee will be working in the job the employee is
transferring from. This will normally be the day before the employee transfers to the new job; however,
this date can be any date prior to the effective date of the new job (the job the employee is transferring to)
and greater than or equal to the Last Paid Date of the prior job.
If the dates overlap on the job the employee is transferring from and the job the employee is
transferring to, STOP. The overlap of dates will result in a problem if the Contract Type for the job the
employee is transferring from is Primary and the job the employee is transferring to is Primary. If both are
Primary, use the appropriate Change Job EPAF (Hourly, Salaried, or Work Study) to change the Contract
Type from Primary to Secondary for the job the employee is transferring from. After the Change Job EPAF
has been applied (not just submitted or approved), the Transfer EPAF can be used to complete the needed
transfer.

Page 65 of 91
13. Enter the Personnel Date for the position the employee is transferring from.
This date does not affect pay and serves as an information field for historical, audit, or reporting
purposes.
14. Review the Job Change Reason (defaulted to 2END, End of Appointment) and use the dropdown box to
change if appropriate.
See the Job Change Reason Codes List in Appendix A for additional information.
In many cases, the Job Change Reason Code for the job the employee is transferring from should match
the Job Change Reason Code for the job the employee is transferring to (e.g., for a lateral transfer, the Job
Change Reason Code for both will be CTRAN).
15. In the Transfer Employment Data section, review the data in the Current Value column. Do not enter
information in the New Value column unless there is no Current Value for a field or if the Current Value in a
field is believed to be inaccurate based on the job the employee is transferring to.
Employee Status (defaulted to Active)
Employee Class Code
See the list of OPSU Employee Class Codes in Appendix E.
Home Organization
Distribution Organization
The Distribution Organization code should be the same as the Home Organization.
Benefit Category (defaulted to JE, All Deds/Bens – Used for trans)
If the employee is transferring to a job with the same Benefit Category as the job the employee
is transferring from (e.g., transferring from a 1.0 FTE hourly job to another 1.0 FTE hourly job),
select the same category from the dropdown box as the category listed in the Current Value
column. Otherwise, leave the New Value as JE, All Ded/Bens – Used for trans.
If the Benefit Category is changing, the Benefit Category in the New Value column MUST be JE,
All Deds/Bens – Used for trans. Current benefit deductions must be ended before the new
deductions can be created. JE is a temporary transitional rule that will allow the Transfer EPAF to
process and allow HR Benefits to review and make the appropriate changes.
If there is an increase or decrease to the employee’s FTE between the job the employee is
transferring from and the job the employee is transferring to, leave the Benefit Category as JE, All
Deds/Bens – Used for trans.
16. In the Transfer to Hourly Job section, review the Job Begin Date (defaulted to Query Date) and change if
appropriate.
The Job Begin Date is the date the assignment begins (the first day the employee can start any time
entry) for the job the employee is transferring to.
This date should be the same as the Jobs Effective Date.
There is one exception where the Job Begin Date will not be the same as the Jobs Effective Date. If the
employee was previously in this position, is the employee transferring back to an existing position and the
position suffix value used is the same as what was used for the prior job for this employee? If yes, the Job
Begin Date must be the same as the original Job Begin Date (as the field cannot be changed on an existing
job).
17. Review the Jobs Effective Date (defaulted to Query Date) and change if appropriate.
The Jobs Effective Date is the date this action will affect payroll.
The Jobs Effective Date MUST be the same as the Job Begin Date. The only exception is when an
employee was previously in this position and is transferring back to the position using the same position
suffix value. See Step 16.
18. Review the Personnel Date (defaulted to Query Date) and change if appropriate.
This date does not affect pay and serves as an information field for historical, audit, or reporting
purposes.
19. Review the Contract Type (defaulted to Primary) and use the dropdown box to change if appropriate.
Primary – The employee’s primary job.
Secondary – Used to add an additional position for an employee.

Page 66 of 91
Overload – Used for a position in addition to a regular assignment (e.g., non-faculty employee who
teaches a class, a faculty member on a 9 month contract who has a summer assignment, housing or car
allowance, etc.).
Each employee can have only one Primary job.
20. Review the Job Status (defaulted to Active) and use the dropdown box to change if appropriate.
Remove – Do not select Remove as the Job Status field must be populated.
Active
Leave without Pay, with Benefits
Leave without Pay, without Benefits
Leave with Pay, with Benefits
Leave with Partial Pay, with Benefits – Used for 60% LTD.
Terminated
21. Select the Job Change Reason from the dropdown box.
See the Job Change Reason Codes List in Appendix A for additional information.
In many cases, the Job Change Reason Code for the job the employee is
transferring from should match the Job Change Reason Code for the job the
employee is transferring to (e.g., for a lateral transfer, the Job Change Reason
Code for both will be CTRAN).
22. Enter the New Value for:
Regular Rate – Employee’s Pay Rate per Hour.
FTE – Full-Time Equivalent. ( Must be 1.0 or less)
Hours Per Day – Number of hours employee will work per day.
Hours Per Pay – Number of hours employee will work per pay period.
Timesheet Organization – Department timesheet organization number.
23. If the employee is to accrue leave using a different rule code than the default for the employee class group,
use the dropdown box to select the appropriate Job Leave Category code.
See Appendix F for a list of Employee Classes with defaults and acceptable overrides.
24. If the Contract Type from step 19 is Secondary or Overload AND the employee should accrue leave on this
Secondary or Overload job, use the dropdown box for Accrue Leave and select Yes.
The Accrue Leave field is used to allow a Secondary or Overload job to accrue paid time off. In most
instances, this field will not be entered (remain as Not Selected) or will be entered with Yes. In the rare
instances where this job previously had an Accrue Leave value of Yes and should be changed to No, a
comment explaining the change to No is required.
If the Contract Type for this job is Primary, do NOT select Yes or No from the dropdown box. The New
Value should remain as Not Selected. For Primary jobs, this is automatically completed by Banner and
should not be overridden.
25. Time Entry Method – defaults to ‘W’ Web Time Entry. You must enter ‘P’ for Monthly Non-Exempt employees
paid on the PM payroll (must still be ‘W’ if paid on PH payroll).
26. Enter the New Value for:
Title
27. Review the Effective Date (defaulted to Query Date) for the funding information
and change if appropriate.
The Effective Date is the date this action will affect payroll.
28. Review the funding information (defaulted based on the position number) in the New section and change if
appropriate.
Chart (COA) MUST be P for OPSU.
Funding total must equal 100%.
The Labor Distribution Percentage on each line must be between .01 and 100. When changing a line to
0%, that line must be removed. After entering 0 in the percent field, hit the Enter key or the Save button. A
remove box will appear for each line. Click on the remove box in the line to be removed, then hit the Enter
key or Save button to remove the line.
Hours/ Hours/
FTE Day Pay
1.0 7.50 162.50
.75 5.63 121.88
.50 3.75 81.25
.25 1.88 40.63
Hours per day and
hours per pay should be
based on the FTE.

Page 67 of 91
29. In the Terminate/End Pay Transfer Job Record Only section, enter the Jobs Effective Date.
The Jobs Effective Date is the date this action will affect payroll.
30. Enter the Personnel Date.
This date does not affect pay and serves as an information field for historical, audit, or reporting
purposes.
31. Select the Job Change Reason (defaulted to 2END, End of Appointment) and use the dropdown box to change
if appropriate.
See the Job Change Reason Codes List in Appendix A for additional information.
32. Review the Routing Queue and use the magnifying glass to change or add User Name(s) if appropriate.
33. In the Comment box, enter comments with sufficient detail for the approvers to understand the change to the
job record.
34. Click on the Save button, and check the top of the EPAF to make sure the action was saved successfully.
35. Review and then click on the Submit button.
The routing process does not begin until you click on the Save button and then the Submit button.

Page 68 of 91
TRANSFER – EMPLOYEE TRANSFERRING TO A SALARIED JOB WITH NO END DATE
1. Log in and select Employee > Employee Self Service > Electronic Personnel Action Forms > New EPAF.
2. Enter the employee’s Banner ID or use the magnifying glass to search by the employee’s name.
Use % as the wildcard for searches.
3. Enter the Query Date (the date the action on the EPAF is to become effective).
Enter the date the employee is to begin the NEW job (the job the employee is transferring to).
4. Select Approval Category Transfer to Salaried Job no end date, TRS1NP.
5. Click on the All Jobs button. Review current assignments under the Employee Job Assignments section.
Click on the All Jobs button below the Employee Job Assignments for a list of all jobs for the employee.
Only one position can be ended with a Transfer approval category. If the employee has multiple jobs
that need to be ended, use the approval category Terminate – Job Record Only, TRM1JP to end all jobs, with
the exception of one (1) job. Then, use the Transfer approval category for the final job.
Two (2) consecutive terminate dates are NOT allowed on a job record. If the employee is transferring
from a position with an End Date (a Jobs Effective Date has been entered to Terminate/End Pay for the Job
Record), contact Payroll Services to request that End Date be removed. After that date is removed, the
Transfer EPAF can be processed.
6. Click on Go.
7. Select the radio button for the position the employee is transferring from.
Note the heading for the box that contains the job information is labeled Terminate/End Pay Job Record
Only. This indicates the job selected is the one that is being terminated.
8. Click on Next Approval Type.
Do NOT select Go at this time. Selecting Go will result in the employee being transferred to the same job
the employee is transferring from.
9. Enter the Position number and Suffix for the job the employee is transferring to.
Note the heading for the box that contains the job information is labeled Transfer to Salaried Job. This
indicates the job selected is the one the employee is transferring to.
For the suffix, follow the same rules you would for a new hire or to add a new job (e.g., begin with the
suffix 00.)
10. Click on Go.
Do NOT select Next Approval Type a second time.
11. Note the sections on the EPAF form.
The data in the Terminate/End Pay Transferred Job Record Only section is for the job the employee is
transferring from.
The data in the other sections (Transfer Employment Data, Transfer to Salaried Job, and Update Labor
Distribution Information) is for the job the employee is transferring to.
12. In the Terminate/End Pay Transferred Job Record Only section, enter the Jobs Effective Date.
The Jobs Effective Date is the last day the employee will be working in the job the employee is
transferring from. This will normally be the day before the employee transfers to the new job; however,
this date can be any date prior to the effective date of the new job (the job the employee is transferring to)
and greater than or equal to the Last Paid Date of the prior job.
If the dates overlap on the job the employee is transferring from and the job the employee is
transferring to, STOP. The overlap of dates will result in a problem if the Contract Type for job the
employee is transferring from is Primary and the job the employee is transferring to is Primary. If both are
Primary, use the appropriate Change Job EPAF (Hourly, Salaried, or Work Study) to change the Contract
Type from Primary to Secondary for the job the employee is transferring from. After the Change Job EPAF
has been applied (not just submitted or approved), the Transfer EPAF can be used to complete the needed
transfer.
13. Enter the Personnel Date for the position the employee is transferring from.

Page 69 of 91
This date does not affect pay and serves as an information field for historical, audit, or reporting
purposes.
14. Review the Job Change Reason (defaulted to 2END, End of Appointment) and use the dropdown box to
change if appropriate.
See the Job Change Reason Codes List in Appendix A for additional information.
In many cases, the Job Change Reason Code for the job the employee is transferring from should match
the Job Change Reason Code for the job the employee is transferring to (e.g., for a lateral transfer, the Job
Change Reason Code for both will be CTRAN).
15. In the Transfer Employment Data section, review the data in the Current Value column. Do not enter
information in the New Value column unless there is no Current Value for a field or if the Current Value in a
field is believed to be inaccurate based on the job the employee is transferring to.
Employee Status (defaulted to Active)
Employee Class Code
See the list of OPSU Employee Class Codes in Appendix E.
Home Organization
Distribution Organization
The Distribution Organization code should be the same as the Home Organization.
Benefit Category (defaulted to JE, All Deds/Bens – Used for trans)
If the employee is transferring to a job with the same Benefit Category as the job the employee
is transferring from (e.g., transferring from a 1.0 FTE salaried job to another 1.0 FTE salaried job),
select the same category from the dropdown box as the category listed in the Current Value
column. Otherwise, leave the New Value as JE, All Ded/Bens – Used for trans.
If the Benefit Category is changing, the Benefit Category in the New Value column MUST be JE,
All Deds/Bens – Used for trans. Current benefit deductions must be ended before the new
deductions can be created. JE is a temporary transitional rule that will allow the Transfer EPAF to
process and allow HR Benefits to review and make the appropriate changes.
If there is an increase or decrease to the employee’s FTE between the job the employee is
transferring from and the job the employee is transferring to, leave the Benefit Category as JE, All
Deds/Bens – Used for trans.
16. In the Transfer to Salaried Job section, review the Job Begin Date (defaulted to Query Date) and change if
appropriate.
The Job Begin Date is the date the assignment begins for the job the employee is transferring to.
This date should be the same as the Jobs Effective Date.
There is one exception where the Job Begin Date will not be the same as the Jobs Effective Date. If the
employee was previously in this position, is the employee transferring back to an existing position and the
position suffix value used is the same as what was used for the prior job for this employee? If yes, the Job
Begin Date must be the same as the original Job Begin Date (as the field cannot be changed on an existing
job).
17. Review the Jobs Effective Date (defaulted to Query Date) and change if appropriate.
The Jobs Effective Date is the date this action will affect payroll.
The Jobs Effective Date MUST be the same as the Job Begin Date. The only exception is when an
employee was previously in this position and is transferring back to the position using the same position
suffix value. See Step 16.
18. Review the Personnel Date (defaulted to Query Date) and change if appropriate.
This date does not affect pay and serves as an information field for historical, audit, or reporting
purposes.
19. Review the Contract Type (defaulted to Primary) and use the dropdown box to change if appropriate.
Primary – The employee’s primary job.
Secondary – Used to add an additional position for an employee.

Page 70 of 91
Overload – Used for a position in addition to a regular assignment (e.g., non-faculty employee who
teaches a class, a faculty member on a 9 month contract who has a summer assignment, housing or car
allowance, etc.).
Each employee can have only one Primary job.
20. Review the Job Status (defaulted to Active) and use the dropdown box to change if appropriate.
Remove – Do not select Remove as the Job Status field must be populated.
Active
Leave without Pay, with Benefits
Leave without Pay, without Benefits
Leave with Pay, with Benefits
Leave with Partial Pay, with Benefits – Used for 60% LTD.
Terminated
21. Select the Job Change Reason from the dropdown box.
See the Job Change Reason Codes List in Appendix A for additional information.
In many cases, the Job Change Reason Code for the job the employee is transferring from should match
the Job Change Reason Code for the job the employee is transferring to (e.g., for a lateral transfer, the Job
Change Reason Code for both will be CTRAN).
22. Enter the new value as appropriate for:
Annual Salary / Contract Amount – Employee’s actual annual salary.
Factor – Used to calculate the amount per month to be paid.
Annual Salary (or Contract Amount) / Factor = Monthly Payment
As a general rule, the Factor will be the number of months in the contract / assignment for
faculty members, 1 for graduate assistants, and 12 for staff members.
Pays – Pays = Factor (Exception: Faculty member with a salary deferral agreement.)
For all new hires, Factor = Pays. Payroll Services will update the Pays field if a faculty member
completes a deferral agreement.
Unless the appointment is for less than 12 months, Factor = 12
and Pays = 12 regardless of when the employee is hired during the
year.
FTE – Full-Time Equivalent. ( Must be 1.0 or less)
Hours Per Day – Number of hours employee will work per day.
Hours Per Pay – Number of hours employee will work per pay period.
If the FTE for this employee is not 1.0, the Hours per Day and Hours
per Pay (based on the FTE) MUST be entered.
Timesheet Organization – Department timesheet organization number.
23. If the employee is to accrue leave using a different rule code than the default for the employee class group,
use the dropdown box to select the appropriate Job Leave Category code.
See Appendix F for a list of Employee Classes with defaults and acceptable overrides.
24. If the Contract Type from step 19 is Secondary or Overload AND the employee should accrue leave on this
Secondary or Overload job, use the dropdown box for Accrue Leave and select Yes.
The Accrue Leave field is used to allow a Secondary or Overload job to accrue paid time off. In most
instances, this field will not be entered (remain as Not Selected) or will be entered with Yes. In the rare
instances where this job previously had an Accrue Leave value of Yes and should be changed to No, a
comment explaining the change to No is required.
If the Contract Type for this job is Primary, do NOT select Yes or No from the dropdown box. The New
Value should remain as Not Selected. For Primary jobs, this is automatically completed by Banner and
should not be overridden.
25. Leave Report Method (defaults based upon employee class). Enter ‘W’ if you wish a leave report to be
presented in Employee Self-Service for this new job. Enter ‘P’ if you do not wish a leave report to be
presented in Employee Self-Service for the new job.
Hours/ Hours/
FTE Day Pay
1.0 7.50 162.50
.75 5.63 121.88
.50 3.75 81.25
.25 1.88 40.63
Hours per day and
hours per pay should be
based on the FTE.

Page 71 of 91
26. Enter the New Value for:
Title
27. Review the Effective Date (defaulted to Query Date) for the funding information and change if appropriate.
The Effective Date is the date this action will affect payroll.
28. Review the funding information (defaulted based on the position number) in the New section and change if
appropriate.
Chart (COA) MUST be P for OPSU.
Funding total must equal 100%.
The Labor Distribution Percentage on each line must be between .01 and 100. When changing a line to
0%, that line must be removed. After entering 0 in the percent field, hit the Enter key or the Save button. A
remove box will appear for each line. Click on the remove box in the line to be removed, then hit the Enter
key or Save button to remove the line.
29. Review the Routing Queue and use the magnifying glass to change or add User Name(s) if appropriate.
30. In the Comment box, enter comments with sufficient detail for the approvers to understand the change to the
job record.
31. Click on the Save button, and check the top of the EPAF to make sure the action was saved successfully.
32. Review and then click on the Submit button.
The routing process does not begin until you click on the Save button and then the Submit button.

Page 72 of 91
TRANSFER – EMPLOYEE TRANSFERRING TO A SALARIED JOB WITH END DATE
1. Log in and select Employee > Employee Self Service > Electronic Personnel Action Forms > New EPAF.
2. Enter the employee’s Banner ID or use the magnifying glass to search by the employee’s name.
Use % as the wildcard for searches.
3. Enter the Query Date (the date the action on the EPAF is to become effective).
Enter the date the employee is to begin the NEW job (the job the employee is transferring to).
4. Select Approval Category Transfer to Salaried Job with END DATE, TRS1EP.
5. Click on the All Jobs button. Review current assignments under the Employee Job Assignments section.
Click on the All Jobs button below the Employee Job Assignments for a list of all jobs for the employee.
Only one position can be ended with a Transfer approval category. If the employee has multiple jobs
that need to be ended, use the approval category Terminate – Job Record Only, TRM1JP to end all jobs, with
the exception of one (1) job. Then, use the Transfer approval category for the final job.
Two (2) consecutive terminate dates are NOT allowed on a job record. If the employee is transferring
from a position with an End Date (a Jobs Effective Date has been entered to Terminate/End Pay for the Job
Record), contact Payroll Services to request that End Date be removed. After that date is removed, the
Transfer EPAF can be processed.
6. Click on Go.
7. Select the radio button for the position the employee is transferring from.
Note the heading for the box that contains the job information is labeled Terminate/End Pay Job Record
Only. This indicates the job selected is the one that is being terminated.
8. Click on Next Approval Type.
Do NOT select Go at this time. Selecting Go will result in the employee being transferred to the same job
the employee is transferring from.
9. Enter the Position number and Suffix for the job the employee is transferring to.
Note the heading for the box that contains the job information is labeled Transfer to Salaried Job. This
indicates the job selected is the one the employee is transferring to.
For the suffix, follow the same rules you would for a new hire or to add a new job (e.g., begin with the
suffix 00.)
10. Click on Go.
Do NOT select Next Approval Type a second time.
11. Note the sections on the EPAF form.
The data in the Terminate/End Pay Transferred Job Record Only section is for the job the employee is
transferring from.
The data in the other sections (Transfer Employment Data, Transfer to Salaried Job, Update Labor
Distribution Information, and Terminate/End Pay Job Record Only) is for the job the employee is
transferring to.
12. In the Terminate/End Pay Transferred Job Record Only section, enter the Jobs Effective Date.
The Jobs Effective Date is the last day the employee will be working in the job the employee is
transferring from. This will normally be the day before the employee transfers to the new job; however,
this date can be any date prior to the effective date of the new job (the job the employee is transferring to)
and greater than or equal to the Last Paid Date of the prior job.
If the dates overlap on the job the employee is transferring from and the job the employee is
transferring to, STOP. The overlap of dates will result in a problem if the Contract Type for job the
employee is transferring from is Primary and the job the employee is transferring to is Primary. If both are
Primary, use the appropriate Change Job EPAF (Hourly, Salaried, or Work Study) to change the Contract
Type from Primary to Secondary for the job the employee is transferring from. After the Change Job EPAF
has been applied (not just submitted or approved), the Transfer EPAF can be used to complete the needed
transfer.
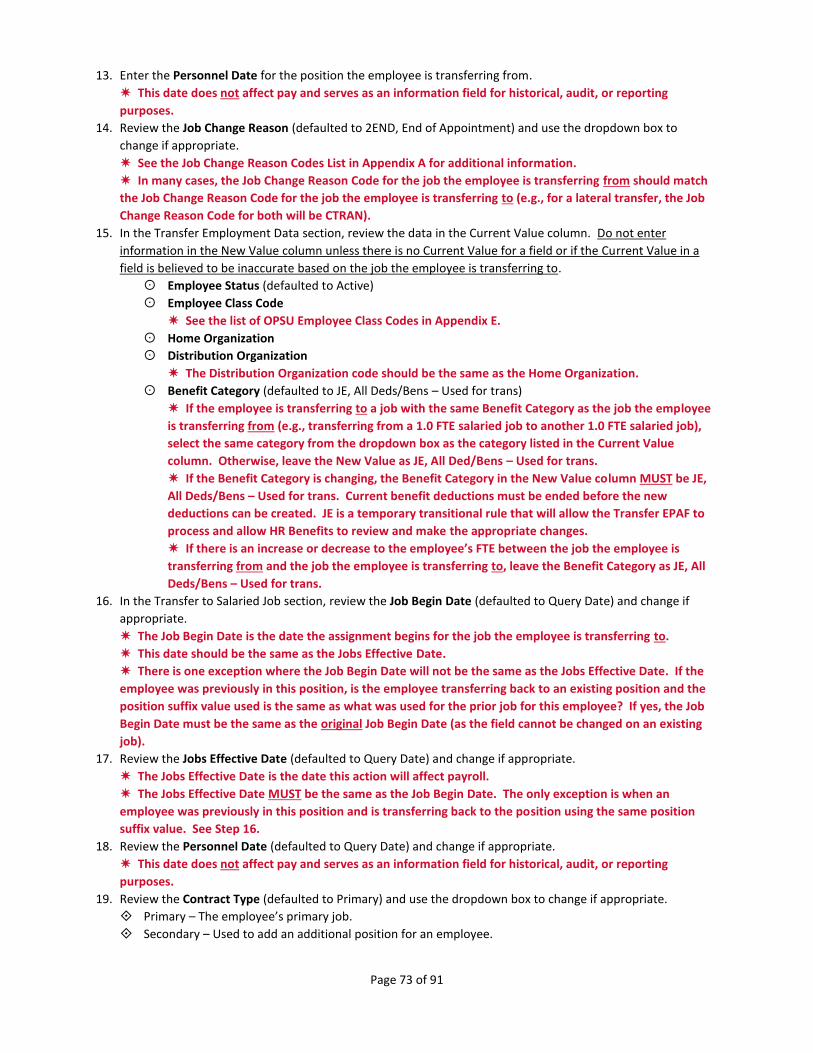
Page 73 of 91
13. Enter the Personnel Date for the position the employee is transferring from.
This date does not affect pay and serves as an information field for historical, audit, or reporting
purposes.
14. Review the Job Change Reason (defaulted to 2END, End of Appointment) and use the dropdown box to
change if appropriate.
See the Job Change Reason Codes List in Appendix A for additional information.
In many cases, the Job Change Reason Code for the job the employee is transferring from should match
the Job Change Reason Code for the job the employee is transferring to (e.g., for a lateral transfer, the Job
Change Reason Code for both will be CTRAN).
15. In the Transfer Employment Data section, review the data in the Current Value column. Do not enter
information in the New Value column unless there is no Current Value for a field or if the Current Value in a
field is believed to be inaccurate based on the job the employee is transferring to.
Employee Status (defaulted to Active)
Employee Class Code
See the list of OPSU Employee Class Codes in Appendix E.
Home Organization
Distribution Organization
The Distribution Organization code should be the same as the Home Organization.
Benefit Category (defaulted to JE, All Deds/Bens – Used for trans)
If the employee is transferring to a job with the same Benefit Category as the job the employee
is transferring from (e.g., transferring from a 1.0 FTE salaried job to another 1.0 FTE salaried job),
select the same category from the dropdown box as the category listed in the Current Value
column. Otherwise, leave the New Value as JE, All Ded/Bens – Used for trans.
If the Benefit Category is changing, the Benefit Category in the New Value column MUST be JE,
All Deds/Bens – Used for trans. Current benefit deductions must be ended before the new
deductions can be created. JE is a temporary transitional rule that will allow the Transfer EPAF to
process and allow HR Benefits to review and make the appropriate changes.
If there is an increase or decrease to the employee’s FTE between the job the employee is
transferring from and the job the employee is transferring to, leave the Benefit Category as JE, All
Deds/Bens – Used for trans.
16. In the Transfer to Salaried Job section, review the Job Begin Date (defaulted to Query Date) and change if
appropriate.
The Job Begin Date is the date the assignment begins for the job the employee is transferring to.
This date should be the same as the Jobs Effective Date.
There is one exception where the Job Begin Date will not be the same as the Jobs Effective Date. If the
employee was previously in this position, is the employee transferring back to an existing position and the
position suffix value used is the same as what was used for the prior job for this employee? If yes, the Job
Begin Date must be the same as the original Job Begin Date (as the field cannot be changed on an existing
job).
17. Review the Jobs Effective Date (defaulted to Query Date) and change if appropriate.
The Jobs Effective Date is the date this action will affect payroll.
The Jobs Effective Date MUST be the same as the Job Begin Date. The only exception is when an
employee was previously in this position and is transferring back to the position using the same position
suffix value. See Step 16.
18. Review the Personnel Date (defaulted to Query Date) and change if appropriate.
This date does not affect pay and serves as an information field for historical, audit, or reporting
purposes.
19. Review the Contract Type (defaulted to Primary) and use the dropdown box to change if appropriate.
Primary – The employee’s primary job.
Secondary – Used to add an additional position for an employee.

Page 74 of 91
Overload – Used for a position in addition to a regular assignment (e.g., non-faculty employee who
teaches a class, a faculty member on a 9 month contract who has a summer assignment, housing or car
allowance, etc.).
Each employee can have only one Primary job.
20. Review the Job Status (defaulted to Active) and use the dropdown box to change if appropriate.
Remove – Do not select Remove as the Job Status field must be populated.
Active
Leave without Pay, with Benefits
Leave without Pay, without Benefits
Leave with Pay, with Benefits
Leave with Partial Pay, with Benefits – Used for 60% LTD.
Terminated
21. Select the Job Change Reason from the dropdown box.
See the Job Change Reason Codes List in Appendix A for additional information.
In many cases, the Job Change Reason Code for the job the employee is transferring from should match
the Job Change Reason Code for the job the employee is transferring to (e.g., for a lateral transfer, the Job
Change Reason Code for both will be CTRAN).
22. Enter the new value as appropriate for:
Annual Salary / Contract Amount – Employee’s actual annual salary.
Factor – Used to calculate the amount per month to be paid.
Annual Salary (or Contract Amount) / Factor = Monthly Payment
As a general rule, the Factor will be the number of months in the contract / assignment for
faculty members, 1 for graduate assistants, and 12 for staff members.
Pays – Pays = Factor (Exception: Faculty member with a salary deferral agreement.)
For all new hires, Factor = Pays. Payroll Services will update the Pays field if a faculty member
completes a deferral agreement.
Unless the appointment is for less than 12 months, Factor = 12 and
Pays = 12 regardless of when the employee is hired during the year.
FTE – Full-Time Equivalent. ( Must be 1.0 or less)
Hours Per Day – Number of hours employee will work per day.
Hours Per Pay – Number of hours employee will work per pay period.
If the FTE for this employee is not 1.0, the Hours per Day and Hours
per Pay (based on the FTE) MUST be entered.
Timesheet Organization – Department timesheet organization number.
23. If the employee is to accrue leave using a different rule code than the default for the employee class group,
use the dropdown box to select the appropriate Job Leave Category code.
See Appendix F for a list of Employee Classes with defaults and acceptable overrides.
24. If the Contract Type from step 19 is Secondary or Overload AND the employee should accrue leave on this
Secondary or Overload job, use the dropdown box for Accrue Leave and select Yes.
The Accrue Leave field is used to allow a Secondary or Overload job to accrue paid time off. In most
instances, this field will not be entered (remain as Not Selected) or will be entered with Yes. In the rare
instances where this job previously had an Accrue Leave value of Yes and should be changed to No, a
comment explaining the change to No is required.
If the Contract Type for this job is Primary, do NOT select Yes or No from the dropdown box. The New
Value should remain as Not Selected. For Primary jobs, this is automatically completed by Banner and
should not be overridden.
25. Leave Report Method (defaults based upon employee class). Enter ‘W’ if you wish a leave report to be
presented in Employee Self-Service for this new job. Enter ‘P’ if you do not wish a leave report to be
presented in Employee Self-Service for the new job.
26. Enter the New Value for:
Title
Hours/ Hours/
FTE Day Pay
1.0 7.50 162.50
.75 5.63 121.88
.50 3.75 81.25
.25 1.88 40.63
Hours per day and
hours per pay should be
based on the FTE.

Page 75 of 91
27. Review the Effective Date (defaulted to Query Date) for the funding information and change if appropriate.
The Effective Date is the date this action will affect payroll.
28. Review the funding information (defaulted based on the position number) in the New section and change if
appropriate.
Chart (COA) MUST be P for OPSU.
Funding total must equal 100%.
The Labor Distribution Percentage on each line must be between .01 and 100. When changing a line to
0%, that line must be removed. After entering 0 in the percent field, hit the Enter key or the Save button. A
remove box will appear for each line. Click on the remove box in the line to be removed, then hit the Enter
key or Save button to remove the line.
29. In the Terminate / End Pay Job Record Only section, enter the Jobs Effective Date.
The Jobs Effective Date is the date this action will affect payroll. Use the termination date – the last day
the employee is scheduled to work in this position.
30. Enter the Personnel Date.
This date does not affect pay and serves as an information field for historical, audit, or reporting
purposes.
31. Review the Job Change Reason (defaulted to 2END, End of Appointment) and use the dropdown box to
change if appropriate.
See the Job Change Reason Codes List in Appendix A for additional information.
32. Review the Routing Queue and use the magnifying glass to change or add User Name(s) if appropriate.
33. In the Comment box, enter comments with sufficient detail for the approvers to understand the change to the
job record.
34. Click on the Save button, and check the top of the EPAF to make sure the action was saved successfully.
35. Review and then click on the Submit button.
The routing process does not begin until you click on the Save button and then the Submit button.

Page 76 of 91
TRANSFER – EMPLOYEE TRANSFERRING TO A WORK STUDY JOB
WITH NO END DATE
1. Log in and select Employee > Employee Self Service > Electronic Personnel Action Forms > New EPAF.
2. Enter the employee’s Banner ID or use the magnifying glass to search by the employee’s name.
Use % as the wildcard for searches.
3. Enter the Query Date (the date the action on the EPAF is to become effective).
Enter the date the employee is to begin the NEW job (the job the employee is transferring to).
4. Select Approval Category Transfer to Work Study Job no end date, TRW1NP.
5. Click on the All Jobs button. Review current assignments under the Employee Job Assignments section.
Click on the All Jobs button below the Employee Job Assignments for a list of all jobs for the employee.
Only one position can be ended with a Transfer approval category. If the employee has multiple jobs
that need to be ended, use the approval category Terminate – Job Record Only, TRM1JP to end all jobs, with
the exception of one (1) job. Then, use the Transfer approval category for the final job.
Two (2) consecutive terminate dates are NOT allowed on a job record. If the employee is transferring
from a position with an End Date (a Jobs Effective Date has been entered to Terminate/End Pay for the Job
Record), contact Payroll Services to request that End Date be removed. After that date is removed, the
Transfer EPAF can be processed.
6. Click on Go.
7. Select the radio button for the position the employee is transferring from.
Note the heading for the box that contains the job information is labeled Terminate/End Pay Job Record
Only. This indicates the job selected is the one that is being terminated.
8. Click on Next Approval Type.
Do NOT select Go at this time. Selecting Go will result in the employee being transferred to the same job
the employee is transferring from.
9. Enter the Position number and Suffix for the job the employee is transferring to.
Note the heading for the box that contains the job information is labeled Transfer to Hourly Job. This
indicates the job selected is the one the employee is transferring to.
For the suffix, follow the same rules you would for a new hire or to add a new job (e.g., begin with the
suffix 00.)
10. Click on Go.
Do NOT select Next Approval Type a second time.
11. Note the sections on the EPAF form.
The data in the Terminate/End Pay Job Record Only section is for the job the employee is transferring
from.
The data in the other sections (Transfer Employment Data, Transfer to Hourly Job, and Update Labor
Distribution Information) is for the job the employee is transferring to.
12. In the Terminate/End Pay Job Record Only section, enter the Jobs Effective Date.
The Jobs Effective Date is the last day the employee will be working in the job the employee is
transferring from. This will normally be the day before the employee transfers to the new job; however,
this date can be any date prior to the effective date of the new job (the job the employee is transferring to)
and greater than or equal to the Last Paid Date of the prior job.
If the dates overlap on the job the employee is transferring from and the job the employee is
transferring to, STOP. The overlap of dates will result in a problem if the Contract Type for job the
employee is transferring from is Primary and the job the employee is transferring to is Primary. If both are
Primary, use the appropriate Change Job EPAF (Hourly, Salaried, or Work Study) to change the Contract
Type from Primary to Secondary for the job the employee is transferring from. After the Change Job EPAF
has been applied (not just submitted or approved), the Transfer EPAF can be used to complete the needed
transfer.

Page 77 of 91
13. Enter the Personnel Date for the position the employee is transferring from.
This date does not affect pay and serves as an information field for historical, audit, or reporting
purposes.
14. Select the Job Change Reason from the dropdown box.
See the Job Change Reason Codes List in Appendix A for additional information.
In many cases, the Job Change Reason Code for the job the employee is transferring from should match
the Job Change Reason Code for the job the employee is transferring to (e.g., for a lateral transfer, the Job
Change Reason Code for both will be CTRAN).
15. In the Transfer Employment Data section, review the data in the Current Value column. Do not enter
information in the New Value column unless there is no Current Value for a field or if the Current Value in a
field is believed to be inaccurate based on the job the employee is transferring to.
Employee Status (defaulted to Active)
Employee Class Code
See the list of OPSU Employee Class Codes in Appendix E.
Home Organization
Distribution Organization
The Distribution Organization code should be the same as the Home Organization.
Benefit Category (defaulted to JE, All Deds/Bens – Used for trans)
If the employee is transferring to a job with the same Benefit Category as the job the employee
is transferring from (e.g., transferring from a Work Study job to another Work Study job), select the
same category from the dropdown box as the category listed in the Current Value column.
Otherwise, leave the New Value as JE, All Ded/Bens – Used for trans.
If the Benefit Category is changing, the Benefit Category in the New Value column MUST be JE,
All Deds/Bens – Used for trans. Current benefit deductions must be ended before the new
deductions can be created. JE is a temporary transitional rule that will allow the Transfer EPAF to
process and allow HR Benefits to review and make the appropriate changes.
If there is an increase or decrease to the employee’s FTE between the job the employee is
transferring from and the job the employee is transferring to, leave the Benefit Category as JE, All
Deds/Bens – Used for trans.
16. In the Transfer to Hourly Job section, review the Job Begin Date (defaulted to Query Date) and change if
appropriate.
The Job Begin Date is the date the assignment begins (the first day the employee can start any time
entry) for the job the employee is transferring to.
This date should be the same as the Jobs Effective Date.
There is one exception where the Job Begin Date will not be the same as the Jobs Effective Date. If the
employee was previously in this position, is the employee transferring back to an existing position and the
position suffix value used is the same as what was used for the prior job for this employee? If yes, the Job
Begin Date must be the same as the original Job Begin Date (as the field cannot be changed on an existing
job).
17. Review the Jobs Effective Date (defaulted to Query Date) and change if appropriate.
The Jobs Effective Date is the date this action will affect payroll.
The Jobs Effective Date MUST be the same as the Job Begin Date. The only exception is when an
employee was previously in this position and is transferring back to the position using the same position
suffix value. See Step 16.
18. Review the Personnel Date (defaulted to Query Date) and change if appropriate.
This date does not affect pay and serves as an information field for historical, audit, or reporting
purposes.
19. Review the Contract Type (defaulted to Primary) and use the dropdown box to change if appropriate.
Primary – The employee’s primary job.
Secondary – Used to add an additional position for an employee.

Page 78 of 91
Overload – Used for a position in addition to a regular assignment (e.g., non-faculty employee who
teaches a class, a faculty member on a 9 month contract who has a summer assignment, housing or car
allowance, etc.).
Each employee can have only one Primary job.
20. Review the Job Status (defaulted to Active) and use the dropdown box to change if appropriate.
Remove – Do not select Remove as the Job Status field must be populated.
Active
Leave without Pay, with Benefits
Leave without Pay, without Benefits
Leave with Pay, with Benefits
Leave with Partial Pay, with Benefits – Used for 60% LTD.
Terminated
21. Select the Job Change Reason from the dropdown box.
See the Job Change Reason Codes List in Appendix A for additional information.
In many cases, the Job Change Reason Code for the job the employee is transferring from should match
the Job Change Reason Code for the job the employee is transferring to (e.g., for a lateral transfer, the Job
Change Reason Code for both will be CTRAN).
22. Enter the New Value for:
a. Regular Rate – Employee’s Pay Rate per Hour.
b. FTE – Full-Time Equivalent. ( Must be 1.0 or less)
c. Hours Per Day – Number of hours employee will work per day.
d. Hours Per Pay – Number of hours employee will work per pay period.
e. Timesheet Organization – Department timesheet organization number.
f. Title
23. Review the Effective Date (defaulted to Query Date) for the funding information
and change if appropriate.
The Effective Date is the date this action will affect payroll.
24. Review the funding information (defaulted based on the position number) in the New section and change if
appropriate.
Chart (COA) MUST be P for OPSU.
Funding total must equal 100%.
The Labor Distribution Percentage on each line must be between .01 and 100. When changing a line to
0%, that line must be removed. After entering 0 in the percent field, hit the Enter key or the Save button. A
remove box will appear for each line. Click on the remove box in the line to be removed, then hit the Enter
key or Save button to remove the line.
25. Review the Routing Queue and use the magnifying glass to change or add User Name(s) if appropriate.
26. In the Comment box, enter comments with sufficient detail for the approvers to understand the change to the
job record.
27. Click on the Save button, and check the top of the EPAF to make sure the action was saved successfully.
28. Review and then click on the Submit button.
The routing process does not begin until you click on the Save button and then the Submit button.
Hours/ Hours/
FTE Day Pay
1.0 7.50 162.50
.75 5.63 121.88
.50 3.75 81.25
.25 1.88 40.63
Hours per day and
hours per pay should be
based on the FTE.

Page 79 of 91
TRANSFER – EMPLOYEE TRANSFERRING TO A WORK STUDY JOB
WITH END DATE
1. Log in and select Employee > Employee Self Service > Electronic Personnel Action Forms > New EPAF.
2. Enter the employee’s Banner ID or use the magnifying glass to search by the employee’s name.
Use % as the wildcard for searches.
3. Enter the Query Date (the date the action on the EPAF is to become effective).
Enter the date the employee is to begin the NEW job (the job the employee is transferring to).
4. Select Approval Category Transfer to Work Study Job with end date, TRW1EP.
5. Click on the All Jobs button. Review current assignments under the Employee Job Assignments section.
Click on the All Jobs button below the Employee Job Assignments for a list of all jobs for the employee.
Only one position can be ended with a Transfer approval category. If the employee has multiple jobs
that need to be ended, use the approval category Terminate – Job Record Only, TRM1JP to end all jobs, with
the exception of one (1) job. Then, use the Transfer approval category for the final job.
Two (2) consecutive terminate dates are NOT allowed on a job record. If the employee is transferring
from a position with an End Date (a Jobs Effective Date has been entered to Terminate/End Pay for the Job
Record), contact Payroll Services to request that End Date be removed. After that date is removed, the
Transfer EPAF can be processed.
6. Click on Go.
7. Select the radio button for the position the employee is transferring from.
Note the heading for the box that contains the job information is labeled Terminate/End Pay Job Record
Only. This indicates the job selected is the one that is being terminated.
8. Click on Next Approval Type.
Do NOT select Go at this time. Selecting Go will result in the employee being transferred to the same job
the employee is transferring from.
9. Enter the Position number and Suffix for the job the employee is transferring to.
Note the heading for the box that contains the job information is labeled Transfer to Hourly Job. This
indicates the job selected is the one the employee is transferring to.
For the suffix, follow the same rules you would for a new hire or to add a new job (e.g., begin with the
suffix 00.)
10. Click on Go.
Do NOT select Next Approval Type a second time.
11. Note the sections on the EPAF form.
The data in the Terminate/End Pay Job Record Only section is for the job the employee is transferring
from.
The data in the other sections (Transfer Employment Data, Transfer to Hourly Job, and Update Labor
Distribution Information) is for the job the employee is transferring to.
12. In the Terminate/End Pay Job Record Only section, enter the Jobs Effective Date.
The Jobs Effective Date is the last day the employee will be working in the job the employee is
transferring from. This will normally be the day before the employee transfers to the new job; however,
this date can be any date prior to the effective date of the new job (the job the employee is transferring to)
and greater than or equal to the Last Paid Date of the prior job.
If the dates overlap on the job the employee is transferring from and the job the employee is
transferring to, STOP. The overlap of dates will result in a problem if the Contract Type for job the
employee is transferring from is Primary and the job the employee is transferring to is Primary. If both are
Primary, use the appropriate Change Job EPAF (Hourly, Salaried, or Work Study) to change the Contract
Type from Primary to Secondary for the job the employee is transferring from. After the Change Job EPAF
has been applied (not just submitted or approved), the Transfer EPAF can be used to complete the needed
transfer.
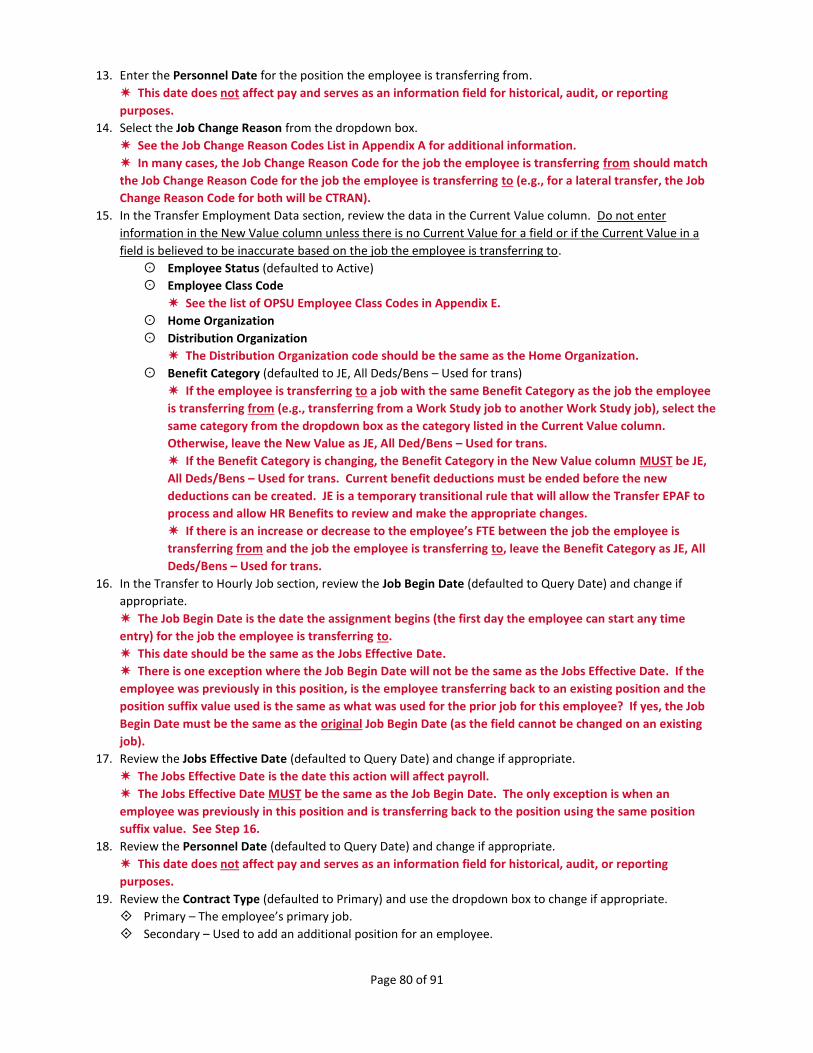
Page 80 of 91
13. Enter the Personnel Date for the position the employee is transferring from.
This date does not affect pay and serves as an information field for historical, audit, or reporting
purposes.
14. Select the Job Change Reason from the dropdown box.
See the Job Change Reason Codes List in Appendix A for additional information.
In many cases, the Job Change Reason Code for the job the employee is transferring from should match
the Job Change Reason Code for the job the employee is transferring to (e.g., for a lateral transfer, the Job
Change Reason Code for both will be CTRAN).
15. In the Transfer Employment Data section, review the data in the Current Value column. Do not enter
information in the New Value column unless there is no Current Value for a field or if the Current Value in a
field is believed to be inaccurate based on the job the employee is transferring to.
Employee Status (defaulted to Active)
Employee Class Code
See the list of OPSU Employee Class Codes in Appendix E.
Home Organization
Distribution Organization
The Distribution Organization code should be the same as the Home Organization.
Benefit Category (defaulted to JE, All Deds/Bens – Used for trans)
If the employee is transferring to a job with the same Benefit Category as the job the employee
is transferring from (e.g., transferring from a Work Study job to another Work Study job), select the
same category from the dropdown box as the category listed in the Current Value column.
Otherwise, leave the New Value as JE, All Ded/Bens – Used for trans.
If the Benefit Category is changing, the Benefit Category in the New Value column MUST be JE,
All Deds/Bens – Used for trans. Current benefit deductions must be ended before the new
deductions can be created. JE is a temporary transitional rule that will allow the Transfer EPAF to
process and allow HR Benefits to review and make the appropriate changes.
If there is an increase or decrease to the employee’s FTE between the job the employee is
transferring from and the job the employee is transferring to, leave the Benefit Category as JE, All
Deds/Bens – Used for trans.
16. In the Transfer to Hourly Job section, review the Job Begin Date (defaulted to Query Date) and change if
appropriate.
The Job Begin Date is the date the assignment begins (the first day the employee can start any time
entry) for the job the employee is transferring to.
This date should be the same as the Jobs Effective Date.
There is one exception where the Job Begin Date will not be the same as the Jobs Effective Date. If the
employee was previously in this position, is the employee transferring back to an existing position and the
position suffix value used is the same as what was used for the prior job for this employee? If yes, the Job
Begin Date must be the same as the original Job Begin Date (as the field cannot be changed on an existing
job).
17. Review the Jobs Effective Date (defaulted to Query Date) and change if appropriate.
The Jobs Effective Date is the date this action will affect payroll.
The Jobs Effective Date MUST be the same as the Job Begin Date. The only exception is when an
employee was previously in this position and is transferring back to the position using the same position
suffix value. See Step 16.
18. Review the Personnel Date (defaulted to Query Date) and change if appropriate.
This date does not affect pay and serves as an information field for historical, audit, or reporting
purposes.
19. Review the Contract Type (defaulted to Primary) and use the dropdown box to change if appropriate.
Primary – The employee’s primary job.
Secondary – Used to add an additional position for an employee.

Page 81 of 91
Overload – Used for a position in addition to a regular assignment (e.g., non-faculty employee who
teaches a class, a faculty member on a 9 month contract who has a summer assignment, housing or car
allowance, etc.).
Each employee can have only one Primary job.
20. Review the Job Status (defaulted to Active) and use the dropdown box to change if appropriate.
Remove – Do not select Remove as the Job Status field must be populated.
Active
Leave without Pay, with Benefits
Leave without Pay, without Benefits
Leave with Pay, with Benefits
Leave with Partial Pay, with Benefits – Used for 60% LTD.
Terminated
21. Select the Job Change Reason from the dropdown box.
See the Job Change Reason Codes List in Appendix A for additional information.
In many cases, the Job Change Reason Code for the job the employee is transferring from should match
the Job Change Reason Code for the job the employee is transferring to (e.g., for a lateral transfer, the Job
Change Reason Code for both will be CTRAN).
22. Enter the New Value for:
g. Regular Rate – Employee’s Pay Rate per Hour.
h. FTE – Full-Time Equivalent. ( Must be 1.0 or less)
i. Hours Per Day – Number of hours employee will work per day.
j. Hours Per Pay – Number of hours employee will work per pay period.
k. Timesheet Organization – Department timesheet organization number.
l. Title
23. Review the Effective Date (defaulted to Query Date) for the funding information
and change if appropriate.
The Effective Date is the date this action will affect payroll.
24. Review the funding information (defaulted based on the position number) in the New section and change if
appropriate.
Chart (COA) MUST be P for OPSU.
Funding total must equal 100%.
The Labor Distribution Percentage on each line must be between .01 and 100. When changing a line to
0%, that line must be removed. After entering 0 in the percent field, hit the Enter key or the Save button. A
remove box will appear for each line. Click on the remove box in the line to be removed, then hit the Enter
key or Save button to remove the line.
25. In the Terminate / End Pay Job Record Only section, enter the Jobs Effective Date.
The Jobs Effective Date is the date this action will affect payroll.
26. Enter the Personnel Date.
This date does not affect pay and serves as an information field for historical, audit, or reporting
purposes.
27. Review the Job Change Reason (defaulted to 2END, End of Appointment) and use the dropdown box to
change if appropriate.
See the Job Change Reason Codes List in Appendix A for additional information.
28. Review the Routing Queue and use the magnifying glass to change or add User Name(s) if appropriate.
29. In the Comment box, enter comments with sufficient detail for the approvers to understand the change to the
job record.
30. Click on the Save button, and check the top of the EPAF to make sure the action was saved successfully.
31. Review and then click on the Submit button.
The routing process does not begin until you click on the Save button and then the Submit button.
Hours/ Hours/
FTE Day Pay
1.0 7.50 162.50
.75 5.63 121.88
.50 3.75 81.25
.25 1.88 40.63
Hours per day and
hours per pay should be
based on the FTE.

Page 82 of 91
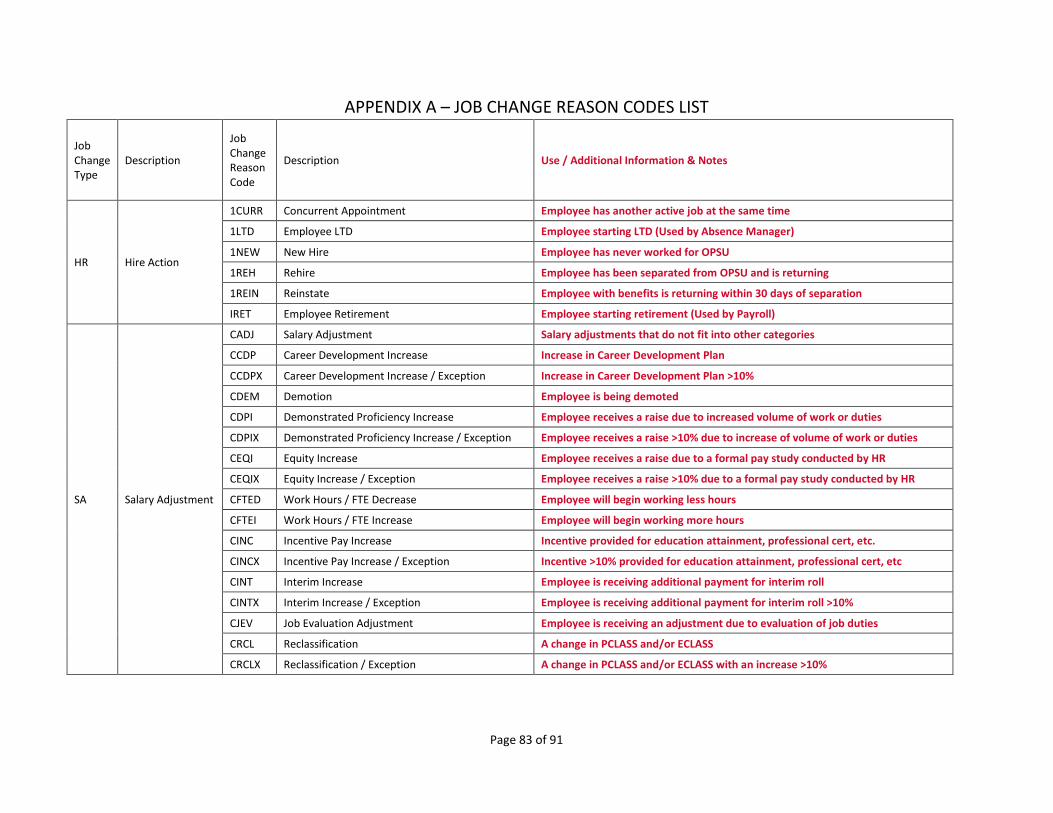
Page 83 of 91
APPENDIX A – JOB CHANGE REASON CODES LIST
Job Change Type
Description
Job Change Reason Code
Description Use / Additional Information & Notes
HR Hire Action
1CURR Concurrent Appointment Employee has another active job at the same time
1LTD Employee LTD Employee starting LTD (Used by Absence Manager)
1NEW New Hire Employee has never worked for OPSU
1REH Rehire Employee has been separated from OPSU and is returning
1REIN Reinstate Employee with benefits is returning within 30 days of separation
IRET Employee Retirement Employee starting retirement (Used by Payroll)
SA Salary Adjustment
CADJ Salary Adjustment Salary adjustments that do not fit into other categories
CCDP Career Development Increase Increase in Career Development Plan
CCDPX Career Development Increase / Exception Increase in Career Development Plan >10%
CDEM Demotion Employee is being demoted
CDPI Demonstrated Proficiency Increase Employee receives a raise due to increased volume of work or duties
CDPIX Demonstrated Proficiency Increase / Exception Employee receives a raise >10% due to increase of volume of work or duties
CEQI Equity Increase Employee receives a raise due to a formal pay study conducted by HR
CEQIX Equity Increase / Exception Employee receives a raise >10% due to a formal pay study conducted by HR
CFTED Work Hours / FTE Decrease Employee will begin working less hours
CFTEI Work Hours / FTE Increase Employee will begin working more hours
CINC Incentive Pay Increase Incentive provided for education attainment, professional cert, etc.
CINCX Incentive Pay Increase / Exception Incentive >10% provided for education attainment, professional cert, etc
CINT Interim Increase Employee is receiving additional payment for interim roll
CINTX Interim Increase / Exception Employee is receiving additional payment for interim roll >10%
CJEV Job Evaluation Adjustment Employee is receiving an adjustment due to evaluation of job duties
CRCL Reclassification A change in PCLASS and/or ECLASS
CRCLX Reclassification / Exception A change in PCLASS and/or ECLASS with an increase >10%

Page 84 of 91
XP Extra Pay
XCHNG Change Additive Pay Change is being made to additive pay
XNEW Enter New Additive Pay Additive pay is beginning. Do not use (see values below).
XNWAU Auto Allowance Job associated with Auto Allowance payment
XNWCP Cell Phone Allowance Job associated with Cell Phone Allowance payment
XNWD1
Department/Division/College Administrative Additive Pay
Job Associated with additional pay associated with Administrative Duties for Departmental/Division/College administrators and chairs
XNWEX
Expense Allowance Job associated with Expense Allowance payments
XNWHA
Housing Allowance Job associated with Housing Allowance payments
XNWF1
Faculty Endowment Job associated with Endowed Faculty Stipend payments
XNWPS
Personal Service Contract Job associated with Personal Service Contracts for Coaches (OSU only)
XNWSUM
Summer Appointment Job associated with summer teaching or research contracts for full-time faculty and staff
XNWOTH
Other Additive Pay Job associated with Other Additive Pay for employees
XSTOP Stop Additive Pay Additive pay is stopping
CH Other Change
CDATA Data Correction Data correction is being made for an existing job record
CFLSA FLSA Regulatory Changes Change due to FLSA regulations (Used by HR)
CFREG Federal Regulatory Changes Changes due to federal regulations (Used by HR)
CLOC Job Location Change Employee is having their job location change
CMER Merit Increase / State Employee is receiving an increase based on merit program
CMERX Merit Increase / State / Exception Employee is receiving an increase >10% based on merit program
CPRO Promotion Employee is receiving a promotion
CPROX Promotion / Exception Employee is receiving a promotion >10%
CSUPV Supervisor Change Employee has a change of supervisor
CTRAN Lateral Transfer Employee is transferring to a lateral position
CTTLE Title Change Employee position title is changing
FYBUD Fiscal Year Budget Used once salary planner is finished (system generated)
FYREP Fiscal Year Budget Replacement Replacing budget from Salary Planner update (Used only to update errors)
LV Leave LAYOF Layoff Employee is starting layoff rights

Page 85 of 91
LRET Return from Leave Employee is returning from approved leave (Update status to Active)
LSABB Sabbatical Leave Faculty is starting a sabbatical
LSWOP Suspension without Pay Employee is suspended without pay
LSWP Suspension with Pay Employee is suspended with pay
LWC Leave Workers Comp Employee is on leave due to workers’ comp
LWCR Leave Workers Comp Return Employee is returning from leave due to workers’ comp
LWOP Leave without Pay Employee is on leave without pay
LWP Leave with Pay Employee is on leave with pay
TA Termination
2END End of Appointment Job assignment has ended
2FND Funding Expiration Funding has ended (typically used for grants)
2LTD Employee LTD Employee is starting LTD (used by campus)
2RET Employee Retirement Employee is retiring (used by campus)
2SEP Employee Separation DO NOT USE - - - Use a more detailed separation code (e.g., Retirement, Death, Voluntary, Involuntary)
2SEPD Employee Death Death of an active employee (use date of death as the effective date)
2SEPI Employee Involuntary Separation Employment has been terminated either for cause or other involuntary reason
2SEPV Employee Voluntary Separation Employee is resigning from position
XTND Extended Pay Date Job is extended to pay past job end date (used by Payroll)

Page 86 of 91
APPENDIX B – ENP JOB CHANGE REASON CODES AND EARNINGS CODES CHART Job Change Reason Earnings Code
Use / Additional Information & Notes Code Description Code Description
ENPSP Special Projects 130 Extra Time Pay Extra work; grading papers; special short-term projects
ENPRP Retroactive Pay A10 Regular Monthly Adj EPAF was late and employee was not paid; adjustment to a payment received in a prior month
ENPIN Incentive Pay 081 Approved Incentive Plans Certificate Programs (e.g., Ambassador Program, Leadership Program)
ENPAW Awards 080 Awards Award for Excellence; Outstanding Staff Award; published paper
ENPMV Moving Allowance 515 Moving Allowance Salary additive for moving expenses for new faculty/staff

Page 87 of 91
APPENDIX C – ENP DATE CHART – EXAMPLE FOR ENPN1P ¹ The regular monthly payroll will pay on the last day of the month and the supplemental payroll will pay on the 12th of the FOLLOWING month, unless the 12th is a
non-working day.
Exception to Normal Pay Add New Job Exception to Normal Pay
Payment Information
Update Labor
Distribution Information
Terminate / End Pay Job Record Only
Pay Period Pay Date ² Query Date Job Begin
Date
Job Effective
Date Personnel
Date Effective
Date End Date Effective
Date
Jobs Effective
Date Personnel
Date
July Regular 07/31/YYYY
07/01/YYYY 07/01/YYYY 07/01/YYYY Info Only 07/01/YYYY 08/01/YYYY 07/01/YYYY 07/31/YYYY 07/31/YYYY Supplemental 08/12/YYYY
August Regular 08/31/YYYY
08/01/YYYY 08/01/YYYY 08/01/YYYY Info Only 08/01/YYYY 09/01/YYYY 08/01/YYYY 08/31/YYYY 08/31/YYYY Supplemental 09/12/YYYY
September Regular 09/30/YYYY
09/01/YYYY 09/01/YYYY 09/01/YYYY Info Only 09/01/YYYY 10/01/YYYY 09/01/YYYY 09/30/YYYY 09/30/YYYY Supplemental 10/12/YYYY
October Regular 10/31/YYYY
10/01/YYYY 10/01/YYYY 10/01/YYYY Info Only 10/01/YYYY 11/01/YYYY 10/01/YYYY 10/31/YYYY 10/31/YYYY Supplemental 11/12/YYYY
November Regular 11/30/YYYY
11/01/YYYY 11/01/YYYY 11/01/YYYY Info Only 11/01/YYYY 12/01/YYYY 11/01/YYYY 11/30/YYYY 11/30/YYYY Supplemental 12/12/YYYY
December Regular 12/31/YYYY
12/01/YYYY 12/01/YYYY 12/01/YYYY Info Only 12/01/YYYY 01/01/YYYY 12/01/YYYY 12/31/YYYY 12/31/YYYY Supplemental 01/12/YYYY
January Regular 01/31/YYYY
01/01/YYYY 01/01/YYYY 01/01/YYYY Info Only 01/01/YYYY 02/01/YYYY 01/01/YYYY 01/31/YYYY 01/31/YYYY Supplemental 02/12/YYYY
February Regular 02/28/YYYY
02/01/YYYY 02/01/YYYY 02/01/YYYY Info Only 02/01/YYYY 03/01/YYYY 02/01/YYYY 02/28/YYYY 02/28/YYYY Supplemental 03/12/YYYY
March Regular 03/31/YYYY
03/01/YYYY 03/01/YYYY 03/01/YYYY Info Only 03/01/YYYY 04/01/YYYY 03/01/YYYY 03/31/YYYY 03/31/YYYY Supplemental 04/12/YYYY
April Regular 04/30/YYYY
04/01/YYYY 04/01/YYYY 04/01/YYYY Info Only 04/01/YYYY 05/01/YYYY 04/01/YYYY 04/30/YYYY 04/30/YYYY Supplemental 05/12/YYYY
May Regular 05/31/YYYY
05/01/YYYY 05/01/YYYY 05/01/YYYY Info Only 05/01/YYYY 06/01/YYYY 05/01/YYYY 05/31/YYYY 05/31/YYYY Supplemental 06/12/YYYY
June Regular 06/30/YYYY
06/01/YYYY 06/01/YYYY 06/01/YYYY Info Only 06/01/YYYY 07/01/YYYY 06/01/YYYY 06/30/YYYY 06/30/YYYY Supplemental 07/12/YYYY
¹ - Similar dates would be used for the approval category ENPR1P; however, the first section on the EPAP will be titled Exception to Normal Pay Reactivate Existing Job,
and the Job Begin Date field will not appear in that section.
² - Pays on the 12th of the following month, unless the 12th is a non-working day.

Page 88 of 91
APPENDIX D – SUFFIX – TYPE OF PAYMENT CHART Type of Payment Suffix
Exception to Normal Pay Z0 through Z9
Auto Allowance AU
Cell Phone CP
Summer Appointment Begins with S
Faculty Endowment F1
Department / College / Division Administrative Additive D1
Housing Allowance HA

Page 89 of 91
APPENDIX E – EMPLOYEE CLASS CODES EClass¹ Description
PA OPSU Faculty 9-month
PB OPSU Faculty 10-month
PC OPSU Faculty 11-month
PD OPSU Temp Faculty
PE OPSU Executive
PG OPSU AdminProf
PJ OPSU Non-Exempt Staff (Paid on PM Payroll)
PS OPSU Temp Staff hrly
PU OPSU Stdnt
PW OPSU WS Stdnt
PX OPSU LTD
PY OPSU Retirees
ZA Affiliates
¹ - In Banner, the EClass, or Employee Classification, is a two-character code that identifies employees by groups with common processing characteristics.

Page 90 of 91
APPENDIX F – EMPLOYEE CLASS CODES WITH LEAVE ACCRUAL DEFAULTS AND ACCEPTABLE OVERRIDES
PTRECLS_VPDI_CODE PTRECLS_CODE PTRECLS_LONG_DESC
Default Leave Rule PTVLCAT_DESC
Exception Leave Rule PTVLCAT_DESC_1
OPSU PA OPSU Faculty 9-month PA OPSU Faculty 9-mo PP OPSU AdminProf 2
OPSU PA OPSU Faculty 9-month PA OPSU Faculty 9-mo XX Ineligible for Leave
OPSU PC OPSU Faculty 11-month PC OPSU Faculty 11-mo PP OPSU AdminProf 2
OPSU PJ OPSU Staff PS OPSU Staff PC OPSU Faculty 11-mo
OPSU PJ OPSU Staff PS OPSU Staff XX Ineligible for Leave
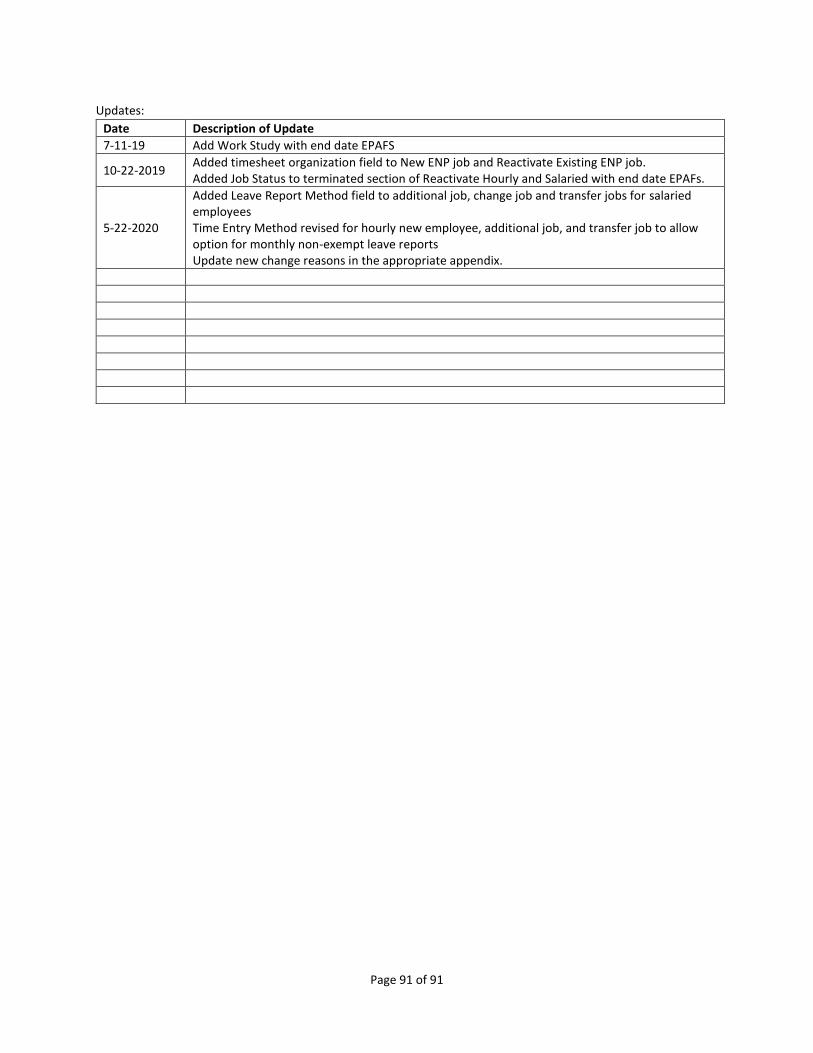
Page 91 of 91
Updates:
Date Description of Update
7-11-19 Add Work Study with end date EPAFS
10-22-2019 Added timesheet organization field to New ENP job and Reactivate Existing ENP job. Added Job Status to terminated section of Reactivate Hourly and Salaried with end date EPAFs.
5-22-2020
Added Leave Report Method field to additional job, change job and transfer jobs for salaried employees Time Entry Method revised for hourly new employee, additional job, and transfer job to allow option for monthly non-exempt leave reports Update new change reasons in the appropriate appendix.