Embed Size (px)
Citation preview
EMPLOY AN M18A1 EMPLOY AN M18A1 CLAYMORE MINECLAYMORE MINE
INSTRUCTOR: SSG HOSKINSINSTRUCTOR: SSG HOSKINS
References: FM 23-23, STP References: FM 23-23, STP 21-1-SMCT21-1-SMCT
EMPLOY AN M18A1 EMPLOY AN M18A1 CLAYMORE MINECLAYMORE MINE
TASK: Employ the M18A1 Claymore MineTASK: Employ the M18A1 Claymore Mine
CONDITIONS: Given an M18A1 Claymore mine, an CONDITIONS: Given an M18A1 Claymore mine, an M57 firing device, an M40 test set, and a firing wire M57 firing device, an M40 test set, and a firing wire with blasting cap, packed in an M57 bandoleer; a with blasting cap, packed in an M57 bandoleer; a designated installation site; a firing position at least designated installation site; a firing position at least 16 meters from the installation site; a sandbag; and 16 meters from the installation site; a sandbag; and two wooden stakes.two wooden stakes.
STANDARDS: Install the Claymore facing the center STANDARDS: Install the Claymore facing the center mass of a kill zone. Perform a circuit test and mass of a kill zone. Perform a circuit test and installation of wire and blasting cap.installation of wire and blasting cap.
EMPLOY AN M18A1 EMPLOY AN M18A1 CLAYMORE MINECLAYMORE MINE
The M18 Claymore, a directional fragmentation mine, is 8-1/2 inches long, 1-3/8 inches wide, 3-1/4 inches high, and weighs 3-1/2 pounds. The mine contains 700 steel spheres (10.5 grains) and 1-1/2 pound layer of composition C-4 explosive and is initiated by a No. 2 electric blasting cap. The M18 command-detonated mine may be employed with obstacles or on the approaches, forward edges, flanks and rear edges of protective minefields as close-in protection against a dismounted Infantry attack.
EMPLOY AN M18A1 EMPLOY AN M18A1 CLAYMORE MINECLAYMORE MINE
The M18A1 mine is primarily a defensive weapon. It may be employed to a limited extent in certain phases of offensive operations. The M18A1 has the same basic capabilities as antipersonnel mines and can be used in most situations where other types of antipersonnel mines are employed. In addition, the M18A1 has the capability of being sighted directionally to provide fragmentation over a specific area and does not necessarily rely upon chance detonation by the enemy. The M18A1 is adaptable for covering the ranges between maximum hand grenade throwing distance and the minimum safe distance of mortar and artillery supporting fires
EMPLOY AN M18A1 EMPLOY AN M18A1 CLAYMORE MINECLAYMORE MINE
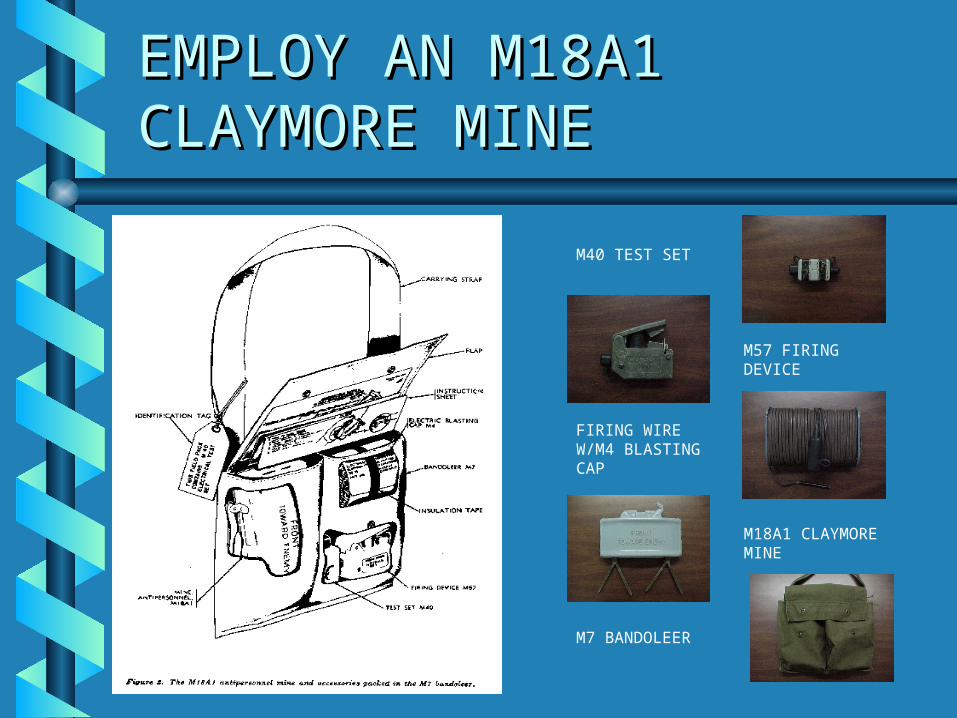
Inventory:Inventory: Inventory the M18A1 Inventory the M18A1 Claymore mine. Account for all Claymore mine. Account for all accessories in the bandoleer. Items accessories in the bandoleer. Items are as follows:are as follows:• M7 BandoleerM7 Bandoleer• Firing Wire w/M4 Blasting CapFiring Wire w/M4 Blasting Cap• M40 Test SetM40 Test Set• M57 Firing DeviceM57 Firing Device• M18A1 Claymore mineM18A1 Claymore mine
EMPLOY AN M18A1 EMPLOY AN M18A1 CLAYMORE MINECLAYMORE MINE
M40 TEST SET
M7 BANDOLEER
M57 FIRING DEVICE
FIRING WIRE W/M4 BLASTING CAP
M18A1 CLAYMORE MINE
EMPLOY AN M18A1 EMPLOY AN M18A1 CLAYMORE MINECLAYMORE MINE
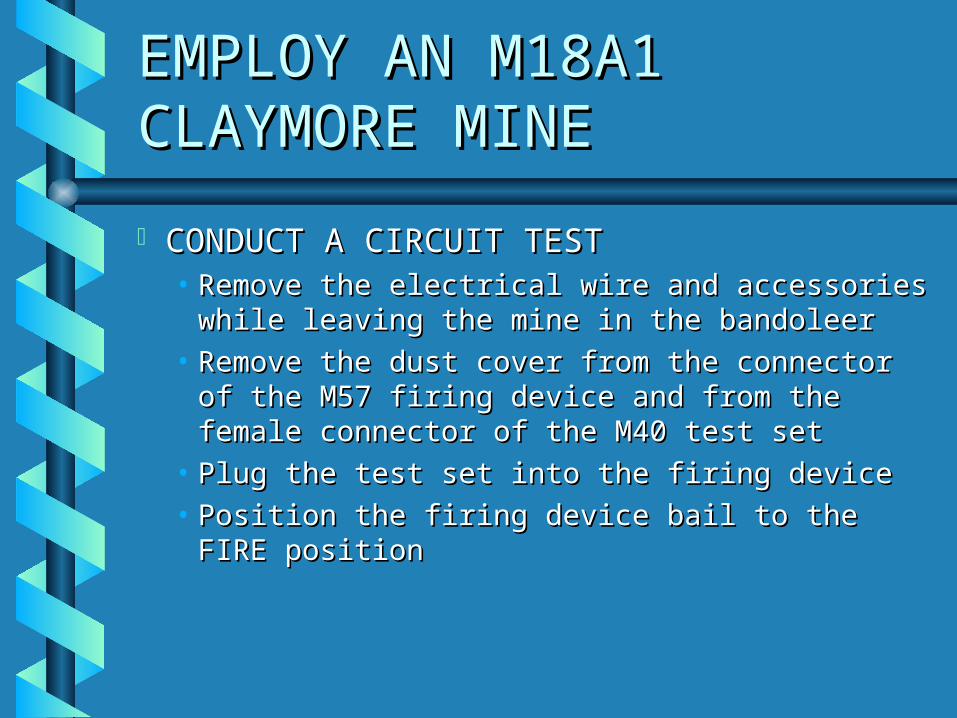
CONDUCT A CIRCUIT TESTCONDUCT A CIRCUIT TEST• Remove the electrical wire and accessories Remove the electrical wire and accessories
while leaving the mine in the bandoleerwhile leaving the mine in the bandoleer• Remove the dust cover from the connector Remove the dust cover from the connector
of the M57 firing device and from the of the M57 firing device and from the female connector of the M40 test setfemale connector of the M40 test set
• Plug the test set into the firing devicePlug the test set into the firing device• Position the firing device bail to the FIRE Position the firing device bail to the FIRE
positionposition
EMPLOY AN M18A1 EMPLOY AN M18A1 CLAYMORE MINECLAYMORE MINE
NOTE: The safety bail on the M57 electrical firing device has two positions. In the upper SAFE position, it acts as a block between the firing handle and the pulse generator. In the lower FIRE position, it is clear of the firing handle and allows the pulse generator to be activated.
EMPLOY AN M18A1 EMPLOY AN M18A1 CLAYMORE MINECLAYMORE MINE
EMPLOY AN M18A1 EMPLOY AN M18A1 CLAYMORE MINECLAYMORE MINE
CONDUCT A CIRCUIT TEST cont:CONDUCT A CIRCUIT TEST cont:• Actuate the handle of the firing device with a Actuate the handle of the firing device with a
firm, quick squeeze, observing the flash of firm, quick squeeze, observing the flash of light through the window of the test setlight through the window of the test set
NOTE:NOTE: The flashing light indicates that The flashing light indicates that the M57 firing device and the M40 test set the M57 firing device and the M40 test set are functioning properlyare functioning properly• Remove the shorting plug cover from the Remove the shorting plug cover from the
connector of the firing wire and from the end connector of the firing wire and from the end of the test setof the test set
EMPLOY AN M18A1 EMPLOY AN M18A1 CLAYMORE MINECLAYMORE MINE
Conduct a Circuit Test cont:Conduct a Circuit Test cont:• Plug the connector of the firing wire Plug the connector of the firing wire
into the test setinto the test set
WARNING:WARNING: The blasting cap must be The blasting cap must be placed under a sandbag, behind a placed under a sandbag, behind a tree or in a hole in the ground to tree or in a hole in the ground to protect the person performing the protect the person performing the circuit check in case the blasting cap circuit check in case the blasting cap detonates.detonates.
EMPLOY AN M18A1 EMPLOY AN M18A1 CLAYMORE MINECLAYMORE MINE
EMPLOY AN M18A1 EMPLOY AN M18A1 CLAYMORE MINECLAYMORE MINE
Conduct a Circuit Check cont;Conduct a Circuit Check cont;• Place the M57 firing device bail in the fire Place the M57 firing device bail in the fire
position and actuate the firing handleposition and actuate the firing handle
NOTE:NOTE: The lamp in the window of the The lamp in the window of the M40 test set should flashM40 test set should flash
• Place the firing device on SAFE, remove Place the firing device on SAFE, remove the M57 firing device and M40 test setthe M57 firing device and M40 test set
• Place the shorting plug cover on the firing Place the shorting plug cover on the firing wirewire
EMPLOY AN M18A1 EMPLOY AN M18A1 CLAYMORE MINECLAYMORE MINE
Install the M18A1 Claymore mineInstall the M18A1 Claymore mine• Tie the shorting plug end of the firing Tie the shorting plug end of the firing
wire to a fixed object, such as a stake wire to a fixed object, such as a stake or tree at the “firing position”or tree at the “firing position”
• Place the bandoleer on your shoulderPlace the bandoleer on your shoulder• Unroll the firing wire to the selected Unroll the firing wire to the selected
installation positioninstallation position
EMPLOY AN M18A1 EMPLOY AN M18A1 CLAYMORE MINECLAYMORE MINE
NOTE:NOTE: The firing wire is laid from the firing The firing wire is laid from the firing position to the mine installation site because position to the mine installation site because the blasting cap end is on the inside of the the blasting cap end is on the inside of the firing wire spool.firing wire spool.
Aim the mineAim the mine• Remove the mine from the bandoleerRemove the mine from the bandoleer• Open both pair of legs to a 45% angle Open both pair of legs to a 45% angle
with two legs facing to the front and with two legs facing to the front and two legs facing to the rear of the minetwo legs facing to the rear of the mine
EMPLOY AN M18A1 EMPLOY AN M18A1 CLAYMORE MINECLAYMORE MINE
EMPLOY AN M18A1 EMPLOY AN M18A1 CLAYMORE MINECLAYMORE MINE
• Push the legs 1/3rd of the way into the ground Push the legs 1/3rd of the way into the ground with the mine facing in the desired direction with the mine facing in the desired direction of fire. In windy areas or when the legs cannot of fire. In windy areas or when the legs cannot be pressed into the ground spread the legs as be pressed into the ground spread the legs as far as they will go so that the legs are to the far as they will go so that the legs are to the front and rear of the mine and the mine will front and rear of the mine and the mine will not tip overnot tip over
• select an aiming point at ground level about select an aiming point at ground level about 50 meters (150 feet) in front of the mine50 meters (150 feet) in front of the mine
• Position one eye about 6 inches to the rear of Position one eye about 6 inches to the rear of the sightthe sight
EMPLOY AN M18A1 EMPLOY AN M18A1 CLAYMORE MINECLAYMORE MINE
On a Knife-edge sight, align the On a Knife-edge sight, align the two edges of the sight with the two edges of the sight with the aiming pointaiming point

EMPLOY AN M18A1 EMPLOY AN M18A1 CLAYMORE MINECLAYMORE MINE

EMPLOY AN M18A1 EMPLOY AN M18A1 CLAYMORE MINECLAYMORE MINE
On a peep-type peep sight, align the On a peep-type peep sight, align the groove of the sight in line with the groove of the sight in line with the aiming point that is 2.5 meters (8 aiming point that is 2.5 meters (8 feet) off the groundfeet) off the ground
EMPLOY AN M18A1 EMPLOY AN M18A1 CLAYMORE MINECLAYMORE MINE
EMPLOY AN M18A1 EMPLOY AN M18A1 CLAYMORE MINECLAYMORE MINE
Arm the MineArm the Mine• Secure the firing wire about 1 meter to the Secure the firing wire about 1 meter to the
rear of the mine so the mine will not become rear of the mine so the mine will not become misaligned if the firing wire is disturbedmisaligned if the firing wire is disturbed
• Unscrew one of the shipping plug priming Unscrew one of the shipping plug priming adapters from the mineadapters from the mine
• Slide the slotted end of the shipping plug Slide the slotted end of the shipping plug priming adapter onto the firing wire of the priming adapter onto the firing wire of the blasting cap between the crimped blasting cap between the crimped connections and the blasting capconnections and the blasting cap
EMPLOY AN M18A1 EMPLOY AN M18A1 CLAYMORE MINECLAYMORE MINE
• Pull the excess wire through the slotted end Pull the excess wire through the slotted end of the adapter until the top of the blasting of the adapter until the top of the blasting cap is firmly seated in the bottom portion of cap is firmly seated in the bottom portion of the shipping plug priming adapterthe shipping plug priming adapter
• Screw the adapter, with the blasting cap, Screw the adapter, with the blasting cap, into the detonator wellinto the detonator well
WARNING:WARNING: Ensure that the face of the mine Ensure that the face of the mine marked “Front Toward Enemy” and the marked “Front Toward Enemy” and the arrows on the mine point in the direction of arrows on the mine point in the direction of the enemythe enemy
EMPLOY AN M18A1 EMPLOY AN M18A1 CLAYMORE MINECLAYMORE MINE
• Recheck the mineRecheck the mine• Camouflage the mineCamouflage the mine• Bury the firing wire (if possible) from Bury the firing wire (if possible) from
the mine back to the firing positionthe mine back to the firing position
EMPLOY AN M18A1 EMPLOY AN M18A1 CLAYMORE MINECLAYMORE MINE
EMPLOY AN M18A1 EMPLOY AN M18A1 CLAYMORE MINECLAYMORE MINE
NOTE:NOTE: To ensure that the mine will function To ensure that the mine will function properly after installation, retesting the firing properly after installation, retesting the firing circuit will check for any break in the wire may circuit will check for any break in the wire may have occurred during installationhave occurred during installation
NOTE:NOTE: Friendly troops within 250 meters to the Friendly troops within 250 meters to the front and sides and 100 meters to the rear of front and sides and 100 meters to the rear of the mine must be under coverthe mine must be under cover
WARNING:WARNING: You must be behind cover or in a You must be behind cover or in a fighting position when retesting the circuit on fighting position when retesting the circuit on a claymore mine with the blasting cap inserted a claymore mine with the blasting cap inserted in the detonation wellin the detonation well
EMPLOY AN M18A1 EMPLOY AN M18A1 CLAYMORE MINECLAYMORE MINE
Fire the MineFire the Mine• Remove the dust cover from the firing Remove the dust cover from the firing
device and firing wiredevice and firing wire• Connect the firing wire to the firing deviceConnect the firing wire to the firing device• Position the firing device safety bail in the Position the firing device safety bail in the
fire positionfire position• Actuate the firing device handle with a Actuate the firing device handle with a
firm, quick squeezefirm, quick squeeze• Assume a prone position behind coverAssume a prone position behind cover
EMPLOY AN M18A1 EMPLOY AN M18A1 CLAYMORE MINECLAYMORE MINE
Questions ???Questions ???